m.k. institute of computer studies, bharuch s.y.bca...
TRANSCRIPT

M.K. Institute Of Computer Studies, Bharuch
S.Y.BCA (Semester -4 )
Paper – 405 Web Designing
UNIT I (HTML)
Prepared By: Meghna Vithlani & Mayursinh Gohil
(Asst. Prof.)

Introduction to HTML
� Hypertext Markup Language
� HTML is not a programming language, in that it does not specify logic. It specifies the
structure of a document.
� Markup is information that is added to a text of document to convey information about
the document's structure or presentation.
� What you see on your screen just looks like a page of text, but the formatting is done
"behind the scenes" by the markup.
� Hypertext Markup Language (HTML) is used to tell Web browsers how to structure and,
some may say, display Web pages.
� Although HTML is the basis for Web pages, you need to know a lot more than HTML to
build useful Web pages (unless the page is very simple).
� The World Wide Web Consortium (W3C) is the primary organization that attempts to
standardize HTML.

About HTML DocumentHow to create Web Page
� Many high-level tools exist for creating Web pages like Microsoft FrontPage, Netscape
Composer, Adobe PageMill, Macromedia DreamWeaver, HotDog …
� Also, many applications have "save to HTML" options like Word, Notepad …
First Look at HTML
� How you want the content to be displayed.
� For example, if you want to show that a section of text is important, you surround the
corresponding text with the markup tags, <b> and </b>, as shown here:
<b>This is important text!</b>
� When a Web browser reads a document that has HTML markup in it, it determines how
to render the document onscreen by considering the HTML elements embedded within
it.
� So we see that an HTML document is simply a text file that contains the information you
want to publish and the appropriate markup instructions indicating how the browser
should structure or present the document.

� These markup elements are made up of a start tag such as <b>, and also might include
an end tag, which is indicated by a slash within the tag such as </b>.
� The tag pair should fully enclose any content to be affected by the element, including
text and other HTML markup.
� Some HTML elements, called empty elements, do not enclose any content, and thus
need no close tags at all. For example, to insert a line break, use the <br> tag, which
represents the empty br element as it doesn't enclose any content and has no
corresponding close tag.
<br>
� A complete overview of the structure of HTML elements is shown here:

Structure of HTML
<!DOCTYPE HTML PUBLIC "-//W3C//DTD HTML 4.01 Transitional//EN"
"http://www.w3.org/TR/html4/loose.dtd">
<html>
<head>
<title> Document Title Goes Here </title>
...Head information describing the document ....
</head>
<body>
...Document content and markup go here....
</body>
</html>

� The first line of the template is the <!DOCTYPE> indicator, which shows the
particular version of HTML being used.
� Within the <html> tag, the basic structure of a document reveals two primary
sections: the "head" and the "body".
� The head of the document, as indicated by the head element, contains information
and tags describing the document such as its title.
� The body of the document, as indicated by the body element, contains the
document itself with associated markup required for structure or presentation.
The <html> Tag
The <html> tag delimits the beginning and the end of an HTML document. Given that
<html> is the common ancestor of an HTML document it is often called the root
element, as it is the root of an inverted tree structure containing the tags and content of
a document. The <html> tag, however, directly contains only the <head> tag, the
<body> tag, and potentially the <frameset> tag instead of the <body> tag. The <html>
tag's typical use in a document is as a container for all other elements.

The <head> Tag
� The information in the head of an HTML document is very important because it is
used to describe or augment the content of the document.
� In many cases, the information contained within the <head>tag is information about
the information of the page, which generally is referred to as meta-information.
� This is a very important and often overlooked aspect of HTML documents. Search
engines use meta-information to index Web pages.
� Aside from meta-information, the head element can include author contact
information, scripts, style sheets, comments—and, most importantly, a page title.

The <title> Tag
� The most important head element is the title element, which most browsers display
in a title bar at the top of the browser window. The document title is actually the
only tag required under traditional HTML specifications and should occur as the first
element within the head element. Regardless of specification variations, the <title>
tag must be used in every HTML document as it gives an HTML document a title by
which it is known to browsers and indexing robots. Browsers display the document
title while the document is being viewed, and might also use the title in bookmark
lists.
� Search engines that index the Web often place special meaning on the contents of
the title element when determining what a page is about. Because of this, a title
should indicate the contents of a page without ambiguity.
� While titles should be descriptive, they should also be concise. Authors should limit
title length to a reasonable number of characters.

Other head Elements
In addition to the title element within the head element include base, isindex, link, meta,
object, script, and style.
The <base> tag specifies an absolute URL address that is used to provide server and
directory information for partially specified URL addresses called relative links used within
the document.
The <isindex> tag indicates that the document contains a searchable index. It causes the
browser to display a query prompt and a field for entering a query.
The <link> tag specifies a special relationship between the current document and another
document. It can be used in hypertext navigational relationships including prefetching of
documents by browsers.
The <meta> tag uses name/value pairs to provide meta-information about a document.
The <meta> element often provides descriptive information targeted by Web search
engines. In a very different use, the <meta> tag can define various HTTP request values
such as a page refresh or an expiration time.

The <object> tag allows programs and other binary objects to be directly embedded in a
Web page. The most popular current approaches use Java applets, plug-ins, or ActiveX
controls to embed multimedia elements such as Flash animations, sounds, or movies.
The <script> tag allows programs written in a scripting language to be directly
embedded in a Web page. The most popular scripting language in Web documents is
JavaScript, which is somewhat standardized in the form of ECMAScript, although few
Web practitioners refer to it as that. The script element and associated usage of scripts,
often dubbed Dynamic HTML (DHTML) because it allows HTML elements to be modified
dynamically, should simply be considered a form of client-side scripting.
The <style> tag encloses document-wide style specifications relating to fonts, colors,
positioning, and other aspects of content presentation. Today, the primary style sheet
technology used in Web pages is called Cascading Style Sheets (CSS).

The <body> Tag
After the head section, the body of a document is delimited by <body> and </body>.
Only one body element can appear per document. Because the body element delimits the
document itself, its attributes are primarily used to effect change across the entire
document, such as setting background images, background colors, and link and text color.
Elements and Characters
Many types of elements are in the body of a Web document. For example, <p> or
headings <h1> or unordered lists <ul> etc.
Finally, within the elements in the body, you can type in regular text and insert special
characters through the use of character entities. To use such characters in an HTML
document, they must be "escaped" by using a special code. All character codes take the
form &code;, in which code is a word or numeric code indicating the actual character that
you want to put onscreen. For example, when adding a less than symbol, <, you could use
< or <.

The Rules of HTML
HTML Is Not Case Sensitive
These markup examples
<B>Go boldly!</B>
<B>Go boldly!</b>
<b>Go boldly!</B>
<b>Go boldly!</b>
HTML Attribute Values May Be Case Sensitive
One interesting aspect of HTML's case sensitivity is that although HTML element names
and attribute names are not case sensitive, we can't assume everything is case
insensitive. For example, consider <img SRC="test.gif"> and <img src="test.gif">.
HTML Is Sensitive to a Single White Space Character
Browsers collapse white space between characters down to a space. This includes all
tabs, line breaks, and carriage returns.

Note that in some situations, HTML does treat white space characters differently. In the
case of the pre element, which defines a preformatted block of text, white space is not
ignored and is preserved because the content is considered preformatted. Also, white
space is preserved within the textarea element when setting default text for a multiline
text entry field.
The final aspect of spacing to consider is the use of the nonbreaking space entity, or
.
HTML Follows a Content Model
Both HTML and XHTML support a strict content model that says that certain elements are
supposed to occur only within other elements. For example, markup like this,
<ul>
<p>What a simple way to break the content model!</p>
</ul>
The <ul> tag is only supposed to contain <li> tags. The <p> tag is not really appropriate in
this context.

Elements Should Have Close Tags Unless Empty
Under traditional HTML, some elements have optional close tags. For example, both of
the paragraphs here are allowed, although the second one is better:
<p>This isn't closed.
<p>This is.</p>
A few tags, such as the horizontal rule <hr> or line break <br>, do not have close tags
because they do not enclose any content. These are considered empty elements.
Unused Elements May Minimize
Sometimes tags may not appear to have effect in a document. Consider, for example,
the <p> tag, which specifies a paragraph. As a block tag it induces a return by default,
but when used repeatedly, like so,
<p></p><p></p><p></p>
it does not produce numerous blank lines because the browser minimizes the empty p
elements.

Elements Should Nest
A simple rule states that tags should nest, not cross, thus
<b><i>is in error as tags cross</b></i>
whereas
<b><i>is not since tags nest</i></b>.
Attributes Should Be Quoted
<img src=robot.gif height=10 width=10 alt=robot>
<img src="robot.gif" height="10" width="10" alt="robot" />
Browsers Ignore Unknown Attributes and Elements
For better or worse, browsers will ignore unknown elements and attributes, so
<bogus>this text will display on screen</bogus>
will be ignored.

Basic HTML Tags
<Body>
� When you create a Web page, you can change several things in the body of your document by adding attributes to the <body> tag.
<body bgcolor="black" text="red" link="yellow" alink="orange" vlink="white" background="image.gif">
� We can use as many or as few of these attributes as we wish. The options we don't use will be set to the Web browser's default values.
� Let us see the brief explanation of each attribute:

Attribute Value Description
background Image.gif Specifies a background image for a document. If you use this
attribute, the background image will take the place of any
background color you may have specified. If you don't use a
background image, the browser will use your background
color or its default background color.
bgcolor color Specifies the background color of a document
text color Specifies the color of the text in a document
alink
color Specifies the color of an active link, which is a link that has
just been clicked on by a user's mouse in a document
link color Specifies the color of all the unvisited links in a document
vlink color Specifies the color of visited links in a document
Bottommargin Number /% Specifies the bottom margin in a document
Topmargin Number /% Specifies the top margin in a document
Leftmargin Number /% Specifies the left margin in a document
Rightmargin Number /% Specifies the right margin in a document

Text and Paragraph Formatting Tag
<p>……</p>
� Surrounding text with the <p> and </p> tags indicates that the text is a logical
paragraph unit.
� On encountering this tag the browser, moves onto the new line, skipping one or two
line between the previous line and the new line depends on the browser and any
applied style sheet.
� The align attribute of <p> makes it possible to specify a left, right, center or justify
alignment.
� Web browser ignore multiple consecutive <p> tags.
<p align=”value”>………</p>

<br>
� This tag inserts a single carriage return or line break into a document.
� It is an empty element—thus, it has no close tag.
� Browser recognize multiple consecutive <br> tags.
� The one attribute commonly used with a <br> tag is clear. This attribute controls
how text flows around images or embedded objects.

<hr>
<hr align="left" width="100" size=”10” noshade=”noshade”>
� As sections are added to an HTML document, it is often useful to break up the document into visually/logically distinct sections.
� A horizontal rule, indicated by the <hr> tag, is an empty block- level element that serves this purpose.
� Different attributes of <hr> :
�The size attribute sets the bar's thickness (height) in pixels.
�The width attribute sets the width of the rule. It can be set to a fixed number of pixels, or to a percentage of the available screen width.
�The align attribute sets its alignment to left, right, or center(default).
�The noshade attribute renders the bar without a surrounding shadow.
�The color attributes specifies the color of the rule.

Heading Styles
� HTML supports six different levels of headings. The highest level header format is <H1> and the lowest is <H6>.
� All the styles appear in Boldface and the size of the heading depends on the level chosen,i.e <H1> to <H6>
<h1> Heading 1 </h1>
� By default heading is left aligned, we can change it using align attribute of heading.
Attribute :
Attribute Value Description
align left
center
right
justify
Specifies the alignment of a heading

Bold Text
<b>…</b>
Displays text in BOLDFACE Style. The tags used are <B>..</B>
Italic Text
<i>…</i>
Displays text in Italic. The tags used are <I>…</I>
Underline
<u>…</u>
Displays text as underlined, the tags used are <U>…</U>
<big>…<big>
Enclosing content within a <big> tag pair makes it one size bigger.
<small> … </small>
Displays text with one smaller size.

<pre>…</pre>
� The <pre> tag defines preformatted text.
� Text in a <pre> element is displayed in a fixed-width font (usually Courier), and it
preserves both spaces and line breaks.
� Imagine that programming source code or poetry needs to be inserted into a Web
page. In both cases, the spacing, returns, and tabs in the document must be
preserved to ensure proper meaning. This situation requires an HTML directive that
indicates the preservation of format.
� The <pre> tag can be used to indicate text that shouldn't be formatted by the
browser.
e.g.
<pre>
for i=1 to 10
print i
next

<sup>…</sup>
The <sup> tag defines superscript text. Superscript text appears half a character above
the baseline. Superscript text can be used for footnotes, like WWW[1].
<sub>…</sub>
The <sub> tag defines subscript text. Subscript text appears half a character below the
baseline. Subscript text can be used for chemical formulas, like H2O.
<abbr>…</abbr>
<abbr title="United Nations">UN</abbr>
<acronym>…</acronym>
<acronym title="World Wide Web">WWW</acronym>

The <center> Tag
<center>…</center>
<center>… </center> tags are used to center everything found between them- text,
lists, images, rules, tables or any other page element.
<center>I am centered!</center>
Fonts
The basic syntax of <font>
<font color="color value" size="size value from 1-7" face="list of font faces">
styled text here
</font>
Given this syntax using <font>, you can set the color attribute equal to a valid color
name such as "red" or an equivalent hex value such as #FF0000 to color text.
e.g. <p><font color="red">This is red.</font> This is not.</p>

It is possible to set the relative size of type by setting the size attribute of the font
element. In a Web page, there are seven relative sizes for text numbered from 1 to 7,
where 1 is the smallest text in a document and 7 is the largest. To set some text into the
largest size.
e.g. <p><font size="7">This is big.</font> This is not.</p>
By default, the typical size of text is 3.
If the font size is not known but the text should be made just one size bigger, you can use
an alternative sizing value such as <font size="+1"> instead of specifying the size directly.
The + and - syntax makes it possible to bring the font size up or down a specified number
of settings.
Lastly, the face attribute can be set to the name of the font to render the text. So, to
render a particular phrase in Verdana, use the following markup:
e.g. <p><font face="Verdana">This is in Verdana.</font> This is not.</p>
The browser then reads this HTML fragment and renders the text in the different font—
but only for users who have the font installed on their systems.

Using the face attribute, it is possible to specify a comma-delimited list of fonts to attempt
one by one before defaulting to the normal proportional or fixed-width font.
e.g. <p>
<font face="Arial, Helvetica, Sans-serif">
This should be in adifferent font
</font> than this.
</p>
<address>… </address>
� The <address> tag defines the contact information for the author/owner of a
document or an article.
� If the <address> element is inside the <body> element, it represents contact
information for the document.
� If the <address> element is inside an <article> element, it represents contact
information for that article.
� The text in the <address> element usually renders in italic.

Text Animation Tags
<blink>
Its simple goal is to make text blink:
<blink> Buy now! </blink>
<marquee>
To create messages that scroll and slide across a viewer's screen in a variety of different
ways.
Using the element is simple; just enclose some text in it and it is transformed into a
scrolling ticker tape, similar to the one found at Times Square.
<marquee>
Welcome to MKICS.
</marquee>

<marquee
bgcolor="yellow“
behavior="alternate“
direction="right"
loop="6”
scrollamount="1”
scrolldelay="40"
title="Silly tags aren't just for Netscape anymore.“
width="80%">
Welcome to MKICS
</marquee>
Changing the attributes will adjust the presentation of the marquee.
The behavior attribute may be set to alternate, scroll, or slide.
The direction attribute is used to set the direction in which the scrolled text moves. The
allowed values for this attribute are down, left, right, and up.
The loop attribute is used to set the number of times that the message loops in the
scroll region. By default, unless the behavior is set to slide, a marquee scrolls forever.
The value of the loop attribute should be a positive integer.

Setting scrollamount to a particular number of pixels allows the smoothness of the scroll
to be controlled. The value of the scrollamount attribute is set to the number of pixels
between each drawing of the scrolled message in the display area. The larger the value
in pixels, the less smooth the scroll.
The scrolldelay attribute is used to set the number of milliseconds between each
rendering of the scrolled message. A higher value for this attribute slows the scrolling. A
reasonable value for this attribute is 50 or greater. Lower values for scrolldelay tend to
produce marquees that are very difficult to read.
Comment
The contents of HTML comments are not displayed within a browser window.
Comments are denoted by a start value of <!-- and an end value of -->.
Comments can be many lines long. For example,
<!–
This is a Comment.
Comment will not be displayed
-->

Lists
Three basic forms of lists:
� Ordered lists (<ol>)
� Unordered lists (<ul>)
� Definition lists (<dl>)

Ordered Lists
� An ordered list, as enclosed by <ol> and </ol>, defines a list in which order
matters.
� Ordering typically is rendered by a numbering scheme, using Arabic numbers,
letters, or Roman numerals.
� Ordered lists are suitable for creating simple outlines or step-by-step instructions
because the list items are automatically numbered by the browser.
<ol>
<li> Item 1 </li>
<li> Item 2 </li>
<li> Item 3 </li>
</ol>

Attributes
type
� The type attribute of <ol> can be set to :
a for lowercase letters
A for uppercase letters
i for lowercase Roman numerals
I for uppercase Roman numerals
1 for regular numerals ( 1 is the default value)
� Each <li> tag can have a local type attribute set to a, A, i, I, or 1.
start
� The <ol> element also has a start attribute that takes a numeric value to begin
the list numbering.
� Whether the type attribute is a letter or a numeral, the start value must be a
number.
� To start ordering from the letter j, you would use <ol type="a" start="10">
because j is the tenth letter.

� Lists can be nested.
For e.g.
<ol>
<li> Item 1 </li>
<ol>
<li> Item1 a </li>
<li> Item1 b </li>
</ol>
<li> Item 2 </li>
<li> item3 </li>
</ol>

Unordered Lists
� An unordered list, signified by <ul> and </ul>, is used for lists of items in which the
ordering is not specific.
� A browser typically adds a bullet of some sort (a filled circle, a square, or an empty
circle) for each item and indents the list.
� Like ordered lists, unordered lists can be nested.
type Atrribute
� The type attribute can be used to set the bullet type for a list.
� The allowed values for type are: disc , circle, square
<ul>
<li> item1 </li>
<li> item2 </li>
<li> item3 </li>
</ul>
� Like ordered lists, unordered lists can be nested. However, in this case each level of nesting
indents the list farther, and the bullet changes accordingly. Generally, a filled circle or solid
round bullet is used on the first level of lists. An empty circle is used for the second-level list.
Third-level nested lists generally use a square.

Definition List
� A definition list is a list of terms paired with associated definitions—in other words,
a glossary.
� Definition lists are enclosed within <dl> and </dl>.
� Each term being defined is indicated by a <dt> element, which is derived from
"definition term.“
� Each definition itself is defined by <dd>.
<dl>
<dt> item1 </dt>
<dd> Description of item1 </dd>
<dt> item2 </dt>
<dd> Description of item2 </dd>
</dl>

Link
� In HTML, the main way to define hyperlinks is with the anchor tag, <a>. A link is simply a unidirectional pointer from the source document that contains the link to some destination. In hypertext, the end points of a link typically are called anchors, thus the use of the anchor nomenclature in HTML documentation.
� For linking purposes, the <a> tag requires one attribute: href. The href attribute is set to the URL of the target resource, which basically is the address of the document to link to, such as http://www.yahoomail.com.
� The text enclosed by an a element specifies a "hot spot" to activate the hyperlink. Anchor content can include text, images, or a mixture of the two.
� A general link takes the form <a href="URL">Visit our site</a>.
� The text "Visit our site" is the link. The URL specified in the href attribute is the destination if the link is activated. The following is an example of simple link usage:
<a href="http://www.yahoo.com">
Yahoo!
</a>

� In most browsers, text links are indicated by underlined text. Text is blue if the
destination has never been visited, purple if it has been visited, and briefly red as the
link is activated.
� If a link includes an image, the border of the image also will be blue or purple, unless
the border attribute has been set to zero.
� HTML authors can override these default link colors with changes to the link, alink,
and vlink attributes of the body element.
Attributes :
href
Name
Id
target
title
accesskey

Name
� An <a> tag usually defines a hyperlink's source location: where the link goes, and
what you click to go there. One possible destination for a hyperlink is a named
location inside an HTML document.
� The <a> tag can also be used to define these locations in a special usage known as
setting a fragment identifier, although the term marker might make more sense.
� To set a marker, set the name to a symbolic name for the marker location. The
defined name must be unique within the document.
� Wherever the marker is placed within an HTML document becomes a named
candidate destination for hyperlinks.
� For example, the HTML markup <a name="marker"> This is a marker</a> sets the
text "This is a marker" to be associated with the fragment identifier #marker.
� In practice, when an <a> tag is used solely as a marker, it often doesn't enclose any
text.
� Their main purpose is to name a location within a document to jump to; for example,
the common "back to top" links found at the bottom of long pages.

� Such link usage can be accomplished by using <a name="top" id="top"></a> to
define named locations and then referencing them with links containing fragment
identifiers such as <a href="#top">Top of the document</a>.
Title
� title is very useful because it can be used to indicate some information about the
link's destination.
<a href="staff/index.html" title="Resumes and information about our staff">
Staff
</a>
� The title attribute serves another purpose: It provides the title information for a
bookmark when a link is bookmarked before the destination page is visited.
Accelerator Keys
� With this attribute, you can set a key to invoke an anchor without requiring a
pointing device to select the link. The link is activated with the combination of the
accelerator key, usually ALT, and the key specified by the attribute. So,
<a href="http://www.yahoo.com/" accesskey="Y"> Yahoo! </a>

Target
� the target attribute is left out, the current window or frame the document is in is
used. Aside from author-named frames, the following are several reserved names
for frames that, when used with the target attribute, have special meaning: _blank,
_self, _parent, and _top.
Image <img>…</img>
� It is an empty tag.
Attribute Value Description
align
top
bottom
middle
left
right
Not supported in HTML5. Deprecated in HTML 4.01. Specifies the alignment of an
image according to surrounding elements
alt text Specifies an alternate text for an image
border pixels Specifies the width of the border around an image
height pixels Specifies the height of an image
hspace pixels Specifies the whitespace on left and right side of an image
ismap ismap Specifies an image as a server-side image-map
src URL Specifies the URL of an image
usemap #mapname Specifies an image as a client-side image-map
vspace pixels Specifies the whitespace on top and bottom of an image
width pixels Specifies the width of an image

Image and Anchor
� <a> tags can enclose text and other content, including images. When an anchor
encloses an image, the image becomes clickable, thus providing the basic
mechanism for a graphic button.
<a href="about.html">
<img src="about.gif" alt="About Button" height="55" width="55" />
</a>
Image Maps
� An image map is a large image that contains numerous hot spots that can be
selected, sending the user to a different anchor destination.
� There are two basic forms of image maps: server-side and client-side.
� In the server-side image map, the user clicks on an image but the server must
decode where the user clicked before the destination page (if any) is loaded.

� With client-side image maps, all of the map information—which regions map to
which URLs—can be specified in the same HTML file that contains the image.
� Including the map data with the image and letting the browser decode it has several
advantages, including the following:
� There is no need to visit a server to determine the destination, so links are
resolved faster.
� Destination URLs can be shown in the status box as the user's pointer moves
over the image.
� Image maps can be created and tested locally, without requiring a server or
system administration support.
� Client-side image maps can be created so that they present an alternate text
menu to users of text-only browsers.

Client-Side Image Maps
� To usea client-side image map
� Add the usemap attribute to an <img> tag
� Have it reference a map element that defines the image map's active areas.
� An example of this syntax is
<img src="controlbar.gif" usemap="#controlmap“ >
� The image will be indicated as a link regardless of the lack of an <a> tag enclosing
the image.

<MAP>…<MAP>
� The <map> tag is used to define a client-side image-map. An image-map is an
image with clickable areas.
� The map element has two important attributes, name and id, which are associated
with the <img>'s usemap attribute and creates a relationship between the image
and the map.
� The <map> element contains a number of <area> elements, that defines the
clickable areas (i.e. hot spots) in the image map.
e.g.
<img src="planets.gif" width="145" height="126" alt="Planets“ usemap="#planetmap">
<map name="planetmap">
<area shape="rect" coords="0,0,82,126" href="sun.htm" alt="Sun">
<area shape="circle" coords="90,58,3" href="mercur.htm" alt="Mercury">
<area shape="circle" coords="124,58,8" href="venus.htm" alt="Venus">
</map>

<AREA>…</AREA> Tag
The <area> tag defines an area inside an image-map (an image-map is an image with
clickable areas).
The <area> element is always nested inside a <map> tag.
In HTML the <area> tag has no end tag.
Attribute Value Description
alt textSpecifies an alternate text for the area. Required if the href attribute is
present
coords coordinates Specifies the coordinates of the area
href URL Specifies the hyperlink target for the area
shape
default
rect
circle
poly
Specifies the shape of the area
target
_blank
_parent
_self
_top
framename
Specifies where to open the target URL

Table
� A table is an orderly arrangement of data distributed across a grid of rows and
columns.
� Web page tables also are commonly used to structure a page for layout.
� In its simplest form, a table places information inside the cells formed by dividing a
rectangle into rows and columns. Most cells contain data; some cells, usually on
the table's top or side, contain headings.
� HTML represent a basic table using four elements.
� table tag pair, <table> … </table>, contains an optional caption
element
� one or more rows, <tr> … </tr>.
� Each row contains cells holding a heading, <th> … </th>, or data, <td>
.. </td>.

<table border="1">
<caption>Basic Fruit Comparison Chart</caption>
<tr>
<th>Fruit</th>
<th>Color</th>
</tr>
<tr>
<td>Apple</td>
<td>Red</td>
</tr>
</table>
� A table is made up of rows enclosed within <tr> … </tr>. The number of rows in the
table is determined by the number of occurrences of the tr element.
� The number of columns in a table is determined by the maximum number of data
cells in one row indicated by <td> … </td>, or headings indicated by <th> … </th>
within the table.
� The headings for the table are set using the <th> element.
� The table might also have a caption enclosed within <caption> … </caption>, whose
contents generally are rendered above or below the table, indicating what the table
contains.

The rowspan and colspan Attributes
� By adding the rowspan and colspan attributes to the table elements, it is possible
to create data cells that span a given number of rows or columns.
� The basic idea of the rowspan and colspan attributes for <td> and <th> is to
extend the size of the cells across two or more rows or columns, respectively.
� To set a cell to span three rows, use <td rowspan="3">; to set a heading to span
two columns, use <th colspan="2">.
� Setting the value of colspan or rowspan to more than the number of columns or
rows in the table should not extend the size of the table.
Other Attributes
� Aside from being able to span rows and columns, the table element, and its
enclosed elements td, th, and caption, support a variety of attributes:
� for alignment (align and valign)
� for sizing (width)
� for presentation (bgcolor and background)
� for layout (cellpadding and cellspacing)

cellpadding and cellspacing
� The space between cells in a table is controlled by the cellspacing attribute for
<table>.
� The value is measured in pixels or percentage values.
� Similarly, the padding between cell walls and the content they surround is
controlled by the cellpadding attribute, which is also often set to 0 in tables used
for layout.
Cell Alignment
� Cells defined by <td> or <th> are generally aligned horizontally by setting the
align attribute to left, right, or center with left being the default. It is also possible
to justify their contents by setting the attribute to justify.
� The contents of cells can also be aligned vertically by setting valign on <th> or
<td> tags to top, middle, bottom or baseline. The following example illustrates
the more common uses of these values.

Colored Tables and Cells
� Table elements also can be assigned background colors using the bgcolor
attribute. The bgcolor attribute is valid for <table>, <tr>, <th>, and <td>.
� bordercolor attribute for <table> as well as for cells.(May not work in all
browsers)
Background Images in Tables
� Using the background attribute it is also possible to apply background images to
tables and table cells. Defining a table with the code
<table width="100%" border="1" cellpadding="0" cellspacing="0“ background="tabletile.gif">
Text Layout
� Besides basic text layout, tables also can be used to provide more precise layout in
relation to a background. One popular design concept employs a vertical strip of
colored background on the left of the page, which contains navigation controls;
the rest of the document contains the main text.

Frames
� A framed document divides a browser window into multiple panes, or smaller
window frames. Each frame can contain a different document.
� The benefits of this approach are obvious: users can view information in one frame
while keeping another frame open for reference instead of moving back and forth
between pages. The contents of one frame can be manipulated, or linked, to the
contents of another.
� A frame is an independent scrolling region, or window, of a Web page. Every Web
page can be divided into many individual frames, which can even be nested within
other frames.
� Of course, fixed screen sizes limit how many frames can realistically be used
simultaneously. Each frame in a window can be separated from the others with a
border.
� Individual frames usually are named so that they can be referenced through links
or scripting, allowing the contents of one frame to affect the contents of another.
This referencing capability is a major difference between tables and frames. Frames
provide layout facilities and, potentially, navigation.

� Within the framing document, the frameset element defines the set of frames
that makes up the document. The major attributes of this element are:
rows
<frameset rows="10%, 80%, 10%">
Cols
<frameset cols="20%, 80%">
� Use the wildcard character (*) to specify that whatever is left over after 175 pixels
should be used for the other frame. The code for such a frameset is
<frameset cols="175,*">.
� Within the frameset element, individual <frame> tags are used to specify the
documents that are placed within the rows or columns defined by the frameset
element.
� The basic syntax of the <frame> tag is
<frame src="URL" name="unique frame name" id="unique frame name">.

e.g
<frameset rows="30%,30%,40%">
<frame src="header.html" name="header" >
<frame src="display.html" name="display" >
<frame src="footer.html" name="footer" >
</frameset>
� Use the target attribute in an <a> tag to set the target for the anchor.
� For example, a link such as <a href="http://www.yahoo.com" target="display">
loads the site specified by the href into the window called "display," if such a
frame exists. If the target specified by the name doesn't exist, the link typically
spawns a new window.
Attributes
frameborder
The default value of 1 indicates a frame border should be used while a value of 0
indicates to remove it. So <frame src="links.html" name="controls" id="controls"
frameborder="0"> would turn off borders for this particular frame.

Framespacing (frameset)
Internet Explorer has added a proprietary attribute, framespacing, to the frameset
element to alleviate this. Just set it to 0 and any gaps should be removed under this
browser.
Scrolling
To set scrolling on a frame, use the scrolling attribute on a <frame> tag; by default, the
value of this attribute is auto, which adds scrollbars as needed. However, setting the
value to yes or no will explicitly indicate the presence or lack of scrollbars regardless of
the content within the frame.
Noresize
The presence of the noresize attribute indicates that the user cannot resize a frame.
marginheight and marginwidth
These attributes are used to control the distance between the frame and its contents.
Very often designers will set these values to 0 to achieve the effect of bleeding framed
content right to the edge of the frame.
<frame src="blue.html" name="right" id="right" marginwidth="0" marginheight="0“ >

The Use of <noframes>
� The <noframes> tag should contain the markup and text to be displayed when a
browser that doesn't support frames accesses the Web page. The <noframes> tag
should be found only within the frameset element.
e.g.
<frameset cols="20%, 80%">
<frame src="links.html" name="links" id="links”>
<frame src="display.html" name="display" id="display”>
<noframes>
<body>
<p>This document uses frames. Please follow this link to a
<a href="noframes.html">no frames</a> version.
</p>
</body>
</noframes>
</frameset>

Frames Problem
� The problems with frames are numerous, and include problems with design,
navigation, bookmarking, URL context, search engine compatibility, and printing.
� Navigation problems include loss of context because the URL of the document, as
displayed in the address bar of the browser, does not change when using frames;
this accounts for why bookmarking doesn't work as expected because a bookmark
just records a document's URL.
� If they try to bookmark the page, their bookmark will open the frameset with its
original pages loaded (frameset home page), not the one you had loaded inside
when you created the bookmark.
� It used to be the case that search engine robots that visited your page would not
be able to read the pages that make up the frameset, and would be forced to read
only the <noframes> “content”. This would mean that only one page of your site
would be in the search engine’s index. Thankfully this isn’t a problem anymore, and
almost all search engines are able to index all pages that make up a framed page.
� Browser Problem :For years there were a considerable amount of browsers in use
that could not access framed pages, and were restricted to viewing whatever the
author had placed in the <noframes> section of their code.

� Printing Problems : Browsers have had a long-standing problem with printing
framed pages. Often you would get only one of the component pages printed off,
or have everything scrunched together in a mess. The most recent browsers have
given you options on whether you want the full frameset printed or an individual
page, but that doesn’t escape the fact that printing framed pages is unnecessarily
tricky and problematic.
� Viewing the source code of a page is also made redundant since the frameset code
appears where many inexperienced users would expect a large amount of useful
code. You can click inside a frame and extract the code from it, but the fact
remains, it goes against user’s expectations.

Floating Frames
� Up to this point, all the frames shown have been attached to the sides of the
browser (left, right, top, or bottom).
� Another form of frame, known as a floating frame but more appropriately called
an inline frame, was initially introduced by Microsoft but has been incorporated
into the HTML standards.
� The idea of the floating frame is to create an inline framed region, or window,
that acts similarly to any other embedded object, insofar as text can be flowed
around it.
� An inline frame is defined by the <iframe>…</iframe> element and can occur
anywhere within the <body> of an HTML document. Compare this to the frame
element that should occur only within the frameset element.
Attributes
Src
The src is set to the URL of the file to load,
height & width
height and width are set either to the pixel or percentage value of the screen that
the floating frame region should consume.
align
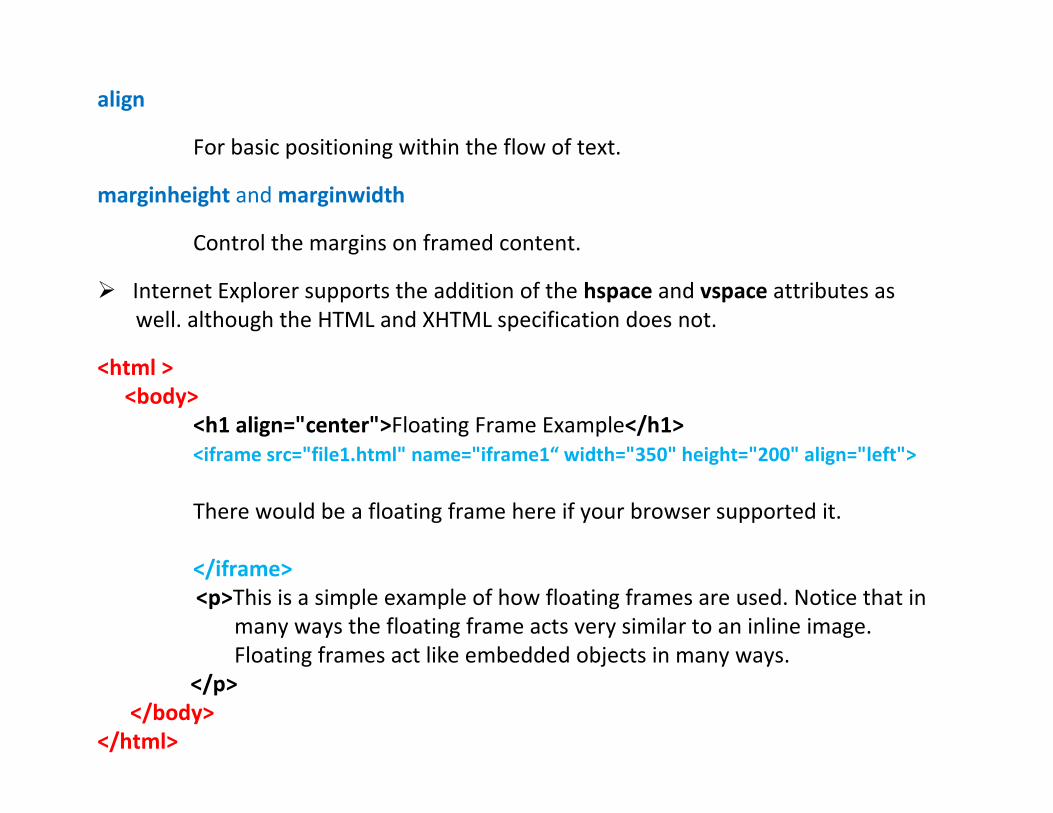
For basic positioning within the flow of text.
marginheight and marginwidth
Control the margins on framed content.
� Internet Explorer supports the addition of the hspace and vspace attributes as
well. although the HTML and XHTML specification does not.
<html >
<body>
<h1 align="center">Floating Frame Example</h1>
<iframe src="file1.html" name="iframe1“ width="350" height="200" align="left">
There would be a floating frame here if your browser supported it.
</iframe>
<p>This is a simple example of how floating frames are used. Notice that in
many ways the floating frame acts very similar to an inline image.
Floating frames act like embedded objects in many ways.
</p>
</body>
</html>

Form
� A form in HTML is contained within a form element. i.e. <form>…<</form>.
� A form is made up of fields as well as the markup necessary to structure the form
and potentially control its presentation.
� Form fields include text fields, password fields, multiple-line text fields, pop-up
menus, scrolled lists, radio buttons, check boxes, and buttons.
� The form itself contains regular text, other HTML elements such as tables, and
form elements such as check boxes, pull-down menus, and text fields.
� In order to make the form work, you must specify two things in the <form> tag:
the address of the program that will handle the form contents using action and the
method by which the form data will be passed using the method attribute.

Form Field Elements
Text Fields
� Single-line text entry fields are specified using the input element and are useful for
collecting small bits of data such as a user's name, address, e-mail address, and so
on.
� It is possible to specify a multiple-line text field using the textarea element.
� To set a text entry control, use the <input> tag and set the type attribute equal to
text.
<input type="text" name="UserName" id="UserName" size="30" maxlength="60"
value="Enter your name here”>
Attributes
Name /Id:
All form elements should be named by setting the name attribute to some unique
value.

Size
By default, unless specified this field generally will be a width of 20 characters.
The value of the size field for an <input> tag is the number of characters to be
displayed. It is possible for the user to type more characters than this value. The text
will just scroll by.
Maxlength
If you want to limit the size of the field, you need to set the value of the maxlength
attribute to the maximum number of characters allowed in the field.
Value
The final attribute that is useful to set with a text entry field is the value attribute. With
this attribute, you can specify the default text you want to appear in the field when the
form is first loaded.

Password Fields
� The password form field is the same as the simple text entry field, except that the
input to the field is not echoed when typed.
� To set a password form control, use the <input> tag again but this time set the type
attribute equal to password.
� As with the text field, it is possible to specify the size of the field in characters with
size and the maximum entry in characters with maxlength.
� Setting a default value for the password field with the value attribute doesn't make
much sense because the user can see it by viewing the HTML source of the
document.
� Of course, the name and id attributes should also be used on this form field.
<input type="password" name="Pass" id="Pass" size="10" maxlength="10“ >

Multiple-Line Text Input
� When it is necessary to enter more than one line of text in a form field, the input
element must be abandoned in favor of the textarea element.
� Like the text input field, there are similar attributes to control the display size of
the data entry area as well as the default value and the name of the control.
Attributes
Rows
To set the number of rows in the text entry area, set the rows attribute equal to the
number of rows desired.
Cols
To set the number of characters per line, set the cols attribute.
<textarea rows="5" cols="80" name="CommentBox" id="CommentBox">
</textarea>

� Because there can be many lines of text within a <textarea> tag, it is not
possible to set the default text for the area using the value attribute. Instead,
place the default text between the <textarea> and </textarea> tags:
<textarea rows="5" cols="80" name="CommentBox" id="CommentBox">
Please fill in your comments here.
</textarea>
� The information enclosed within a <textarea> tag must be plain text and should
not include any HTML markup.
� In fact, the default text in a <textarea> tag preserves all the spaces, returns,
and other special characters. Markup included within the form control will not
be interpreted.

Pull-Down Menus
� A pull-down menu enables the user to select one choice out of many possible
choices.
� One nice aspect of pull-down menus is that all choices do not have to be seen on
the screen and are generally are hidden.
� To create a pull-down menu, use the <select> tag.
� The tag should contain one or more occurrences of the option element. Each
<option> tag specifies a menu choice.
<select name="GadgetType" id="GadgetType">
<option> Super Gadget </option>
<option> Mega Gadget </option>
<option> Mongo Gadget </option>
<option> Plain Gadget </option>
</select>
� Like all form fields the select element has name and id attributes used to set a
unique name for the field.

� It is also possible to set the size attribute on a <select> tag, but generally this is not
set unless the menu is a scrolled list.
� The option element has a few attributes as well. An occurrence of the attribute
selected in an <option> tag sets the form control to select this item by default.
Otherwise, a browser will choose the first <option> within the select element as
the default.
� If multiple selected attributes are specified, the result is generally to select the
final <option> tag with a selected attribute.
� Generally, the value submitted when the form is sent is the value enclosed by the
option element. However, it is possible to set the value attribute for the element
that will be returned instead. Separating the text of the option from the submitted
value is often a good idea so you can have a descriptive message for the user and a
short data item for transmission.
<form >
<select name="GadgetType" id="GadgetType">
<option>Super Gadget</option>
<option value="MEG-G5">Mega Gadget</option>
<option value="MO-45" selected="selected">Mongo Gadget</option>
<option>Plain Gadget</option>
</select>
</form>

<optgroup>
� The goal of an <optgroup> tag is to create menu categories.
� Although initially not well-supported by browsers, today's modern browsers do
recognize <optgroup>.
<select name="GadgetType" id="GadgetType">
<optgroup label="S* Gadgets">
<option value="SG-01">Super Gadget</option>
</optgroup>
<optgroup label="M* Gadgets">
<option value="MEG-G5">Mega Gadget</option>
<option value="MO-45">Mongo Gadget</option>
</optgroup>
<option selected="selected">Gadget</option>
</select>

Scrolled Lists
� The select element also might contain the size attribute, which is used to specify
the number of items showing on the screen at once.
� The default value for this attribute is 1, which specifies a normal pull-down menu.
� Setting the size attribute to a value of two or more creates a list in a window of the
specified number of rows.
� In the default case, scrolled lists act just like pull-down menus. However, if a
<select> tag contains the attribute multiple, it becomes possible to select more
than one entry.
� Because it is possible to select more than one entry in a scrolled list when the
multiple option is applied, it is possible to use the selected attribute multiple times
in the enclosed option elements.

<form>
<select name="GadgetOptions" id="GadgetOptions" multiple="multiple" size="3">
<option selected="selected" value="Hit with hammer">
Bumps
</option>
<option value="Add glitter">
Sparkles
</option>
<option selected="selected" value="Buff it">
Polished
</option>
<option>
Scratches
</option>
<option>
Shrink wrapped
</option>
</select>
</form>

Check Boxes
� With the scrolled list, it is possible to select many items out of a large group of
items. Unfortunately, not all the items are presented at once for the user to
choose. If there are a few options to select from that are not mutually exclusive, it
probably is better to use a group of check boxes that the user can check off.
� Check boxes are best used to toggle choices on and off. Although it is possible to
have multiple numbers of check boxes and let the user select as many as he or she
wants.
� To create a check box, use an <input> tag and set the type attribute equal to
checkbox.
� The check box also should be named by setting the name and id attributes.
Cheese: <input type="checkbox" name="Cheese“ >
� If the check box is selected, a value of Cheese=on will be transmitted to the server.
Setting a value for the check box might make more sense. Values to be transmitted
instead of the default value can be set with the value attribute. The code
Cheese: <input type="checkbox" name="Extras“ value="Cheese“ >
would send a response such as Extras=Cheese to the server.

� It is possible to set a check box to be selected by default by using the checked
attribute within an <input> tag.
<form>
Super-magneto:
<input type="checkbox" name="mag" value="Magnetize" >
<br>
Kryptonite Coating:
<input type="checkbox" name="krypto" value="Anti-Superman"
checked="checked" >
<br />
Anti-gravity:
<input type="checkbox" name="antigrav" value="Anti-gravity" >
<br>
</form>

Radio Buttons
� Radio buttons use a similar notation to check boxes, but only one option may be
chosen among many.
� This is an especially good option for choices that don't make sense when selected
together.
� In this sense, radio buttons are like pull-down menus that allow only one choice.
The main difference is that all options are shown at once with radio buttons.
� Like check boxes, this form field uses the standard <input type=""> format. In this
case, set type equal to radio.
� Setting the name attribute is very important in the case of radio buttons because
it groups together controls that share the radio functionality.
� The radio functionality says that when an item is selected, it deselects the
previously pressed item. If the names are not the same, the radio group will not
work. Be careful when naming radio fields.
� When working with radio buttons, the value attribute must also be carefully
considered. It is important to set each individual radio button to a different value
entry. Otherwise, it will be impossible to decipher which button was selected.

� Like check boxes, the occurrence of the selected attribute in an <input> tag will
preselect the item. Only one item may be selected as a default out of a radio
group.
� If the selected attribute does not occur, the browser typically will not display any
items as selected.
<form>
Groovy Green:
<input type="radio" name="Color" value="Green">
Rocket Red:
<input type="radio" name="Color" value="Red" checked="checked">
Yipee! Yellow:
<input type="radio" name="Color" value="Yellow">
</form>

Reset and Submit Buttons
� Once a form has been filled in, there must be a way to send it on its way, whether
it is submitted to a program for processing or simply mailed to an e-mail address.
� The input element has two values, reset and submit, for the type attribute for
accomplishing this.
� Setting the type attribute for an <input> tag to reset creates a button that allows
the user to clear or set to default all the form fields at once.
� Setting the type attribute for <input> to submit creates a button that triggers the
browser to send the contents of the form to the address specified in the action
attribute of the enclosing form element.
� The buttons have two important attributes: value and name. The value attribute
sets both the value of the button transmitted to the server and the text wording on
the button.
� The name value associates an identifier with the form field for submission. Of
course, id can be used as well for setting a name, but it is typically more related to
style sheets.

<form action="http://www.htmlref.com/scripts/formecho.php" method="post" name="form1“ >
<strong>Customer Name:</strong>
<input type="text" name="UserName“ size="25" maxlength="35“ >
<br>
<strong>Password:</strong>
<input type="password" name="Pass" id="Pass" size="10" maxlength="10" >
<br>
<strong>Gadget Type:</strong>
<select name="GadgetType" id="GadgetType">
<option value="SG-01">Super Gadget</option>
<option value="MEG-G5">Mega Gadget</option>
<option value="MO-45">Mongo Gadget</option>
<option selected="selected">Gadget</option>
</select>
<br ><br >
<input type="submit" value="Order Gadget" >
<input type="reset" value="Reset Form" >
</form>

� Because the Submit and Reset buttons cause an action, either form submission or
field reset, it may not be obvious why the name field can be useful.
� Although having multiple Reset buttons might not be so useful, multiple Submit
buttons are useful because the value of the button is sent to the address specified in
the form element's action attribute.
<input type="submit" value="Place Order" name="Add“ >
<input type="submit" value="Delete Order" name="Delete”>
<input type="submit" value="Update Order" name="Update”>
<input type="reset" value="Reset Form" name="ResetButton”>

The action Attribute
� How a form is to be handled is set using the action attribute for the form element.
� The action attribute usually is set to a URL of the program on the web server that
will process the form data captured and being sent back.
� The server side program that processes this data can be written in any scripting
language that the web server understands.
� For example, the code
<form action="http://www.democompany.com/cgi-bin/post-query.pl" method="post">
would be for a script called post-query.pl in the cgi-bin directory on the server
www.democompany.com.
� It is also possible to use a relative URL for the action attribute if the form is
delivered by the same server that houses the form-handling program:
<form action="../cgi-bin/post-query.pl" method="post">

The method Attribute
� It is also necessary to specify how the form will be submitted to the address
specified by the action attribute.
� How data will be submitted is handled by the method attribute.
� There are two acceptable values for the method attribute:
1) get
2) post
� These are the HTTP methods that a browser uses to "talk" to a server.
� If the method attribute remains unspecified, it defaults to the get method.
The get Method
� The HTTP get method generally is the default method for browsers to submit
information.

� In fact, HTML documents generally are retrieved by requesting a single URL from a
Web server using the get method, which is part of the HTTP protocol. When you
type a URL such as http://www.democompany.com/staff/thomas.html into your
Web browser, it is translated into a valid HTTP get request like this:
GET /staff/thomas.html HTTP/1.1
This request is then sent to the server www.democompany.com.
What this request says, essentially, is "Get me the file thomas.html in the staff
directory. I am speaking the 1.1 dialect of HTTP."
� We need to pass the form data along with the name of the program to run. To do
this, all the information from the form is appended onto the end of the URL being
requested. This produces a very long URL with the actual data in it, as shown here:
http://www.democompany.com/cgi-bin/comments.exe?Name=Matthew+Foley&Age=32&Sex=male
Disadvantages:
� The get method isn't very secure because the data input appears in the URL.
� Furthermore, there is a limitation to just how much data can be passed with the
get method (1024 bytes).

Advantage:
� First, get is easy to deal with. An example URL like the previous one should make it
obvious that the Name field is set to Matthew Foley, the Age is 32, and the Sex is
male. The individual form field values are separated by ampersands.
� Other reason to use get is that it comes in the form of a URL, so it can be
bookmarked or set as a link.
� The get method is used properly in search engines. When a user submits a query
to a search engine, the engine runs the query and then returns page upon page of
results. It is possible to bookmark the query results and rerun the query later.
The post Method
� In situations where a large amount of information must be passed back, the post
method is more appropriate than get.
� The post method transmits all form input information as a data stream
immediately after the requested URL.
� In other words, once the server has received a request from a form using post, it
knows to continue "listening" for the rest of the information.

� The get method comes with the data to use right in the URL request.
� The encoding of the form data is handled in the same general way as the get
method by default; spaces become plus signs and other characters are encoded
in the URL fashion. A sample form might send data that would look like the
following:
Name=Jane+Smith&Age=30&Sex=female
� The benefit of using the post method is that a large amount of data can be
submitted this way because the form contents are not in the URL.
� In the post example, the encoding of the form data is the same as get, although
it is possible to change the encoding method using the enctype attribute.
� One potential downside of the post method is that pages generated by data
submitted via post cannot be bookmarked.

Generalized Buttons
� One last form of the input element, hinted at earlier, is the generalized button. By
using <input type="button" />, it is possible to create a button in the style of the
Submit or Reset buttons, but that has no predetermined actions. Inserting
something like the following doesn't really do much:
<input type="button" value="Press Me!“ >
� If you click the rendering of this button, no action is triggered, and no value will
be submitted. So what's the point? By using a scripting language, it is possible to
tie an event to the button and create an action. For example,
<input type="button" value="Press Me!" onclick="alert('Hello from JavaScript');“ >

Multimedia Audio Video
<bgsound>
� Microsoft Internet Explorer 2 and later supports WAV and MIDI files directly using
a <bgsound> tag, which plays a sound in the background after it is loaded.
� <bgsound > is an empty tag.
� The tag should occur within the body of a document. A complete tag example
might look like this:
<bgsound src="boing.wav" loop=3" volume="0">
Attribute
src
� It is set to the URL of the sound file to play.
� The sound file must be in the appropriate format, either WAV or MIDI.

loop
� which can be set to an integer value indicating how many times the sound should
play.
� The loop attribute can also be set to the value infinite to keep playing over and
over.
Volume
� Volume can be controlled through the volume attribute, which has a value from
10,000 to 0, with 0 being full natural sound volume and -10,000 being volume off.
Embedding RealAudio <embed>
� The <embed> tag defines a container for an external application or interactive
content (a plug-in).
� A helper application is a small computer program that extends the standard
functionality of the browser. Helper applications are also called plug-ins.
� Plug-ins are often used by browsers to play audio and video.
� Examples of well-known plug-ins are Adobe Flash Player and QuickTime.
� Plug-ins can be added to Web pages through the <object> tag or the <embed> tag.
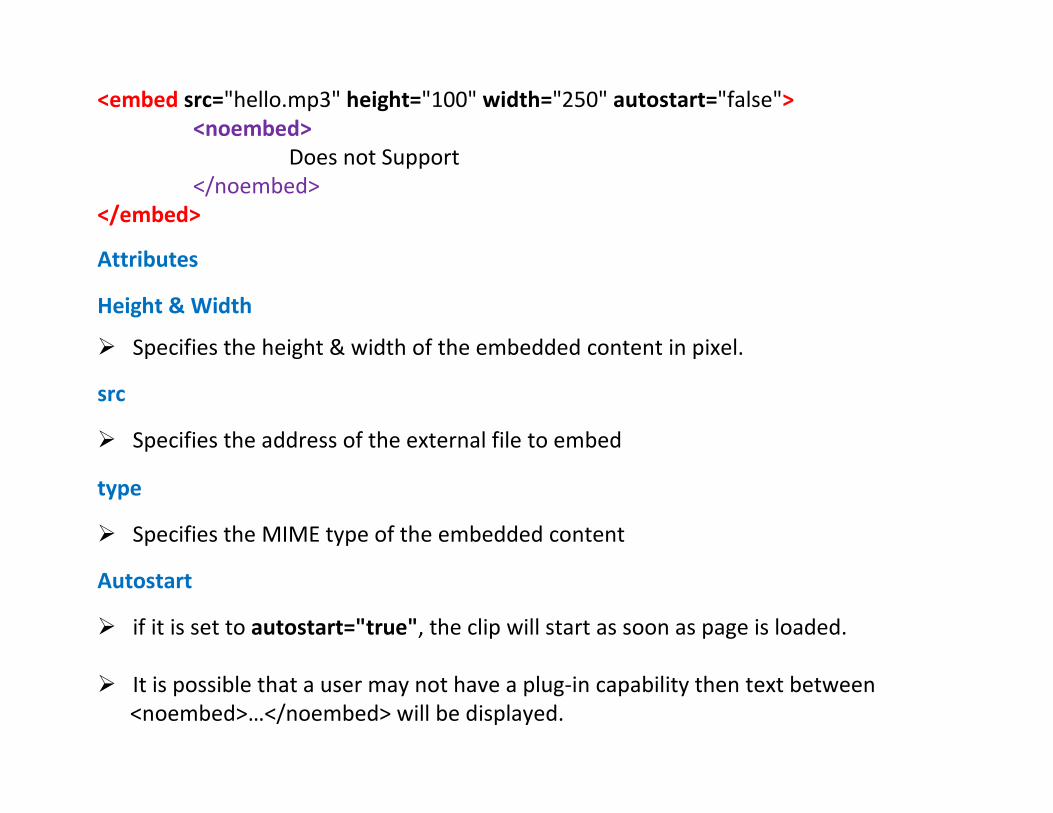
<embed src="hello.mp3" height="100" width="250" autostart="false">
<noembed>
Does not Support
</noembed>
</embed>
Attributes
Height & Width
� Specifies the height & width of the embedded content in pixel.
src
� Specifies the address of the external file to embed
type
� Specifies the MIME type of the embedded content
Autostart
� if it is set to autostart="true", the clip will start as soon as page is loaded.
� It is possible that a user may not have a plug-in capability then text between
<noembed>…</noembed> will be displayed.

<object>
� The purpose of the <object> element is to support HTML helpers (plug-ins).
� The <object> tag defines an embedded object within an HTML document. Use
this element to embed multimedia (like audio, video, Java applets, ActiveX, PDF,
and Flash) in your web pages.
� You can also use the <object> tag to embed another webpage into your HTML
document.
� You can use the <param> tag to pass parameters to plugins that have been
embedded with the <object> tag.
� An <object> element must appear inside the <body> element. The text between
the <object> and </object> is an alternate text, for browsers that do not support
this tag.
<object width="400" height="400" data="hell.mp3">
Does not Support
</object>

Attributes
Attribute Value Description
align
top
bottom
middle
left
right
Specifies the alignment of the <object> element according to
surrounding elements
border pixels Specifies the width of the border around an <object>
data URL Specifies the URL of the resource to be used by the object
height pixels Specifies the height of the object
hspace pixels Specifies the whitespace on left and right side of an object
name name Specifies a name for the object
type MIME_type Specifies the MIME type of data specified in the data attribute
vspace pixels Deprecated in HTML 4.01. Specifies the whitespace on top and
bottom of an object
width pixels Specifies the width of the object
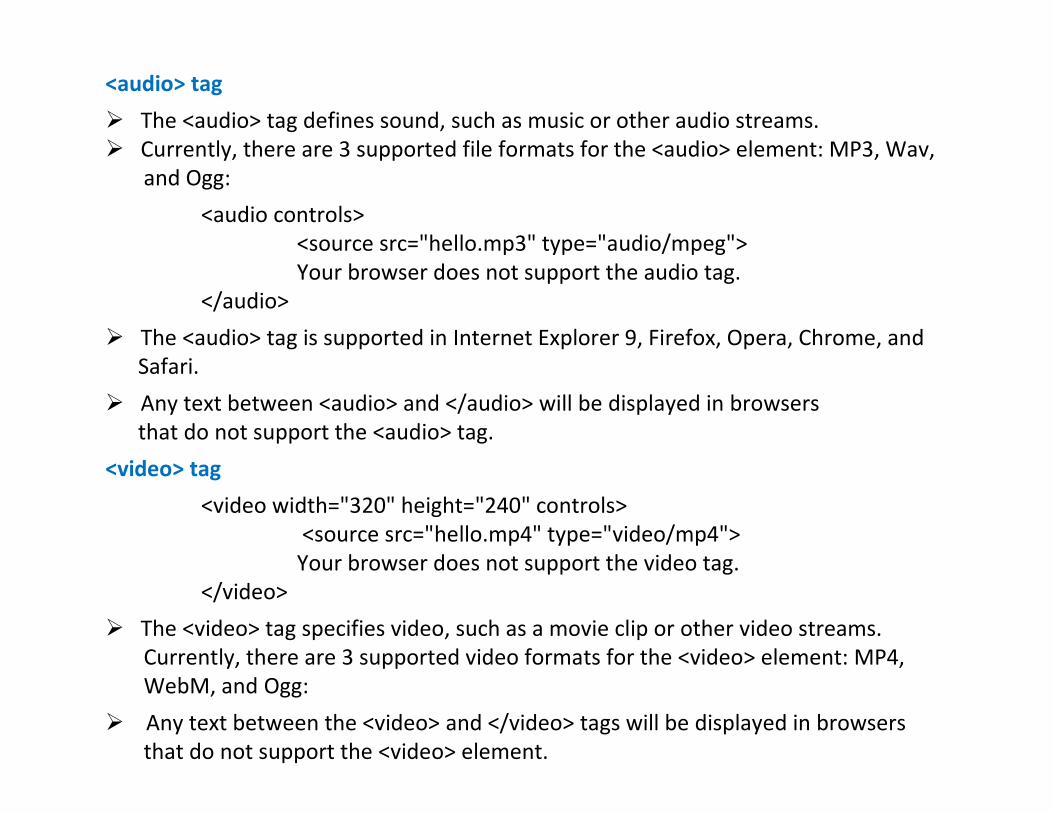
<audio> tag
� The <audio> tag defines sound, such as music or other audio streams.
� Currently, there are 3 supported file formats for the <audio> element: MP3, Wav,
and Ogg:
<audio controls>
<source src="hello.mp3" type="audio/mpeg">
Your browser does not support the audio tag.
</audio>
� The <audio> tag is supported in Internet Explorer 9, Firefox, Opera, Chrome, and
Safari.
� Any text between <audio> and </audio> will be displayed in browsers
that do not support the <audio> tag.
<video> tag
<video width="320" height="240" controls>
<source src="hello.mp4" type="video/mp4">
Your browser does not support the video tag.
</video>
� The <video> tag specifies video, such as a movie clip or other video streams.
Currently, there are 3 supported video formats for the <video> element: MP4,
WebM, and Ogg:
� Any text between the <video> and </video> tags will be displayed in browsers
that do not support the <video> element.

Attribute Value Description
Autoplay autoplay Specifies that the video will start playing as soon as it is ready
Controls controls Specifies that video controls should be displayed (such as a play/pause button
etc).
Height pixels Sets the height of the video player
Loop loop Specifies that the video will start over again, every time it is finished
Muted muted Specifies that the audio output of the video should be muted
Poster URL Specifies an image to be shown while the video is downloading, or until the
user hits the play button
Preload auto
metadata
none
Specifies if and how the author thinks the video should be loaded when the
page loads
Src URL Specifies the URL of the video file
width pixels Sets the width of the video player
Attribute

Dynamic HTML
� DHTML is a new and emerging technology that has evolved to meet the increasing
demand for eye-catching and mind-catching web sites.
� DHTML combines HTML with cascading Style Sheets (CSSs) and scripting Laguage.
� HTML specifies a web page’s elements like table, frame, paragraph, bulleted list etc.
� Cascading Style Sheets can be used to determine an element’s size, color, position
and a number of other features.
� Scripting languages (Javascript and VBScript) can be used to manipulate the web
page’s elements so that styles assigned to them can change in response to the user’s
input.
Cascading Style Sheet Basic
� A style sheet associates look or formatting to a particular piece of content in a
document.
� They are not a replacement for markup. Without a binding to an element, a style
really doesn't mean anything.

� The purpose of a style sheet is to create a presentation for a particular element
or set of elements.
� They enforce standards and uniformity throughout a web site and provide
numerous attributes to create dynamic effects.
� The advantages of a style sheet includes the ability to make global changes to all
documents from a single location.
� Binding an element to a style specification is very simple; it consists of
� a selector—in this case, simply the element name
� selector followed by its associated style information (called rules) within
curly braces. The rules are composed of property names and property
values separated by colons with each rule in turn being separated by a
semicolon.
� The basic syntax is as follows:

� As rules are added, you may take advantage of the fact that CSS is not terribly
whitespace sensitive, so we can put one declaration in one line.
h1 {font-size: 28pt;color: red;font-family:Impact;}
should render the same as
h1 { font-size: 28pt;
color: red;
font-family: Impact;}
� Lastly, under most browsers property names and selectors are not case sensitive.
CSS Comments
� Comments are used to explain your code, and may help you when you edit the
source code at a later date. Comments are ignored by browsers.
� A CSS comment begins with "/*", and ends with "*/", like this:
/*This is a comment*/
p
{
text-align:center;
/*This is another comment*/
color:black;
font-family:arial;
}

CSS Attributes (Style Attributes)
� CSS provides a powerful set of properties for manipulating the look of HTML
elements.
� Font attributes
� Color and Background attributes
� Text attributes
� Border attributes
� Margin related attributes
� List attributes

� To make the style rule useful, it must be bound to an actual document.
� There are numerous ways to add style to a document, either using
1) an external style sheet referenced by a <link> tag
2) a document-wide style sheet specified by the <style> tag in <head> or
3) using inline styles with the style attribute common to most HTML elements
Document-wide style sheet (Internal Style Sheet)
� Document-wide style Sheet, defined with the <style> tag found within the
<head> element of an HTML document.
<style type="text/css" media="all | print | screen" >
style rules here
</style>
� The type attribute again is used to indicate the MIME type of the enclosed style
sheet.
� The media attribute indicates the media for which the style sheet applies. By
default, the style sheet is applied to all media so most developers omit this
attribute as well.
� Within the style block, style sheet rules are included.

<html>
<head>
<title> First CSS Example </title>
<style type="text/css">
h1 {font-size: 28pt; font-family: Impact; color: red;}
</style>
</head>
<body>
<h1>New and Improved Markup with CSS Style!</h1>
</body>
</html>
Using Inline Style
� In addition to using a style sheet for the whole document, you can add style
information directly in a single element.
� Suppose you want to set one particular <h1> tag to render in 48-point, green,
Arial font.
� You could quickly apply the style to only the tag in question using its style
attribute. style is one of the core HTML attributes besides class, id, and title that
can be used within nearly any HTML element.

� For example, the following example shows how style rules could be applied to a
particular <h1> tag:
<h1 style="font-size: 48pt; font-family: Arial; color: green;">
CSS1 Inline
</h1>
� The main problem is that inline rules are bound very closely to a tag.
� If you want to affect more than one <h1>, as shown in the previous example, you
would have to copy- paste the style attribute into every other <h1> tag.
� The separation of markup from CSS presentation is just not where it should be.
� However, for quick and dirty application of CSS rules this might be appropriate,
particularly for testing things out.

Linking to a Style Sheet (External Style sheet)
� An external style sheet is ideal when the style is applied to many pages.
� With an external style sheet, you can change the look of an entire Web site by
changing one file.
� Each page must link to the style sheet using the <link> tag. The <link> tag goes
inside the head section:
<head>
<link rel="stylesheet" type="text/css" href="mystyle.css">
</head>
� An external style sheet can be written in any text editor. The file should not
contain any html tags.
� Your style sheet should be saved with a .css extension.
� An example of a style sheet file is shown below “mystyle.css”:
hr { color:sienna; }
p { margin-left:20px; }
body { background-image:url("images/back40.gif"); }
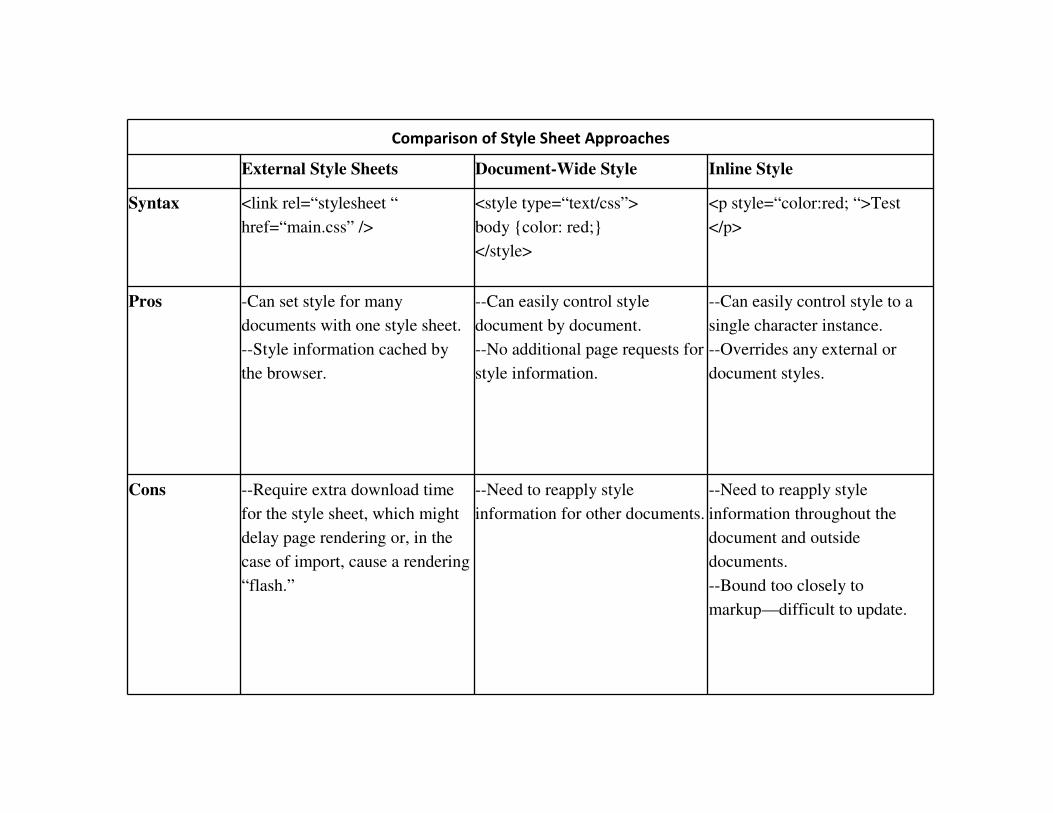
Comparison of Style Sheet Approaches
External Style Sheets Document-Wide Style Inline Style
Syntax <link rel=“stylesheet “
href=“main.css” />
<style type=“text/css”>
body {color: red;}
</style>
<p style=“color:red; “>Test
</p>
Pros -Can set style for many
documents with one style sheet.
--Style information cached by
the browser.
--Can easily control style
document by document.
--No additional page requests for
style information.
--Can easily control style to a
single character instance.
--Overrides any external or
document styles.
Cons --Require extra download time
for the style sheet, which might
delay page rendering or, in the
case of import, cause a rendering
“flash.”
--Need to reapply style
information for other documents.
--Need to reapply style
information throughout the
document and outside
documents.
--Bound too closely to
markup—difficult to update.

The class Selector
� The class selector is used to specify a style for a group of elements. Unlike the id
selector, the class selector is most often used on several elements.
� This allows you to set a particular style for many HTML elements with the same
class.
� The class selector uses the HTML class attribute, and is defined with a "."
� In the example below, all HTML elements with class="center" will be center-
aligned:
.center {text-align:center;}
� You can also specify that only specific HTML elements should be affected by a class.
� In the example below, all p elements with class="center" will be center-aligned:
p.center {text-align:center;}

The SPAN Element
� The SPAN element changes the style of the text it encloses.
� Without any style attributes, the SPAN element won’t change the enclosed items at
all.
� To use the SPAN element, simply surround the text that you want to add styles to
with the <span> and </span> tags:
<p> <span class="highlight">Highlighted text</span> and non-highlighted text.</p>
The SPAN element has no required attributes, but the three that are the most useful
are :
� style
� class
� id
� Use SPAN when you want to change the style of elements without placing them in
a new block-level element in the document.
� For example, if you had a Level 3 Heading (H3) that you wanted the second word to
be red, you could surround that word with
<span style="color : #f00;">2ndWord</span>
and it would still be a part of the H3 tag, just red. For example:
<h3>This is My <span style="color: red;">Awesome</span> Headline</h3>

Cascading order
� What style will be used when there is more than one style specified for an HTML
element?
� Generally speaking we can say that all the styles will "cascade" into a new "virtual"
style sheet by the following rules, where number four has the highest priority:
1) Browser default
2) External style sheet
3) Internal style sheet (in the head section)
4) Inline style (inside an HTML element)
� So, an inline style (inside an HTML element) has the highest priority, which means
that it will override a style defined inside the <head> tag, or in an external style
sheet, or in a browser (a default value).