mobarena documentation - media.readthedocs.org · 5 getting started 15 6 item and reward syntax 17...
TRANSCRIPT
MobArena DocumentationRelease 0.99.1
garbagemule, Justin W. Flory (jflory7), MobArena contributors
Jul 19, 2018

Developer resources
1 Announcement strings 1
2 Arena setup 3
3 Class chests 9
4 Commands 13
5 Getting started 15
6 Item and reward syntax 17
7 Leaderboards 21
8 Monster types 23
9 Permissions 25
10 Setting up the config file 29
11 Setting up waves 37
12 Using MobArena 45
13 Wave formulas 49
14 Indices and tables 51
i

ii
CHAPTER 1
Announcement strings
MobArena supports custom strings for announcement and messages. This lets you create custom messages uniqueto your server based on certain actions, like a game ending. The announcements.yml file stores MobArenaannouncement and message strings.1
1.1 Color support
Color codes are supported. To add color to a message, use an ampersand (&) followed by a valid color code. Colorcodes are available in the Gamepedia Minecraft wiki. Examples are in the default file.
1.2 Variables
Some announcements use a variable. In the string, variables are represented by a percent sign (%). Remove it if youdo not want a variable in the message.
There are some limitations to variables:
• Not possible to add variables to announcements that don’t take them by default
• Announcements that take one variable cannot take more than that variable
1.3 Disable an announcement
If you want to disable a specific announcement, set its value to two single quotes (''). MobArena ignores an-nouncements set to an empty value. To disable one, you must override it. Deleting the option does not disable anannouncement since MobArena adds them in by default.
1 Default strings are found in the Msg.java class
1

MobArena Documentation, Release 0.99.1
1.4 Examples
Three examples below show all of the features explained above.
# Use a red message for the start of a new gamearena-start: 'Let the games begin! &cMay the odds be ever in your favor!'
# Use a variable for the number of seconds until the game beginsarena-auto-start: 'Arena will auto-start in &c%&r seconds.'
# Turn off the golem-died messagegolem-died: ''
2 Chapter 1. Announcement strings
CHAPTER 2
Arena setup
This page explains how to set up an arena, from defining it to configuring it.
2.1 Building an arena
There are four key parts to an arena:
1. Lobby
2. Arena floor
3. Spectator area
4. Exit point
2.1.1 Lobby
A lobby is where players choose a class before joining an arena. It’s also the “waiting area” before a new match begins.
Lobbies have two requirements:
• Class selection signs: Clicked to select a class
• Iron block: Clicked to mark self as “ready”
Class selection signs must have the name of the class on the first line (case-sensitive). The last three lines are notchecked and they can have any text.
You will not receive a confirmation message after making a new sign since MobArena does not register the creationof class selection signs. If you get a confirmation message, another plugin is interferring.
3

MobArena Documentation, Release 0.99.1
2.1.2 Arena floor
An arena floor is where the action happens. Players fight through mob waves on the arena floor. How the arena floorlooks is up to you, but we recommend these minimum requirements:
• Closed in by walls on all sides
• Have a ceiling / roof
This prevents players and mobs from escaping and also blocks players from wandering out of the arena with classitems.
2.1.3 Spectator area
A spectator area lets non-players watch an on-going match. The /ma spec command teleports a player into thespectator area. If configured,1 players warp into the spectator arena when they die.
Design the area so spectators cannot escape the spectator area, since they are invincible. Spectators should not enterthe arena floor or exit the spectator area on foot.
2.1.4 Exit point
When players leave the arena or when the last player standing dies, arena players and spectators teleport to the locationthey joined from. Optionally, an arena can have an exit warp. This controls where players go after leaving a match.
2.2 Defining areas
By now, you have a full arena map and you are ready to configure it in MobArena. When an area is built, it must bedefined by MobArena. This tells MobArena where the arena boundaries are, such as whether an area is a lobby or thearena floor.
MobArena has four types of areas:
1. Regions
2. Warps
3. Spawnpoints
4. Containers
2.2.1 Regions
Arenas must have an arena region and optionally a lobby region. Regions are set using the Regions tools. MobArenauses the arena region to. . .
• Stop cheating by kicking players if they leave the arena region
• Only spawn MobArena mobs inside arena region
1 Set spectate-after-death to true in the config file to force players to the spectator area after dying
4 Chapter 2. Arena setup

MobArena Documentation, Release 0.99.1
2.2.2 Warps
Players teleport to different warps for different events. There are four warps used in MobArena:
• Lobby warp: Warp location for players joining a new match; leave when all players “ready up” or matchcountdown timer ends
• Arena warp: Warp location for players to spawn in the arena floor
• Spectator warp: Warp location for spectators to watch an on-going match
• Exit warp: Optional warp location for players to teleport to after a match finishs or they leave the arena
2.2.3 Spawnpoints
Mobs spawn at the spawnpoint(s) of an area. MobArena only uses spawnpoints in a 15-block radius from any player.An arena can have multiple spawnpoints. Spawnpoints are added using the Spawnpoints tool.
The number of mobs spawned is not determined by the number of spawnpoints, but actual formulas. See Waveformulas for more information.
2.2.4 Containers
Containers are locations of chests, dispensers, or other containers with renewable contents. Any containers added toan arena must be registered using the Chests tool.
2.3 Setup Mode
Configure a new arena with Setup Mode. Setup Mode is a special mode that temporarily stores inventory and gives anadministrator a set of golden tools. The golden tools are called the Toolbox.
Flying is enabled to simplify arena setup. Talking in server chat is also disabled because Setup Mode starts an isolatedconversation with the administrator (explained below).
• Create a new arena: /ma addarena <arena name>
• Enter Setup Mode: /ma setup <arena name>2
• Leave Setup Mode: done (no slash)
• Delete an arena: /ma delarena <arena name>3
2.3.1 Setup Mode commands
Setup Mode is an isolated conversation, which means Setup Mode intercepts everything an administrator types. Thismakes commands in Setup Mode shorter and prevents accidental use of other plugins.
Below is a list of all commands in Setup Mode:
2 If you only have one arena, you don’t have to specify the arena name3 An arena named default is created on first use. You can remove this arena if you want to use an arena with a different name.
2.3. Setup Mode 5

MobArena Documentation, Release 0.99.1
Command Description Aliasesdone Leave Setup Mode end, stop,
done, quithelp Display help screen ?, hmissing Display list of missing (mandatory) regions, warps,
spawnpoints. Useful to check what is left to set up.miss
expand <region> <amount><direction>
Expand region by some amount in a given direction. Ex-ample: expand ar 5 up
exp
show [<region>| <warp>|<spawnpoint>| <container>]
Show a region, warp, spawnpoint(s), or container as redwool blocks. Example: show sp
N/A
• Valid regions: ar (arena region), lr (lobby region)
• Valid amounts: Any positive integer (i.e. whole number)
• Valid directions: up, down, out
• Valid warps: arena, lobby, spec, exit
• Valid spawnpoints: spawns (or sp)
• Valid containers: chests (or c)
2.3.2 Toolbox
The Toolbox is a set of golden tools. Each tool has a specific function. We use them to set up regions, warps,spawnpoints, and containers. Toolbox tools are used with either a left- or right-click.
Tool functions are also described in the item tooltip in your inventory.
Region tools
Arena and lobby regions are defined with Region tools (golden axes). There are two golden axes in the Toolbox. Oneis for arena setup and the other is for lobby setup. The tools are named accordingly.
Region tools behave similarly to the WorldEdit wand (wooden axe). If you are familiar with regions in WorldEdit,Region tools should feel familiar.
• Left-click: Sets first point on clicked block
• Right-click: Sets second point on clicked block
When both points are set, the region is defined. show ar (or show lr) lets you check the region spans the desiredarea. If the region is too small, use the expand command (see above) to make it bigger.
The region must be three-dimensional (like a box) and not two-dimensional (flat rectangle). Make sure your arenafloor is contained in the region selection (expanding a block or two below the floor is recommended).
Warp tool
All warps are defined using the Warp tool (golden hoe). The tool defines any of the four types of warps dependingwhich one is selected.
6 Chapter 2. Arena setup

MobArena Documentation, Release 0.99.1
• Left-click: Set selected warp type on top of clicked block
• Right-click: Cycle between warp types
A selected warp is placed on top of the clicked block. The direction you are looking is also taken into account.
Arena, lobby, and spectator warps are required. An exit warp is optional.
Spawnpoint tool
Spawnpoints are set up with the Spawnpoint tool (golden sword). The tool allows an administrator to set or removespawnpoints for mobs.
• Left-click: Add spawnpoint on top of clicked block
• Right-click: Remove spawnpoint on top of clicked block (if one exists)
A high number of spawnpoints is recommended. Mobs only spawn at spawnpoints within 15 blocks of a player.Every area in the arena should have one or more spawnpoints in a 15 block radius from each other.
If a player is not within 15 blocks of a spawnpoint, MobArena prints a warning to the console with coordinates. If noplayers are within 15 blocks of a spawnpoint, MobArena uses a random spawnpoint. This means mobs may spawn faraway from players.
Container tool
Containers are set up with the Container tool (golden shovel). It works like the Spawnpoint tool, but checks that theclicked block is a valid container.
• Left-click: Register clicked container (if not registered)
• Right-click: Unregister clicked container (if registered)
At the end of a match, a container is restored to its contents from the beginning of the match.
2.3. Setup Mode 7

MobArena Documentation, Release 0.99.1
8 Chapter 2. Arena setup

CHAPTER 3
Class chests
On this page: * About Class Chests * Linked Class Chests
3.1 About Class Chests
If some of your favorite items aren’t supported by MobArena’s internal [[item parser|Item and Reward Syntax]], or ifyou just want to be able to configure your class items from in-game, the class chests may be what you’re looking for!
Note: The Class Chests will only work for arenas with ‘‘use-class-chests: true‘‘, and the classes *MUST* existin the config-file for MobArena to recognize them, however the items and armor lists can be empty. * * *
The idea behind the class chests is to simply place some chests below the corresponding class signs in the lobby, andfill them with whatever items you want the given class to have. When the players activate the class signs, the contentsof the chests are copied to the player inventory. This suggests a type of “control room” setup, where an admin-onlyaccess room below the lobby contains the chests, allowing admins to warp down there and change the contents of thechests.
user/img/1.png
Fig. 1: Lobby and Control Room
For easier access and modification of the class chests, omitting the control room from the arena or lobby region mayprove useful. Otherwise, arenas may have to be temporarily disabled or put into edit mode to allow warping to andchanging the contents of the chests.
The class chests can be located up to 6 blocks below the sign itself or below the block right behind the sign (for wallsigns, this would be the block the sign is attached to). The chest may also be in the block directly behind the sign itself
9
MobArena Documentation, Release 0.99.1
- this is safe, because MobArena prevents players in the lobby from opening inventories, so if your lobby is in a tightspot, this might be the better option.
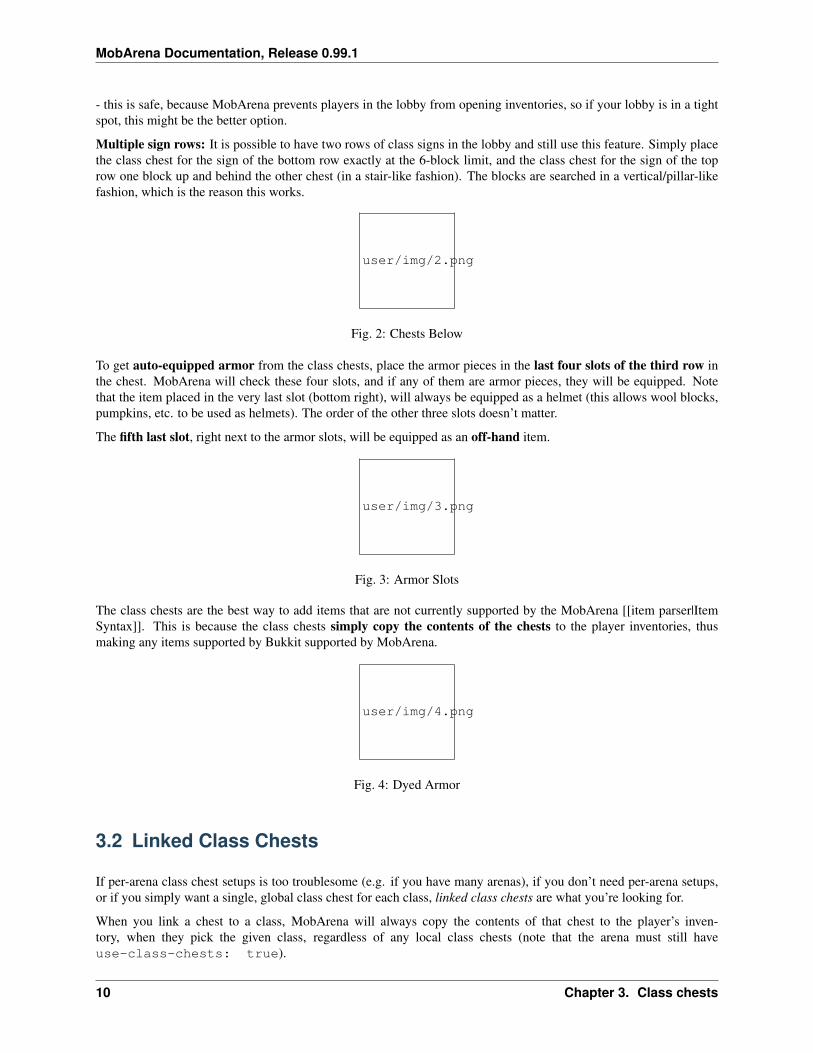
Multiple sign rows: It is possible to have two rows of class signs in the lobby and still use this feature. Simply placethe class chest for the sign of the bottom row exactly at the 6-block limit, and the class chest for the sign of the toprow one block up and behind the other chest (in a stair-like fashion). The blocks are searched in a vertical/pillar-likefashion, which is the reason this works.
user/img/2.png
Fig. 2: Chests Below
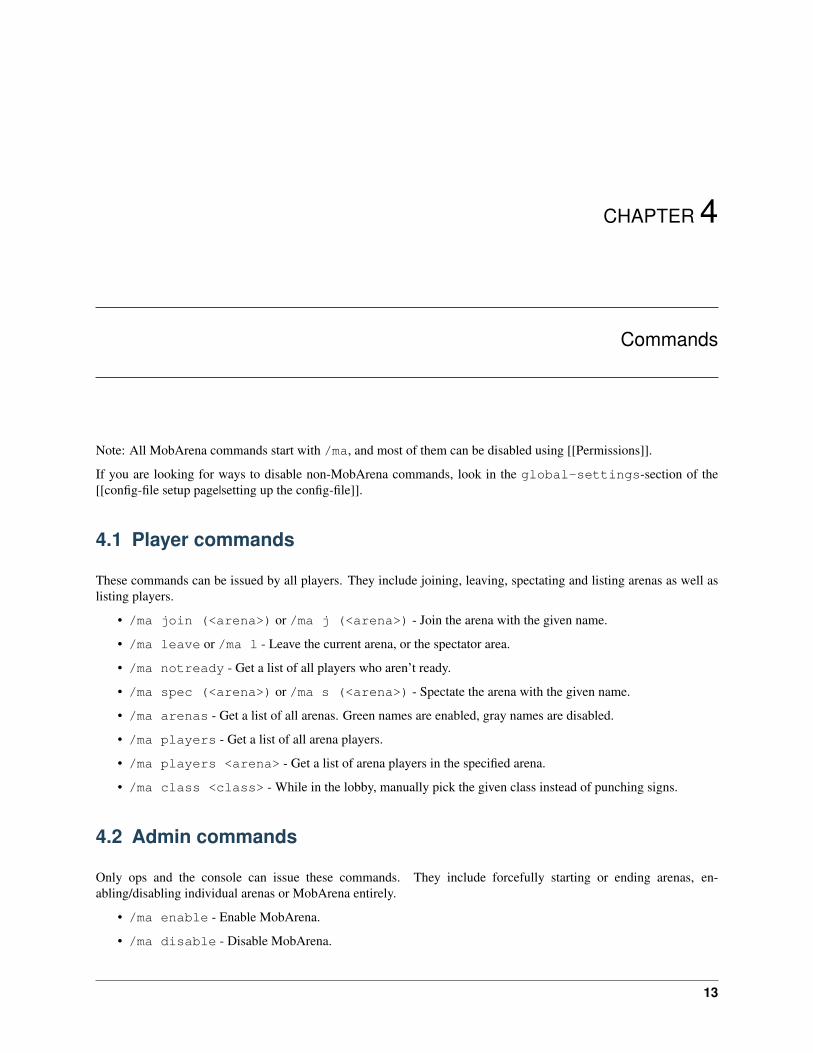
To get auto-equipped armor from the class chests, place the armor pieces in the last four slots of the third row inthe chest. MobArena will check these four slots, and if any of them are armor pieces, they will be equipped. Notethat the item placed in the very last slot (bottom right), will always be equipped as a helmet (this allows wool blocks,pumpkins, etc. to be used as helmets). The order of the other three slots doesn’t matter.
The fifth last slot, right next to the armor slots, will be equipped as an off-hand item.
user/img/3.png
Fig. 3: Armor Slots
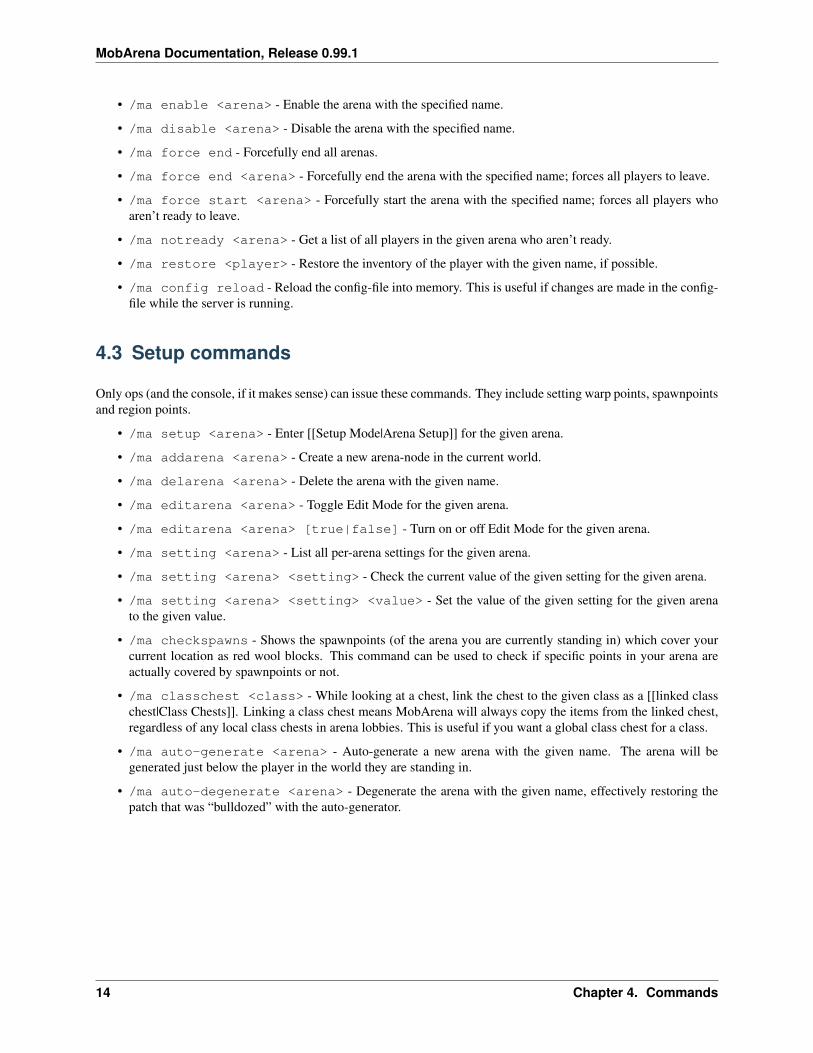
The class chests are the best way to add items that are not currently supported by the MobArena [[item parser|ItemSyntax]]. This is because the class chests simply copy the contents of the chests to the player inventories, thusmaking any items supported by Bukkit supported by MobArena.
user/img/4.png
Fig. 4: Dyed Armor
3.2 Linked Class Chests
If per-arena class chest setups is too troublesome (e.g. if you have many arenas), if you don’t need per-arena setups,or if you simply want a single, global class chest for each class, linked class chests are what you’re looking for.
When you link a chest to a class, MobArena will always copy the contents of that chest to the player’s inven-tory, when they pick the given class, regardless of any local class chests (note that the arena must still haveuse-class-chests: true).
10 Chapter 3. Class chests

MobArena Documentation, Release 0.99.1
To link a chest to a class, simply look at the chest and type /ma classchest <class>, and you’re done! Thelinked class chests may exist in any world, but remember that there can only be one class chest per class, and that localclass chests will be ignored!
To unlink a class chest, you will have to open the config-file and remove the classchest node from the given class.
3.2. Linked Class Chests 11

MobArena Documentation, Release 0.99.1
12 Chapter 3. Class chests
CHAPTER 4
Commands
Note: All MobArena commands start with /ma, and most of them can be disabled using [[Permissions]].
If you are looking for ways to disable non-MobArena commands, look in the global-settings-section of the[[config-file setup page|setting up the config-file]].
4.1 Player commands
These commands can be issued by all players. They include joining, leaving, spectating and listing arenas as well aslisting players.
• /ma join (<arena>) or /ma j (<arena>) - Join the arena with the given name.
• /ma leave or /ma l - Leave the current arena, or the spectator area.
• /ma notready - Get a list of all players who aren’t ready.
• /ma spec (<arena>) or /ma s (<arena>) - Spectate the arena with the given name.
• /ma arenas - Get a list of all arenas. Green names are enabled, gray names are disabled.
• /ma players - Get a list of all arena players.
• /ma players <arena> - Get a list of arena players in the specified arena.
• /ma class <class> - While in the lobby, manually pick the given class instead of punching signs.
4.2 Admin commands
Only ops and the console can issue these commands. They include forcefully starting or ending arenas, en-abling/disabling individual arenas or MobArena entirely.
• /ma enable - Enable MobArena.
• /ma disable - Disable MobArena.
13
MobArena Documentation, Release 0.99.1
• /ma enable <arena> - Enable the arena with the specified name.
• /ma disable <arena> - Disable the arena with the specified name.
• /ma force end - Forcefully end all arenas.
• /ma force end <arena> - Forcefully end the arena with the specified name; forces all players to leave.
• /ma force start <arena> - Forcefully start the arena with the specified name; forces all players whoaren’t ready to leave.
• /ma notready <arena> - Get a list of all players in the given arena who aren’t ready.
• /ma restore <player> - Restore the inventory of the player with the given name, if possible.
• /ma config reload - Reload the config-file into memory. This is useful if changes are made in the config-file while the server is running.
4.3 Setup commands
Only ops (and the console, if it makes sense) can issue these commands. They include setting warp points, spawnpointsand region points.
• /ma setup <arena> - Enter [[Setup Mode|Arena Setup]] for the given arena.
• /ma addarena <arena> - Create a new arena-node in the current world.
• /ma delarena <arena> - Delete the arena with the given name.
• /ma editarena <arena> - Toggle Edit Mode for the given arena.
• /ma editarena <arena> [true|false] - Turn on or off Edit Mode for the given arena.
• /ma setting <arena> - List all per-arena settings for the given arena.
• /ma setting <arena> <setting> - Check the current value of the given setting for the given arena.
• /ma setting <arena> <setting> <value> - Set the value of the given setting for the given arenato the given value.
• /ma checkspawns - Shows the spawnpoints (of the arena you are currently standing in) which cover yourcurrent location as red wool blocks. This command can be used to check if specific points in your arena areactually covered by spawnpoints or not.
• /ma classchest <class> - While looking at a chest, link the chest to the given class as a [[linked classchest|Class Chests]]. Linking a class chest means MobArena will always copy the items from the linked chest,regardless of any local class chests in arena lobbies. This is useful if you want a global class chest for a class.
• /ma auto-generate <arena> - Auto-generate a new arena with the given name. The arena will begenerated just below the player in the world they are standing in.
• /ma auto-degenerate <arena> - Degenerate the arena with the given name, effectively restoring thepatch that was “bulldozed” with the auto-generator.
14 Chapter 4. Commands
CHAPTER 5
Getting started
To get MobArena up and running on your server, you’ll first have to download it and stick it in your server’s plugins-folder.
When the plugin has been loaded up, you’ll have to build an arena if you haven’t already. Then it’s time to set it up.Follow the instructions on the [[Arena Setup]] page, which has all the information you’ll need to get your arena upand running in no time at all. After setup, you’re ready to play! Check out the [[Using MobArena]] page for a briefdescription of the usage commands.
The default arena setup is only meant as a starting point, so you may want to configure the waves, the rewards,the classes, or perhaps some of the arena-specific settings. The various pages on this wiki will help you configureMobArena to your liking. Here are a couple of links to get you started:
• [[Setting up the config-file]]
• [[Setting up the waves]]
• [[MobArena Commands]]
Also make sure to have a look at the [[Item and Reward Syntax]] page, if you’re planning to change the classes or therewards. MobArena uses its own semi-compact item syntax in the config-file, so you’ll need to get familiar with it toget things like enchantments and sub-types to work.
5.1 More information
Always make sure to check the pages on the wiki when you’re in doubt - 99% of the information you’ll everneed is right here. Check out the [[list of wiki pages|https://github.com/garbagemule/MobArena/wiki/_pages]]to see if maybe you’d be able to find your answer there. You can also check the projectpages on [[Spigot|https://www.spigotmc.org/resources/mobarena.34110/]] and [[Bukkit|http://dev.bukkit.org/bukkit-plugins/mobarena/]].
15
MobArena Documentation, Release 0.99.1
5.2 Suggestions, bugs, etc.
If you think you have found a bug, or if you have a suggestion for the plugin, you can create a ticket here on Github.Make sure to be as descriptive as possible, because the more information you can provide, the easier it is to dosomething about your bug report or feature request.
If you’d rather have a little chat about the plugin, you can visit the [[IRC chan-nel|http://webchat.esper.net/?channels=#mobarena]] (#mobarena @ EsperNet) - please note that IRC is idlechat, which means people will appear to be in the channel, but they might not be at their computers when you join.Hop on, ask your question, and then hang around until you get an answer; it may be seconds, minutes or hours, butthere is no harm in hanging around the channel indefinitely (as many people do).
16 Chapter 5. Getting started

CHAPTER 6
Item and reward syntax
This page explains the syntax for items and rewards for completing MobArena waves.
6.1 Item types
MobArena items must use a specific syntax to work as expected. The plugin allows three different ways of definingitems:
• Single: [<id>|<name>]
• Multiple: [<id>|<name>]:<amount>
• Sub-types: [<id>|<name>]:<data>:<amount>
6.1.1 Single items
[<id>|<name>]
Either an item ID number1 (<id>) or item name (<name>) can be used. Item names are defined in the Material enumof the Bukkit API. Item names are case-insensitive.
The Material enum changes when items are added, changed, or reworked. The Minecraft server version determineswhat items are available. Check the documentation for what item names are available.
This example gives the barbarian class a bow and leather leggings.
classes:barbarian:items: bowarmor: leather_leggings
1 Each item ID number must be wrapped in apostrophes ('') to work correctly.
17

MobArena Documentation, Release 0.99.1
6.1.2 Multiple items
[<id>|<name>]:<amount>
This method lets you add an amount to an item. This is useful for items like arrows or potions.
Now, our example also gives 64 arrows and four pieces of cooked porkchops.
classes:barbarian:items: bow, arrow:64, grilled_pork:4armor: leather_leggings
6.1.3 Item sub-types
[<id>|<name>]:<data>:<amount>
To add an item sub-type, both the sub-type name and an amount must be specified. This is helpful for items likepotions, wool, and/or dyes.
• Potion effect types
• Color names
Now, our example gives one Potion of Strength I and one piece of purple wool.
classes:barbarian:items: bow, arrow:64, grilled_pork:4, potion:increase_damage:1,
wool:purple:1armor: leather_leggings
6.2 Enchantments
<item> <eid>:<level>;<eid>:<level>;...
Add enchantments to an item by adding a space with a semi-colon separated list with the enchantment name and thestrength. Find valid enchantment names in the Enchantment class in the Spigot API.
Now, our example adds Power II and Flame I to the bow and a diamond sword with Sharpness I and Knockback II.
classes:barbarian:items: bow arrow_damage:2;arrow_fire:1, arrow:64, grilled_pork:4,
potion:increase_damage:1, wool:purple:1,diamond_sword damage_all:1;knockback:2
armor: leather_leggings
6.3 Economy Money
$<amount>
MobArena supports entry fees and rewards with economy plugins. You must use Vault for this to work.
Since v0.96, floating point numbers are also supported.
18 Chapter 6. Item and reward syntax

MobArena Documentation, Release 0.99.1
Examples:
• $1
• $5
• $3.14
• $0.99
6.4 Command Rewards
cmd:/give <player> dirtcmd(description of reward):/give <player> dirt
You can run a command to give a special reward to a player. Command rewards are supported since v0.99. Usefulexamples might be to give a permission (maybe unlocking a new arena) or integrating with other plugins.
It is possible to customize the message a player receives when they receive a command reward. By default, the pluginprints the command. You can specify a more user-friendly message in the second format listed above.
For example, cmd(New arena to play!)/perm add <player> <permission> appears to the playeras You just earned a reward: New arena to play!.
6.4. Command Rewards 19
MobArena Documentation, Release 0.99.1
20 Chapter 6. Item and reward syntax

CHAPTER 7
Leaderboards
MobArena supports so-called leaderboards (although technically they are more like scoreboards or session signs). Byarranging signs in a two-dimensional grid on a wall, spectators can see which classes each player has chosen, whichwave they died on, how many kills and how much damage they have done, etc.
user/img/leaderboards/1.png
Fig. 1: Sign Grid
The requirements for leaderboards are at the very least two rows of signs on a wall as seen in the screenshot above.The top row should not be empty, however, as it should contain the leaderboard headers, which denote what kind ofinformation the signs below them display. How many headers (and which) you want is entirely up to you.
user/img/leaderboards/2.png
Fig. 2: Top Left Sign
To get started, replace the top left empty sign (or place it if you haven’t already), and write [MA]<name>, where<name> is the name of your arena, on the first line. In the screenshot above, I have set up the top left sign for thearena named Jail by writing [MA]jail on it. MobArena automatically fills in the rest of the text and the colors foryou.
MobArena will then tell you that the sign has been created, and that you should set up the rest of the signs. The rest ofthe headers follow the same kind of format as the top left sign, so you simply write [MA]<stat>, where <stat> is
21
MobArena Documentation, Release 0.99.1
user/img/leaderboards/3.png
Fig. 3: Sign Text Screen
one of the following:
• class - The class name of the player
• lastWave - The last wave the player was part of (current wave if still alive)
• kills - The number of monsters the player has killed
• dmgDone - The amount of damage the player has dealt
• dmgTaken - The amount of damage the player has taken
• swings - The number of times the player has swung their weapon
• hits - The number of times the player has swung their weapon and successfully hit a monster
In the screenshot above, I have already set up a couple of signs, and I’m about to set up the sign for damage done. Aswith the top left sign, your only job is to tell MobArena which stat you want - it’ll take care of colors and formattingautomatically. Note that MobArena’s sign handling is case sensitive, so make sure you get it right.
user/img/leaderboards/4.png
Fig. 4: Final Setup
When you’re done setting up the leaderboards, they should look something like the screenshot above, and you shouldbe good to go! Leaderboards can be set up anywhere (even outside of the world the arena is in), but you can only havea single leaderboard per arena.
22 Chapter 7. Leaderboards

CHAPTER 8
Monster types
MobArena supports any monster available in the EntityType enum. You don’t have to write the names in all caps, andyou can omit or include underscores (_), hyphens (-), and periods (.) as you please.
Some monsters are a little special. Creepers, for instance, can be charged or powered, meaning their explosionsbecome much more powerful, and their appearance changes. Another example is slimes and magma cubes, whichhave different sizes.
MobArena supports some of the variations of these different monster types, and they are listed here:
• explodingsheep is a MobArena-specific type of sheep that bounces around and explodes when in the prox-imity of a player
• poweredcreeper is a charged/powered creeper
• angrywolf is an aggressive wolf with red eyes
• babyzombie is a baby-version of a zombie
• babypigman is a baby-version of a pigman
• babyzombievillager is a baby-version of a zombie villager
• killerbunny is a killer bunny version of a rabbit
As for slimes and magma cubes, both monster types are assigned a random size when they spawn. However, they alsoboth support size suffixes that force them to be a specific size. They are:
• tiny size 1
• small size 2
• big size 3
• huge size 4
As an example, slimehuge will spawn a size 4 slime, while magmacubetiny will spawn a size 1 magma cube.
23

MobArena Documentation, Release 0.99.1
24 Chapter 8. Monster types
CHAPTER 9
Permissions
A permissions plugin is NOT required for MobArena to work, but if you want that extra bit of control, here’s arundown of the different types of permission nodes you can use with MobArena.
NOTE: MobArena uses sane defaults. This means that by default, all players can use all arenas and all classes,and ops can use all admin and setup commands. Unless you want to prevent some groups from accessingcertain arenas or classes, or you want to give non-ops admin and setup permissions, there is no need to messwith any permissions at all, so go away from this page and remove all occurrences of ‘‘mobarena‘‘ in yourpermissions-file!
9.1 Arenas
Did you read the note at the top? If not, read it before you continue.
So, you want to remove permissions for certain arenas from certain users? Alright, that means you will have tonegate or revoke the permissions in your permissions plugin. In bPermissions, the negation modifier is a caret, ^, inGroupManager and PermissionsEx it is a minus, -, and in zPermissions it is by setting the permission to false. Theexamples below revoke the permission for the default arena.
bPermissions: ^mobarena.arenas.defaultGroupManager: -mobarena.arenas.defaultzPermissions: mobarena.arenas.default: false
I recommend letting everyone enjoy all your arenas, but this could be used in combination with “leveling” plugins toallow players to use “harder” arenas at higher levels. It could also be used for sponsors-only arenas.
Still confused? Check the sample setup at the bottom of the page!
25
MobArena Documentation, Release 0.99.1
9.2 Classes
Did you read the note at the top? If not, read it before you continue.
Alright, if you’re reading this, you want to remove permissions for certain classes from certain users. As with the arenapermissions, you need to negate or revoke the permissions in your permissions plugin. In bPermissions, the negationmodifier is a caret, ^, in GroupManager and PermissionsEx it is a minus, -, and in zPermissions it is by setting thepermission to false. The examples below revoke the permission for the Knight class.
bPermissions: ^mobarena.classes.knightGroupManager: -mobarena.classes.knightzPermissions: mobarena.classes.knight: false
Note how the class name is lowercase. This is important. Even if the Knight class is called KnIGhT in your config-file, it MUST be all lowercase in your permissions-file.
As with arenas, I recommend letting everyone enjoy all the classes, unless you have a special reason not to.
Still confused? Check the sample setup at the bottom of the page!
9.3 Commands
Did you read the note at the top? If not, read it before you continue.
If you’re reading this, you want to either give certain users access to some of the admin and/or setup commands, oryou want to remove some of the user commands from some groups. If this is not the case, stop reading and leave thispage!
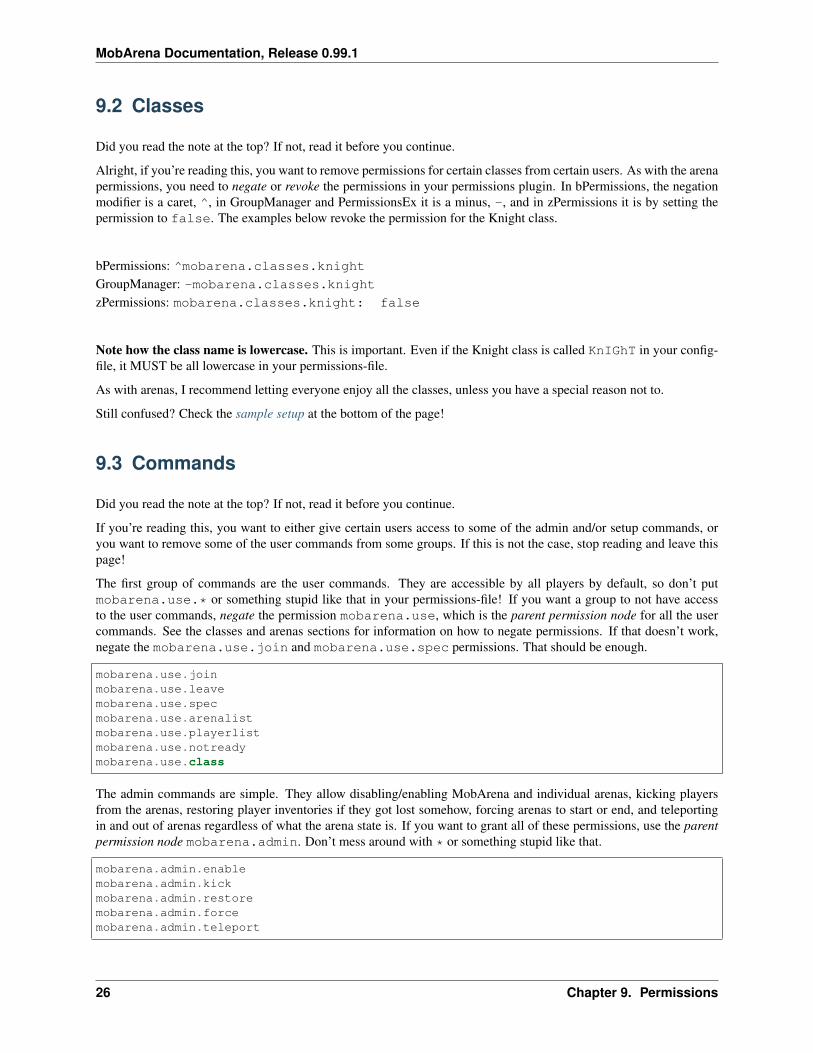
The first group of commands are the user commands. They are accessible by all players by default, so don’t putmobarena.use.* or something stupid like that in your permissions-file! If you want a group to not have accessto the user commands, negate the permission mobarena.use, which is the parent permission node for all the usercommands. See the classes and arenas sections for information on how to negate permissions. If that doesn’t work,negate the mobarena.use.join and mobarena.use.spec permissions. That should be enough.
mobarena.use.joinmobarena.use.leavemobarena.use.specmobarena.use.arenalistmobarena.use.playerlistmobarena.use.notreadymobarena.use.class
The admin commands are simple. They allow disabling/enabling MobArena and individual arenas, kicking playersfrom the arenas, restoring player inventories if they got lost somehow, forcing arenas to start or end, and teleportingin and out of arenas regardless of what the arena state is. If you want to grant all of these permissions, use the parentpermission node mobarena.admin. Don’t mess around with * or something stupid like that.
mobarena.admin.enablemobarena.admin.kickmobarena.admin.restoremobarena.admin.forcemobarena.admin.teleport
26 Chapter 9. Permissions
MobArena Documentation, Release 0.99.1
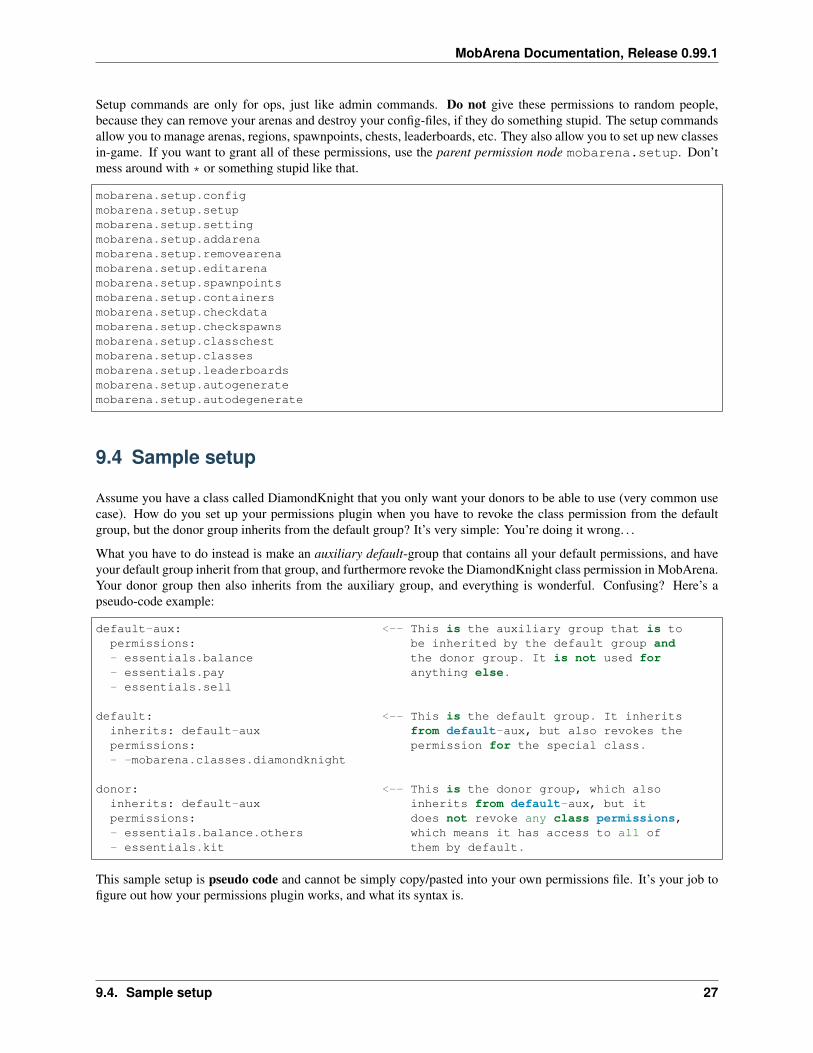
Setup commands are only for ops, just like admin commands. Do not give these permissions to random people,because they can remove your arenas and destroy your config-files, if they do something stupid. The setup commandsallow you to manage arenas, regions, spawnpoints, chests, leaderboards, etc. They also allow you to set up new classesin-game. If you want to grant all of these permissions, use the parent permission node mobarena.setup. Don’tmess around with * or something stupid like that.
mobarena.setup.configmobarena.setup.setupmobarena.setup.settingmobarena.setup.addarenamobarena.setup.removearenamobarena.setup.editarenamobarena.setup.spawnpointsmobarena.setup.containersmobarena.setup.checkdatamobarena.setup.checkspawnsmobarena.setup.classchestmobarena.setup.classesmobarena.setup.leaderboardsmobarena.setup.autogeneratemobarena.setup.autodegenerate
9.4 Sample setup
Assume you have a class called DiamondKnight that you only want your donors to be able to use (very common usecase). How do you set up your permissions plugin when you have to revoke the class permission from the defaultgroup, but the donor group inherits from the default group? It’s very simple: You’re doing it wrong. . .
What you have to do instead is make an auxiliary default-group that contains all your default permissions, and haveyour default group inherit from that group, and furthermore revoke the DiamondKnight class permission in MobArena.Your donor group then also inherits from the auxiliary group, and everything is wonderful. Confusing? Here’s apseudo-code example:
default-aux: <-- This is the auxiliary group that is topermissions: be inherited by the default group and- essentials.balance the donor group. It is not used for- essentials.pay anything else.- essentials.sell
default: <-- This is the default group. It inheritsinherits: default-aux from default-aux, but also revokes thepermissions: permission for the special class.- -mobarena.classes.diamondknight
donor: <-- This is the donor group, which alsoinherits: default-aux inherits from default-aux, but itpermissions: does not revoke any class permissions,- essentials.balance.others which means it has access to all of- essentials.kit them by default.
This sample setup is pseudo code and cannot be simply copy/pasted into your own permissions file. It’s your job tofigure out how your permissions plugin works, and what its syntax is.
9.4. Sample setup 27

MobArena Documentation, Release 0.99.1
28 Chapter 9. Permissions
CHAPTER 10
Setting up the config file
On this page: * Overview * `global-settings <./Setting-up-the-config-file#wiki-global-settings>‘__ *`classes <./Setting-up-the-config-file#wiki-classes>‘__ * Bring your own items * Slot-specific armor nodes *Price * Unbreakable items * Per-class permissions * Pet classes * Mounts * `arenas <./Setting-up-the-config-file#wiki-arenas>‘__ * `settings <./Setting-up-the-config-file#wiki-settings>‘__ * `waves <./Setting-up-the-config-file#wiki-waves>‘__ * `rewards <./Setting-up-the-config-file#wiki-rewards>‘__ * `coords <./Setting-up-the-config-file#wiki-coords>‘__
10.1 An Overview
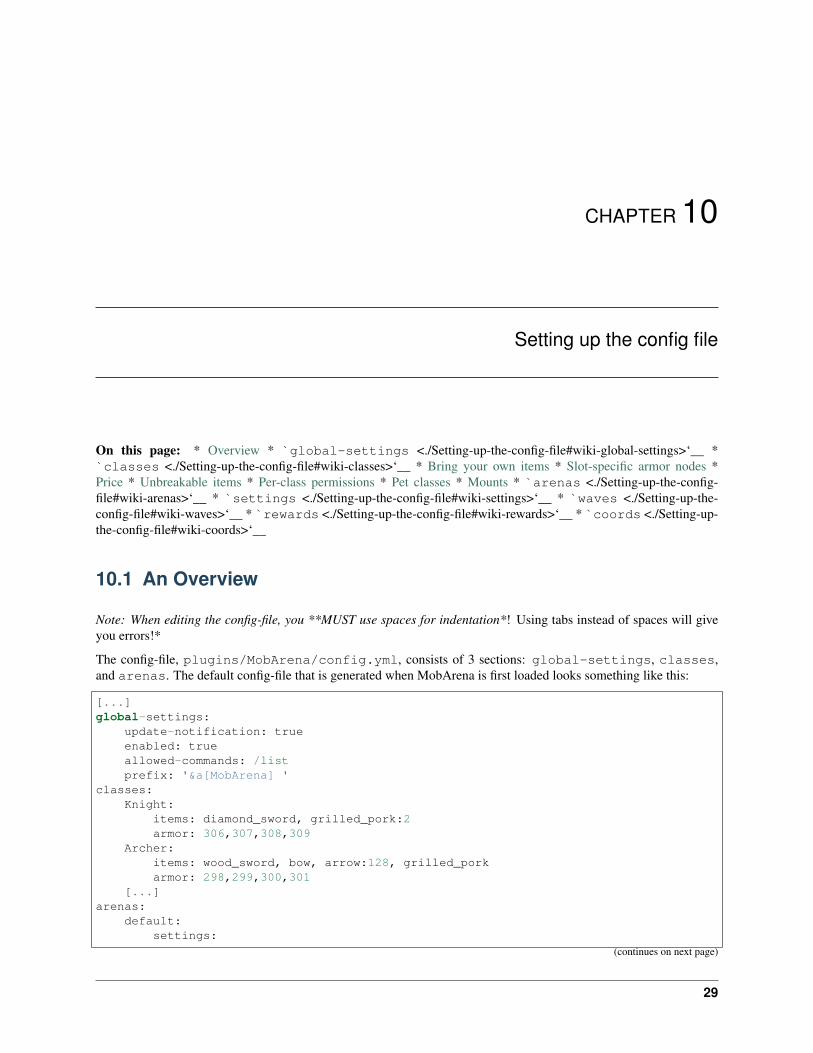
Note: When editing the config-file, you **MUST use spaces for indentation*! Using tabs instead of spaces will giveyou errors!*
The config-file, plugins/MobArena/config.yml, consists of 3 sections: global-settings, classes,and arenas. The default config-file that is generated when MobArena is first loaded looks something like this:
[...]global-settings:
update-notification: trueenabled: trueallowed-commands: /listprefix: '&a[MobArena] '
classes:Knight:
items: diamond_sword, grilled_pork:2armor: 306,307,308,309
Archer:items: wood_sword, bow, arrow:128, grilled_porkarmor: 298,299,300,301
[...]arenas:
default:settings:
(continues on next page)
29

MobArena Documentation, Release 0.99.1
(continued from previous page)
prefix: ''world: Tundraenabled: trueprotect: trueclear-wave-before-next: false[...]
waves:[...]
rewards:[...]
Note about notation: [true|false] means the setting must be “true or false”, either or. <time> means the settingmust be an amount of time (in seconds or server ticks), always a whole number, and always 0 or greater. <amount>is similar to time.
10.1.1 global-settings
The global-settings are few, but important. Note that if enabled: false, no arenas can be joined, re-gardless of their individual enabled status.
• enabled: [true|false] - This determines if MobArena is enabled or not. If set to false, players willnot be able to join any arenas at all, regardless of what the arenas’ individual statuses are.
• update-notification: [true|false] - If true, MobArena will send a message to ops when theylog on if a new version of MobArena is available.
• allowed-commands: <com1>, <com2>, ... - A comma-separated list of the commands that play-ers are allowed to use while in the lobby and/or arena. This is useful if you don’t want players to use teleport-commands, flying carpets, kill commands, etc. If you write the command WITH its forward-slash, the entirecommand and all “sub-commands” will be allowed. For instance, writing /kill will allow both /kill, /kill Sausageman22 and /kill Notch. Writing the command WITHOUT its forward-slash will allowonly that specific command or “sub-command”. Writing kill will thus ONLY allow /kill, but not /killSausageman22.
• prefix: <prefix> - The prefix MobArena uses for all of its messages. The default is the classic green[MobArena], but you can change it to whatever you want. You can override the prefix for specific arenas byusing the arena-specific setting with the same name.
I recommended leaving the update notifications on, and disabling commands like /kill and /tp.
10.1.2 classes
The classes-section is slightly more complicated. It is divided into class-branches, where each branch denotesthe name of the class, and each branch has mandatory nodes items and armor, as well as optional slot-specificarmor nodes and optional nodes price, permissions, lobby-permissions, unbreakable-weapons,and unbreakable-armor.
Note: YAML is picky about how you type your items. Make sure you read the short [[Item and Reward Syntax]]-pageand fully understand it before you attempt to modify the config file!
classes:Archer:
items: wood_sword, bow, arrow:128, grilled_porkarmor: 298,299,300,301permissions:
(continues on next page)
30 Chapter 10. Setting up the config file

MobArena Documentation, Release 0.99.1
(continued from previous page)
- EffectiveArrows.use.*- -mobarena.use.leave
Tank:items: iron_swordarmor: 310,311,312,313offhand: shield
Knight:items: '276'armor: iron_helmet, iron_chestplate, iron_leggings, iron_boots
Wolf Master:items: stone_sword, grilled_pork, bone:2armor: 298,299,300,301
Crusader:items: iron_sword, hay_block:17armor: 302,303,304,305price: $5
10.2 Bring your own items
MobArena allows you to just bring your own items into the arena via the implicit ‘My Items’ class. What this meansis that if you just place a sign in the lobby with the text My Class, you’ll get the items that you had before joining thearena. Items are still restored on dying in or leaving the arena.
For a smooth, own-items-only experience, ditch the signs and set the per-arena setting default-class tomyitems.
10.3 Slot-specific armor nodes
If you want to use off-hand items, or if you just want to be explicit about which items go where in the armor slots, usethe optional slot-specific armor nodes: offhand, helmet, chestplate, leggings, boots. In the exampleabove, the Tank class gets a shield in its off-hand slot.
10.4 Price
The optional price node can be used to give classes a per-session price. When a player tries to pick a class that hasa price, they will only be able to if they can afford it. The money is withdrawn when the arena starts, i.e. pickingdifferent priced classes in succession will not (necessarily) result in empty player wallets. In the example above, theCrusader class costs $5.
10.5 Unbreakable weapons/armor
The optional unbreakable-weapons and unbreakable-armor nodes can be used to toggle on or off theunbreakability of class items and armor. The nodes default to true, so they are really only necessary if you want totoggle OFF the feature, i.e. if you want items to deteriorate and break! If that’s what you want, set the nodes to false.
10.2. Bring your own items 31

MobArena Documentation, Release 0.99.1
10.6 Per-class permissions
Using the optional permissions-node, you can give classes special permissions to customize them even more.Each permission must be listed with a dash (-) in front of it. If you want a class to not have a permission, put adash/minus at the very beginning of the permission node. In the example above, the Archer class will be able to usethe EffectiveArrows plugin, but won’t be able to use /ma leave (meaning it’s impossible to leave the arena withoutdying).
The optional lobby-permissions-node gives players special permissions while they are in the lobby after theyhave picked a class. This feature can be used e.g. in combination with a shop plugin and a base class that perhaps hasnothing (maybe except for a few potions).
10.7 Pet classes
For every bone (Material name: bone, data value: 352) in a class’ items-list (or class chest), one wolf pet will spawnupon arena start. In the example above, every player that picks the Wolf Master class will have 2 wolves spawn uponarena start. The wolves are invincible, but deal less damage than normal wolves.
10.8 Mounts
To give a class a horse mount, give it a hay block in the items-list (or place a hay block in the class chest). The itemstack amount (in the first encountered stack) determines the variant and barding of the horse. You can use this table tofigure out which hay block amount you need for your desired variant and barding:
None Iron Gold DiamondHorse 1 9 17 25Donkey 2 • • •
Mule 3 • • •
Skeleton 4 • • •
Zombie 5 • • •
Note that only normal horses can have barding.
In the example above, every player that picks the Crusader class will have a white horse with gold barding upon arenastart. The mounts are invincible.
10.8.1 arenas
This section is by far the largest, and it is divided into several smaller branches. In the above example, defaultdenotes the name of the default arena. This name can be altered, but it must contain no spaces (use underscoresinstead). The arena name is significant when a server has multiple arenas and no Master Lobby (will be featured later).Let’s go over the different branches:
32 Chapter 10. Setting up the config file

MobArena Documentation, Release 0.99.1
10.9 settings
The settings-branch is quite extensive, and besides the world-node, it is basically just a bunch of toggles (on/off,true/false), though a few are number-based.
• prefix: <prefix> - An arena-specific prefix to use for messages/announcements in this arena only. Thedefault is the empty string (''), which means the global-settings prefix will be used.
• world: <name> - The name of the world the arena resides in.
• enabled: [true|false] - If false, players cannot join the arena.
• protect: [true|false] - If false, the arena will not be protected from explosions and players breakingthe blocks.
• entry-fee: [$<amount>|<item>:<amount>] - Follows the exact same notation as the class itemsand rewards (read the [[Item and Reward Syntax]]-page). $20 will subtract 20 of whatever currency you usefrom the players upon joining. $5, stick:2 will require the player to have 5 currency units and 2 sticks tojoin the arena. The entry-fee will be refunded if the player leaves before the arena starts.
• default-class: <class> - If non-empty, this class is automatically assigned to players when they jointhe arena. The class name must be all lowercase and with no spaces.
• clear-wave-before-next: [true|false] - If true, no monsters will spawn before all monsters ofthe previous wave have been killed.
• clear-boss-before-next: [true|false] - If true, no new waves will spawn before the currentboss (if any) is dead.
• clear-wave-before-boss: [true|false] - If true, a boss wave will not spawn until all previousmonsters have been killed.
• auto-equip-armor: [true|false] - If true, armor pieces will automatically be equipped upon classselection. Note that this does not work if a class has more than 1 of an armor piece type.
• soft-restore: [true|false] - If true, all destroyed blocks will be saved in a “repair list”, which willbe used to restore blocks at arena end. No data is saved to the harddrive. Note that this setting, if true, ignoresthe protect flag.
• soft-restore-drops: [true|false] - If true, blocks destroyed by players will drop as items likethey normally do (using pickaxes, spades, etc.). Note that this makes it very easy for classes with pickaxes to“mine the arena” and build forts.
• require-empty-inv-join: [true|false] - If false, players’ inventories will be saved upon join-ing, and restored upon death/leaving.
• require-empty-inv-spec: [true|false] - If false, players can spectate the arena without havingto empty their inventories.
• hellhounds: [true|false] - If true, all pet wolves in the arena will be in flames! This has no actualfunction, and is purely for the cool-factor. Also useful for distinguishing enemy wolves and pet wolves.
• pvp-enabled: [true|false] - If true, players can damage each other in the arena.
• monster-infight: [true|false] - If false, monsters will no longer damage each other.
• allow-teleporting: [true|false] - If false, all warping to and from the arena region is blocked.Useful for preventing players from summoning other players into the arena for help.
• spectate-on-death: [true|false] - If false, players will not get warped to the spectator area, butinstead be “kicked” from the arena (essentially a forced /ma leave).
10.9. settings 33
MobArena Documentation, Release 0.99.1
• auto-respawn: [true|false] - If false, players will be greeted with the typical death screen upondying in the arena, and will have to click the respawn button to respawn. With this setting at false, playerswill actually die in the arena, meaning plugins like Heroes and mcMMO will properly trigger their resetting ofinternal data upon respawn.
• share-items-in-arena: [true|false] - If false, players will not be able to drop items in the arena.
• min-players: <amount> - Gives a lower limit on how many players are required to start the arena. Thedefault of 0 is the same as 1, which means 1 or more players may start the arena. Note that this feature isincompatible with auto-start-timer and start-delay-timer!
• max-players: <amount> - Gives an upper limit on how many players may join the arena. The defaultof 0 means no limit.
• max-join-distance: <distance> - The maximum distance (in blocks) from which players can joinor spectate the arena. If 0 (default), there is no limit, and players can join from any world. Note that the distanceis calculated from every corner of the arena region, and that players not in the arena world won’t be able to joinor spectate.
• first-wave-delay: <time> - The time (in seconds) before the first wave of monsters upon arena start.
• wave-interval: <time> - The time (in seconds) between each new wave of monsters. If clear-wave-before-next: true, this setting will be ignored.
• final-wave: <number> - The number of the final wave before the arena is force ended. This is useful ifyou want to set a cap on how many waves an arena will have.
• monster-limit: <amount> - The maximum amount of monsters MobArena is allowed to spawn forthis arena. The next wave, if any, will not spawn until there is room for more monsters.
• monster-exp: [true|false] - If true, monsters will drop experience orbs. This is useful if you wish togive players the ability to spend the gathered experience on enchants or something else (using different plugins)during the session.
• keep-exp: [true|false] - If true, players will keep the experience they gather in the arenas afterdeath. This is useful if you want to allow players to level up or gather experience in the arenas. NOTE: If usingdisplay-waves-as-level or display-timer-as-level, set keep-exp to false.
• food-regen: [true|false] - If true, a full food bar will cause players to regenerate health while inthe arena. Note that this potentially makes tank-like classes extremely overpowered, since diamond armor (bydefault) coupled with a full food bar will make a player very hard to kill.
• lock-food-level: [true|false] - If true, the food bar will be locked for all players in the arena,meaning they will not end up starving, and they will be able to sprint around as they please.
• player-time-in-arena: <time of day> - When set to anything but world, this setting will freezethe apparent world time for players in the arena to whatever value you set. This is useful for making time-of-daythemed arenas (e.g. constant night time for a cemetery, broad daylight for a pirate ship). Valid values are: dawn,sunrise, morning, midday, noon, day, afternoon, evening, sunset, dusk, night, midnight.
• auto-ignite-tnt: [true|false] - If true, TNT will be automatically ignited when placed. This isuseful for preventing Oddjob-like classes from forting.
• auto-start-timer: <time> - The time (in seconds) before the arena will be force started after the firstplayer has joined the lobby (the default of 0 means deactivated or infinite time). Non-ready players will beremoved from the lobby. This setting is useful to prevent ill-minded players from delaying or preventing otherplayers from starting the arena. Note that this feature is incompatible with min-players!
• start-delay-timer: <time> - The time (in seconds) before the arena can be started after the firstplayer has joined the lobby. This setting is useful if you want to give your players a fixed window of time tojoin the arena after the first player has joined, so they can’t just start it off right away. Note that this feature isincompatible with min-players!
34 Chapter 10. Setting up the config file
MobArena Documentation, Release 0.99.1
• display-waves-as-level: [true|false] - When set to true, the players’ level counter (abovethe experience bar) will be used to display the current wave number. If the wave announcements in theannouncements-file are silenced, this can be used to make a much less “spammy” MobArena experience. NOTE:Do not use this if keep-exp is set to true!
• display-timer-as-level: [true|false] - When set to true, the players’ level counter (above theexperience bar) will be used to display the auto-start timer in the lobby. NOTE: Do not use this if keep-expis set to true!
• auto-ready: [true|false] - When set to true, players are automatically flagged as ready when theypick a class. Useful for arenas with many players where hitting an iron block becomes difficult.
• use-scoreboards: [true|false] - Whether to use scoreboards in MobArena or not.
• isolated-chat: [true|false] - When set to true, all chat messages sent by arena players will beseen only by other arena players in the same arena. The arena players will still be able to see chat messagesfrom other players on the server who aren’t in an arena.
• global-end-announce: [true|false] - When set to true, MobArena will announce thearena-end-global message (see [[Announcements]]) to all players on the server when an arena ends.
• global-join-announce: [true|false] - When set to true, MobArena will announce thearena-join-global message (see [[Announcements]]) to all players on the server when the first playerjoins an arena.
10.10 waves
Please go to [[setting up the waves]] for more information.
10.11 rewards
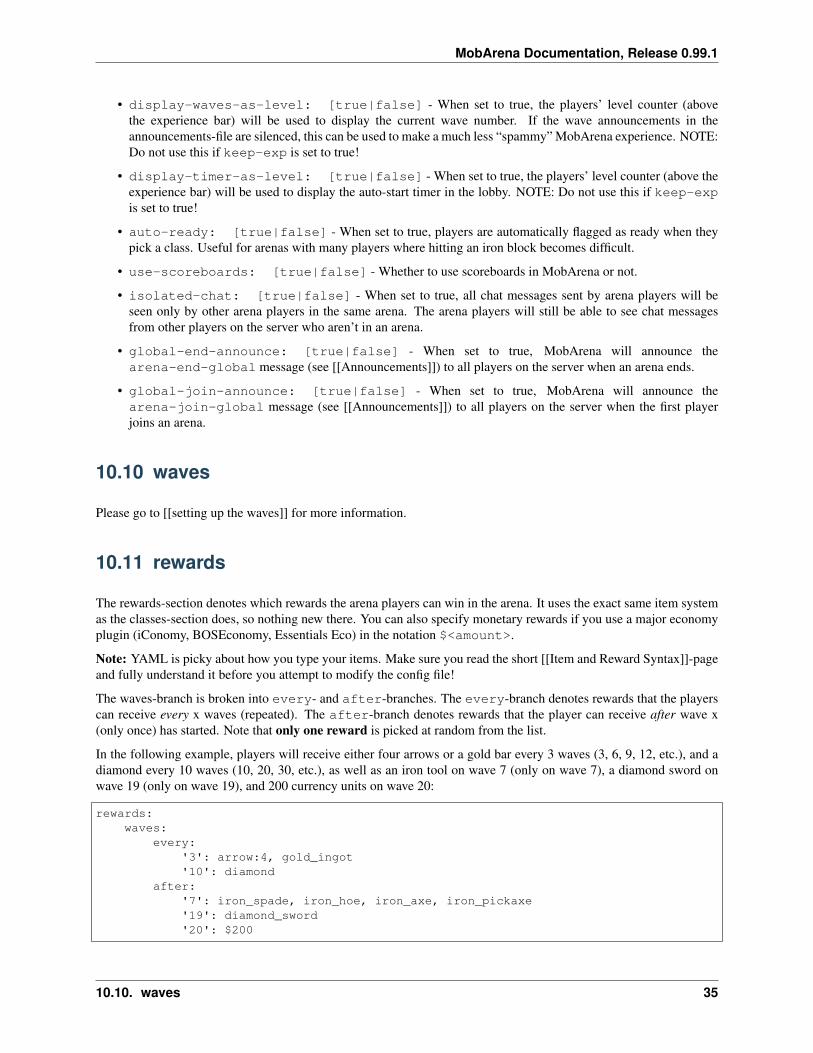
The rewards-section denotes which rewards the arena players can win in the arena. It uses the exact same item systemas the classes-section does, so nothing new there. You can also specify monetary rewards if you use a major economyplugin (iConomy, BOSEconomy, Essentials Eco) in the notation $<amount>.
Note: YAML is picky about how you type your items. Make sure you read the short [[Item and Reward Syntax]]-pageand fully understand it before you attempt to modify the config file!
The waves-branch is broken into every- and after-branches. The every-branch denotes rewards that the playerscan receive every x waves (repeated). The after-branch denotes rewards that the player can receive after wave x(only once) has started. Note that only one reward is picked at random from the list.
In the following example, players will receive either four arrows or a gold bar every 3 waves (3, 6, 9, 12, etc.), and adiamond every 10 waves (10, 20, 30, etc.), as well as an iron tool on wave 7 (only on wave 7), a diamond sword onwave 19 (only on wave 19), and 200 currency units on wave 20:
rewards:waves:
every:'3': arrow:4, gold_ingot'10': diamond
after:'7': iron_spade, iron_hoe, iron_axe, iron_pickaxe'19': diamond_sword'20': $200
10.10. waves 35

MobArena Documentation, Release 0.99.1
Note: The wave numbers must be enclosed by apostrophes (e.g. '7':, not 7:), or YAML will throw errors. If youaren’t sure how to do it, just copy one of the other lines and change the wave number and the items.
10.12 coords
The coords-section does not exist when MobArena first generates the config-file. This is because the coordinates needto be set by the user in-game. See the in-game section for more details on how to set everything up. The coords-sectionconsists of five key points, and an arbitrary amount of spawnpoints:
• p1 and p2 - These two points should span the entire arena region (including spectator areas and the lobbyassociated with the arena, if possible).
• l1 and l2 - [OPTIONAL] If the lobby can’t properly reside within the arena region for some reason, these twopoints should span the lobby region.
• arena - This warp is where the players will be teleported upon arena start.
• lobby - Where the players will be teleported upon joining the arena.
• spectator - Where the players will be teleported upon death or spectating.
• spawnpoints - A list of points where monsters can spawn from.
Note that editing these points manually can have some very unhappy consequences. Always edit these points fromwithin Minecraft to ensure that they are generated properly.
36 Chapter 10. Setting up the config file

CHAPTER 11
Setting up waves
On this page: * About Modules * Wave Branches * Common Nodes * `recurrent <./Setting-up-the-waves#wiki-recurrent-waves>‘__ * `single <./Setting-up-the-waves#wiki-single-waves>‘__ * Wave Types *`default <./Setting-up-the-waves#wiki-default-waves>‘__ * `special <./Setting-up-the-waves#wiki-special-waves>‘__ * `swarm <./Setting-up-the-waves#wiki-swarm-waves>‘__ * `supply <./Setting-up-the-waves#wiki-supply-waves>‘__ * `upgrade <./Setting-up-the-waves#wiki-upgrade-waves>‘__ * `boss <./Setting-up-the-waves#wiki-boss-waves>‘__ * A Sample Setup
Note: If you are impatient, go to the bottom of this page for an example config-file setup to see what the wavescould look like. Modify them as you please, but make sure to read this page before asking any questions!
Make sure to check out Agnate’s MobArena Bosses and Waves Thread if you need inspiration for adding some coolbosses to your arenas!
11.1 About Modules
The new MobArena waves-system is extremely modular, meaning every time you plug in a new wave, you only haveto provide the nodes required by the specific modules you are using. The modules can be broken into wave branchesand wave types. The structure of the waves-section in config-file is the following:
waves:recurrent: <-- Wave branch
<wave name>:type: <wave type> <-- Wave typefrequency: #priority: #
single: <-- Wave branch<wave name>:
type: <wave type> <-- Wave typewave: #
37

MobArena Documentation, Release 0.99.1
11.2 Wave Branches
The waves are split into two branches, recurrent and single. Recurrent waves (may) occur more than once (asin, they repeat), given a frequency (how often they occur) and a priority (how “important” they are, i.e. which waveshould spawn if two recurrent waves clash). Single waves occur just once, on the given wave (and always occur overrecurrent waves, should they clash).
11.2.1 Common Nodes
As you can see, the two branches have one thing in common, the type-node. Other than that, their other nodes differ.However, there are two additional nodes that can be used regardless of branch and type (doesn’t work for boss waves,though):
amount-multiplier: <decimal value> (optional) minimum value of 0.1, this multiplier helps determinehow many monsters spawn per wave (minimum 1). If 8 mobs are supposed to spawn, and the value is 0.5, only 4mobs will spawn. If the value is 3, 24 will spawn.
health-multiplier: <decimal value> (optional) minimum value of 0.1, this multiplier helps determinethe health for each monster in a wave. If a zombie spawns with the default of 20 health points and the value is 0.5,the zombie will have 10 health points. If the value is 4, it will be 80 health points.
These two common nodes can be used to greatly customize the difficulty of the monsters in each wave. If you wantmore monsters, just set the amount-multiplier higher than 1, and maybe adjust the health with the health-multiplieraccordingly. If you want the monsters to be tougher to kill, just up the health-multiplier.
An additional node can be used to help determine where enemies will spawn:
spawnpoints: <semi-colon separated list of spawnpoints>
For example, we can make a swarm wave spawn monsters only on spawns 5,53,198, -16,54,185, and -7,53,179 if players are in range:
swarm3:type: swarmwave: 11monster: zombie_pigmanspawnpoints: 5,53,198; -16,54,185; -7,53,179
Note that these spawnpoints must exist in the spawnpoints-list of the coords-section to work.
11.2.2 Recurrent Waves
type: [default|special|swarm|supply|upgrade|boss] (required) determines the wave type. Readthe Wave types section further down for more details.
frequency: # (required) determines how often the wave will/can spawn. With a frequency of 1, the wave canpotentially spawn on every single wave number. The implicit default waves in MobArena have a frequency of 1, andthe implicit special waves have a frequency of 4, which means the default waves (can) spawn every wave, and thespecial waves (can) spawn every 4th wave.
priority: # (required) determines how “important” the wave is. If two recurrent waves clash, the wave withthe highest priority will spawn. The implicit default waves in MobArena have a priority of 1, and the implicit specialwaves have a priority of 2, which means if the default and special waves clash, the special waves will spawn becausetheir priority is higher.
wave: # (optional) determines the first wave number on which this wave can/will spawn. This is useful for off-setting waves with similar frequencies. Note that if no wave is specified, it will default to the value of the (required)
38 Chapter 11. Setting up waves
MobArena Documentation, Release 0.99.1
frequency-node. The implicit default waves in MobArena have wave value of 1, and the implicit special waves havea wave value of 4 (same as the frequency), which means the default waves may begin spawning from wave 1, and thespecial waves may begin spawning from wave 4.
11.2.3 Single Waves
type: [default|special|swarm|supply|upgrade|boss] (required) determines the wave type. Readthe Wave types section further down for more details.
wave: # (required) determines the wave on which this wave will spawn. No matter what priority a recurrent wavehave, if it clashes with a single wave, the single wave will always spawn instead of the recurrent waves. Single wavesare good for extraordinary waves like “swarm” waves, “boss” waves or even normal waves with specific monster types,for instance.
11.3 Wave Types
All MobArena waves must specify a wave type, which must be either default, special, swarm, supply,upgrade or boss. These different wave type modules introduce some new required and optional nodes. Note thatno matter what the wave type is, any wave must adhere to the requirements of the wave branch (read above).
11.3.1 Default Waves
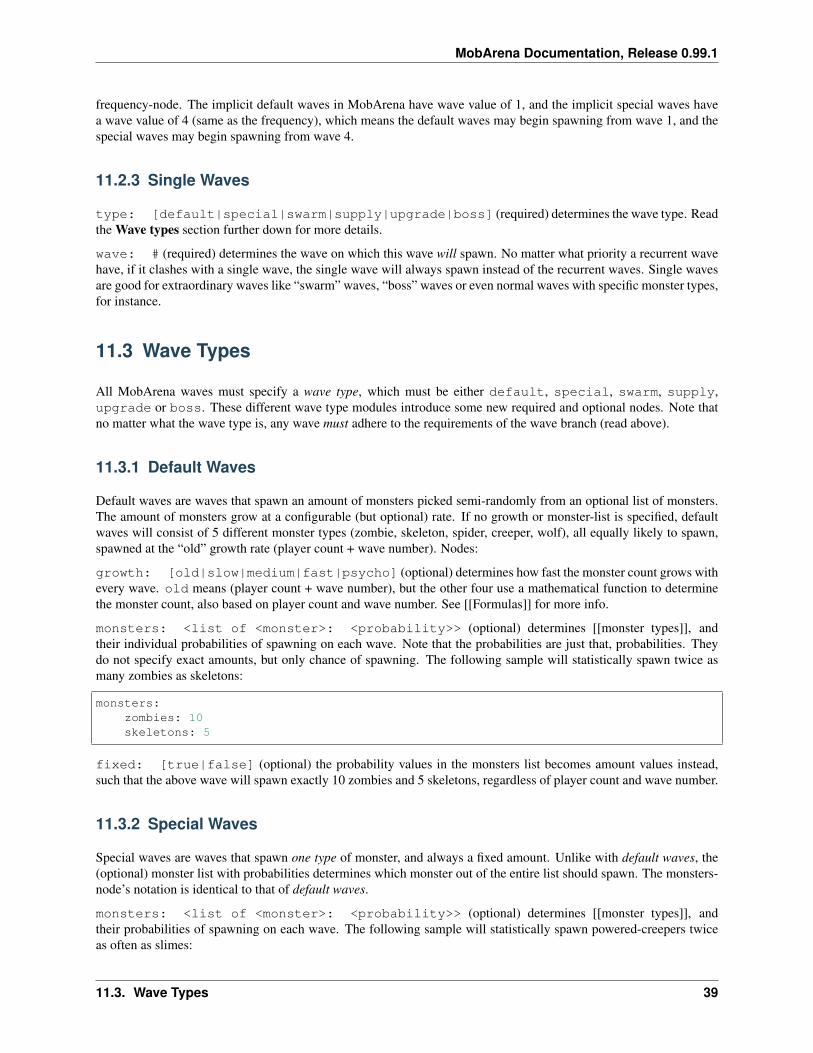
Default waves are waves that spawn an amount of monsters picked semi-randomly from an optional list of monsters.The amount of monsters grow at a configurable (but optional) rate. If no growth or monster-list is specified, defaultwaves will consist of 5 different monster types (zombie, skeleton, spider, creeper, wolf), all equally likely to spawn,spawned at the “old” growth rate (player count + wave number). Nodes:
growth: [old|slow|medium|fast|psycho] (optional) determines how fast the monster count grows withevery wave. old means (player count + wave number), but the other four use a mathematical function to determinethe monster count, also based on player count and wave number. See [[Formulas]] for more info.
monsters: <list of <monster>: <probability>> (optional) determines [[monster types]], andtheir individual probabilities of spawning on each wave. Note that the probabilities are just that, probabilities. Theydo not specify exact amounts, but only chance of spawning. The following sample will statistically spawn twice asmany zombies as skeletons:
monsters:zombies: 10skeletons: 5
fixed: [true|false] (optional) the probability values in the monsters list becomes amount values instead,such that the above wave will spawn exactly 10 zombies and 5 skeletons, regardless of player count and wave number.
11.3.2 Special Waves
Special waves are waves that spawn one type of monster, and always a fixed amount. Unlike with default waves, the(optional) monster list with probabilities determines which monster out of the entire list should spawn. The monsters-node’s notation is identical to that of default waves.
monsters: <list of <monster>: <probability>> (optional) determines [[monster types]], andtheir probabilities of spawning on each wave. The following sample will statistically spawn powered-creepers twiceas often as slimes:
11.3. Wave Types 39
MobArena Documentation, Release 0.99.1
monsters:powered-creepers: 4slimes: 2
11.3.3 Swarm Waves
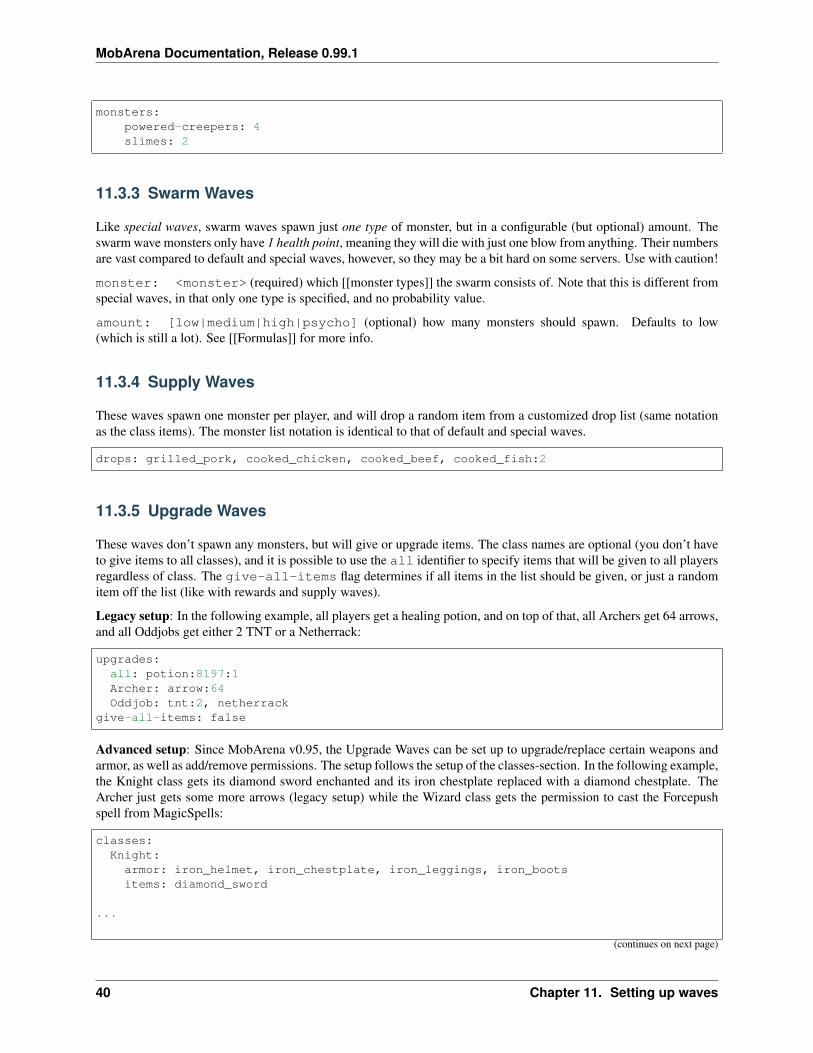
Like special waves, swarm waves spawn just one type of monster, but in a configurable (but optional) amount. Theswarm wave monsters only have 1 health point, meaning they will die with just one blow from anything. Their numbersare vast compared to default and special waves, however, so they may be a bit hard on some servers. Use with caution!
monster: <monster> (required) which [[monster types]] the swarm consists of. Note that this is different fromspecial waves, in that only one type is specified, and no probability value.
amount: [low|medium|high|psycho] (optional) how many monsters should spawn. Defaults to low(which is still a lot). See [[Formulas]] for more info.
11.3.4 Supply Waves
These waves spawn one monster per player, and will drop a random item from a customized drop list (same notationas the class items). The monster list notation is identical to that of default and special waves.
drops: grilled_pork, cooked_chicken, cooked_beef, cooked_fish:2
11.3.5 Upgrade Waves
These waves don’t spawn any monsters, but will give or upgrade items. The class names are optional (you don’t haveto give items to all classes), and it is possible to use the all identifier to specify items that will be given to all playersregardless of class. The give-all-items flag determines if all items in the list should be given, or just a randomitem off the list (like with rewards and supply waves).
Legacy setup: In the following example, all players get a healing potion, and on top of that, all Archers get 64 arrows,and all Oddjobs get either 2 TNT or a Netherrack:
upgrades:all: potion:8197:1Archer: arrow:64Oddjob: tnt:2, netherrack
give-all-items: false
Advanced setup: Since MobArena v0.95, the Upgrade Waves can be set up to upgrade/replace certain weapons andarmor, as well as add/remove permissions. The setup follows the setup of the classes-section. In the following example,the Knight class gets its diamond sword enchanted and its iron chestplate replaced with a diamond chestplate. TheArcher just gets some more arrows (legacy setup) while the Wizard class gets the permission to cast the Forcepushspell from MagicSpells:
classes:Knight:armor: iron_helmet, iron_chestplate, iron_leggings, iron_bootsitems: diamond_sword
...
(continues on next page)
40 Chapter 11. Setting up waves

MobArena Documentation, Release 0.99.1
(continued from previous page)
arenas:...waves:
...upgrades:Archer: arrow:64Knight:
armor: diamond_chestplateitems: diamond_sword 16:2
Wizard:permissions:- magicspells.cast.forcepush
give-all-items: true
Explanation: Items listed in the armor node will be considered armor, and (if valid) will replace any item currentlyin the armor slots of the players. Items in the items node will be checked if they are weapons or not; if they areweapons, then MobArena will search through the players’ inventories for weapons with the same ID, and then replacethe first weapon that matches it (automatic upgrades). If no weapon is found, it will default to a generic item, whichwill just be added to the inventory.
11.3.6 Boss Waves
Boss waves consist of one monster with a configurable (but optional) amount of health, and a configurable (but op-tional) list of special abilities. The health of a boss monster is significantly higher than that of normal monsters, andthus take much longer to kill. The special abilities help increase the difficulty (and fun!) of a boss wave.
monster: <monster> (required) the boss [[monster types]]. Note that only one monster will spawn.
name: <name> (optional) the name of the boss. Shows the given name in a name tag above the boss’ head.
health: <amount>|[verylow|low|medium|high|veryhigh|psycho] (optional) how much healththe boss has. Can be either a flat value, e.g. 40 or 800, or one of the scaling values. Defaults to the scaling valuemedium. See [[Formulas]] for more info about the scaling values.
reward: <item> (optional) a reward for getting the killing blow on the boss. This reward will only be given toone player (the killer, if any).
drops: <item list> (optional) a comma-separated list of items dropped by the boss when killed. The bosswill drop exactly the items listed. This could be used to have the boss drop a “key” to advance in the arena, or to gainaccess to a shed full of weapon chests or something wonderful like that. The item syntax is the same as the one forSupply Waves.
potions: <potion list> (optional) a comma-separated list of potion effects that will be applied to theboss when it spawns. Use this to slow down or speed up bosses that don’t move at quite the speed you want,or perhaps to give a boss the wither effect to limit the amount of time it will stay alive. The potion syntax is<effect>:<amplifier>:<seconds>. The amplifier and duration are optional, and will default to 0 (level1) and pseudo-infinity, respectively. Note that slow, slow:0, and slow:0:600 are identical, except the last onewill only last 10 minutes (600 seconds). Check the sample config-file at the bottom for more examples.
abilities: <comma-separated list of boss abilities> (optional) determines which (if any)boss abilities this boss has. The boss can have several abilities; just separate each ability with a comma (e.g. arrows,fire-aura, throw-target). Note that the abilities happen in a cycle every few seconds, so the more abilities,the longer it takes before each ability is used again. Here is an overview of the different abilities bosses can have:
NAME DESCRIPTIONarrows Shoots arrows
(continues on next page)
11.3. Wave Types 41

MobArena Documentation, Release 0.99.1
(continued from previous page)
fireballs Hurls fireballsfire-aura Burns all nearby (5 blocks radius) playerslightning-aura Strikes lightning 4 places around itself (3-block radius)living-bomb A random player is set on fire, and explodes after 3 secondsobsidian-bomb Spawns an Obsidian block which explodes after 4 secondschain-lightning Lightning strikes the target and jumps to a nearby playerdisorient-target Spins the target around 45-315 degreesdisorient-nearby Spins all nearby (5 blocks radius) playersdisorient-distant Spins all distant (8+ blocks) playersroot-target Locks the target in place for a couple of secondswarp-to-player Picks a random player in the arena to warp toshuffle-positions Swaps everyone's (including the boss) positions aroundflood Places a water block on a random player's locationthrow-target Throws the target backwards (if in distance)throw-nearby Throws all nearby (5 blocks radius) playersthrow-distant Throws all distant (8+ blocks) playerspull-target Pulls the target towards the boss' locationpull-nearby Pulls all nearby (5 blocks radius) players towards the boss'→˓locationpull-distant Pulls all distant (8+ blocks) players towards the boss' locationfetch-target Warps the target to the boss' locationfetch-nearby Warps all nearby (5 blocks radius) players to the boss' locationfetch-distant Warps all distant (8+ blocks) players to the boss' location
ability-announce: [true|false] (optional) should boss abilities be announced to arena players? De-faults to true.
ability-interval: <seconds> (optional) time between each ability. Defaults to 3.
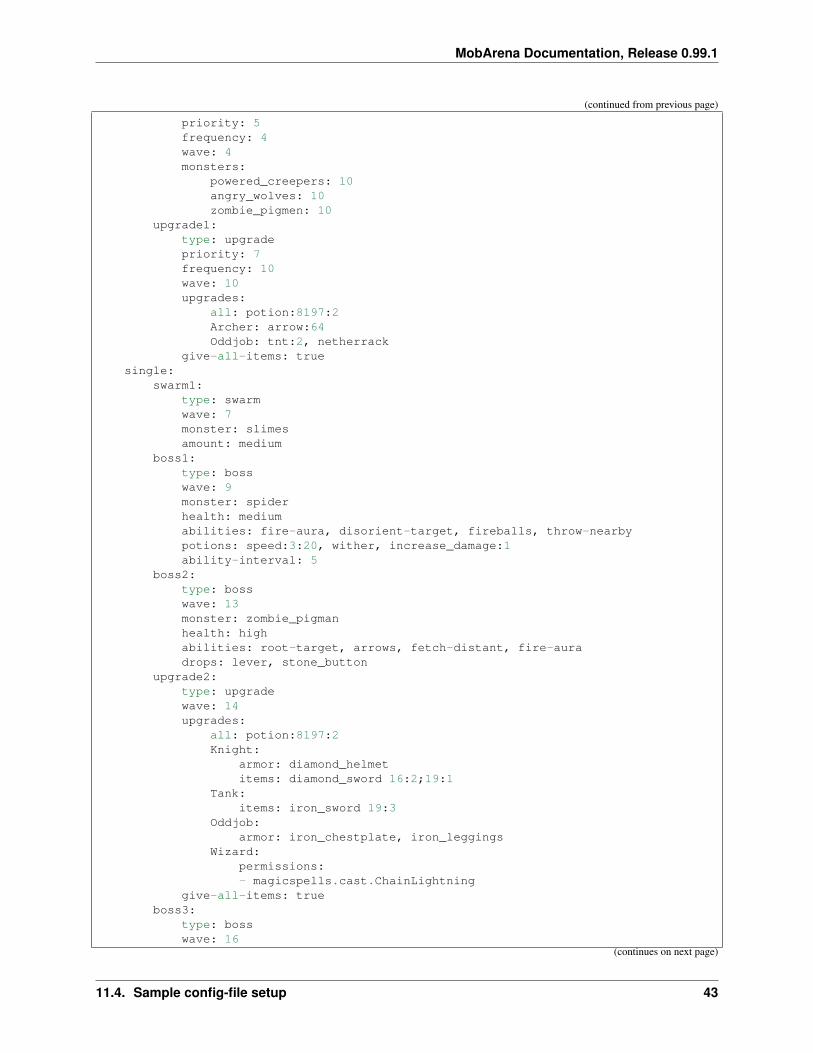
11.4 Sample config-file setup
If you want to try a sample setup, here’s one that you can use. Simply copy this block of text, and paste it into yourown config-file, replacing the waves-section.
waves:recurrent:
def1:type: defaultpriority: 1frequency: 1monsters:
zombies: 10skeletons: 4exploding_sheep: 5
def2:type: defaultpriority: 2frequency: 1wave: 5monsters:
zombies: 10skeletons: 6creepers: 4
spec1:type: special
(continues on next page)
42 Chapter 11. Setting up waves
MobArena Documentation, Release 0.99.1
(continued from previous page)
priority: 5frequency: 4wave: 4monsters:
powered_creepers: 10angry_wolves: 10zombie_pigmen: 10
upgrade1:type: upgradepriority: 7frequency: 10wave: 10upgrades:
all: potion:8197:2Archer: arrow:64Oddjob: tnt:2, netherrack
give-all-items: truesingle:
swarm1:type: swarmwave: 7monster: slimesamount: medium
boss1:type: bosswave: 9monster: spiderhealth: mediumabilities: fire-aura, disorient-target, fireballs, throw-nearbypotions: speed:3:20, wither, increase_damage:1ability-interval: 5
boss2:type: bosswave: 13monster: zombie_pigmanhealth: highabilities: root-target, arrows, fetch-distant, fire-auradrops: lever, stone_button
upgrade2:type: upgradewave: 14upgrades:
all: potion:8197:2Knight:
armor: diamond_helmetitems: diamond_sword 16:2;19:1
Tank:items: iron_sword 19:3
Oddjob:armor: iron_chestplate, iron_leggings
Wizard:permissions:- magicspells.cast.ChainLightning
give-all-items: trueboss3:
type: bosswave: 16
(continues on next page)
11.4. Sample config-file setup 43

MobArena Documentation, Release 0.99.1
(continued from previous page)
monster: wolfhealth: psychoabilities: warp-to-player, fire-aura, throw-nearby, fireballs, fetch-
→˓target, arrowspotions: slow:1ability-interval: 1reward: diamond_chestplate
supply1:type: supplywave: 19monsters:
cows: 10pigs: 5
drops: grilled_pork, cooked_chicken, cooked_beef, cooked_fish:2boss4:
type: bosswave: 20monster: blazehealth: lowabilities: fire-aura, throw-nearbypotions: speedreward: diamond_helmet
44 Chapter 11. Setting up waves

CHAPTER 12
Using MobArena
On this page: * Overview * Joining * Getting a list of arenas * Picking a class * Finding out who isn’t ready *Leaving * Spectating * A note on inventories
12.1 Overview
This page briefly describes the usage-commands of MobArena. Make sure to check out the [[MobArena Commands]]page for a list of all the commands. Remember that typing /ma help will get you a list of all available commandsin-game, along with a (very) brief description of what the command does.
The commands covered on this page pertain to the usage-commands only, i.e. the commands that the players will useto interact with MobArena. The most basic commands are:
• /ma join - for joining arenas to start playing
• /ma leave - for leaving lobbies or arenas
• /ma spec - for spectating arenas in progress
• /ma arenas - for getting a list of arenas
Additionally, there are a few commands that might prove useful:
• /ma class - for picking classes in the lobby instead of punching signs
• /ma notready - for finding out who isn’t ready yet
12.2 Joining
To join an arena, use the /ma join command. If you have more than one arena, you will also need to specify anarena name. Let’s say we have arenas cave and ship. To join the Ship arena, simply type /ma join ship.
Upon joining, you will be taken to the lobby of the given arena. In the lobby, you will have to pick a class, which istraditionally done by punching a sign with a class name on it. You can also use a command directly to manually pick a
45
MobArena Documentation, Release 0.99.1
class if you know its name, or indirectly via buttons powering command blocks, or perhaps something more complex(like NPCs).
Once you’ve picked a class, you will need to ready up, which is traditionally done by punching an iron block. However,there is also a per-arena config-file setting that automatically flags you as ready once you’ve picked a class (check the[[Setting up the config-file]] page).
12.2.1 Getting a list of arenas
To get a list of available arenas, you simply type /ma arenas. Arenas that have been set up and are ready for usewill be green, and unavailable arenas (disabled or not yet set up) will be gray. Note that you won’t see arenas for whichyou don’t have permission, just like you won’t be able to actually join an arena for which you don’t have permission.Check the [[Permissions]] page for more information.
12.2.2 The class command
Normally, you would punch class signs to pick classes, but MobArena also supports picking a class with the /maclass command. If you want to pick the Knight class, for example, simply type /ma class knight. Forcingmanual class selection like this is not recommended, because it’s unintuitive and there is no way of listing availableclasses. Instead, this command is useful if you want to set up command blocks or something more advanced like NPCswearing the class items and armor, and allowing players to pick the class by interacting with the NPCs.
12.2.3 Finding out who isn’t ready
Sometimes it’s hard to keep track of who hit the iron block and who didn’t. To figure out which of the players in thelobby have not yet readied up, you can use the /ma notready command. This is useful if everyone thinks they’vereadied up and are waiting for everyone else, but in fact one or more people haven’t readied up yet.
12.3 Leaving
When you’re done playing in the arena, you have to leave it with the /ma leave command (unless thespectate-after-death setting in the config-file is set to false, in which case the command will be exe-cuted for you). You may also leave the lobby of an arena you didn’t actually want to join, or if you just don’t want toplay anymore, and you don’t want to wait for death.
Leaving an arena in progress has no consequences other than missing out on the fun! You’ll still be given the rewardsyou earned up to this point. If you don’t want your players to be able to leave arenas in progress, you can revoke thepermission on a per-class basis. See the [[Setting up the config-file]] page for more information.
12.4 Spectating
If you want to spectate an arena already in progress, use the /ma spec command, just like you would use the /majoin command. Spectating an arena means you will be taken to the spectator area of the arena so you have a greatoverlook of the arena.
Spectators cannot interact with the arena players or the monsters in the arena, nor with each other, so there should beno hooligan fights whatsoever.
Note that when you die in an arena, you will automatically become a spectator, unless spectate-after-deathis set to false.
46 Chapter 12. Using MobArena

MobArena Documentation, Release 0.99.1
12.5 A note on inventories
Once you have joined an arena, either for playing or for spectating, you are considered as in the arena. What thismeans is that MobArena will hold on to your inventory until you leave. You leave by typing /ma leave, either fromthe lobby or the arena, or after you’ve died. If the spectate-after-death option in the config-file is false,you are automatically kicked out of the arena when you die, so in that case, you won’t have to do anything.
Inventories are stored on a per-player basis until they leave. Joining a new arena (or the same arena again) afterfinishing a session will not cause your inventory to be overwritten, even though it seems like you have no items. Whenyou leave with the /ma leave command, all of your earned rewards from all sessions since you first joined will begranted. Of course, with spectate-after-death set to false, you will automatically leave after every session.
12.5. A note on inventories 47

MobArena Documentation, Release 0.99.1
48 Chapter 12. Using MobArena

CHAPTER 13
Wave formulas
This page holds an overview of all the formulas used in the MobArena waves system. Customizing the differentproperties of the waves should be somewhat easier if they can be calculated, so here they all are!
About notation: Each variable used in the formulas will have its own name. A variable that starts with a # denotes“number (of)”, so #players means “number of players”, and #wave means “wave number”. The function min(a,b) returns the lowest of the values a and b, and max(a,b) returns the highest.
13.1 Wave growth
The wave growth node growth, used in default waves, denotes how fast monster amounts grow over time. The base iscalculated by half of the number of players, but at most 13 (i.e. there is no difference between 25 and 50 players). Theamounts can be altered further using the amount-multiplier (see the [[wave setup page|Setting up the waves]]).
#monsters = base * #wave^expbase = min(#players/2 + 1 , 13)
The exp variable is defined by the growth node, and has the following values:
slow = 0.5medium = 0.65fast = 0.8psycho = 1.2
Note that with the node value old (which is the default), the monster count is #wave + #players.
13.2 Swarm Amount
The swarm amount node amount, used in swarm waves, denotes how many monsters should spawn in the swarmwaves. There will always be at least 10 monsters due to the max function and the lowest multiplier value being 10,
49

MobArena Documentation, Release 0.99.1
however this can be further customized with the amount-multiplier (see the [[wave setup page|Setting up thewaves]]).
#monsters = max(1, #players/2) * multiplier
The multiplier variable is defined by the amount node, and has the following values:
low = 10medium = 20high = 30psycho = 60
13.3 Boss Health
The boss health node health, used in boss waves, denotes how much health the boss has. Note that thehealth-multiplier node (see the [[wave setup page|Setting up the waves]]) does NOT affect boss waves atall, so these are the only values that can be used. The minimum health a boss can have is 320 health points (~160hearts), which is with low health and only 1 player fighting. With 10 players and high health, the boss will have5500 health points (~2750 hearts).
health = (#players + 1) * 20 * multiplier
The multiplier variable is defined by the health node, and has the following values:
verylow = 4low = 8medium = 15high = 25veryhigh = 40psycho = 60
50 Chapter 13. Wave formulas
CHAPTER 14
Indices and tables
• genindex
• modindex
• search
51