models r2n and r2n ultra - russell hendrix coupe - r2n.pdf · giving you detailed instructions for...
TRANSCRIPT

robot coupe U.S.A., Inc.P.O. Box 16625, Jackson, MS 39236-6625
280 South Perkins St., Ridgeland, MS 39157
email: [email protected]
website: www.robotcoupeusa.com
1-800-824-1646
OPERATION MANUAL
FOR
MODELS
R2N and R2N Ultra(3 Quart)
Also includes the submodels
R2 B, R2 C, and R2 Ultra B within the
following serial number groups:
246xxxxx03
247xxxxx03

R2N and R2N Ultra
Operation Manual
2

R2N and R2N Ultra
Operation Manual
3
INTRODUCTION
The Robot Coupe commercial food processor performs
a host of culinary feats. It is designed for high speed
and quality vegetable processing. The Robot Coupe
slices, juliennes, and shreds with the continuous feed
attachment, plus it will chop, grind, puree, mix, or knead
using the cutter bowl attachment.
This operators manual is broken down into sections
giving you detailed instructions for assembly and op-
eration of the continuous feed attachment and the cut-
ter bowl attachment. Close attention should be paid to
all instructions in this manual to ensure a long life utili-
zation of your food processor.
This manual should be kept within easy
access to all users for reference, and
should be read completely by all first time
users of the machine.
Maintaining the food processor in good working condi-
tion is one of the most important measures to be taken.
Inspect the machine and all parts regularly to make
sure they are in good working condition.
DO NOT operate a machine that has mal-
functioned in any way.
Discard any food processed at the time of
a malfunction and have the machine inspected and
repaired at one of the Robot Coupe Authorized Ser-
vice Agencies, a list is provided in the back of this
manual. Contact one of these service agencies for all
of your service, parts and accessory requirements.
CAUTION: Your Robot Coupe comes with
a sharp cutting �S� blade and cutting
plates. Always handle with safety in mind.
We suggest that a pair of cut-resistant
gloves be worn when handling the �S�
blade and plates.
Machine Specifications:
The Models R2N and R2N Ultra are equipped with a
high speed motor generating 1/2 Hp which plugs into a
standard 120 volt/ 60 Hz, 15 amp power outlet. The
full load amperage rating is 7 amps. The machines
are supplied with a 3 Quart bowl. The R2N has a plas-
tic bowl, and the R2N Ultra has a metal bowl. The
machines are supplied with an S-blade and a clear plas-
tic cover, a continuous feed assembly, and two cutting
plates. The machines are equipped with push type on/
off/pulse buttons.
I. INTRODUCTION
II. ASSEMBLY/DISASSEMBLY
INSTRUCTIONS
III. OPERATING INSTRUCTIONS
IV. PREVENTIVE MAINTENANCE
GUIDE
V. TROUBLE SHOOTING AIDS
VI. SERVICE AGENCY LISTING

R2N and R2N Ultra
Operation Manual
4
II. ASSEMBLY/DISASSEMBLY INSTRUCTIONS
Your Robot Coupe should be placed on a sturdy work surface at a comfortable working height and have a
standard 115 volt power outlet available. Always keep the machine unplugged during assembly and disas-
sembly.
A. CUTTER BOWL ATTACHMENT ASSEMBLY INSTRUCTIONS
Always use caution, and wear cut-
resistant gloves when handling the
blade or the cutting plates.
Always unplug the machine during
assembly and disassembly.
1. Unplug the machine.
2. Place the bowl on the motor base assembly
with the handle located just off center and to the
left as you are facing the front of the unit. Then,
turn the bowl back counterclockwise locking it
in place.
3. Place the blade on the motor shaft. Rotate
the blade until it falls into place on the motor
shaft. The bottom blade should be just off, and
parallel with, the bottom of the bowl.
4. Press the off button in case the machine
was left turned on.
5. Facing the front of the motor base assembly,
place the lid on the bowl with the ramp turned
off center and to the left.
6. Turn the ramp back to the right until it locks
in place over the safety switch rod.
7. DO NOT OPERATE THE MACHINE
UNLESS IT IS PROPERLY AS-
SEMBLED WITH THE LID CENTERED
OVER THE BOWL AND THE RAMP
LOCKED IN PLACE OVER THE
SAFETY SWITCH ROD!
8. ALWAYS REMOVE THE BOWL LID
BEFORE ATTEMPTING TO REMOVE
THE BOWL. OTHERWISE, THE
SAFETY PIN CAN BE BROKEN, PRE-
VENTING MACHINE OPERATION.
LidLidLidLidLid
BladeBladeBladeBladeBlade
BowlBowlBowlBowlBowl
MotorMotorMotorMotorMotorBaseBaseBaseBaseBaseAssemblyAssemblyAssemblyAssemblyAssembly
RampRampRampRampRamp

R2N and R2N Ultra
Operation Manual
5
B. CONTINUOUS FEED ATTACHMENT ASSEMBLY INSTRUCTIONS
1. THE CORD SHOULD ALWAYS BE UN-
PLUGGED DURING ASSEMBLY AND DISASSEM-
BLY!
2. Place the continuous feed attachment on the mo-
tor base with the discharge chute to the back (as you
are facing the front of the motor base).
3. Looking from the top, turn the attachment slightly
clockwise, and with a gentle downward pressure, turn
it back counterclockwise; until it locks into place. The
attachment should be level with the top surface of the
motor base.
4. Place the plastic discharge plate on the motor shaft,
and rotate the plate until it drops fully into place on
the motor shaft. When properly installed, it should be
level with and just off the bottom of the continuous
feed attachment.
5. Place the cutting plate of your choice on the dis-
charge plate. Rotate the plate until it drops into place
and is fully seated on the discharge plate.
6. Press the off button in case the ma-
chine was left turned on.
9. DO NOT OPERATE THE MACHINE UN-
LESS IT IS PROPERLY ASSEMBLED AND
THE CONTINUOUS FEED LEAD IS FULLY
SEATED AND CENTERED OVER THE AT-
TACHMENT!
LargeLargeLargeLargeLargePusherPusherPusherPusherPusher
MotorMotorMotorMotorMotorBaseBaseBaseBaseBase
AssemblyAssemblyAssemblyAssemblyAssembly
ExitExitExitExitExitChuteChuteChuteChuteChute
ContinuousContinuousContinuousContinuousContinuousFeedFeedFeedFeedFeed
AttachmentAttachmentAttachmentAttachmentAttachment
DischargeDischargeDischargeDischargeDischargePlatePlatePlatePlatePlate
ContinuousContinuousContinuousContinuousContinuousFeedFeedFeedFeedFeedLeadLeadLeadLeadLead
SmallSmallSmallSmallSmallPusherPusherPusherPusherPusher
CuttingCuttingCuttingCuttingCuttingPlatePlatePlatePlatePlate
7. Facing the front of the mo-
tor base assembly, place the
continuous feed lead on the
continuous feed attachment
with the ramp on the lead
aligned over the safety switch
rod on the continuous feed at-
tachment. While looking
down at the top, turn the lead
slightly clockwise then back
counterclockwise, locking it in
place. The lead should be
aligned with the top surface of
the continuous feed attach-
ment.
8. Place the pushers in their
corresponding openings in the
continuous feed lead.
RampRampRampRampRamp

R2N and R2N Ultra
Operation Manual
6
The continuous feed lead, with the pushers in place,
provides protection from the cutting plate. When the
lead is turned to it�s closed position with the ramp in
place over the pin, a safety switch is activated, and
the machine can be turned on and off by use of the
push buttons. If the lead is not in the closed position,
the buttons will not function.
NEVER ATTEMPT TO DEFEAT THE PUR-
POSE OF THE SAFETY SWITCH MECHA-
NISM.
ALWAYS USE THE OFF AND ON BUT-
TONS TO OPERATE THE MACHINE.
The Food Processor is now assembled and ready
to perform its desired function.
BEFORE CONTINUING YOU SHOULD
COMPLETELY READ THE INSTRUC-
TIONS CONTAINED IN THIS MANUAL.
The continuous feed lead has two feed openings, one
large and one small, with matching pushers. The food
is inserted in the chosen opening by removing the
pusher with one hand and then depositing the food
into the chute with the other hand. The pusher should
then be used to push the food through the opening.
DISASSEMBLY INSTRUCTIONS: Simply reverse
the steps outlined in the assembly instructions with
the power cord unplugged from its wall socket.
ALWAYS REMOVE THE CONTINUOUS
FEED LEAD BEFORE REMOVING THE
CONTINUOUS FEED ATTACHMENT.
OTHERWISE, THE SAFETY PIN CAN BE
BROKEN, PREVENTING MACHINE OP-
ERATION.
III. OPERATING INSTRUCTIONS
THE UNIT SHOULD BE OFF EXCEPT WHEN PRO-
CESSING IS UNDERWAY.
It is recommended that the machine be operated on
a 50% duty cycle. This is easily accomplished since
the preparation time (cleaning, coring, peeling, and
loading) takes longer than the processing time. This
will yield the longest life for your machine.
NOTE: This machine is equipped with manual reset
thermal overload protection. If the machine is over-
loaded or run too long under heavy load conditions,
the overload will trip. If this occurs, first remove the
bowl and reduce the amount of food being processed.
The reset button is located on the bottom of the mo-
tor base. Press the button in to reset the overload
protector.
DO NOT ALLOW THE MACHINE TO RUN
UNATTENDED.
A. INSTRUCTIONS FOR USE OF THE
CUTTER BOWL
The cutter bowl attachment is used for grinding, pu-
reeing, blending, mixing, of ingredients. With the
power switch off and the bowl and blade secured in
place (per previous instructions), you are now ready
to add product to the bowl. There are two ways to
run your machine. Chopping, using a quick start/stop
action with the pulse button, or running continuously
for a fine chop or puree.
1. TO CHOP
To achieve a chopped consistency for vegetables,
meats, cheese, etc., fill the bowl 2/3 to 3/4 full with
portions no larger than 1 to 2 inch square. Press the
pulse button until the desired consistency is reached.
If the motor stalls, reduce the amount of product in
the bowl.
2. TO PUREE OR FINE CHOP: For a fine puree,
emulsification, or fine chop, fill the bowl 2/3 to 3/4 full
with portions no larger than 1 to 1 1/2 inches square.
Begin by pulsing the machine to reduce the size then,
press the on button, and allow the machine to run
until the product is finely chopped or pureed. Some
purees may require the addition of a liquid to obtain
the correct consistency.
3. TO CHOP HARD CHEESE: Place uniform 1� to 1
1/2� cubes of chilled cheese up to 1 1/2 pounds into
the bowl and pulse the machine. For powdered
cheese pulse the motor until the cheese is about pea
size then allow the motor to run continuously until you

R2N and R2N Ultra
Operation Manual
7
7. Repeat the procedure for the other blade.
8. Wash the blade before use.
3. TO CHOP HARD CHEESE: Place uniform 1� to 1
1/2� cubes of chilled cheese up to 1 1/2 pounds into
the bowl and pulse the machine. For powdered
cheese pulse the motor until the cheese is about pea
size then allow the motor to run continuously until you
have a fine powder.
4. TO CHOP ONIONS, CELERY, CABBAGE, ETC.
Quarter onions, and cut other vegetables into 2 to 3
inch portions. Place the product into the bowl up to 3/
4 full and pulse the unit until you reach the desired
consistency. CAUTION: If you overfill or allow the
machine to run continually, the product on the top
may not be cut while that on the bottom will be pu-
reed.
5. TO PUREE OR MIX: To puree, make sauces, or
to mix and blend, place the ingredients into the bowl
(do not overfill), turn the unit on, and allow to run con-
tinuously.
Sharpening the �S� blade
The �S� blade will require sharpening on a
periodic basis depending on use. The use
of a dull blade will sometimes give unsatis-
factory results. Follow the directions shown
to sharpen the blade, or have the blades
sharpened professionally if you prefer.
1. Put on your cut-resistant gloves
2. Use a Robot Coupe stone or any good
sharpening stone.
3. Hold or clamp the blade flat on the edge or
corner of a sturdy table.
4. With the other hand, hold the stone at a 30
degree angle against the top bevel of one
blade.
5. Pull the stone into the blade edge moving
from hub to tip, several strokes, until the
blade is sharp.
6. Turn the blade over, and rub the stone flat
against the underside of the blade to remove
the feather edge formed at step 5.

R2N and R2N Ultra
Operation Manual
8
B: INSTRUCTIONS FOR USE OF THE
CONTINUOUS FEED ATTACHMENT:
The Robot Coupe Food Processor will slice, grate,
shred, and juliene. These processes will be performed
in a matter of seconds. Because of the speed of the
process, it is necessary that the operator perform pre-
liminary steps before turning the machine on. Food
preparation, feed chute loading, and availability of a
receptacle for receiving the finished product are some
of the steps to assure positive control of the process-
ing operation.
Food preparation will be required to assure that the
produce will fit a feed chute with the pusher covering
the product. Additionally, according to personal pref-
erence, some products may or may not be cored or
peeled. Feed chute selection should be made de-
pending upon the product to be processed. As an
example, good consistency of small round produce
(carrots, cucumbers, etc.) necessitates use of the
small feed chute to allow better operator control. Use
of the larger port for this type of produce may result in
an undesired finished product, e.g., slicing with the
grain. In general, more control of the processing op-
eration can also be obtained by filling the selected
feed chute and placing the pusher in position before
turning the machine on.
Adherence to certain operational techniques will also
enhance the processing operation. For instance, a
consistent pressure with the pusher upon the produce
will yield a consistent output. Application of more pres-
sure will increase the thickness of the product, e.g.,
thicker slice, while reduction in pressure will result in
a finer product. However, do not apply enough pres-
sure to stall or slow the motor. This will cause dam-
age to both the plate and the motor. If no pressure is
applied at all and the produce is permitted to bounce
around, an inconsistent product may result. When
the pusher has settled fully in the feed chute, press
the off switch and re-load the entry port for a repeat
process.
THE UNIT SHOULD BE OFF EXCEPT WHEN PRO-
CESSING IS UNDERWAY. It is recommended that
the machine be operated on a 50% duty cycle. This
is easily accomplished since the preparation time
(cleaning, coring, peeling, and loading) takes longer
than the processing time. This will yield the longest
life for your machine.
DO NOT remove the continuous feed lead
when the motor is running. Wait until the
motor has come to a full stop.
DO NOT attempt to run frozen products
through the cutting plates.
DO NOT put anything other than food
products in the feed chute.
Wear cut-resistant gloves when handling
the cutting plates.
Keep hands out of the feed openings.
Always use the food pushers.
(1) Slicing Operation: When preparing food to be
sliced, make sure the food will fit into the proper feed
chute. Produce such as carrots, cucumbers, etc.,
should be �squared� at both ends. This will provide a
consistent slice throughout the whole product. With
cabbage, lettuce or any product that has an undesir-
able core, the core should be removed. Medium
size heads of lettuce or cabbage may be cut into
thirds to fit the feed chute. It is also suggested that
the rounded half be squared to permit a consistent
cut. The rounded portion can be dropped into the
chute at the end and with no pressure applied, it will
normally be processed uniformly. Larger heads of
cabbage or lettuce may be more effectively processed
if they are cut into fourths. When the preparation has
been accomplished, fill the selected feed chute, place
the pusher in position, turn the machine on and ob-
serve the results.

R2N and R2N Ultra
Operation Manual
9
(2) Grating Operation: Again, prepare the product
as to allow insertion into the feed chute. Consider
which chute will be used. As an example, placement
of carrots horizontally in the large chute will result in
a long grated product, while vertical insertion in the
smaller chute will result in a short grated product. It
is recommended that chilled cheese be used when
grated cheese is desired, otherwise a gumminess may
result. A fine coating of cornstarch applied to the
cheese before grating will aid in keeping the finished
product separated. A fine coating of cornstarch will
not be visible and is tasteless. Grating cheese is one
of the most trying processes and may cause over-
heating of the motor if not done in the recommended
manner. It is recommended that a slight pulsating
pressure be applied with the pusher while grating,
alternating slight pressure on the pusher�no pres-
sure�continuing in this manner until the block of
cheese is completely grated. It is recommended that
the cheese be prepared to fit the opening in volumes
which will permit motor cool-down time during long
production runs.
(3) Julienne Operation: Insertion of the product to
be cut must be horizontal if a long stick is to be
achieved, e.g., squash sticks. Vertical insertion will
result in finely chopped products, e.g., chopped cel-
ery. A finely chopped onion product may also be
obtained with this operation.
Plate Utilization
The Robot Coupe food processor will perform a vari-
ety of functions: slicing, grating, French fry, and
julienne. There are a total of 25 different plates avail-
able to perform these functions to meet individual
tastes. The 21 plates consists of:
7 slicing plates
8 grating plates
6 julienne plates
The standard Robot Coupe comes with two (2) plates.
Check your most current price list for the plates which
are included as standard. The number and type of
plates will vary depending upon the use of the ma-
chine.
SLICING PLATES
The seven (7) slicing plates range from 1mm (ap-
proximately 3/64") to 6.5mm (approximately 1/4"):
Part Number MM Slicing Inches (Approx.)
R291 1mm 1/32 in.
R212 2mm(waved) 5/64 in.
R210 2mm 5/64 in.
R292 3mm 1/8 in.
R211 4mm 5/32 in.
R293 5mm 3/16 in.
R270 6mm 1/4 in.
R2N and R2N Ultra
Operation Manual
10
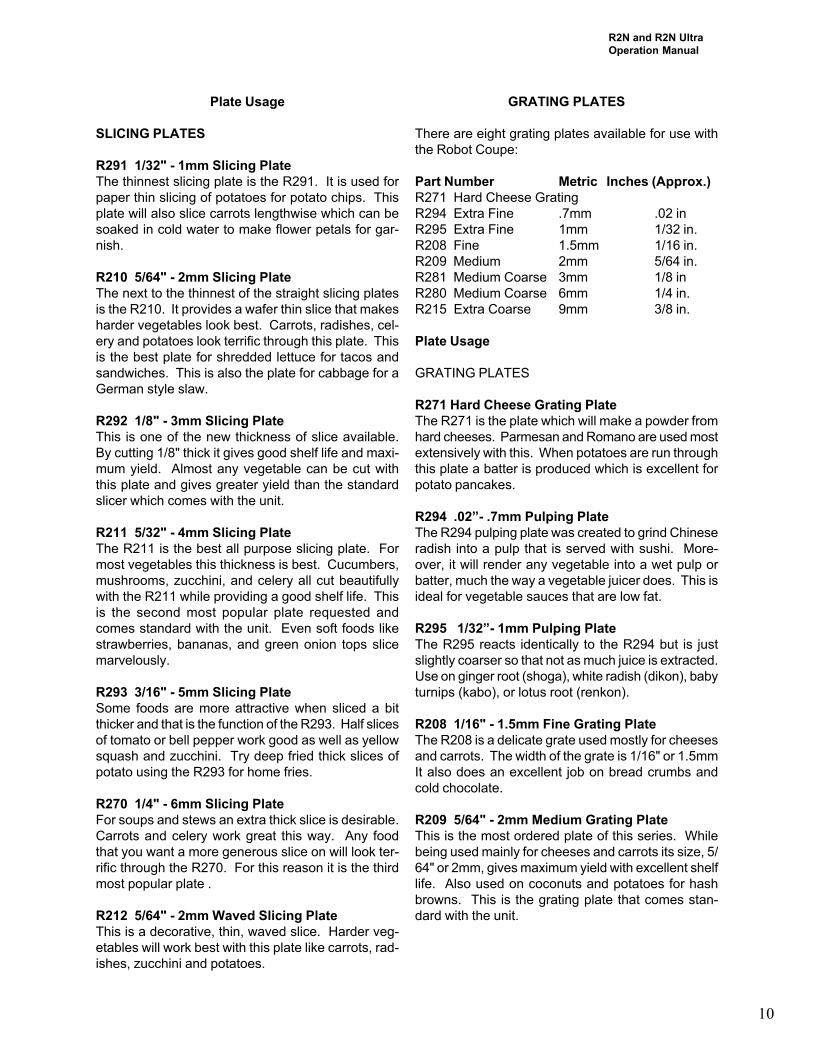
GRATING PLATES
There are eight grating plates available for use with
the Robot Coupe:
Part Number Metric Inches (Approx.)
R271 Hard Cheese Grating
R294 Extra Fine .7mm .02 in
R295 Extra Fine 1mm 1/32 in.
R208 Fine 1.5mm 1/16 in.
R209 Medium 2mm 5/64 in.
R281 Medium Coarse 3mm 1/8 in
R280 Medium Coarse 6mm 1/4 in.
R215 Extra Coarse 9mm 3/8 in.
Plate Usage
GRATING PLATES
R271 Hard Cheese Grating Plate
The R271 is the plate which will make a powder from
hard cheeses. Parmesan and Romano are used most
extensively with this. When potatoes are run through
this plate a batter is produced which is excellent for
potato pancakes.
R294 .02�- .7mm Pulping Plate
The R294 pulping plate was created to grind Chinese
radish into a pulp that is served with sushi. More-
over, it will render any vegetable into a wet pulp or
batter, much the way a vegetable juicer does. This is
ideal for vegetable sauces that are low fat.
R295 1/32�- 1mm Pulping Plate
The R295 reacts identically to the R294 but is just
slightly coarser so that not as much juice is extracted.
Use on ginger root (shoga), white radish (dikon), baby
turnips (kabo), or lotus root (renkon).
R208 1/16" - 1.5mm Fine Grating Plate
The R208 is a delicate grate used mostly for cheeses
and carrots. The width of the grate is 1/16" or 1.5mm
It also does an excellent job on bread crumbs and
cold chocolate.
R209 5/64" - 2mm Medium Grating Plate
This is the most ordered plate of this series. While
being used mainly for cheeses and carrots its size, 5/
64" or 2mm, gives maximum yield with excellent shelf
life. Also used on coconuts and potatoes for hash
browns. This is the grating plate that comes stan-
dard with the unit.
Plate Usage
SLICING PLATES
R291 1/32" - 1mm Slicing Plate
The thinnest slicing plate is the R291. It is used for
paper thin slicing of potatoes for potato chips. This
plate will also slice carrots lengthwise which can be
soaked in cold water to make flower petals for gar-
nish.
R210 5/64" - 2mm Slicing Plate
The next to the thinnest of the straight slicing plates
is the R210. It provides a wafer thin slice that makes
harder vegetables look best. Carrots, radishes, cel-
ery and potatoes look terrific through this plate. This
is the best plate for shredded lettuce for tacos and
sandwiches. This is also the plate for cabbage for a
German style slaw.
R292 1/8" - 3mm Slicing Plate
This is one of the new thickness of slice available.
By cutting 1/8" thick it gives good shelf life and maxi-
mum yield. Almost any vegetable can be cut with
this plate and gives greater yield than the standard
slicer which comes with the unit.
R211 5/32" - 4mm Slicing Plate
The R211 is the best all purpose slicing plate. For
most vegetables this thickness is best. Cucumbers,
mushrooms, zucchini, and celery all cut beautifully
with the R211 while providing a good shelf life. This
is the second most popular plate requested and
comes standard with the unit. Even soft foods like
strawberries, bananas, and green onion tops slice
marvelously.
R293 3/16" - 5mm Slicing Plate
Some foods are more attractive when sliced a bit
thicker and that is the function of the R293. Half slices
of tomato or bell pepper work good as well as yellow
squash and zucchini. Try deep fried thick slices of
potato using the R293 for home fries.
R270 1/4" - 6mm Slicing Plate
For soups and stews an extra thick slice is desirable.
Carrots and celery work great this way. Any food
that you want a more generous slice on will look ter-
rific through the R270. For this reason it is the third
most popular plate .
R212 5/64" - 2mm Waved Slicing Plate
This is a decorative, thin, waved slice. Harder veg-
etables will work best with this plate like carrots, rad-
ishes, zucchini and potatoes.

R2N and R2N Ultra
Operation Manual
11
R288 5/32"x 5/32" - 4mm x 4mm Julienne Plate
This is the most popular of the julienne plates. Car-
rots, yellow squash, and zucchini work best. These
can be sautéed and makes a beautiful garnish for an
entree. Try steaming these too for a healthy and col-
orful side dish.
R297 5/64" x 1/4" - 2mm x 6mm Julienne Plate
This new julienne cut is becoming a very popular pre-
sentation on salads. Carrots, zucchini and yellow
squash look especially good this way.
R213 1/4 x 1/4" or 6 x 6mm French Fry Plate
This might as well be called the taco plate. Toma-
toes and onions can be quartered and allowed to grav-
ity feed through the lead and are chopped without
damage. Lettuce can be cut for a chopped taco let-
tuce. Chopped onions through the R213 are great
for hot-dogs also. Every school system should have
this plate. Bell peppers can be chopped like the on-
ions for meatloaf or chili. As a sideline the French fry
plate makes great French fries and is the fifth most
popular plate.
R298 5/16" x 5/16" or 8mm x 8mm Julienne Plate
The 8 x 8mm julienne plate is great for zucchini, on-
ions, and eggplants.
While the standard Robot Coupe comes with two spe-
cific plates (R209 and R211 at time of printing), many
user applications may require some of the optional
plates available with the unit. As an example, a typi-
cal salad bar might use:
R210 2mm (3/32 in.) Slicing plate
R211 4mm (5/32 in.) Slicing plate
R209 Medium Grating plate
The R210 plate could be used to slice cucumbers,
carrots, celery, etc. Good yield with long shelf life.
The R211 plate could be used to provide half slices
of tomatoes, bell peppers, or onions.
The R209 Medium Grating plate would process car-
rots, cheese, etc.
PLATE HOLDER
R255 Plate Rack
Holds nine plates and is ideal to store your Robot
Coupe accessories.
R281 1/8" - 3mm Medium Coarse Grating
This new size grating plate is good for an extra fine
coleslaw or anything you prefer grated a bit coarser
than the standard R209 medium grating plate. This
plate works wonderfully with cheese, potatoes, beets,
eggs, cabbage or sweet potatoes.
R280 1/4" - 6mm Coarse Grating Plate
This in-between size of grate has become popular
with salad bars. Cheeses and carrots appear a bit
more generous when grated this way. Also purple
cabbage run through this plate can add a splash of
color to a salad bowl filled with lettuce.
R215 3/8 - 9mm Extra Coarse Grating Plate
The R215 is the widest grating plate. It provides an
extra thick grate of cabbage for slaw and cheeses for
melting. Mozzarella cheese looks terrific through the
R215
JULIENNE PLATES
There are six julienne plates available:
Part Number Metric Inches (Approx.)
R214 2x2mm 5/64 x 5/64 in.
R296 2x4mm 5/64 x 5/32 in.
R288 4x4mm 5/32 x 5/32 in.
R297 2x6mm 5/64 x 1/4 in.
R213 6x6mm 1/4 x 1/4 in.
R298 8x8mm 5/16 x 5/16 in.
Plate Usage
JULIENNE PLATES
Products such as squash sticks, chopped celery, and
finely chopped onions are obtainable as well as
julienne celery
DO NOT ATTEMPT TO JULIENNE MEATS
OR CHEESES.
R214 5/64 x 5/64 - 2 x 2mm Julienne Plate
The R214 is an extremely fine julienne which can
dress up a salad. Radishes, potatoes, and carrots
work best. Try julienne radishes with the R214 for an
ultra-fine cut that looks like a top chef worked for hours
preparing.
R296 5/64"x 5/32" - 2mm x 4mm Julienne Plate
This is an interesting flat julienne that gives substance
to a delicate cut. One unique function of this plate is
to duplicate the slaw cut that comes from a buffalo
chopper. Try the R296 with radish, potato, summer
squash, or sweet potato.
R2N and R2N Ultra
Operation Manual
12
IV. CLEANING/PREVENTIVE
MAINTENANCE
(1) CLEANING: Proper cleaning of the machine is
one of the most important preventive maintenance
measures the user can employ. The high acid con-
tent of food can cause harm to the electrical parts
contained within the housing. Although a seal iso-
lates these elements from the outside, food juices
will tend to seep. If food juices are allowed to collect
on the machine over periods of use, erosion of the
seal can occur. It is recommended that the machine
be cleaned after each operational use.
Correct cleaning procedures are required to assure
that damage is not inflicted in the cleaning process.
The motor base assembly contains the motor and
electrical components.
DO NOT IMMERSE THE MOTOR BASE
ASSEMBLY IN WATER!
CLEANING INSTRUCTIONS
ATTACHMENTS: Remove and disassemble all at-
tachments before cleaning. The bowl and continu-
ous feed attachments should be cleaned per the fol-
lowing instructions or as required by local health de-
partment regulations.
The bowl, blade, lid, continuous feed attachment,
continuous feed lead, pushers, and plates are dish-
washer safe. All of the attachments listed above can
be washed in a dish machine or three tank system
pot sink. Pre-rinse the attachments before washing
to remove any bulk food on the parts. A stiff bristle
brush or power sprayer faucet attachment is effec-
tive in knocking the food out of the crevices as a pre-
rinse procedure. The washer should have an indus-
try standard wash, rinse, and sanitization cycle. Al-
low the parts to air dry after sanitizing and before re-
assembly.
NOTE: The high temperatures of dish
machines will tend to shorten the life of
the plastic and rubber parts. Hand wash-
ing using a three pot sink will provide for
the longest life of these parts.
Inspect the area around the handle and bowl-switch-
rod to ensure they are clean. Use a brush on these
areas if necessary.
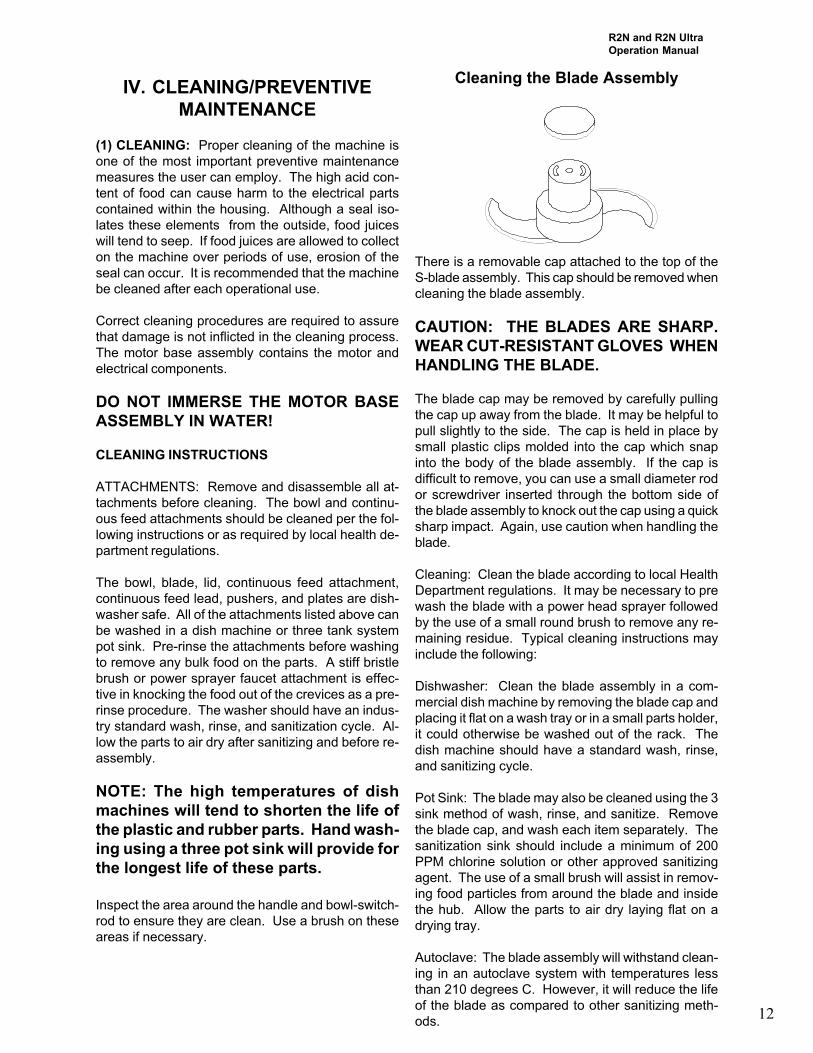
Cleaning the Blade Assembly
There is a removable cap attached to the top of the
S-blade assembly. This cap should be removed when
cleaning the blade assembly.
CAUTION: THE BLADES ARE SHARP.
WEAR CUT-RESISTANT GLOVES WHEN
HANDLING THE BLADE.
The blade cap may be removed by carefully pulling
the cap up away from the blade. It may be helpful to
pull slightly to the side. The cap is held in place by
small plastic clips molded into the cap which snap
into the body of the blade assembly. If the cap is
difficult to remove, you can use a small diameter rod
or screwdriver inserted through the bottom side of
the blade assembly to knock out the cap using a quick
sharp impact. Again, use caution when handling the
blade.
Cleaning: Clean the blade according to local Health
Department regulations. It may be necessary to pre
wash the blade with a power head sprayer followed
by the use of a small round brush to remove any re-
maining residue. Typical cleaning instructions may
include the following:
Dishwasher: Clean the blade assembly in a com-
mercial dish machine by removing the blade cap and
placing it flat on a wash tray or in a small parts holder,
it could otherwise be washed out of the rack. The
dish machine should have a standard wash, rinse,
and sanitizing cycle.
Pot Sink: The blade may also be cleaned using the 3
sink method of wash, rinse, and sanitize. Remove
the blade cap, and wash each item separately. The
sanitization sink should include a minimum of 200
PPM chlorine solution or other approved sanitizing
agent. The use of a small brush will assist in remov-
ing food particles from around the blade and inside
the hub. Allow the parts to air dry laying flat on a
drying tray.
Autoclave: The blade assembly will withstand clean-
ing in an autoclave system with temperatures less
than 210 degrees C. However, it will reduce the life
of the blade as compared to other sanitizing meth-
ods.

R2N and R2N Ultra
Operation Manual
13
MOTOR BASE: Cleaning of the motor base assem-
bly must be done with care: First unplug the unit.
A sponging with a cloth lightly soaked (not dripping)
in a mild detergent is acceptable, making sure the
water is not permitted to penetrate the shaft seal or
around the switches. Clean around the shaft seal
with a small brush, taking care to remove all food.
Do not forget to clean the motor shaft. Rinse the motor
base first using a cloth lightly dampened (not drip-
ping) with water, then with a sanitizing solution, and
dry the machine with a soft cloth removing all liquids
from seal areas.
(2) PREVENTIVE MAINTENANCE CHECKS
While your Robot Coupe is a ruggedly constructed
machine, overall handling should be accomplished
with a sense of use rather than abuse. Reasonable
care should be exercised. While the machine is rea-
sonably portable, care should be taken not to drop it.
Equally, caution should be exercised in handling all
the parts to assure they are not damaged.
An examination should be made periodically to as-
sure that a seal against liquids is being maintained
around the motor shaft. With proper care, and de-
pending on use, the seal should last for a year or
more. However, it can and should be replaced when-
ever wear or erosion is noted, or minimally once per
year. It is recommended that the seal be replaced by
an authorized repair agency.
Blades should be kept sharp. It is not necessary to
have a razor edge however they will need sharpen-
ing periodically. Replacement of the dull blades or
plates is recommended.
(3) CARE: Your Robot Coupe is a piece of kitchen
equipment and like all other kitchen equipment, care
and caution should be used when operating. Although
training requirements are minimal, only responsible
individuals familiar with this operation manual should
be allowed to operate your Robot Coupe.
In general, the best preventive measures that can be
applied are close adherence to the assembly, opera-
tion, cleaning, and handling instructions, common
sense and regular maintenance.
TROUBLE SHOOTING AIDS: The following
sections indicate potential problems and the correct
solution which should be implemented by the user.
Problems which extend beyond these will require an
experienced serviceman. A list of the authorized
agencies is supplied.
V. TROUBLE SHOOTING AIDS
A. Unit does not start when assembled correctly:
1. Pull plug and try another outlet
2. Make sure bowl lid or continuous feed lead is
in the proper position with the ramp fully
pushed to the right, engaging the safety
mechanism.
3. Check the safety switch pin. It will break if the
attachment cover is not removed before the
attachment.
B. Continuous feed lead will not fit flush with
continuous feed attachment:
1. Processing plate is not in its proper position.
2. Rim of plate should be level with upper edge
of motor base.
C. Unit stops during processing:
1. Turn unit off, and unplug machine
2. Remove continuous feed lead
3. Remove cutting plate
4. Remove product being processed from inside
of machine and continuous feed lead
5. Reassemble unit
D. If unit does not operate after following above:
1. Check outlet for current (Breaker or Fuse)
2. Try unit again
3. Call local authorized service agency.
E. Unit starts to spark or smoke:
1. Turn unit off, unplug it, call local authorized
service agency.
F. Unit makes grinding noise:
1. Turn unit off, disassemble, check continuous
feed lead and processing plate to see if they
have been rubbing together (small pieces of
plastic would be present).
2. If this was the case, the processing plate was
not fully seated. Check for food particles
inside stem of processing plate.
3. Replace the plate-insuring that it is fully
seated. Make sure there are not food par-
ticles on the motor shaft.
4. If noise continues, turn unit off and remove
processing plate. Assemble unit without plate
and turn unit on. If no noise�processing
plate may be bent or warped. Try another
plate. If noise persists, call your local factory
authorized service agency.
G. Cucumbers coming out with torn skins and/
or with seeds knocked out:1. Cutting plate is dull and must be changed.

R2N and R2N Ultra
Operation Manual
14
VI. SERVICE INFORMATION/
SERVICE AGENCY LIST
Your Robot Coupe has a one year limited warranty
against defects in parts and workmanship (Check
the warranty page within this manual for additional
information and/or coverage). Should the unit re-
quire service, check with your distributor to see where
local service is available. If not or if you wish your
unit to be serviced at the factory, call for a return
merchandise authorization (RMA) number, and upon
receipt of same; ship it PREPAID and insured to our
factory address.
Robot Coupe USA, Inc. Service Dept.
Phone: 1-800-824-1646
601-898-8411
NOTE: Cucumber condition before process-
ing should be considered.
H. Carrots are watery after grating:
1. Grating plate is dull and should be re-
placed.
I. Cheese forms balls instead of shreds:
1. Warm cheese
2. Grating plate is dull and should be re-
placed.
J. Machine becomes jammed while processing:
1. Turn unit OFF, and unplug machine. Remove
continuous feed lead and remove remnants of
product being processed. Put on a pair of cut-
resistant gloves and try to turn the plate manu-
ally in a counterclockwise direction. CAUTION:
This may be very hard to do. As soon as you feel
the plate slip, you will be able to reassemble the
unit and continue processing. If unit jams again,
repeat above until you get the plate to slip. Now,
remove and clean the plate. Before reassembling,
make sure:
a. Motor shaft is clean.
b. Plate is fully seated on motor
shaft.
2. If jamming is too tight to loosen by hand, con-
tact service agency.
CAUTION: IT IS ADVISABLE TO KEEP
THE MACHINE UNPLUGGED WHILE
CLEANING OR SERVICING.


Indexes Part # Description
1 103281 (B) Small Pusher
2 27242 *(B) R2N Cont. Feed Kit, Gray
3 103280 (B) Large Pusher
4 118592 (B) R2 Cont Feed Lead, Gray (replaces white)
5 103288 (B)Discharge Plate
6 102699 (B) R2N/U Cont. Feed Attach, Gray (replaces white)
7 R242 Pin Assy for Plastic Bowl
8 R1776 Spring
9 Number NA Description NA
10 R204 Cutter Bowl Lid
11 27239 *(B) R2N Bowl Kit 3qt, Gray
12 R3030 Cap Only, R301 S. Blade
13 R203 * Blade
14 27240 * (B) R2N Clear Bowl Kit, 3qt.
15 112204 (B) R2N Gray Bowl Only, 3qt
16 112203 (B) R2N Clear Bowl Only, 3qt
17 39103 (B) Pin Assy, R2N 3qt Gray
18 R1776 Spring
19 39077 (B) Pin Assy R2N 3qt. Clear Bowl
20 Number NA Description NA
21 R3030 Cap Only, R301 S. Blade
22 R203D * S Blade, Fine Serration
23 R3030 Cap Only, R301 S. Blade
24 R203E * S. Blade Coarse Serrations
25 R255 * Plate Rack
26 R248 Honing Stone
27 39108 (B) R2N Motor Support, 3qt
28 R262 Screw Cover
29 R232A Screw (Motor - MS)
30 R118 Motor Support Seal
31 R274 Pulse Switch
32 39106 (B) R2N Switch Assy, 3qt
33 407669 (B) Frant Data Plate R2N, 3qt
34 R239 Mtr F/C 1/3HP 115V/60HZ
35 R239D.3 Adapter Plate, EM
36 R239D Motor, EM
37 R265 Bottom Cushion Bushing
38 R278A Baffle
39 R277A Screen Kit
40 R286 8amp Breaker (R2ANN)
41 104124 (B) R2 Base, Gray
42 R101 Foot
43 R119 Screw (Base-MS 3.9x19)
44 R276A Louvre (mtl) W/Rivits
45 R240 Cord with Plug
46 R104 Strain Relief
47 R225 Rubber O Ring (Black)
48 R115K Safety Switch Assembly
49 R222 Capacitor F/C Mtr (R2N)
50 R237 6203 Bearing R2 Top/Btm
51 R239D.2 Capacitor
52 R237 6203 Bearing R2 Top/Btm
53 R239D.1 Relay
PRICES AND OTHER INFORMATION SUBJECT TO CHANGE WITHOUT NOTICE
MODEL
R2N (3 Quart)
Serial Numbers 246xxxxx03

Indexes Part # Description
1 103281 (B) Small Pusher
2 27242 * (B) R2N Cont Feed Kit, Gray
3 103280 (B) Large Pusher
4 118592 (B) R2 Cont Feed Lead, Gray (replaces white)
5 103288 (B)Discharge Plate
6 102699 (B) R2N/U Cont. Feed Attach, Gray (replaces white)
7 R242 Pin Assy for Plastic Bowl
8 R1776 Spring
9 Number NA Description NA
10 R204 Cutter Bowl Lid
11 27243 * (B) R2U S.S. Bowl Kit, 3qt
12 R3030 Cap Only, R301 S. Blade
13 R203 * Blade
14 104099 (B) R2U S.S. Bowl Only,3qt
15 104098 (B) Pin, 3qt S.S. Bowl
16 Number NA Description NA
17 R1776 Spring
18 104050 (B) Retaining Nut
19 R289 Lckg Bush Set w/Screws
20 R3030 Cap Only, R301 S. Blade
21 R203D * S Blade, Fine Serration
22 R3030 Cap Only, R301 S. Blade
23 R203E * S. Blade Coarse Serrations
24 R255 * Plate Rack
25 R248 Honing Stone
26 39109 (B) R2U Motor Support, 3qt
27 R262 Screw Cover
28 R232A Screw (Motor - MS)
29 R118 Motor Support Seal
30 R274 Pulse Switch
31 39107 (B) R2U Switch Assy, 3qt
32 407670 (B) Front Data Plate R2U,3qt
33 R239 Mtr F/C 1/3HP 115V/60HZ
34 R239D.3 Adapter Plate, EM
35 R239D Motor, EM
36 R265 Bottom Cushion Bushing
37 R278A Baffle
38 R277A Screen Kit
39 R286 8amp Breaker (R2ANN)
40 104124 (B) R2 Base, Gray
41 R101 Foot
42 R119 Screw (Base-MS 3.9x19)
43 R276A Louvre (mtl) W/Rivits
44 R240 Cord with Plug
45 R104 Strain Relief
46 R225 Rubber O Ring (Black)
47 R115K Safety Switch Assembly
48 R222 Capacitor F/C Mtr (R2N)
49 R237 6203 Bearing R2 Top/Btm
50 R239D.2 Capacitor
51 R237 6203 Bearing R2 Top/Btm
52 R239D.1 Relay
PRICES AND OTHER INFORMATION SUBJECT TO CHANGE WITHOUT NOTICE
MODEL
R2N Ultra (3 Quart)
Serial Numbers 247xxxxx03

11jan02
ROBOT COUPE U.S.A. INC. LIMITED WARRANTY
R2 SERIES ONE YEAR LIMITED WARRANTY AND
EXTENDED THREE-YEAR MOTOR LIMITED WARRANTY
This LIMITED WARRANTY is to the original purchaser only against defects in material and/or workmanship, and includes
labor for replacement of defective parts, provided repairs are performed by a Robot Coupe Authorized Service Agency (see
attached list). The CUSTOMER must inform the Service Agency of the possibility of warranty coverage and provide a copy of
the dated sales or delivery receipt BEFORE WARRANTY REPAIRS ARE BEGUN. Replacement parts and accessories are
warranted for ninety (90) days from the date of purchase when purchased separately and will be verified by a dated sales
receipt OR packing list, which list that item. All parts or accessories replaced under warranty are the property of Robot Coupe
and must be returned to the Service Agency.
The motor of your new R2 series machine, which serial number begins with 244xxxxxx or 245xxxxxx is warranted an
additional two (2) years against defects for a total of three (3) year motor warranty. Robot Coupe will replace any motor and
shaft seal only which fails due to mechanical malfunction not including seal and bearing failure. The additional two (2) year
motor warranty does NOT include labor to install, shipping charges, travel or mileage charges, or other incidental charges
incurred during motor replacement. The machine purchase date must be verified with a dated copy of the purchase invoice
from your selling dealer.
Robot Coupe USA designs many attachments and accessories for use on specific models and series of machines.
THE USE OF PARTS, ATTACHMENTS, OR ACCESSORIES OTHER THAN THOSE OFFERED FOR SALE
BY ROBOT COUPE U.S.A. Inc. AND DESIGNED FOR USE ON YOUR SPECIFIC MODEL AND SERIES
WILL VOID YOUR WARRANTY.
THE FOLLLOWING ARE NOT COVERED BY THE ROBOT COUPE LIMITED WARRANTY
1. Damage caused by abuse, misuse, dropping, or other similar incidental damage caused by or as a result of failure to
follow assembly, operating, cleaning, and user maintenance or storage instructions.
2. Labor to sharpen and/or parts to replace knife assemblies or blades which have become dull, chipped, or worn due to
normal use.
3. Material or labor to renew or repair scratched, stained, chipped, dented or discolored surfaces, blades, knives,
attachments, or accessories.
4. Transportation charges to or from an authorized service agency for repairs of a machine designated as CARRY IN
SERVICE . The R2 series are warranted only for carry in service.
5. Labor charges to install or test attachments or accessories (i.e. bowls, cutting plates, blades, attachments) which are
replaced for any reason.
6. SHIPPING DAMAGE IS NOT COVERED BY WARRANTY. Visible and hidden damages are the responsibility
of the freight carrier. The consignee or receiver must file a damage claim promptly against the carrier, or upon
discovery in the case of hidden damage. KEEP ALL ORIGINAL CONTAINERS AND PACKING MATERIAL
FOR CARRIER INSPECTION.
Robot Coupe U.S.A., Inc., Robot Coupe S.A., or any of their affiliates, distributors, officers, directors,
agents, employees, or insurers will not be obligated for consequential or other damages, losses, or
expenses in connection with or by reason of the use of or inability to use the machine for any purpose.
THIS WARRANTY IS GIVEN EXPRESSLY AND IN LIEU OF ALL OTHER WARRANTIES
EXPRESSED OR IMPLIED, FOR MERCHANTABILITY AND FOR FITNESS TOWARD A
PARTICULAR PURPOSE AND CONSTITUTES THE ONLY WARRANTY MADE BY ROBOT
COUPE U.S.A., Inc.