module 2_lecture 5 - network configuration - peer to peer network
DESCRIPTION
System AdministrationModule 2: Lecture 5: Network Configuration: Peer to Peer NetworkTRANSCRIPT
NETWORK CONFIGURATIONPEER-TO-PEER NETWORK
Dr. Zeeshan Bhatti
Lecture 5
Creating Peer-to-Peer Network between
two PCs
2
WHAT IS LOCAL AREA CONNECTION
LAN (Local Area Network) card will automatically install when you setup windows 7.
LAN connection is required when you want to share your pc with others in your Home Group.
Supposes you have two Laptop/Pc and you want to connect them for some purpose say playing multiplayer games or to access another Pc ,just setup Local Area Connection.
You can connect your Pc to your friends Pc no meter how far the distance, using LAN with Straight Cable connection.
3

PROCEDURE OF SETUP LOCAL AREA CONNECTION
Create Work Group:
Go to my computer properties.
Click change settings.
4

In system properties, click on Change button, to specify a workgroup for your home network.
5
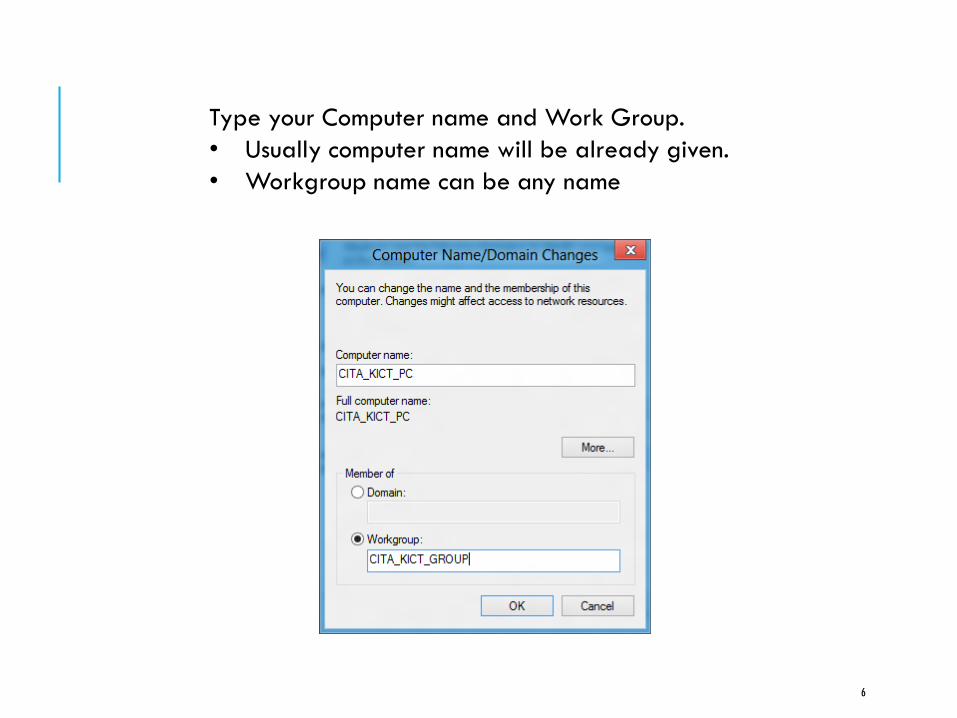
Type your Computer name and Work Group.
• Usually computer name will be already given.
• Workgroup name can be any name
6

This message will appear.
7
Restart your computer then your Work
Group will be created.
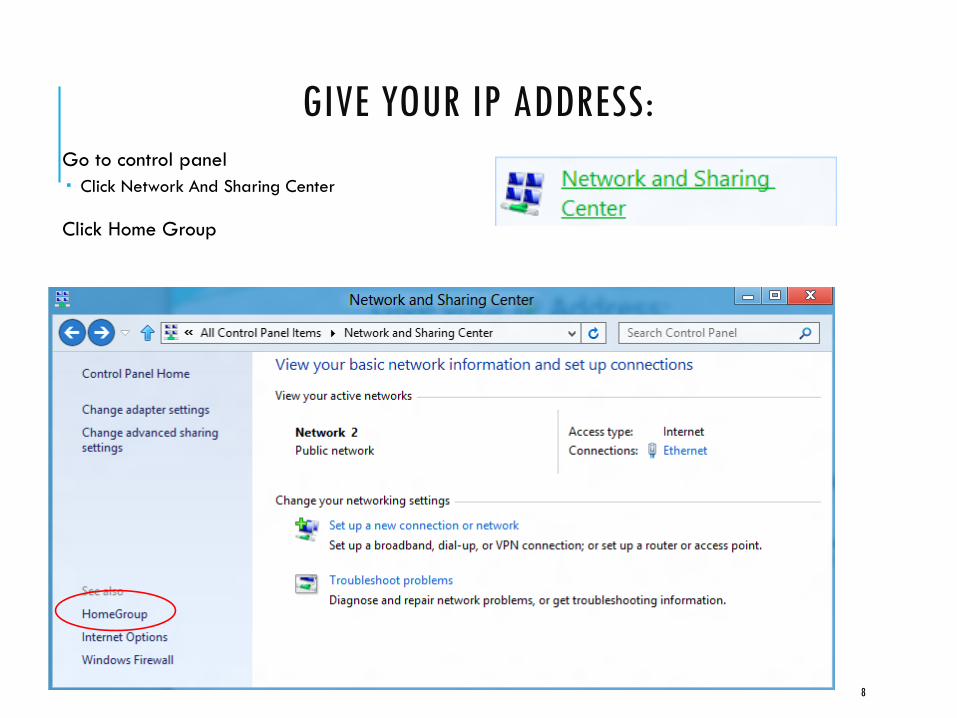
GIVE YOUR IP ADDRESS:Go to control panel
Click Network And Sharing Center
Click Home Group
8

Click Advance Sharing Setting
9
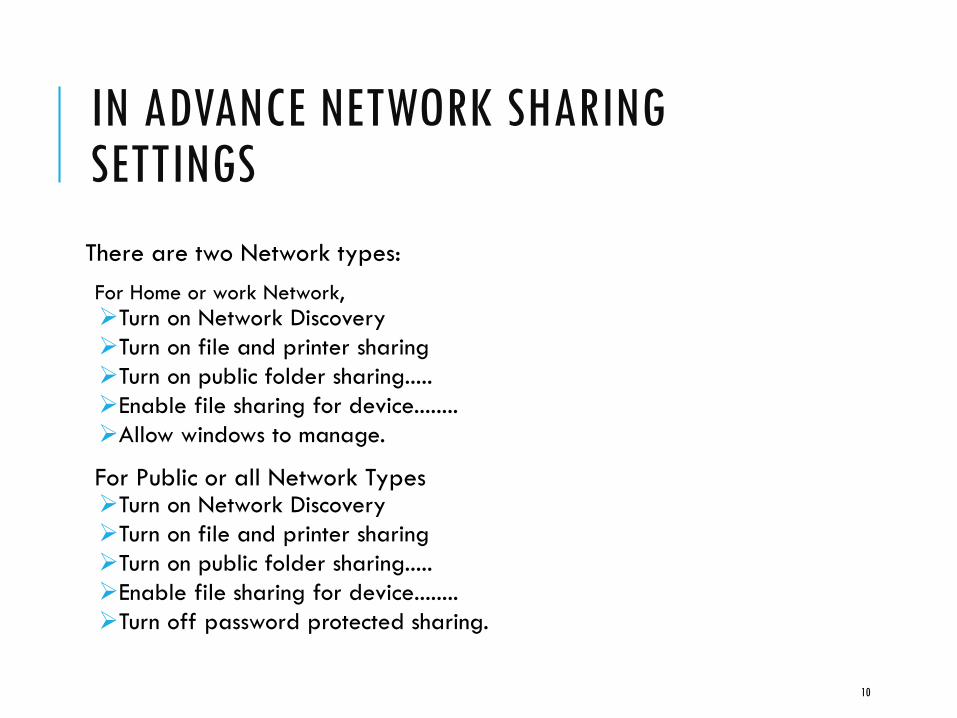
IN ADVANCE NETWORK SHARING SETTINGS
There are two Network types:
For Home or work Network,
Turn on Network Discovery
Turn on file and printer sharing
Turn on public folder sharing.....
Enable file sharing for device........
Allow windows to manage.
For Public or all Network Types Turn on Network Discovery
Turn on file and printer sharing
Turn on public folder sharing.....
Enable file sharing for device........
Turn off password protected sharing.
10
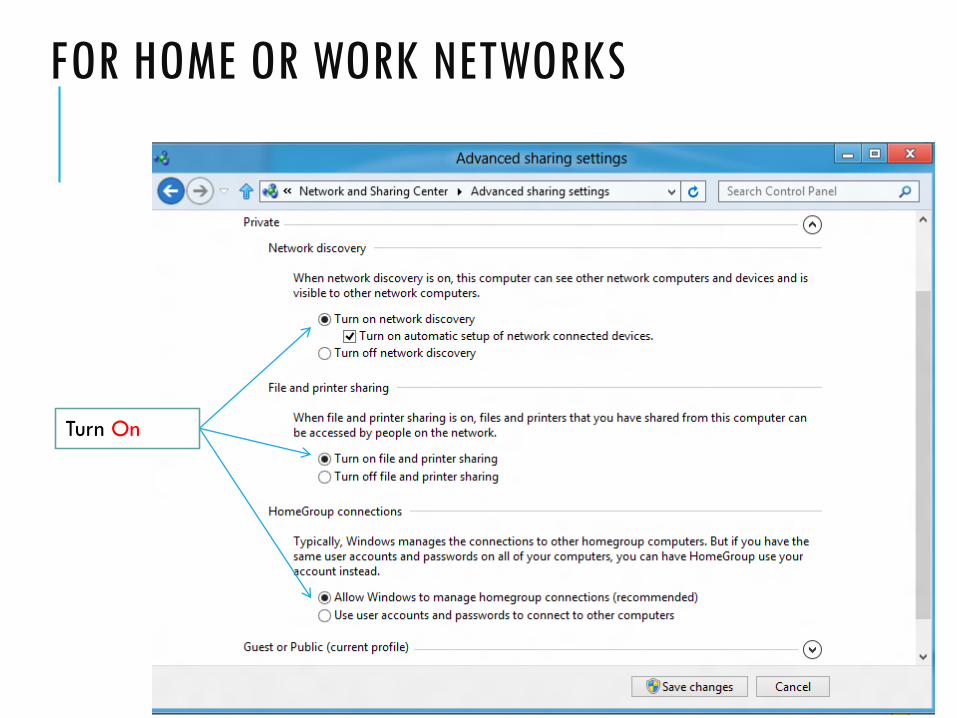
FOR HOME OR WORK NETWORKS
11
Turn On
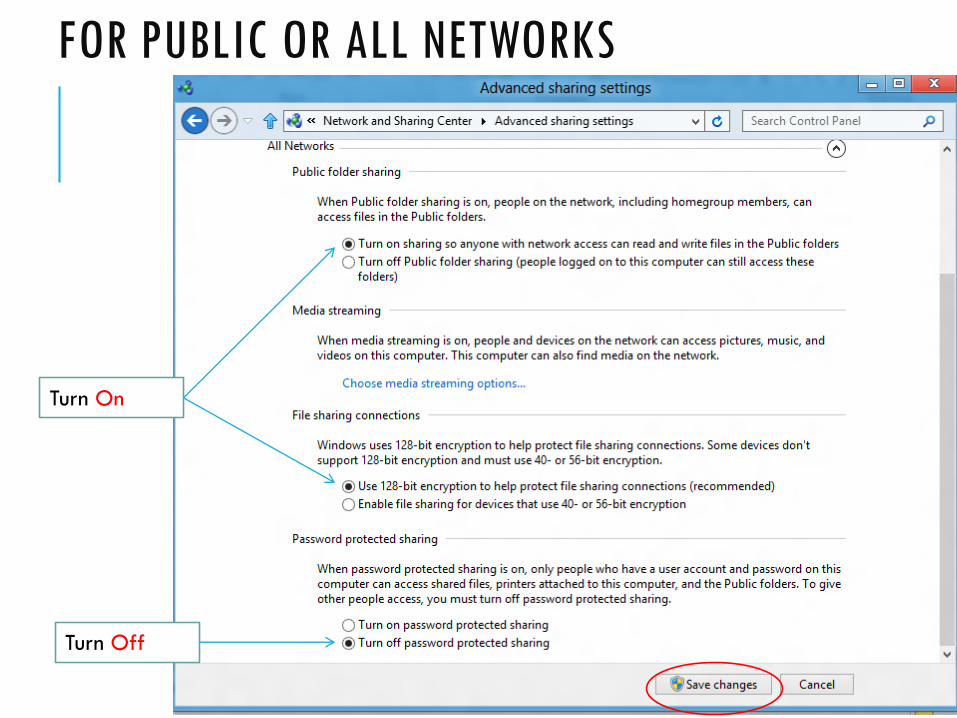
FOR PUBLIC OR ALL NETWORKS
12
Turn On
Turn Off
Now Do the above process on the Second Computer As Well.
Note: PC name must be different for each PC, but the workgroup has to be same.
13
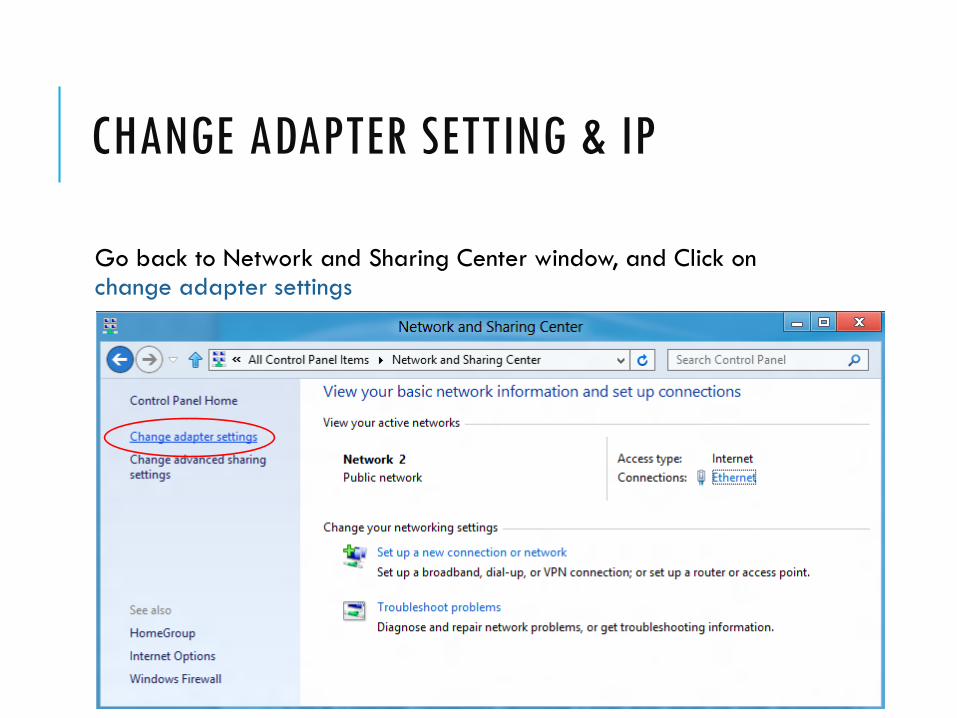
CHANGE ADAPTER SETTING & IP
Go back to Network and Sharing Center window, and Click on change adapter settings
14

15
Plug your cable and then find this.
1. Right click on Local Area Connection go to
properties.
2. Double click Internet protocol version 4 (TCP/IPv4)
Or click properties button
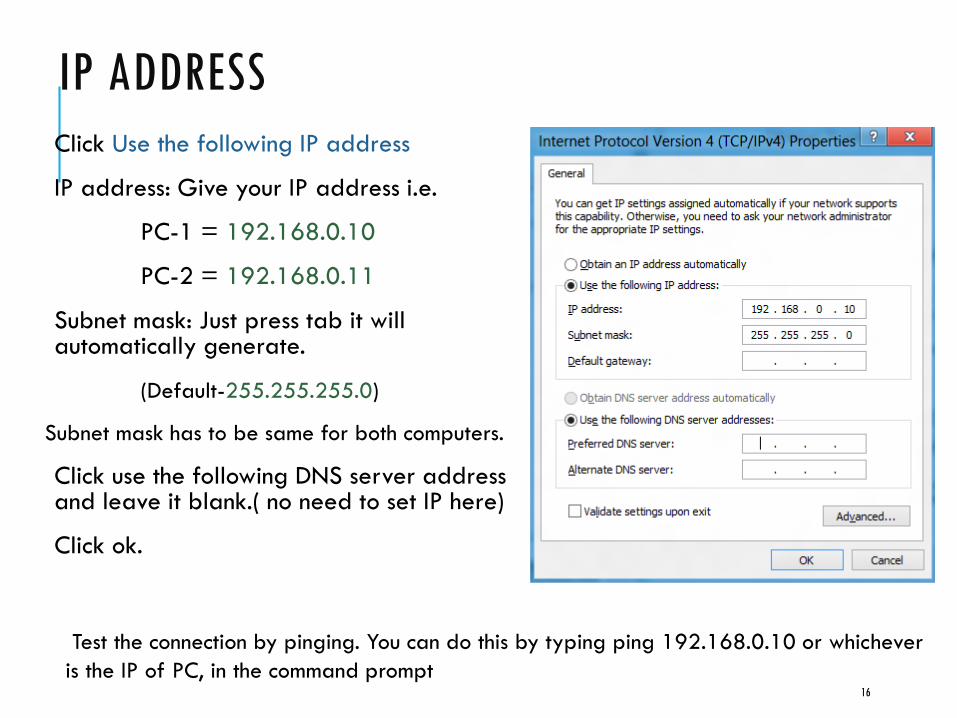
IP ADDRESS
Click Use the following IP address
IP address: Give your IP address i.e.
PC-1 = 192.168.0.10
PC-2 = 192.168.0.11
Subnet mask: Just press tab it will automatically generate.
(Default-255.255.255.0)
Subnet mask has to be same for both computers.
Click use the following DNS server address and leave it blank.( no need to set IP here)
Click ok.
16
Test the connection by pinging. You can do this by typing ping 192.168.0.10 or whichever
is the IP of PC, in the command prompt

SHARING THE INTERNET CONNECTION OF PC-1 WITH PC-2
Right click on LAN card of PC-1 which is connected to Internet and select Properties.
17
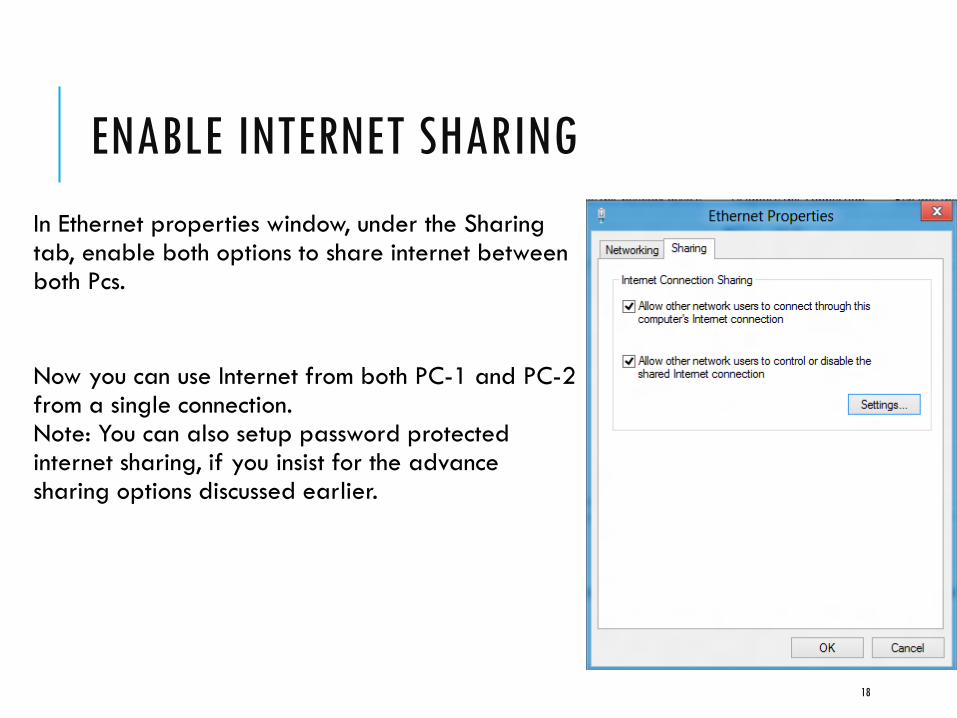
ENABLE INTERNET SHARING
In Ethernet properties window, under the Sharing tab, enable both options to share internet between both Pcs.
Now you can use Internet from both PC-1 and PC-2 from a single connection.Note: You can also setup password protected internet sharing, if you insist for the advance sharing options discussed earlier.
18
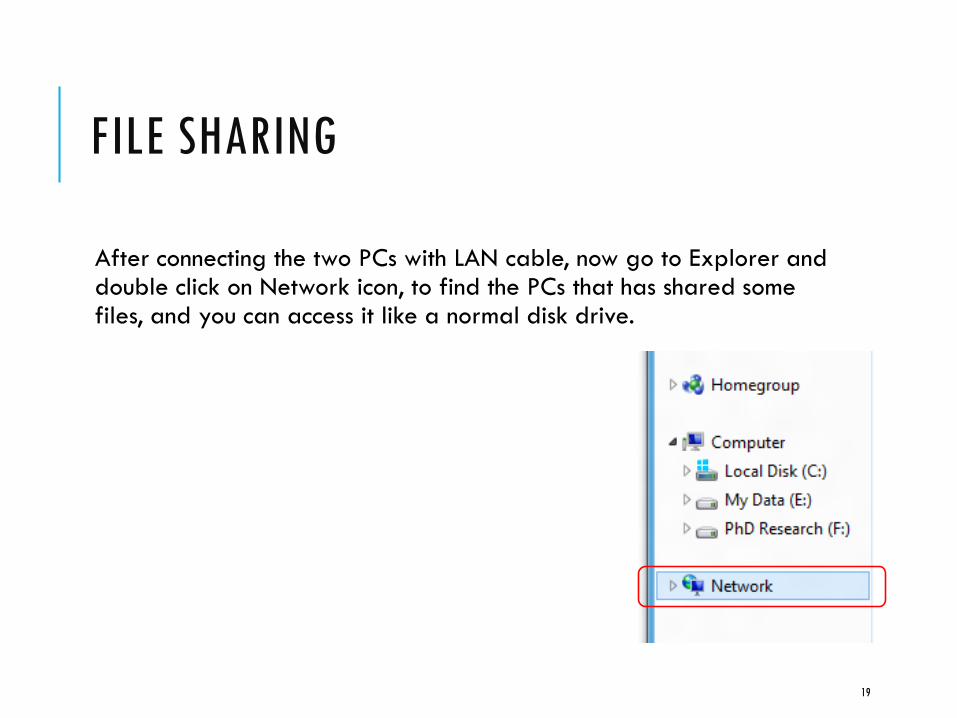
FILE SHARING
After connecting the two PCs with LAN cable, now go to Explorer and double click on Network icon, to find the PCs that has shared some files, and you can access it like a normal disk drive.
19

Converting your laptop into WI-FI router
PART-VIII
20
SOFTWARE:
Connectify is an easy to use software router for Windows computers that utilizes your PC’s built in Wi-Fi card to wirelessly share any available Internet connection with friends, co-workers, and mobile devices
21
http://www.connectify.me/

TRANSFERE FILES BETWEEN PC AND MOBILE DEVICE BY DRAG-AND-DROP
Transferring files to PCs, iPads, and smartphones has never been easier. Just drag a file onto the appropriate device, and ConnectifyPRO uses your PC’s built-in Wi-Fi card to Fling the file securely, and directly to that device only.
22
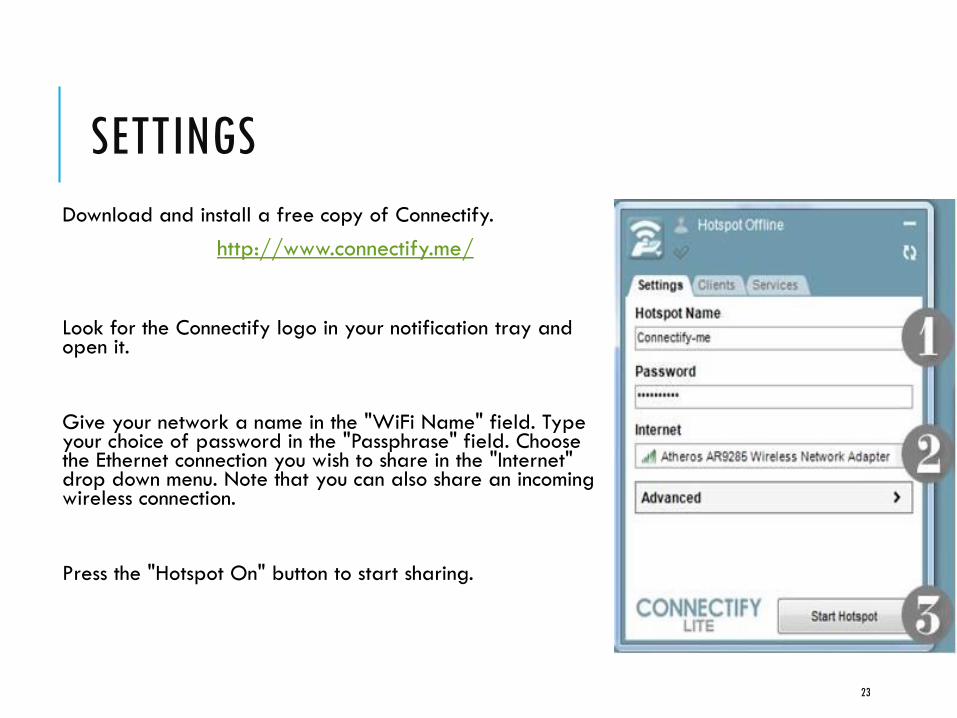
SETTINGS
Download and install a free copy of Connectify.
Look for the Connectify logo in your notification tray and open it.
Give your network a name in the "WiFi Name" field. Type your choice of password in the "Passphrase" field. Choose the Ethernet connection you wish to share in the "Internet" drop down menu. Note that you can also share an incoming wireless connection.
Press the "Hotspot On" button to start sharing.
23
http://www.connectify.me/

Using Bluetooth to transfer files
PART-VIII
24
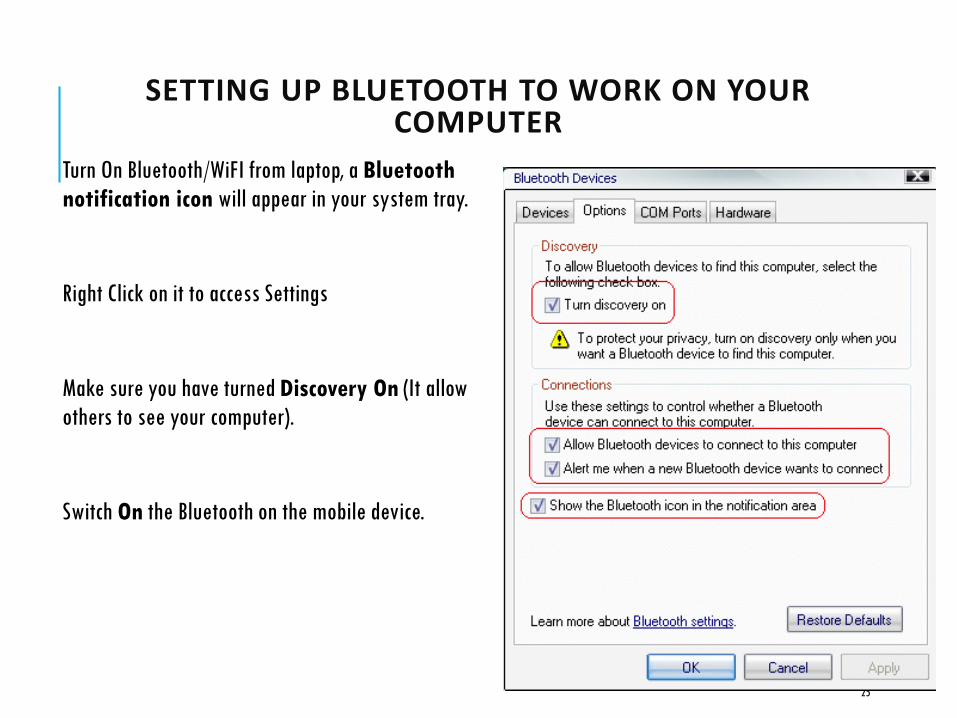
SETTING UP BLUETOOTH TO WORK ON YOUR COMPUTER
Turn On Bluetooth/WiFI from laptop, a Bluetooth
notification icon will appear in your system tray.
Right Click on it to access Settings
Make sure you have turned Discovery On (It allow
others to see your computer).
Switch On the Bluetooth on the mobile device.
25
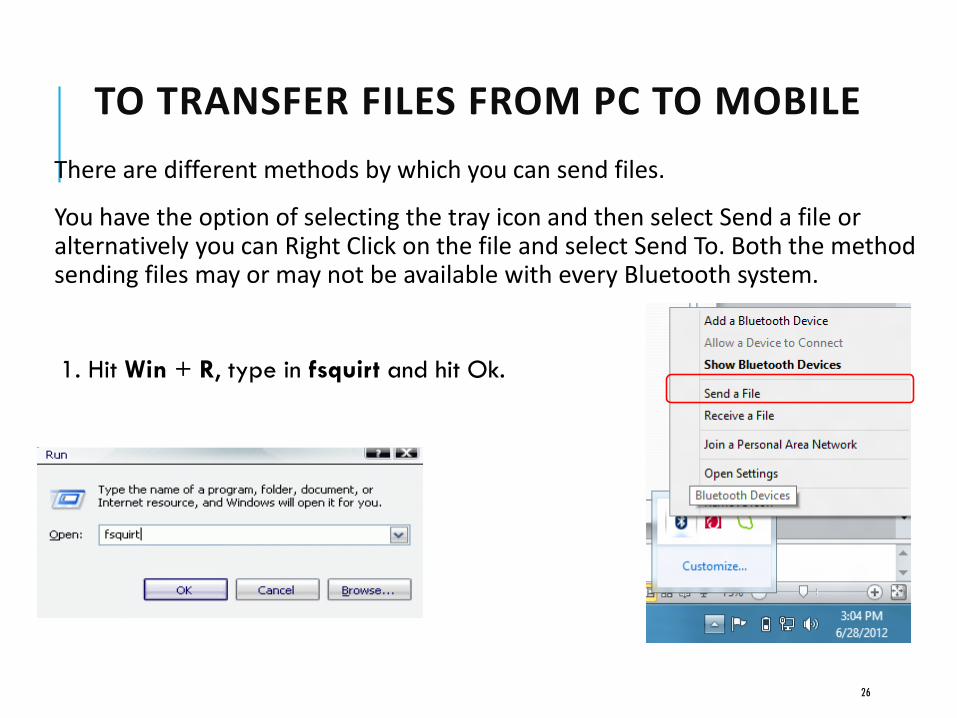
TO TRANSFER FILES FROM PC TO MOBILE
There are different methods by which you can send files.
You have the option of selecting the tray icon and then select Send a file or alternatively you can Right Click on the file and select Send To. Both the method sending files may or may not be available with every Bluetooth system.
1. Hit Win + R, type in fsquirt and hit Ok.
26
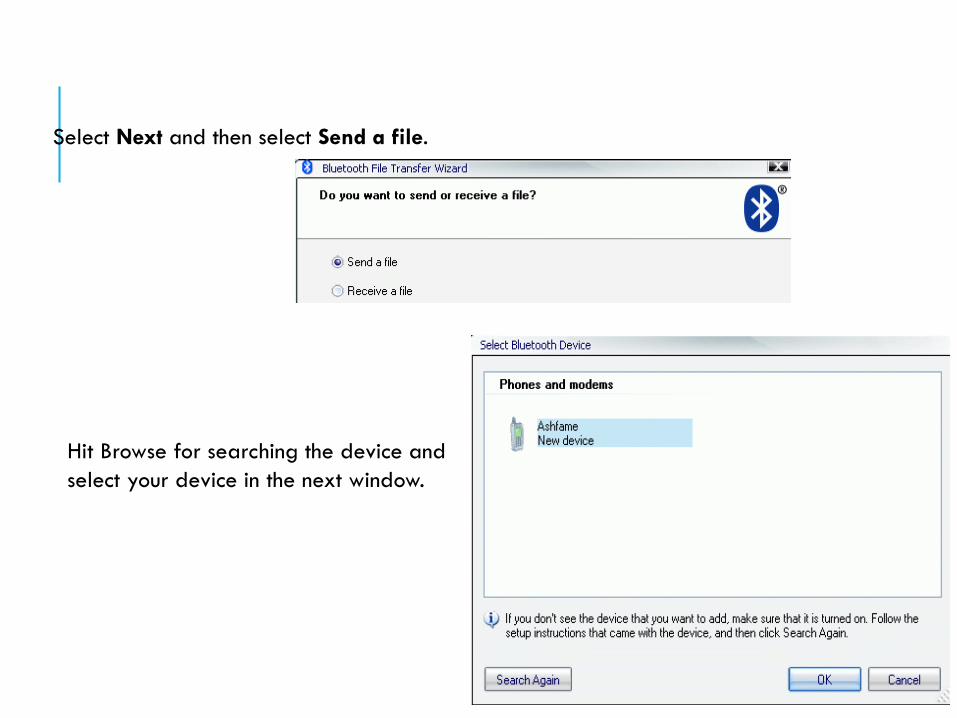
Select Next and then select Send a file.
27
Hit Browse for searching the device and
select your device in the next window.
28

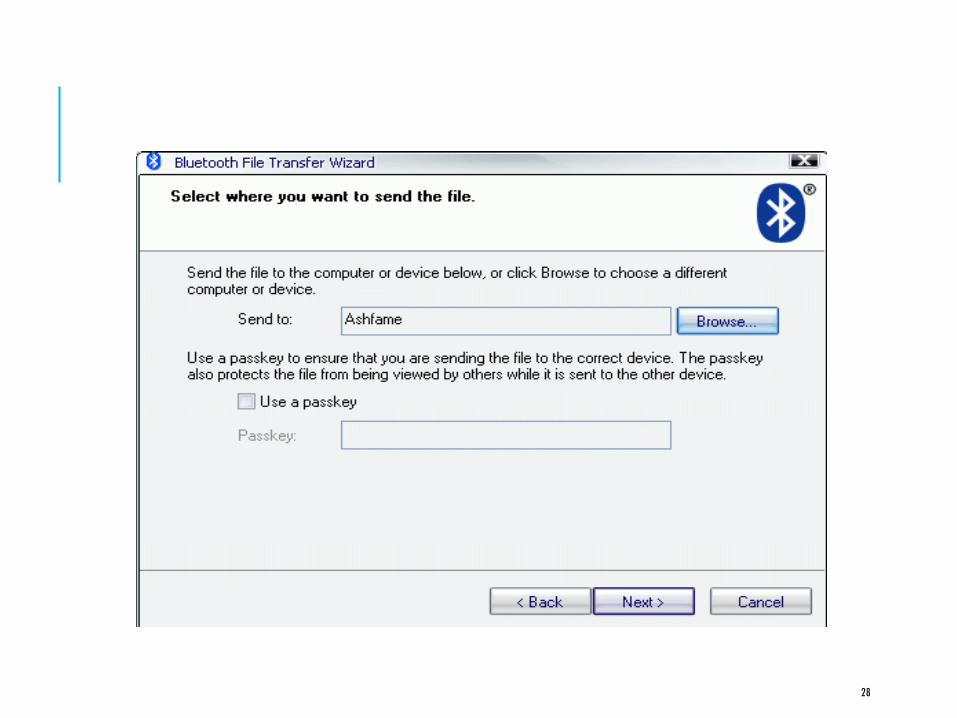
SELECT NEXT AND THEN SELECT THE FILE TO SEND VIA BLUETOOTH BY CLICKING ON BROWSE.
29
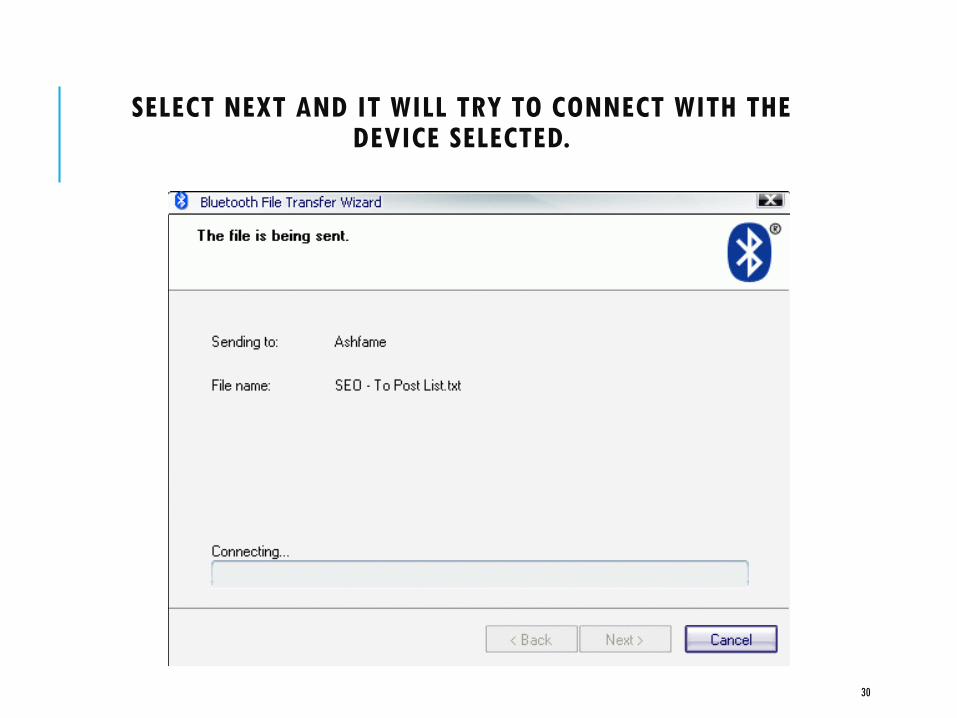
SELECT NEXT AND IT WILL TRY TO CONNECT WITH THE DEVICE SELECTED.
30
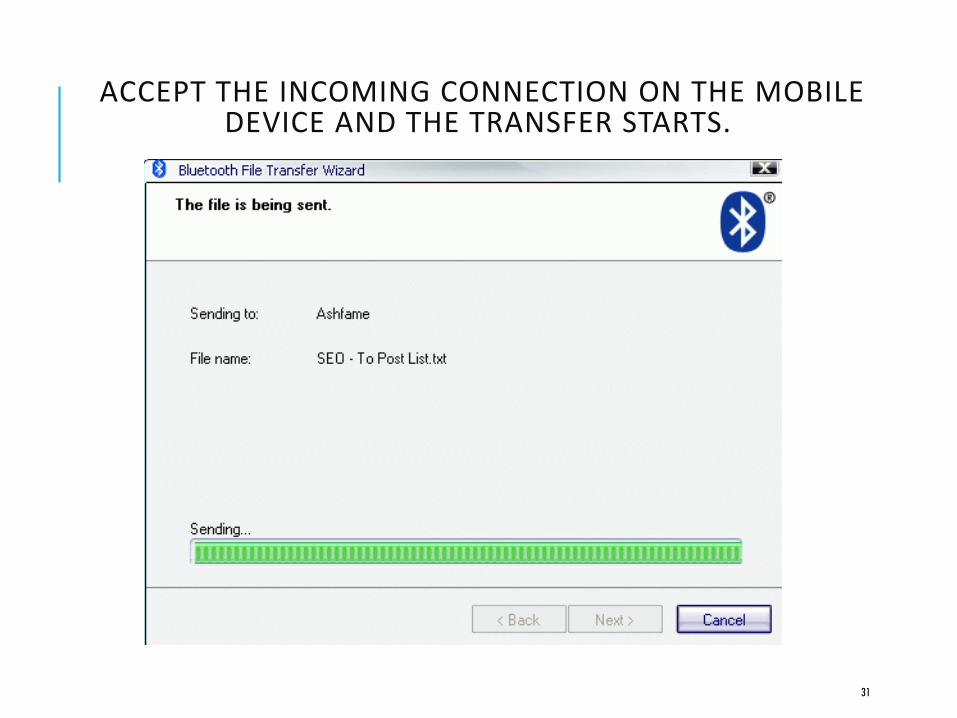
ACCEPT THE INCOMING CONNECTION ON THE MOBILE DEVICE AND THE TRANSFER STARTS.
31
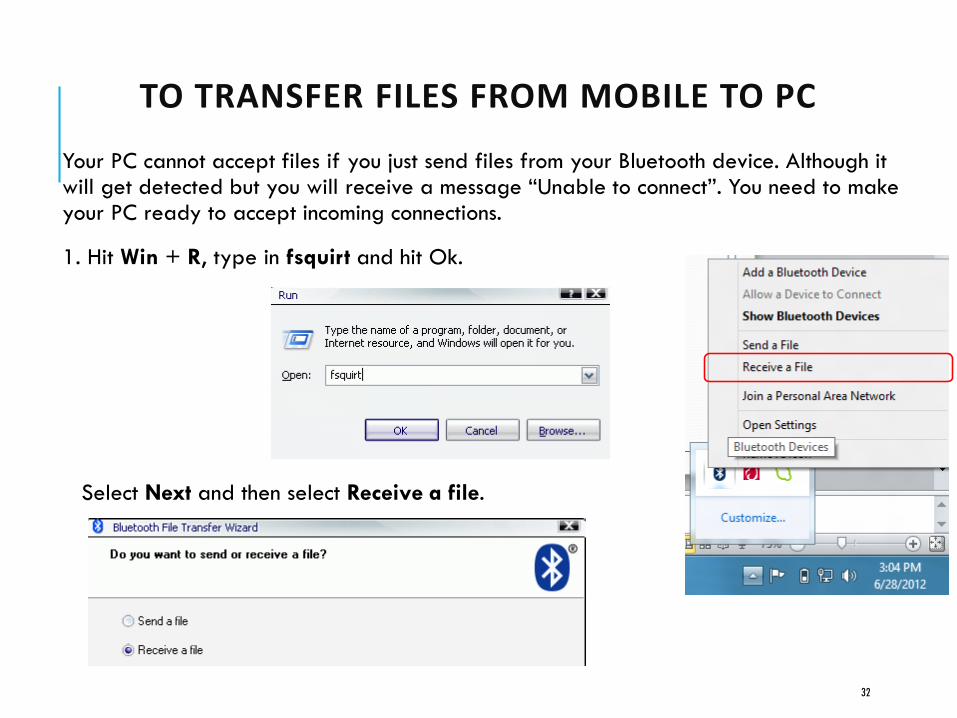
TO TRANSFER FILES FROM MOBILE TO PC
Your PC cannot accept files if you just send files from your Bluetooth device. Although it will get detected but you will receive a message “Unable to connect”. You need to make your PC ready to accept incoming connections.
1. Hit Win + R, type in fsquirt and hit Ok.
32
Select Next and then select Receive a file.
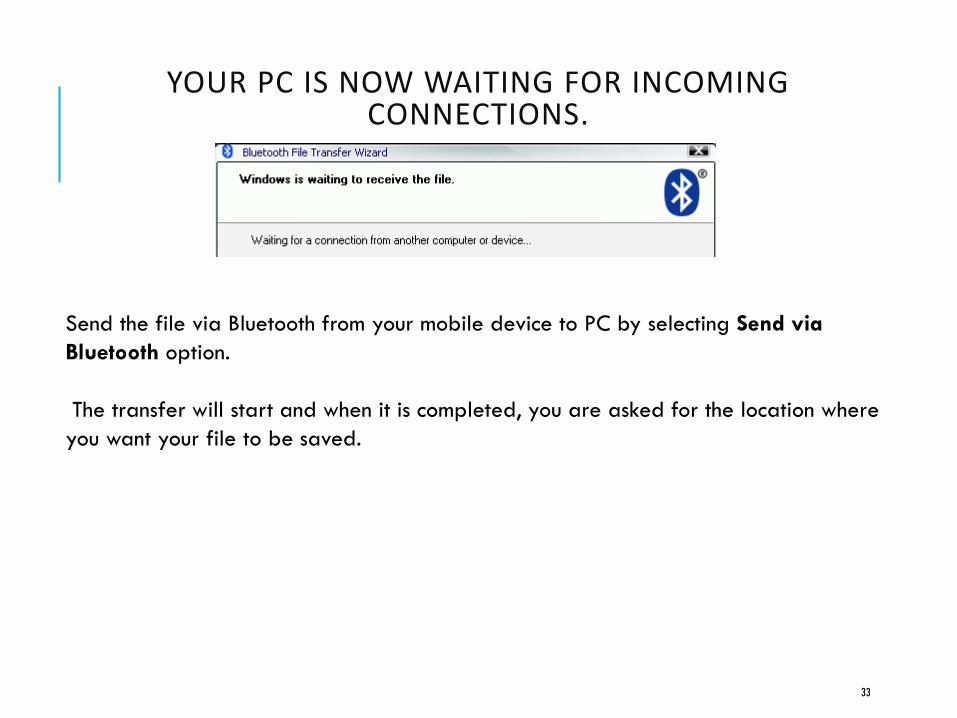
YOUR PC IS NOW WAITING FOR INCOMING CONNECTIONS.
33
Send the file via Bluetooth from your mobile device to PC by selecting Send via
Bluetooth option.
The transfer will start and when it is completed, you are asked for the location where
you want your file to be saved.

34
Receiving file…
35
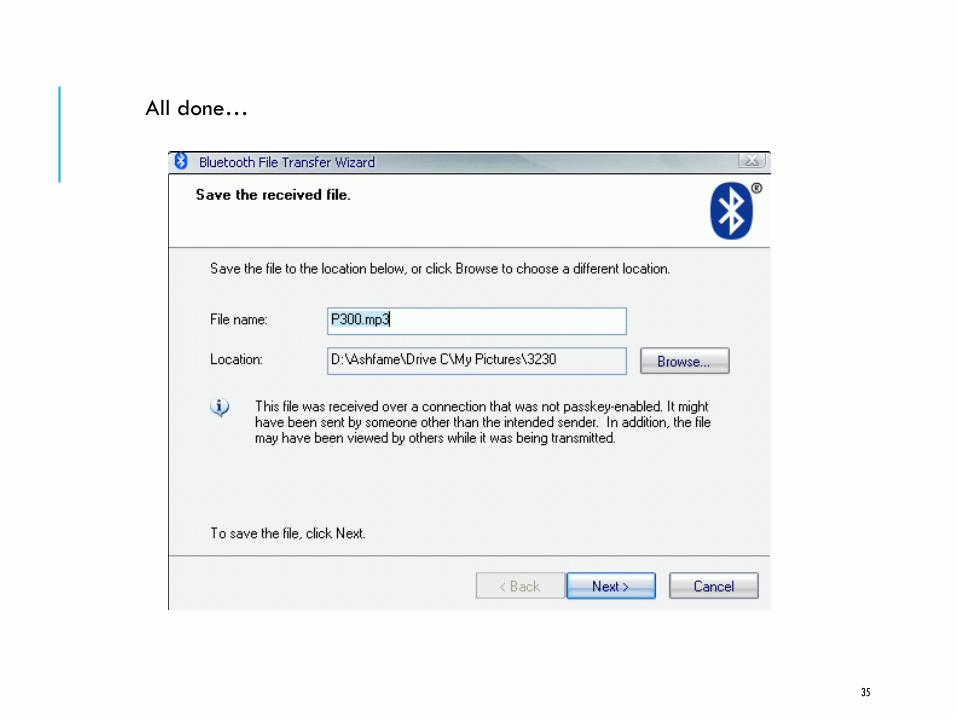
All done…

THANKYOU
Q & A
For My Slides and Handouts
http://zeeshanacademy.blogspot.com/
https://www.facebook.com/drzeeshanacademy