moodle 2 for students - wofford...
TRANSCRIPT

Moodle for Students 1
Revised: August 22, 2013
Moodle 2 for Students
Preferable Browsers:
PC: Chrome or Firefox. (Internet Explorer does not work well with Moodle.)
Mac: Safari or Firefox
Accessing Moodle
You will have access to Moodle through myWofford.
Click on the Moodle 2 link in the Systems Links
channel under the myWofford tab.
When you enter Moodle you will see a list of your Moodle-enabled courses. Not every one of
your courses may be on the list. If a professor has not set up a course in Moodle, the course will
not be displayed.
Click on the name of the course for which you want to see the Moodle Homepage.

Moodle for Students 2
Revised: August 22, 2013
The Course Homepage
What you see on the course Homepage will depend on what your professor has decided to put
there. The Homepage below is an example.
The Homepage has three columns:
Left: Menus
Center: Course Information
Right: Miscellaneous
Let’s take a look at a few items on this page. We will start with the course information in the
center column.
News Forum
The News Forum is a place in which your professor can post
general news and announcements. If you click on the News
Forum link you will see a list of announcements that have been
posted recently.
Moodle for Students 3
Revised: August 22, 2013
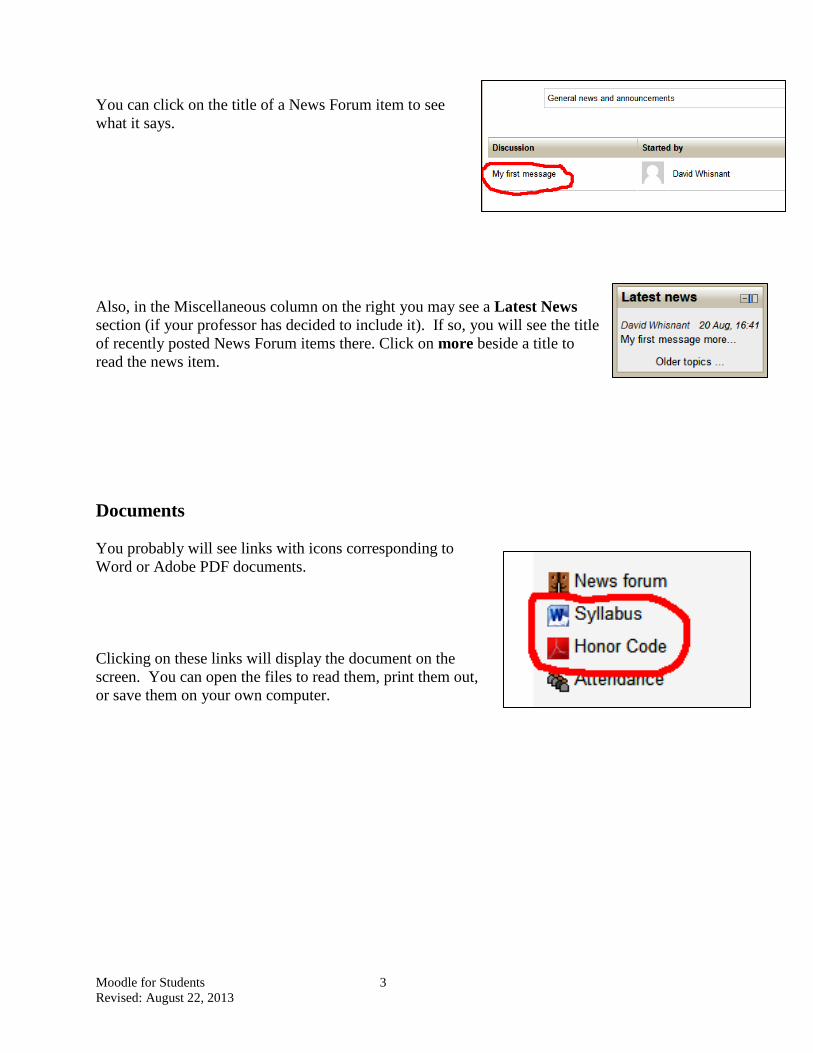
You can click on the title of a News Forum item to see
what it says.
Also, in the Miscellaneous column on the right you may see a Latest News
section (if your professor has decided to include it). If so, you will see the title
of recently posted News Forum items there. Click on more beside a title to
read the news item.
Documents
You probably will see links with icons corresponding to
Word or Adobe PDF documents.
Clicking on these links will display the document on the
screen. You can open the files to read them, print them out,
or save them on your own computer.

Moodle for Students 4
Revised: August 22, 2013
Attendance
If your professor is recording class attendance using Moodle, clicking on the
Attendance link will show your attendance record for the term.
You can control how many of the
class days are displayed (all, this
month, this week, etc.).
Assignments
A “hand holding a piece of paper” icon is the symbol for an assignment.
Clicking on the link for the assignment will display a web page describing the assignment.

Moodle for Students 5
Revised: August 22, 2013
Later when you are ready to turn the document in, return to Moodle and click on the link to the
assignment again.
On the assignment page, click on Add
Submission to find the file on your
computer.
You can drag
and drop the
file into the
“File
Submissions”
section of the
Assignment
page.
Internet Explorer users only -------------------------------------------------------------------------------
NOTE: Drag and drop will not work with the
current version of Internet Explorer. If you are
using IE, click on the Add . . . icon
In the “File Picker,” click on Upload a file
and follow the instructions to upload your
file.

Moodle for Students 6
Revised: August 22, 2013
In any case, once the file has been uploaded you
should see its icon in the File Submissions area.
Click on Save Changes.
If you are allowed by your professor to
submit a revision before the assignment’s
due date, you can click on the Edit my
Submission.
You will see the File Submissions window again. You can delete the file’s icon and then drag-
and-drop a new version of the file into Moodle.
Later, after the assignment has been graded, you will find the grade on the assignment page. The
professor also may include written feedback and a copy of the graded document with comments.
Moodle for Students 7
Revised: August 22, 2013
Participating in a Discussion
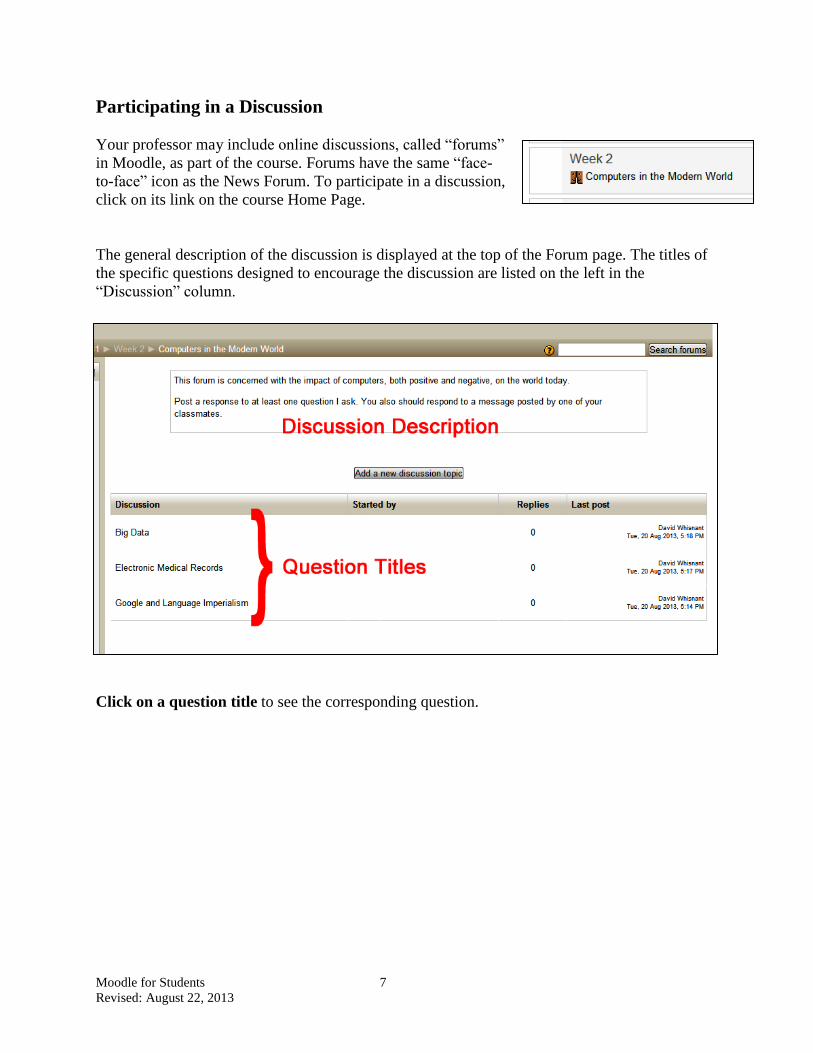
Your professor may include online discussions, called “forums”
in Moodle, as part of the course. Forums have the same “face-
to-face” icon as the News Forum. To participate in a discussion,
click on its link on the course Home Page.
The general description of the discussion is displayed at the top of the Forum page. The titles of
the specific questions designed to encourage the discussion are listed on the left in the
“Discussion” column.
Click on a question title to see the corresponding question.

Moodle for Students 8
Revised: August 22, 2013
After you have read a
question, click on
Reply if you would like
to post a reply.
After clicking on Reply, enter your response in the text box.
Note that you can attach a file, such as a Word document, by drag-and-drop..
I recommend setting the Subscription to I don’t want email copies of posts to this forum. You
will need to set this only once for each forum.
Click on Post to forum when you are finished with your response.
Moodle for Students 9
Revised: August 22, 2013
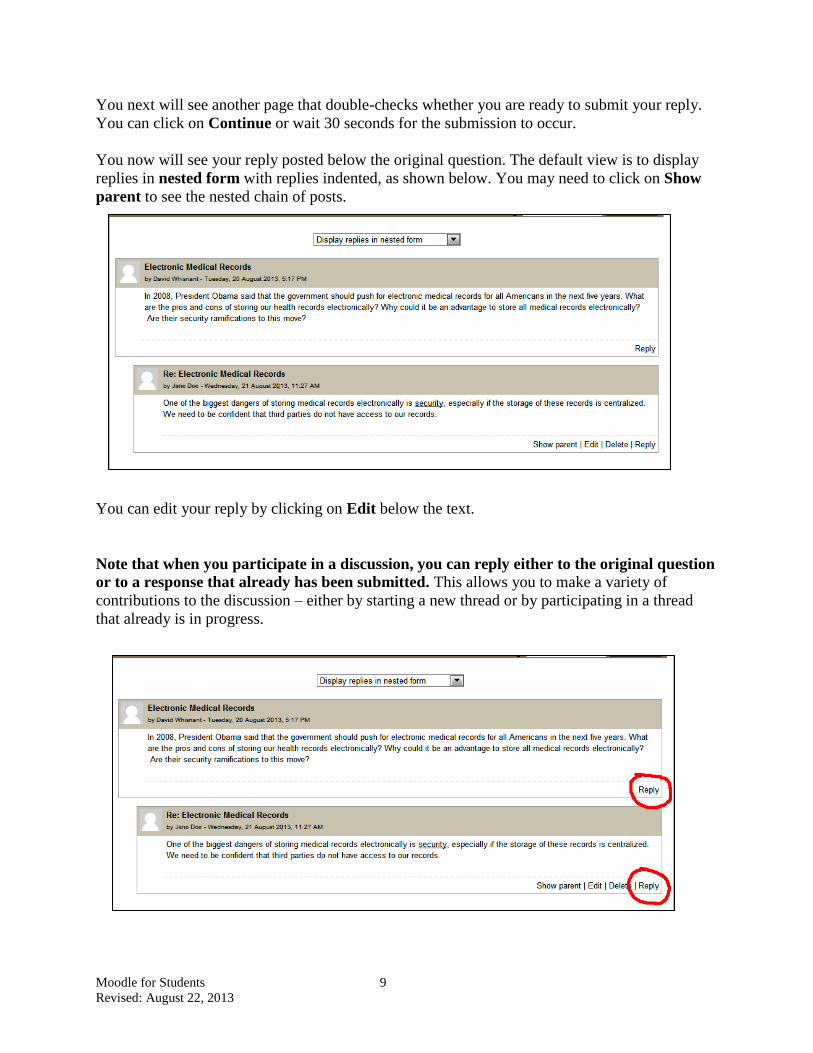
You next will see another page that double-checks whether you are ready to submit your reply.
You can click on Continue or wait 30 seconds for the submission to occur.
You now will see your reply posted below the original question. The default view is to display
replies in nested form with replies indented, as shown below. You may need to click on Show
parent to see the nested chain of posts.
You can edit your reply by clicking on Edit below the text.
Note that when you participate in a discussion, you can reply either to the original question
or to a response that already has been submitted. This allows you to make a variety of
contributions to the discussion – either by starting a new thread or by participating in a thread
that already is in progress.
Moodle for Students 10
Revised: August 22, 2013
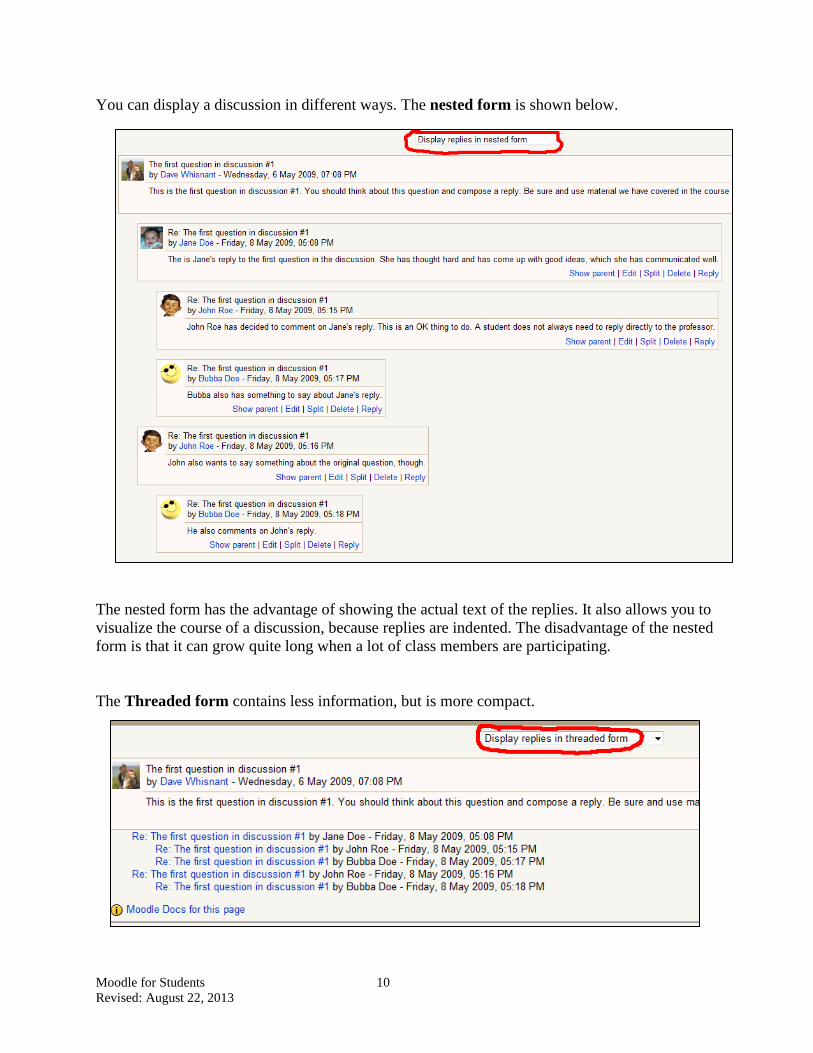
You can display a discussion in different ways. The nested form is shown below.
The nested form has the advantage of showing the actual text of the replies. It also allows you to
visualize the course of a discussion, because replies are indented. The disadvantage of the nested
form is that it can grow quite long when a lot of class members are participating.
The Threaded form contains less information, but is more compact.
Moodle for Students 11
Revised: August 22, 2013
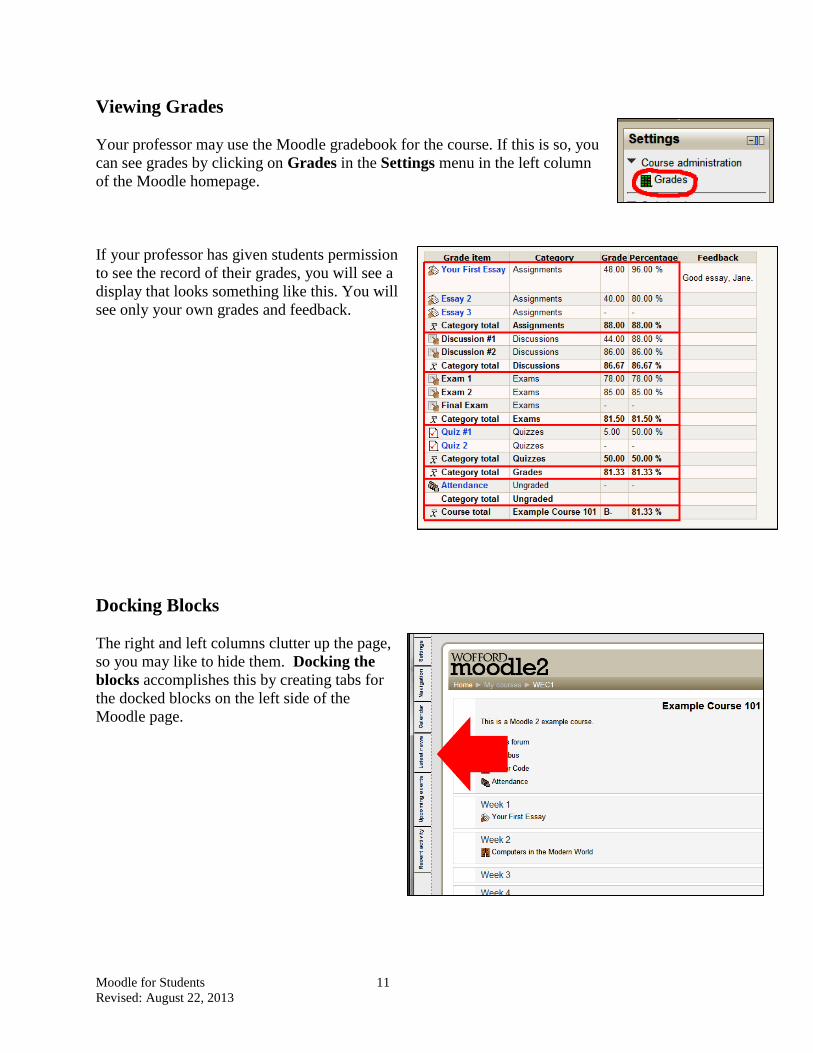
Viewing Grades
Your professor may use the Moodle gradebook for the course. If this is so, you
can see grades by clicking on Grades in the Settings menu in the left column
of the Moodle homepage.
If your professor has given students permission
to see the record of their grades, you will see a
display that looks something like this. You will
see only your own grades and feedback.
Docking Blocks
The right and left columns clutter up the page,
so you may like to hide them. Docking the
blocks accomplishes this by creating tabs for
the docked blocks on the left side of the
Moodle page.

Moodle for Students 12
Revised: August 22, 2013
Placing the cursor over a tab displays the corresponding block.
To dock a block, click on the small rectangular icon
in the upper right corner of the block.