motor & power shield voor arduino®€¦ · para controlar relés, solenoides, motores dc y...
TRANSCRIPT
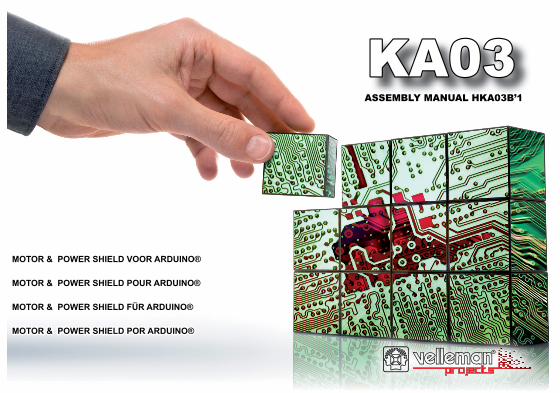
ASSEMBLY MANUAL HKA03B’1
MOTOR & POWER SHIELD VOOR ARDUINO®MOTOR & POWER SHIELD VOOR ARDUINO®
MOTOR & POWER SHIELD POUR ARDUINO®MOTOR & POWER SHIELD POUR ARDUINO®
MOTOR & POWER SHIELD FÜR ARDUINO®MOTOR & POWER SHIELD FÜR ARDUINO®
MOTOR & POWER SHIELD POR ARDUINO®MOTOR & POWER SHIELD POR ARDUINO®
ASSEMBLY MANUAL HKA03 1ASSEMBLY MANUAL HKA03B’1
KA03KA03

ForumForumParticipate our Velleman Projects Forum
Subscribing our newsletter?, visit www.vellemanprojects.eu

- 3 -
MOTOR & POWER SHIELD VOOR ARDUINO®
For software, visit www.vellemanprojects.eu
De power shield kan relais, solenoïdes, DC- en stappenmotors aansturen.
Kenmerken• Voor: Arduino Due™, Arduino Uno™, Arduino Mega™• Gebaseerd op L298P-IC (dubbele H-brug motoraansturing ) • Uitgangen: tot 2 DC-motoren of 1 bipolaire stappenmotor• Voeding: externe voeding of voeding via Arduino®
Specifi caties• Voeding: 7...46 VDC• Max. stroom: 2A• Afmetingen: 68 x 53mm
- 4 -
MOTOR & POWER SHIELD VOOR ARDUINO®
ALVORENS TE BEGINNEN: Zie ook de algemene handleiding voor soldeertips en andere algemene informatie.
Benodigdheden om de kit te bouwen: » Kleine soldeerbout van max 40W. » Dun 1mm soldeersel, zonder soldeervet. » Een kleine kniptang.
1. Monteer de onderdelen correct op de print zoals in de illustraties.2. Monteer de onderdelen in de correcte volgorde, zoals in de geïllustreerde stuklijst.3. Gebruik de vakjes om uw vorderingen aan te duiden.4. Hou rekening met eventuele opmerkingen in de tekst.
I. BOUW
Tip: U kunt de foto’s op de verpakking gebruiken als leidraad tijdens de montage. Door eventuele verbeteringen is het mogelijk dat de foto’s niet 100% nauwkeurig zijn.1. Monteer de weerstanden. 2. Monteer de keramische condensators die zich op de tape bevinden.3. Monteer de schottkydiode. Let op de polariteit!4. Monteer de transistors.5. Monteer de pinheaders. Knip deze op maat zoals aangegeven op de fi guur. 6. Monteer de vrouwelijke wire wrap headers. Maak gebruik van de tekeningen in de geïllustreerde handleiding voor een juiste montage!7. Monteer de LEDs. Let op de polariteit!8. Monteer de schroefconnectoren. Schuif deze in elkaar zoals aangegeven op de fi guur, plaats het geheel op de print en soldeer dan pas de montage-
pennen. 9. Monteer de elektrolytische condensators. Let op de polariteit!10. Monteer de SMD dubbele volledige brugversterker, soldeer deze zoals aangegeven op de fi guur. Let op de positie van de nok!
II. AANSLUITSCHEMAZie de geïllustreede handleiding voor het aansluitschema. Kijk ook eens op de KA03 webpaging voor een voorbeeldcode.
VOLG NIET BLINDELINGS DE VOLGORDE VAN DE TAPE. CONTROLEER ALTIJD DE WAARDE VIA DE STUKLIJST!

- 5 -
MOTOR & POWER SHIELD POUR ARDUINO®
For software, visit www.vellemanprojects.eu
Le bouclier power est capable de piloter des relais, des solénoides, des moteurs DC et pas à pas.
Caractéristiques• Pour: Arduino Due™, Arduino Uno™, Arduino Mega™• Basé sur CI LP298P (Double pont en H) • Sorties : jusqu’à 2 moteurs 2CC ou 1 moteur à pas bipolaire• Alimentation: alimentation externe ou alimentation depuis Arduino®
Spécifi cations• Alimentation : 7...46 VCC• Max. courant : 2A• Dimensions : 68 x 53mm
- 6 -
AVANT DE COMMENCER: Consultez également le manuel général pour des astuces concernant le soudage et pour de plus amples informations.
Matériel nécessaire pour le montage du kit: » Petit fer à souder de max. 40W. » Fine soudure de 1mm, sans pâte à souder. » Petite pince coupante.
1. Montez les pièces correctement orientées sur le circuit imprimé, voir l’illustration.2. Montez les pièces dans l’ordre correct sur le circuit imprimé, comme dans la liste des composants illustrée.3. Utilisez les cases pour indiquer votre état d’avancement.4. Tenez compte des remarques éventuelles dans le texte.
I. MONTAGE
Truc: Les photos sur l’emballage peuvent vous servir de guide lors de l’assemblage. Toutefois, il se peut que les photos ne correspondent pas à 100% à la réalité en raison des adaptations subies.
1. Montez les résistances.2. Montez les condensateurs céramiques qui se trouvent sur le ruban adhésif.3. Montez la diode Schottky. Respectez la polarité!4. Monter les transistors.5. Montez la barrete male. Coupez-le sur mesure comme indiqué sur l‘illustration.6. Montez les connecteurs femelles à wrapper. Voir le mode d’emploi illustré pour un montage correct !7. Montez les LEDs. Attention à la polarité!8. Montez les connecteurs à visser. Glissez l’une dans l’autre comme indiqué sur l’illustration, placez ensuite cet ensemble sur le circuit imprimé et ne
soudez qu’ensuite les contacts pour le montage.9. Montez les condensateurs électrolytiques. Attention à la polarité! 10. Montez l’amplifi cateur en pont double (type CMS). Soudez-le comme illustré. Attention à la position de l’encoche !
II. SCHÉMA DE CONNEXIONConsultez le mode d’emploi illustré pour le schéma de connexion. Naviguez vers la page web du KA03 pour un code d’exemple.
NE PAS SUIVRE NÉCESSAIREMENT L’ORDRE DES COMPOSANTS SUR LE RUBAN. CONTRÔLEZ TOUJOURS LA VALEUR À L’AIDE DE LA LISTE DES PIÈCES !
MOTOR & POWER SHIELD POUR ARDUINO®

- 7 -
MOTOR & POWER SHIELD FÜR ARDUINO®
For software, visit www.vellemanprojects.eu
Zum ansteuern von Relais, Solenoiden, DC- und Schrittmotoren.
Eigenschaften• Für: Arduino Due™, Arduino Uno™, Arduino Mega™• beruht auf dem Dual H-Brücken-Treiber • Ausgänge: max. 2 DC-Motoren oder 1 bipolarer Schrittmotor• Stromversorgung: externe Stromversorgung oder Stromversorgung über Arduino®
Technische Daten• Stromversorgung: 7...46VDC• Max. Strom: 2A• Abmessungen: 68 x 53mm

- 8 -
MOTOR & POWER SHIELD FÜR ARDUINO®
FOLGEN SIE NIE BLINDLINGS DER REIHENFOLGE DER KOMPONENTEN IM BAND. ÜBERPRÜFEN SIE IMMER DEN WERT ÜBER DIE STÜCKLISTE!
BEVOR SIE ANFANGEN: Siehe auch die allgemeine Anleitung für Löthinweise und andere allgemeine Informationen.
Zum Bau notwendiges Material: » Kleiner Lötkolben von höchstens 40W. » Dünnes Lötmetall von 1mm, ohne Lötfett. » Eine kleine Kneifzange.
1. Montieren Sie die Bauteile in der richtigen Richtung auf der Leiterplatte, siehe Abbildung.2. Montieren Sie die Bauteile in der richtigen Reihenfolge, wie in der illustrierten Stückliste wiedergegeben.3. Notieren Sie mittels der -Häuschen Ihre Fortschritte.4. Beachten Sie eventuelle Bemerkungen im Text.
I. MONTAGE
Hinweis: Die Fotos auf der Verpackung können als Hilfe bei der Montage verwendet werden. Wegen bestimmter Anpassungen ist es allerdings möglich, dass die Fotos nicht zu 100% mit der Wirklichkeit übereinstimmen.
1. Montieren Sie die Widerstände.2. Montieren Sie die keramischen Kondensatoren, die am Band befestigt sind3. Montieren Sie de Schottky-Diode. Beachten Sie die Polarität!4. Montieren Sie die Transistoren.5. Montieren Sie das Stiftkopfstück. Schneiden Sie es zurecht, wie in der Abbildung gezeigt wird. 6. Montieren Sie de Wire Wrap Buchsenleisten. Siehe Abbildungen in der illustrierten Stückliste für eine korrekte Montage!7. Montieren Sie die LED. Achten Sie auf die Polarität!8. Montieren Sie die Schraubconnectoren. Schieben Sie die connectoren ineinander, wie auf der Abbildung wiedergegeben. Befestigen Sie das
Ganze auf der Leiterplatte und löten Sie erst dann die Montagestifte.9. Montieren Sie die Elektrolytkondensatoren. Achten Sie auf die Polarität!10. Montieren Sie die 2 SMD-Vollbrückenverstärker und löten Sie diese (siehe Abb.). Achten Sie auf die Position der Einkerbung!
II. SCHALTPLANSiehe illustrierte Stückliste für das Anschlussdiagramm. Besuchen Sie auch die KA03-Webseite für einen Beispielcode.
- 9 -
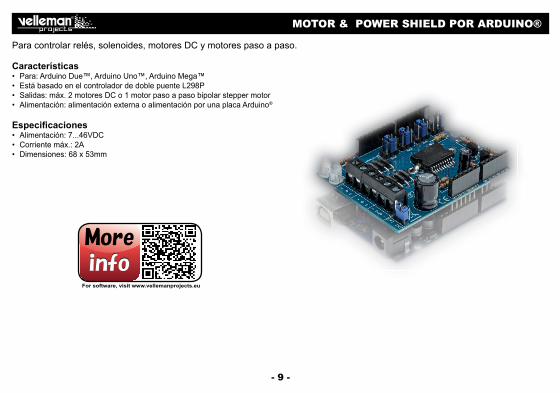
MOTOR & POWER SHIELD POR ARDUINO®
For software, visit www.vellemanprojects.eu
Para controlar relés, solenoides, motores DC y motores paso a paso.
Características• Para: Arduino Due™, Arduino Uno™, Arduino Mega™• Está basado en el controlador de doble puente L298P • Salidas: máx. 2 motores DC o 1 motor paso a paso bipolar stepper motor• Alimentación: alimentación externa o alimentación por una placa Arduino®
Especifi caciones• Alimentación: 7...46VDC• Corriente máx.: 2A• Dimensiones: 68 x 53mm
- 10 -
RGB SHIELD POR ARDUINO®
NO SIGA A CIEGAS EL ORDEN DE LOS COMPONENTES EN LA CINTA. ¡CONTROLE SIEMPRE EL VALOR CON LA LISTA DE COMPONENTES!
ANTES DE EMPEZAR: Lea también el manual del usuario para consejos de soldadura y otras informaciones generales.
Material necesario para el montaje del kit : » Pequeño soldador de 40W máx. » Soldadura de 1mm, sin pasta de soldadura. » Pequeños alicates de corte.
1. Coloque los componentes correctamente orientados en el circuito integrado (véase la fi gura).2. Coloque los componentes por orden correcto (véase la lista de componentes).3. Use los cajetines para indicar su progreso. 4. Tenga en cuenta las eventuales observaciones.
I. MONTAJE
Consejos: Puede usar las fotos del embalaje como directrices durante el montaje. Sin embargo, es posible que las fotos no correspondan completamente a la realidad debido a cambios posteriores.
1. Monte las resistencias.2. Monte los condensadores cerámicos que se encuentran en la banda.3. Monte el diodo Schottky. ¡Controle la polaridad!4. Monte los transistores. 5. Monte el contacto. Córtelo a la medida como se indica en la fi gura.6. Monte los conectores wire-wrap hembra. ¡Consulte las fi guras de la lista de componentes ilustrada para un montaje correcto!7. Monte el LED. ¡Controle la polaridad!8. Monte las regletas de conexión. Introdúzcalas una en otra (véase la fi gura). Monte el conjunto en el circuito integrado y suelde los contactos para
el montaje.9. Monte los condensadores electrolíticos. ¡Controle la polaridad! 10. Monte los dos amplifi cadores de puente completo (SMD) y suéldelo (véase fi g.). ¡Atención a la posición de la muesca!
II. ESQUEMA DE CONEXIONConsulte la lista de componentes ilustrada para el esquema de conexión. Visite también la página web de la KA03 para un código de ejemplo.
Velleman NVLegen Heirweg 33
9890 Gavere (België)
KIT EDUCATIVO CON OSCILOSCOPIO PARA PC

Modifi cations and typographical errors reserved - © Velleman nv. KA03B’1 - Velleman NV, Legen Heirweg 33 - 9890 Gavere.