mtcwe
TRANSCRIPT

1/1/2013
1
www.MikroTiktrain.com 1
MikroTik RouterOS TrainingAdvanced Wireless
MTCWE
Mashad , IRAN13-15 Dey 91
www.MikroTiktrain.com 2
Schedule
• 09:00 – 10:30 Morning Session I• 10:30 – 11:00 Morning Break
• 11:00 – 12:30 Morning Session II• 12:30 – 13:30 Lunch Break
• 13:30 – 15:00 Afternoon Session I• 15:00 – 15:30 Afternoon Break
• 15:30 – 17:00 (18.00) Afternoon Session II
www.MikroTiktrain.com 3
Instructors
Working with MikroTik OS for More than 8 years
Implementation and experience in DSL & Wimax Network
Expert in VOIP
Work as Network Engineer in Laser (Nation Wide Company) for 4 years
TNS Network Administrator
Technical Manager and Consultant of some other company
www.MikroTiktrain.com 4
Housekeeping
• Course materials
• Routers, cables
• Break times and lunch
• Restrooms and smoking area locations

1/1/2013
2
www.MikroTiktrain.com 5
Course Objective
• Provide thorough knowledge and hands-on training for MikroTik RouterOS advanced wireless capabilities for small and medium size networks
• Introduce the 802.11n wireless networking• Upon completion of the course you will be
able to plan, implement, adjust and debug wireless MikroTik RouterOS network configurations
www.MikroTiktrain.com 6
Topics Overview
• Wireless Standard overview
• Wireless tools
• Troubleshooting wireless clients
• Wireless Advanced settings– DFS and country regulation– Data Rates and TX-power– Virtual AP
www.MikroTiktrain.com 7
Topics Overview (cont.)
• Wireless Security measures– Access List and Connect List– Management Frame Protection– RADIUS MAC Authentication– Encryption
• Wireless WDS and MESH• Wireless Transparent Bridge
– WDS– VPLS/MPLS transparent bridging
• Wireless Nstreme Protocol• 802.11n
www.MikroTiktrain.com 8
Introduce Yourself• Please, introduce yourself to the class
• Your name• Your Company• Your previous knowledge about RouterOS• Your previous knowledge about networking• What do you expect from this course?
• Please, remember your class XY number.(X is number of the row, Y is your seat number in the row)
My number is:_________

1/1/2013
3
www.MikroTiktrain.com 9
Class Setup Lab
• Create an 192.168.XY.0/24 Ethernet network between the laptop (.1) and the router (.254)
• Connect routers to the AP SSID “AP_N”• Assign IP address 10.1.1.XY/24 to the wlan1• Main GW and DNS address is 10.1.1.254• Gain access to the internet from your laptops via
local router • Create new user for your router and change
“admin” access rights to “read”
www.MikroTiktrain.com 10
Class Setup
www.MikroTiktrain.com 11
Class setup Lab (cont.)
• Set system identity of the board and wireless radio name to “XY_<your_name>”. Example: “00_Janis”
• Upgrade your router to the latest MikrotikRouterOS version 5.x
• Upgrade your Winbox loader version• Set up NTP client – use 10.1.1.254 as server• Create a configuration backup and copy it to the
laptop (it will be default configuration)
www.MikroTiktrain.com 12
Simple/Advanced View

1/1/2013
4
www.MikroTiktrain.com 13
Wireless Standards
• 802.11b – 11Mbps, 2.4Ghz
• 802.11g – 54Mbps, 2.4Ghz
• 802.11a – 54Mbps, 5Ghz
• 802.11n – 300Mbps, 2.4/5Ghz
www.MikroTiktrain.com 14
Wireless Bands
• 2Ghz
– B, B/G, Only-G, G-Turbo, Only-N, B/G/N,
5mhz, 10mhz
• 5Ghz
– A, A-Turbo, Only-N, A/N, 5mhz, 10mhz
www.MikroTiktrain.com 15
Band Variations
Double channel (40MHz) – 108Mbit max air rate
2.4ghz-g-turbo
5ghz-turbo
Half channel (10MHz) – 27Mbit max air rate
2ghz-10mhz
5ghz-10mhz
Quarter channel (5MHz) – 13.5Mbit max air rate
2ghz-5mhz
5ghz-5mhzwww.MikroTiktrain.com 16
Supported Bands by chipsets
• AR5213/AR5414– A/B/G, G-Turbo, A-Turbo, 5Mhz, 10Mhz
• AR5416/AR9160/AR9220– A/B/G/N, 5Mhz*, 10Mhz*
*not fully supported

1/1/2013
5
www.MikroTiktrain.com 17
Supported Frequencies
• A/B/G Atheros chipset cards usually support such frequencies– 2Ghz band: 2192-2539Mhz– 5Ghz band: 4920-6100Mhz
• N Atheros chipset cards usually support such frequencies– 2Ghz band: 2192-2539Mhz– 5Ghz band: 4800-6075Mhz
www.MikroTiktrain.com 18
Scan List
• Default frequencies from the scan-list shown bold in the frequency field (Winbox only)
• Default scan-list value from the country shown as ‘default’
• Frequency range is specified by the dash– 5500-5700
• Exact frequencies specified by comma– 5500,5520,5540
• Mixed option also possible– default,5520,5540,5600-5700
www.MikroTiktrain.com 19
Wireless tools for finding the best band/frequency
www.MikroTiktrain.com 20
Wireless Tools
• Scan
• Frequency Usage
• Spectral Scan/History
• Snooper
• Align
• Sniffer

1/1/2013
6
www.MikroTiktrain.com 21
Scan and Frequency Usage
• Both tools use the Scan-list
• Interface is disabled during the usage of tools
• Scan shows all 802.11 based APs
• Frequency usage shows every 802.11 traffic
www.MikroTiktrain.com 22
Spectral Scan/History
• Uses only Atheros Merlin 802.11n chipset wireless cards
• Range– 2ghz, 5ghz, current-channel, range
• Value– avg, avg-peak, interference, max, min
• Classify-samples– wifi, bluetooth, microwave-oven, etc
www.MikroTiktrain.com 23
Spectral-history
• Plot spectrogram
• Power values are printed in different colors
• Audible option - plays each line as it is printed on the routers speaker– Each line is played from left to right, with
higher frequencies corresponding to higher values in the spectrogram
www.MikroTiktrain.com 24
Spectral-history

1/1/2013
7
www.MikroTiktrain.com 25
Spectral-scan
• Continuously monitor spectral data• Each line displays one spectrogram bucket:
– Frequency
– Numeric value of power average– Character graphic bar
• average power value - ':'
• average peak hold - '.'
• maximum lone floating - ':'
• Show Interference option
www.MikroTiktrain.com 26
Spectral-scan
www.MikroTiktrain.com 27
Wireless Snooper Tool
www.MikroTiktrain.com 28
Alignment Tool

1/1/2013
8
www.MikroTiktrain.com 29
Wireless Sniffer
www.MikroTiktrain.com 30
Wireless Tools Lab
• Enable your AP on one of the 5ghz frequencies
• Check if that frequency is the less occupied by using the RouterOS wireless tools
www.MikroTiktrain.com 31
Use of DFS for automatic frequency selection
www.MikroTiktrain.com 32
DFS
• Dynamic Frequency Selection (DFS)• “no radar detect” - at startup AP scans
channel list from "scan-list" and chooses the frequency which is with the lowest amount of other networks detected
• “radar detect” - adds capability to detect radar at start up for 60 seconds and avoid them by changing frequency
• By most country regulations DFS must be set to “radar detect”
1/1/2013
9
www.MikroTiktrain.com 33
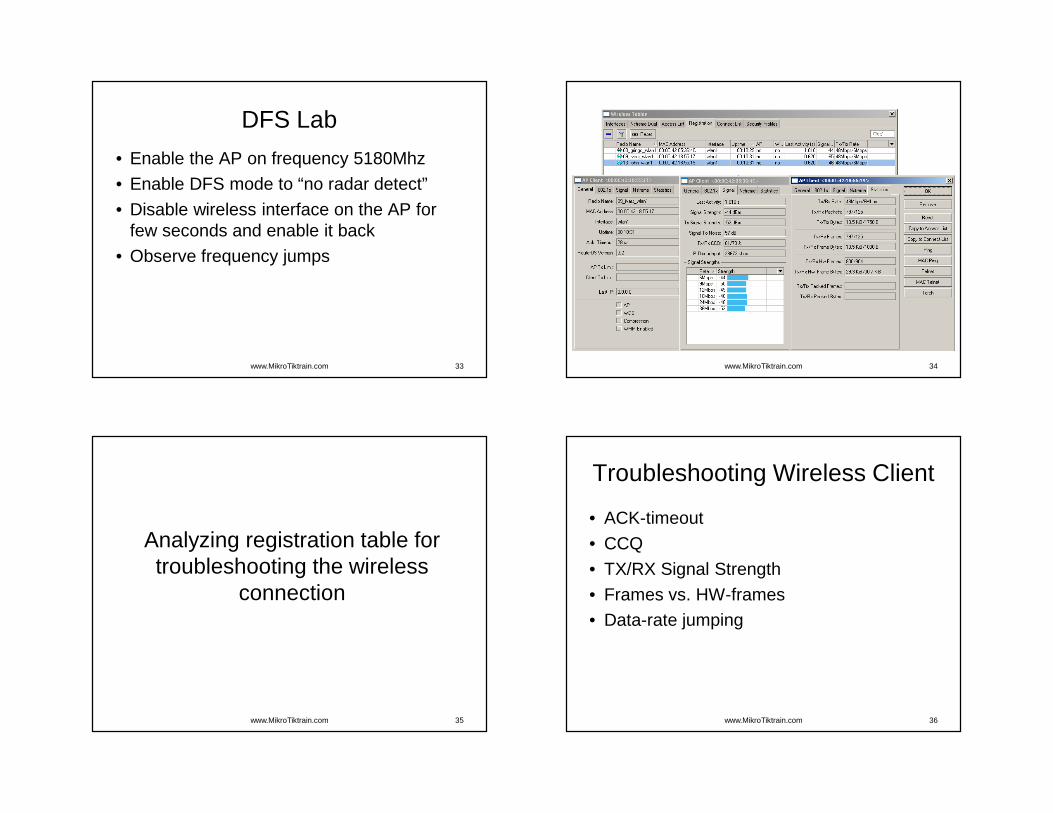
DFS Lab
• Enable the AP on frequency 5180Mhz
• Enable DFS mode to “no radar detect”
• Disable wireless interface on the AP for few seconds and enable it back
• Observe frequency jumps
www.MikroTiktrain.com 34
www.MikroTiktrain.com 35
Analyzing registration table for troubleshooting the wireless
connection
www.MikroTiktrain.com 36
Troubleshooting Wireless Client
• ACK-timeout
• CCQ
• TX/RX Signal Strength
• Frames vs. HW-frames
• Data-rate jumping

1/1/2013
10
www.MikroTiktrain.com 37
Registration table
www.MikroTiktrain.com 38
CCQ – Client Connection Quality
• Value in percent that shows how effective the bandwidth is used regarding the theoretically maximum available bandwidth
• Weighted average of values Tmin/Trealcalculated for every transmitted frame – Tmin is time it would take to transmit given
frame at highest rate with no retries– Treal is time it took to transmit frame in real
life
www.MikroTiktrain.com 39
Frames vs. HW-frames
• Wireless retransmission is when the card sends out a frame and you don't receive back the acknowledgment (ACK), you send out the frame once more till you get back the acknowledgment
• If the hw-frames value is bigger than frames value then it means that the wireless link is making retransmissions
• I case of Nstreme you can’t compare the frames with hw-frames
www.MikroTiktrain.com 40
Using advanced settings for troubleshooting and fine tuning the
wireless connection

1/1/2013
11
www.MikroTiktrain.com 41
Wireless Advanced Settings
• Advanced Wireless Tab settings
• HW-retries
• HW-protection– RTS/CTS– CTS to self
• Adaptive-noise-immunity
• Configuration Reset
• WMM
www.MikroTiktrain.com 42
Wireless Advanced Tab
www.MikroTiktrain.com 43
Advanced Wireless Tab
• Area – string that describes the AP, used in the clients Connect-list for choosing the AP by the area-prefix
• Ack-timeout – acknowledgement code timeout in µs; “dynamic” by default
• Periodic-calibration – to ensure performance of chipset over temperature and environmental changes
• Hide-ssid – whether to hide ssid or not in the beacon frames
www.MikroTiktrain.com 44
HW-retries• Number of frame sending retries until the
transmission is considered failed• Data rate is decreased upon failure• But if there is no lower rate, 3 sequential
failures activate on-fail-retry-timetransmission pause and the counter restarts
• The frame is being retransmitted either until success or until client is disconnected – disconnect-timeout reached

1/1/2013
12
www.MikroTiktrain.com 45
HW-protection
• Frame protection helps to fight "hidden node" problem
• CTS/RTS protection
• “CTS to self” protection
• hw-protection-threshold – frame size threshold at which protection should be used; 0 – used for all frames
www.MikroTiktrain.com 46
RTS/CTS based protection
• RTS/CTS based protection– Device willing to send frame at first sends
RequestToSend frame and waits for ClearToSend frame from intended destination
– By "seeing" RTS or CTS frame 802.11 compliant devices know that somebody is about to transmit and therefore do not initiate transmission themselves
www.MikroTiktrain.com 47
“CTS to self” based protection
• "CTS to self" based protection– Device willing to send frame sends CTS frame
"to itself“– As in RTS/CTS protocol every 802.11
compliant device receiving this frame know not to transmit.
– "CTS to self" based protection has less overhead, but it must be taken into account that this only protects against devices receiving CTS frame
www.MikroTiktrain.com 48
“CTS to self” or RTS/CTS
• If there are 2 "hidden" stations, there is no use for them to use "CTS to self" protection, because they will not be able to receive CTS sent by other station - in this case stations must use RTS/CTS so that other station knows not to transmit by seeing CTS transmitted by AP
• Use only one protection

1/1/2013
13
www.MikroTiktrain.com 49
HW-fragmentation-threshold• Maximum fragment size in bytes when
transmitted over wireless medium• Fragmentation allows packets to be fragmented
before transmiting over wireless medium to increase probability of successful transmission
• Only fragments that did not transmit correctly are retransmitted
• Transmission of fragmented packet is less efficient than transmitting unfragmented packet because of protocol overhead and increased resource usage at both - transmitting and receiving party
www.MikroTiktrain.com 50
Adaptive-noise-immunity
• Adjusts various receiver parameters dynamically to minimize interference and noise effect on the signal quality
• Works on Atheros 5212 or newer Atheros chipset
• Uses CPU power• 3 options:
– None – disabled– Client-mode – will be enabled only if station or
station-wds used– Ap-and-client-mode – will be enabled in any mode
www.MikroTiktrain.com 51
Wireless Configuration reset
• Sometimes after reconfiguring advanced settings you might want to get back the default settings
• Use the “Reset Configuration” option – resets the current wireless cards all configuration
www.MikroTiktrain.com 52
Wireless MultiMedia (WMM)
• 4 transmit queues with priorities:• 1,2 – background• 0,3 – best effort• 4,5 – video• 6,7 – voice
• Priorities set by• Bridge or IP firewall• Ingress (VLAN or WMM) • DSCP

1/1/2013
14
www.MikroTiktrain.com 53
Modifying data rates and tx-power for stabilizing wireless connection
www.MikroTiktrain.com 54
Basic and supported rates• Supported rates –
client data rates
• Basic rates – link
management data
Rates
• If router can't send or receive data at basic rate – link goes down
www.MikroTiktrain.com 55
Data rates changing options
• Lower the higher supported data-rates on the client which have stability issues
• Lower the higher supported data-rates on the AP if most of the clients have problems running on higher data rates.
• Not recommended to disable lower data rates and leave only the higher data rates as disconnection of the link could happen more often
• Note that AP and the Client should support the same Basic rates to establish the wireless connection
www.MikroTiktrain.com 56
TX power
• Different TX-power for each data-rate –higher date rate, less power
• Disabling the higher data-rates could improve the signal as it uses higher tx-power on lower data-rates

1/1/2013
15
www.MikroTiktrain.com 57
TX-power-mode
• Default – uses tx-power values from cards eeeprom
• Card-rates – use tx-power, that for different rates is calculated according the cards transmit power algorithm, which as an argument takes tx-power value
• All-rates-fixed – use one tx-power value for all rates
• Manual-table – use the tx-power as defined in /interface wireless manual-tx-power-table
www.MikroTiktrain.com 58
Data rates Lab
• Configure the AP to allow the data-rates up to 24Mbps data rates and test the max throughput
• Configure the AP to allow only the 54Mbps data rate and check the max throughput and check how stable is the connection
www.MikroTiktrain.com 59
Use of Virtual AP feature for creating multiple APs
www.MikroTiktrain.com 60
Virtual AP
• Used for creating a new AP on top of the physical wireless card
• Works for AR5212 and newer Atheros Chipset cards
• Up to 128 Virtual AP per wireless card• Uses different MAC address and can be
changed• Can have different SSID, security profile,
Access/Connect-list, WDS options

1/1/2013
16
www.MikroTiktrain.com 61
Virtual AP Setup
www.MikroTiktrain.com 62
Virtual AP Lab• Work two together• Connect both routers using Ethernet cable• First router
– Create 2 VLAN interfaces on that Ethernet– Create 2 hotspots – one on each VLAN– For one Hotspot change the background color of login page
• add background-color: #A9F5A9; in the body line in the login.html page
• Second router– Create 2 VLAN interfaces on the Ethernet interfaces with the VLAN ID
from the first router– Create 2 Virtual APs with different SSID– Bridge first VLAN with first Virtual AP– Create second bridge with second VLAN and second Virtual AP
• Connect to each Virtual AP and check if one AP has different login page
• Reset the configuration and switch places
www.MikroTiktrain.com 63
Managing access for AP/Clients using Access-List and Connect-List
www.MikroTiktrain.com 64
Access Management• default-forwarding (on AP) – whether the
wireless clients may communicate with each other directly (access list may override this setting for individual clients)
• default-authentication – default authentication policy that applies to all hosts not mentioned in the AP's access list or client's connect list
• Both options are obsolete – same functionality can be achieved with new connect list and access list features

1/1/2013
17
www.MikroTiktrain.com 65
Wireless Access/Connect Lists
• Access List is AP's authentication filter • Connect List is Client's authentication filter• Entries in the lists are ordered , just like in firewall
- each authentication request will have to pass from the first entry until the entry it match
• There can be several entries for the same MAC address and one entry for all MAC addresses
• Entries can be wireless interface specific or global for the router
www.MikroTiktrain.com 66
Wireless Access List
• It is possible to specify authentication policy for specific signal strength range • Example: allow clients to connect with good signal
level or not connect at all
• It is possible to specify authentication policy for specific time periods• Example: allow clients to connect only on weekends
• It is possible to specify authentication policy for specific security keys:• Example: allow clients only with specific security key
to connect to the AP.
www.MikroTiktrain.com 67
Wireless Access List
www.MikroTiktrain.com 68
Wireless Connect List
• Used for allowing/denying access based on:• SSID
• MAC address of the AP
• Area Prefix of the AP• Signal Strength Range
• Security Profile
• It is possible to prioritize one AP over another AP by changing order of the entries
• Connect list is used also for WDS links, when one AP connects to other AP

1/1/2013
18
www.MikroTiktrain.com 69 www.MikroTiktrain.com 70
Access/Connect List Lab
• Peer up with other group (so that there will be two APs and two clients in one group)
• Leave default-forwarding, default-authentication enabled
• On APs: • Ensure that only clients from your group and
with -70..120 signal strength are able to connect
• (Advanced) Try out Time settings
www.MikroTiktrain.com 71
Access/Connect List Lab
• On clients:• Ensure that your client will connect only to
your group APs• Try to prioritize one AP over another
• When APs have same SSID
• When APs have different SSID
• Delete all access list and connect list rules – change places and repeat the lab
www.MikroTiktrain.com 72
Centralized Access List Management – RADIUS

1/1/2013
19
www.MikroTiktrain.com 73
RADIUS MAC Authentication
• Option for remote centralized MAC RADIUS authentication and accounting
• Possibility of using radius-incoming feature to disconnect specific MAC address from the AP
• MAC mode – username or username and password
• MAC Caching Time – how long the RADIUS authentication reply for MAC address authentication if considered valid for caching
www.MikroTiktrain.com 74
www.MikroTiktrain.com 75
RADIUS Client Configuration
• Create a RADIUS client under ‘Radius’ menu
• Specify the Service, IP address of RADIUS Server and Secret
• Use Status section to monitor the connection status
www.MikroTiktrain.com 76
Wireless security for protecting wireless connection

1/1/2013
20
www.MikroTiktrain.com 77
Wireless Security
• Authentication– PSK Authentication– EAP Authentication
• Encryption– AES– TKIP– WEP
• EAP RADIUS Security
www.MikroTiktrain.com 78
Security Principles
• Authentication - ensures acceptance of transmissions only from confirmed source
• Data encryption• Confidentiality - ensures that information is
accessible only to those authorized to have access
• Integrity – ensures that information is not changed by any other source and are exactly the same as it was sent out
www.MikroTiktrain.com 79 www.MikroTiktrain.com 80
PSK Authentication
• Pre-Shared Key is a authentication mechanism that uses a secret which was previously shared between the two parties
• Most common used wireless security type
• Multiple authentication types for one profile
• Optional PSK key for each MAC address (using Access list)

1/1/2013
21
www.MikroTiktrain.com 81
EAP Authentication
• Extensible Authentication Protocol provides a negotiation of the desired authentication mechanism (a.k.a. EAP methods)
• There are about 40 different EAP methods
• RouterOS support EAP-TLS method and also is capable to passtrough all methods to the RADIUS server
www.MikroTiktrain.com 82
www.MikroTiktrain.com 83
AES-CCM
• AES-CCM – AES with CTR with CBC-MAC
• AES - Advanced Encryption Standard is a block cipher that works with a fixed block size of 128 bits and a key size of 128, 192, or 256 bits
• CTR - Counter generates the next keystream block by encrypting successive values of a "counter"
www.MikroTiktrain.com 84
AES-CCM (2)
• CBC - Cipher Block Chaining each block of plaintext is XORed with the previous ciphertext block before being encrypted. This way, each ciphertext block is dependent on all plaintext blocks processed up to that point.
• MAC - Message Authentication Codeallows to detect any changes to the message content

1/1/2013
22
www.MikroTiktrain.com 85
TKIP
• Temporal Key Integrity Protocol is a security protocol used in the IEEE 802.11 wireless networks
• TKIP is evolution of WEP based on RC4 stream cipher
• Unlike WEP it provides • per-packet key mixing, • a message integrity check, • rekeying mechanism
www.MikroTiktrain.com 86
WEP (obsolete)
• Wired Equivalent Privacy is one of the first
and simple security type
• Does not have authentication method
• Not recommended as it is vulnerable to
wireless hacking tools
www.MikroTiktrain.com 87 www.MikroTiktrain.com 88
Pre-Shared Key (PSK)
• To make PSK authentication• Use “Dynamic Keys” mode• Enable WPAx-PSK authentication type• Specify Unicast and Group Ciphers (AES
CCM, TKIP)• Specify WPAx-Pre-Shared Key
• Keys generated on association from PSK will be used in ciphers as entry key

1/1/2013
23
www.MikroTiktrain.com 89 www.MikroTiktrain.com 90
Unicast Cipher
• On the AP and on Station at least one
unicast cipher should match to make the
wireless connection between 2 devices
www.MikroTiktrain.com 91
Group Cipher
• For the AP– If on AP the group cipher will be AES and
TKIP the strongest will be used – AES– It is advised to choose only one group cipher
on the AP
• For the Station– If on the Station both group ciphers are used it
means that it will connect to the AP that supports any of these ciphers
www.MikroTiktrain.com 92
EAP RADIUS Security
• To make the EAP passthrough authentication• Enable WPAx-EAP authentication type
• Enable MAC authentication
• Set EAP Method to passthrough• Enable RADIUS client
• To make EAP-TLS authentication• Enable WPAx-EAP authentication type
• Configure TLS option if you plan to use certificate
• Import and decrypt certificate

1/1/2013
24
www.MikroTiktrain.com 93 www.MikroTiktrain.com 94
Wireless Security Lab
• Make wireless link with your neighbour using WPA-PSK:• Create a security profile and use the same
pre-shared key to establish a wireless connection with your neighbour router.
• On the AP add an Access List entry with the neighbours MAC address and specify different PSK key, ask your neighbour to connect to it again
www.MikroTiktrain.com 95
Protecting wireless clients from deauthentication and MAC cloning
attacks
www.MikroTiktrain.com 96
Management Frame Protection
• RouterOS implements proprietary management frame protection algorithm based on shared secret
• RouterOS wireless device is able to verify source of management frame and confirm that particular frame is not malicious
• Allows to withstand deauthentication and disassociation attacks on RouterOS based wireless devices.

1/1/2013
25
www.MikroTiktrain.com 97
Management Protection Settings• Configured in the security-profile
– disabled - management protection is disabled– allowed - use management protection if supported by
remote party• for AP - allow both, non-management protection and
management protection clients• for client - connect both to APs with and without management
protection
– required - establish association only with remote devices that support management protection
• for AP - accept only clients that support management protection
• for client - connect only to APs that support management protection
www.MikroTiktrain.com 98
Management Protection key
• Configured with security-profile management-protection-key setting
• When interface is in AP mode, default management protection key can be overridded by key specified in access-list or RADIUS attribute.
www.MikroTiktrain.com 99
Management Protection Lab
• Work in group with 3 persons• One makes an AP• Other two connect to the AP• One of the client clones the other clients MAC
address• Check connectivity from both clients to the AP• Set the management protection to required and
specify a key on the AP and on the original client• Check which client connected – original or
cloned
www.MikroTiktrain.com 100
Wireless WDS and MESH

1/1/2013
26
www.MikroTiktrain.com 101
WDS and MESH
• WDS– Dynamic WDS Interface– Static WDS Interface
• RSTP Bridge
• HWMP+ MESH– Reactive mode– Proactive mode– Portals
www.MikroTiktrain.com 102
WDS – Wireless Distribution System
• WDS allows to create custom wireless coverage using multiple APs what is impossible to do only with one AP
• WDS allows packets to pass from one AP to another, just as if the APs were ports on a wired Ethernet switch
• APs must use the same band, same SSID and operate on the same frequency in order to connect to each other
www.MikroTiktrain.com 103
Wireless Distribution System
• One AP (bridge/ap-bridge mode) can have WDS link with:• Other AP in bridge/ap-bridge mode• Other AP in wds-slave (frequency adapting) mode • Client in station-wds mode
• You must disable DFS setting if you have more that one AP in bridge/ap-bridge mode in your WDS network
• WDS implementation could be different for each vendor – not all different vendor devices could be connected together with WDS
www.MikroTiktrain.com 104
WDS Configuration
• There are four different WDS operation modes• Dynamic – WDS interfaces are created automatically
as soon as other WDS compatible device is found
• Static – WDS interfaces must be crated manually
• Dynamic-mesh – same as dynamic mode, but with HWMP+ support (not compatible with standard dynamic mode or other vendors)
• Static-mesh – same as static mode, but with HWMP+ support (not compatible with standard static mode or other vendors)

1/1/2013
27
www.MikroTiktrain.com 105
WDS Configuration
• There are four different WDS operation modes• Dynamic – WDS interfaces are created automatically
as soon as other WDS compatible device is found
• Static – WDS interfaces must be crated manually
• Dynamic-mesh – same as dynamic mode, but with HWMP+ support (not compatible with standard dynamic mode or other vendors)
• Static-mesh – same as static mode, but with HWMP+ support (not compatible with standard static mode or other vendors)
www.MikroTiktrain.com 106
Dynamic WDS Interface
• It is created 'on the fly' and appears under WDS menu as a dynamic interface ('D' flag)
• When link for dynamic WDS interface goes down attached IP addresses will slip off from WDS interface and interface will slip of the bridge
• Specify “wds-default-bridge” parameter and attach IP addresses to the bridge
www.MikroTiktrain.com 107
Static WDS Interface
• Requires the destination MAC address and master interface parameters to be specified manually
• Static WDS interfaces never disappear, unless you disable or remove them
• WDS-default-bridge should be changed to “none”
www.MikroTiktrain.com 108
WDS Configuration• WDS Default Cost -
default bridge port cost
of the WDS links
• WDS Cost Range -
margin of cost that can be adjusted based on link throughput
• WDS Ignore SSID –
whether to create WDS links with any other AP in this frequency

1/1/2013
28
www.MikroTiktrain.com 109
Point-to-point WDS link
www.MikroTiktrain.com 110
Single Band Mesh
www.MikroTiktrain.com 111
Dual Band Mesh
www.MikroTiktrain.com 112
WDS Mesh and Bridge• WDS Mesh is not possible without bridging• To create a WDS mesh all WDS interfaces on
every router should be bridged together, and with interfaces where clients will be connected
• To prevent possible loops and enable link redundancy it is necessary to use (Rapid) Spanning Tree Protocol ((R)STP)
• RSTP works faster on topology changes than STP, but both have virtually the same functionality
1/1/2013
29
www.MikroTiktrain.com 113
(Rapid) Spanning Tree Protocol• (R)STP eliminate the possibility for the same
MAC addresses to be seen on multiple bridge ports by disabling secondary ports to that MAC address• First (R)STP will elect a root bridge based on smallest
bridge ID
• Then (R)STP will use breadth-first search algorithmtaking root bridge as starting point
• If algorithm reaches the MAC address for the first time – it leaves the link active
• If algorithm reaches the MAC address for the second time – it disables the link
www.MikroTiktrain.com 114
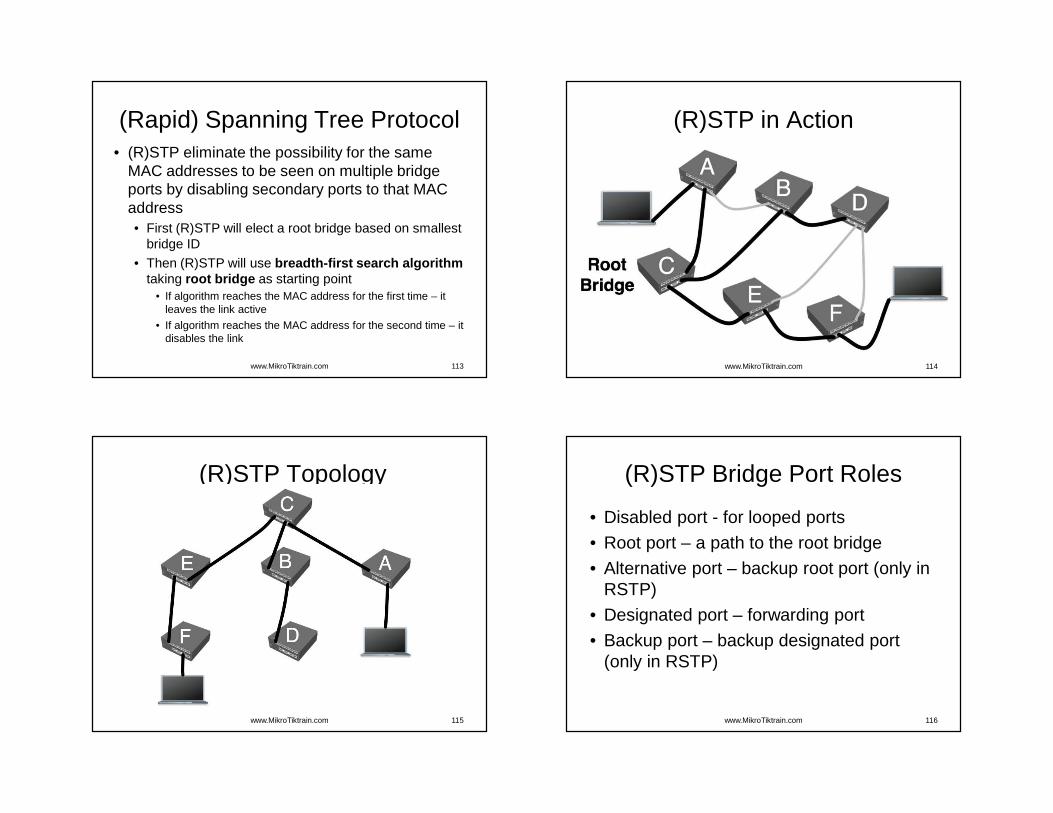
(R)STP in Action
www.MikroTiktrain.com 115
(R)STP Topology
www.MikroTiktrain.com 116
(R)STP Bridge Port Roles
• Disabled port - for looped ports
• Root port – a path to the root bridge
• Alternative port – backup root port (only in RSTP)
• Designated port – forwarding port
• Backup port – backup designated port (only in RSTP)

1/1/2013
30
www.MikroTiktrain.com 117
Admin MAC Address• MAC address for the
bridge interface is taken from one on the bridge ports
• If the ports changes a lot – MAC address of bridge also could change
• Admin MAC option allows to use static MAC address for the bridge
www.MikroTiktrain.com 118
RSTP Configuration
• Router with the lowest priority in the network will be elected as a Root Bridge
www.MikroTiktrain.com 119
RSTP Port Configuration
• Cost – allows to choose one path over another
• Priority – if costs are the same it is used to choose designated port
• Horizon – feature used for MPLS• Do not forward packet
to the same label ports
www.MikroTiktrain.com 120
RSTP Port Configuration
• There are 3 options that allow to optimize RSTP performance:• Edge port – indicates whether this port is
connected to other bridges• Point-to-point - indicates whether this port is
connected only to one network device (WDS, wireless in bridge mode)
• External-fdb – allow to use registration table instead as forwarding data base (only AP)

1/1/2013
31
www.MikroTiktrain.com 121
Layer-2 routing for Mesh networks
• MikroTik offers alternative to RSTP - HWMP+• HWMP+ is a MikroTik specific Layer-2 routing
protocol for wireless mesh networks• The HWMP+ protocol is based on, but is not
compatible with Hybrid Wireless Mesh Protocol (HWMP) from IEEE 802.11s draft standard
• HWMP+ works only with• wds-mode=static-mesh• wds-mode=dynamic-mesh
www.MikroTiktrain.com 122
HWMP+• To configure HWMP+ use “/interface
mesh” menu - configuration is very similar to bridge configuration.
• HWMP+ provide optimal routing based on link metric• For Ethernet links the metric is configured
statically• For WDS links the metric is updated
dynamically depending on wireless signal strength and the selected data transfer rate
www.MikroTiktrain.com 123
Reactive Mode Discover
• All path are discovered on demand, by flooding Path Request (PREQ) message in the network.
www.MikroTiktrain.com 124
Reactive Mode Response
• The destination node or some router that has a path to the destination will reply with a Path Response (PREP)

1/1/2013
32
www.MikroTiktrain.com 125
Proactive Mode
• In proactive mode some routers are configured as portals – router has interfaces to some other network, for example, entry/exit point to the mesh network
• Best suited when most of traffic goes between internal mesh nodes and a few portal nodes
www.MikroTiktrain.com 126
Proactive Mode Announcement
• The portals will announce their presence by flooding Root Announcement (RANN) message in the network.
www.MikroTiktrain.com 127
Proactive Mode Response
• Internal nodes will reply with a Path Registration (PREG) message
• Result – routing trees with roots in the portal routers
www.MikroTiktrain.com 128
Portals
• Routes to portals will serve as a kind of default routes
• If an internal router does not know path to a particular destination, it will forward all data to its closest portal – the portal will then discover path on behalf of the router, if needed. The data afterwards will flow through the portal
• This may lead to suboptimal routing, unless the data is addressed to the portal itself or some external network the portals has interfaces to

1/1/2013
33
www.MikroTiktrain.com 129
Mesh configuration settings• Reoptimize paths – sends out periodic PREQ messages
asking for known MAC addresses – If no reply is received to a reoptimization PREQ, the existing
path is kept anyway (until it timeouts itself)– Better for Proactive mode and for mobile mesh networks
• hwmp-preq-destination-only – if ‘no’ then on the Path Requests not only the destination router could answer but also one of the router on the way if it has route to the destination
• hwmp-preq-reply-and-forward – effective only when hwmp-preq-destination-only=no; Router on the way after the reply will still forward the Path Request to the destination (with flags that only the destination router could answer)
www.MikroTiktrain.com 130
WDS/MESH Lab
• Configure the wireless interface as an AP with the same SSID as the teachers AP
• Enable Static WDS mesh mode• Create WDS link with the teachers AP• Configure the MESH – add WDS to the mesh port• Use MESH traceroute to check the path to the neighbors
router
• Create WDS link with your neighbor router and add that to the mesh port
• Check again the MESH traceroute to your neighbor
www.MikroTiktrain.com 131
Wireless Transparent Bridge
www.MikroTiktrain.com 132
Wireless Transparent Bridge
• Bridging of Ethernet Clients using WDS
• Bridging using AP-Station WDS
• Pseudobridge mode with and without MAC Cloning
• Bridging of Wireless Clients using WDS

1/1/2013
34
www.MikroTiktrain.com 133
Bridging of the Ethernet Clients
www.MikroTiktrain.com 134
AP-Station WDS Link
www.MikroTiktrain.com 135
Station-WDS• Set station-wds mode
• WDS-mode must be
“disabled” on the wireless card
Wireless client in
• Station-WDS mode
can be bridged
www.MikroTiktrain.com 136
Pseudobridge mode
• Uses MAC-NAT – MAC address translation for all the traffic
• Inspecting packets and building table of corresponding IP and MAC addresses
• All packets are sent to AP with the MAC address used by pseudobridge, and MAC addresses of received packets are restored from the address translation table
• Single entry in address translation table for all non-IP packets – more than one host in the bridged network cannot reliably use non-IP protocols (pppoe for example)
• IPv6 doesn't work over Pseudobridge

1/1/2013
35
www.MikroTiktrain.com 137
Pseudobridge Clone mode
• station-bridge-clone-mac – use this MAC address when connection to AP
• If this value is 00:00:00:00:00:00, station will initially use MAC address of the wireless interface
• As soon as packet with MAC address of another device needs to be transmitted, station will reconnect to AP using that address
www.MikroTiktrain.com 138
Bridging of the Wireless Clients
www.MikroTiktrain.com 139
Transparent Bridging Lab
• Create a transparent bridge between you and your neighbor
• Test both methods– WDS– Pseudobridge mode– Pseudobridge mode with MAC cloning
• Check the communication between the PCs behind each router.
www.MikroTiktrain.com 140
Wireless Nstreme Protocol

1/1/2013
36
www.MikroTiktrain.com 141
MikroTik Nstreme• Nstreme is MikroTik's proprietary (i.e.,
incompatible with other vendors) wireless protocol created to improve point-to-point and point-to-multipoint wireless links.
www.MikroTiktrain.com 142
Nstreme Protocol
• Benefits of Nstreme protocol:
• Client polling
• Disable CSMA
• No protocol limits on link distance
• Smaller protocol overhead per frame allowing super-high data rates
• No protocol speed degradation for long link distances
www.MikroTiktrain.com 143
Nstreme Protocol: Frames
• framer-limit - maximal frame size• framer-policy - the method how to combine
frames. There are several methods of framing: • none - do not combine packets
• best-fit - put as much packets as possible in one frame, until the limit is met, but do not fragment packets
• exact-size - same as best-fit, but with the last packet fragmentation
• dynamic-size - choose the best frame size dynamically
www.MikroTiktrain.com 144
Nstreme Lab
• Route your private network together with
your neighbour's network
• Enable Nstreme and check link productivity
with different framer policies

1/1/2013
37
www.MikroTiktrain.com 145
Wireless Nstreme Dual Protocol
www.MikroTiktrain.com 146
Nstreme Dual Protocol• MikroTik proprietary (i.e., incompatible with other
vendors) wireless protocol that works with a pair of wireless cards (Atheros chipset cards only) – one transmitting, one receiving
www.MikroTiktrain.com 147
Nstreme Dual Interface• Set both wireless
cards into “nstreme_dual_slave” mode
• Create Nstreme dual interface
• Specify the remote MAC address – MAC address of the remote ends receive wireless card
• Use framer policy only if necessary
www.MikroTiktrain.com 148
802.11n

1/1/2013
38
www.MikroTiktrain.com 149
802.11n
• MIMO• 802.11n Data Rates• Channel bonding• Frame Aggregation• Wireless card configuration• TX-power for N cards• Transparent bridging for N links
– MPLS/VPLS tunnel
www.MikroTiktrain.com 150
802.11n Features
• Increased data rates – up to 300Mbps
• 20Mhz and 2x20Mhz channel support
• Works both in 2.4 and 5ghz
• Uses multiple antennas for receive and transmit
• Frame aggregation
www.MikroTiktrain.com 151
MIMO
• MIMO – Multiple Input and Multiple Output• SDM – Spatial Division Multiplexing• Multiple spatial streams across multiple
antennas• Multiple antenna configurations for receive
and transmit:– 1x1, 1x2, 1x3– 2x2, 2x3– 3x3
www.MikroTiktrain.com 152
802.11n Data Rates

1/1/2013
39
www.MikroTiktrain.com 153
N card Data Rates
www.MikroTiktrain.com 154
Channel bonding – 2x20Mhz
• Adds additional 20Mhz channel to existing channel
• Channel placed below or above the main channel frequency
• Backwards compatible with 20Mhz clients – connection made to the main channel
• Allows to use higher data rates
www.MikroTiktrain.com 155
Frame Aggregation
• Combining multiple data frames into single frame – decreasing the overhead
• Aggregation of MAC Service Data Units (AMSDU)
• Aggregation of MAC Protocol Data Units (AMPDU)– Uses Block Acknowledgement– May increase the latency, by default enabled only for
the best-effort traffic– Sending and receiving AMSDUs will also increase
CPU usage
www.MikroTiktrain.com 156
Wireless card configuration

1/1/2013
40
www.MikroTiktrain.com 157
Wireless card configuration
• ht-rxchains/ht-txchains – which antenna connector use for receive and transmit – antenna-mode setting is ignored for N cards
• ht-amsdu-limit – max AMSDU that device is allowed to prepare
• ht-amsdu-threshold – max frame size to allow including in AMSDU
www.MikroTiktrain.com 158
Wireless card configuration
• ht-guard-interval – whether to allow use of short guard interval
• ht-extension-channel – whether to use additional 20MHz extension channel; below or under the main channel frequency
• ht-ampdu-priorities – frame priorities for which AMPDU sending should get negotiated and used (aggregating frames and using block acknowledgment)
www.MikroTiktrain.com 159
TX-power for N cards
• When using two chains at the same time the tx-power is increased by 3db –see total-tx-power column
• When using three chains at the same time tx-power is increased by 5db
www.MikroTiktrain.com 160
Transparent Bridging of N links
• WDS will not provide the full speed – WDS doesn’t support frame aggregation
• EOIP adds overhead
• MPLS/VPLS tunnel for faster speeds and less overhead

1/1/2013
41
www.MikroTiktrain.com 161
VPLS/MPLS Bridge for N link
• Establish the wireless N link AP<->Station• Configure IP on AP and Station
– 172.16.0.1/30 on wlan1 (AP)– 172.16.0.2/30 on wlan1 (Station)
• Enable LDP (Label Distribution Protocol)– /mpls ldp set enabled=yes lsr-id=172.16.0.1 transport-
address=172.16.0.1; /mpls ldp interface add interface=wlan1 (AP)
– /mpls ldp set enabled=yeslsr-id=172.16.0.2 transport-address=172.16.0.2; /mpls ldp interface add interface=wlan1 (Station)
www.MikroTiktrain.com 162
VPLS/MPLS Bridge for N link
• Configure VPLS tunnel– /interface vpls add name=vpls1 remote-
peer=172.16.0.2 vpls-id=1:1 disabled=no (AP)– /interface vpls add name=vpls1 remote-
peer=172.16.0.1 vpls-id=1:1 disabled=no (Station)
• Create Bridge and bridge ether1 and vpls1 interface together
www.MikroTiktrain.com 163
VPLS/MPLS Bridge for N link
• Confirm the LDP running status– /mpls ldp neighbor print– /mpls forwarding-table print
• Confirm VPLS tunnel status– /interface vpls monitor vpls1 once
www.MikroTiktrain.com 164
VPLS bridge and fragmentation
• VPLS tunnel increases the packet size• If it exceeds the MPLS MTU of outgoing
interface fragmentation is used• If case the ethernet interface supports MPLS
MTU 1526 or greater fragmentation can be avoided by increasing the MPLS MTU– /mpls interface set 0 mpls-mtu=1526
– List of RouterBoards that supports big MPLS MTU can be found on the wiki page

1/1/2013
42
www.MikroTiktrain.com 165
Outdoor setup
• Test each chain separately before using both chains at the same time
• For 2 chain operation suggested to use different polarization for each chain
• When used dual-polarization antennas, isolation of the antenna recommended to be at least 25db
www.MikroTiktrain.com 166
802.11n Lab
• Establish the N link with your neighbor
• Test the performance with one and with two chains
• Create the transparent bridge using VPLS
Before Certification Test
• Reset the router
• Restore backup or restore configuration
• Make sure you have access to the Internet and to training.mikrotik.com
167
Before Certification Test
• Turn off your cellphone
• Don’t use proxy
• Don’t use copy, paste and print screen bottom
• Close all messenger, email services and any capture software
168

1/1/2013
43
Certification Test
169