my robot time is developed by huna educational … · my robot time is developed by huna...
TRANSCRIPT
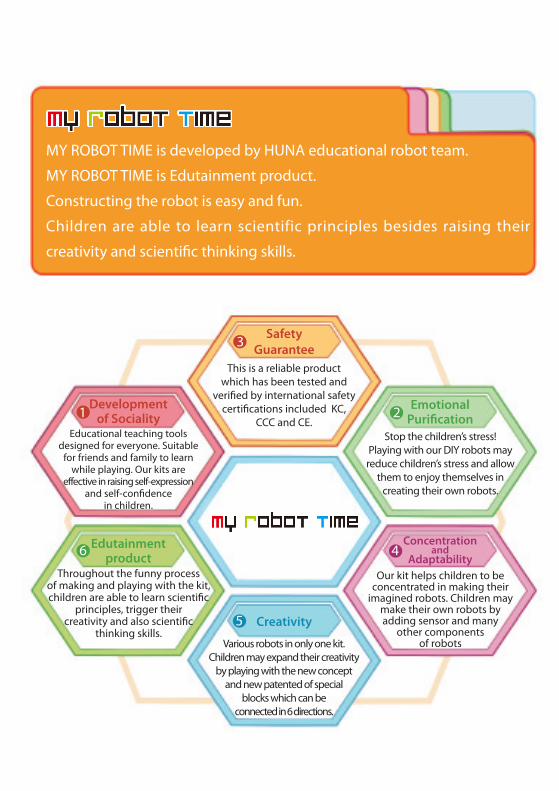
MY ROBOT TIME is developed by HUNA educational robot team.
MY ROBOT TIME is Edutainment product.
Constructing the robot is easy and fun.
Children are able to learn scientific principles besides raising their
creativity and scientific thinking skills.
This is a reliable product which has been tested and
verified by international safety certifications included KC,
CCC and CE.Educational teaching tools
designed for everyone. Suitable for friends and family to learn
while playing. Our kits are effective in raising self-expression
and self-confidence in children.
Throughout the funny process of making and playing with the kit, children are able to learn scientific
principles, trigger their creativity and also scientific
thinking skills.Various robots in only one kit.
Children may expand their creativityby playing with the new concept
and new patented of special blocks which can be
connected in 6 directions.
Our kit helps children to beconcentrated in making their
imagined robots. Children may make their own robots by adding sensor and many
other components of robots
Stop the children’s stress!Playing with our DIY robots mayreduce children’s stress and allow
them to enjoy themselves increating their own robots.
Safety Guarantee
Emotional Purification
Edutainment product
Development of Sociality
3
2
4
5
6
1
Creativity
Concentration and
Adaptability
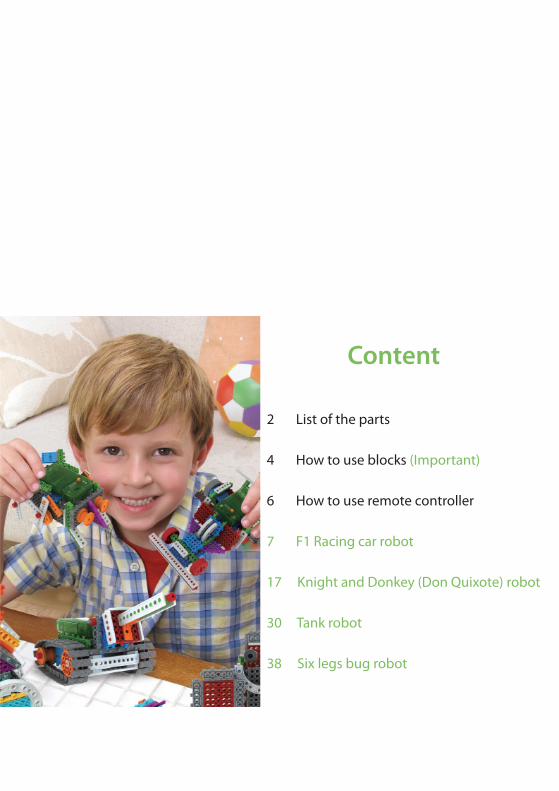
Content
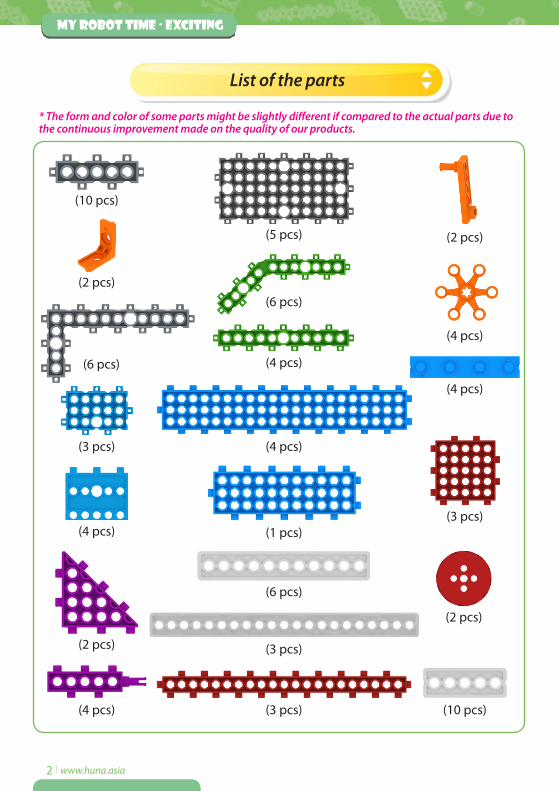
2 List of the parts
4 How to use blocks (Important)
6 How to use remote controller
7 F1 Racing car robot
17 Knight and Donkey (Don Quixote) robot
30 Tank robot
38 Six legs bug robot
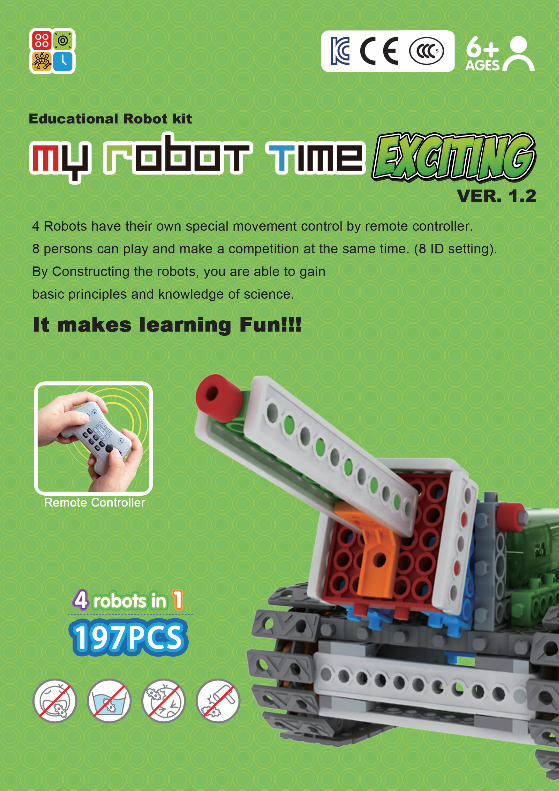
MY ROBOT TIME · exciting
2│www.huna.asia
(10 pcs)
(2 pcs)
(6 pcs)
(3 pcs)
(5 pcs)
(2 pcs)
(6 pcs)
(2 pcs)
(2 pcs)
(4 pcs)
(4 pcs)
(3 pcs)
(1 pcs)
(4 pcs)
(4 pcs)
(4 pcs)
(6 pcs)
(4 pcs)
(10 pcs)
(3 pcs)
(3 pcs)
* The form and color of some parts might be slightly different if compared to the actual parts due to the continuous improvement made on the quality of our products.
List of the parts
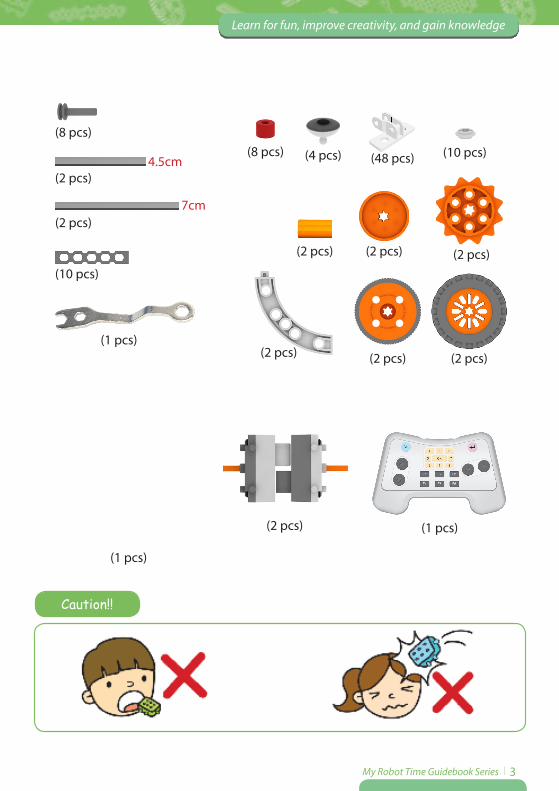
Learn for fun, improve creativity, and gain knowledge
My Robot Time Guidebook Series │3
(8 pcs)4.5cm
7cm
(2 pcs)
(2 pcs)(2 pcs)
(2 pcs)
(48 pcs)(2 pcs)
(8 pcs)
(1 pcs)
(1 pcs)
(2 pcs) (1 pcs)
(10 pcs)
(2 pcs)
(10 pcs)
(4 pcs)
(2 pcs)
Caution!!
(2 pcs)
MY ROBOT TIME · exciting
4│www.huna.asia
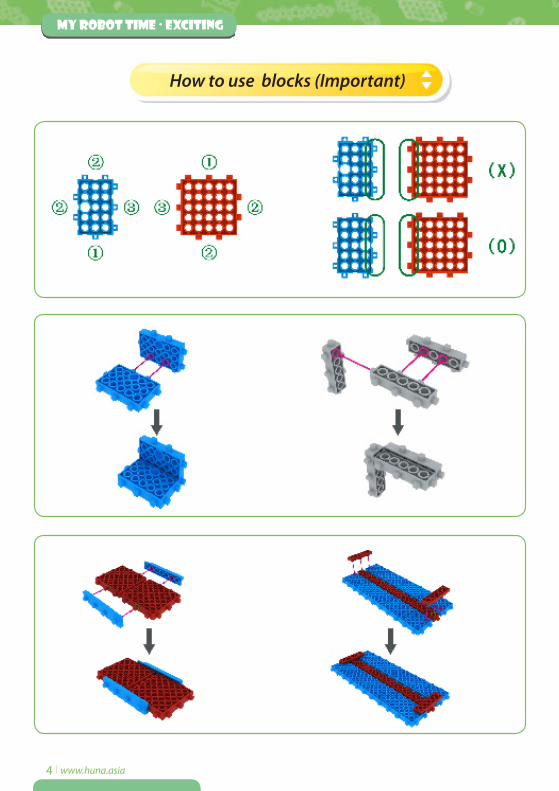
How to use blocks (Important)
Learn for fun, improve creativity, and gain knowledge
My Robot Time Guidebook Series │5
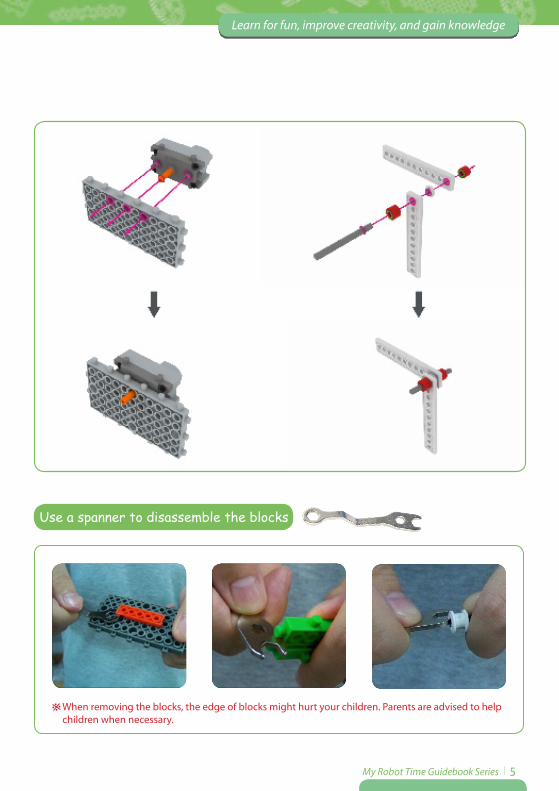
Use a spanner to disassemble the blocks
When removing the blocks, the edge of blocks might hurt your children. Parents are advised to helpchildren when necessary.
MY ROBOT TIME · exciting
6│www.huna.asia
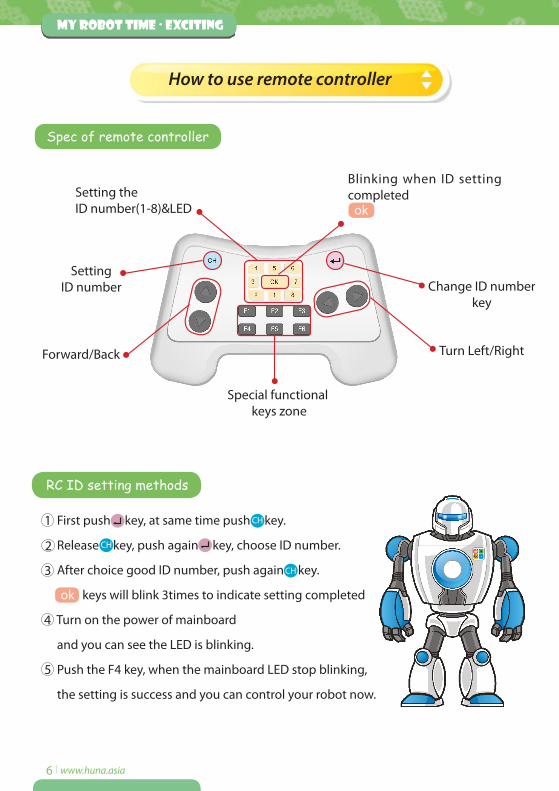
Setting the ID number(1-8)&LED
Blinking when ID setting completed
First push key, at same time push key.
Release key, push again key, choose ID number.
After choice good ID number, push again key.
keys will blink 3times to indicate setting completed
Turn on the power of mainboard
and you can see the LED is blinking.
Push the F4 key, when the mainboard LED stop blinking,
the setting is success and you can control your robot now.
Special functional keys zone
Change ID numberkey
Turn Left/Right
Setting ID number
Forward/Back
ok
ok
1
2
3
4
5
CH
CH
CH
How to use remote controller
Spec of remote controller
RC ID setting methods
Learn for fun, improve creativity, and gain knowledge
My Robot Time Guidebook Series │7
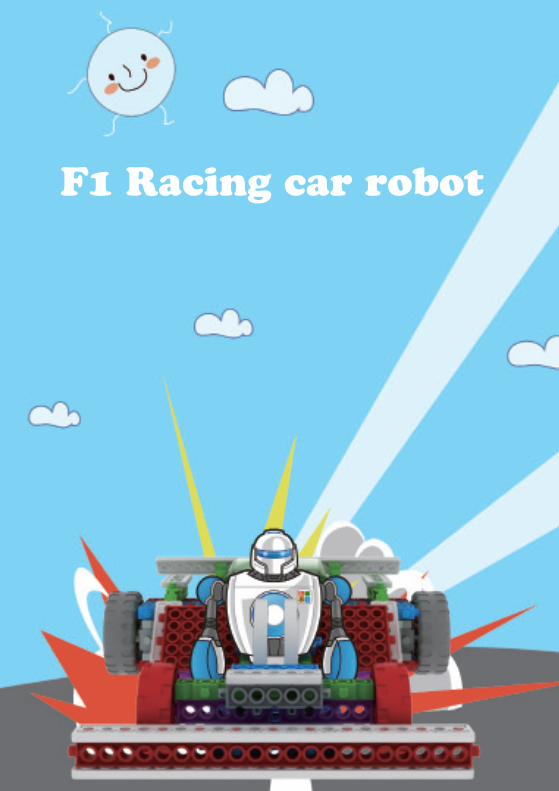
F1 Racing car robot
MY ROBOT TIME · exciting
8│www.huna.asia
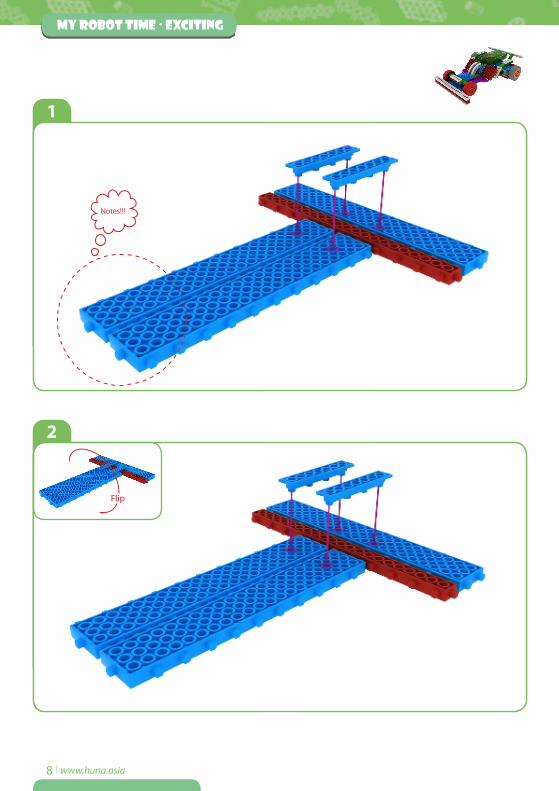
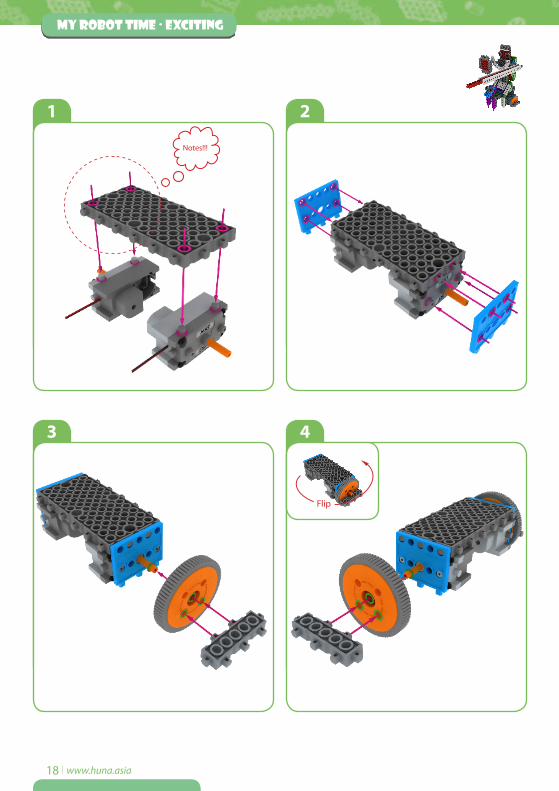
Notes!!!
1
2
Flip
Learn for fun, improve creativity, and gain knowledge
My Robot Time Guidebook Series │9
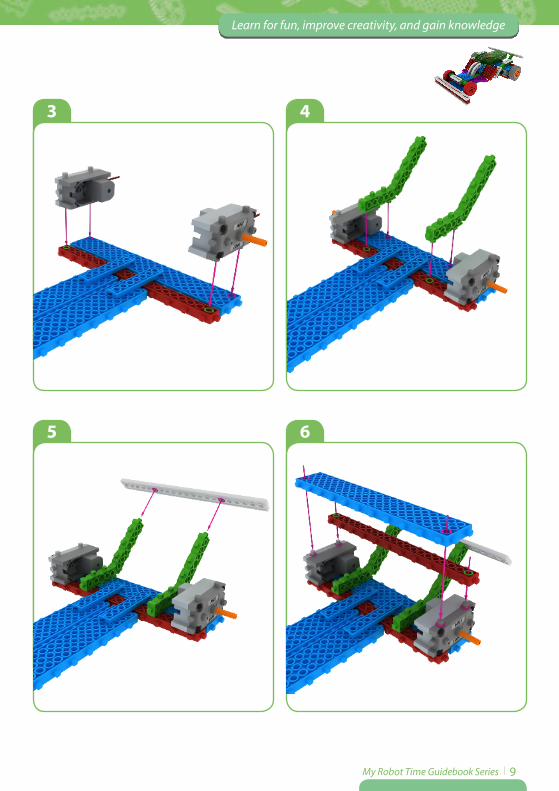
3
5
4
6
MY ROBOT TIME · exciting
10│www.huna.asia
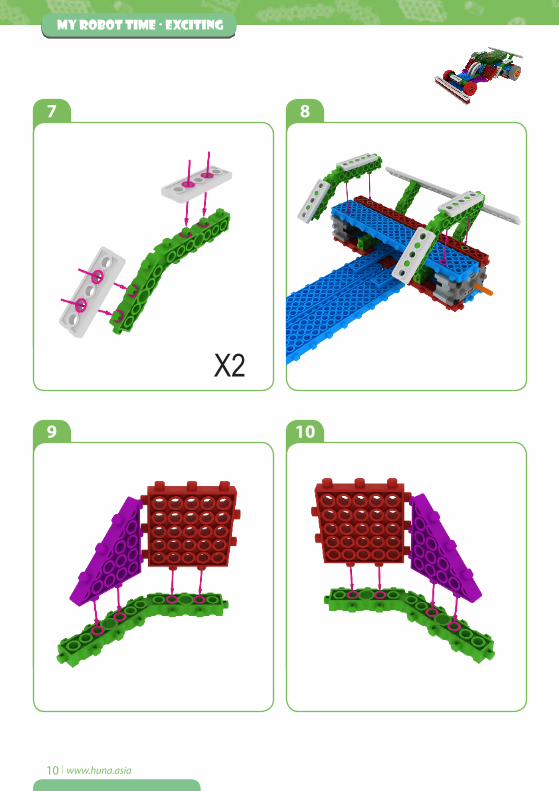
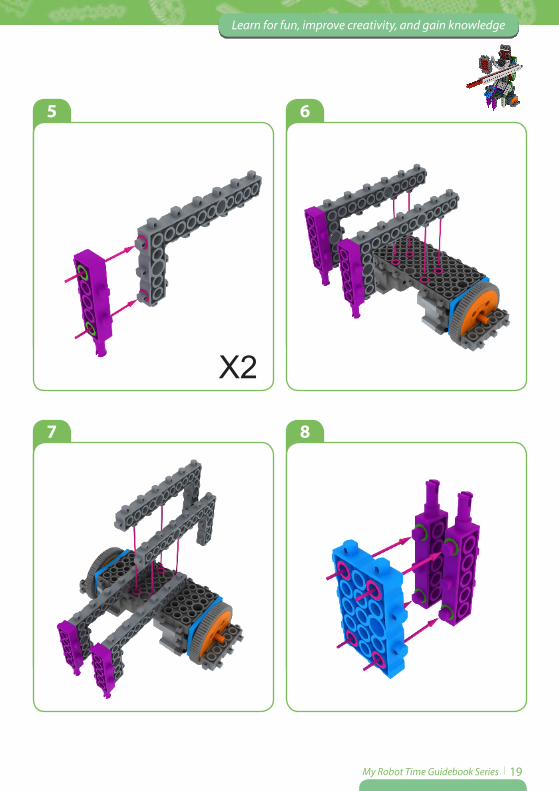
X2
7
9
8
10
Learn for fun, improve creativity, and gain knowledge
My Robot Time Guidebook Series │11
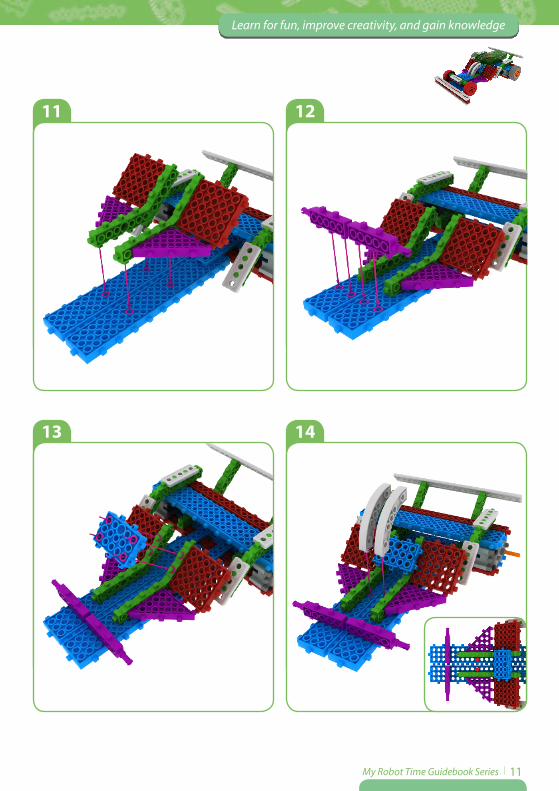
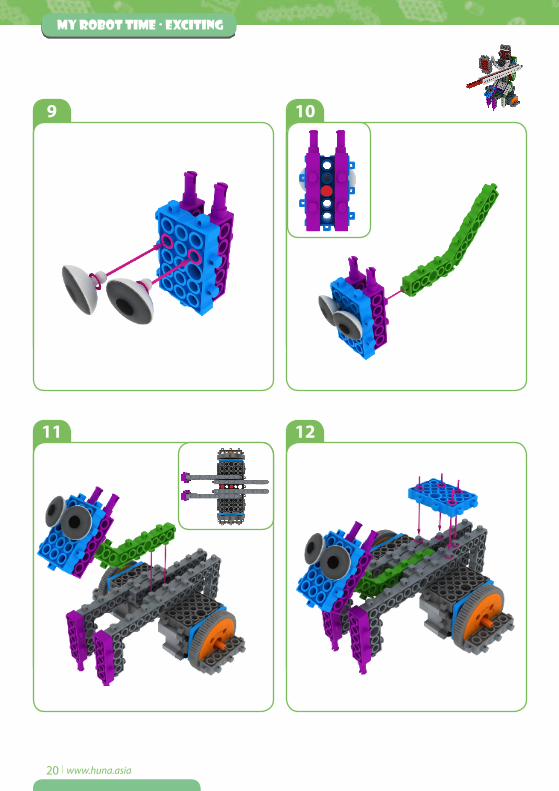
11
13
12
14
MY ROBOT TIME · exciting
12│www.huna.asia
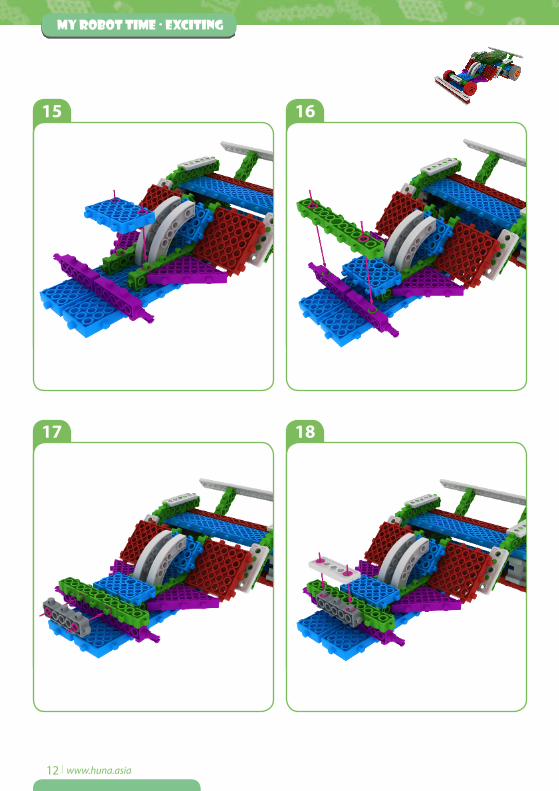
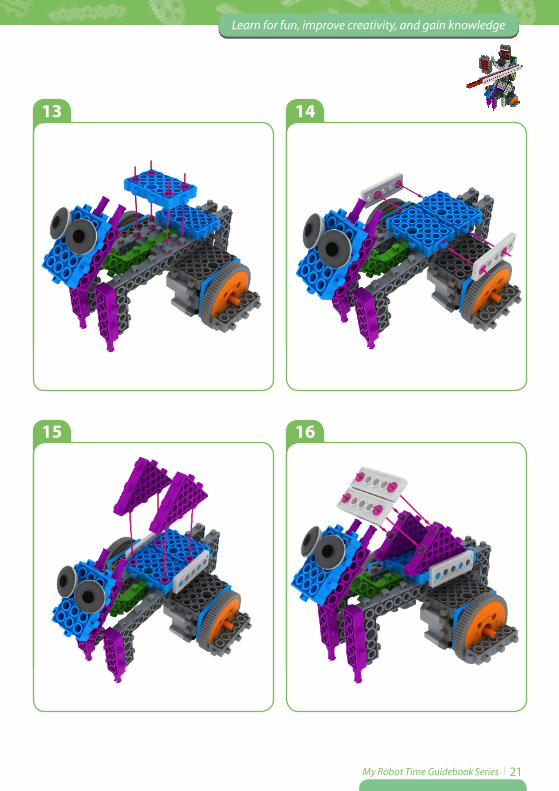
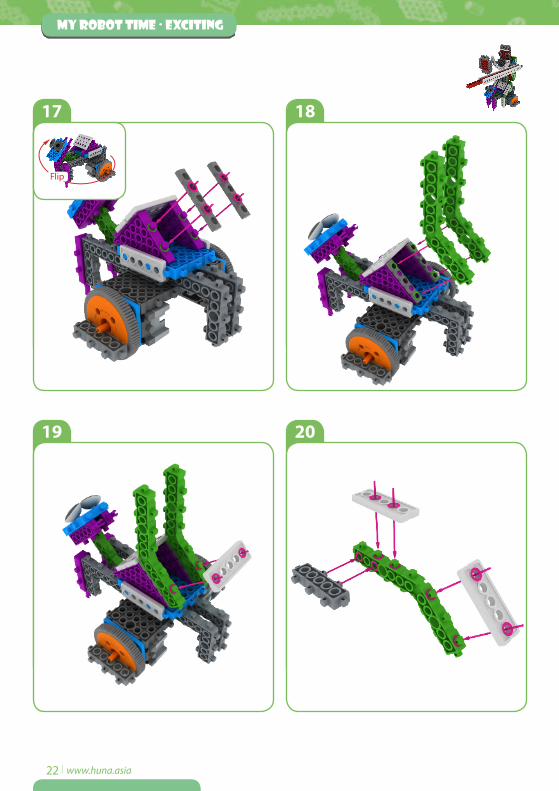
15
17
16
18
Learn for fun, improve creativity, and gain knowledge
My Robot Time Guidebook Series │13
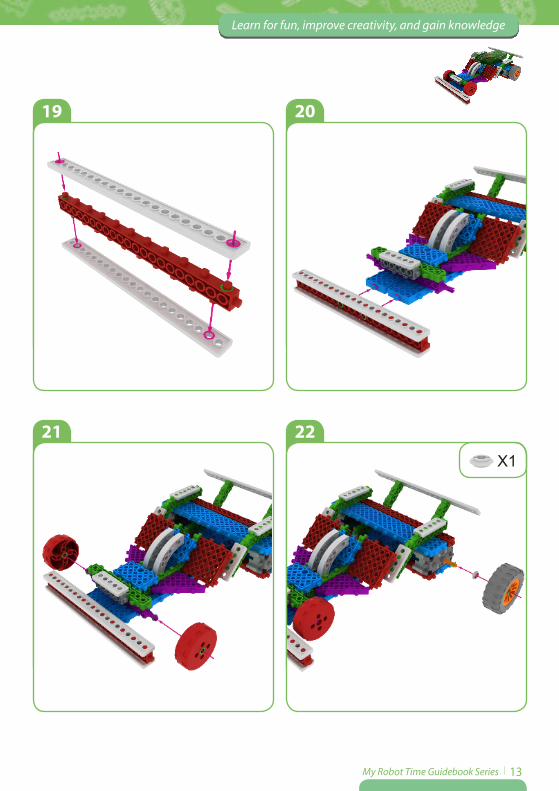
19
21
20
22X1
MY ROBOT TIME · exciting
14│www.huna.asia
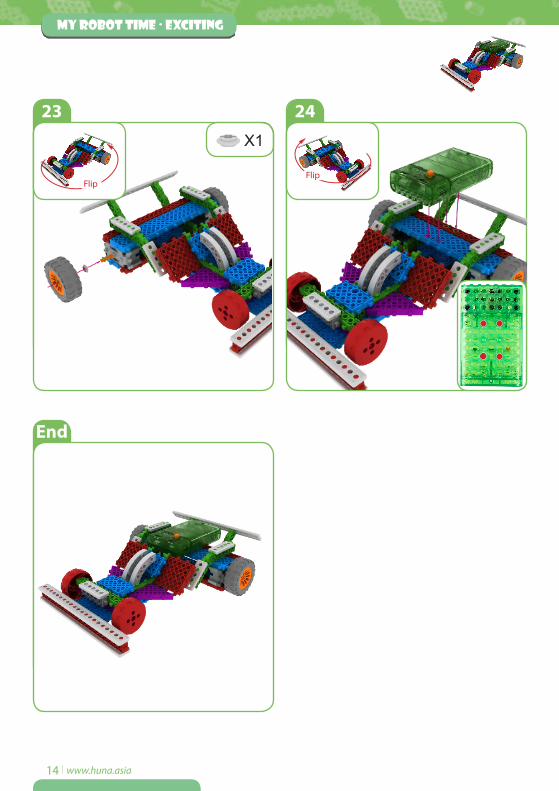
23 24
End
FlipFlip
X1
Learn for fun, improve creativity, and gain knowledge
My Robot Time Guidebook Series │15
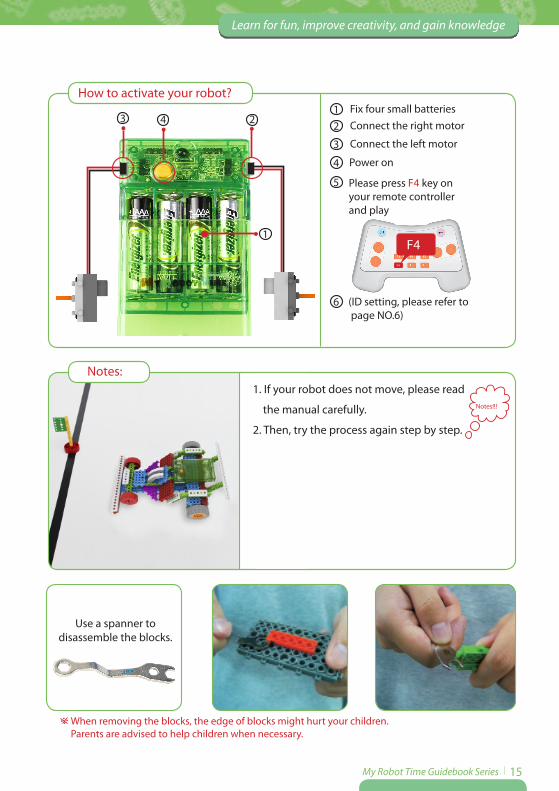
1. If your robot does not move, please read
the manual carefully.
2. Then, try the process again step by step.
F4F4
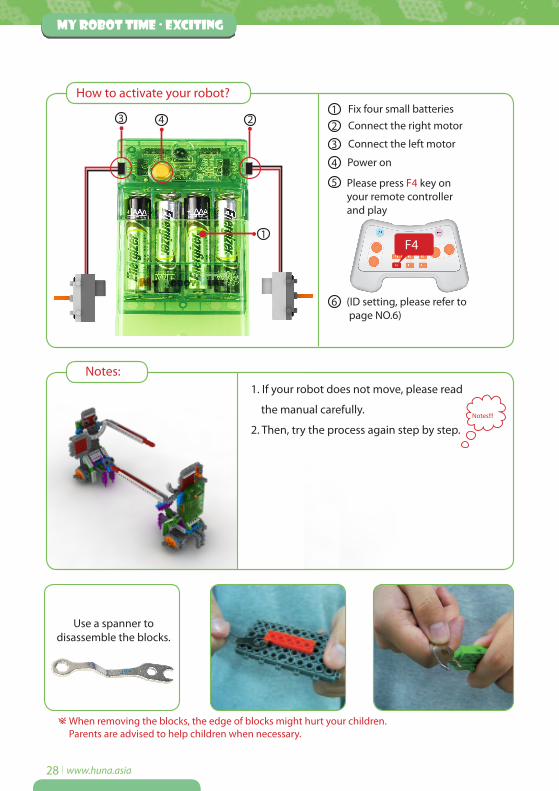
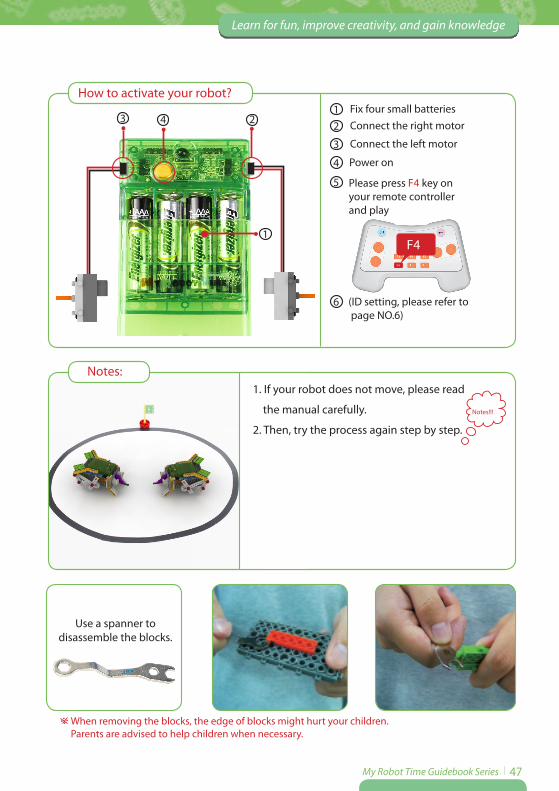
Fix four small batteriesConnect the right motor
Connect the left motor
Power on
Please press F4 key on your remote controllerand play
(ID setting, please refer to page NO.6)
Notes!!!
How to activate your robot?
Notes:
Use a spanner to disassemble the blocks.
1
12
3
4
5
6
23 4
When removing the blocks, the edge of blocks might hurt your children. Parents are advised to help children when necessary.
MY ROBOT TIME · exciting
16│www.huna.asia
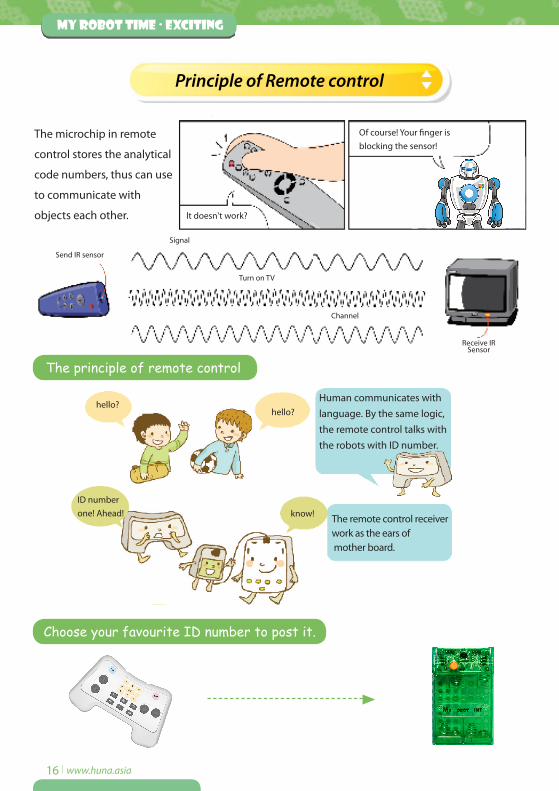
The microchip in remote
control stores the analytical
code numbers, thus can use
to communicate with
objects each other.
Of course! Your finger is blocking the sensor!
lt doesn't work?
Signal
Turn on TV
Channel
know!
hello?hello?
Receive IRSensor
Send IR sensor
The remote control receiverwork as the ears of mother board.
Human communicates with language. By the same logic,the remote control talks with the robots with ID number.
Choose your favourite ID number to post it.
Principle of Remote control
The principle of remote control
ID number one! Ahead!
Learn for fun, improve creativity, and gain knowledge
My Robot Time Guidebook Series │17
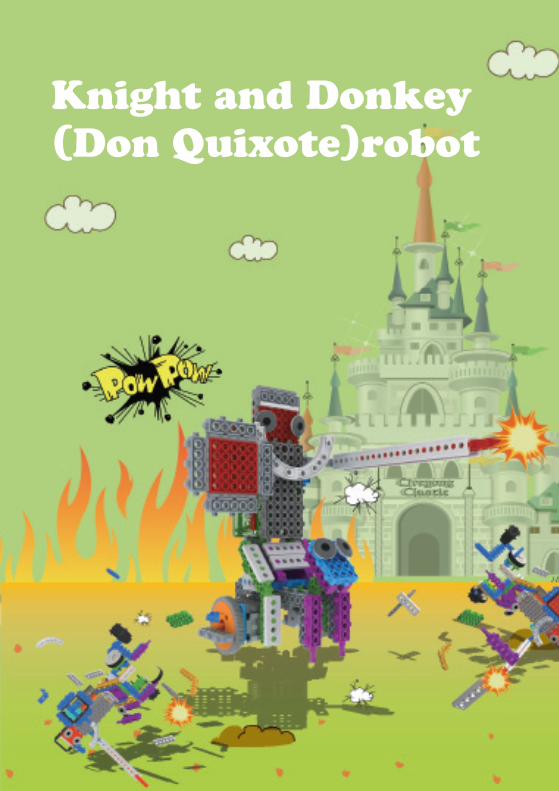
Knight and Donkey(Don Quixote)robot
MY ROBOT TIME · exciting
18│www.huna.asia
Notes!!!
1
3
2
4
Flip
Learn for fun, improve creativity, and gain knowledge
My Robot Time Guidebook Series │19
X2
5
7
6
8
MY ROBOT TIME · exciting
20│www.huna.asia
9
11
10
12
Learn for fun, improve creativity, and gain knowledge
My Robot Time Guidebook Series │21
13
15
14
16
MY ROBOT TIME · exciting
22│www.huna.asia
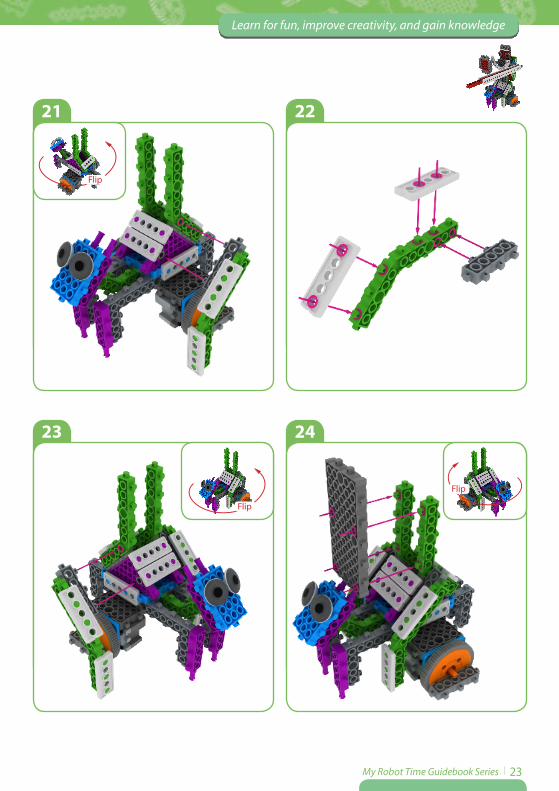
17
19
18
20
Flip
Learn for fun, improve creativity, and gain knowledge
My Robot Time Guidebook Series │23
21
23
22
24
Flip
Flip
Flip
MY ROBOT TIME · exciting
24│www.huna.asia
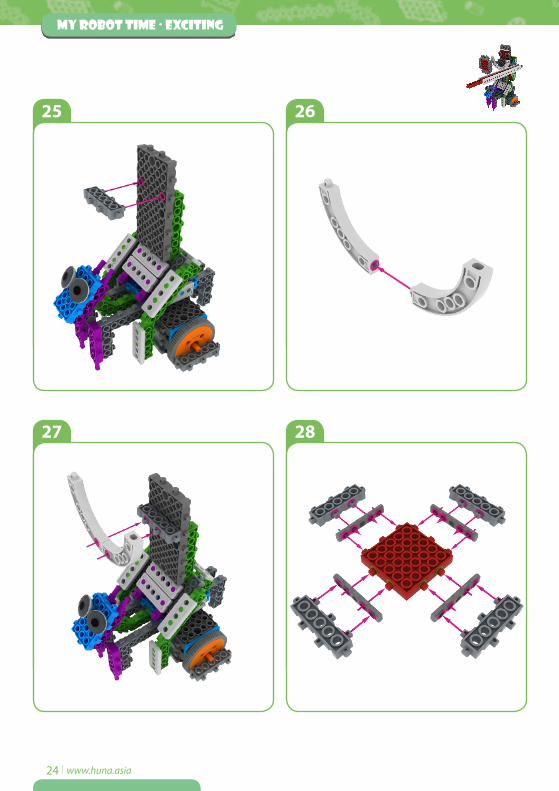
25
27
26
28
Learn for fun, improve creativity, and gain knowledge
My Robot Time Guidebook Series │25
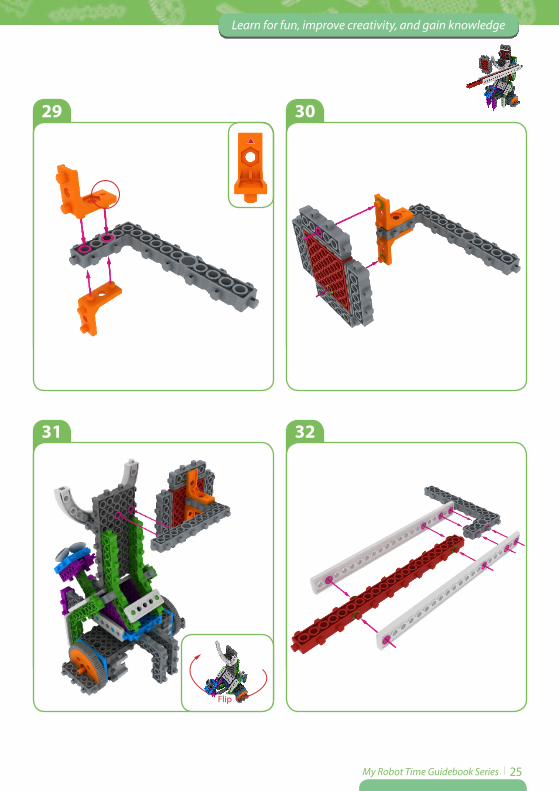
29
31
30
32
Flip
MY ROBOT TIME · exciting
26│www.huna.asia
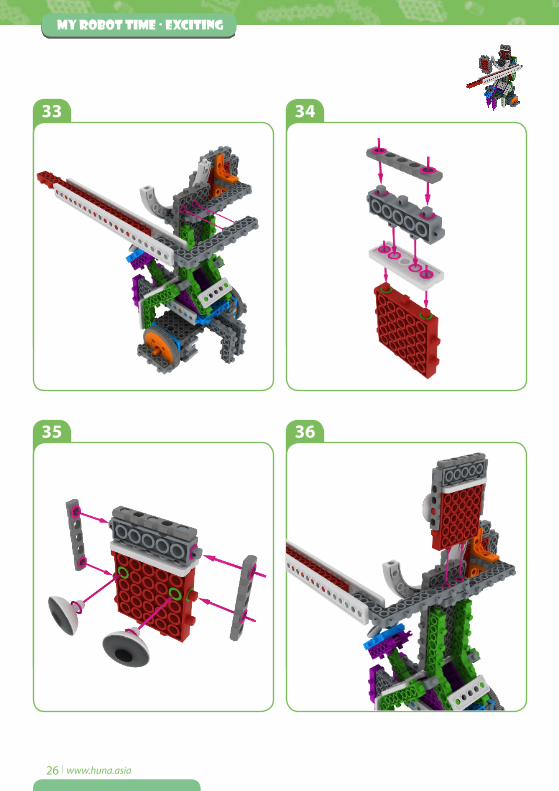
33
35
34
36
Learn for fun, improve creativity, and gain knowledge
My Robot Time Guidebook Series │27
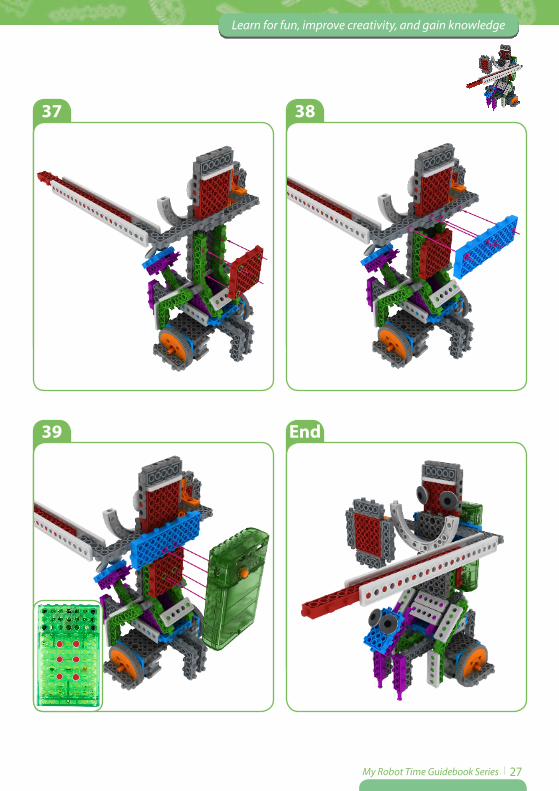
37
39
38
End
MY ROBOT TIME · exciting
28│www.huna.asia
1. If your robot does not move, please read
the manual carefully.
2. Then, try the process again step by step.
1
12
3
4
5
6
23 4
F4F4
Fix four small batteriesConnect the right motor
Connect the left motor
Power on
Please press F4 key on your remote controllerand play
(ID setting, please refer to page NO.6)
Notes!!!
How to activate your robot?
Notes:
Use a spanner to disassemble the blocks.
When removing the blocks, the edge of blocks might hurt your children. Parents are advised to help children when necessary.
Learn for fun, improve creativity, and gain knowledge
My Robot Time Guidebook Series │29
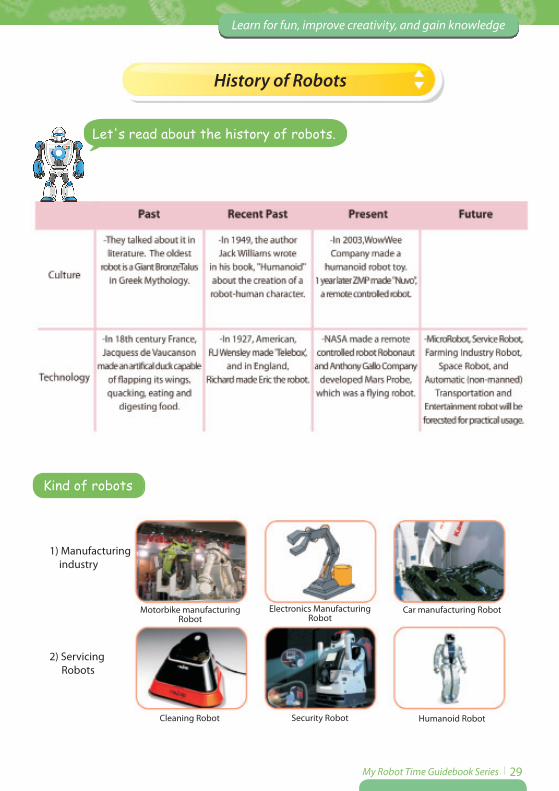
1) Manufacturing industry
2) Servicing Robots
Motorbike manufacturing Robot
Electronics Manufacturing Robot
Car manufacturing Robot
Cleaning Robot Security Robot Humanoid Robot
Let's read about the history of robots.
History of Robots
Kind of robots
MY ROBOT TIME · exciting
30│www.huna.asia
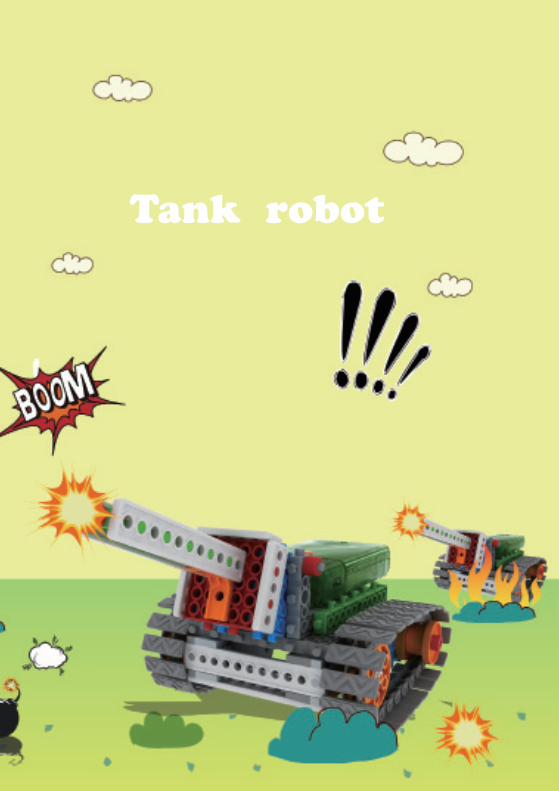
Tank robot
Learn for fun, improve creativity, and gain knowledge
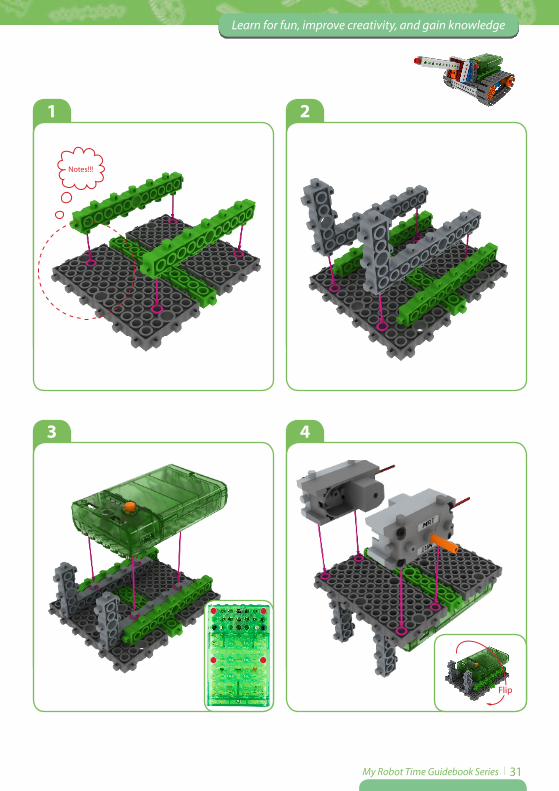
My Robot Time Guidebook Series │31
Notes!!!
1
3
2
4
Flip
MY ROBOT TIME · exciting
32│www.huna.asia
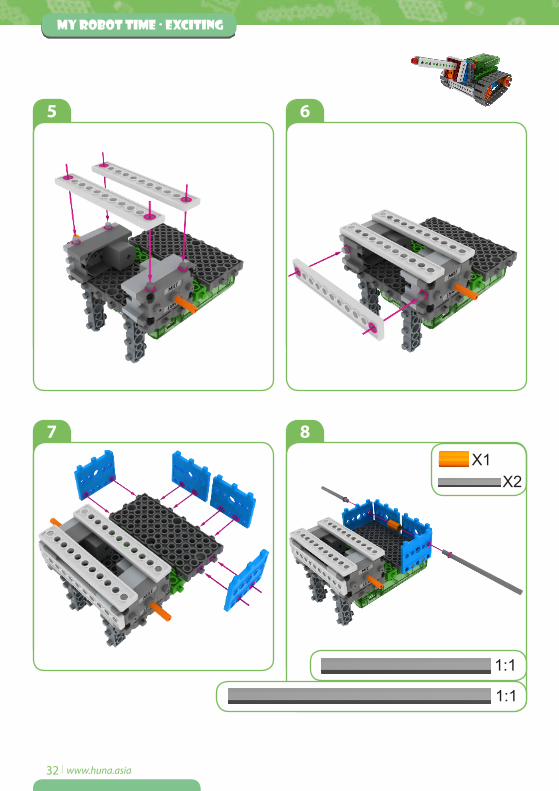
5
7
6
8
1:1
1:1
X1X2
Learn for fun, improve creativity, and gain knowledge
My Robot Time Guidebook Series │33
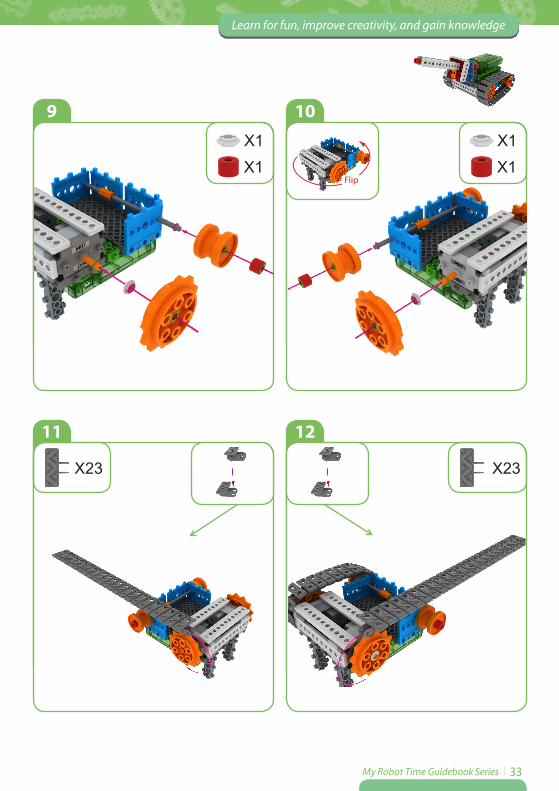
X23X23
9
11
10
12
Flip
X1X1
X1X1

MY ROBOT TIME · exciting
34│www.huna.asia
13
15
14
16
Flip
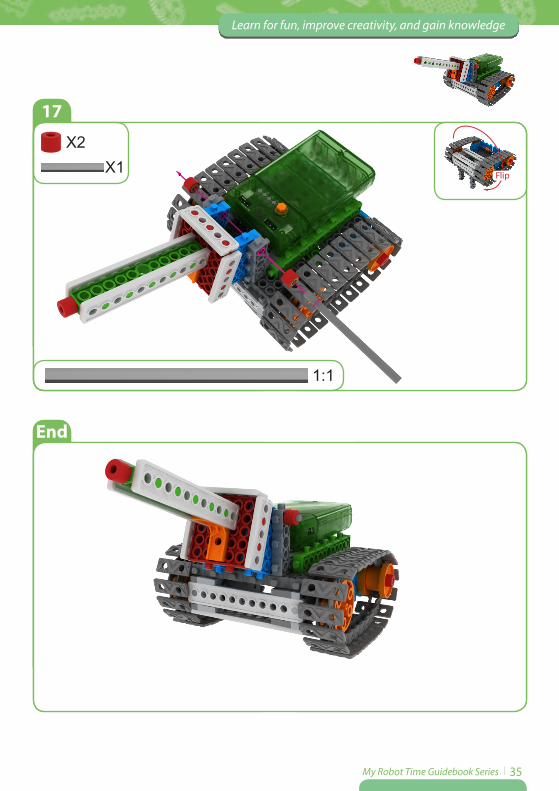
Learn for fun, improve creativity, and gain knowledge
My Robot Time Guidebook Series │35
1:1
17
End
X2X1
Flip

MY ROBOT TIME · exciting
36│www.huna.asia
1. If your robot does not move, please read
the manual carefully.
2. Then, try the process again step by step.
F4F4
Fix four small batteriesConnect the right motor
Connect the left motor
Power on
Please press F4 key on your remote controllerand play
(ID setting, please refer to page NO.6)
Notes!!!
How to activate your robot?
Notes:
Use a spanner to disassemble the blocks.
1
12
3
4
5
6
23 4
When removing the blocks, the edge of blocks might hurt your children. Parents are advised to help children when necessary.
Learn for fun, improve creativity, and gain knowledge
My Robot Time Guidebook Series │37
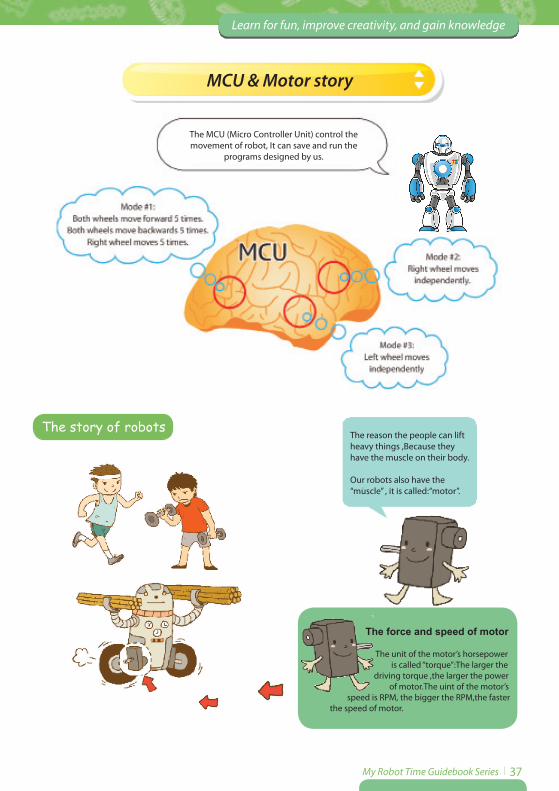
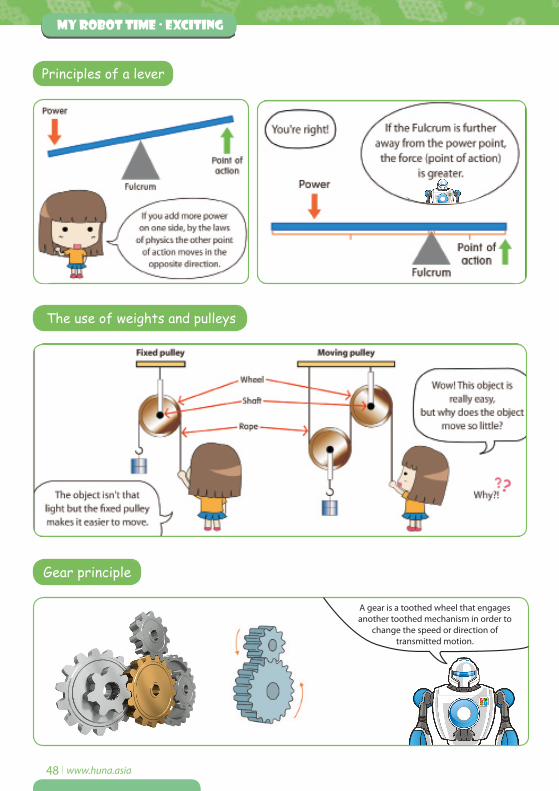
The reason the people can lift heavy things ,Because they have the muscle on their body.
Our robots also have the“muscle” , it is called:“motor”.
The force and speed of motor The unit of the motor’s horsepower is called “torque”:The larger the driving torque ,the larger the power of motor.The uint of the motor’s speed is RPM, the bigger the RPM,the faster the speed of motor.
MCU & Motor story
The story of robots
The MCU (Micro Controller Unit) control the movement of robot, It can save and run the
programs designed by us.
MY ROBOT TIME · exciting
38│www.huna.asia
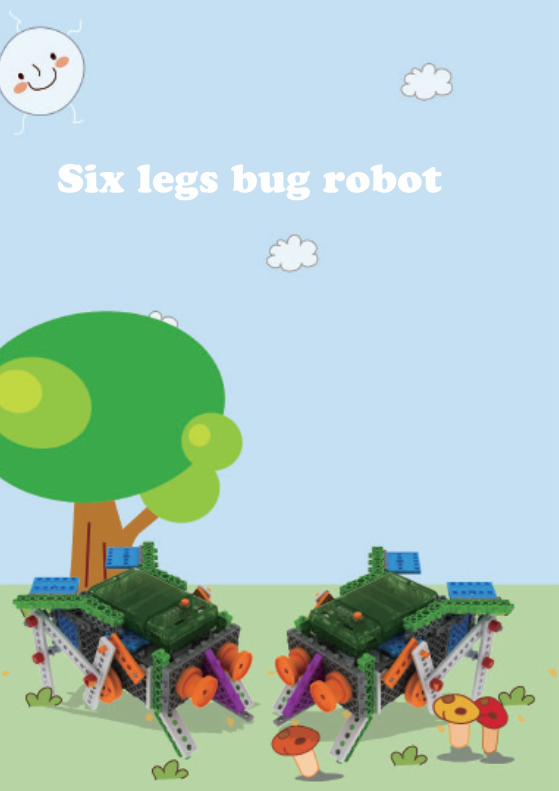
Six legs bug robot
Learn for fun, improve creativity, and gain knowledge
My Robot Time Guidebook Series │39
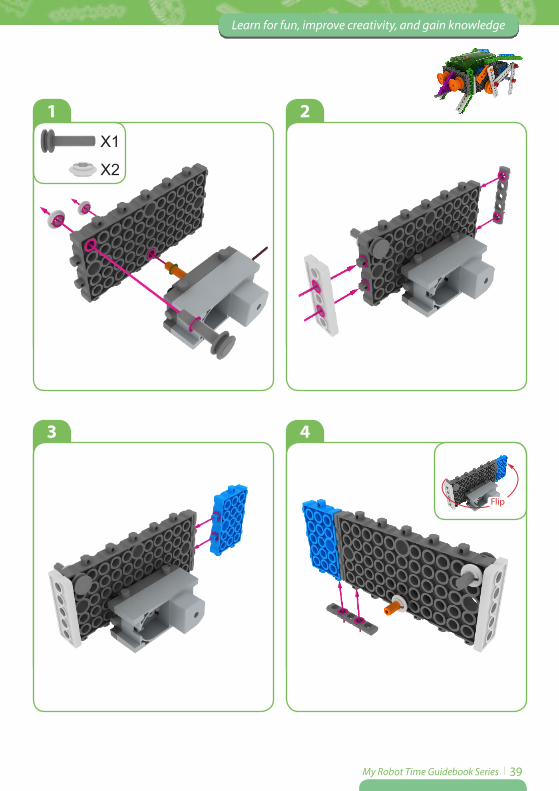
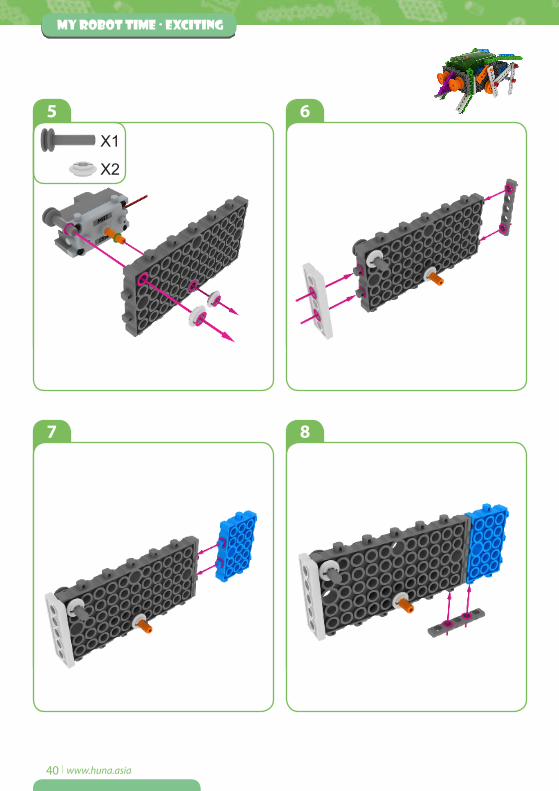
1
3
2
4
Flip
X1
X2
MY ROBOT TIME · exciting
40│www.huna.asia
5
7
6
8
X1
X2

Learn for fun, improve creativity, and gain knowledge
My Robot Time Guidebook Series │41
9
11
10
Flip
1:1
1:1
X2X2
X1X4
MY ROBOT TIME · exciting
42│www.huna.asia
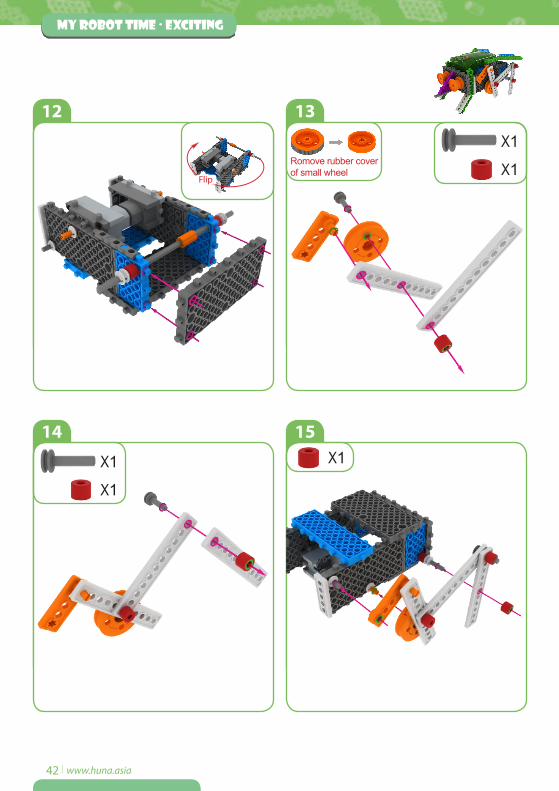
12
14
13
15
Flip
X1
X1
X1
X1
X1
Romove rubber coverof small wheel
Learn for fun, improve creativity, and gain knowledge
My Robot Time Guidebook Series │43
X2
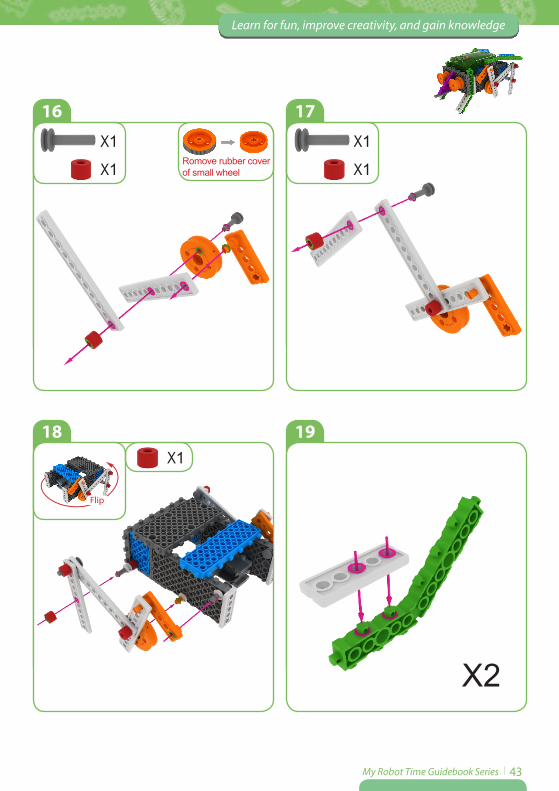
16
18
17
19
Flip
X1
X1
X1
X1
X1
Romove rubber coverof small wheel
MY ROBOT TIME · exciting
44│www.huna.asia
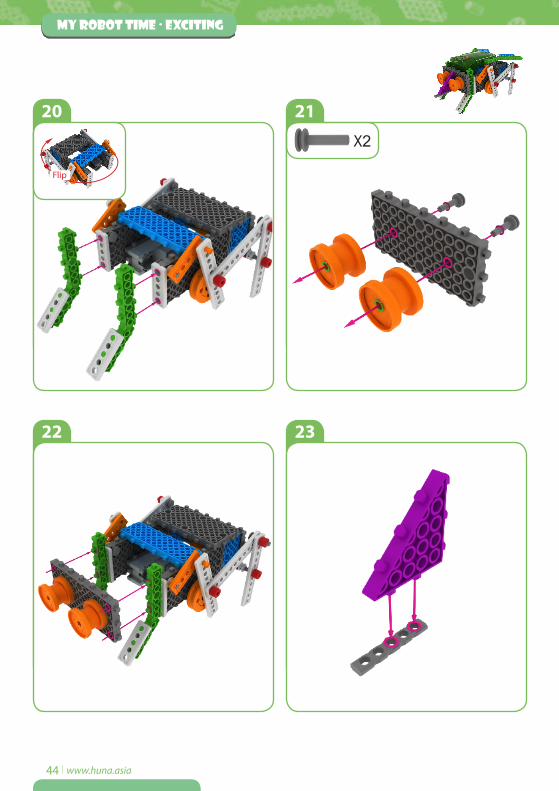
20
22
21
23
Flip
X2
Learn for fun, improve creativity, and gain knowledge
My Robot Time Guidebook Series │45
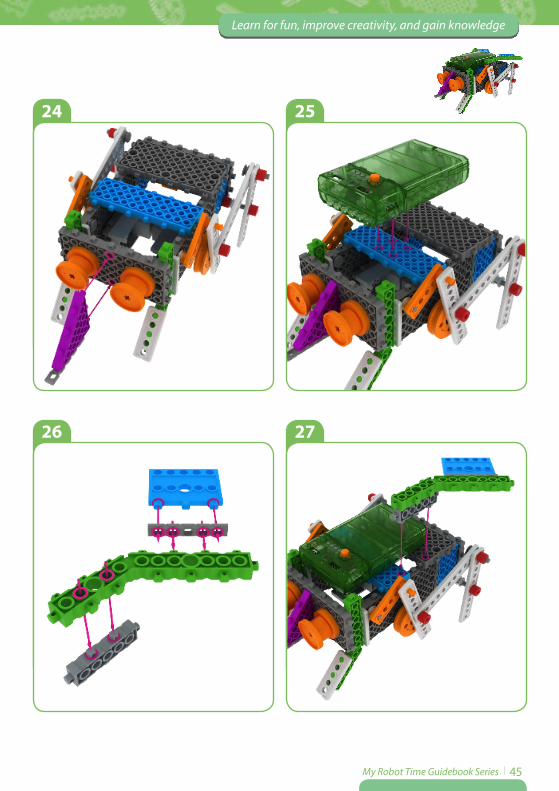
24
26
25
27
MY ROBOT TIME · exciting
46│www.huna.asia
28 29
End
Flip
Learn for fun, improve creativity, and gain knowledge
My Robot Time Guidebook Series │47
1. If your robot does not move, please read
the manual carefully.
2. Then, try the process again step by step.
F4F4
Fix four small batteriesConnect the right motor
Connect the left motor
Power on
Please press F4 key on your remote controllerand play
(ID setting, please refer to page NO.6)
Notes!!!
How to activate your robot?
Notes:
Use a spanner to disassemble the blocks.
1
12
3
4
5
6
23 4
When removing the blocks, the edge of blocks might hurt your children. Parents are advised to help children when necessary.
MY ROBOT TIME · exciting
48│www.huna.asia
A gear is a toothed wheel that engagesanother toothed mechanism in order to
change the speed or direction oftransmitted motion.
Principles of a lever
The use of weights and pulleys
Gear principle
MY ROBOT TIME-EXCITING VER1.2
Fitst edition | Aug.20.2013Revised edition | Dec.1.2013Publisher | MRT International LimitedAddress | 512-15, Deung chon-dong, Gangseo-gu, Seoul, KoreaWeb | www.myrobottime.comArt & Compile | MRT ROBOTICS
Copyrights (c) 2013 MRT International Ltd.Reproduction, translation or audio-visual products of any part of this book without permission of the copyright owner is unlawful.