mysql installation windows - craig m. boothcraigmbooth.com/sql_bootcamp/mysql installation...
TRANSCRIPT
INSTALLING MYSQL ON WINDOWS This document contains instructions on how to install MySQL server and MySQL Workbench on Windows. If you don’t know what MySQL server, and workbench are, that’s fine! We’ll be covering it in the class. All you need to know for now is that we’ll need both to get through the bootcamp.
As mentioned in the main README, please come to class with MySQL and MySQL Workbench already installed on your computer.
If you have issues with this process, I will be in class one hour prior to the official start time and can help with any installation issues.
INSTALLING MYSQL ON WINDOWS 1
INSTALLING MYSQL SERVER AND WORKBENCH 2
TESTING YOUR INSTALLATION 12

INSTALLING MYSQL SERVER AND WORKBENCH
Go to the MySQL downloads page, found here:
https://dev.mysql.com/downloads/mysql/
Select the 32-bit MSI installer-community and click the blue download button to the right of the screen. Oracle will prompt you to log in to install, you can either go through this process, or click “No thanks, just start my download”
This will start your download. If you use Internet Explorer, a bar will appear at the bottom of the screen, select “Run”

After the file has downloaded it will automatically execute
First, you need to accept the Terms of Service and hit next
Then select your type of install. The “Developer Default” will cover everything we need for SQL Bootcamp. Select this and click “Next”

At this point, the installer will check your system for all the required components. There is a good chance that you will be missing something. In my case, I needed “Microsoft Visual C++ 2013 Runtime” in order to install MySQL Workbench.

To install your dependencies press “Execute”. This will open another installer and install some software for you.
Keep hitting “Next”, “Continue” and “Install” until your dependencies are installed. At this point you will go back to the MySQL installer and press continue. Note that unless you installed ALL of the requirements, you will get a warning message
This is OK, just so long as you installed any missing requirements for MySQL Server and MySQL Workbench. It doesn’t matter if the other things get missed.

You can confirm that everything is correct on the next page, where the installer lists what will be installed. If MySQL Server or MySQL Workbench are missing from this list, you need to go back and install the correct requirements.
If both items are present, then you’re good to go. Click “Execute”
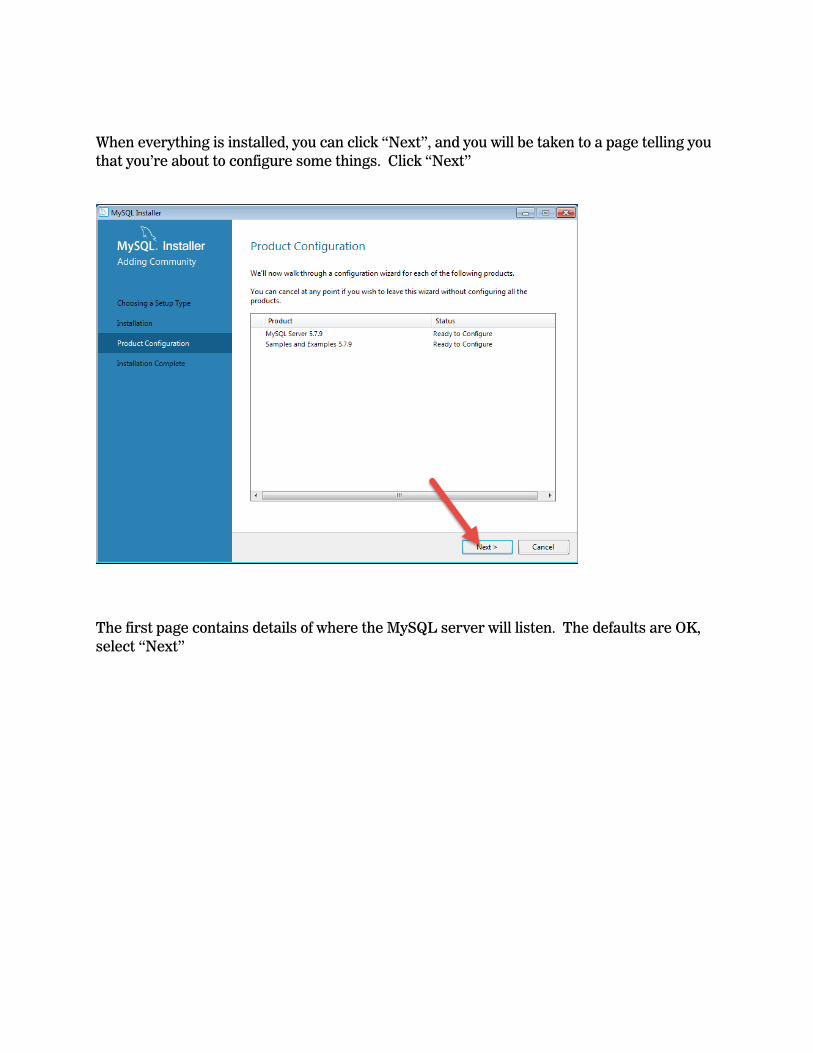
When everything is installed, you can click “Next”, and you will be taken to a page telling you that you’re about to configure some things. Click “Next”
The first page contains details of where the MySQL server will listen. The defaults are OK, select “Next”

On the next page, you need to specify usernames and passwords for MySQL. Type a “root” (admin) password into the box. PLEASE DO NOT FORGET THIS!
Then click “Add User”
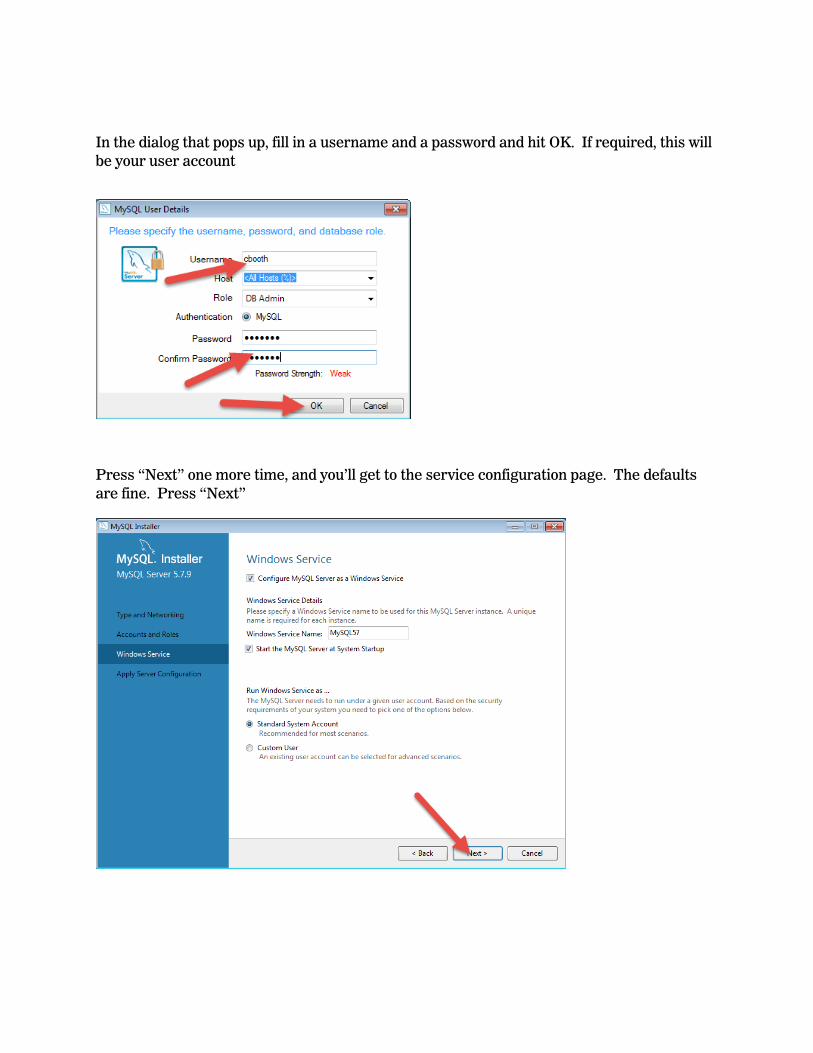
In the dialog that pops up, fill in a username and a password and hit OK. If required, this will be your user account
Press “Next” one more time, and you’ll get to the service configuration page. The defaults are fine. Press “Next”

Next, you will actually apply all the changes you just configured. Press the “Execute” button
You’ll then get the window telling you that you’re configuring another part of MySQL. If everything worked OK, you should be able to hit Next again and get a window with an entry in the “Here are the compatible servers installed” box. If there is something in there, type your root username and password in where prompted, and press “Next”.
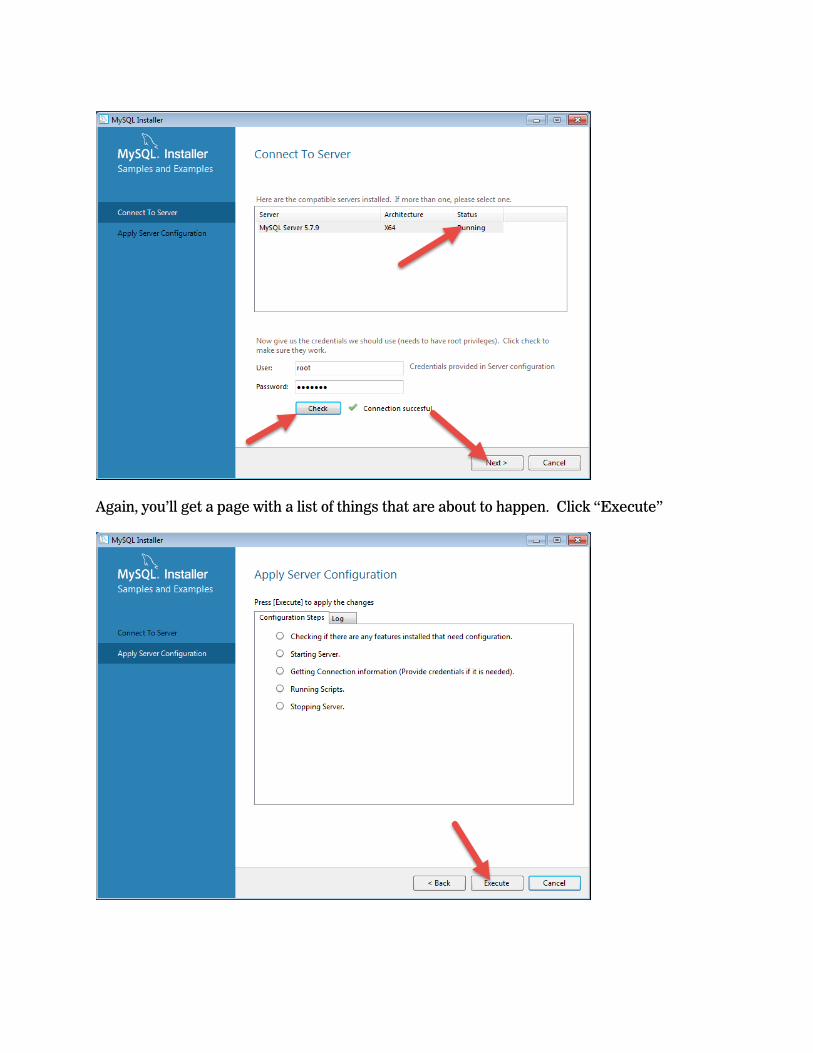
Again, you’ll get a page with a list of things that are about to happen. Click “Execute”
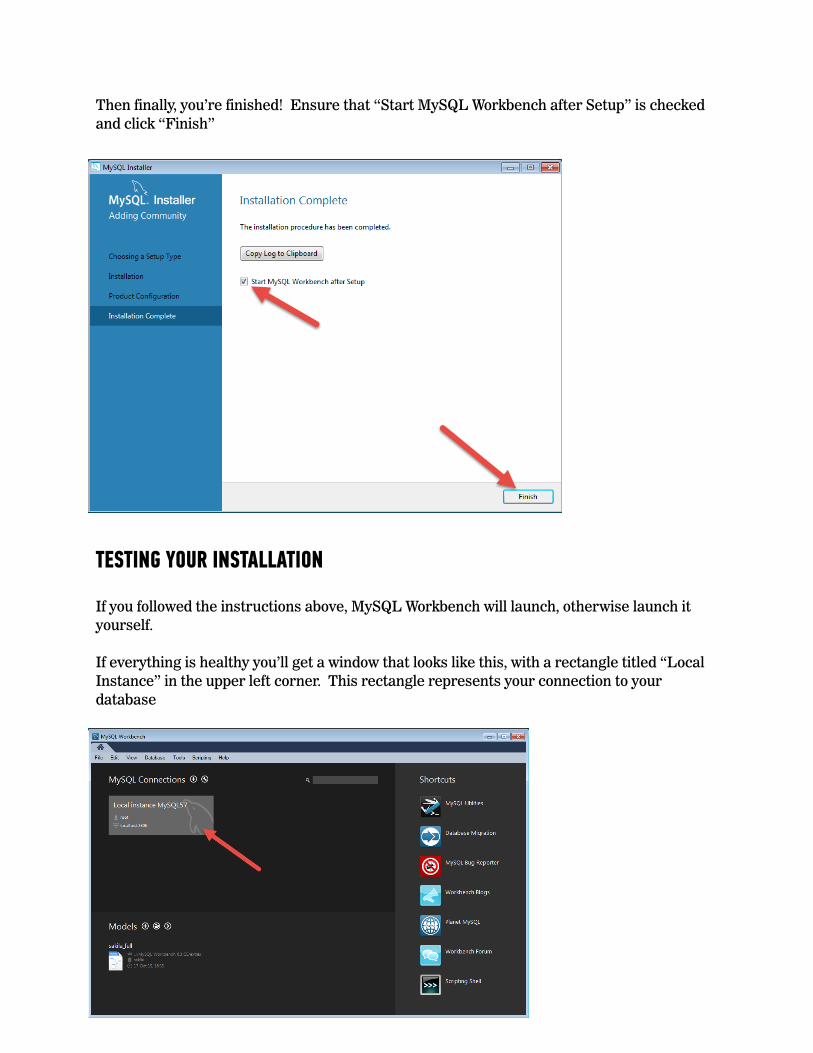
Then finally, you’re finished! Ensure that “Start MySQL Workbench after Setup” is checked and click “Finish”
TESTING YOUR INSTALLATION
If you followed the instructions above, MySQL Workbench will launch, otherwise launch it yourself.
If everything is healthy you’ll get a window that looks like this, with a rectangle titled “Local Instance” in the upper left corner. This rectangle represents your connection to your database
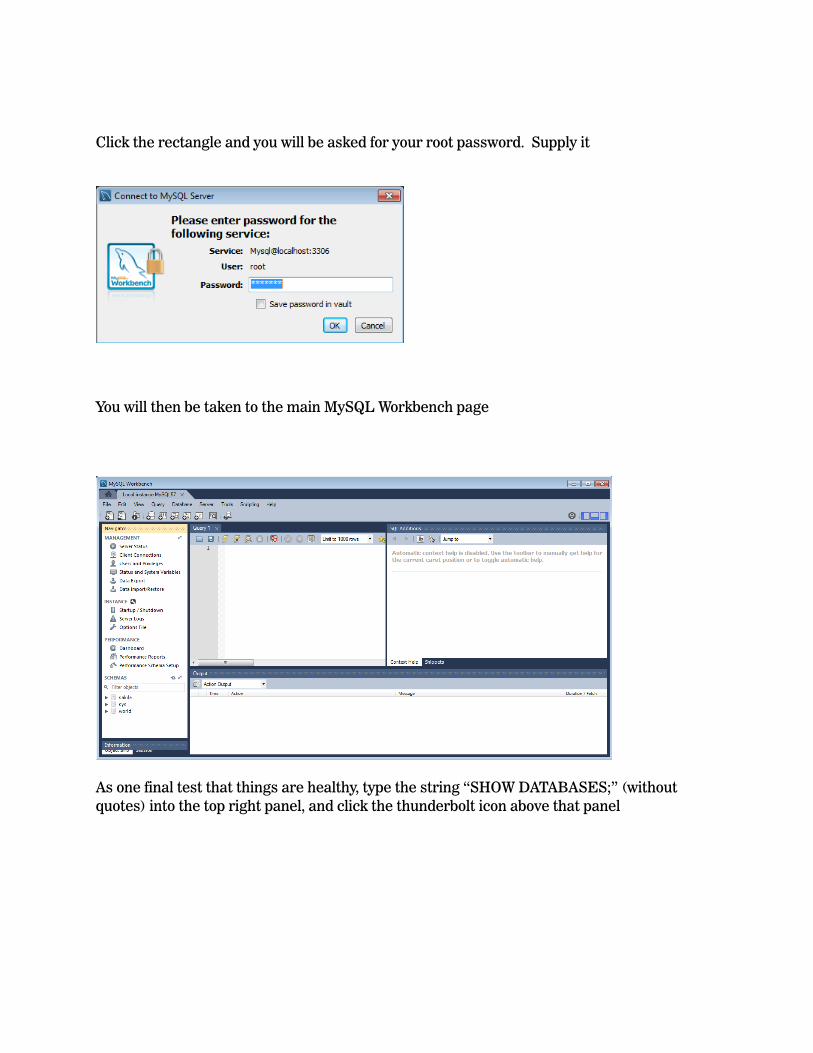
Click the rectangle and you will be asked for your root password. Supply it
You will then be taken to the main MySQL Workbench page
As one final test that things are healthy, type the string “SHOW DATABASES;” (without quotes) into the top right panel, and click the thunderbolt icon above that panel
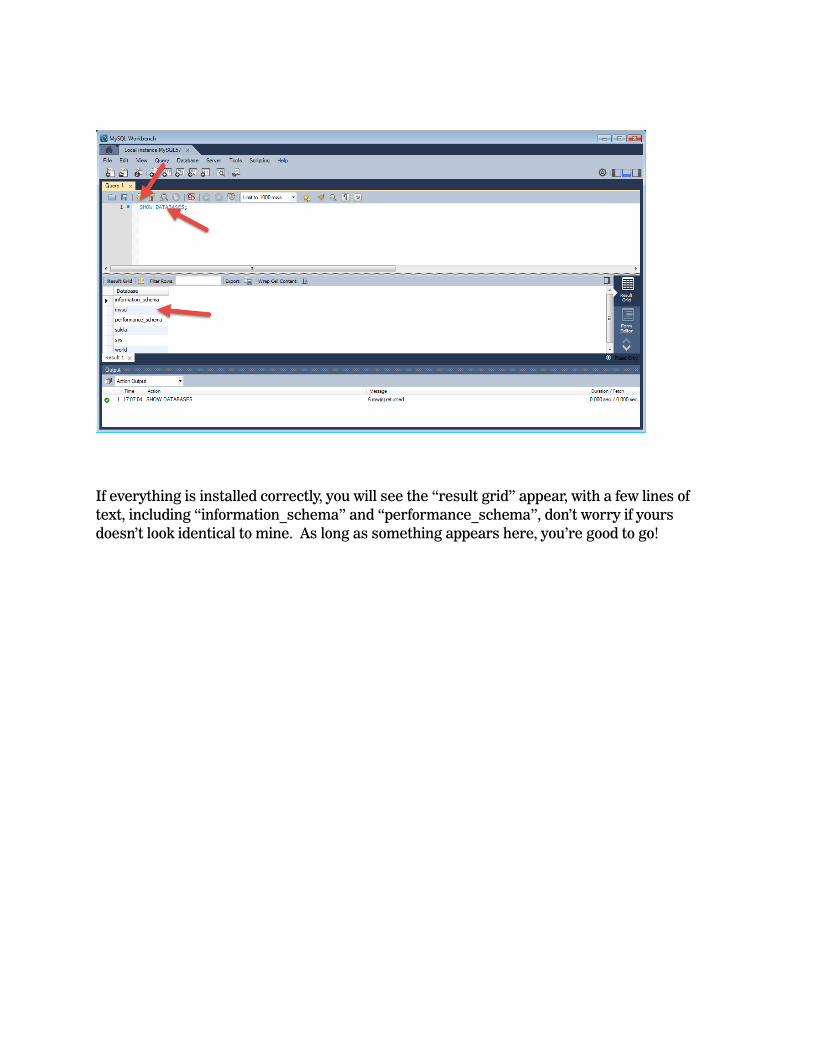
If everything is installed correctly, you will see the “result grid” appear, with a few lines of text, including “information_schema” and “performance_schema”, don’t worry if yours doesn’t look identical to mine. As long as something appears here, you’re good to go!