navy rockets united states naval academy annapolis, … midshipman capstone, aerospace engineering...
TRANSCRIPT

Critical Design Review
11 JAN 15
Navy Rockets
United States Naval Academy
Annapolis, Maryland
1/C Midshipman Capstone, Aerospace Engineering Department
ii
T e a m M i s s i o n
The mission of Navy Rockets is to provide an expansion and application of classroom
knowledge through a unique project based engineering opportunity. Navy Rockets also strives to
develop members morally and mentally by imbuing them with the highest ideals of engineering
leadership and practice. During this year’s Student Launch program, Navy Rockets will deliver a
rocket and ground support element that incorporates a payload delivery system that meets all
required criteria as defined by NASA and Centennial Challenges guidelines. Overall, Navy
Rockets is committed to excellence in practice, delivery, and conduct.
Navy Rockets Charter
The vision of Navy Rockets is to: Supplement academic material in both the aerospace and engineering fields
Expand each midshipmen’s knowledge and experience to become more proficient and well-
rounded members of the engineering community
Provide leadership opportunities in a technical environment to better serve midshipmen as future
leaders in today’s Navy
As a team we strive to: Seek out projects that can benefit the aerospace community and reinforce our own educational
objectives
Deliver quality research and products on time, based in sound engineering and business
practices, and operate to a level above client expectation
As representatives of the armed services we will: Conduct ourselves in a professional manner and bring credit to both the United States Naval
Academy and the United States Naval service.
We are committed to excellence in practice, delivery, and conduct.
iii
T a b l e o f C o n t e n t s
Team Mission.................................................................................................................................. ii Navy Rockets Charter ............................................................................................................. ii
List of Figures ............................................................................................................................... vii List of Tables ............................................................................................................................... viii List of Abbreviations ..................................................................................................................... ix
1 Critical Design Review ........................................................................................................... 1 1.1 Team Summary ........................................................................................................... 1 1.2 Launch Vehicle Summary ........................................................................................... 1 1.3 AGSE Summary .......................................................................................................... 1
1.4 Team Members ............................................................................................................ 2 2 Changes to the Preliminary Design Review ........................................................................... 3
2.1 Vehicle ......................................................................................................................... 3 2.1.1 Payload ........................................................................................................................ 3
2.1.2 Recovery ...................................................................................................................... 3 2.2 AGSE ........................................................................................................................... 3
2.3 Project Plan .................................................................................................................. 3
2.3.1 Wind Tunnel ................................................................................................................ 4
3 Vehicle Criteria ....................................................................................................................... 5 3.1 Launch Vehicle ............................................................................................................ 5
3.1.1 Mission ........................................................................................................................ 5 3.1.2 Requirements ............................................................................................................... 5 3.1.3 Success Criteria ........................................................................................................... 5
3.1.4 Subsystems Success Criteria ....................................................................................... 6 3.1.5 Milestone Schedule ..................................................................................................... 7
3.1.6 Flight Profile ................................................................................................................ 7 3.1.7 Final Design ................................................................................................................ 8 3.1.8 Launch Vehicle Testing ............................................................................................. 10
3.1.9 Final Rocket Motor Selection .................................................................................... 10
3.1.10 Flight Reliability and Confidence ............................................................................. 13 3.1.11 Workmanship ............................................................................................................ 13 3.1.12 Component Manufacturing ........................................................................................ 14
3.1.12.1 Material Components ...................................................................................... 14
3.1.12.2 Manufacturing and Assembly Process ............................................................ 15
3.1.12.3 Motor Mounting .............................................................................................. 16
3.1.12.4 Mass Statement ................................................................................................ 17
3.1.13 Component Testing ................................................................................................... 18
3.1.14 Safety and Failure Analysis ....................................................................................... 18 3.2 Payload System ......................................................................................................... 19 3.2.1 System Design ........................................................................................................... 19

iv
3.2.1.1 Drawings and Specifications ........................................................................... 20
3.2.1.2 Analysis Results .............................................................................................. 21
3.2.1.3 Test Results...................................................................................................... 21
3.2.1.4 Design Integrity ............................................................................................... 21
3.2.2 System Manufacturing .............................................................................................. 22 3.2.3 Electronic Systems .................................................................................................... 22
3.2.3.1 Test Plans ......................................................................................................... 23
3.2.4 Safety and Failure Analysis ....................................................................................... 23
3.3 Igniter Insertion ......................................................................................................... 24 3.3.1 System Design ........................................................................................................... 24
3.3.1.1 Drawings and Specifications ........................................................................... 24
3.3.1.2 Analysis Results .............................................................................................. 25
3.3.1.3 Test Results...................................................................................................... 26
3.3.2 Design Requirements ................................................................................................ 26 3.3.3 System Manufacturing .............................................................................................. 26 3.3.4 Integration Plan ......................................................................................................... 26
3.3.4.1 Test Plans ......................................................................................................... 26
3.3.5 Safety and Failure Analysis ....................................................................................... 27
3.4 Subscale Flight Results ............................................................................................. 27 3.5 Wind Tunnel Testing ................................................................................................. 28
3.5.1 Nose Cone ................................................................................................................. 28 3.5.2 Body Section ............................................................................................................. 28 3.5.3 Fin Section ................................................................................................................. 28
3.5.4 Testing ....................................................................................................................... 28 3.6 Recovery Subsystem ................................................................................................. 29
3.6.1 Recovery Components .............................................................................................. 29 3.6.2 Electrical Components .............................................................................................. 31
3.6.3 Recovery Schematic .................................................................................................. 33
3.6.4 Kinetic Energy ........................................................................................................... 37
3.6.5 Recovery Test Results ............................................................................................... 38 3.6.6 Safety and Failure Analysis ....................................................................................... 39 3.7 Mission Performance Predictions .............................................................................. 39 3.7.1 Mission Performance Criteria ................................................................................... 39 3.7.2 Flight Simulations and Predictions ............................................................................ 40
3.7.3 Stability Margin ......................................................................................................... 42 3.8 AGSE Integration ...................................................................................................... 44 3.8.1 Integration Plan ......................................................................................................... 44
3.8.1.1 Payload to Rocket Body .................................................................................. 44
3.8.1.2 Vehicle to Ground Interface ............................................................................ 44
3.8.2 Compatibility ............................................................................................................. 44

v
3.8.3 Simplicity and Ease ................................................................................................... 45 3.9 Launch and Operation Procedures ............................................................................ 45 3.9.1 Recovery Preparation ................................................................................................ 45
3.9.2 Motor Preparation ...................................................................................................... 45 3.9.3 Launcher Setup .......................................................................................................... 46 3.9.4 Igniter Installation ..................................................................................................... 46 3.9.5 Troubleshooting ......................................................................................................... 46 3.9.6 Post-flight Inspection ................................................................................................ 47
3.10 Safety and Environment ............................................................................................ 47 3.10.1 Hazards and Failure Modes ....................................................................................... 47
3.10.1.1 Laws................................................................................................................. 47
3.10.1.2 MSDS .............................................................................................................. 47
3.10.1.3 Operational Risk Management ........................................................................ 47
3.10.2 Environmental Concerns ........................................................................................... 52
4 AGSE Criteria ....................................................................................................................... 54 4.1 Testing and Design of AGSE .................................................................................... 54
4.1.1 System Design ........................................................................................................... 54 4.1.1.1 AGSE Analysis ................................................................................................ 59
4.1.2 Component Testing ................................................................................................... 59
4.1.3 Electronic Integration Plan ........................................................................................ 61 4.1.4 Instrument Precision .................................................................................................. 63
4.1.5 AGSE Timeframe ...................................................................................................... 63 4.2 AGSE Concept Features ............................................................................................ 64 4.2.1 Tower Structure ......................................................................................................... 64
4.2.2 Motor and Amplifier ................................................................................................. 64 4.2.3 Scorbot ER-V ............................................................................................................ 64
4.3 Science Value ............................................................................................................ 66 4.3.1 AGSE Objectives ...................................................................................................... 66 4.3.2 AGSE Mission ........................................................................................................... 66
4.3.3 Success Criteria ......................................................................................................... 68 4.3.4 Experimental Approach ............................................................................................. 68 4.3.5 Variable Control ........................................................................................................ 69 4.3.6 Error Analysis ............................................................................................................ 69
5 Project Plan ........................................................................................................................... 70 5.1 Budget Plan ............................................................................................................... 70 5.2 Funding Plan .............................................................................................................. 72 5.3 Timeline ..................................................................................................................... 72 5.4 Educational Engagement ........................................................................................... 72
5.4.1 STEM Coordination .................................................................................................. 73 5.4.2 Team Participation .................................................................................................... 73
5.4.3 STEM events ............................................................................................................. 73 5.4.3.1 MESA DAY .................................................................................................... 74

vi
5.4.3.2 Mini-STEM ..................................................................................................... 74
5.4.3.3 Girls-Only STEM Day..................................................................................... 74
5.4.3.4 Space Exploration Merit Badge ....................................................................... 75
5.4.4 Sustainability ............................................................................................................. 75 5.4.4.1 Major Sustainability Challenges and Solutions ............................................... 75
5.4.5 Educational Engagement Progress (Proposal to PDR) .............................................. 76
5.4.6 Outreach Update ........................................................................................................ 76 6 Conclusion ............................................................................................................................ 77
APPENDIX A: CDR Flysheet ...................................................................................................... 78 APPENDIX B: Suggestion Changes ............................................................................................ 80 APPENDIX C: Mission Requirements ......................................................................................... 82 APPENDIX D: Rocket Dimensions ............................................................................................. 89
APPENDIX E: Wind Tunnel Testing ........................................................................................... 91 APPENDIX F: Laws ..................................................................................................................... 97
A.1 Subpart C— Amateur Rockets ..................................................................................... 103 A.2 Law & Regulations: NAR ............................................................................................ 105
APPENDIX G: MSDS ................................................................................................................ 110 APPENDIX H: Gantt Chart ........................................................................................................ 149

vii
L i s t o f F i g u r e s
Figure 1. Flight Profile .................................................................................................................... 8 Figure 2. OpenRocket Design ......................................................................................................... 9
Figure 3. Rocket Dimensions .......................................................................................................... 9 Figure 4. Fin and Motor Dimensions ............................................................................................ 10 Figure 5. K600 Veritcal Motion vs. Time ..................................................................................... 11
Figure 6. K750 Vertical Motion vs. Time ..................................................................................... 11 Figure 7. K1200 Vertical Motion vs. Time ................................................................................... 12 Figure 8. K1200 Trust and Vertical Motion vs. Time .................................................................. 13 Figure 9. Tubing Mold Shape (Half Circle) .................................................................................. 15
Figure 10. Tubing Connections (Full Circle) ................................................................................ 16 Figure 11. Payload Containment Area Cross Section ................................................................... 19 Figure 12. Payload Section (Side View) ....................................................................................... 20 Figure 13. Payload Section (Top View) ....................................................................................... 20
Figure 14. Payload Section Electrical Schematic ......................................................................... 22 Figure 15. Front View of Igniter Insertion System ....................................................................... 25
Figure 16. Side View of Igniter Insertion System ........................................................................ 25
Figure 17. Recovery Electrical Schematic .................................................................................... 32
Figure 18. Recovery Harness Attachment Points – ...................................................................... 33 Figure 19. Avionics Bay with Bulkheads ..................................................................................... 34
Figure 20. Tail Section Drogue Harness Attachment Points ........................................................ 34 Figure 21. Payload Bay Recovery Attachment Point ................................................................... 35 Figure 22. The Launch Vehicle in Recovery Configurations after Ejection Event 1 (left) and
Ejection Event 2 (right) ................................................................................................................. 36 Figure 23. Recovery Test Stand .................................................................................................... 38
Figure 24. Vertical Motion vs. Time at 5 mph ............................................................................. 40 Figure 25. Vertical Motion vs. Time at 10 mph ........................................................................... 41 Figure 26. Vertical Motion vs. Time at 15 mph ........................................................................... 41
Figure 27. Vertical Motion vs. Time at 20 mph ........................................................................... 42
Figure 28. K1200 Stability Margin and Angle of Attack vs. Time .............................................. 43 Figure 29. ORM Values ................................................................................................................ 48 Figure 30. ORM Risk Matrix ........................................................................................................ 48 Figure 31. Tower Feet ................................................................................................................... 54 Figure 32. Upper Right Gear ........................................................................................................ 55
Figure 33. Tower Motor Placement - Top View........................................................................... 56 Figure 34. Gate Latch ................................................................................................................... 57 Figure 35. Front View of the Igniter Stand ................................................................................... 57 Figure 36. Side View of the Igniter Stand .................................................................................... 58 Figure 37. Tower and Rail Design ................................................................................................ 58
Figure 38. Payload Tube ............................................................................................................... 60 Figure 39. AGSE Schematic ......................................................................................................... 62

viii
Figure 40. Top-down View of Scorbot Operating Range ............................................................. 65 Figure 41. Side View of Scorbot Operation Range ...................................................................... 65 Figure 42. Entire Assembly (Horizontal Position) ....................................................................... 67
Figure 43. Entire Assembly (Vertical Position) ............................................................................ 67
L i s t o f T a b l e s
Table 1. Subsystem Criteria ............................................................................................................ 6 Table 2. Milestone Schedule ........................................................................................................... 7 Table 3. Material QFD .................................................................................................................. 14
Table 4. Mass Budget ................................................................................................................... 17 Table 5. Launch Vehicle Failure Modes ....................................................................................... 18
Table 6. Payload Section Failure Analysis ................................................................................... 23
Table 7. Igniter Insertion Failure Modes ...................................................................................... 27
Table 8. Black Powder Charge Required ...................................................................................... 31 Table 9. Section Masses ................................................................................................................ 37
Table 10. Kinetic Energy .............................................................................................................. 37 Table 11. Hazard Analysis for Project and Safety ........................................................................ 49 Table 12. Hazard Analysis for Launch and AGSE ....................................................................... 50
Table 13. Hazard Analysis for the Vehicle ................................................................................... 51 Table 14. Environmental Hazards................................................................................................. 53
Table 15. AGSE Timeframe ......................................................................................................... 63 Table 16. Success Criteria ............................................................................................................. 68 Table 17. Navy Rockets' 2014-2015 Student Launch Budget ...................................................... 70
Table 18. Itemized Budget of Full Scale Launch Vehicle ............................................................ 71
Table 19. Navy Rockets Funding Plan ......................................................................................... 72 A-1. Wind Tunnel Test Personnel ............................................................................................... 93

ix
L i s t o f Ab b r e v i a t i o n s
AGL .......................................Above Ground Level
AGSE .....................................Autonomous Ground Support Equipment
AIAA......................................American Institute of Aeronautics and Astronautics
BSA ........................................Boy Scouts of America
CG ..........................................Center of Gravity
CNC .......................................Computer Numerical Control
CP ...........................................Center of Pressure
DARPA ..................................Defense Advanced Research Projects Agency
E-glass ....................................Fiberglass
FAA........................................Federal Aviation Administration
GET IT and GO .....................Girls Exploring Technology through Innovative Topics, Girls Only
GSE ........................................Ground Support Equipment
GNC .......................................Guidance, Navigation, Control
GPS ........................................Global Positioning System
HDF........................................High Density Foam
ISR .........................................Intelligence, Surveillance, and Reconnaissance
MATLAB ...............................Matrix Laboratory
MDRA....................................Maryland Delaware Rocketry Association
MESA ....................................Maryland Mathematics Engineering Science Achievement
MSL .......................................Mean Sea Level
NAR .......................................National Association of Rocketry
NASA .....................................National Aeronautics and Space Administration
NESA .....................................National Eagle Scout Association
PVC ........................................Polyvinyl Chloride
QFD........................................Quality Function Deployment
REPTAR ................................Rocket Equipped Payload Transportation and Autonomous Release
RSO ........................................Range Safety Officer
S-glass ....................................Stiff Fiberglass
SRQA .....................................Safety, Reliability, and Quality Assurance
STEM .....................................Science, Technology, Engineering, and Mathematics
TRA........................................Tripoli Rocketry Association
VTC........................................Video-teleconferencing and communication
USLI .......................................University Student Launch Initiative
USNA .....................................United States Naval Academy
USNA MSTEM .....................United States Naval Academy Midshipmen Science, Technology,
Engineering, and Mathematics

1
1 C r i t i c a l D e s i g n R e v i e w
1.1 Team Summary
Team Name: Navy Rockets
Institution: United States Naval Academy
Mailing Address: Aerospace Engineering Department
United States Naval Academy
ATTN: NASA Student Launch Capstone
Mail Stop 11B
590 Holloway Road
Annapolis, MD 21402-5042
Project Mentor: Robert Utley (NAR Level 3)
NAR # 71782
TRA # 6103
President, Maryland Delaware Rocketry Association
1.2 Launch Vehicle Summary
The REPTAR launch vehicle will utilize a redundant dual deployment system upon the recovery
stage of flight. This system includes two identical PerfectFlite Stratologger altimeters and four
black powder ejection charges. Upon apogee, both altimeters will simultaneously trigger two aft
facing ejection charges, pressurizing the aft recovery compartment and releasing an 18 inch
elliptical drogue parachute. Then, at an altitude of 1000 feet AGL, the altimeters will trigger a
second ejection event in the forward recovery compartment. This event will pressurize the
compartment and jettison the forward payload section of the launch vehicle. The main body will
deploy a 72 inch torroidal parachute and the payload section will deploy a 60 inch torroidal
parachute. The Flysheet for the rocket can be found in Appendix A.
1.3 AGSE Summary
Project Title: REPTAR (Rocket Equipped Payload Transportation and Autonomous
Release) System
The Autonomous Ground Support Equipment is designed to insert the payload with the use of a
Scorbot ER-V and remotely secure the payload within the payload compartment. Following this,
the AGSE will move the rocket from a horizontal loading position to the final launch position,
which is 5 degrees from the vertical plane. Upon placement of the rocket into the launch
position, the AGSE will insert the rocket motor igniter. All AGSE tasks will be issued from a
laptop computer through RF transmitter and receiver units. The entire sequence will be
completed from start to finish within a 10 minute window.

2
1.4 Team Members
Team Size: 9 Midshipmen
Hayes (Astronautical Engineering, ’15)
Team Manager
GNC (Guidance, Navigation, Control) / Recovery System Chief
Systems Engineering/Integration Chief
Alex (Astronautical Engineering, ’15)
Administrative Officer
Chief Engineer
Drafting Chief
Avionics Chief
Cole (Aeronautical Engineering, ’15)
Proposal Manager
Safety Administration Officer
SRQA (Safety Reliability & Quality Assurance) Chief
Materials/Structures Chief
Joe (Astronautical Engineering, ’15)
Technology Officer
Propulsion Chief
Richie (Astronautical Engineering, ’15)
Financial Officer
GSE (Ground Support Equipment) Chief
Thor (Astronautical Engineering, ’15)
Acquisitions Officer
Payload Design Chief
Sam (Astronautical Engineering, ’15)
AGSE Coding Chief
Tower Erection Lead
Troy (Aeronautical Engineering, ’15)
Public Affairs/ Outreach Officer
Aerodynamics Chief
Andy (Astronautical Engineering, ’16)
Project Assistant
Igniter Insertion Lead

3
2 C h a n g e s t o t h e P r e l i m i n a r y D e s i g n R e v i e w
2.1 Vehicle
2.1.1 Payload
A minor change has been made to the payload section of the rocket since the PDR. The
mechanism that draws the nosecone back onto the rocket body and secures the nosecone has
been changed from a linear stepper motor to a brushed DC motor. This brushed DC motor drives
a rack and pinion system. This change was made due to both the simplicity of control and
physical size constraints of the rocket. The driver for the selected linear stepper motor would
have been excessively large.
2.1.2 Recovery
The recovery system has been modified since the Preliminary Design Review to better reflect
redundancy precautions in its design. First, the independent arming switches independent for
each battery system were removed as they were potential single point failures, and the entire
system will be armed by a single external switch on the rocket body. Second, a redundant
ejection charge was added in lieu of the motor delay event. This change was made in order to
better control the apogee drogue deployment timing as well as provide redundant control of the
event. Third, a redundant ejection well was added to each event. This secondary well, wired in
parallel with the first, again provides redundancy in the event that the first ejection well
malfunctions. Last, the main body parachute size was increased to ensure proper kinetic energy
control.
2.2 AGSE
The time delay occurring after the insertion of the payload into the payload bay was reduced to
10 seconds to decrease the total time utilized by the AGSE. 10 second delays were added
between all stages to minimize the risk of interference between processes.
2.3 Project Plan
During the PDR, NASA made multiple suggestions to improve the REPTAR project. A list or
suggestions and results can be found in Appendix B.

4
2.3.1 Wind Tunnel
The major changes to the wind tunnel testing regard the design of the wind tunnel model. The
wind tunnel model has gone through multiple iterations. The main problems were the difficulty
of attaching the model to the sting balance, not overloading the balance moments, and choosing
the right material for pressure calculations. In the final iteration, the rocket has been designed
with a sting balance attachment attaching the sting, the rocket body, and the fin section.

5
3 V e h i c l e C r i t e r i a
3.1 Launch Vehicle
3.1.1 Mission
The mission of Navy Rockets is to provide an expansion and application of classroom
knowledge through a unique project based engineering opportunity. Navy Rockets also strives to
develop its member midshipman morally and mentally by imbuing them with the highest ideals
in engineering leadership and practice. During this year’s Student Launch program, Navy
Rockets will deliver a rocket and ground support element that incorporates a payload delivery
system meeting all required criteria as defined by NASA and Centennial Challenges guidelines.
Overall, Navy Rockets is committed to excellence in practice, delivery, and conduct.
3.1.2 Requirements
The key requirements in this year’s NASA Student Launch competition are as follows:
◦ Launch Vehicle:
Payload Sample Containment System
Active GPS tracking
Launch to 3000 feet AGL
Jettison payload section at 1000 feet AGL
Return both sections to ground with under 75 ft-lb KE
◦ Autonomous Ground Support Equipment (AGSE):
Retrieve sample and place inside horizontal launch vehicle
Erect launch vehicle to 5° from vertical
Insert electronic igniter into motor
Include pause function
No human interaction or commands sent once process begins
◦ Neither deliverable may cost over $5,000, for a total of $10,000
The full list of requirements, each requirement’s verification method, and status is listed in
Appendix C.
3.1.3 Success Criteria
In order for this year’s REPTAR project to be a success, Navy Rockets will deliver an
autonomous ground support element capable of loading the specified payload into a rocket,
launch the rocket to 3000 feet AGL, and return both the main rocket body and the jettisoned
payload section safely to the ground while meeting all specified mission criteria listed above.

6
3.1.4 Subsystems Success Criteria
The REPTAR launch vehicle has multiple subsystems and components that work into the design
as shown in Table 1.
Table 1. Subsystem Criteria
Subsystem Description Function
Payload
The design, construction, and testing
of payload sample integration and
associated recovery system.
Shall integrate and retain the sample
into the rocket body and deliver it
safely back to the surface
Materials and
Structures
The design, validation, construction,
and testing of the materials and
dimensions used in the rocket body,
fins, and nosecone.
Shall effectively support and retain
all internal hardware from both
atmospheric and internal effects, and
maintain structural integrity from
launch to landing.
Flight Avionics
The selection and integration of all
GPS systems and flight data recorders,
as well as associated power systems.
Shall provide real-time tracking of
the vehicle’s position after launch as
well as provide the flight data for SL
and Centennial scoring judges.
Recovery
The design, selection, and testing of
the parachute and associated
components for both the payload and
main body sections.
Shall safely deliver both the payload
and main body sections back to the
ground in a timely and controlled
manner, while allowing both to
maintain their structural integrity.
Propulsion
The selection and calculation of the
motor size and manufacturer to meet
the flight requirements based on the
vehicle design.
Shall deliver the vehicle to the
prescribed altitude and provide the
initial phase of the recovery system in
a controlled manner.

7
3.1.5 Milestone Schedule
The Navy Rockets’ milestone schedule is shown in Table 2.
Table 2. Milestone Schedule
Date Milestone Event
Nov. 05 Design Concept Sub Scale Model Completed
Nov. 08 Successful Flight – Body Design Validated
Nov. 19 ½ Sub Scale Model Completed
Nov. 14 PDR Presentation
Nov. 30 SCORBOT Initial Programming Complete
Dec. 1 GPS, Recovery Components, Avionics, I242 Motor Received
Dec. 6,7 Recovery Systems Test Flight Scrubbed (Weather)
Dec. 10 Rocket Body Mold Design Finished
Jan. 08 Wind Tunnel Test Model Fabrication Begins
Jan. 12 SCORBOT/Payload Test Bed Complete
Jan. 14 CDR Mock Presentation with Faculty
Jan. 15 CDR Completed and Submitted
3.1.6 Flight Profile
The rocket will follow a planned flight path. This path will include apogee at 3000 feet and
deployment of the drogue and payload at 1000 feet. The flight plan can be seen in Figure 1.

8
Figure 1. Flight Profile
3.1.7 Final Design
The rocket will be a 5 inches in diameter and 103 inches long made from both carbon fiber and
fiberglass. The entire structure will have a constant thickness of 0.08 inches thick. The nose cone
and avionics section, shown in Figure 2, will hold electronic equipment and will be made from
fiberglass and Kevlar. The nose cone is 22 inches long, shown in Figure 3, and will hold the
payload section’s GPS and cover the sample payload. The avionics section will hold the main
body’s GPS and altimeters.

9
Figure 2. OpenRocket Design
The rest of the rocket body will be made from carbon fiber. The payload compartment will be 14
inches long and hold the mechanical equipment that will control the payload system. The
parachutes are housed in a 22 inch long section with the entire recovery harnesses for both the
payload and the main body. The lower section of the rocket will be 35 inches long and hold the
motor casing and motor retention. The motor mount will be 20 inches long and 54 millimeters in
diameter, shown in Figure 4, in order to accommodate the correct motor. The three fins will be
connected to the motor mount and held between centering rings. The fins will be 0.125 inches
thick and have an area of 47.5 square inches. The complete component sizes can be found in
Appendix D.
Figure 3. Rocket Dimensions

10
Figure 4. Fin and Motor Dimensions
3.1.8 Launch Vehicle Testing
After the launch vehicle has completed the manufacturing process, it will undergo testing in
order to ensure it will perform at the desired level. The vehicle will complete at least two
separate launches in order to be verified. The first launch will be on a regular launch stand which
will verify that the rocket can be launched and recovered in the planned sections without any
incidents. The second launch will be a full scale launch using the AGSE system. Using the
AGSE will show that the entire project will be successful.
3.1.9 Final Rocket Motor Selection
The selection of the motor was dominated by three principle factors: impulse, diameter, and
apogee. The length and impulse of the motor were first looked at. As long as the total impulse
was kept under the required 5120 N-s, or a maximum of an L-class motor, any motor could be
used. The second constraint of motor diameter was then put into Open Rocket, rocket simulation
software. For our design, a motor diameter of 2.13 inches was chosen. This narrowed the choices
to mostly K motors and a few L motors. Finally, the motor was chosen based on the required
apogee of 3,000 feet with a buffer zone of 100 feet. This led to the selection of a K1200WT
motor by Cesaroni Technology Inc. There were other motors that came within 15% of the
targeted 3100 foot goal notably the 2130-K600-WH and the K750-17 motors. Figures 5-7 below
are graphs, generated from Open Rocket, depicting vertical motion vs. time in the K600, K750,
and K1200 motors respectively.

11
Figure 5. K600 Veritcal Motion vs. Time
Figure 6. K750 Vertical Motion vs. Time

12
Figure 7. K1200 Vertical Motion vs. Time
The K600 motor reaches 2,997 feet, 3 feet below the required altitude of 3,000 feet. However,
the desired margin of error of 100 feet makes choosing this motor too risky, based on unforeseen
weight and drag that will occur on the day of the launch. The second motor, K750-17, reached
3,534 feet in the simulation. This is above the desired altitude of 3,100 feet by 434 feet. This
would be too great of a deduction to the final grade to justify having that much excess height in
order to guarantee reaching 3,000 feet on launch day. It would also be a safety risk and exceed
the altitude requirement. The last motor, the K1200WT-16, was chosen because it reached close
to the desired height with an apogee of 3,068 feet, only 32 feet under the desired altitude of
3,100 feet. It also has a given total impulse of 2011 N-s.
After selecting the K1200 motor based on altitude calculations, competition thrust requirements
were considered. Using Figure 8 below, a maximum thrust of approximately 1,350 N was
determined. This value will be essential in developing a motor mount to sustain this force. Due to
the predicted performance of the K1200 motor, it will be used in the final rocket design.

13
Figure 8. K1200 Trust and Vertical Motion vs. Time
3.1.10 Flight Reliabili ty and Confidence
Theoretical Open Rocket altitudes were compared to empirically measured altitudes during three
previous high-powered rocket launches. Empirical data varied by less than 3%, indicating that
the theoretical values represent a reliable estimate of true performance. This small error gives a
good expectation to the performance for the final rocket during testing and competition. Also,
when the rocket is tested before the competition, it will be checked against the predicted values
in order to ensure that it meets the requirements and expectations.
3.1.11 Workmanship
Precision measurement and manufacturing techniques will be required to properly construct the
rocket. This requires attention to detail and expert supervision to ensure each part is correctly
manufactured. It is a team effort to build and assemble the rocket properly for launch.

14
3.1.12 Component Manufacturing
3.1.12.1 Material Components
Carbon fiber and fiberglass are common materials used in high power rocketry. In order to
determine which material is the better product a house of quality is used. The house of quality
uses the Quality Function Deployment System (QFD) as seen in Table 3. The QFD system
allows the two materials to be tested on important characteristics for the project. Each
characteristic has a weighting of importance for the project; a one weighting represents little
importance to the project, a three weighting represents medium importance, and a nine weighting
means that it is critical to the project. This weighting allows the important factors to outweigh
less desired characteristics. If the material agreed with the material factor it was given a positive
weighting score. If the material completely disagreed it was given a negative weight score. A
score of zero was given when the material met the requirements but did not standout against the
other.
Table 3. Material QFD
Materials
Material Factors Weighting
Factor
Carbon Fiber Fiberglass
Low cost 3 -3 3
High availability 3 3 3
Compact rocket size 9 9 -9
Low weight 9 9 -9
Easy production 9 -9 -9
High tensile strength 1 1 1
High compressive strength 9 9 0
High stiffness 3 3 0
High heat resistance 3 3 3
High Young's modulus 3 3 0
Large motor selection 9 9 0
Totals 37 -17
Carbon fiber was selected for its superior material strength, low weight, and relatively high
availability. Although the cost of carbon fiber was significantly higher than alternative
materials, such as fiberglass and cardboard, the cost difference was not significant enough to
push the design out of budget. Due to the low density of carbon fiber, the dimensions of the
rocket were able to be greatly reduced, as well as the motor size required to push the rocket to
3,000 feet in altitude. Using carbon fiber for a majority of the rocket allows for level K motors to
be used whereas it would require an L motor to power a fiberglass rocket to the same altitude.
Carbon fiber will be used throughout the body to save on weight and increase the strength of the

15
rocket. In the avionics section and the nose cone, the rocket will be made from fiberglass. The
fiberglass is strong enough to endure the forces during a flight but it also allows signal to
transmit. Using fiberglass throughout the entire body would greatly increase the weight and
decrease the strength for the thickness of the material.
3.1.12.2 Manufacturing and Assembly Process
The rocket will consist of both carbon fiber and fiberglass materials. The process of constructing
the rocket with carbon fiber and fiberglass has been taught to the team by a composite specialist
from the Machine Shop in Rickover Hall. This specialist will also supervise the entire
manufacturing process in order to ensure that the components come out correctly. For the body
tube, two circle in-lay molds has been extruded from high density foam. The two half circles
slightly overlap each other with a small lip and come to a small taper at each end. This lip allows
each piece of the tube to interlock with the opposite side as shown in Figures 9 and 10.
Figure 9. Tubing Mold Shape (Half Circle)

16
Figure 10. Tubing Connections (Full Circle)
For the carbon fiber, the connection points of the tubing will have an additional layer of carbon
fiber to secure them. For the fiberglass, the connection points will be secured using nuts and
bolts which will allow for internal access to the electronic sections. When producing the
material, a quick release agent will be applied to the inside of the mold and then the material will
be laid and secure with epoxy. Once the layers have been correctly laid it will then be vacuum
bagged to help the material set properly. The fins and bulkheads, which will be 0.125 inches
thick, will then be created by layering the material, using the same layering method, on pre-cut
foam shapes in the dimensions of each part. The nose cone will be created by an extruded foam
mold of the nose cone. The material will be wrapped around the mold and then vacuum bagged
in order for the mold to come out correctly.
The small taper that was designed into the mold allows for the ends to be used for coupling the
various sections. After each section has been produced it will be placed in the correct order and
the tubes will be marked so that the alignment for the tubes does not change. Each tube will be
secured to its adjoining tubes by shear bolts.
3.1.12.3 Motor Mounting
The motor mount for the rocket will be created from a smaller carbon fiber tube that is created
around a PVC pipe that has an inner diameter that is equal to the motor tube. The mount will
have two centering rings, one on both ends of the tube to ensure the tube is completely centered
while it is inserted into the rocket. Each centering ring will be 0.125 inches thick of carbon fiber.
The carbon fiber tube will hold the motor and its casing and at the bottom end be secured by a
twist on bolt for a cap to ensure that the motor does not separate from the body. The fins will be
secured by epoxy onto the motor mount in between the two centering rings. This motor mount
section will then be able to be inserted into the bottom of the main body section through pre-cut

17
slits for the fins. Since each fin will be 0.125 inches the slits will only be slightly larger to allow
the fins to be inserted. The mount will be secured with epoxy and bolts to the body tube.
3.1.12.4 Mass Statement
The mass for the rocket design can be found in Table 4. The structural values are based off of the
OpenRocket data and the components are based off of specifications.
Table 4. Mass Budget
Section Item Quantity Weight (lb)
Total
Weight
(lb)
Fiberglass Nosecone 1 1.190 1.190
Fiberglass Tubing 1 0.814 0.814
Carbon Fiber Tubing 1 5.560 5.560
Fiberglass Coupler 3 0.467 1.401
Fiberglass Bulkhead 4 0.097 0.388
Fin Set 1 1.360 1.360
Launch lugs 2 0.003 0.006
Centering Rings 3 0.075 0.225
Engine Block 1 0.420 0.420
Shock Cord 3 0.161 0.483
TT15 Dog Device 2 0.626 1.252
StratoLogger Altimeter 3 0.030 0.090
Drogue Chute (24 inch) 1 0.070 0.070
Main Chute (72 inch) 1 0.938 0.938
Main Chute (60 inch) 1 0.680 0.680
Shock Cord (ft) 45 0.005 0.225
Haydon Kerk Size 14 Linear Stepper Motor, Non-captive 1 0.356 0.356
Hitec HS-422 Servo Motor 1 0.200 0.200
Tenergy 6V 3300mAh NiMH Battery pack 1 0.625 0.625
Brackets 1 0.500 0.500
3/8" x 48" Alumnium Rod 1 0.571 0.571
MaxStream xBee Wireless Serial Modem 1 0.070 0.070
Eyehook 1 0.080 0.080
Motor Mount 1 0.171 0.171
CTI 54mm K1200 1 3.600 3.600
54mm Motor Retainer 1 0.950 0.950
Miscellaneous Parts 1 0.500 0.500
Additonal Building Weight (~25% increase) 1 5.000 5.000
Final Mass (lb) 27.725
Structure
Avionics
Recovery
Payload
Motor
Extra
18
An additional half pound was added for the nuts, bolts, and fasteners that will be added to the
rocket. Also, the mass of a rocket will increase around 25% from predicted values so an extra 5
pounds were added to the rocket for calculations. This makes the final mass of the rocket to be
27.725 pounds.
3.1.13 Component Testing
In order to ensure that the components are built correctly, they will each undergo testing verify
their strength values. These values will be compared against the specifications of the material
and what they will experience during launch. The sections of tubing will undergo compression
testing to determine if the material will withstand the axial loads during flight. After compression
testing, the material will then experience side force loading to ensure that the material will not
break with any lateral loads that occur, to include a hard landing.
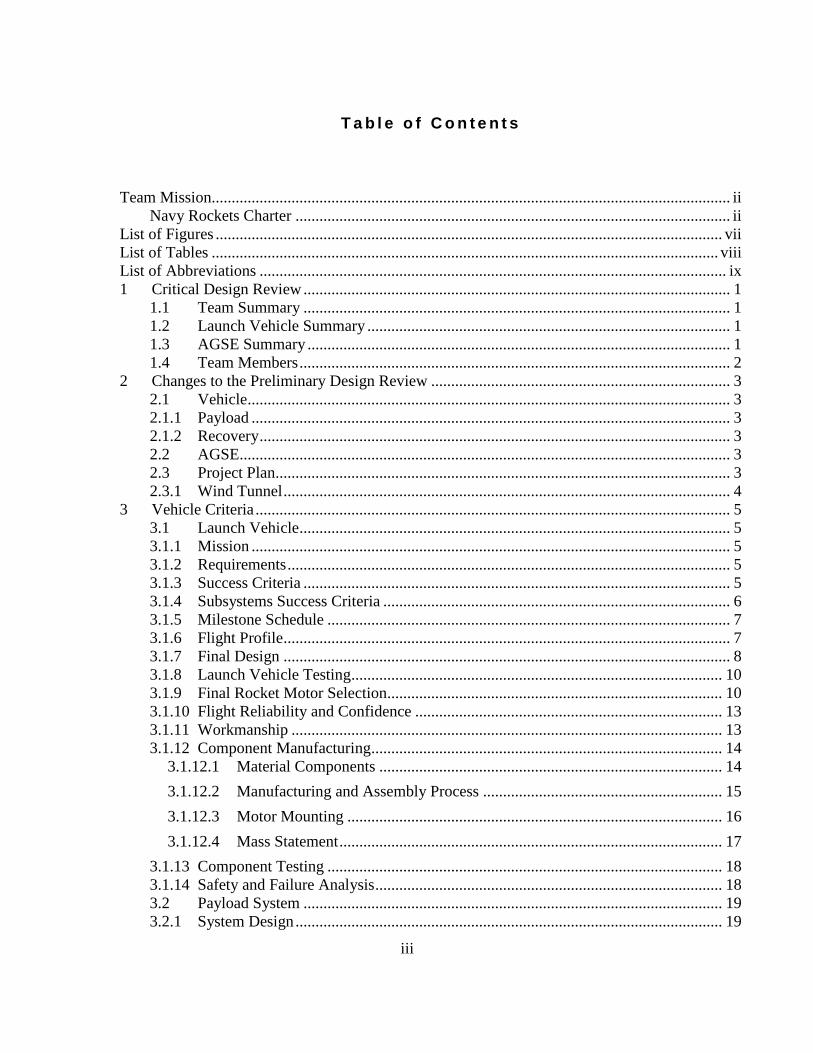
3.1.14 Safety and Failure Analysis
The failure modes for the launch vehicle are presented below in Table 5.
Table 5. Launch Vehicle Failure Modes
Failure Mode Cause Likelihood Severity Mitigation
Frame Breaks Defect in the tube from the building
process Low High
Material
Testing
Rocket
Overweight
Additional components or extra
epoxy in the rocket Medium Medium
Testing,
Analysis
Catastrophic
Motor Failure
The motor has a defect in which it
explodes on the launch pad Very Low High Research
All of these failure risks in the igniter insertion system will be mitigated and addressed through
extensive testing of both individual components and the system as a whole. Each of these failures
would cause a failure of the entire launch process, so it is extremely critical that each of these
failure modes is thoroughly addressed through testing.
The main safety risk associated with the igniter insertion system is accidental ignition of the
rocket motor. This risk would likely result from the AGSE control element, not the igniter
insertion system itself. Regardless, the igniter insertion system will be extensively tested to
ensure proper and safe operation.

19
3.2 Payload System
3.2.1 System Design
The payload section of the rocket will utilize the nosecone structure as an entry point to the
payload bay. Once activated via wireless transmission, the nosecone will be slid away from the
rocket body by a central rack and pinion system, driven by a brushed DC motor, exposing the
payload bay. This bay will consist of a containment area in which the payload will be placed and
a servomotor driven tab that will rotate over the payload to secure it inside the rocket body. This
containment area will have the cross section shown below in Figure 11 and have end-caps on
both of its ends. It will be made of aluminum sheeting and be 5.25 inches long with 1.5 inch
square sides.
Figure 11. Payload Containment Area Cross Section
The payload section will also contain an Arduino Micro control board and xBee-Pro wireless
serial modem. This wireless modem will receive commands from the AGSE control element.
The control board will provide a link between this modem and both the brushed DC motor and
the servomotor. It will be programmed using the native Arduino language. There will also be a
battery power supply located in the payload section of the rocket to power all of the payload
section components. This power supply will consist of four AA batteries configured for a 6 Volt
power source. All of these elements will be mounted on two central support rods, made from 3/8
inch aluminum rods, using suitable mechanical fasteners. These rods will be secured to the aft
bulkhead of the payload section. An eyehook will also be mounted on this bulkhead, facing aft. It
will be used to attach the payload section and nosecone to the recovery system.
The payload section of the rocket will initially be open, with the nosecone separated from the
rocket body. Once the AGSE places the payload into the payload containment area within the
payload bay, the wireless serial modem will receive a command from the control element of the
AGSE to rotate the payload securement tab 90 degrees, via the servomotor. Following
securement of the payload sample and a short delay of five seconds, the brushed DC motor will
activate and slide the nosecone back onto the rocket body, through the associated rack and pinion
system. The nosecone will be sealed onto the rocket body with O-rings and the brushed DC
motor and its rack and pinion system will lock into place. The gearing of the DC motor will
prevent any back-driving of the motor, thereby providing a static force that will secure the
nosecone to the rocket body. The nosecone is a protective housing for the sample during the

20
launch procedures and flight. After the nosecone separates and lands, the payload will be able to
be retrieved using the same wireless signal to open the payload section again.
3.2.1.1 Drawings and Specifications
A schematic of the payload section of the rocket is shown below in Figures 12 and 13.
Figure 12. Payload Section (Side View)
Figure 13. Payload Section (Top View)
The individual components of the payload section and their specifications are detailed below.
Arduino Micro Control Board
o This microcontroller operates at 5 Volts. It has 20 digital input/output pins, as
well as a 3.3 Volt power output, which is compatible with the xBee-Pro. The
Arduino control board was selected for its small size, low cost, user-friendliness,
and compatibility with other components.
Pololu Micro Metal Gearmotor HP
o This motor operates at 6 Volts. It rotates at 32 RPM free-run and provides up to
125 oz-in of torque. These component parameters satisfy the requirements of the
motor in the payload section. This particular brushed DC motor was selected for
its small size and relatively low cost in comparison to other motors.
Hitec HS-422 Servomotor
o This servomotor operates from 4.8 to 6 Volts. At its slowest speed, it rotates 60
degrees in 0.21 seconds and produces 46 ounce-inches of torque. A servomotor
was selected for this portion of the payload bay due to its simplicity of use and
design. The HS-422 was selected due to its high durability and reliability in
comparison to other servomotors. It remains light weight and compact while
providing the necessary performance characteristics.
MaxStream xBee-Pro Wireless Serial Modem

21
o This wireless serial modem was chosen for its simplicity, low cost, and small size.
Each of these characteristics is important to the design of the payload bay. This
particular modem provides the best mix of these characteristics when compared to
other similar products. A wireless product was necessary for the payload bay
because it eliminates the logistical issue of having a wire run from inside the
rocket to an external point. That arrangement could cause issues during erection
and launch, so the wireless modem was selected.
AA Batteries (6 Volt power source arrangement)
o This battery configuration will be able to provide power to all of the electrical
components of the payload section of the rocket. This particular power source was
selected due to its weight, cost, availability and meeting of the minimum
performance characteristics required for the payload bay.
Aluminum Support Rods
o Aluminum support rods were selected for the payload bay due to their strength to
weight ratio. They will weigh less than comparable steel support rods, which is
critical to keeping the payload section mass budget low. Although other
composite supports could provide better strength to weight ratios than aluminum
supports, the increased cost outweighs the benefits. Therefore aluminum support
rods were the best choice for the payload section.
3.2.1.2 Analysis Results
Sizing and compatibility tests are being performed to ensure that all components will fit within
and operate properly with the payload section of the rocket. All components of the payload
section have been ordered or are already on hand, so these tests will continue while components
are acquired and will cease once all components of the payload section are assembled and ready
for insertion to the rocket body.
3.2.1.3 Test Results
At this point, the payload section has not been fully constructed, so no integrated testing has been
done with either the full-scale rocket or a payload section mock-up. All components of the
payload section have been ordered or are already on hand and will undergo independent testing.
3.2.1.4 Design Integrity
The design requirements of the payload section are to first autonomously secure the payload and
second to autonomously seal the nosecone to the rocket body in the closed position. Navy
Rockets’ design of the payload section fully meets both of these requirements. The servomotor
and its associated securement tab will serve to autonomously secure the payload within the
payload section for launch. The brushed DC motor and its rack and pinion system will
autonomously pull the nosecone back onto the rocket body. The gearing of the motor will also
22
prevent any back-driving of the motor and provide a static force to hold the payload section
closed.
3.2.2 System Manufacturing
All components of the payload section are either on-hand or in the acquisitions process.
Individual components are being tested as they are received, but no full-scale manufacturing has
begun yet. Once the performance parameters of individual components are verified and all parts
are on-hand, full-scale production of the payload section will begin.
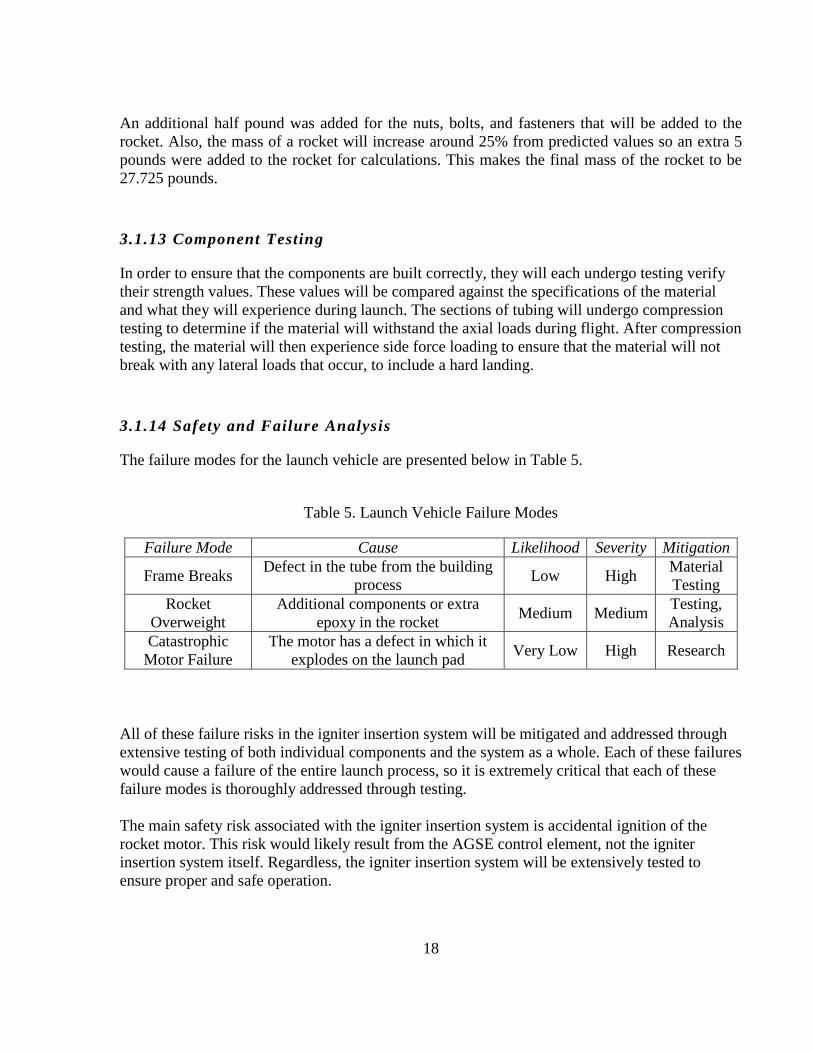
3.2.3 Electronic Systems
The electrical schematic of the payload section can be seen below in Figure 14.
Figure 14. Payload Section Electrical Schematic

23
The switch shown in the above diagram will either supply or deny power to the entire payload
section when turned on or off, respectively. It will be placed in an easily accessible location
within the payload section to allow for great ease of use.
3.2.3.1 Test Plans
Testing of the payload section of the rocket will only occur at full scale. The wireless serial
modem, servomotor, and linear stepper motor will all undergo independent testing before being
integrated into the payload section. A mock payload section of the rocket body will be
constructed and the payload bay components will be mounted in flight configuration. An external
transmitter will send a signal to the wireless serial modem to begin a test iteration. The
servomotor will then rotate the tab over the payload bed, and the linear stepper motor will seal
the nosecone to the rocket body. 25 iterations of this test will be performed and 23 of the
iterations must effectively complete the process for the testing of the payload section to be a
success. EMI will be assessed through testing in the full-scale launch configuration. The xBee-
Pros will be dedicated to certain systems, as described by Richie in the AGSE part. This will
help to limit crosstalk and interference. If EMI is deemed excessive, we will implement shielding
methods as appropriate.
3.2.4 Safety and Failure Analysis
The failure modes for the payload section of the rocket are presented below in Table 6.
Table 6. Payload Section Failure Analysis
Failure Mode Cause Likelihood Severity Mitigation
Payload not
secured Servomotor malfunction Low Low Testing
Payload section
fails to close
DC motor malfunction Low High Testing
Mechanical fault Low High Testing
All of these failure risks in the payload section will be mitigated and addressed through extensive
testing of both individual components and the system as a whole.
The main safety risk involved with the payload section of the rocket is failure to close the
payload section. This failure would result in an improperly sealed or seated nosecone. This could
greatly affect the aerodynamics or structural integrity of the rocket as a whole, which could result
in erratic and dangerous flight of the rocket. This main safety risk is a result of the second failure
mode presented in the above table, and as such, it will be mitigated through extensive testing of
the payload section using both mock-ups and the full-scale rocket body.
24
3.3 Igniter Insertion
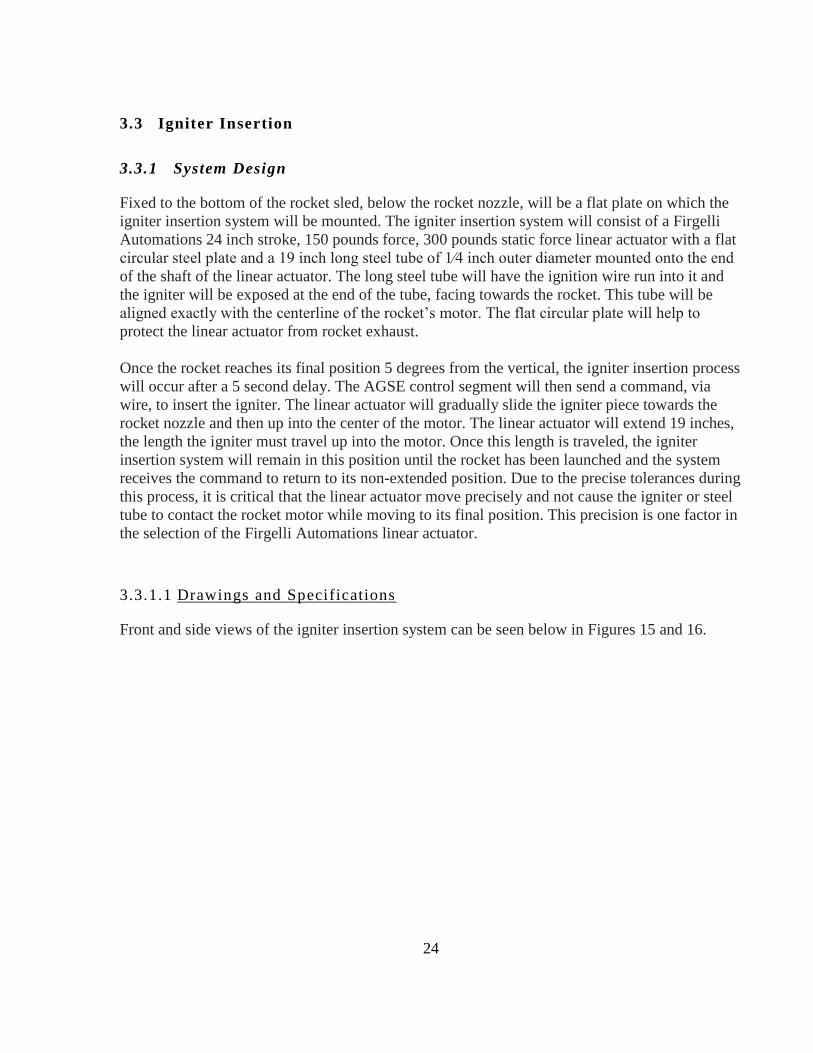
3.3.1 System Design
Fixed to the bottom of the rocket sled, below the rocket nozzle, will be a flat plate on which the
igniter insertion system will be mounted. The igniter insertion system will consist of a Firgelli
Automations 24 inch stroke, 150 pounds force, 300 pounds static force linear actuator with a flat
circular steel plate and a 19 inch long steel tube of 1⁄4 inch outer diameter mounted onto the end
of the shaft of the linear actuator. The long steel tube will have the ignition wire run into it and
the igniter will be exposed at the end of the tube, facing towards the rocket. This tube will be
aligned exactly with the centerline of the rocket’s motor. The flat circular plate will help to
protect the linear actuator from rocket exhaust.
Once the rocket reaches its final position 5 degrees from the vertical, the igniter insertion process
will occur after a 5 second delay. The AGSE control segment will then send a command, via
wire, to insert the igniter. The linear actuator will gradually slide the igniter piece towards the
rocket nozzle and then up into the center of the motor. The linear actuator will extend 19 inches,
the length the igniter must travel up into the motor. Once this length is traveled, the igniter
insertion system will remain in this position until the rocket has been launched and the system
receives the command to return to its non-extended position. Due to the precise tolerances during
this process, it is critical that the linear actuator move precisely and not cause the igniter or steel
tube to contact the rocket motor while moving to its final position. This precision is one factor in
the selection of the Firgelli Automations linear actuator.
3.3.1.1 Drawings and Specifications
Front and side views of the igniter insertion system can be seen below in Figures 15 and 16.

25
Figure 15. Front View of Igniter Insertion System
Figure 16. Side View of Igniter Insertion System
3.3.1.2 Analysis Results
Sizing and compatibility tests are being performed to ensure that all components will fit within
the AGSE sizing requirements and operate with full compatibility. All components of the igniter
insertion system are already on hand or in the acquisitions process, so these tests will continue
while components are acquired and will cease once all components of the igniter insertion
system are assembled and ready for full integration with the AGSE.

26
3.3.1.3 Test Results
At this point, the igniter insertion system has not been fully constructed, so no integrated testing
has been done with either the full-scale AGSE or a mock-up. All components of the igniter
insertion system are already on hand or in the acquisitions process and will undergo independent
testing.
3.3.2 Design Requirements
The requirement for the igniter insertion system is to successfully insert the igniter and perform
ignition on the first attempt. Navy Rockets’ design will successfully meet both of these
requirements. The inclusion of the long, slender steel tube in the design will ensure that the
igniter is properly inserted into the rocket motor without any bending of the ignition wire. The
selection of the Firgelli Automations linear actuator allows for precise and reliable movement of
the igniter and its supporting steel tube into the rocket motor. The high level of precision will
help to ensure that not unwanted contact is made with the rocket motor. The linear motion of the
actuator will ensure that the ignition wire is not damaged through twisting.
3.3.3 System Manufacturing
All components of the igniter insertion system are either on-hand or in the acquisitions process.
Individual components are being tested as they are received, but no full-scale manufacturing has
begun yet. Once the performance parameters of individual components are verified and all parts
are on-hand, full-scale production of the igniter insertion system will begin.
3.3.4 Integration Plan
The entire igniter insertion system will be mounted on a flat plate at the base of the rocket sled.
This simple connection allows for easy integration of the igniter insertion system with the
remainder of the AGSE. The igniter used in the ignition system will be a standard rocket motor
igniter, which is fully compatible and easily integrates with the K1200 motor.
3.3.4.1 Test Plans
The igniter insertion device will initially undergo testing with a dummy rocket motor. The
dummy rocket motor will have the same physical characteristics as the actual rocket motor,
including motor bore diameter and length. The igniter insertion device will be tested 25 times to
determine if it can successfully insert a wire into the dummy rocket motor. 23 of the 25 rounds
must result in successful wire insertion for the test to be deemed successful.

27
3.3.5 Safety and Failure Analysis
The failure modes for the igniter insertion system are presented below in Table 7.
Table 7. Igniter Insertion Failure Modes
Failure Mode Cause Likelihood Severity Mitigation
Igniter damaged Contact with the wall of the rocket
motor bore Medium High Testing
Igniter not
inserted to motor
Linear actuator failure Low High Testing
Mechanical fault Low High Testing
All of these failure risks in the igniter insertion system will be mitigated and addressed through
extensive testing of both individual components and the system as a whole. Each of these failures
would cause a failure of the entire launch process, so it is extremely critical that each of these
failure modes is thoroughly addressed through testing.
The main safety risk associated with the igniter insertion system is accidental ignition of the
rocket motor. This risk would likely result from the AGSE control element, not the igniter
insertion system itself. Regardless, the igniter insertion system will be extensively tested to
ensure proper and safe operation.
3.4 Subscale Flight Results
Three members of Navy Rockets are high power rocketry certified, with one being a level two.
One of the subscale testing rockets was used in a level two certification flight. This flight was
predicted by Open Rocket to reach 2100 feet and on launch day the rocket reached 2041 feet in
altitude. This gives the team an idea on how precise the Open Rocket program is compared to
actual flight data. This knowledge allows the team to account for a possibly lesser altitude
compared to the Open Rocket simulation.
Other subscale testing flights have tested various GPS systems and dual deployment recovery.
During these GPS and dual deployment testing, the team used different components to determine
which would perform at a more efficient and precise level. The team plans to continue testing
with the previously used level two rockets. This rocket will have additional weight added to the
nose cone in order to match the locations of the center of pressure and the center of gravity. This
launch will take place on 17-18 January 2015.

28
3.5 Wind Tunnel Testing
In an effort to model the static and dynamic stability of the rocket during flight, a scale model of
the rocket will be constructed and tested on a sting balance in the open loop, open return Eiffel
wind tunnel located at the United States Naval Academy. This scale model will consist of
multiple different materials.
3.5.1 Nose Cone
The nose cone will be 3D printed in order to create 10-15 pressure ports along the leading edge
of the rocket. The nose cone will be 3D printed to create the tunnels inside the nose cone
necessary to determine pressure. For instance, the pressure port at the leading edge, PP1, will be
tunneled to a point at the bottom of the nose cone that will be inside the PVC section. This tunnel
will allow the pressure to be measured at PP1 using a standard pressure measurement tool inside
the body of the PVC pipe.
3.5.2 Body Section
The body section of the test model will be Polyvinyl chloride (PVC). The body will be modeled
out of PVC because of reduced cost, and simplicity of construction. Because the weight of the
scale model will not factor into the data, and the PVC will not be containing a firing motor, the
PVC will be sufficient. The PVC body section will be coated to decrease the skin friction
coefficient. The body section will hold between 8-15 pressure ports in order to calculate the
pressure along the body of the rocket. Directly across the pressure ports will be access holes to
put the stainless steel tip of the tygon tubing into the pressure port of the PVC. The access ports
will be no more than ½ inches in diameter, and will be covered by aluminum tape during the
testing.
3.5.3 Fin Section
The fin section will be 3-D printed. The fin section will be attached to the body section by means
of an aluminum attachment located on the inside of the rocket. The main purpose of the
aluminum attachment is to connect the rocket to the sting balance. The fin section was chosen to
be 3-D printed in order to accurately attach the fins at 120º intervals. The additive printing of the
whole fin section will allow the sting attachment to be lengthened and hold the PVC in place.
3.5.4 Testing
The scale model will be tested on the sting balance in the Eiffel Wind Tunnel at varying
Reynolds numbers, and angles of attack. To determine the pressure along the nose cone and
rocket body at different radial locations, the nose cone will be manually rotated on the sting
balance. Because the speed of the Eiffel Wind Tunnel limits the Reynolds number, the Reynolds
numbers will be characteristic of the boost phase of the actual flight of the full-scale rocket,
which is where disturbances are most detrimental to stability of the rocket. The Reynolds number

29
will be limited by the maximum free-stream Reynolds number of the wind tunnel, and the overall
size (namely the height and width) of the test section.
The goal of the wind tunnel testing will be to model the pressure distribution along the rocket
along with measuring the forces on the sting balance, including the drag and moment forces.
These values will also be calculated over a time interval of increasing tunnel speed to analyze the
dynamic stability. When analyzing the overall stability of the rocket, the forces measured by the
sting force balance will be taken into account. The tabulated pressures will be analyzed using
MATLAB, and any instability found by the force balance will be further analyzed by the
tabulated pressure readings. Moreover, with MATLAB, the center of pressure will be calculated,
non-dimensionalized, and then compared to the full-scale in order to verify the stability margin
calculated by the OpenRocket software.
Because the full-scale rocket will be made out of carbon fiber, and the scale rocket will be made
of a plastic nose cone, PVC body section, and HDF fins, the skin-friction drag coefficient will be
different. For this reason, the difference in skin friction coefficient of the scale model and the
full-scale rocket will not be taken into account. Therefore, the significance of the drag calculated
by the sting balance will be attributed to profile drag due to that geometry of the rocket and
placement of the fins, and not the difference in skin-friction drag due to the material of the
rocket.
In order to use the Eiffel Wind Tunnel in Rickover Hall at the USNA, a test plan must be
submitted to the aerospace engineering department chair. The preliminary test plan is attached in
Appendix E. The test plan shows the pertinent information of the testing process, including
purpose, philosophy of operations, and the testing procedure. Test plans often take multiple
iterations based on the suggestions of the department. The preliminary test plan is the general
plan for testing of the scale model that was submitted to the aerospace engineering department.
The department may suggest changes, but being a preliminary test plan, the changes will be
small and detail oriented. The final test plan will mirror the structure of the preliminary test plan,
and will be similar in substance.
3.6 Recovery Subsystem
3.6.1 Recovery Components
The full recovery system consists of two ejection events and three parachutes. Per current design,
the rocket will weigh 27.9 pounds upon launch and after burnout will weigh 25.0 pounds. The
payload section weighs 10.75 pounds and the main body weighs 15.54 pounds.
The first event will take place upon apogee when the Stratologgers ignite Ejection Event A.
Twin black powder ejection charges will pressurize the Aft Recovery Compartment, deploying a
24 inch elliptical, rip stop nylon parachute. This parachute will slow the rocket down to an
optimal descent rate 48.23 ft/sec from 3000 feet AGL to 1000 feet AGL. The drogue parachute

30
will be attached via a barrel swivel to a quick release carabineer. The carabineer will in turn have
the recovery harnesses to both the aft and forward ends of the rocket body. The harnesses will be
made of 9/16 inch tubular nylon and will be 10 feet and 8 feet respectively. The forward harness
will consist of a single strand of the tubular nylon from the drogue carabineer to another quick
release carabineer attached to a single ½ inch stainless steel eyebolt in the aft bulkhead of the
avionics compartment. The aft harness will consist of a doubled back 20 feet length of tubular
nylon, resulting in a 12 feet harness. The harness will be attached at two equidistant points along
the diameter of the motor mount assembly via two more stainless steel eyebolts and quick release
carabineers.
The 0.25 inch stainless steel eyebolts will be used as the connection points for all recovery
harnesses on the rocket. The open end will be spot welded shut to provide more strength and the
threaded portions will be epoxied into the bulkheads to prevent backing out.
Once the rocket reaches the 1000 feet AGL mark, the twin Stratologgers will trigger Ejection
Event B and the second black powder charges will pressurize, deploying two chutes and
jettisoning the payload section. The main body will remain attached to a 72 inch high drag
Torroidal parachute with a 15 feet tubular nylon harness and the payload bay will be deployed
with a 60 inch high drag Torroidal parachute with a 10 feet harness. Each harness will again be
attached to quick release carabineers and stainless steel eyebolts. These parachutes will slow
each section down to 15.76 ft/sec and 15.81 ft/s, which projects them to land well within the
prescribed 75 ft-lbf limit. Calculations for the sizing and descent speeds are further discussed in
Section 3.3.4.
The ejection charges used will be Apogee Components Large Capacity Ejection Canisters able to
be filled with 2.1g of black powder. This however will be more than enough capacity. To
determine a rough estimate on the amount of black powder needed Equation 1 can be used.
( ) ( ) ( )
Equation 1
Using this equation, the compartment parameters in Table 8, and a margin of error of 150% to
slightly overestimate the pressurization force, the amount of black powder for each charge is
calculated as 0.788g (0.75 rounded) and 0.495g (0.50 rounded). This amount of black powder is
the baseline test to ensure that the nylon shear pins that hold the sections together are sheared
and the sections fully separate.

31
Table 8. Black Powder Charge Required
Ejection Event A (Drogue) B (Main)
DCompartment (in) 5.0 5.0
LCompartment (in) 35.0 22.0
Calculated
Amount (g) 1.575 0.99
Final Amount
per Canister (g) .788 0.495
To prevent any damage to the parachutes from the ejection charge 2- 18 inch Nomex fire
resistant protective barriers will be utilized. One will be placed along the harness in the drogue
assembly, while the other will be placed along the harness in the main parachute assembly.
3.6.2 Electrical Components
The recovery system will utilize two identical flight altimeters to operate the launch vehicle’s
recovery system. The PerfectFlite Stratologger SL100 is flight heritage hardware with Navy
Rockets and continues to produce accurate, expected results. The REPTAR system will use two
for redundancy of the ejection events. A full schematic of the recovery electronics can be seen in
Figure 17.
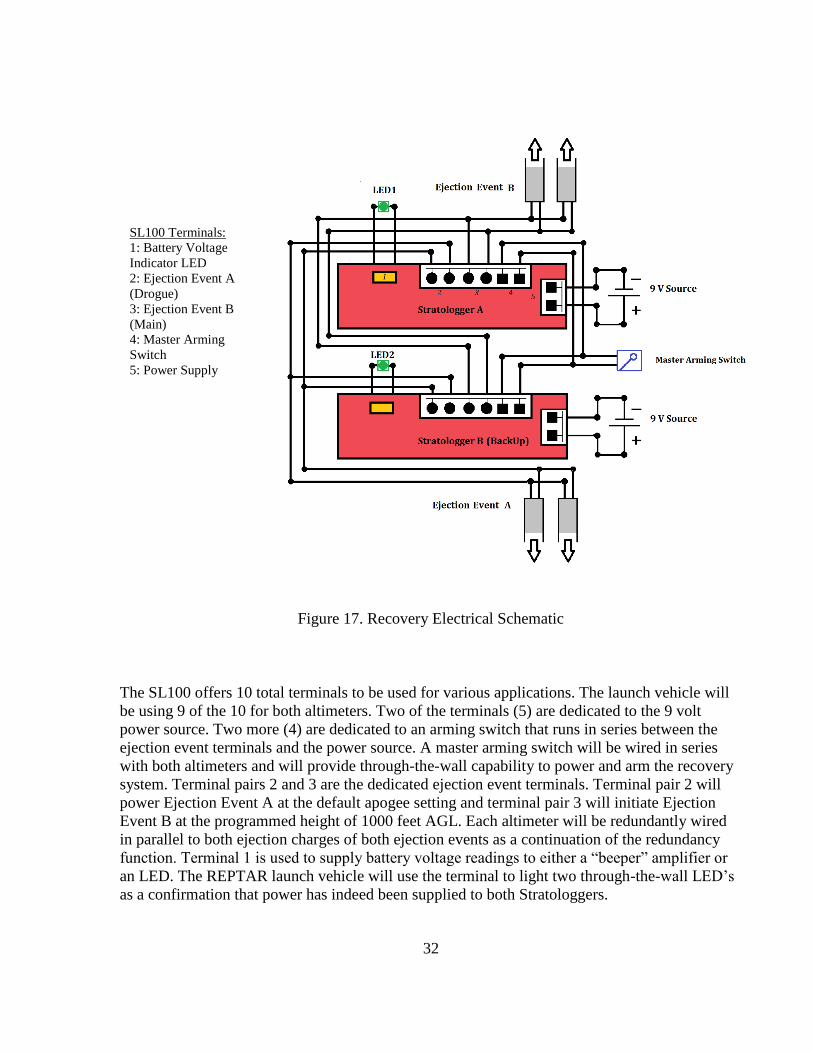
32
Figure 17. Recovery Electrical Schematic
The SL100 offers 10 total terminals to be used for various applications. The launch vehicle will
be using 9 of the 10 for both altimeters. Two of the terminals (5) are dedicated to the 9 volt
power source. Two more (4) are dedicated to an arming switch that runs in series between the
ejection event terminals and the power source. A master arming switch will be wired in series
with both altimeters and will provide through-the-wall capability to power and arm the recovery
system. Terminal pairs 2 and 3 are the dedicated ejection event terminals. Terminal pair 2 will
power Ejection Event A at the default apogee setting and terminal pair 3 will initiate Ejection
Event B at the programmed height of 1000 feet AGL. Each altimeter will be redundantly wired
in parallel to both ejection charges of both ejection events as a continuation of the redundancy
function. Terminal 1 is used to supply battery voltage readings to either a “beeper” amplifier or
an LED. The REPTAR launch vehicle will use the terminal to light two through-the-wall LED’s
as a confirmation that power has indeed been supplied to both Stratologgers.
SL100 Terminals:
1: Battery Voltage
Indicator LED
2: Ejection Event A
(Drogue)
3: Ejection Event B
(Main)
4: Master Arming
Switch
5: Power Supply

33
3.6.3 Recovery Schematic
The following figures display the four recovery system integration points within the launch
vehicle as well as the two recovery configurations following the two ejection events. Note: All
components are to scale with exception of the recovery harness lengths, which were shortened in
Solid Works to provide productive figures. Also shoulders between sections and the nylon shear
pins are not displayed.
Figure 18 first shows the main avionics bay (recovery electronics not included) and the
placement of the two eyebolts as well as the dual ejection canisters per each bulkhead. The
drogue will harness will attach to the aft eyebolt and the main parachute will attach to the
forward bolt and feed through the main parachute compartment. It is important to note that the
eyebolts were modeled as closed designs, as the open bolts used in the REPTAR system will be
welded shut.
Figure 18. Recovery Harness Attachment Points –
Tail Section, Avionics Bay, and Payload Bay (Top to Bottom)
Figures 19 and 20 show the harness attachment points for both the tail section containing the
motor and drogue and the payload bay respectively.

34
Figure 19. Avionics Bay with Bulkheads
Figure 20. Tail Section Drogue Harness Attachment Points
Each of the eyebolts, shown in Figure 21, will attach to the harness by quick release carabiners.
The harness ends themselves will be looped and wrapped with fishing line and finally sealed
with epoxy to create a sturdy attachment point.
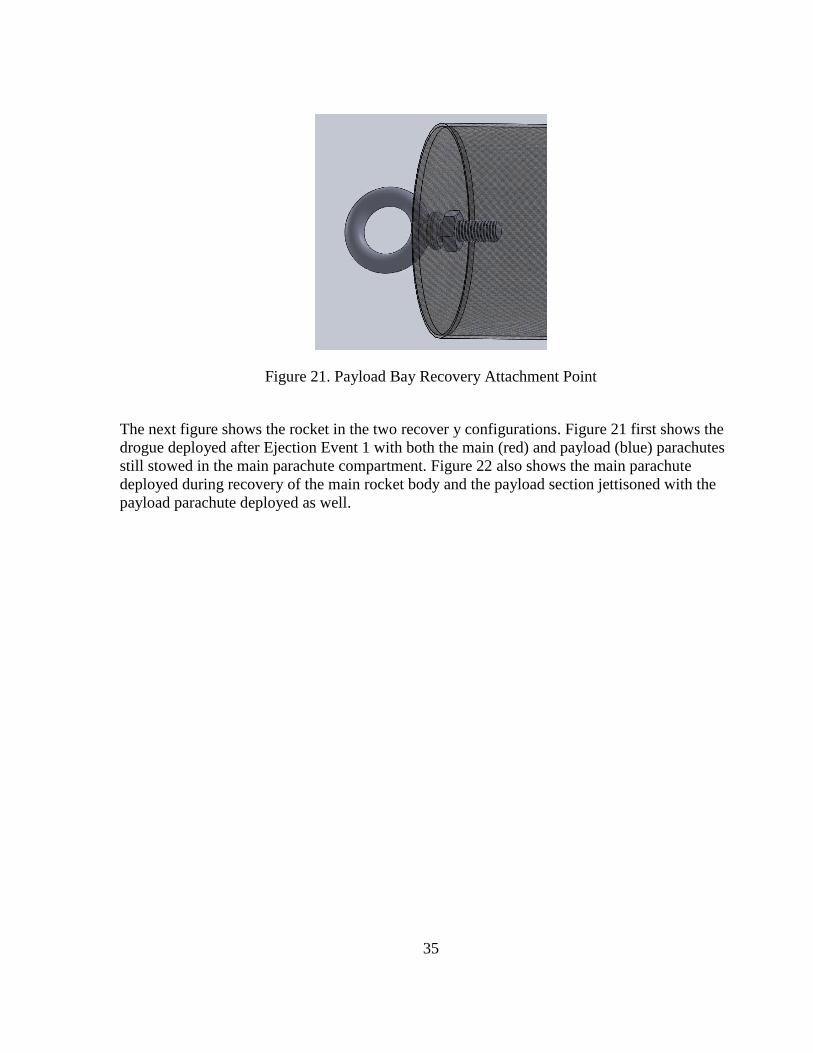
35
Figure 21. Payload Bay Recovery Attachment Point
The next figure shows the rocket in the two recover y configurations. Figure 21 first shows the
drogue deployed after Ejection Event 1 with both the main (red) and payload (blue) parachutes
still stowed in the main parachute compartment. Figure 22 also shows the main parachute
deployed during recovery of the main rocket body and the payload section jettisoned with the
payload parachute deployed as well.
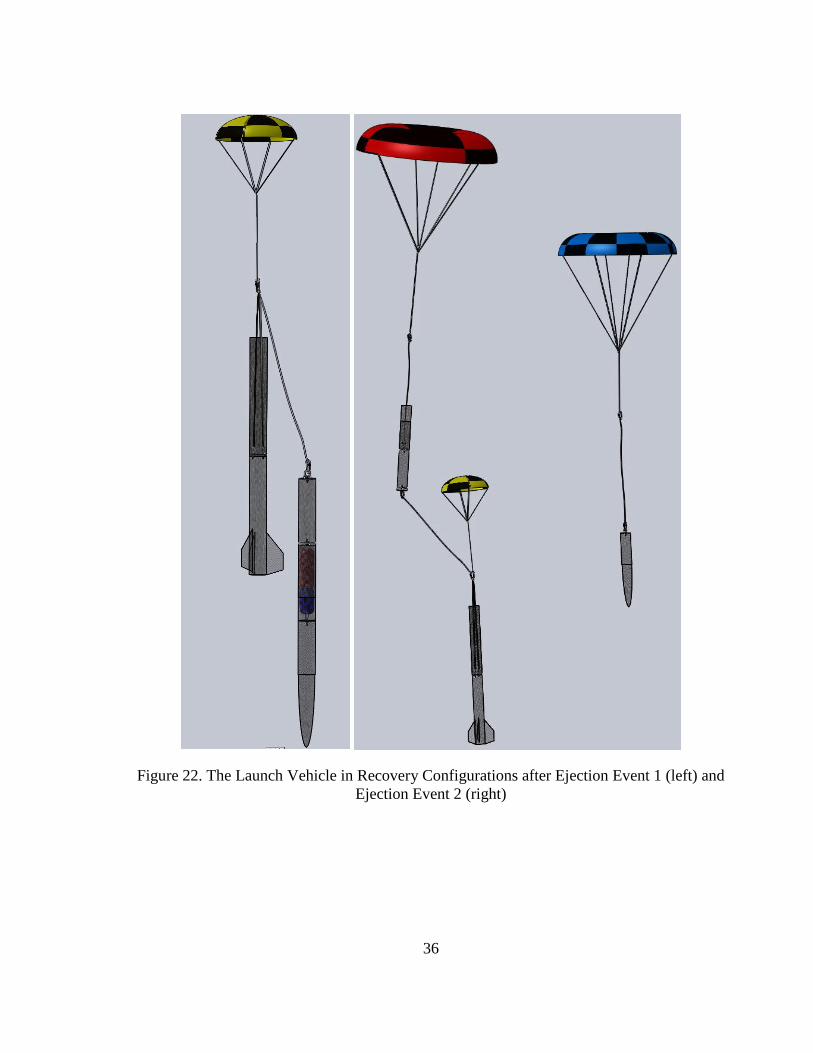
36
Figure 22. The Launch Vehicle in Recovery Configurations after Ejection Event 1 (left) and
Ejection Event 2 (right)

37
3.6.4 Kinetic Energy
The final kinetic energy of the sections was determined using several calculations beginning with
the masses of the sections at different point in the flight. The masses are listed below in Table 9.
Table 9. Section Masses
Sections Total
Weights (lbf)
Pre-Launch 27.70
Post Burnout 25.51
Payload 10.73
Main Body 14.78
The next step is finding the velocity of the section as it comes down. By rearranging the equation
to find the parachute surface area, the terminal velocity (V) can be found for once the parachute
is fully deployed using Equation 2, where S is the effective drag area of the chute, Cd is the
coefficient of drag, ρ is the air density (.averaged to be 0.00200 sl/ft3), and W is the weight of the
rocket in lbs.
( )
( )( )
Equation 2
Once the final velocity was found, the kinetic energy could be calculated using Equation 3.
These values can be found in Table 10.
( )
Equation 3
Table 10. Kinetic Energy
Vehicle Section W (lb) Cd S (ft2) V (ft/s) KE (ft-lb)
Full With Drogue Deployed 25.51 1.5 3.02 62.97 1884.97
Main Body 14.78 2.2 27.14 14.45 47.94
Payload 10.73 2.2 18.85 14.58 36.34

38
From this calculation the kinetic energy values for the two separate sections is well under the
required 75ft-lb requirement.
3.6.5 Recovery Test Results
Ground testing of a subscale recovery system was completed in order to ground test the
deployment of parachutes. The parachutes were packed and flame retardant wadding into a ½
scale rocket fuselage section. The fuselage section was inserted into a small section of PVC pipe
which has been glued to a section of plywood. Through a hole in the bottom of the plywood, a
black powder loaded ejection canister was inserted. The ejection charge was detonated using a
standard model rocketry launch trigger switch. The system was modeled after the recovery
deployment system of previous rockets and shown in Figure 23.
Figure 23. Recovery Test Stand
At this time there has been no significant testing of the actual recovery system. This is due
largely to the delayed sub-scale launch that will test the dual ejection event feature of the
Stratologger SL100 and the basic wiring harness. The full-scale avionics harness is currently in
the production phase and will be tested along with completed sections of the launch vehicle
body. The parachutes will be tested by securing the parachute and then adding tension to the
harness to see if any damage occurs. These tests will first verify and finalize the appropriate
amount of black powder needed to pressurize the vehicle compartments, as well as ensure the

39
redundant features of the harness operate as designed in the class of an altimeter or ejection
charge failure.
3.6.6 Safety and Failure Analysis
The recovery system has been designed such that in the event of an avionics failure, there are
back-up systems and wiring in place to continue operability and complete the mission
successfully. In the avionics bay the only source of single event failure is the master arming
switch, which is operated while the rocket is still on the ground, where a diagnostic and repairs
can be made. Otherwise the black powder charges and the avionics themselves are fully
redundant. With regards to the recovery hardware, each item has been carefully selected for
either its flight heritage (in the case of the ejection canisters and altimeters) or has a significant
margin of error in its rated strengths. The 1/2 inch Type316 Stainless Steel eyebolts are rated for
a 1000 pound working load, and the tubular nylon harness is rated for 1500 lbs of tensile force.
Each eyebolt will be welded shut to increase its working load and will be epoxied in place with
its backing nut and a locking washer to ensure neither back out. The main and payload
parachutes will be supporting close to half their maximum loads of 28 and 19 lbs respectively.
The carabiners will be Black Diamond Positron Screwgate Carabiners, each rated for 5,620 lbf.
With regards to safety, the single item that needs mention is the black powder charge. The
canisters will be loaded last as a safety precaution, and the master switch prevents any accidental
discharge before continuity. The altimeters themselves will be located in a wire mesh cage to
prevent any interference from the numerous wireless radio signal used to power the various
REPTAR systems, and all wiring will be checked routinely to ensure the circuits aren’t shorted.
When the black powder is finally loaded, all other team members will be at safe distance and all
safety precautions will be met.
3.7 Mission Performance Predictions
3.7.1 Mission Performance Criteria
In order for this year’s REPTAR project to be a success, Navy Rockets will deliver an
autonomous ground support element capable of loading the specified payload into a rocket,
launch the rocket to 3000 feet AGL, and return both the main rocket body and the jettisoned
payload section safely to the ground while meeting all specified mission criteria listed above.

40
3.7.2 Flight Simulations and Predictions
Varying weather conditions with will have an effect on the REPTAR launch vehicle on the day
of the launch. In order to predict possible consequences of varying weather, a computer model of
the launch was run through Open Rocket at wind speeds of 5, 10, 15, and 20 mph. Graphs of the
results are shown below in Figures 24-27.
Figure 24. Vertical Motion vs. Time at 5 mph

41
Figure 25. Vertical Motion vs. Time at 10 mph
Figure 26. Vertical Motion vs. Time at 15 mph

42
Figure 27. Vertical Motion vs. Time at 20 mph
The highest apogee occurred at 5 mph with a height of 3095 feet. The lowest apogee occurred at
20 mph with a height of 2934 feet. At 10 mph and 15 mph, the resulting apogees were 3057 and
3025 respectively. As sustained winds increase, the vertical motion of the rocket will be
translated into greater horizontal motion. The Navy Rockets team will have the greatest chance
of reaching the goal height of 3000 feet as long as winds do not go over 15 mph.
3.7.3 Stability Margin
The stability of each motor as compared to angle of attack is shown in Figure 28. This figure was
created using the OpenRocket program and allowed the stability margin to be determined
throughout flight.
A stable flight refers to a balance of the six degrees of freedom that the rocket encounters during
flight. A successful balance of a rocket’s flight is when the rocket does not rotate around the
pitch or the yaw axis. By rotating on these axes the flight will alter course and reduce the
performance of the rocket. A rocket that has the Center of Gravity (CG) forward of the Center of
Pressure (CP) will have a positive stability relationship. This leads to a rocket being able to fly
straight in the direction of the launch rail and have pitch stiffness to deter from external forces
attempting to change the course of the flight. Using open rocket, the CG and CP were calculated
to be 55.7 inches and 76.5 inches from the nose cone respectively during flight.

43
Figure 28. K1200 Stability Margin and Angle of Attack vs. Time
This plot helps predict the flight path of the rocket during testing, which will lead to
modifications and a change in motors if necessary. Stability margin is measured in calibers, and
is defined as the ratio of the distance between the CG to CP and the diameter of the rocket.
Typically stability margin should be kept between one to two calibers from the original margin.
The main rocket the margin was an average of 4.15. This is high, but the possible instabilities
here are not nearly as worrisome as a stability margin below one caliber. The high stability
margin makes the rocket overly stable and results in a reduced chance of flight alternation from
any external forces. The overly stability of the rocket is not great enough to alter the flight path
during the possible flight conditions. The stability margin is high during the flight and the rocket
will become less overly stable as it reaches apogee as the CG and CP move closer together. This
less overly stable flight will result in a continued successful balance of the degrees of freedom
and an efficient rocket flight.

44
3.8 AGSE Integration
3.8.1 Integration Plan
3.8.1.1 Payload to Rocket Body
The payload section of the rocket is a main compartment of the rocket body. Therefore it is
critical that the payload section falls within any constraints placed on the rocket as a whole, most
notably size and mass, and is co-developed with the remainder of the rocket body. The payload
bay components must fit within the payload section and rearrangement of the components may
be necessary if the current design proves to be unsuitable. The interface between the payload
section and the remainder of the rocket will consist of mechanical fasteners, such as brackets or
bolts, and epoxy. The payload bay components will be attached to support rods, which will be
mounted through the aft bulkhead of the payload section, as described in section 3.2.1. To ensure
full interoperability of the payload section with the remainder of the rocket body, the payload
lead will work closely with the chief engineer and the structures lead throughout the entire
process of design and development.
3.8.1.2 Vehicle to Ground Interface
The payload section of the rocket body will interface with the AGSE through the use of wireless
transmissions. Within the payload bay, there will be a MaxStream xBee-Pro wireless serial
modem, which operates at 900 MHz. The MaxStream xBee-Pro within the payload bay will
interface with another MaxStream xBee-Pro, which will be connected to the control segment of
the AGSE. This link between the two modems will allow for commands to be sent from the
AGSE to the payload bay and for feedback from the payload bay to be sent back to the AGSE.
To ensure the flawless operation of this interface, the payload and AGSE leads will work hand-
in-hand throughout the design and development stages.
3.8.2 Compatibility
All components of the payload section will be fully compatible with the remainder of the rocket
body. All of the components will be mounted on two aluminum support rods, which are then
secured through the aft bulkhead of the payload section. This creates full compatibility between
the payload components and the rocket body. Any additional securement that may be needed in
the payload section will be done with epoxy. This will allow for a firm and secure mounting of
components within the payload section, as necessary.

45
3.8.3 Simplicity and Ease
The components of the payload section will be mounted on two aluminum support rods, which
will then be secured through the aft bulkhead of the payload section. This configuration allows
for easy insertion or removal of the payload section components from the rocket body.
3.9 Launch and Operation Procedures
3.9.1 Recovery Preparation
The steps for the recovery system are below:
1) Lay out all parachute and recovery harness lines.
2) Inspect harness elements to ensure no tangles, twists, or tears in parachute cloth, shrouds,
or harness lines.
3) Assemble full harness by attaching all carabineers, harness loops, and parachute swivels.
4) Ensure parachute protectors are in correct location on harness.
5) Roll parachutes and lines in an orderly pre-determined fashion to eliminate tangles upon
deployment.
6) Check all connection points and carabineer screw gates.
7) Position protectors inside parachute housing compartments.
8) Pack parachutes loosely into compartments.
9) Install new 9V batteries into altimeter power clips.
10) Ensure each altimeter powers on.
11) Install new batteries in GPS Unit housings.
12) Ensure each GPS unit powers on and is transmitting.
13) Seal avionics compartment.
14) Following all safety precautions, load black powder into ejection canisters.
15) Tightly seal ejection canisters.
Before Launch:
1) Engage master arming switch in locked “armed” position.
2) Ensure both exterior LED lights function and flash correct battery voltage.
3.9.2 Motor Preparation
While traveling to the launch site, Navy Rockets will ensure that safety is at the highest priority.
The motor will be purchased from Animal Motor Works who will also transport the motor to the

46
competition. On launch day, the motor will not leave its packaging until Navy Rockets is
prompted to load the motor into the rocket body. Until it is needed, the motor will be placed in a
location where the team can keep it secured.
3.9.3 Launcher Setup
Setup of the AGSE will begin with the assembly of the tower structure. The upper and lower
components of each tower will be pinned together. The rocket sled and track will then be put into
position between the two sides of the tower structure. The igniter insertion system is permanently
attached to the sled. The tower rungs and chains will be pinned into place, connecting the two
sides of the tower structure and fixing the sled track into place. Next, the tower motor will be
pinned to the back of the tower structure. All chains will be properly mounted on their respective
gears. When this is complete, the rocket sled will be connected to the vertically oriented chain
system. The Scorbot will be placed on the ground, adjacent to the payload bay area. All
components will then be connected to their respective power source and powered on. All
subsystems will be tested to ensure that they are functioning correctly. Following this, the rocket
sled will be detached from the tower and the rocket will be fed into the launch rail on the rocket
sled. The rocket sled will then be reattached to the tower and the payload bay will be opened.
The sample will then be placed on the ground, beneath the Scorbot gripper. Upon completion of
these tasks, the AGSE will be ready for launch.
3.9.4 Igniter Installation
Once the rest of the AGSE is assembled, the igniter insertion device will be in place since it is
attached to the base of the rocket sled. It will be verified that the igniter insertion device is
properly aligned with the center of the rocket motor bore. The igniter insertion device, with its
linear actuator, will be tested in place on the AGSE for proper operation. Once proper operation
is ensured, the igniter insertion device will be considered ready for launch. During the actual
launch process, the igniter insertion device will receive the command from the AGSE control
element and insert the igniter into the rocket motor.
3.9.5 Troubleshooting
Any problems that occur during the set up and launch of the rocket will be discussed with the
team, our faculty representative, and our rocketry mentor. With each team member focusing on a
specific area it allows Navy Rockets to have an idea on all of the topics that require work. By
utilizing the faculty representative and also the rocketry mentor it enables more knowledge to be
used in order to fix the problem.

47
3.9.6 Post-flight Inspection
A post flight inspection will be conducted by the safety officer to ensure that the rocket is in
good condition and able to launch again. The inspection will check for connected harnesses and
damage to the overall structure of the rocket.
3.10 Safety and Environment
3.10.1 Hazards and Failure Modes
3.10.1.1 Laws
The Navy Rockets team understands the laws that govern high power rockets. This includes the
FAA regulation on airspace, the Federal Aviation Regulation 14 CFR: Subchapter F: Part 101:
Sub-part C, the Code of Federal Regulation 27 Part 55, and the code for the use of low-
explosives: NFPA 1127 Code for High Power Model Rocketry. This information can be found in
Appendix F.
All of the flight testing and some ground testing for the project will be done with MDRA at their
launch sites. MDRA has a FAA flight waiver for an altitude of 17,000 feet every weekend of the
year. This allows Navy Rockets to be able to launch whenever testing needs to be completed on
both the sub-scale and full-scale launches. MDRA has a goal for zero injuries to occur during
their launches, the group has multiple, qualified Range Safety Officers that ensure everyone is
adhering to the rules.
3.10.1.2 MSDS
Many of the material used during the competition have hazards associated with them. A list of
potential material hazards can be found in Appendix G on the material hazards before they are
used on any part of the project by the Safety Officer.
3.10.1.3 Operational Risk Management
Although the team focuses on safety, some of the activities can still be dangerous to the team or
equipment. Due to the team’s military ties, the United States Navy’s Operational Risk
Management (ORM) system was used to rate the hazards and failure modes for Navy Rockets.
Each situation requires a probability and severity, which can be seen in Figure 29. The
probability assigns a letter A-D with A being highly probable and D most likely not occurring.
The severity column assigns a number I-IV with I(1) being extremely dangerous and IV(4) being
no threat of danger. The ORM is then complete by using the risk matrix, shown in Figure 30.
The number value and letter that were found from Figure 27 are then used in the risk matrix to

48
determine the risk assessment code. This code is assigns a number 1-5 and is color coded to
ensure that the assessment is known. For the code, a value of 1 is red and a critical situation
which means that it is high probability of a high severity. A value of 5 is almost no risk and
means that it is not sever or probable. The hazards and failure modes can be found in Tables 11-
0-13.
Figure 29. ORM Values
Figure 30. ORM Risk Matrix

49
Table 11. Hazard Analysis for Project and Safety
HazardORM
ValueCause Effect Mitigation Verification
Over budget 2
Not paying attention to where
money is being spent; spending
money on items that are not
necessary or could be purchased
for cheaper.
Could run out of money at the
end of the project that could
have been used to fix a last-
minute problem or emergency.
Maintain detailed budget
records and hold individuals
accountable for money that is
spent. Do thorough research on
the most cost effective ways to
purchase materials.
Fall behind on the
schedule3
Lack of focus and "big picture"
oversight; procrastinating on
projects; not paying attention or
adhering to set deadlines.
Quality of project could
decrease overall, threatening
performance at final
competition. Could not finish on
time and therefore not be able
to compete.
Leadership maintain constant
oversight on set timeline; hold
team members accountable for
project deadlines. Try to finish
projects ahead of schedule and
don't procrastinate.
Material not
available2
Sometimes out of team's control;
other times could be a result of
procrastination, leading to limited
options.
Could force team to use
materials that aren't the most
ideal for a certain part of the
project. In a worst-case
scenario, a crucial material
could be unobtainable and the
project could fail.
Do not procrastinate in
obtaining materials. Have
backup materials available,
especially if they are crucial to
the project's success.
Material damaged
during testing2
Variety of potential causes, ranging
from unavoidable accidents to user
error.
Could delay project progress,
could cause project to fail if it
happens at a crucial time
during the end or at the
competition. Could force
redesign.
Have backup materials
available to fix any damaged
ones. Have alternate designs
prepared in the event a
redesign is necessary.
Machines
breakdown4
Machines not properly taken care
of or are used improperly.
Could delay the building and
manufacturing process of the
project.
Follow all machine shop rules
and ensure that the correct
machines are used for specific
materials.
Team fails to
communicate4
Schedule becomes busy and then
failure to update team on progress
occurs.
The team falls behind on
building and then misses
deadlines for the project.
Have weekly meetings to
discuss what each person is
working on and the progress on
their sections.
Chemical Burns 1
Poor handling of dangerous
materials, poor oversight from
leadership responsible for safety,
lack of knowledge about dangers of
materials.
Could cause severe injury to
crucial team members, thus
placing more workload on other
members, decreasing the
overall quality of the output of
their work.
Educate all team members on
safe handling of dangerous
materials. Ensure a safety
observer oversees all handling
of said materials.
Injury from Power
Equipment1
Poor safety practices, lack of
knowledge about dangers involved
with the power equipment.
Could cause severe injury to
crucial team members, thus
placing more workload on other
members, decreasing the
overall quality of the output of
their work.
Educate and train all team
members on safe operation of
dangerous equipment. Ensure
a safety observer oversees all
handling of said equipment.
Motor or black
powder explosion1
Variety of potential causes, ranging
from unavoidable accidents to user
error.
Could delay project progress,
could cause project to fail if it
happens at a crucial time
during the end or at the
competition. Could force
redesign.
Educate and train all team
members on safe handling of
motors and black powder.
Ensure a safety observer
oversees all handling of all
motors and black powder.
Project
Safety

50
Table 12. Hazard Analysis for Launch and AGSE
HazardORM
ValueCause Effect Mitigation Verification
Rocket fails to be
erected3
Faulty coding, faulty motor, power
source error, etc.Rocket cannot be launched
Repeatedly test rocket erection
prior to competition so as not
to have any issues on launch
day. Perhaps compose a
checklist to ensure no
important steps are forgotten.
Rocket fails to
leave the stand3 Motor issues, power issues Rocket cannot be launched
Repeatedly test launch
procedures prior to competition
so as not to have any issues
on launch day. Perhaps
compose a checklist to ensure
no important steps are
forgotten.
Ignitor fails to
ignite motor3
Ignitor issues, motor issues, power
issues.Rocket cannot be launched
Repeatedly test motors prior to
competition so as not to have
any issues on launch day.
Perhaps compose a checklist
to ensure no important steps
are forgotten.
Catastrophic
motor failure3
Faulty motor or mishandling during
traveling.
Rocket destroys the frame and
possibily damages the system.
Ensure properly storage and
handling of the motor.
AGSE drops
sample2
Poor coding, motor issues, power
issues, environmental issues.Cause failure of competition
Repeatedly test AGSE
operation; work out all issues
before competition day
AGSE loses
communications
link
2Power issues, external wireless
interference
AGSE stops working, causes
failure of competition
Ensure nearby wireless radios
are turned off so as to not
interfere with AGSE
communications link
Igniter does not
insert3
Power issues or the interfaces are
not working properly.Cause failure of competition
Test the igniter system to
ensure that it functions
properly.
Launch
AGSE

51
Table 13. Hazard Analysis for the Vehicle
HazardORM
ValueCause Effect Mitigation Verification
Parachute fails to
deploy2
Poor packing, damage on launch,
environmental circumstances at
deployment altitude.
Rocket falls uncontrollably,
potentially causing project-
ending damage.
Ensure parachute is packed
properly, test repeatedly before
competition to determine best
packing configuration.
Parachute
catches on fire3
Poor packing or not enough
protection from the motor.
Rocket falls uncontrollably,
potentially causing project-
ending damage.
Ensure parachute is packed
properly and place fire retardant
material between them and the
motor.
Parachute lines
tangled4 Poor packing of the parachutes
Rocket falls uncontrollably,
potentially causing project-
ending damage.
Ensure parachute is properly
packed.
Sections fail to
separate2
Sections initially connected
improperly, damage on liftoff,
environmental circumstances at
deployment altitude.
Rocket does not perform to
project standards, potentially
causing project-ending damage.
Ensure sections are connected
properly. Test connections
repeatedly before competition
to determine best connecting
process and configuration
Parachute
separates from
rocket
2
Poor packing, damage on launch,
environmental circumstances at
deployment altitude.
Rocket falls uncontrollably,
potentially causing project-
ending damage.
Ensure parachute is packed
properly, ensure separation
works before competition, test
repeatedly before competition
to determine best packing
configuration.
Altimeter fails to
work3
Not enough power or faulty wiring
systems.
Rocket will not deploy
parachutes at the proper
altitude.
Redundant systems are utilized
in order to ensure the
altimeters function properly.
Stability margin is
too small4
The CG shifts too close to the CP
from bottom loading the rocket.
The stability of the rocket
decreased which can harm the
flight path and performance.
Ensuring that the weight
balance is correct and verified
with Open Rocket data.
Structural failure 2
A defect during the building
process or potential damage during
launch operations.
The rocket will not be launch
ready or not able to be
relaunched.
Careful manufacturing of the
rocket and strength testing to
ensure it can withstand the
required loads.
Payload section
fails to close2
The payload section jams or will
not secure properly.
The rocket will not be safe to
launch and the payload could
fall out.
Testing and inspecting the
payload section to ensure that
everything works properly.
Early section
separation3
The connection points are not
strong enough to hold the rocket
together.
Rocket does not reach required
altitude or damages itself during
flight.
Testing of the connection
points as well as full scale
testing of the rocket separating.
Delayed section
separation4
The connection points are too
strong holding the rocket together
and will not allow it to separate.
Rocket will not deploy
parachutes at the proper
altitude.
Testing of the connection
points as well as full scale
testing of the rocket separating.
Bulkhead failure 3
The bulkhead breaks from the
ejection canisters pressurizing the
tube or from the recovery system
causing too much stress.
Rocket will not deploy
parachutes at the proper
altitude or will split into pieces
and be a hazard while landing.
Testing the strength conditions
of the bulkheads to ensure they
can withstand heavy loads.
Systems lacking
enough power4
The batteries are not fully powered
or wired incorrectly.
The rocket systems will not
function properly and may
cause damage to the rocket.
Test the circuitry and also put
in new batteries before launch.
Recovery system
lines fail4
Cord and wires are not secured
properly or are damaged.
Rocket will not be safe when it
deploys parachutes causing the
landing to be hazardous.
Test and check all of the
recovery harnesses prior to
launch.
Avionics will not
track5
Possible loss of rocket due to
winds.Unsuccessful rocket recovery.
Test the GPS system to
ensure that it is functioning
properly.
Vehicle
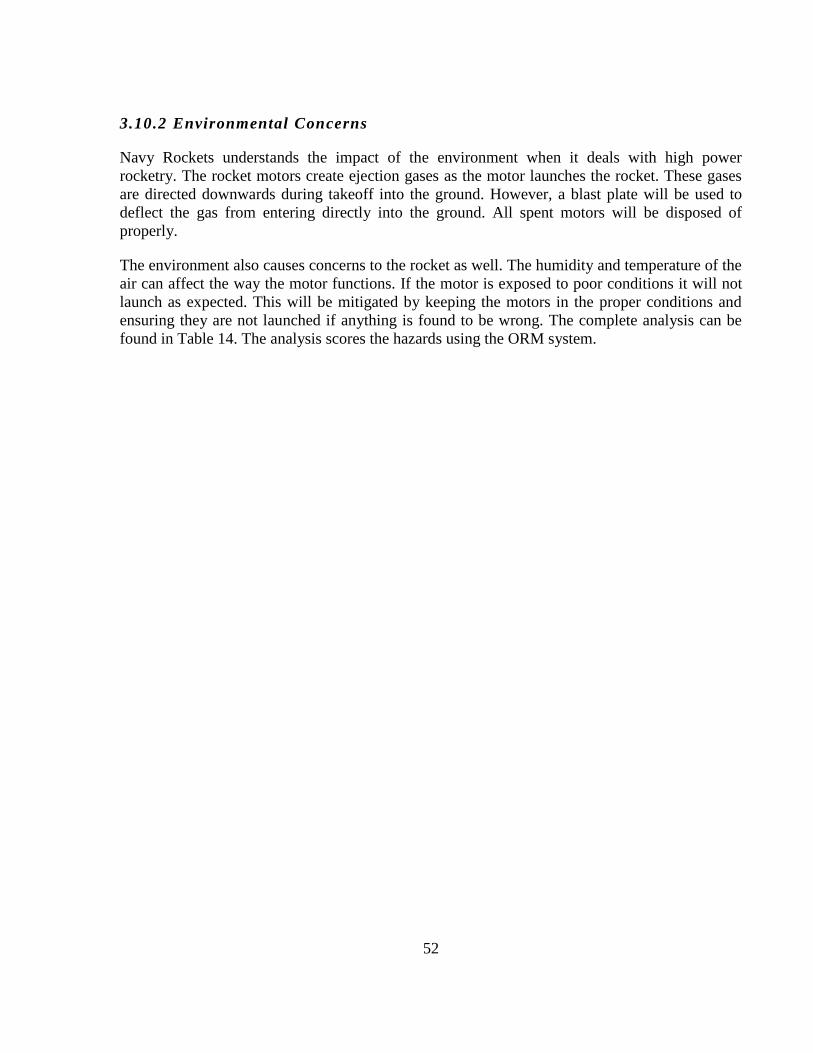
52
3.10.2 Environmental Concerns
Navy Rockets understands the impact of the environment when it deals with high power
rocketry. The rocket motors create ejection gases as the motor launches the rocket. These gases
are directed downwards during takeoff into the ground. However, a blast plate will be used to
deflect the gas from entering directly into the ground. All spent motors will be disposed of
properly.
The environment also causes concerns to the rocket as well. The humidity and temperature of the
air can affect the way the motor functions. If the motor is exposed to poor conditions it will not
launch as expected. This will be mitigated by keeping the motors in the proper conditions and
ensuring they are not launched if anything is found to be wrong. The complete analysis can be
found in Table 14. The analysis scores the hazards using the ORM system.
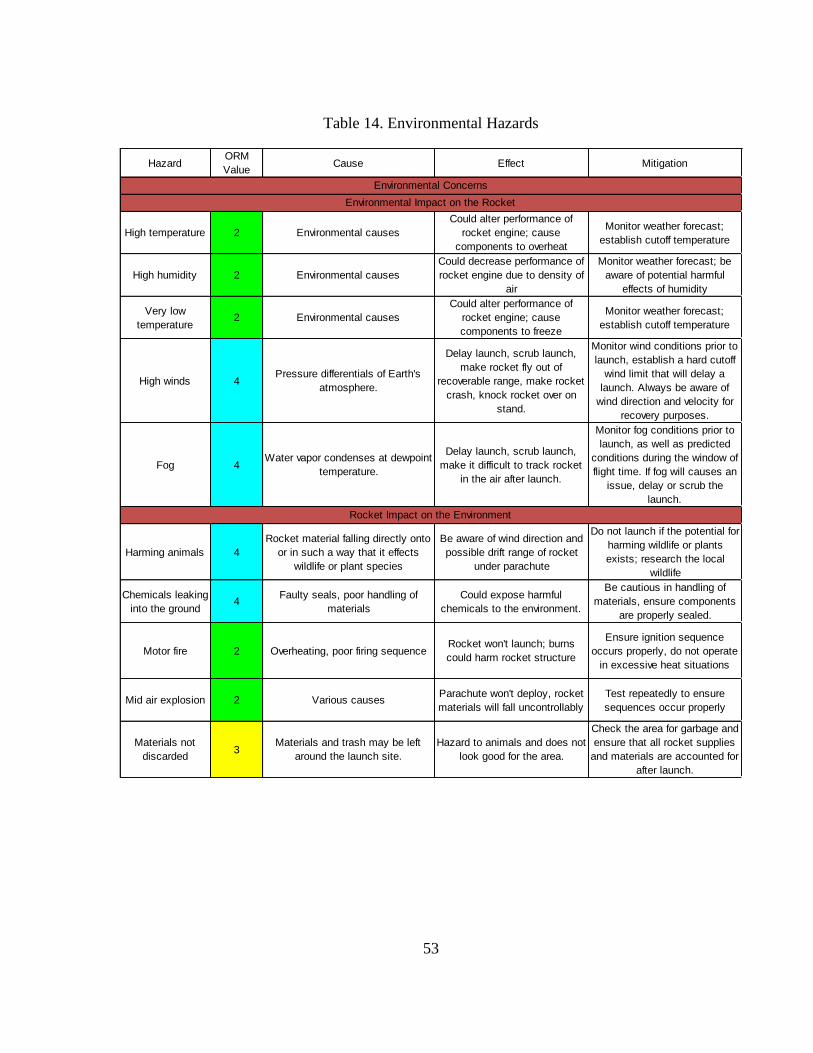
53
Table 14. Environmental Hazards
HazardORM
ValueCause Effect Mitigation
High temperature 2 Environmental causes
Could alter performance of
rocket engine; cause
components to overheat
Monitor weather forecast;
establish cutoff temperature
High humidity 2 Environmental causes
Could decrease performance of
rocket engine due to density of
air
Monitor weather forecast; be
aware of potential harmful
effects of humidity
Very low
temperature2 Environmental causes
Could alter performance of
rocket engine; cause
components to freeze
Monitor weather forecast;
establish cutoff temperature
High winds 4Pressure differentials of Earth's
atmosphere.
Delay launch, scrub launch,
make rocket fly out of
recoverable range, make rocket
crash, knock rocket over on
stand.
Monitor wind conditions prior to
launch, establish a hard cutoff
wind limit that will delay a
launch. Always be aware of
wind direction and velocity for
recovery purposes.
Fog 4Water vapor condenses at dewpoint
temperature.
Delay launch, scrub launch,
make it difficult to track rocket
in the air after launch.
Monitor fog conditions prior to
launch, as well as predicted
conditions during the window of
flight time. If fog will causes an
issue, delay or scrub the
launch.
Harming animals 4
Rocket material falling directly onto
or in such a way that it effects
wildlife or plant species
Be aware of wind direction and
possible drift range of rocket
under parachute
Do not launch if the potential for
harming wildlife or plants
exists; research the local
wildlife
Chemicals leaking
into the ground4
Faulty seals, poor handling of
materials
Could expose harmful
chemicals to the environment.
Be cautious in handling of
materials, ensure components
are properly sealed.
Motor fire 2 Overheating, poor firing sequenceRocket won't launch; burns
could harm rocket structure
Ensure ignition sequence
occurs properly, do not operate
in excessive heat situations
Mid air explosion 2 Various causesParachute won't deploy, rocket
materials will fall uncontrollably
Test repeatedly to ensure
sequences occur properly
Materials not
discarded3
Materials and trash may be left
around the launch site.
Hazard to animals and does not
look good for the area.
Check the area for garbage and
ensure that all rocket supplies
and materials are accounted for
after launch.
Environmental Impact on the Rocket
Rocket Impact on the Environment
Environmental Concerns

54
4 A G S E C r i t e r i a
4.1 Testing and Design of AGSE
4.1.1 System Design
The AGSE will incorporate a structure consisting of two vertical towers, each 13 feet tall,
connected at five separate locations with horizontal connecting tubes. Each tube, or rung, will be
36 inches long. Each rung will be held in place by 4 ring pins, each 2 inches in length and 0.375
inches in diameter. The pins will be inserted through the rungs vertically, with one pin on either
side of each tower. Each rung shall have at least one inch exposed on either side of each tower to
facilitate the insertion and removal of the pins. Each tower will have four horizontal feet, each
welded to the base of the tower to ensure maximum integrity and stability. The feet are shown
below in Figure 31.
Figure 31. Tower Feet
Each tower will be composed of two detachable sections for transportation purposes. The bottom
section will include the feet as well as the lower 48 inches of the vertical component. The
second, or top, section of each tower will be composed of the remainder of the vertical
component. Upon assembly, the tapered portion of the top section will be fed into the opening of
the bottom section, and will be held in place by two hitch pins, 4 inches apart. Each hitch pin will
have a diameter of 0.5 inches and a length of 4.75 inches. When each tower is assembled, the
rungs will be inserted, connecting the two towers and preventing independent motion.
Each tower will support a bicycle chain oriented in a vertical loop with the plane of the loop
perpendicular to the horizontal rungs. Each chain will be supported by two gears, mounted on the
top and bottom rungs, 2 inches in the horizontal direction away from the tower, as illustrated
below in Figure 32.

55
Figure 32. Upper Right Gear
On the top rung, each of the two gears will be mounted on a roller bearing to minimize frictional
effects. The bottom rung will also have two roller bearings, but these will support an aluminum
tube covering the majority of the rung, upon which the lower gears will be mounted. The two
gears closest to the towers will support the vertical chains, similarly to the gears on the top rung.
A third gear will be mounted on the tube between the two outer gears and will be driven by a
horizontal chain connected to a motor. The motor will be fixed to two bars attached to the legs
behind the tower structure. These bars will each be held in place by two hitch pins identical to
the ones used to connect the upper and lower portions of the structure. When the motor is
activated, it will drive the horizontal chain and the middle gear. When the middle gear turns, the
aforementioned aluminum tube will rotate the outer gears. These outer gears will drive the
vertical chains. The inclusion of the aluminum tube will ensure equal rotation of the outer gears.
The motor will be fixed to a base attached to the back legs of the tower, as shown below in
Figure 33.

56
Figure 33. Tower Motor Placement - Top View
An aluminum rod will connect the two chains together. This rod will also be connected to the
rocket sled. The rocket sled will lie on a horizontal plane 8 inches above the ground,
perpendicular to the tower rungs and the towers themselves. The rocket will be placed on the
sled with the nose cone open and pointed toward the tower structure. As the motor spins the
lower gears, the chains will rotate and raise the rod to a predetermined height. As this rod is
raised, it will raise the head of the sled with it. The other end of the sled will roll on a wheel that
runs along a 13 foot long track. This track will have a support bar connected perpendicularly at
the end of the track furthest from the support towers. The track will be fixed to the tower
structure through the use of two hitch pins, identical to those described above. This elevation
process will erect the sled from horizontal to 5 degrees from the vertical. A pair of 5 inch rods
will extend horizontally from the each side of the center of the wheel, perpendicular to the track.
When the rocket reaches its launch position, each bar will lock into a gate latch to prevent
unwanted sled movement. Latches will also lock the bar attaching the rocket sled to the vertical
chains in place. These latches will be fixed to the rail and vertical component of the tower
structure. Washers will be fixed to the 5 inch rods and larger upper rod to prevent them, and by
extension, the sled, from wobbling laterally during the launch process. The rods will be
machined to an appropriate thickness to ensure that they do not wobble vertically within the gate
latches during the launch process. The gate latch selected for use is shown below in Figure 34.
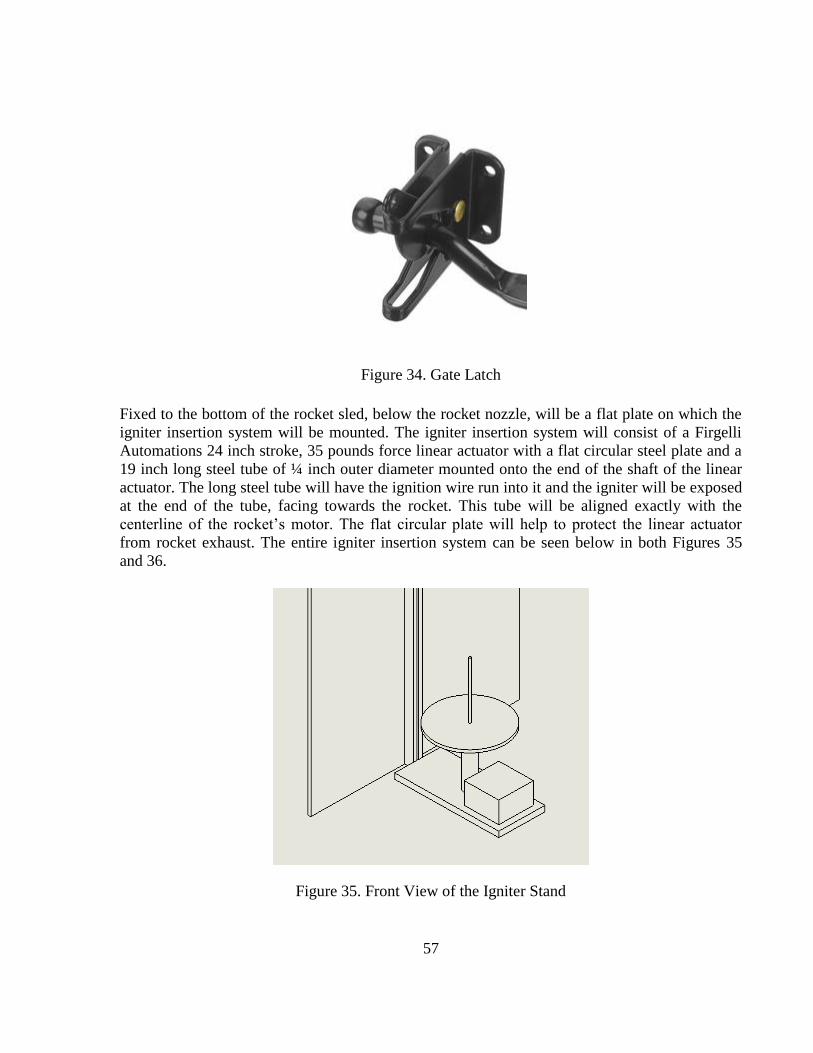
57
Figure 34. Gate Latch
Fixed to the bottom of the rocket sled, below the rocket nozzle, will be a flat plate on which the
igniter insertion system will be mounted. The igniter insertion system will consist of a Firgelli
Automations 24 inch stroke, 35 pounds force linear actuator with a flat circular steel plate and a
19 inch long steel tube of ¼ inch outer diameter mounted onto the end of the shaft of the linear
actuator. The long steel tube will have the ignition wire run into it and the igniter will be exposed
at the end of the tube, facing towards the rocket. This tube will be aligned exactly with the
centerline of the rocket’s motor. The flat circular plate will help to protect the linear actuator
from rocket exhaust. The entire igniter insertion system can be seen below in both Figures 35
and 36.
Figure 35. Front View of the Igniter Stand

58
Figure 36. Side View of the Igniter Stand
The elevation process will erect the sled from horizontal to 5 degrees from the vertical. The
tower and rail system is illustrated below in Figure 37.
Figure 37. Tower and Rail Design

59
4.1.1.1 AGSE Analysis
An initial analysis of the tower structure determined that it is at the highest risk of tipping when
it is in the launch configuration, with the rocket elevated to 5 degrees from the vertical. The fixed
track along which the rocket sled wheel will roll mitigates the risk of the tower tipping forward
or backward, indicating that in event that the tower begins to tip, it will happen along the plane
perpendicular to the fixed rail. A point mass analysis of the individual components places the
center of gravity at 40 inches AGL. The minimum force required to begin tipping the structure is
55 lbf at the top of the tower structure, in the direction of the tipping plane. A complete moment
analysis will be completed again once the structure has been created and all AGSE components
directly involved in the physical manipulation of the rocket and payload have been attached.
Tipping tests will also be conducted at a later date. If the testing indicates any risk of tipping or
rocking, the tower feet will be staked into the soil.
4.1.2 Component Testing
The Scorbot testing phase will be done using only the full scale version of the AGSE system.
The Scorbot will initially undergo independent testing. The testing will be conducted using a
dummy payload composed of PVC pipe and sand filling, designed and built from the engineering
drawings for the project shown in Figure 38. A mock payload bay will be constructed with PVC
and wood. The Scorbot positions will be determined and programmed. The Scorbot will then run
50 cycles and the results for all of the iterations will be recorded. In order to consider the testing
to be successful, 45 of the 50 cycles must effectively insert the payload into the mock payload
bay. Power consumption by the Scorbot will be measured and analyzed. When the testing is
deemed successful, the Scorbot will be ready for use with the tower and rocket. An initial
program designed to test the Scorbot’s capabilities and range of motion has been successfully
written and tested.

60
Figure 38. Payload Tube
Once the tower structure has been completed, it will initially undergo testing without the use of
the Scorbot or rocket. At least 25 rounds of testing will be done to ensure that the tower can
successfully raise the rocket sled to the launch configuration and lock the rocket sled in place.
The tower must successfully erect the sled 25 consecutive times to be considered successful.
Upon determination of the tower’s capabilities, the rocket will be mounted to the sled. The tower
structure will then undergo another 25 rounds of testing with the added weight of the rocket.
Power consumption by the tower motor will be measured and analyzed for integration with the
rest of the AGSE.
The igniter insertion device will initially undergo testing with a dummy rocket. The rocket will
have the same physical characteristics as the real rocket, including motor bore diameter. The
igniter insertion device will be tested 25 times to determine if it can successfully insert a wire
into the dummy rocket. 23 of the 25 rounds must result in successful wire insertion. Although the
power consumed by the igniter insertion device will be miniscule by comparison to the rest of
the AGSE components, it will still be measured and analyzed to ensure compatibility.
Once all three components of the AGSE have been deemed fully functional, they will be tested
together to mimic the actual scenario. First, the Scorbot will insert the payload into the payload
bay. The rocket will then seal the payload bay. The tower structure will then erect the rocket.
When the rocket sled is locked into place, the igniter insertion device will insert the igniter into a
dummy motor that has been temporarily placed within the rocket. All aspects of the AGSE,
including the safety functions and status indicator lights will be tested during this phase. This
process must be completed successfully at least 10 times in order to deem the AGSE compliant
with all requirements and ready for use with a live rocket.

61
4.1.3 Electronic Integration Plan
All components of the AGSE will be controlled via a laptop computer running MATLAB, and
by extension, a switch box with three buttons. The first button will control the power supply to
all elements of the AGSE. The second button will activate the AGSE payload insertion and
rocket erection process. The third button will temporarily terminate all functions of the AGSE.
When the run button is pressed, the laptop will send commands to the Scorbot to initiate the
payload insertion process. When the Scorbot has completed its series of events, the laptop will
send a command to the payload bay after a 10 second delay. The signal will be sent via radio
frequency transmitter. When this signal is received by the payload bay, the payload will be
secured and the payload bay will close. There will be a 10 second delay once the payload bay is
closed. At the end of the 10 second delay, the laptop will send a command to the motor system
via transmitter to erect the rocket. Contained within the motor-driver system will be an encoder
unit that will relay information back to the laptop, including a signal to indicate when the rocket
has reached its final position. The number of motor wheel rotations required to erect the rocket
will be determined during the testing phase. When this completion signal is received by the
laptop, a signal will be sent to the igniter insertion device via RF transmitter. A micro switch on
the igniter insertion device will return a signal indicating completion of the igniter insertion
process. Pressing the pause button at any time during this series of events will stop all processes.
Lights will indicate when the AGSE is carrying out the assigned tasks, as well as when the
process is complete and the system is ready for launch. The use of several transmitters ensures
that any unwanted communication between separate subsystems will be avoided. Limiting the
AGSE to one task at a time will minimize the risk of compounding any errors and will simplify
the trouble shooting process. Any error can be traced back to the single subsystem that will be
operating during the time of the incident. Thus far, no changes have been made to the integration
plan. The AGSE layout is displayed below in Figure 39.

62
Figure 39. AGSE Schematic
Unit C will communicate with unit E to relay commands to the Scorbot control unit. Unit E will
relay feedback back to unit C to signal when the Scorbot has completed motion sequence. Unit D
will communicate with units F, G, and H. Commands to the payload bay concerning the securing
of the payload and the closure of the payload bay will be sent from unit D to unit H. Feedback
stating when these tasks are complete will be returned. Unit D will communicate with unit F to
control the tower motor. When the rocket has reached the 85 degree launch angle, motor rotation
will cease and unit F will relay a signal back to unit D stating that the process is complete.
Following this, unit D will relay commands to unit G to begin the igniter insertion process.
Feedback will indicate when the igniter has been fully inserted. All processes will occur in this
order, one at a time. The logic behind dedicating unit C solely to the Scorbot sequence is to
eliminate the risk of crosstalk interfering with the idle state of the Scorbot. If the Scorbot were to
receive a command intended for a different AGSE component, it will relay an error message and
interfere with the feedback from the other Rx/Tx units.

63
4.1.4 Instrument Precision
The laptop computer utilized by the AGSE will control and monitor all subsystems through the
use of MATLAB. The Scorbot control unit will relay feedback to the program to indicate the
position of the Scorbot arm throughout the insertion process. Encoders the various motors used
will indicate when they have completed their respective rotations or extensions. The position
repeatability of the Scorbot is advertised to be 0.5 mm or 0.02 inches at the tip of the gripper.
This satisfies the requirement that the payload is placed within 0.5 inches along the longitudinal
axis of the rocket and 0.3 inches left or right of the centerline of the intended payload insertion
position. The AGSE shall erect the rocket to no less than 85 degrees from parallel to avoid
improper locking of the gate latches. If intended 85 degree mark is not reached, the rocket sled
will fail to lock into position. If the tower sled is erected to more than 85.5 degrees, the brackets
securing the gate latches could be damaged. The linear actuator incorporated by the igniter
insertion must insert the igniter within -0.5 inches to avoid over insertion and potential damage
to the insertion unit.
4.1.5 AGSE Timeframe
The AGSE will conduct its operations during several separate stages, with delays in between
stages. The entire process shall take no more than 7 minutes, excluding the countdown to launch.
A breakdown of the timeframe is shown below in Table 15.
Table 15. AGSE Timeframe
Event Number
Event
Event Time
(min:sec)
Total Time Elapsed
(min:sec)
1 Payload Insertion 0:30 0:30
Delay 0:10 0:40
2 Payload
Securement 0:10 0:50
3 Nosecone Closure 1:10 2:00
Delay 0:10 2:10
4 Tower Erection 3:00 5:10
Delay 0:10 5:20
5 Igniter Insertion 1:40 7:00
6 Launch TBD 7:00+

64
4.2 AGSE Concept Features
4.2.1 Tower Structure
The components of the tower were selected for a variety of reasons including cost, effectiveness,
durability, and ease of procurement. Aluminum was chosen for the upper component of each
tower, the tower rungs, the rocket sled, and the sled rail because it is lightweight, durable, and
inexpensive. Steel was chosen for the lower section of each tower because of its welding
properties. There are several properties that aluminum possesses that make welding difficult.
These properties include the aluminum oxide surface coating, aluminum’s high thermal
expansion and thermal conductivity coefficients, and low melting temperature. The team has
some experience with welding but it is very limited. A Master Welder is on staff in the Rickover
Machine Shop and will be teaching and supervising the welding process for the project. The fact
that all tower components are hollow reduces excess weight. The use of ring pins and hitch pins
instead of bolts decreases the amount of time it will take to construct and breakdown the
structure. These pins are more expensive than bolts but the benefit of decreased setup time is
considered to have a higher impact than the excess cost. The gate latches used to lock the rocket
in the launch position were chosen on the basis of simplicity and low cost. They require no
electronic component and can be unlocked quickly when resetting or deconstructing the tower
structure. The use of roller bearings to support the gears on the tower decreases any frictional
effects that rotation might incur.
4.2.2 Motor and Amplifier
The NPC-T74 was selected based on durability, size, and power output. The motor is advertised
to produce anywhere from 26 to 1214 lb-ft of torque and has a durable 20:1 ratio gearbox. The
motor itself weighs 14.4 pounds. The amplifier selected for use is an HDC2450 Motor
Controller. This amplifier is capable of controlling the NPC-T74 motor and can be programmed
in the field if need be. The HDC2450 comes with all necessary equipment for operation and can
be controlled using the AGSE’s laptop computer. This amplifier is compact and light, weighing
just 3.3 pounds. The challenge of using this subsystem lies within being able to halt the motor’s
rotation when the rocket has reached the launch position. The most probable solution will be
recording the number of cycles completed by the motor during the time it takes to move the
rocket from horizontal to 85 degrees. This process will be repeated several times and the results
will be averaged to create a standard number of cycles to use within the program.
4.2.3 Scorbot ER-V
A Scorbot ER-V will be integrated into the AGSE because of its durability and simplicity. This
particular Scorbot model is capable of lifting up to 2.2 pounds and has a wide enough range of
motion to handle the payload insertion process. The Scorbot’s range of motion as advertised in
the Scorbot ER-V user manual is displayed below in Figures 40 and 41.

65
Figure 40. Top-down View of Scorbot Operating Range
Figure 41. Side View of Scorbot Operation Range

66
The Scorbot ER-V was chosen over several other robotic arms based upon the ease with which
one can program and operate the device. Its user-friendly interface allowed the team to run
payload insertion testing within one hour of operating the device.
4.3 Science Value
4.3.1 AGSE Objectives
The Autonomous Ground Support Equipment is responsible for the insertion of the payload into
the rocket, as well as the placement of the rocket in the proper launch configuration. The entire
sequence will be activated remotely and will have a pause function in place for safety reasons.
The AGSE shall be able to remain paused for at least one hour and still be able to complete its
tasks once the pause ends.
The primary goal of the AGSE is to create a sample recovery system suitable for use on Mars.
The ability to retrieve Martian samples and study them in a laboratory environment on Earth will
greatly increase our understanding of Mars. The design of the AGSE is compatible for use on
Mars because there are no air breathing components and the presence of gravity will allow the
AGSE to function similarly to how it would on Earth. This is to be considered a small scale test
compared to the size of the rocket needed to escape Mars’ atmosphere and rendezvous with a
transport spacecraft. The payload would theoretically be delivered by a rover programmed to
return to the launch site after acquiring samples.
4.3.2 AGSE Mission
The Autonomous Ground Support Equipment will insert the payload with the use of a Scorbot
ER-V and remotely secure the payload within the payload compartment. Then the AGSE system
will erect the rocket from the horizontal position shown in Figure 42 to the final launch position,
which is 5 degrees from the vertical plane shown in Figure 43. Upon securing the rocket in the
launch position with latches, the AGSE system will then begin to insert the rocket motor igniter.
Once the igniter has been inserted the rocket will be ready to launch.

67
Figure 42. Entire Assembly (Horizontal Position)
Figure 43. Entire Assembly (Vertical Position)

68
4.3.3 Success Criteria
In order for the project to be successful, the rocket must accomplish certain criteria which will be
graded during the competition. These graded events can be found in Table 16 and will determine
how success of the project and performance of the team.
Table 16. Success Criteria
Success Criteria
Event Goal
Altitude Reached 3000 feet
Timing of System 10
minutes
Launch Angle 5 degrees
Safety Controls All
working
Capture of Sample First
attempt
Sample Containment First
attempt
Erection of Rocket First
attempt
Igniter Insertion First
attempt
4.3.4 Experimental Approach
The process of designing, programming, and testing each subsystem individually before
integrating them into the overall system provides the benefit of being able to ensure that all
criteria are met. By having a single subsystem responsible for its own stage in the overall
sequence, the process can be observed and altered as needed. For example, if it is determined
that the Scorbot is drawing too much power from the source during the payload insertion
sequence, the programming can be altered so motion is only occurring on one axis at a time,
thereby decreasing energy consumption. Using a single master code to control all subsystems
will enables monitoring of the status of each subsystem as it runs as well as the status of the
AGSE as a whole unit.

69
4.3.5 Variable Control
The AGSE’s various subsystems can be controlled in terms of speed and position through
programming. The Scorbot’s speed and pattern of motion can be changed from the command
laptop. This includes speeding up or slowing down the arm speed as it travels from waypoint to
waypoint. Slower speeds will allow for more accurate position of the payload, but will increase
the total amount of time needed for payload insertion. The igniter insertion device’s speed can
also be increased or decreased from the command laptop. Similar to the Scorbot process, slower
speeds will minimize unnecessary vibration and increase accuracy. The tower motor’s speed can
also be controlled from the laptop. The effects of environmental factors on the AGSE can be
considered negligible within appropriate launch conditions.
4.3.6 Error Analysis
Full scale tests will be recorded with GoPro high definition cameras from multiple vantage
points to provide video for analysis. These recordings will be primarily used to study the
performance of the tower system. Excessive movement of the launch rail and tower will be noted
and modifications will be made. Any failures within the AGSE will be captured by the
recordings. Any subsystem that experiences one or more failures will be repaired or
reprogrammed, and will be retested thoroughly before being reintegrated into the system.
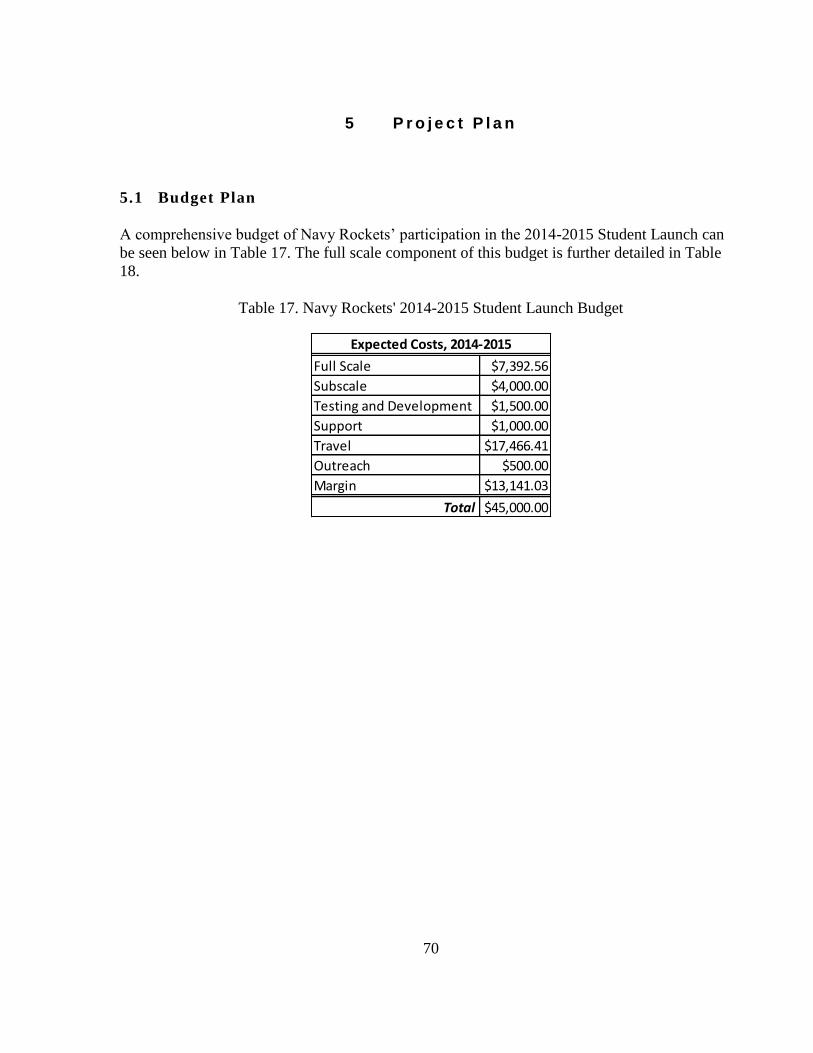
70
5 P r o j e c t P l a n
5.1 Budget Plan
A comprehensive budget of Navy Rockets’ participation in the 2014-2015 Student Launch can
be seen below in Table 17. The full scale component of this budget is further detailed in Table
18.
Table 17. Navy Rockets' 2014-2015 Student Launch Budget
Full Scale $7,392.56
Subscale $4,000.00
Testing and Development $1,500.00
Support $1,000.00
Travel $17,466.41
Outreach $500.00
Margin $13,141.03
Total $45,000.00
Expected Costs, 2014-2015

71
Table 18. Itemized Budget of Full Scale Launch Vehicle
Subsystem Item Unit Price Count Total Price
Twill Weave Carbon Fiber Cloth $47.45 7 $332.15
Resin $99.73 1 $99.73
Hardener $46.06 1 $46.06
Aero-Mat Soric LRC Honeycomb Foam $21.40 3 $64.20
Fiberglass (10 oz E-glass) $6.95 5 $34.75
Garmin Astro Bundle (Astro 320 GPS receiver and T5 GPS Device) $599.99 1 $599.99
Garmin T5 GPS Device $249.99 1 $249.99
Fruity Chutes Iris Ultra 72" Parachute $201.36 1 $201.36
Fruity Chutes Iris Ultra 60" Parachute $166.92 1 $166.92
Fruity Chutes 24" Classic Elliptical Parachute $62.06 1 $62.06
Chute Protector, 18" $9.99 2 $19.98
Eyebolt $1.56 6 $9.36
Kevlar Cord $41.40 1 $41.40
Pololu Micro Metal Gearmotor HP $22.95 1 $22.95
Hitec HS-422 Servo Motor $9.99 2 $19.98
AA Battery $0.49 4 $1.96
Brackets $1.00 4 $4.00
Arduino Micro Control Board $22.49 1 $22.49
3/8" x 48" Alumnium Rod $7.96 1 $7.96
MaxStream xBee-Pro 900HP Wireless Serial Modem $39.00 1 $39.00
Scorbot-ER V $2,500.00 1 $2,500.00
Chain Ring $15.00 6 $90.00
56' of Bike Chain $280.00 1 $280.00
Hitch Pins $7.25 10 $72.50
Ring Pins $2.69 20 $53.80
NPC T74 Electric Motor $355.00 1 $355.00
RoboteQ HDC2450 Motor Controller $645.00 1 $645.00
Lenovo ThinkPad X140e $429.00 1 $429.00
Steel and Aluminum Tubing $450.00 1 $450.00
Steel Plating $112.50 1 $112.50
1/4 Inch OD Steel Tubing $15.84 1 $15.84
Firgelli Automations 24" Stroke 35 Lbs Linear Actuator $119.99 1 $119.99
K1200 54mm Motor $137.95 1 $137.95
54mm Motor Casing $84.69 1 $84.69
$7,392.56Total
Full Scale Itemized Budget
Rocket Structure
Avionics and Recovery
Payload Bay
AGSE
Propulsion

72
5.2 Funding Plan
For the 2014-2015 Student Launch competition, Navy Rockets has received funding from the
Defense Advanced Research Projects Agency (DARPA). There is also potential for additional
funding from the USNA MSTEM program, but this funding is currently non-finalized. Table 19
below details Navy Rockets’ funding plan.
Table 19. Navy Rockets Funding Plan
Navy Rockets expected funding results in over a $13,000 margin over the budgeted project costs.
This margin will allow Navy Rockets to successfully compete in the 2014-2015 Student Launch,
even if the projections of project costs are exceeded.
5.3 Timeline
In order for Navy Rockets to stay on track, a schedule has been created. This schedule, found in
Appendix H, shows the plan for the team from the present time until the final launch.
5.4 Educational Engagement
Navy Rockets intends to involve itself in the community through educational outreach events.
The main targets of outreach events will be primary and secondary school students interested in
the areas of Science, Technology, and Mathematics (STEM). In general, Navy Rockets
participation in the outreach events will be supplementary to the overall goal of the event. All
STEM events involve the rotation of interested young scholars through a myriad of engineering
and technological disciplines. Navy Rockets plans to provide an opportunity for under-
represented populations to experience design and engineering processes. This is to be done
outside of a classroom setting through selected STEM events where participants engaged and
actively participating.
DARPA $40,000.00
USNA MSTEM* $5,000.00
Total $45,000.00
Navy Rockets SL Funding, 2014-2015
*Denotes a non-final i zed source.
73
5.4.1 STEM Coordination
According to the USNA STEM website, the outreach methodology is to
“utilize unique approach to recruiting and retaining technologists by
actively engaging elementary/middle/high school students and teachers in
a wide variety of science and engineering events (camps, mini-camps,
competitions, site visits, short courses, internships) to initiate interest and
enthusiasm for future STEM participation in academic and career choices.
Unique approach is defined by project based, Navy-relevant curriculum,
focusing on current topics, and a pyramidal structure with practicing Navy
technologists/educators on top and near peer midshipmen acting as the
interface with students, using the outstanding USNA resources as a
backdrop for the activities.
Navy Rockets will supplement the mission of the STEM Program by fulfilling its own
requirements. The shared goals of the USNA STEM program and Navy Rockets are:
Outreach with local communities to influence students and teachers to increase focus
toward STEM-related studies and activities.
Allow Navy Rocket participants to be intellectually challenged by creating programs for
Midshipmen, and other program participants that will facilitate problem solving and
critical thinking while still developing a basic technical sense of the projects.
Create an interest in aerospace specifically, and all aspects of systems engineering that it
entails. Through hands on utilization of technology and computer programs, Navy
Rockets hopes to foster interest in the future of aerospace engineering and space flight.
5.4.2 Team Participation
It is of utmost importance that each active member of Navy Rockets participates in outreach such
that they have direct educational interaction with at least 100 different participants. This will
ensure that the Student Launch minimum requirement of 200 participants, at least 100 being
middle school, is surpassed.
5.4.3 STEM events
Navy Rockets plans to be involved in unique STEM events where different populations are
targeted. There are four types of events that Navy Rockets plans on doing. All four events
involve direct interaction with the participants. The four types are
Direct Educational interaction involving Aerospace Engineering
Direct Outreach interaction involving aerospace engineering
Direct Educational interaction not involving aerospace engineering
Direct Outreach interaction not involving aerospace engineering

74
The four types of events will encompass Navy Rockets’ educational outreach. Of that, the events
where Navy Rockets is interacting through aerospace engineering topics will be the majority of
the events attended by Navy Rockets.
Navy Rockets plans on impacting the following STEM events. The events are not a
comprehensive list of the events the team members attend, but they are a list of the major events
that are scheduled at the time of the proposal.
5.4.3.1 MESA DAY
Done in collaboration with Maryland Mathematics Engineering Science Achievement (MESA),
MESA day is one of the primary recurring USNA STEM events that Navy Rockets plans on
doing. MESA day is a full day of involved activities that keep elementary students from local
counties and Baltimore City involved and interested in STEM related activities. Along with a
plethora of age-appropriate interactive activities in different STEM areas, groups are encouraged
to participate in a mini engineering design competition. Navy Rockets’ involvement in MESA
day would consist of creating aerospace specific activities that will keep the students engaged
and attentive. MESA day occurs monthly.
5.4.3.2 Mini-STEM
At the Naval Academy, high schools from around the country have students come visit USNA
for an overnight visit or a long weekend. This is known as a Candidate Visit Weekend. During
these candidate visits, the students tour the technical majors, but more importantly, spend time
engaged in interactive science and engineering activities. Navy Rockets plans to bolster the
candidate’s visits with helpful science and engineering activities. Navy Rockets has the ability to
conduct wind tunnel experiments, load cell experiments, and much more with the mini-STEM
groups. Candidate visits are held a handful of times during a semester, so there are an abundance
of mini-STEM opportunities for Navy Rockets to pick up on.
5.4.3.3 Girls-Only STEM Day
Part of the Girls Exploring Technology through Innovative Topics (GET IT and go) Program, the
girls-only STEM day focuses on engineering design and development through a comprehensive
competition. The goal is to encourage female participation in STEM programs and studies
because females are under-represented in STEM communities. At the competition, female
students will have the opportunity to compete, and to attend workshops and meet female faculty
members working on innovative technologies, and sciences. The girls-only STEM day is a one-
time competition of the GET IT and GO Program.

75
5.4.3.4 Space Exploration Merit Badge
In conjunction with the National Eagle Scout Association (NESA) chapter at the Naval
Academy, Navy Rockets will counsel groups of Boy Scouts to achieve the Space Exploration
Merit Badge on Martin Luther King weekend in January of 2015. The merit badge involves
instruction about Newton’s Laws, model rocketry, and much more. The complete requirements
for the badge can be found on the Boy Scouts of America’s (BSA) website.
5.4.4 Sustainability
Because it is the first year in the competition for Navy Rockets, extra measures will be taken in
order to sustain the project for years to come. While it is difficult for Navy Rockets to receive
funding through commercial enterprises and other businesses, the team is continually lobbying
for community support in other areas. Outside of the Student Launch Initiative, the Navy
Rockets club is able to get continued funding and support through the USNA STEM program.
Other than that, Navy Rockets has had a mutually beneficial relationship with the local AIAA
student chapter, and the local amateur rocket associations. Similar to the Student Launch
Initiative, the local programs ask us to perform community outreach on their behalf. Through
outreach, Navy Rockets is promoted, along with promoting an interest in pertinent aerospace
engineering communities and technological advances.
The Navy Rockets team expends a lot of effort to ensure sustainability and interest in Navy
Rockets. Navy Rockets has attended multiple class meetings to promote rocketry, mostly on an
amateur level. For example, for the last few years, members have attended aerospace open
houses geared toward freshmen. At these open houses, Navy Rockets has a booth, and hands out
flyers with information about the team. Aside from that, Navy Rockets attends aerospace specific
class-wide pre-registration briefs. At these briefs, classes are told about the classes they can
register for in the oncoming semester. Information about Navy Rockets and what the team does
is also promulgated at these briefs.
5.4.4.1 Major Sustainability Challenges and Solutions
The major foreseeable challenge for Navy Rockets is team sustainability in the future. It has the
possibility of being difficult to find enough interest for future years to come. Because all 4th
year
students on the team will not be able to be with the team next year there will be a high turnover
rate. If there are not enough incoming third and second year students this could pose a problem.
Adding to that, the Naval Academy is a smaller school, with a relatively small selection of
students pursuing aerospace engineering.
The best solution to this challenge will be to make team information flyers and events more
effective in providing interest. A way to do this will to branch outside of the aerospace
engineering department when soliciting for members. The major members of the team now are

76
all aerospace majors. In the future this will most likely not be the case with increased solicitation
to, and interest from, other engineering majors.
5.4.5 Educational Engagement Progress (Proposal to PDR)
The educational engagement events have progressed as expected following Navy Rocket’s
admission into the Student Launch competition. Between the submission of the proposal and the
admission into the competition, Navy Rockets members conducted educational outreach with a
community elementary school through the American Institute of Aeronautics and Astronautics
(AIAA). Although the educational outreach did not count towards requirements that NASA has
made, the outreach was both beneficial for the participants and the Navy Rockets team members.
Since the submission, Navy Rockets has taken a major part in outreach with the Girls STEM Day
at the Naval Academy. With an effect on over 270 participants, Navy Rockets was able to
positively influence middle school participants.
5.4.6 Outreach Update
Since submitting the Preliminary Design Review, Navy Rockets has already started interacting
with the community through educational platforms. Navy Rockets proudly shared a role in
shaping the minds of young students that attended MESA Day. Currently Navy Rockets is
planning to lead 37 boy scouts through the process of obtaining the Space Exploration Merit
Badges. This outreach event will involve scouts learning about NASA missions, astronauts, and
most importantly, NASA rockets. Navy Rockets looks forward to sharing their limited
knowledge about rocketry through a variety of mediums.

77
6 C o n c l u s i o n
Navy Rockets will produce an autonomous system that will move a soil sample into a high
powered launch vehicle. The system will then seal the rocket and erect itself to five degrees from
vertical. After the rocket is erected, an igniter will be placed inside the motor and launched to an
altitude of 3000 feet. After apogee the system will deploy a parachute and slow the vehicle down
as it approaches a target altitude of 1000 feet. At the target altitude the soil sample and payload
section will be ejected from the main launch vehicle, deploy a parachute, and return to the Earth
without damage.

78
A P P E N D I X A : C D R F l y s h e e t

79

80
A P P E N D I X B : S u g g e s t i o n C h a n g e s
Drift Analysis All wind drift analysis has been recalculated with
higher scrutiny to ensure that maximum wind drift
doesn’t surpass 2500 ft. This change is incorporated in
the presentation.
Terminal Velocities and KE
Values
The discrepancies were largely due to incorrect data in
the parachute specifications and analysis. This has
been corrected and the values recalculated.
Black Powder Charges The REPTAR Launch Vehicle avionics now
incorporates two ejections charges per event bulkhead
to provide redundancy for the recovery system.
Switch S3 Switch #S3 in the recovery avionics schematic has
been removed when the system was rewired. In its
place will be a single switch that will utilize the
associated terminal in both Stratologger SL100s in
order to provide power to the system.
Bulkheads The bulkheads within the rocket body will be
constructed out of either fiber glass or carbon fiber,
depending on the associated section. These bulkheads
will be 1/8 in. thick.
Eyebolts The eyebolts used in the recovery harness will be
purchased as open, and then tack-welded shut. These
eyebolts and associated lock-nuts will be ½ in. 310
Stainless steel and will be fillet epoxied around its
threaded portion to ensure no backing out.
Nose Cone Configuration During launch prep, the nose cone will be open to
allow the insertion of the payload sample.
Recovery Harnesses The recovery harnesses have been lengthened for all
three parachutes to mitigate the impact force on the
eyebolts and bulkheads upon recovery. The drogue
harness will be 20 ft., the main harness 15 ft., and the
payload harness 10 ft. Each harness will also utilize
Black Diamond Positron carabineers as attachment
points within the harness. Each carabineer is rated for
over 5,000 lbf.
Fin Construction The launch vehicle fins will be integrated directly into
the motor mount assembly as “through the wall” fins.
Nosecone Latching The nosecone will utilize a rubber O-Ring about the
payload bay interface to provide a sealant force, as
well as the captive force of the linear motor. If this
proves to be ineffective during testing, a small current

81
will be sent to the motor during the flight to ensure
this captive force maintains stable.
Autonomous Procedure Duration Navy Rockets expects the entire procedure to take
under the allotted 10 minutes. However a more
specific time can’t be provided at this time without
adequate testing.

82
A P P E N D I X C : M i s s i o n R e q u i r e m e n t s
Req't # Requirement Designated Subsystem
1.1 The vehicle shall deliver the payload to, but not exceeding, an apogee altitude of 3,000 feet above ground level (AGL).
Structures & Propulsion
1.2
The vehicle shall carry one commercially available, barometric altimeter for recording the official altitude used in the competition scoring. The altitude score will account for 10% of the team’s overall competition score. Teams will receive the maximum number of altitude points (3,000) by fully reaching the 3,000 feet AGL mark. For every foot of deviation above or below the target altitude, the team will lose 1 altitude point. The team’s altitude points will be divided by 3,000 to determine the altitude score for the competition.
Avionics
1.2.1 The official scoring altimeter shall report the official competition altitude via a series of beeps to be checked after the competition flight.
Avionics
1.2.2 Teams may have additional altimeters to control vehicle electronics and payload experiment(s).
Avionics & Recovery
1.2.2.1 At the Launch Readiness Review, a NASA official will mark the altimeter that will be used for the official scoring.
Avionics
1.2.2.2 At the launch field, a NASA official will obtain the altitude by listening to the audible beeps reported by the official competition, marked altimeter.
Avionics
1.2.2.3 At the launch field, to aid in determination of the vehicle’s apogee, all audible electronics, except for the official altitude-determining altimeter shall be capable of being turned off.
Avionics
1.2.3 The following circumstances will warrant a score of zero for the altitude portion of the competition:
Avionics
1.2.3.1 The official, marked altimeter is damaged and/or does not report an altitude via a series of beeps after the team’s competition flight.
Avionics
1.2.3.2 The team does not report to the NASA official designated to record the altitude with their official, marked altimeter on the day of the launch.
Avionics
1.2.3.3. The altimeter reports an apogee altitude over 5,000 feet AGL. Avionics
1.2.3.4 The rocket is not flown at the competition launch site. All
1.3 The launch vehicle shall be designed to be recoverable and reusable. Reusable is defined as being able to launch again on the same day without repairs or modifications.
Structures & Recovery
1.4
The launch vehicle shall have a maximum of four (4) independent sections. An independent section is defined as a section that is either tethered to the main vehicle or is recovered separately from the main vehicle using its own parachute.
Structures
1.5 The launch vehicle shall be limited to a single stage. Structrues
1.6 The launch vehicle shall be capable of being prepared for flight at the launch site within 2 hours, from the time the Federal Aviation Administration flight waiver opens.
All
1.7 The launch vehicle shall be capable of remaining in launch-ready configuration at the pad for a minimum of 1 hour without losing the
Avionics, Payload, and Recovery

83
functionality of any critical on-board component.
1.8 The launch vehicle shall be capable of being launched by a standard 12 volt direct current firing system. The firing system will be provided by the NASA-designated Range Services Provider.
Propulsion
1.9
The launch vehicle shall use a commercially available solid motor propulsion system using ammonium perchlorate composite propellant (APCP) which is approved and certified by the National Association of Rocketry (NAR), Tripoli Rocketry Association (TRA), and/or the Canadian Association of Rocketry (CAR).
Propulsion
1.9.1 Final motor choices must be made by the Critical Design Review (CDR). Propusion
1.9.2 Any motor changes after CDR must be approved by the NASA Range Safety Officer (RSO), and will only be approved if the change is for the sole purpose of increasing the safety margin.
Propulsion
1.10. The total impulse provided by a launch vehicle shall not exceed 5,120 Newton-seconds (L-class).
Propulsion
1.11
Any team participating in Maxi-MAV will be required to provide an inert or replicated version of their motor matching in both size and weight to their launch day motor. This motor will be used during the LRR to ensure the igniter installer will work with the competition motor on launch day.
Propulsion
1.12 Pressure vessels on the vehicle shall be approved by the RSO and shall meet the following criteria:
Structures
1.12.1 The minimum factor of safety (Burst or Ultimate pressure versus Max Expected Operating Pressure) shall be 4:1 with supporting design documentation included in all milestone reviews.
Structures
1.12.2 The low-cycle fatigue life shall be a minimum of 4:1. Structures
1.12.3 Each pressure vessel shall include a solenoid pressure relief valve that sees the full pressure of the tank.
Structures
1.12.4 Full pedigree of the tank shall be described, including the application for which the tank was designed, and the history of the tank, including the number of pressure cycles put on the tank, by whom, and when.
Structures
1.13
All teams shall successfully launch and recover a subscale model of their full-scale rocket prior to CDR. The subscale model should resemble and perform as similarly as possible to the full-scale model, however, the full-scale shall not be used as the subscale model.
All
1.14
All teams shall successfully launch and recover their full-scale rocket prior to FRR in its final flight configuration. The rocket flown at FRR must be the same rocket to be flown on launch day. The purpose of the full-scale demonstration flight is to demonstrate the launch vehicle’s stability, structural integrity, recovery systems, and the team’s ability to prepare the launch vehicle for flight. A successful flight is defined as a launch in which all hardware is functioning properly (i.e. drogue chute at apogee, main chute at a lower altitude, functioning tracking devices, etc.). The following criteria must be met during the full scale demonstration flight:
All
1.1.14.1 The vehicle and recovery system shall have functioned as designed. Recovery
1.14.2 The payload does not have to be flown during the full-scale test flight. The following requirements still apply:
All
1.14.2.1 If the payload is not flown, mass simulators shall be used to simulate the payload mass.
Recovery
1.12.2.2 The mass simulators shall be located in the same approximate location on the rocket as the missing payload mass.
Payload
1.14.2.3 If the payload changes the external surfaces of the rocket (such as with Payload

84
camera housings or external probes) or manages the total energy of the vehicle, those systems shall be active during the full-scale demonstration flight.
1.14.3
The full-scale motor does not have to be flown during the full-scale test flight. However, it is recommended that the full-scale motor be used to demonstrate full flight readiness and altitude verification. If the full-scale motor is not flown during the full-scale flight, it is desired that the motor simulate, as closely as possible, the predicted maximum velocity and maximum acceleration of the competition flight.
Payload
1.14.4 The vehicle shall be flown in its fully ballasted configuration during the full-scale test flight. Fully ballasted refers to the same amount of ballast that will be flown during the competition flight.
All
1.14.5 After successfully completing the full-scale demonstration flight, the launch vehicle or any of its components shall not be modified without the concurrence of the NASA Range Safety Officer (RSO).
All
1.15
Each team will have a maximum budget they may spend on the rocket and the Autonomous Ground Support Equipment (AGSE). Teams who are participating in the Maxi-MAV competition are limited to a $10,000 budget while teams participating in Mini-MAV are limited to $5,000. The cost is for the competition rocket and AGSE as it sits on the pad, including all purchased components. The fair market value of all donated items or materials shall be included in the cost analysis. The following items may be omitted from the total cost of the vehicle:
All
1.16 Vehicle Prohibitions
1.16.1 The launch vehicle shall not utilize forward canards. Sturctures
1.16.2 The launch vehicle shall not utilize forward firing motors. Propulsion
1.16.3 The launch vehicle shall not utilize motors that expel titanium sponges (Sparky, Skidmark, MetalStorm, etc.).
Propulsion
1.16.4 The launch vehicle shall not utilize hybrid motors. Propulsion
1.16.5 The launch vehicle shall not utilize a cluster of motors. Propulsion
2.1
The launch vehicle shall stage the deployment of its recovery devices, where a drogue parachute is deployed at apogee and a main parachute is deployed at a much lower altitude. Tumble recovery or streamer recovery from apogee to main parachute deployment is also permissible, provided the kinetic energy during drogue-stage descent is reasonable, as deemed by the Range Safety Officer.
Recovery
2.2. Teams must perform a successful ground ejection test for both the drogue and main parachutes. This must be done prior to the initial subscale and full scale launches.
Recovery
2.3 At landing, each independent section of the launch vehicle shall have a maximum kinetic energy of 75 ft-lbf.
Recovery
2.4 The recovery system electrical circuits shall be completely independent of any payload electrical circuits.
Recovery
2.5
The recovery system shall contain redundant, commercially available altimeters. The term “altimeters” includes both simple altimeters and more sophisticated flight computers. One of these altimeters may be chosen as the competition altimeter.
Recovery
2.6 A dedicated arming switch shall arm each altimeter, which is accessible from the exterior of the rocket airframe when the rocket is in the launch configuration on the launch pad.
Recovery

85
2.7 Each altimeter shall have a dedicated power supply. Recovery
2.8 Each arming switch shall be capable of being locked in the ON position for launch.
Recovery
2.9 Removable shear pins shall be used for both the main parachute compartment and the drogue parachute compartment.
Recovery
2.10. An electronic tracking device shall be installed in the launch vehicle and shall transmit the position of the tethered vehicle or any independent section to a ground receiver.
Avionics
2.10.1 Any rocket section, or payload component, which lands untethered to the launch vehicle shall also carry an active electronic tracking device.
Avionics
2.10.2 The electronic tracking device shall be fully functional during the official flight at the competition launch site.
Avionics
2.11 The recovery system electronics shall not be adversely affected by any other on-board electronic devices during flight (from launch until landing).
Recovery
2.11.1 The recovery system altimeters shall be physically located in a separate compartment within the vehicle from any other radio frequency transmitting device and/or magnetic wave producing device.
Recovery
2.11.2 The recovery system electronics shall be shielded from all onboard transmitting devices, to avoid inadvertent excitation of the recovery system electronics.
Recovery
2.11.3
The recovery system electronics shall be shielded from all onboard devices which may generate magnetic waves (such as generators, solenoid valves, and Tesla coils) to avoid inadvertent excitation of the recovery system.
Recovery
2.11.4 The recovery system electronics shall be shielded from any other onboard devices which may adversely affect the proper operation of the recovery system electronics.
Recovery
3.2.1.12
The rocket will launch as designed and jettison the payload at 1,000 feet AGL during descent
Payload & Recovery
3.2.4.1
Each launch vehicle must have the space to contain a cylindrical payload approximately 3/4 inch in diameter and 4.75 inches in length. The payload will be made of ¾ x 3 inch PVC tubing filled with sand and weighing approximately 4 oz., and capped with domed PVC end caps. Each launch vehicle must be able to seal the payload containment area autonomously prior to launch.
Payload
3.2.4.2 Teams may construct their own payload according to the above specifications, however, each team will be required to use a regulation payload provided to them on launch day.
Payload
3.2.4.3 The payload will not contain any hooks or other means to grab it. A diagram of the payload and a sample payload will be provided to each team at time of acceptance into the competition.
Payload
3.2.4.4 The payload may be placed anywhere in the launch area for insertion, as long as it is outside the mold line of the launch vehicle when placed in the horizontal position on the AGSE.
Payload
3.2.4.5 The payload container must utilize a parachute for recovery and contain a GPS or radio locator.
Avionics, Payload, & Recovery

86
Req't # Designated Subsystem Verification
1.1 Structures & Propulsion Analysis & Testing
1.2 Avionics Design
1.2.1 Avionics Design
1.2.2 Avionics & Recovery Design
1.2.2.1 Avionics -
1.2.2.2 Avionics Design
1.2.2.3 Avionics -
1.2.3 Avionics Testing
1.2.3.1 Avionics Testing
1.2.3.2 Avionics Testing
1.2.3.3. Avionics Testing
1.2.3.4 All Testing
1.3 Structures & Recovery Testing
1.4 Structures Design
1.5 Structures Design
1.6 All Design
1.7 Avionics, Payload, and
Recovery Design
1.8 Propulsion Design
1.9 Propulsion Design
1.9.1 Propulsion Design
1.9.2 Propulsion Design
1.10. Propulsion Analysis
1.11 Propulsion Design
1.12 Structures -
1.12.1 Structures Analysis
1.12.2 Structures Analysis
1.12.3 Structures Analysis
1.12.4 Structures Analysis
1.13 All Testing
1.14 All Testing
1.1.14.1
Recovery Analysis and
Testing
1.14.2 All Testing
1.14.2.1
Recovery Testing
1.12.2.2
Payload Testing
1.14.2.3
Payload Testing

87
1.14.3 Payload Testing
1.14.4 All Testing
1.14.5 All Testing
1.15 All Design
1.16
-
1.16.1 Structures Design
1.16.2 Propulsion Design
1.16.3 Propulsion Design
1.16.4 Propulsion Design
1.16.5 Propulsion Design
2.1 Recovery Design
2.2. Recovery Testing
2.3 Recovery Analysis
2.4 Recovery Design
2.5 Recovery Design
2.6 Recovery Design
2.7 Recovery Design
2.8 Recovery Design
2.9 Recovery Design
2.10. Avionics Design
2.10.1 Avionics Design
2.10.2 Avionics Design
2.11 Recovery Testing
2.11.1 Recovery Design
2.11.2 Recovery Testing
2.11.3 Recovery Testing
2.11.4 Recovery Testing
3.2.1.12
Payload & Recovery Testing
3.2.4.1 Payload Design
3.2.4.2 Payload Design
3.2.4.3 Payload Design
3.2.4.4 Payload Testing
3.2.4.5 Avionics, Payload, &
Recovery Design

88

89
A P P E N D I X D : R o c k e t D i m e n s i o n s

90

91
A P P E N D I X E : W i n d T u n n e l T e s t i n g
USNA ROCKET PROPULSION
PROGRAM
FUNCTIONAL TEST PLAN
USNA-TP-R001 20 AUG 2014
Approvals
___________________________________________________ ___________________ Project Engineer Date

92
RECORD OF CHANGES
REVISION
LETTER
DATE TITLE OR BRIEF DESCRIPTION ENTERED BY
A 20 SEP 14 Draft TM
B 9 JAN 14 Draft TM

93
Introduction:
This Functional Test Plan describes the procedures used to operate the flow aerodynamic force
test being performed on the University Student Launch Initiative (USLI) scale rocket in the
Eiffel Wind Tunnel.
Pressure Variation along Rocket: The purpose of this experiment is to test a scale model
rocket at an array of incidence angles with varying Reynolds numbers. This test will allow Navy
Rockets to determine the aerodynamic forces present on the rocket throughout the flight.
Knowledge of the forces during flight will give way to more accurate analysis of rocket flight
path trajectory, especially in comparison to rocket trajectory simulation software. This work will
be presented to complement the Navy Rocket research and development as a part of the NASA
Student Launch competition.
1.1 Philosophy of OPERATIONS
The scale model testing will take place inside the Eiffel Wind Tunnel in Rickover Hall. It will be
mounted to the sting balance, with pressure ports located along the nose cone and rocket body.
The nose cone and the fin section will be designed in SolidWorks and 3D printed to an exact
0.475:1 scale. The pressure ports will be 3D printed into the scale model nose cone, and drilled
into the body section. The body section will be made of PVC. The model will be run at varying
Reynolds numbers. The incidence angle of the scale model and the free-stream flow will vary
between -10 and 10 degrees.
1.2 Participation
Personnel responsible for the operations are listed in A-1.
A-1. Wind Tunnel Test Personnel
Name Organization Role/Responsibility Contact Information
Captain Kristen
Castonguay
USNA Aerospace
Engineering
Instructor, USAF
Project Manager 410.293.6403
Troy McKenzie
USNA Class of 2015
USLI Aerodynamics
Lead
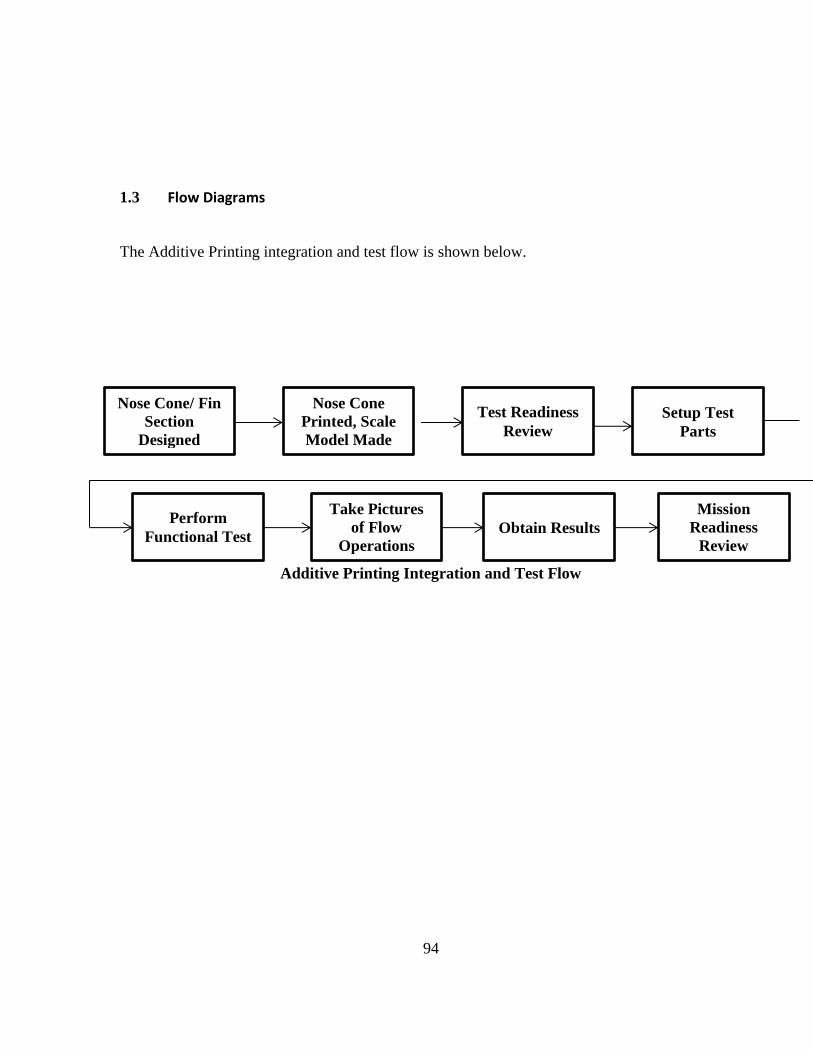
94
1.3 Flow Diagrams
The Additive Printing integration and test flow is shown below.
Additive Printing Integration and Test Flow
Setup Test
Parts
Test Readiness
Review
Nose Cone
Printed, Scale
Model Made
Perform
Functional Test
Take Pictures
of Flow
Operations
Obtain Results
Mission
Readiness
Review
Nose Cone/ Fin
Section
Designed
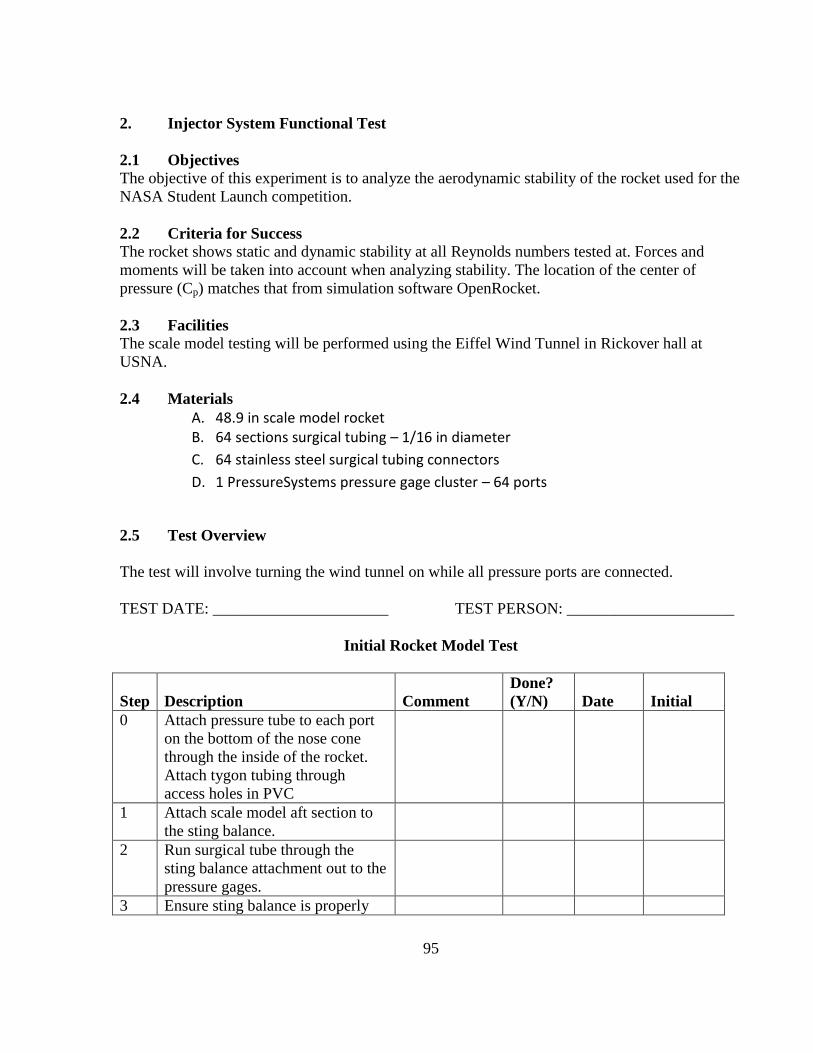
95
2. Injector System Functional Test
2.1 Objectives
The objective of this experiment is to analyze the aerodynamic stability of the rocket used for the
NASA Student Launch competition.
2.2 Criteria for Success The rocket shows static and dynamic stability at all Reynolds numbers tested at. Forces and
moments will be taken into account when analyzing stability. The location of the center of
pressure (Cp) matches that from simulation software OpenRocket.
2.3 Facilities
The scale model testing will be performed using the Eiffel Wind Tunnel in Rickover hall at
USNA.
2.4 Materials
A. 48.9 in scale model rocket B. 64 sections surgical tubing – 1/16 in diameter
C. 64 stainless steel surgical tubing connectors
D. 1 PressureSystems pressure gage cluster – 64 ports
2.5 Test Overview
The test will involve turning the wind tunnel on while all pressure ports are connected.
TEST DATE: ______________________ TEST PERSON: _____________________
Initial Rocket Model Test
Step Description Comment
Done?
(Y/N) Date Initial
0 Attach pressure tube to each port
on the bottom of the nose cone
through the inside of the rocket.
Attach tygon tubing through
access holes in PVC
1 Attach scale model aft section to
the sting balance.
2 Run surgical tube through the
sting balance attachment out to the
pressure gages.
3 Ensure sting balance is properly

96
attached with the sting balance
attachment
4 Ensure all pressure ports and force
measuring devices are securely
fitted by inspection, then by flow
through test section
5 Run program at initial test speed.
6 When flow steadies tabulate data
for given speed.
7 Perform steps 5-6 as needed for
each successive test speed at each
angle of attack
8 Once all data is taken, run again at
initial test speed
9 Perform free-stream velocity
sweep from initial to final test
speeds, simultaneously tabulating
data.
10 When finished tabulating velocity
sweep, move wind tunnel test
speed down to 0%
11 Shut down wind tunnel and wind
tunnel software
12 Detach the assembly in reverse
order of attachment.

97
A P P E N D I X F : L a w s

98

99

100
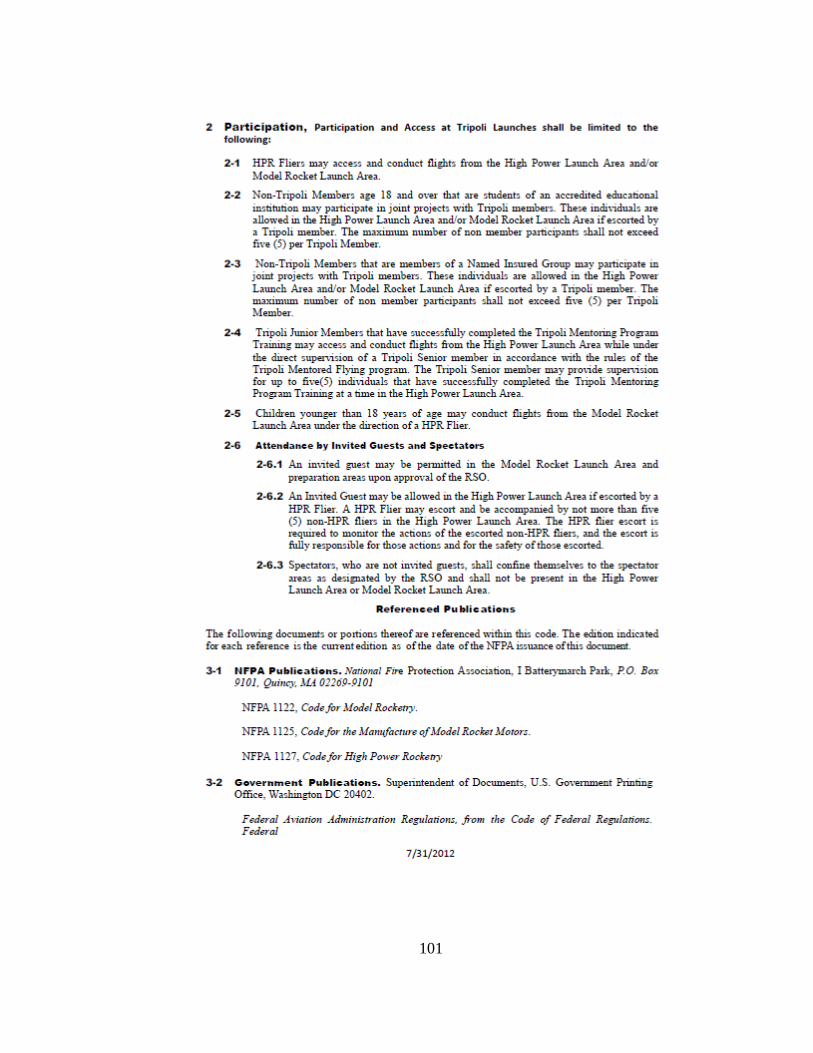
101

102

103
A.1 Subpart C— Amateur Rockets
101.21 Applicability.
(a) This subpart applies to operating unmanned rockets. However, a person operating an
unmanned rocket within a restricted area must comply with §101.25(b) (7) (ii) and with any
additional limitations imposed by the using or controlling agency.
(b) A person operating an unmanned rocket other than an amateur rocket as defined in §1.1 of
this chapter must comply with 14 CFR Chapter III.
101.22 Definitions.
The following definitions apply to this subpart:
(A) Class 1—Model Rocket means an amateur rocket that:
(1) uses no more than 125 grams (4.4 ounces) of propellant;
(2) Uses a slow-burning propellant;
(3) Is made of paper, wood, or breakable plastic;
(4) Contains no substantial metal parts; and
(5) Weighs no more than 1,500 grams (53 ounces), including the propellant.
(b) Class 2—High-Power Rocket means an amateur rocket other than a model rocket that is
propelled by a motor or motors having a combined total impulse of 40,960 Newton-seconds
(9,208 pound-seconds) or less.
(c) Class 3—Advanced High-Power Rocket means an amateur rocket other than a model rocket
or high-power rocket.
101.23 General operating limitations.
(a) You must operate an amateur rocket in such a manner that it:
(1) Is launched on a suborbital trajectory;
(2) When launched, must not cross into the territory of a foreign country unless an agreement is
in place between the United States and the country of concern;
(3) Is unmanned; and
(4) Does not create a hazard to persons, property, or other aircraft.
(b) The FAA may specify additional operating limitations necessary to ensure that air traffic is
not adversely affected, and public safety is not jeopardized.
101.25 Operating limitations for Class 2-High Power Rockets and Class 3-Advanced High
Power Rockets.
When operating Class 2-High Power Rockets or Class 3-Advanced High Power Rockets, you
must comply with the General Operating Limitations of §101.23. In addition, you must not
operate Class 2-High Power Rockets or Class 3-Advanced High Power Rockets—
(a) At any altitude where clouds or obscuring phenomena of more than five-tenths coverage
prevails;
(b) At any altitude where the horizontal visibility is less than five miles;

104
(c) Into any cloud;
(d) Between sunset and sunrise without prior authorization from the FAA;
(e) Within 9.26 kilometers (5 nautical miles) of any airport boundary without prior authorization
from the FAA;
(f) In controlled airspace without prior authorization from the FAA;
(g) Unless you observe the greater of the following separation distances from any person or
property that is not associated with the operations:
(1) Not less than one-quarter the maximum expected altitude;
(2) 457 meters (1,500 ft.);
(h) Unless a person at least eighteen years old is present, is charged with ensuring the safety of
the operation, and has final approval authority for initiating high-power rocket flight; and
(i) Unless reasonable precautions are provided to report and control a fire caused by rocket
activities.
101.27 ATC notification for all launches.
No person may operate an unmanned rocket other than a Class 1—Model Rocket unless that
person gives the following information to the FAA ATC facility nearest to the place of intended
operation no less than 24 hours before and no more than three days before beginning the
operation:
(a) The name and address of the operator; except when there are multiple participants at a single
event, the name and address of the person so designated as the event launch coordinator, whose
duties include coordination of the required launch data estimates and coordinating the launch
event;
(b) Date and time the activity will begin;
(c) Radius of the affected area on the ground in nautical miles;
(d) Location of the center of the affected area in latitude and longitude coordinates;
(e) Highest affected altitude;
(f) Duration of the activity;
(g) Any other pertinent information requested by the ATC facility.
101.29 Information requirements.
(a) Class 2—High-Power Rockets. When a Class 2—High-Power Rocket requires a certificate of
waiver or authorization, the person planning the operation must provide the information below
on each type of rocket to the FAA at least 45 days before the proposed operation. The FAA may
request additional information if necessary to ensure the proposed operations can be safely
conducted. The information shall include for each type of Class 2 rocket expected to be flown:
(1) Estimated number of rockets,
(2) Type of propulsion (liquid or solid), fuel(s) and oxidizer(s),
(3) Description of the launcher(s) planned to be used, including any airborne platform(s),
(4) Description of recovery system,
(5) Highest altitude, above ground level, expected to be reached,
(6) Launch site latitude, longitude, and elevation, and
(7) Any additional safety procedures that will be followed.

105
(b) Class 3—Advanced High-Power Rockets. When a Class 3—Advanced High-Power Rocket
requires a certificate of waiver or authorization the person planning the operation must provide
the information below for each type of rocket to the FAA at least 45 days before the proposed
operation. The FAA may request additional information if necessary to ensure the proposed
operations can be safely conducted. The information shall include for each type of Class 3 rocket
expected to be flown:
(1) The information requirements of paragraph (a) of this section,
(2) Maximum possible range,
(3) The dynamic stability characteristics for the entire flight profile,
(4) A description of all major rocket systems, including structural, pneumatic, propellant,
propulsion, ignition, electrical, avionics, recovery, wind-weighting, flight control, and tracking,
(5) A description of other support equipment necessary for a safe operation,
(6) The planned flight profile and sequence of events,
(7) All nominal impact areas, including those for any spent motors and other discarded hardware,
within three standard deviations of the mean impact point,
(8) Launch commits criteria,
(9) Countdown procedures, and
(10) Mishap procedures.
A.2 Law & Regulations: NAR
User Certification
NFPA Code 1127–and the safety codes of both the NAR and TRA–require that “high power
motors” be sold to or possessed by only a certified user. This certification may be granted by a
“nationally recognized organization” to people who demonstrate competence and knowledge in
handling, storing, and using such motors. Currently only the NAR and TRA offer this
certification service. Each organization has slightly different standards and procedures for
granting this certification, but each recognizes certifications granted by the other. Certified users
must be age 18 or older.
Explosives Permits
Hobby rocket motors (including high power) no longer require a Federal explosives permit to
sell, purchase, store, or fly. Certain types of igniters, and cans or other bulk amounts of black
powder do require such permits. Under the Organized Crime Control Act of 1970 (Public Law
91- 452). A Federal Low Explosives User Permit (LEUP) from the Bureau of Alcohol, Tobacco,
and Firearms (BATF) is required to purchase these items outside one’s home state, or to
transport them across state lines. These items, once bought under an LEUP, must thereafter be
stored in a magazine that is under the control of an LEUP holder. A “Type 3″ portable magazine
or “Type 4″ indoor magazine (described under NFPA Code 495) is required, and it can be
located in an attached garage. BATF must inspect such magazines.

106
Federal permits can be obtained from the BATF using their Form 5400.13/5400.16, available
from the ATF Distribution Center, 7943 Angus CT., Springfield, VA 22153. These are issued
only to U.S. citizens, age 18 and older, who have no record of conviction of felonies and who
pass a background check conducted by the BATF. This check includes a personal interview by a
BATF agent.
Launch Site Requirements
The first requirement for any launch site is permission of the owner to use it for flying rockets!
Use of land–even public property–without permission is usually illegal and always a bad way for
a NAR member to demonstrate responsible citizenship. The NAR will issue “site owner”
insurance to chartered sections to cover landowners against liability for rocket-flying accidents
on their property– such insurance is normally required.
The NAR safety codes and NFPA Codes establish some minimum requirements for the size and
surroundings of launch sites. Model rocket launch sites must have minimum dimensions which
depend on the rocket’s motor power as specified in Rule 7 of the model rocket safety code and
its accompanying table. The site within these dimensions must be “free of tall trees, power lines,
buildings, and dry brush and grass”. The launcher can be anywhere on this site, and the site can
include roads. Site dimensions are not tied to the expected altitude of the rockets’ flights.
According to the high-power safety code, high-power rocket launch sites must be free of these
same obstructions, and within them the launcher must be located “at least 1500 feet from any
occupied building” and at least “one quarter of the expected altitude” from any boundary of the
site. NFPA Code 1127 establishes further requirements for the high-power site: it must contain
no occupied buildings, or highways on which traffic exceeds 10 vehicles per hour; and the site
must have a minimum dimension no less than either half the maximum expected rocket altitude
or 1500 feet, whichever is greater–or it must comply with a table of minimum site dimensions
from NFPA 1127 and the high power safety code.
While model rocketry and high power rocketry, when conducted in accordance with the NAR
Safety Codes, are legal activities in all 50 states, some states impose specific restrictions on the
activity (California being the worst example of this) and many local jurisdictions require some
form of either notification or prior approval of the fire marshal. It is prudent and highly
recommended that before you commit to a launch site you meet with the fire marshal having
jurisdiction over the site to make him aware of what you plan to do there and build a relationship
with him just as you did with the land owner. The fact that NAR rocketry is recognized and its
safety and launch site requirements are codified in Codes 1122 (Model Rockets) and 1127 (High
Power Rockets) by the National Fire Protection Association will be a very powerful part of your
discussion with any fire marshal.
Airspace Clearance
The Federal Aviation Administration (FAA) has jurisdiction over the airspace of the U.S. and
whatever flies in it. Their regulations concerning who may use it and under what conditions are
known as the Federal Aviation Regulations (FAR)–which are also called Title 14 of the Code of

107
Federal Regulations (14 CFR). Chapter 1, Subchapter F, Part 101 of these regulations (14 CFR
101.1) specifically exempts model rockets that weigh 16 ounces or less and have 4 ounces or less
of propellant from FAA regulation as long as they are “operated in a manner that does not create
a hazard to persons, property, or other aircraft.” When operated in this safe manner, model
rockets may be flown in any airspace, at any time, and at any distance from an airport–without
prior FAA approval.
Rockets larger than these specific limits–i.e. all high-power rockets–are referred to as
“unmanned rockets” by the FARs and are subject to very specific regulations. Such rockets may
not be flown in controlled airspace (which is extensive in the U.S. even at low altitudes and
includes all airspace above 14,500 feet), within 5 miles of the boundary of any airport, into cloud
cover greater than 50% or visibility less than 5 miles, within 1500 feet of any person or property
not associated with the operation, or between sunset and sunrise. Both NFPA Code 1127 and the
NAR high-power safety code require compliance with all FAA regulations.
Deviation from these FAR limits for unmanned rockets requires either notification of or granting
of a “waiver” by the FAA. Such a waiver grants permission to fly but does not guarantee
exclusive use of the airspace. The information required from the flier by the FAA is detailed in
section S 101.25 of the FAR (14 CFR 101.25). If the rockets are no more than 1500 grams with
no more than 125 grams of propellant, no notification of or authorization by the FAA is
required. Larger rockets require a specific positive response from the FAA Regional Office
granting a waiver before flying may be conducted; and the waiver will require that you notify a
specific FAA contact to activate a Notice to Airmen 24 hours prior to launch. The waiver is
requested using FAA Form 7711-2, available from any FAA office or the FAA website. This
form must be submitted in triplicate to the nearest FAA Regional Office 30 days or more in
advance of the launch, and it is advisable to include supplemental information with it, including
copies of the Sectional Aeronautical Chart with the launch site marked on it and copies of the
high-power safety code. The FAA charges no fee.
Ignition Safety
The NAR safety codes and the NFPA Codes both require that rockets be launched from a
distance by an electrical system that meets specific design requirements. Ignition of motors by a
fuse lit by a hand- held flame is prohibited, and in fact both NFPA Codes prohibit the sale or use
of such fuses. All persons in the launch area are required to be aware of each launch in advance
(this means a PA system or other loud signal, especially for high-power ranges), and all
(including photographers) must be a specified minimum distance from the pad prior to
launch. This “safe distance” depends on the power of the motors in the rocket; the rules are
different for model rockets and high-power rockets. Both the field size and the pad layout at a
rocket range–particularly a high-power range–must take into account and support the size of the
rockets that will be allowed to fly on the range.
For model rockets, the “safe distance” depends on the total power of all motors being ignited on
the pad: 15 feet for 30 N-sec or less and 30 feet for more than 30 N-sec. For high-power rockets,
the distance depends on the total power of all motors in the rocket, regardless of how many are
108
being ignited on the pad, and on whether the rocket is “complex”, i.e. multistaged or propelled
by a cluster of motors. The distance can range from 50 feet for a rocket with a single ‘H’ motor
to 2000 feet for a complex rocket in the ‘O’ power class. These distances are specified in a table
in NFPA Code 1127 and the NAR high-power safety code.
Motor Certification
Both NAR safety codes and both NFPA Codes require that fliers use only “certified” motors.
This certification requires passing a rigorous static testing program specified in the NFPA Codes.
The NAR safety codes and insurance require that NAR members use only NAR certified motors;
and since the NAR currently has a reciprocity agreement with TRA on motor certification, this
means that TRA- certified motors also have NAR certification. The NFPA Codes recognize
certifications granted by any “approved testing laboratory or national user organization”, but
only the NAR and TRA can provide this service in most parts of the country. The California Fire
Marshal has his own testing program for motors in that state. Motors made by private individuals
or by companies without proper explosives licenses, and motors not formally classified for
shipment by the U.S. Department of Transportation, are not eligible for NAR certification and
may not be used on an NAR range.
Shipping of Motors
Sport rocket motors generally contain highly flammable substances such as black powder or
ammonium perchlorate, and are therefore considered to be hazardous materials or explosives for
shipment purposes by the U.S. Department of Transportation (DOT). There are extensive
regulations concerning shipment in the DOT’s section of the CFR–Title 49, Parts 170-179. These
regulations cover packaging, labeling, and the safety testing and classification that is required
prior to shipment. These regulations are of great concern to manufacturers and dealers, and there
are severe penalties for non-compliance. Basically, it is illegal to send rocket motors by UPS,
mail, Federal Express, or any other common carrier–or to carry them onto an airliner–except
under exact compliance with these regulations. The reality of these regulations, and the shippers’
company regulations, is that it is virtually impossible for a private individual to legally ship a
rocket motor of any size. Transportation of motors on airlines is very difficult to do legally and
should be avoided if at all possible. It takes weeks of advance effort with the airline, and in the
post-September 11 world is probably not even worth attempting.
Insurance
Most property owners, whether government bodies or private owners, will demand the protection
of liability insurance as a precondition to granting permission to fly sport rockets on their
property. The NAR offers such insurance to individual fliers, to chartered NAR sections, and to
flying site owners. Individual insurance is automatic for all NAR members. It covers only the
insured individual, not the section or the site owner. Under the current underwriter this insurance
runs for a 12 month period, coincident with NAR membership.
Sections are insured as a group for a year; remember that section insurance is coincident with
the section charter and expires on April 4 each year. Site owner insurance is available to all
active sections for free. Each site owner insurance certificate covers only a single site (launch

109
field or meeting room). NAR insurance covers only activities that are conducted in accordance
with the NAR safety code using NAR-certified motors. It provides $2 -million aggregate liability
coverage for damages from bodily injury or property damage claims resulting from sport rocket
activities such as launches, meetings, or classes and $1 million coverage for fire damage to the
launch site. It is “primary” above any other insurance you may have.
References
NFPA Code 495, Explosives Materials Code, National Fire Protection Association, 1
Batterymarch Park, Quincy, MA 02269.
NFPA Code 1122, Code for Model Rocketry. NFPA Code 1127, Code for High Power Rocketry.
Code of Federal Regulations, Title 14, Part 101, Federal Aviation Regulations by the FAA for
unmanned rockets.
Code of Federal Regulation, Title 16, Part 1500.85(a)(8), Consumer Product Safety Commission
exemption for model rockets.
Code of Federal Regulations, Title 27, Part 55, Bureau of Alcohol, Tobacco, and Firearms
regulations.
Code of Federal Regulations, Title 49, Parts 170-177, Department of Transportation hazardous
material shipping regulations.
Model Rocket Safety Code, National Association of Rocketry.
High Power Rocketry Safety Code, National Association of Rocketry.

110
A P P E N D I X G : M S D S

111

112

113

114

115

116

117
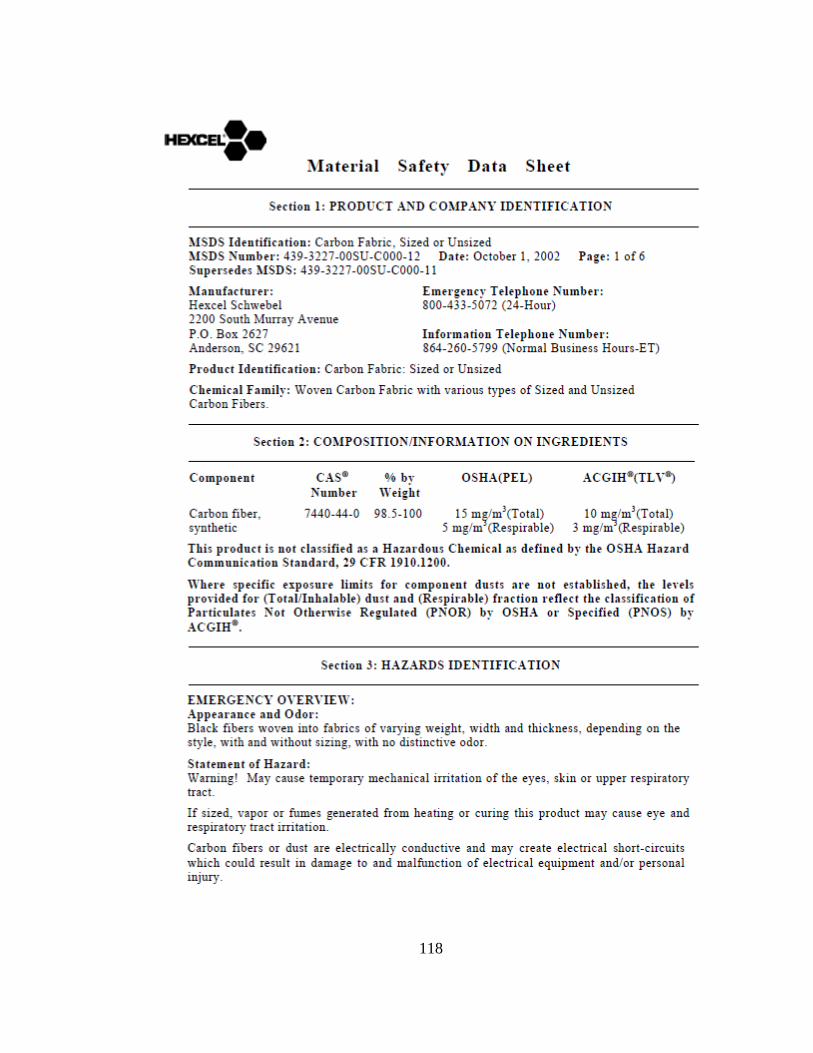
118

119

120

121

122

123

124

125

126
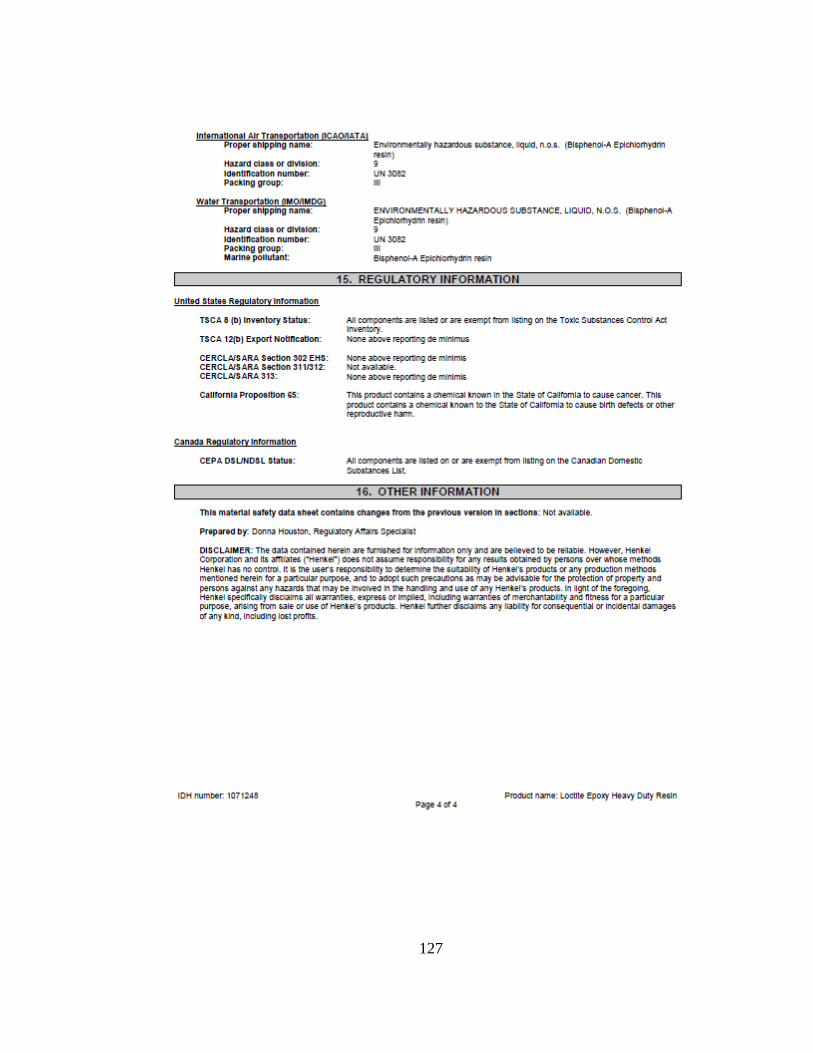
127

128

129

130

131

132

133

134

135

136
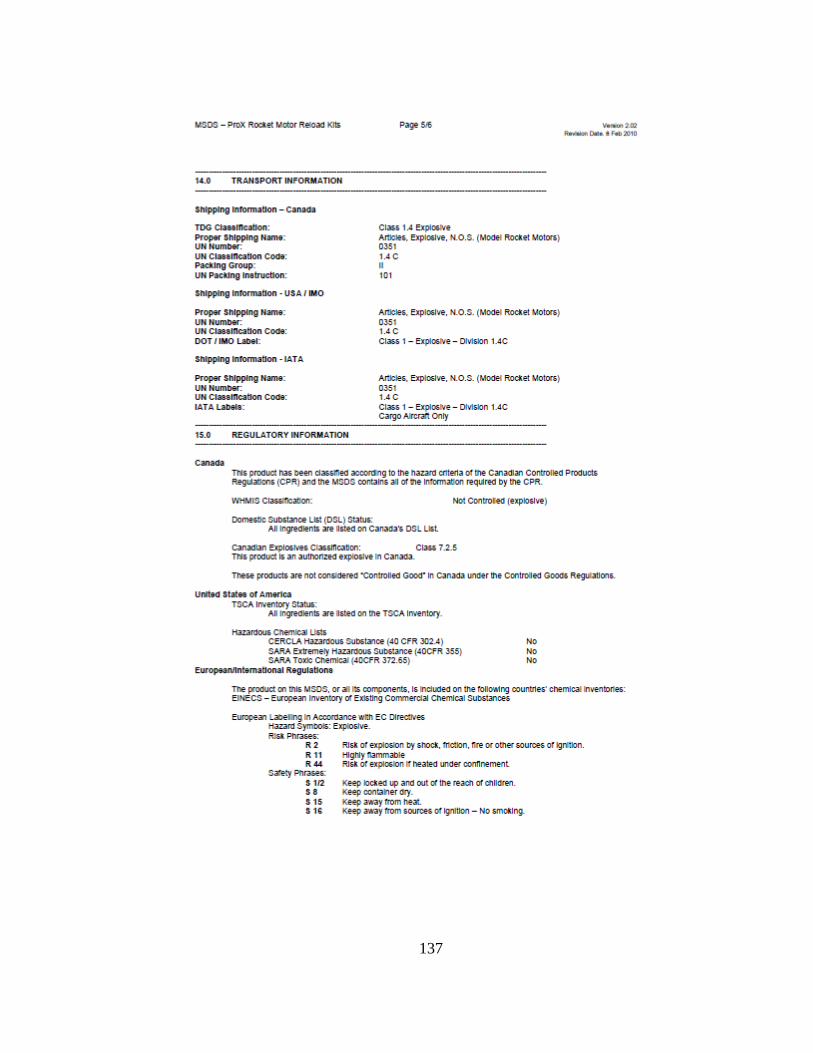
137

138

139

140

141

142

143

144
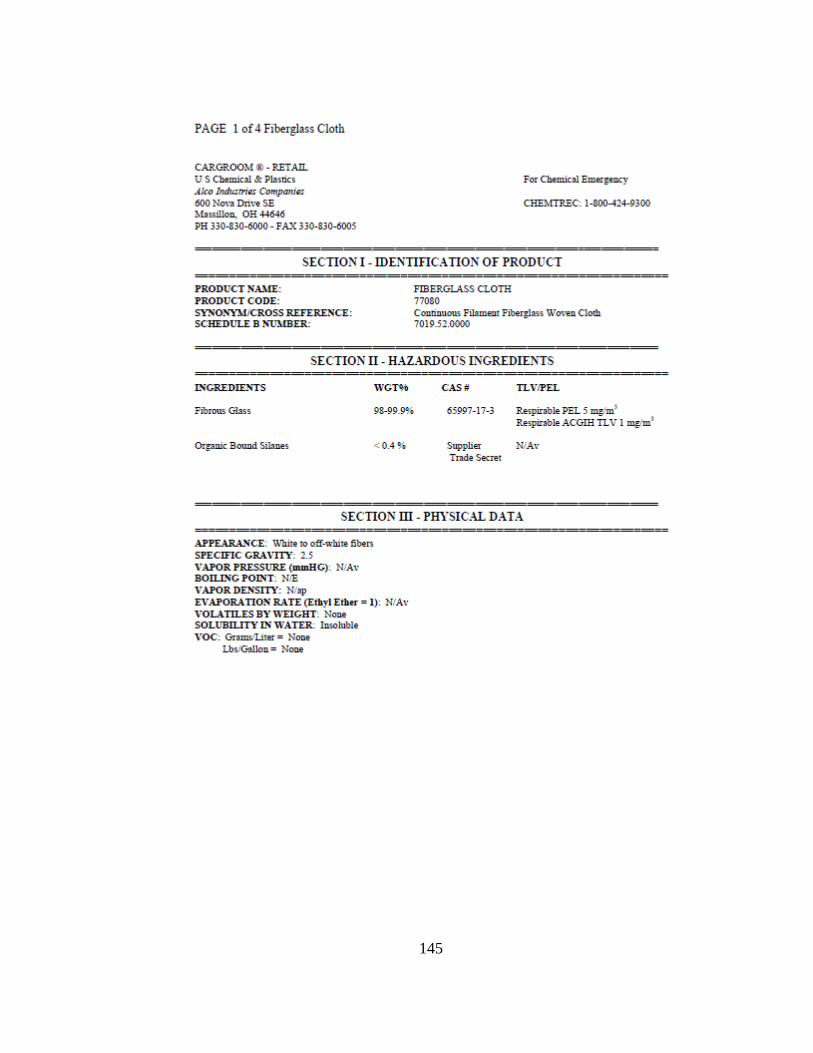
145

146

147

148
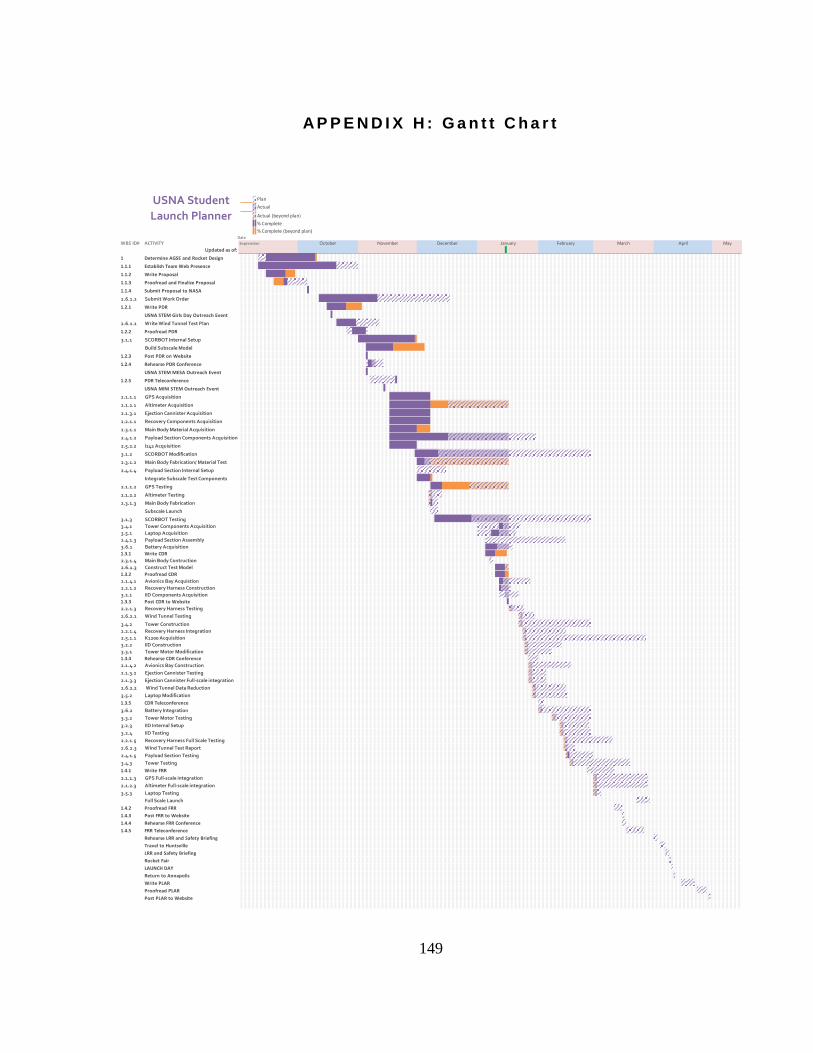
149
A P P E N D I X H : G a n t t C h a r t
Plan
Actual
Actual (beyond plan)
% Complete
% Complete (beyond plan)Date
WBS ID# ACTIVITY September
Updated as of:
1 Determine AGSE and Rocket Design
1.1.1 Establish Team Web Presence
1.1.2 Write Proposal
1.1.3 Proofread and Finalize Proposal
1.1.4 Submit Proposal to NASA
2.6.1.2 Submit Work Order
1.2.1 Write PDR
USNA STEM Girls Day Outreach Event
2.6.1.1 Write Wind Tunnel Test Plan
1.2.2 Proofread PDR
3.1.1 SCORBOT Internal Setup
Build Subscale Model
1.2.3 Post PDR on Website
1.2.4 Rehearse PDR Conference
USNA STEM MESA Outreach Event
1.2.5 PDR Teleconference
USNA MINI STEM Outreach Event
2.1.1.1 GPS Acquisition
2.1.2.1 Altimeter Acquisition
2.1.3.1 Ejection Cannister Acquisition
2.2.1.1 Recovery Components Acquisition
2.3.1.1 Main Body Material Acquisition
2.4.1.2 Payload Section Components Acquisition
2.5.2.2 I242 Acquisition
3.1.2 SCORBOT Modification
2.3.1.2 Main Body Fabrication/ Material Test
2.4.1.4 Payload Section Internal Setup
Integrate Subscale Test Components
2.1.1.2 GPS Testing
2.1.2.2 Altimeter Testing
2.3.1.3 Main Body Fabrication
Subscale Launch
3.1.3 SCORBOT Testing
3.4.1 Tower Components Acquisition
3.5.1 Laptop Acquisition
2.4.1.3 Payload Section Assembly
3.6.1 Battery Acquisition
1.3.1 Write CDR
2.3.1.4 Main Body Contruction
2.6.1.3 Construct Test Model
1.3.2 Proofread CDR
2.1.4.1 Avionics Bay Acquistion
2.2.1.2 Recovery Harness Construction
3.2.1 IID Components Acquisition
1.3.3 Post CDR to Website
2.2.1.3 Recovery Harness Testing
2.6.2.1 Wind Tunnel Testing
3.4.2 Tower Construction
2.2.1.4 Recovery Harness Integration
2.5.1.1 K1200 Acquisition
3.2.2 IID Construction
3.3.1 Tower Motor Modification
1.3.4 Rehearse CDR Conference
2.1.4.2 Avionics Bay Construction
2.1.3.2 Ejection Cannister Testing
2.1.3.3 Ejection Cannister Full-scale integration
2.6.2.2 Wind Tunnel Data Reduction
3.5.2 Laptop Modification
1.3.5 CDR Teleconference
3.6.2 Battery Integration
3.3.2 Tower Motor Testing
3.2.3 IID Internal Setup
3.2.4 IID Testing
2.2.1.5 Recovery Harness Full Scale Testing
2.6.2.3 Wind Tunnel Test Report
2.4.1.5 Payload Section Testing
3.4.3 Tower Testing
1.4.1 Write FRR
2.1.1.3 GPS Full-scale integration
2.1.2.3 Altimeter Full-scale integration
3.5.3 Laptop Testing
Full Scale Launch
1.4.2 Proofread FRR
1.4.3 Post FRR to Website
1.4.4 Rehearse FRR Conference
1.4.5 FRR Teleconference
Rehearse LRR and Safety Briefing
Travel to Huntsville
LRR and Safety Briefing
Rocket Fair
LAUNCH DAY
Return to Annapolis
Write PLAR
Proofread PLAR
Post PLAR to Website
October November
USNA Student
Launch Planner
MayDecember January February March April