nero linux manual - nero multimedia suiteftp6.nero.com/user_guides/nerolinux/nerolinux_enu.pdf ·...
TRANSCRIPT

Nero Linux Manual
Nero AG

Copyright and Trademark Information
This Nero Linux manual and all its contents are protected by copyright and are the property of Nero AG. All rights are reserved. This manual contains materials which are protected by internationally recognized copyright laws. This manual may not - in whole or in part - be cop-ied, transmitted, or otherwise reproduced without the express written permission of Nero AG.
All trade names and trademarks are the property of their respective owners.
Nero AG rejects any claims that transcend the clauses of the guarantee rights. Nero AG does not undertake any liability for the correctness of the content of the Nero Linux manual. The contents of the software supplied, as well as of the Nero Linux manual, may be changed without prior warning.
The trademarks mentioned here are listed for information purposes only.
Copyright © 2007 Nero AG and their licensors. All rights reserved.
REV 1.0, SW: 3.0.0.0
Contents
Page 3
Contents
1 General information 6 1.1 About the manual 6 1.2 About Nero Linux 6
2 System requirements 7 2.1 General system requirements 7 2.2 Linux kernel requirements 7 2.2.1 How to get the Linux kernel version 7 2.2.2 About the Linux kernel version 7 2.3 Advanced system requirements 8 2.3.1 Explanation to device filenames under Linux 8 2.3.2 IDE Devices configuration with 2.4 kernels 10 2.3.3 IDE Devices configuration with 2.6 kernels 10 2.3.4 Setting correct permissions on the devices files 11 2.3.5 Setting up DMA acceleration on IDE devices 11
3 Supported formats 13
4 Installing Nero Linux 14
5 Working with Nero Linux 15 5.1 Main screen 15 5.2 Basic steps 16
6 New compilation 17 6.1 New Compilation window 17 6.1.1 Multisession tab 19 6.1.2 ISO tab 20 6.1.3 UDF tab 21 6.1.4 Label tab 21 6.1.5 Audio CD tab 22 6.1.6 Boot tab 22 6.2 Creating a new compilation 23
7 Selecting a file 24 7.1 Selection screen 24 7.2 Selecting files 25 7.3 File selection details 26 7.3.1 Audio CD 26

Contents
Page 4
7.3.2 Mixed Mode CD and CD EXTRA 26 7.3.3 miniDVD 26 7.4 Audio Track Properties window 27
8 Burning a compilation 28 8.1 Choose recorder 28 8.2 Burn Compilation window 29 8.3 The Burn tab 30 8.4 Starting the burn process 31
9 Bootable disc 32 9.1 Booting requirements 32 9.2 Bootable disc template 32 9.3 Creating and burning a bootable disc 33
10 Image file 34 10.1 Creating an image file 34 10.2 Burning an image file 35
11 Copying discs 36 11.1 On-the-fly copying versus copy over image 36 11.1.1 On-the-fly copying 36 11.1.2 Copy over image 37 11.2 Compilation window 37 11.2.1 Image tab 38 11.2.2 Copy Options tab 38 11.2.3 Read Options tab 39 11.3 Copying a disc 40
12 Saving and converting audio files 42 12.1 Save Tracks window 42 12.1.1 Source tab 43 12.1.2 Output tab 43 12.2 Saving audio files 44 12.3 Encode Files window 45 12.4 Converting audio files 46
13 Erasing a rewritable disc 48 13.1 Erase Rewritable Disc window 48 13.2 Erase Disc 49
14 Configuration 50 14.1 Configuration options 50 14.2 Expert Features 51

Contents
Page 5
15 List of figures 52
16 Glossary 53
17 Index 59
18 Tab Matrix 62
19 Contact 63

General information
Page 6
1 General information
1.1 About the manual This manual is intended for all users who want to learn how to use Nero Linux. It is therefore structured according to operations and provides step-by-step instructions for what you want to do.
In order to make best use of this manual, please note the following conventions:
Symbol Meaning
Indicates warnings, preconditions or instructions that have to be followed strictly.
Indicates additional information or advice.
1. Start … A number at the beginning of a line indicates a request for action. Carry out these actions in the order specified.
Indicates an intermediate result.
Indicates a result.
OK Indicates text passages or buttons that appear in the program in-terface. They are shown in bold print.
Chapter Indicates references to other chapters. They are executed as links and are shown in red and underlined.
[…] Indicates keyboard shortcuts for entering commands.
1.2 About Nero Linux Nero Linux is a high-performance software application with a user-friendly interface for burn-ing data, music and videos on CD,DVD, HD DVD and Blu-ray discs.
Nero Linux enables advanced users to customize their work. You will have full control of your burning project. For example, you can define the file system used or assign a name for the disc.
Despite the scope and the vast ability of Nero Linux, it remains an easy-to-use burning pro-gram which creates your own discs in just three easy steps. First select the desired disc type and the disc format (depending on the installed recorder and your requirements), compile the files for burning and then start the burn process. It is just as quick and easy to copy discs (not copy-protected discs).

System requirements
Page 7
2 System requirements
2.1 General system requirements To install Nero Linux you need administrator rights
Processor and Installed Memory
For writing audio and data discs: 800 MHz Intel® Pentium® III processor, AMD™ Sem-pron™ 2200+ or equivalent, at least 128 MB RAM or more
Hard Drive Space
700 MB free hard drive space for CD images and temporary files
Up to 9 GB free hard drive space for DVD images and temporary files
Up to 50 GB free hard drive space for Blu-ray Disc BD-R/RE dual layer disc images
Up to 30 GB free hard drive space for HD DVD-R/RW dual layer disc images Optical device
CD and/or DVD/DVD-RAM recorder Sound Devices and Speakers
16-bit sound card and speakers Optional
Blu-ray recorder and Blu-ray disc
HD DVD recorder and HD DVD
2.2 Linux kernel requirements Kernel version 2.4 or higher
Together with Serial ATA recorders, we recommend kernel version 2.6 or higher
2.2.1 How to get the Linux kernel version To get the version of the Linux kernel, proceed as follows:
1. Open a terminal.
2. Type the command uname –r
The output gives you the number of the kernel version, for example 2.6.13.2.
2.2.2 About the Linux kernel version The kernel is the heart of your Linux system. It provides, for example, the low-level drivers used to access your devices.
In order to identify your devices file names clearly, you need to first know the version of the Linux kernel you are currently using.

System requirements
Page 8
The version depends on four numbers A.B.C.D separated by periods (full stops), for example 2.6.13.2.
The first number (A) Represents the kernel version (2 in our example). It is changed least frequently, and only when major changes in the code and the concept of the kernel occur.
The second number (B)
Represents the kernel major revision (6 in our example). Prior to kernel 2.6, all kernels that are considered “stable” have an even major number. The kernels with odd major numbers are development kernels.
The third number (C) Represents the kernel minor revision (13 in our example). This number is incremented when new drivers or new features are added.
The last number (D) Represents the kernel release number (2 in our example). This number is incremented when a bug fix or a security patch is applied to the kernel.
The Linux kernel version is often identified by the first two numbers, as there is no signifi-cant change between two releases of the same kernel. Prior to kernel 2.6.11, there were only three numbers. With such a versioning scheme, the third number was incremented when new features were added or security fixes applied.
2.3 Advanced system requirements Under Linux, all the devices are associated with specific files called device files. All device files that are available on your machine are located inside the /dev directory. Depending on the version of the Linux kernel you are using, your recorder device file name may differ, due to the low-level driver it is using.
In this chapter you will find explanations on how to find your device file names and how to set access on them. In any case, if Nero Linux detects that something is misconfigured on your system, it will warn you when starting.
2.3.1 Explanation to device filenames under Linux Currently, you can have many different interfaces on a recorder: IDE, SCSI, USB, FireWire (IEEE 1394) or Serial ATA.
2.3.1.1 IDE devices Most internal recorders are connected to the IDE bus. Linux assigns them a device file ac-cording to their position on this bus (bus number and master/slave settings). Basically, you should have the following naming convention:
/dev/hda : Primary Master device
/dev/hdb : Primary Slave device
/dev/hdc : Secondary Master device
/dev/hdd : Secondary Slave device
If you have an additional IDE controller on your motherboard, the filenames scheme is the same, using the remaining letters (for example /dev/hde and /dev/hdf).

System requirements
Page 9
2.3.1.2 SCSI devices SCSI recording devices are handled by two different drivers under Linux, and so two differ-ent device files are created to handle one physical device:
/dev/srX or /dev/scdX : Used only to read data from media
/dev/sgX : Used by Nero Linux to communicate with the device
(X is a number identifying your device)
If your recorder is correctly recognized by the Linux kernel it should appear in the file /proc/scsi/scsi. Unfortunately, there is no way to determine the X number from the SCSI coordinates of your recorder. But usually, the numbers are used incrementally, starting from 0, corresponding to the position of the device in the /proc/scsi/scsi file.
Usually all distributions are shipping a kernel configured with these options. Sometimes, de-pending on your kernel configuration, one of these files can be unavailable. In order to have both, you should make sure that your kernel is configured with the following options:
CONFIG_SCSI (SCSI support)
CONFIG_BLK_DEV_SR (SCSI CD-ROM support : provides /dev/scdX)
CONFIG_CHR_DEV_SG (SCSI generic support : provides /dev/sgX)
For more information about how to configure your kernel for recording CD or DVD, you can refer to the generic Linux HOWTOs, for example see
CD-Writing HOWTO: http://www.ibiblio.org/pub/Linux/docs/HOWTO/other-formats/html_single/CD-Writing-HOWTO.html
CDROM-Writing HOWTO: http://www.ibiblio.org/pub/Linux/docs/HOWTO/other-formats/html_single/CDROM-HOWTO.html
2.3.1.3 External devices As all external devices are associated with a virtual SCSI device, the filename scheme is the same as for real SCSI devices (see SCSI devices).
If you do not see your external device in the /proc/scsi/scsi file after you plugged it in, make sure that the kernel is correctly configured. For more information please refer to your Linux distribution documentation.
If your external device is inside the /proc/scsi/scsi file and not present in the record-ers list of Nero Linux, make sure you have the SCSI generic support enabled. Most of the time, loading the ‘sg’ kernel module fix this problem.
2.3.1.4 Serial ATA devices Some new recorders are now coming with a Serial ATA connector instead of the old IDE o-ne. These devices are correctly handled with the 2.6 kernel libata. However we strongly re-command to use a kernel 2.6.19 or higher to use such devices without problems.
Serial ATA devices controlled by the libata are – like external devices – associated with a vir-tual SCSI device, so they should also appear in the /proc/scsi/scsi file.

System requirements
Page 10
2.3.2 IDE Devices configuration with 2.4 kernels With 2.4 kernels, all IDE devices that you want to be available in Nero Linux must use the ide-scsi driver (even CD/DVD readers). This driver associates a virtual SCSI device with a standard IDE device.
Usually, Linux distributions automatically configure everything so that only recorders use this driver. In such cases, you will not be able to use your CD or DVD readers inside Nero Linux and you have to make the device use the ide-scsi driver.
Before you configure a device, make sure that you have configured your kernel with the fol-lowing options:
CONFIG_BLK_DEV_IDESCSI (SCSI emulation support)
CONFIG_SCSI (SCSI support)
CONFIG_BLK_DEV_SG (SCSI generic support) Configuring a device, so that it will use the ide-scsi driver, is done by providing a specific ar-gument hdx=ide-scsi to the kernel command line. For example, if the device file corre-sponding to your recorder is /dev/hdb, you will have to provide hdb=ide-scsi to the ker-nel command line.
If you do not know how to do this, please refer to your distribution documentation to find out how to pass options to the kernel at boot time. Please also note that most of the actual dis-tributions provide some graphical frontends to modify the boot loader parameters:
For Red Hat Linux run ksconfig (this application is called Kickstart Configurator). When the application is running, click on Boot Loader Options and fill the Kernel Pa-rameters field.
For SuSE Linux run YaST2, select System in the left pane and then double-click on Boot Loader Configuration. Once the module is launched, click on Edit Configuration Files to set up the device parameters.
2.3.3 IDE Devices configuration with 2.6 kernels With 2.6 kernels, the native IDE CD-ROM driver, called ide-cdrom, has been completely re-written to use the latest technologies available and permit optical disc recording. This driver includes DMA acceleration that lets you use high-speed devices (like DVD recorders).
Accordingly, the ide-scsi driver (that has been used with lower version kernels) has been deprecated. If you continue using this driver with a 2.6 kernel, your devices will not be avail-able with Nero Linux (note that you will also have a warning message from the kernel at boot time).
In order to use an IDE device with Nero Linux under a 2.6 kernel, you must associate it with the ide-cdrom driver. Therefore, the kernel command line must not be associated with the "old", ide-scsi driver (no hdXX=ide-scsi parameter).
If you do not know how to do this, please refer to your boot loader documentation.

System requirements
Page 11
2.3.4 Setting correct permissions on the devices files
2.3.4.1 Static /dev support If you need to allow user accounts to have access to all your disc devices you can do this in Linux by setting correct permission on the corresponding device file names. This section shows how to correctly configure the permission on the devices file names for all users of the system.
Requirements:
You have enough privileges to do so. To setup correct permissions on your device files, proceed as follows:
1. Open a terminal.
2. Type the following command:
chmod o+r+w /dev/sg* chmod o+r+w /dev/hdX
(where X is the letter corresponding to the IDE device)
You can run the last command more that once if you have multiple IDE devices.
Users are given read and write permission on all your SCSI generic devices (CD-ROM for example) and your IDE disc devices.
If you only want to give access to some users, another possibility is to create a new group called for example "nero" and change the group of the device files corresponding to your disc devices with it. Then give read/write permission to the group on these device files and finally, just add all the users that are allowed to use Nero Linux to the newly created group.
2.3.4.2 udev support Nero Linux supports udev, the new /dev file system implementation that are used in actual Linux distributions.
With this file system, all permissions is set during boot time using some specific configuration files. In order to make your modifications permanent, you have to change the files located in /etc/udev/rules.d. For more details, you can have a look to udev FAQ.
In some rare cases, an hotplug device that gets plugged in when Nero Linux is already started might not being recognized directly. In such cases, restart the application.
2.3.5 Setting up DMA acceleration on IDE devices DMA acceleration provides an improvement in throughput for the disc drives, and let you sa-fely use all your recording devices. Depending on your Linux kernel and distribution configu-ration, you might have DMA acceleration that is automatically enabled on startup.
If your hardware supports it, we recommend enabling DMA acceleration not only for IDE hard disk drives, but also for disc drives such as CD/DVD readers and recorders.

System requirements
Page 12
If one of your devices has no DMA acceleration, Nero Linux will warn you when starting the application. To enable DMA acceleration on one of your devices, you can run the following command (as root):
hdparm –d1 /dev/hdX (where X is the letter corresponding to the IDE device)
This setting is not permanent. If you want to enable DMA at boot time, you can add the command above in one of your startup scripts. As these scripts are distribution dependant, please refer to your distribution documentation to find out how to do this. Please note that most of the distributions have some graphical frontends to configure this.
For example: With SuSE Linux distributions, you can use YaST2 to setup the DMA-mode of your IDE devices. To do this, launch YaST2 and select the hardware item in the left pane and then double-click on IDE-DMA Mode. Once the module is launched, make sure that all your disc drives DMA mode is set to On.

Supported formats
Page 13
3 Supported formats Nero Linux supports the following disc types:
CD
DVD
HD DVD
Blu-ray Disc
The recorder installed determines which disc type (CD, DVD, HD DVD and/or Blu-ray Disc) can be burned. With Nero Image Recorder which is included in Nero Linux you will still be able to create an image (see Creating an image file) even if you have not installed a recorder. Nero Image Recorder is also suitable for creating an image of a disc type not supported by the installed recorder (see Expert Features). You can therefore create a HD DVD image for instance without having installed a HD DVD recorder. You can use Nero Linux to burn the following formats:
Disc formats Audio formats
Data disc: CD/DVD-ROM (ISO) CD/DVD/HD DVD-ROM/Blu-ray disc (UDF) CD/DVD-ROM (UDF/ISO)
Audio CD
Mixed Mode CD
CD EXTRA
miniDVD
DVD-Video
Bootable disc (CD/DVD-ROM (Boot))
FLAC
MP3
OGG/Vorbis
PCM
WAV

Installing Nero Linux
Page 14
4 Installing Nero Linux
To install Nero Linux you need administrator rights on your computer.
Nero Linux is packaged in the RPM and Debian format. These formats are used by the ma-jority of Linux distributions.
To install the program, proceed as follows:
1. Open a terminal.
2. Go to where your package is located.
3. Type the following command:
rpm -i nerolinux-<version>-<machine>.rpm (RPM package)
dpkg -i nerolinux-<version>-<machine>.deb (Debian package)
You can also use your distribution's software installer tool to install Nero Linux.
Some shortcuts will be add in the KDE and GNOME programs menu. With the Debian package, it will also add a shortcut to Nero Linux in the Debian menu subsystem repository.
If you do not get a shortcut, you can copy the generic one that is located in /usr/share/applications/nerolinux.desktop.

Working with Nero Linux
Page 15
5 Working with Nero Linux
5.1 Main screen The main screen in Nero Linux is the starting point for all actions. It consists of a menu bar and a toolbar with buttons and a drop-down list.
Fig. 1: Nero Linux menu bar and toolbar
The main screen contains the following options:
Menu Bar
File
Opens the File menu containing file functions such as opening, saving and closing that you are already familiar with. You can also show the configuration options for the compilation, update the compilation and define configuration options (see Configuration).
Edit
Opens the Edit menu which contains the file editing functions in the selection screen such as cutting, copying and deleting that you are al-ready familiar with. You can also display the properties of a selected file.
View Opens the View menu where you can customize the Browser Area. You can also change visualization options here.
Recorder
Opens the Recorder menu which contains functions for the recorder. You can select the recorder here, start the burn process and erase a rewritable disc. You can also display information on the disc and eject it.
Extras Opens the Extras menu which let you convert audio files into a differ-ent format, save audio files from an Audio CD, and view the content of data tracks as hexadecimal data.
Window Opens the Window menu which enables you to alter the position of the Compilation Area and Browser Area.
Help Opens the Help menu which contains the help options you are familiar with. You can also enter a new serial number if necessary.
Toolbar
Opens the New Compilation window where you can set options for a burn or copy process.
Opens an existing compilation.
Saves the active compilation.
Cuts selected elements in the compilation (selection).
Copies selected elements in the compilation (selection).
Pastes a selection that was cut or copied beforehand.
Working with Nero Linux
Page 16
Starts the burn process by opening the Burn Compilation window containing the Burn tab.
Starts the copy process by opening the New Compilation window containg the Burn tab.
Displays information on the disc inserted such as the contents (if any) and capacity for instance.
Opens the selected recorder.
Shows or hides the file browser.
Display the user’s home folder contents in the file browser Drop-down
menu Displays available recorders.
Opens the Choose recorder window by selecting from a list a re-corder available for the burn process.
Displays information on program and version number.
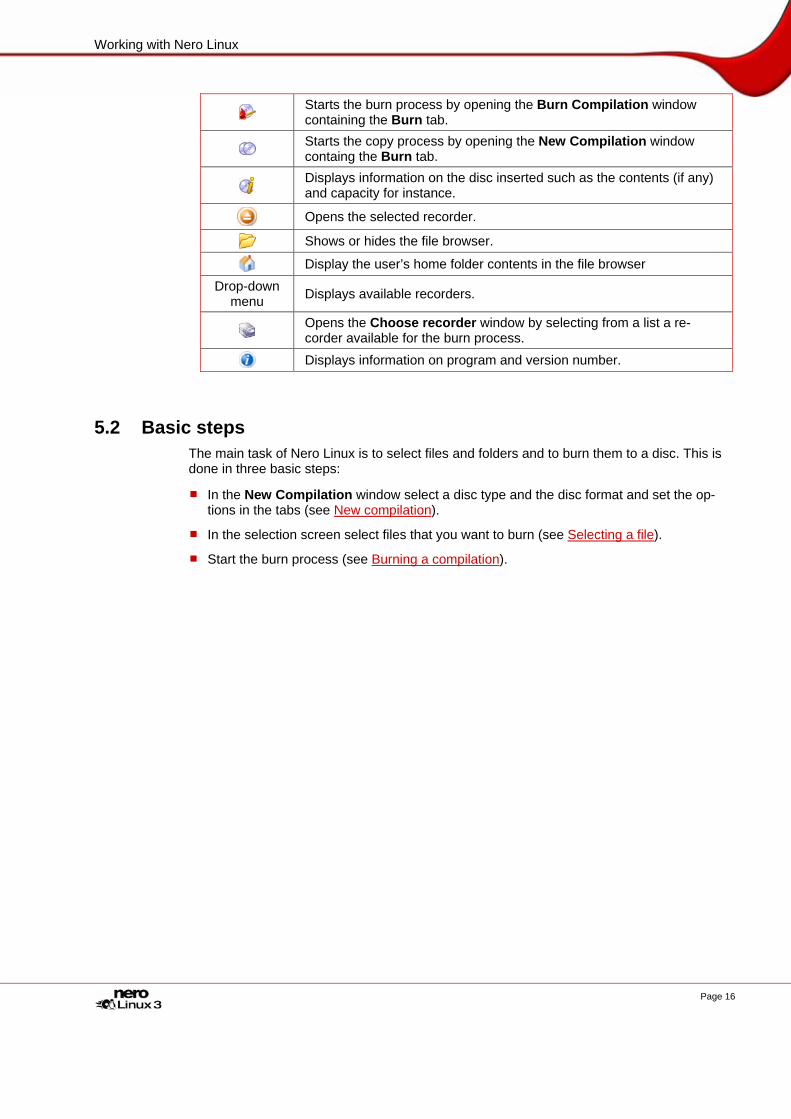
5.2 Basic steps The main task of Nero Linux is to select files and folders and to burn them to a disc. This is done in three basic steps:
In the New Compilation window select a disc type and the disc format and set the op-tions in the tabs (see New compilation).
In the selection screen select files that you want to burn (see Selecting a file).
Start the burn process (see Burning a compilation).

New compilation
Page 17
6 New compilation
6.1 New Compilation window In the New Compilation window select the disc type and configure the options for the disc format in the tabs. The window basically looks the same for all disc types. The only differ-ence is the tabs that are available.
When you launch Nero Linux, the New Compilation window opens automatically. If the win-dow is not open, click on the New button. In the default setting, CD-ROM (ISO) is selected and the ISO tab is on top.
Fig. 2: New Compilation window, CD-ROM (ISO) disc type
The window consists of a drop-down menu, a selection list, various tabs and four buttons.
The drop-down menu can contain the entries CD, DVD, HD DVD and Blu-ray Disc . The se-lection list will contain different entries depending on the entry selected.
The recorder installed will determine which disc type (CD, DVD, HD DVD and/or Blu-ray Disc) is displayed and burned. If the recorder can only burn CDs, the drop-down list is grayed out. Using Nero Image Recorder which is installed in Nero Linux you will always be able to cre-ate an image (see Creating an image file) even if you have not installed a recorder. Nero Image Recorder is also suitable for creating an image from a disc type that the installed re-corder does not support (see Expert Features). You can therefore create a HD DVD image for instance without having installed a HD DVD recorder.

New compilation
Page 18
The following entries are available in the selection list:
Entry Description
CD/DVD-ROM (ISO) Creates a data CD/DVD, each file type can be burned. The burned data complies with the ISO standard.
Audio CD Creates a standard Audio CD that can play audio files on all Audio CD players.
Mixed Mode CD
Creates a CD with data and audio files in a single session. Usually a data file is followed by one or more audio files for instance (e.g. sound track in PC games). Older Audio CD players are often not capable of recognizing the data file as such and attempt to play it.
CD EXTRA
Creates a multisession CD with audio and data files that are stored in two sessions. The first session contains the audio files and the second session the data. Popular CD players play the first session as Audio CDs. The second session can only be used by PCs with a CD-ROM drive, it cannot be 'seen' by a normal CD player.
Copy CD/DVD/HD DVD/Blu-ray Disc
Copies a source disc to a CD/DVD/HD DVD/Blu-ray disc (see Copying discs).
miniDVD
Creates a CD that uses the specifications of a DVD. The mi-niDVD has the same technical options and qualities as a DVD. It can easily be played on a PC whereas there is no guarantee that it can be played in all DVD players. You can use Nero Linux to burn a miniDVD if the DVD video title, i.e. a complete DVD folder structure is already avail-able. However, if you want to convert video files into a DVD video title, you cannot do so with Nero Linux.
CD/DVD-ROM (Boot) Creates a bootable CD (see Bootable disc).
CD/DVD-ROM/HD DVD/Blu-ray Disc (UDF)
Creates a data disc, all file types can be burned. The burned data complies with the UDF standard.
CD/DVD-ROM (UDF/ISO)
Creates a data disc; all file types can be burned. The burned data complies with ISO and UDF standards.
DVD-Video
Creates a DVD that can play high-quality video and/or pic-ture files on DVD players. You can use Nero Linux to burn a DVD if the DVD video title, i.e. a complete DVD folder struc-ture is already available. However, if you want to convert vi-deo files into a DVD video title, you cannot do so with Nero Linux.
The following buttons are available:
Button Meaning
Open Opens a file browser where you can find and open a saved compila-tion.
New Opens the selection screen where you can select the files for burn-ing.
Cancel Closes the New Compilation window.

New compilation
Page 19
You can set the options for the respective disc format in the tabs on the Compilation win-dow. Refer to the matrix in the appendix for information on which tab is available for which disc type (see Copying discs). The following tabs are available:
Tab Description Info Shows statistical information on the compilation.
Multisession Contains options for configuring multisession discs (see Multisession tab). The tab is only available if a recorder is installed.
ISO Contains options for configuring the ISO file system (see ISO tab). UDF Contains options for configuring the UDF file system (see UDF tab). Label Defines the title of the CD.
Date Allows you to define the date of the compilation and of the associated files. You can also specify a validity period for the disc. (You can ac-cess the data regardless of the validity period specified)
Misc Defines whether and which files are stored in the buffer memory.
Audio CD Contains options for configuring audio files. You can also enter addi-tional information about the CD (see Audio CD tab).
Boot Contains options for configuring a bootable disc (see Bootable disc and Boot tab).
Burn Contains options for configuring burning (see The Burn tab).
6.1.1 Multisession tab The Multisession tab provides the option to create multisession discs for data discs. Multis-ession discs can be burned in multiple sessions until you have reached the maximum disc capacity. A session is a self-contained data area that is burned using a single process, and consists of a lead-in (with the table of contents), and one or more tracks and a lead-out. Discs without the multisession option, e.g. Audio CDs, are burned in a single session.
Multisession discs are particularly suitable for backing up important files burned on a regu-lar basis.
If a new multisession disc is being started, Nero Linux also saves (if possible) the point of o-rigin for the files. This information is used when continuing the multisession disc.
If a multisession disc is being continued, Nero Linux automatically sets a cross reference to the imported session, i.e. the table of contents for the imported session is copied to the table of contents for the current session. You must define which session is being imported at the start of the burn process. The files in the previous sessions are retained and continue to take up space.
In the case of unchanged files, a cross reference is set to the file of the same name in the previous session. In this case Nero Linux automatically verifies whether the correct multises-sion disc has been inserted for continuation. If not, the disc is ejected.
If you disable the Finalize disc check box on the Burn tab, you can always burn additional sessions on the disc, but then only the last session will be visible and you will only be able to access data from the final session.

New compilation
Page 20
The Multisession tab contains the following check boxes in the Multisession area:
Start Multisession disc
Burns the selected compilation in one session to the disc. If the disc already contains sessions, you can also select this option. Sessions are then not imported and cross ref-erences are not set.
Continue Multisessi-on disc
Continues a multisession disc by burning an additional session to a disc with at least one session. Cross refer-ences to imported sessions are set in the process.
No Multisession Creates a disc without a multisession.
6.1.2 ISO tab The ISO tab provides options for configuring the ISO file system.
ISO 9660 is a system-independent standard. It can be read on all operating systems. The following features apply:
Permits eight characters (Level 1) and/or 31 characters (Level 2) for the file name.
Permits eight characters for the folder name.
Restricts the maximum directory depth to eight levels (including root folder).
The characters A-Z, 0-9 and the underscore (_) are allowed. Joliet is a standard that has been designed for Microsoft® Windows® 95 and Microsoft® Win-dows® NT. Up to 64 characters are supported in the file name (8 characters in DOS). The characters A-Z, a-z as well as foreign language characters such as the German umlaut may be used.
The following configuration options are available in the Data and File area:
Data mode
Selects the mode for the data. Mode 1 and Mode 2/XA are available. The latest drives can easily read Mode 1 and Mode 2. Some older drives however cannot read Mode-1 discs cor-rectly. If the disc is always to be readable on older drives, you should select the Mode-2/XA format.
File system
Selects the file system that is used for the data. ISO 9660 only and ISO 9660 + Joliet are available. ISO 9660 only: pure ISO format is used. ISO 9660 + Joliet: the ISO format is used and is enhanced by the Joliet standard.
File name length
Defines the possible length of the file name. Level 1 and Le-vel 2 are available. In Level 1 the file name can be eight char-acters long and the file name extension (e.g. *.doc) three cha-racters. In Level 2 the file name can be 31 characters long.
Character set Defines the character set that is used. Add Rock Ridge extension
Adds a Rock Ridge extension on Unix systems to add POSIX rights to the items.
In the Relax restrictions area, restrictions imposed on the selected file system are relaxed. For example, you can allow a higher path level or more than 64 characters for the Joliet na-me.

New compilation
Page 21
If it should be possible to read the disc on all operating systems, select ISO 9660 as the file system and disable all check boxes in the Relax restrictions area.
If the disc is to be used mainly on Windows® computers and you want to use lowercase let-ters and foreign language characters such as the German umlaut in the file names, select ISO 9660 + Joliet as the file system.
6.1.3 UDF tab The UDF tab provides options for configuring the UDF file system. The UDF standard was developed by OSTA (Optical Storage Technology Association) in response to the require-ments of DVDs. The standard works on all platforms.
The following entries are available in the Options drop-down menu:
Automatic settings Sets options automatically for the UDF file system. We recommend that you select this entry.
Manual settings Enables you to manually define the UDF partition type and the file system version.
Enable Xbox™ compatibili-ty mode Creates a disc that is compatible with Xbox™.
6.1.4 Label tab The Label tab provides options for configuring the name of the disc. The Automatic area is always available. The Manual area is only available if multiple file systems have been se-lected for the disc type, e.g. the ISO 9660 + Joliet entry on the ISO tab for instance.
The following configuration options are available in the Automatic area:
Automatic Enables the Disc name text box Disc name Defines the name of the disc.
The Manual area enables you to enter a unique disc name for each file system. The restric-tions for this file system also apply in connection with the given character set. Characters not allowed are replaced by underscores. The following text boxes are available:
Manual Enables the text boxes in the Manual area. ISO 9660 Defines the name for the ISO 9660 file system. Joliet Defines the name for the Joliet file system. UDF Defines the name for the UDF file system.
The following button is available in the Advanced area:
More Labels Opens the More Labels window where you can enter addi-tional information on the disc such as the Publisher for in-stance.

New compilation
Page 22
6.1.5 Audio CD tab The Audio CD tab provides options for configuring the Audio CD.
The following check box is available in the General area:
No pause between tracks
Allows the audio files to merge into one another on the Audio CD without a pause (just like in live recordings). If the check box is disabled, there are pauses of two seconds between the audio files.
The following check box is available in the CD Text area:
Write on CD Enables the option for writing CD Text. With CD players that support CD Text, the title of the CD, the name of the audio file as well as of the artist appear in the display.
In the Edition area you can enter additional information about the Audio CD such as the producer or comments for instance.
6.1.6 Boot tab The Boot tab provides configuration options for the bootable disc. The following configura-tion options are available in the Source of boot image data area:
Bootable logical drive Selects a logical drive for the template data. Image file Selects an image file for the template data.
Browse Opens the Open window where you can select an image file.
Boot locale Selects the language that appears when the drive boots
You can configure expert settings in the Advanced area. It may be necessary to make changes for certain image files. Refer to the documentation for relevant information on the boot image. We recommend that you only change the settings if you are familiar with creat-ing bootable discs and boot images. The following configuration options are available:
Enable expert features Enables the following configuration options. Kind of emulation Selects an emulation type. Boot message Defines the message that opens when the drive boots. Load segment of sec-tors
Defines where the boot image starts and how the sectors behave after booting.
Number of loaded sec-tors Defines how many sectors will be loaded.

New compilation
Page 23
6.2 Creating a new compilation To create a new compilation, proceed as follows.
1. Select the disc type you want from the drop-down menu in the New Compilation window.
The recorder you have installed will determine which disc type (CD, DVD, HD DVD and/or Blu-ray Disc) can be burned. If the recorder can only burn CDs, the drop-down menu is grayed out. But with Nero Image Recorder which is included in Nero Linux you will always be able to create an image (see Image file) even you have not installed a recorder.
The drop-down menu displays the disc formats that can be burned using this disc type.
2. Select the disc format you want from the drop-down menu.
The tabs for this disc format are displayed.
Select the Copy CD and Copy DVD entries to go to the copy process (see Copying discs).
3. Configure the options you want in the tabs (see New Compilation window).
4. Click on the New button.
The New Compilation is closed and the selection screen is opened.
You have successfully created a new compilation. Now you can add files to the compila-tion (see Selecting a file).

Selecting a file
Page 24
7 Selecting a file
7.1 Selection screen The selection screen is the starting point for work that you want to do on compilations. The selection screen is opened in the main screen after you select the disc type and format and click on the New button.
The selection screen consists of the Compilation Area, the Browser Area and a capacity sca-le.
Fig. 3: Selection screen for the disc type CD-ROM (ISO)
The Compilation Area is named after the relevant compilation. Files and folders are compiled here for burning.
In the Browser Area (File Browser) you can find the elements that you want to burn.
If the Browser Area is hidden, you can show it again using the button.
The bottom margin of the screen contains a capacity scale in MB (for data discs) or min (for Audio CDs). The exact magnitude of the scale will depend on which disc type you have se-lected.
When you are compiling files, a capacity bar indicates how much space the files need on the disc. The color of the capacity bar indicates whether the data will fit on the disc or not:

Selecting a file
Page 25
Green capacity bar The data will fit on the disc. Yellow capacity bar (from the yellow mark on the scale)
The data might fit on the disc. The size of the disc that has been inserted will determine whether the data will fit or not.
Red capacity bar (from the red mark on the scale)
The data will not fit on the disc. (unless you have inserted an oversize disc.)
The yellow and red marks are set by default for discs that are commercially available. The disc type you have selected will determine the exact scale value.
For example, blank CDs are available with a capacity of 650 MB or 700 MB. Therefore the yellow mark is set for CDs at 650 MB and the red at 700 MB.
If the capacity scale is hidden, you can show it again by clicking on the menu File > Op-tions > Show compilation size and by enabling the check box Show compilation size in the Nero Linux status bar.
7.2 Selecting files You can select files by dragging them from the browser to the compilation area in the selec-tion screen. The same principle is used for all disc formats.
To select and compile files, proceed as follows:
1. Select the files/folders that you want to burn from the Browser Area.
2. Drag the required files/folders into the compilation area.
The files/folders are displayed in the compilation area and the capacity bar indicates how much space is being used on the disc.
3. If you want to save the compilation with the selected files: 1. Click on the icon.
The Save As window is opened.
2. Select a file name and a storage location and click on the Save button.
The compilation is saved and the Save As window is closed.
You have successfully selected the files for burning and can now start the burn process (see Burning a compilation).

Selecting a file
Page 26
7.3 File selection details There are certain details that you need to bear in mind when selecting files.
7.3.1 Audio CD Source audio files for an Audio CD may be contained on your hard drive as compressed au-dio files, or originate from one or more Audio CDs.
Audio CDs have been available on the market with a copy protection for some time now. It is not possible to either play or copy these using a computer. The copy protection is identi-fiable by a notice on the cover of the original CD. You can work on the audio files in the compilation or change the properties (see Audio Track Properties window).
7.3.2 Mixed Mode CD and CD EXTRA The selection screen for the disc formats mixed mode CD and CD EXTRA contains one compilation area for audio tracks and one for data files.
To select files, proceed as follows:
1. If you want to insert data files, click on the Data button.
The compilation area for data files is opened.
2. If you want to insert audio files, click on the Audio button.
The compilation screen for audio files is opened.
3. Proceed with the file selection (see Selecting files).
7.3.3 miniDVD The selection screen for the disc format miniDVD contains two preset folders in the Compila-tion Area: AUDIO_TS and VIDEO_TS.
To select files, proceed as follows:
1. Drag the existing DVD folder structure of the video title ("VIDEO_TS" folder) from the Brow-ser Area into the VIDEO_TS folder in the Compilation Area.
The files are displayed in the compilation area and the capacity bar indicates how much space is required on the disc.
2. Proceed with the file selection (see Selecting files).

Selecting a file
Page 27
7.4 Audio Track Properties window In the Audio Track Properties window you can view the properties of a selected audio file, i.e. of a track, in the compilation, change it if necessary and edit the audio file. You can open the window via the menu Edit > Properties menu.
Fig. 4: Audio Track Properties window
General information on the selected audio file is displayed in the Source information area.
The Properties area offers the following configuration options:
Title Defines a title which is saved as CD Text.
Artist Defines the artist which is saved as CD Text.
Pause Defines the length of the pause between this and the sub-sequent audio file. You can specify the length of the pause in seconds or in sectors.
International Standard Recording Code
Identifies the CD title using a 12-figure digital code. The ISRC is entered in the subcode and included silently. If you do not know the ISRC, you should leave this text box blank.
Protection Enables copy protection.

Burning a compilation
Page 28
8 Burning a compilation In order to burn your compilation, you must first select a recorder. Then start the burn proc-ess. Before Nero Linux burns the disc, the Burn Compilation window is opened where you can select or check burn options.
8.1 Choose recorder If you have installed multiple recorders, select a suitable recorder for burning. To do this, proceed as follows:
1. Click on the icon .
The Choose recorder window is opened.
2. Mark the relevant recorder.
The window shows useful information on the recorder, e.g. which disc types are supported.
3. If you would like to burn to a blank DVD, you can define the Book Type settings.
The Book Type determines which specification is recognized by the DVD player. With Nero Linux you can define or change the Book Type. This is recommended particularly if your DVD player has difficulties with self-burned DVDs of the specification DVD-, DVD+ or DVD-RW. In this case, set the Book Type to DVD-ROM.
1. Click on the Options button. 2. Select the required option from the Book Type Settings drop-down menu.
Four Book Type settings are available: Automatic: automatically selects the most suitable Book Type for this DVD. DVD-ROM: sets the Book Type to DVD-ROM. Select this option if the DVD should play on multiple DVD players. Physical disc type: selects the Book Type which is specified on the DVD. Current recorder setting: leaves the Book Type setting to the recorder.
4. Click on the OK button.
The selected recorder is accepted and the Choose recorder window closed.
You have successfully selected a recorder.

Burning a compilation
Page 29
8.2 Burn Compilation window In the Burn Compilation window you can set or check the required burn options and then start the actual burn process.
The Burn Compilation window consists of a drop-down menu, a selection list, various tabs and buttons.
Fig. 5: Burn Compilation window for the disc type CD-ROM (ISO)
The selected disc format is displayed in the selection list. If multiple disc types are available for this disc format, and if you have installed a suitable recorder, you can select another disc type from the drop-down menu.
The following buttons are available:
Disc Info Displays information on the disc inserted such as contents (if avail-able) or available capacity for instance.
Burn
Starts the burn process if a recorder is connected. If a recorder is not connected, the Save Image File window is ope-ned (see Creating an image file). This button is only available if the Burn check box is enabled.
OK Accepts all changes and closes the window. This button is only available if the Burn check box is disabled.
Cancel Closes the Burn Compilation window.

Burning a compilation
Page 30
8.3 The Burn tab The Burn tab provides options for the burn process.
The following check boxes are available in the Action area:
Determine maximum speed
Determines how quickly the compiled files can be ac-cessed.
Simulation Simulates burning. In the process the simulation performs all steps that are also carried out during burning with the exception of setting the laser beam. A test determines whether there is a constant flow of data.
Write Enables the Burn button.
Finalize disc
Closes or fixes the disc so that you cannot write to this disc anymore. Depending on the disc format, finalizing may be necessary. Nero Linux automatically enables the check box for the relevant disc formats.
The speed test and simulation are not required for recorders that have a function for pro-tecting against buffer underruns. The following configuration options are available in the Write method area:
Write method
Selects the method used to burn the disc. Disc-at-once and track-at-once are available. Disc-at-once: burns the entire disc in one go without hav-ing to switch off the laser between individual audio files. Track-at-once: burns each audio file (track) separately onto the disc, i.e. that the laser is switched off and swit-ched on again after each audio file.
Number of copies Defines the number of discs that are to be burned. The default is set to one disc.
Buffer underrun protec-tion
Provides buffer underrun protection. This check box is only available if the selected recorder supports a method for protecting buffer underruns.
Verify written data
Checks the data written to the disc after the burn process. You can use this option particularly when burning backups to ensure that all data has been written correctly. This check box is only available if the selected recorder is not the Nero Image Recorder.
Burning a compilation
Page 31
8.4 Starting the burn process To start the burn process, proceed as follows:
1. Click on the Burn button in the main screen.
The Burn Compilation window is opened; the Burn tab is on top.
2. Check or select the options in the individual tabs.
3. Insert a corresponding blank disc and click on the Burn button.
Many CD players cannot read rewritable CDs (CD-RW). You should therefore use normal CD-ROMs for burning Audio CDs.
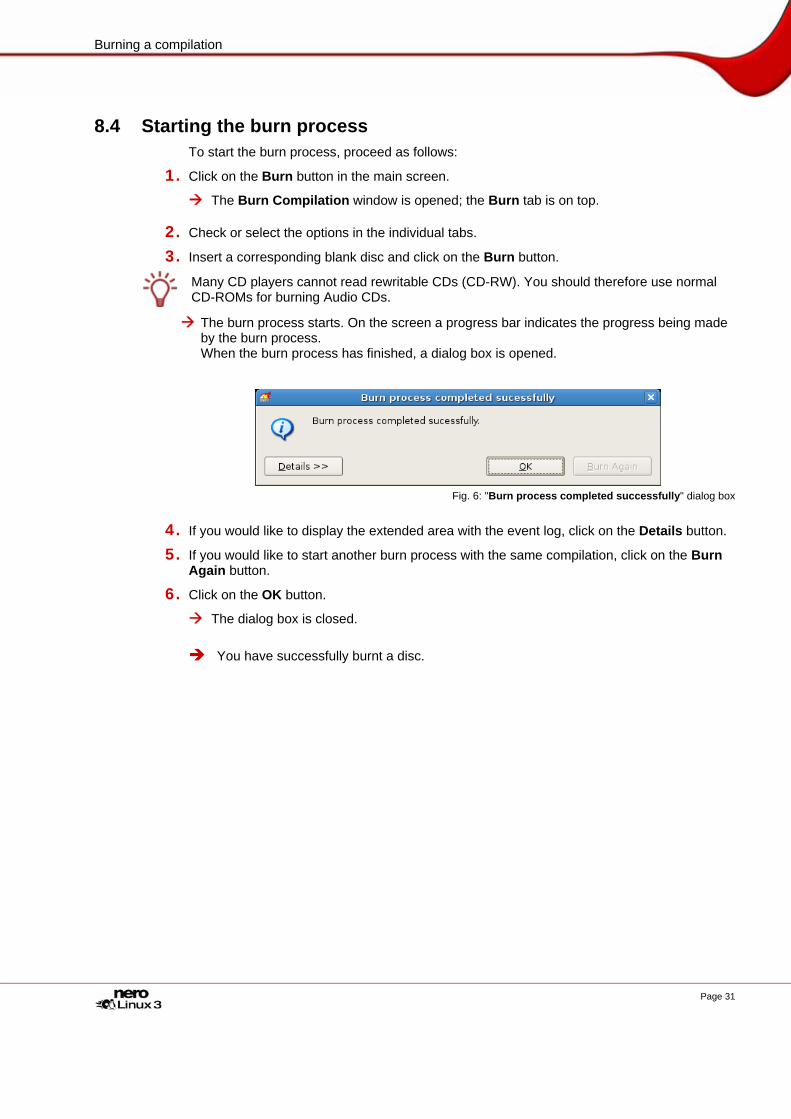
The burn process starts. On the screen a progress bar indicates the progress being made by the burn process. When the burn process has finished, a dialog box is opened.
Fig. 6: "Burn process completed successfully" dialog box
4. If you would like to display the extended area with the event log, click on the Details button.
5. If you would like to start another burn process with the same compilation, click on the Burn Again button.
6. Click on the OK button.
The dialog box is closed.
You have successfully burnt a disc.

Bootable disc
Page 32
9 Bootable disc Using Nero Linux you can create a bootable disc with which the computer can be started without having to access the hard drive. For this reason a bootable CD is often used as an "emergency disc" to start the computer if it is not possible to access the hard drive.
Bootable discs are created in accordance with the "El Torito" standard, an extension to the ISO-9660 standard, which defines the structure of data discs. The CD contains a boot image and an ISO part. The boot image contains all files that are required to load the operating sys-tem and to start the computer. The ISO part can contain any number of data files that you can back up using this method.
9.1 Booting requirements To ensure that a computer can boot from disc, the start sequence must be set in the BIOS of the computer in such a way that the drive is addressed first as the boot drive (start sequence CD-ROM, C, A for instance). In the case of a SCSI CD-ROM drive, this must be connected to a SCSI adapter with a separate BIOS whose settings can be modified accordingly. (This will only work when there are no IDE hard drives present as these precede the SCSI adapter in the boot sequence).
When booting from a disc, you can only start an operating system that does not write to the disc, such as "MS DOS" or "Linux". During booting Microsoft® Windows® 2000 and Micro-soft® Windows® XP write to the disc from which they are being booted. This is not possible with a disc and so the process is canceled and the PC cannot be started.
9.2 Bootable disc template For Nero Linux the template for creating a bootable disc can be either a logical drive or a drive image file, which contains the contents of a drive as a file sector for sector. If the tem-plate for the bootable disc is a logical drive, the boot disc will emulate this when the system is booting. There are three emulation types:
Floppy emulation: this requires a bootable floppy disk for creating the boot disc. At startup the bootable disc emulates a floppy disk in drive A:. In the process, the drive letters in-crement, so that Drive A: corresponds to the bootable disc. Floppy disk drive A: can be accessed as B: after booting. The volume of the start data is limited by the capacity of the floppy disk (e.g: 1.44 MB).
Hard drive emulation: a bootable hard drive is required to create the bootable disc. At startup the disc emulates Drive C:. All drive letters from Drive C: increment by one. The volume of the start data is limited by the capacity of the CD (e.g. 700 MB) or DVD (8.5 GB). If, for instance, you own a 200 GB hard drive with only one (200 GB) partition, you cannot create a bootable disc from it without re-partitioning your hard drive accordingly beforehand.
No emulation: in this process the drive names are not changed. This type is used for bootable installation CDs. This setting is intended for users who do not require any floppy or hard drive emulation and who want to install their own device driver.

Bootable disc
Page 33
9.3 Creating and burning a bootable disc To create a bootable disc, proceed as follows:
1. Click on the New button in the main Nero Linux screen.
The New Compilation window is opened.
2. If you want to create a bootable CD, select the option CD from the drop-down menu and the option CD-ROM (Boot) from the selection list. If you want to create a bootable DVD, select the option DVD from the drop-down menu and the option DVD-ROM (Boot) from the selection list.
The tabs for the bootable CD are displayed; the Boot tab is on top.
3. If the template data for the bootable disc should originate from a logical drive: 1. Select the Bootable logical drive option button in the Source of boot image data area. 2. Select the option you want from the drop-down menu.
4. If the template data for the bootable disc should originate from an image file: 1. Select the Image file option button in the Source of boot image data area. 2. Click on the Browse button and select the desired image file. 3. Select the language that should appear while the system is booting from the Boot locale
drop-down menu. 4. Enable the Enable expert features check box and select the emulation type for the image
file from the Emulation type drop-down menu.
5. Select any other options required in the tabs (see New Compilation window).
6. Click on the New button.
The selection screen is displayed.
7. Select the files/folders that should be written to the ISO part of the bootable disc and drag them into the Compilation Area.
The files/folders are displayed in the compilation area and the capacity bar indicates how much storage space is required on the disc.
8. Start the burn process (see Starting the burn process ).
You have successfully burnt a bootable disc.

Image file
Page 34
10 Image file You can use Nero Linux and Nero Image Recorder to create an image file. Nero Image Re-corder is automatically installed while Nero Linux is being installed. An image file is an indi-vidual file on the hard drive that contains an image of a complete disc. You can burn copies of this image file as often as you like. The image file is exactly the same size as the original files.
The following estimate applies to Audio CDs: the image file requires a capacity of approxi-mately 10 MB for every minute of audio data.
10.1 Creating an image file To create an image file, proceed as follows:
1. Click on the New button.
2. Create a new compilation of your choice (see New compilation).
Using Nero Linux you can also create image files for disc types that the installed recorder cannot burn. You can enable this function via the File > Options > Expert Features menu, Enable all supported recorder formats for image recorder check box. The drop-down menu in the Compilation window then makes available all supported disc types (CD, DVD, HD DVD and Blu-ray disc).
3. Select the files that you want to burn (see Selecting files).
4. If you have installed multiple recorders, select Nero Image Recorder from the drop-down menu.
5. Click on the Burn button.
The Burn Compilation window is opened, the Burn tab is on top.
6. Click on the Burn button.
The Save Image File window is opened.
7. Specify a file name and a storage location for the image file and click on the Save button.
The image file is created and saved in the selected storage location. On the screen, a progress bar indicates the progress made while the file is being created. Once the create process is over, a dialog box is opened.
8. Click on the OK button.
The dialog box is closed, you have successfully created the image file.

Image file
Page 35
10.2 Burning an image file To burn a saved image file, proceed as follows:
1. Select a recorder from the drop-down menu (not Nero Image Recorder).
2. Click on Recorder > Burn Image.
The Open browser window is opened.
3. Select the desired image file and click on the Open button.
The Burn Compilation window with the Burn tab is opened.
4. Proceed with the burn process (see Burning a compilation).
You have successfully burnt an image file.

Copying discs
Page 36
11 Copying discs You can copy discs using Nero Linux. There are two methods for this:
On-the-fly copying
Copy over image Each method has advantages and disadvantages which will depend on your requirements.
11.1 On-the-fly copying versus copy over image
11.1.1 On-the-fly copying When using the on-the-fly method, insert the original disc into a drive and a blank disc into the recorder. The original disc in the drive is copied immediately without any time delay to the blank disc in the recorder. The on-the-fly method allows you to copy very fast and does not require any additional space on the disc.
In order to be able to use the on-the-fly method, you will need at least two drives: one for reading the disc and a recorder for burning. The following requirements apply to the drive and recorder:
The recorder must have a function for protecting against buffer underruns or the drive must be capable of delivering the data sufficiently fast. The read speed must be at least as high as the write speed to ensure that a buffer underrun does not occur. It is more reli-able when the read speed is twice as fast as the write speed.
The drive must be capable of delivering information on the number and type of sessions, otherwise Nero Linux may not be able to produce an exact copy.
On-the-fly copying can have the following disadvantages:
If the recorder does not have a function for protecting against buffer underruns, the on-the-fly method is highly sensitive to read errors. The reason for this is as follows: if errors occur while the disc is being read because it is scratched, it is not possible to try to eliminate the error by reading the disc several times for example because, in contrast to the copy-over-image method, there is not enough time (danger of buffer underrun).
Index positions in audio files get lost. The reason for this is as follows: index positions only become identifiable if the corresponding position on the CD is read. However, quick copies can only be burned using the disc-at-once method. With this method the information on the index positions must be available before the burn process begins. This means that Nero Linux cannot copy over index positions.
The quality of audio data read in may suffer. The reason for this is as follows: Nero Linux reads several megabytes of data at a time from the drive, transfers the data to the Nero Linux buffer and writes the data to the recorder. If the data transfer slows down because the buffer in Nero Linux is full for instance, the reading head of the drive has to jump back to a previous position. Some drives cannot position the reading head precisely for Audio CDs, which means that corrupt audio data may be transferred sometimes.

Copying discs
Page 37
11.1.2 Copy over image With the copy-over-image method, an image of the original disc is saved to a file first. The image file is then burned to a blank disc. Copying using an image copy takes longer, but of-ten produces better results.
You must have sufficient space on the disc to use the copy-over-image method (see Image file).
Copying using an image copy is particularly suitable in the following situations:
Only one drive is available
You would like to make several copies of the same CD
You think it likely that read errors may have occurred on the source CD (for example be-cause it is scratched)
You appreciate the best possible reproduction (particularly in relation to index positions and the quality of Audio CDs).
11.2 Compilation window In the Compilation window, define the options for copying at the beginning of the copy pro-cedure. You can use the Copy button to open the window.
The New Compilation window consists of a drop-down menu, various buttons and tabs.
Fig. 7: Compilation window, Copy

Copying discs
Page 38
The drop-down menu contains the options CD, DVD, HD DVD and Blu-ray Disc. Only those disc types supported by the recorder are displayed. If the recorder can only burn CDs, the drop-down menu is grayed out.
The following buttons are available:
Disc Info Displays information on the disc inserted such as contents (if avai-lable) or available capacity for instance.
Copy Starts the copy process. Cancel Closes the New Compilation window.
The following tabs are available:
Image Displays the path to the temporary image file and provides informa-tion on the speed of the hard drive (see Image tab).
Copy Options Contains options for configuring copying (see Copy Options tab).
Read Options Contains options for configuring reading of the original disc (see Read Options tab).
Burn Contains options for configuring the burn process (see The Burn tab).
11.2.1 Image tab The Image tab provides the Image file area. The Image file area is only enabled, if the On-the-fly check box is disabled on the Copy Options tab.
In the Image file area the path to the temporary image file is displayed and the following configuration options are available:
Browse Opens the Save As window where you can specify a file name and a directory where the temporary image file should be stored.
Delete image file after disc copy
Deletes the temporary image file when the copy process is finished.
11.2.2 Copy Options tab The following configuration options are available on the Copy Options tab:
General area
On-The-Fly Creates the copy using the on-the-fly method. If the check box is disabled, the copy is created using the copy-over-image method.
Source area
Drive Selects the drive for reading the disc. If a copy over image is created, we recommend that you se-lect the recorder for reading in.
Read speed Defines the speed at which the disk is read in.

Copying discs
Page 39
11.2.3 Read Options tab You can select options for reading the original disk on the Read Options tab. The following options are available:
Profile area
Profile selection
Selects predefined copy options or a user-defined setting. In thecase of predefined copy settings Nero Linux sets the configura-tion options automatically. You can select the configuration options yourself in the case of a customized setting.
Data Track area for the disc type CD
Ignore read errors
Ignores read errors on the original disc and continues the read process. If the check box is disabled, Nero Linux may interrupt the burn process depending on the type of error that occurs.
Write defect sectors
Still passes on corrupt sectors (that have caused read errors) for burning. If the check box is disabled, corrupt sectors are not passed on and remain blank.
Read sectors in raw mode Reads PQ subchannel data.
Read all subchannel data Reads all subchannel data.
Audio tracks area for disc type CD
Ignore read errors
Ignores read errors on the original disk and resumes the read process. If the check box is disabled, Nero Linux may interrupt the burn process depending on the type of error.
Read indexes of au-dio data Reads the audio file indexes.
Read all subchannel data Reads all subchannel data.
Advanced area for the disc type CD
Read Media Catalog Number and ISRC
Reads the media catalog number, a unique number worldwide for compilations and the ISRC (International Standard Re-cording Code), a unique number worldwide for audio re-cordings.
Use jitter correction Removes scratches from audio and video files. Error correction area for disc type DVD
Read with error cor-rection
Performs error correction while reading. In the process, the checksum of a corrupt sector is adjusted so that the sector in itself is consistent.
Read retry count Establishes the number of attempts that are made to correct errors.
Fast reading without error correction Performs fast reading without error correction.
Handling of non-correctable read errors area for disc type DVD
Ignore read errors Ignores read errors on the original disc. If the check box is disabled, Nero Linux may interrupt the burn process depending on the type of error.

Copying discs
Page 40
With certain disc formats such as Audio CD for instance, read errors often have little or no impact because they are not perceptible when the CD is played.
Subchannel data contains additional information such as CD Text or information on posi-tions for instance.
11.3 Copying a disc
If you are not in possession of the copyright of the relevant disc and do not have authoriza-tion from the owner of the copyright, unauthorized copying violates national and interna-tional legislation.
Copy-protected Audio CDs cannot be copied using Nero Linux.
To copy a disc, proceed as follows:
1. Click on the Copy button in the main screen.
The New Compilation window is opened.
2. Select the disc type you want from the drop-down menu.
Your installed recorder or drive will determine which disc type (CD, DVD, HD DVD and/or Blu-ray Disc) you can select. If the recorder can only burn CDs, the drop-down menu is grayed out. But with Nero Image Recorder, which is installed in Nero Linux, you will always be able create an image (see Image file) even if you have not installed a recorder.
3. Select the options required in the tabs (see Compilation window).
4. If you want to copy discs using the copy-over-image method: 1. Disable the On-the-fly check box on the Copy Options tab. 2. Insert the disc that you want to copy into the recorder. 3. Click on the Copy button.
A screen is displayed and a progress bar indicates the progress made while the tem-porary image file is being created. When the image file has been created, the disc is ejected. The recorder name: Waiting for Disc window is opened.
4. Remove the ejected original disc and insert the blank disc.
The burn or copy process starts. On the screen a progress bar indicates the progress being made during the burn or copy process.
5. If you want to copy using the on-the-fly method: 1. Enable the On-the-fly check box on the Copy Options tab. 2. Select the drive that is to contain the disc to be copied from the Drive drop-down menu. 3. Insert the disc that you want to copy into the selected drive. 4. Insert a blank disc.

Copying discs
Page 41
5. Click on the Copy button.
The burn or copy process starts. On the screen a progress bar indicates the progress being made during the burn or copy process.
6. Proceed with the burn process (see Starting the burn process ).
You have successfully copied a disc.

Saving and converting audio files
Page 42
12 Saving and converting audio files Using Nero Linux you can convert an Audio CD into a format you require and save it to the hard drive. You can also convert (transcode) audio files saved on the hard drive into a differ-ent format.
12.1 Save Tracks window In the Save Tracks window you can define the settings for the audio files that are to be sto-red on the hard drive. The window consists of tabs and buttons. You can open the window by clicking on the Extras > Save Tracks menu.
Fig. 8: Save Tracks window - Source tab
The following tabs are available:
Source Configures the source data (see Source tab). Output Sets output files configuration options (see Output tab).
The following buttons are available:
Save Tracks Starts the save process.
Close Closes the window.

Saving and converting audio files
Page 43
12.1.1 Source tab The source tab displays the audio files on the Audio CD. The functions of the control buttons correspond to the familiar control buttons on CD players. The following configuration options are available:
Drive drop-down menu Selects the drive where the Audio CD is inserted.
area Title Displays the audio files on the Audio CD. area Properties Displays the properties of the selected audio track.
button Internet DB
Sends a query to the Internet Database www.freedb.org to complete the properties of the Audio CD, if there is an appropriate entry.
Nero AG is not responsible for the www.freedb.org web page, we simply provide an inter-face to it.
12.1.2 Output tab The output tab let you specify the output audio files properties.
Fig. 9: Save Tracks window - Output tab
The following options are available in the Target and Format areas:
Output direc-tory Selects the storage location for the output file.

Saving and converting audio files
Page 44
Browse Opens a browser window where you can select a storage location.
File name creation me-thod
Selects the method to be used for creating the name of the output file.
Settings Opens a window where you can configure the file name creation if you select Automatic or User defined as method.
Output file format Selects the output audio format for the selected audio file.
Settings Opens a window where you can define options such as bit rate and frequency for the output audio file.
12.2 Saving audio files Using Nero Linux you can store audio files from an Audio CD on the hard drive. In the proc-ess, the files are encoded, i.e. converted into a format that the computer can read. Mostly, the audio file is compressed.
Audio files from copy-protected Audio CDs cannot be saved using Nero Linux.
To save audio files, proceed as follows:
1. Insert the desired Audio CD into a drive.
2. Click on the Extras > Save Tracks button.
The Save Tracks window is opened.
3. Select the audio tracks that you want to save in the Track list.
By default all audio tracks are selected.
4. Click on the Output tab.
The Output tab is opened.
5. If you want to specify a storage location for the output files, click on the Browse button and select a path.
6. If you want to select a file name creation method, click on the File name creation mode drop-down menu and select a method.
The default setting for the method for default names is Automatic. If you select User de-fined, enter the desired name for the audio file.
7. Select the required output format from the File format drop-down menu.
8. If you want to define the encoding options: 1. Click on the Settings button.
A window is opened.

Saving and converting audio files
Page 45
2. Depending on the selected output form, define the encoding options such as bit rate, en-coding quality and frequency.
3. Click on the OK button.
The window is closed and the changes accepted.
9. Click on the Save Tracks button.
Conversion starts. The Progress window is opened and displays the progress made while saving. At the end of the save process, it is closed automatically.
10. Click on the Close button.
The Save Tracks window is closed.
You have saved individual audio files or an entire Audio CD to your hard drive.
12.3 Encode Files window In the Encode Files window, the audio files that are to be encoded are selected and the properties for the output defined. You can open the window via the Extras > Encode Files menu.
Fig. 10: Encode Files window
The window consists of a selection area and a properties area.
In the selection area the selected files are displayed in the Files to be encoded list. The fol-lowing buttons and check boxes are available:
Show full paths Displays the full source and destination paths for the files in the Files to be encoded list.
Add Opens the browser window where you can select a file to add it to the list of files to be encoded.

Saving and converting audio files
Page 46
Remove This removes the selected file(s).
Remove All Removes all files from the list of Files to be encoded.
Reset Status Resets the status of the selected file to "Not done".
Go Starts the encode process.
Close Closes the window. The following configuration options are available in the Properties area:
Output file format Selects the output audio format for the selected audio file.
Settings Opens a window where you can define options such as bit rate and frequency for the output audio file.
Target file/ Target directory Displays the storage location of the output file or output files.
Browse Opens a browser window where you can select a storage loca-tion.
Source file info Displays information on the selected audio file.
12.4 Converting audio files Using Nero Linux you can transcode, i.e. convert audio files that are stored on the hard drive into a different format.
To transcode a file, proceed as follows:
1. Click on the Extras > Encode Files menu.
The Encode Files window is opened.
2. Click on the Add button.
The familiar browser window Open is opened.
3. Select the required file and click on the Open button.
4. Repeat the two previous steps for each file that you want to convert.
5. Select the required output format from the Output file format drop-down menu.
6. If you want to define encoding options: 1. Click on the Settings button.
A window is opened.
2. Depending on the output format, define the encoding options such as bit rate, encoding quality and frequency.
3. Click on the OK button.
The window is closed and the changes accepted.
7. If you want to specify a storage location for the output files, click on the Browse button and select a path.

Saving and converting audio files
Page 47
8. Click on the Go button.
The Progress window is opened and displays the progress made while saving. At the end of the save process, the window is closed automatically. The status of the file that was transcoded is set to "Done".
9. Click on Close.
The Encode Files window is closed.
You have successfully transcoded your audio files.

Erasing a rewritable disc
Page 48
13 Erasing a rewritable disc Using Nero Linux you can erase rewritable discs, i.e. discs with the RW specification, as long as your recorder supports this function.
13.1 Erase Rewritable Disc window
Fig. 11: Erase Rewritable Disc window
This window contains the following drop-down menus and configuration options:
Select recorder Selects a recorder.
Select the erase method to be used
Selects an erase method. Two options are available: Quick-erase rewritable disc: does not physically erase the disc fully, but only the references to the existing con-tents. The disc will appear to be empty even though the da-ta is still physically available. Erasing a disc using this me-thod takes between one and two minutes. Full-erase rewritable disc: physically erases all data from the disc. The contents cannot be restored. Erasing the disc using this method takes longer than the other method de-pending on the type of disc involved.
Erase speed Selects the speed at which the disc is erased. Erase Starts the erase process. Cancel Cancels the action and closes the window.

Erasing a rewritable disc
Page 49
13.2 Erase Disc To erase a rewritable disc, proceed as follows:
Requirement: your recorder must support this function.
1. Insert the disc that you want to erase.
2. Select the Recorder > Erase Rewritable Disc menu from the main Nero Linux screen.
The Erase Rewritable Disk window is opened.
3. If you have installed multiple recorders, select the desired recorder from the Choose re-corder drop-down menu.
4. Select an erase method from the Select erase method to be used drop-down list.
If you want to erase confidential data, use the "full-erase" method to physically erase all of the data from the disc. Otherwise third parties could restore the contents.
5. If required, select the erase speed from the Erase speed drop-down menu.
6. Click on the Erase button.
The erase process starts. A progress bar in a window informs you about the progress being made by the erase process. When all data has been fully erased, the window is closed and the disc ejected.
You have successfully erased a rewritable disc and can now write to the disc again.

Configuration
Page 50
14 Configuration
14.1 Configuration options You can define options for working with Nero Linux in the Options window. Open the win-dow by click on the Options entry in the File menu.
Fig. 12: Options window
The Options window contains the following sections:
Tab Description Compilation Contains options for compilation and the selection screen.
Cache Contains options for the cache.
Sounds Contains selection options for sounds in connection with burn tasks.
Audio Displays the directory for the audio plug-ins.
Expert Features Contains options for configuring overburning and burning (see Expert Features).
We recommend that you retain the default settings.
Audio CD Database Offers the option to use the Internet database.
Ultrabuffer Defines the size of the RAM buffer.
System Settings Contains options for checking the system settings at applica-tion startup.

Configuration
Page 51
File Browser Contains options for configuring the file browser.
Misc Contains options for configuring compilations, burning, the u-ser interface as well as advanced settings for Nero Linux.
14.2 Expert Features The Expert Features tab in the Options window provides you with further configuration op-tions for burning and overburning for instance.
Using Nero Linux you can overburn a disc beyond the specified capacity. You can display the capacity of a disc using the button. Tolerances in the manufacturing process often cause the actual rewritable area on the disc to exceed the maximum specified capacity. This additional area is often 2-3 minutes long, but may also be shorter or longer. It is not technically possible to establish the precise extent of the excess capacity prior to burning.
During the overburn process, the following difficulties may arise: Read errors, sound errors, incorrectly written data and error messages during the burn pro-cess. Theoretically the recorder could be damaged. The following configuration options are available:
Enable Disc-at-once CD overburning Enables overburning for CDs in disc-at-once mode.
Relative maximum overburning size: Defines the relative maximum overburning size.
Absolute maximum overburning size: Defines the absolute maximum overburning size.
Enable DVD overbur-ning
Enables overburning for DVDs. If the check box is enabled, you can specify the maximum DVD size in the text box.
Enable generation of short lead-out
Writes a short lead-out for CDs that are being burned in disc-at-once mode. This creates additional capacity of about 12 MB.
Do not eject disc after the burn is complete Does not eject the disc after the burn process is complete.
Reload the disc after the burn is complete Reload the disc after the burn process is complete.
Allow to disable final-izing for burning a disc image
Disables finalizing when an image file is saved.
Enable all supported recorder formats for image recorder
Enables all supported recorder formats for Nero Image Re-corder. It is now possible to create compilations that the in-stalled recorder cannot burn. You can therefore create a DVD compilation without a DVD recorder for instance and create an image file using Nero Image Recorder. The same applies for HD DVD and Blu-ray discs.

List of figures
Page 52
15 List of figures Fig. 1: Nero Linux menu bar and toolbar..........................................................................................................15 Fig. 2: New Compilation window, CD-ROM (ISO) disc type ..........................................................................17 Fig. 3: Selection screen for the disc type CD-ROM (ISO)................................................................................24 Fig. 4: Audio Track Properties window..........................................................................................................27 Fig. 5: Burn Compilation window for the disc type CD-ROM (ISO) ...............................................................29 Fig. 6: "Burn process completed successfully" dialog box .........................................................................31 Fig. 7: Compilation window, Copy ..................................................................................................................37 Fig. 8: Save Tracks window - Source tab .......................................................................................................42 Fig. 9: Save Tracks window - Output tab .......................................................................................................43 Fig. 10: Encode Files window .........................................................................................................................45 Fig. 11: Erase Rewritable Disc window..........................................................................................................48 Fig. 12: Options window..................................................................................................................................50

Glossary
Page 53
16 Glossary
Blue Book Standard for CDs created in the formats CD Extra and Enhanced CD.
Blu-ray Disc Abbreviated to BD. The Blu-ray disc or Blu-ray is a possible successor to the DVD. The BD was developed by the BDA (Blu-ray-Disc Association) in response to high-definition video requirements. Their storage capacity is practically five times that of DVDs. Single-layer discs can store data volumes of up to 20 GB and dual-layer discs up to 50 GB. In BD recorders a blue-violet laser is used, which can write the data "more tightly" on the disc. The protective layer is also thinner.
Book Type The Book Type defines the specification (e.g. DVD-, DVD+, DVD-ROM) of a DVD and is sto-red in the lead-in. Even burned DVDs are sometimes not read by DVD players. This may be due to the fact that the players either cannot read or have difficulty in reading DVD-, DVD+ or DVD-RW. Using Nero Linux you can set the book Type of the self-burned DVD on DVD-ROM to guarantee playback.
Bootable CD Boot refers to the loading of the operating system on the computer when it starts up. This is normally done from the hard drive. If you do not want to or cannot boot from your hard drive, you can use a bootable CD to boot from the disc drive.
Cache Fast temporary storage (buffer), which is used in different areas in a computer.
CD Compact Disc. Widely used disc type. The following types of CD are available:
CD-ROM Compact Disc-Read Only Memory. Various computer readable forms of data such as programs, picture or audio data, for instance, can be stored in this format.
CD-R Compact Disc - Recordable. Write-once disc. CD-RW Compact Disc - ReWritable. A disc that can be written to more than once.
CD-DA Compact Disc - Digital Audio. The first standard for Audio CDs. An Audio CD consists of multiple audio files whereby one file generally corresponds to one title/song; in addition, each file is subdivided into sectors.
CD-i Compact Disc-Interactive. Format for multimedia CDs that combine video, audio, and data and can only be played using a CD-i player or CD-ROM drive that supports CD-i technology.

Glossary
Page 54
CD Text Additional information on the CD that can store the title and artists of the individual pieces for instance. CD Text is stored in the so-called lead-in area of the CD before the audio data starts.
Not all CD players support CD Text. Despite this a CD with CD Text can still be played in the player.
You must have a CD recorder which supports CD Text to enable the CD Text to be written to a CD. In particular, CD Text can only be written in disc-at-once mode. Please refer to the re-corder selection dialog in Nero Linux to find out whether your recorder supports CD Text.
Decoding Decoding refers to the conversion of computer readable audio files (e.g. mp3) into Audio CD format. Decoding takes place at the same time as the burn process.
Digitalization Conversion of analog signals to digital signals.
Disc Disc is a data medium to which the data is saved. CD-R, DVD-R, and DVD+R are examples of write-once discs that are written to by a recorder and read by a player. Discs of the same type with different storage capacities are available, e.g. for DVD-R with 4.38 GB or as DVD-R DL (Dual Layer, with two data layers) with 7.95 GB.
Disc-At-Once (DAO) An entire CD/DVD is recorded without ever stopping the laser. This format is best for Audio CDs that will be played in home and car stereo equipment.
DVD Digital Versatile Disc or Digital Video Disc. DVD was originally designed for the movie and games market. In the meantime it has become possible to burn data and certain video films to a DVD-Video disc and play them on all DVD-ROM drives. The following types are avai-lable:
DVD-R The DVD-R is a non-rewritable format that is compatible with most DVD-ROM drives and DVD players.
DVD-RAM Format of rewritable media that is compatible with most DVD-ROM drives and DVD players. Files cannot be copied and deleted.
DVD-RW DVD ReWriteable. The DVD-RW is a rewritable disc that fulfills the same functions as a DVD-R, but is compatible with fewer DVD-ROM drives and DVD players.
DVD+R/RW
Format developed in cooperation with Hewlett-Packard, Mitsubishi Chemical, Philips, Ricoh, Sony, and Yamaha. DVD+RW is a rewri-table format that is fully and immediately compatible with DVD play-ers and DVD-ROM drives.
EDC/ ECC Error Detection Code/Error Correction Code. Used to identify and correct scan errors which may be caused by scratches or dirt on the surface of a CD.

Glossary
Page 55
Emulation Simulation of the structure and function of a system, e.g. a bootable disc can "emulate" a floppy drive.
Encode Encoding is the conversion of audio files that are located on an Audio CD into an audio for-mat that the computer can read (e.g. mp3).
Finalizing Definitive conclusion of the process of writing to a CD/DVD. After this it is not possible to wri-te to the CD/DVD anymore. However, a finalized rewritable disc can still be deleted. A disc is automatically finalized if it is burned using the disc-at-once method.
Firmware The firmware in recorders functions as the operating system of the drive and contains in-structions which determine how the drive reacts to commands from the PC. Generally the firmware in modern recorders can be updated, improving the support for discs from other manufacturers for instance.
HD DVD High Definition DVD. A possible successor to the DVD with greater storage capacity. The format is recognized by the DVD Forum. The HD DVD was developed in response to high-definition video requirements. Single-layer discs can store data volumes of up to 15 GB. In HD DVD recorders blue-violet laser is used, which can write the data "more tightly" on the disc. This makes it possible to store large quantities of data.
HFS CD File system used by Apple© Macintosh systems. This format is only suitable for Macintosh discs.
Image File An individual file on the hard drive that contains an image of a complete disc. An image can be used if problems occur during the burn process or if there is no recorder connected to the PC. You will need free space on your hard drive to create an image.
Index Position You can set index positions within an audio track. You can "jump" to these using a suitable CD player. Currently, only very few CD players can handle index positions.
Table of Contents (T.O.C.) Indicates the content of each session. The table of contents is stored in the lead-in.
Jitter Control Many CD-ROM drives cannot read an individual sector on an Audio CD, which means that small gaps may occur in the data stream. Audio correction synchronizes the data stream by overlapping the sectors and so gaps do not occur.
Crossfade A crossfade is a merging between two audio tracks. The start of the new track begins softly, while the current track is still playing. The two tracks merge without a pause.

Glossary
Page 56
Label Most CDs have an imprint or label. You can use different methods, such as screen printing for example, to apply a label to the CD.
Lead-in The initial area of every session is known as the lead-in. This is where the “table of contents” for your disc and additional information concerning the CD is stored.
Lead-out The final area in a session. This area is located at the end of the disc. If the disc has not yet been finalized, the reference to the next session is stored here.
MP3 MPEG-1 Audio Layer 3. Audio format often used to compress audio files to a fraction of their original size (ratio 1:10) without any loss of quality.
MPEG Motion Picture Experts Group. Standard that was developed for videos compressed at a hig-her ratio (e.g. SVCD and VCD).
MPEG-1 This format which is a part of the MPEG compression family has the highest compression rate.
MPEG-2 There are only minor differences between MPEG-1 and MPEG-2. MPEG-2 works better with TV sets with interlacing and is a broadcast-ing standard.
MPEG-3 Standard for defining High Definition TV. MPEG-4 This standard is the next generation of MPEG-2.
NTSC Standard for video and television in the United States and Japan. NTSC has more frames per second than PAL, but has fewer horizontal lines.
PAL Video and TV standard in Europe. PAL has more horizontal lines than NTSC, but has fewer frames per second.
Photo-CD CD which is used for storing images, photos, slides, and other visual data. A photo CD gen-erally consists of multisessions. The standard originates from Kodak and Philips.
Plug-in Software used to add other features to a program (software) or to support troubleshooting.
Buffer Underrun Buffer underruns are caused when there is an interruption to the flow of data to the internal buffer of the recorder. This can be the fault of the software or the hardware itself. When re-cording, data is fed continuously to the recorder’s buffer in order to keep a steady flow of da-ta which is required when recording. When something interrupts that steady flow, it can cau-se a buffer underrun and your disc is no longer useable.
Glossary
Page 57
Most modern recorders have a protective mechanism against buffer underruns.
Red Book This standard describes the CD-DA.
Recorder A recorder writes to discs. A recorder is commonly referred to as a "burner".
SCSI Small Computer System Interface. Bus system to which different terminal devices such as a SCSI hard drive, streamers or a CD recorder may be connected. At this time, SCSI is the on-ly possibility of operating a CD recorder on a typically used computer system.
Sector Smallest addressable information unit on a CD. A sector is composed of 2,352 bytes of which - depending on the type of CD used - differing amounts are available as user data. A sector generally consists of a header, synchronization bits and user data. It may also have error recognition and correction data. A drive with a simple read speed of 1/75 seconds is required to read a sector.
Session Discs such as CDs and DVDs are divided into tracks and sessions. A session is a self-contained data area that is burned using a single process, and consists of a lead-in, one or more tracks, and a lead-out. In principle, a session is comparable to the partition on a hard drive. A multisession disc can contain multiple sessions.
Simulation Performs all steps in a burn process without using the laser beam. We recommend running a simulation if you are decompressing data before burning, e.g. when burning an Audio CD from MP3 files. You can assume that if simulation is successful, the burn process will also be successful.
Track Data unit that joins successive sectors on a disc. On an Audio CD a track corresponds to a piece of music. Several tracks together with the lead-in and lead-out build a session.
Track-At-Once (TAO) Writing method in which each track is written individually to the CD. The writing process is in-terrupted briefly after each track, i.e. the laser switches off. With this writing method, it is only possible to continue writing to a CD sometimes and at a later stage.
Transcoding Transcoding is the conversion from one audio format to another, e.g. WAV files to MP3 files.
Volume Descriptor Area at the beginning of a CD containing the structure of the file system. It may also contain additional and optional information about the CD (e.g. the name of the CD, the publisher, the copyright notice).

Glossary
Page 58
Yellow Book The Yellow Book is the standard for the format of CDs used for data storage.

Index
Page 59
17 Index
A
Audio CD 18
Audio File 27
Configuration Options 22
Audio File
Converting 46
Editing 15
Properties 27
Saving 44
Audio Formats 13
B
Backups 19
Verifying Data 30
Blu-ray Disc 17
Booktype 28
Boot Disc 18, 22
Bootable Disc 32
Burning 33
Template 32
Booting requirements 32
Browser Area 24
Buffer Underrun 30
Burn 28
Burn Options 30
Starting 31, 33, 41
Write Method 30
C
Capacity Bar 25
Capacity Scale 24
Showing 25
CD EXTRA 18
Compiling 26
CD Text 22
character set 20
Code
Converting 19
Compilation
Burning 28
Creating 23
Compilation 25
Compilation Area 24
Configuration Options 50
Contact 63
Conventions 6
Copy Options 38
Copy Over Image 36, 37
Copy Protection 26, 27
Copying 36
D
Data Disc 18
Data Mode 20
Date
Defining 19
devices
external 9
IDE 8
SCSI 9
Serial ATA 9
setting correct permission 11
Disc
Copying 40
Fixing 30
Disc Format
Selecting 23
Supported 13
Tabs 19
Disc Formats 13
Disc Type
Selecting 23
Supported 13
Disc-at-Once 30
DVD
Book Type Setting 28
DVD-Video 18

Page 60
E
El Torito standard 32
Emulation 32
Expert Features 51
External devices 9
F
File Name Length 20
File System 20
Files
Selecting 25
Format
Supported 13
H
HD DVD 17
I IDE devices 8
configur with 2.4 kernel 10
configur with 2.6 kernel 10
setting up DMA acceleration 11
Ignore read errors 39
Image File 34
Burning 35
Creating 34
Image Recorder 13, 17
Enable Recorder Formats 51
Index
Reading 39
Install Nero Linux 14
Internet Database 43
ISO 20
ISO 9660 20
ISRC 27
J
Jitter Correction 39
Joliet 20
L
Linux kernel requirements 7
Linux kernel version 7
how to get 7
M
Main Screen 15
Menu Bar 15
Toolbar 15
miniDVD 18
Compiling 26
Mixed Mode CD 18
Compiling 26
Multisession Disc 19
Continuing 20
Starting 20
N
Nero Linux
Steps 16
New Compilation 17
O
on-the-fly 36
On-the-Fly Copying 36
Overburning 51
R
Read Speed 38
Recorder
Choosing 28
Selecting 16
Requirement
Hard drive space 7
Processor Memory 7
Rewritable CD 31
Rewritable Disc
Erase Method 48
Erasing 48
Rock Ridge 20
S
SCSI devices 9
Selection Screen 24
Serial ATA devices 9

Page 61
Session
Importing 19
Simulation 30
System requirements 7
T
Title
Adding 21
Track-at-Once 30
U
UDF 21
X
Xbox™
Creating a Compatible Disc 21

Tab Matrix
Page 62
18 Tab Matrix This matrix shows which tabs are available for which disc format in the Compilation window. The tabs are listed in the top row; the disc formats in the left-hand column.
An "x" entered in a cell within the table indicates that the tab is available for this disc format. A "-" in a cell indicates that the relevant tab is not available for this disc format. The "Extra" column lists specific additional tabs that apply to the respective disc format.
Info
Mul
tises
sion
ISO
UD
F
Labe
l
Dat
e
Mis
c
Aud
io C
D
Bur
n
Extr
a
CD/DVD-ROM (ISO) x x x - x x x - x -
Audio CD x - - - - - - x x -
Mixed Mode CD x - x - x x x x x -
CD EXTRA - - x - x x x x x -
miniDVD x - x - x x x - x -
CD/DVD-ROM (Boot) x - x - x x x - x Boot
CD/DVD/HD DVD-ROM/ Blu-ray Disc (UDF) x x - x x x x - x -
CD/DVD-ROM (UDF/ISO) x x x x x x x - x -
DVD-Video x - x - x x x - x -

Contact
Page 63
19 Contact Nero Linux is a Nero AG product.
Nero AG Im Stoeckmaedle 13-15 76307 Karlsbad Germany
Web: www.nero.com Help: http://support.nero.com E-mail: [email protected] Fax: +49 724 892 8499
Copyright © 2007 Nero AG. All rights reserved.