netscaler radius authentication · 5 . step phase and task page √ 9 configure the netscaler...
TRANSCRIPT
NetScaler Radius Authentication
Integration Guide

Copyright© 2018 Crossmatch. All rights reserved. Specifications are subject to change without prior otice. The Crossmatch logo and Crossmatch® are trademarks or registered trademarks of Cross Match Technologies, Inc. in the United States and other countries. DigitalPersona® is a registered trademark of DigitalPersona, Inc., which is owned by the parent company of Cross Match Technologies, Inc. All other brand and product names are trademarks or registered trademarks of their respective owners.
Published/Revised: July 13, 2018
3
Table of Contents
Introduction ........................................................................................................................................... 4 Overview ....................................................................................................................................... 4 Main topics ................................................................................................................................... 4 Components .................................................................................................................................. 4 Deployment overview and checklist ............................................................................................. 4
Configuration ........................................................................................................................................ 5 Configure the NPS Server RADIUS Client .................................................................................. 5 Configure the NPS Server Connection Request Policy ................................................................ 7 Configure the NPS Server Network Policy .................................................................................. 9 Configure the NetScaler Authentication Policy and Server........................................................ 12 Configure the NetScaler Gateway Virtual Server ....................................................................... 14
Deployment ......................................................................................................................................... 17 Run the DigitalPersona AD NPS Plugin ..................................................................................... 17
Verification ......................................................................................................................................... 20
Troubleshooting checkpoints .............................................................................................................. 20
4
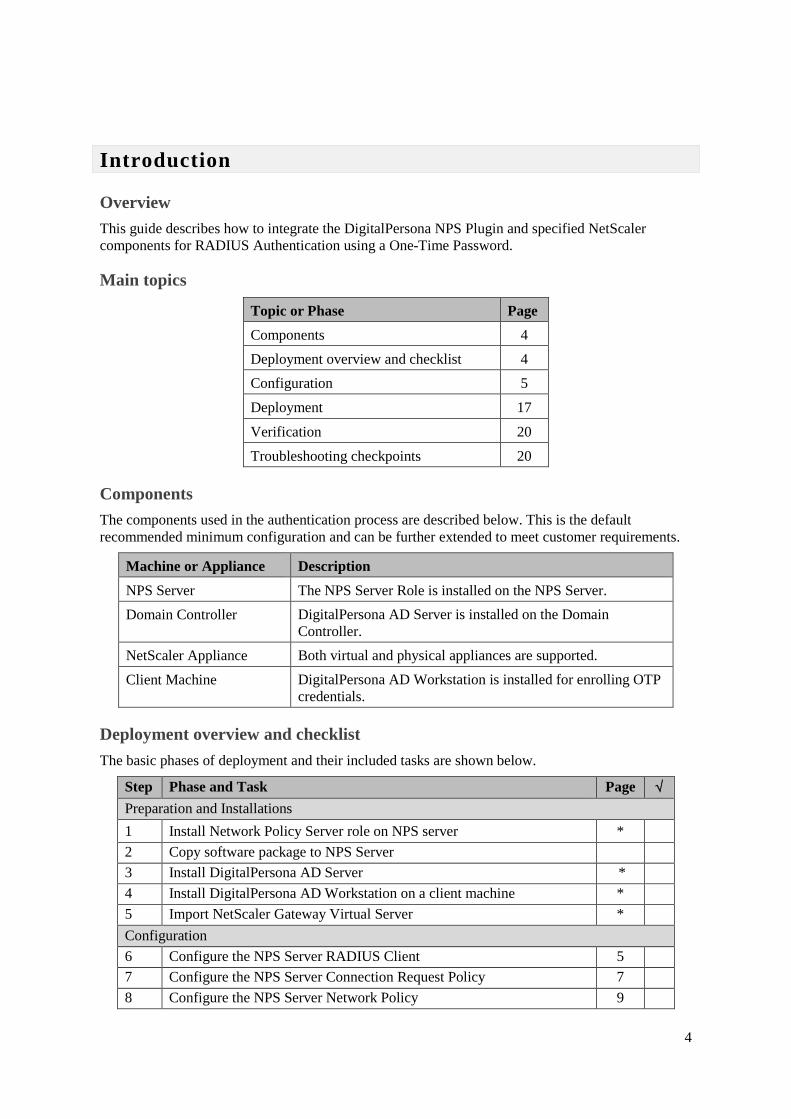
Introduction
Overview This guide describes how to integrate the DigitalPersona NPS Plugin and specified NetScaler components for RADIUS Authentication using a One-Time Password.
Main topics
Topic or Phase Page Components 4 Deployment overview and checklist 4 Configuration 5
Deployment 17
Verification 20
Troubleshooting checkpoints 20
Components
The components used in the authentication process are described below. This is the default recommended minimum configuration and can be further extended to meet customer requirements.
Machine or Appliance Description NPS Server The NPS Server Role is installed on the NPS Server. Domain Controller DigitalPersona AD Server is installed on the Domain
Controller. NetScaler Appliance Both virtual and physical appliances are supported.
Client Machine DigitalPersona AD Workstation is installed for enrolling OTP credentials.
Deployment overview and checklist The basic phases of deployment and their included tasks are shown below.
Step Phase and Task Page √ Preparation and Installations 1 Install Network Policy Server role on NPS server * 2 Copy software package to NPS Server 3 Install DigitalPersona AD Server * 4 Install DigitalPersona AD Workstation on a client machine * 5 Import NetScaler Gateway Virtual Server * Configuration 6 Configure the NPS Server RADIUS Client 5 7 Configure the NPS Server Connection Request Policy 7 8 Configure the NPS Server Network Policy 9

5
Step Phase and Task Page √ 9 Configure the NetScaler Authentication Policy and Server 12 10 Configure the NetScaler Gateway Virtual Server 14 Deployment 11 Run the DigitalPersona AD NPS Plugin 17 Verification 12 Open the NetScaler Gateway Login Page 20 13 Log on with AD user credentials and a Radius OTP credential 20 Completion
* For installation details, see the DigitalPersona NPS Plugin chapter in the DigitalPersona AD Administrator Guide.
Configuration
On the NPS machine, open the Network Policy Server console.
Configure the NPS Server RADIUS Client 1. In the left panel, expand RADIUS Clients and Servers.
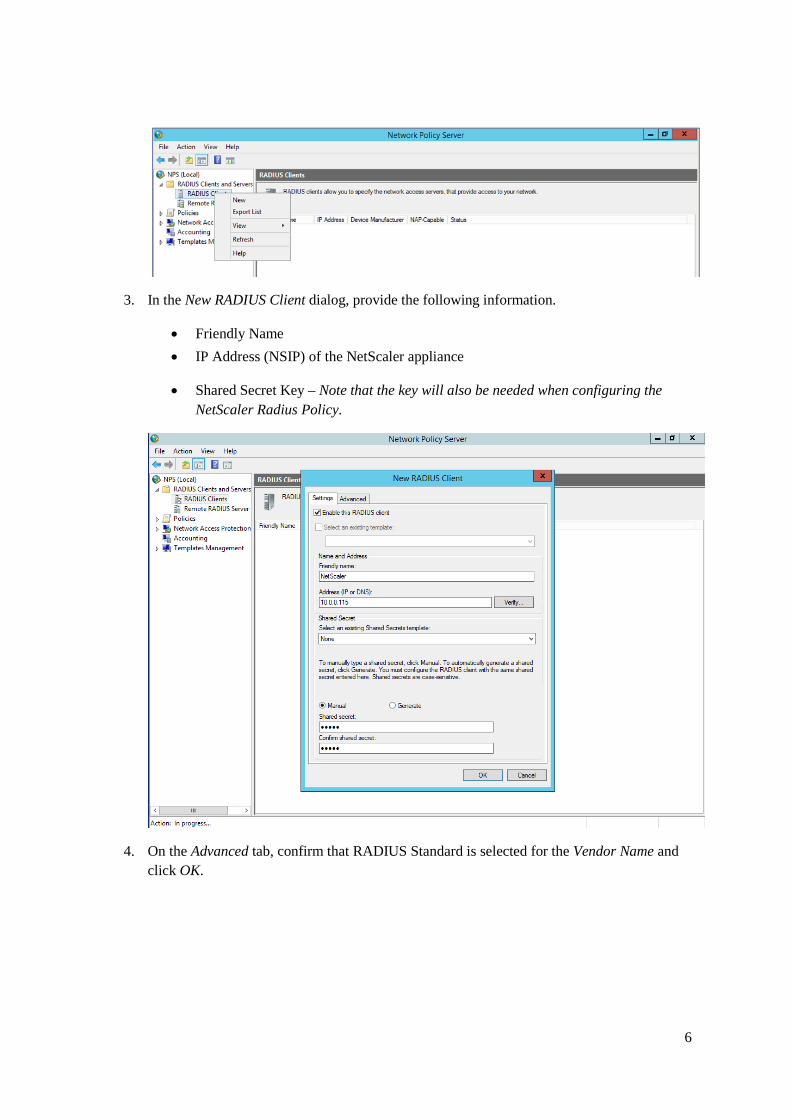
2. Right-click RADIUS Clients and select New.
6
3. In the New RADIUS Client dialog, provide the following information.
• Friendly Name • IP Address (NSIP) of the NetScaler appliance
• Shared Secret Key – Note that the key will also be needed when configuring the NetScaler Radius Policy.
4. On the Advanced tab, confirm that RADIUS Standard is selected for the Vendor Name and click OK.
7
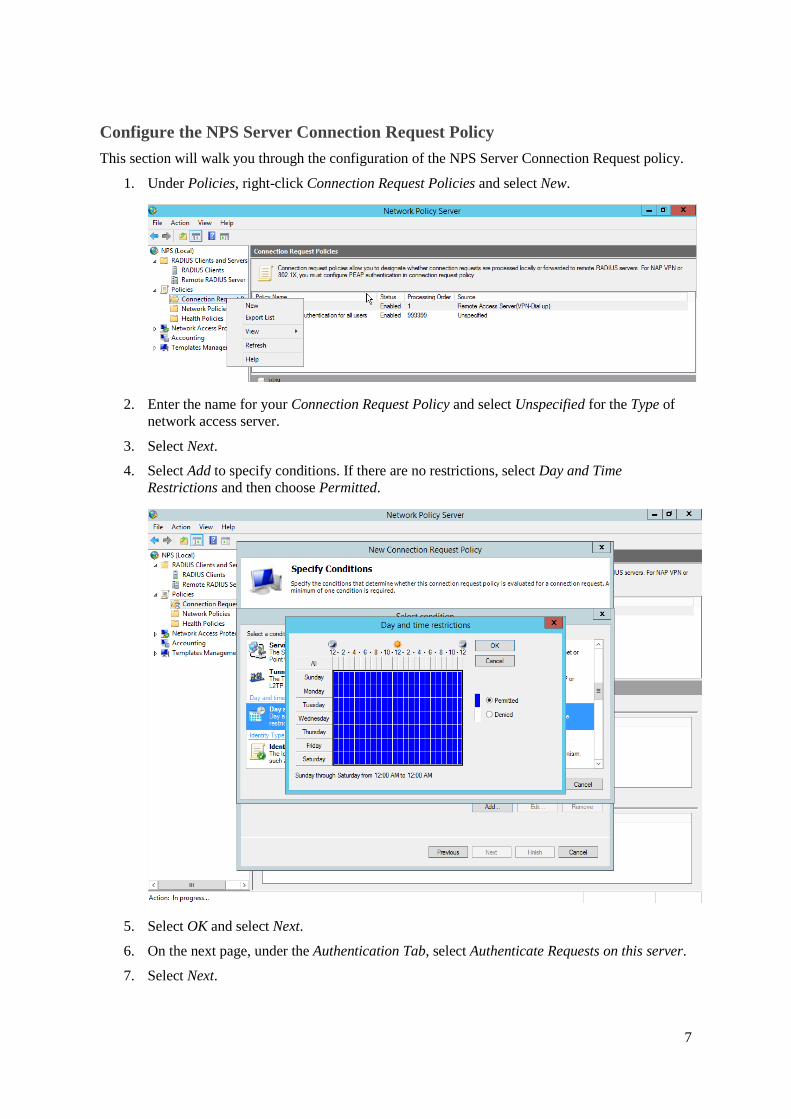
Configure the NPS Server Connection Request Policy This section will walk you through the configuration of the NPS Server Connection Request policy.
1. Under Policies, right-click Connection Request Policies and select New.
2. Enter the name for your Connection Request Policy and select Unspecified for the Type of network access server.
3. Select Next.
4. Select Add to specify conditions. If there are no restrictions, select Day and Time Restrictions and then choose Permitted.
5. Select OK and select Next.
6. On the next page, under the Authentication Tab, select Authenticate Requests on this server.
7. Select Next.
8
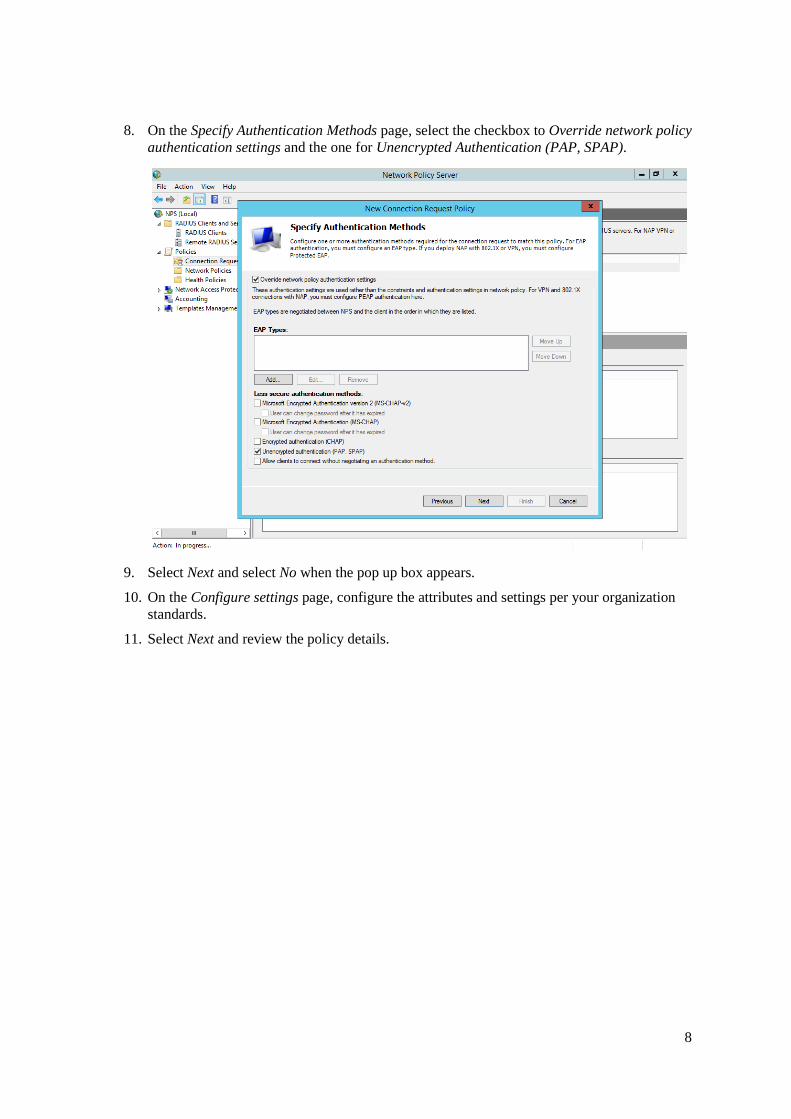
8. On the Specify Authentication Methods page, select the checkbox to Override network policy authentication settings and the one for Unencrypted Authentication (PAP, SPAP).
9. Select Next and select No when the pop up box appears.
10. On the Configure settings page, configure the attributes and settings per your organization standards.
11. Select Next and review the policy details.
9
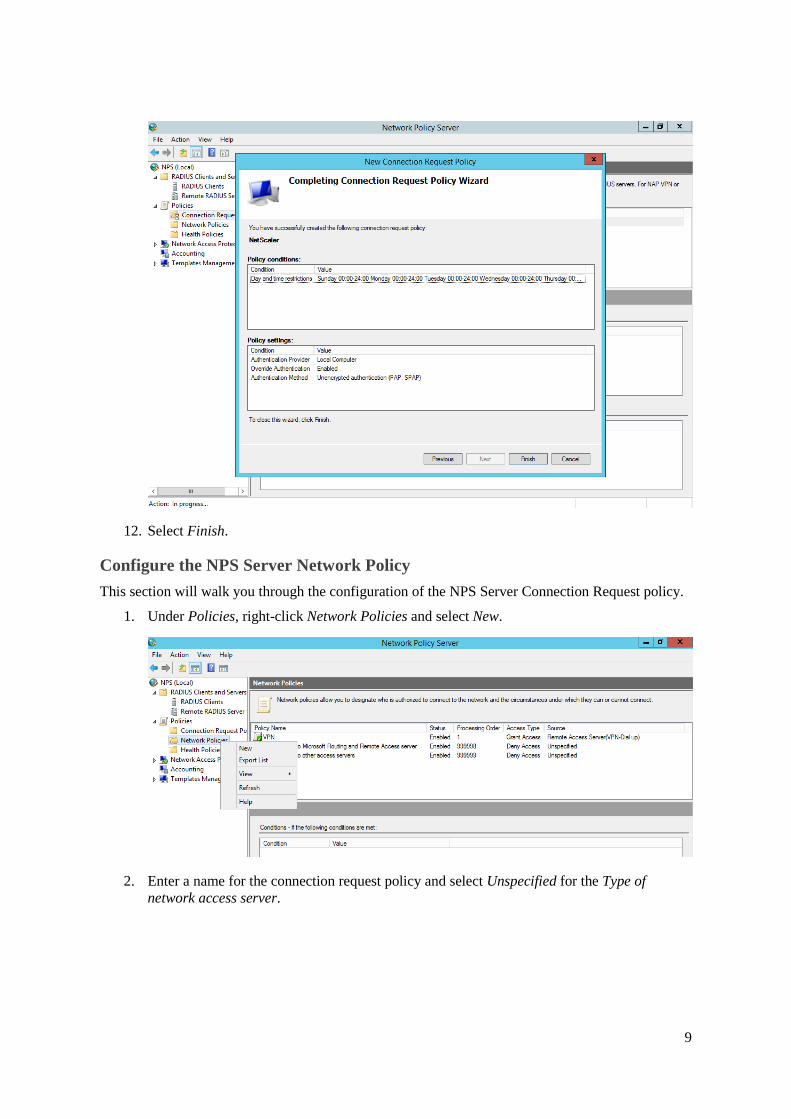
12. Select Finish.
Configure the NPS Server Network Policy This section will walk you through the configuration of the NPS Server Connection Request policy.
1. Under Policies, right-click Network Policies and select New.
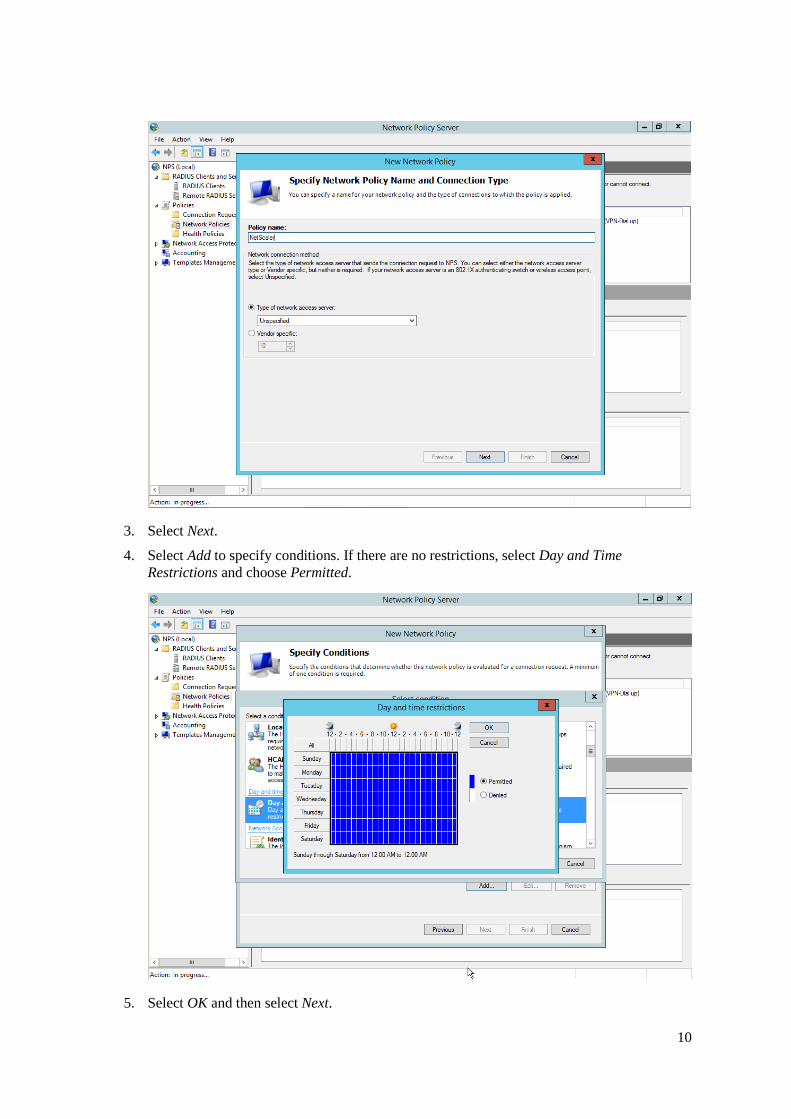
2. Enter a name for the connection request policy and select Unspecified for the Type of network access server.
10
3. Select Next.
4. Select Add to specify conditions. If there are no restrictions, select Day and Time Restrictions and choose Permitted.
5. Select OK and then select Next.
11
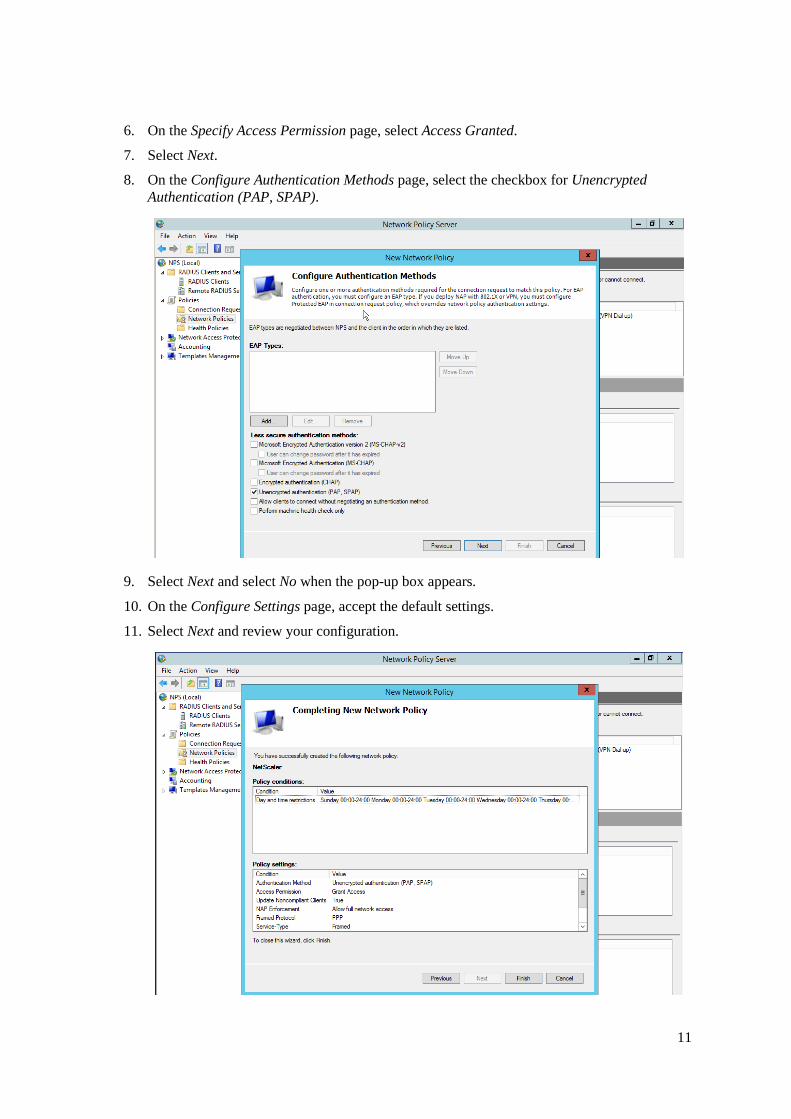
6. On the Specify Access Permission page, select Access Granted.
7. Select Next.
8. On the Configure Authentication Methods page, select the checkbox for Unencrypted Authentication (PAP, SPAP).
9. Select Next and select No when the pop-up box appears.
10. On the Configure Settings page, accept the default settings.
11. Select Next and review your configuration.
12
12. Select Finish.
Configure the NetScaler Authentication Policy and Server This section will walk you through the process of configuring your NetScaler appliance Radius Authentication policy and server.
1. Open a web browser and connect to your NetScaler Management Interface using the NSIP (http://IPofNSIP)
2. Log in with your administrator credentials.
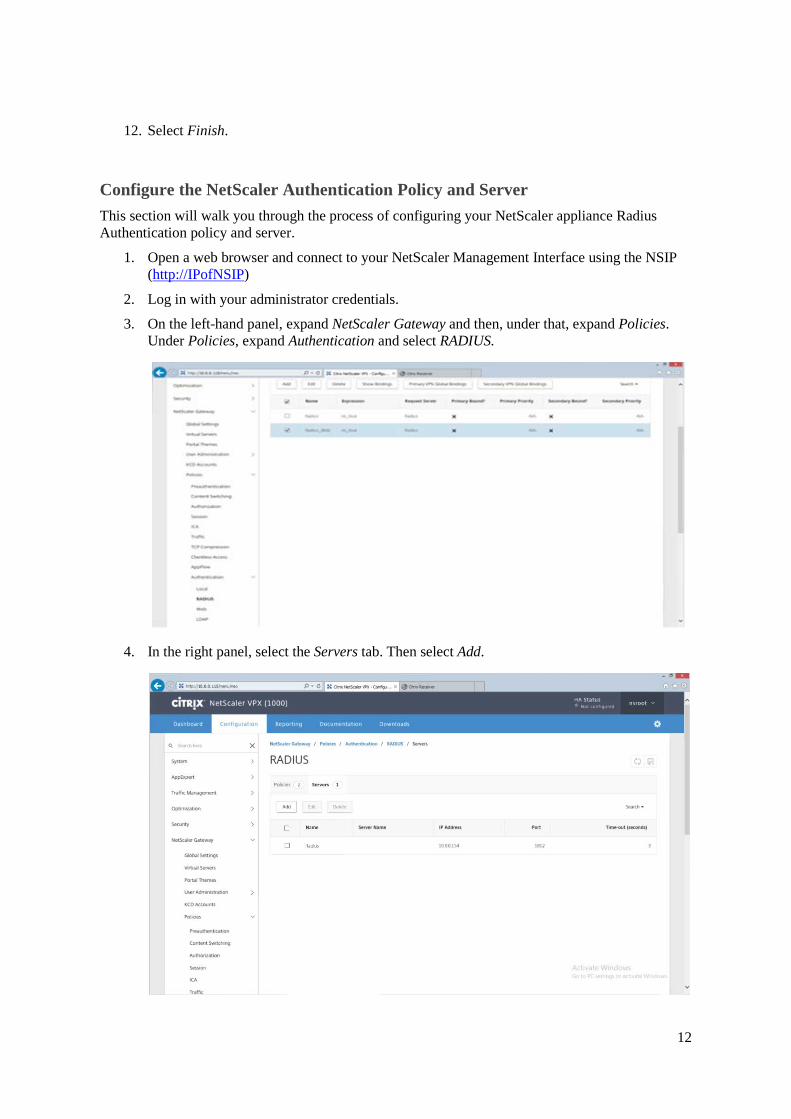
3. On the left-hand panel, expand NetScaler Gateway and then, under that, expand Policies. Under Policies, expand Authentication and select RADIUS.
4. In the right panel, select the Servers tab. Then select Add.
13
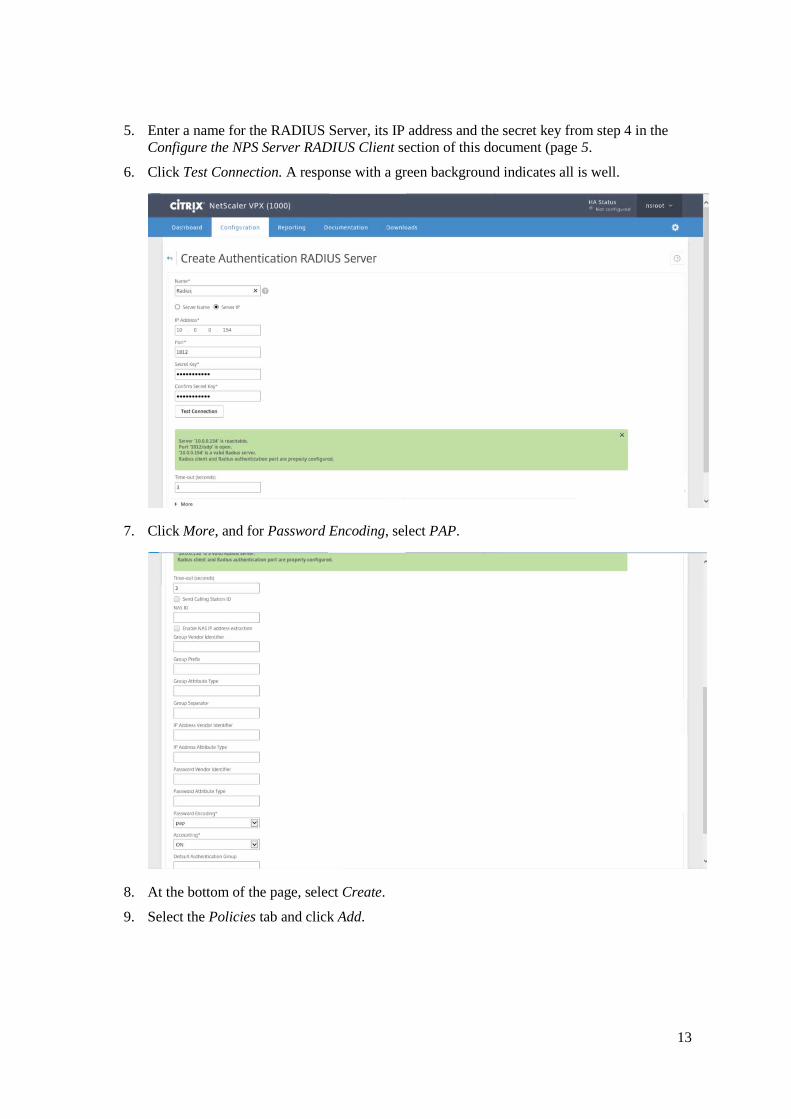
5. Enter a name for the RADIUS Server, its IP address and the secret key from step 4 in the Configure the NPS Server RADIUS Client section of this document (page 5.
6. Click Test Connection. A response with a green background indicates all is well.
7. Click More, and for Password Encoding, select PAP.
8. At the bottom of the page, select Create.
9. Select the Policies tab and click Add.
14
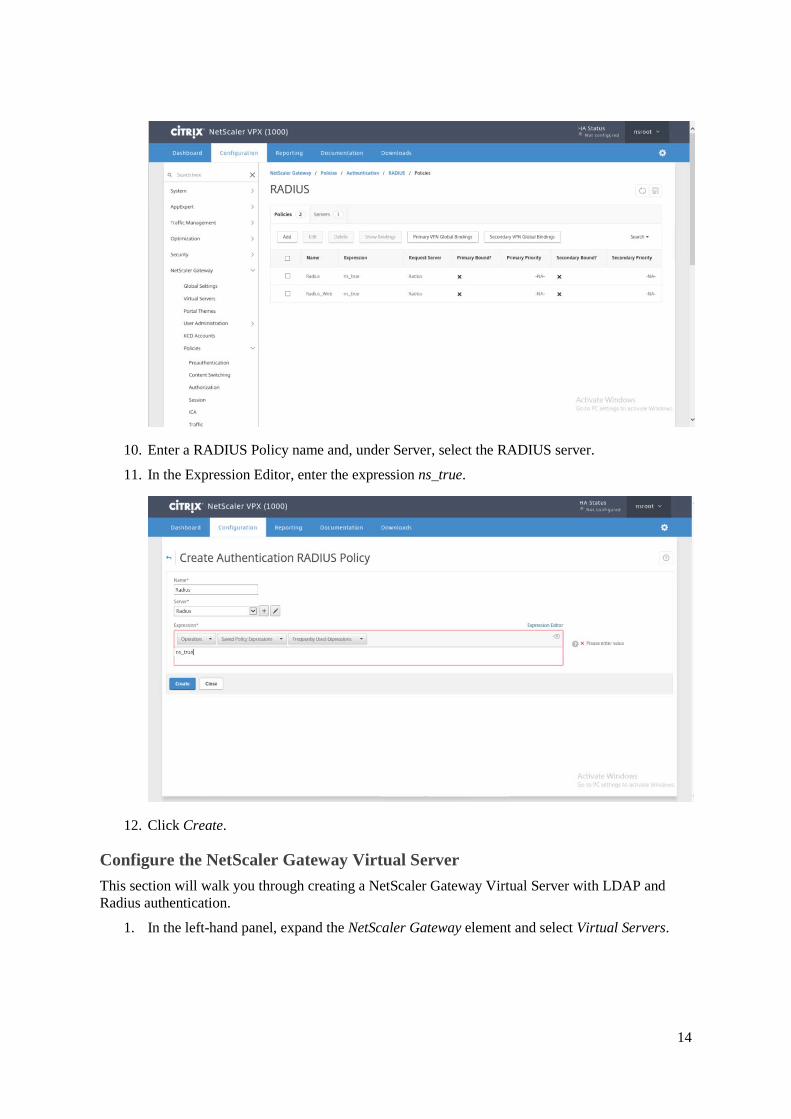
10. Enter a RADIUS Policy name and, under Server, select the RADIUS server.
11. In the Expression Editor, enter the expression ns_true.
12. Click Create.
Configure the NetScaler Gateway Virtual Server This section will walk you through creating a NetScaler Gateway Virtual Server with LDAP and Radius authentication.
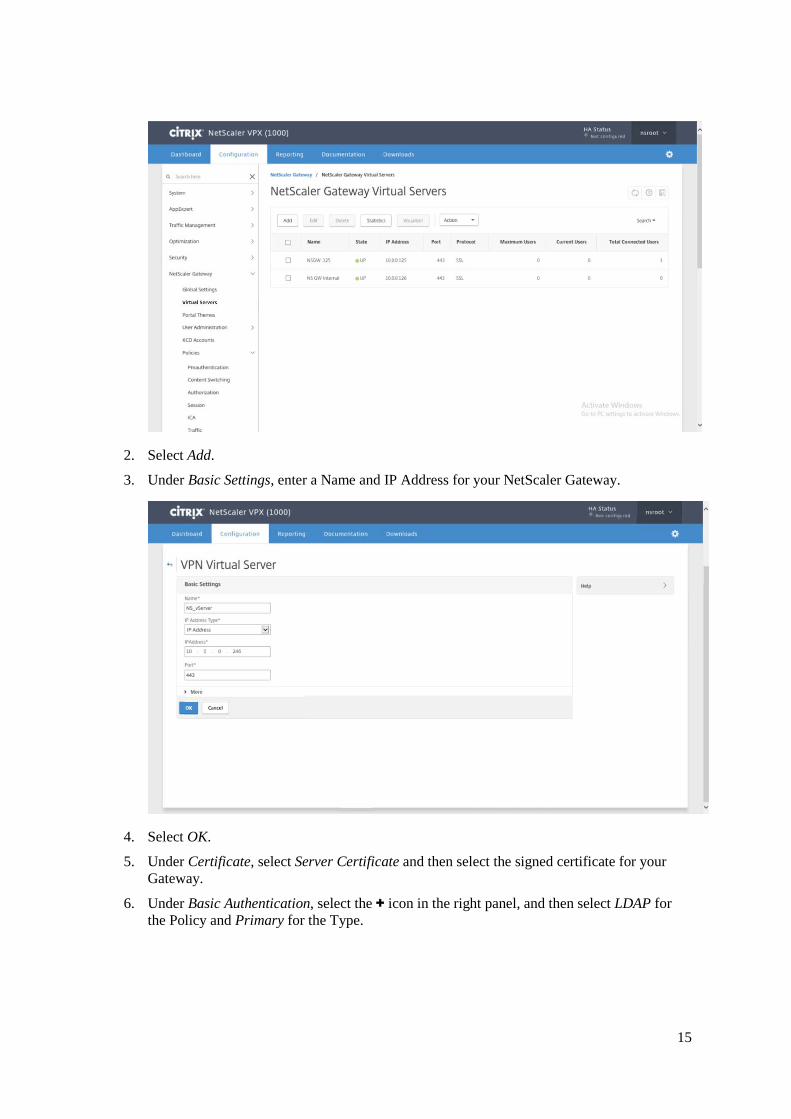
1. In the left-hand panel, expand the NetScaler Gateway element and select Virtual Servers.
15
2. Select Add.
3. Under Basic Settings, enter a Name and IP Address for your NetScaler Gateway.
4. Select OK.
5. Under Certificate, select Server Certificate and then select the signed certificate for your Gateway.
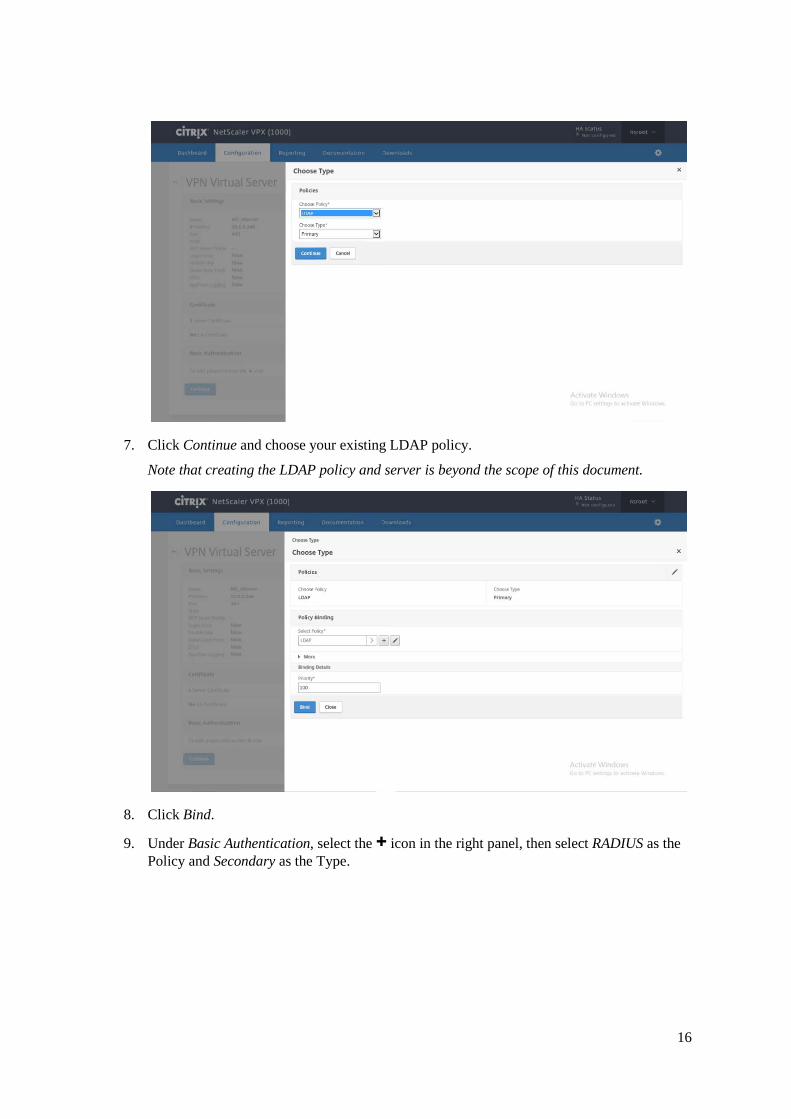
6. Under Basic Authentication, select the + icon in the right panel, and then select LDAP for the Policy and Primary for the Type.
16
7. Click Continue and choose your existing LDAP policy.
Note that creating the LDAP policy and server is beyond the scope of this document.
8. Click Bind.
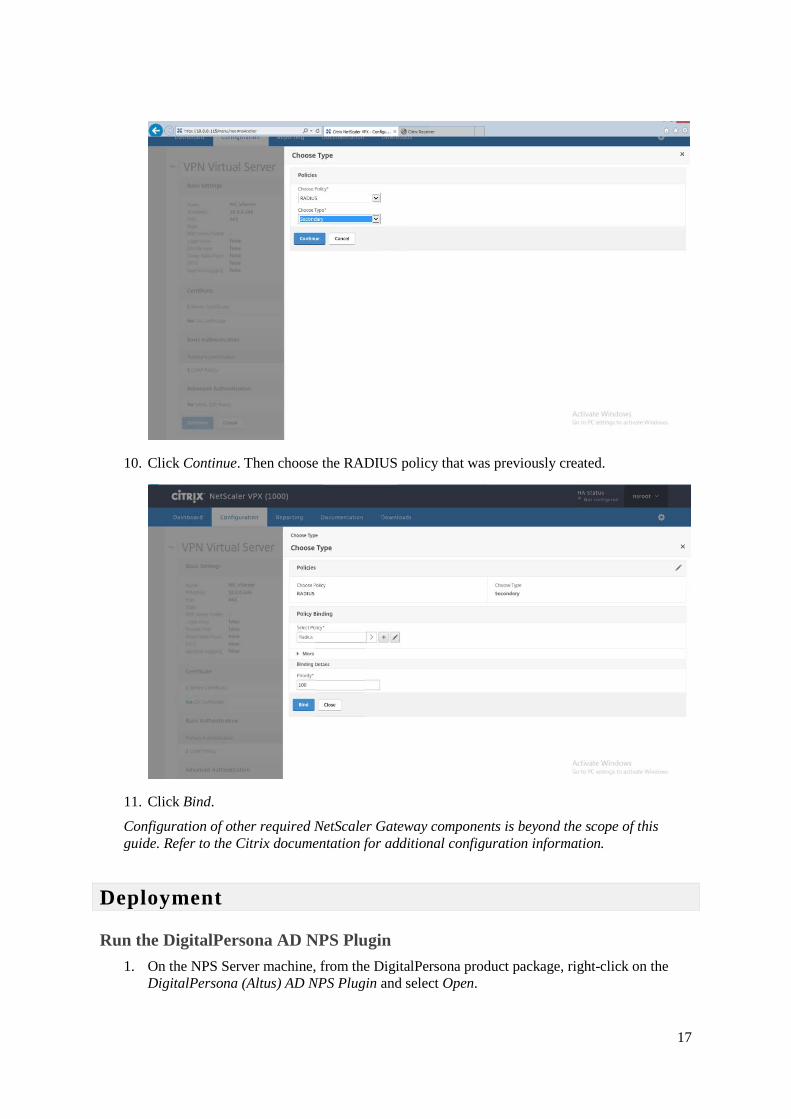
9. Under Basic Authentication, select the + icon in the right panel, then select RADIUS as the Policy and Secondary as the Type.
17
10. Click Continue. Then choose the RADIUS policy that was previously created.
11. Click Bind.
Configuration of other required NetScaler Gateway components is beyond the scope of this guide. Refer to the Citrix documentation for additional configuration information.
Deployment
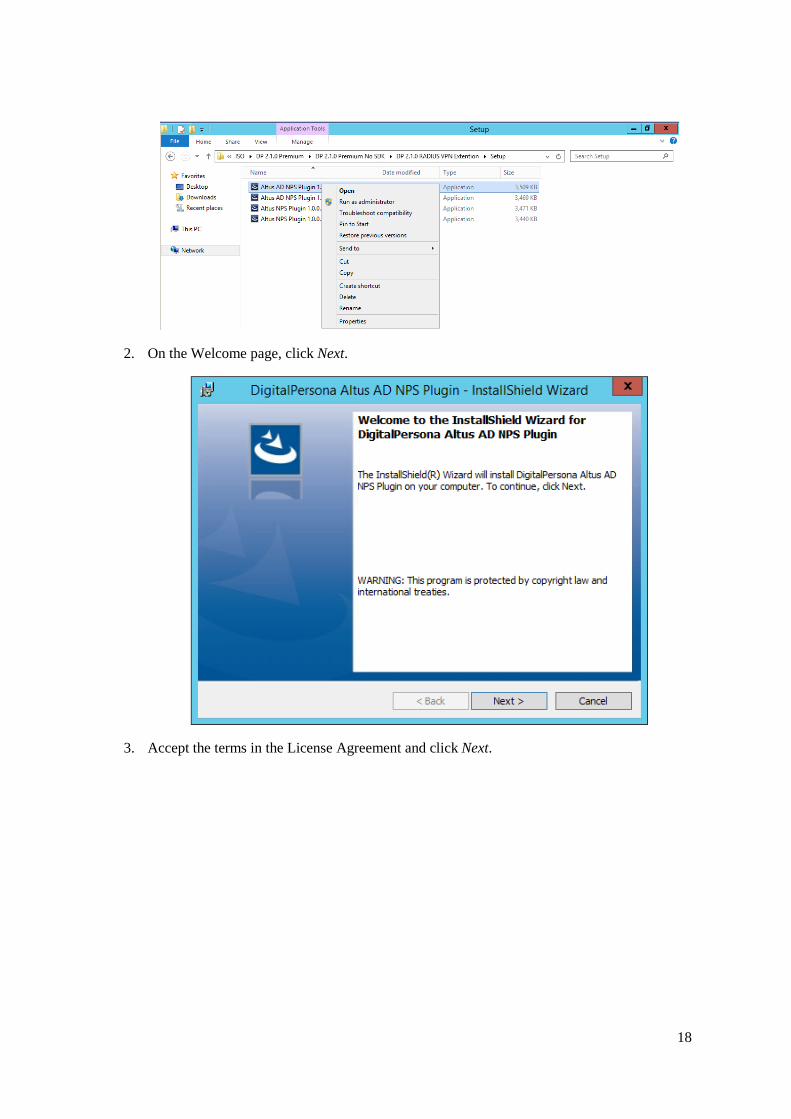
Run the DigitalPersona AD NPS Plugin 1. On the NPS Server machine, from the DigitalPersona product package, right-click on the
DigitalPersona (Altus) AD NPS Plugin and select Open.
18
2. On the Welcome page, click Next.
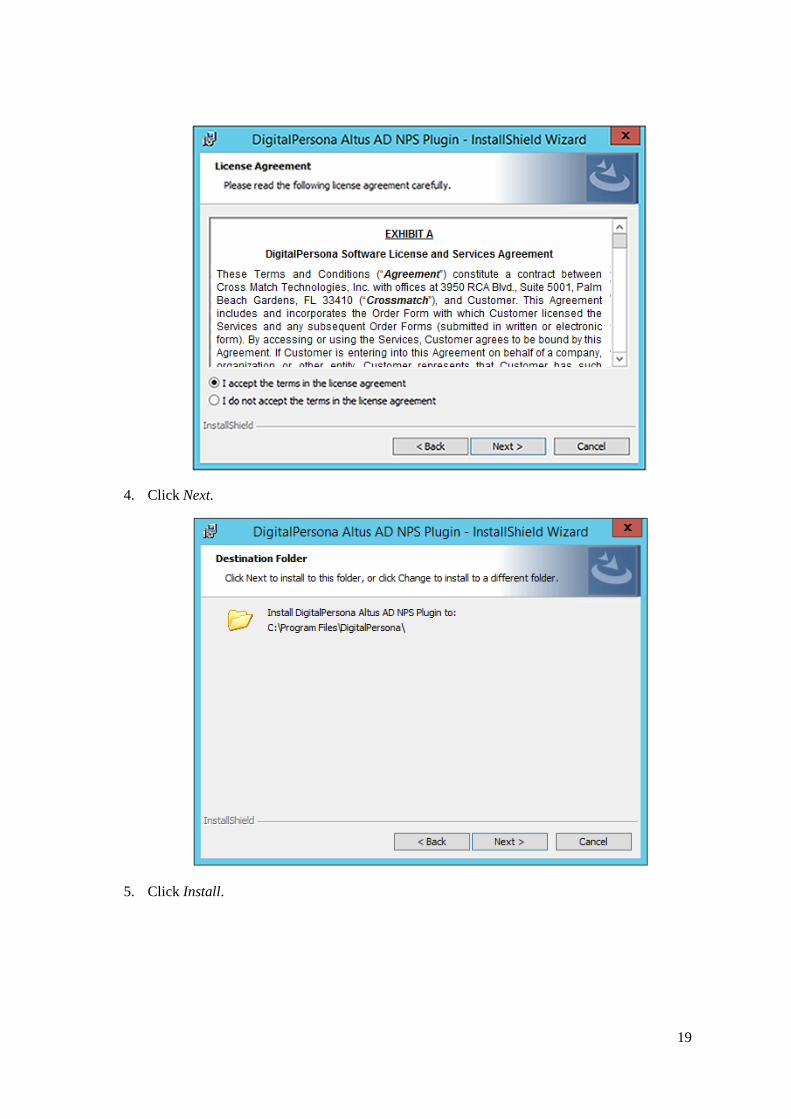
3. Accept the terms in the License Agreement and click Next.
19
4. Click Next.
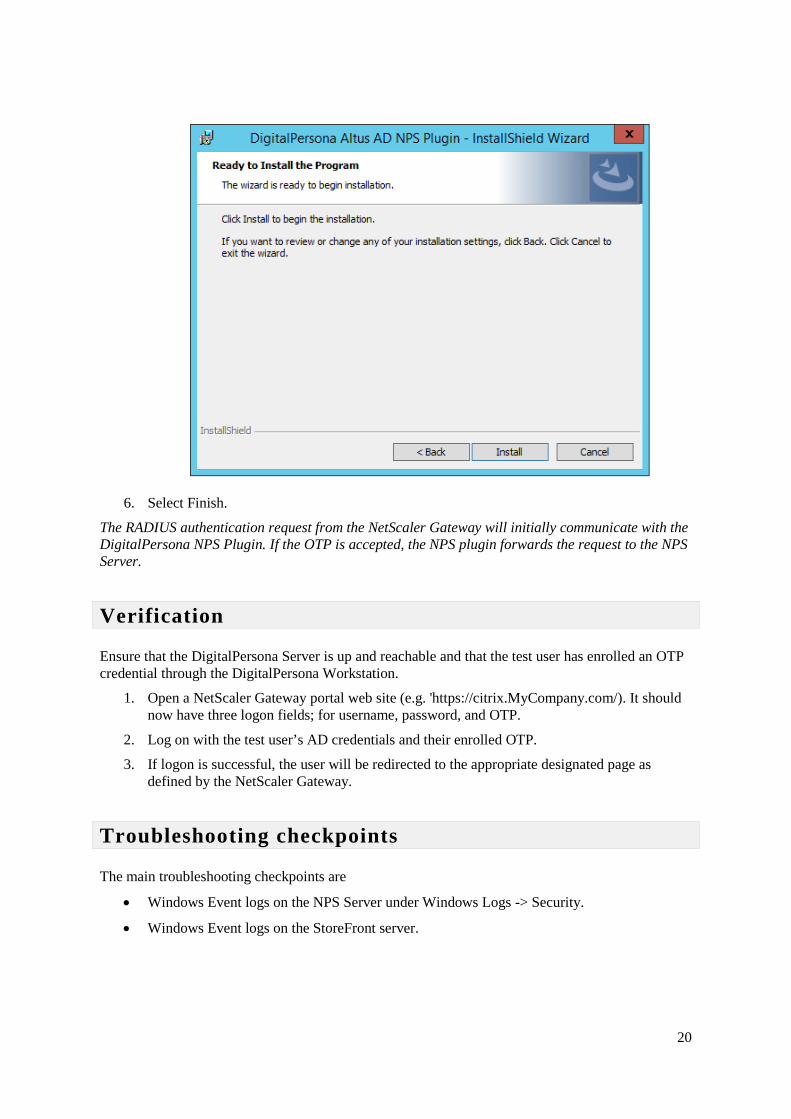
5. Click Install.
20
6. Select Finish.
The RADIUS authentication request from the NetScaler Gateway will initially communicate with the DigitalPersona NPS Plugin. If the OTP is accepted, the NPS plugin forwards the request to the NPS Server.
Verification
Ensure that the DigitalPersona Server is up and reachable and that the test user has enrolled an OTP credential through the DigitalPersona Workstation.
1. Open a NetScaler Gateway portal web site (e.g. 'https://citrix.MyCompany.com/). It should now have three logon fields; for username, password, and OTP.
2. Log on with the test user’s AD credentials and their enrolled OTP.
3. If logon is successful, the user will be redirected to the appropriate designated page as defined by the NetScaler Gateway.
Troubleshooting checkpoints
The main troubleshooting checkpoints are
• Windows Event logs on the NPS Server under Windows Logs -> Security.
• Windows Event logs on the StoreFront server.