netsuite 2019.1 release notes - terillium joins for search and advanced search electronic bank...
TRANSCRIPT
NetSuite 2019.1 Release Notes 1
ReleaseNotes_2019.1.0.pdf - Subject to Change - ReleasePreview Draft
NetSuite 2019.1 Release Notes
Release Preview DraftRevision Date: February 6, 2019PDF File Version: v4
Important: This document summarizes the changes to NetSuite between 2019.1 and theprevious release.
These release notes are subject to change every week.
The 2019.1 enhancements and changes listed in this document are not available to customers untilthey are upgraded to NetSuite 2019.1. Please check the version number at the bottom of your Homepage if you are unsure which NetSuite version you are using. The features and SuiteApps describedhere may not be available in your NetSuite account. Your access to these features and SuiteApps issubject to the terms of service in your NetSuite contract. Some features may require extra purchase.
Click links below for details about product changes:
NetSuite
NetSuite · Accounting
Adjustment-Only Secondary BooksBudgets for Secondary Accounting BooksEmployee Related Lists EnhancementsPeriod End Journal Entries EnhancementsAdvanced Revenue Management EnhancementsGL Audit Numbering EnhancementMonth End Currency Revaluation EnhancementTransaction Numbering EnhancementsCurrency Rounding in Custom GL Lines Plug-inSuiteApprovals V3.0Fixed Assets Management Enhancements
NetSuite · Administration
Opt In to Release PreviewMandatory 2FA Now Enforced for Integration Access to NetSuiteIssue Token Endpoint Extended to Accommodate Mandatory 2FA RequirementSandbox Domain DeprecationCore Administration Permissions FeaturePlan to Deprecate the Full Access RoleEnhanced Options to Configure Subsidiary Restrictions for RolesNew Employee Access PermissionCopy to Account (Beta): Copy a Custom Record from One Account to AnotherMulti-Language Translation Management (Beta)Certificate Storage for Digital SigningMutual (Two-Way) Authentication for Outbound HTTPS ConnectionsLog of Outbound HTTPS and SFTP Requests Now AvailableReset of Long-Abandoned Customer Center PasswordsAccount-Specific Domains in NetSuite

NetSuite 2019.1 Release Notes 2
ReleaseNotes_2019.1.0.pdf - Subject to Change - ReleasePreview Draft
Application Performance Management (APM) Enhancements
NetSuite · Employee Management
Time-Off Management: Accruals Based on Hours Worked for Non-Payroll CustomersMissing Weekly TimesheetsForeign Currency Expense ReportsEmployee Status and Employee Type CategoriesWorkforce Analytics EnhancementsAdvanced Employee Permissions EnhancementsTime-Off Expiry Notification ConfigurationClassification for Individual Paycheck Line ItemsAssociating Deductions and Earnings Payroll Items with Asset AccountsCorporate Card Expenses EnhancementsWeekly Timesheets ImprovementsKudos Enhancements
NetSuite · Item Record Management
Commerce Categories on the Item RecordCSV Import of Item Location ConfigurationFulfill and Receive Service Items
NetSuite · Inventory Management
Inventory Costing EnhancementsControl Tower Snapshot EnhancementsQuality Management
NetSuite · Manufacturing
Editing Legacy Bills of Material (BOMs)Decimal (non-integer) Resource Values in Work CenterBuildable Quantity Field in Saved SearchesNew Item Record Communications SubtabCSV Import for BOM and BOM RevisionsAdvanced Manufacturing
NetSuite · Order Management
Add-On Items for SuiteBillingRecurring Amount on SuiteBilling Subscription LinesInstallment BillingOff-Cycle Modify Pricing Change Orders for SuiteBillingRecurring Amount on SuiteBilling Subscription LinesSuiteBilling Joins for Search and Advanced SearchElectronic Bank Payments EnhancementsInbound Shipment ManagementElectronic Invoicing EnhancementsEnhancements to Japanese Invoicing and Localization FeaturesVeriTrans and PayU Payment Gateway Temporary Retirement
NetSuite · Projects
Resource GroupsCharge Based Billing Support for PurchasesDefault Configurations for Advanced Project Profitability

NetSuite 2019.1 Release Notes 3
ReleaseNotes_2019.1.0.pdf - Subject to Change - ReleasePreview Draft
Advanced Project Profitability ImprovementsProject Management Improvements
NetSuite · Vendors, Purchasing, and Receiving
Installment PaymentsVendor Payment Approvals
NetSuite · Taxation
Making Tax Digital Support for UK VATNew Country Tax Reports for SuiteTaxMalaysia Sales and Service Tax (SST-02) Return
NetSuite · User Interface
User Interface Enhancements to DashboardsAccount-Specific Domains Listed on Company Information Page
Commerce
Commerce · Commerce Applications
SuiteCommerce Release Notes
Commerce · Site Management Tools
Published Assets
Commerce · Commerce Merchandising
Assigning or Removing Items in a Merchandise Hierarchy With the Hierarchy ManagerCustomer Specific SuitePromotionsEnhanced Search Experience with Commerce Search Synonyms
Commerce · Commerce Platform
Ability to Preview System Email Templates for Web StoresSeparate Shopping Cart for Each Business Customer ContactImage Compression for Web Store ImagesAbility to Track Subscription Email sent to an EntityShopping Domains in System Email TemplatesFrequency of Updates to Dynamic Groups used as AudiencesOut of Stock Items in Web Store EmailSupport for Site Builder Secure Shopping DomainsCNAME Flattening is now supported in SuiteCommerceAccount-Specific Domains for External FormsCMS Page Types
SuiteCloud Platform
SuiteCloud Platform · SuiteApp Distribution
Bundle Support during Release PhasingSuiteApp Marketplace Permission Replaces SuiteBundler PermissionTranslation Collection Objects Can Be Included in BundlesNew Location for Installing SDF SuiteApps

NetSuite 2019.1 Release Notes 4
ReleaseNotes_2019.1.0.pdf - Subject to Change - ReleasePreview Draft
SuiteCloud Platform · SuiteBuilder - Customization
Address Scripting Enhancements to Support Transaction Tax CalculationsAdvanced Printing Enhancements for Additional Language SupportApplied Custom Segments Visible on the Custom Record Type Configuration PageAbility to Include Custom Record Names in Saved Search ResultsCustom Sublist Translation Field Length IncreasedUnified ID Applied to All New Custom Segments
SuiteCloud Platform · SuiteAnalytics (Dashboards, Reporting, and Search)
SuiteAnalytics Workbook Feature Now Generally AvailableNew Analytics Portlet for SuiteAnalytics WorkbookNew Multi-Series Chart for Trend Graph PortletUser Interface Enhancements to Dashboards
SuiteCloud Platform · CSV Import
Newly Supported Record Types for CSV Import
SuiteCloud Platform · SuiteFlow (Workflow Manager)
Enhancements to Release StatusNew Create Line ActionEnhancement to Set Field Mandatory ActionEnhancement to Set Field Display Label ActionTranslation Support for Workflow ActionsEnhanced Ability to Identify Workflow Actions in a Workflow Log
SuiteCloud Platform · SuiteScript
SuiteScript 2.0 – N/translation Module (Beta)SuiteScript 2.0 – Bulk Actions (Beta)SuiteScript 2.0 – Query API EnhancementsSuiteScript 2.0 – Enhancement for N/currentRecord ModuleSuiteScript 2.0 – N/format/i18n ModuleSuiteScript 2.0 – Enhancement for N/file ModuleSuiteScript 2.0 – Signing APIAddress Scripting Enhancements to Support Transaction Tax CalculationsNew SDF Installation Script TypeSuiteScript 1.0 and 2.0 - Time format is returned in a simplified version of Oracle format
SuiteCloud Platform · SuiteTalk (Web Services) Integration
Release Preview Version of the 2019.1 WSDLAraxis Merge Diff File for the 2019.1 Endpoint2019.1 SuiteTalk Schema Browser
SuiteCloud Platform · SuiteCloud IDE Plug-ins
2019.1 Plug-in for Eclipse is Not Yet Available for Download2019.1 Plug-in for WebStorm is Not Yet Available for Download
SuiteCloud Platform · SuiteCloud Development Framework
New Standard Role for DeveloperAbility to Execute Installation Scripts in a SuiteApp Project Deployment

Accounting 5
ReleaseNotes_2019.1.0.pdf - Subject to Change - ReleasePreview Draft
Installation Preferences Now Support File and Folder Locking in SDF SuiteAppsSDF Now Supports Custom Content Type Records for SuiteCommerce Site ManagementRoles in SDF Now Support RestrictionsNew Workflow Enhancements Supported in SDFSDF SDK 2019.1 is Not Yet Available for DownloadCopy to Account (Beta): Copy a Custom Record from One Account to Another
SuiteApps
SuiteApps · SuiteApps (Bundles) Released by NetSuite
Accounting SuiteAppsOrder Management SuiteAppsInventory Management SuiteAppsLocalization SuiteAppsManufacturing SuiteAppsTaxation SuiteApps
AccountingNetSuite 2019.1 includes the following enhancements to accounting features:
■ Adjustment-Only Secondary Books
■ Budgets for Secondary Accounting Books
■ Employee Related Lists Enhancements
■ Period End Journal Entries Enhancements
■ Advanced Revenue Management Enhancements
■ GL Audit Numbering Enhancement
■ Month End Currency Revaluation Enhancement
■ Transaction Numbering Enhancements
■ Currency Rounding in Custom GL Lines Plug-in
■ SuiteApprovals V3.0
■ Fixed Assets Management Enhancements
Adjustment-Only Secondary BooksNetSuite 2019.1 offers you the ability to post book-specific adjustments to a secondary, adjustment-only book at closing.
Adjustment-only books differ from standard secondary books in that they do not duplicate the datain the primary book. Instead, adjustments to data from the primary book are made in the adjustmentbook. You can display financial reports on the data from both the primary book and adjustment bookin reports and searches.
Adjustment-only books can be used to comply with different accounting standards across multiplejurisdictions. They are also useful when the only requirement is to post adjustments by book-specificjournal entries. You can create multiple adjustment books for a single base accounting book, andadjustment-only books do not count against the accounting book limit.

Accounting 6
ReleaseNotes_2019.1.0.pdf - Subject to Change - ReleasePreview Draft
Note: Adjustment-only books do not support using different base currencies in differentbooks or books with different revenue recognition rules. Use a standard secondary accountingbook setup for these cases.
To use this feature, you must use NetSuite OneWorld and have the Multi-Book Accounting featureenabled. Then, when setting up a new accounting book, check the new Adjustment Only box on theaccounting book record to make it an adjustment-only book.
When created, standard transactions post only to the primary book, and adjustments are made in theadjustment-only book using book-specific journal entries. Reports generated for the adjustment-onlybook automatically include data from the primary book.
For more information, see the help topic Adjustment-Only Books Overview.
Budgets for Secondary Accounting BooksIn NetSuite 2019.1, you can now create and report on budgets and set independent budget exchangerates for secondary books. A new list called Accounting Book has been added to the budget record toselect the book for which the budget is to be created.
With this option you can compare your secondary book data with budget values. It is particularly usefulif you create budgets in a secondary book base currency. As with budgets for primary books, you canimport budget data from CSV files.
Budgets for secondary books are included in the following budget reports:
■ Budget Income Statement
■ Budget Income Statement Detail
■ Budget vs. Actual
Secondary book budgets can be used with or without the Multiple Budget feature. In both cases,you can create secondary book budgets with global budget categories if the secondary books can beconsolidated and include the parent subsidiary.
If you do not have the Multiple Budgets feature, budgets for secondary books are treated as globalbudgets by default. With the Multiple Budgets feature enabled, you can create budgets with localbudget categories without any restrictions. Secondary budgets are also copied when you copy budgetsat Transactions > Financial > Copy Budgets.
To use this feature, you must use NetSuite OneWorld and the Multi-Book Accounting feature enabled.
For more information, see the help topic Budgets for Secondary Accounting Books Overview.
Employee Related Lists EnhancementsIn NetSuite 2019.1, you can assign a category to an employee status and an employee type. Categoriesfor employee status include prehire, actively employed, leave, and terminated. Categories for employeetype include contingent, contractor, non-worker, and permanent. For more information, see EmployeeStatus and Employee Type Categories.
Period End Journal Entries EnhancementsNetSuite 2019.1 includes the following enhancements to the Period End Journal Entries feature.

Accounting 7
ReleaseNotes_2019.1.0.pdf - Subject to Change - ReleasePreview Draft
New and Enhanced Subsidiary Preferences
One subsidiary preference for Period End Journal Entries has been changed in 2019.1 and a newpreference has been added.
■ Create Period End Journals by Segment has been enhanced and renamed to Group by TheseSegments. The enhanced preference is a multi-select list that displays all the segment typesavailable for the subsidiary. You select the classification segments for which you want to generateseparate period end journals. The multi-select list for this preference displays all the segment typesin the account that impact the general ledger.
■ When the GL Audit Numbering feature is enabled, the new Exclude Balance Sheet Closing Journalsfrom GL Numbering preference lets you skip GL numbering for balance sheet closing journals.Balance sheet closing journals are excluded from GL audit numbering when the preference box ischecked. The check box is available for editing after you have saved the subsidiary record with theCreate Balance Sheet Closing and Opening Journals preference checked and configured.
Increased Flexibility for Creating Period End Journals
Changes in the user interface and processing rules have been made to enhance period end journalcreation and deletion.
■ The Task: Create Period End Journals page now includes a Create All Journals button. When youclick Create All Journals, all period end journal processes shown on the task page are started. If youhave already successfully completed some processes for this period, those processes are skipped.
If the Require Memo on Period End Journals box is checked in the preferences for any subsidiary,an error is logged for the first process for that subsidiary. The processes for other subsidiariescontinue to run.
■ The Actions menu has been moved from the Create Journals page to the Task: Create Period EndJournals page. The Actions menu includes the Delete link that opens the Delete Period End Journalspage.
■ On the Create Period End Journals page, you can now check any box on any of the subtabs thathave journals ready to process. If you check boxes for processes that are dependent on other

Accounting 8
ReleaseNotes_2019.1.0.pdf - Subject to Change - ReleasePreview Draft
processes, the required processes run automatically, even if you have not selected them. Previouslycompleted processes are skipped.
Advanced Revenue Management EnhancementsAdvanced Revenue Management includes two enhancements in 2019.1:
■ The functions available for fair value formulas have been restricted to those that are appropriate foruse with fair value calculations.
■ A new filter has been added to the Update Revenue Arrangement and Revenue Plans page forthose who use Multi-Book Accounting with Advanced Revenue Management. When you do manualupdates, the Accounting Book filter enables you to filter your submissions by accounting book,as well as by date range. The Accounting Book filter applies to the update processes for revenueelements, revenue arrangements, and revenue recognition plans.
GL Audit Numbering EnhancementBeginning in 2019.1, you can choose whether to exclude posting transactions containing only zero-amount lines from general ledger audit numbering, including:
■ Voided transactions
■ Cancelled bills
■ Item fulfillments for zero-amount items
This can be used for companies in jurisdictions which require that all transactions be numbered foraudit purposes, regardless of value. To use this preference, you must have the GL Audit Numberingfeature enabled.
This feature adds an Exclude Zero Amount Transactions box to the GL Audit Numbering Sequenceform at Transactions > Management > GL Audit Numbering Sequences. When checked, transactionswith only zero-amount lines are excluded from the numbering sequence. When cleared, all transactionswill be included in GL audit numbering.
For more information, see the help topic Excluding Transactions with Zero Amount Lines from GL AuditNumbering.
Month End Currency Revaluation EnhancementThe Month End Currency Revaluation page now has Mark All and Unmark All buttons at the top of thelist of accounts to facilitate account selection. You can access this page from the menu at Transactions> Financial > Revalue Open Currency Balances or from the Revalue Open Foreign Currency Balancestask on the Period Close Checklist.

Accounting 9
ReleaseNotes_2019.1.0.pdf - Subject to Change - ReleasePreview Draft
Transaction Numbering EnhancementsFollowing are the 2019.1 transaction numbering enhancements:
■ Block Duplicate Document Numbers When Creating Vendor Bills, Vendor Credits, Card Charges, orCard Refunds
■ Global Search by Document Number Only
Block Duplicate Document Numbers When Creating VendorBills, Vendor Credits, Card Charges, or Card Refunds
NetSuite 2019.1 now makes it possible to block users from creating the following transaction types ifsaving the form will result in duplicate document numbers:
■ Vendor Bills
■ Vendor Credits
■ Card Charges
■ Card Refunds
Prior to 2019.1, if the Duplicate Number Warnings preference on the Items/Transactions subtab atSetup > Accounting > Preferences > Accounting Preferences (Administrator) was checked, NetSuitewarned when saving a transaction would produce a duplicate document number. With 2019.1, whenWarn and Block in the Duplicate Number Warnings list is selected, users must change the externaldocument number when a duplicate is possible.
To use this preference, an administrator can go to Setup > Accounting > Preferences > AccountingPreferences (Administrator). On the Items/Transactions subtab, select one of three options in theDuplicate Number Warnings list:
■ No Warnings – Users are not warned when the transaction they are saving will create a duplicatedocument number.
■ Warn – Users receive a message when attempting to save a transaction record with the samedocument number as another record of the same type. When the warning is displayed, a user canenter a different number before attempting to save again. Prior to 2019.1, this is how the DuplicateNumber Warnings preference worked.
■ Warn and Block - Users receive a message when attempting to save a transaction record with thesame number as another record of the same type. When the warning is displayed, the user mustclick Cancel and change the document number in the record.
Users can also set their preference for duplicate number warnings at Home > Settings > SetPreferences > Transactions > Warnings, however, this setting is overridden by the company preferenceat Setup > Accounting > Preferences > Accounting Preferences (Administrator).
For more information, see the help topics Items/Transactions Accounting Preferences and DuplicateTransaction Number Warnings.
Global Search by Document Number Only
NetSuite 2019.1 adds a preference to search only by document numbers when running globalsearches.

Accounting 10
ReleaseNotes_2019.1.0.pdf - Subject to Change - ReleasePreview Draft
Prior to 2019.1, entering a number in global search returned results for both that document numberand transaction number. With this preference, global search excludes transaction numbers from thesearch, and only searches by document numbers.
To use this preference, users with the Set Up Company role permission can go to Setup > Company> General Preferences and clear the Show Transaction Numbering Setup box. This will limit globalsearches to document numbers. This preference also hides the transaction numbering subtab at Setup> Company > Auto-Generated Numbers. To include both document and transaction numbers in globalsearches, check the Show Transaction Numbering Setup box.
For more information, see the help topic Setting General Account Preferences.
Currency Rounding in Custom GL Lines Plug-inCurrency precision in NetSuite is zero or two decimal places, depending on the currency. For example,USD amounts have two digits to the right of the decimal, and Japanese yen (JPY) have none. Previously,the custom lines rounding was performed together with standard lines, which could result in errors orrounding corrections that sometimes affected standard lines.
As of 2019.1, credit and debit amounts set by the Custom GL Lines Plug-in are now directly roundedto currency precision. This change ensures that custom and standard lines are rounded and balancedseparately. The totals of the rounded currency amounts entered on custom lines must balance, so acheck is performed when the plug-in starts to run. If the validation of the totals fails, then the plug-inrun also fails.
AdministrationNetSuite 2019.1 includes the following enhancements to Administration features:
■ Opt In to Release Preview
■ Mandatory 2FA Now Enforced for Integration Access to NetSuite
■ Issue Token Endpoint Extended to Accommodate Mandatory 2FA Requirement
■ Sandbox Domain Deprecation
■ Core Administration Permissions Feature
■ Plan to Deprecate the Full Access Role
■ Enhanced Options to Configure Subsidiary Restrictions for Roles
■ New Employee Access Permission
■ Copy to Account (Beta): Copy a Custom Record from One Account to Another
■ Multi-Language Translation Management (Beta)
■ Certificate Storage for Digital Signing
■ Mutual (Two-Way) Authentication for Outbound HTTPS Connections
■ Log of Outbound HTTPS and SFTP Requests Now Available
■ Reset of Long-Abandoned Customer Center Passwords
■ Account-Specific Domains in NetSuite
■ Application Performance Management (APM) Enhancements
Administration 11
ReleaseNotes_2019.1.0.pdf - Subject to Change - ReleasePreview Draft
Opt In to Release PreviewNetSuite 2019.1 introduces a Release Preview opt-in model. Based on 2018.2 Release Preview usage,some customers will receive a Release Preview account by default. All other customers can request aRelease Preview account using the new Release Preview page in your production account.
For details about how administrators can opt in, see the help topic Requesting a Release PreviewAccount.
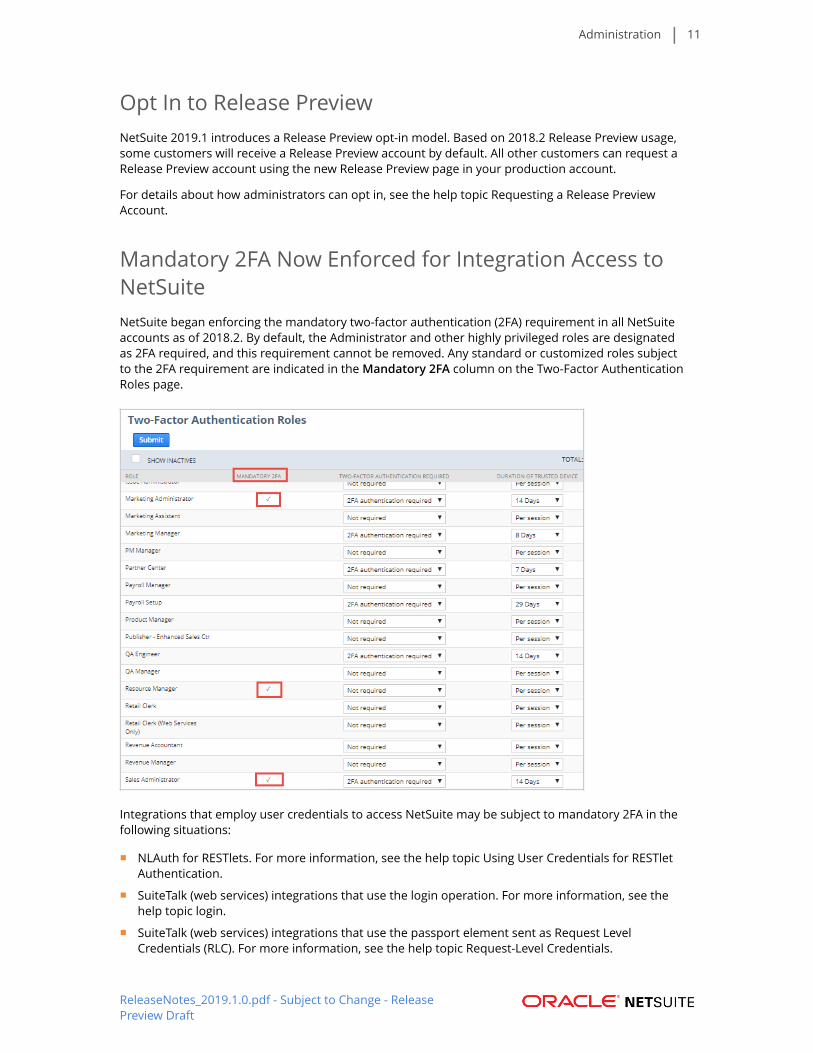
Mandatory 2FA Now Enforced for Integration Access toNetSuiteNetSuite began enforcing the mandatory two-factor authentication (2FA) requirement in all NetSuiteaccounts as of 2018.2. By default, the Administrator and other highly privileged roles are designatedas 2FA required, and this requirement cannot be removed. Any standard or customized roles subjectto the 2FA requirement are indicated in the Mandatory 2FA column on the Two-Factor AuthenticationRoles page.
Integrations that employ user credentials to access NetSuite may be subject to mandatory 2FA in thefollowing situations:
■ NLAuth for RESTlets. For more information, see the help topic Using User Credentials for RESTletAuthentication.
■ SuiteTalk (web services) integrations that use the login operation. For more information, see thehelp topic login.
■ SuiteTalk (web services) integrations that use the passport element sent as Request LevelCredentials (RLC). For more information, see the help topic Request-Level Credentials.

Administration 12
ReleaseNotes_2019.1.0.pdf - Subject to Change - ReleasePreview Draft
■ Inbound SSO integrations that use the mapSso operation. For more information, see the help topicmapSso.
For more information, see the help topic Mandatory Two-Factor Authentication (2FA) for NetSuiteAccess.
Important: Your integrations must use certain functions that require a highly privilegedrole. You should transition these integrations to use token-based authentication (TBA) ratherthan user credentials, or specify a less-privileged role that does not require 2FA. For moreinformation, see the help topic Token-based Authentication (TBA). For information about usingTBA with your integrations, see the help topic Integration Management.
Note: A series of test windows is planned for enforcing mandatory 2FA for integrations.Thesetest windows will help you to determine whether your integrations are ready for mandatory2FA.You will receive notifications concerning the dates and times the test windows will be ineffect in your accounts.
Issue Token Endpoint Extended to AccommodateMandatory 2FA RequirementFor the issue token endpoint, the NLAuth authentication header includes an optional parameter,nlauth_otp. The nlauth_otp parameter is useful if you are going to issue a token for a highly privilegedrole. You can use the nlauth_otp parameter to include a one-time password (OTP) in the NLAuthheader. The OTP is equivalent to the 2FA verification code provided by a user logging in to the NetSuiteUI. Users can generate the necessary codes using an authenticator application, such as GoogleAuthenticator, Microsoft Authenticator, or Okta Verify. The authentication application you choose mustsupport OATH TOTP, the IETF RFC 6238 standard. To review the standard, go to https://tools.ietf.org/html/rfc6238.
An authenticator app is configured for and linked to a user’s email address. The verification code mustbe synchronized to the email address used in the NLAuth header for the integration.
Note: An authenticator app must generate the verification code included in an NLAuth header.Verification codes such as those supplied by an email, an SMS message, a voice call, or from abackup code are not acceptable.
The OTP is a TOTP: a time-based one-time password.Time-based means that the verification codemust be generated at the time of need. In this case, the verification code must be generated whenthe request is sent and being authenticated. The verification code is valid for approximately a minuteduring authentication.The validity window may vary depending on the implementation.
For more information, see the help topic Mandatory 2FA, the Issue Token Endpoint, and nlauth_otp.
When calling the Issue Token endpoint, an Integration record is created and automatically installedin your account. The Require Approval during Auto-Installation of Integration preference affectswhether this new record is automatically enabled. You can manage the preference at Setup >Integration > Web Services Preferences.
If the box for the Require Approval during Auto-Installation of Integration preference is:
■ not checked (set to false) the State field on the new application is automatically set to Enabled, andall requests are permitted.
■ checked (set to true) the State field on the new integration record is set to Waiting for Approval.

Administration 13
ReleaseNotes_2019.1.0.pdf - Subject to Change - ReleasePreview Draft
In the latter case, you must manually edit the record and set the State to Enabled. Until you do, allrequests sent by that application are blocked.
Note: A series of test windows is planned for enforcing mandatory 2FA for integrationsusing the issue token endpoint.These test windows will help you to determine whether yourintegrations that are using the issue token endpoint are ready for mandatory 2FA.You willreceive notifications concerning the dates and times when the test windows will be in effect inyour accounts.
Sandbox Domain DeprecationThe sandbox domain will no longer be accessible as of February 28, 2019. You must refresh yoursandbox accounts residing on the sandbox domain (system.sandbox.netsuite.com) before this date sothat they will move to the NetSuite domain (system.netsuite.com). If you do not refresh your sandbox,you will lose access to sandbox accounts on the sandbox domain on February 28th, 2019.
For more information, see the help topic Sandbox Pre-transition Checklist.
Core Administration Permissions FeatureThe Core Administration Permissions feature has been introduced in 2019.1 to reduce the need to usethe standard administrator role. You can use the Core Administration Permissions feature to customizea role to behave like the administrator role, while also restricting access to areas of NetSuite. Forexample, you can create a role for an IT administrator and assign the access the role needs, but limitthe role’s access to sensitive employee information.
Important: When you assign the Core Administration Permissions feature to a role, the roleautomatically becomes a mandatory two-factor authentication (2FA) role. For more information,see the help topic Permissions Requiring Two-Factor Authentication (2FA).
Before you can assign Core Administration Permissions, you must enable the feature. To enable theCore Administration Permissions feature, go to Setup > Company > Setup Tasks > Enable Features. Onthe Company subtab, under Access, check the Core Administration Permissions box.
You can assign Core Administration Permissions to any role, and then configure the role to restrictaccess to areas of NetSuite. To grant access to other parts of NetSuite, assign the appropriatepermissions to the customized role. To assign Core Administration Permissions, go to Setup >Users/Roles > User Management > Manage Roles. Next to a role, click Customize. Check the CoreAdministration Permissions box. To save your changes, click Save.
For more information, see the help topic Core Administration Permissions Feature.
Plan to Deprecate the Full Access RoleAs of 2019.1, the following changes have been made to the Full Access role:
■ The Full Access role has been renamed to Full Access (deprecated).
■ You cannot assign the Full Access role to new users.
■ When users log in with the Full Access role, they see a notification indicating that the Full Access roleis being deprecated.
■ A new permission called Core Administration Permissions is available. This permission providesaccess to some of the same functions that are currently available to users with the Full Access role.You may be able to use Core Administration Permissions as an alternative to the Full Access role.

Administration 14
ReleaseNotes_2019.1.0.pdf - Subject to Change - ReleasePreview Draft
You should review the users in your account to whom the Full Access role is assigned. Determine whichusers need the Full Access role for their job functions and consider the following:
■ If any users do not need the Full Access role, assign them another role and encourage them to startusing it as soon as possible.
■ For users who do require this role, analyze their needs to determine the access granted by this rolethat is not available through a different role. Develop a strategy to configure the desired access forthese users by assigning them a different role or additional global permissions.
For more information, see the help topics Customizing or Creating NetSuite Roles and CoreAdministration Permissions Feature.
Enhanced Options to Configure Subsidiary Restrictionsfor RolesAs of 2019.1, enhancements have been added to the role record page where you configure subsidiaryrestrictions. These changes are designed to make it more intuitive to assign subsidiary restrictionsto roles. Previously, it was not clear how to restrict access to a user’s subsidiary, and granting accessto all active subsidiaries was a manual process. Also, it was not possible to control access to inactivesubsidiaries because they were not included in the list of active subsidiaries. To address these issues, anew Subsidiary Restrictions section has been added to the Role page.
The Subsidiary Restrictions section of the Role page now includes the following four options:
■ All – Grants the role access to all subsidiaries, including inactive subsidiaries.
■ Active – Grants the role access to the active subsidiaries only.
■ User Subsidiary – Restricts the role’s access to the user’s subsidiary only. When users log in with thisrole, they can access their own subsidiary only. A user’s subsidiary is set on the employee record.For more information, see the help topic Assigning a Subsidiary to an Employee. By default, thisoption is selected when you create a new role.
■ Selected – When you select this option, a list of active and inactive subsidiaries is populated. Youselect the subsidiaries to which you want to restrict the role’s access. You must select at least onesubsidiary from the list.
Also, the Allow Cross-Subsidiary Record Viewing box has been moved from the General section to theSubsidiary Records section of the Role page.
As of the 2019.1 upgrade, the default behavior of the Subsidiary Restrictions section is as follows:
■ New role – By default, Subsidiary Restrictions is set to User Subsidiary.
■ Existing role with no subsidiary restrictions selected - By default, Subsidiary Restrictions is set toUser Subsidiary.
■ Existing role with subsidiary restrictions selected – By default, Subsidiary Restrictions is set toSelected. The selected subsidiaries does not change. If you want a role to be able to access all

Administration 15
ReleaseNotes_2019.1.0.pdf - Subject to Change - ReleasePreview Draft
subsidiaries or all of the active subsidiaries, you need to change the Subsidiary Restrictions to All orActive for the roles.
The enhancements to subsidiary restrictions may cause some users to experience changes in access torecords. Administrators will be required to adjust the impacted roles to make sure that users have theaccess they require. Additionally, some scripts using custom roles may require updates.
If necessary, administrators and users with the Set Up Company permission can revert the rolebehavior of active and inactive subsidiaries to the 2018.2 state. To revert the 2019.1 subsidiaryassignment changes, on the General Preferences page, check the Enable Legacy SubsidiaryRestrictions box.
Note: The Enable Legacy Subsidiary Restrictions is a temporary preference that will beremoved in a future release. As such, you should only use the preference as a temporarysolution.
For more information about subsidiary restrictions for roles, see the help topic Customizing or CreatingNetSuite Roles.
New Employee Access PermissionAs of 2019.1, when the Advanced Employee Permissions feature is enabled, the Employee Accesspermission is available to be assigned to roles. A role with this permission can give access and assignroles to employees who fall into the restriction policy defined on their role. This permission is notautomatically assigned to a role when the feature is enabled and must be manually added. For moreinformation, see the help topic Employee Access Permission Overview.
Copy to Account (Beta): Copy a Custom Record from OneAccount to Another
Warning: Copy to Account is a beta feature. The contents of this feature are preliminary andmay be changed or discontinued without prior notice. Any change may impact the feature’soperation with the NetSuite application. Warranties and product service levels do not applyto this feature or the impact of the feature on other portions of the NetSuite application. Wemay review and monitor the performance and use of this feature. The documentation for thisfeature is also considered a beta version and is subject to revision.
Copy to Account is a new SuiteCloud platform tool for administrators. Users with limited programmingknowledge can copy a custom record, also known as a custom object, into another account.
Note: Copy to Account is powered by SuiteCloud Development Framework (SDF).
Prior to 2019.1, installing a customization to another account required SuiteScript or SDF experience.You could use SDF to import customizations into an account customization project and deploy themto your accounts. With Copy to Account, you can now deploy a custom record, also known as a customobject, with a point-and-click NetSuite interface. Copy to Account is for accounts to which you haveadministrator access, such as your production, development, and sandbox account types. It can copyone custom object (including dependencies and instances) at a time.
Copy to Account is available only to users with the account administrator role. In addition, on thetarget account to which you want to deploy, you must enable the Copy to Account feature at Setup >Company > Enable Features.

Administration 16
ReleaseNotes_2019.1.0.pdf - Subject to Change - ReleasePreview Draft
To start Copy to Account, in the source NetSuite account, click the Copy to Account (Beta) linkon a custom record that is supported by SDF. For more information about custom records thatare supported by SDF, see the help topic Customizations Supported by SuiteCloud DevelopmentFramework.
Specify the target account and give it a deployment name.
Copy to Account determines any dependencies, references, and instances related to the customrecord. A data grid is generated to help you select which dependencies to include in your copy. It showsthe required items, parent and child components, status in the target account, and other information.
Administration 17
ReleaseNotes_2019.1.0.pdf - Subject to Change - ReleasePreview Draft
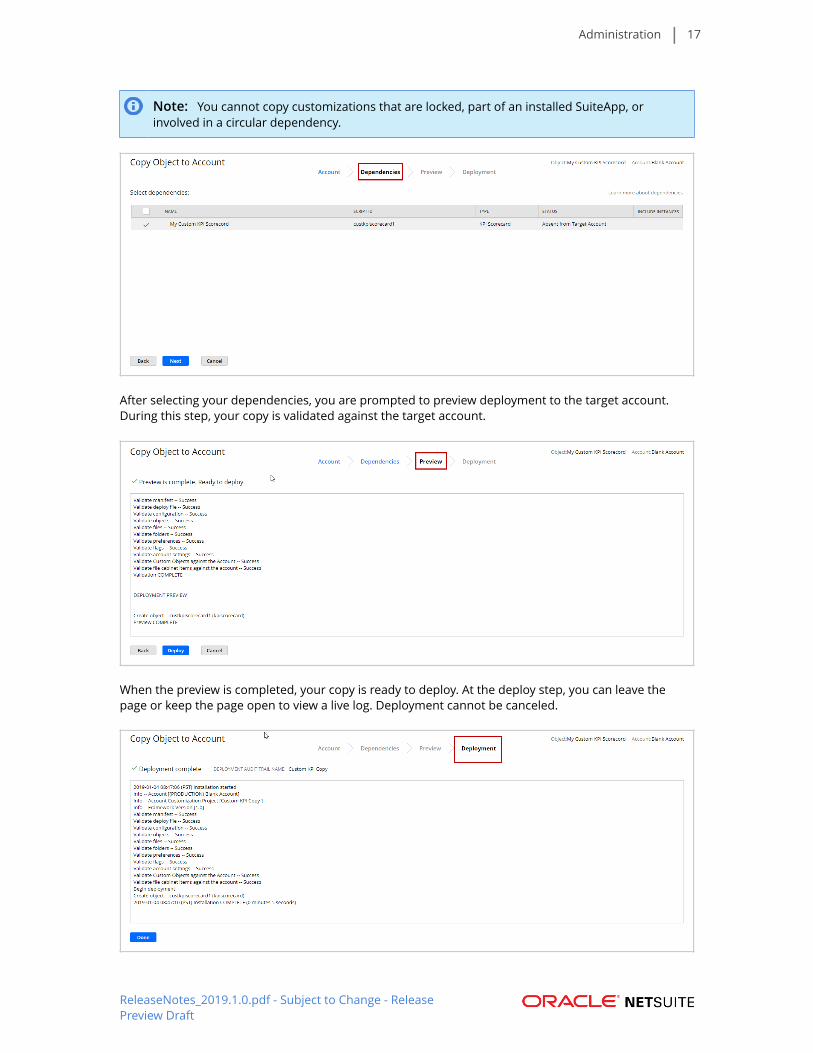
Note: You cannot copy customizations that are locked, part of an installed SuiteApp, orinvolved in a circular dependency.
After selecting your dependencies, you are prompted to preview deployment to the target account.During this step, your copy is validated against the target account.
When the preview is completed, your copy is ready to deploy. At the deploy step, you can leave thepage or keep the page open to view a live log. Deployment cannot be canceled.

Administration 18
ReleaseNotes_2019.1.0.pdf - Subject to Change - ReleasePreview Draft
From the target account, you can download a log of the deployment at Customization > SuiteCloudDevelopment > Deployment Audit Trail. The log is identified by the deployment name you specifiedfor the copy.
Important: In some cases, object support is only partial and only a subset of the fields can becopied.
Multi-Language Translation Management (Beta)
Warning: Translation Collections is a beta feature. The contents of this feature are preliminaryand may be changed or discontinued without prior notice. Any change may impact the feature’soperation with the NetSuite application. Warranties and product service levels do not applyto this feature or the impact of the feature on other portions of the NetSuite application. Wemay review and monitor the performance and use of this feature. The documentation for thisfeature is also considered a beta version and is subject to revision.
NetSuite 2019.1 provides beta support for NetSuite Translation Collections.
A Translation Collection is a customization object that stores translation terms with their translations.A single Translation Collection can contain up to 1,000 translation terms. A translation term is a key/value pair: the key being an identifier, and its value being a translatable string. Keys contain one stringthat can be translated into multiple languages. You can translate a string into any language supportedby NetSuite. For a list of languages supported by NetSuite, see the help topic Configuring MultipleLanguages.
If you are a NetSuite developer or NetSuite account administrator, you can create a collection of termsfor translation. You can export the collection of terms to a translation vendor in the form of an XLIFF orXLF translation file. After the translation vendor translates the collection of terms, you can import thetranslation file. You can use the collection of terms to translate labels and messages in the NetSuite UIand in SuiteApps.
You can include Translation Collections in NetSuite bundles. For more information, see TranslationCollection Objects Can Be Included in Bundles.
SuiteScript developers can programmatically interact with Translation Collections with the SuiteScript2.0 N/translation Module. Developers can load a collection to view the terms within a collection, or geta single string to use in a translation. For more information, see SuiteScript 2.0 – N/translation Module(Beta).
To use Translation Collections, you must have:
■ The Multi-Language feature enabled in your NetSuite account. For information, see the help topicEnable Localization Features.
■ The Manage Translation permission granted for your role. For information about settingpermissions for a role, see the help topic Set Permissions.

Administration 19
ReleaseNotes_2019.1.0.pdf - Subject to Change - ReleasePreview Draft
In the UI, you manage Translation Collections on the Manage Translations page, accessible fromCustomization > Translations > Manage Translations (Beta).
The following table lists translation management tasks and where to find information about each task:
Task See
Create Translation Collections Creating a Translation Collection
Modify Translation Collections Modifying a Translation Collection
Delete Translation Collections Deleting a Translation Collection
Export collection translation files to send to translation vendorsfor translation
Exporting a Translation Collection
Import translation files after they have been translated byvendors
Importing a Translation Collection
Manage collection strings Working with Translation Collection Strings
View information about Translation Collections About the Manage Translations Page
Manage Translations Page Collections Subtab
View information about the strings in collections Manage Translations Page Strings Subtab
View information about collections that have been imported Manage Translations Page Import Jobs Subtab
Use collections with SuiteScript Use Translation Collections with SuiteScript
Include collections in bundles Creating a Bundle with the Bundle Builder
Objects Available in Customization Bundles
Certificate Storage for Digital SigningAs of 2019.1, a new Certificates menu item is available to administrators and other users with theappropriate permission. To access the Certificates menu, go to Setup > Company > Preferences. TheDigital Certificates page offers storage for PFX and P12 files used to authenticate your identity injurisdictions where digital signing is required or supported. Developers can now sign sections of XMLdocuments generated from NetSuite, such as invoices, with the digital signature from a certificate theyhave uploaded on the Digital Certificates page. A new SuiteScript 2.0 Digital Signing API is supported forthis purpose.
You can view upcoming expiration dates of certificates and upload multiple certificates for varioussubsidiaries. You do not need to upload public certificates.
The Server SuiteScript feature must be enabled to access the Digital Certificates page. Two newpermissions are available to manage access to the Digital Certificates page. You can add the Certificate

Administration 20
ReleaseNotes_2019.1.0.pdf - Subject to Change - ReleasePreview Draft
Access permission to a role to give users access to certificates through scripting. Add the CertificateManagement permission to give access to the Digital Certificates page in the UI.
For more information on the new Digital Signing API, see SuiteScript 2.0 – Signing API.
Mutual (Two-Way) Authentication for Outbound HTTPSConnectionsIn some countries and markets, NetSuite customers must comply with government regulationsrequiring mutual, or two-way, authentication of HTTPS connections. Both parties, the server andthe client, can authenticate each other.The need for highly secure communications is typically arequirement for tax-related communications between business and governments or other institutions.Administrators and SuiteScript developers will appreciate the benefits that mutual authenticationprovides. Mutual authentication provides a more secure communication pathway that any of yourapplications can use.
Log of Outbound HTTPS and SFTP Requests NowAvailableAn Outbound Requests log is now available in NetSuite, a record of all outbound HTTPS and SFTPrequests made by an account. Previously, it was not possible to view logs for outgoing HTTPS and SFTPrequests made from your NetSuite account. The ability to view logs is important for auditing accountactivity. An audit of a log helps to identify requests that result in errors and requests that are not asefficient as they could be.
The Outbound Requests log includes the URL, the method, the result, and other useful details.SFTP requests issued from SuiteScript are also logged. A link to the script deployment that issued aparticular request is also available. By default, the log is only accessible to users with the administratorrole. Administrators can assign the Outbound Request permission to other roles in an account toprovide view access to the log to other users.
Reset of Long-Abandoned Customer Center PasswordsAs announced in the 2018.2 release notes, the passwords associated with website customers who meteither of the following criteria have been reset:
■ The website customer had not logged in within the previous three years.
■ It had been more than 90 days since the customer registered a login name and created a password,and the customer never logged in again.
The customer, lead, or prospect records associated with reset passwords still exist in your NetSuiteaccount. Only the password was reset on the records. Users whose passwords were reset can still
Administration 21
ReleaseNotes_2019.1.0.pdf - Subject to Change - ReleasePreview Draft
attempt to log in to your website. These users receive an error message that their password hasexpired, and that they need to set up a new password. For information on how to customize theexpired password error message for your website, see Customizing Website Text.
Account-Specific Domains in NetSuiteAn account-specific domain is a domain that is unique for each NetSuite account, because the accountID is a part of the domain.An account-specific domain does not change, even if your account wasmoved to a different data center. For example, if you were using account-specific domains in yourintegrations, you would not need to make changes to URLs.
For the last several releases, account-specific domains have been available in production, sandbox, andRelease Preview accounts for SuiteTalk, RESTlets, and a shop subdomain for WSDK websites.
As of 2019.1, there are several new features available related to account-specific domains. See thefollowing for more information about each of these new features:
■ Announcing Account-Specific Domains for the NetSuite UI
■ Account-Specific Domains Listed on Company Information Page
■ Account-Specific Domains for External Forms
■ Account-Specific Domains Now Available for Special Purpose NetSuite Accounts
■ Account-Specific Domains Reap the Benefits of CDNs
Announcing Account-Specific Domains for the NetSuite UI
A new feature, account-specific domains in the NetSuite UI, will be rolling out in the first half of2019.This feature will be activated on an account-by-account basis, and account administrators will benotified in advance when the feature will be activated in their accounts. The feature will first becomeavailable in sandboxes and 2019.1 Release Preview accounts. Then the feature will be activated inproduction accounts.
The new account-specific domain is in the following format:
<accountID>.app.netsuite.com
Users will still log in to NetSuite from system.netsuite.com. As soon as authentication completes, usersare automatically redirected to their account-specific domain.
Users may notice that the URL in the browser looks different and that the URL contains theaccount-specific domain. For example, if the account ID was 123456, the domain would be123456.app.netsuite.com. The URL for the home page (the dashboard), for example, would behttps://123456.app.netsuite.com/app/center/card.nl?sc=-29&whence=.
The <accountID>.app.netsuite.com domain provides a big advantage. Because the account ID is partof the domain, users can have active sessions in different accounts on the same domain, at the sametime, with the same browser. Every account (production, sandbox, Release Preview, and other specialpurpose NetSuite accounts) has a unique account ID. See the following procedure for instructions onhow to start and maintain two active sessions in different accounts.
Starting and maintaining active sessions in production and sandbox accountssimultaneously:
1. Log in to the production account.

Administration 22
ReleaseNotes_2019.1.0.pdf - Subject to Change - ReleasePreview Draft
2. Select another role in a sandbox account. Right-click and select the option to open in anothertab.
3. Click the original tab to with your production role and click Login.
Account-Specific Domains Listed on Company Information Page
Administrators and other users with adequate permissions can go to Setup > Company > CompanyInformation and click the Company URL tab to view the account-specific domains available in theNetSuite account. The URLs for account-specific domains are listed for all services where they areavailable in your account, including:
■ Customer Center Login page
■ NetSuite UI (new in this release)
■ External Forms (new in this release)
■ SuiteTalk (web services)
■ RESTlets
■ Shop (for WSDK sites)
In the following example of the new Company URLs tab, the account ID is 123456.
Account-specific domains contain the account ID as part of the domain name. The account-specificdomain name is not dependent on the data center where an account is hosted. The domain does notchange, even if an account is moved to a different data center.
Account-specific domains are returned when using dynamic discovery methods, such as the SuiteTalkmethod getDataCenterUrls, The REST roles Service, or a method in the SuiteScript 2.0 N/url Module.See the help topic url.resolveDomain(options).
It is possible to use an account-specific domain directly in an integration. However, you should usedynamic discovery methods unless there is a specific reason to use an account-specific domain in yourintegration.
Note: Account-specific domains currently are not available for SuiteAnalytics Connect (ODBC).You can find the host name you should use for your connection in the Service Host field on theSuiteAnalytics Connect Driver Download page under Your Configuration.
Account-Specific Domains for External Forms
The following items now link to account-specific domains:
■ Links in email, such as email address verification email and success notification email for bulkmerge operation

Administration 23
ReleaseNotes_2019.1.0.pdf - Subject to Change - ReleasePreview Draft
■ External forms
■ Campaign Subscription Center
For information about account-specific domains, see the help topic URLs for Account-Specific Domains.
Account-Specific Domains Now Available for Special PurposeNetSuite Accounts
Account-specific domains are now available for special purpose NetSuite accounts. In past releases,account-specific domains were available for REST, SuiteTalk (web services), and WSDK sites, but thesedomains were not available in special purpose accounts. This release extends support for account-specific domains to special purpose account types, including training, sales demo, trial, SuiteCloudDeveloper Network, Oracle University, and education accounts.
■ Account-specific domains contain the account ID as part of the domain name. The account-specificdomain name is not dependent on the data center where an account is hosted. The domain doesnot change, even if an account is moved to a different data center.
■ Account-specific domains are returned when using dynamic discovery methods, such as theSuiteTalk method getDataCenterUrls, The REST roles Service, or a method in the SuiteScript 2.0 N/url Module. For more information, see the help topic url.resolveDomain(options).
■ An account-specific domain can also be used directly in an integration.
Administrators and other users with adequate permission can go to Setup > Company > CompanyInformation and click the Company URL tab to view the account-specific domains.
Note: Account-specific domains are not currently available for SuiteAnalytics Connect(ODBC). You can find the host name to use for your connection in the Service Host field on theSuiteAnalytics Connect Driver Download page, under Your Configuration.
Account-Specific Domains Reap the Benefits of CDNs
All NetSuite users can enjoy the performance benefits provided by Content Distribution Networks, orCDNs, even when accessing the NetSuite UI using account-specific domains. CDNs cache frequentlyused content. The presence of CDNs in the global distribution network means faster page load times,especially for users located far from a data center.
Employee ManagementNetSuite 2019.1 includes the following enhancement to Employee Management features:
■ Time-Off Management: Accruals Based on Hours Worked for Non-Payroll Customers
■ Missing Weekly Timesheets
■ Foreign Currency Expense Reports
■ Employee Status and Employee Type Categories
■ Workforce Analytics Enhancements
■ Advanced Employee Permissions Enhancements
■ Time-Off Expiry Notification Configuration

Employee Management 24
ReleaseNotes_2019.1.0.pdf - Subject to Change - ReleasePreview Draft
■ Classification for Individual Paycheck Line Items
■ Associating Deductions and Earnings Payroll Items with Asset Accounts
■ Corporate Card Expenses Enhancements
■ Weekly Timesheets Improvements
■ Kudos Enhancements.
Time-Off Management: Accruals Based on Hours Workedfor Non-Payroll CustomersIf you are not a NetSuite Payroll customer, when you create time-off rules within a time-off plan, youcan now set up a time-off type to accrue based on hours worked. Previously, accruals based on hoursworked were available only to NetSuite Payroll customers.
Accruals based on hours worked require the Time Tracking feature. After supervisors review andapprove time records, accrued time off is calculated based on hours worked and the rate indicated inthe time-off rule. The accrued time off is then added to employees' time-off balances.
Important: To use accruals based on hours worked, time records must be approved bysupervisors. In Accounting Preferences, on the Time & Expenses subtab, make sure the RequireApprovals on Time Records box is checked.
Missing Weekly TimesheetsThe following new fields have been added to the Weekly Timesheet:
■ Submitted hours – Sum of pending and approved hours.
■ Rejected hours – Sum of hours with rejected status.
■ Planned hours – Sum of planned hours. This field is only available when Project Management andShow Planned Time in Time Entry preference are enabled.
■ Allocated hours – Sum of allocated hours. This field is only available when Resource Allocations isenabled.
■ Work Calendar hours – Sum of expected hours based on the employee work calendar.
All of these new fields are automatically calculated and hidden by default. You must customize yourweekly timesheet entry form to show these fields in the user interface.
You can use these fields to create saved searches and add dashboard reminders to track incompletetimesheets. Missing timesheets are now automatically created for the current week and the previousfive weeks on the first day of the week for active employees and project resources.
Foreign Currency Expense ReportsIn NetSuite 2019.1, employees can now create expense reports in currencies other than your defaultcurrency. The Multiple Currencies feature is required to create foreign currency expense reports.
You can define employee currencies for expense reports on the employee record under HumanResources > Expense Report Currencies. Only currencies available for your company can be added toan employee’s expense report currencies.

Employee Management 25
ReleaseNotes_2019.1.0.pdf - Subject to Change - ReleasePreview Draft
Currency and Exchange Rate fields have also been added to the expense report form. An employee’sdefault currency is automatically selected. You can select a different currency based on the currenciesdefined on the employee’s record. If you change the currency on a new expense report after enteringexpense lines, the existing lines are not automatically updated.
When creating a bill payment for an expense report, in the currency field, you can select a currencyfrom the employee’s list of defined currencies.
Note: Expenses can be paid through NetSuite Payroll only if the reimbursement currency is setto United States Dollars.
Employee Status and Employee Type CategoriesIn NetSuite 2019.1, you can assign a category to an employee status and an employee type. Employeestatus categories enable Human Resources to classify and track the stages of employment thatemployees move through in your company. Employee status categories include prehire, activelyemployed, leave, and terminated. Employee type categories are used to represent the legal relationshipbetween the company and the employee. Employee type categories include contingent, contractor,non-worker, and permanent.
Each category ships with pre-defined employee statuses and types. By default, these statuses andtypes are marked inactive. To assign them to employees these statuses and types will need to madeactive. When a category is assigned to a status or a type it is permanent and cannot be changed. Formore information, see the help topic Setting Up Employee Related Lists.
Workforce Analytics EnhancementsIn NetSuite 2019.1, headcount, hire, and turnover trends can be filtered by employee typecategories.Employee type categories include contingent, contractor, non-worker, and permanent.For more information about the Workforce Analytics feature, see the help topic Workforce AnalyticsOverview. For more information about employee type categories, see the help topic Setting UpEmployee Related Lists.
Advanced Employee Permissions EnhancementsIn 2019.1, when the Advanced Employee Permissions feature is enabled it now includes the EmployeeAccess permission. A role with this permission can give access and assign roles to employees who fallinto the restriction policy defined on their role. This permission is not automatically assigned to anyrole when the feature is enabled and must be manually added. For more information, see the helptopic Employee Access Permission Overview.
Time-Off Expiry Notification ConfigurationIn NetSuite 2019.1, you can now specify whether expiry notifications appear for a specific time-off typewithin a time-off plan. Previously, expiry notifications appeared for all time-off types. When you createa time-off rule, to turn on expiry notifications, you can check the Show Balance Expiry box. Notificationsappear in the Employee Center when employees have time off that expires within the current or thenext calendar month.
In existing time-off rules that were created before your account is updated to 2019.1, the Show BalanceExpiry box is checked by default. To turn off expiry notifications, clear the Show Balance Expiry box.

Employee Management 26
ReleaseNotes_2019.1.0.pdf - Subject to Change - ReleasePreview Draft
Classification for Individual Paycheck Line ItemsWith NetSuite Payroll, on individual paycheck line items, you can now classify earnings, deductions,taxes, or company contributions by department, location, or class. The Departments, Locations, orClasses features must be enabled in your NetSuite account. Previously, you could classify an entirepaycheck, but not individual line items.
To classify individual paycheck line items, you can check the Classify Individual Paycheck Lines box onpaycheck records, or you can set a payroll preference so that the box is checked by default.
Also, department, location, and class values from time entries now automatically appear as read-onlyfields on paycheck records.
Associating Deductions and Earnings Payroll Items withAsset AccountsIn NetSuite 2019.1, the Expand Account List for Payroll Items preference, which was introduced in2018.2, has additional functionality. You can now choose to associate deduction and earning payrollitems with asset accounts. When deductions are posted to asset accounts, the asset account is creditedin the general ledger. When earnings are posted to asset accounts, the asset account is debited in thegeneral ledger.
Corporate Card Expenses EnhancementsEmployees whose companies pay corporate credit card bills directly now have the ability todifferentiate personal expenses charged to a corporate card using expense categories.
To use personal corporate card expenses, check the Personal Corporate Card Expense box on expensecategory records. When employees enter expense reports, they can select any personal corporate cardexpense category to indicate that the line item is not a company expense. Only one personal expensecategory may be used on a single expense report.
Note: Corporate card expense categories can only use other asset accounts. If your companydoes not use expanded account lists, the corporate card field on expense categories is disabled.Any expense category attached to an other asset account is automatically designated acorporate card expense. To enable the expanded account list preference, go to Settings >Accounting > Preferences > Accounting Preferences > General Ledger.
Weekly Timesheets ImprovementsIn NetSuite 2019.1, the following improvements have been made to Weekly Timesheets:
■ When entering time on a weekly timesheet, you can now edit empty or open time entries in rowswith locked entries. Time entries with a status of approved or pending approval are locked forediting.
■ The Approve Time page now remembers the last view (Timesheet or Time Entry) used to approvetime. Previously, the Approve Time page always loaded in the Timesheet view..
Note: The Approve Time page has a new URL. Any bookmarks you may have to theprevious Approve Time page should be updated.
■ The Post Time page now includes a date range filter. Job Costing and Project Budgeting is requiredfor posting time.

Employee Management 27
ReleaseNotes_2019.1.0.pdf - Subject to Change - ReleasePreview Draft
■ You can now sort time entries on weekly timesheets in view mode only.
■ Weekly timesheets are now available in the Recent records menu.
Kudos EnhancementsIn NetSuite 2019.1, you can now rename Kudos in the Employee Center to better reflect your companyculture. For more information, see the help topic Kudos.
Item Record ManagementNetSuite 2019.1 includes the following enhancement to Item Record Management features:
■ Commerce Categories on the Item Record
■ CSV Import of Item Location Configuration
■ Fulfill and Receive Service Items
Commerce Categories on the Item RecordThis release brings important Commerce Category information and reporting to item records. Youcan now see a list of all the Commerce Categories an item is assigned to on the Item Record. Thisinformation is located on the Web Store subtab of the Commerce Categories subtab. The followinginformation is listed for each category:
■ Site
■ Commerce Catalog
■ Commerce Category
■ Primary Category Assignment Yes/No
■ Inactive Category Yes/No
■ Category Start Date and Time
■ Category End Date and Time
The Item Record search now also lets you include Commerce Category information in the item list andfilter the list based on Commerce Categories. You can also create item saved searches with CommerceCategory information results and criteria. Fields available for search include the following:
■ Commerce Catalog
■ Commerce Category
■ Commerce Category End Date
■ Commerce Category Is Inactive Yes/No
■ Commerce Category is Primary Yes/No
■ Commerce Category Name
■ Commerce Category Start Date
See the help topic View Commerce Category Assignments for Items for more information.

Item Record Management 28
ReleaseNotes_2019.1.0.pdf - Subject to Change - ReleasePreview Draft
CSV Import of Item Location ConfigurationPreviously, when using the Advanced Item Location Configuration feature, item location attributes hadto be set or updated individually and manually for each location. Now, item location attributes can beset or updated using the CSV import process.
Item location attributes may need to be added when a new location is added. If an item has a newvendor lead time, that update may need to be made across locations. Now, you can make thesechanges more easily by mass updates using CSV Import.
To import CSV records for Item Location Configuration, use the CSV import assistant at Setup > Import/Export > Import CSV Records.
You can still manually update individual items and location attributes, if needed.
Fulfill and Receive Service ItemsAs of NetSuite 2019.1, when you use the Projects feature, the following is now true:
■ You can create a non-inventory item regardless of whether the Can Be Fulfilled/Received box ischecked.
■ You can create a service item regardless of whether the Can Be Fulfilled/Received box is cleared.
■ You can edit non-inventory and service items and clear the Can Be Fulfilled/Received box, ifchecked.
■ You can edit service items, but you cannot check the Can Be Fulfilled/Received box, if cleared.
■ You can edit non-inventory items, and you can check the Can Be Fulfilled/Received box, if cleared.
Inventory ManagementNetSuite 2019.1 includes the following enhancements to Inventory Management features:
■ Inventory Costing Enhancements
■ Control Tower Snapshot Enhancements
■ Quality Management
Inventory Costing EnhancementsWhen using the Inventory feature, the following enhancements have been made for managinginventory costing.
■ Allow Inventory Transactions Dated Outside the Posting Period
To ensure your employees adhere to required accounting practices, set the preference that preventssetting a transaction date that is outside the correct posting period. Set the Allow InventoryTransactions Dated Outside the Posting Period preference at Setup > Accounting > AccountingPreferences.
■ Deleting a Standard Cost Item
When you use the Standard Costing feature, administrators now receive a warning message whendeleting an item that has a standard cost, either active or historical. This is done to help preserve

Inventory Management 29
ReleaseNotes_2019.1.0.pdf - Subject to Change - ReleasePreview Draft
the integrity of the data used to evaluate items' inventory costs. For example, this happens whenthe unit cost of an item is found in inventory revaluation transactions and not on item records.
Before you can delete such an item, you must first delete the standard cost on the inventoryrevaluation transaction. The warning message displays a link to the revaluation transaction thatincludes the standard cost.
Control Tower Snapshot EnhancementsNow, when you use the Supply Chain Control Tower feature, you can better analyze inventory supplyand demand and more efficiently plan future purchases and product line production.
To use the new fields below on Supply Chain Snapshots, you must use Advanced InventoryManagement with these features enabled: Inventory, Multi-Location Inventory, Supply Chain ControlTower. Inventory must be enabled for Supply Chain Control Tower.
Customize your Supply Chain Snapshot page to use the following new fields:
■ Entity – Add the Entity field to the show information about the vendor or customer in the SupplyChain Snapshot.
■ Original Transaction Date – Add the Original Transaction Date field to show the Original TransactionDate in the Supply Chain Snapshot.
■ Past Due Date – Add the Past Due Date field to show the number of days past due in the SupplyChain Snapshot.
■ Status – Add the Status field to show the transaction status in the Supply Chain Snapshot. Whenyour custom snapshot form shows the Status field, you can additionally choose to filter the list bytransaction status using the Filters field on the Available Filters subtab.
To create custom Supply Chain Snapshot forms that show these fields, click Customize View. In theField list, select the appropriate field value and click Add. Then, click Save.
ManufacturingNetSuite 2019.1 includes the following enhancements to Manufacturing features:
■ Editing Legacy Bills of Material (BOMs)
■ Decimal (non-integer) Resource Values in Work Center
■ Buildable Quantity Field in Saved Searches
■ New Item Record Communications Subtab
■ CSV Import for BOM and BOM Revisions
■ Advanced Manufacturing
Editing Legacy Bills of Material (BOMs)After you enable the Advanced BOM feature, existing Bills of Materials (BOM) are automaticallyconverted to read-only legacy BOM records. A legacy BOM is a snapshot of an assembly and itscomponents at the time of conversion.
You might want to use Advanced BOM, but do not want to copy legacy BOMs. As of NetSuite 2019.1,you can now edit legacy BOMs.

Manufacturing 30
ReleaseNotes_2019.1.0.pdf - Subject to Change - ReleasePreview Draft
After you enable legacy BOM editing, you cannot disable the Advanced BOM feature. You should testthis feature in your sandbox account before turning it on in your production account.
To learn more, see the help topic Migrating to Advanced BOM.
Decimal (non-integer) Resource Values in Work CenterManufacturing resources, such as labor and machines, often work in more than one work centerduring a shift.
NetSuite 2019.1 enables you to enter decimal amounts to better represent resource allocation tomultiple work centers, which in turn more accurately defines costs and work centers.
For example, Wolfe Manufacturing builds bicycles. Assemblers spend half the day welding steel framesand the other half of the day building bicycles. When entering labor resources, the planner can nowallocate 0.5 labor resources to the Welding Work Center and 0.5 to the Bicycle Assembly Work Center.
To learn more, see the help topic Creating Manufacturing Work Centers or Groups.
Buildable Quantity Field in Saved SearchesWith NetSuite 2019.1, you can now use the Buildable Quantity field in saved searches to improvevisibility into manufacturing analytics. For example, you can search for Work Order Quantity andBuildable Quantity (number of components available) to learn which work orders are ready to be builtor can be partially built by.
This feature is available for both Manufacturing Routing Work Orders and Conventional, or non-routing, Work Orders.
The following changes have been made to the user interface:
■ A Buildable field now appears on work orders that displays the number of components available forthe work order.
■ The Buildable field is now an available filter in a transaction search.
■ In a transaction search, the Buildable field is now available to select to appear in search results.

Manufacturing 31
ReleaseNotes_2019.1.0.pdf - Subject to Change - ReleasePreview Draft
New Item Record Communications SubtabA Communications subtab has been added to the 2019.1 Manufacturing item record. This subtabincludes Activities and Files subtabs that enable you to share knowledge interdepartmentally, reducepaper, and create daily activity reminders.
For example, you could create one activity to set up the assembly work center, a second activity thatreminds you to attach the assembly instructions, and a third to start assembling green bicycles.
Then, on the Files subtab tab, attach the Bicycle Assembly instructions.
CSV Import for BOM and BOM RevisionsNetSuite 2019.1 enables customers to use CSV import to update or upload BOM and BOM Revisions.
This enhancement helps improve and accelerate your initial data loads, mass updates, or mass loads ofBOMs or BOM Revisions.
To learn more, see the help topic Importing CSV Files with the Import Assistant.
Order ManagementNetSuite 2019.1 includes the following enhancements to order management features:
■ Add-On Items for SuiteBilling
■ Installment Billing
■ Off-Cycle Modify Pricing Change Orders for SuiteBilling
■ Recurring Amount on SuiteBilling Subscription Lines
■ SuiteBilling Joins for Search and Advanced Search

Order Management 32
ReleaseNotes_2019.1.0.pdf - Subject to Change - ReleasePreview Draft
■ Electronic Bank Payments Enhancements
■ Inbound Shipment Management
■ Electronic Invoicing Enhancements
■ Enhancements to Japanese Invoicing and Localization Features
■ VeriTrans and PayU Payment Gateway Temporary Retirement
Add-On Items for SuiteBillingThe Add-On Items feature lets you add subscription items to any subscription, either at the time-of-sale, or during the subscription term. After the Add-On Items feature is enabled, you can createcustomized subscriptions without modifying the subscription plan. You set the price for each add-onitem as you add it. The Add-On Items feature eliminates the need to create a new subscription planand subsequent subscription to add items during the subscription term. For details, refer to ManagingAdd-On Items.
InstallmentsThe installments feature allows your customers to pay for goods or services over installment terms.Installment payments can be split evenly or have different payment amounts for each installment. Thefirst installment payment includes all taxes associated with the purchase.
Installment BillingInstallments are created on the term record. Check the Installment box on the term record to createthe installment terms. When the Installment box is checked, you can only edit the fields associated withinstallments. All other fields are unavailable.
Installments are added to sales orders from the Billing subtab. When items are billed and fulfilled, aninvoice is generated. For information on creating and billing installments, see the help topic CreatingInstallments.
Installment PaymentsThe Installment Payments release note is located in the Vendors, Purchasing, and Receiving section. Toview the Installment Payments release note, see Installment Payments.
Off-Cycle Modify Pricing Change Orders for SuiteBillingThere is a new SuiteBilling change order. The off-cycle modify pricing change order is similar to theexisting modify pricing change order. The difference is that you can now modify prices off-cycle. Whenyou modify pricing off-cycle, you must process billing operations to process charges or a credit memo.For more information, see the help topic Off-Cycle Invoicing With Modify Pricing Change Orders.
Recurring Amount on SuiteBilling Subscription LinesYou can now view recurring amount data for existing subscription price interval lines and subscriptionchange order lines. On a subscription pricing line, the recurring amount is calculated from your set

Order Management 33
ReleaseNotes_2019.1.0.pdf - Subject to Change - ReleasePreview Draft
values for the Quantity, Price Plan, and Discount fields. The dynamically calculated recurring amountappears in the Pricing subtab and in modify pricing change orders. You can find a recurring amount byentering the subscription line name in a search.
SuiteBilling Joins for Search and Advanced SearchNew joins have been added to help SuiteBilling customers expand their advanced search and savedsearch capabilities. For example, Price Plan is available as a join from the Price Book record.
The following list indicates the record and new joins:
■ Price Book and Price Plan
■ Price Book and Subscription Plan
■ Subscription and Subscription Line
■ Subscription and Subscription Change Order
■ Charge and Usage
■ Price Plan and Pricing Interval
Joins have an ellipsis (...) after the name of the record. Price Plan... is an example.
The following columns have been added to the Price Plan search:
■ Start Date
■ Interval Status
■ Quantity
■ Discount
■ Charge Frequency
■ Repeat Every
For more information about searches, see the help topic Defining an Advanced Search.
ProjectsNetSuite 2019.1 includes the following enhancements to Projects features:
■ Resource Groups
■ Charge Based Billing Support for Purchases
■ Default Configurations for Advanced Project Profitability
■ Advanced Project Profitability Improvements
■ Project Management Improvements
Resource GroupsIn NetSuite 2019.1, you can now assign a group of resources to a project task at the same time.Resource groups enables you to create a group of resources to be assigned together to a single projecttask. For example, if you have a group of engineers that typically work on tasks together, you cancreate a resource group for those engineers. Then, when creating project tasks, you can assign thegroup to the task instead of each individual engineer.

Projects 34
ReleaseNotes_2019.1.0.pdf - Subject to Change - ReleasePreview Draft
When assigning groups to a project task, you can choose to divide the estimated work evenly acrossthe members of the resource group or you can assign each member the estimated work entered forthe task.
For more information, see the help topic Creating Resource Groups.
Charge Based Billing Support for PurchasesUsing Charge Based Billing, you can now create purchase charge rules to automatically generatecharges for items and services purchased for your projects from purchase orders and vendor bills.Previously, Charge Based Billing did not support purchase transactions.
Project charge rules enable you to add a markup to your generated charges. Adding a markupincreases the total charge by the selected amount. You can also define filters to limit which purchasetransactions should be included.
Default Configurations for Advanced Project ProfitabilityIn NetSuite 2019.1, you can now edit and save the standard configuration for Advanced ProjectProfitability and your default reports are automatically updated. Previously, you could not edit thestandard configuration or standard reports. Any custom configurations generated reports in the SavedReports menu.
When creating a new configuration, the standard configuration is automatically populated eliminatingthe need to create a configuration from scratch.
Advanced Project Profitability ImprovementsAdvanced Project Profitability now supports the addition of any expense category. Previously, expensecategories without an item were grouped together and could not be added individually. When definingrows for custom configurations, Expenses without Items has been replaced with UncategorizedExpenses. You can also choose to add all expense categories or individual expense categories.
You can now customize your project profitability reports to include the entity associated with thelisted transaction. For example, for time transactions showing on your profitability report, the projectresource tracking time would appear in the report.
Improvements have been made to the speed which the project profitability reports appear bypreloading and caching the last accessed data. Now, when you open a project profitability report, thelast loaded date automatically appears without requiring you to wait for the report to be calculated. Allprofitability data is automatically calculated once per day. At the bottom of the report, you can see thedate and time of the last data calculation. You can also click the Recalculate button to manually triggera recalculation.
Project Management ImprovementsIn NetSuite 2019.1, you can now use the bulk task reassignment functionality without using theResource Allocations feature. You can also pick the tasks for reassignment directly in the pop upwindow.
You can now change the customer on an existing project if the project does not have any associatedtransactions. In View mode, click the Customer Change button. You can select a new customer in thepopup window and decide to recalculate rates based on the new customer’s defined rates. When

Projects 35
ReleaseNotes_2019.1.0.pdf - Subject to Change - ReleasePreview Draft
changing a project’s customer, you can only choose customers that support the same currency andsubsidiary as the original customer.
When creating projects from sales transactions, opportunities and estimates are now available togenerate projects.
Vendors, Purchasing, and ReceivingNetSuite 2019.1 includes the following enhancements to the vendors, purchasing, and receivingfeatures:
■ Installment Payments
■ Vendor Payment Approvals
Installment PaymentsPreviously, each vendor bill identified a transaction date, a single amount, and a single due date. As ofNetSuite 2019.1, using the Installments feature, the total amount for a vendor bill can be divided intoseveral parts to be paid in installments. Each individual installment payment can have a distinct duedate.
For example, a vendor bill total is $120. This total can be broken into three installments of $40 each, asfollows:
■ Installment 1 – Total due = $40, Due Date is October 30
■ Installment 2 – Total due = $40, Due Date is November 30
■ Installment 3 – Total due = $40, Due Date is December 30
Previously, the due date was used only for calculating how much of the balance was overdue and forcalculating finance charges on late payments. Now, aging is based on the due date, not the transactiondate. Single or multiple payments can be made either before or after the due date.
The vendor bill posts to the Accounts Payable account on the payment transaction date, but, now youcan pay amounts on different due dates as determined by the defined installment terms.
Enable the Installments feature at Setup > Accounting > Accounting Preferences. Click the Accountingsubtab, check the Installments box, and then click Save.
For information about Installment billing, see Installment Billing.
Vendor Payment ApprovalsPreviously, SuiteFlow workflows could not be used for vendor bills. Now, SuiteFlow workflows canbe used for vendor bills to provide additional flexibility to review and evaluate vendor bills beforeapproving or rejecting them.
When you enable approval routing for use with vendor bills, you can create an approval rule to defineapproval preferences to prompt approval routing. You can specify a specific vendor bill approver on theemployee record and set approval limits on employee records.
TaxationNetSuite 2019.1 includes the following enhancements to taxation features:

Taxation 36
ReleaseNotes_2019.1.0.pdf - Subject to Change - ReleasePreview Draft
■ Making Tax Digital Support for UK VAT
■ New Country Tax Reports for SuiteTax
■ Malaysia Sales and Service Tax (SST-02) Return
User InterfaceNetSuite 2019.1 includes the following enhancements to the NetSuite User Interface:
■ User Interface Enhancements to Dashboards
■ Account-Specific Domains Listed on Company Information Page
User Interface Enhancements to DashboardsAs of 2019.1, a number of visual and functional enhancements have been made to NetSuitedashboards. The main changes are the following:
■ New Dashboard Look and Feel
■ New Analytics Portlet
■ Feature Enhancements to Specific Portlets
■ Enhancement to Personalize Dashboard Palette Navigation
■ Visual Enhancements to Portlets
New Dashboard Look and FeelThe design of the user interface has been refreshed to be more modern. The new design improvesreadability and enables you to have a visual overview of the data on your dashboard.

User Interface 37
ReleaseNotes_2019.1.0.pdf - Subject to Change - ReleasePreview Draft
New Analytics PortletA new Analytics Portlet enables you to view your chart-based workbook data at a glance on your homedashboard.
For more information about setting up this portlet, see New Analytics Portlet for SuiteAnalyticsWorkbook.
Feature Enhancements to Specific PortletsThe following portlets include functional enhancements as of 2019.1:
■ Trend Graph portlet
□ Add up to three KPIs – The comparison capabilities of the portlet have been improved. Priorto this version, the portlet showed the differences in data over time for one Key PerformanceIndicator (KPI). You can now compare up to three KPIs in a single chart.
For more information about adding multiple KPIs to the Trend Graph portlet, see the help topicTrend Graph Portlets.
■ Key Performance Indicators portlet
□ Quickly add KPIs – Prior to 2019.1, you could only add KPIs to the portlet using the Set Upoption. Now you have the possibility to add up to four KPIs by clicking the Add a KPI icon.

User Interface 38
ReleaseNotes_2019.1.0.pdf - Subject to Change - ReleasePreview Draft
□ Trend graphs for all KPIs displayed as headlines – Up to four KPIs can be displayed as headlinesto see the data you consider the most relevant. In previous versions, headlines appeared in boldwith a red or green arrow. Now, a trend graph is included for each KPI headline.
□ Compact format for the list of KPIs – Prior to 2019.1, a horizontal scroll bar was needed to seethe hidden data in the portlet rows. This scroll bar is no longer needed as the new condensedformat enables you to see all data at a glance.
□ Expand/collapse settings – You can now collapse and expand the list of KPIs as needed. Beforethis release, the complete list of KPIs was displayed with no expand/collapse setting available.
For more information about setting up this type of portlet, see the help topic Setting Up the KeyPerformance Indicators Portlet.
Enhancement to Personalize Dashboard Palette Navigation
The number of icons in the Personalize Dashboard palette has been significantly reduced, enabling youto quickly find the portlet that you want to add.
Prior to 2019.1, the palette displayed all of the available portlet icons. For example, if you still had threeavailable Calendar portlets, the palette would display three Calendar portlet icons.
As of 2019.1, there is a single icon for each portlet type, which includes a badge count. Therefore, thePersonalize Dashboard palette displays one icon with the number three to indicate the number ofportlets that you can add to your home dashboard.

User Interface 39
ReleaseNotes_2019.1.0.pdf - Subject to Change - ReleasePreview Draft
This new design also optimizes the palette structure by reducing the maximum number of tabs on theleft from five to three. The number of tabs on the left depends on the assigned role, permissions, anddashboard setup.By default, all users can see the following tabs:
■ Standard Content – Includes all available portlets except for the SuiteApps portlets.
■ Currently Used – Includes the portlets that are currently used on the dashboard. This tab enablesyou to remove the currently used portlets quickly.
Visual Enhancements to PortletsThe following changes align the appearance of portlets with the new look and feel of the dashboard:
■ The menu icon for portlets has changed. The three-line menu icon is now replaced by the three-dot menu icon .
■ Prior to NetSuite 2019.1, titles were duplicated in both the portlet and the chart header. The title isnow displayed in the portlet header only.
■ The semicircular meter of the Key Performance Indicator (KPI) Meter portlet has been enhancedwith light colors and a refined design.
■ The background color of portlet headers has been removed.
■ The portlet borders have been rounded.
Commerce ApplicationsThe latest version of SuiteCommerce, 2019.1, includes the following enhancements:
■ SCA Release Naming Convention Changes
■ Two-Factor Authentication Support
■ Theme and Extension Activation Improvements
■ Theme and Extension Version Management
■ Google Tag Manager Editor
■ Site Search Bar Enhancements
■ SuiteCommerce Configuration Changes
■ SMT Category Visibility Dates Support
■ SuiteCommerce InStore Extensions Support
■ Legacy Tab Added to SuiteCommerce Configuration Record
■ Footer Support
■ Newsletter Support
■ Node.js Requirement Change
■ Extensibility API Updates
Complete release notes are available here: 2018.2 Release of SuiteCommerce.
SuiteCommerce ExtensionsSuiteCommerce Extensions provide additional functionalities to your SuiteCommerce web store.
Commerce Applications 40
ReleaseNotes_2019.1.0.pdf - Subject to Change - ReleasePreview Draft
Important: SuiteCommerce Extensions are only available if they are provisioned and set up inyour account. For more information, see the help topic NetSuite SuiteCommerce Extensions.
Complete release notes are found here: Extensions Release Notes.
Site Management ToolsThis version of SuiteCommerce Site Management Tools includes the following enhancement:
Published AssetsThe Published Assets view gives you more ways to manage your existing content. This new view showsall your currently published assets and lets you edit multiple pieces of content and pages at one time.The Published Assets view is available in Overview mode. Your content is grouped together by the URL.For example, all content items listed on the /about-us page are grouped together and content items onthe /back-to-school page is grouped together.
You can filter the view of your assets the following ways:
■ Visibility – This lets you filter for content that is currently visible or content with a future start date.
■ Content Type – This lets you filter your content by type. So you can look at just HTML, Image, Text,Page, or other types of content.
■ Location – This lets you filter by the URL of your content.
Click Edit Tags to make changes to your tags and save them. Click Edit Visibility to make changes toyour visibility dates and save them. Similar to most other content on your site, you must publish thechanges before the edits are applied to your content.
See the help topic Published Assets.
Commerce MerchandisingNetSuite 2019.1 includes the following enhancements to commerce merchandising features:
■ Assigning or Removing Items in a Merchandise Hierarchy With the Hierarchy Manager
■ Customer Specific SuitePromotions
■ Enhanced Search Experience with Commerce Search Synonyms
Assigning or Removing Items in a Merchandise HierarchyWith the Hierarchy ManagerPrior to NetSuite 19.1, users were only able to assign or remove items in a merchandise hierarchy fromthe item record or via CSV import. This feature enhances the Hierarchy Manager interface allowingusers to assign or remove items to a hierarchy node directly from the Hierarchy Manager.
For more information, see the help topic Assigning Items to a Hierarchy Node.

Commerce Merchandising 41
ReleaseNotes_2019.1.0.pdf - Subject to Change - ReleasePreview Draft
Customer Specific SuitePromotionsPrior to NetSuite 2019.1, you could create promotions targeted at specific customer categories.Customer Specific Promotions now lets you create a promotion destined for one or more customers, ora customer group.
Customer groups can be either static or dynamic. For dynamic customer groups, to optimize theperformance when applying the promotion to transactions, you can choose to use a cached version ofthe results, or you can run the dynamic customer group every time the promotion is applied.
For more information, see the help topic Setting Customer Eligibility on SuitePromotions.
Enhanced Search Experience with Commerce SearchSynonymsThe Search Synonyms feature is now available to all SuiteCommerce and SuiteCommerce Advancedcustomers. You can define synonyms in NetSuite to ensure that when a shopper searches for a specificword, the search results also include synonyms for that word.
For example, you define trousers and pants as synonyms. Any shopper searching for the term pantsnow gets search results for pants and trousers.
For more information, see the help topic Search Synonyms.
Commerce PlatformCommerce Platform includes platform capabilities that you can use to build and deploy a moreinteractive and engaging shopping experience for customers. NetSuite 2019.1 includes the followingenhancements:
■ Ability to Preview System Email Templates for Web Stores
■ Separate Shopping Cart for Each Business Customer Contact
■ Image Compression for Web Store Images
■ Ability to Track Subscription Email sent to an Entity
■ Shopping Domains in System Email Templates
■ Frequency of Updates to Dynamic Groups used as Audiences
■ Out of Stock Items in Web Store Email
■ Support for Site Builder Secure Shopping Domains
■ CNAME Flattening is now supported in SuiteCommerce
■ Application Publisher Name when using SDF for SSP Applications
■ CMS Page Types
Ability to Preview System Email Templates for Web StoresIn 2018.2, if you used system email templates for web store email, the only way to identify how theemail looked to your web store customers was to sign up as a web store customer and trigger eachemail to be sent to your email address. To eliminate the need for this lengthy and tedious process,2019.1 introduces the ability to preview any web store email that uses a System Email Template.

Commerce Platform 42
ReleaseNotes_2019.1.0.pdf - Subject to Change - ReleasePreview Draft
Email can be previewed quickly and easily within NetSuite and you can switch between email sent bydifferent websites.
Email can be previewed from the Email tab of the Web Site record. If a system email template isselected in the Select a System Email Template menu, clicking the Preview icon next to it opens theemail preview selection window. In this window, you can choose the details of the email you want tosee in the email preview. For all email types, you can choose the website from which the email is sentand the language of the email. The other options available depend on the email type. For example,you can select a sales order number to include in an order confirmation email preview. After you haveselected all the options, you can preview the email.
For instructions on previewing email from the Web Site record, see the help topic Preview System EmailTemplates.
Note: Email preview is available only for system email templates for web stores. It is notavailable for web store email templates or customized text groups because these features willbe phased out soon.
Separate Shopping Cart for Each Business CustomerContactWebsite administrators can now choose between two shopping cart options for their businesscustomers:
■ Separate shopping carts for each customer contact – this option, available from 2019.1, enableseach contact defined for a business customer to shop and check out using their own shopping cart.One contact’s cart is not visible to any other customer contact. This prevents situations where onecontact removes items that another contact has added, or where one contact checks out an orderbefore other contacts have added all the items they need.
■ Shared shopping cart – this option provides each business customer with a single shopping cartthat is shared by all contacts who place orders for that customer. This pre-2019.1 option remainsavailable in 2019.1.
The shopping cart option that is most appropriate depends upon the type of web store. For example, ifa web store caters to large corporations that have many contacts placing orders, separate carts enablecontacts to order the items they need without affecting each others orders. Shared carts may be moreappropriate for other situations, such as small business customers where two or three contacts worktogether to place orders.
Website administrators can choose which shopping cart option (shared or separate) to use for eachwebsite.
Until 2018.2, order-related email were sent only to the contact who placed the order. In 2019.1, if theseparate cart option is selected, a new email preference is available, which sends a copy of all order-related email to the main customer email address. This gives business customers greater visibility intoorders placed by their contacts. Even if this email preference is not selected, business customers caneasily identify who placed a sales order by checking the Relationships tab of the sales order form. Theresponsible contact is listed there with the new Order Creator role.
For more information, see the help topic Shopping Cart Options for Business Customers.
Image Compression for Web Store ImagesWebsite administrators can use the new image compression feature to reduce the file size of imagesused in SuiteCommerce. Compressed images load faster resulting in better web site performance

Commerce Platform 43
ReleaseNotes_2019.1.0.pdf - Subject to Change - ReleasePreview Draft
and improved shopper experience. The higher the compression level, the smaller the file size, andthe quicker it is to load. Higher compression levels also lower the quality of the image. However, thereduction in quality typically is unnoticeable. The available levels of compressed image quality inSuiteCommerce are:
■ Very High (minimum compression)
■ Optimum (recommended)
■ Standard
■ Low (maximum compression)
If image compression settings have been defined for an image, a compressed copy of the image iscreated the first time it is accessed. The original image is not affected. The compressed copy of theimage is cached, either internally or on the CDN, if CDN is enabled for the website.
Image compression settings can be defined at the website level and apply to all images displayed onwebsite domains. Compression settings can also be defined in the File Cabinet for any subfolder of theWeb Site Hosting Files folder. Defining compression settings at the folder level, means that images inthe folder are compressed regardless of where they are accessed from. For example, images used inSCIS are compressed if they are stored in a folder which has image compression settings defined.
Image compression settings are applied only to images that are:
■ JPEG or PNG format
■ Between 500KB and 5 MB
■ Stored in the NetSuite file cabinet (images stored outside of NetSuite and linked to from the website are not compressed)
■ Not already resized. Resized images are automatically compressed using the ‘Optimum’ imagecompression setting regardless of the setting chosen at the site or folder level. See the help topicSetting Up Image Resizing for SuiteCommerce for information about resizing images.
For more information about image compression settings and how to define them, see the help topicSetting up Image Compression for SuiteCommerce.
Ability to Track Subscription Email sent to an EntityThe existing Subscription Email feature enables you to send email to customers inviting them tosubscribe to marketing email or confirm their existing subscription preferences. The new SubscriptionMessage History subtab lists all subscription messages that have been sent to an entity in the past. Ifyou review the information on this subtab before sending opt-in invitation or opt-in confirmation email,you can avoid spamming the entity with repeated or frequent email. The information can also help youto adhere to any local regulations that restrict the quantity of unsolicited email sent to entities.

Commerce Platform 44
ReleaseNotes_2019.1.0.pdf - Subject to Change - ReleasePreview Draft
The Subscription Message History subtab is located under the Marketing tab on all entity records.For each opt-in email sent to an entity, the subtab lists the type of subscription email (invitation orconfirmation), date and time it was sent, name of the person who sent it, recipient name, recipientemail address, and email template used. For more information, see the help topic Viewing List ofSubscription Messages Sent to a Recipient.
Note: Subscription message history is available starting from June 20, 2018.
Shopping Domains in System Email TemplatesSystem email templates can now reliably identify the shopping domain on which an order was placedeven if the domain is not marked as the primary domain. The domain name is available in the syntheticfield domain, which is now included in the default system email templates for web stores. See the helptopic System Email Templates for Web Stores for more information about default email templates.
You can also include the domain field in custom scriptable templates. Templates for web store emailin the Order and Digital Delivery categories would benefit from having the domain included. See thehelp topic Synthetic Fields for Scriptable Templates for more information on creating custom scriptabletemplates.
Frequency of Updates to Dynamic Groups used asAudiencesIn some cases, dynamic groups are used by NetSuite to determine whether or not a particular entitycan access a specific asset. For example, you can restrict a folder in the File Cabinet to a dynamicgroup. You can also publish a tab or category to a dynamic group using the Audience subtab of the tabor category record. The audience that can see such a folder, tab, or category is updated whenever thefolder, tab, or category record is saved.
Until 2018.2, the audience that could see the folder, tab, or category was also updated every 24 hours.From 2019.1, the audience that can see the folder, tab, or category is updated approximately 12 hoursfrom the time it was last updated. Therefore, the list of people who have access to the folder, tab, orcategory is updated:
■ whenever the dynamic group record is saved, and
■ 12 hours after the dynamic group record was last updated.
Out of Stock Items in Web Store EmailThe new itemAvailabilities synthetic field returns the number of items available for sale, takinginto consideration items in warehouses minus items already committed to other orders. You canuse this field in system email templates to calculate whether or not an item is out of stock. The exactcalculation to obtain this information depends on how you have set up the ordering workflow inNetSuite. You can use the result of the calculation in the template to display whether the item is out ofstock or not. For more information about the itemAvailabilities synthetic field, see the help topicRecords and Fields Available in Website System Email Templates.
Support for Site Builder Secure Shopping DomainsIf you have any of the following releases of Site Builder, you can use SSL certificates to secure theshopping portion of your Site Builder web store. See the help topic Secure Web Store for details.
Commerce Platform 45
ReleaseNotes_2019.1.0.pdf - Subject to Change - ReleasePreview Draft
■ Site Builder (without Extensions)
■ Site Builder Extensions or Site Builder Extensions Premium (Elbrus)
■ Site Builder Extensions or Site Builder Extensions Premium (Kilimanjaro)
If you have a different release of Site Builder, secure shopping domains may be available with a patch.
CNAME Flattening is now supported in SuiteCommerceCNAME Flattening is a feature specific to DNS providers, which when enabled, lets you use adynamically distributed A record for your root domain. With CNAME Flattening, your website can reapthe benefits that a CDN provides while you use your root domain to host several services.
From 2019.1, you can safely use a dynamic A record for your root domain in SuiteCommerce, asopposed to a static A record that points to a fixed IP address. For more information, see the help topicWebsite Domains and Email Hosting.
Note: CNAME Flattening is a feature specific to DNS providers. Therefore, you should choose aDNS provider that offers this feature and set it up for your domain.
Application Publisher Name when using SDF for SSPApplicationsIf you use SuiteCloud Development Framework (SDF) to develop SSP applications, you must use theApplication ID as the Application Publisher name. For information about Application IDs, see the helptopics SuiteApp Application ID and for information on Application Publishers, see the help topic TheURL Root and its Components.
CMS Page TypesThe CMS Page Type record lets SMT extension developers create page types that can be used by theextension. The page type defines a set of attributes specific to that type. These attributes include thefollowing:
■ Base URL Path – The base URL path lets you customize the URL for all pages of that type. Forexample, if you a have a page type of blog and a base URL path of blog, all blog pages are accessedby mysite.com/blog/[page url].
■ Custom Record Type – This a group of settings and attributes you can set for each page type.
■ Active or Inactive – If the page type is inactive, existing pages of that type still display, but youcannot create new pages of that type.
■ CMS Creatable – If set to yes, you can create instances of this page type in SMT. If set to no, thepage type is hidden in SMT.
CMS Page Type records are defined in NetSuite at Lists > Web Site > CMS Page Type. The CMS PageType is dependent on the 19.1 release of SuiteCommerce.
See the help topic CMS Page Types.
SuiteApp Distribution 46
ReleaseNotes_2019.1.0.pdf - Subject to Change - ReleasePreview Draft
SuiteApp DistributionSuiteApp distribution includes SuiteBundler and SuiteApp Listing capabilities that you can use todistribute customizations to accounts. NetSuite 2019.1 includes the following changes:
■ Bundle Support during Release Phasing
■ SuiteApp Marketplace Permission Replaces SuiteBundler Permission
■ Translation Collection Objects Can Be Included in Bundles
■ New Location for Installing SDF SuiteApps
Bundle Support during Release PhasingBundle support during phasing of 2019.1 is consistent with the support provided during previousreleases. During phasing of 2019.1, some accounts continue to use 2018.2 at the time that otheraccounts are upgraded to 2019.1. Therefore, you may be using a version different from some of theaccounts where your bundles are installed.
Review the description below for a reminder of how bundles from different versions are handledduring release phasing.
■ Bundles developed with 2018.2 can be installed into accounts that are already using 2019.1.
■ Bundles developed with 2019.1 can be installed into accounts that are still using 2018.2, but notethe following limitations:
□ When a user in a 2018.2 account installs a bundle from a 2019.1 account, the bundle installationstops if there are object types in the bundle that are not supported in 2018.2.
□ A bundle with a SuiteScript that uses a new API available only in 2019.1 can be installed into a2018.2 account, but the script may not function correctly because 2018.2 does not support theAPI.
SuiteApp Marketplace Permission Replaces SuiteBundlerPermissionAs of 2019.1, the new SuiteApp Marketplace permission replaces the existing SuiteBundler permission.The SuiteApp Marketplace permission includes all of the previous SuiteBundler permission capabilities,and adds:
■ Access to the SuiteApp Listing page in NetSuite
■ The ability to install SDF SuiteApps from the SuiteApp Listing page
■ The ability to uninstall SuiteApps from the Installed SuiteApps page
■ The ability to view the Deployment Audit Trail page
For more information, see the following:
■ To use the SuiteApp Marketplace permission, see the help topic Permissions Documentation.
■ To learn about the SuiteApp Listing page, see New Location for Installing SDF SuiteApps andSuiteApp Listings in NetSuite.
■ To install SDF SuiteApps from the SuiteApp Listing page, see the help topic SuiteApp Installation.

SuiteApp Distribution 47
ReleaseNotes_2019.1.0.pdf - Subject to Change - ReleasePreview Draft
Translation Collection Objects Can Be Included in Bundles
Warning: The Translation Collections is a beta feature. The contents of this feature arepreliminary and may be changed or discontinued without prior notice. Any change may impactthe feature’s operation with the NetSuite application. Warranties and product service levelsdo not apply to this feature or the impact of the feature on other portions of the NetSuiteapplication. We may review and monitor the performance and use of this feature. Thedocumentation for this feature is also considered a beta version and is subject to revision.
As of 2019.1, Translation Collection objects can be included in bundles using the Bundle Builder.
Translation Collections are custom objects comprised of translated terms. The Translations Collectionobject includes terms and their translations in the specified locale. For more information aboutTranslation Collections, see the help topics Translation Collection Overview and Creating a TranslationCollection.
You can select Translation Collection objects in the Bundle Builder from the Select Objects tab, underthe Translation Collections in the Object Types list. For more information about including objects inbundles, see the help topic Creating a Bundle with the Bundle Builder.
The Multi-Language feature must be enabled in the source account, to support the bundling ofTranslation Collection objects. If that feature is not enabled in the target account, the objects areinstalled and scripts can access them, although the Translation Collections are not viewable in theNetSuite UI.
For more information, see the Translation Collections object type documentation in Objects Available inCustomization Bundles.
New Location for Installing SDF SuiteAppsAs of NetSuite 2019.1, there is a new location for installing SDF SuiteApps.
The SuiteApp Listing page provides a location in NetSuite for you to find and install SuiteApps createdusing the SuiteCloud Development Framework, otherwise known as SDF SuiteApps. SuiteApps caninclude custom objects and configuration settings that are useful to your organization. This featureis directed at NetSuite administrators and users who have permission to install SuiteApps in theiraccounts. If you are a developer and you are interested in creating SDF SuiteApps, see the help topicSuiteApp Projects.
Important: For 2019.1, only SuiteApps from the com.netsuite publisher ID are available onthe SuiteApp Listing page. These are all managed SuiteApps.
To view the SuiteApp Listing page, go to Customization > SuiteCloud Development > SuiteApp Listing.This page lists SDF SuiteApps available for installation to your account.
Note: Access to the SuiteApp Listing page, and the ability to install SuiteApps to your account,requires the SuiteApp Marketplace permission.
For information about using the SuiteApp Listing page, see the following topics:
■ Viewing SuiteApp Listings
■ Identifying SuiteApp Incompatibility
■ Requesting Access to a SuiteApp

SuiteApp Distribution 48
ReleaseNotes_2019.1.0.pdf - Subject to Change - ReleasePreview Draft
■ SuiteApp Installation
SuiteBuilder - CustomizationNetSuite 2019.1 includes the following enhancements to SuiteBuilder features:
■ Address Scripting Enhancements to Support Transaction Tax Calculations
■ Advanced Printing Enhancements for Additional Language Support
■ Applied Custom Segments Visible on the Custom Record Type Configuration Page
■ Ability to Include Custom Record Names in Saved Search Results
■ Custom Sublist Translation Field Length Increased
■ Unified ID Applied to All New Custom Segments
Address Scripting Enhancements to Support TransactionTax CalculationsNetSuite 2019.1 includes changes to script processing of custom address values on transactions. Thesechanges enhance the accuracy of tax calculations for transactions that have custom addresses.
These enhancements include the following:
■ Synchronization of address text values on subrecord and parent record
■ Elimination of code workarounds required to ensure accurate nexus and tax recalculation
■ Enhanced override logic
■ Enhanced validation of country and state combinations
■ Avoidance of unnecessary form refreshes
Some existing scripts may include code to work around previous tax calculation limitations fortransactions with custom addresses. These scripts are likely to have unexpected behavior after the2019.1 upgrade.
To avoid any issues, you should review your existing scripts as soon as possible, to determine whichscripts set custom address values on transactions. You may need to update these scripts to ensurethat they continue to function correctly after the upgrade. You can test updated scripts in your 2019.1Release Preview account, before your production account is upgraded.
For details about these changes, recommended actions to adapt your scripts, and sample codeupdates, see the help topic 2019.1 Address Scripting Changes to Support Transaction Tax Calculations.
Advanced Printing Enhancements for AdditionalLanguage SupportThe following advanced printing enhancements have been made to support languages that are readfrom right to left:
■ Arabic and Hebrew Languages Supported in Advanced PDF/HTML Templates
■ Multiple Languages Supported in Advanced PDF/HTML Templates

SuiteBuilder - Customization 49
ReleaseNotes_2019.1.0.pdf - Subject to Change - ReleasePreview Draft
■ Updated BFO Library for Advanced PDF/HTML Templates
Arabic and Hebrew Languages Supported in Advanced PDF/HTML Templates
You can now print advanced templates in Hebrew and Arabic.
For example, to set up your template to print in Arabic, enter a line that resembles the following as thefirst line in the <head> section:
<link name="NotoSansArabic" type="font" subtype="opentype" src="${nsfont.NotoSansArabic_Regular}" src-bold="${nsfont.NotoS
ansArabic_Bold}" bytes="2" subset ="false"/>
For more information about configuring your template to print in another language, see the help topicLanguages for Printed Forms that Use Advanced Templates.
Multiple Languages Supported in Advanced PDF/HTMLTemplates
You can now use multiple languages in one advanced template. When printing a template, only onelocale is selected. However, you can use other locales in the document as long as the required fonts arelinked and the lang attribute is set correctly.
To use multiple languages in a template, configure the template as follows:
1. Use the <link> element to load all required fonts.
2. Create a CSS selector to pair the language and font.
3. Set the lang attribute on elements that have a language different from the language set in thetemplate.
For more information about configuring your template to print in another language and an example,see the help topic Languages for Printed Forms that Use Advanced Templates.
Updated BFO Library for Advanced PDF/HTML Templates
Advanced PDF/HTML templates now use updated BFO libraries.
BFO version 1.1.63 provides printing support for languages that are read from right to left, includingArabic and Hebrew.
For more information, see The Big Faceless Report Generator User Guide.
Applied Custom Segments Visible on the Custom RecordType Configuration PagePreviously, custom segments applied to a custom record type were not listed on the custom recordtype configuration page.
With this change, custom segments that are applied to a custom record type are listed on the Fieldssubtab of the custom record type configuration page.

SuiteBuilder - Customization 50
ReleaseNotes_2019.1.0.pdf - Subject to Change - ReleasePreview Draft
Ability to Include Custom Record Names in Saved SearchResultsYou can now include the translated name and language fields in custom record saved search results.On the Results subtab of the saved search definition, two new fields are available: Display Name(Translated) and Language. Include these fields in your search to return all translated name andlanguage fields for the custom record instances.
If you include the Display Name (Translated) and Language fields in your search results, enter Languageas a filter on the Criteria subtab. When you enter Language on the Criteria subtab, the saved searchresults are filtered by the user's language preference.
For more information about creating a saved search, see the help topic Defining a Saved Search.
Custom Sublist Translation Field Length IncreasedPreviously, the length of the Translation fields for custom sublists was not consistent for all languages.In 2019.1, the custom sublist Translation fields for all languages support up to 50 characters.
Unified ID Applied to All New Custom SegmentsThe unified ID is now used on all new custom segment definitions. The unified ID lets you use one IDin your customizations to refer to all of the record types for one custom segment. With the unified ID,you are not required to know the applied record type when referring to a custom segment field on aspecific record.
As of 2019.1, the unified ID is applied to all new custom segment definitions. When you create a newcustom segment, the Use as Field ID box is not visible on the Custom Segment definition page.
For custom segments created before 2019.1, the Use as Field ID box is available on the CustomSegment definition page. The box was not checked on custom segment definitions created before2018.2 because existing scripts would fail. For more information, see the help topic Creating a CustomSegment.
SuiteAnalytics (Dashboards, Reporting, andSearch)NetSuite 2019.1 includes the following enhancements to SuiteAnalytics:
■ SuiteAnalytics Workbook Feature Now Generally Available
■ New Analytics Portlet for SuiteAnalytics Workbook
■ New Multi-Series Chart for Trend Graph Portlet

SuiteAnalytics (Dashboards, Reporting, and Search) 51
ReleaseNotes_2019.1.0.pdf - Subject to Change - ReleasePreview Draft
■ User Interface Enhancements to Dashboards
SuiteAnalytics Workbook Feature Now Generally AvailableIn 2018.2, SuiteAnalytics Workbook was available as a beta feature. In 2019.1, SuiteAnalytics Workbookis generally available in all NetSuite implementations. To watch an introduction to SuiteAnalyticsWorkbook, click here.
Earlier versions of NetSuite offered searches and reports as separate analytical tools, each with theirown user interfaces, authoring processes, and data sources. The different data sources have resultedin some inconsistencies in field naming and exposure between the two tools. These differences havecaused challenges for users, including confusion over which tool to use, and difficulty locating fields.Additionally, both tools lack support for multilevel joins and have limitations on formatting options.
In 2019.1, SuiteAnalytics Workbook adds a new analytical tool to all NetSuite accounts. WithSuiteAnalytics Workbook you can create highly customizable workbooks that combine queries,pivot tables, and charts using a single tool that leverages a new, unified data source. This new datasource is designed to ensure that fields are consistently exposed in SuiteAnalytics Workbook, withconsistent results across all components of the workbook. SuiteAnalytics Workbook also uses a newuser interface that is designed so that users with limited knowledge of record schemas and querylanguage can still create complex workbooks through actions such as drag-and-drop editing. Theinterface also makes SuiteAnalytics Workbook ideal for ad hoc diagnostic analysis, with options forinstant formula validation, data refreshment, and drilling down through query results. Additionally, arange of customization options have also been added to the interface to enable rich formatting andvisualizations of your data.
Support for multilevel joins has also been added to SuiteAnalytics Workbook, enabling you to authorworkbooks using field data from multiple record types, including custom records. Custom formulafields are also supported in SuiteAnalytics Workbook, so you can create and add fields with dynamicallycalculated values to your workbooks. Finally, SuiteAnalytics Workbook also offers multiple displayoptions for hierarchical fields, so you can easily view data for fields with parent/child relationships.
By default, SuiteAnalytics Workbook is enabled in all NetSuite accounts. To ensure that it has beenactivated in your account, go to Setup > Company > Setup Tasks > Enable Features. On the Analyticssubtab, under SuiteAnalytics Workbook, verify that the SuiteAnalytics Workbook box has beenchecked and click Save.
When the feature is enabled, most roles are given access to the tool. You can also enable specific usersto edit and monitor the workbooks created in your account by adding the Analytics Administratorpermission to their roles. For more information about access to SuiteAnalytics Workbook, or forsteps to assign the Analytics Administrator permission to different roles in your account, see theSuiteAnalytics Workbook Overview.
■ Finding Records and Fields Using SuiteAnalytics Workbook
■ Creating a Workbook
■ Elements of the SuiteAnalytics Workbook Interface
■ Multilevel Joins in SuiteAnalytics Workbook
■ Supported Workbooks
■ Additional Features
Finding Records and Fields Using SuiteAnalytics WorkbookSuiteAnalytics Workbook uses a new data source which might require different fields, records, joins, orformulas to replicate your existing saved searches and reports. Review the Unified Data Source Overviewfor more information, including a list of available records and fields, and sample workbooks you canuse to replicate your searches and reports.

SuiteAnalytics (Dashboards, Reporting, and Search) 52
ReleaseNotes_2019.1.0.pdf - Subject to Change - ReleasePreview Draft
Creating a WorkbookAfter the SuiteAnalytics Workbook feature is enabled in your account, the NetSuite navigation menuincludes a new Analytics tab. To create a workbook, click the Analytics tab to open the Analyticsdashboard. On the Analytics dashboard, click New Workbook.
You are prompted to select a record type for the workbook.
Select a record type from the list to open the Data tab and begin the authoring process.
To learn how to create your own custom workbooks, see Custom Workbooks. This section includes stepsfor defining, filtering, and pivoting your workbook source data, as well as procedures for how to createcustom formula fields and charts. You can also complete the SuiteAnalytics Workbook Tutorial whichguides you through the creation of a sample Transaction workbook.
Elements of the SuiteAnalytics Workbook InterfaceAfter you click New Workbook and choose a root record, you define the workbook in the SuiteAnalyticsWorkbook interface. This interface is divided into four tabs:
■ The Data Tab, where you define the source data for your workbook by creating a query. The dataavailable for a query includes fields from the selected root record, as well as fields from multiplelevels of related records. You can also create custom formula fields on the Data tab. For moreinformation about formula fields, see Formula Fields in SuiteAnalytics Workbook.

SuiteAnalytics (Dashboards, Reporting, and Search) 53
ReleaseNotes_2019.1.0.pdf - Subject to Change - ReleasePreview Draft
■ The Criteria Tab, where you apply filter conditions to the source data for your workbook.
■ The Pivot Tab, where you define the layout for formatting, summarizing, and pivoting your sourcedata.
■ The Chart Tab, where you define the layout for presenting your source data as a chart.

SuiteAnalytics (Dashboards, Reporting, and Search) 54
ReleaseNotes_2019.1.0.pdf - Subject to Change - ReleasePreview Draft
For more information about the SuiteAnalytics Workbook user interface, see Navigating SuiteAnalyticsWorkbook. This topic provides detailed descriptions about the elements on each tab of theSuiteAnalytics Workbook interface.
Multilevel Joins in SuiteAnalytics Workbook
At any point during the authoring process, you can join additional related records to your workbook.This includes records which are multiple levels away from the root record of the workbook.
To do so, click the Join Record icon next to any record listed in the Available Field List on the Datatab.

SuiteAnalytics (Dashboards, Reporting, and Search) 55
ReleaseNotes_2019.1.0.pdf - Subject to Change - ReleasePreview Draft
All possible joins are listed in the popup window.
■ To join a record to the workbook, click the record name.
■ To search for a specific record, type the record name in the Search field.
■ To join a record that is more than one level away from the root record of the workbook, click the joinrecord icon next to any previously joined record.
For more information about multilevel joins in SuiteAnalytics Workbook, see Defining Workbook SourceData.
Supported Workbooks
SuiteAnalytics Workbook currently does not support standard workbooks that can be generatedbased on prebuilt definitions, except for the Sales Workbooks (Beta). With the Sales Workbooks(Beta), the source data, criteria, and layouts for specific charts and pivot tables are predefined. Usethe Sales Workbooks (Beta) to view Sales By Item, Sales By Customer, and Sales By Sales Rep datafor the invoices and orders in your account. To open the Sales Workbooks (Beta) , click the StandardWorkbooks link on the Analytics dashboard and click the Sales (Invoiced) Workbook (Beta) or Sales(Ordered) Workbook (Beta) links.

SuiteAnalytics (Dashboards, Reporting, and Search) 56
ReleaseNotes_2019.1.0.pdf - Subject to Change - ReleasePreview Draft
Important: The Sales (Invoiced) Workbook (Beta) and Sales (Ordered) Workbook (Beta)workbooks are currently in a beta state. The fields, records, formatting, and data displayed ineach of these workbooks are subject to change.
For more information about predefined workbooks, see Standard Workbooks.
For steps on how to replicate some of your existing saved searches and reports using SuiteAnalyticsWorkbook, see Saved Search Replication Examples.
Additional Features
As of 2019.1, the following features have been added to SuiteAnalytics Workbook:
■ Additional currency conversion options: In 2018.2, the beta version of SuiteAnalytics Workbooksupported currency consolidation, but you could only consolidate amounts to the currency of yourparent subsidiary. In 2019.1, SuiteAnalytics Workbook supports currency conversion to any currencyset up in your account.
■ Filters based on measure values: As of 2019.1, you can filter workbook pivot table data usingmeasure values. This enables you to quickly view different subsets of data directly from the Pivottab without having to create new workbook filters on the Criteria tab.
■ Workbook-based portlets: Starting in 2019.1, you can add workbook-based portlets to yourNetSuite dashboards. However, only charts are currently supported in the portlet.
For more information, see New Analytics Portlet for SuiteAnalytics Workbook.
■ Expanded formula functions: SuiteAnalytics Workbook now includes a more comprehensiveversion of the CASE formula function, including support for WHERE and WHEN clauses in yourformula definitions.
For more information, see Formula Fields.
New Analytics Portlet for SuiteAnalytics WorkbookA new Analytics Portlet enables you to view your chart-based workbook data at a glance on your homedashboard.

SuiteAnalytics (Dashboards, Reporting, and Search) 57
ReleaseNotes_2019.1.0.pdf - Subject to Change - ReleasePreview Draft
You can display up to five Analytics Portlets on your home dashboard. After adding the portlet, to selectwhich chart you want to view, click the Menu icon , and then click Set Up. The Analytics popup liststhe workbooks available in your account that have at least one chart defined. You will see your chart-based workbooks and those shared with you.
You can set layout options for the displayed portlets, such as the portlet size, chart type, and portlettitle. These settings apply only to the portlet.
The New Analytics portlet also gives you quick access to your workbook. To edit a workbook, click theMenu icon, and then click Open in Workbook.
Note: To set up Analytics portlets on your dashboard, the SuiteAnalytics Workbook featuremust be enabled.
For more information about setting up the portlet, see the help topic Setting Up the Analytics Portlet.
New Multi-Series Chart for Trend Graph PortletPrior to 2019.1, the Trend Graph portlet displayed one chart to show the differences in data over timefor a specific Key Performance Indicator (KPI).
As of 2019.1, the Trend Graph portlet can now support up to three KPIs. This capability enables youto compare the differences in data for multiple KPIs in a single chart. The design and user interfaceelements of the trend graph portlet have also been aligned with the new look and feel of the NetSuitedashboard.

SuiteAnalytics (Dashboards, Reporting, and Search) 58
ReleaseNotes_2019.1.0.pdf - Subject to Change - ReleasePreview Draft
For more information about adding multiple KPIs to the Trend Graph portlet, see the help topic TrendGraphs.
For more information about the new look and feel of the NetSuite dashboard, see User InterfaceEnhancements to Dashboards.
User Interface Enhancements to DashboardsThe user interface has been refreshed with visual and functional enhancements. For more informationon the new design, see User Interface Enhancements to Dashboards.
CSV ImportNetSuite 2019.1 includes the following enhancement to CSV Import:
Newly Supported Record Types for CSV Import
Record Type Notes
Period EndJournal Entry
Period End Journal is a transaction record that posts subsidiary consolidation and year-endclosing to the general ledger. Period end journals are generated automatically when youcomplete the Create Period End Journals task on the Period Close Checklist.
This record is part of the Period End Journal Entries feature, which is available only in NetSuiteOneWorld accounts. The Accounting Periods feature is a prerequisite for the Period EndJournal Entries feature.
To import period end journal entry data, in the Import Assistant, set the import type toTransactions, and the record type to Period End Journal Entry.
SuiteFlow (Workflow Manager)NetSuite 2019.1 includes the following enhancements to SuiteFlow features:
■ Enhancements to Release Status

SuiteFlow (Workflow Manager) 59
ReleaseNotes_2019.1.0.pdf - Subject to Change - ReleasePreview Draft
■ New Create Line Action
■ Enhancement to Set Field Mandatory Action
■ Enhancement to Set Field Display Label Action
■ Translation Support for Workflow Actions
■ Enhanced Ability to Identify Workflow Actions in a Workflow Log
Enhancements to Release StatusAs of 2019.1, several enhancements have been made to the Release Status property of workflows.
Change to the Default Release StatusPrior to 2019.1, by default, the Release Status property of workflows was set to Not Running. As of2019.1, by default, the Release Status property of workflows is set to Testing. You can change theRelease Status of workflows on the workflow definition page. For more information, see the help topicRelease Status.
Renamed Release StatusPrior to 2019.1, there were three Release Status options available for workflows: Not Running,Released, and Testing. As of 2019.1, Not Running has been renamed to Not Initiating. This changewas made to better align the label with the task and to help prevent confusion. The way that ReleaseStatus options work has not changed. When you select Not Initiating, new workflow instances do notinitiate but workflow instances that are already running will continue to do so. For more information,see the help topic Release Status.
New Release StatusThe Suspended Release Status option has been added to SuiteFlow. This new option provides you withgreater control over workflows, along with the ability to disable workflow execution. When you set theRelease Status of a workflow to Suspended, the following is true:
■ No new instances of the suspended workflow are created.
■ No existing instances of the suspended workflow are executed.
■ If the suspended workflow includes scheduled workflows, transitions, or actions, none of them willbe executed.
■ It is not possible to initiate a suspended workflow from SuiteScript, or by using the Initiate Workflowor Mass Update actions in SuiteFlow.
To resume a suspended workflow, change the Release Status to Released. Suspended workflowsresume at the point the workflow was at when it was suspended.
New Create Line ActionAs of 2019.1, a new workflow action, Create Line, has been added to SuiteFlow. You can use the CreateLine workflow action to add a new line to a sublist and specify the default values for line fields. TheCreate Line action is available in workflow definitions on record types with a sublist SuiteFlow supports.Currently, SuiteFlow only supports the Items sublist on Transaction Record types.
The addition of the Create Line action enables you to customize sublist-related processes by addinglines to the sublist, and permits greater customization without having to use SuiteScript. The Create

SuiteFlow (Workflow Manager) 60
ReleaseNotes_2019.1.0.pdf - Subject to Change - ReleasePreview Draft
Line workflow action includes the standard action fields, including Basic Information, Condition, andSchedule. You can execute the Create Line action in the following:
■ Server triggers Before Load, Before Submit, and After Submit.
■ Scheduled triggers.
The Create Line action does not support client triggers.
For more information, see the help topics Working with Workflows and Workflow Actions.
Enhancement to Set Field Mandatory ActionThe Set Field Mandatory action has been extended to support the setting of a line field in a sublist asmandatory. This enhancement provides you with a greater ability to customize workflows based onyour business needs.
You can use the Set Field Mandatory action on record types with a sublist SuiteFlow supports.Currently, SuiteFlow only supports the Items sublist on Transaction Record types. The Set FieldMandatory action is available at the record level, but cannot be applied to the sublist action group.
For more information, see the help topics Actions Reference and Set Field Mandatory Action.
Enhancement to Set Field Display Label ActionThe Set Field Display Label action has been extended to support changes to the label of a sublistcolumn. This enhancement allows users to change and customize the sublist column label according tobusiness needs.
You can use the Set Field Display Label action on record types with a sublist SuiteFlow supports.Currently, SuiteFlow only supports the Items sublist on Transaction Record types. The Set Field DisplayLabel action is available at the record level, but cannot be applied to the sublist action group. Ifnecessary, you can leave the label field blank. If the multi-language feature is enabled on your account,you can also enter translations for the new label.
For more information, see the help topics Actions Reference and Set Field Display Label Action.
Translation Support for Workflow ActionsAs of 2019.1, if multi-language support is enabled on your account, you will be able to translatecustom workflow action text and messages. When multi-language support is enabled on an account,a standard section for translations is displayed for workflow actions. You can enter translations forevery active language on the account. This enhancement allows you to easily develop internationalcustomizations without having to create language-specific workflows.
The following workflow actions support translation:
■ Set Field Display Label
■ Confirm
■ Show Message
■ Return User Error
Note: The translation support for the Add Button action has not changed and is still availablefor you to use.
For more information, see the help topics Working with Actions and Enabling Features.
SuiteFlow (Workflow Manager) 61
ReleaseNotes_2019.1.0.pdf - Subject to Change - ReleasePreview Draft
Enhanced Ability to Identify Workflow Actions in aWorkflow LogAs of 2019.1, if the Show Internal IDs preference is enabled in your account, you can see the internal IDfor workflow actions in the following locations:
■ Workflow logs
■ Context panel
■ Action Group and Sublist Action Group detail pages
■ State Definition form
This enhancement makes it easier to quickly identify every executed action in context. The ability toquickly identify workflow actions is designed to assist you with debugging workflows.
When the Show Internal IDs preference is enabled, you can view the internal ID for actions in thefollowing locations:
■ In the Context panel, when you hover over an action.
■ In the list of actions and transitions, on the State detail dialog.
■ In the list of actions in the Action Group and Sublist Action Group, on the State detail dialog.
■ If you have selected the Show ID box on the Log dialog, in the Workflow Execution log.
For more information, see the help topic Enabling the Show Internal IDs Preference.
SuiteScriptRefer to the following sections for details on SuiteScript updates for NetSuite 2019.1:
■ SuiteScript 2.0 – N/translation Module (Beta)
■ SuiteScript 2.0 – Bulk Actions (Beta)
■ SuiteScript 2.0 – Query API Enhancements
■ SuiteScript 2.0 – Enhancement for N/currentRecord Module
■ SuiteScript 2.0 – N/format/i18n Module
■ SuiteScript 2.0 – Enhancement for N/file Module
■ SuiteScript 2.0 – Signing API
■ Address Scripting Enhancements to Support Transaction Tax Calculations
■ New SDF Installation Script Type
■ SuiteScript 1.0 and 2.0 - Time format is returned in a simplified version of Oracle format
SuiteScript 2.0 – N/translation Module (Beta)Warning: The N/translation module is a beta feature. The contents of this feature arepreliminary and may be changed or discontinued without prior notice. Any change may impactthe feature’s operation with the NetSuite application. Warranties and product service levelsdo not apply to this feature or the impact of the feature on other portions of the NetSuiteapplication. We may review and monitor the performance and use of this feature. Thedocumentation for this feature is also considered a beta version and is subject to revision.
The SuiteScript 2.0 N/translation module provides SuiteScript developers a programmatic wayto interact with NetSuite translation collections. Both the N/translation module and TranslationCollections are beta features in 2019.1.

SuiteScript 62
ReleaseNotes_2019.1.0.pdf - Subject to Change - ReleasePreview Draft
Translation collections are customization objects that store translation terms with their translations.For more information about NetSuite translation collections, see Multi-Language TranslationManagement (Beta).
The terms stored in translation collections can be accessed in SuiteScript 2.0 with the N/translationModule. Translation collections are managed in the NetSuite UI. You cannot create or modifytranslation collections in SuiteScript. The N/translation module provides read-only access to translationcollections. For information about how translation collections are managed in the UI, see the help topicTranslation Collection Overview.
N/translation Module APIsTranslation collections are encapsulated in the N/translation module's translation.Handle object.A translation.Handle object is a hierarchical object; each node in the object is either anothertranslation.Handle object or a translation.Translator function. Translator functions combinestrings with parameters to return strings with the values you pass in for the parameters. Consider thefollowing code snippet:
// key HELLO_1 = 'Hello, {1}'
message: translation.get({
collection: 'custcollection_my_strings',
key: 'HELLO_1'
})({
params: ['NetSuite']
})
In the snippet, if the specified key's string value is "Hello, {1}", the translation.Translator functioncombines the string with the options.params parameter value and returns, "Hello, NetSuite". Forinformation about the way strings are added to and formatted in collections, see the help topicWorking with Translation Collection Strings.
Use translation.load(options) to load one or more collections, and use translation.get(options) to getspecific key strings in a collection.
You can load collections in different language locales with the translation.load(options) –options.locales property and translation.selectLocale(options).
To see a complete list of the objects and methods in the N/translation module, see the help topic N/translation Module Members.
N/translation Module Script SampleThe following example shows how you can load a translation collection in SuiteScript using the N/translation module. The example loads a collection and uses terms in the collection for two N/ui/message module messages.
/**
*@NApiVersion 2.x
*/
require(['N/ui/message', 'N/translation'],
function(message, translation) {
var localizedStrings = translation.load({
collections: [{
alias: "myCollection",

SuiteScript 63
ReleaseNotes_2019.1.0.pdf - Subject to Change - ReleasePreview Draft
collection: "custcollection_my_strings"
}]
});
var myMsg = message.create({
title: localizedStrings.myCollection.MY_TITLE(),
message: localizedStrings.myCollection.MY_MESSAGE(),
type: message.Type.CONFIRMATION
});
// Message disappears after 5 seconds
myMsg.show({
duration: 5000
});
// Every node is a translation.Handle object or a translation.Translator function
var collection = localizedStrings.myCollection;
var myMsg2 = message.create({
title: collection.MY_TITLE(),
message: collection.MY_MESSAGE(),
type: message.Type.CONFIRMATION
});
// Message disappears after 5 seconds
myMsg2.show({
duration: 5000
});
});
For other examples of ways you can use the N/translation module, see the help topic N/translationModule Script Samples.
SuiteScript 2.0 – Bulk Actions (Beta)
Warning: Bulk Actions is a beta feature. The contents of this feature are preliminary andmay be changed or discontinued without prior notice. Any change may impact the feature’soperation with the NetSuite application. Warranties and product service levels do not applyto this feature or the impact of the feature on other portions of the NetSuite application. Wemay review and monitor the performance and use of this feature. The documentation for thisfeature is also considered a beta version and is subject to revision.
The 2019.1 Bulk Actions beta release previews APIs that are currently in development for SuiteScript2.0.
In 2018.2, you could only execute an N/action Module action for a single record instance. As of 2019.1,you can use SuiteScript 2.0 bulk action APIs to execute an action on multiple record instances of thesame type, either with the same or different parameters.
The 2019.1 bulk action API beta offers previews of the following SuiteScript 2.0 N/action Module APIs:
■ Action.executeBulk(options) (Beta) – executes an asynchronous bulk record action and returns itstask ID for status queries with Action.executeBulk(options) (Beta).

SuiteScript 64
ReleaseNotes_2019.1.0.pdf - Subject to Change - ReleasePreview Draft
■ action.getBulkStatus(options) (Beta) – returns the current status of action.executeBulk(options) forthe specified task ID. The bulk execution status is returned in a status object.
■ action.executeBulk(options) (Beta) – executes an asynchronous bulk record action and returns itstask ID for status queries with Action.executeBulk(options) (Beta).
In addition to the new APIs in the N/action module, there are two new record action task objectsavailable for beta preview in the SuiteScript 2.0 N/task Module:
■ task.RecordActionTask (Beta) – encapsulates a record action task.
■ task.RecordActionTaskStatus (Beta) – encapsulates the status of a record action task.
Use the N/task module to create record action tasks and place them in the internal NetSuite schedulingor task queue.
A new beta preview enum, task.ActionCondition (Beta), is also added to the N/task module for actions.
For more information about SuiteScript 2.0 actions, see the help topic Overview of Record Action andMacro APIs.
SuiteScript 2.0 – Query API Enhancements2019.1 includes the following features related to the Query API:
■ Query API Now Generally Available
■ Query Support for Map/Reduce Scripts
■ New Operators for Polymorphic and Inverse Joins
■ Relative Dates and Date Ranges for Conditions
■ Columns with Consolidations
■ Script ID Support for Loading Queries
Query API Now Generally Available
As of 2019.1, SuiteAnalytics Workbook and the Query API are no longer considered beta features andare generally available. For more information, see the help topics SuiteAnalytics Workbook and N/query Module.
Query Support for Map/Reduce Scripts
NetSuite 2019.1 adds support for queries in the getInputData stage of map/reduce scripts. ThegetInputData stage generates the input data and returns it as one of several types. Previously, youcould return the input data as an array, a generic Object, a search.Search object or object reference, ora file.File object or object reference. Now, you can create or load a query to generate the input data andreturn the data as a query.Query object, object reference, or result set. Using a query to generate inputdata lets you take advantage of the added power of the SuiteAnalytics Workbook query engine.
To return a query.Query object from the getInputData stage:
function getInputData() {
var myInputQuery = query.create({
type: query.Type.CUSTOMER

SuiteScript 65
ReleaseNotes_2019.1.0.pdf - Subject to Change - ReleasePreview Draft
});
// Add columns, conditions, and other properties to the query, as needed
return myInputQuery;
}
To return a query that is loaded using query.load(options):
function getInputData() {
var myInputQuery = query.load({
id: 'custworkbook237'
});
return myInputQuery;
}
To return a query.Query object reference:
function getInputData() {
return {
type: 'query',
id: 'custworkbook1234'
};
}
For more information about map/reduce scripts, see the help topic SuiteScript 2.0 Map/Reduce ScriptType.
New Operators for Polymorphic and Inverse Joins
NetSuite 2019.1 includes new operators to access fields in joined record types. Use the new^ operator to access fields in record types that are joined using Query.joinTo(options) orComponent.joinTo(options). This type of join is also known as a polymorphic join. Use the new< operator to access fields in record types that are joined using Query.joinFrom(options) andComponent.joinFrom(options). This type of join is also known as an inverse join. These new operatorsare designed to make it easier and more intuitive to access fields in joined record types.
Use the new ^ and < operators in formulas when you create query columns and conditions. You canuse these operators when working with formulas in SuiteScript or the NetSuite UI. You can also placewhitespace characters and parentheses around these operators to improve the readability of yourformulas. For more information, see the help topics Formulas in the N/query Module and Formulas inSearch.
The ^ and < operators replace the #polymorphic and #inverse operators that were used in previousreleases. Use the following table to decide which new operator to use:
Join Type Previous Operator New Operator
Polymorphic using Query.joinTo(options) orComponent.joinTo(options)
#polymorphic ^
Inverse using Query.joinFrom(options) andComponent.joinFrom(options)
#inverse <

SuiteScript 66
ReleaseNotes_2019.1.0.pdf - Subject to Change - ReleasePreview Draft
Relative Dates and Date Ranges for ConditionsNetSuite 2019.1 adds support for relative dates and date ranges in query conditions. A newobject, query.RelativeDate, represents a date range relative to the current date, which meansthat the current date is used as one of the boundaries of the date range. A new method,query.createDateRange(options), creates a query.RelativeDate object. You can use values in the newquery.DateRangeId enum to specify the type of range to create. For example, to create a date rangethat includes dates from three weeks ago until the current date:
var myDateRange = query.createDateRange({
dateRangeId: query.DateRangeId.WEEKS_AGO,
value: 3
});
To use this date range in a query condition:
var myCondition = myQuery.createCondition({
fieldId: 'trandate',
operator: query.Operator.WITHIN,
values: myDateRange
});
Other operators in the query.Operator enum are also supported for use with relative date ranges, suchas BEFORE, AFTER, ON_OR_AFTER, and BEFORE_NOT.
You can also use the query.RelativeDate object and the WITHIN operator to specify complex dateranges. Complex date ranges do not use the current date as one of the boundaries. A new enum,query.RelativeDateRange, can help you to construct these types of date ranges. This enum containspredefined date ranges, and you can use the start and end properties of these ranges to define otherranges. For example, to create a condition that matches dates from the start of this fiscal year until theend of yesterday:
var myComplexCondition = myQuery.createCondition({
fieldId: 'trandate',
operator: query.Operator.WITHIN,
values: [query.RelativeDateRange.THIS_FISCAL_YEAR.start, query.RelativeDateRange.YESTERDAY.end]
});
For more information, see the help topics query.createDateRange(options) and query.RelativeDate.
Columns with ConsolidationsNetSuite 2019.1 adds a new boolean property, Column.consolidated, to the query.Column object.When you create a column using Query.createColumn(options) or Component.createColumn(options),you can use the options.consolidated parameter to indicate whether the column should displayconsolidated currency amounts. Consolidation is a financial concept of converting currency amountsfrom the base currency of a subsidiary to the base currency of its parent subsidiary. If you specify anoptions.consolidated value of true, the column displays currency amounts in the base currencyfor the parent subsidiary. If you specify an options.consolidated value of false, the columndisplays currency amounts in the base currency of the subsidiary. The default value is false. Forexample:
var myTransactionColumn = myQuery.createColumn({
fieldId: 'netamount',

SuiteScript 67
ReleaseNotes_2019.1.0.pdf - Subject to Change - ReleasePreview Draft
consolidated: true
});
Script ID Support for Loading QueriesNetSuite 2019.1 changes the way that you load queries using query.load(options) . Previously,you loaded a query by specifying the internal ID of the query as a number. Now, you load a queryby specifying the script ID of the query as a string. The script ID of a query usually starts withcustworkbook, but some do not (such as queries for predefined system workbooks). For example:
var myLoadedQuery = query.load({
id: 'custworkbook237'
});
SuiteScript 2.0 – Enhancement for N/currentRecordModuleIn 2019.1, options.forceSyncSourcing replaces the options.fireSlavingSync parameter in thefollowing SuiteScript 2.0 N/currentRecord Module methods:
■ CurrentRecord.setText(options)
■ CurrentRecord.setValue(options)
■ CurrentRecord.setCurrentSublistText(options)
■ CurrentRecord.setCurrentSublistValue(options)
■ CurrentRecord.setCurrentMatrixSublistValue(options)
■ CurrentRecord.setMatrixHeaderValue(options)
This boolean parameter determines whether dependent values for sublist fields are sourcedsynchronously. It is set to false by default. If options.forceSyncSourcing is set to true,dependent values for sublist fields are sourced synchronously. If options.forceSyncSourcing is setto false, dependent values for sublist fields are not sourced synchronously.
Scripts that use the options.fireSlavingSync parameter will continue to run as expected;you do not need to update scripts that use options.fireSlavingSync. However, you shoulduse options.forceSyncSourcing in your scripts beginning in 2019.1. Note that if you use bothoptions.fireSlavingSync and options.forceSyncSourcing in the same script, the setting foroptions.forceSyncSourcing takes precedence.
SuiteScript 2.0 – N/format/i18n Module2019.1 adds a new sub module to the SuiteScript 2.0 format module, i18n. You can use the N/format/i18n’s module format.spellOut(options) method to spell out numbers as strings in a specific language.The method takes two parameters, options.number and options.locale:
/**
*@NApiVersion 2.x
*/
require(['N/format/i18n'],
function(format) {
SuiteScript 68
ReleaseNotes_2019.1.0.pdf - Subject to Change - ReleasePreview Draft
var spellOut = format.spellOut({number: 12345, locale: "DE"});
log.debug(spellOut);
});
The options.locale parameter can be specified with an ISO 639-1 alpha-2 language code. The exampleabove specifies "DE", the ISO 639-1 alpha-2 language code for German. The language specified inthe options.locale parameter is not related to the language specified for a NetSuite account. You canspecify any language for the options.locale parameter; you do not have to specify a NetSuite supportedlanguage.
For more information, see the help topic N/format/i18n Module
SuiteScript 2.0 – Enhancement for N/file ModuleYou can use the new Reader object in the N/file module to perform special read operations, such asreading until a specified character is reached and reading a specified number of characters.
For more information, see the help topic N/file Module.
SuiteScript 2.0 – Signing APIA Digital Signing API is now available. Marketed for Brazil and China in NetSuite 2019.1, the DigitalSigning API enables a secure connection with authorities requiring digital signatures in communicationto authenticate your identity. You can create a scheduled script to sign transactions in XML format withyour certificate, which you can upload on the Digital Certificates page. The script sends the signed XMLto the appropriate authority for verification and then sends it on to the recipient.
Three new SuiteScript 2.0 modules are added to support signing: N/crypto/certificate, N/https/clientCertificate, and N/certificateControl.
For more information on storing digital certificates in NetSuite, see Certificate Storage for DigitalSigning.
For more information on making https connections for the Signing API, see Mutual (Two-Way)Authentication for Outbound HTTPS Connections.
Address Scripting Enhancements to Support TransactionTax CalculationsChanges to address scripting implemented with the 2019.1 upgrade will enhance the accuracy of taxcalculations for transactions that have custom addresses.
For more information, see the help topic 2019.1 Address Scripting Changes to Support Transaction TaxCalculations.
New SDF Installation Script TypeInstallation scripts for SDF are available as a new SuiteScript 2.0 script type. SuiteApp projects caninclude SDF installation scripts that are automatically executed when the project is deployed.
For more information, see the help topic SuiteScript 2.0 SDF Installation Script Type.

SuiteScript 69
ReleaseNotes_2019.1.0.pdf - Subject to Change - ReleasePreview Draft
SuiteScript 1.0 and 2.0 - Time format is returned in asimplified version of Oracle formatBeginning in 2019.1, time format is returned in a simplified version when using the following APIs to setthe time:
■ getPreference(name)
■ nlapiLoadConfiguration(type)
■ getFieldValue(name)
SuiteTalk (Web Services) IntegrationNetSuite 2019.1 includes the following enhancements to SuiteTalk features:
■ Release Preview Version of the 2019.1 WSDL
■ Araxis Merge Diff File for the 2019.1 Endpoint
■ 2019.1 SuiteTalk Schema Browser
Release Preview Version of the 2019.1 WSDLThe 2019.1 WSDL is not yet available, but this section provides information about working with the betaversion of web services endpoints.
When your implementation is upgraded to 2019.1, the 2019.1 WSDL becomes available in yourproduction account. However, this version is considered a beta version. During the time that the WSDLis a beta version, additional changes are still gradually made to the endpoint. Some of these changesmay be backward incompatible. You should use the beta version for testing and development purposesonly.
Before the WSDL becomes generally available, use one of the earlier generally available versions inyour production account. You do not need to upgrade your WSDL as soon as a new version is generallyavailable. NetSuite supports each endpoint for three years. For information about the supportedgenerally available versions, see the help topic Support for Existing WSDL Versions.
After the WSDL becomes generally available, you can upgrade your other client applications. Thegeneral availability of the WSDL is announced in the Integration Newsletter.
You are able to access the new WSDL during your Release Preview period. Click here to view the 2019.1Release Preview (beta) WSDL.
Important: When you attempt to access the beta version of the WSDL, you may receive thefollowing error. To avoid this error and ensure that you receive the correct response, use youraccount-specific domain for your request for the data center URL. Alternatively, you can use thec parameter in your request to specify your account ID. The routing depends on the version ofyour NetSuite account, and not the version of the WSDL you use.

SuiteTalk (Web Services) Integration 70
ReleaseNotes_2019.1.0.pdf - Subject to Change - ReleasePreview Draft
Note: Previously, you accessed the Release Preview WSDL in the beta domain. As of 2018.1,you must access it on the NetSuite domain. This change is the result of the transition of ReleasePreview accounts from the beta domain to the NetSuite domain. The NetSuite domain is thedomain used by production accounts.
Araxis Merge Diff File for the 2019.1 EndpointThe Araxis Merge Diff file will highlight 2018.2 - 2019.1 schema changes. The diff file is not yet available,but this section provides details about the types of information it will include.
■ About the Araxis Diff File
■ Using the Araxis Diff File
About the Araxis Diff FileNetSuite publishes an Araxis Diff File for every new endpoint. Depending on the scope of the release,changes described in the Araxis Diff File may include:
■ New record types
■ Elements (fields) that have been added, removed, or changed
■ New sublists (lists)
■ New joins
■ New search filters and search return columns
■ New platform operations
Using the Araxis Diff File
Important: The figures in this section are for illustrative purposes only. They do not reflectchanges related to any specific endpoint.
The SuiteTalk diff file is generated using Araxis Merge. When you click the diff file link (when it isavailable), a page appears that offers an overview of all schema changes.
The following screenshot shows how this summary page looks. In this example, the rows highlightedin purple indicate that an XSD has been modified. The integers at the center indicate the number ofchanged lines in the file. To see the exact differences, click the Report link in the column at the right, orclick the name of the file in either column.

SuiteTalk (Web Services) Integration 71
ReleaseNotes_2019.1.0.pdf - Subject to Change - ReleasePreview Draft
When you click any of these links, the diff file shows a page with two columns. The previous version ofthe file is displayed on the left, and the new version on the right. Changed elements are highlighted.
For example, the following screenshot shows an excerpt from the report onplatform.commonTypes.xsd. Notice the addition of two values to the PermissionCode enumeration:_accessPaymentAuditLog and _advancedPDFHTMLTemplates.
The diff file also shows changes to data types. The following screenshot is a snapshot oftransactions.sales.xsd. Notice that the chargeType element changed from an enumeration to aRecordRef.
2019.1 SuiteTalk Schema BrowserThe 2019.1 SuiteTalk Schema Browser is not yet available.
SuiteCloud IDE Plug-insSuiteCloud IDE plug-ins can be installed in integrated development environments (IDEs) for NetSuiteplatform development.
SuiteCloud IDE plug–ins for 2019.1 include the following features and behavior changes:
■ 2019.1 Plug-in for Eclipse is Not Yet Available for Download
■ 2019.1 Plug-in for WebStorm is Not Yet Available for Download
Generally, 2019.1 plug-in behavior changes are designed to support the SuiteCloud DevelopmentFramework. In addition, SuiteCloud IDE plug-ins for versions 2017.1 and later have compatibilityrequirements. The version of your plug-in must match the version of your NetSuite account beforeyou can use the plug-in to create SuiteCloud Development Framework (SDF) projects. For informationabout additional features that impact SuiteCloud IDE plug-ins, see the release note for SuiteCloudDevelopment Framework.
2019.1 Plug-in for Eclipse is Not Yet Available forDownloadThe 2019.1 Eclipse plug-in is targeted to be released in February 2019.

SuiteCloud IDE Plug-ins 72
ReleaseNotes_2019.1.0.pdf - Subject to Change - ReleasePreview Draft
Important: When your account is upgraded to 2019.1, your instance of the plug–in is notupdated automatically to 2019.1. After your account upgrade, you must manually upgrade theplug-in to the latest version. For more information, see the help topic Updating Eclipse for Usewith SuiteCloud IDE.
2019.1 Plug-in for WebStorm is Not Yet Available forDownloadThe 2019.1 WebStorm plug-in is targeted to be released in February 2019.
Important: When your account is upgraded to 2019.1, your instance of the plug–in is notupdated automatically to 2019.1. After your account upgrade, you must manually upgrade theplug–in to the latest version. For more information, see the help topic Adding the SuiteCloudIDE to WebStorm.
SuiteCloud Development FrameworkSuiteCloud Development Framework (SDF) is a development framework and deployment mechanism.Customers and partners can use SDF to create customization projects for internal use within theirorganizations or for commercial distribution. For more information about SDF, see the help topicSuiteCloud Development Framework Overview.
For a complete list of custom records and customizations that are supported by SDF, see the help topicCustomizations Supported by SuiteCloud Development Framework.
With the release of SuiteCloud Development Framework, the SuiteCloud Terms of Service were updatedin September 2016 to specifically include SuiteCloud Development Framework as one of the listedSuiteCloud Technologies and to make other clarifying changes. You can review the complete updatedterms at http://www.netsuite.com/termsofservice.
View the SuiteCloud Development Framework 2018.2 New Feature Training.
NetSuite 2019.1 includes the following enhancements to SuiteCloud Development Framework features:
■ New Standard Role for Developer
■ Ability to Execute Installation Scripts in a SuiteApp Project Deployment
■ Installation Preferences Now Support File and Folder Locking in SDF SuiteApps
■ SDF Now Supports Custom Content Type Records for SuiteCommerce Site Management
■ Roles in SDF Now Support Restrictions
■ New Workflow Enhancements Supported in SDF
■ SDF SDK 2019.1 is Not Yet Available for Download
■ Copy to Account (Beta): Copy a Custom Record from One Account to Another
Generally, SDF features are supported by SuiteCloud IDE plug-ins. SuiteCloud IDE plug-ins for versions2017.1 and later have compatibility requirements. The version of your plug-in must match the versionof your NetSuite account before you can use the plug-in to create SuiteCloud Development Framework(SDF) projects. For information about additional features that may impact SDF, see the release notesfor SuiteCloud IDE Plug-ins.

SuiteCloud Development Framework 73
ReleaseNotes_2019.1.0.pdf - Subject to Change - ReleasePreview Draft
New Standard Role for DeveloperIn previous releases, NetSuite did not include a standard Developer role to use with SDF. You eitherrequired the administrator role or an administrator had to create a custom role and provide access toseveral permissions.
As of 2019.1, administrators can assign or customize the new Developer role and assign it to SDFusers. To find the Developer role, go to Setup > Users/Roles > User Management > Manage Roles(Administrator) and choose Developer from the list of roles.
The new Developer role includes all permissions required to work with SDF. Administrators shouldenable SDF-supported features before customizing the Developer role for SDF users. See the help topicEnabling SDF in Your NetSuite Account (Admin Only).
Note: You must customize the Developer role when working with SDF projects that eitherimpact standard record types or require additional permissions that are not included with thestandard Developer role. The customized role must have the appropriate permissions enabledfor all the standard record types your project affects.
For more information, see the following:
■ NetSuite Roles Overview
■ Assigning the Developer Role (Admin Only)
Ability to Execute Installation Scripts in a SuiteApp ProjectDeploymentPrior to 2019.1, only bundle installation scripts were available for running SuiteScripts during a bundleinstallation. You could add bundle installation script entry points to run scripts before or after aninstallation or update. A script type to run during SuiteApp installations was not available. If you usedSDF to deploy a SuiteApp project, you could not execute your installation scripts.
As of 2019.1, installation scripts for SuiteApp projects are supported with the new SDF installationscript type. You can add run elements to the deploy file in your SuiteApp project to trigger execution ofSDF installation scripts.
For information about using SDF installation scripts in a SuiteApp project, see the following topics:
■ Changing the SuiteApp Deploy File
■ Using an SDF Installation Script
Changing the SuiteApp Deploy FileWithin the run element, you can reference the installation file path and script ID of the deploymentrecord for the script you want to execute. The location of the run element within the deploy filedetermines the order that the deployment runs.
The following is an example of a deploy file with a run element that contains references to theSuiteScript file path and the script ID of the deployment record for the referenced SuiteScript:
<deploy>
<run>
<script>
<path>~/Objects/customscript_install_script.xml</path>
<deployment>customdeploy1</deployment>

SuiteCloud Development Framework 74
ReleaseNotes_2019.1.0.pdf - Subject to Change - ReleasePreview Draft
</script>
</run>
</deploy>
In the following example, the run element indicates that the following actions will occur for each of thethree scripts when they are executed:
1. The script file is uploaded.
2. The script record and deployment is created from the XML definition.
3. The script is executed.
Note: Installation scripts are executed as the role you used to deploy the SuiteApp project.
<deploy>
<files>
<path>~/FileCabinet/SuiteApps/com.example.scriptdemo/*</path>
</files>
<run>
<script>
<path>~/Objects/customscript_execute.xml</path>
<deployment>customdeploy_before_objects</deployment>
</script>
</run>
<objects>
<path>~/Objects/*</path>
</objects>
<run>
<script>
<path>~Objects/customscript_execute2.xml</path>
<deployment>customdeploy_1</deployment>
</script>
<script>
<path>~/Objects/customscript_execute.xml</path>
<deployment>customdeploy_after_objects</deployment>
</script>
</run>
</deploy>
Using an SDF Installation ScriptNetSuite 2019.1 introduces a new server-side SuiteScript 2.0 script type called SDF installation script.You can create script records and script deployments for instances of this new script type the same wayyou can for other SuiteScript 2.0 scripts.
Use this script type when you want to write code that performs tasks during an SDF deploymentto your target account. Tasks include setup, configuration, and data management tasks that wouldotherwise have to be completed by account administrators. The following are some examples:
■ Trigger code to verify the account
■ Customize the installation
■ Set up the target account
■ Prevent installation if proper setup has not occurred
■ Migrate existing data

SuiteCloud Development Framework 75
ReleaseNotes_2019.1.0.pdf - Subject to Change - ReleasePreview Draft
To execute the script during your SuiteApp project deployment, the script must be associated with ascript record and deployment record. Script records and deployments can be created in your projectas XML representations. For more information, see the help topic SuiteCloud Development FrameworkXML Reference.
SDF installation scripts are governed by a maximum of 10,000 units per execution. For moreinformation, see the help topic Script Usage Unit Limits.
Installation Preferences Now Support File and FolderLocking in SDF SuiteAppsSupport for installation preferences was added in 2018.1. It included the ability to hide files or foldersand lock most custom objects.
As of 2019.1, locking installation preferences are extended to files and folders.
A locked file in a NetSuite account is protected from being edited, copied, or downloaded as XML.When you lock a folder, you lock all files and folders it contains.
You can list the path and name of a single file that you want to lock when your project is deployedin the locking.xml file in the InstallationPreference folder.To lock multiple files when your project isdeployed, you can use the path and name of a folder, an appliesTo attribute, and a wildcard in thelocking.xml file.
From the Installation folder of a SuiteApp project, the locking.xml file uses the following lines:
<preference type="LOCKING" defaultAction="UNLOCK">
<apply action="LOCK">
<path> ~/FileCabinet/SuiteApps/com.example.mysuiteapp/file132.js</path> <!lock a single file-->
</apply>
</preference>
The example above sets the preference type to LOCKING, the default action to UNLOCK, the applyaction to LOCK, and references those preferences to apply to file132.js.
To include folder contents, such as all of the files in your SuiteApp, you must include a wildcard (*) andthe appliesTo attribute in the path:
<path appliesTo="FILES">~/FileCabinet/SuiteApps/com.example.myfiles/*</path> <!locks all the files under the ~/
FileCabinet/SuiteApps/com.example.myFiles folder-->

SuiteCloud Development Framework 76
ReleaseNotes_2019.1.0.pdf - Subject to Change - ReleasePreview Draft
If you reference a folder path that uses a wildcard, you must also set the includeRoot attribute:
<path appliesTo="FILES_AND_FOLDERS" includeRoot="F">~/FileCabinet/SuiteApps/com.example.myfiles/folderA/*</path> <!locks
all the files and folders within the ~/FileCabinet/SuiteApps/com.example.myfile/ folder-->
<path appliesTo="FILES_AND_FOLDERS" includeRoot="T">~/FileCabinet/SuiteApps/com.example.myfiles2/folder/A*</path> <!locks
all the files and folders of ~/FileCabinet/SuiteApps/com.example.myfiles2/ including the folder specified-->
This locking preference can be applied to items in folders supported by SDF:
■ SuiteApps. For example, ~/SuiteApps/<application-ID>/<subfolder-name>.
■ Web Site Hosting. For example, ~/FileCabinet/Web Site Hosting Files/<hosting-root-folder-name>/SSP Applications/<application-ID>.
You must apply content protection for each project deployment to apply the installation preferencesyou specified in the InstallationPreferences folder of a SuiteApp project.
For more information, see the following topics:
■ Locking Files in an SDF SuiteApp Project
■ Installation Preferences in a SuiteApp Project
■ Setting Installation Preferences
■ Using the Content Protection Option to Apply Installation Preferences
SDF Now Supports Custom Content Type Records forSuiteCommerce Site ManagementAs of 2019.1, SDF supports CMS content type records for use with site management tools. In NetSuite,these records are located under Lists > Web Site > CMS Content Types. For more information, see thehelp topics Custom Content Type and CMS Content Type Record.
The following is an example of a custom content type record object in SDF that uses all available fields:
<cmscontenttype scriptid="custcontenttype_sample">
<customrecordid>[scriptid=customrecord_childdatetime]</customrecordid>
<description>This is the description of the content type.</description>
<iconimagepath>/netsuite.com/sample_image.svg</iconimagepath>
<label>Sample CCT</label>
<name>Sample Custom Content Type</name>
</cmscontenttype>
For more information, see the following:
■ CMS Content Types as XML Definitions
■ cmscontenttype
Roles in SDF Now Support RestrictionsYou can now apply any type of restriction to custom roles in SDF. Restrictions define the set of recordsthat users of an assigned role can view or edit for specific record types, such as employees. For moreinformation, see the help topic Permissions and Restrictions.

SuiteCloud Development Framework 77
ReleaseNotes_2019.1.0.pdf - Subject to Change - ReleasePreview Draft
SDF now supports the following restriction fields for custom roles:
■ The Employee Restrictions field, including the ability to view employee records that are not availablefor editing.
■ The Do Not Restrict Employee Fields field, which determines whether users can select anyemployee.
■ The Restrict Time and Expenses field, which determines whether users can view or edit those fields.
■ The Restrictions sublist, where you can select a segment, a segment restriction, whether to allowviewing, and whether to apply restrictions to items.
The following is an example of a custom role object in SDF that uses the new restriction fields:
<role scriptid="customrole_restrictsample">
<centertype>ACCOUNTCENTER</centertype>
<name>Role Restriction Sample</name>
...
<employeerestriction>UNASSIGNED</employeerestriction>
<employeeviewingallowed>T</employeeviewingallowed>
<restricttimeandexpenses>T</restricttimeandexpenses>
...
<recordrestrictions>
<recordrestriction>
<segment>LOCATION</segment>
<restriction>OWNONLY</restriction>
<itemrestricted>T</itemrestricted>
<viewingallowed>T</viewingallowed>
</recordrestriction>
<recordrestriction>
<segment>DEPARTMENT</segment>
<restriction>DEFAULTTOOWN</restriction>
<itemrestricted>F</itemrestricted>
<viewingallowed>F</viewingallowed>
</recordrestriction>
<recordrestriction>
<segment>CLASS</segment>
<restriction>UNASSIGNED</restriction>
<itemrestricted>T</itemrestricted>
<viewingallowed>F</viewingallowed>
</recordrestriction>
</recordrestrictions>
</role>
For more information, see the following:
■ Roles and Permissions as an XML Definition
■ role
New Workflow Enhancements Supported in SDFThe following 2019.1 SuiteFlow feature enhancements are supported in SDF so that they can be usedwith custom Workflow objects:
■ New Create Line Action. A new createlineaction structure has been added to theworkflowactiongroup and workflowactions structures.

SuiteCloud Development Framework 78
ReleaseNotes_2019.1.0.pdf - Subject to Change - ReleasePreview Draft
■ Enhancements to Release Status. The new SUSPENDED Workflow Release status is available. Inaddition to the new release status, the NOTRUNNING status has been renamed to NOTINITIATING.The NOTRUNNING status is still supported for backwards compatibility.
■ Enhancement to Set Field Display Label Action.
■ Enhancement to Set Field Mandatory Action.
For more information, see the following:
■ Workflows as XML Definitions
■ workflow
SDF SDK 2019.1 is Not Yet Available for Download
Important: SDF SDK 2019.1 is targeted for release in the middle of February 2019.
SDF SDK contains the SDF command line interface (SDF CLI). You can use SDF CLI with your ownintegrated development environment (IDE) to create SDF projects, including SDF SuiteApps. You canalso create batch and shell scripts that use CLI commands to automate your project validation anddeployment processes. When used with your own IDE, CLI acts as an alternative to SuiteCloud IDE. Formore information about SDF CLI, see the help topic Command Line Interface Guide.
SDF SDK is supported on Windows, Linux, and Mac OS X. For more information, see the help topic SDFSDK Installation Prerequisites.
SuiteApps (Bundles) Released by NetSuiteNetSuite 2019.1 includes the following enhancements to SuiteApps released by NetSuite:
■ Accounting SuiteApps
■ Order Management SuiteApps
■ Inventory Management SuiteApps
■ Localization SuiteApps
■ Manufacturing SuiteApps
■ Taxation SuiteApps
Accounting SuiteAppsFollowing are the 2019.1 accounting enhancements to SuiteApps:
■ SuiteApprovals V3.0
■ Fixed Assets Management Enhancements
SuiteApprovals V3.0SuiteApprovals version 3.0 includes the following enhancements:
■ Support for Vendor Bill and Purchase Order Record Types – SuiteApprovals now supports vendorbill and purchase order record types, in addition to journals and engineering change orders.

SuiteApps (Bundles) Released by NetSuite 79
ReleaseNotes_2019.1.0.pdf - Subject to Change - ReleasePreview Draft
Using SuiteApprovals, you can now create approval rules for purchase order and vendor bill records.You can design approval rules for these records in two ways:
□ Using the total line amount as basis and then selecting and building an approval routing type:employee hierarchy or custom approval chain.
□ Specifying an approval chain regardless of the total amount on the record.
For vendor bill records, you can specify exception criteria to execute within the approvalworkflow.
■ Super Approval – The Super Approval feature applies to all supported record types: journal,engineering change order, purchase order, and vendor bill records. Super Approval is a capabilityby which an employee, designated as a Super Approver, can approve and finalize, or reject a record.The Super Approver’s action bypasses the approval chain in the running approval rule.
The Super Approver role is set on the employee record. Any employee or team in urgent need of arecord’s approval can directly contact the Super Approver with details and link to the record.
■ Skip Approval – An additional feature to creating approval rules for all supported record types,Skip approval can be applied to any rule that has the Route Approvals Based on Amount settingenabled. Skip approval is enabled by selecting the Require One Level of Approval Based onApprover’s Approval Limit option under the Approval Routing section of the rule record.
When enabled, the affected record is automatically routed to the approver who has the requiredapproval limit relative to the record’s amount. That approver’s action determines final approval orrejection of the record.
■ Multi-Language Support for SuiteApprovals – SuiteApprovals supports multiple languages.
For more information, see the help topic SuiteApprovals V3.0.
Fixed Assets Management Enhancements
Fixed Assets Management version 19.1 includes the following enhancements:
■ Lease Accounting
■ FAM Usability
■ Customize Report Template
Lease Accounting
The Lease Accounting feature is introduced in the Fixed Assets Management SuiteApp to comply withthe IFRS 16 and ASC 842 standards for lease. This standard requires lessees to recognize nearly allleases and transfer all operating leases to the balance sheet starting on January 1, 2019.
This feature lets you perform the following tasks in the Fixed Assets Management SuiteApp:
■ Create a lease proposal – The Lease Proposal record lets you propose a new lease, define theterms of the lease, add lease payments, and create the lease amortization schedule. The leaseamortization schedule contains the lease payments, interest, and the related interest journals forthe lease.
■ Add lease payments – You can add your lease payments in one of two ways:
□ One at a time – This can be done through the Lease Amortization tab of the Lease Proposalrecord.
□ By Bulk – This can be done through CSV import. After importing the lease payments, you cangenerate the lease schedules through the Generate Lease Schedules page.

SuiteApps (Bundles) Released by NetSuite 80
ReleaseNotes_2019.1.0.pdf - Subject to Change - ReleasePreview Draft
■ Create lease journal entries – When the lease amortization schedules for the lease proposal havebeen generated and completed, the Generate Lease Journal button will be available in the LeaseProposal record. You can click the button to create the lease journal entry, and recognize your Right-Of-Use Asset and Lease Liability. The link to the lease journal is available on the Lease Proposalrecord.
■ Record lease interest – This feature lets you recognize the interest amount per period. The interestamount is taken from the lease amortization schedule of the lease proposal. The Interest journal isthen linked back to the Lease Proposal record.
■ Migrate lease details — With the introduction of the Lease Accounting feature, the lease details inthe Lease tab of the asset record will no longer be used. The lease details of all newly-created leaseassets will be available in the Lease tab > Lease Proposal subtab. You can migrate lease details tocreate a Lease Proposal record for the existing lease assets.
FAM Usability
■ Delete Assets – Administrators are now able to delete incorrectly added assets. The assets must notbe created from a proposal or transaction and must not have any associated depreciation journalentries. The system will delete the asset, tax methods, corresponding asset values, and depreciationhistories for both asset and tax method.
■ Precompute depreciation values in System Setup – A Precompute depreciation values button hasbeen added to the FAM System Setup page. You can click the button to manually trigger the pre-computation of depreciation values.
■ Changes to the Asset List – When you view the Asset List (in Fixed Asset > Lists > Assets), you cannow see the values for the Current Net Book Value and Cumulative Depreciation. the correct andcurrent values will be reflected in the asset record when it is printed.
Customize Report Template
The ability to customize report templates through XML manipulation was introduced in an earlierversion of the FAM SuiteApp. In FAM 19.1, you can now customize the FAM report template throughthe user interface. You can add fields from the asset and alternate depreciation record to the followingreport templates:
■ Asset Register Report
■ Depreciation Monthly Report
■ Depreciation Schedule NBV Report
■ Depreciation Schedule PD Report
You can set the custom template as the preferred template. You can also choose to remove all yourcustomizations by reverting to the standard template.
Administration SuiteAppsFollowing is the 2019.1 administration enhancements to SuiteApps:
Application Performance Management (APM) EnhancementsFollowing are enhancements to the APM SuiteApp:
■ Multilanguage Support for the APM SuiteApp

SuiteApps (Bundles) Released by NetSuite 81
ReleaseNotes_2019.1.0.pdf - Subject to Change - ReleasePreview Draft
■ CSV Export Option Added to APM Pages
■ Exclusion of Internal Applications Data on the Concurrency Monitor
Multilanguage Support for the APM SuiteApp
APM version 1.09 enables you to view APM pages in multiple languages. Prior to this release, APMpages, which include their labels, field level help, links, statuses, and error messages, can be viewedonly in the English language.
Note: Ensure that the Multi-Language feature is enabled, so you can view the APM SuiteAppin multiple languages. As an Administrator, go to Setup > Company > International. Verify thatthe Multi-Language box is checked.
The APM SuiteApp now supports the following languages:
■ Chinese (Traditional)
■ Czech
■ Danish
■ Dutch
■ Finnish
■ French (Belgium)
■ French (Canada)
■ French (France)
■ German
■ Indonesian
■ Italian
■ Japanese
■ Korean
■ Latin American Spanish
■ Norwegian
■ Portuguese (Brazil)
■ Russian
■ Spanish
■ Swedish
■ Thai
■ Turkish
■ Vietnamese
Note: Multilanguage support applies only to features that were released prior to APM version1.09. Support for features that are released along with version 1.09 will be available in a futurerelease.
For more information about supported languages, read the help topic Setting Language Preferencesfor the APM SuiteApp.

SuiteApps (Bundles) Released by NetSuite 82
ReleaseNotes_2019.1.0.pdf - Subject to Change - ReleasePreview Draft
CSV Export Option Added to APM Pages
Prior to 2019.1, you can export data in CSV format only from the following tools: PerformanceDashboard, Page Time Summary, and SuiteScript Analysis.
APM version 1.09 extends the CSV export option to the following APM tools:
APM Tool Page or Window Name To Export Data
PerformanceDashboard
Dashboard page 1. Go to Customization > Performance > Dashboard.
2. On the Record Pages portlet, point to the upperright corner to show the menu icon.
3. Click the menu icon, and then select Export.
Page Time Summary Page Time Summary page 1. Go to Customization > Performance > Page TimeSummary.
2. Click the CSV export icon.
SuiteScript Analysis SuiteScript Details popupwindow
1. Go to Customization > Performance > SuiteScriptAnalysis.
2. On the SuiteScript Details portlet, click View Logs.
3. On the SuiteScript Details page, click the CSV exporticon.
SuiteCloud ProcessorsMonitor
SuiteCloud ProcessorsMonitor page
1. Go to Customization > Performance > SuiteCloudProcessors Monitor.
2. On the Overview portlet, click the CSV export icon.
SuiteCloud ProcessorsJob Details
SuiteCloud Processors JobDetails page
1. Go to Customization > Performance> SuiteCloud Processors Job Details.
2. On the Job Details portlet, click the CSV export icon.
Search PerformanceDetails
Saved Search Logs popupwindow
1. Go to Customization > Performance > SearchPerformance Details.
2. On the Saved Search Details portlet, click any datapoint.
3. On the Saved Search Logs popup window, click theCSV export icon.
Concurrency Details Instance Details popupwindow
1. Go to Customization > Performance > ConcurrencyMonitor.
2. Filter the data according to date range. To knowmore, read the help topic Filtering Data on theConcurrency Monitor Dashboard.
3. On the General Concurrency portlet, choose the cellof the hour you want to explore.
4. Click the cell to access the Concurrency Detailsdashboard.
5. On the Detailed Concurrency portlet, click the ViewRequests link on the tooltip to go to open theInstance Details popup window.
6. Click the CSV export icon.
Web Services Analysis Web Services OperationLogs popup window
1. Go to Customization > Performance > Web ServicesAnalysis.

SuiteApps (Bundles) Released by NetSuite 83
ReleaseNotes_2019.1.0.pdf - Subject to Change - ReleasePreview Draft
APM Tool Page or Window Name To Export Data2. Click a data point to open Web Services Operation
Details page.
3. On the Performance Details portlet, click any datapoint.
4. On the Web Services Operation Logs popupwindow, click the CSV export icon.
Web Services RecordProcessing Logs popupwindow
1. Go to Customization > Performance > Web ServicesAnalysis.
2. Click a data point to open Web Services OperationDetails page.
3. On the Top Records Performance portlet, click anydata point.
4. On the Web Services Record Processing Logs popupwindow, click the CSV export icon.
For more information about CSV export support on APM, read the help topic Exporting Data fromApplication Performance Management.
Exclusion of Internal Applications Data on the Concurrency Monitor
As of 2019.1, requests that come from internal applications are excluded from the scope of theConcurrency Monitor tool in APM. This exclusion helps you monitor your concurrency usage moreaccurately, because the requests from the specified internal applications do not count toward yourconcurrency limit.
To start using the Concurrency Monitor dashboard, go to Customization > Performance > ConcurrencyMonitor.
For more information, read the help topic Monitoring Web Services and RESTlet Concurrency.
Order Management SuiteAppsFollowing are the 2019.1 order management enhancement to SuiteApps:
■ Electronic Bank Payments Enhancements
■ Inbound Shipment Management
■ Electronic Invoicing Enhancements
■ VeriTrans and PayU Payment Gateway Temporary Retirement
Electronic Bank Payments EnhancementsElectronic Bank Payments version 2019.1 includes the following features:
Note: These features are targeted to be available in the first quarter of 2019.
■ SuiteTax Support on Electronic Bank Payment File Creation
■ Support SuiteCloud Processors in Electronic Payments Queue Management
■ Direct Debit Processing to use SuiteScript 2.0
■ NetSuite SuiteApps License Client to Replace Advanced Electronic Bank Payments SuiteApp
■ Enhancements to Japan Bank Fee Calculation to Payment Transactions

SuiteApps (Bundles) Released by NetSuite 84
ReleaseNotes_2019.1.0.pdf - Subject to Change - ReleasePreview Draft
SuiteTax Support on Electronic Bank Payment File CreationDepending on the payment template, the Electronic Bank Payments SuiteApp uses the tax informationon the entity record when processing payments and generating bank payment files. To ensurecompatibility with the SuiteTax feature, a new field is added to the Payment File Template form. TheSuiteTax Bank File Template field sources the default tax registration of the entity record.
If the SuiteTax feature is enabled in your account, the value in the new SuiteTax Bank File Templatefield will be used by default when processing payments and generating bank files. If this field is blank,the value in the Bank File Template field will be used.
For more information, see the help topic Payment File Template Changes in NetSuite Electronic BankPayments 2019.1.
Support SuiteCloud Processors in Electronic Payments QueueManagementIn addition to supporting script deployments using script queues, you can also configure the ElectronicPayments Queue Management to use script deployments configured for SuiteCloud Processors.SuiteCloud Processors ensures that more tasks are processed in shorter time frame without any needfor complicated settings, and promotes effective use of resources.
Using the SuiteCloud Processors in Electronic Bank Payments, you can set the number of processorsassigned to a map/reduce script deployment record through the Concurrency Limit field. TheSuiteCloud Processors will automatically divide processing of the scripts used by the Electronic BankPayments SuiteApp for generating payment files.
Direct Debit Processing to use SuiteScript 2.0As of 2019.1, setting up of multiple queues for script deployments exclusive to Direct Debit functionswill no longer be possible. Instead, you can assign processors through the Concurrency Limit field ofthe map/reduce script deployment record for Direct Debit.
This is change is part of upgrading the Electronic Bank Payments SuiteApp by updating all functions forDirect Debit processing to use SuiteScript 2.0.
NetSuite SuiteApps License Client to Replace Advanced Electronic BankPayments SuiteAppAs of 2019.1, the Advanced Electronic Bank Payments SuiteApp is deprecated and replaced by theNetSuite SuiteApps License Client SuiteApp. As part of this change, new error handling and licensevalidation is added to the following advanced features of Electronic Bank Payments:
■ Advanced Electronic Bank Payment license is now required for Instant Bank File Generationfeature – As of 2019.1, license-based restriction now applies when you generate instant electronicbank payment file through Generate Bill or Customer Payment File page. The Generate BillPayment File or Generate Customer Payment File page can be accessed from Payments > Bank FileGeneration.
Without an active license With an active license
If your account does not have an active AdvancedElectronic Bank Payments license, the CompanyBank Account list does not include company bankaccounts that use the following:
□ A company bank detail record that uses standardtemplates that is not based in your account’scountry of operation.
If you have an active Advanced Electronic BankPayments license, the Company Bank Account listincludes company bank accounts that use standardand custom templates regardless of your country ofoperation.
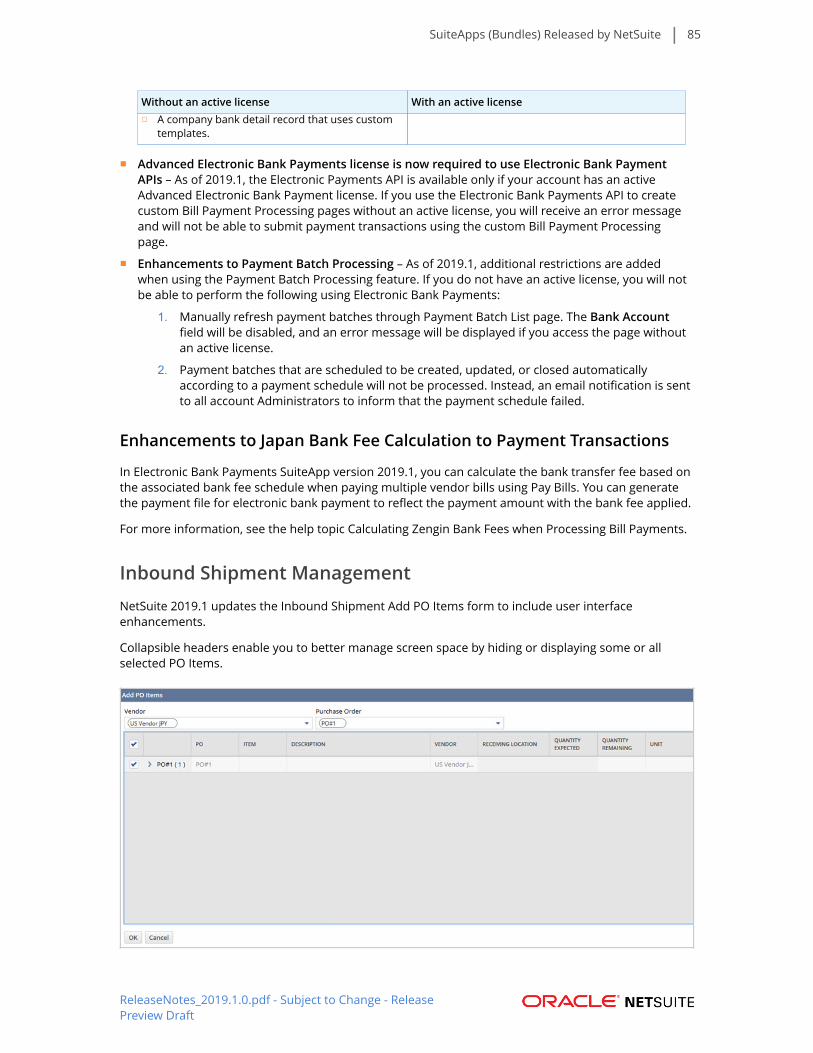
SuiteApps (Bundles) Released by NetSuite 85
ReleaseNotes_2019.1.0.pdf - Subject to Change - ReleasePreview Draft
Without an active license With an active license□ A company bank detail record that uses custom
templates.
■ Advanced Electronic Bank Payments license is now required to use Electronic Bank PaymentAPIs – As of 2019.1, the Electronic Payments API is available only if your account has an activeAdvanced Electronic Bank Payment license. If you use the Electronic Bank Payments API to createcustom Bill Payment Processing pages without an active license, you will receive an error messageand will not be able to submit payment transactions using the custom Bill Payment Processingpage.
■ Enhancements to Payment Batch Processing – As of 2019.1, additional restrictions are addedwhen using the Payment Batch Processing feature. If you do not have an active license, you will notbe able to perform the following using Electronic Bank Payments:
1. Manually refresh payment batches through Payment Batch List page. The Bank Accountfield will be disabled, and an error message will be displayed if you access the page withoutan active license.
2. Payment batches that are scheduled to be created, updated, or closed automaticallyaccording to a payment schedule will not be processed. Instead, an email notification is sentto all account Administrators to inform that the payment schedule failed.
Enhancements to Japan Bank Fee Calculation to Payment Transactions
In Electronic Bank Payments SuiteApp version 2019.1, you can calculate the bank transfer fee based onthe associated bank fee schedule when paying multiple vendor bills using Pay Bills. You can generatethe payment file for electronic bank payment to reflect the payment amount with the bank fee applied.
For more information, see the help topic Calculating Zengin Bank Fees when Processing Bill Payments.
Inbound Shipment ManagementNetSuite 2019.1 updates the Inbound Shipment Add PO Items form to include user interfaceenhancements.
Collapsible headers enable you to better manage screen space by hiding or displaying some or allselected PO Items.

SuiteApps (Bundles) Released by NetSuite 86
ReleaseNotes_2019.1.0.pdf - Subject to Change - ReleasePreview Draft
Within the PO Item header, you can select which PO Items to include or exclude in the shipment. Thisfeature also enables you to edit column details, such as Quantity Expected or Expected Rate.
To learn more, see the help topic Using Inbound Shipment Management.
Electronic Invoicing EnhancementsThe Electronic Invoicing SuiteApp version 4.0 includes the following new features and enhancements:
■ Custom Plug-in Implementations
■ E-document Certification in Outbound E-document Process
■ Multi-Subsidiary Customer and Vendor in Outbound E-document Process
■ Restrict Editing of Transactions based on E-document Status
■ Change to the View XML button
Custom Plug-in Implementations
Custom plug-in Implementations are supported for the following:
■ E-document sending method - On a new sending method record, a new E-Document SendingMethod Plugin Implementation field is available where you can select the sending method customplug-in implementation to use. For more information, see the help topic Creating a Custom Plug-inImplementation for Sending E-Documents.
■ Inbound e-document validation - On a new inbound validation plug-in record, you can select acustom validation plug-in from the new Inbound E-Document Validation Plugin Implementationfield. For more information, see the help topic Creating a Custom Plug-in for Inbound E-DocumentValidation.
■ Custom data source for e-documents – On a new e-document template record, a new CustomData Source Plugin Implementation field is available. In this field, you can select the custom datasource plug-in implementation to add more field values to e-documents that will be generated. Formore information, see the help topic Creating a Custom Plug-in Implementation for E-DocumentCustom Data Source.
Existing scripts for sending methods and inbound validation will continue to work. But you mustconvert these scripts into plug-in implementations by NetSuite 2019.2. After the 2019.2, sendingmethod and inbound validation scripts will not be supported anymore.
E-document Certification in Outbound E-document Process
E-document certification is now supported in the outbound e-document process. You can send e-documents to a certification authority or tax agency to be certified. The administrator can create asending method to be used for certification by checking the new Sending Method for Certificationbox on a sending method record. A generated e-document with the associated certification sendingmethod will display a Certify E-Document button, which when clicked sends the e-document to thecertification authority. The XML file of successfully certified e-documents can be viewed by clicking alink from the E-Document subtab under Certified E-Document. New e-document statuses describe theprogress of the e-document in the certification process. For more information, see the help topic E-Document Certification in the Outbound Process.
Multi-Subsidiary Customer and Vendor in Outbound E-document Process
Multi-subsidiary customer and vendor is supported in the outbound e-document process. A newSubsidiary field on outbound e-document template and sending method records enables theadministrator to select multiple subsidiaries. In addition, if only one outbound template or one sending

SuiteApps (Bundles) Released by NetSuite 87
ReleaseNotes_2019.1.0.pdf - Subject to Change - ReleasePreview Draft
method is associated with a customer or vendor, automatic selection of that template and sendingmethod can be enabled on the transactions of the customer or vendor. To do this, you can check thenew Template and Sending Method Auto-selection box on the E-Document subtab of a customeror vendor record. The template and sending method will be automatically selected as the defaultvalue of the E-Document Template or E-Document Sending Method field on the transaction recordsof the customer or vendor. For more information, see the help topic Multi-subsidiary Support in theOutbound Process.
Restrict Editing of Transactions based on E-document Status
The administrator can restrict the editing of transactions based on the E-document status. On anoutbound e-document template record, e-document statuses can be selected from the new RestrictEditing of Transactions with E-document Status field. Transactions with the selected e-documentstatus will be locked for editing if the e-document template is associated with them.
Change to the View XML button
The View XML button on generated e-documents will no longer be available and will become a link onthe E-Document subtab of the transaction record.
VeriTrans and PayU Payment Gateway Temporary RetirementAs of 2019.1, the following payment gateways are temporarily unavailable because of an ongoinggateway security integration update:
PaymentGateway
What is Changing?
Pay U A warning message will display when you perform the following tasks in NetSuite using thePayU payment profile:
■ Creating a PayU Payment Profile – The message will inform you that PayU is unavailable inNetSuite 2019.1. All sales orders created using PayU will automatically be placed on hold.
■ Using the PayU Payment Processing Profile on Transactions – Status of web orders createdwill automatically be set to Payment Hold. The message will inform you that the payment ison hold and you will need to check the PayU gateway portal to review the payment requestof the order. After reviewing, you can either cancel the order or manually override thepayment hold to continue processing the payment transaction.
VeriTrans A warning message will display when you perform the following tasks in NetSuite using theVeriTrans payment profile:
■ Creating a VeriTrans Payment Profile – The message will inform you that VeriTrans isunavailable in NetSuite 2019.1 and you will be unable to use the payment processing profile.
■ Using the VeriTrans Payment Profile on Transactions – The message will inform you thata payment hold has been placed on the record when you use the payment profile on thefollowing transactions:
□ Get Authorization on Sales Order
□ Capture on Cash Sale
□ Charge Card on Cash Sale
□ Sale on Customer Deposit and Customer Payment
Inventory Management SuiteAppsFollowing is the 2019.1 inventory management enhancement to SuiteApps:

SuiteApps (Bundles) Released by NetSuite 88
ReleaseNotes_2019.1.0.pdf - Subject to Change - ReleasePreview Draft
Quality Management
Following are the enhancements to the Quality Management SuiteApp:
Multi-Language Support
NetSuite 2019.1 provides multi–language support for all lists, records, and fields throughout the QualityManagement SuiteApp and Quality table interface for all the languages supported in the NetSuite userinterface.
Specification Triggering API
The NetSuite 2019.1 Quality Management SuiteApp introduces a RESTlet based API that can be usedby customers, partners, and NetSuite professional services to trigger inspections for business casesnot yet supported by the Quality Management configuration. For example, Receiving Inspection andManufacturing Inspection.
This API interfaces can GET (read), POST (create), and DELETE (cancel) new inspection requests that canbe tracked and completed through the tablet interface.
Implemented as a REST API, these operations can be leveraged by outside software components andthrough SuiteScript REST support. They can also be called from local NetSuite customizations.
The API ensures separation of inspections triggered in this manner versus those that occur because ofthe SuiteApp configuration to safeguard customizations from interfering with standard behavior.
To learn more, see the Quality Management REST API documentation.
Quality Tablet Queue Sidebar
Quality Management 19.1 introduces a new collapsible sidebar that displays the same list of Pendingand In-Work inspections as are in the primary Inspection Queue page.
This new feature enables quality engineers to view other pending inspections within the data entryform, without returning to the inspection queue.
The following screenshot displays the sidebar expanded:

SuiteApps (Bundles) Released by NetSuite 89
ReleaseNotes_2019.1.0.pdf - Subject to Change - ReleasePreview Draft
The following screenshot displays the sidebar collapsed:
You can also collapse the data entry page header to better use screen space while retaining quickaccess to valuable information.
The following screenshot displays the information pane collapsed:
New Tablet Icons
New tablet icons offer the following features to provide intuitive access with minimal consumption ofscreen space:
■ Click the menu icon ( ) to expand the sidebar navigation pane. To collapse the pane, click the closeicon (X).
■ Click the up-arrow icon () to collapse the information pane to provide additional screen space fordata entry. Click the down-arrow icon ( ) to expand the pane.
Localization SuiteAppsThe following is the 2019.1 localization enhancement to SuiteApps.
SuiteApps (Bundles) Released by NetSuite 90
ReleaseNotes_2019.1.0.pdf - Subject to Change - ReleasePreview Draft
Enhancements to Japanese Invoicing and Localization Features
The Japan Localization SuiteApp version 19.1 includes the following new features and enhancements:
■ Support for Zengin XML Payment Format
■ Enhancements to the Invoice Summary
■ Support for Multi-Subsidiary Customer Feature
■ Access to Purchase Tax by Tax Category Report
Support for Zengin XML Payment Format
Japan Localization SuiteApp version 19.1 includes a Zengin XML template file that you can use forelectronic bank payments in Japan.
To use this feature, you must first install or update to the latest version of the Electronic BankPayments SuiteApp. Next, you must install or update the Japan Localization SuiteApp, which addsthe Zengin XML template to the Electronic Bank Payments SuiteApp. Then, using the Electronic BankPayments SuiteApp, you can generate electronic payment files in Zengin XML format when you transferpayments to vendors, employees, and partners.
Note: Automatic calculation of bank fees is not yet supported using the Zengin XML template.
For more information, see the help topic Support for Japan Zengin XML Payment Format.
Enhancements to the Invoice Summary
The following are enhancements to the invoice summary:
■ Using a Customer Saved Search for the Invoice Summary
A customer saved search can be specified in the new Customer Saved Search field on the GenerateInvoice Summary page. This feature enables you to apply a custom search for customers that youwant to include in the invoice summary. For more information, see the help topic Generating aJapanese Invoice Summary.
■ Adding Transaction Field Values to the Invoice Summary
In the Statement Search field, you can select a public transaction saved search that specifiesfields whose values you want to include in the invoice summary. This field is available on a Japansubsidiary record for OneWorld accounts or on the Company Information page for accounts thatare not OneWorld. For more information, see the help topic Adding Field Values to the InvoiceSummary Output.
■ Changes to the Invoice Summary Template and Its Field
The Default Invoice Summary Template field is renamed to Invoice Summary Template. This fieldis available on a Japan subsidiary record for OneWorld accounts or on the Company Informationpage for accounts that are not OneWorld. For more information, see the help topic Setting theInvoice Summary Template. The default invoice summary template included in the SuiteApp alsohave changes.
■ Including Overdue Invoices in the Invoice Summary
If the Include Overdue Invoices box is checked on the Generate Invoice Summary page, the searchresult will include invoices with the transaction closing date the same as the closing date of thepayment term. Previously, the criteria is set to include only overdue invoices that were still open

SuiteApps (Bundles) Released by NetSuite 91
ReleaseNotes_2019.1.0.pdf - Subject to Change - ReleasePreview Draft
as of closing date. Also, the Invoice Summary Invoice Details section on the generated invoicesummary will indicate the net amount. For more information, see the help topic Generating aJapanese Invoice Summary.
■ Statement Template Field
The Statement Template field is removed from the invoice summary search results page. You canselect a statement template in the Invoice Summary Template field on a Japan subsidiary recordfor OneWorld accounts, or on the Company Information page for accounts that are not OneWorld.
■ Statement Date on the Invoice Summary
The Statement Date on the invoice summary indicates the same date selected in the Closing Datefield on the Generate Invoice Summary page.
Support for Multi-Subsidiary Customer Feature
In the invoice summary, you can include transactions of customers with Japan as secondary subsidiaryif the following are set:
■ Include in Invoice Summary box is checked on the invoice
■ Use Invoice Summary box is checked on the customer record
After generating the invoice summary, the subsidiary is indicated on the search results page. For moreinformation, see the help topics Specifying Customers Who Use Invoice Summaries and SpecifyingTransactions for Inclusion in an Invoice Summary.
Access to Purchase Tax by Tax Category Report
By default, the Bookkeeper, Payroll Manager, A/P Clerk, and A/R Clerk roles do not have access to thePurchase Tax by Tax Category Report. You must create custom roles and grant them access to thereport. For more information, see the help topic Deductible Purchase Tax Calculation for Japan.
Manufacturing SuiteAppsFollowing is the 2019.1 manufacturing enhancements to SuiteApps.
Advanced Manufacturing
The Advanced Manufacturing SuiteApp version 2019.1 includes the following enhancements and newfeatures, and incorporates fixes to several customer-reported issues.
■ Production Unit of Measure
■ Tablet Non-Routing Work Order Support
Production Unit of Measure
NetSuite Advanced Manufacturing 2019.1 customers to report production quantities in an alternateUnit of Measure (UoM). You can now record assembly production in a unit of measure to minimizethe need for calculation. This new feature is available in the shop floor tablet in Normal and Real-Timemodes, including both production and scrap reporting.
To learn more, see the help topic Assemblies and Units of Measure.

SuiteApps (Bundles) Released by NetSuite 92
ReleaseNotes_2019.1.0.pdf - Subject to Change - ReleasePreview Draft
Administration and Setup
The 2019.1 Advanced Manufacturing subtab enables you to select default Assembly Production Units.You can only select the units defined for the Item Unit Type. This selection is then copied to a newProduction Units Type field for reference.
Newly created work orders now inherit the production unit information from the assembly item. Youcan update this field when specific production needs will benefit from reporting alternative units. Forexample, change in production lines which package differently or location variations in production.
For a complete description of the administrative setup, see the help topic Defining AdministrationSettings.
Production Units of Measure in the Tablet Interface
For consistency with NetSuite transaction counts and reporting, the Advanced Manufacturing tabletwork queue continues to display work order expected and produced amounts in base units.

SuiteApps (Bundles) Released by NetSuite 93
ReleaseNotes_2019.1.0.pdf - Subject to Change - ReleasePreview Draft
The data entry form displays the expected unit of measure for production reporting in parenthesis inthe Quantity field. Tables that display previously reported production, now list quantities as they wereentered (without conversion to base units) with a reminder of the units of measure being used.
The following tablet interface updates are available in Advanced Manufacturing 2019.1:
■ Production Normal and Real-Time mode
■ Scrap Normal and Real-Time mode
Production reporting for conventional work orders does not support production units of measure.
For a complete overview of how to use the new tablet interface, see the help topic AdvancedManufacturing.
Reporting
All Advanced Manufacturing records used to capture production reporting now include the followingquantity fields:
■ Production Quantity- base units of measure
■ Quantity in Production Units - production quantity converted to the Production UoM
Both fields are guaranteed to be populated regardless of production units of measure setting forconsistent search and reporting.

SuiteApps (Bundles) Released by NetSuite 94
ReleaseNotes_2019.1.0.pdf - Subject to Change - ReleasePreview Draft
Tablet Non-Routing Work Order Support
NetSuite Advanced Manufacturing 2019.1 enables you to prioritize and execute conventional workorders (work orders without routings) in the Advanced Manufacturing shop floor tablet interface.Cleaner, more intuitive forms enable operators to record assembly production. The system automatesthe associated transaction processing.
Reconfigurable plugins automate inventory detail generation related to bin location and lot/serialnumbers used in manufacturing. This can reduce shop floor data entry and help enforce rules for itemconsumption and production with respect to lot/serial information.
■ Serialized assemblies is a beta feature. The contents of this feature are preliminary and may bechanged or discontinued without prior notice. Any changes may impact the feature’s operationwith the NetSuite application. Oracle warranties and product service levels shall not apply to thefeature or the impact of the feature on other portions of the NetSuite application. Oracle mayreview and monitor the performance and use of this feature. The documentation for this feature isalso considered a beta version and is subject to revision.
Limited testing has been completed on plugin serial number retrieval and validation. You shouldtest this feature in your sandbox account and report any issues so that subsequent releases cancompletely handle serialized items.
■ Repeating the same work order component item multiple times (duplicate line item) is notsupported by the default plugin implementations.
To learn more, see the help topic Setting up Conventional Work Orders.
Taxation SuiteAppsFollowing are the 2019.1 taxation enhancements to SuiteApps:
■ Making Tax Digital Support for UK VAT
■ New Country Tax Reports for SuiteTax
■ Malaysia Sales and Service Tax (SST-02) Return
Making Tax Digital Support for UK VATBeginning April 1, 2019, all UK VAT-registered businesses with a taxable turnover above £85,000 mustuse the Making Tax Digital (MTD) system as mandated by Her Majesty's Revenue and Customs (HMRC).
In NetSuite, UK VAT-registered companies can use the Making Tax Digital for VAT feature to digitallykeep their VAT records, generate VAT Returns, and submit the UK VAT100 Return online to HMRC.
Using the MTD for VAT feature, you can:
■ Digitally store and maintain VAT records
■ Generate and submit the UK VAT100 Return online to HMRC
■ Export the VAT100 Return in an Excel file (.xls)
■ Consolidate the VAT100 Return Excel file with VAT reports from other systems, incorporateadjustments, and submit the final VAT100 Return to HMRC using a CSV file (.csv)
■ Retrieve previously submitted VAT100 Returns from HMRC
■ View the MTD VAT Return submission history
This feature requires the International Tax Reports SuiteApp. For more information about thisSuiteApp, see the help topic International Tax Reports.
SuiteApps (Bundles) Released by NetSuite 95
ReleaseNotes_2019.1.0.pdf - Subject to Change - ReleasePreview Draft
To know more about the Making Tax Digital for VAT feature, see the help topic Making Tax Digital forVAT.
New Country Tax Reports for SuiteTaxThe SuiteTax Reports SuiteApp enables you to generate localized tax reports by providing editabletemplates. Using this SuiteApp, you can choose the transactions that you want to include in your taxreports. Supported reports include VAT/GST returns, supplementary VAT/GST reports, EU Cross-Borderreports, and Tax Audit Files. To see the full list of country tax reports supported by SuiteTax Reportsand read other information about this SuiteApp, see the help topic SuiteTax Reports.
For more information on customizing localized tax returns in SuiteTax Reports, see the help topicCustomizing Localized Tax Returns.
Malaysia Sales and Service Tax (SST-02) ReturnInternational Tax Reports version 3.103.0 now includes the following country forms for Malaysia Salesand Service Tax Returns:
■ Malaysia Sales Tax Return (SST-02) – This worksheet automatically generates details and relatedvalues for Part A: Registered Manufacture / Registered Person Particulars and Part B: Value of TaxPayable for Goods (Sales, Disposed, Own Use).
■ Malaysia Service Tax Return (SST-02) – This worksheet automatically generates details and relatedvalues for Part A: Registered Manufacture / Registered Person Particulars and Part B2: Value of TaxPayable for Services (Services Performed, Own Use).
For more information, see the help topic Malaysia SST-02 Return.