ni 9792 wsn real-time gateway getting started guide ... the add node dialog box: a. select the type....
TRANSCRIPT
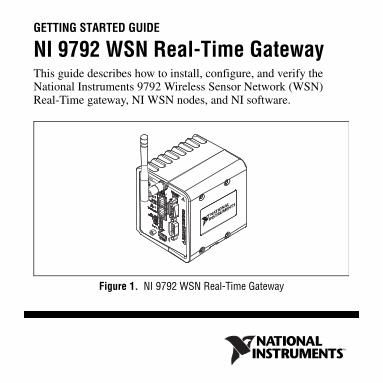
GETTING STARTED GUIDE
NI 9792 WSN Real-Time GatewayThis guide describes how to install, configure, and verify the National Instruments 9792 Wireless Sensor Network (WSN) Real-Time gateway, NI WSN nodes, and NI software.
Figure 1. NI 9792 WSN Real-Time Gateway

NI 9792 WSN Getting Started Guide 2 ni.com
Figure 2. NI WSN System Components
The NI WSN system contains four main components: a PC running Windows and NI software, a NI WSN gateway, NI WSN-32xx node(s), as shown in Figure 2, and an Ethernet network.
1 NI WSN-32xx Nodes2 NI 9792 WSN Real-Time
Gateway
3 PC Running NI Software4 Ethernet Connection (not pictured)
1
1 2
3
© National Instruments Corp. 3 NI 9792 WSN Getting Started Guide
What You Need To Get StartedFor information about which software version supports your device, go to ni.com/info and enter wsnsoftware.
• Host PC running Windows and NI software
• NI LabVIEW
• NI LabVIEW Real-Time Module
• NI LabVIEW WSN Module (Optional. Includes NI-WSN driver software)
• NI-WSN driver software, which contains NI Measurement & Automation Explorer (MAX)
• NI 9792 WSN gateway and appropriate power supply
• NI WSN-32xx node(s) with an approved power supply or four approved 1.5 V AA batteries for each node
• RJ45 Ethernet cable/Ethernet network
• Related hardware and software documentation

NI 9792 WSN Getting Started Guide 4 ni.com
Related DocumentationFor a complete list of documentation related to NI WSN, refer to ni.com/info and enter rdwsnrd. In addition to this guide, the following documents may be useful when configuring your NI WSN system.
• NI 9792 WSN Real-Time Gateway User Guide and Specifications
• NI WSN-32xx User Guide and Specifications
• MAX Help for WSN Devices, available in MAX from Start»AllPrograms»National Instruments»NI-WSN»Configuring WSN in MAX
• Refer to the NI-WSN book on the Contents tab of the LabVIEW Help, which is available by selecting Help»LabVIEW Help in LabVIEW
• NI-WSN Readme, available on the installation disc included with your device
Caution Before installing your device, read all product documentation to ensure compliance with safety, EMC, and environmental regulations.

© National Instruments Corp. 5 NI 9792 WSN Getting Started Guide
Step 1. Unpack and Set Up the DeviceRemove the device from the packaging and inspect it. Contact NI if the device appears damaged. Do not install a damaged device.
Caution The device is static sensitive. Always properly ground yourself and the equipment when handling or connecting to the device.
Powering on and Mounting the NI WSN DeviceRefer to the NI WSN device documentation for more information about powering on and mounting your device. Before setting up NI WSN nodes, remove and save the serial number sticker located on the back of NI WSN device for future use when configuring your device in software.
NI 9792 WSN Getting Started Guide 6 ni.com
Step 2. Install NI-WSN Software on the PC HostFor information about which software version supports your device, go to ni.com/info and enter wsnsoftware. You must be an Administrator or have administrator privileges to install NI software and devices on your computer. To install the NI-WSN software, complete the following steps:
1. Close all other applications.
2. Install NI LabVIEW.
3. Install NI LabVIEW Real-Time.
4. Install the NI LabVIEW WSN Module (optional).
5. Install the NI-WSN driver software.
Step 3. Install NI-WSN Software on the NI 9792 WSN Real-Time Gateway
1. Launch MAX.
2. Expand Remote Systems to confirm that MAX detects the NI 9792. If MAX is not detecting your device, refer to step 2 of Step 4. Configuring the NI WSN System.
© National Instruments Corp. 7 NI 9792 WSN Getting Started Guide
3. Expand the NI 9792 and click on Software and select Add/Remove Software.
4. Install NI-WSN for LabVIEW software.
Step 4. Configuring the NI WSN SystemYou must configure the NI WSN devices in MAX or in your web browser before using NI LabVIEW to take measurements. To confirm device recognition and configure the NI WSN system, complete the following steps:
1. Launch MAX.
2. Expand Remote Systems to confirm that MAX detects the NI 9792 gateway. If plugged into an Ethernet port on the local subnet or directly into the PC host, the device appears in Remote Systems. If the device is plugged into a port that is not on your subnet, try manually adding it by right-clicking Remote Systems and selecting Create New. Select Remote Device (not on the local subnet). Click Next.
• If your DHCP server is set up to automatically register hostnames, the hostname is registered as NI-NI9792-<serial number>. Enter the hostname and click Finish.

NI 9792 WSN Getting Started Guide 8 ni.com
• If you know the device IP address, such as 192.168.0.2, enter it and click Finish.
Note If you are still unable to detect your device, wait until the POWER LED on the device is green for V1, or yellow for V2, and the STATUS LED turns off. Wait one minute to allow the device to connect to the network and then press <F5> to refresh MAX. If the device does not appear, contact your system administrator to confirm that the network is functioning properly and that a firewall is not interfering with device discovery. For more information about the ports used for device discovery and communication, refer to the NI 9792 WSN Real-Time Gateway User Guide and Specifications.
3. Select the NI WSN Gateway and open the Network Settings tab.
a. Confirm or change the default settings.
b. For the Configure IPv4 Address field, select DHCP or Link Local or Static.
c. Click Apply to save changes.
© National Instruments Corp. 9 NI 9792 WSN Getting Started Guide
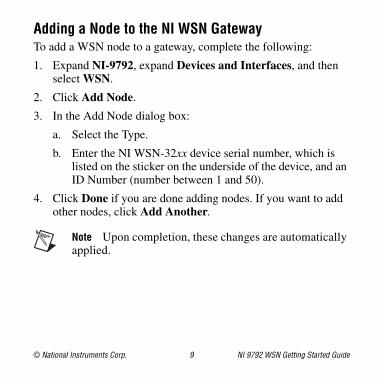
Adding a Node to the NI WSN GatewayTo add a WSN node to a gateway, complete the following:
1. Expand NI-9792, expand Devices and Interfaces, and then select WSN.
2. Click Add Node.
3. In the Add Node dialog box:
a. Select the Type.
b. Enter the NI WSN-32xx device serial number, which is listed on the sticker on the underside of the device, and an ID Number (number between 1 and 50).
4. Click Done if you are done adding nodes. If you want to add other nodes, click Add Another.
Note Upon completion, these changes are automatically applied.

NI 9792 WSN Getting Started Guide 10 ni.com
5. After nodes are added in MAX, nodes connect automatically when they are in range of a gateway.
Note If your node does not connect automatically, refer to ni.com/info and enter exxhqv for troubleshooting information.
© National Instruments Corp. 11 NI 9792 WSN Getting Started Guide
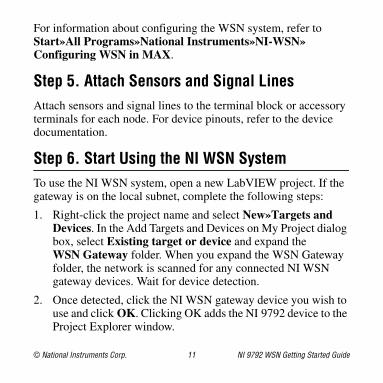
For information about configuring the WSN system, refer to Start»All Programs»National Instruments»NI-WSN»Configuring WSN in MAX.
Step 5. Attach Sensors and Signal LinesAttach sensors and signal lines to the terminal block or accessory terminals for each node. For device pinouts, refer to the device documentation.
Step 6. Start Using the NI WSN SystemTo use the NI WSN system, open a new LabVIEW project. If the gateway is on the local subnet, complete the following steps:
1. Right-click the project name and select New»Targets and Devices. In the Add Targets and Devices on My Project dialog box, select Existing target or device and expand the WSN Gateway folder. When you expand the WSN Gateway folder, the network is scanned for any connected NI WSN gateway devices. Wait for device detection.
2. Once detected, click the NI WSN gateway device you wish to use and click OK. Clicking OK adds the NI 9792 device to the Project Explorer window.

NI 9792 WSN Getting Started Guide 12 ni.com
3. Expand the listing for the NI WSN gateway in the NI LabVIEW project to see the NI WSN-32xx nodes connected to it. Expand each node to list the I/O variables.
If the gateway is not on the local subnet, complete the following steps:
a. Right-click the project name and select New»Targets and Devices, click Existing target or device, and click Specify a target or device by IP address.
b. Select IP Address and enter the IP address.
c. Expand the WSN Gateway folder and select the Gateway type and click OK.
d. To add the nodes, right click the gateway in the project and select New»Targets and Devices. Expand the WSN Node folder, select the node(s), and click OK.
© National Instruments Corp. 13 NI 9792 WSN Getting Started Guide
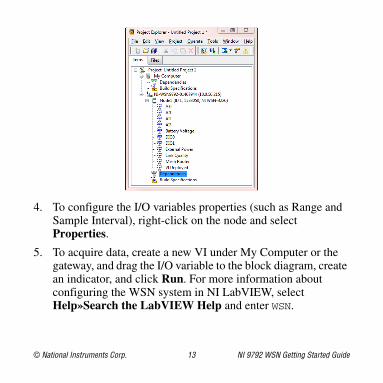
4. To configure the I/O variables properties (such as Range and Sample Interval), right-click on the node and select Properties.
5. To acquire data, create a new VI under My Computer or the gateway, and drag the I/O variable to the block diagram, create an indicator, and click Run. For more information about configuring the WSN system in NI LabVIEW, select Help»Search the LabVIEW Help and enter WSN.

NI 9792 WSN Getting Started Guide 14 ni.com
Programming ExamplesNI LabVIEW includes example programs to help you develop an application. To locate LabVIEW examples, go to ni.com/info and enter wsnexamples. For additional examples, refer to zone.ni.com.
Where to Go for SupportThe National Instruments Web site is your complete resource for technical support. At ni.com/support you have access to everything from troubleshooting and application development self-help resources to email and phone assistance from NI Application Engineers.
National Instruments corporate headquarters is located at 11500 North Mopac Expressway, Austin, Texas, 78759-3504. National Instruments also has offices located around the world to help address your support needs. For telephone support in the United States, create your service request at ni.com/support and follow the calling instructions or dial 512 795 8248. For telephone support outside the United States, visit the Worldwide Offices section of ni.com/niglobal to access the branch office Web sites, which provide up-to-date contact information, support phone numbers, email addresses, and current events.

© 2011 National Instruments Corp. All rights reserved.
373731A-01 Aug11
LabVIEW, National Instruments, NI, ni.com, the National Instruments corporate logo, and the Eagle logo are trademarks of National Instruments Corporation. Refer to the Trademark Information at ni.com/trademarks for other National Instruments trademarks. Other product and company names mentioned herein are trademarks or trade names of their respective companies. For patents covering National Instruments products/technology, refer to the appropriate location: Help»Patents in your software, the patents.txt file on your media, or the National Instruments Patent Notice at ni.com/patents. Refer to the Export Compliance Information at ni.com/legal/export-compliance for the National Instruments global trade compliance policy and how to obtain relevant HTS codes, ECCNs, and other import/export data.