ni cdaq-9138/9139 documentation accuracy and … before installing your device, read all product ni...
TRANSCRIPT
Installation andRecovery Media
Documentation
Power Connector NI cDAQ-9138/9139
Screwdriver Ferrite
OFF
12345
DO NOT SEPERATECONNECTORS
WHEN ENERGIZEDIN HAZARDOUS
LOCATIONS
POWERDRIVESTATUSUSER1
NI cDAQ-9138
NI CompactDAQ
DISABLE ATSAFE MODECONSOLE OUTIP RESETNO APPUSER1
ON
RESET
MX
I-E
xp
ress
x 1
RS-232
INPUT9-30 V75 W MAX
V1
C
V2
C
LINK
ACT/LINK
ACT/LINK
2
10/100/1000
10/100/1000
RS-435
678
Contents I Contenu I Inhalt内容 I 내용 I 内容
NI cDAQTM-9138/9139
Quick Start
Démarrage rapide
Erste Schritte
クイックスタート
시작하기
快速入门
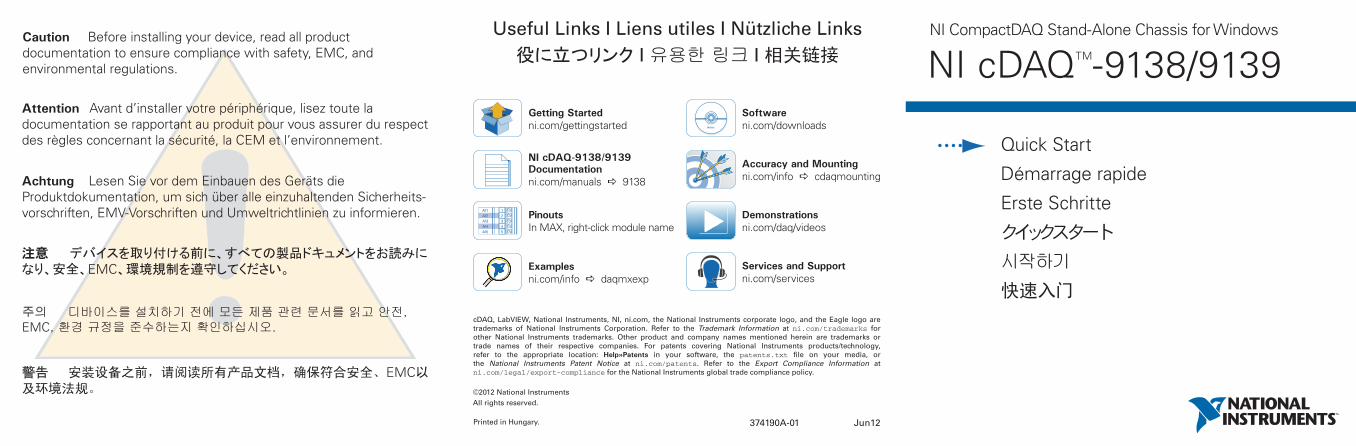
NI CompactDAQ Stand-Alone Chassis for WindowsCaution Before installing your device, read all product documentation to ensure compliance with safety, EMC, andenvironmental regulations.
Attention Avant d’installer votre périphérique, lisez toute la documentation se rapportant au produit pour vous assurer du respect des règles concernant la sécurité, la CEM et l’environnement.
Achtung Lesen Sie vor dem Einbauen des Geräts die Produktdokumentation, um sich über alle einzuhaltenden Sicherheits-vorschriften, EMV-Vorschriften und Umweltrichtlinien zu informieren.
11
cDAQ, LabVIEW, National Instruments, NI, ni.com, the National Instruments corporate logo, and the Eagle logo are trademarks of National Instruments Corporation. Refer to the Trademark Information at ni.com/trademarks for other National Instruments trademarks. Other product and company names mentioned herein are trademarks or trade names of their respective companies. For patents covering National Instruments products/technology, refer to the appropriate location: Help»Patents in your software, the patents.txt fi le on your media, or the National Instruments Patent Notice at ni.com/patents. Refer to the Export Compliance Information at ni.com/legal/export-compliance for the National Instruments global trade compliance policy.
©2012 National InstrumentsAll rights reserved.
374190A-01 Jun12
Getting Startedni.com/gettingstarted
Softwareni.com/downloads
Demonstrationsni.com/daq/videos��
PinoutsIn MAX, right-click module name
AI1AI2AI3AI4AI5
12345
Examplesni.com/info daqmxexp
Services and Supportni.com/services
NI cDAQ-9138/9139Documentationni.com/manuals 9138
Accuracy and Mountingni.com/info cdaqmounting
Printed in Hungary.
Useful Links I Liens utiles I Nützliche Links役に立つリンク I 유용한 링크 I 相关链接
22
Connectez le châssis cDAQ à la terre. Ensuite, installez les modules d’E/S. Reportez-vous aux instructions d’utilisation du module pour effectuer les connexions de signal.
Erden Sie das cDAQ-Chassis. Bauen Sie anschließend die I/O-Module ein. Die Verkabelung des Moduls ist in der Modulanleitung beschrieben.
cDAQシャーシをアースに接続します。 続いて、I/Oモジュールを取り付けます。 信号接続については、モジュールの操作手順を参照してください。
cDAQ 섀시를 접지에 연결합니다. 그런 다음 I/O 모듈을 설치합니다. 신호 연결은 해당 모듈의 사용 설명서를 참조하십시오.
Connect the cDAQ chassis to earth ground. Then install I/O modules. Refer to the module operating instructions for signal connections.
将cDAQ机箱接地。安装I/O模块。关于信号连接, 见模块使用说明。
Connectez un écran, un clavier et une souris au châssis cDAQ. Mettez l’écran sous tension.
Schließen Sie einen Monitor, eine Tastatur und eine Maus an das cDAQ-Chassis an. Schalten Sie den Monitor ein.
モニタ、キーボードおよびマウスをcDAQシャーシに接続します。 モニタの電源を入れます。
모니터, 컴퓨터 키보드 및 마우스를 cDAQ 섀시에 연결합니다. 모니터의 전원을 켭니다.
Connect a monitor, computer keyboard, and mouse to the cDAQ chassis.Power on the monitor.
将显示器、计算机键盘, 以及鼠标与cDAQ机箱相连。给显示器上电。
注意 デバイスを取り付ける前に、すべての製品ドキュメントをお読みになり、安全、EMC、環境規制を遵守してください。
주의 디바이스를 설치하기 전에 모든 제품 관련 문서를 읽고 안전, EMC, 환경 규정을 준수하는지 확인하십시오.
警告 安装设备之前,请阅读所有产品文档,确保符合安全、EMC以及环境法规。
OnlinePDFbarcode.indd 1 5/16/2012 1:11:31 PM

Installation andRecovery Media
Documentation
Power ConnectorNI cDAQ-9138/9139
ScrewdriverFerrite
OFF
1 2 3 4 5
DO NOT SEPERATECONNECTORS
WHEN ENERGIZEDIN HAZARDOUS
LOCATIONS
POWERDRIVESTATUSUSER1
NI cDAQ-9138
NI CompactDAQ
DISABLE ATSAFE MODECONSOLE OUTIP RESETNO APPUSER1
ON
RESET
MX
I-Ex
pre
ss x 1
RS-232
INPUT9-30 V75 W MAX
V1
C
V2
C
LINK
ACT/LINK
ACT/LINK
2
10/100/1000
10/100/1000
RS-435
6 7 8
Contents I Contenu I Inhalt内容 I 내용 I 内容
NI cDAQTM
-9138/9139
Quick Start
Démarrage rapide
Erste Schritte
クイックスタート
시작하기
快速入门
NI CompactDAQ Stand-Alone Chassis for Windows Caution Before installing your device, read all product documentation to ensure compliance with safety, EMC, andenvironmental regulations.
Attention Avant d’installer votre périphérique, lisez toute la documentation se rapportant au produit pour vous assurer du respect des règles concernant la sécurité, la CEM et l’environnement.
Achtung Lesen Sie vor dem Einbauen des Geräts die Produktdokumentation, um sich über alle einzuhaltenden Sicherheits-vorschriften, EMV-Vorschriften und Umweltrichtlinien zu informieren.
11
cDAQ, LabVIEW, National Instruments, NI, ni.com, the National Instruments corporate logo, and the Eagle logo are trademarks of National Instruments Corporation. Refer to the Trademark Information at ni.com/trademarks for other National Instruments trademarks. Other product and company names mentioned herein are trademarks or trade names of their respective companies. For patents covering National Instruments products/technology, refer to the appropriate location: Help»Patents in your software, the patents.txt fi le on your media, or the National Instruments Patent Notice at ni.com/patents. Refer to the Export Compliance Information at ni.com/legal/export-compliance for the National Instruments global trade compliance policy.
©2012 National InstrumentsAll rights reserved.
*325926A-01* 325926A-01 Jun12
Getting Startedni.com/gettingstarted
Softwareni.com/downloads
Demonstrationsni.com/daq/videos ��
PinoutsIn MAX, right-click module name
AI1AI2AI3AI4AI5
12345
Examplesni.com/info daqmxexp
Services and Supportni.com/services
NI cDAQ-9138/9139Documentationni.com/manuals 9138
Accuracy and Mountingni.com/info cdaqmounting
Printed in Hungary.
Useful Links I Liens utiles I Nützliche Links役に立つリンク I 유용한 링크 I 相关链接
22
Connectez le châssis cDAQ à la terre. Ensuite, installez les modules d’E/S. Reportez-vous aux instructions d’utilisation du module pour effectuer les connexions de signal.
Erden Sie das cDAQ-Chassis. Bauen Sie anschließend die I/O-Module ein. Die Verkabelung des Moduls ist in der Modulanleitung beschrieben.
cDAQシャーシをアースに接続します。 続いて、I/Oモジュールを取り付けます。 信号接続については、モジュールの操作手順を参照してください。
cDAQ 섀시를 접지에 연결합니다. 그런 다음 I/O 모듈을 설치합니다. 신호 연결은 해당 모듈의 사용 설명서를 참조하십시오.
Connect the cDAQ chassis to earth ground. Then install I/O modules. Refer to the module operating instructions for signal connections.
将cDAQ机箱接地。安装I/O模块。关于信号连接, 见模块使用说明。
Connectez un écran, un clavier et une souris au châssis cDAQ. Mettez l’écran sous tension.
Schließen Sie einen Monitor, eine Tastatur und eine Maus an das cDAQ-Chassis an. Schalten Sie den Monitor ein.
モニタ、キーボードおよびマウスをcDAQシャーシに接続します。 モニタの電源を入れます。
모니터, 컴퓨터 키보드 및 마우스를 cDAQ 섀시에 연결합니다. 모니터의 전원을 켭니다.
Connect a monitor, computer keyboard, and mouse to the cDAQ chassis.Power on the monitor.
将显示器、计算机键盘, 以及鼠标与cDAQ机箱相连。给显示器上电。
注意 デバイスを取り付ける前に、すべての製品ドキュメントをお読みになり、安全、EMC、環境規制を遵守してください。
주의 디바이스를 설치하기 전에 모든 제품 관련 문서를 읽고 안전, EMC, 환경 규정을 준수하는지 확인하십시오.
警告 安装设备之前,请阅读所有产品文档,确保符合安全、EMC以及环境法规。
QS374190A.indd 15/16/2012 11:31:46 AM

CV2C
V1
+
x1
–DISABLE RT
SAFE MODE
CONSOLE OUT
IP RESET
NO APP
USER1OFFON
Assurez-vous que la source d’alimentation est hors tension. Installez la ferrite le long des fi ls conducteurs négatif et positif de la source d’alimentation.
Stellen Sie sicher, dass die Stromversorgung ausgeschaltet ist. Bringen Sie einen Ferritblock an die Stromversorgungsleitung an.
電源がオフになっていることを確認します。 電源の正極および負極リードにフェライトを取り付けます。
전원 공급 장치의 전원이 꺼져 있는지 확인합니다. 전원 공급 장치의 양극과 음극 도선에 자성체를 설치합니다.
Verify power source is turned off. Install ferrite across the negative and positive leads of the power source.
检查并确保电源已关闭。在电源正负极线上安装磁箍。
Vérifi ez la position des commutateurs DIP.
Prüfen Sie, ob die DIP-Schalter richtig eingestellt sind.
DIPスイッチの位置を確認します。
DIP 스위치의 위치를 확인합니다.
Verify DIP switch positions.
检查DIP开关位置。
Connectez le fi l conducteur positif de la source d’alimentation au terminal V1 du connecteur d’alimentation, et le fi l négatif à l’un des terminaux C.
Verbinden Sie die positive Ader der Stromversorgung mit dem V1-Anschluss desStromversorgungssteckers und die negative Ader mit einem der C-Anschlüsse.
電源の正極リードを電源コネクタプラグのV1端子に、負極リードをC端子の1つに接続します。
전원 공급 장치의 양극 도선을 전원 커넥터 플러그의 V1 터미널에 연결하고, 음극 도선을 C 터미널 중 하나에 연결합니다.
Connect the positive lead of the power source to the V1 terminal on the power connector plug, and the negative lead to one of the C terminals.
将电源正极导线连接至电源连接器插头的V1端子, 负极导线连接至C端子。
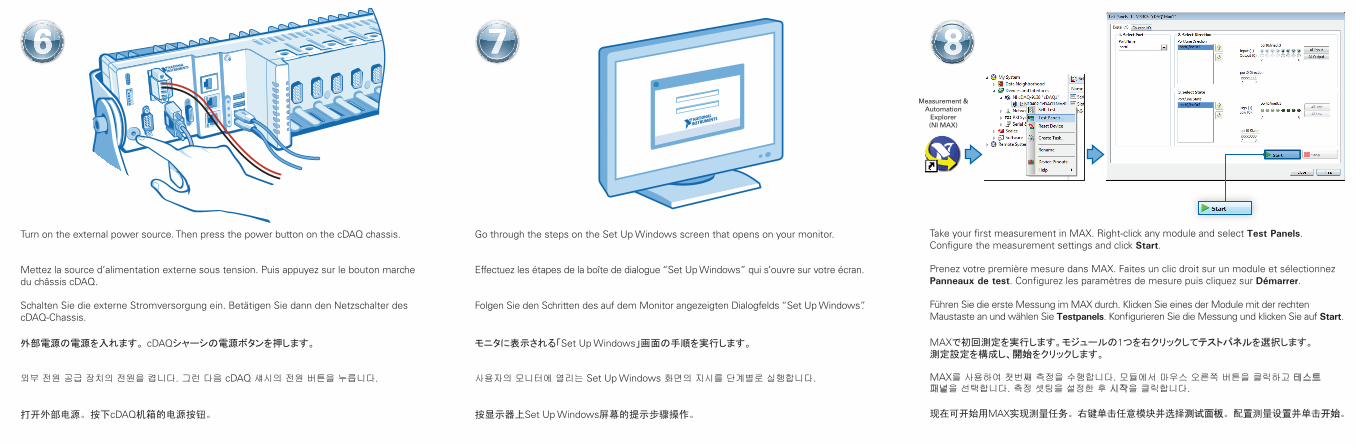
Prenez votre première mesure dans MAX. Faites un clic droit sur un module et sélectionnez Panneaux de test. Confi gurez les paramètres de mesure puis cliquez sur Démarrer.
Führen Sie die erste Messung im MAX durch. Klicken Sie eines der Module mit der rechten Maustaste an und wählen Sie Testpanels. Konfi gurieren Sie die Messung und klicken Sie auf Start.
MAXで初回測定を実行します。モジュールの1つを右クリックしてテストパネルを選択します。測定設定を構成し、開始をクリックします。
MAX를 사용하여 첫번째 측정을 수행합니다. 모듈에서 마우스 오른쪽 버튼을 클릭하고 테스트 패널을 선택합니다. 측정 셋팅을 설정한 후 시작을 클릭합니다.
Take your fi rst measurement in MAX. Right-click any module and select Test Panels.Confi gure the measurement settings and click Start.
现在可开始用MAX实现测量任务。右键单击任意模块并选择测试面板。配置测量设置并单击开始。
Effectuez les étapes de la boîte de dialogue “Set Up Windows” qui s’ouvre sur votre écran.
Folgen Sie den Schritten des auf dem Monitor angezeigten Dialogfelds “Set Up Windows”.
モニタに表示される「Set Up Windows」画面の手順を実行します。
사용자의 모니터에 열리는 Set Up Windows 화면의 지시를 단계별로 실행합니다.
Go through the steps on the Set Up Windows screen that opens on your monitor.
按显示器上Set Up Windows屏幕的提示步骤操作。
Mettez la source d’alimentation externe sous tension. Puis appuyez sur le bouton marche du châssis cDAQ.
Schalten Sie die externe Stromversorgung ein. Betätigen Sie dann den Netzschalter des cDAQ-Chassis.
外部電源の電源を入れます。 cDAQシャーシの電源ボタンを押します。
외부 전원 공급 장치의 전원을 켭니다. 그런 다음 cDAQ 섀시의 전원 버튼을 누릅니다.
Turn on the external power source. Then press the power button on the cDAQ chassis.
打开外部电源。按下cDAQ机箱的电源按钮。
66 77 88
554433
CV2
CV1
CV2CV1
+
–
Measurement &Automation
Explorer(NI MAX)
QS374190A.indd 2 5/16/2012 11:31:49 AM
CV2C
V1
+
x1
–DISABLE RT
SAFE MODE
CONSOLE OUT
IP RESET
NO APP
USER1OFFON
Assurez-vous que la source d’alimentation est hors tension. Installez la ferrite le long des fi ls conducteurs négatif et positif de la source d’alimentation.
Stellen Sie sicher, dass die Stromversorgung ausgeschaltet ist. Bringen Sie einen Ferritblock an die Stromversorgungsleitung an.
電源がオフになっていることを確認します。 電源の正極および負極リードにフェライトを取り付けます。
전원 공급 장치의 전원이 꺼져 있는지 확인합니다. 전원 공급 장치의 양극과 음극 도선에 자성체를 설치합니다.
Verify power source is turned off. Install ferrite across the negative and positive leads of the power source.
检查并确保电源已关闭。在电源正负极线上安装磁箍。
Vérifi ez la position des commutateurs DIP.
Prüfen Sie, ob die DIP-Schalter richtig eingestellt sind.
DIPスイッチの位置を確認します。
DIP 스위치의 위치를 확인합니다.
Verify DIP switch positions.
检查DIP开关位置。
Connectez le fi l conducteur positif de la source d’alimentation au terminal V1 du connecteur d’alimentation, et le fi l négatif à l’un des terminaux C.
Verbinden Sie die positive Ader der Stromversorgung mit dem V1-Anschluss desStromversorgungssteckers und die negative Ader mit einem der C-Anschlüsse.
電源の正極リードを電源コネクタプラグのV1端子に、負極リードをC端子の1つに接続します。
전원 공급 장치의 양극 도선을 전원 커넥터 플러그의 V1 터미널에 연결하고, 음극 도선을 C 터미널 중 하나에 연결합니다.
Connect the positive lead of the power source to the V1 terminal on the power connector plug, and the negative lead to one of the C terminals.
将电源正极导线连接至电源连接器插头的V1端子, 负极导线连接至C端子。
Prenez votre première mesure dans MAX. Faites un clic droit sur un module et sélectionnez Panneaux de test. Confi gurez les paramètres de mesure puis cliquez sur Démarrer.
Führen Sie die erste Messung im MAX durch. Klicken Sie eines der Module mit der rechten Maustaste an und wählen Sie Testpanels. Konfi gurieren Sie die Messung und klicken Sie auf Start.
MAXで初回測定を実行します。モジュールの1つを右クリックしてテストパネルを選択します。測定設定を構成し、開始をクリックします。
MAX를 사용하여 첫번째 측정을 수행합니다. 모듈에서 마우스 오른쪽 버튼을 클릭하고 테스트 패널을 선택합니다. 측정 셋팅을 설정한 후 시작을 클릭합니다.
Take your fi rst measurement in MAX. Right-click any module and select Test Panels.Confi gure the measurement settings and click Start.
现在可开始用MAX实现测量任务。右键单击任意模块并选择测试面板。配置测量设置并单击开始。
Effectuez les étapes de la boîte de dialogue “Set Up Windows” qui s’ouvre sur votre écran.
Folgen Sie den Schritten des auf dem Monitor angezeigten Dialogfelds “Set Up Windows”.
モニタに表示される「Set Up Windows」画面の手順を実行します。
사용자의 모니터에 열리는 Set Up Windows 화면의 지시를 단계별로 실행합니다.
Go through the steps on the Set Up Windows screen that opens on your monitor.
按显示器上Set Up Windows屏幕的提示步骤操作。
Mettez la source d’alimentation externe sous tension. Puis appuyez sur le bouton marche du châssis cDAQ.
Schalten Sie die externe Stromversorgung ein. Betätigen Sie dann den Netzschalter des cDAQ-Chassis.
外部電源の電源を入れます。 cDAQシャーシの電源ボタンを押します。
외부 전원 공급 장치의 전원을 켭니다. 그런 다음 cDAQ 섀시의 전원 버튼을 누릅니다.
Turn on the external power source. Then press the power button on the cDAQ chassis.
打开外部电源。按下cDAQ机箱的电源按钮。
66 77 88
554433
CV2
CV1
CV2CV1
+
–
Measurement &Automation
Explorer(NI MAX)
QS374190A.indd 2 5/16/2012 11:31:49 AM