ns guide non structure
TRANSCRIPT

8/8/2019 NS Guide Non Structure
http://slidepdf.com/reader/full/ns-guide-non-structure 1/24
EEE
IIss YYoouurr HHoommee
PPrrootteecctteedd
FFrroomm EEEaaarrrttthhhqqquuuaaakkkeee DDDiiisssaaasssttteeerrr???
A Homeowner’s Guide to Nonstructural Earthquake Retrofit
8/8/2019 NS Guide Non Structure
http://slidepdf.com/reader/full/ns-guide-non-structure 2/24
cover photo credits
EERI Northridge Earthquake Reconnaissance Team, J. Hall, CIT; F.Desler, APA; Godden Collection,
EERC, UCB; and USGS, D. Perkins
architectural illustrations
W. Spaulding, AIA
disclaimer
The suggestions and recommendations you will read in this guide are based on professional judgment, expe-
rience and research. The authors, contributors and publisher disclaim all warranties and guarantees with
respect to the information in the document and assume no liability or responsibility with respect to the infor-
mation.
A Homeowner’s Guide to Earthquake Retrofit

8/8/2019 NS Guide Non Structure
http://slidepdf.com/reader/full/ns-guide-non-structure 3/24
table of contents
introduction . . . . . . . . . . . . . . . . . . . . . . . . . . . . . . . . . . . . . . . . . . . . . . . . . . . . . . . . . . . . . . . 4
earthquakes and your home . . . . . . . . . . . . . . . . . . . . . . . . . . . . . . . . . . . . . . . . . . . . . . 5
What You Can Do... . . . . . . . . . . . . . . . . . . . . . . . . . . . . . . . . . . . . . . . . . . . . . . . . . . . . . 6
nonstructural retrofits . . . . . . . . . . . . . . . . . . . . . . . . . . . . . . . . . . . . . . . . . . . . . . . . . . . . 7
Bookcases . . . . . . . . . . . . . . . . . . . . . . . . . . . . . . . . . . . . . . . . . . . . . . . . . . . . . . . . . . . . . . 7
Cabinets and Drawers . . . . . . . . . . . . . . . . . . . . . . . . . . . . . . . . . . . . . . . . . . . . . . . . . . 10
Picture Frames and Bulletin Boards . . . . . . . . . . . . . . . . . . . . . . . . . . . . . . . . . . . . . . 12
Ceiling Lights, Suspended Ceilings and Hanging Fixtures . . . . . . . . . . . . . . . . . . 13
Windows and Doors . . . . . . . . . . . . . . . . . . . . . . . . . . . . . . . . . . . . . . . . . . . . . . . . . . . 15
Large Appliances . . . . . . . . . . . . . . . . . . . . . . . . . . . . . . . . . . . . . . . . . . . . . . . . . . . . . . 15
Water Heaters . . . . . . . . . . . . . . . . . . . . . . . . . . . . . . . . . . . . . . . . . . . . . . . . . . . . . . . . . 16
home improvement project list . . . . . . . . . . . . . . . . . . . . . . . . . . . . . . . . . . . . . . . . . 22
checklist . . . . . . . . . . . . . . . . . . . . . . . . . . . . . . . . . . . . . . . . . . . . . . . . . . . . . . . . . . . . . . . . . . 23
table of contents

8/8/2019 NS Guide Non Structure
http://slidepdf.com/reader/full/ns-guide-non-structure 4/24
E
introduction
arthquakes occur suddenly with
little or no warning, during any
season and at any time of day.
Although the West Coast generally has
the greatest earthquake activity, the po-
tential for earthquakes exists in almost
every corner of the United States.
More than 3,360 Americans have died
during earthquakes in the last century,
and homes in all 50 states have suf-
fered damage in the last 250 years.1
So, what can you do to protect your-
self , your home and its contents from
earthquakes? This brochure will help
you by providing information about:
• key areas of your home that are
especially susceptible to damage;
• ways you can reduce damage to
your home and belongings; and,
• what you can do to protect yourself
and your family.
The information and suggestions pre-
sented in this brochure range from
simple weekend tasks that requirebasic carpentry skills to involved pro-
jects that may require professional
assistance. Before starting on any
activity, make sure you are comfort-
able with the required skill level. If
you are uncertain, contact a profes-
sional engineer, architect or building
contractor.
Damage in San Francisco’s
Marina District.
1Based on U.S. Geological Survey numbers.
J. Preli
introduction

8/8/2019 NS Guide Non Structure
http://slidepdf.com/reader/full/ns-guide-non-structure 5/24
U S G S .
R e a g o
E E R I , J .
E g a n
Figure 4: Your Home in an Earthquake
What Your Home Experiences Imagine that a strong earthquake strikes where
you live. Loose items fall and break. Cabinets
and bookcases tip over, blocking exits. Dust bil-
lows everywhere. Gas and water lines break,
and phone and electrical service are interrupted
for days. Your home may collapse, slide off its
foundation or simply come apart at the seams. Figure 4 illustrates how your home reacts in an
earthquake. Because it is not able to move in sync
with the surrounding ground, your home and its
contents can experience substantial damage.
Home at Rest;
Ground at Rest
LeftwardMovementBegins
RightwardMovement
Begins
Ground Comesto Rest
Ground at Rest;Home
Continues
to MoveDue toInertia
A sand boil near El Centro, Calif.
provides evidence of an earthquake.
Building collapse in Marina
District, San Francisco, Calif.
earthquakes and your home

8/8/2019 NS Guide Non Structure
http://slidepdf.com/reader/full/ns-guide-non-structure 6/24
N O A A / N G D C
U S G S ,
C .
S t o v e
Top: Structure shifted
on its foundation in
Watsonville, Calif.
Bottom: Nonstruc-
tural kitchen damage,
Northridge, Calif.
What You Can Do
You can protect your home by modifying it,or retrofitting it, in two different ways:
N onstr uctur al retr ofits protect your home’s
contents against damage with little cost and
effort. Examples of retrofits include:
• securing water heaters, large appliances,
bookcases, pictures and bulletin boards;
• latching cabinet doors; and
• using safety film on windows.
To complete these improvements simply
follow the instructions in this brochure. In
most cases, you won’t need a building per-
mit. It’s a good idea, however, to contact
your local building department to make
sure.
*St r uctur al retrofits strengthen your home’s
structure or skeleton so it can better with-
stand the force of an earthquake. Your
home’s structure is made up of many differ-
ent parts, or components, which must work
together in order to resist an earthquake.
Modifications to your home’s structure tendto be quite involved and generally require
the expertise of a registered design profes-
sional (engineer, architect or building con-
tractor) and your local building depart-
ment’s approval (see note * below).
If you have any questions or concerns
about what you see, contact a professional
engineer or architect.
A Homeowner’s Guide to Earthquake Retrofit

8/8/2019 NS Guide Non Structure
http://slidepdf.com/reader/full/ns-guide-non-structure 7/24
I
U S G
S
U S G S
nonstructural retrofits
n this section, you will learn inex-pensive and easy ways to protectyourself against some of the damage
earthquakes can cause inside yourhome. Start by looking for ob jects thatcould fall and break during an earth-quake. Consider items such as waterheaters, bookcases and light fixtures,as well as items that are difficult toreplace because they have monetary or
sentimental value. As you conductyour inspection, think about ways inwhich you can protect them f romdamage. If you have any questionsabout the changes you should make,contact a professional engineer, archi-tect or contractor.
Bookcases It’s true that bookcases are great forstoring books, toys and supplies. Theycan, however, shake and tip over in anearthquake, causing considerable dam-age or injury. For this reason, makesure all bookcases are securely fastenedto nearby walls.
One way to do this is to attach
either L-brackets or Z-brackets to thebookcase and the wall after pre-drilling holes in each. Be sure to use abracket that can accommodate the fas-teners you are using. See Figure 5 onthe next page for details.
Fallen bookcases
at the Lawrence
,
Livermore Lab,
Livermore, Calif.
nonstructural retrofits

8/8/2019 NS Guide Non Structure
http://slidepdf.com/reader/full/ns-guide-non-structure 8/24
Figure 5: Securing Bookcases (views looking from above)
Exterior L-Bracket
Wood Stud Bookcase
Exterior Z-Bracket
Bookcase
Wood Screw
Wood Screw or Machine Screw
Drywall Interior L-Bracket
Wood Screw
Drywall
Wood Screw or Machine Screw
Wood Stud Bookcase
Wood Screw or Machine Screw
Wood Stud Wood Screw Drywall
General Notes:
• Bracket to Bookcase (Interior or Exterior) #8 (or larger) wood screws; or #8 (or larger) machine screws with washers and nuts
• Bracket to Wall (Interior or Exterior) Wood-stud wall: 3” long, #8 (or larger) wood screws Masonry wall: 3” long, #8 (or larger) screws with
plastic anchors, or 3/16” diameter(or larger) masonry screws
Exterior Bracket
Interior Bracket
Attach object with museum gel, or largepatches of hook &loop material (such as Velcro ® ).
Screw through back into wall.Use washers.
Bolt back to back through framewith #8 (or larger) machine screws,oversized washers and nuts. Nomore than 12” apart.
Metal, plastic, or wood ledge barriersprevent objects from falling
A Homeowner’s Guide to Earthquake Retrofit
8/8/2019 NS Guide Non Structure
http://slidepdf.com/reader/full/ns-guide-non-structure 9/24
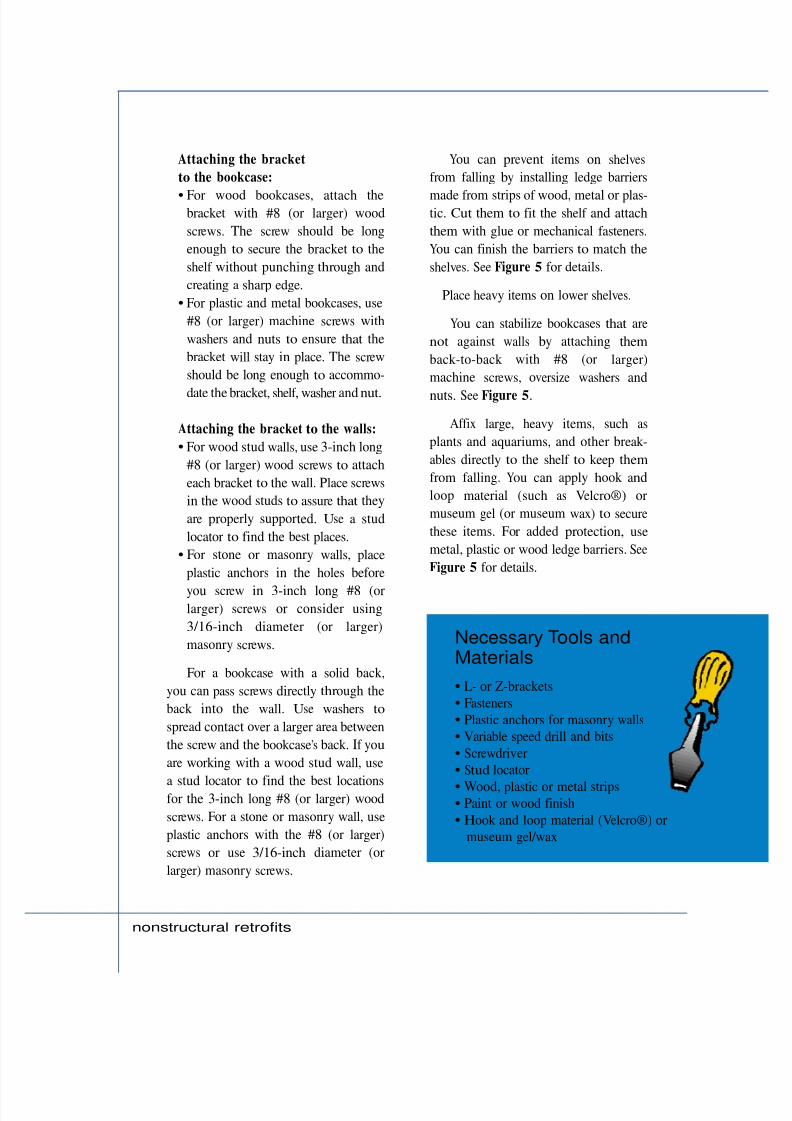
Attaching the bracket
to the bookcase:
• For wood bookcases, attach thebracket with #8 (or larger) wood
screws. The screw should be long
enough to secure the bracket to the
shelf without punching through and
creating a sharp edge.
• For plastic and metal bookcases, use
#8 (or larger) machine screws with
washers and nuts to ensure that the
bracket will stay in place. The screw
should be long enough to accommo-
date the bracket, shelf , washer and nut.
Attaching the bracket to the walls:
• For wood stud walls, use 3-inch long
#8 (or larger) wood screws to attach
each bracket to the wall. Place screws
in the wood studs to assure that they
are properly supported. Use a stud
locator to find the best places.
• For stone or masonry walls, place
plastic anchors in the holes before
you screw in 3-inch long #8 (orlarger) screws or consider using
3/16-inch diameter (or larger)
masonry screws.
For a bookcase with a solid back,
you can pass screws directly through the
back into the wall. Use washers to
spread contact over a larger area between
the screw and the bookcase’s back. If you
are working with a wood stud wall, use
a stud locator to find the best locationsfor the 3-inch long #8 (or larger) wood
screws. For a stone or masonry wall, use
plastic anchors with the #8 (or larger)
screws or use 3/16-inch diameter (or
larger) masonry screws.
You can prevent items on shelves
from falling by installing ledge barriers
made from strips of wood, metal or plas-tic. Cut them to fit the shelf and attach
them with glue or mechanical fasteners.
You can finish the barriers to match the
shelves. See Figure 5 for details.
Place heavy items on lower shelves.
You can stabilize bookcases that are
not against walls by attaching them
back-to-back with #8 (or larger)
machine screws, oversize washers and
nuts. See Figure 5.
Affix large, heavy items, such as
plants and aquariums, and other break-
ables directly to the shelf to keep them
from falling. You can apply hook and
loop material (such as Velcro®) or
museum gel (or museum wax) to secure
these items. For added protection, use
metal, plastic or wood ledge barriers. See
Figure 5 for details.
Necessary Tools and Materials
• L- or Z-brackets
• Fasteners
• Plastic anchors for masonry walls
• Variable speed drill and bits
• Screwdriver
• Stud locator
• Wood, plastic or metal strips • Paint or wood finish
• Hook and loop material (Velcro®) or
museum gel/wax
nonstructural retrofits

8/8/2019 NS Guide Non Structure
http://slidepdf.com/reader/full/ns-guide-non-structure 10/24
E E R I C o a l i n g a E a r t h q u a k e R e c o n
n a i s s a n c e
T e a m ,
S .
R i h a l , C a l . P o l y .
Cabinets and Drawers Like bookcases, cabinets can tip over and
their doors can open, spilling their con-tents. Furthermore, the drawers, which
sometimes have sharp edges, can slide out
and hurt you, or your family.
To secure them, do the following:
• Attach cabinets to the wall and floors
using L-brackets or Z-brackets. Again,
be sure to use brackets that can accom-
modate the diameter of the fasteners.
You should follow the specific direc-
tions given in Figure 6 and in the“Bookcases” section for securing the
bracket to the wall and cabinet.
Interior damage to kitchen, Coalinga
Junior High School, Coalinga, Calif.
Figure 6: Cabinets and Drawers
Top connections tie units together for amore stable configuration. Use steelstraps with #8 (or larger) machinescrews with nuts and washers.
Provide self-locking doorlatches or mechanicalcabinet catches.
Brackets for fastening units to: Wood Stud Walls: Use #8 (or larger) woodscrews with 3” min.embedment in studs.
Masonry Walls: Use 3” long #8 (or larger)screws with plastic anchorsor 3/16” diameter (or larger)masonry screws.
Cabinets: Use#8 (or larger) machinescrews with nuts andwashers.
Install self-locking or mechanical drawerclosures (baby-proof latches, drawer lock,
or other speciality latches).
A Homeowner’s Guide to Earthquake Retrofit

8/8/2019 NS Guide Non Structure
http://slidepdf.com/reader/full/ns-guide-non-structure 11/24
• You can fasten several units togeth-
er to form a wider footprint using
#8 (or larger) machine screws.
Attach simple mechanical or self-
locking latches to cabinet drawers so
they cannot slide open.
Figure 7: Secure Heavy Objects
Attach hookand loopmaterial
Install mechanical or self-locking
latches to prevent your cabinet doors
from swinging open and spilling their
contents. Your local hardware store has
a large variety of latches, many of
which are small, unobtrusive and easy
to operate. See Figure 6 for details.
Most of us place heavy objects such
as televisions, computers and stereos
on top of cabinets, bookcases and
tables. You should fasten these items
down so they will not slide off during
an earthquake. Several methods of
attachment are shown in Figure 7.
Secure items with L-Brackets(see Figure 5 forattachmentdetails).
Use
adhesivebacked
latches.
(such as
Velcro ® )betweenobject andtable surface.
Necessary Tools and Materials
• L- or Z-brackets
• Fasteners
• Door or drawer latches
• Plastic anchors for masonry walls
• Variable speed drill and bits • Screwdriver
• Stud locator
nonstructural retrofits

8/8/2019 NS Guide Non Structure
http://slidepdf.com/reader/full/ns-guide-non-structure 12/24
J .
P r e l i
Damage to framed pictures,
Northridge, Calif.
Necessary Toolsand Materials
• Stud locator
• Screwdriver
• Variable speed drill and bits
• Screw-eyes or screw-hook
• Heavy picture wire
• Pliers
Picture Frames and Bulletin Boards
The photographs, bulletin boards and art-
work you display in your home add to its
character. But these items can easily fall dur-
ing an earthquake if you do not fasten them
properly to a wall in the following way:
Use closed screw-eyes, instead of tradi-
tional picture hangers, for securing picture
frames, bulletin boards and mirrors.
• Depending on the weight of the object
and the screw-eye’s maximum weight
limit, screw one or more closed screw
eyes into wall studs. Use a stud finder to
figure out where to put them.
• Attach picture wire to one side of the
frame. Thread the wire through the
closed screw-eye, fastening it securely to
the other side of the frame. See Figure 8.
• If you use an open screw-eye instead of a
closed screw-eye, be sure to close it with
pliers once you have hung the picture.
Always mount heavy or sharp wall hang-ings away from areas where they could fall on
children.
Figure 8: Secure Picture Frame to Wall
Picture
Closed Screw-Eye
Wire
Wood Stud
Drywall
A Homeowner’s Guide to Earthquake Retrofit

8/8/2019 NS Guide Non Structure
http://slidepdf.com/reader/full/ns-guide-non-structure 13/24
E
E R I C o a l i n g a E a r t h q u a k e R e c o n n a i s s a n c e
T e a m
S .
R i h a l , C a l . P o l y .
E E R I , S .
S w a n ,
E Q
I n t e r .
Ceiling Lights, Suspended Ceilings
and Hanging Fixtures If they aren’t well attached and supported,
ceiling lights, suspended ceilings and hang-
ing fixtures, such as chandeliers and ceiling
fans, can fall in an earthquake and serious-
ly injure those below. Here are some ways
to protect yourself:
Secure ceiling lights to supports using
safety cables.
• Use a chain strap or a minimum 14-
gauge wire to attach the light fixture to
a nearby ceiling support. Locate the
support visually or use a stud locator.
Be sure to leave the safety cables slack;
they should not support the weight of
the lights under normal circumstances.
See Figure 9 for details.
• If your ceiling light has a cover, keep it
from falling during an earthquake by
fastening it to the fixture itself or to the
home’s permanent structure.
• Pay special attention to your home’s
fluorescent lights. Installing plastic
sleeves over the fluorescent light tubes
will keep the glass from scattering if
they break. As an alternative, consider
using Teflon® fluorescent lights, which
are shatter-resistant.
Use safety cables every few feet to
attach suspended or false ceilings to the
structure of your home.
• Use chain straps, plumber’s strapping
(metal strapping with holes) or heavy
wire (minimum 14-gauge) to secure sus-
pended or false ceilings. See Figure 9.
Top: Failure of pendant light fix-tures in the Dawson Elementary
School library, Coalinga, Calif.
Bottom: Damage to suspended
ceiling and recessed ceiling lights,
Philippines.
• Use screws, bolts or other appropriate
fasteners to attach the safety cables to
both the suspended ceiling and the per-
manent structure.
• You can prevent the ceiling panels from
flying upward by installing adjustable
compression struts. Contact your sus-
pended ceiling manufacturer for
details. See Figure 9.
nonstructural retrofits
8/8/2019 NS Guide Non Structure
http://slidepdf.com/reader/full/ns-guide-non-structure 14/24
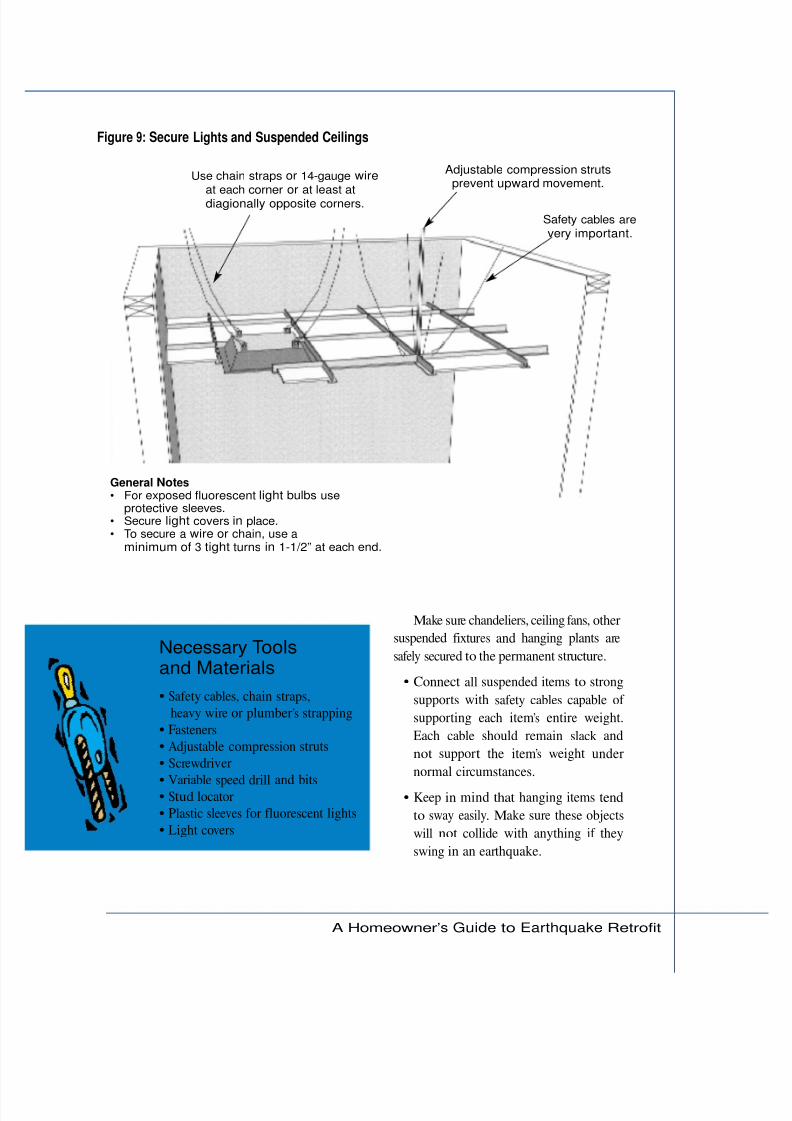
Figure 9: Secure Lights and Suspended Ceilings
Use chain straps or 14-gauge wireat each corner or at least atdiagionally opposite corners.
Adjustable compression struts prevent upward movement.
Safety cables arevery important.
General Notes • For exposed fluorescent light bulbs useprotective sleeves.
• Secure light covers in place. • To secure a wire or chain, use aminimum of 3 tight turns in 1-1/2” at each end.
Necessary Toolsand Materials
• Safety cables, chain straps,
heavy wire or plumber’s strapping
• Fasteners
• Adjustable compression struts
• Screwdriver
• Variable speed drill and bits • Stud locator
• Plastic sleeves for fluorescent lights
• Light covers
Make sure chandeliers, ceiling fans, other
suspended fixtures and hanging plants are
safely secured to the permanent structure.
• Connect all suspended items to strong
supports with safety cables capable of
supporting each item’s entire weight.
Each cable should remain slack and
not support the item’s weight under
normal circumstances.
• Keep in mind that hanging items tend
to sway easily. Make sure these objects
will not collide with anything if they
swing in an earthquake.
A Homeowner’s Guide to Earthquake Retrofit

8/8/2019 NS Guide Non Structure
http://slidepdf.com/reader/full/ns-guide-non-structure 15/24
U S G S ,
M .
H o p p e r
Windows and Doors
Your home’s windows and glass doors may
seem harmless enough. But in an earth-
quake, glass can break explosively, serious-
ly injuring anyone nearby.One way to pro-
tect yourself and your family from broken
glass is to apply safety film to windows and
glass doors:
Use a protective film (minimum thick-
ness of 4 mils) on all types of glass, includ-
ing tempered glass and annealed glass. You
can buy it in rolls at your local hardware
and home improvment stores, or contactthe International Window Film Associ-
ation for the nearest distributor. Be sure to
install the film according to the manufac-
turer’s instructions.
As an alternative, consider professional
installation.
Large Appliances
An earthquake can cause refrigerators,
washing machines and other large appli-
ances to slide or fall over. Heavy objects on
wheels may roll if brakes or stops are not
provided and locked. To secure these items:
Anchor large appliances to walls using
safety cables or straps. The restraint should
be located in the mid- to upper-portion of
the appliance. Use the following method:
• Choose a screw-eye that is sized appro-
priately for the appliance. For example,
use a 3/8-inch diameter screw-eye (orlarger) for a refrigerator.
• For wood stud walls, use a stud locator
to find the best wall location to install
the screw-eye. For stone or masonry
Damaged building, Coalinga, Calif.
walls, place plastic anchors in the pre-
drilled holes before you install the
screw-eye.
•Connect coated wire cable to the
screw-eye at one end and to a snap-
hook fastener at the other end.
• Attach the cable to the appliance with
the snap-hook fastener.
Replace rigid water or gas connec-
tions on large appliances with flexible
connectors.
• Check to see if your local building
codes allow you to use flexible connec-
tors and whether a professional must
install them.
Always lock the rollers of any large
appliances or pieces of furniture.
Necessary Toolsand Materials
• Coated wire cable or other
strapping system
• Screwdriver
• Variable speed drill and bits • Stud locator
• Screw-eyes
• Hook fasteners
• Flexible connectors
• Plastic anchors
nonstructural retrofits

8/8/2019 NS Guide Non Structure
http://slidepdf.com/reader/full/ns-guide-non-structure 16/24
B
e n R o t h o l t z
Water heater burned in residential
fire caused by a gas leak.
Figure 10: Retrofitted Water Heater
Water Heaters
Water heaters can move or tip over in an
earthquake and the broken water pipe can
flood your home, destroying ceilings,
floors, walls, furniture, artwork and family
photos. If your heater runs on flammable
gas and the gas line breaks, the situation
becomes far more serious.
In many areas of the country where earth-
quakes are common, local building codes
may require that water heaters be laterally
braced or strapped to resist seismic forces.
Most hardware stores sell retrofit kits for dif-
ferent-sized water heaters. In addition, sever-al generic restraint systems are available.
Before you decide on a retrofit method,check with your local building depart-ment and make sure that it is approvedfor use in your area or goes beyond what
is required by your local building code.
Existing Walls Existing Water Heater
3/4” Plumber’sstrapping snug
around water heater
Heavy-duty shelving bracketlocated within the top 1/3 of thewater heater.
2x4 Wood Blocking
Heavy-duty shelving bracket located within the lower 1/3 of the water
heater. It must be a minimum of 4”above controls.
Water Heater Control
Note: See general notes on next page for additional information
A Homeowner’s Guide to Earthquake Retrofit

8/8/2019 NS Guide Non Structure
http://slidepdf.com/reader/full/ns-guide-non-structure 17/24
Extend blocking at least two (2) studsbeyond bracket attachment.
Figure 11: Straight Wall Configuration
Existing Wall
Attach bracket to blockingwith two (2) #16 (or min. 1/4”Ø) by 1-1/2” lag screws.
Use one (1) heavy-dutyshelving bracket in four(4) places.
Attach bracket to plumber’s strapping with aminumum 1/4” Ø x 3/4” hex bolt. Use a
ExistingWaterHeater
Attach blocking to wall, see General Notes below.
2 x 4 Wood Blocking (two (2) places)
Use minumum 3/4” plumber’sstrapping. Wrap around waterheater and provide snug fit.
washer under the nut. Keep 1” between endof bracket and center of bolt.
General Notes: Blocking Attachment to Wall
1) Wood Stud Wall: Use two (2) #16 (or
minimum 1/4”Ø) x 3-1/2” lag screws withhex head and washer under head of screw.
2) Concrete or Masonry Wall: Use 3/8”Ømasonry anchors with 1-5/8” embedmentinto existing wall at 12”-16” on center.
Attach bent ends of strapping with a minu-mum 1/4” Ø x 1” hex bolt. Use washersunder head and nut. Keep 1” between endof strapping and center of bolt.
3) Steel Stud Wall: Use two (2) #10-16 self-
drilling sheet metal screws with hex head andwasher under head of screw.
4) Wood and Steel Stud Walls: Center screws onstuds.
• Method recommended by NIS T. See NIS T R epor t GCR 97-732 reference pg. 37. • Ø refer s to the connection ’ s diameter .
Secure water heaters (up to 50 gallons)
to stud walls using the simple, generic
method detailed in Figures 10 through 12.
• You can anchor the water heater usingitems that are readily available from the
local hardware store.
• To begin: fasten two 2 x 4 wood block-
ing strips to the nearby wall - one at a
height within the upper one-third
(1/3) of the water heater and the other
within the lower one-third (1/3) of the
water heater. The lower 2 x 4 should be
at least four (4) inches above the water
heater control. If you are working with
a wood or metal stud wall, attach the
blocking directly to the studs. Use a
stud locator to find the studs.
nonstructural retrofits

8/8/2019 NS Guide Non Structure
http://slidepdf.com/reader/full/ns-guide-non-structure 18/24
Figure 12: Corner Wall Configuration
Use one (1)heavy-duty shelv-ing bracket in
four (4) places.
2 x 4 Wood Blockingfour (4) places
Existing Wall
Attach blocking towall, see GeneralNotes, below.
Attach bracket to blocking withtwo (2) #16 (ormin. 1/4”Ø) by 1-1/2” lagscrews.
Extend blocking atleast two (2) studsbeyond bracketattachment.
Attach bracket to plumber’sstrapping with a minumum
1/4” Ø x 3/4” hex bolt. Usea washer under the nut.Keep 1” between end ofbracket and center of bolt.
Use minumum 3/4” plumber’sstrapping. Wrap around waterheater and provide snug fit.
Attach bent ends of strapping with aminumum 1/4” Ø x 1” hex bolt. Usewashers under head and nut. Keep 1”between end of strapping and center
of bolt.
General Notes: Blocking Attachment to Wall
1) Wood Stud Wall: Use two #16 (or minimum 1/4”Ø) x 3-1/2” lag screwswith hex head and washer under head of screw.
2) Concrete or Masonry Wall: Use 3/8”Ø masonry anchors with 1-5/8” embedment into existing wall at 12”-16” on center.
3) Steel Stud Wall: Use two (2) #10-16 self-drilling sheet metal screwswith hex head and washer under head of screw.
4) Wood and Steel Stud Walls: Center screws on studs.
• Method recommended by NIS T. See NIS T R epor t GCR 97-732 reference pg. 37. • Ø refer s to the connection ’ s diameter .
Necessary Toolsand Materials
• 2 x 4s
• Stud locator
• Screwdriver
• Hammer drill & bits
(stone & masonry walls)
• Variable speed drill & bits (wood & metal stud walls)
• Various fasteners
• Heavy-duty shelving brackets
• Plumber’s strapping
• Flexible connector
• Fasten heavy-duty shelving brackets to the
wood blocking. These brackets should fit
snugly against the water heater.
• Wrap plumber’s strapping (metal strap-
ping with holes) around the heater and
secure it to the brackets.
Remember: Use flexible, not rigid, water
and gas connectors and check with local build-
ing code officials to see if you must hire a
licensed plumber to modify the connections.
Make certain all adult and teenage family
members know where to locate the gas shut-
off valve and how to operate it.
A Homeowner’s Guide to Earthquake Retrofit

8/8/2019 NS Guide Non Structure
http://slidepdf.com/reader/full/ns-guide-non-structure 19/24
Reducing Earthquake Hazards: Securing Your Water Heater
Protected source of water – or a puddleFresh water after a disaster may be as close asyour water heater – provided, of course, that itremains standing upright. A typical water heaterholds 30 to 50 gallons of water.
However, this supply of water is extremelyvulnerable to the ground undulation (swells androlls) and ground acceleration of earthquakes,causing them to tip over.
You can protect this valuable resource bysecuring your water heater to the wall studs.
Changes to strapping recommendationsExperts have modified the recommendedprocedure for strapping water heaters becausemany tanks burst through their strapping in boththe 1989 Loma Prieta (San Francisco) and the1994 Northridge (Los Angeles) earthquakes.Experts recommend these two importantchanges:
1. Secure both the top and the bottom, rather
than just the top or just the middle, of the hotwater tank.
2. Use heavy-gauge metal strapping rather thanplumber’s tape. Many water heaters in both the1989 and the 1994 earthquakes burst throughthe plumber’s tape that was intended to keepthem secure. Plumber’s tape has been found tobe too brittle to be effective.
Do NOT use this. This is plumber’s tape.
Use heavy-gauge strapping instead
When securing your water heater:
• There should be very little space between thewater heater and the wall. If there is morethan 1 or 2 inches, attach a wooden block tothe wall studs with long lag screws. Thepurpose is to prevent the heater from tippingbackwards.
• Wrap the heavy-gauge metal strapping 1½times around the tank. Start by placing thestrapping at the back of the tank. Bring it to
the front and then take it back to the wall.
• Secure this strapping to the wall studs orthe wood block using several 1/4" x 3" orlonger lag screws with oversized washers .If you are securing it directly into concrete,use 1/4" expansion bolts in place of thescrews.
• Replace all copper and metal piping withflexible natural gas and water lineconnectors.
Commercially available kits like thisone come complete with the strapping, lag screws, washers, spacers, and tension bolts. These kits can be purchased at many local hardware stores, and are recommended.
City of Seattle
Office of Emergency Management
2320 4th Ave
Seattle, WA 98121-1718
206-233-5076

8/8/2019 NS Guide Non Structure
http://slidepdf.com/reader/full/ns-guide-non-structure 20/24
Securing Your Water Heater
Water Heater Drain Spout
Wraps around 1 1/2 times
Water heaters are an excellent supply of emergency water. Make sure the electricity or natural gas is shut offbefore opening the drain. The water can be accessed from the drain spout at the bottom of the tank. This ismade easier by connecting a garden hose to the drain spout. Open a faucet somewhere in the house to allowthe water to drain easier.
City of Seattle
Office of Emergency Management
2320 4th Ave
Seattle, WA 98121-1718
206-233-5076

8/8/2019 NS Guide Non Structure
http://slidepdf.com/reader/full/ns-guide-non-structure 21/24
8/8/2019 NS Guide Non Structure
http://slidepdf.com/reader/full/ns-guide-non-structure 22/24
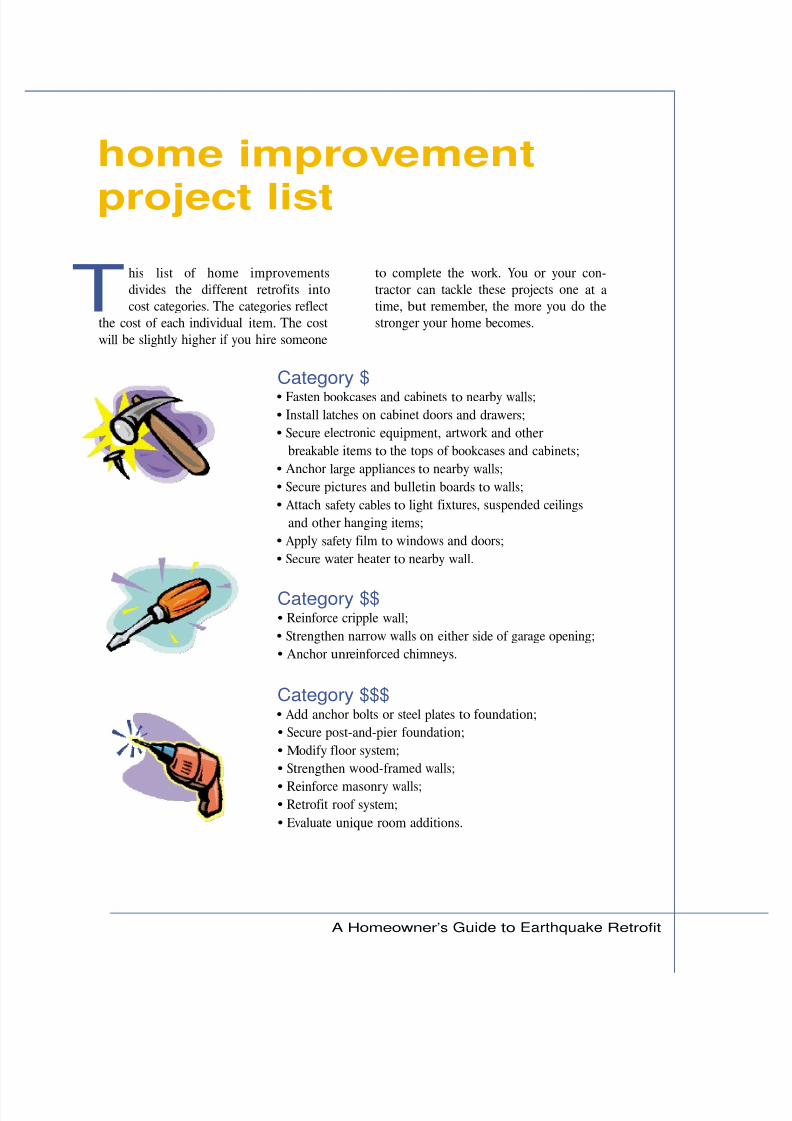
T
home improvement
project list
his list of home improvements
divides the different retrofits into
cost categories. The categories reflect
the cost of each individual item. The cost
will be slightly higher if you hire someone
to complete the work. You or your con-
tractor can tackle these projects one at a
time, but remember, the more you do the
stronger your home becomes.
Category $ • Fasten bookcases and cabinets to nearby walls;
• Install latches on cabinet doors and drawers;
• Secure electronic equipment, artwork and other
breakable items to the tops of bookcases and cabinets;
• Anchor large appliances to nearby walls;
• Secure pictures and bulletin boards to walls;
• Attach safety cables to light fixtures, suspended ceilings
and other hanging items;
• Apply safety film to windows and doors;
• Secure water heater to nearby wall.
Category $$ • Reinforce cripple wall;
• Strengthen narrow walls on either side of garage opening;
• Anchor unreinforced chimneys.
Category $$$ • Add anchor bolts or steel plates to foundation;
• Secure post-and-pier foundation;
• Modify floor system;
• Strengthen wood-framed walls;
• Reinforce masonry walls; • Retrofit roof system;
• Evaluate unique room additions.
A Homeowner’s Guide to Earthquake Retrofit

8/8/2019 NS Guide Non Structure
http://slidepdf.com/reader/full/ns-guide-non-structure 23/24
checklist How well will your home resist damage
during a 3.0 earthquake? How about
one that is a 6.0 or greater? Most homes
typically will need some type of rein-
forcement to withstand a major earth-
quake. Here is a checklist that will help
you focus on how to strengthen your
home.
To answer some of these questions you
may need to enter uncomfortable or
small spaces. You may want to have an
experienced inspector or professional
engineer or architect check your home,
instead. Whatever choice you make, take
some time to do this before the next
earthquake strikes.
Observation Recommendation Unsecured bookcases and cabinets Fasten to nearby walls
Cabinet doors and drawers that swing open easily Install latches
Electronic equipment and artwork that can topple Secure items to bookcases and cabinets
Pictures and bulletin boards that can fall Fasten securely to walls
Hanging fixtures and suspended ceilings Attach safety cables
Large appliances that can tip over Anchor to nearby walls
Unprotected windows and doors Apply safety film
Water heater that can tip over Secure to nearby wall
Home not anchored to foundation Add anchor bolts or steel plates
Weak cripple wall Reinforce cripple wall
Unsound post-and-pier foundation Secure post-and-pier foundation
Weak floor system Modify floor system
Inadequate walls Strengthen wood-framed walls
Unreinforced masonry Reinforce masonry walls
Poor roof support Retrofit roof system
Unsecured chimney Anchor unreinforced chimney
Room over garage Strengthen the support
Unique addition Have engineer evaluate
A Homeowner’s Guide to Earthquake Retrofit

8/8/2019 NS Guide Non Structure
http://slidepdf.com/reader/full/ns-guide-non-structure 24/24
175 Federal Street, Suite 500, Boston, MA 02110-2222
(617) 292-2003 • Fax (617) 292-2022 • http://www.ibhs.org/