nsg 2.0 po invoice/credit memo creation - mynabors.com 2.0 invoice... · invoice pos that have been...
TRANSCRIPT

NSG 2.0PO Invoice/Credit Memo Creation October 2017
Presented by:
Vendor Services, Nabors Corporate Services
2
NOTE: NOTE: The Oracle Portal should only be used to
access documents from NABORS COPRORATE
SERVICES, NABORS ALASKA, NABORS CANADA or
SANAD Operating Units. To access documents from any
other Nabors entity (NLF2, Canrig etc.) the User should
log in to the NSG portal.

3
Under the Responsibility of NI_SUPP_PO_Invoice, the User will be able to
invoice POs that have been Acknowledged (if required) by the supplier, under the
Nabors Procurement & Invoice Functions.
PO Invoice Creation
All of the pre-programmed layout slides are available with this text box for footnotes.
You can insert any pertinent notes or comments (6-8 pt. text) if applicable, or delete the text box if necessary.

4
Once the User is on the Supplier Collaboration page, the Finance tab should be
selected.
PO Invoice Creation continued
Then the option to create a PO invoice should be selected

5
The User will need to enter the PO Number and select the Go option.
PO Invoice Creation continued
Select the item(s) to be invoiced and then click on the Next button

6
Step 2 includes the following information that the User will need to enter as
required: Invoice Number, Invoice Date, Invoice Description, Tax Amount, as
well as the area where the User will be required to add an PDF of the Vendor
Invoice.
PO Invoice Creation continued
The requirement to attach a copy of the invoice is new and the User will not be
able to submit the electronic invoice without that attachment.
7
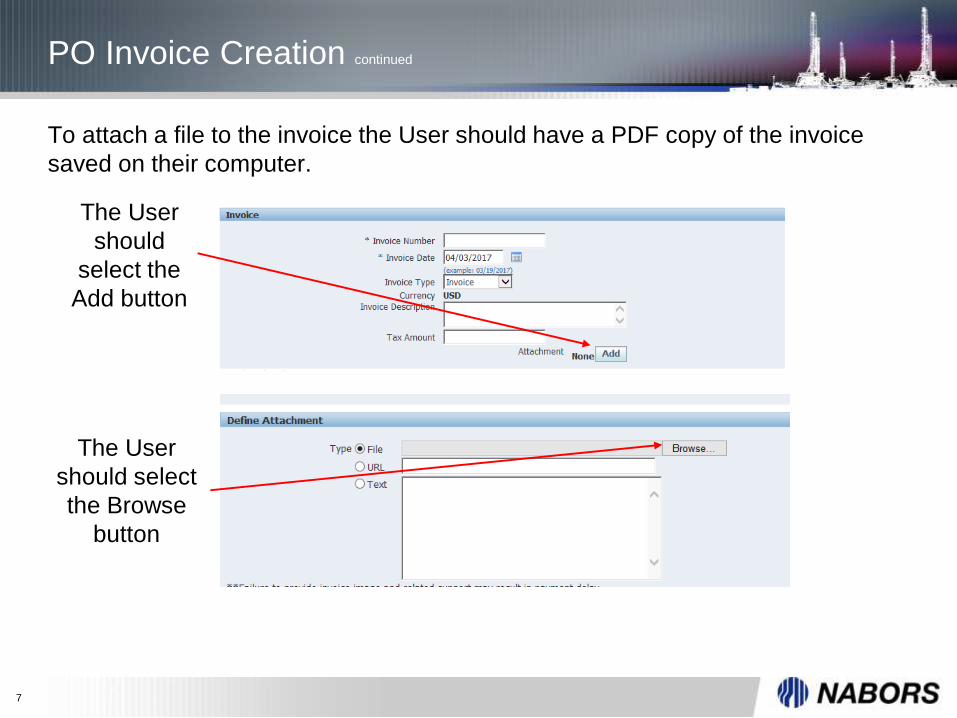
To attach a file to the invoice the User should have a PDF copy of the invoice
saved on their computer.
PO Invoice Creation continued
The User
should select
the Browse
button
The User
should
select the
Add button

8
PO Invoice Creation continued
Locate and select the saved
document
Select the Open button
The selected document will
populate on the electronic
invoice and the Apply button
should be clicked

9
The system notes that the document has been added by showing an option of an
Attachment List next to the Add button. Please note the file size is limited to 5MB
and if necessary more than one document can be added to the electronic invoice.
The next action in Step 2 is to adjust the Quantity, if required, in the Item Details.
The system will default to the Quantity that remains open for invoicing.
PO Invoice Creation continued
10
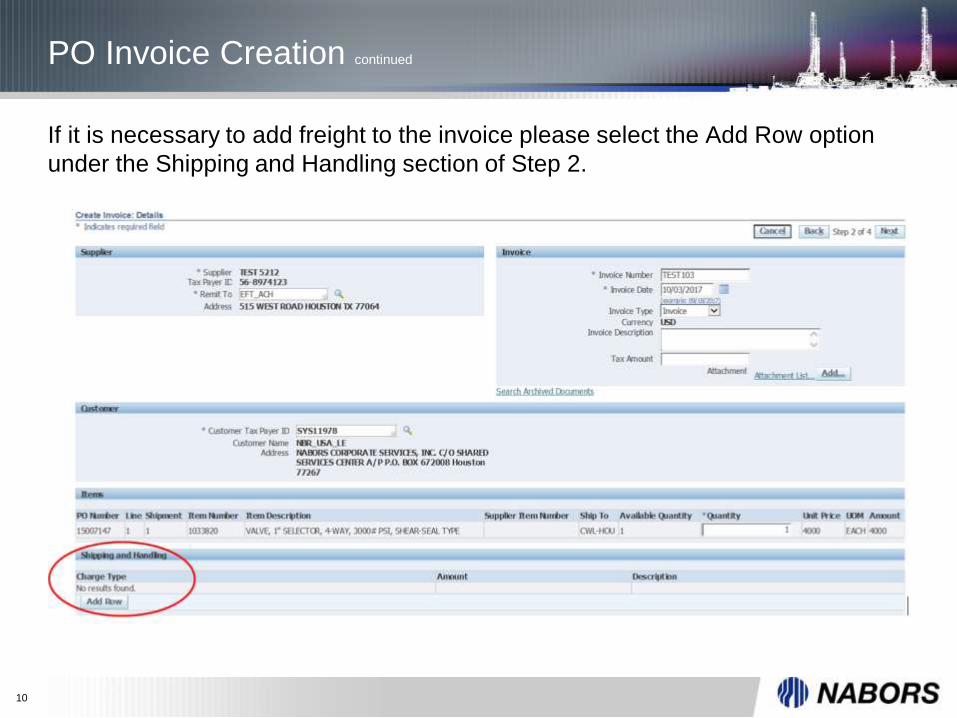
If it is necessary to add freight to the invoice please select the Add Row option
under the Shipping and Handling section of Step 2.
PO Invoice Creation continued

11
By selecting the Add Row option the Freight option should auto populate the
Charge Type and the User should populate the Amount and Description.
PO Invoice Creation continued
Please note:
To add freight to an invoice the Freight terms will need to be P&A (Prepaid
and added).
Freight under $500.00 dollars does not require original carrier invoice.
Freight between $500.00 and $2,500.00 requires the attachment of the
original carrier invoice.
Freight over $2,500.00 will require a line on the PO for invoicing. If the
freight line is not on the PO an SIR is required.
12
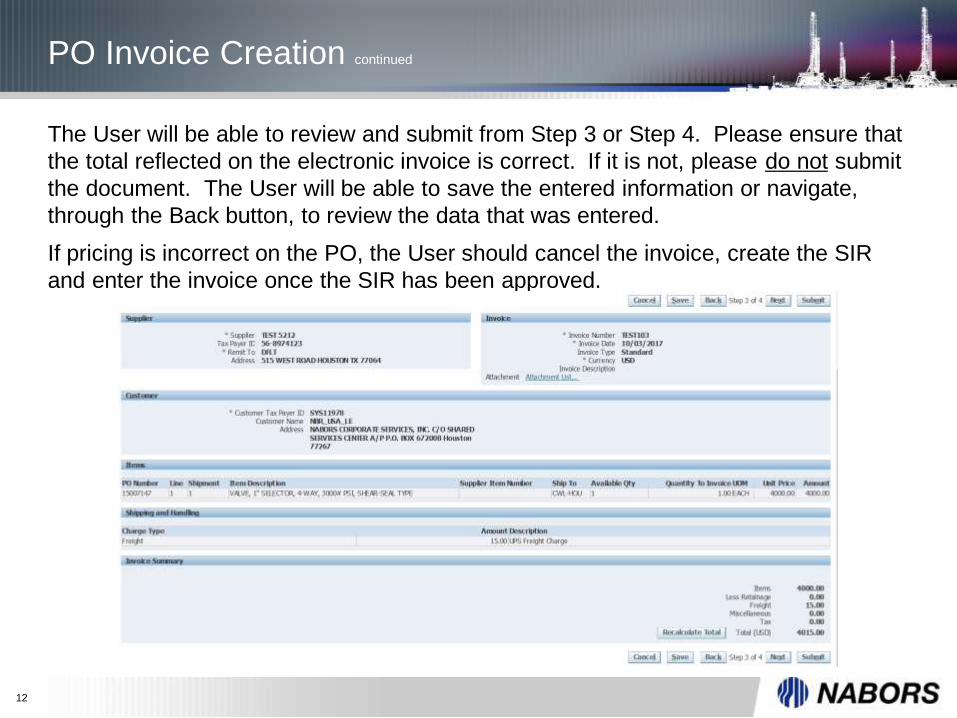
The User will be able to review and submit from Step 3 or Step 4. Please ensure that
the total reflected on the electronic invoice is correct. If it is not, please do not submit
the document. The User will be able to save the entered information or navigate,
through the Back button, to review the data that was entered.
If pricing is incorrect on the PO, the User should cancel the invoice, create the SIR
and enter the invoice once the SIR has been approved.
PO Invoice Creation continued
13
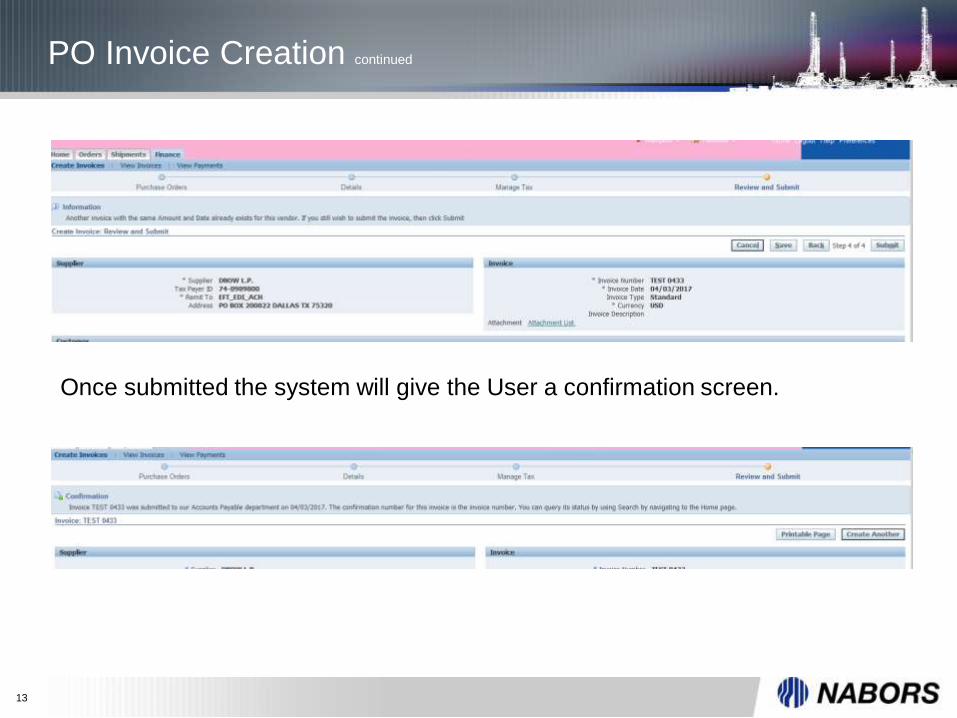
PO Invoice Creation continued
Once submitted the system will give the User a confirmation screen.

14
To create a credit memo in the Oracle portal you will need to have the PO in an
open status both at the header and at the line level. The User will need to work
with the buyer to have the PO opened and if necessary unreceived so that the
credit memo can be created.
To create a credit memo, the User should follow the same steps used when
creating an invoice.
Select the Create Invoice With a PO option by clicking on the Go button.
PO Credit Memo Creation continued

15
Enter the PO number associated with the invoice to be credited
and select Go.
PO Credit Memo Creation continued

16
Select the item or items to be credited and click on the Add To
Invoice button and then click on the Next button.
PO Credit Memo Creation continued

17
Once on Step 2 the User will need to enter the Credit Memo number and the
date. In the Invoice Type field the User should use the drop down menu to
change the field from Invoice to Credit Memo.
PO Credit Memo Creation continued

18
The User will also need to attach a copy of the CM by the Add button. Once this
has been completed the User will need to enter the quantity that is being
credited. Note: The quantity field will auto populate with the remaining quantity
on the PO to bill. The quantity to be credited should be entered in the Quantity
field as a negative number.
PO Credit Memo Creation continued
After the credit quantity has been entered the User will select the next button to
review what has been entered and to ensure that the credit memo total is
correct.

19
If the total of the credit is correct the User can then select the Submit button.
PO Credit Memo Creation continued