nvivo 10 workshop - piratepanelcore.ecu.edu/ofe/statisticsresearch/nvivo workshop i 10 22...
TRANSCRIPT

1
NVIVO 10 WORKSHOP
Hui Bian Office for Faculty Excellence
BY HUI BIAN
CONTACT INFORMATION
2
• Email: [email protected]
• Phone: 328-5428
• 1001 Joyner Library
• Website:
http://core.ecu.edu/ofe/StatisticsResearch/
BY HUI BIAN

DOWNLOAD NVIVO10 FROM ECU
BY HUI BIAN 3
• Go to download.ecu.edu to request Nvivo 10

GOALS OF WORKSHOP
BY HUI BIAN 4
• Know how to organize data and results
• How to create nodes through coding
• How to run Word frequency query
• How to run Text search query

DATA SAMPLE
5
• Data sample used is from NVivo website
• Environmental Change Down East
• Researchers conducted many interviews
• Gather newspaper articles,
• Photographs and maps,
• A survey
BY HUI BIAN

OPEN NVIVO
6
• If it is the first launch of the software, you
need to set up your default user profile.
• If it is not the first launch of the software,
you can go File > Options: on the General
tab, type your name and initial.
BY HUI BIAN

OPEN NVIVO
7 BY HUI BIAN

OPEN NVIVO
8
• The initial of current user profile are
displayed on the status bar.
• In a team project, user profile can be used
to keep track of the work done by team
members.
BY HUI BIAN

NVIVO HELP
BY HUI BIAN 9
• NVivo help
Or Click

NVIVO HELP: FROM QSR
BY HUI BIAN 10
Iterative process

NVIVO HELP
BY HUI BIAN 11
• “Remember that NVivo can help
you to manage, explore and find
patterns in your data but it
cannot replace your analytical
expertise.”
CREATE A NEW PROJECT
12
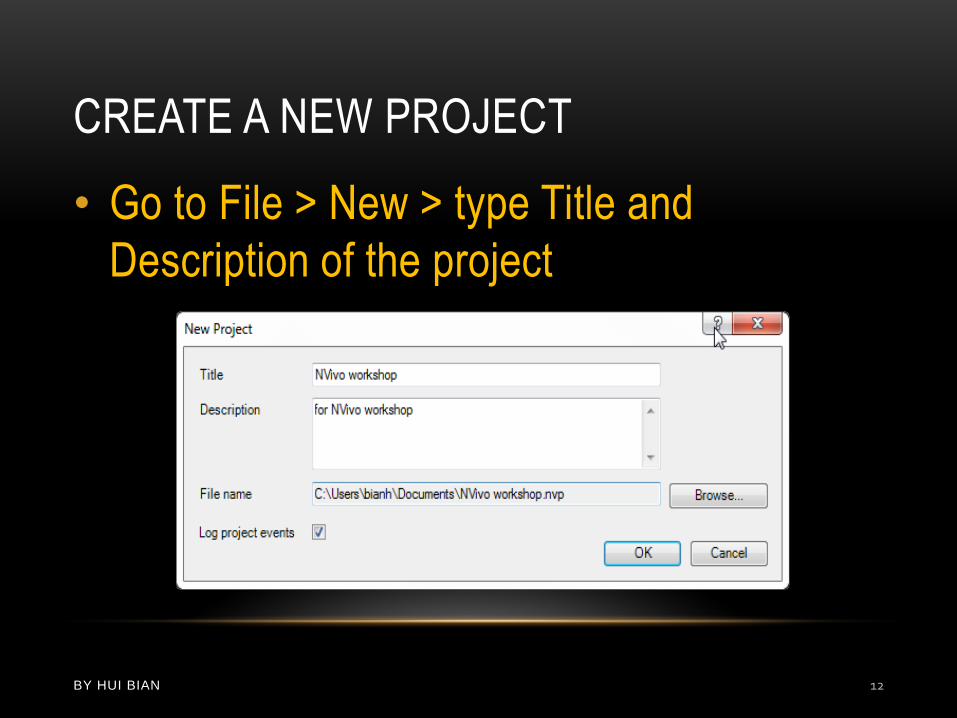
• Go to File > New > type Title and
Description of the project
BY HUI BIAN

SOURCES
BY HUI BIAN 13
• Project items and research materials: the data
you collected.

SOURCES
14
• Sources include
• Internals: materials that you can import or create in Nvivo project, such as interview recordings or transcriptions, field notes, photos, etc.
• Externals: materials that you CANNOT import into Nvivo, such as reference books in the library, webpages, handwritten letters, etc.
BY HUI BIAN
SOURCES
BY HUI BIAN 15
• Sources include
• Memos: your reflections, your thoughts
about the project.
• Framework Matrices: summarize sources
material in a matrix.

SOURCES
BY HUI BIAN 16

PREPARE DOCUMENTS FOR IMPORT
BY HUI BIAN 17
• Before import any sources to NVivo, you need to prepare your documents.
• The interview transcripts saved as Word documents (or text files).
• Could use paragraph styles to format the headings for questions (if you ask the same questions), later on you can use auto coding to code them.

PREPARE DOCUMENTS FOR IMPORT
BY HUI BIAN 18
• Prepare your documents
• Use Word or Excel to document a log of what you are doing —date and time, location, the events that took place, the surrounding conditions and your personal feelings about the events.

PREPARE DOCUMENTS FOR IMPORT
BY HUI BIAN 19
• Use Excel to document the
demographics of your participants.
• Use Word (texts or table) to
document video and audio
contents.

IMPORT SOURCES INTO NVIVO
20
• Use folders to organize your sources
• Four default folders from Nvivo:
Internals, Externals, Memos, and
Framework Matrices.
• Let’s focus on Internals folder.
BY HUI BIAN

IMPORT SOURCES INTO NVIVO
BY HUI BIAN 21

IMPORT SOURCES INTO NVIVO
22
• Organize your sources: first set up sub-folders
under Internals folder.
• Highlight Internals > Go to Create > Click Folder
• Or right click Internals and then click New
Folder.
BY HUI BIAN

IMPORT SOURCES INTO NVIVO
BY HUI BIAN 23
• Exercise: create three sub-folders:
Interview, Dataset, and Pictures.
Type name here

IMPORT SOURCES INTO NVIVO
24
• Documents
• Transcribed interviews
• Focus group discussions
• Observations
• Field notes
• Survey responses
• Policy documents
• Other text materials
BY HUI BIAN

IMPORT SOURCES INTO NVIVO
25
• Documents: material formats
• Word files
• Rich text format (.rtf)
• Text (.txt)
BY HUI BIAN

IMPORT SOURCES INTO NVIVO
BY HUI BIAN 26
• Import documents
• Click Interview subfolder (make sure this
subfolder is opened)
• Click External Data > Documents

IMPORT SOURCES INTO NVIVO
27
• The following interview files are imported:
Barbara, Charles, Dorothy, Margaret, Robert,
Susan, Thomas, Williams
BY HUI BIAN

IMPORT SOURCES INTO NVIVO
28
• Documents in Interview subfolder
BY HUI BIAN

IMPORT SOURCES INTO NVIVO
29
• Double click document name. The document is displayed in
Detail View.
BY HUI BIAN

IMPORT SOURCES INTO NVIVO
30
• Edit documents
BY HUI BIAN

IMPORT SOURCES INTO NVIVO
31
• Change Detail view
•Click View tab > Detail View >
Right or Bottom
BY HUI BIAN

IMPORT SOURCES INTO NVIVO
BY HUI BIAN 32
• Bottom view

IMPORT SOURCES INTO NVIVO
BY HUI BIAN 33
• Right view

IMPORT SOURCES INTO NVIVO
34
• Import video or audio files into NVivo
• Formats
•Audio(.mp3, .wma, .wav)
•Video (.mpg, .mpeg, .mpe, .wmv,
.avi, .mov, .qt, .mp4)
BY HUI BIAN

IMPORT SOURCES INTO NVIVO
BY HUI BIAN 35
• Import video or audio files
• Click Interviews subfolder
• Click External Data > Videos or Audios
• We import two files: Ken.wmv (video)
and real estate agent hq.mp3 (audio)
IMPORT SOURCES INTO NVIVO
BY HUI BIAN 36
• Transcribe video clip while listen
• Open the video source.
• Make sure you are in edit mode.
• On the Media tab, in the Playback group,
under Play Mode, click Transcribe.
• Select playing speed

IMPORT SOURCES INTO NVIVO
BY HUI BIAN 37
• Click Play/Pause.
• A new transcript entry is added.
• Enter the content.
• Click Stop when you have completed an
entry. The end time is added to the
Timespan field.

IMPORT SOURCES INTO NVIVO
BY HUI BIAN 38
• Import video and audio transcripts to Nvivo
• Open the audio or video source
• Click Click to edit
• On the Media tab, in the Import group,
click Transcript Rows.

IMPORT SOURCES INTO NVIVO
BY HUI BIAN 39

IMPORT SOURCES INTO NVIVO
40 BY HUI BIAN

IMPORT SOURCES INTO NVIVO
BY HUI BIAN 41
• Edit transcripts in Nvivo
• Select the row or timespan you want to listen to.
• On the Media tab, in the Selection group, click
Select Media from Transcript.
• Then click Play or Play Transcript Media button
to play video
• You can make any changes for the content.

IMPORT SOURCES INTO NVIVO
BY HUI BIAN 42

IMPORT SOURCES INTO NVIVO
BY HUI BIAN 43
• You can change the speed of playing video clip

IMPORT SOURCES INTO NVIVO
44
• Import a picture
• Click sub-folder: Pictures
• Click External Data > Pictures
• Open a picture
• To hide a log: on the Picture tab, in the
Display group, uncheck Log.
BY HUI BIAN

IMPORT SOURCES INTO NVIVO
45
Log
BY HUI BIAN
IMPORT SOURCES INTO NVIVO
46
• Edit a picture
• To create a note about the whole picture: simply type in the Content column
• To create a note about a portion of the picture: click and drag on the image to make a selection.
• Click the Region column where you want to set the coordinates of the selected region.
• On the picture tab: click Assign Region to Rows
BY HUI BIAN

IMPORT SOURCES INTO NVIVO
47
Select a part of
the picture
Select this row
BY HUI BIAN
Click

IMPORT SOURCES INTO NVIVO
48
• Import Excel dataset
• Our example contains survey responses.
• With brief text entries will serve as
classifications (such as age or gender).
• Click Datasets sub-folder
• Click External Data > Dataset
BY HUI BIAN

IMPORT SOURCES INTO NVIVO
49
Locate your dataset file
BY HUI BIAN

IMPORT SOURCES INTO NVIVO
50 BY HUI BIAN

IMPORT SOURCES INTO NVIVO
51
• Analysis Type
• Codable field: the field contains open-ended data for qualitative analysis, such as any free-form text responses.
• Classifying field: the responses are used for classifying, such as gender, age, Likert scale responses.
• For our example: change the types of Commercial fishing and Recreational fishing into Boolean
BY HUI BIAN

IMPORT SOURCES INTO NVIVO
52 BY HUI BIAN
• Data types
Data types in dataset
Data type Used to store Example
Text Any textual content-letters, numbers, or characters
In codable dataset columns, you can use this data type to store responses to open-ended survey questions. In classifying dataset columns, you can use this data type to store range names (age 20-29 years) or city names, or country names
Integer A number with no decimal places 874
Decimal A number with decimal places 874.95
Date A calendar data (month, day of month and year)
10/28/2010
Time A time (hour, minutes, and seconds) 06:10:00
Date/time A calendar data and time within a single value
10/28/2010 06:10:00
Boolean Value pairs True or false, yes or no, 0 or 1
Source shortcut Used only in datasets to store a link to another source in the project

NODES AND CODING
53
• Node: a place to store references
about themes that emerge from your
sources.
• Coding is a procedure of gathering
references sharing similar themes or
other characteristics.
BY HUI BIAN

NODES AND CODING
54
• A place to store data about themes that emerge from
your analysis.
• Gather data sharing similar themes or other
characteristics.
• The references to them are stored in a node.
• The same piece of text can be stored in many nodes.
• You can store portions of image, video, or audio in a
node.
BY HUI BIAN

CREATE A NEW NODE FOLDER
55
• Nodes can be stored under the general Nodes folder or
subfolders.
• Examples: create two new nodes subfolders labeled as:
Themes and Participants
BY HUI BIAN

CREATE A NEW NODE FOLDER
56
• Two nodes folders
BY HUI BIAN

CREATE A NEW NODE
57
• Create a node without coding in List View
• Example: one theme emerged from the
sources or data: Environmental change.
• Open Themes folder
• Create > Node
• Type Environmental change.
BY HUI BIAN

CREATE A NEW NODE
BY HUI BIAN 58
CREATE A NEW NODE
BY HUI BIAN 59
• Create a node while coding in Detail View
• Interview of Barbara as an example
• Read the content and highlight anything
related to any new themes
• Go to Analyze > in Coding group > Code
Selection as New Node

CREATE A NEW NODE
BY HUI BIAN 60

CREATE A NEW NODE
BY HUI BIAN 61
• Create a node from selected text (In Vivo code)
• Selecting the content you want to code
• The selected text will be used to name the node.
• On the Analyze tab, in the Coding group, click Code In Vivo.

MANAGE NODES
62
• Move nodes
Move Development node under Themes
Select Development node, right click and
choose Cut
Then double click Themes folder, right click
and chose Paste
BY HUI BIAN
MANAGE NODES
63
• Merge nodes
• Sometimes two or more nodes are created with similar meaning or purpose.
• By merging nodes, all of the coded material is combined into a single node
• Cut a node first then select a node you want to merge
• Right click and then choose Merge into Selected Node
BY HUI BIAN

MANAGE NODES
64
• Rename a node
• Double click node name and change it or
• Select the node, then go Home >
Properties > Node properties
BY HUI BIAN

CODING
BY HUI BIAN 65
• Provide evidence for the nodes
• Basic coding in documents, PDFs, and
memos: select a few words, a whole
passage or all text in the source. Click
and drag to the nodes.

CODING
BY HUI BIAN 66
• Basic coding in pictures: select and drag to
the nodes
• A region of the picture
• Text in the Content column of the picture log
• The entire picture source
CODING
BY HUI BIAN 67
• Highlight coding reference
• Highlight all the content that has been coded
in a source
• Open the source.
• On the View tab, in the Coding group, click
Highlight, and then click Coding for All Nodes

CODING
BY HUI BIAN 68
• Remove coding: remove coding at selected nodes
• Select the content or source you want to uncode.
• On the Analyze tab, in the Uncoding group, under Uncode Selection At, click Existing Nodes.

CODING
BY HUI BIAN 69
• Remove coding: remove a reference or
part of a reference from a node
• Open the node.
• Select the content you want to remove.
• On the Analyze tab, in the Uncoding group,
under Uncode Selection At, click This Node.

CODING
BY HUI BIAN 70
• Auto coding: use survey data as an
example
• Open datasheet
• Analyze > Auto Code > Code at nodes
for selected columns
• Focus on all codable areas

CODING
BY HUI BIAN 71
CODING
BY HUI BIAN 72
• Select all codable questions and move
them from Available columns to Selected
columns
• Click next
• We want those new nodes under an
existing node: Environmental change node

CODING
BY HUI BIAN 73

CODING
BY HUI BIAN 74
• Then select Name of existing node

CODING
BY HUI BIAN 75
• The node structure

QUERY: TEXT SEARCH
BY HUI BIAN 76
• Example: search Environmental
Change
• Text search: Query > Text Search
• Key words: Environment OR/AND
Change

QUERY: TEXT SEARCH
BY HUI BIAN 77
• Text search criteria

QUERY: TEXT SEARCH
BY HUI BIAN 78
• Query options

QUERY: TEXT SEARCH
BY HUI BIAN 79
• Text search results

QUERY: TEXT SEARCH
BY HUI BIAN 80
• Select interview transcript for Robert for
example (look at Q2)
• Select something related to environmental
change
• Right click > Code Selection > Code Selection at
Existing node > save selection to Environmental
change node

QUERY: WORD FREQUENCY
BY HUI BIAN 81
• Word frequency: Query > Word Frequency

QUERY: WORD FREQUENCY
BY HUI BIAN 82
• Word Frequency results
QUERY: WORD FREQUENCY
BY HUI BIAN 83
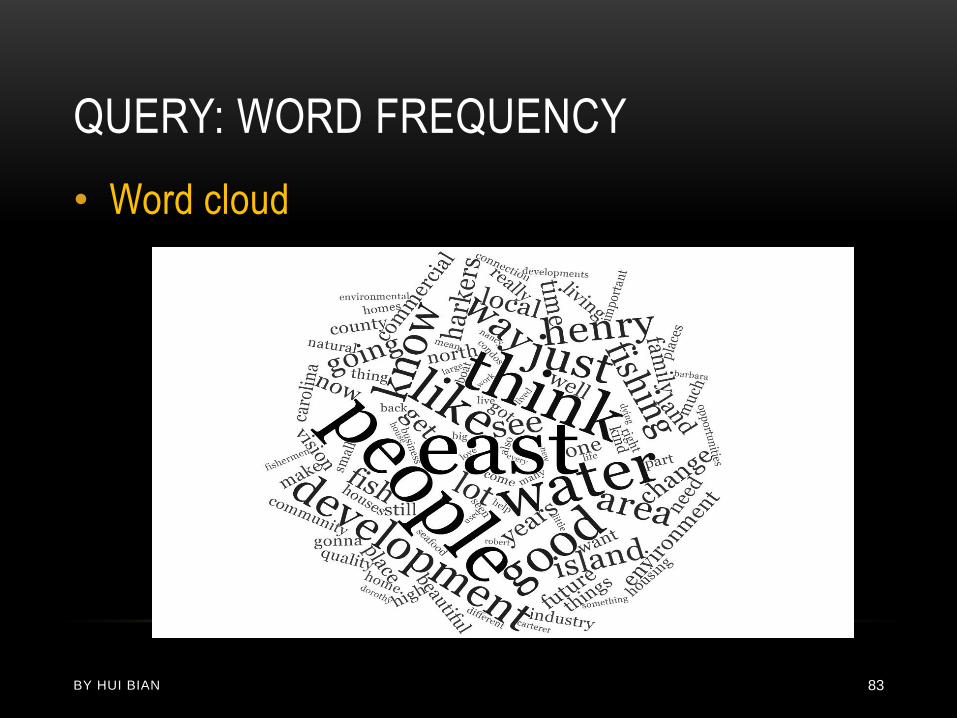
• Word cloud

QUERY: WORD FREQUENCY
BY HUI BIAN 84
• Get a picture file of word cloud
• Right click the word cloud >
• Click Export Word Cloud

QUERY: WORD FREQUENCY
BY HUI BIAN 85
• Highlight any word you think important
and code it as a new node
• Example: highlight word:
development
•Right click > Create as node

QUERY: WORD FREQUENCY
BY HUI BIAN 86
• Look at references for Development node

QUERY: WORD FREQUENCY
BY HUI BIAN 87
• Look at summary for Development node
RELATIONSHIP NODES
88
• Relationships must be based on existing items
• Created in Relationships folder or from a model.
• Relationship nodes consist of three elements
• Two project items
• A relationship type
• Nvivo includes only one relationship type by default,
Associated. You can create additional types.
BY HUI BIAN

RELATIONSHIP NODES
89
• Create a relationship type
• We are going to create a new type called
threatened
• On the Create tab > click Relationship Type
(in Classifications group) > choose One Way
as relationship direction
BY HUI BIAN

RELATIONSHIP NODES
BY HUI BIAN 90
• A new relationship type: Threatened

RELATIONSHIP NODES
BY HUI BIAN 91
• Create a relationship node
• Highlight relationships folder
• Go to Create > click Relationship (in
Nodes group)

RELATIONSHIP NODES
92
1. Click first Select for From, then
choose Environmental change
node.
2. Click second Select for To,
then choose Fishing node.
3. Click third Select for Type
Name, then choose
“threatened ”.
4. Color: use Red
BY HUI BIAN

93 BY HUI BIAN