object-oriented programming in blitzmax - brucey's...
TRANSCRIPT

Object-Oriented Programming in BlitzMaxBy John Judnich
Introduction
At first, object-oriented programming (OOP) may appear confusing or unnecessary to those accustomed to procedural programming methods; however, once you are familiar with OOP techniques and their benefits, you may never want to go back to procedural programming again. As the name implies, object-oriented programming basically provides a way to associate variables and functions around virtual “objects”. By the end of this tutorial, you should have a good understanding of the use and benefits of OOP techniques.
Custom Types
Note: If you are already familiar with the use of custom Type's with Field's, you can skip this section.A custom Type definition is a handy way to define your own custom variable types. A custom Type is
basically a group of variables all bundled into one. For example:
Strict
Type CarField Image:TImageField Name:StringField Speed:Float, Rotation:Float
End Type
Local a:Int, b:Float, c:Car
Try running the above example. You may be surprised that it actually works. Yes - “Car” is now a valid variable type! You can pass it to functions, set it's value, etc. just like any other variable. The Field lines supply variables which Car variables include internally; these internal variables are technically called “members” of Car. A custom Type is really just a handy way to group variables.
Accessing a member of a Car variable is very easy. Simply use the dot (.) operator like this:
Strict
Type CarField Image:TImageField Name:StringField Speed:Float, Rotation:Float
End Type
Local a:Int, b:Float, c:Car
c = New Car
c.Name = "70s Chevy"Print c.Name
As you can see, c.Name is accessing the Name member of the Car variable “c”. As in the example, the Name can be modified and read from, just like any other variable.
You may be wondering what the “c = New Car” line does. This aspect of custom Types is generally hard to understand at first. Think of it this way: a custom type variable (unlike a normal Float, Int, etc. variable) is not actually a variable – imagine the Car variable in this example as a handle which you can stick onto any Car to get a grip on it. Through this handle (the “c” variable), you can access any of the Car's data (such as

c.Name). However, a handle on it's own is worthless; it must first be attached to something. To attach this handle (the “c” variable) to something, simply assign it to a real object. And, to create a real object, you use the “New” keyword. The “c = New Car” line in the example above creates a New Car and assigns it to “c”. Without this line, the “c.Name” code below will cause a runtime error since it is trying to access nothingness.
Note: When a custom type variable is attached to nothing, it's value is called “Null”. If you want to detach a “handle” (custom type variable) from an object, simply set the variable's value to Null (such as “c = Null”). You should always detach variables from real objects when you no longer need access to it; a real object (created with “New”) will always remain in memory until all “handles” have been detached from it. Take a look at this example:
Strict
Type CarField Image:TImageField Name:StringField Speed:Float, Rotation:Float
End Type
Local a:Int, b:Float, c:Car, d:Car
c = New Car
d = c
c.Name = "70s Chevy"Print d.Name
First, a new car is created, and assigned to “c”. Then “d” (another Car “handle”) is assigned to “c”. When a custom Type variable is assigned to another custom Type variable like this, “d” is attached to the same object that “c” is attached to. So now both “c” and “d” should be attached to the same Car.
As you can see below, “c.Name” set's the Car's Name to “70s Chevy”. Then, “d.Name” (this is “d” now, not “c”) displays “70s Chevy” on the screen. Since both “c” and “d” are attached to the same Car object, this is the correct behavior.
You may be wondering what all this is good for. The real advantage to custom type variables being only “handles” and not “real objects” is when you begin to represent actual real-world objects in your game. This way, you have complete control over the creation/deletion of objects, and you can easily pass an existing object into a function. For example:
Strict
Type CarField Image:TImageField Name:StringField Speed:Float, Rotation:Float
End Type
Local a:Int, b:Float, c:Carc = New Car 'Create a New Car object and assign it to c
InitCar(c)
'Demonstrate that the InitCar() function has actually modified c's Car objectPrint c.SpeedPrint c.Rotation
c = Null 'Car is no longer needed

Function InitCar(obj:Car)obj.Speed = 0obj.Rotation = 90Return
End Function
Since Car variables are only “handles” to the real data, the InitCar() function is able to perform operations on an existing object. In InitCar(), the Car parameter (obj:Car) gets attached to whatever Car is specified. In this case, it is the car which “c” is attached to. The function then modifies the variables of this car, and returns.
Before you move on in this tutorial, you may want to take a while to experiment with custom Types. To understand object-oriented techniques, you must first be completely comfortable working with custom Types.
Object-Orient Programming Basics
First, take a look at the following example, which is an extremely simple demonstration of a traditional (procedural) implementation of a “counter” (it simply increments a number every time a function is called):
Strict
Type TCounterField Value:Int
End Type
Function IncrementCounter(counter:TCounter)counter.Value :+ 1
End Function
'Create a test counterLocal test:TCounter = New TCounter
'Display it's valuePrintPrint "Counter value is " + test.Value
'Increment itIncrementCounter(test)Print "Counter has been incremented"
'Now display it's value (which should now be 1+ the old value)Print "Counter value is " + test.Value
The above example simply creates an extremely simple type (called TCounter – the 'T' prefix is just a way of indicating that it is a Type) which contains a single integer field (called Value). The function called IncrementCounter() will add 1 to the Value of any TCounter object. The rest of the code below simply demonstrates the operation of the function and type.
Now, to convert this example into an object-oriented program, only a few small changes would be made. Since OOP allows you to insert functions within a Type definitions (just as you are allowed to insert variables within them), the IncrementCounter can be moved inside the type definition (however, this “Function” will now be called a “Method”). For example:
Strict
Type TCounter
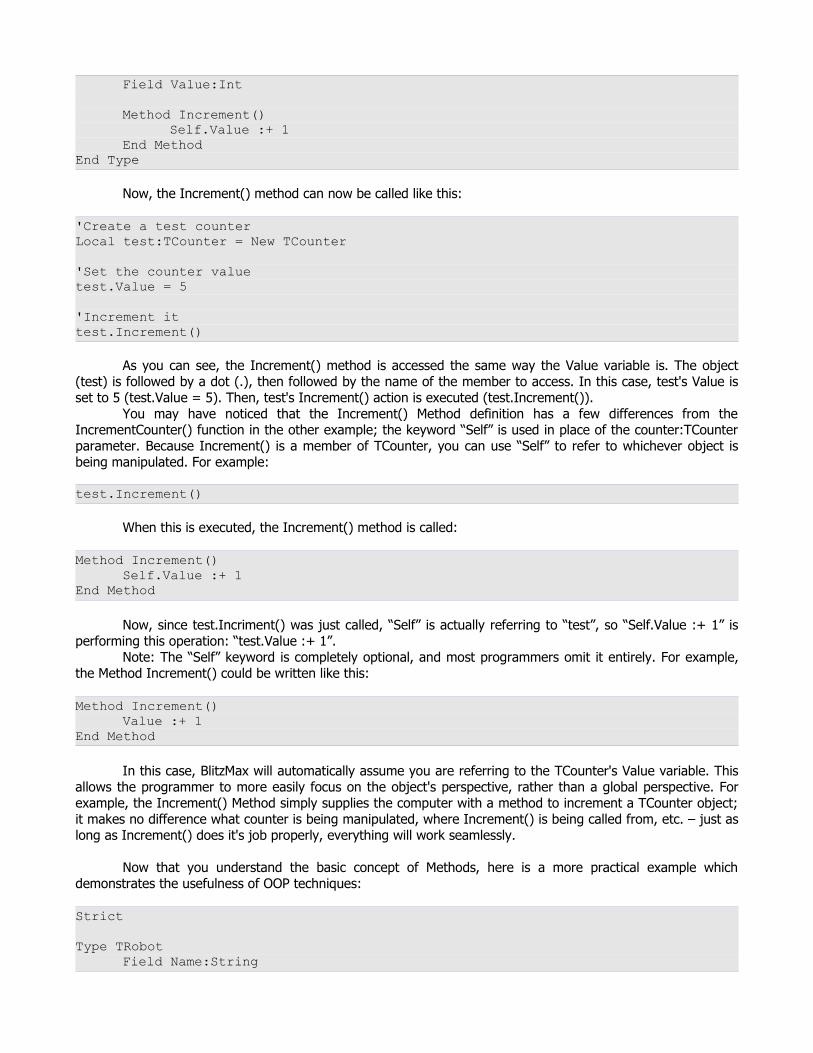
Field Value:Int
Method Increment()Self.Value :+ 1
End MethodEnd Type
Now, the Increment() method can now be called like this:
'Create a test counterLocal test:TCounter = New TCounter
'Set the counter valuetest.Value = 5
'Increment ittest.Increment()
As you can see, the Increment() method is accessed the same way the Value variable is. The object (test) is followed by a dot (.), then followed by the name of the member to access. In this case, test's Value is set to 5 (test.Value = 5). Then, test's Increment() action is executed (test.Increment()).
You may have noticed that the Increment() Method definition has a few differences from the IncrementCounter() function in the other example; the keyword “Self” is used in place of the counter:TCounter parameter. Because Increment() is a member of TCounter, you can use “Self” to refer to whichever object is being manipulated. For example:
test.Increment()
When this is executed, the Increment() method is called:
Method Increment()Self.Value :+ 1
End Method
Now, since test.Incriment() was just called, “Self” is actually referring to “test”, so “Self.Value :+ 1” is performing this operation: “test.Value :+ 1”.
Note: The “Self” keyword is completely optional, and most programmers omit it entirely. For example, the Method Increment() could be written like this:
Method Increment()Value :+ 1
End Method
In this case, BlitzMax will automatically assume you are referring to the TCounter's Value variable. This allows the programmer to more easily focus on the object's perspective, rather than a global perspective. For example, the Increment() Method simply supplies the computer with a method to increment a TCounter object; it makes no difference what counter is being manipulated, where Increment() is being called from, etc. – just as long as Increment() does it's job properly, everything will work seamlessly.
Now that you understand the basic concept of Methods, here is a more practical example which demonstrates the usefulness of OOP techniques:
Strict
Type TRobotField Name:String

Field x:Float, y:FloatField Health:Int
Method SetName(NewName:String)Name = NewName
End Method
Method Move(x:Float, y:Float)Self.x :+ xSelf.y :+ y
End Method
Method Draw()SetColor 255, 255, 255DrawText Name, x - (TextWidth(Name)/2), y - 20
SetColor 0, 0, 255DrawRect x - 5, y - 5, 10, 10
SetColor 255, 0, 0DrawRect x - 4, y - 4, 8, 8
End MethodEnd Type
This TRobot Type has these members: Name, x, y, Health, SetName(), and Move(). The Fields (Name, x, and y) store information about the robot, while the Methods (SetName(), Move(), and Draw()) provide actions which can be performed on any TRobot object. For example:
Graphics 640, 480
Local robot:TRobot = New TRobot
robot.SetName("XB-75b")
While Not KeyHit(KEY_ESCAPE)Cls
robot.Move(1, 1)robot.Draw()
FlipWend
First, this example creates a New TRobot object (called “robot”). robot.SetName(“XB-75b”) executes the TRobot SetName() Method (the SetName() Method is a little redundant, since you could just as easily say robot.Name = “XB-75b”; the SetName() method is simply for demonstration purposes).
The main While loop simply calls robot.Move(1, 1) and robot.Draw() each frame. The Move() method moves the robot 1 unit to the right, and 1 unit down. The Draw() method draws the “robot” to the screen.
Note: The equivalent of this in traditional programming methods would be something like: MoveRobot(robot, 1, 1) and DrawRobot(robot). The object-oriented style is not only more structured and intuitive, but provides advanced features such as Inheritance and Polymorphism which makes programming complex object relationships extremely easy.
As you can see, using OOP techniques enforces a modular design in your programs, taking your mind off the complex inner workings of the system, and rather focusing on the higher level manipulation of objects. When writing a Draw() Method for an object, for example, the programmer only needs to focus on one thing: instructing the computer to draw an object correctly. Once that task is complete, you will never need to worry

about the internal operations of that Method again; whenever an object needs to be drawn, it's as simple as calling “object.Draw()”.
Inheritance
Inheritance in OOP is really very simple once you understand it. Inheritance is the term for appending one Type onto another one. This may seem slightly confusing at first, and is best taught by example.
If you're making a game with BlitzMax, it's most likely that you'll have many different types of game objects (for example, you mnight have a TPlayer, TRobot, and TBuilding). Here's a short example:
Strict
Type TPlayerField x:Float, y:FloatField Health:Int
End Type
Type TRobotField x:Float, y:FloatField Health:Int
End Type
Type TBuildingField x:Float, y:FloatField Enterable:Int
End Type
Local obj:TPlayer = New TPlayerobj.x = 1obj.y = 2
As you can see, all three types have a lot in common; they all have “x” and “y” variables, and both TPlayer and TRobot have “health”. Inheritance provides a way to make a sort of template Type which others can build on. For example:
Strict
Type TEntityField x:Float, y:Float
End Type
Type TPlayer Extends TEntityField Health:Int
End Type
Type TRobot Extends TEntityField Health:Int
End Type
Type TBuilding Extends TEntityField Enterable:Int
End Type
Local obj:TPlayer = New TPlayerobj.x = 1obj.y = 2

In this example, the Extends keyword after TPlayer, for example, tells BlitzMax that TPlayer not only contains “Field Health:Int”, but everything else that TEntity has as well. The result is that any TPlayer objects will now automatically have “x” and “y” variables (notice that “obj.x = 1” works just fine, even though the TPlayer Type doesn't specifically include “x”).
This may at first seem like only a way to save typing, but it gets amazingly useful when you get into polymorphism. However, you should first learn more about Inheritance's benefits which appear when your types include Methods.
First, here is the same example with a Method added to TEntity:
Strict
Type TEntityField x:Float, y:Float
Method Draw()SetColor 255, 255, 255Plot x, y
End MethodEnd Type
Type TPlayer Extends TEntityField Health:Int
End Type
Type TRobot Extends TEntityField Health:Int
End Type
Type TBuilding Extends TEntityField Enterable:Int
End Type
Graphics 640, 480
Local obj:TPlayer = New TPlayerobj.x = 1obj.y = 2
obj.DrawFlip
WaitKey
The Draw() method of TEntity simply plots a dot at the entity's location. Now, since TPlayer, TRobot, and TBuilding all inherit TEntity's properties, this means that they now have a Draw() Method (as you can see if you run the example).
Now, drawing a dot might be OK if you want to mark the position of an entity, but TBuilding's, TRobot's, and TPlayer's should all look unique. This can be done by overriding the Draw() method. Doing this is really just as simple as adding a Draw() method to TBuilding, for example, and BlitzMax will use that one instead. For example:
Strict
Type TEntityField x:Float, y:Float
Method Draw()SetColor 255, 255, 255

Plot x, yEnd Method
End Type
Type TPlayer Extends TEntityField Health:Int
Method Draw()SetColor 0, 0, 255DrawOval x, y, 5, 5
End MethodEnd Type
Type TRobot Extends TEntityField Health:Int
Method Draw()SetColor 255, 0, 0DrawOval x, y, 5, 5
End MethodEnd Type
Type TBuilding Extends TEntityField Enterable:Int
Method Draw()SetColor 255, 255, 255DrawRect x - 5, y - 5, 10, 10
End MethodEnd Type
Graphics 640, 480
Local obj:TPlayer = New TPlayerobj.x = 5obj.y = 7
obj.DrawFlip
WaitKey
When BlitzMax executes “obj.Draw”, it uses the most appropriate Method. In this case, it is TPlayer's Draw() Method (not TEntity's, because it is more abstract).
If you do not want TEntity to provide a “default” draw method (as it is now, it just draws a dot if no specific Draw() Method is provided), you can delete TEntity's Draw() Method, and “obj.Draw” will still work, since TPlayer contains a Draw() Method. However, a better way to do this is to add an “Abstract” Draw() Method to TEntity. Making a Method “Abstract” is really just a way of saying that this Method is blank, and sub-Types (such as TBuilding and TPlayer) must provide one (or else you'll get a compile error). For example:
Strict
Type TEntityField x:Float, y:Float
Method Draw() AbstractEnd Type

Type TPlayer Extends TEntityField Health:Int
Method Draw()SetColor 0, 0, 255DrawOval x, y, 5, 5
End MethodEnd Type
Type TRobot Extends TEntityField Health:Int
Method Draw()SetColor 255, 0, 0DrawOval x, y, 5, 5
End MethodEnd Type
Type TBuilding Extends TEntityField Enterable:Int
Method Draw()SetColor 255, 255, 255DrawRect x - 5, y - 5, 10, 10
End MethodEnd Type
Graphics 640, 480
Local obj:TPlayer = New TPlayerobj.x = 5obj.y = 7
obj.DrawFlip
WaitKey
You may notice that “Method Draw() Abstract” in TEntity has no “End Method” statement. This is because an Abstract Method is always blank, and contains no data. This abstract method definition is really just saying “all Types which inherit TEntity must have a Draw() Method”. Try deleting TPlayer's Draw() Method, and run the program. A compile error occurs, enforcing your rule that inheritors of TEntity must have a Draw() Method.
This may at first seem only useful for error checking (to make sure that your entities can be drawn, or whatever actions you require), but it comes in handy when using polymorphism.
Polymorphism
Polymorphism is really just a fancy word for the process of handling your objects in a generalized way. Polymorphism might be easier to understand if you think about it like this: in OOP, a TApple Type would Extend the TFruit Type (since an apple is a fruit, of course). Now you can do this, for example:
Local apple:TApple = New TAppleLocal orange:TOrange = New TOrange
Local fruit:TFruit

fruit = applefruit = orange
The fruit:TFruit variable, has the capability to store apples, oranges, or any other Type which Extends TFruit. In other words, with a generalized variable (a TFruit variable or TEntity variable, for example), you can store any sub-Type object. This means that a TPlayer, TRobot, or TBuilding object can be stored in a TEntity variable. This is called polymorphism. For example, you could do this:
Graphics 640, 480
Local player:TPlayer = New TPlayerplayer.x = 5player.y = 7
Local entity:TEntityentity = playerentity.Draw()
As you can see, the TEntity variable is used to reference a TPlayer Type. The “entity.Draw()” line tells the computer to draw the TEntity. In this case, this TEntity is a actually a TPlayer, so TPlayer's Draw() Method is used (not TEntity's). Whether the entity was a TPlayer, TRobot, TBuilding, etc. makes no difference; the appropriate Draw() Method will automatically be executed.
However, when accessing a TPlayer, TRobot, etc. through a TEntity variable like this, you will only be allowed access to fields and methods included in the TEntity definition; the only members you can be certain the object will contain are TEntity members – anything else may vary (depending on whether it's a TPlayer, TRobot, TBuilding, etc.)
You might be wondering what it could be useful for. The main advantages of polymorphism become apparent when you want to do something to all objects of a general type. For example, what if you wanted to execute Draw() for every TPlayer, TRobot, and TBuilding? Normally, you would have to keep a list of all players, all houses, and all robots separately (which would get very messy, especially if you later decide to add more TEntity-inherited Types). The solution is to keep a list of them as TEntity's, since a TEntity variable has the polymorphic ability to store TPlayer's, TRobot's, TBuilding's, etc. You can then Draw() them whenever you need, since Draw() is a Method common to all TEntity's. For example:
Graphics 640, 480
Local EntityList:TList = New TList
Local obj:TPlayer = New TPlayerobj.x = 5obj.y = 7EntityList.AddLast(obj)
Local obj2:TBuilding = New TBuildingobj2.x = 15obj2.y = 3EntityList.AddLast(obj2)
'Draw all entitiesLocal ent:TEntityFor ent = EachIn EntityList
ent.Draw()Next
FlipWaitKey

Note: In case you are not familiar with BlitzMax's TList Module, it simply provides an easy way to manage a list of objects, similarly to storing them in an array.
Polymorphism is useful in any case where generalization would benefit. For example, if you have a general-purpose function which accepts a TEntity as a parameter, this means that your players, houses, and robots will all work seamlessly with that function! For example:
Graphics 640, 480
Local player:TPlayer = New TPlayerplayer.x = 5player.y = 7
Local house:TBuilding = New TBuildinghouse.x = 15house.y = 3
While Not KeyHit(KEY_ESCAPE)Cls
DrawAndMove(player)DrawAndMove(house)
FlipWend
WaitKey
Function DrawAndMove(entity:TEntity)entity.Drawentity.x :+ 1entity.y :+ 1
End Function
Constructors & Destructors
First, take a look at the following example (specifically, the section where obj and obj2 is added to EntityList):
Strict
Type TEntityField x:Float, y:Float
Method Draw() AbstractEnd Type
Type TPlayer Extends TEntityField Health:Int
Method Draw()SetColor 0, 0, 255DrawOval x, y, 5, 5
End MethodEnd Type

Type TRobot Extends TEntityField Health:Int
Method Draw()SetColor 255, 0, 0DrawOval x, y, 5, 5
End MethodEnd Type
Type TBuilding Extends TEntityField Enterable:Int
Method Draw()SetColor 255, 255, 255DrawRect x - 5, y - 5, 10, 10
End MethodEnd Type
Graphics 640, 480
Local EntityList:TList = New TList
Local obj:TPlayer = New TPlayerobj.x = 5; obj.y = 7EntityList.AddLast(obj)
Local obj2:TBuilding = New TBuildingobj2.x = 15; obj2.y = 3EntityList.AddLast(obj2)
'Draw all entitiesLocal ent:TEntityFor ent = EachIn EntityList
ent.Draw()Next
FlipWaitKey
There is one thing which might be considered messy or tedious in the above example: the need to call “EntityListAddLast()” for each new TEntity-derived object (if it wasn't added to the list, it wouldn't be rendered later on). Wouldn't it be a lot easier if could be done automatically? For example:
Local obj:TPlayer = New TPlayerobj.x = 5; obj.y = 7
Local obj2:TBuilding = New TBuildingobj2.x = 15; obj2.y = 3
It would be much easier if these objects could automatically add themselves to a list somewhere. Fortunately, this can be done in OOP! Any Type can have a special “constructor” Method which is automatically called just as the object is created. The constructor can do anything you like, just as any other Method can (in this case, it will be adding the TEntity to a list). To add a constructor to a Type, simply add a Method named “New()”. The New() Method will be executed whenever an object of that type is created.
In the example above, the best place to put the constructor is in TEntity; this way, TPlayer, TBuilding, and all the other sub-Types will inherit the constructor as well. And if necessary, some of the sub-Types can override the constructor Method. However, overriding a constructor is not the same as overriding a normal Method (in fact, it really doesn't override it at all); rather than the new Method being performed instead of the

original Method, the new constructor method is done in addition to the original Method. The reason for this should be clear in this example:
Strict
Global EntityList:TList = New TList
Type TEntityField x:Float, y:Float
Method Draw() Abstract
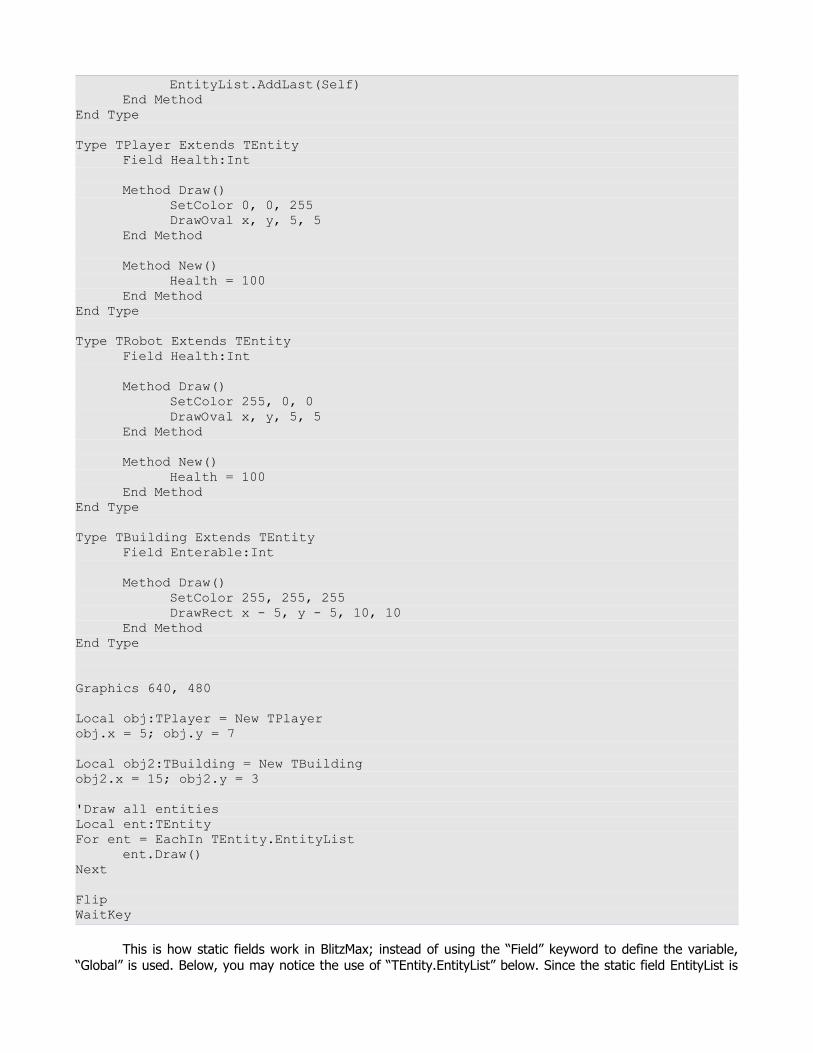
Method New()EntityList.AddLast(Self)
End MethodEnd Type
Type TPlayer Extends TEntityField Health:Int
Method Draw()SetColor 0, 0, 255DrawOval x, y, 5, 5
End Method
Method New()Health = 100
End MethodEnd Type
Type TRobot Extends TEntityField Health:Int
Method Draw()SetColor 255, 0, 0DrawOval x, y, 5, 5
End Method
Method New()Health = 100
End MethodEnd Type
Type TBuilding Extends TEntityField Enterable:Int
Method Draw()SetColor 255, 255, 255DrawRect x - 5, y - 5, 10, 10
End MethodEnd Type
Graphics 640, 480
Local obj:TPlayer = New TPlayerobj.x = 5; obj.y = 7
Local obj2:TBuilding = New TBuilding

obj2.x = 15; obj2.y = 3
'Draw all entitiesLocal ent:TEntityFor ent = EachIn EntityList
ent.Draw()Next
FlipWaitKey
When the TPlayer object is created, first the inherited TEntity constructor is called, which properly adds the TPlayer to the EntityList. Then, the TPlayer constructor is called additionally (remember – constructors cannot be overridden like normal Methods), which sets the player's health to 100%. Next, the TBuilding is created. With the TBuilding, only the inherited TEntity constructor is called, since no specific constructor code is provided.
After the TBuilding is added to the EntityList through the TEntity constructor, all the items in the EntityList are drawn to demonstrate that both TEntity's have been added to the list correctly.
In addition to constructors, there are also destructors. A destructor is done exactly like a constructor, except “Delete” is used instead of “New” as the Method's name. Destructors in BlitzMax can be used to perform some final steps before an object is deleted. Note: Since BlitzMax uses a garbage collection system to delete objects, don't rely on a destructor being called at any specific time; the Delete() Method (destructor) will be called whenever the “garbage collector” gets around to it.
Of course, the use of a constructor here is only a small example of what you can do with constructors. Basically, any initialization code you want to be performed to new objects can be automated with constructors.
Static Methods & Fields
As you know, a Type is a group of Method's and Field's. The value of Field's, and the operation of Method's depends entirely on which object you are working with. For example, “car1.x” may be different than “car2.x”. In OOP, you can also include what is called static methods and variables. A static variable is shared by all objects of that type. Static variables in Type's are really no different from a standard Global variable, with the added benefit of keeping your code more object-oriented. For example, look at the example from the last section:
Strict
Global EntityList:TList = New TList
Type TEntityField x:Float, y:Float
Method Draw() Abstract
Method New()EntityList.AddLast(Self)
End MethodEnd Type
Type TPlayer Extends TEntityField Health:Int
Method Draw()SetColor 0, 0, 255

DrawOval x, y, 5, 5End Method
Method New()Health = 100
End MethodEnd Type
Type TRobot Extends TEntityField Health:Int
Method Draw()SetColor 255, 0, 0DrawOval x, y, 5, 5
End Method
Method New()Health = 100
End MethodEnd Type
Type TBuilding Extends TEntityField Enterable:Int
Method Draw()SetColor 255, 255, 255DrawRect x - 5, y - 5, 10, 10
End MethodEnd Type
Graphics 640, 480
Local obj:TPlayer = New TPlayerobj.x = 5; obj.y = 7
Local obj2:TBuilding = New TBuildingobj2.x = 15; obj2.y = 3
'Draw all entitiesLocal ent:TEntityFor ent = EachIn EntityList
ent.Draw()Next
FlipWaitKey
Now, the “Global EntityList:TList = New Tlist” line can be moved inside the TEntity Type:
Strict
Type TEntityField x:Float, y:FloatGlobal EntityList:TList = New TList
Method Draw() Abstract
Method New()
EntityList.AddLast(Self)End Method
End Type
Type TPlayer Extends TEntityField Health:Int
Method Draw()SetColor 0, 0, 255DrawOval x, y, 5, 5
End Method
Method New()Health = 100
End MethodEnd Type
Type TRobot Extends TEntityField Health:Int
Method Draw()SetColor 255, 0, 0DrawOval x, y, 5, 5
End Method
Method New()Health = 100
End MethodEnd Type
Type TBuilding Extends TEntityField Enterable:Int
Method Draw()SetColor 255, 255, 255DrawRect x - 5, y - 5, 10, 10
End MethodEnd Type
Graphics 640, 480
Local obj:TPlayer = New TPlayerobj.x = 5; obj.y = 7
Local obj2:TBuilding = New TBuildingobj2.x = 15; obj2.y = 3
'Draw all entitiesLocal ent:TEntityFor ent = EachIn TEntity.EntityList
ent.Draw()Next
FlipWaitKey
This is how static fields work in BlitzMax; instead of using the “Field” keyword to define the variable, “Global” is used. Below, you may notice the use of “TEntity.EntityList” below. Since the static field EntityList is

shared by all TEntity's, you can even use “TEntity.” to access it. This comes in handy especially when you don't know if there are any TEntity objects existing (yes - static fields can be accessed, even when there are no objects of their type in existence).
Static fields are really just a nice way to categorize your Global variables, keeping everything object-oriented.
BlitzMax also supports static methods. Just as static fields are simply Global variables associated with a Type, static methods are simply Functions associated with a Type. Static method can be used for a variety of purposes, although the most common is a form of initialization. For example, you could make the functions CreatePlayer(), CreateRobot(), and CreateBuilding() to make it easier to initialize certain properties of objects when creating them (since the functions would allow you to include parameters, such as x, y, etc.):
Strict
Type TEntityField x:Float, y:FloatGlobal EntityList:TList = New TList
Method Draw() Abstract
Method New()EntityList.AddLast(Self)
End MethodEnd Type
Type TPlayer Extends TEntityField Health:Int
Method Draw()SetColor 0, 0, 255DrawOval x, y, 5, 5
End Method
Method New()Health = 100
End MethodEnd Type
Type TRobot Extends TEntityField Health:Int
Method Draw()SetColor 255, 0, 0DrawOval x, y, 5, 5
End Method
Method New()Health = 100
End MethodEnd Type
Type TBuilding Extends TEntityField Enterable:Int
Method Draw()SetColor 255, 255, 255DrawRect x - 5, y - 5, 10, 10
End Method

End Type
Function CreatePlayer:TPlayer(x:Float, y:Float, Health:Int)Local ent:TPlayer = New TPlayerent.Health = Healthent.x = x; ent.y = yReturn ent
End Function
Function CreateRobot:TRobot(x:Float, y:Float, Health:Int)Local ent: TRobot = New TRobotent.Health = Healthent.x = x; ent.y = yReturn ent
End Function
Function CreateBuilding:TBuilding(x:Float, y:Float, Enterable:Int)Local ent:TBuilding = New TBuildingent.Enterable = Enterableent.x = x; ent.y = yReturn ent
End Function
Graphics 640, 480
Local obj:TPlayer = CreatePlayer(5, 7, 100)Local obj2:TBuilding = CreateBuilding(15, 3, False)
'Draw all entitiesLocal ent:TEntityFor ent = EachIn TEntity.EntityList
ent.Draw()Next
FlipWaitKey
As you can see, using Functions to initialize object has advantages, but doing it this way is not very object-oriented. Just like the Global EntityList was moved into the Type definition, functions can be move in also. This way, all player-related code is now associated with the TPlayer object, all building-related code is now associated with the TBuilding object, etc.:
Strict
Type TEntityField x:Float, y:FloatGlobal EntityList:TList = New TList
Method Draw() Abstract
Method New()EntityList.AddLast(Self)
End MethodEnd Type
Type TPlayer Extends TEntityField Health:Int

Method Draw()SetColor 0, 0, 255DrawOval x, y, 5, 5
End Method
Method New()Health = 100
End Method
Function Create:TPlayer(x:Float, y:Float, Health:Int)Local ent:TPlayer = New TPlayerent.Health = Healthent.x = x; ent.y = yReturn ent
End FunctionEnd Type
Type TRobot Extends TEntityField Health:Int
Method Draw()SetColor 255, 0, 0DrawOval x, y, 5, 5
End Method
Method New()Health = 100
End Method
Function Create:TRobot(x:Float, y:Float, Health:Int)Local ent: TRobot = New TRobotent.Health = Healthent.x = x; ent.y = yReturn ent
End FunctionEnd Type
Type TBuilding Extends TEntityField Enterable:Int
Method Draw()SetColor 255, 255, 255DrawRect x - 5, y - 5, 10, 10
End Method
Function Create:TBuilding(x:Float, y:Float, Enterable:Int)Local ent:TBuilding = New TBuildingent.Enterable = Enterableent.x = x; ent.y = yReturn ent
End FunctionEnd Type
Graphics 640, 480
Local obj:TPlayer = TPlayer.Create(5, 7, 100)Local obj2:TBuilding = TBuilding.Create(15, 3, False)
'Draw all entities

Local ent:TEntityFor ent = EachIn TEntity.EntityList
ent.Draw()Next
FlipWaitKey
Generally, static methods and fields are useful when you want to perform a Type-related operation without regard to any specific object. Static fields provide globally applicable data regarding your custom Type, while static methods provide globally applicable code regarding your custom Type. The Create() functions in the previous example is a good demonstration of the most common use of static functions. However, there are many other uses. For example, the code which draws all entities in the example above could be made into a static method:
Strict
Type TEntityField x:Float, y:FloatGlobal EntityList:TList = New TList
Method Draw() Abstract
Method New()EntityList.AddLast(Self)
End Method
Function DrawAll()Local ent:TEntityFor ent = EachIn EntityList
ent.Draw()Next
End FunctionEnd Type
Type TPlayer Extends TEntityField Health:Int
Method Draw()SetColor 0, 0, 255DrawOval x, y, 5, 5
End Method
Method New()Health = 100
End Method
Function Create:TPlayer(x:Float, y:Float, Health:Int)Local ent:TPlayer = New TPlayerent.Health = Healthent.x = x; ent.y = yReturn ent
End FunctionEnd Type
Type TRobot Extends TEntityField Health:Int

Method Draw()SetColor 255, 0, 0DrawOval x, y, 5, 5
End Method
Method New()Health = 100
End Method
Function Create:TRobot(x:Float, y:Float, Health:Int)Local ent: TRobot = New TRobotent.Health = Healthent.x = x; ent.y = yReturn ent
End FunctionEnd Type
Type TBuilding Extends TEntityField Enterable:Int
Method Draw()SetColor 255, 255, 255DrawRect x - 5, y - 5, 10, 10
End Method
Function Create:TBuilding(x:Float, y:Float, Enterable:Int)Local ent:TBuilding = New TBuildingent.Enterable = Enterableent.x = x; ent.y = yReturn ent
End FunctionEnd Type
Graphics 640, 480
Local obj:TPlayer = TPlayer.Create(5, 7, 100)Local obj2:TBuilding = TBuilding.Create(15, 3, False)
'Draw all entitiesTEntity.DrawAll()
FlipWaitKey
Summary
Hopefully, by now you will have a good understanding of object-orient programming techniques, and how to use them. Object-oriented programming is an extremely useful tool which makes even the most complex programs easier to make than ever. The entire purpose of OOP is to allow you take your mind off the inner working of your program (the parts you already completed), and lets you focus on more high-level tasks, as you continue to create your program.