ocean county college school of...
TRANSCRIPT
Nursing Lab Skills Manual Page 1
OCEAN COUNTY COLLEGE SCHOOL OF NURSING
NURSING LAB SKILLS MANUAL
SPRING 2014

Nursing Lab Skills Manual Page 2
Table of Contents
Overview
Page 3
Nurs. 175
Page 5
Nurs. 176 – Medical-Surgical
Page 48
Nurs. 176 – Mental Health/Illness
Page 63
Nurs. 273 - OB/Pedi
Page 68
Nurs. 273 – Medical-Surgical
Page 68
Nurs. 274
Page 70

Nursing Lab Skills Manual Page 3
OVERVIEW
Welcome to the OCC School of Nursing Skills Lab. It is our objective that the Nursing Skills Lab is a place where you can learn and demonstrate safe practice of nursing skills. This will be accomplished through a variety of learning methods such as reading, video, direct demonstration, simulation and remediation. ATTENDANCE The Nursing Lab session is an integral part of your nursing education. It is scheduled during clinical laboratory time frames. Students are required to attend all lab sessions. If a student misses the live lab, the student is required to view the videotape (on the student’s own time) and any other required materials to meet the objectives. Contact your classroom faculty for instructions regarding make-up labs. This must be accomplished within one week of the missed lab. PREPARATION
Each college lab session has a set of directions in the form of a checklist. These can be found in the “Procedure Checklists” on the DVD that came with your Wilkinson Fundamentals of Nursing Volume 1. You will be required to print these checklists out as needed for practice and practicum testing.
The previewing of required media (if assigned) is an integral part of the lab preparation. The media can be found either in the DVD from Wilkinson’s Nursing Video Skills, in the Nursing Lab 109 or on the Nursing Computer Lab computers. Students who come to the Lab unprepared may be dismissed by the Instructor. The student is responsible for the material covered in the missed lab.
Nursing Lab Skills Manual Page 4
NURSING SKILLS LAB PRACTICE
When in the Nursing Skills Lab, each student is required to sign in and out on the lab computer with their name, time of arrival and departure and objective.
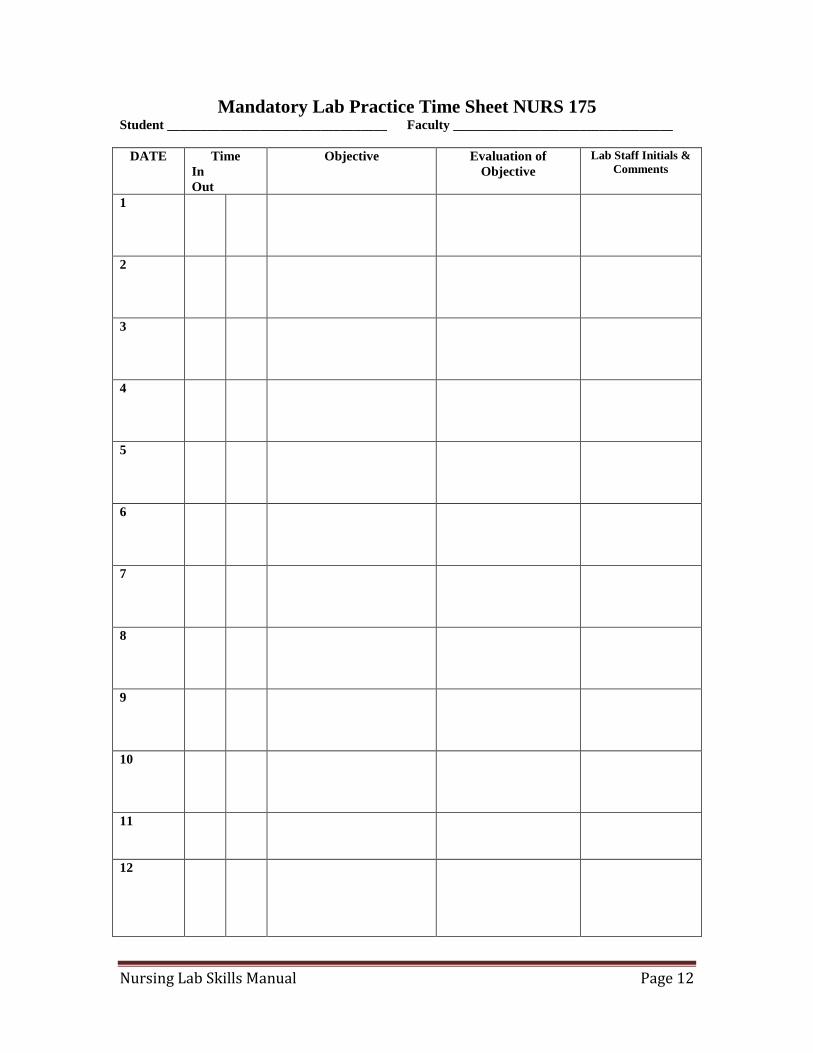
NURS 175 students are required to spend 12 hours in the Nursing Skills Lab practicing skills. It is recommended the student should spend 1-2 hours per week in this independent practice. Practice sessions should focus on content learned in the class/laboratory that week. It is your responsibility to keep track of your practice sessions on the Mandatory Lab Independent Practice Sheet. A copy of the sheet and a sample sheet are in this manual. This document is to be submitted to your classroom faculty at the third practicum. The student cannot perform the practicum without the completed mandatory lab sheet; the student would then be in redo status. NURS 175 students who have not completed the mandatory 12 hours of practice by the date of the third practicum will receive a clinical failure.
SIMULATION According to Miriam-Webster, simulation is the imitative representation of the functioning of one system or process by the means or functioning of another. The OCC School of Nursing Simulation Lab has one adult, one pediatric, and one newborn human patient simulator (HPS), along with many low fidelity manikins, which can imitate the functioning of real patients in a healthcare setting. Clinical Simulation provides students with the opportunity to practice skills and critical thinking without risk of harm to patients. The advanced video recording system allows videotaping of scenarios for debriefing and feedback purposes. Maintain professional integrity at all times including strict confidentiality as HIPAA rules apply. The HPS are to be treated as a real patient. Wear gloves when handling the manikins and remember they are allergic to Iodine and Betadine! Orientation to the Simulation Lab is available via videotape on the Nursing Skills Lab tab in Ocean Cruiser.

Nursing Lab Skills Manual Page 5
Nursing 175

Nursing Lab Skills Manual Page 6
NURSING 175 SKILLS MANUAL ATTENDANCE Attendance for the clinical, simulation and college laboratory experience is mandatory. Therefore the nursing program maintains a zero tolerance policy for absences for the clinical, simulation and laboratory experiences. See student handbook for complete attendance policy.
PREPARATION NURS 175, the first nursing course, contains many basic skills. These skills are best taught and practiced in the college lab. This manual serves as a guide for you to use for this applied aspect of nursing. Each college lab session has a set of objectives and a general list of activities conducted during the lab session itself. Proceeding the lab session the student must read applicable content from required textbooks. The appropriate DVD from Wilkinson’s Nursing Video Skills should be viewed prior to the lab. These readings and viewings are an integral part of preparation for lab. Dress Code: You must strictly adhere to the clinical dress code while in the clinical setting during preclinical research as well as your clinical experience. Full uniform is also required while in the college lab for clinicials, practicums as well as practicum redos. You may wear appropriate casual clothes while working in the college lab on independent lab hours. The dress code is outlined in the Nursing Student Handbook. PRACTICUMS There are three opportunities for students to demonstrate proficiency in the psychomotor and cognitive skills of the NURS 175 College Skills Lab. These scheduled hands-on testing times are called practicums. The student must pass each of the three practicums. During the practicum the student must successfully demonstrate the designated skill(s) with regard for all critical elements of safe nursing practice. Additionally, a Medication Calculation Practicum test is now part of Practicum 3. During the Med/Calc practicum students are allowed to use simple calculators. No PDA or cell phone calculators are permitted for use during the practicum. The same protocol for missing a practicum applies to the medication calculation practicum. If a student is unsuccessful on the first attempt remediation occurs as outlined in the nursing student handbook. If unsuccessful, the student has one opportunity to re-do the practicum.

Nursing Lab Skills Manual Page 7
Before the second attempt to demonstrate proficiency of the skill(s), the student will be given a lab remediation form to make an appointment and practice in the lab with the lab personnel. The form must be signed by the lab personnel remediating the student. It is the student’s responsibility to rememdiate and practice the skill until they have mastered it. Exact timing/scheduling of the re-do practicum is determined by faculty but takes place within two weeks of the failed practicum. The re-do practicum is conducted with two faculty members present. The re-do must be passed with regard to all critical elements in order to pass NURS 175. Failure to demonstrate mastery on the second attempt will result in a clinical failure. PROCEDURE GUIDELINES/REFERENCES These are the steps of the skills that are learned in this course. They include all the major criteria (and many minor points) for the safe performance of a nursing skill, and they also are used as a guide for evaluation in the Skills Practicums. Procedure guidelines are listed in the Fundamentals of Nursing textbook, the Fundamentals of Nursing Procedure Checklists text and in the Skills Videos that accompany Wilkinson. MANDATORY LABORATORY PRACTICE All NURS 175 students are required to spend 12 additional hours in the college laboratory practicing skills. . The student is required to log into the lab on the lab computer and to identify and evaluate the objectives for each practice session. [A copy of the sign-in sheet and an example of how to fill it out are on the next two pages] Ideally the student should spend 1 – 2 hours a week in this independent practice. Practice sessions should focus on content learned in class/laboratory that week. Hours spent in the lab for “remediation” does not count towards your 12 hours of mandatory time. It is your responsibility to keep track of your practice sessions on the Mandatory Lab Independent Practice Sheet and to total the hours at the completion of the practice sessions. These documents are submitted to your classroom faculty at the third practicum. The student cannot perform the practicum without the completed mandatory lab sheet; the student would then be in redo status. If you have not completed the 12 hours by the date of the third practicum you will receive a clinical failure for NURS 175. You must turn in your 12 hour sheet and return your syringe package that you will be assigned in order to be admitted to your 3rd and final practicum.
Clinical Objectives
1. During the clinical experience for NURS 175, the student will:

Nursing Lab Skills Manual Page 8
1. Assess the patient 2. Formulate appropriate nursing diagnoses 3. Develop short and long–term goals for each diagnosis 4. Incorporate elements of the communication process while interacting with
the patient 5. Incorporate theoretical and clinical skills in the care of hospitalized clients 6. Establish a therapeutic relationship with a patient 7. Identify a patient-selected problem, conduct a therapeutic communication
and guide patient to solve own problem 8. Incorporate facets of culture, spirituality and lifestyle into care of client 9. Identify knowledge of self, in relationship with client
2. In preparation for clinical, the student will: 1. Have demonstrated mastery of all skills required 2. Obtain clinical assignment from clinical instructor
1. Review and clarify assignment 2. Review skills as needed in the nursing lab 3. Research the client's chart prior to the clinical experience
3. During these clinical experiences, the student will: 1. Attend Pre-conference 2. Become oriented to the nursing unit 3. Perform acquired assessments, e.g., vital signs, hygienic care, assistance
with mobility, handwashing, medical asepsis, assistance with food and fluids, therapeutic relationships and therapeutic communication
4. Administer medications that have been researched with supervision 5. Use the designated assessment guides to assess your client 6. Document pertinent information according to agency policy and
instructor's directions 7. Attend post-conference
4. Following the clinical experience, the student will submit written assignments as required by the clinical instructor
Clinical Routines
Safety first:
1. hand washing = first line of defense 2. careful observation of isolation procedures 3. location of barrier protection – gloves, sinks, hand sanitizers 4. activity orders – size the load – remember that patient activity orders are
physician driven 5. restrain free philosophy – safety in monitoring fall risks

Nursing Lab Skills Manual Page 9
6. patient observation – always be in eyesight of your patient's room 7. covering your patient – you need to have another student monitor your patient
when leaving the unit 8. Always report off on your patient's status before going to post conference. The
nurse caring for your patient needs a full report on the patient's status: current vital signs, care provided, comfort level, IV status, wound care, treatments, medication given, including effects of prn meds given, written note if completed.
Daily Procedure:
1. Check the assignment sheet. Read the bottom section to see what your clinical responsibilities are for the day, eg: Am care, BP, meds.
2. Visit the patient – identify the patient's name by looking on their chart cover. Your assignments are posted with initials only, HIPAA.
3. Introduce yourself to the patient and state what care you will be providing. Make a brief eyeball assessment: LOC, pain level, IV's, tubes, odors. Always check the patient's name band. Do not perform any hands-on care. Care is never given without a report from the floor nurse and review of the patient record.
4. Find the nurse assigned to the patient and receive report. Key information: diagnoses, treatments, wound care issues, intake and output, IV, activity levels, special needs, safety issues. Inform the nurse of what you will be doing, eg: nine am scheduled oral meds.
5. Review the patient's chart: the history and physical and nurse's notes sections. As the semester progresses, you will be looking at laboratory reports, special testing. Original doctor's orders for medication administration.
6. Plan your care. ASSESSMENT ALWAYS COMES FIRST then you can progress to hygienic care. Start with the bath and end with a clean bed. The process of bathing should be individualized to meet the patient's needs. Incontinence care will take priority. MOUTH CARE.
7. Each clinical week you will complete the NURSING HISTORY DATA FORM and PHYSICAL ASSESSMENT FORM. These will be submitted to your clinical instructor at the end of the day or as directed. You should identify your patient with initials and room numbers only. No official information on the patient may leave the hospital. Shredder boxes are available on all units.
8. Medication research. When you give medication thorough research is expected. You will need to complete a medication card for each medication you administer. You will need to research all medications the patient is on even if you are not administering them.
Medication Sheets info:
Nursing Lab Skills Manual Page 10
• Name – generic and all brand name(s) • Classification (defined) and expected therapeutic effect • Doses – routine specific / frequency • Routes of admission: rates for IVPB administration • Nursing assessments – eg: BP, related lab monitoring • Major side effects • Nursing interventions – eg: give with food, empty stomach
DOCUMENTATION
Learning to write concise, complete documentation of your care will be an ongoing learning process all semester. Your documentation will be evaluated on a weekly basis in the clinical setting after the documentation lecture has been given.
JOURNALING All nursing students are required to submit a weekly journal to their Clinical Instructor/Faculty within 48-72 hours of the clinical experience. This journal is a reflection of the student’s growth and opportunities for improvement. The journal should not be a summary of the clinical day. All journaling is to be done in the appropriate secure college server, such as Ocean Cruiser or Web CT. Journaling is not to occur via private email. All Clinical Instructor/Faculty are required to respond to the journal entry in a timely fashion to allow for constructive planning and feedback for the next clinical experience. Please send a copy of your journal to your clinical instructor AND post a copy of it to “my journal” in cruiser.
Weekly Journal Guidelines
Each of you will prepare a weekly journal reflection, to be emailed to your clinical instructor through the end of the course. This is to exemplify your growth over the course this semester. The work should be submitted as your clinical instructor requests. Make new entries each week so that the journal is a complete record of your dialog with your instructors. Journaling will be considered part of your clinical requirement.
Example:
2/03/11: John Smith clicks on his My Journal area and enters his reflections about the first experience seeing a patient (see guidelines 1-3 below), and clicks the Post Topic button. He writes the reflections as soon as possible after the clinical experience, while the impressions are still strong.
2/04/11: Instructor reads, and responds to the first journal entry.
2/05/11: John opens his Journal area and reads the new message from his instructor.
Nursing Lab Skills Manual Page 11
2/10/11: John composes a new message for the second week of experiences, etc.
The general purpose of the journal is to enable you to critically reflect on your clinical experiences. The journal will showcase your ongoing development and skill acquisition and it will also provide a personal line of communication between you and your clinical instructor.
You will write at least one page per clinical day in the journal, responding to each clinical experience.
1. You begin with a brief statement of what you did well. 2. Then you write another brief statement as to what you did that needs
improvement and how you would improve that if you were to return another day. 3. Finally you write a critical reflection of any aspect of the clinical day that
"moved" you. This might be a positive aspect, a negative event or the application of some insight to your daily life (an "A HA" experience). You are to critically reflect on your own thinking and relate what you have learned to your progress as a nurse and/or as a human being. Therefore, we are hoping for a change of perspective and/or reality. This assignment must be completed to pass the course.
Your analysis for these experiences should include observation of the type of nursing delivered; the interactions the mentor professionals have with their clients and the psychosocial implications of care in these settings.
• These journals will reflect your growth over the semester. Our goal is that you develop good critical thinking skills.
• Critical thinking is a component we are evaluating in these written assignments. You do this by examining your thoughts and behaviors.
• Ask yourself: What if something goes wrong? What if I try something another way?
• You should also look for flaws in your thinking. What is missing? What did I fail to consider? What are my biases?
We all make mistakes and they become the building blocks to maturity and growth. Discuss mistakes and learning. Take this seriously! This is how WE learn and grow!
REMEMBER: Journaling will be considered part of your clinical requirement.
Nursing Lab Skills Manual Page 12
Mandatory Lab Practice Time Sheet NURS 175 Student _________________________________ Faculty _________________________________
DATE Time In Out
Objective Evaluation of Objective
Lab Staff Initials & Comments
1
2
3
4
5
6
7
8
9
10
11
12

Nursing Lab Skills Manual Page 13
(SAMPLE) Mandatory Lab Practice Time Sheet NURS 175 Student John Doe_____ Faculty: Prof. Smith_______
DATE Time In Out
Objective Evaluation of Objective Lab Staff Initials &
Comments
1 9/9
3:00pm
4:00pm
Asepsis Barrier techniques
Able to gown & glove properly
C. B.
2 9/10
9:00am
10:00am
Asepsis Principles of Standard Precautions
Identified times to wash hands and to use exam gloves
D. L.
3 9/12
12 pm
1:30 pm
Asepsis Review & practice different types of Barrier techniques
Differentiated when a mask was needed, and how/when to wash my hands
C.B.
4 9/13
6:30pm
7:30 pm
Vital Signs Practice
Need more practice Especially on BP and reading a glass thermometer
D. L. Advised to focus on BP machine
5
E
6
X
7
A
8
M
P
9
L
10
E
11
Nursing Lab Skills Manual Page 14
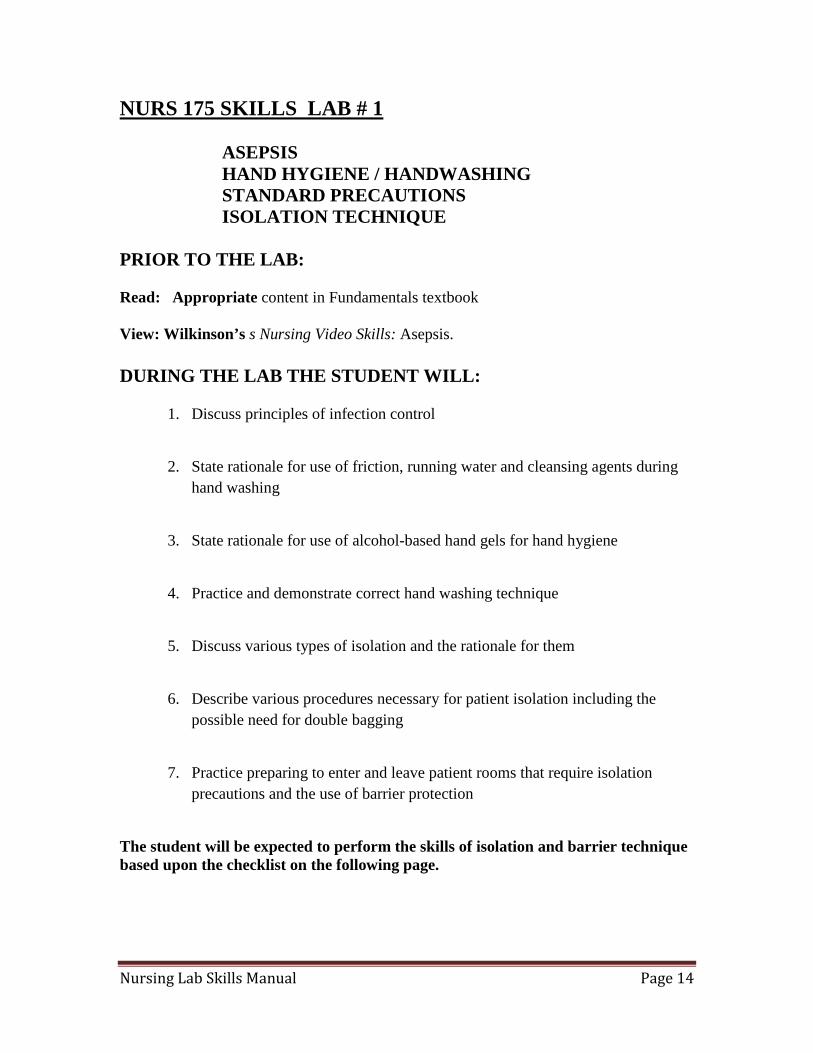
NURS 175 SKILLS LAB # 1 ASEPSIS HAND HYGIENE / HANDWASHING STANDARD PRECAUTIONS ISOLATION TECHNIQUE PRIOR TO THE LAB: Read: Appropriate content in Fundamentals textbook View: Wilkinson’s s Nursing Video Skills: Asepsis. DURING THE LAB THE STUDENT WILL:
1. Discuss principles of infection control
2. State rationale for use of friction, running water and cleansing agents during
hand washing
3. State rationale for use of alcohol-based hand gels for hand hygiene
4. Practice and demonstrate correct hand washing technique
5. Discuss various types of isolation and the rationale for them
6. Describe various procedures necessary for patient isolation including the
possible need for double bagging
7. Practice preparing to enter and leave patient rooms that require isolation
precautions and the use of barrier protection
The student will be expected to perform the skills of isolation and barrier technique based upon the checklist on the following page.
Nursing Lab Skills Manual Page 15
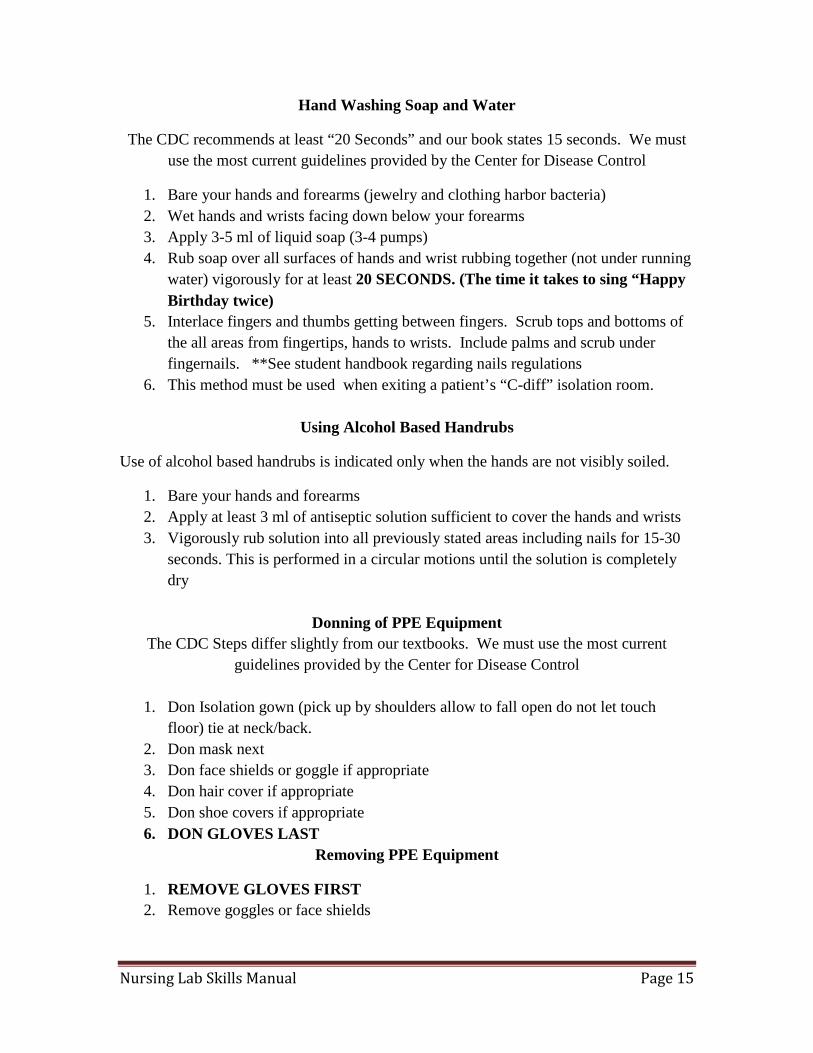
Hand Washing Soap and Water
The CDC recommends at least “20 Seconds” and our book states 15 seconds. We must use the most current guidelines provided by the Center for Disease Control
1. Bare your hands and forearms (jewelry and clothing harbor bacteria) 2. Wet hands and wrists facing down below your forearms 3. Apply 3-5 ml of liquid soap (3-4 pumps) 4. Rub soap over all surfaces of hands and wrist rubbing together (not under running
water) vigorously for at least 20 SECONDS. (The time it takes to sing “Happy Birthday twice)
5. Interlace fingers and thumbs getting between fingers. Scrub tops and bottoms of the all areas from fingertips, hands to wrists. Include palms and scrub under fingernails. **See student handbook regarding nails regulations
6. This method must be used when exiting a patient’s “C-diff” isolation room.
Using Alcohol Based Handrubs
Use of alcohol based handrubs is indicated only when the hands are not visibly soiled.
1. Bare your hands and forearms 2. Apply at least 3 ml of antiseptic solution sufficient to cover the hands and wrists 3. Vigorously rub solution into all previously stated areas including nails for 15-30
seconds. This is performed in a circular motions until the solution is completely dry
Donning of PPE Equipment
The CDC Steps differ slightly from our textbooks. We must use the most current guidelines provided by the Center for Disease Control
1. Don Isolation gown (pick up by shoulders allow to fall open do not let touch
floor) tie at neck/back. 2. Don mask next 3. Don face shields or goggle if appropriate 4. Don hair cover if appropriate 5. Don shoe covers if appropriate 6. DON GLOVES LAST
Removing PPE Equipment
1. REMOVE GLOVES FIRST 2. Remove goggles or face shields
Nursing Lab Skills Manual Page 16
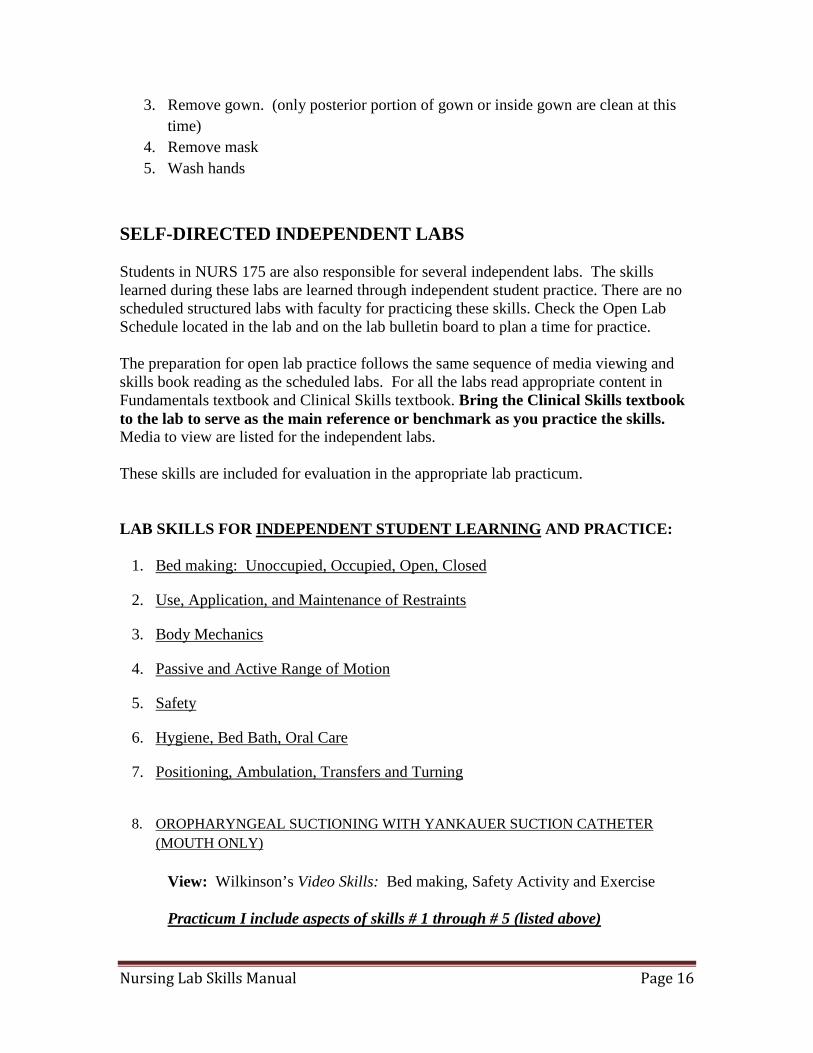
3. Remove gown. (only posterior portion of gown or inside gown are clean at this time)
4. Remove mask 5. Wash hands
SELF-DIRECTED INDEPENDENT LABS Students in NURS 175 are also responsible for several independent labs. The skills learned during these labs are learned through independent student practice. There are no scheduled structured labs with faculty for practicing these skills. Check the Open Lab Schedule located in the lab and on the lab bulletin board to plan a time for practice. The preparation for open lab practice follows the same sequence of media viewing and skills book reading as the scheduled labs. For all the labs read appropriate content in Fundamentals textbook and Clinical Skills textbook. Bring the Clinical Skills textbook to the lab to serve as the main reference or benchmark as you practice the skills. Media to view are listed for the independent labs. These skills are included for evaluation in the appropriate lab practicum. LAB SKILLS FOR INDEPENDENT STUDENT LEARNING AND PRACTICE:
1. Bed making: Unoccupied, Occupied, Open, Closed
2. Use, Application, and Maintenance of Restraints
3. Body Mechanics
4. Passive and Active Range of Motion
5. Safety
6. Hygiene, Bed Bath, Oral Care
7. Positioning, Ambulation, Transfers and Turning
8. OROPHARYNGEAL SUCTIONING WITH YANKAUER SUCTION CATHETER
(MOUTH ONLY) View: Wilkinson’s Video Skills: Bed making, Safety Activity and Exercise Practicum I include aspects of skills # 1 through # 5 (listed above)

Nursing Lab Skills Manual Page 17
The student will be expected to perform the skills of restraints (# 2) 6. Fecal and Urine (including from an indwelling Foley catheter) Specimen Collection View: Wilkinson’s Nursing Video Skills: Specimen Collection – urine and fecal 7. Administering Enemas View: Wilkinson’s Nursing Video Skills: Administering a Cleansing Enema Note: Practicum II includes aspects of skills # 6 and # 7 (listed above)
NURS 175 Practicum Skills
All procedures must follow principle based “concepts” that will be covered this semester in lecture and outlined in your Wilkinson’s Fundamentals of Nursing Volume 1 textbooks.
Always introduce yourself to the patient and explain any procedures you will be performing.
Always check order and gather necessary supplies or equipment prior to performing a procedure and obtain assistance as needed.
Always properly identify your patient prior to each procedure or task according to facility policy. When administering medications, always use Two Patient Identifiers, perform the 6 Rights and the 3 Medication Checks.
Always adhere to appropriate standard precautions, maintain sterile technique when indicated and practice appropriated hand hygiene before and after every patient encounter.
Always provide for patient privacy, safety and use good body mechanics.
Always conclude all tasks with appropriate documentation.

Nursing Lab Skills Manual Page 18
Physical Exam- Wilkinson’s “Fundamentals of Nursing Volume 2” Pages 231-332
Students should download and familiarize themselves with the Ocean County College Assessment and Pre-clinical research Tool/Form found under shared files. It is the student’s responsibility to become familiar with all terms and abbreviations found on this tool. You should use your textbooks as a resource.
Vital Signs and Pulses- Wilkinson’s “Fundamentals of Nursing Volume 2” Pages 193-219 Apical Pulse Rate Knowledge of PMI location, location of all other pulses ***Also see attached Chart
***You will be responsible to know the normal limits/ranges for all vital signs.
Occupied/Unoccupied Bed making- Wilkinson’s “Fundamentals of Nursing Volume 2” Pages 417-422
Hygiene/Bed Bath/Oral Care-Wilkinson’s “Fundamentals of Nursing Volume 1” Pages 464-494 and Volume 2 pages 384-416
Safety/Body Mechanisms- Wilkinson’s “Fundamentals of Nursing Volume 2” Page 729
Restraints Guidelines, Application and Monitoring- Wilkinson’s “Fundamentals of Nursing Volume 2” Pages 367-373, Volume 1 Pages 443-444
Range of Motion (ROM) - Wilkinson’s “Fundamentals of Nursing Volume 2” Pages 299-300 and 737-743
Positioning, Ambulation, Transfers and Turning- Wilkinson’s “Fundamentals of Nursing Volume 1” Pages 374-375 and 769-780
Sterile Gloves and Field- Wilkinson’s “Fundamentals of Nursing Volume 2’’ Pages 348-352
Dressings/Wound Care-Wilkinson’s “Fundamentals of Nursing Volume 2” Pages 781-788
Sterile Wound Irrigation- Wilkinson’s “Fundamentals of Nursing Volume 2” Pages 778-781
Insertion and Removal of Indwelling Catheter- Wilkinson’s “Fundamentals of Nursing Volume 2” Pages 613-628
Straight Catheterization Procedure- Wilkinson’s “Fundamentals of Nursing Volume 2” Pages 613-628
Nursing Lab Skills Manual Page 19
Collecting Urine Specimen- Wilkinson’s “Fundamentals of Nursing Volume 2” Pages 608-609
Enemas- Wilkinson’s “Fundamentals of Nursing Volume 2” Pages 655-659
Medication Administration (All Routes)-Wilkinson’s “Fundamentals of Nursing Volume 2” Pages 441-527
INJECTIONS: The student will be responsible for selecting appropriate needles and syringes for all types of injections. You must be able to correctly identify the appropriated landmarks/injection sites for various injections as well as the maximum amount of fluid medication appropriate for each injection site. Proper technique which includes maintaining sterile technique must be demonstrated. ***The dorsogluteal site is no longer used because of the proximity of this site to the sciatic nerve and major blood vessels!!
Medication Calculation- Refer to the NURS 175 Medication Calculation Power points 1-4 and Pikkar’s textbook
Common Abbreviations and DO NOT USE List: Wilkinson’s Fundamental of Nursing Volume 1 Pages 298-299 and Volume 2 Pages 183-187 and 518-525
Nursing Lab Skills Manual Page 20
NURS 175 SKILLS LAB (INDEPENDENT STUDENT LEARNING) BATHING BEDPANS, URINALS, PERINEAL CARE AND CATHETER CARE ORAL CARE AND OROPHARYNGEAL SUCTIONING WITH YANKAUER SUCTION CATHETER (MOUTH ONLY) MOVING PATIENTS IN BED, POSITIONING, TRANSFERS, AMBULATION PRIOR TO THE LAB: Read: Appropriate content in Fundamentals textbook and Clinical Skills Checklist textbook. View: Wilkinson’s Nursing Video Skills: Hygiene, Activity and Exercise Elimination Assistance; Safe Patient Handling; Performing Oropharyngeal Suctioning (under Respiratory Care and Suctioning); Performing perineal care: male/female Application of TEDs and SCD’s DURING THE LAB THE STUDENT WILL:
1. Practice aspects of hygiene, including baths, back massage, perineal care, oral care, oropharyngeal suctioning, hair care, nail care, eye care, AM and PM care.
2. Given a patient situation, state what hygienic care consists of for a patient getting
a complete bedbath, partial bedbath, or self-care with assistance.
3. Practice different techniques used in providing a bedpan or urinal.
4. Demonstrate the perineal cleansing procedures for an adult with an indwelling or
external urinary catheter.
5. Incorporate measures to ensure privacy during the patient’s act of elimination.
Nursing Lab Skills Manual Page 21
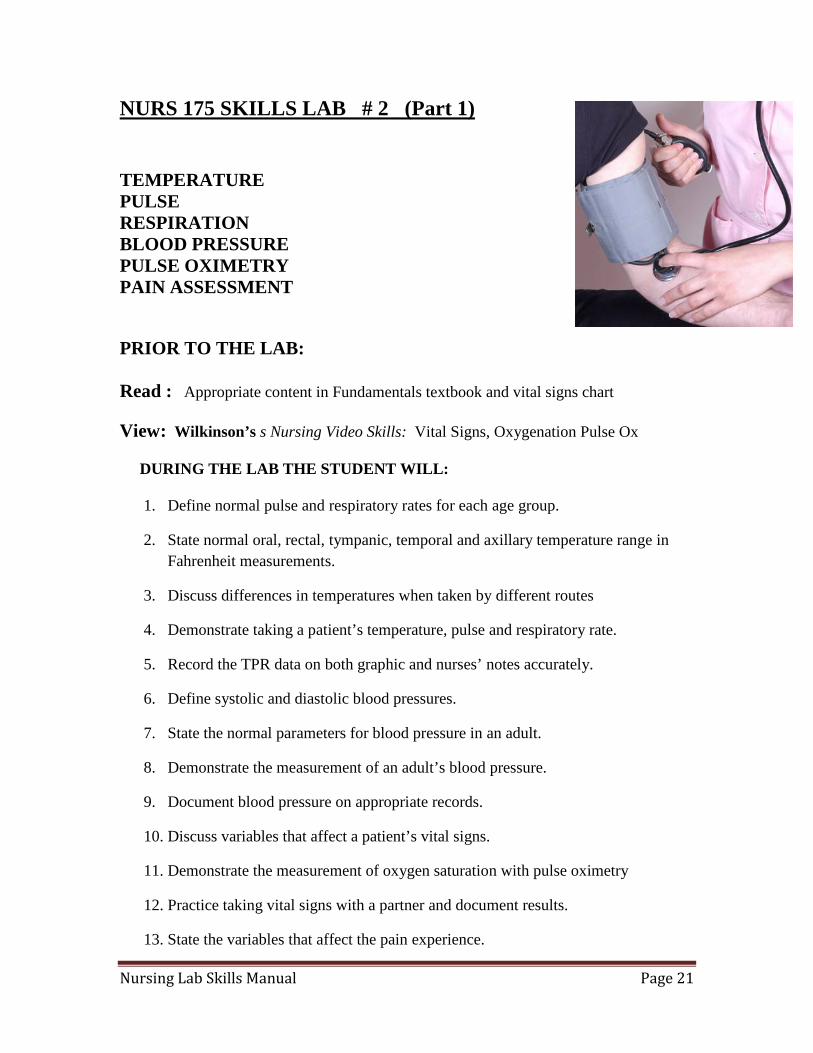
NURS 175 SKILLS LAB # 2 (Part 1) TEMPERATURE PULSE RESPIRATION BLOOD PRESSURE PULSE OXIMETRY PAIN ASSESSMENT
PRIOR TO THE LAB: Read : Appropriate content in Fundamentals textbook and vital signs chart View: Wilkinson’s s Nursing Video Skills: Vital Signs, Oxygenation Pulse Ox DURING THE LAB THE STUDENT WILL:
1. Define normal pulse and respiratory rates for each age group.
2. State normal oral, rectal, tympanic, temporal and axillary temperature range in Fahrenheit measurements.
3. Discuss differences in temperatures when taken by different routes
4. Demonstrate taking a patient’s temperature, pulse and respiratory rate.
5. Record the TPR data on both graphic and nurses’ notes accurately.
6. Define systolic and diastolic blood pressures.
7. State the normal parameters for blood pressure in an adult.
8. Demonstrate the measurement of an adult’s blood pressure.
9. Document blood pressure on appropriate records.
10. Discuss variables that affect a patient’s vital signs.
11. Demonstrate the measurement of oxygen saturation with pulse oximetry
12. Practice taking vital signs with a partner and document results.
13. State the variables that affect the pain experience.

Nursing Lab Skills Manual Page 22
14. Assess the client’s response when experiencing a pain problem.
15. Document your pain assessment findings.
Nursing Lab Skills Manual Page 23
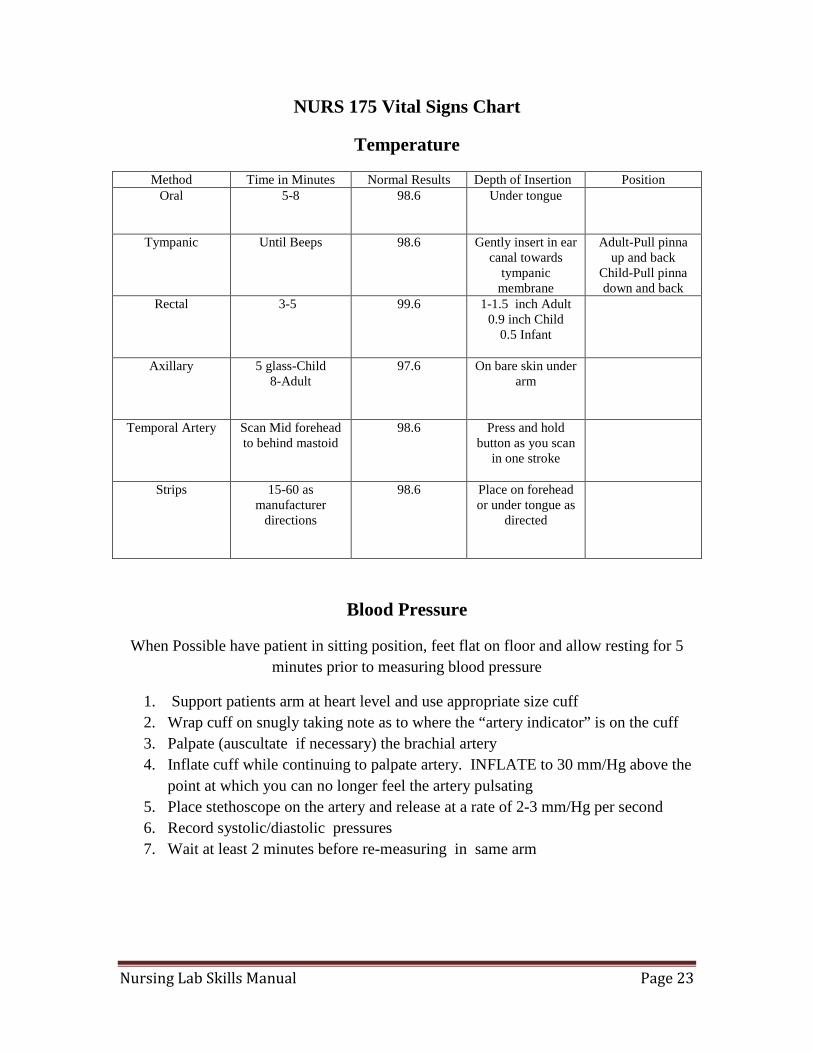
NURS 175 Vital Signs Chart
Temperature
Method Time in Minutes Normal Results Depth of Insertion Position Oral 5-8
98.6 Under tongue
Tympanic Until Beeps
98.6 Gently insert in ear canal towards
tympanic membrane
Adult-Pull pinna up and back
Child-Pull pinna down and back
Rectal 3-5
99.6 1-1.5 inch Adult 0.9 inch Child
0.5 Infant
Axillary 5 glass-Child 8-Adult
97.6 On bare skin under arm
Temporal Artery Scan Mid forehead to behind mastoid
98.6 Press and hold button as you scan
in one stroke
Strips 15-60 as manufacturer
directions
98.6 Place on forehead or under tongue as
directed
Blood Pressure
When Possible have patient in sitting position, feet flat on floor and allow resting for 5 minutes prior to measuring blood pressure
1. Support patients arm at heart level and use appropriate size cuff 2. Wrap cuff on snugly taking note as to where the “artery indicator” is on the cuff 3. Palpate (auscultate if necessary) the brachial artery 4. Inflate cuff while continuing to palpate artery. INFLATE to 30 mm/Hg above the
point at which you can no longer feel the artery pulsating 5. Place stethoscope on the artery and release at a rate of 2-3 mm/Hg per second 6. Record systolic/diastolic pressures 7. Wait at least 2 minutes before re-measuring in same arm
Nursing Lab Skills Manual Page 24
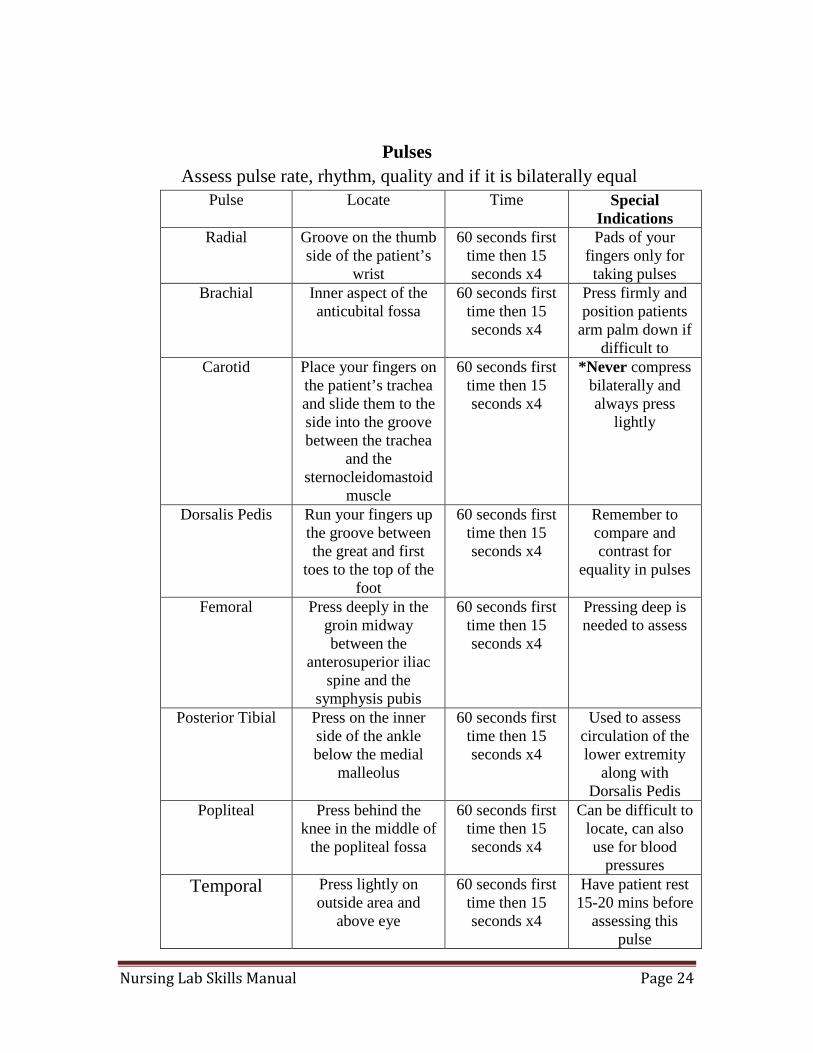
Pulses
Assess pulse rate, rhythm, quality and if it is bilaterally equal Pulse Locate Time Special
Indications Radial Groove on the thumb
side of the patient’s wrist
60 seconds first time then 15 seconds x4
Pads of your fingers only for taking pulses
Brachial Inner aspect of the anticubital fossa
60 seconds first time then 15 seconds x4
Press firmly and position patients
arm palm down if difficult to
Carotid Place your fingers on the patient’s trachea and slide them to the side into the groove between the trachea
and the sternocleidomastoid
muscle
60 seconds first time then 15 seconds x4
*Never compress bilaterally and always press
lightly
Dorsalis Pedis Run your fingers up the groove between the great and first
toes to the top of the foot
60 seconds first time then 15 seconds x4
Remember to compare and contrast for
equality in pulses
Femoral Press deeply in the groin midway between the
anterosuperior iliac spine and the
symphysis pubis
60 seconds first time then 15 seconds x4
Pressing deep is needed to assess
Posterior Tibial Press on the inner side of the ankle below the medial
malleolus
60 seconds first time then 15 seconds x4
Used to assess circulation of the lower extremity
along with Dorsalis Pedis
Popliteal Press behind the knee in the middle of
the popliteal fossa
60 seconds first time then 15 seconds x4
Can be difficult to locate, can also use for blood
pressures Temporal Press lightly on
outside area and above eye
60 seconds first time then 15 seconds x4
Have patient rest 15-20 mins before
assessing this pulse
Nursing Lab Skills Manual Page 25
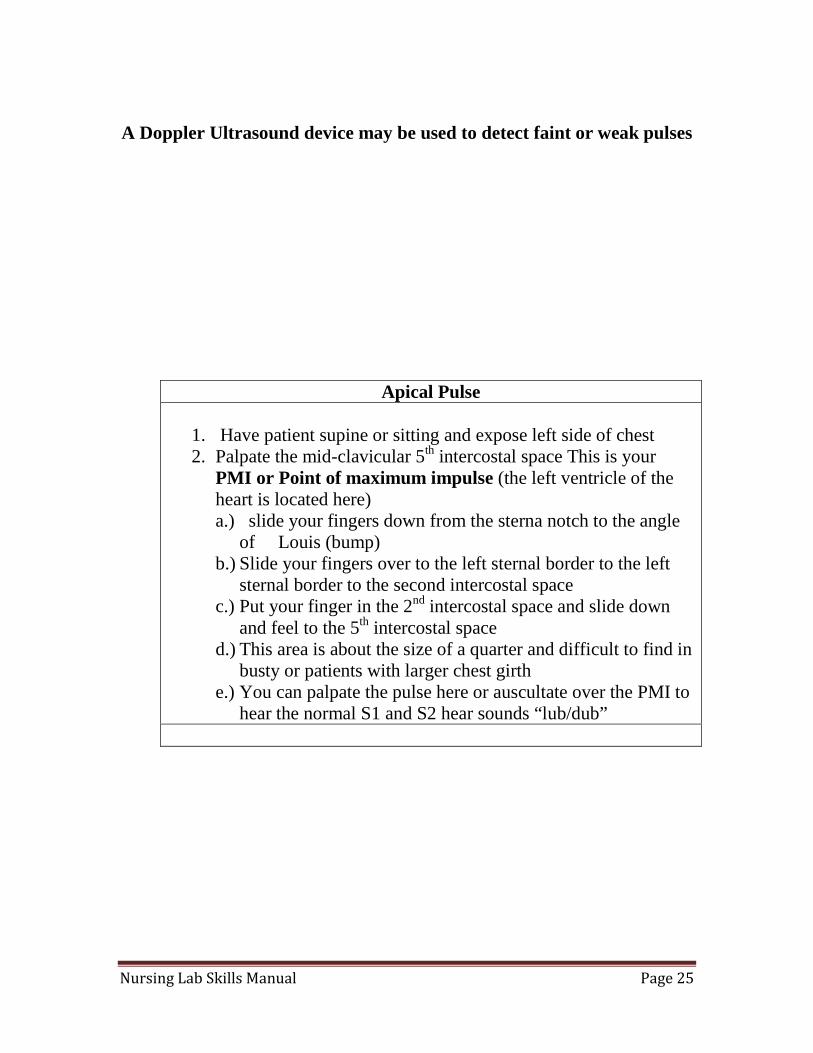
A Doppler Ultrasound device may be used to detect faint or weak pulses
Apical Pulse
1. Have patient supine or sitting and expose left side of chest 2. Palpate the mid-clavicular 5th intercostal space This is your
PMI or Point of maximum impulse (the left ventricle of the heart is located here) a.) slide your fingers down from the sterna notch to the angle
of Louis (bump) b.) Slide your fingers over to the left sternal border to the left
sternal border to the second intercostal space c.) Put your finger in the 2nd intercostal space and slide down
and feel to the 5th intercostal space d.) This area is about the size of a quarter and difficult to find in
busty or patients with larger chest girth e.) You can palpate the pulse here or auscultate over the PMI to
hear the normal S1 and S2 hear sounds “lub/dub”

Nursing Lab Skills Manual Page 26
NURS 175 SKILLS LAB # 2 (Part 2)
PHYSICAL ASSESSMENT PRIOR TO THE LAB Read: Appropriate content in Fundamentals textbook and familiarize yourselves with terms and abbreviations found on Physical assessment form found in shared files (bring this form to your lecture/lab/clinical days View: Wilkinson’s Vital Signs, Brief Physical Assessment DURING THE LAB THE STUDENT WILL:
1. Pair up with a lab partner and practice basic head-to-toe physical assessment
i. NOTE: Exclude cranial nerves, ophthalmic exam, otoscopic exam, sinuses, thyroid, breast and axillae, reflexes, anus and rectum, prostate, female and male genitalia
2. Document normal / abnormal findings.
3. Describe three techniques the student will use during a basic physical assessment:
a. Inspection
b. Palpation
c. Auscultation
4. Identify equipment used in basic physical assessment.
5. Demonstrate techniques to ensure patient comfort and prepare patient for focused
area of physical assessment.
6. Discuss information included in the general survey component on your physical
assessment form.
7. Recognize normal findings of skin, hair, nails, head, face, eyes, ear, mouth,
thorax, peripheral vascular system, abdomen, and muscular / skeletal system.
Nursing Lab Skills Manual Page 27
NURS 175 SKILLS LAB # 3 (Part 1) STERILE TECHNIQUE SURGICAL WOUND CARE PRIOR TO THE LAB: Read appropriate content in Fundamentals textbook and familiarize yourselves with terms and abbreviations DURING THE LAB THE STUDENT WILL:
1. Define sterile versus clean technique.
2. Demonstrate how to open and maintain a sterile field, add sterile items, pour
liquids, and put on and remove sterile gloves.
3. Identify actions that would potentially contaminate a sterile field.
4. State three function of dressings.
5. Describe the various types of drains, and how to clean around them.
6. Practice changing dressing with/without a drain.
7. Describe the appropriate documentation regarding wound assessment and
dressing change.
8. Demonstrate setting up a sterile field on a sterile glove wrapper and adding
dressing items to the field.

Nursing Lab Skills Manual Page 28
NURS 175 SKILLS LAB # 3 (Part 2) PRESSURE ULCER ASSESSMENT AND CARE WOUND IRRIGATION with a Toomey Syringe (Not Bulb Syringe) WOUND CULTURE APPLICATION OF CREAM/OINTMENT TO AN OPEN WOUND PRIOR TO THE LAB: Read: Appropriate content in Fundamentals textbook DURING THE LAB THE STUDENT WILL:
1. Assess for pressure ulcer risk factors.
2. Describe a variety of nursing interventions to prevent the development of pressure
ulcers.
3. Demonstrate patient care for pressure ulcer wound while maintaining safety and
comfort.
4. State the general purpose of wound irrigation.
5. State observations to be made during wound irrigation.
6. Set up a sterile field and add cream/ointment to the field.
7. List equipment needed for wound irrigation and pressure ulcer dressing changes.
8. Demonstrate patient positioning for wound irrigation.
9. Demonstrate collection of a specimen for culture and sensitivity (C & S) of a
wound.

Nursing Lab Skills Manual Page 29
NURS 175 SKILLS LAB # 4 URINARY CATHETERIZATION REMOVAL OF FOLEY CATHETER PRIOR TO THE LAB: Read: Appropriate content in Fundamentals textbook and OCC Checklist View: Wilkinson’s Nursing Video Skills: Urinary Elimination DURING THE LAB THE STUDENT WILL:
1. Identify all items needed for catheterization of the bladder.
2. State rationale for sterile technique.
3. Demonstrate draping of the male and female patient prior to catheterization.
4. Demonstrate urinary catheterization using sterile technique in male and female
mannequins.
5. Discuss common ways contamination occurs during catheterization.
6. Demonstrate procedure for removing Foley catheter.
7. Document procedure and how patient tolerated it.
Nursing Lab Skills Manual Page 30
NURS 175 SKILL LAB # 5 PARENTERAL INJECTIONS PRIOR TO THE LAB: Read: Appropriate content in Fundamentals textbook, OCC handout and pharmacology textbook View: Wilkinson’s Nursing Video Skills: Medication Administration DURING THE LAB Use: Syringes will be provided during practice hours in the Nursing Lab but MUST NOT BE REMOVED FROM THE NURSING LAB FOR ANY REASON. DURING THE LAB THE STUDENT WILL:
1. Handle appropriate needles and syringes to identify parts of a syringe, size and gauge, and areas to keep sterile.
2. Identify appropriate sites and the bony landmarks for various types of injections.
3. Acknowledges expirations dates and uses proper technique in medication preparation
4. Identify appropriate syringe, needle, and angle for various types of injections.
5. Practice administering intradermal, subcutaneous and intramuscular injections (including
Z-track), and disposing of equipment safely.
6. Describe the appropriate injection sites and technique for heparin and Lovenox and IM
injections.
7. Identify the 6 patient rights, 3 checks and two patient identifiers

Nursing Lab Skills Manual Page 31
8. Describe documentation for all of the above.
9. List aspects to assess when the patient is to receive medications in the home.
Nursing Lab Skills Manual Page 32
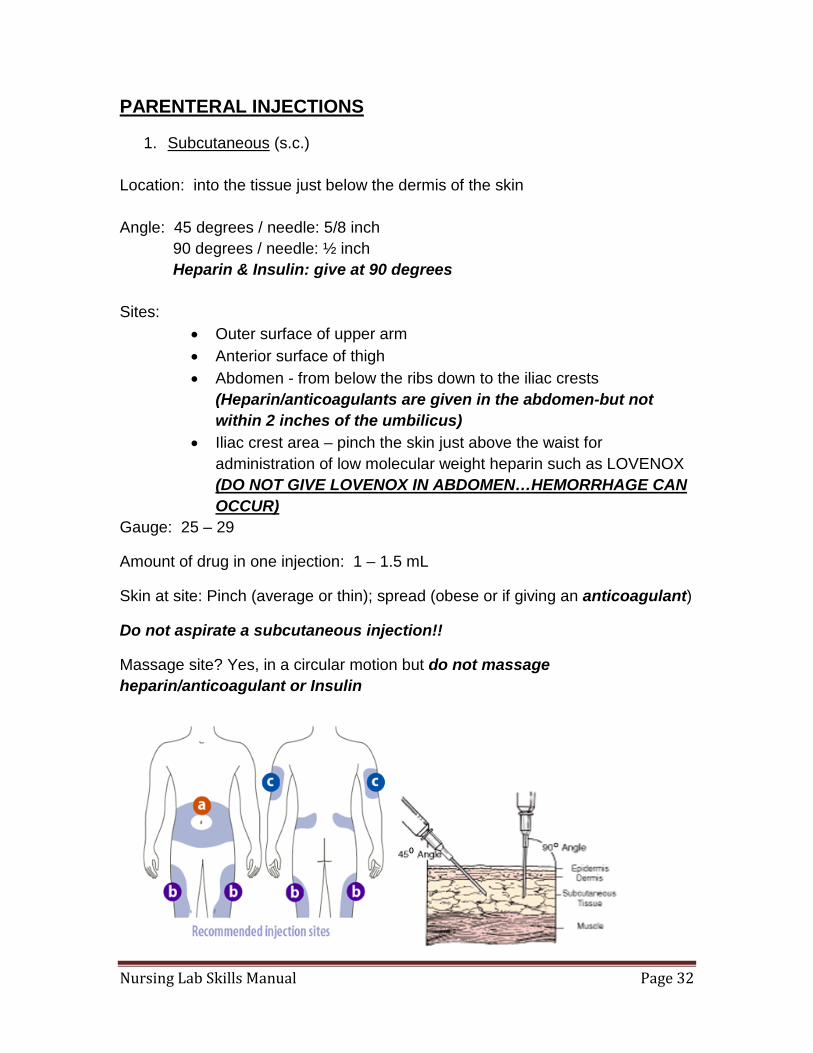
PARENTERAL INJECTIONS
1. Subcutaneous (s.c.) Location: into the tissue just below the dermis of the skin Angle: 45 degrees / needle: 5/8 inch 90 degrees / needle: ½ inch Heparin & Insulin: give at 90 degrees Sites:
• Outer surface of upper arm • Anterior surface of thigh • Abdomen - from below the ribs down to the iliac crests
(Heparin/anticoagulants are given in the abdomen-but not within 2 inches of the umbilicus)
• Iliac crest area – pinch the skin just above the waist for administration of low molecular weight heparin such as LOVENOX (DO NOT GIVE LOVENOX IN ABDOMEN…HEMORRHAGE CAN OCCUR)
Gauge: 25 – 29
Amount of drug in one injection: 1 – 1.5 mL
Skin at site: Pinch (average or thin); spread (obese or if giving an anticoagulant)
Do not aspirate a subcutaneous injection!!
Massage site? Yes, in a circular motion but do not massage heparin/anticoagulant or Insulin
Nursing Lab Skills Manual Page 33
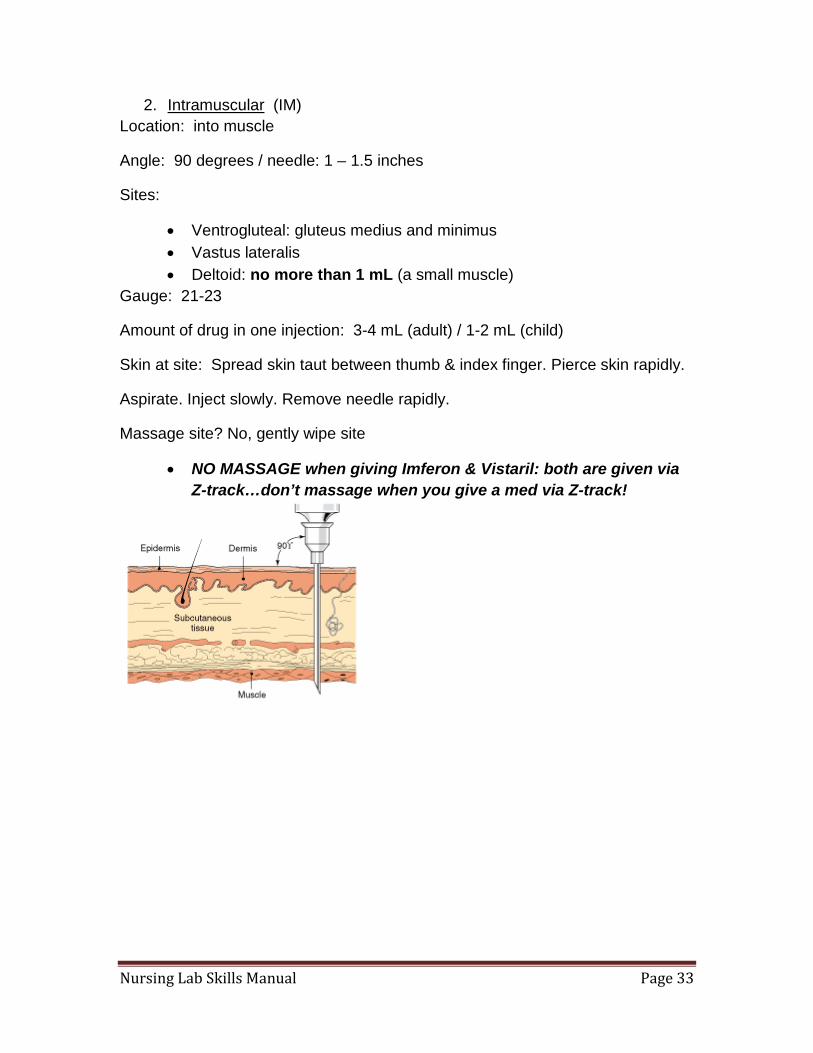
2. Intramuscular (IM) Location: into muscle
Angle: 90 degrees / needle: 1 – 1.5 inches
Sites:
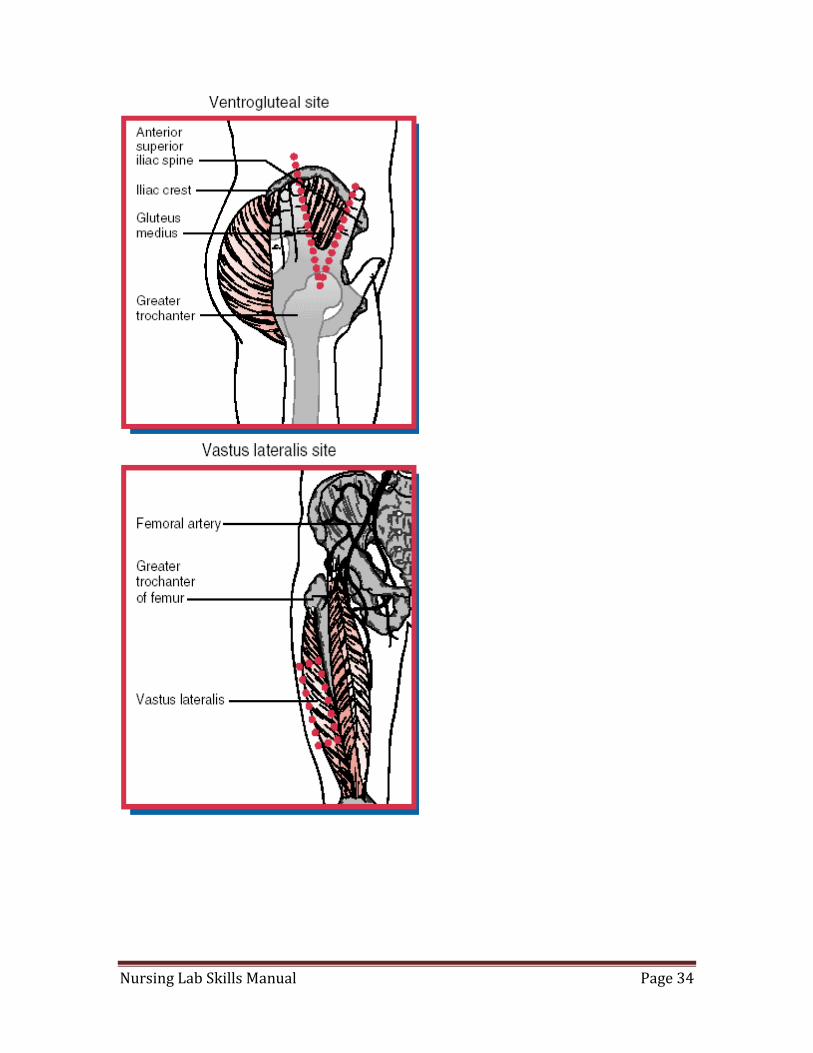
• Ventrogluteal: gluteus medius and minimus • Vastus lateralis • Deltoid: no more than 1 mL (a small muscle)
Gauge: 21-23
Amount of drug in one injection: 3-4 mL (adult) / 1-2 mL (child)
Skin at site: Spread skin taut between thumb & index finger. Pierce skin rapidly.
Aspirate. Inject slowly. Remove needle rapidly.
Massage site? No, gently wipe site
• NO MASSAGE when giving Imferon & Vistaril: both are given via Z-track…don’t massage when you give a med via Z-track!
Nursing Lab Skills Manual Page 34
Nursing Lab Skills Manual Page 35
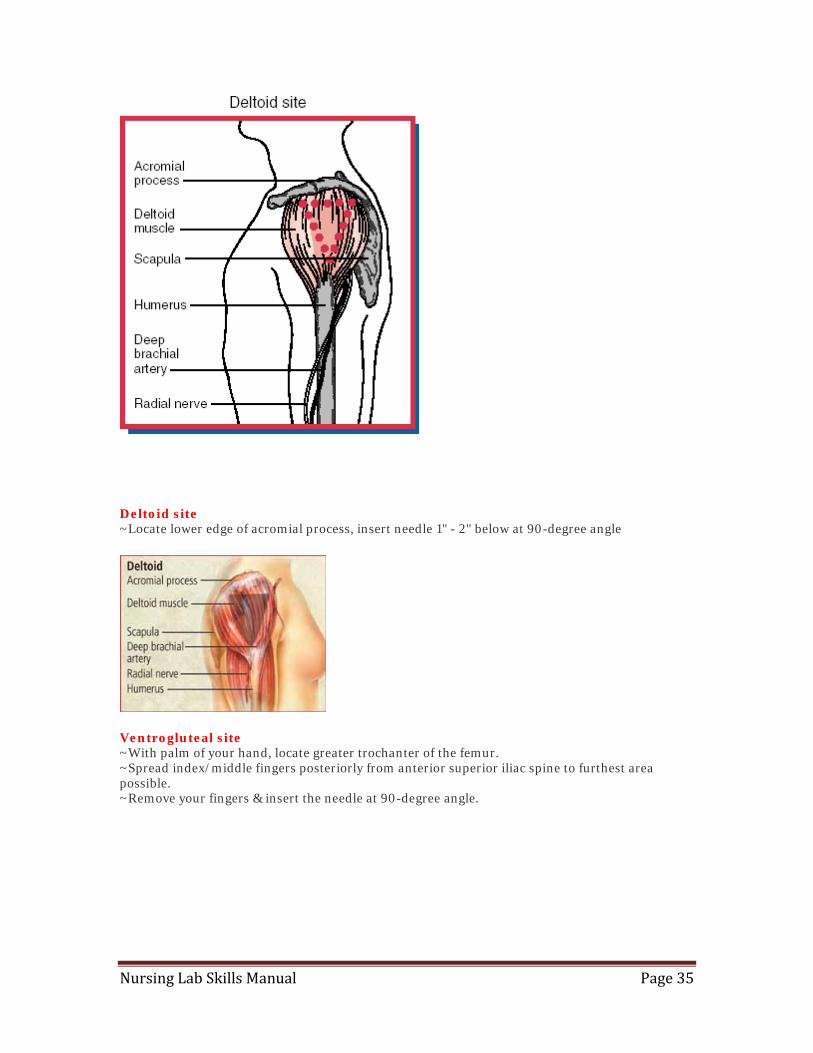
Deltoid site ~Locate lower edge of acromial process, insert needle 1" - 2" below at 90-degree angle
Ventrogluteal site ~With palm of your hand, locate greater trochanter of the femur. ~Spread index/middle fingers posteriorly from anterior superior iliac spine to furthest area possible. ~Remove your fingers & insert the needle at 90-degree angle.
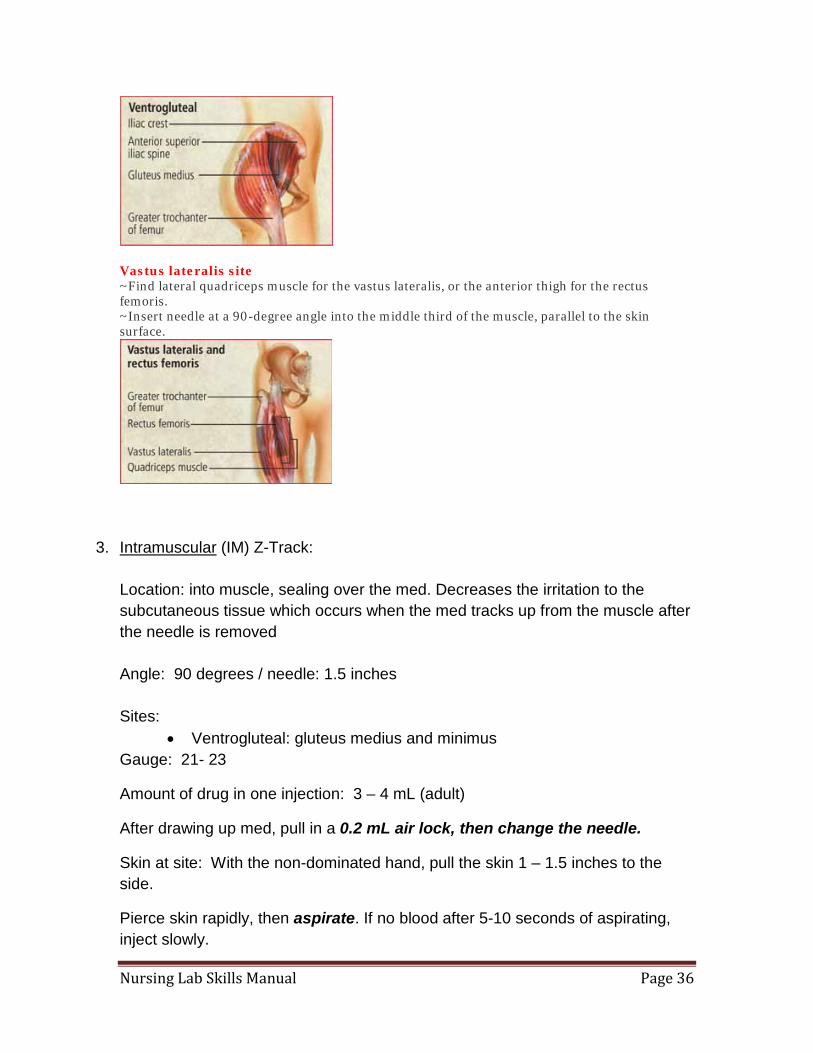
Nursing Lab Skills Manual Page 36
Vastus lateralis site ~Find lateral quadriceps muscle for the vastus lateralis, or the anterior thigh for the rectus femoris. ~Insert needle at a 90-degree angle into the middle third of the muscle, parallel to the skin surface.
3. Intramuscular (IM) Z-Track: Location: into muscle, sealing over the med. Decreases the irritation to the subcutaneous tissue which occurs when the med tracks up from the muscle after the needle is removed Angle: 90 degrees / needle: 1.5 inches Sites:
• Ventrogluteal: gluteus medius and minimus Gauge: 21- 23
Amount of drug in one injection: 3 – 4 mL (adult)
After drawing up med, pull in a 0.2 mL air lock, then change the needle.
Skin at site: With the non-dominated hand, pull the skin 1 – 1.5 inches to the side.
Pierce skin rapidly, then aspirate. If no blood after 5-10 seconds of aspirating, inject slowly.

Nursing Lab Skills Manual Page 37
After injecting the med, wait 10 seconds before withdrawing the needle rapidly and then releasing the skin.
Massage site? NOOOOOO!!
4. Intradermal (ID) Location: into the dermis
Angle: 10 – 15 degree angle
Sites:
• Inner forearm • Upper back
Gauge: 26 – 27
Syringe: tuberculin
Amount of drug in one injection: 0.1 – 0.01 mL
Skin at site: Pull taut with thumb of non-dominant hand.
With the bevel of needle up, hold needle parallel to the skin and pierce skin slowly.
Do not aspirate.
Inject slowly to form a bleb or wheal beneath the skin.
Remove needle slowly.
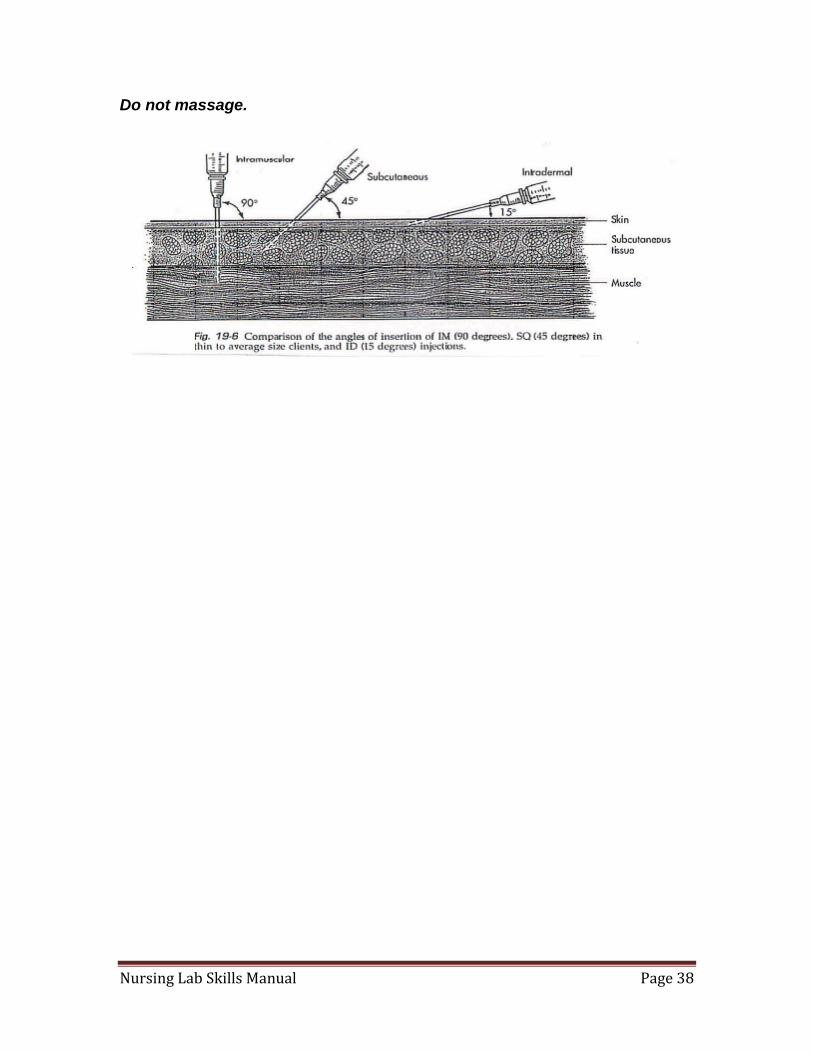
Nursing Lab Skills Manual Page 38
Do not massage.
Nursing Lab Skills Manual Page 39
NURS 175 CLASSROOM SKILLS LAB # 1
BASIC INTRAVENOUS THERAPY IV PIGGYBACKS (IVPB) SAS: SALINE FLUSH-ADMINISTER-SALINE FLUSH PRIOR TO THE LAB: Read: Appropriate content in Fundamentals textbook View: Wilkinson’s Nursing Video Skills: Medication Administration Intravenous Participate in: Ocean County College Mandatory Medication Simulation Lab DURING THE LAB THE STUDENT WILL:
1. Describe the assessment of an intravenous site.
2. Identify the 6 patient rights, 3 checks and two patient identifiers
3. State the signs and symptoms of phlebitis versus infiltration.
4. Acknowledges expirations dates and uses proper technique in medication preparation
5. Examine the IV equipment and identify all of its aspects.
6. Prime an intravenous tubing setup and label intravenous bag appropriately.
7. Regulate the drip rate by manual control.
8. Demonstrate changing the fluid container to a new bag.
9. Calculate the infusion rate (mL/Hr and gtts / minute).
10. Discuss how to maintain intravenous infusions correctly, with comfort and safety.
11. Discontinue an IV and dispose of the IV equipment properly.
12. Differentiated between infiltration vs. phlebitis
Nursing Lab Skills Manual Page 40
13. Document IV care and assessment of site.
14. Set up a premixed small-volume container (piggyback) and attach it to an ongoing IV or attaching it to a saline lock.
15. Prepare saline syringes and practice SAS (saline-administer-saline)
16. Describe complete documentation data necessary for all of the above.

Nursing Lab Skills Manual Page 41
NURS 175 CLASSROOM SKILLS LAB # 2
BASIC OXYGEN THERAPY ADMINISTRATION ORAL AND NASOPHARYNGEAL SUCTIONING
PRIOR TO THE LAB: Read: Appropriate content in Fundamentals textbook View: Wilkinson’s Nursing Video Skills: Oxygenation
DURING THE LAB THE STUDENT WILL:
1. Describe the mechanisms for respiratory regulation in a healthy person compared to a person
having emphysema.
2. Discuss the importance of maintaining a clear airway
3. Demonstrate the appropriate administration of oxygen through a nasal cannula or
face mask
4. Differentiate between respiration, ventilation, and aeration
5. Identify the percent of oxygen administered through a Venturi, breather and non-
rebreather mask.
6. Demonstrate appropriate use of a pulse ox monitor
7. Discuss nebulizer treatments and inhalation medications
8. Describe documentation for all of the above.
Nursing Lab Skills Manual Page 42
NURS 175 CLASSROOM SKILLS LAB # 3
ORAL MEDICATIONS NON-PARENTERAL MEDICATION ADMINISTRATION PRIOR TO THE LAB: Read: Appropriate content in Fundamentals textbook and Pharmacology Textbook View: Wilkinson’s Nursing Video Skills: Medication Administration Participate in: Ocean County College Mandatory Medication Simulation Lab DURING THE LAB THE STUDENT WILL:
1. Discuss nursing responsibility in administering oral medication.
2. Identify the 6 patient rights, 3 checks and two patient identifiers
3. Acknowledges expirations dates and uses proper technique in medication preparation
4. Discuss nursing responsibility in administering medication via the alternative routes: sublingual, buccal, ophthalmic, otic, nasal, inhalation, transdermal, vaginal and rectal.
5. Calculate medication as per doctor’s orders.
6. Practice preparing oral medications for administration.
7. Correctly interpret medication orders that include abbreviations and controlled medication substances.
8. Compute equivalencies between metric and household systems.
9. Identify: paper soufflé cup, plastic medicine cups, pill splitter, medicine tray or cart, and the narcotic control system (Pixis)
10. Given a patient situation, identify whether to use sterile or clean technique for ophthalmic, otic, nasal, skin, vaginal and rectal administration of medications.
11. Select appropriate positioning for patient receiving medications via the route listed in objective #4.
Nursing Lab Skills Manual Page 43
12. Explain recording of medication administration. 13. Time, date, initial and document site of transdermal medication patches
12. List aspects to assess when patient is to receive medications in the home setting. 13. Describe patient/caregiver teaching needs for patients who are to receive medications in the home setting.
Nursing Lab Skills Manual Page 44
PRACTICUM SPECIFICS:
PRACTICUM I – Scheduled Labs #1, #2.1,#2.2, Self-directed independent labs (# 1 - #5) PRACTICUM II – Scheduled Lab #3.1, #3.2, #4, Self-directed independent labs (# 6, #7) as listed in this manual. PRACTICUM III - Scheduled Lab # 5 Classroom Skills Labs # 1, # 2, # 3 Three practica are conducted by your clinical faculty to evaluate the skills that are included in NURS 175. Students are required to demonstrate competency in every skill which is prepared and practiced prior to the practicum. A sampling of skills or portions of skills are evaluated during the practicum. You must be fully prepared in all of the skills designated for each practicum. A practicum may include a variety of methods for evaluating competence in nursing skills. You may be asked to:
• Demonstrate a specific skill in its entirety
• Demonstrate one or several aspects of a skill
• Assess and record findings in written or oral form
• Recite the steps of a procedure
Preparation for success in each practicum includes:
• Review of Wilkinson’s Nursing Video Skills DVD’s
• Following guidelines for Mandatory Lab Practice
Nursing Lab Skills Manual Page 45
• Using additional practice during open lab times to develop confidence and manual dexterity. YOU MUST PRACTICE THE SKILLS NUMEROUS TIMES IN ORDER TO BE SUCCESSFUL!!
Nursing Lab Skills Manual Page 46
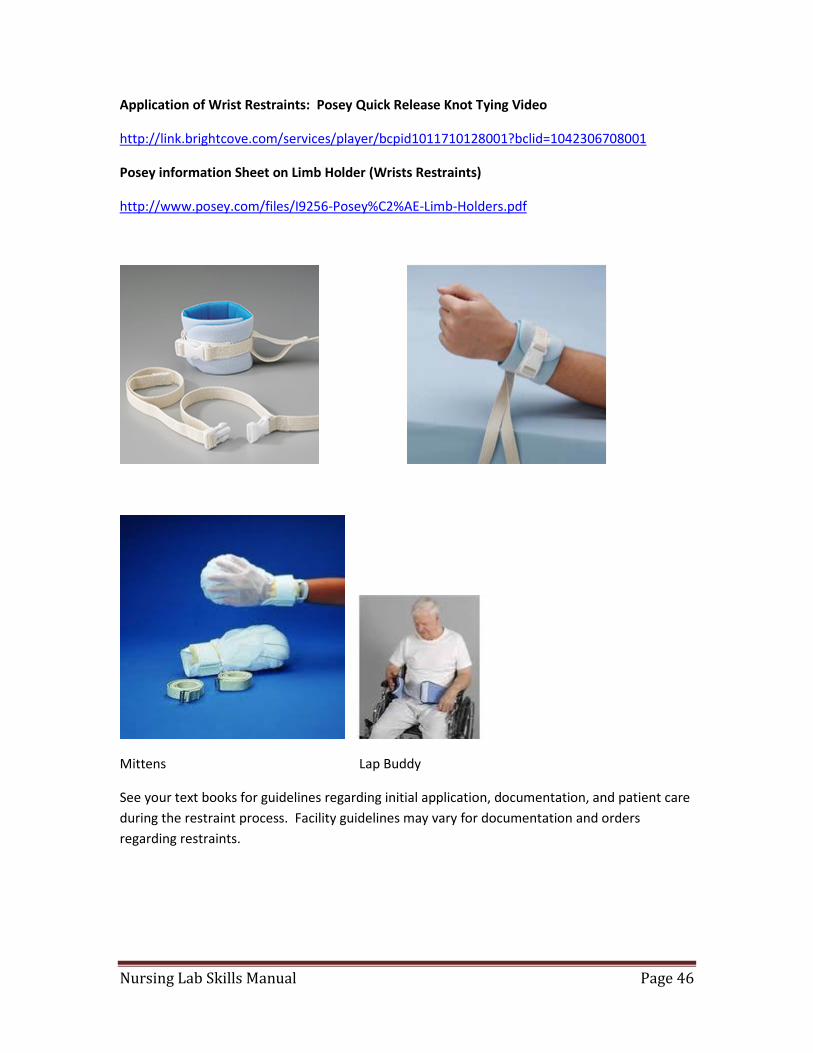
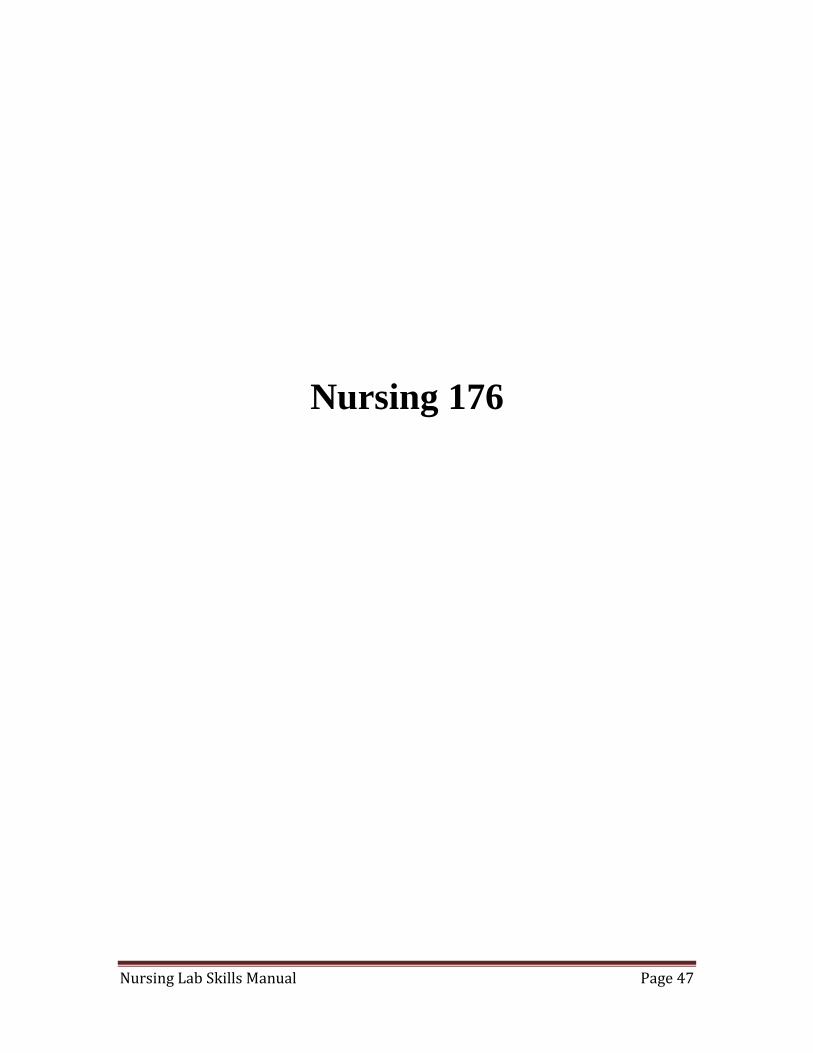
Application of Wrist Restraints: Posey Quick Release Knot Tying Video
http://link.brightcove.com/services/player/bcpid1011710128001?bclid=1042306708001
Posey information Sheet on Limb Holder (Wrists Restraints)
http://www.posey.com/files/I9256-Posey%C2%AE-Limb-Holders.pdf
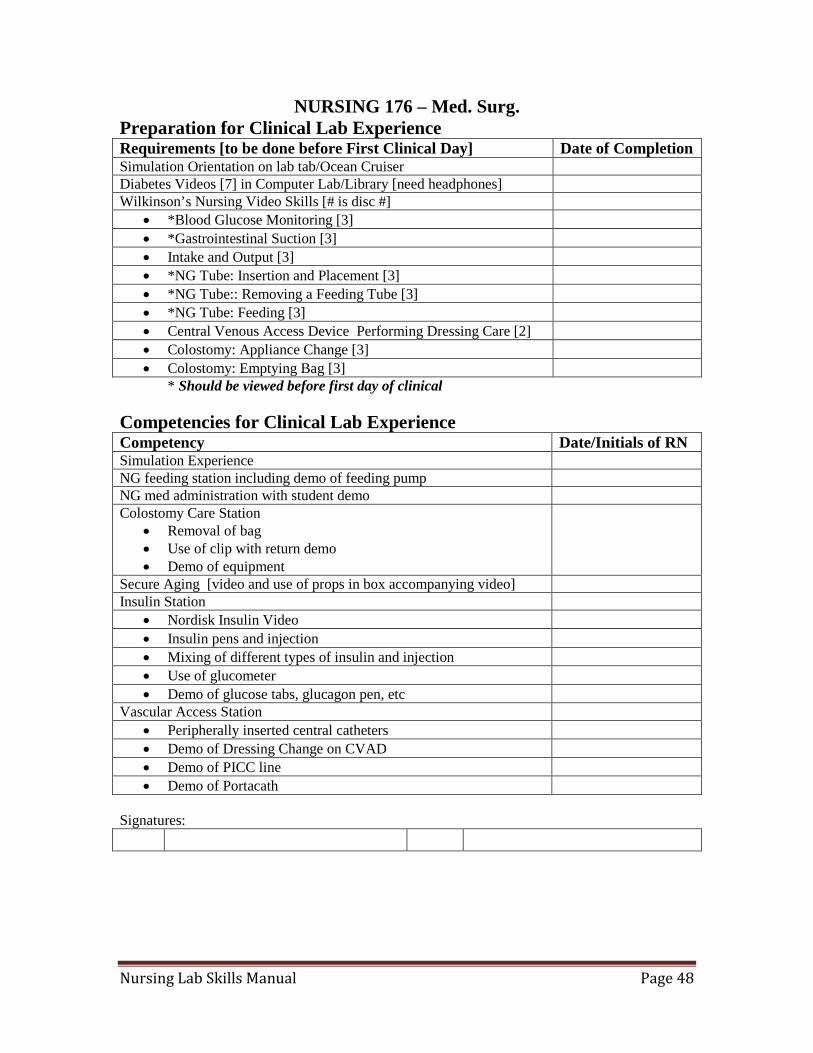
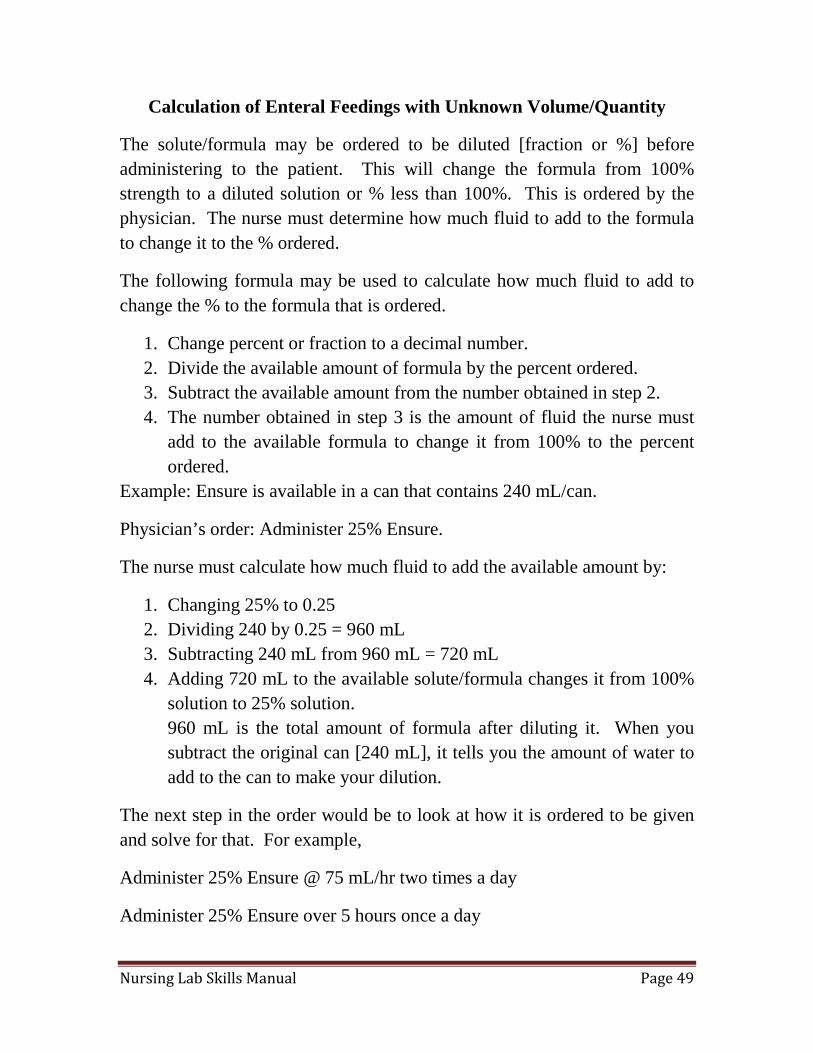
Mittens Lap Buddy
See your text books for guidelines regarding initial application, documentation, and patient care during the restraint process. Facility guidelines may vary for documentation and orders regarding restraints.
Nursing Lab Skills Manual Page 47
Nursing 176
Nursing Lab Skills Manual Page 48
NURSING 176 – Med. Surg. Preparation for Clinical Lab Experience Requirements [to be done before First Clinical Day] Date of Completion Simulation Orientation on lab tab/Ocean Cruiser Diabetes Videos [7] in Computer Lab/Library [need headphones] Wilkinson’s Nursing Video Skills [# is disc #]
• *Blood Glucose Monitoring [3] • *Gastrointestinal Suction [3] • Intake and Output [3] • *NG Tube: Insertion and Placement [3] • *NG Tube:: Removing a Feeding Tube [3] • *NG Tube: Feeding [3] • Central Venous Access Device Performing Dressing Care [2] • Colostomy: Appliance Change [3] • Colostomy: Emptying Bag [3]
* Should be viewed before first day of clinical
Competencies for Clinical Lab Experience Competency Date/Initials of RN Simulation Experience NG feeding station including demo of feeding pump NG med administration with student demo Colostomy Care Station
• Removal of bag • Use of clip with return demo • Demo of equipment
Secure Aging [video and use of props in box accompanying video] Insulin Station
• Nordisk Insulin Video • Insulin pens and injection • Mixing of different types of insulin and injection • Use of glucometer • Demo of glucose tabs, glucagon pen, etc
Vascular Access Station • Peripherally inserted central catheters • Demo of Dressing Change on CVAD • Demo of PICC line • Demo of Portacath
Signatures:
Nursing Lab Skills Manual Page 49
Calculation of Enteral Feedings with Unknown Volume/Quantity
The solute/formula may be ordered to be diluted [fraction or %] before administering to the patient. This will change the formula from 100% strength to a diluted solution or % less than 100%. This is ordered by the physician. The nurse must determine how much fluid to add to the formula to change it to the % ordered.
The following formula may be used to calculate how much fluid to add to change the % to the formula that is ordered.
1. Change percent or fraction to a decimal number. 2. Divide the available amount of formula by the percent ordered. 3. Subtract the available amount from the number obtained in step 2. 4. The number obtained in step 3 is the amount of fluid the nurse must
add to the available formula to change it from 100% to the percent ordered.
Example: Ensure is available in a can that contains 240 mL/can.
Physician’s order: Administer 25% Ensure.
The nurse must calculate how much fluid to add the available amount by:
1. Changing 25% to 0.25 2. Dividing 240 by 0.25 = 960 mL 3. Subtracting 240 mL from 960 mL = 720 mL 4. Adding 720 mL to the available solute/formula changes it from 100%
solution to 25% solution. 960 mL is the total amount of formula after diluting it. When you subtract the original can [240 mL], it tells you the amount of water to add to the can to make your dilution.
The next step in the order would be to look at how it is ordered to be given and solve for that. For example,
Administer 25% Ensure @ 75 mL/hr two times a day
Administer 25% Ensure over 5 hours once a day

Nursing Lab Skills Manual Page 50
PROCEDURE CHECKLIST Administering Insulin Injection
PROCEDURE STEPS: Before, during, and after the procedure, follows “Principles-Based Checklist to Use with All Procedures,” including: Identifies the patient according to agency policy; attends to standard precautions, hand hygiene, safety, privacy, body mechanics, and documentation.
1. Prepares and administers medications according to “Medication Guidelines: Steps to follow for all medications.”
2. Selects appropriate syringe and needle. For insulin, must use an insulin syringe [measured in units]- ranging 0.3, 0.5 or 1.0 mL. Most insulin syringes are 28-31 gauges. Needle length is often 3/16- 1 inch based on amount of adipose tissue.
3. When administering long-acting [cloudy] insulin, it must be thoroughly mixed by rolling vial in hands.
a. Clean top of vial with alcohol b. Draw up air into syringe equal to the prescribed dose of longer-
acting insulin c. Inject air into the vial with the longer acting insulin BUT DO
NOT DRAW UP INSULIN d. NEXT: draw up air into the syringe equal to the prescribed dose
of the faster acting insulin e. Inject the air into the clear, faster acting insulin and draw up
correct amount of insulin f. WITH THE SAME SYRINGE, insert that needle into the vial
of cloudy, longer-acting insulin & withdraw exact dose g. CLEAR BEFORE CLOUDY
4. Identify the different landmarks for administration and place in sequential order of effectiveness. Select an appropriate site abdomen, outer aspect of the upper arms, anterior aspects of the thighs, anterior aspects of the thighs, scapular area on the upper back, and high on the buttocks near the waist level.
5. Position patient so the injection site is accessible and patient can relax the area.
6. Dons procedure gloves.
Nursing Lab Skills Manual Page 51
7. Cleanses the injection site with an alcohol prep pad by circling from the center of the site outward. Allows the site to dry before administering the injection.
8. Removes the needle cap. 9. With the non-dominant hand, pinches or pulls taut the skin at the
injection site. a. If patient is obese or “pinch” of adipose tissue is >2inches, uses
90° angle. b. If patient is average size or “pinch” is less than 1 inch, uses a
45° angle. 10. Holding the syringe between thumb and index finger of the dominant
hand like pencil or dart, inserts the needle at the appropriate angle into the pinched-up skinfold or spread skin.
11. Stabilizes the syringe with the fingers of the non-dominant hand. 12. Using the thumb or index finger of the dominant hand, presses the
plunger slowly to inject the medication. [Alternately, after inserting the needle continues to hold the barrel with the dominant hand to depress the plunger.]
13. Removes the safety needle smoothly along the line of insertion. 14. Gently blots any blood with a gauze pad. 15. Engages the needle safety device or places the uncapped syringe and
needle directly into a “sharps” container.
Nursing Lab Skills Manual Page 52
PROCEDURE CHECKLIST Administering Feeding through an Gastric and Enteric Tube
PROCEDURE STEPS: Before, during, and after the procedure, follows “Principles-Based Checklist to Use with All Procedures,” including: Identifies the patient according to agency policy; attends to standard precautions, hand hygiene, safety, privacy, body mechanics, and documentation.
1. Checks the health record to determine that tube placement has been confirmed by radiography before the first feeding.
2. Determine the type of feeding, rate of infusion, and frequency of feeding. Verify against MD order.
3. Check the expiration date of the feeding formula. 4. Shakes the feeding formula to mix well. 5. Warms the feeding formula to room temperature for intermittent
feedings; for continuous feedings, keep formula cool but not cold 6. Performs any necessary calculations and dilute formula per MD
orders. 7. Prepares equipment for administration.
a. For an open system with feeding bag: i. Fills a disposable tube feeding [TF] bag with 4-6 hour
supply of formula, primes the tubing; labels the TF with date, time, formula type, and rate; and hangs the TF bag on IV pole.
b. For an open system with a syringe i. Prepares the syringe by removing the plunger
c. For a closed system with prefilled bottle with drip chamber i. Attaches the administration set to prefilled bottle and
primes tubing and hangs the prefilled bottle on an IV pole.
8. Elevates the head of the bed at least 30° to 45° 9. Places a linen saver pad under the connection end of the feeding tube. 10. Dons procedure gloves

Nursing Lab Skills Manual Page 53
11. For subsequent feedings after radiography, check for mitigation of all types of tube placement and residual volume [except for jejunostomy tubes].
a. Connect the syringe to the proximal end of the feeding tube. Draws back slowly to aspirate contents.
b. Measure the volume of aspirated contents using syringe [if volume is >60 mL, uses a graduated container].
c. Reinstalls aspirate unless the volume is more than the formula flow rate for 1 hour or volume of 150 mL. If volume is greater than formula flow rate for 1 hour or volume of 150 mL, notify primary care provider.
12. Flushes the tube with 30 mL of tap water for intermittent feedings.
Beginning the feeding: 13. With an infusion pump:
a. Hang the feeding and prime tubing unless previously done. Thread tubing through pump per manufacturer’s instructions.
b. Clamps or pinches off the end of the feeding tube. c. Traces the tubing from the bag back to the patient. d. Attaches the distal end of the administration tubing to the
proximal end of the feeding tube. May use connector if appropriate.
e. Turn on infusion pump setting to the correct infusion rate and volume per calculations.
f. Unclamps the tube and begins the infusion. 14. With an open system or syringe:
a. Clamps or pinches off the end of the feeding tube. b. Attaches the syringe to the proximal end of the tube. c. Fills the syringe with the prescribed formula d. Release the tube clamp or pinch and elevates the syringe. Does
not elevate syringe >18 inches above the tube insertion site. e. Allows the feeding to flow slowly adjusting the height of
syringe accordingly.
Nursing Lab Skills Manual Page 54
f. When the syringe is nearly empty, clamps the tube or holds it above the level of the stomach, refills syringe, unclamps and continues feeding, continuing process until prescribed amount is administered.
15. Using a closed system with a prefilled bottle with a drip chamber without an infusion pump:
a. Attaches the distal end of the administration tubing to the proximal end of the feeding tube. May use connector if appropriate.
b. Begins the infusion. Opens the roller clamp on the administration tubing and regulates the flow to the prescribed rate.
Ending the feeding 16. When formula feeding has infused, proceeds as follows
a. Infusion pump: turn off the pump; pinch end of the feeding tube, and flush with the prescribed amount of water.
b. Open system syringe: disconnect the syringe from the feeding tube, flushes the tube with approximately 50 mL of tap water
c. Closed system with prefilled bottle with drip chamber: turn off the roller clamp; disconnect the feeding tube, and flush with the prescribed amount of water.
d. Continuous feeding: flush the tube with the prescribed amount of water [50-100 mL] every 4-6 hours.
17. Cap the proximal end of the feeding tube. 18. Keep the head of the bed elevated at least 30° to 45° for 1 hour after
TF is infused 19. Provide frequent oral hygiene and gargling. 20. Procedure variations for Gastrostomy tubes and G-buttons:
a. Cleans insertion site daily with soap and water b. A small, precut gauze dressing may be applied to site.
21. Procedure variations for cuffed Tracheostomy tube: a. Inflate the cuff before administering the feeding and keeps the
cuff inflated for at least 15 minutes afterwards 22. Document any pertinent information.
Nursing Lab Skills Manual Page 55
PROCEDURE CHECKLIST Changing dressing for Percutaneous Central Venous
Catheter Placement
PROCEDURE STEPS Before, during, and after the procedure, follows “Principle-Based Checklist to Use with All Procedures” including: Identifies the patient according to agency policy; attends to standard precautions, hand hygiene, safety, privacy, body mechanics, and documentation.
1. Explain the procedure to the patient. 2. Take baseline vital signs. 3. Gather supplies and perform hand hygiene. 4. Set up sterile field and add supplies as needed. 5. Position table for easy accessibility and place patient in Fowler’s
position. 6. Don sterile cap, mask, gown, and gloves. 7. Either have patient wear a mask or turn head away from procedure. 8. Remove the old dressing carefully. Remove any tape that is securing
the catheter one strip at a time being careful not to pull out catheter. 9. Remove the transparent dressing by detaching the opposite corners of
the dressing on the diagonal and pulling on the diagonal to release the bonds of the dressing.
10. Assess the catheter site for erythema, induration, drainage, odor, etc. Assess the integrity of the catheter.
11. Change sterile gloves. 12. Cleanse the site with chlorhexidine-containing antiseptic solution or
protocol of institution. a. Using a back-and-forth motion, scrub area. Do not go back over
an area with the same applicator. b. Repeat with three applicators scrubbing for at least 30 seconds;
2 minutes for a moist site. c. Allow site to air dry completely and do not touch, wipe or blot
dry. 13. Apply transparent dressing smoothly over the catheter, avoiding wrinkling and pockets under the dressing. The catheter below the dressing may be secured with tape to prevent movement. Do not tape over transparent dressing to obstruct view of catheter.
Nursing Lab Skills Manual Page 56
14. Label the dressing with date, time, and initials. 15. Position patient for comfort. 16. Dispose of supplies. 17. Document any pertinent information including date and time of change. 18. Remember transparent dressing may be used for 7 days or per institutional policy.
Nursing Lab Skills Manual Page 57
PROCEDURE CHECKLIST Administering Medication through an Enteral Tube
PROCEDURE STEPS Before, during, and after the procedure, follows “Principles-Based Checklist to Use with All Procedure.” including: Identifies the patient according to agency policy; attends to standard precautions, hand hygiene, safety, privacy, body mechanics, and documentation.
1. Checks the health record to determine that tube placement has been confirmed by radiography before the first feeding.
2. Prepares and administers medications according to “Medication Guidelines: Steps to follow for all medications.”
3. Follow steps in Procedure Checklist: Administering oral medications a. If pouring from a multidose container, does not touch the
medication. b. Pours the correct dosage. c. Breaks only scored tablets or use a pill cutter. d. For liquid medications, shakes bottle as necessary, maintains
medical asepsis, pours away from label, measures at eye level and wipes the outside of bottle lip if dripping occurs.
4. Checks to be sure medications can be crushed and given via enteral tube.
5. Crushes tablet and mixes with approximately 20 mL water per each tablet. Does not give all medications together.
6. Places patient in high Fowler’s position if possible. 7. Checks for nasogastric tube placement by checking for mitigation of
tube. 8. Checks for residual volume. 9. Flushes the tube, using a bulb or Toomey syringe by removing the bulb
or plunger from the syringe, attaching to the barrel of tube and pours in 20-30 mL of water.
10. Instill medication by depressing the syringe plunger or using the barrel of the syringe as a funnel and pouring in the medication. Smaller tubes require instilling with a 30 to 60 mL syringe; the medication maybe poured with larger tubes.
11. Flushes the medication through the tube by instilling an additional 20 to 30 mL of water after each medication.
12. Have patient maintain a sitting position for at least 30 minutes after medication administration.
Nursing Lab Skills Manual Page 58
PROCEDURE CHECKLIST Changing an Ostomy Appliance
PROCEDURE STEPS Before, during, and after the procedure, follows “Principles-Based Checklist to Use with All Procedures,” including: Identifies the patient according to agency policy; attends to standard precautions, hand hygiene, safety, privacy, body mechanics, and documentation.
1. Washes hands and dons clean procedure gloves. 2. Folds down the linens to expose the ostomy; placing a clean towel
across the abdomen under the existing pouch. 3. Position patient so skin folds are not along line of the stoma. 4. If the pouch is drainable, open it by removing the clamp and unrolling
it and the bottom to empty into a bedpan. SAVE THE CLAMP FOR REUSE.
5. Using a silicone-based adhesive remover with one hand, use the other hand to gently remove the old wafer from the skin, beginning at the top and proceeding in a downward direction.
6. Place the old pouch and after in a plastic disposal bag. If the bag is not drainable, dispose of it according to agency policy.
7. Inspect stoma and periostomal skin. 8. Use warm water or skin cleansing agent with a pH of 5.5 to cleanse
stoma and surrounding skin. 9. Allows the area to dry. 10. Measures the size of the stoma in one of the following ways:
a. Using a standard stoma measuring guide placed over the stoma b. Reusing a previously cut template c. Measuring the stoma from side to side
11. Place a clean 4 x 4 gauze pad over the stoma. 12. Remove gloves and washes hands. 13. Traces the size of the opening obtained in step 10 onto the paper on
the back of the new wafer; cuts the opening. 14. Peels the paper off the wafer. If wafer comes with outer ring of tape
attached, do not peel off until wafer is secured to patient. 15. Dons clean procedure gloves. 16. Use ostomy skin care products if appropriate. (For example, wipes
around stoma with skin prep, applies skin barrier powder or paste, applies extra adhesive paste, etc.)
Nursing Lab Skills Manual Page 59
17. Removes the gauze. Centers the wafer opening around stoma. Pressing firmly against skin and holding for 30-60 seconds.
a. One-piece pouch, point bag toward feet. b. Two-piece system, place wafer on first. When seal is complete,
attach bag. c. Open-ended system, fold end of the pouch over clamp, listening
for the “click” to ensure it is secure. 18. Removes gloves and washes hands. 19. Returns patient to a comfortable position. 20. Disposes of used ostomy pouch following agency policy for
biohazardous waste. 21. Document pertinent information.

Nursing Lab Skills Manual Page 60
Mental Health/Illness:
The Mini Mental State Examination (MMSE)
By: Lenore Kurlowicz, PhD, RN, CS and Meredith Wallace, PhD, RN, MSN
WHY: Cognitive impairment is no longer considered a normal and inevitable change of aging. Although older adults are at higher risk than the rest of the population, changes in cognitive function often call for prompt and aggressive action. In older patients, cognitive functioning is especially likely to decline during illness or injury. The nurses’ assessment of an older adult’s cognitive status is instrumental in identifying early changes in physiological status, ability to learn, and evaluating responses to treatment.
BEST TOOL: The Mini Mental State Examination (MMSE) is a tool that can be used to systematically and thoroughly assess mental status. It is an 11-question measure that tests five areas of cognitive function: orientation, registration, attention and calculation, recall, and language. The maximum score is 30. A score of 23 or lower is indicative of cognitive impairment. The MMSE takes only 5-10 minutes to administer and is therefore practical to use repeatedly and routinely.
TARGET POPULATION: The MMSE is effective as a screening tool for cognitive impairment with older, community dwelling, hospitalized and institutionalized adults. Assessment of an older adult’s cognitive function is best achieved when it is done routinely, systematically and thoroughly.
VALIDITY/RELIABILITY: Since its creation in 1975, the MMSE has been validated and extensively used in both clinical practice and research.
STRENGTHS AND LIMITATIONS: The MMSE is effective as a screening instrument to separate patients with cognitive impairment from those without it. In addition, when used repeatedly the instrument is able to measure changes in cognitive status that may benefit from intervention. However, the tool is not able to diagnose the case for changes in cognitive function and should not replace a complete clinical assessment of mental status. In addition, the instrument relies heavily on verbal response and reading and writing. Therefore, patients that are hearing and visually impaired, intubated, have low English literacy, or those with other communication disorders may perform poorly even when cognitively intact.

Nursing Lab Skills Manual Page 61
More on the topic:
Folstein, M., Folstein, S.E., McHugh, P.R. (1975). “Mini-Mental State” a Practical Method for Grading the Cognitive State of Patients for the Clinician.
Journal of Psychiatric Research, 12(3); 189-198. Foreman, M.D., Grabowski, R. (1992). Diagnostic Dilemma: Cognitive Impairment in
the Elderly. Journal of Gerontological Nursing, 18; 5-12. Foreman, M.D., Fletcher, K., Mion, L.C., & Simon, L. (1996). Assessing Cognitive Function. Geriatric Nursing, 17; 228-233.

Nursing Lab Skills Manual Page 62
The Mini-Mental State Exam Patient Examiner Date
Maximum Score
Orientation
5 ( ) What is the (year) (season) (date) (day) (month)? 5 ( ) Where are we (state) (country) (town) (hospital) (floor)?
Registration
3 ( ) Name 3 objects: 1 second to say each. Then ask the patient all 3 after you have said them. Give 1 point for each correct answer. Then repeat them until he/she learns all 3. Count trials and record. Trials
Attention and Calculation 5 ( ) Serial 7’s. 1 point for each correct answer. Stop after 5 answers.
Alternatively spell “world” backward.
Recall 3 ( ) Ask for the 3 objects repeated above. Give 1 point for each correct answer.
Language
2 ( ) Name a pencil and watch. 1 ( ) Repeat the following “No ifs, ands, or buts” 3 ( ) Follow a 3-stage command:
“Take a paper in your hand, fold it in half, and put it on the floor.”
1 ( ) Read and obey the following: CLOSE YOUR EYES 1 ( ) Write a sentence. 1 ( ) Copy the design shown.
Total Score ASSESS level of consciousness a l o n g a continuum __________________ Alert Drowsy Stupor Coma
Nursing Lab Skills Manual Page 63
VIDEO INTERPERSONAL PROCESS ANALYSIS (VIPA) REQUIREMENTS
The VIPA is a method for the student to demonstrate progress in the use of therapeutic communication. Through the analysis of the videotaped interactions, the student recognizes verbal and non-verbal therapeutic and non-therapeutic exchanges. Areas of strength and areas needing improvement are identified, affording the student an opportunity to refine and modify communication techniques. By recalling and then writing out personal thought and feelings prompted during the interaction, the student understands how these internal experiences affect communication with clients. The VIPA is considered a practicum. Satisfactory completion of the VIPA is required to pass NURS 176. Timeframes for videotaping the VIPA are strictly enforced by lab staff. Practicing in the lab with your VIPA partner is highly recommended as preparation for the taped practicum. To successfully complete this assignment all components of all the documents must be addressed, spelling and grammar must be correct, and APA style must be followed. If you are not sure about use of APA style go to the OCC Writing Lab for help. They will review your written work and suggest revisions but will not write your assignment. The VIPA assignment is graded as pass/fail; passing is achieved when the assignment is graded as a 75% or higher using the grading sheet provided. One re-do may be permitted for the assignment (see grading sheet for explanation). Failure to achieve at least a 75% grade for this assignment results in a clinical failure for NURS 176 and therefore a failure for the course. If you are unable to hand in any written work on-time your clinical faculty must be told at least two weeks prior to the due date. Failure to comply with this requirement results in a clinical failure for NURS 176.
Nursing Lab Skills Manual Page 64
Video Interpersonal Process Analysis (VIPA) You will be videotaping a scenario within the Nursing Lab in which you will be the Registered Nurse interacting with a fellow student who will take on the role of the client. During this interaction you will demonstrate use of the communication techniques that you have been practicing in the clinical area. Additional information will be provided by your Clinical Instructor including when to complete (tape) the assignment. Once you have completed the taping session submit a report including the information listed below in sections A, B, and C. All of the information indicated in these sections must be included to successfully complete this assignment. Please note that this assignment is a requirement to fulfill the clinical obligations for NURS 176. A. Cover Sheet
1. Name
2. Date
3. Client Initials
4. Client Age
5. Developmental Stage
a. Identify Theorist who’s Developmental Stages you select to use (Erikson, Piaget, Havighurst). b. Label the Developmental Stage in which you see the client to be.
• Underline pole you believe the client to be in: Generatively vs. Isolation.
c. Describe all tools and tasks of this Developmental Stage. a. Address those the client has met. b. Address any that are unmet.
d. Assess if the client’s Developmental Stage and chronological ages match. e. If the client’s chronological and developmental stage Do Not concur:
a. Identify the Developmental Stage the client should be in. b. Discuss the tools and tasks of this chronological Developmental Stage and document ways in which you believe the client has never developed or has lost them through the advent of his/her illness.
Nursing Lab Skills Manual Page 65
6. Goal of Interaction State the goal of this interaction. Remember that the goal must:
a. Be client centered b. Identify the issue of importance to the client at that moment in time
B. VIPA Format Interaction
• N (Nurse): What you said. a. “Content in quotations”
b. Nonverbal communication must also be included • C (Client): What the client said.
a. “Content in quotations” b. Nonverbal communication must also be included Interpretation
• Include after each Nurse-Client Interaction • Numbered from 1 through 5 1. Technique
• Document the specific Communication Technique utilized (Ex: Broad Opening, Clarification)
2. Rationale • What you believed was the therapeutic value of using this technique • Not just a definition of the technique
3. Thoughts • Your thoughts and impressions about yourself, and about the client • What you believe was going on between you and the client (Examine your past experiences to see how they affect your present thoughts and impressions at this moment).
4. Feelings • Describe your feelings/gut reactions at that point in time during the
interaction • Include feelings about yourself and the client • Examine past experiences to see how they affect your feelings at this
moment • Video Interpersonal Process Analysis (VIPA) Assignment
5. Correction • If you used a non-therapeutic technique document what technique it was • State what technique would have been more therapeutic
Nursing Lab Skills Manual Page 66
C. Self-Evaluation of VIPA Answer all of the following questions. 1. To what extent were the goals for this interview realized? 2. What other goals emerged? 3. What factors helped or hindered goal achievement? 4. a. Did you allow the client to freely express the way things seem to her/him?
b. Did you push the client too much?
5. a. Did you use yourself as facilitator in helping the client explore their own “space”? b. How effective were you in getting the specific details of the client’s story?
6. a. Did you use open-ended communication techniques?
b. Which non-therapeutic communication techniques did you use?
7. Was your attitude one that allowed the client to get closer to her/his own feelings? 8. a. Did you really listen or were you busy getting an answer ready?
b. Did you unintentionally change the topic or focus of the conversation?
9. a. Was the client afraid or hesitant to express her/himself? b. What did you do to relieve those feelings?
10. a. What themes were expressed by the client? b. Did you pick up on the themes, symbols, metaphors?
11. a. When was the client most comfortable during the interview? b. When was the client most uncomfortable during the interview?
12. a. When were you most comfortable during the interview? b. When were you most uncomfortable during the interview?
Adapted from Hein, Eleanor C. 1980. Communication in Nursing Practice, 2nd ed. Boston: Little Brown and Company, pp 77-78.

Nursing Lab Skills Manual Page 67
VIPA Taping Instructions
The students will be videotaping each other in the OCC nursing lab. Please call the lab staff at X2236 to make appointments for yourself and your taping partner during the week(s) before the VIPA due date. No more than 30 minutes will be reserved for appointments. You will be taping each other with a mini DVD camcorder. You need to bring with you 1 Mini DVD-RW. Please make sure this is the mini and not the full size DVD-RW. On the day you are scheduled for taping, report to the lab office. The lab staff will give you each a different scenario for you to tape each other. They will bring you to the taping room and review how to use the camera for taping. The student playing the patient may take a few minutes to read her scenario before enactment. Please follow the instructions below carefully for use of the camera. Camera Use Instructions:
1. If the power switch is set to off, turn it while pressing the green button. 2. Make sure lens cover is open. Switch is on front of camera. 3. Open the disc access door and insert disc. STBY should be displayed on
the camera’s touch screen. 4. Press the red record button on the tripod remote. REC will appear on the
touch screen. 5. When taping is complete, press the red record button again to go back to
standby mode. 6. IMPORTANT- Do not remove disc. You must finalize the disc at this
point so it can be played back in your DVD player or computer. 7. Finalizing a disc: Touch the HOME button on the camera’s touch screen.
Touch the Manage Media icon on the touch screen. Touch Finalize on the touch screen Touch YES and YES When finalizing is completed, touch OK. You may then open access door and switch discs. REMEMBER to always finalize before removing disc. Finalizing may take 4-5 minutes. Do not touch the camera during finalizing.
Return original scenarios to lab staff. You may view your discs in lab computers or DVD players before leaving to make sure there were no recording problems.

Nursing Lab Skills Manual Page 68
Nursing 273
Nursing Lab Skills Manual Page 69
NURSING 273 OB/PEDIATRICS
Please see your Instructor for handouts.
NURSING 273 MEDICAL/SURGICAL
Please refer to “Procedure Checklists” on the DVD that came with your Wilkinson Fundamentals of Nursing Volume 1. You will be required to print the checklists for Chapter 35, “Performing Tracheostomy or Endotracheal Suctioning” and “Tracheostomy Care Using Modified Sterile Technique”. Please note: In the checklist “Tracheostomy Care Using Modified Sterile Technique”, the latest evidence-based practice does not recommend using hydrogen peroxide for cleaning the reusable inner cannula. Therefore, we will only use sterile normal saline for cleaning.
Nursing Lab Skills Manual Page 70
Nursing 274

Nursing Lab Skills Manual Page 71
NURSING 274
ASSESSMENT LAB #1 PHYSICAL ASSESSMENT (CARDIAC INTENSE) GENERAL OBJECTIVE: TO PERFORM A BEGINNING LEVEL PHYSICAL ASSESSMENT OF THE ILL CLIENT, SYSTEMATICALLY COLLECTING DATA IN ALL PERTINENT AREAS USING ALL SENSES. Prior to the Lab: Read pertinent Cardiac/PV assessment in textbook During the lab the student will: 1. State two general purposes for performing a physical assessment. 2. State appropriate use of inspection, palpation, auscultation relative to
the heart. 3. Demonstrate an organized physical assessment of the
cardiopulmonary and vascular structure. 4. State important systemic observations of alterations in health to be
made during a physical assessment. 5. Describe, discuss and identify S1 S2 S3 S4 holosystolic, diastolic and
systolic murmur, pericardial friction rub. 6. Discuss the cardiovascular alterations which give rise to abnormal
heart sounds including murmurs, rubs, regurgitation and stenosis. 7. Describe the physiologic concomitants of those alterations. 8. Review lung sounds including rales (crackles) rhonchi, wheezes, and
stridor. 9. Demonstrate client preparation for physical assessment. 10. Practice inspection, palpation, auscultation. 11. Practice a systematic assessment of a partner. 12. Describe important findings. 13. Practice documentation in a concise, systematic manner.

Nursing Lab Skills Manual Page 72
NURSING 274 SKILLS & ASSESSMENT LAB #2 BASIC CARDIAC RHYTHM INTERPRETATION GENERAL OBJECTIVE: TO BE ABLE TO READ AND INTERPRET BASIC CARDIAC RHYTHMS IN AN ORGANIZED MANNER. Prior to the Lab: Read pertinent Cardiac/PV assessment in textbook View pertinent videos on cardiac and dysrhythmias assessment. Reading EKG’s (30 mins) Identifying Cardiac Dysrhythmias (30 mins) During the lab the student will: 1. Identify the following waves on a rhythm strip: P wave, QRS
complex, T wave. 2. Be able to count heart rate by looking at a rhythm strip. 3. Recognize Regular Sinus Rhythm (RSR). 4. Recognize changes in the EKG which indicate ischemia and/or
infarction. 5. Recognize the following dysrhythmias: bradycardia, tachycardia,
atrial fibrillation, heart block, asystole, premature ventryricular contractions, ventricular tachycardia, ventricular fibrillation.
6. Recognize artificial pacemaker function on a rhythm strip. 7. Correlate the clients subjective symptoms with objective symptoms
and telemetry readings. 8. Practice organized assessment methods of the cardiac system,
including looking at RSR and calculating the heart rate by looking at a rhythm strip.
9. Work in collaborative groups examining a variety of rhythm strips to define the dysrhythmias.
10. Describe important physical assessment factors and how them may or may not correlate with EKG findings.
11. Practice documentation in a concise, organized manner.
Nursing Lab Skills Manual Page 73
NURSING 274 SKILL & ASSESSMENT LAB #3 NEUROLOGICAL ASSESSMENT GENERAL OBJECTIVE: TO PERFORM A BEGINNING-LEVEL NEUROLOGIC ASSESSMENT OF THE ILL CLIENT, COLLECTING DATE IN AN ORGANIZED MANNER. Prior to the Lab: READ: 1. Assessment of the Neurologic System in current textbook 2. Neurologic Sensory Status Assessment Guide (found in this handout) VIEW: Physical Assessment: The Neurologic System (25 min.) Identifying Neurologic Deficits (25 min.) Various videos on Neuro – view according to content in class During the lab the student will: 1. State 3 purposes for performing a neurologic assessment. 2. List equipment necessary for a neurologic assessment. 3. Discuss integration of the neurologic assessment into a general
physical assessment. 4. Demonstrate an organized neurologic assessment. 5. State important observations of altered neurologic functioning to be
recorded. 6. Select equipment for a neurologic assessment. 7. Simulate client preparation for a neurologic assessment. 8. Practice organized assessment methods of the neurologic system
including the cranial nerves. 9. Describe important findings of the neurologic assessment. 10. Practice documentation in a concise, organized manner.
Nursing Lab Skills Manual Page 74
NEURO/SENSORY STATUS ASSESSMENT GUIDE I. Tests for Cerebral Function
Neuro Lab – Mental Status Exam Guideline This is best performed while doing a physical assessment. Mood and
thought process will be evident as the history unfolds. Memory, orientation, and calculation should be integrated into the history so that the client does not feel “test anxiety”. A. Appearances: 1. Posture and Motor Behavior: Dress, grooming, and hygiene Facial expression Speech: Quality (loudness, clarity, inflection) organization (coherence, relevance circumstantiality) Assess and do baseline charging on each area here (consider depression, anxiety, drug side effects, chronic brain syndrome). Also, note change in relation to topics and persons in environment. 2. Mood: Via observation and questioning: How did/do you feel? What do you see for yourself in the future? Do you ever feel that life isn’t worth living? Etc. 3. Thought process and perception: Is the thought coherent and relevant? What is the content of the thought? Are there misperceptions? 4. Cognitive function: Try first in the context of the interview: a. then, ascertain: orientation x3 time

Nursing Lab Skills Manual Page 75
place person b. attention and concentration Explain that you would like to test his/her ability to concentrate. Have the client repeat digit series which you recite at 1 per second. Stop after a second failure: 5, 8 6, 1, 7 5, 3, 8, 2 4, 7, 2, 9, 3 3, 6, 9, 5, 2 9, 4 8, 3, 1 2, 1, 7, 9 5, 3, 6, 2, 9 4, 1, 5, 3, 7, 9 7, 2, 44, 8, 359 6, 19, 825437 3615842 3, 87249165 (Normal would be 5 to 8 digits forward and four to six backwards) Serial 7s: Start from 100, subtract 7, and keep subtracting 7 Note speed and accuracy. (Normals should do this in 1 ½ minutes). If serial 7s are too hard, do serials 3s. B. Memory: You should do this in the context of the interview. Look at remote memory: Birthdays, anniversaries, 3rd grade teacher, etc. Recent memory: events of the day which can be checked with others tell the client that you will want him/her to remember an object and an address that you will ask for in about 5 minutes Information: (Average correct is 8 to 13 questions) 1. How many days are there in a week? 2. What must you do to make water boil? 3. How many things are in a dozen? 4. Name the four seasons. 5. What do we celebrate on the 4th of July? 6. How many pounds are there in a ton? 7. What does the stomach do? 8. What is the capital of Greece? 9. Where does the sun set? 10. Who invented the airplane? 11. Why does oil float on water?
Nursing Lab Skills Manual Page 76
12. Where do we get turpentine? 13. When is Labor Day? 14. How far is New York from Chicago? 15. What is a hieroglyphic? 16. What is a barometer? 17. Who wrote “Paradise Lost”? 18. What is a prime number? 19. What is Habeas Corpus? 20. Who discovered the South Pole? C. Vocabulary: (the best indicator of underlying intelligence) 1. apple 9. tint 17. seclude 2. donkey 10. armory 18. spangle 3. diamond 11. fable 19. recede 4. nuisance 12. nitro- 20. affliction 5. join glycerine 21. chattel 6. fur 13. microscope 22. dilatory 7. shilling 14. stanza 23 flout 8. bacon 15. guillotine 24. amanuensis 16. plural D. Abstract Reasoning: 1. Proverbs: Look for relevance of answers and the degree of concreteness or abstractions. a. A stitch in time saves nine. b. Don’t count your chickens before they are hatched. c. The proof of the pudding is in the eating. d. A rolling stone gathers no moss. e. The squeaking wheel gets the grease. 2. Similarities: How are the following alike? a. orange and apple b. cat and mouse c. child and dwarf d. church and theatre e. piano and violin f. paper and coal
Nursing Lab Skills Manual Page 77
E. Sensory Perception/Coordination: Have a client copy: circle diamond cross row of dots square looping figure II. Tests for Cranial Nerve Function A. Olfactory Nerve (1) Test each nostril separately for the ability to identify a familiar odor. B. Optic Nerve (II) (Perform together with “C” below) 1. Assess visual fields (test each eye individually): While the client looks straight ahead, have the individual indicate when the examiner’s finger comes into peripheral vision range. 2. Assess visual acuity: Use the Snellen or Rosenbaum chart. C. Oculomotor Nerve (III), Trochlear Nerve (IV), and Abducens Nerve (VI) Examine eye for the six cardinal points of: Gaze, papillary size and shape, direct and consensual papillary response, accommodation, and opening of the eyelid. D. Trigeminal Nerve (V) 1. Sensory (test each side of the face): Touch the forehead, cheeks, and jaw with a cotton swab, test tubes of warm and cold water, and a sharp pin. 2. Test the corneal reflex by touching the cornea with cotton or gauze. 3. Motor: Palpate the masseter and temporal muscles while the individual’s teeth are clenched.
Nursing Lab Skills Manual Page 78
E. Facial Nerve (VII) 1. Sensory: Place sugar, vinegar, salt, and quinine separately on the anterior two thirds of the tongue. 2. Motor: Assess facial muscles for strength and symmetry by asking the individual to raise the eyebrows, frown, smile, puff out the cheeks, close eyes tightly against resistance, and show the teeth. F. Acoustic Nerve (VIII) 1. Assess hearing acuity by covering one ear and move a ticking watch or whisper near other ear. (If acuity is suspect, perform Weber’s and Rinne’s tests next.) G. Glossopharyngeal Nerve (IX) and Vagus Nerve (X) Examine the palatal arch for symmetric elevation while the individual opens mouth and says “Ah”. Assess swallowing for smoothness and coordination and speech for articulation. Elicit the gag reflex. 1. Assess speech and swallowing H. Spinal Accessory Nerve (XI) Inspect and palpate the trapezius and sternocleidomastoid muscles for symmetry and size. Have the individual raise the shoulders against resistance. Then have the individual turn the head against resistance. I. Hypoglossal Nerve (XII) Inspect the tongue for atrophy, fasciculation, and alignment while it is sticking out. Have the individual press the tongue against the inside of the check while the examiner assesses its strength. III. Cerebellar Function and Proprioception A. Test for Diadochokinesia (pronation and supination test) With arms outstretched or flexed at the elbow, the individual rapidly pronates and supinates the hands; assess for smoothness of movement.
Nursing Lab Skills Manual Page 79
B. Test for Movement Direction Accuracy 1. Finger-to-nose test: Have the individual rapidly touch the tip of the nose with the index finger of one hand, then the other. This should be performed with eyes open, the closed. 2. Heel-to-knee test: Have the individual run the heel of each foot down the leg, knee to foot, while in a supine position. 3. Romberg test: While standing with feet together and eyes closed, in individual stands for 5 seconds. Evaluate for gross swaying. IV. Motor Function A. Assess gait, posture, and smoothness of extremity movement while individual walks with eyes opened and closed. B. Assess muscles bilaterally for tone, size, strength, and involuntary movement. V. Sensory Function With the client’s eyes closed, evaluate bilaterally for: A. Touch Sensation: The skin is touched lightly with a cotton swab. B. Pain Sensation: Use a pin to have individual’s identify sharp and dull pressure. C. Vibration Sensation: Have individual distinguish vibration by placing a vibrating tuning fork handle over a bony prominence.
D. Kinesthetic Sensation: With the client’s eyes closed, move the individual’s fingers, toes, and extremities into various positions and have individual identify the positions.
VI. Cortical Function A. Stereognosis: Place familiar objects in the individual’s hand for identification. B. Two-Part Discrimination: Simultaneously prick a part of the body with two pins, and have the individual determine how many pin pricks (one or two). C. Extinction: Touch the individual in corresponding areas on both sides of the body, and have him or her state where touch was felt.
Nursing Lab Skills Manual Page 80
D. Graphesthesia: Draw a letter or number on the client’s palm,
back, or other area with a blunt object and have the individual identify it.
VII. Reflex Status: A. Deep Tendon Reflexes 1. biceps 2. triceps 3. brachioradialis 4. patellar 5. Achilles B. Superficial Reflexes 1. gag 2. corneal 3. abdominal

Nursing Lab Skills Manual Page 81
NURSING 274 – LAB #4 NURSING 274 – MEDICATION CALCULATION INSTRUCTIONS: Prior to attending Medication Calculation lab, complete all activities in the NURS. 274 Medication Calculation Learning Packet. If you have difficulties with the packet or with math in general, see Nursing Lab Personnel for assistance. Bring your completed medication packet to your scheduled NURS. 274 lab for medication calculation. The focus of the lab will be on managing calculations for critical care drugs. Basic math skills and calculations taught in previous courses will not be covered. Your medication book as well as computer software in the Nursing Department must be used to develop medication calculation skills. Use the book and computer software prior to attending medication calculation class and as needed prior to the medication calculation test.