once upon a garden update - illinois aitc · page 4: indoor gardening care/needs page 5:...
TRANSCRIPT

Page 1-2: Vocabulary Page 3: Why Gardens Help! Page 4: Indoor Gardening Care/Needs Page 5: Bio-degradable Planter Lesson Page 6-7: Outdoor Gardening Care/Needs Garden Themes Page 8-10: Theme 1: Pizza Garden Try something different in your garden this year. Everyone will enjoy growing a pizza gar-den. This garden can be shaped like a pizza. In your pizza garden, plan to grow three vegetables and three herbs along with wheat to make the flour for your pizza crust.
Page 11-12: Theme 2: Peanut Butter & Jelly Garden Most children and adults enjoy a peanut butter and jelly sandwich! This garden will grow peanuts and strawberries to make that possible. You will also need to plant wheat in or near your garden so you can make the flour, to turn into bread, to complete your sand-wich!
Page 13-14: Theme 3: Alphabet Garden An alphabet garden is full of fruits and vegetables! Decide what to plant (as long as you have a different fruit or vegetable for each letter of the alphabet).
Page 15-20: Theme 4: Cabbage Garden How do you feel about growing a 50 pound cabbage?! Teachers submit a class winner and then 1 child from every state will be chosen to win a $1,000 scholarship! Learn more about growing a giant cabbage in your garden.
Page 21-22: Theme 5: Sunflower Garden Plant sunflowers in a circle to make a sunflower house garden! All your garden will need is sunflowers and it will be a beautiful and fun place for children to be.
Page 23-24: Theme 6: Edamame vs. Conventional Soybeans Edamame, soybeans, it’s all the same, right? Not quite. There are many varieties of soybeans grown for different purposes. Plant both types and see the difference!
Page 25-26: Theme 7: Community Garden Get everyone involved! Students, teachers, parents, and the community! Decide as a group what to plant in your garden. This is a great way to meet your neighbors and get more involved.
Page 27: Suggested Gardening Books Page 28-30: Other Gardening Lessons
Table of Contents
Vocabulary
Annual: A plant grown outdoors in the spring and summer and surviving just for one growing season.
Antennae: A feeler organ on the head of an insect, crustacean, or other animal. Bar graph: A graph using rectangular bars to show how large each value is. The bars can be horizontal or vertical.
Beneficials: Organisms that provide a benefit to crop production, applied especially to natural enemies of Pests, and to pollinators such as bees.
Biennial: A plant that normally requires two seasons to complete its life cycle, growing usually as a rosette in the first season and producing flowers and fruits and then dying in the second season.
Circumference: The length around a circle. Centimeter: A unit of length in the metric system equal to 0.01 meters. Coir-based: A natural fiber extracted from the husk of coconut. Compost: Organic matter that has been decomposed and recycled as a fertilizer. Cotyledon: A significant part of the embryo within the seed of a plant. Decomposition: The process by which organic substances are broken down into simpler forms of matter.
Diameter: Any straight line segment that passes through the center of the circle or sphere and whose endpoints lie on the circle or sphere.
Entomologist: A person who studies the classification, life cycle and habits of insects and relat-ed life forms.
Fertilizer: Any organic or inorganic material of natural or synthetic origin (other than liming ma-terials) that is added to a soil to supply one or more nutrients essential to the growth of plants.
Floret: A small flower, usually refers to the flowers of the daisy and grass families.
Vocabulary Height: The measurement of vertical distance (either how “ tall” something is, or how “ high up” it is).
Irrigation: The artificial application of water to the land or soil. It is used to assist in the growing of agricultural crops, maintenance of landscapes, and revegetation of disturbed soils in dry areas and during periods of inadequate rainfall. Irrigation can also protect plants against frost.
Meter: The fundamental unit of length in the metric system, equal to 100 centimeters or approxi-mately 39.37 inches.
Metric system: The decimal measuring system based on the meter, liter, and gram as units of length, capacity, and weight or mass.
Observation: An act of recognizing and noting a fact or occurrence often involving measurement with instruments.
Organic fertilizer: Naturally occurring fertilizer which includes manure, slurry, worm castings, peat, seaweed, humic acid, and guano.
Peat: An accumulation of partially decayed vegetation. Perennial: A plant that lives for more than two years. Perlite: Perlite encourages quicker germination and improved seedling growth, aeration, drain-age and insulation. Perlite stimulates roots and holds moisture but does not become soggy.
Pest: Any unwanted and destructive insect or other animal that attacks food, crops or livestock. Roots: The part of a plant that attaches it to the ground or to a support, and carries water and nourishment to the rest of the plant.
Shoots: A young branch or sucker springing from the main stock of a tree or other plant. Synthetic fertilizer: Synthetic fertilizers have inorganic material that is added to a soil to supply nutrients essential to the growth of plants.
Vermiculite: Vermiculite is combined with other materials, such as peat or composted pine bark, to produce soilless growing media. These mixes promote faster root growth and give quick anchorage to young roots. The mixture helps retain air, plant food, and moisture, releasing them as the plant requires them.
Water-soluble: Able to be dissolved in water.
School gardens provide space for students to reconnect to the ecology around them. Gardens teach students about agriculture, how we nourish ourselves, the importance of stewardship, and an appreciation for the natural systems that support life on our planet. By planting fruits and vegetables, the students will have the opportunity to see where their food comes from while learning how nutritious and healthy fruits and vegetables are. The students will also learn the importance of taking care of plants. Keeping the garden weed free is important to have a good harvest. The students are more likely to appreci-ate the final product because of the work they put in to creating a garden.
Gardens help to fight childhood obesity through nutrition education and physical activity.
Learning the nutritional value of fruits and vegetables is important. This may change not only the child's diet, but could encourage the families to have a healthier diet. Physical activity is a key component to the fight against obesity. Spending time in the garden will keep the children active while having fun.
Gardens help children learn where their food comes from and to take pride in growing it.
The children will have the opportunity to watch their plants grow from seed. They will have opportunities to research each plant and learn the history of each plant, too.
Gardens create a learning laboratory for hands-on learning. Working in the garden is
much different than just learning about one. Having the chance to plant the seeds and take care of the plant as it grows is exciting! The best part is harvesting the plant and be-ing able to enjoy the fruits and vegetables!
Gardens foster cross-curricular learning connections to reinforce daily lessons. The stu-
dents will have daily lessons working with measurement, writing, reading, physical activity and social studies. It is important to concentrate on more than one subject while teach-ing. This will also accommodate each individual learning style. The students will be working with hands on activities, listening to instructions, and following the instructions. Making sure every child understands is very important!
Why Gardens Help!
Page | 3
Container gardening is the practice of growing plants exclusively in containers instead of planting them in the ground. This method is useful in areas where the soil or climate is unsuitable for the plant or crop, there is limited growing space, or even when the growing space has been paved over. Gardening gets you in touch with the earth and is a great hands- on learning experience for children and adults. Soil Mix: Almost any brand of growing media designated for containers or hanging plants will work. This media should be peat or coir-based, and contain perlite and/or vermiculite. If you are using the “Earth Box,” you’ll need the big bag (2 cubic feet, or 60 dry quarts per Earth Box). Much of today’s growing media has a water-soluble or 3-month time-release fertilizer added. This is ok to use, but this doesn't re-place the fertilizer application. Do NOT use compost or growing media that contains rock, clay, sand or topsoil. Dolomite: Dolomite is lime that contains calcium and magnesium. Incorporate 1 lb. of dolomite during the initial planting. When replanting, mix the dolomite in the top 3-4” of the growing media before planting. Fertilizer: The Earth Box is designed to be used with a strip of common, dry, granular fertilizer or plant food for vegetables. Almost any brand of fertilizer will work. Do NOT use water-soluble, time-released, or slow released fertilizer. Synthetic and organic fertilizers are both okay to use. If you choose a synthetic fertilizer, only use 2 cups, whereas an organic fertilizer uses 3 cups. There is no need to add any additional fertilizer during the growing season. Plant Selection: Try anything! Almost anything that is available at your local nursery or garden center will grow in a container garden. Don’t overcrowd your container.
Water: In the first 36 hours, you may go through nine gallons of water. After that, water every two to three days. You will know your box is full when the water runs out of the drain hole in the front of the container. Sunlight: Most plants need full sun for healthy growth. This means locating your containers in are-as that receive at least six hours of light.
Insects and Diseases: Plants in containers are no more susceptible to insects or diseases than they would be growing in open soil. In fact, the use of soilless potting mixes can eliminate some pest and weed problems almost completely. Regular inspections of the plants are important. Control insects by ei-ther handpicking or by spraying/dusting with a recommended insecticide. Select disease resistant plant varieties to help prevent disease. If disease does occur, either remove and discard infected plant or spray/dust with a recommended fungicide when the problem is first noticed. Removing dead leaves and flowers is a good sanitation practice that helps discourage insects and dis-ease organisms.
Container Garden and/or Earth Box
Page | 4
Use this activity to start your plants from seed before transplanting them into an outdoor or container garden. Common Core State Standards: Language Arts: CCSS.ELA-Literacy.RI.2.10; RL.2.10; W.2.1; W.2.2; W.2.7 Mathematics: CCSS.Math.Content.2.MD.A.1 Next Generation Science Standards: Ecosystems: Interactions, Energy and Dynamics: 2-LS2-1 Biological Evolution: Unity and Diversity: 2-LS4-1 Suggested Reading Materials: Ag Mags: Renewable Energy Ag Mag Tree Ag Mag Books: Lily’s Garden by: Deborah Kogan Ray; ISBN-10: 0761326537 The Beautiful Christmas Tree by Charlotte Zolotow; ISBN-13: 978-0618152452 The Tiny Seed by Eric Carle; ISBN-13: 978-0887081552 Michael Recycle by: Ellie Bethel; ISBN-13: 978-1600102240 Materials Needed: Newspaper Tin Cans Compost Seeds Directions: 1. Take a sheet of newspaper and fold it along its length almost in half, leaving a portion at the top showing. 2. Fold this top portion over the previously folded section to create a thicker top. 3. Take a tin can and place it so that the edge of the can is level with the top edge of the paper. Roll the can along,
rolling the paper along with it so as to create a paper tube. 4. Place the can with paper around it top end down. Fold the extra newspaper inwards flat on the bottom of the can
(this creates the base of the pot). 5. Remove the can from inside the newspaper pot. 6. Fill with compost and plant seeds. Record progress in a journal book. 7. When plants have grown large enough to plant outside, you can plant the entire pot in the ground. The newspaper
will degrade into the soil. Lesson Extender: You can also turn empty tissue rolls into little boxes that are just the right size for starting plants! 1. Collapse the empty tissue roll by setting it on its side and pressing it flat so that it forms a rectangle. 2. Placing it so that one of the long sides is closest to you, cut a vertical line down the middle of the roll. Be sure to cut
through both layers of the cardboard. 3. Select one half of the roll and pop it back to its original shape. It will look more square than round. Make 4 cuts along
one of the open ends. Cuts should be approximately 1/2” deep and equidistance apart. These are your flaps. 4. Crease each of the flaps by folding inward. 5. Now fold the flaps closed as you would the flaps on a box. 6. Set your seed starter pot upright so that it rests on the folded flaps. Place on a tray or plate to keep from leaking. 7. Fill with potting soil, seeds, and water. These can also be planted in the ground once the plant is large enough.
Bio-degradable Planter
Page | 5
A garden is a planned space, usually outdoors, set aside for the display, cultivation, and enjoyment of plants and other forms of nature. Gardens have a lot of needs and careful planning is necessary to have a successful garden.
Site Analysis Size and Existing Features: Be aware of the available land and leave room for growth. Have the students measure the parameters of the proposed site. They also need to make note of pathways, fences, water sources, shaded areas, etc. Sketching a garden layout is a good plan! A good size is about 16x10 feet, with 11 rows that are 10 feet long. The rows should run north and south to take full advantage of the sun.
Soil: A nutrient-rich soil with good texture will help your garden advance. Buying a “do-it-yourself” soil kit will help determine the amount of sand, silt, and clay needed. You should also test the pH and nutrient content. The kits are located at most garden centers. Researching the history of the potential garden site is also very important. If the schoolyard soil is not suitable for gardening, you can garden in raised beds or containers.
Sunlight: Most flower, vegetable and herb gardens need to be exposed to full sunlight for at least six hours a day. Students will need to check the potential garden site at different times during the day and year to see how much sun it is receiving. The students will also need to determine the path of sunlight to anticipate shadows. Use the shade areas for gathering places or to plant shade-tolerant crops such as lettuce.
Water Sources: Having access to water is essential for gardening, and the closer the water is to the garden the better. There are various water systems to consider: watering cans, garden hose, drip irri-gation or overhead watering. Drip irrigation and water-conserving sprinkler systems are the most used and time efficient way for watering a garden.
Water Drainage: How water moves through the site is also important. You don’t want to plant a garden in a low level plain area unless you are planting a wetland or water plants. You will need to visit the site after a rain to check for puddles or to see if it drains away. Both slope and soil type will affect the drainage. Accessibility: It is important that your site be easily accessible both during class time and outside class. A garden close to the classroom is easier to incorporate into the curriculum on a regular basis. The path to the garden needs to be level and handicap accessible. Placing the garden in a visible location is important to all students, teachers, parents, and community members so they can enjoy its beauty.
Outdoor Garden Care/Needs
Page | 6
Pest Management: Pull out any weak plants that may already be infected. Make sure you dispose of the plants away from the garden area to keep predators away. Building healthy soil is helpful. Minimize insect habitats by keeping the garden clear of debris and weeds, which are breeding places for insects. Interplant and rotate crops. When plants are mixed, pests are less likely to spread throughout a crop. Ro-tating crops each year is a common method to avoid re-infestation of pests which have over-wintered in the bed. Keep foliage dry. Water early so foliage will be dry for most of the day. Wet foliage encourages insect and fungal damage to your plants. Lastly, disinfect your tools before moving on to other garden are-as.
Security and Safety: Be careful choosing your site. Do not choose a site near a road with heavy traffic. You may want to use fences to help with protection on the weekends and during extended breaks.
Future Uses: You will want to check with the school principal and administrators about long-term plans for your site. You wouldn't want to invest large amounts of energy and money in a site that may be-come a new classroom wing or an add-on to a playground.
Inventory Garden Beds: You can create the beds in various shapes and sizes. You should keep the growing area no more than 4 feet wide (so everyone can reach all the plants). You can choose to have rectangular beds evenly in rows, but some avoid doing that to leave room for creative inspiration. Some try circular gardens, or even scatter beds of different sizes and shapes throughout the garden site. It is YOUR gar-den, so be creative! Paths: Paths reduce the risk that plants will get stepped on. Making main pathways 4 to 6 feet wide accommodate wheelchairs and wheelbarrows. The garden also needs to be kept weed-free.
Gathering Places: Students need a place in the garden to gather. A shady part of the garden, a picnic table, or a bench would work well. This will be a place to clean and sort vegetables, conduct out-door lessons, do arts and crafts, write in journals, or read while also enjoying the garden. Storage Area: Having a toolshed or storage area is helpful for organizing, cleaning, and protecting the tools and equipment.
Compost Area: Having a compost pile is a great learning spot and is helpful to our environment. Students can convert garden and lunchroom waste into a rich, soil-building ingredient making observations of decomposition. Weather Station: Having weather watchers can help determine how different factors affect the gar-den life.
Outdoor Garden Care/Needs
Page | 7
The Tasty Pizza Garden
What kinds of herbs and vegetables would YOU plant in your pizza garden? Check out the exam-ples on page 9 to see what you can plant. You can even grow your garden in the shape of a pizza!
Common Core State Standards: Language Arts: CCSS.ELA-Literacy.RI.2.10; RL.2.10; W.2.1 Mathematics: CCSS.Math.Content.2.G.A.3; 2.MD.A.1
Suggested Reading Materials: Ag Mags: Pizza Ag Mag Specialty Crop Ag Mag
Terra Nova: Wheat, Pizza, Dairy
mAGic Kit: Wheat (The mAGic kit is available to you by contacting your Ag Literacy Coordinator. You can find your county’s coordinator on our website). www.agintheclassroom.org
Books: Growing Things (Usborne) by Angela Wilkes; ISBN 978-0860208570 How Groundhog’s Garden Grew by Lynne Cherry; ISBN 978-0-439-32371-0 The Vegetables We Eat by Gail Gibbons; ISBN-13 978-0-8234-2153-4 Tops and Bottoms by Janet Stevens; ISBN 0-15-292851-0 Up, Down, and Around by Katherine Ayres; ISBN 978-0-7636-4017-0 Lily’s Garden by Deborah Kogan Ray; ISBN 0-7613-1593-4 Hold The Anchovies! A Book about Pizza by Shelley Rotner & Julia Pemberton Hellums; ISBN 0-531-09507-X Extra Cheese, Please! Mozzarella's Journey from Cow to Pizza by Cris Peterson; ISBN-13 978-1590782460 The Little Red Hen (Makes a Pizza) by Philemon Sturges & Amt Walrod; ISBN-13 978-0142301890 Pizza for the Queen by Nancy Castaldo; ISBN 0-8234-1865-0 Farmer George Plants a Nation by Peggy Thomas & Layne Johnson; ISBN-13 978-1590784600
Page | 8
The Tasty Pizza Garden
Background Information:
Most everyone enjoys cheese on the top of their pizza. We can’t grow cheese in our garden, but we know that cheese comes from a dairy cow. California, Wisconsin, Idaho, New York, and Pennsylvania are the top five milk producing states in the country.
Fun Fact! Plant marigolds with basil and tomatoes. Marigolds have a chemical in them called pyrethrin, which smells bad to insects and will keep them away!
Page | 9
Tomatoes
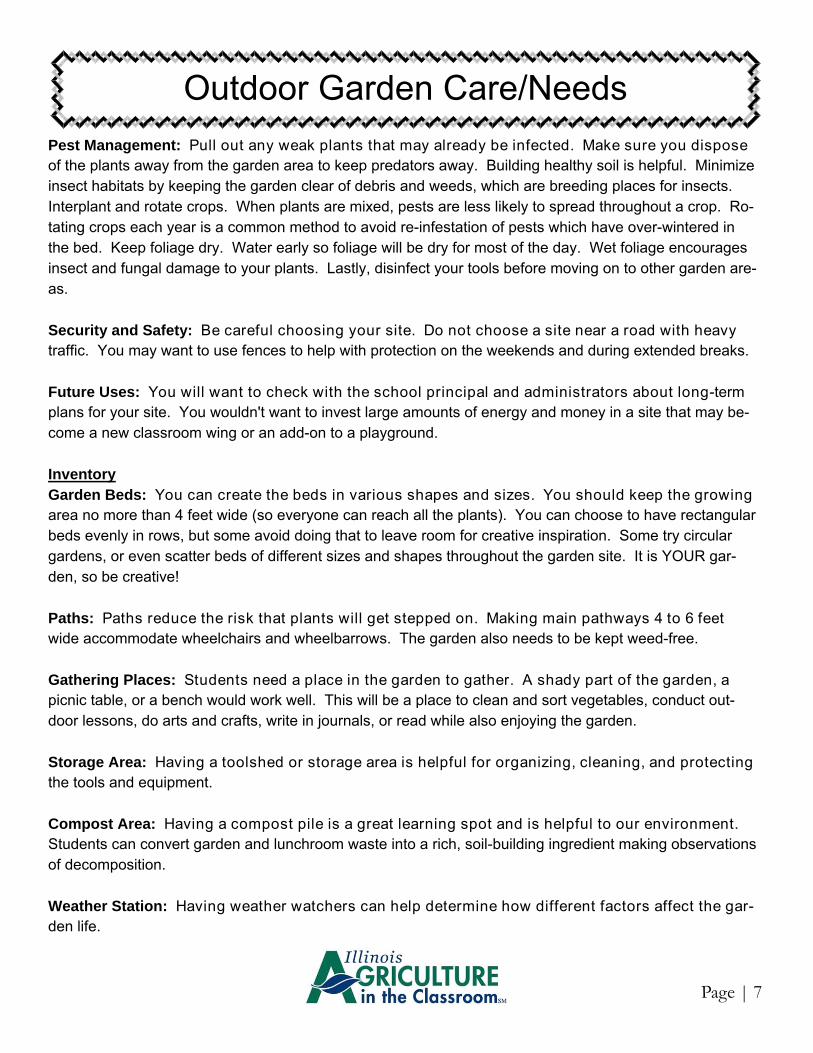
A paste tomato variety, such as Roma, is recommended. Roma tomatoes are good canning and sauce tomatoes. Plant 1 tomato plant in your pizza garden.
Wheat
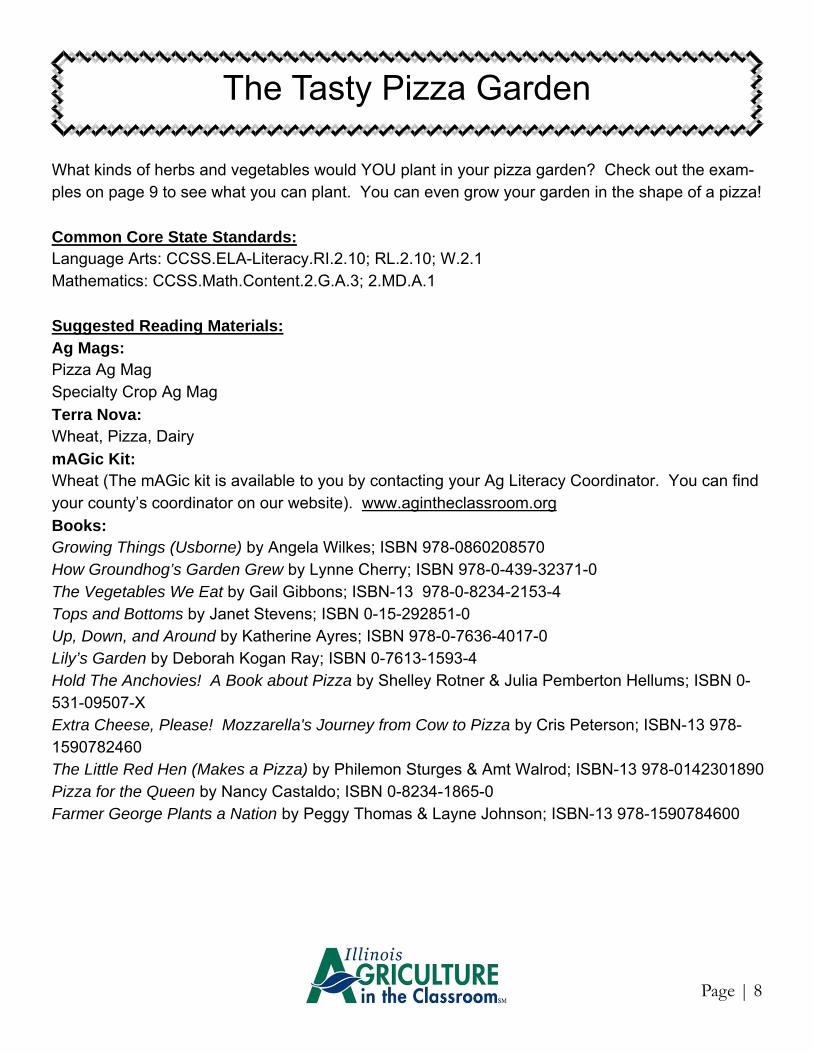
Hard Spring Red Wheat is planted in the Northern Plains States where the winters are too severe for winter wheat production. The rich, black soil and dry, hot summers make it ideal. It is primarily to make breads. Most farmers in Illinois plant soft red winter wheat. This wheat can be grown in more humid environments. It is mostly used to make cakes, cookies and snacks.
Onions
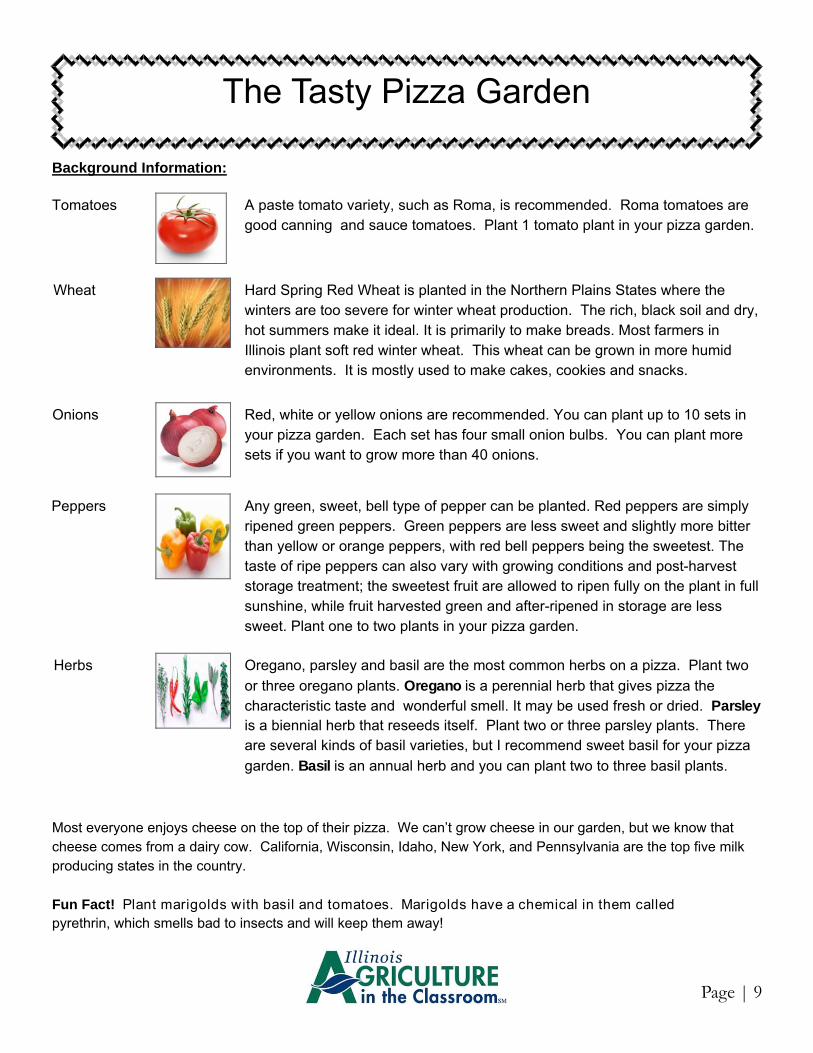
Red, white or yellow onions are recommended. You can plant up to 10 sets in your pizza garden. Each set has four small onion bulbs. You can plant more sets if you want to grow more than 40 onions.
Peppers
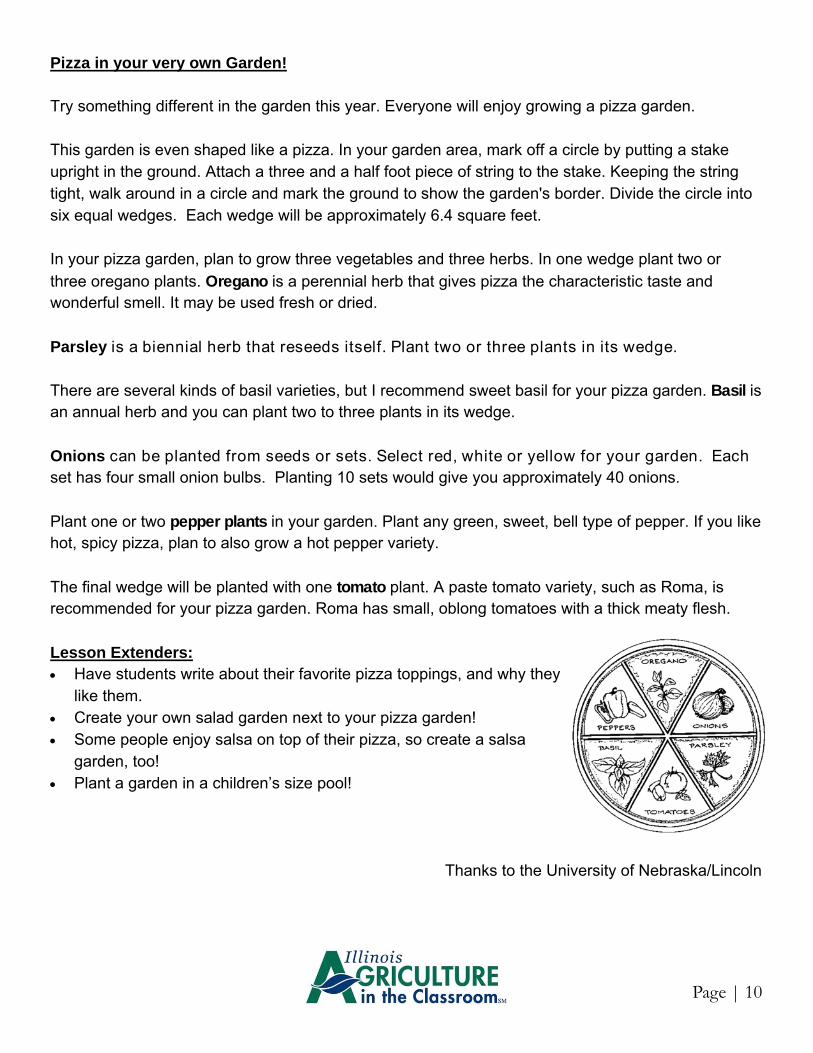
Any green, sweet, bell type of pepper can be planted. Red peppers are simply ripened green peppers. Green peppers are less sweet and slightly more bitter than yellow or orange peppers, with red bell peppers being the sweetest. The taste of ripe peppers can also vary with growing conditions and post-harvest storage treatment; the sweetest fruit are allowed to ripen fully on the plant in full sunshine, while fruit harvested green and after-ripened in storage are less sweet. Plant one to two plants in your pizza garden.
Herbs
Oregano, parsley and basil are the most common herbs on a pizza. Plant two
or three oregano plants. Oregano is a perennial herb that gives pizza the characteristic taste and wonderful smell. It may be used fresh or dried. Parsley is a biennial herb that reseeds itself. Plant two or three parsley plants. There are several kinds of basil varieties, but I recommend sweet basil for your pizza
garden. Basil is an annual herb and you can plant two to three basil plants.
Pizza in your very own Garden! Try something different in the garden this year. Everyone will enjoy growing a pizza garden. This garden is even shaped like a pizza. In your garden area, mark off a circle by putting a stake upright in the ground. Attach a three and a half foot piece of string to the stake. Keeping the string tight, walk around in a circle and mark the ground to show the garden's border. Divide the circle into six equal wedges. Each wedge will be approximately 6.4 square feet. In your pizza garden, plan to grow three vegetables and three herbs. In one wedge plant two or
three oregano plants. Oregano is a perennial herb that gives pizza the characteristic taste and wonderful smell. It may be used fresh or dried.
Parsley is a biennial herb that reseeds itself. Plant two or three plants in its wedge.
There are several kinds of basil varieties, but I recommend sweet basil for your pizza garden. Basil is an annual herb and you can plant two to three plants in its wedge. Onions can be planted from seeds or sets. Select red, white or yellow for your garden. Each set has four small onion bulbs. Planting 10 sets would give you approximately 40 onions.
Plant one or two pepper plants in your garden. Plant any green, sweet, bell type of pepper. If you like hot, spicy pizza, plan to also grow a hot pepper variety.
The final wedge will be planted with one tomato plant. A paste tomato variety, such as Roma, is recommended for your pizza garden. Roma has small, oblong tomatoes with a thick meaty flesh. Lesson Extenders: Have students write about their favorite pizza toppings, and why they
like them. Create your own salad garden next to your pizza garden! Some people enjoy salsa on top of their pizza, so create a salsa
garden, too! Plant a garden in a children’s size pool!
Thanks to the University of Nebraska/Lincoln
Page | 10
What do you plant in your garden to make a peanut butter and jelly sandwich? You would need to plant pea-nuts, wheat and strawberries.
Common Core State Standards: Language Arts: CCSS.ELA-Literacy.RI.2.10; RL.2.10; SL.2.2; W.2.3; W.2.8 Mathematics: CCSS.Math.Content.3.MD.A.2
Suggested Reading Materials: Ag Mags: Specialty Crop Ag Mag
Terra Nova: Wheat
Books: Pick, Pull, Snap by Lola M. Schaefer; ISBN-13 978-0-668-17834-5 In the Garden with Dr. Carver by Susan Grigsby; ISBN 978-0-8075-3630-8 The Giant Jam Sandwich by John Vernon Lord; ISBN-13 978-0-395-44237-1 Peanut Butter and Jelly by Nadine Bernard Westcott; ISBN-13 978-0140548525 Farmer George Plants a Nation by Peggy Thomas; ISBN-13 978-1590784600 Plant Plumbing by Susan Blackaby; ISBN 1-4048-0109-X
Background Information:
Peanut Butter Jelly Time
Page | 11
Fun Facts! It takes about 540 peanuts to make a 12-ounce jar of peanut butter!
There are enough peanuts in one acre to make 30,000 peanut butter sandwiches.
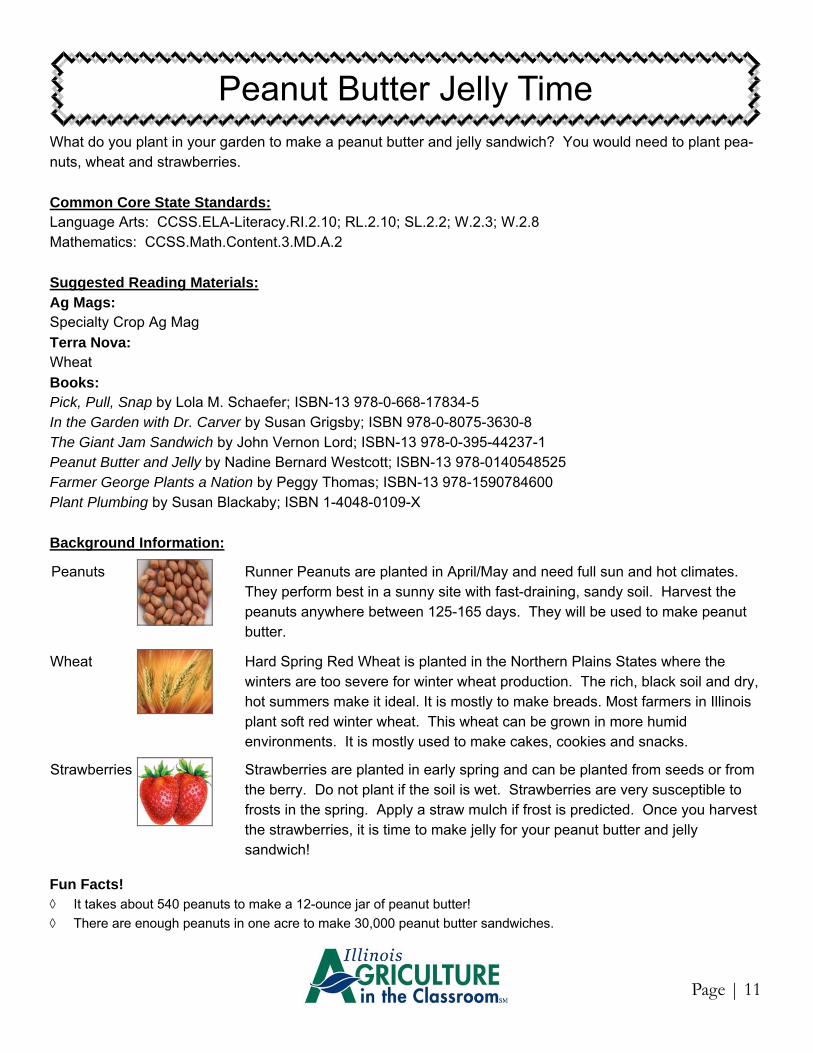
Peanuts
Runner Peanuts are planted in April/May and need full sun and hot climates. They perform best in a sunny site with fast-draining, sandy soil. Harvest the peanuts anywhere between 125-165 days. They will be used to make peanut butter.
Wheat
Hard Spring Red Wheat is planted in the Northern Plains States where the winters are too severe for winter wheat production. The rich, black soil and dry, hot summers make it ideal. It is mostly to make breads. Most farmers in Illinois plant soft red winter wheat. This wheat can be grown in more humid environments. It is mostly used to make cakes, cookies and snacks.
Strawberries
Strawberries are planted in early spring and can be planted from seeds or from the berry. Do not plant if the soil is wet. Strawberries are very susceptible to frosts in the spring. Apply a straw mulch if frost is predicted. Once you harvest the strawberries, it is time to make jelly for your peanut butter and jelly sandwich!
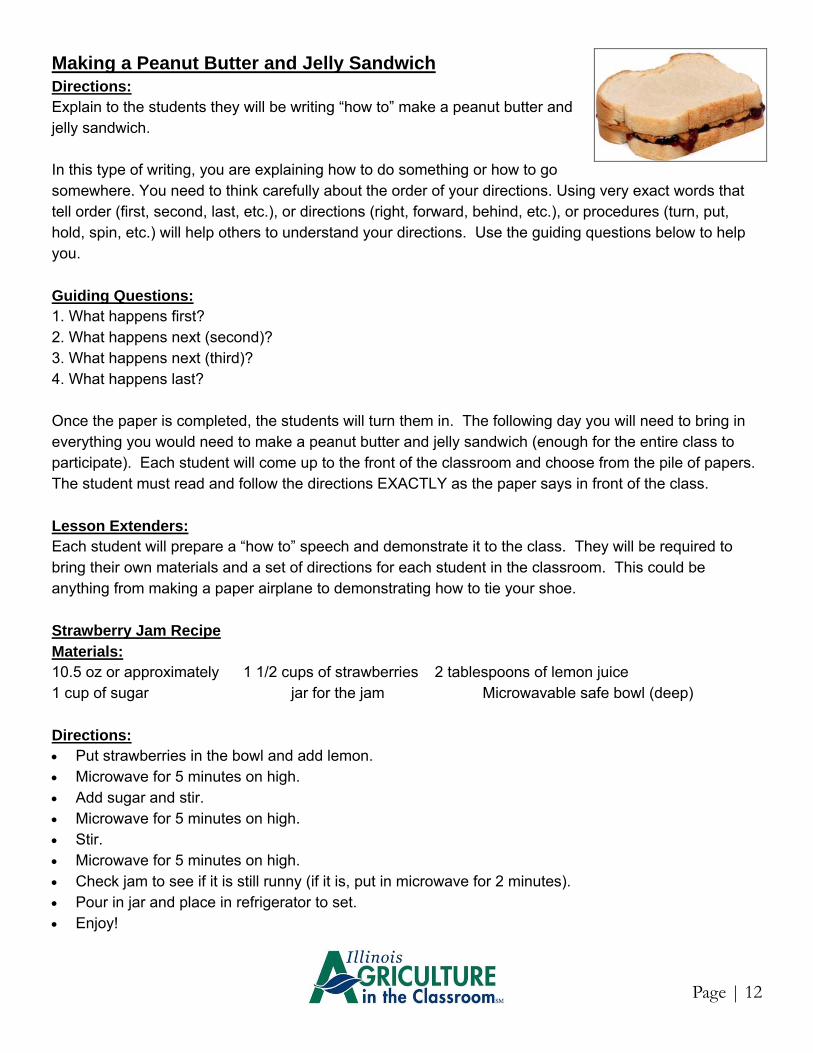
Making a Peanut Butter and Jelly Sandwich Directions: Explain to the students they will be writing “how to” make a peanut butter and jelly sandwich. In this type of writing, you are explaining how to do something or how to go somewhere. You need to think carefully about the order of your directions. Using very exact words that tell order (first, second, last, etc.), or directions (right, forward, behind, etc.), or procedures (turn, put, hold, spin, etc.) will help others to understand your directions. Use the guiding questions below to help you.
Guiding Questions: 1. What happens first? 2. What happens next (second)? 3. What happens next (third)? 4. What happens last? Once the paper is completed, the students will turn them in. The following day you will need to bring in everything you would need to make a peanut butter and jelly sandwich (enough for the entire class to participate). Each student will come up to the front of the classroom and choose from the pile of papers. The student must read and follow the directions EXACTLY as the paper says in front of the class.
Lesson Extenders: Each student will prepare a “how to” speech and demonstrate it to the class. They will be required to bring their own materials and a set of directions for each student in the classroom. This could be anything from making a paper airplane to demonstrating how to tie your shoe.
Strawberry Jam Recipe Materials: 10.5 oz or approximately 1 1/2 cups of strawberries 2 tablespoons of lemon juice 1 cup of sugar jar for the jam Microwavable safe bowl (deep)
Directions: Put strawberries in the bowl and add lemon. Microwave for 5 minutes on high. Add sugar and stir. Microwave for 5 minutes on high. Stir. Microwave for 5 minutes on high. Check jam to see if it is still runny (if it is, put in microwave for 2 minutes). Pour in jar and place in refrigerator to set. Enjoy!
Page | 12

An alphabet garden is full of fruits and vegetables! The class will decide what they want to plant (as long as you have a different fruit or vegetable for each letter of the alphabet). Your class will also decide together if they want to plant something for each letter or just pick a few.
Common Core State Standards: Language Arts: CCSS.ELA-Literacy.RI.2.10; RL.2.10; W.2.1; W.2.7
Next Generation Science Standards: Matter and It’s Interactions: 2-PS1-2
Suggested Reading Materials: Ag Mags: Corn Nutrition Pumpkin Specialty Crop
Terra Nova: Corn Pumpkins
Books: Alphabet Soup: A Feast of Letters by Scot Gustafson; ISBN 978-0867130256 An Edible Alphabet by Carol Watterson; ISBN 978-1-58246-421-3 Eating the Alphabet: Fruits and Vegetables from A-Z by Lois Elhert; ISBN 978-0152244361 Harvest Year by Cris Peterson; ISBN-13: 9781590787830 How Groundhog’s Garden Grew by Lynne Cherry; ISBN 978-0-439-32371-0 Taste by Sue Hurwitz; ISBN 978-0823950522 The Vegetables We Eat by Gail Gibbons; ISBN-13: 978-0-8234-2153-8 Up, Down, & Around by Katherine Ayres; ISBN 978-0-7636-4017-0
Let’s Plant an Alphabet Garden!
Page | 13
Background Information: Fall Tasting Party
Materials Needed: A wide variety of fruits and vegetables Napkins/paper towels Dixie cups or small paper plates Silverware and serving utensils as needed Directions: 1. Teachers will prepare fresh, canned, dried, and/or frozen fruits and vegetables for students to taste test and evaluate. 2. Students will record what was tasted, whether or not they liked it, whether it is a fruit or a vegetable and whether or not it
should be included on the menu, and why. Describe the size, shape, color, texture, taste and smell of each fruit or vegetable. The tasting area could be decorated with posters of fruits and vegetables and each item should have a name card that identifies what it is.
Lesson Extenders: 1. Teach the differences between fruits and vegetables, where and how they are grown, how they are eaten, which parts
are eaten (leaves, seeds, roots, etc.) and why they are good for you. 2. Have an A-to-Z spelling bee using the names of fruits and vegetables as the words. 3. Play “Apple, Apple, Squash” (Duck, Duck, Goose). 4. Have a sing-along using songs about fruits/vegetables—i.e. “Apples and Bananas.” 5. Make a cookbook of the students’ favorite fruit and vegetable recipes to take home or for the classroom library. 6. Study each state (what each state grows, what the state is known for, fun facts, etc). You will need a large map of the United States that you could bring outside with you or even into the gymnasium. Once the map is laid out, you will bring out your container garden and start the game! The students will be asked questions about the state and they will have to roll the container garden to the correct state. If they guess the state correctly, they will move on to the next round. This is a good way for students to learn more about plants and where they come from. 7. Write an acrostic poem about a fruit or vegetable from the book, Eating the Alphabet by Lois Ehlert; ISBN 978-0-15-
224436-1 Example: So tasty Afternoon meal Leafy greens A lot of vegetables Dressing on top
Page | 14
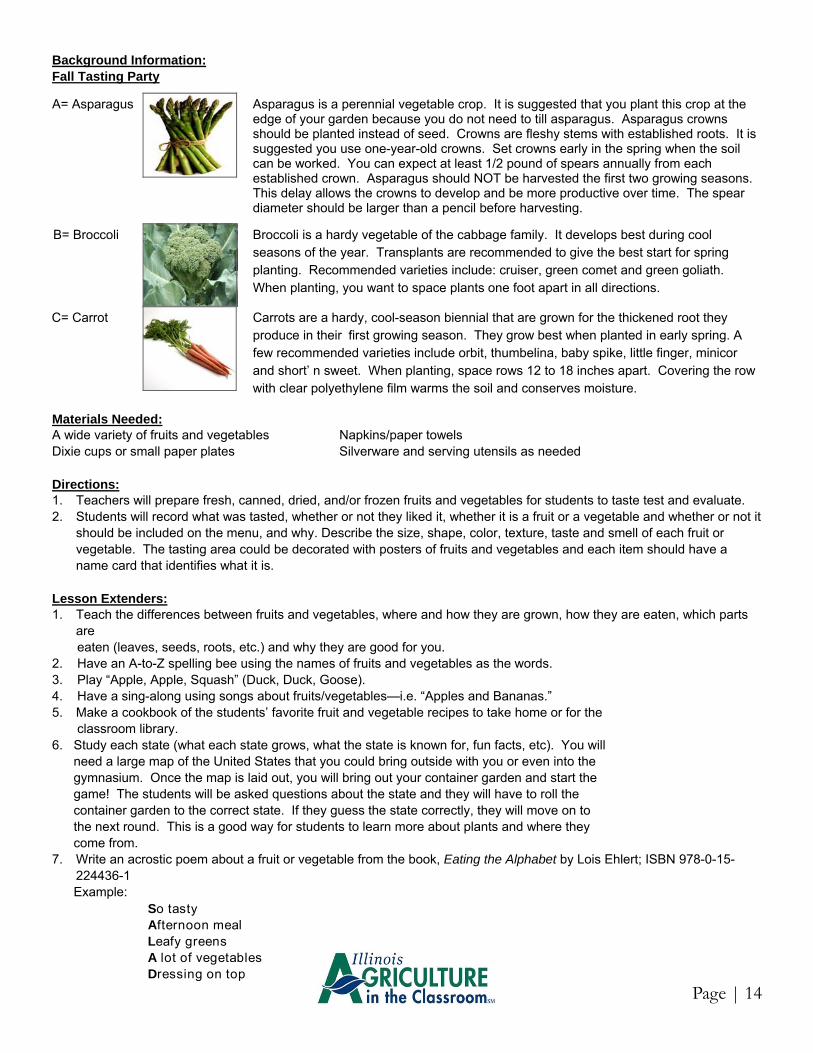
A= Asparagus
Asparagus is a perennial vegetable crop. It is suggested that you plant this crop at the edge of your garden because you do not need to till asparagus. Asparagus crowns should be planted instead of seed. Crowns are fleshy stems with established roots. It is suggested you use one-year-old crowns. Set crowns early in the spring when the soil can be worked. You can expect at least 1/2 pound of spears annually from each established crown. Asparagus should NOT be harvested the first two growing seasons. This delay allows the crowns to develop and be more productive over time. The spear diameter should be larger than a pencil before harvesting.
B= Broccoli
Broccoli is a hardy vegetable of the cabbage family. It develops best during cool seasons of the year. Transplants are recommended to give the best start for spring planting. Recommended varieties include: cruiser, green comet and green goliath. When planting, you want to space plants one foot apart in all directions.
C= Carrot
Carrots are a hardy, cool-season biennial that are grown for the thickened root they produce in their first growing season. They grow best when planted in early spring. A few recommended varieties include orbit, thumbelina, baby spike, little finger, minicor and short’ n sweet. When planting, space rows 12 to 18 inches apart. Covering the row with clear polyethylene film warms the soil and conserves moisture.
Having a school garden is fun, but having a school garden with GIANT cabbages...WOW! Common Core State Standards: Language Arts: CCSS.ELA-Literacy.RI.2.10; RL.2.10; W.2.7; W.2.8 Mathematics: CCSS.Math.Content.2.MD.A.1; 2.MD.A.2; 2.MD.A.3; 2.MD.A.4; 2.MD.D.9; 2.MD.D.10
Next Generation Science Standards: Ecosystems: Interactions, Energy, and Dynamics: 2-LS2-1 Biological Evolution: Unity and Diversity: 2-LS4-1
Suggested Reading Materials: Books: The Giant Cabbage (An Alaska Folktale) by Cherie B. Stihler; ISBN-13: 978-157061-357-9 Plantzilla by Gerdine Nolen; ISBN-10: 0152024123
Background Information: Materials Needed: Cabbage Growth Journal Hand lens Centimeter ruler Meter sticks Chart paper
Engagement Activity: 1. Begin by creating a “KWL” chart. Ask students what they already know about cabbage (K). 2. Next, ask students what they want to know about cabbage (W). 3. Lastly, once the unit is completed, ask the students what they have learned (L).
The GIANT Cabbage
Page | 15
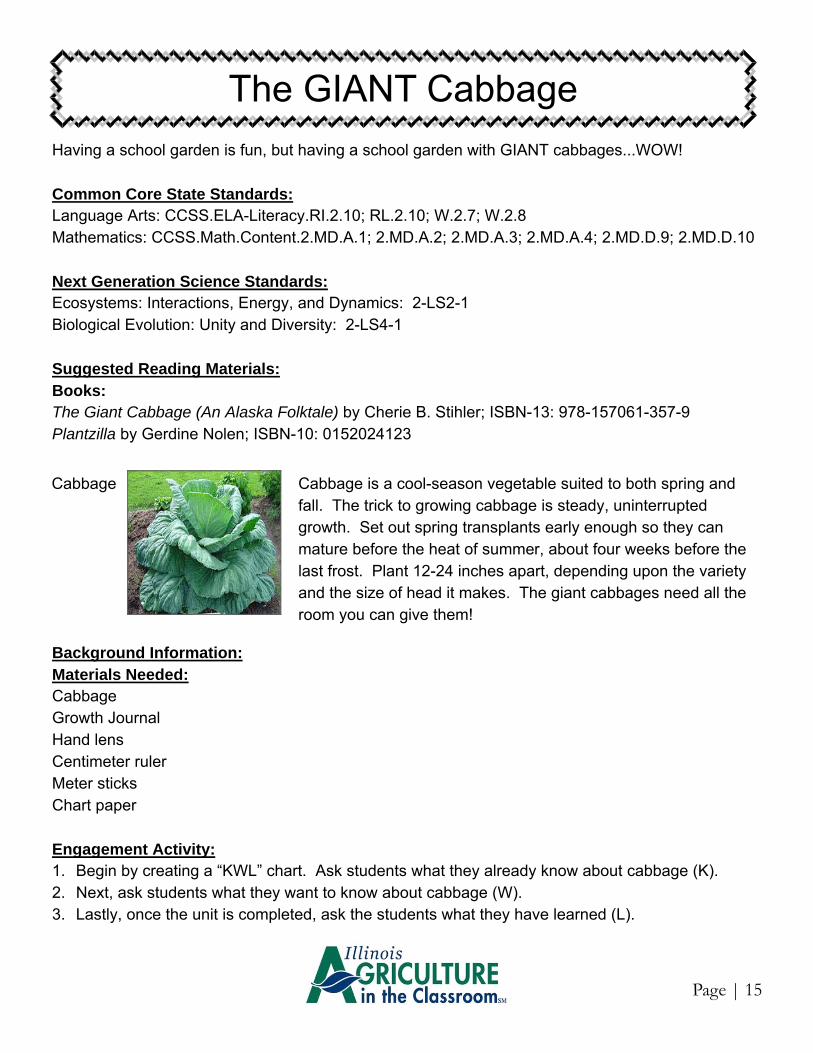
Cabbage
Cabbage is a cool-season vegetable suited to both spring and fall. The trick to growing cabbage is steady, uninterrupted growth. Set out spring transplants early enough so they can mature before the heat of summer, about four weeks before the last frost. Plant 12-24 inches apart, depending upon the variety and the size of head it makes. The giant cabbages need all the room you can give them!
Bonnie Plants Cabbage Program Activity 1. Introduce students to the Bonnie Plants 3rd Grade Cabbage Program. 2. Distribute plants to students. Have students spend a couple of minutes sketching their new
cabbage plant. Encourage students to be as detailed as possible since their cabbage plant will soon undergo many changes.
3. Next, have students record the date and age of the plant (approximately 28 days old when delivered). Note: Before measuring the height and diameter of the plants, youʼll want to ensure that your students are familiar with these concepts, as well as how to take accurate measurements. Youʼll also want to set some parameters for measuring. For example, you may want to start at the soil line when measuring height, and measure the outermost leaves when looking for diameter.
4. Students need to record measurements and observations each week for 12 weeks. 5. Finally, students will color in the height and diameter on the respective growth bar graphs. Guiding Questions: • Which weeks had the greatest difference in growth? The least? • During which weeks did you notice the most growth? • What questions have you developed about your plants’ growth? • What unexpected observations have you made? • What predictions do you have about next week’s growth? • How does your plant’s growth differ from your partner’s? • Do you think all plants will grow at the same rate?
On-going Assessments: • Are students correctly measuring the height and diameter using the metric system? • Are students able to identify the difference in the amount of growth from one week to the next? • Are student observations, sketches, and inquiries complete and on-task?
Extension Idea: Use a Venn Diagram to compare and contrast your cabbage plant with another student’s plant. For more information: bonnieplants.com
Page | 16
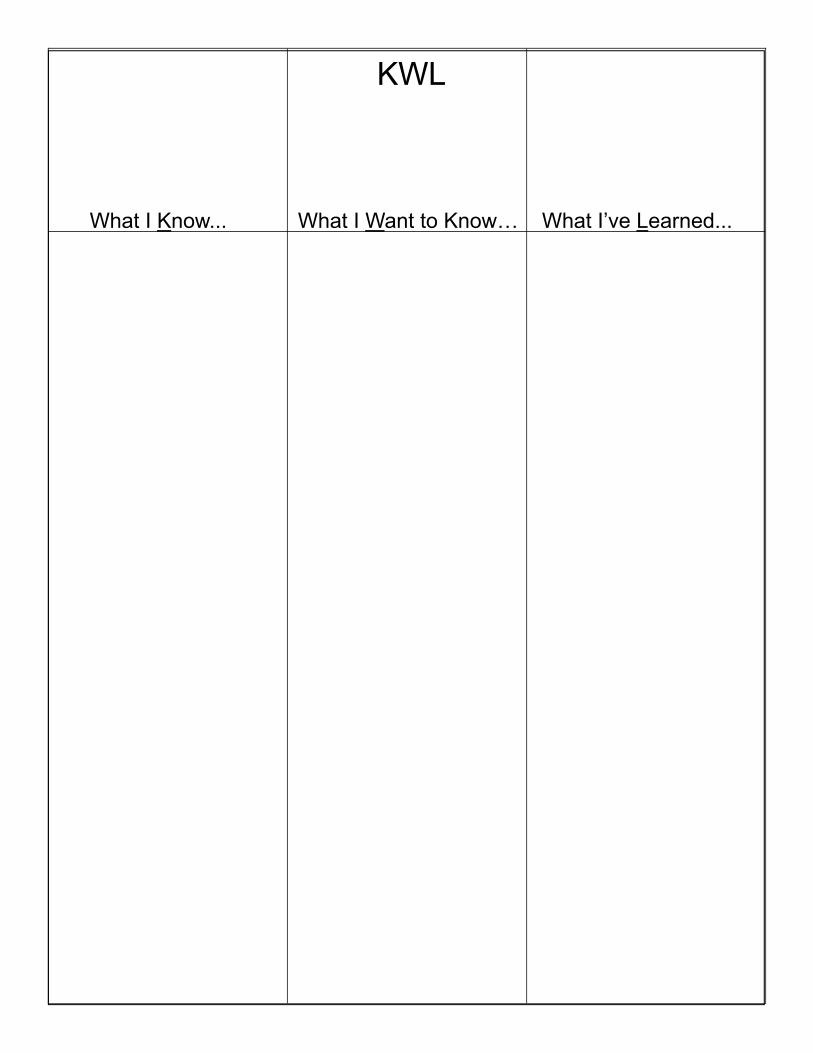
KWL What I Know... What I Want to Know… What I’ve Learned...

Date
Age
Height
+/-
Diameter
+/-
Growth Recording Chart
You will be creating a Sunflower House in your garden! All you need to plant are sunflowers. If you plant the seeds in a circle, you will have a “Sunflower House,” which is a nice reading/play spot. Check out the book Sunflower House by Eve Bunting to see what this house looks like!
Common Core State Standards: Mathematics: CCSS.Math.Content.2.MD.A.1; 2.MD.A.2; 2.MD.A.4; 2.MD.D.9 Suggested Reading Materials: Books: The Tiny Seed by Eric Carle; ISBN 978-0689872303 Sunflower House by Eve Bunting; ISBN-13: 978-0152019525
Materials Needed: Yellow construction paper Pencil Sunflower seeds Ruler Scissors Glue
Directions: 1) Work in pairs to trace each other’s hands (5 times) on the one color you choose for your petals. 2) Give the students time to cut out their own hands (that were traced). 3) Have a template already made (on green construction paper) with four leafs. They can share
with their partners and cut out their two leafs. 4) Give each child sunflower seeds to use for the center of their flowers. Take time to discuss sun-
flower seeds. 5) Once the students have the flower put together, now have them make the stems! 6) To make the stems, the students will measure each other with a ruler. They will make their stem
as long as they are tall. Then you will help them finish their flowers. 7) You can display their flowers in the hallway. Before doing that, you can have the class put their
flowers in order from the tallest to the shortest flower. 8) Repeat this activity towards the end of the school year to see how much their “flower” has grown!
Sunflower House
Page | 21
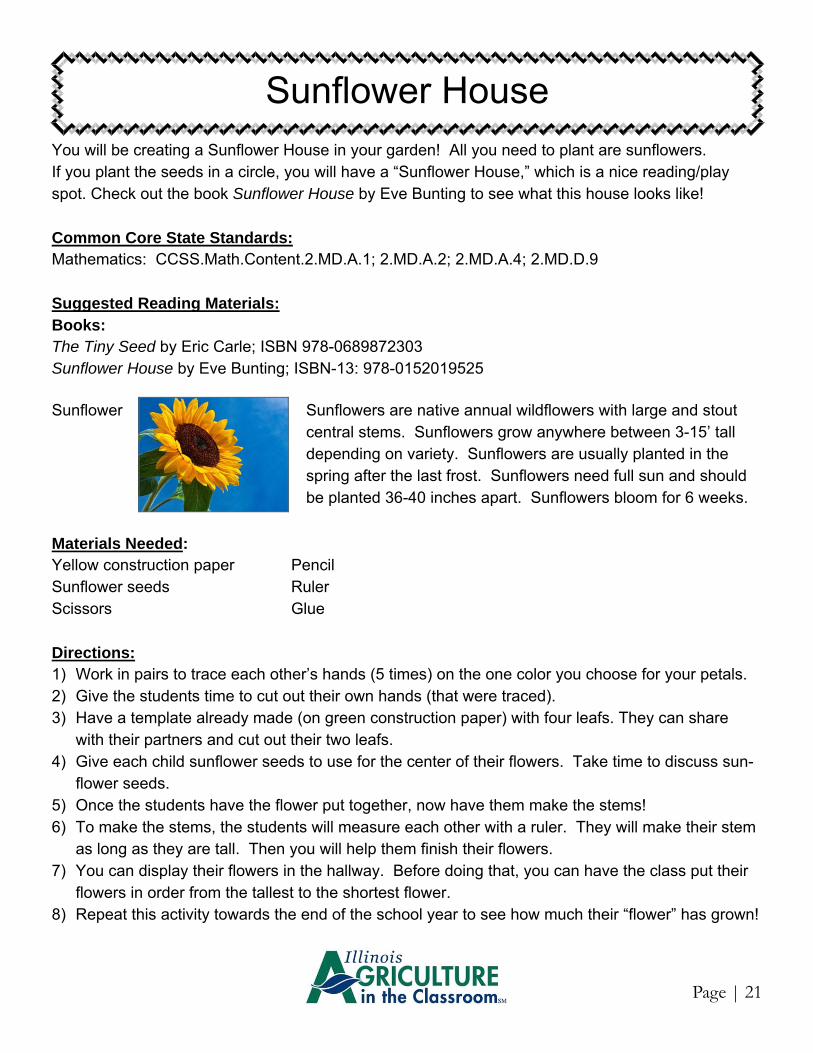
Sunflower Sunflowers are native annual wildflowers with large and stout central stems. Sunflowers grow anywhere between 3-15’ tall depending on variety. Sunflowers are usually planted in the spring after the last frost. Sunflowers need full sun and should be planted 36-40 inches apart. Sunflowers bloom for 6 weeks.
Lesson Extenders: Talk about the seasons and how flowers and trees change throughout the seasons. Plant Morning Glory seeds in honor of Earth Day (April 22nd). Ask the children what plants give
us (food, shelter, medicine, & oxygen). Celebrate Arbor Day (the last Friday in April). Make leaf rubbings of various leaves. How are they similar and different?
Save The Seeds! 1. Once you determine that your sunflowers are healthy and are ready for harvest you will need to cut the seed heads. Be sure to leave about a foot of stem still attached. 2. Place your flower heads in a paper bag. 3. Be sure the bag has holes (a hole punch makes this step easy). 4. Secure the bag with a twist tie. 5. Hang your flowers (stems up) in a warm, dry, well-ventilated area. The paper bag will catch falling florets and seeds as they drop during the drying process. 6. Store your seeds in an airtight container and in a cool, dark and dry location until you plant.
Roasting Sunflower Seeds! 1. Use raw unshelled mature seeds. 2. Place seeds in a large pot of salted water (two quarts of water to 1/4 to 1/2 cups salt). 3. Bring to a boil, and soak overnight. 4. Drain and dry on absorbent paper. 5. Put sunflower seeds in a shallow pan in a 300 degree oven for 30 to 40 minutes or until golden
brown, stirring occasionally. 6. Take out of the oven, toss with a little melted butter and add more salt to taste.
Page | 22
Edamame, soybeans, it’s all the same, right? Not quite. There are many varieties of soybeans grown for different purposes. Plant both types and see the difference!
Common Core State Standards: Language Arts: CCSS.ELA-Literacy.RI.2.10; RL.2.10; W.2.2; W.2.7 Mathematics: CCSS.Math.Content.2.MD.A.1; 2.MD.A.2; 2.MD.A.4; 2.MD.D.10
Next Generation Science Standards: Matter and It’s Interactions: 2-PS1-1; 2-PS1-2 Engineering Design: K-2-ETS1-3
Suggested Reading Materials: Ag Mags: Soybean Ag Mag
Terra Nova: Soybean
Books: Auntie Yang’s Great Soybean Picnic by Ginnie Lo; ISBN 978-1-60060-442-3 The Super Soybean by Rayond Bial; ISBN 978-0-8075-7549-9 Soybeans in the Story of Agriculture by Susan Anderson & JoAnne Buggey; ISBN 978-0-9811335-2-2
Background Information:
Page | 23
Edamame vs. Conventional Soybeans
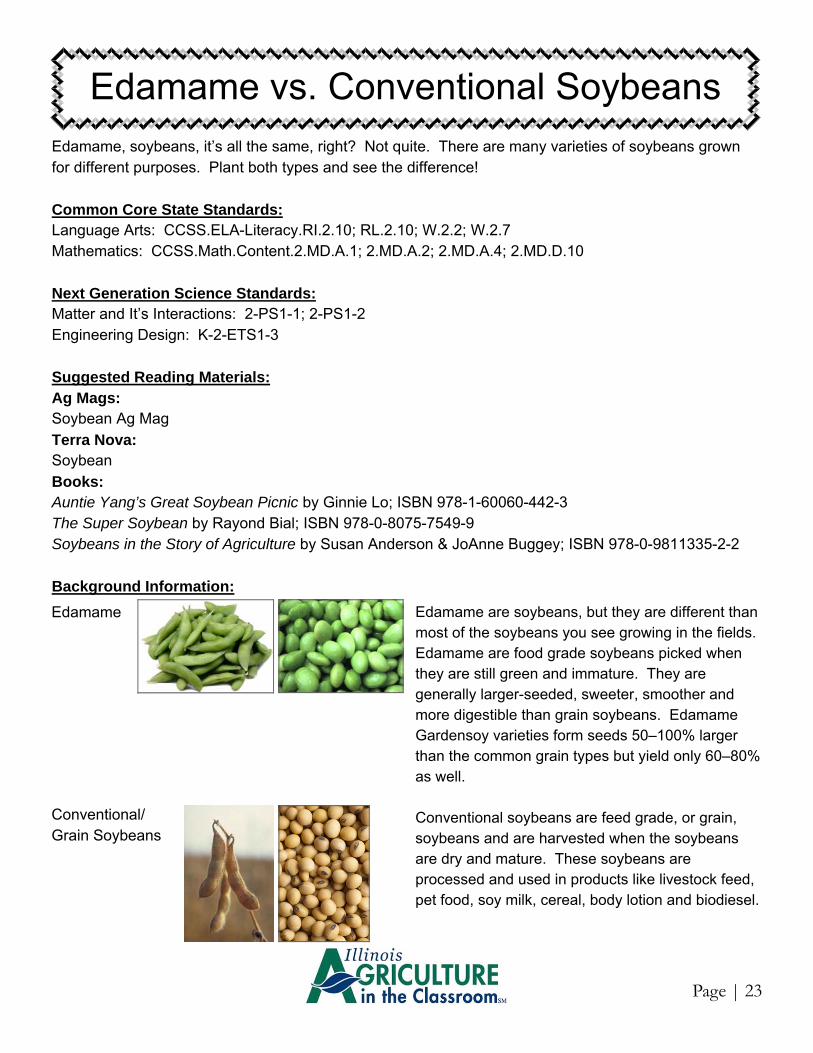
Edamame
Conventional/Grain Soybeans
Edamame are soybeans, but they are different than most of the soybeans you see growing in the fields. Edamame are food grade soybeans picked when they are still green and immature. They are generally larger-seeded, sweeter, smoother and more digestible than grain soybeans. Edamame Gardensoy varieties form seeds 50–100% larger than the common grain types but yield only 60–80% as well. Conventional soybeans are feed grade, or grain, soybeans and are harvested when the soybeans are dry and mature. These soybeans are processed and used in products like livestock feed, pet food, soy milk, cereal, body lotion and biodiesel.
Cultivation: Soybeans should be sown after all danger of frost has passed and the soil has warmed. In the
Midwest, soybeans are usually planted between May and mid-June. The vegetable/edamame varieties are no different.
Once the soil is warmed, seeds should be planted in full sun, about one inch deep, two to three inches apart in rows that are spaced 15-30 inches apart. Soybeans planted densely will form a canopy, which will help control weed growth. The soil should be kept moist, not wet, until the plants are established.
A mature edamame variety is about 2 to 3 feet tall. The seeds/pods are harvested by hand once the pods are filled out, and are used in this "green" stage. They are tender and cook quickly. Conventional/grain soybeans can grow to nearly 5 feet tall. They are harvested by a machine, called a combine, when the plant and pods have dried. The ideal moisture content of the soybean inside is around 13%. These soybeans are processed into soybean meal or oil to be used in other products.
Directions: Give students soybean seeds from a garden/edamame variety as well as a conventional/grain
variety. Have students keep a soybean journal to compare and contrast the two varieties of plants. The
date and height of the plant should be noted on each journal entry. Students should measure items in both the vegetative and reproductive stages. Use the following as a guide:
1. Date of planting 5. Full pod 2. Emergence 6. Full seed (green seed fills pod) 3. Appearance of first trifoliate 7. Harvest date (this will vary—edamame is harvested in an
4. Beginning flowering immature state-conventional are harvested when fully mature & dry)
Lesson Extenders: Use the IAITC Beanie Baby activity to watch soybeans germinate in a baggie! You can find it
under Teacher Resources on our website: www.agintheclassroom.org Have students taste both prepared edamame and roasted soy nuts. Compare and contrast the
two types of soybeans. Boil the edamame in salted water for 5 minutes. Drain and rinse in cold water. Add salt
to taste. Find a roasted soy nut recipe at http://www.thumboilseed.com/recipes/snacks/roasted-
nuts.htm
Page | 24
Edamame vs. Conventional Soybeans
What should you plant in your school and/or community garden? It is up to you! Here are some ideas of what you can do with your students/community to learn more about gardening and working together.
BUG SWEEP Common Core State Standards: Language Arts: CCSS.ELA-Literacy.RI.2.10; RL.2.10; SL.2.1; SL.2.3; SL.2.4; SL.2.6; W.2.7; W.2.8 Mathematics: CCSS.Math.Content.2.MD.A.3; 2.OA.B.2; 2.OA.C.3
Next Generation Science Standards: Matter and It’s Interactions: 2-PS1-1; 2-PS1-2 Biological Evolution: Unity and Diversity: 2-LS4-1 Engineering Design: K-2-ETS1-2
Suggested Reading Materials: mAGic Kit: Insect mAGic Kit Books: Diary of a Fly by Doreen Cronin; ISBN-13: 978-0060001569 Diary of a Worm by Doreen Cronin; ISBN-13: 978-0060001506 Backyard Insects by Millicent E. Selsam and Ronald Goor; ASIN: B000O94GPC In the Garden by David Schwartz; ISBN-13: 978-1574712162 Seedfolks by Paul Fleischman; ISBN-13: 978-0-06-447207-4 A Season of Gifts by Richard Peck; ISBN 978-0-14-241729-4 Notes From The Dog by Gary Paulsen; ISBN-13: 978-0375855429 The Forgotten Garden by Kate Morton; ISBN-13: 978-1416550556 Materials Needed: Gallon zipper-type plastic bag or panty hose, one per group Coat hangers, one per group Tape Notebook or journal Jars and lids with holes Insect identification book Magnifying glass Pest identification resources
Community Gardens
Page | 25
Directions: 1. Explain to the class that there are countless insects found in the garden. Some insects are
beneficial, while others are considered pests. Distribute one hanger, tape and a gallon zipper-type plastic bag or panty hose to each student group. Tell students to stretch the bag (or panty hose) across the frame of the hanger to create a bug sweeper to collect garden pests.
2. Give students 15 minutes to collect as many different bugs as possible in the garden area. Encourage students to gently examine the leaves of plants to locate bugs. Transfer each group’s collection to a clear jar with holes.
3. Ask students to count and categorize the insects according to physical attributes. Students may select their own criteria to categorize their findings. This may include the number of legs, winged or non-winged, color, weight, body structure, size, antennae, etc. Encourage students to share their discoveries with the class.
4. Instruct students to closely observe their insects and draw realistic pictures of their insects in an insect journal. Challenge students to make their drawings as detailed as possible. Students may need to use a magnifying glass or in some cases, a microscope, to make their observations. Once groups have completed their drawings, they can use an insect guide to identify their collection. Try to determine if each insect is a beneficial insect or a pest. Discuss with students why it is important for gardeners and farmers to identify the insects in their growing area.
5. Release the insects outside when the study is completed. Students can gently tip their collecting jar on its side and remove the lid. The insects should crawl or fly out of the jar.
This lesson has been adapted from a California Ag in the Classroom lesson activity.
Lesson Extenders: 1) Find the perimeter, area and circumference of the garden. 2) Calculate the amount of fertilizer, plant food, soil mixes and water needed. 3) Ask probability questions to teach more about the plants, soil and water. 4) Find the mean, median and mode of the plants’ heights. 5) Make recipes with the fruits and vegetables of the garden. 6) Research the history of the plants, where they originated, find the location on the map, etc. 7) Write letters to local merchants asking for donations (don’t forget to write thank you notes too)! 8) Create a newsletter each month updating the students, parents and community members. 9) Have the students/community give presentations on the contents of the garden. 10) Research the nutritional value of everything planted in the garden. 11) Create a video (time-lapse) of the plants growing. 12) Find another school that has a garden and share pictures, themes, comparisons of the plants due to the differences of climate, etc.
Page | 26
Amelia Ellicott’s Garden by Liliana Stafford & Stephen Michael King; ISBN-13: 978-1876289331
First PEAS to the Table by Susan Grigsby; ISBN-13: 978-0807524527 Flower Garden by Eve Bunting; ISBN-13: 978-0152023720 From Seed to Plant by Gail Gibbons; ISBN-13: 978-1430110798 Growing Vegetable Soup by Lois Ehlert; ISBN-13: 978-0152325817 How to Grow a School Garden by Arden Bucklin-Sporer & Rachel Kathleen Pringle; ISBN
-13: 978-1604690002 Jack’s Garden by Henry Cole; ISBN-13: 978-0688152833 Math in the Garden by Jennifer M White, Katharine D Barrett, Jaine Kopp, Christine
Manoux, Katie Johnson, and Yvette McCullough; ISBN-13: 978-0915873463 Mrs. Spitzer’s Garden by Edith Pattou; ISBN-13: 978-0152019785 My Garden by Kevin Henkes; ISBN-13: 978-0061715174 Our Generous Garden by Anne Nagro; ISBN-13: 978-0979373947 Out and About at the Greenhouse by Bitsy Kemper; ISBN-13: 978-1404822795 Potatoes on Rooftops (Farming in the City) by Hadley Dyer; ISBN-13: 978-1554514250 Roots, Shoots, Buckets & Boots by Sharon Lovejoy; ISBN-13: 978-0761110569 Secrets of the Garden by Kathleen Weidner Zoehfeld; ISBN-13: 978-0517709900 The Curious Garden by Peter Brown; ISBN-13: 978-0316015479 The Gardner by Sarah Stewart; ISBN-13: 978-0312367497 The Ugly Vegetables by Grace Lin (Chinese veggies); ISBN-13: 978-0881063363 Under Ground by Denise Fleming; ISBN-13: 978-1442458826 One Watermelon Seed by Celia Barker Lottridge; ISBN-13: 978-15554552221 Watermelon Wishes by Lisa Moser; ISBN-10: 0618564330
Other Gardening Books
Page | 27
SPROUT ROBOT Sprout Robot tells you when to plant AND sends you the seeds! How it works: 1. Begin by going to sproutrobot.com and entering your zip code. 2. Once you complete that, it will show you your city’s planting calendar. 3. You will know what seeds to plant, if you need to start them indoor or outdoor, detailed
instructions for planting and care, and you will be given the option to purchase the seeds, too! 4. Sprout Robot will even make you a personalized planting calendar and send you an email when
it is time to plant.
GARDEN JOURNAL Keeping a garden journal is a great way to share ideas, growth patterns, weather, etc. Here are some topic ideas for your garden journal! 1. An insect page–describe, identify and draw insects. What were they doing? Could you write a short story from the insects’ point of view? 2. Weather Charts–wind speed, rainfall & snow. 3. Keep a record of all activities that occur in the garden. 4. Make comparison charts, between different types of plants. 5. Write about different accomplishments and disappointments in the garden. Which plant grew the
best? Which plant didn’t make it? 6. Write stories and poems that are inspired by the garden. 7. Write down ideas and plans for upcoming gardens. 8. Draw pictures and take photos each week to see the differences. 9. Graph plant growth. 10. Press and dry flowers from the garden and glue inside your journal!
Page | 28
Other Lesson Ideas
POT PEOPLE Every garden needs some little folk to watch over it. Pot people will grow with your garden.
Materials Needed: 1. Six small clay pots with holes in the bottom (2 inch pots) 2. One clay orchid pot with slits in the sides and a hole in the bottom, 2-3 times bigger than the first pots
(6 inch pots) 3. One “in-between” sized classic clay pot (4-inch pot) 4. Craft cord, as is used to braid ankle bracelets, 1-2 yards 5. Five beads or stringable balls, each larger than the hole in the bottom of the pots 6. One pair of googly eyes and craft glue, and/or waterproof paints to paint a face 7. Potting soil or peat pellet 8. Grass seed
Directions: 1. Lay out all of the pieces and make sure you have everything you need. 2. Stack two sets of two small pots and set the pots upside down. Cut two pieces of craft cord twice as
long as the largest pot. Make a knot and tie a bead onto one end of each cord. String the bead up into the bottom, open end of one set of two pots and up, so it extends out the small hole. Do this with each set, so you now have two “legs”.
3. Tie the two cords together, about halfway up the cord that’s showing, but don’t tie a bead there. String the large orchid pot, upside down, onto the craft cord, so the cord extends up through the small hole in the top. The “legs” may fit under it.
4. Take the in-between sized pot and put it right side up on top of the orchid pot. String the double cord up through the top. Holding it carefully, move the cord up and down, so you can see how long you want the legs to be under the body, once you tie the knot. When you have the right size, (remembering that you have to tie “high” and then it will drop to the bottom of the pot once you let go), tie a bead into the double cord and cut off any extra cord. You now have a body, legs, and a head.
5. Cut a piece of craft cord that is about 11/2 times as big as the orchid pot. Tie a bead onto one end and string one pot on. Run the cord from one side to the other of the orchid pot. You may have to put your hand inside from the bottom to guide it through. String the last small pot on the other side (small side to the body, open side out) and pull it a little tight. Measure how long you want the “arms” once you tie the knot. When you have the length you want, tie a bead onto the cord and cut off any extra cord. You have arms!
6. Glue simple googly eyes, or paint the whole thing. It’s up to you! 7. Fill the top pot with soil or drop in an expanded peat pellet. Press grass seed into the soil. 8. Place your friend in a sunny spot. Keep his head well watered and in a few days you will see him
sprout a head of grassy hair! For pictures of a “POT PERSON,” check out the book, kids’ container gardening.
Extension Idea: Make Stepping Stones for your garden! Check out page 65-67 in kids’ container gardening.
Page | 29
GARDEN AQUARIUM Owning your own fish is a great thing, but making him his own home is even more fun! Create your own water garden and add a fish!
Materials Needed: 1. Clear, clean glass container that holds at least 1 gallon of water. 2. Enough clean pebbles or marbles to cover the bottom. 3. Three pieces of good luck bamboo tall enough to stick out of the top. 4. One gallon of water that has been allowed to sit, open air, overnight. 5. One beta or goldfish from the pet store (they are usually male fish). 6. Stress Coat and fish food.
Directions: 1. Pour water into your container until it is full to the widest spot, but leave at least 2 inches from the
top for air. 2. Use a scoop or spoon and evenly spread a layer or pebbles across the bottom. Try not to let
your hands touch the water. We have germs on our hands that can get into the water and are bad for fish.
3. Nestle the bottoms of a few pieces of good luck bamboo into the pebbles so they stand on the bottom and lean against the top. Cross the trunks in “tepee” form so your fish can swim in and out.
4. Following the directions on the bottle, spray two or three drops of Stress Coat or other protective coating into the water. This helps your little fish keep healthy skin even during the journey to his new home.
5. Are you ready? In one quick move, pour the fish out of his travel bag or box into his new home. He may look dazed or swim lopsidedly for a few minutes. Leave him and don’t tap on the tank or make loud noises for awhile. He needs to get his “sea legs.”
6. Once he seems calm, give him a tiny pinch of food. Do not overfeed your fish. He will keep eating as long as there is food in his tank, and then he will get very sick. Only feed him every 2-3 days.
7. Once a week, let a bowl of water sit overnight. In the morning, change his water. Take the bamboo out and run it under warm water. Pour out as much of the water in his tank as you can. Pour or scoop him with a few inches of water into a clean cup or glass. Clean his tank with a soft cloth, but no soap! When the tank is clean, pour in new water, add a few squirts of Stress Coat, and then pour him back in, just as you did the first time.
Page | 30


Sponsored by: