operating instructions for ecotec access battery …rme-energy.com/support/access manual.pdfcharger...
TRANSCRIPT

Operating Instructions for ECOTEC
Access Battery Charger

` Page 2
Table of Contents
General Safety ............................................... 3
Installation ...................................................... 4
Operation ....................................................... 6
Configuration & Programming ........................ 9
Maintenance &Trouble Shooting .................. 17
Appendix A - Charger Curve Setting .............. 21
Appendix B - Best Battery Choice Setup ....... 23

` Page 3
General Safety
The charger may only be used for the specified battery types.
This battery charger is supplied with pre-set charging curves
that are adapted for the battery types listed in figure 1.
Always contact the battery manufacturer to verify that the
charging curve is appropriate.
Hydrogen gas is generated when charging batteries, which
can cause an explosion.
During and immediately after charging, batteries may not be
placed in the vicinity of sparks or open flame.
Do not use the battery charger if it is damaged. Do not
touch damaged components. Turn off the input AC voltage
immediately and contact service personnel.
The battery charger has high voltage inside the charger case
that can cause personal injury or death. The metal casing
may only be opened by authorized service personnel.
Disconnect the battery and input AC power before carrying
out maintenance or cleaning the battery charger.
The Battery charger must be connected to an earth
grounded AC input source.
Batteries should only be charged in a well ventilated area.
` Page 4
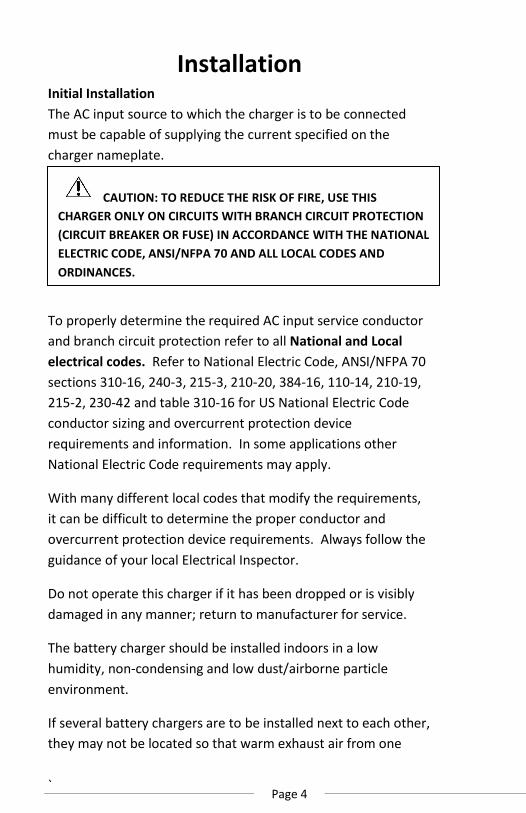
Installation Initial Installation
The AC input source to which the charger is to be connected
must be capable of supplying the current specified on the
charger nameplate.
To properly determine the required AC input service conductor
and branch circuit protection refer to all National and Local
electrical codes. Refer to National Electric Code, ANSI/NFPA 70
sections 310-16, 240-3, 215-3, 210-20, 384-16, 110-14, 210-19,
215-2, 230-42 and table 310-16 for US National Electric Code
conductor sizing and overcurrent protection device
requirements and information. In some applications other
National Electric Code requirements may apply.
With many different local codes that modify the requirements,
it can be difficult to determine the proper conductor and
overcurrent protection device requirements. Always follow the
guidance of your local Electrical Inspector.
Do not operate this charger if it has been dropped or is visibly
damaged in any manner; return to manufacturer for service.
The battery charger should be installed indoors in a low
humidity, non-condensing and low dust/airborne particle
environment.
If several battery chargers are to be installed next to each other,
they may not be located so that warm exhaust air from one
CAUTION: TO REDUCE THE RISK OF FIRE, USE THIS
CHARGER ONLY ON CIRCUITS WITH BRANCH CIRCUIT PROTECTION
(CIRCUIT BREAKER OR FUSE) IN ACCORDANCE WITH THE NATIONAL
ELECTRIC CODE, ANSI/NFPA 70 AND ALL LOCAL CODES AND
ORDINANCES.

` Page 5
battery charger blows into the air intake of another battery
charger. This is accomplished by always allowing for at least 12
inches of space on both sides, bottom and the top around the
charger. This includes other chargers and/or equipment, walls
or other obstructions.
Install the battery charger so that gasses from charging battery
do not get sucked in by the battery charger fan.
The battery charger must be mounted vertically suspended on a
wall, post, struts or available shelf mount bracket. When
mounted on a wall the charger should be placed vertically to
provide the most efficient cooling. Mounting the charger other
than vertically will result in a “Charger Not Upright” fault
condition that can be corrected by moving it to an upright
position. This charger is not intended to be mounted on mobile
equipment.
WARNING: SPARKS OR MOLTON METAL FALLING
FROM THE CHARGER CAN CAUSE FIRE OR EXPLOSION.
INSTALL OVER NONCOMBUSTIBLE MATERIAL SUCH AS
METAL OR CONCRETE.
KEEP THE CHARGING ARE CLEAR OF COMBUSTIBLE
MATERIAL.
WARNING: TO REDUCE THE RISK OF AN ELECTRIC SHOCK,
KEEP THE CHARGER DRY. DO NOT EXPOSE IT TO RAIN,
CONDENSATION OR STANDING WATER. STORE IN A CLEAN AND
DRY LOCATION.

` Page 6
Please note that the product described in this manual contains a
radio transmitter that complies with Part 15 of the FCC rules
and is licensed as listed below:
FCC ID: B7WACCESS Canada IC: 10687A-ACCESS
WARNING! Changes/modifications not approved by the responsible party could void the user’s authority to operate the equipment. This transmitter must not be relocated or operated in conjunction with any other antenna or transmitter. This equipment complies with FCC and IC radiation exposure limits set forth for an uncontrolled environment. This equipment should be installed and operated keeping the radiator at least 20cm or more away from person’s body (excluding extremities: hands, wrists, feet and ankles). AVERTISSEMENT! Les changements/modifications non approuvés par le parti responsible pourraient invalider l'autorité de l'utilisateur à faire fonctionner l'équipement. Cet émetteur ne doit pas être relocalisé ou être utilisé avec une autre antenne ou émetteur.' Cet équipement est conforme aux limites d'exposition de émissions de IC, FCC présentées pour un environnement non contrôlé. Cet equipement devrait être installé de façon à ce que l'antenne soit éloigné de 20 centimètres ou plus du corps humain (en excluant les extrémités : les mains, les poignets, les pieds et les chevilles).

` Page 7
Operation
Charger Control Panel
The charger control panel and display is used to configure the charger
to match the battery type, AH size, Voltage and application. Details
regarding configuration of the charger can be found in the
“Programming” section of this manual.
The charger can be set to charge several types, sizes and applications
of batteries using the control panel and LCD display. Be sure to
properly program the charger to meet your battery manufacturer’s
specifications before connecting the battery to the charger.
Connecting the Battery
1 Check the wiring and connectors for visible signs of
damage.
2 Connect the battery to the battery charger.
3 The battery charger automatically starts charging a few
seconds after the battery is connected.
4 The charging status is shown in the display user interface
and on the charger control panel display.
5 A green battery symbol is lit when the battery is fully
charged. The battery charger then continuous with
maintenance charger (if included in selected charge
profile).
WARNING: IN THE EVENT OF DANGER, SWITCH OFF THE AC
INPUT POWER BY SHUTTING THE INPUT BRANCH CIRCUIT BREAKER
OFF, TURNING THE BRANCH CIRCUIT DISCONNECT TO THE OFF
POSITION OR UNPLUGGING THE CHARGER FROM THE WALL
SOCKET

` Page 8
Note: The green battery symbol might not show up immediately if a
fully charged battery is connected. The delay time could be lengthy,
depending on charger programming.
Disconnecting a battery
1 Stop the battery charging process by pressing the
STOP button on the charger control panel.
2 Disconnect the battery from the battery charger.
DANGER: EXPLOSIVE GASES ARE PRODUCED BY THE
BATTERY. DO NOT SMOKE, USE OPEN FLAME OR CAUSE SPARKING
NEAR BATTERY
WARNING: THE CHARGING PROCESS MUST BE HALTED BY
PRESSING THE STOP BUTTON ON THE CHARGER WHEN
DISCONNECTING THE BATTERY FROM THE CHARGER. IF THE
BATTERY IS DISCONNECTED DURING THE CHARGING PROCESS
SPARKS MAY BE GENERATED THAT COULD CAUSE AN EXPLOSION

` Page 9
Configuration & Programming
The charger front panel can be used to program charger functions and
charging parameters. The charger display and programming buttons
are shown in Fig. 1 below.
Figure 1
The programming menus are selected and navigated using the “OK”,
“ESC” and arrow buttons. The programming menus can be entered by
pressing the “OK” button.
Top Menu and Logging In
All programmable functions require the entry of a first level password
before the settings can be modified. When selecting a programmable
parameter, the user will be prompted for the first level password. The
first level password is 2451. However the user can also login from the
top level menu screen shown in the left hand screen on the previous
page. Using the arrow keys scroll to “Log in”, press OK and the screen

` Page 10
on the right will appear. Press OK again and the cursor will move over
the left hand digit location. Press the up arrow until the number 2 is
visible. Press the right arrow once and the cursor will be on the second
digit. Press 4. Repeat for the third digit (5) and fourth (1) digit. Once
logged in, use the arrow buttons go to the Service menu and press OK
to enter the menu and program the desired parameters.
Service Menu Review and Programming
The two Service menu screens are shown above. Scrolling down the
first menu page with the down arrow key will automatically jump to
the second screen menu page once the bottom of the page is reached.
To navigate back to the first menu page, scroll up using the up arrow.
Charger Info
The Charger Info screen provides circuit board serial number, Main
Firmware program number and revision level and Radio Firmware
program number and revision level.
Charging Parameters
The Charging parameter screen allows programming of the following
Source Selects the source for battery info (user defined or
Battery Module

` Page 11
Curve Selects the charging curve (CFLA-01, CIMX-01, OP25-
01, OP30-01, OP35-01, OP40-01) see appendix A
Capacity Battery Capacity rating in AH
Cells Number of Battery Cells
Cable Ri Cable drop compensation level
Base Load Level of minimum vehicle current draw in a system
with the vehicle “hard wired” to the battery during
charging
Time Restrictions
Charging can be restricted for up to 3 different, variable time periods
each week day. The start and stop of each period can be adjusted for
each day.
The function can be enabled by selecting (OK) the function and using
the arrow keys to enable the selecting (OK) again. Selecting the Time
settings screen allows you to navigate to each week day’s settings.
Each day up to 3 restricted charging time periods can be selected and
programmed using the screen for that day.

` Page 12
Extra Charge
The Extra Charge function can provide a “topping off” charge period to
full charge the battery if there is a regularly scheduled weekly idle
period of greater than 24 hours. Enabling this function and selecting
the day of week and time of day that the “topping off” cycle will cause
the charger to restart and charge like the battery had been
disconnected and reconnected (to full charge). Checking the Status
function in this menu screen will confirm if the ongoing charge cycle is
an “Extra Charge” cycle.
BBC (Best Battery Choice)
See Appendix B.
Equalize

` Page 13
The Equalize function enables equalize charging based on two
different criteria, Cyclic Weekday.
Weekday equalizing will cause the charger to initiate a 3-Hour Equalize
charge anytime when the battery is connected to the charger and the
charge cycle has finished on the programmed weekday. The charge
cycle could for example have ended on the prior day, but if the battery
is still connected to the charger on the selected day the 3-Hour
equalize period will begin at 00:01 (one minute after midnight) on the
selected day.
Cycle equalizing is based on the number of full charge cycles that have
been completed by the charger since the last equalize cycle.
The number of cycles can be set from 0 to 99 cycles.
I/O Control
When equipped with Optional I/O PCB, the charger can be configured
for AGV systems, Arc-Free Disconnect, Remote Stop and/or water
valve control. Contact factory for your individual application details.
Function (Fn) Button
The function button can be programmed for custom application
requirements. Contact factory for details.
Date and Time

` Page 14
Date and time parameters can be programmed in this screen using the
arrow, OK and ESC buttons. Formats include USA, ISO/JIS and Euro.
Display
Display Contrast and Backlight intensity can be adjusted from the
Display menu screen.
Radio
Radio functions are programmed and displayed in this menu screen.
Function Enables and disables radio
functions
Status Reports radio connection status
Network Settings Program auto or manual
assignment of network
parameters, program Charger ID (0
to 4294967236), program or read
the assigned channel and PAN ID.

` Page 15
Network Info Displays Network Information
Start/Leave Network Starts a new Network or leaves
current network.
CAN
This function is not available in standard charger software.
Calibration
Calibration of charger output voltage and current readings. To be
adjusted by qualified service personnel only. Contact factory.
Factory Settings
Configuration of charger settings. To be adjusted by qualified service
personnel only. Contact factory.
Advanced
Advanced configuration of charger settings. To be adjusted by
qualified service personnel only. Contact factory.

` Page 16
Force Start Forces charger start, to be used by
qualified service personnel only.
Instant Log Instant view of logged data
Power Group Assign Power Group number and
power levels

` Page 17
Maintenance &Trouble Shooting
Monthly Preventive Maintenance
If charger is charging, end the charge cycle by pressing the
STOP button.
Disconnect the battery from the charger.
Remove AC power from the charger.
Remove the front charger cover and lower charger I/O cover.
Using compressed Air remove any dust from the internal
components of the charger.
Visually inspect the visible charger components for signs of
discoloration or darkening. Replace if necessary.
Check all accessible bolted or screwed electrical connections
for tightness.
Check that all exposed cable and wire insulation is in good
condition. Replace if necessary.
Wipe the charger exterior and clear any obstructions from
ventilation openings and fans.
CAUTION: BEFORE PERFORMING ANY MAINTENANCE ON
THE CHARGER:
If a battery is being charged, stop the charge cycle by
pressing the STOP Button
Disconnect the battery from the charger
Remove AC power from the charger
WARNING: HIGH VOLTAGES EXIST WITH THE CHARGER,
WICH CAN CAUSE SEVERE INJURY OF DEATH. SERVICE SHOULD
ONLY BE PERFORMED BY QUALIFIED SERVICE PERSONNEL.
IMPROPER SERVICING MAY DAMAGE THE CHARGER.
` Page 18
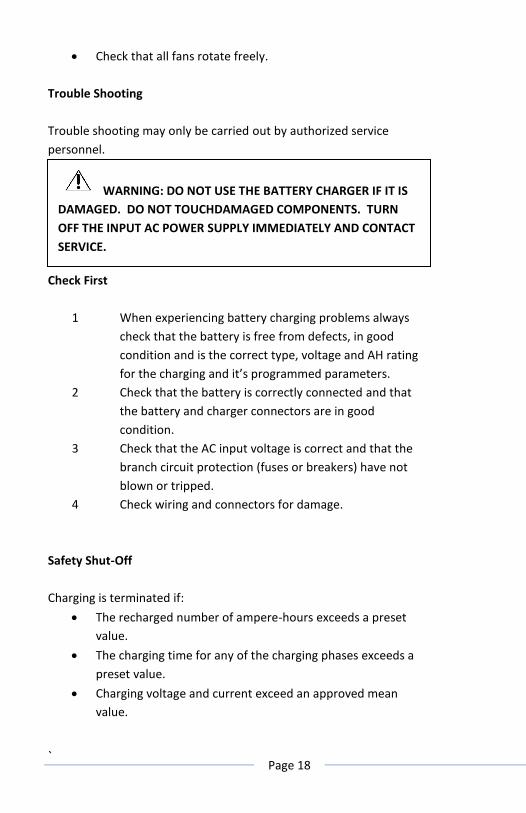
Check that all fans rotate freely.
Trouble Shooting
Trouble shooting may only be carried out by authorized service
personnel.
Check First
1 When experiencing battery charging problems always
check that the battery is free from defects, in good
condition and is the correct type, voltage and AH rating
for the charging and it’s programmed parameters.
2 Check that the battery is correctly connected and that
the battery and charger connectors are in good
condition.
3 Check that the AC input voltage is correct and that the
branch circuit protection (fuses or breakers) have not
blown or tripped.
4 Check wiring and connectors for damage.
Safety Shut-Off
Charging is terminated if:
The recharged number of ampere-hours exceeds a preset
value.
The charging time for any of the charging phases exceeds a
preset value.
Charging voltage and current exceed an approved mean
value.
WARNING: DO NOT USE THE BATTERY CHARGER IF IT IS
DAMAGED. DO NOT TOUCHDAMAGED COMPONENTS. TURN
OFF THE INPUT AC POWER SUPPLY IMMEDIATELY AND CONTACT
SERVICE.

` Page 19
The battery is disconnected without the charger being turned
off.
Charging is temporarily reduced when:
The battery charger internal temperature exceeds charger
limits
The battery charger is not in a near vertical position.
Checking Error Messages
When the battery charger’s built-in self-testing function detects a
fault, this is indicated by the alarm indicator being lit on the charger
control panel. The error messages are shown on the charger LCD
display. If there is more than one error message, they are
automatically scrolled.
Make note of any messages and relate them when calling for service.
Error Messages
Code Alarm text Description
1 Low battery voltage Battery voltage below low limit. Defined by selected charging curve.
2 High battery voltage Battery voltage above low limit. Defined by selected charging curve.
3 Time limit exceeded Time limit defined in selected charging curve.
4 AH limit exceeded AH limit defined in selected charging curve exceeded
6 Charger not in upright position
Charger is not upright.
7 High battery voltage power unit shut off
Battery voltage is above charger high limit. Defined by selected charging curve
17 Mains feed phase error
An AC input voltage phase is missing from the input supply.
18 Regulator error Error in power unit control circuits.
19 Low charger temp Heat sink temperature is above low limit.
20 High charger temp, Heat sink temperature is above high

` Page 20
derating output limit. Charger output is reduced to lower heatsink temperature.
21 High charger temp power unit shut off
Hardware temperature protection is active.
For service assistance and parts ordering, contact:
Ecotec Ltd.
262 Fox Drive
Piqua, OH 45356
Phone: 937-606-2793
Fax: 937-606-2026

` Page 21
Appendix A - Charger Curve
Setting
The charger curve (or algorithm) can be set from the Charging
Parameter menu of the first page of the Service Menu. There are 6
curve types available in this menu.
Conventional Flooded Lead Acid, CFLA-01 – This curve is designed to
recharge a 100% discharged battery in 8 hours, and is intended for use
in single shift medium to light duty applications where the battery
typically lasts through the full shift and is charged during the off shift
periods. It is also intended for use with 2 and 3 shift applications
where the battery is removed from the vehicle for charging.
Ionic Mixing Flooded Lead Acid, CIMX-01 – This curve is designed to
recharge a 100% discharged battery in 8 hours, and is intended for use
in single shift medium to light duty applications where the battery
typically lasts through the full shift and is charged during the off shift
periods. It is also intended for use with 2 and 3 shift applications
where the battery is removed from the vehicle for charging. It differs
from the conventional curve by using high rate charging current at a
very low duty cycle during the finish charging phase to promote short,
temporary high levels of gassing that mix the charger acid and prevent
stratification of the acid in the cell.
Opportunity 25A/100AH, OP25-01 – This curve is designed to
opportunity charge a battery in the vehicle during break, lunch and
shift change periods for 2 shift applications where the level of
discharge is typically at or below 1.25 times the 80% rating of the
battery (1.25 EBU) per day.

` Page 22
Opportunity 30A/100AH, OP30-01 – This curve is designed to
opportunity charge a battery in the vehicle during break, lunch and
shift change periods for 2 shift applications where the level of
discharge is typically at or below about 1.37 times the 80% rating of
the battery (1.37 EBU) per day.
Opportunity 35A/100AH, OP35-01 – This curve is designed to
opportunity charge a battery in the vehicle during break, lunch and
shift change periods for 2 shift applications where the level of
discharge is typically at or below about 1.49 times the 80% rating of
the battery (1.49 EBU) per day.
Opportunity 40A/100AH, OP40-01 – This curve is designed to
opportunity charge a battery in the vehicle during break, lunch and
shift change periods for 2 or 3 shift applications where the level of
discharge is typically at or below 1.60 times the 80% rating of the
battery (1.60 EBU) per day.
NOTICE: OPPORTUNITY CHARGING APPLICATIONS
REQUIRE THOROUGH INVESTIGATION INTO THE ACTUAL
BATTERY USAGE, CHARGE TIME AVAILIABLE AND AMBIENT
TEMPERATURE. THE NUMBERS SUGGESTED ABOVE ARE TYPICAL
IN NATURE AND DO NOT IMPLY ANY WARRANTY OR GUARANTEE
OF OPPORTUNITY CHARGING APPLICATION SUCCESS.

` Page 23
Appendix B - Best Battery Choice
Setup The Best Battery Choice (BBC) feature allows the implementation of a “first-in-first-out” (FIFO) battery system without the addition of any hardware or software. This allows chargers to be set up in groups by battery type so they can signal to the battery room operator which battery has been off charge the longest and should be used next. BBC setup steps
1 Enable Radio. See page 13. All chargers must be configured for the same channel.
2 Start network. First charger will require that a new network be started. Select this feature from the Radio menu screen on the first charger that is setup.
3 Join network. The remaining chargers will need to be Joined to the network. Select this feature in the Radio Screen.
4 Enable the BBC Function to Enabled

` Page 24
5 Assign the same group ID (0-255) to all chargers for each battery type. Each battery type must be assigned to a unique group.
When the BBC functions are set, all chargers set to the same group, will communicate with each other and only the charger that has been fully charged the longest will light the green charge finished light. When the BBC function is active the main screen will only display either Charging or Ready.

` Page 25

` Page 26
Warranty
Access Charger FOR INDUSTRIAL APPLICATIONS IN NORTH AMERICA
Ecotec warrants each new Ecotec charging system for industrial application and use to be free from defects in material and workmanship. This product warranty applies to the original purchaser of the equipment provided that: 1) The Ecotec charger is installed, operated and maintained in
accordance with the Ecotec printed installation and operating instructions.
2) The Ecotec charger is used under normal conditions for the purposes for which it was designed.
3) The Ecotec charger is not subject to misuse, negligence, accident or unauthorized modification. Misuse to include abnormal operating conditions (including exposure to chemicals, flames, extreme dust or extreme temperatures).
4) The Ecotec charger is properly serviced in accordance with Ecotec service guidelines and using Ecotec parts.
5) The Ecotec charger is used in accordance with Ecotec’s performance ratings for the equipment.
This warranty is subject to the following provisions: 1) Products and Parts Warranted: Subject to the exceptions
listed below each new Ecotec charger is warranted for a period of twelve (12) months covering parts and labor from the commencement of warranty period. The exceptions to this warranty is as follows:
Electronic PCB’s are warranted for thirty-six (36) months covering labor and replacement parts, provided, however, that during the last twenty-four (24) months of this 36 months period the warranty covers replacement parts only – no labor or other services are included.
Power transformers are warranted for ten (10) years covering labor and replacement parts, provided, however, that the during the last nine (9) years of this ten year period the warranty covers replacement parts only – no labor or other services are included.

` Page 27
Accessories such as BMU’s, Temperature sensors and Water level sensors, as applicable, are warranted for 1 year covering parts only.
Filters, fuses, bulbs, power and communication cables and connectors and vehicle mounted attachments are not warranted unless found defective prior to first use by original purchaser.
2) Commencement of Warranty Time Periods: The warranty period shall commence on the date of installation provided, however, that under no circumstances shall this period exceed 30 days from date of shipment by Ecotec.
3) Limitation of Liability: Ecotec's liability is limited to the repair of any defects or, at Ecotec's option, the replacement of the defective product with the same or similar product. Purchaser shall assume the responsibility for the removal, re-installation and freight in connection with replacement components. Replacement and exchange parts will be warranted for the remainder of the original Ecotec’s charger warranty period or for a period of ninety (90) days, whichever is greater. Ecotec shall not be liable for direct or indirect, special or consequential damages in excess of such repair or replacement. In no event shall the purchaser be entitled to recover for contingent expenses resulting from, but not limited to, travel expenses, lodging, duties and taxes, rental or replacement equipment, loss of business or profits or any other commercial losses.
4) Use of Defective Product: Continued use of a defective Ecotec charger, unless approved by Ecotec, may void warranty.
Except as stated above, all other warranties and conditions, either expressed or implied, including implied warranties of merchantability and fitness for a particular purpose, are excluded and buyer assumes all risks and liability resulting from use of the goods. Ecotec neither assumes nor authorizes any persons to assume for Ecotec any other liability in connection with the sale or use of the goods sold, and there are no verbal agreements or warranties collateral to or affecting this written warranty.
Warning: At all times, safety must be considered an important factor in the installation, servicing and operation of the Ecotec charger, and only skilled, qualified technical assistance should be utilized.

` Page 28