or how to get started in dslr astrophotography with ......put your camera on a tripod 2. attach a...
TRANSCRIPT
Or how to get started in DSLR astrophotography with equipment you
may already own
Dale Murray, TAAS
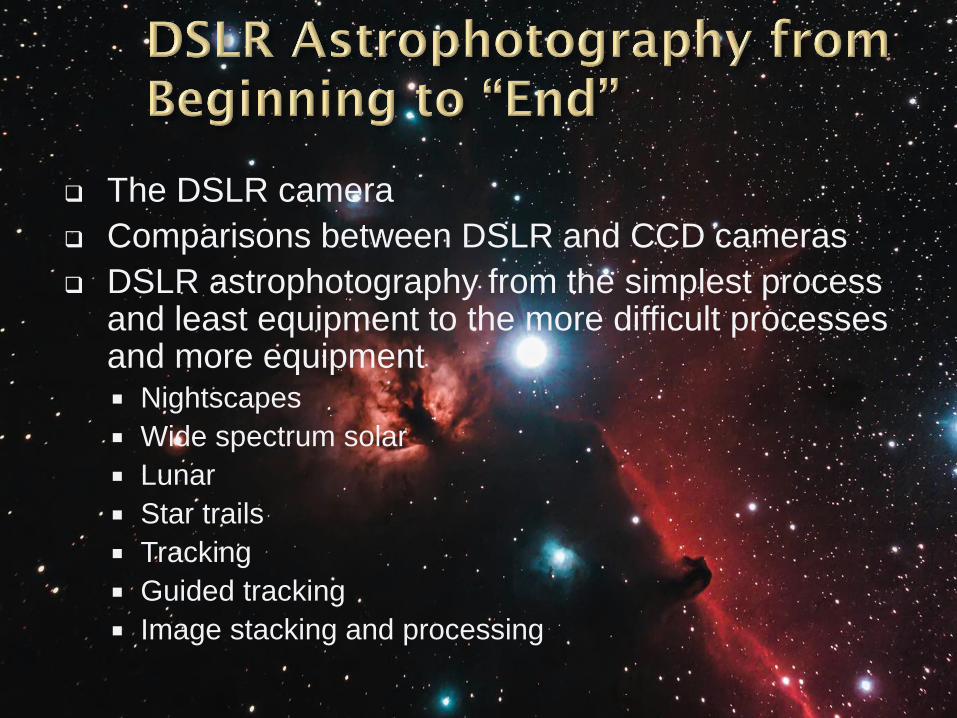
The DSLR camera
Comparisons between DSLR and CCD cameras
DSLR astrophotography from the simplest process and least equipment to the more difficult processes and more equipment Nightscapes
Wide spectrum solar
Lunar
Star trails
Tracking
Guided tracking
Image stacking and processing
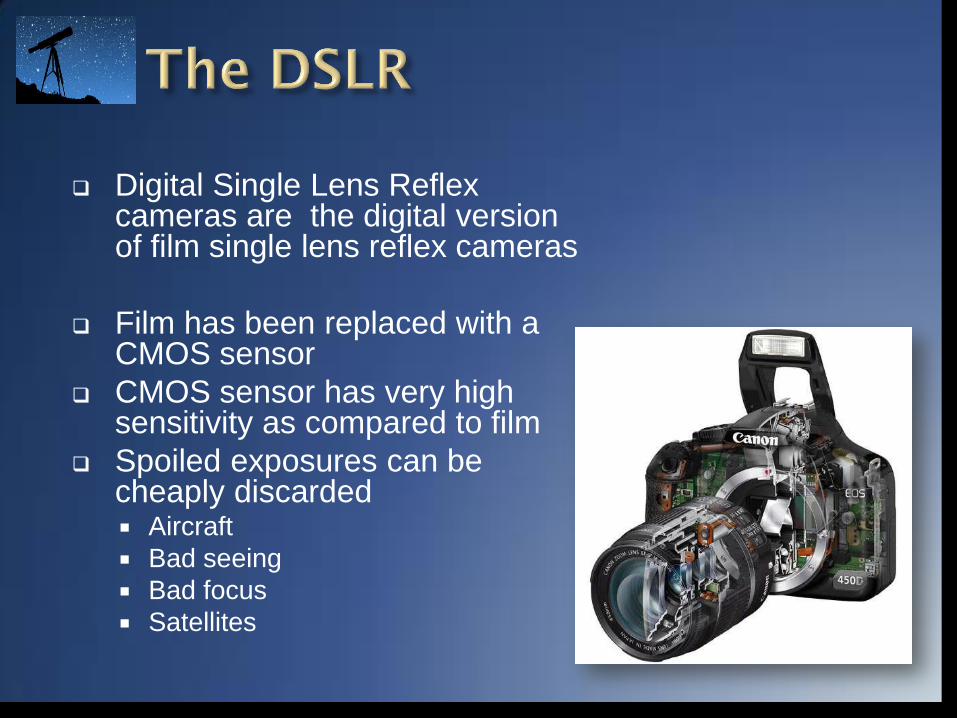
Digital Single Lens Reflex cameras are the digital version of film single lens reflex cameras
Film has been replaced with a CMOS sensor
CMOS sensor has very high sensitivity as compared to film
Spoiled exposures can be cheaply discarded Aircraft
Bad seeing
Bad focus
Satellites
Charge Coupled Device cameras are up to 50 times more sensitive than standard digital SLRs
CCD cameras have a greater dynamic range than digital SLRs, meaning they can more easily capture both faint and bright detail in a single exposure
For setups where guiding is required, some CCD cameras have built-in guide chips to make guiding much easier
CCD cameras designed for
astrophotography have better H-alpha
response
CCD astrophotography cameras often
have internal cooling and fans
Small chips mean better framing for
planets and small deep space objects
DSLRs are much less expensive for a given size chip and number of megapixels
More pixels means larger prints can be made with native resolution
Larger chip size means wider fields can be captured in single panel
A wide range of excellent lenses are available
DSLRs can be used for other purposes but, mostly, you may already own one
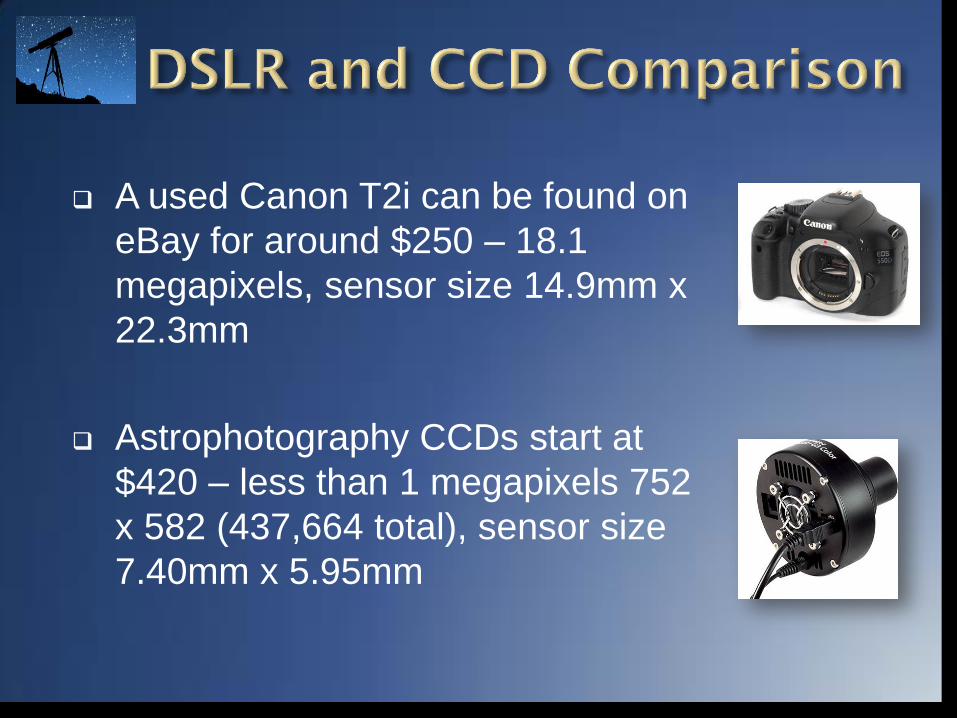
A used Canon T2i can be found on
eBay for around $250 – 18.1
megapixels, sensor size 14.9mm x
22.3mm
Astrophotography CCDs start at
$420 – less than 1 megapixels 752
x 582 (437,664 total), sensor size
7.40mm x 5.95mm
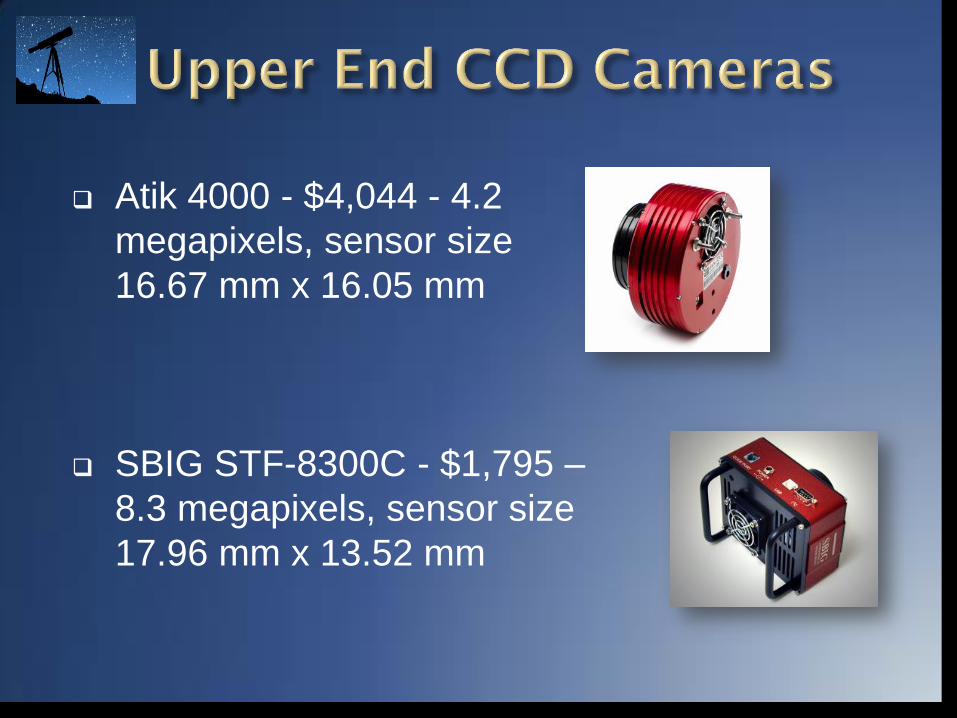
Atik 4000 - $4,044 - 4.2
megapixels, sensor size
16.67 mm x 16.05 mm
SBIG STF-8300C - $1,795 –
8.3 megapixels, sensor size
17.96 mm x 13.52 mm
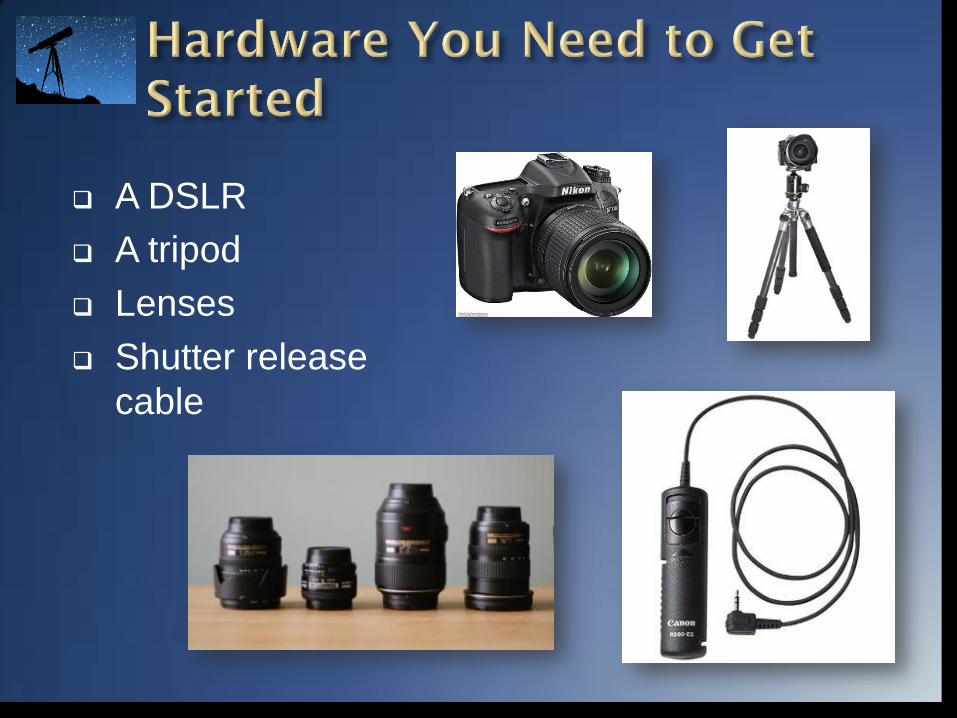
A DSLR
A tripod
Lenses
Shutter release
cable
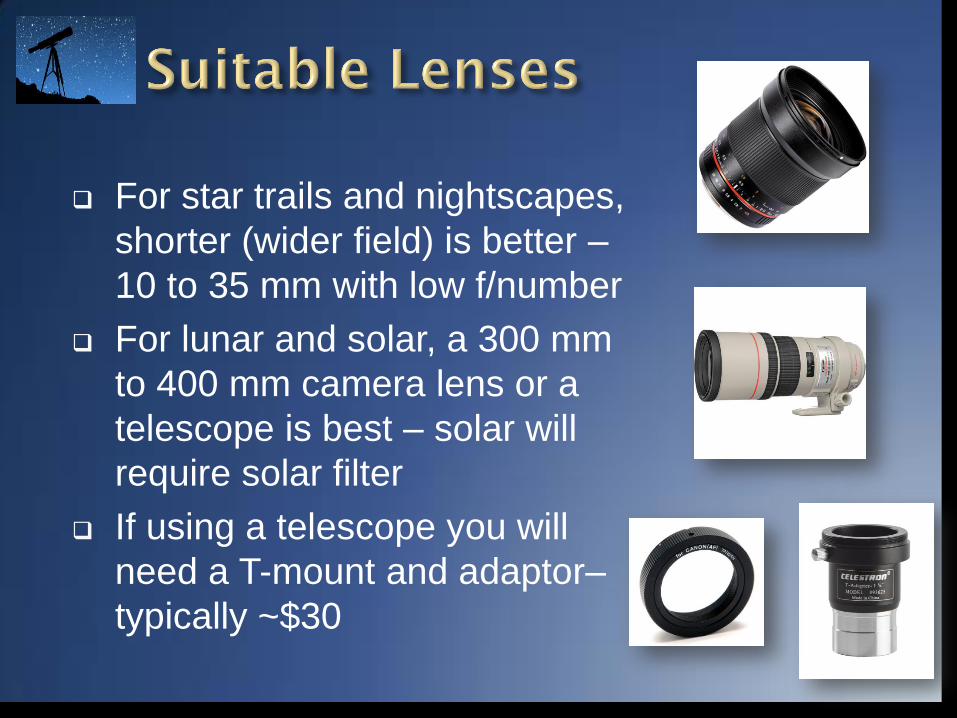
For star trails and nightscapes,
shorter (wider field) is better –
10 to 35 mm with low f/number
For lunar and solar, a 300 mm
to 400 mm camera lens or a
telescope is best – solar will
require solar filter
If using a telescope you will
need a T-mount and adaptor–
typically ~$30
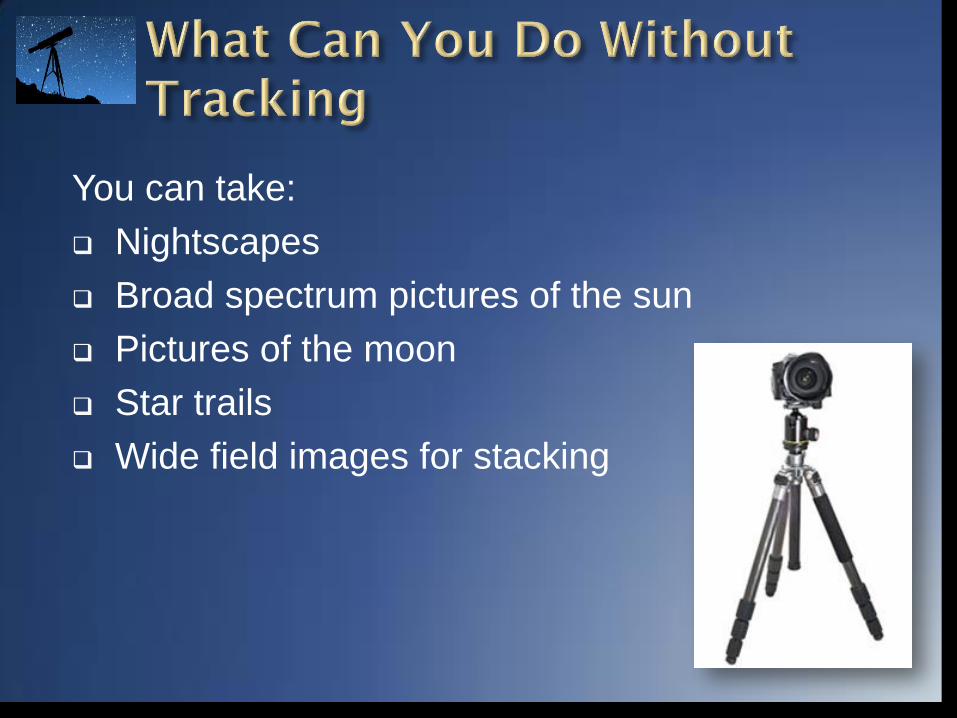
You can take:
Nightscapes
Broad spectrum pictures of the sun
Pictures of the moon
Star trails
Wide field images for stacking
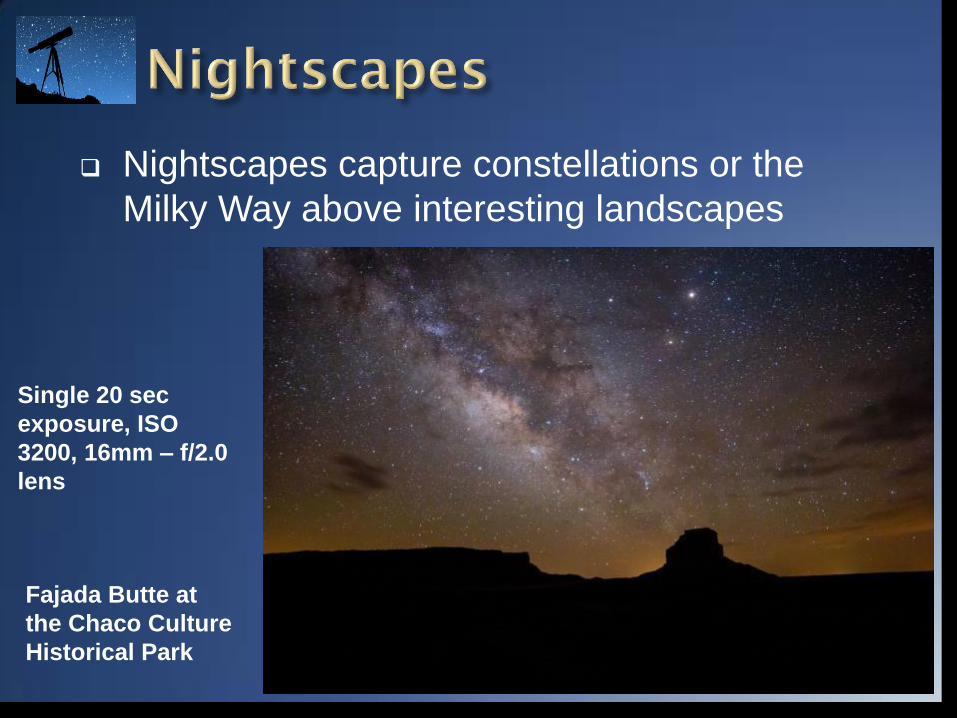
Nightscapes capture constellations or the
Milky Way above interesting landscapes
Single 20 sec
exposure, ISO
3200, 16mm – f/2.0
lens
Fajada Butte at
the Chaco Culture
Historical Park
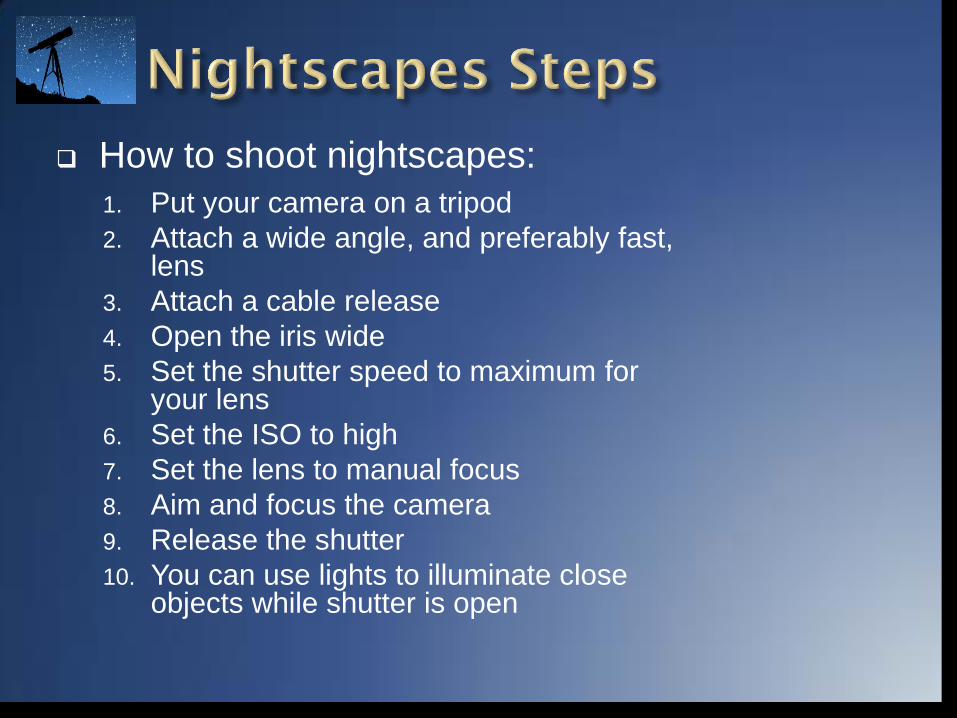
How to shoot nightscapes:
1. Put your camera on a tripod
2. Attach a wide angle, and preferably fast, lens
3. Attach a cable release
4. Open the iris wide
5. Set the shutter speed to maximum for your lens
6. Set the ISO to high
7. Set the lens to manual focus
8. Aim and focus the camera
9. Release the shutter
10. You can use lights to illuminate close objects while shutter is open
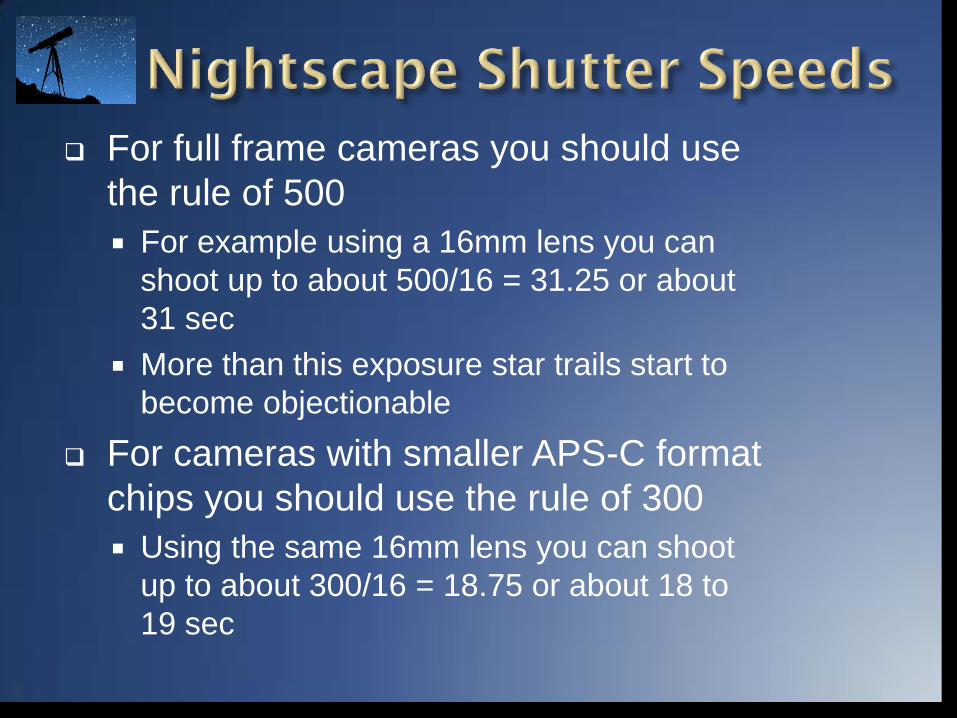
For full frame cameras you should use
the rule of 500
For example using a 16mm lens you can
shoot up to about 500/16 = 31.25 or about
31 sec
More than this exposure star trails start to
become objectionable
For cameras with smaller APS-C format
chips you should use the rule of 300
Using the same 16mm lens you can shoot
up to about 300/16 = 18.75 or about 18 to
19 sec
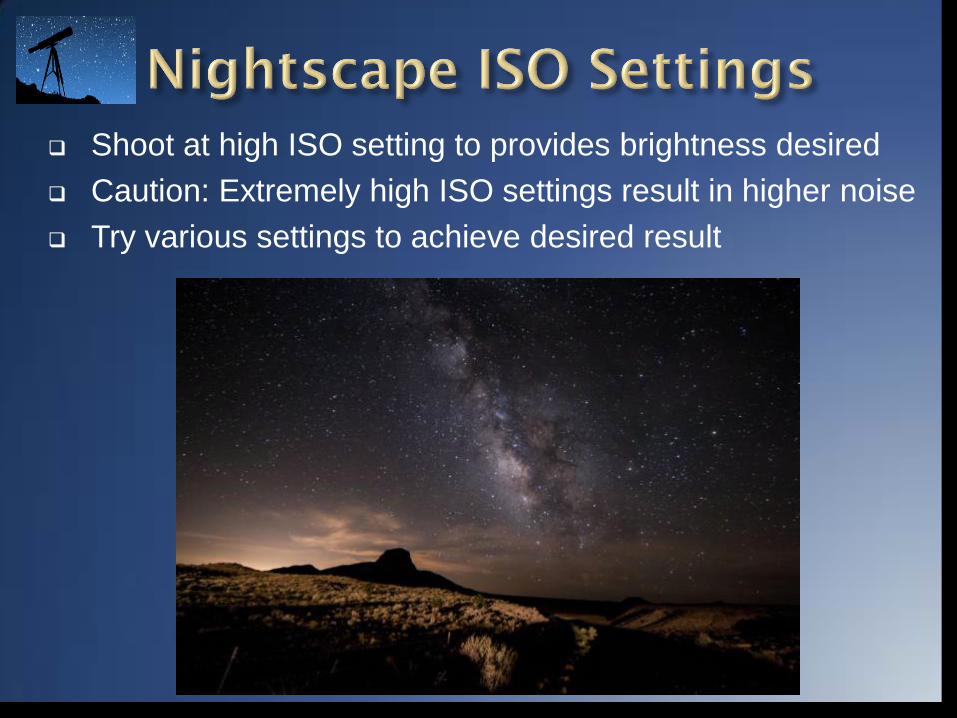
Shoot at high ISO setting to provides brightness desired
Caution: Extremely high ISO settings result in higher noise
Try various settings to achieve desired result
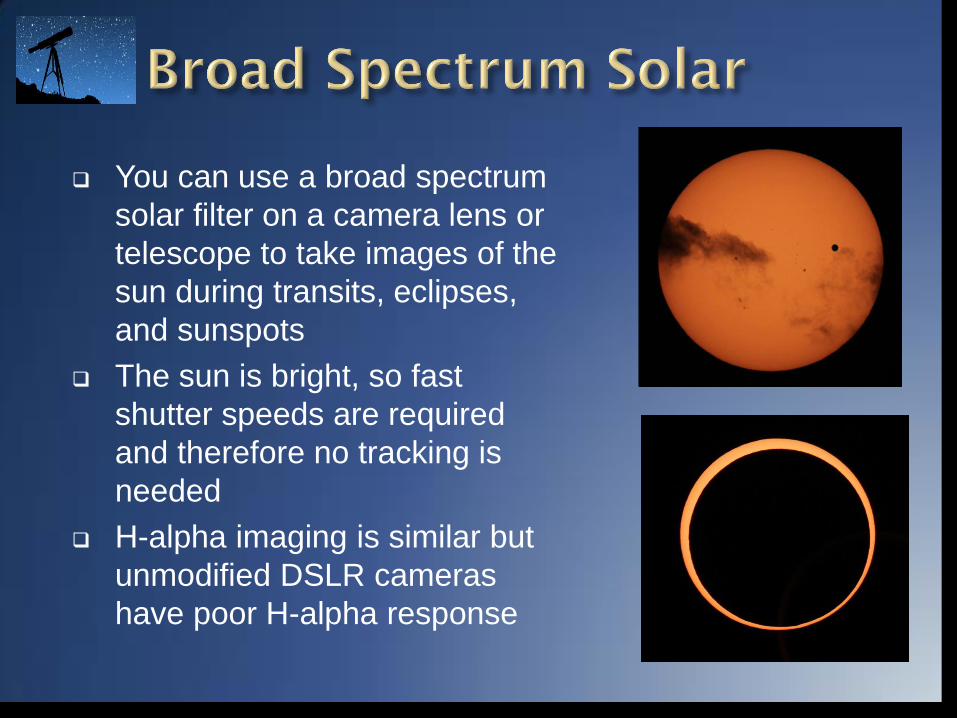
You can use a broad spectrum
solar filter on a camera lens or
telescope to take images of the
sun during transits, eclipses,
and sunspots
The sun is bright, so fast
shutter speeds are required
and therefore no tracking is
needed
H-alpha imaging is similar but
unmodified DSLR cameras
have poor H-alpha response

The moon is another
bright object allowing
short shutter speeds
You can use a camera
lens or a small
telescope
NOTE: Close up images of craters using
long focal length telescopes will require
tracking
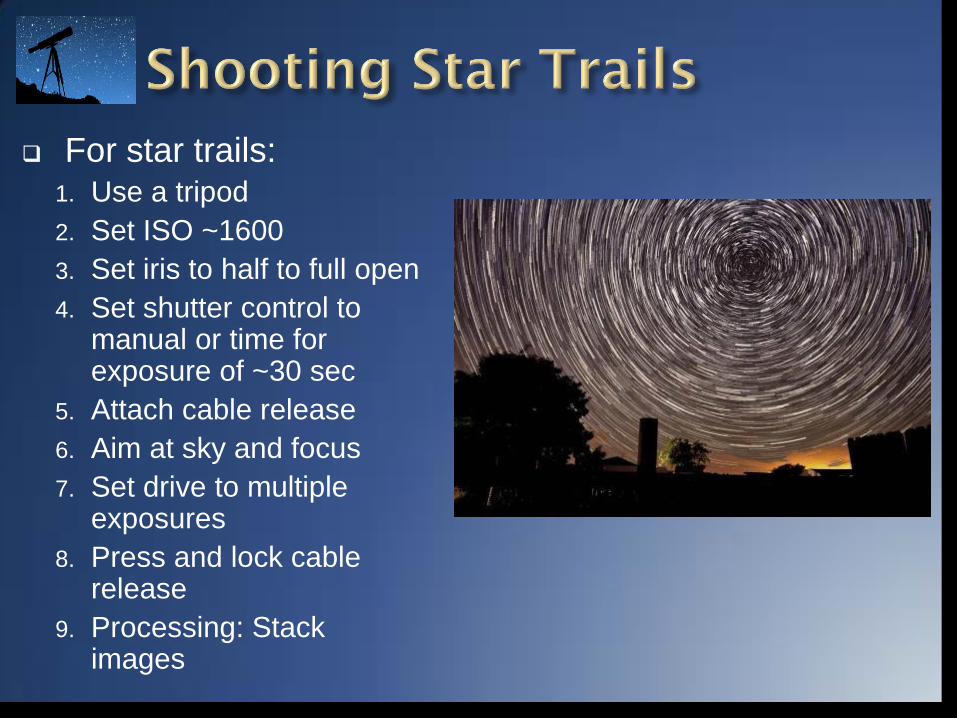
For star trails: 1. Use a tripod
2. Set ISO ~1600
3. Set iris to half to full open
4. Set shutter control to manual or time for exposure of ~30 sec
5. Attach cable release
6. Aim at sky and focus
7. Set drive to multiple exposures
8. Press and lock cable release
9. Processing: Stack images
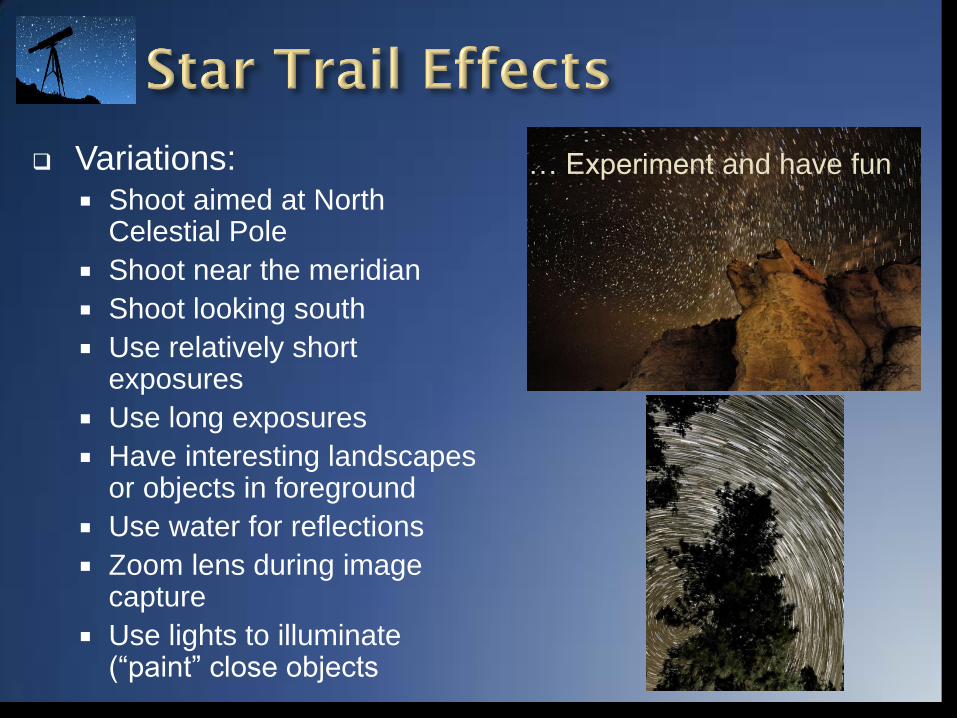
Variations: Shoot aimed at North
Celestial Pole
Shoot near the meridian
Shoot looking south
Use relatively short exposures
Use long exposures
Have interesting landscapes or objects in foreground
Use water for reflections
Zoom lens during image capture
Use lights to illuminate (“paint” close objects
… Experiment and have fun
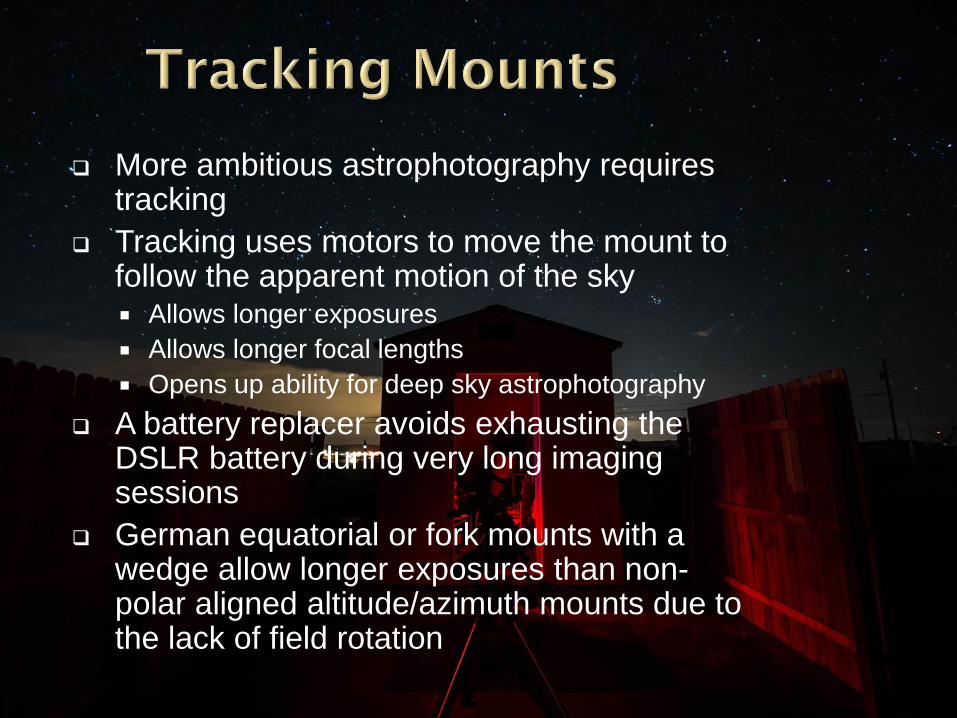
More ambitious astrophotography requires tracking
Tracking uses motors to move the mount to follow the apparent motion of the sky Allows longer exposures
Allows longer focal lengths
Opens up ability for deep sky astrophotography
A battery replacer avoids exhausting the DSLR battery during very long imaging sessions
German equatorial or fork mounts with a wedge allow longer exposures than non-polar aligned altitude/azimuth mounts due to the lack of field rotation
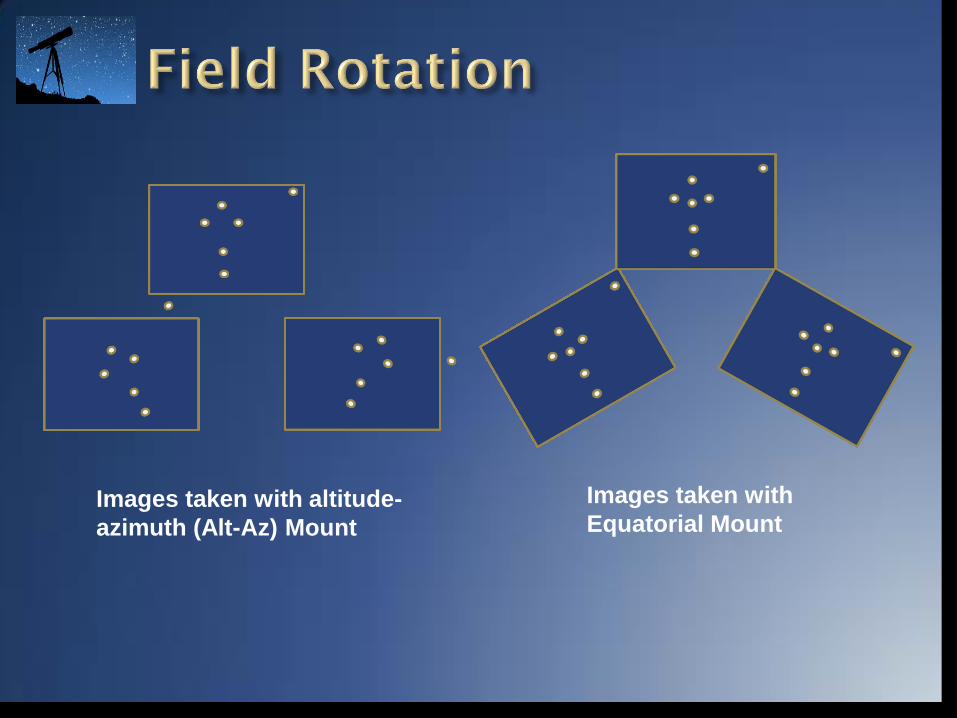
Images taken with
Equatorial Mount Images taken with altitude-
azimuth (Alt-Az) Mount
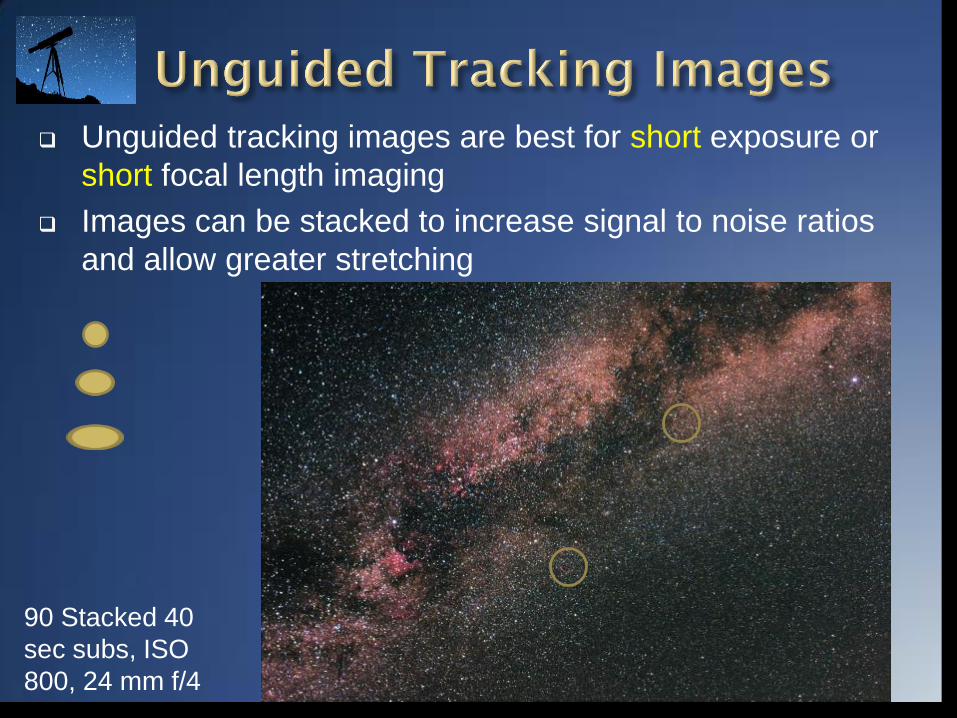
Unguided tracking images are best for short exposure or
short focal length imaging
Images can be stacked to increase signal to noise ratios
and allow greater stretching
90 Stacked 40
sec subs, ISO
800, 24 mm f/4
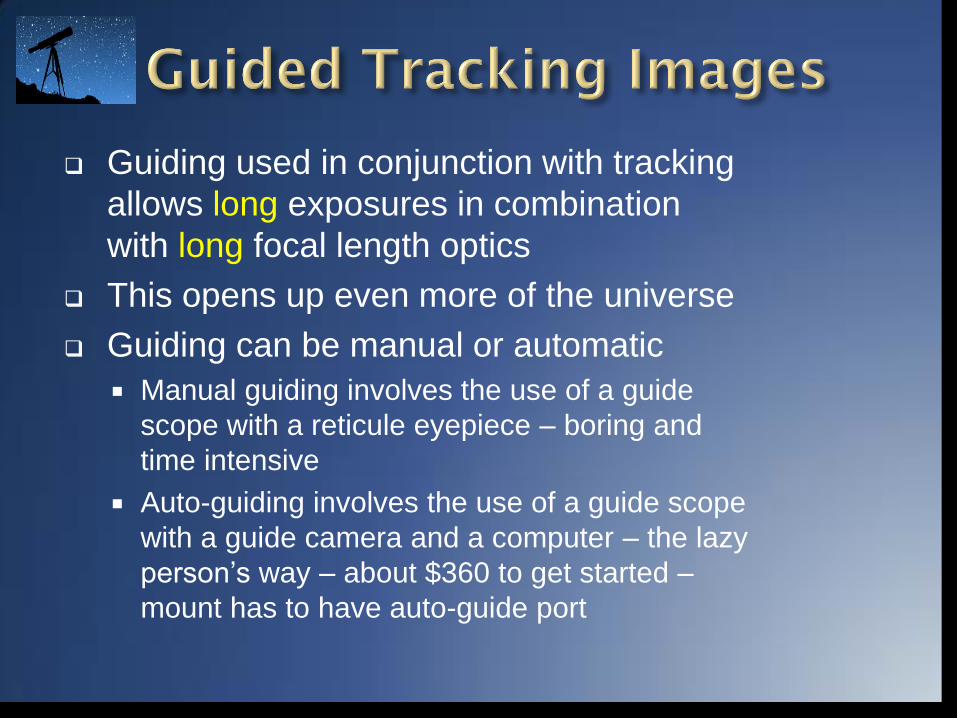
Guiding used in conjunction with tracking
allows long exposures in combination
with long focal length optics
This opens up even more of the universe
Guiding can be manual or automatic
Manual guiding involves the use of a guide
scope with a reticule eyepiece – boring and
time intensive
Auto-guiding involves the use of a guide scope
with a guide camera and a computer – the lazy
person’s way – about $360 to get started –
mount has to have auto-guide port
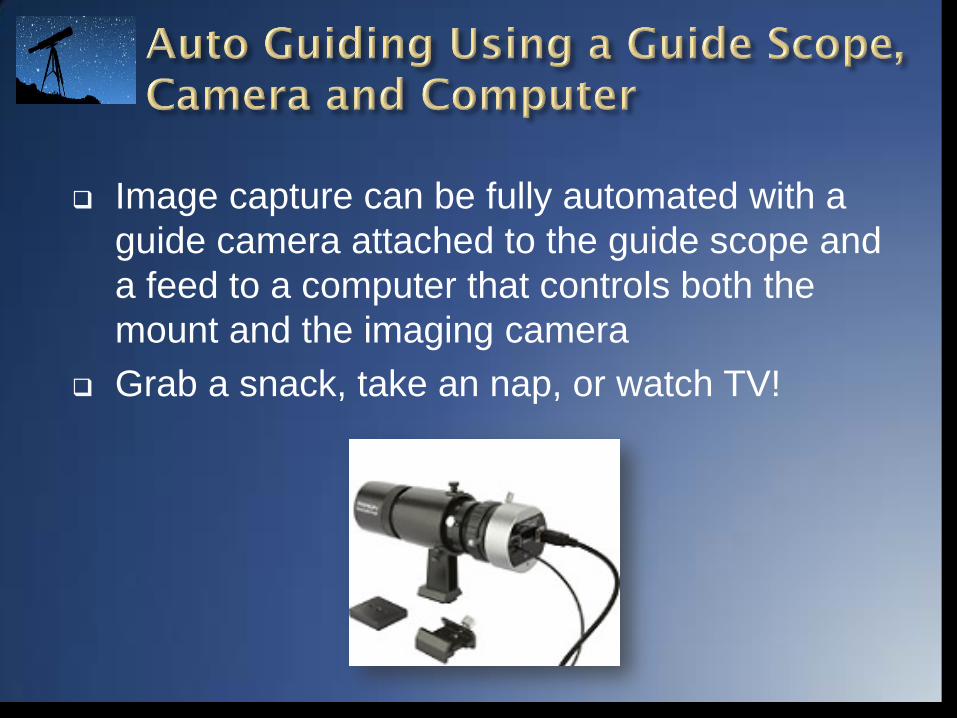
Image capture can be fully automated with a
guide camera attached to the guide scope and
a feed to a computer that controls both the
mount and the imaging camera
Grab a snack, take an nap, or watch TV!
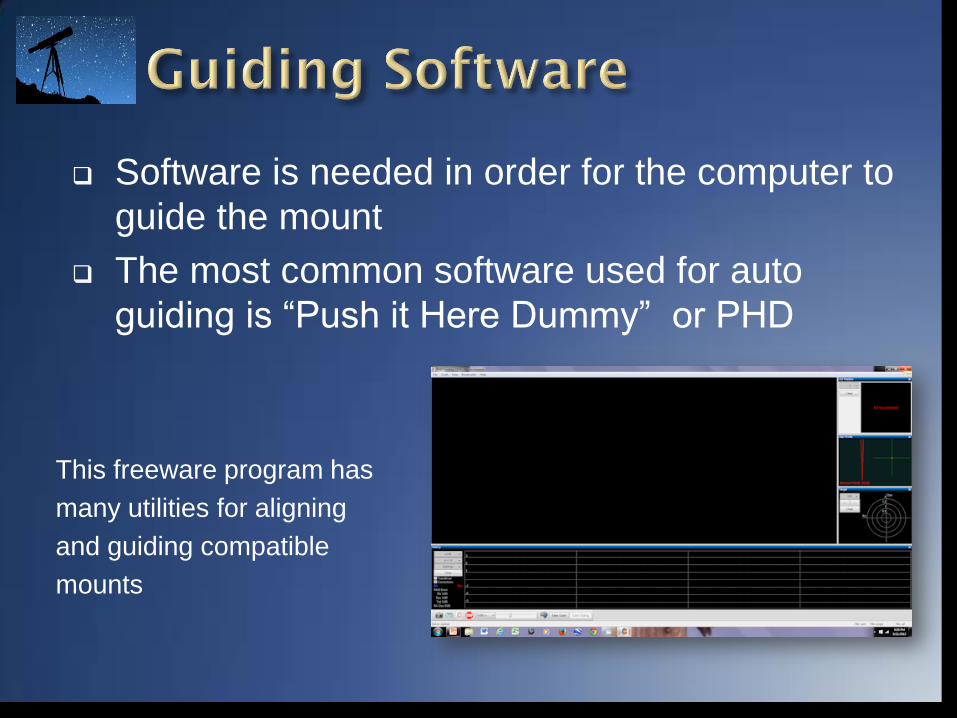
Software is needed in order for the computer to
guide the mount
The most common software used for auto
guiding is “Push it Here Dummy” or PHD
This freeware program has
many utilities for aligning
and guiding compatible
mounts
It is fairly easy to focus the DSLR camera for wide-field, as well as for the sun and moon, but focusing for high-magnification deep space is difficult
Auto focus will not work unless there is a large amount of light
Manual focus looking through the view finder is difficult because objects are small and dim
There are several techniques that allow for good focusing for deep space
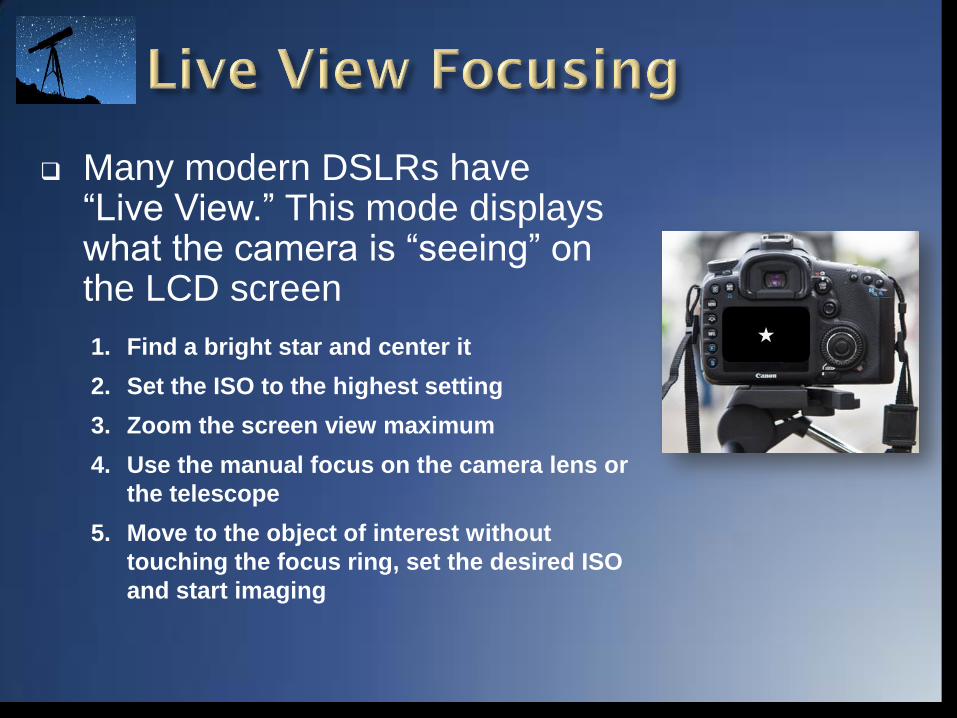
Many modern DSLRs have “Live View.” This mode displays what the camera is “seeing” on the LCD screen
1. Find a bright star and center it
2. Set the ISO to the highest setting
3. Zoom the screen view maximum
4. Use the manual focus on the camera lens or
the telescope
5. Move to the object of interest without
touching the focus ring, set the desired ISO
and start imaging

Some software like “Backyard EOS”
for Canon cameras and “DSLR
Focus” have functions that examine
individual stars and analyze the
distribution of light dynamically as
you focus
Motorized remote controlled focusers
can be controlled by focusing
software to automatically focus a
telescope
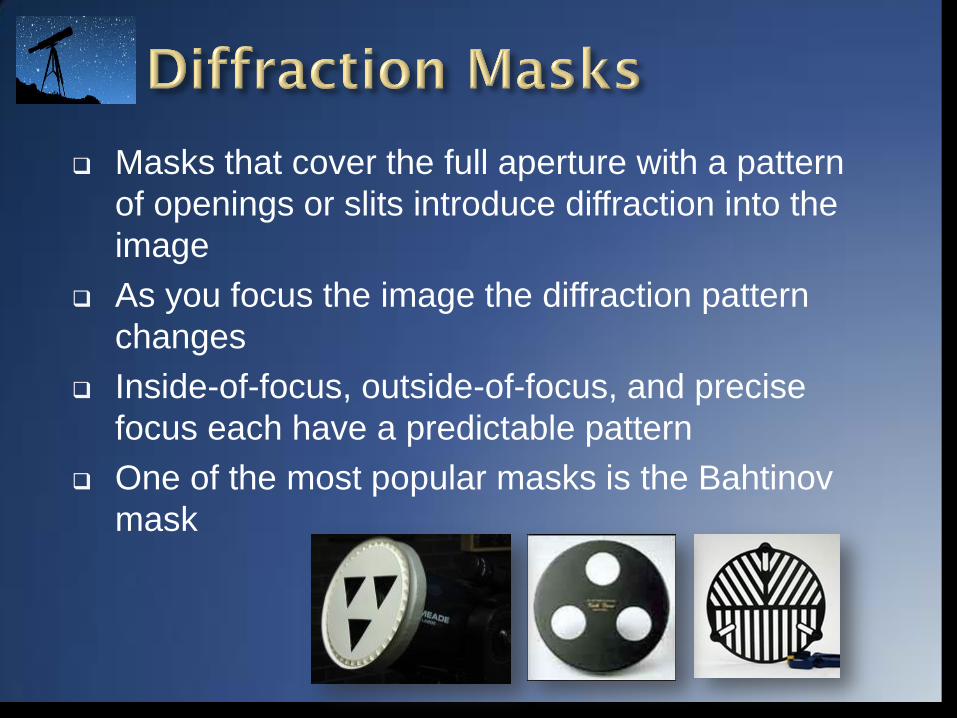
Masks that cover the full aperture with a pattern
of openings or slits introduce diffraction into the
image
As you focus the image the diffraction pattern
changes
Inside-of-focus, outside-of-focus, and precise
focus each have a predictable pattern
One of the most popular masks is the Bahtinov
mask
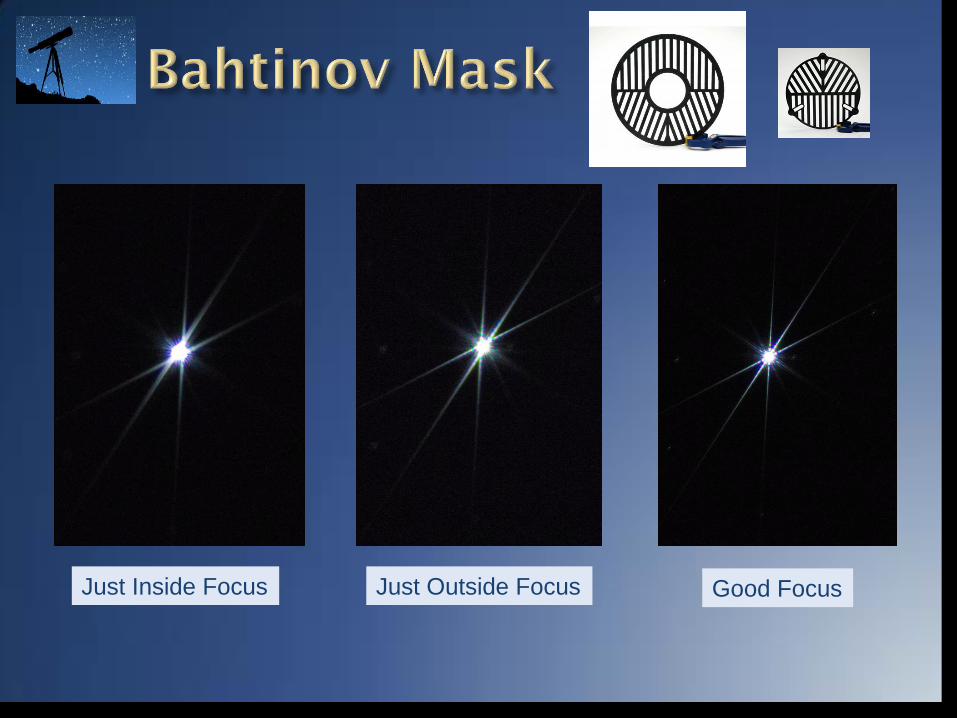
Just Inside Focus Just Outside Focus Good Focus
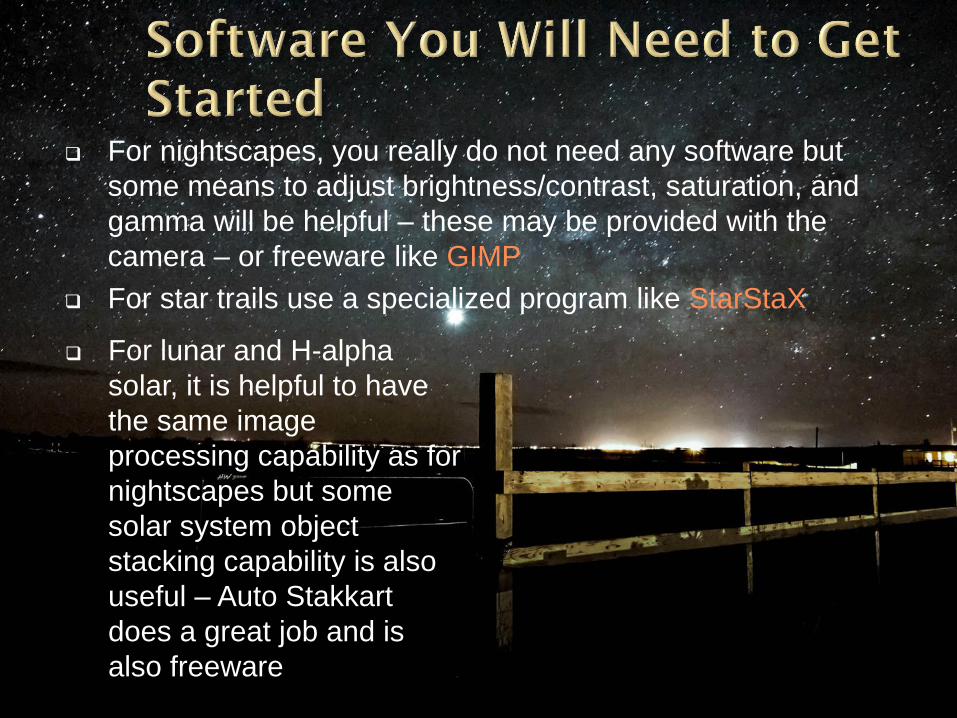
For nightscapes, you really do not need any software but
some means to adjust brightness/contrast, saturation, and
gamma will be helpful – these may be provided with the
camera – or freeware like GIMP
For star trails use a specialized program like StarStaX
For lunar and H-alpha
solar, it is helpful to have
the same image
processing capability as for
nightscapes but some
solar system object
stacking capability is also
useful – Auto Stakkart
does a great job and is
also freeware
There are a variety of software packages
available for astrophotography image
processing
Some cost money but there are some capable
programs that are free
One of the most useful freeware programs is
“Deep Sky Stacker” (DSS)
A highly powerful commercial program is
“PixInsight”
The real power of guided tracking and stacking imaging is what happens after images are captured
Dim noisy images are stacked to improve signal-to-noise ratio and allow stretching to bring out faint details
Without stacking, stretching will amplify noise and degrade the image
Stacking reduces noise in final image by the square root of the number of images stacked
For example, stacking 25 images reduces the noise by a factor of 5
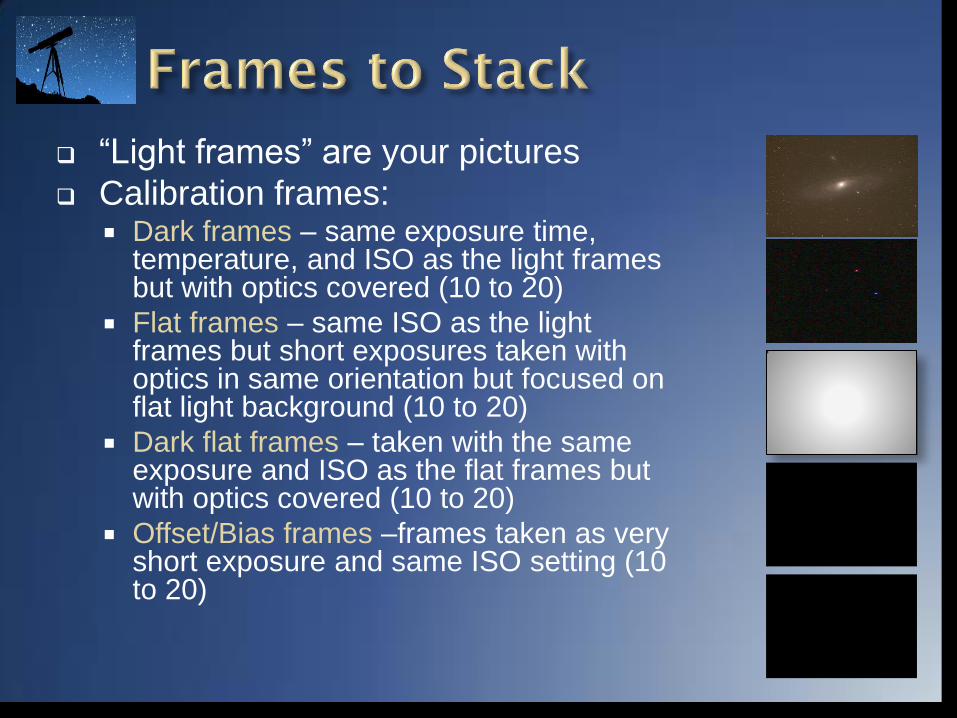
“Light frames” are your pictures
Calibration frames: Dark frames – same exposure time,
temperature, and ISO as the light frames but with optics covered (10 to 20)
Flat frames – same ISO as the light frames but short exposures taken with optics in same orientation but focused on flat light background (10 to 20)
Dark flat frames – taken with the same exposure and ISO as the flat frames but with optics covered (10 to 20)
Offset/Bias frames –frames taken as very short exposure and same ISO setting (10 to 20)
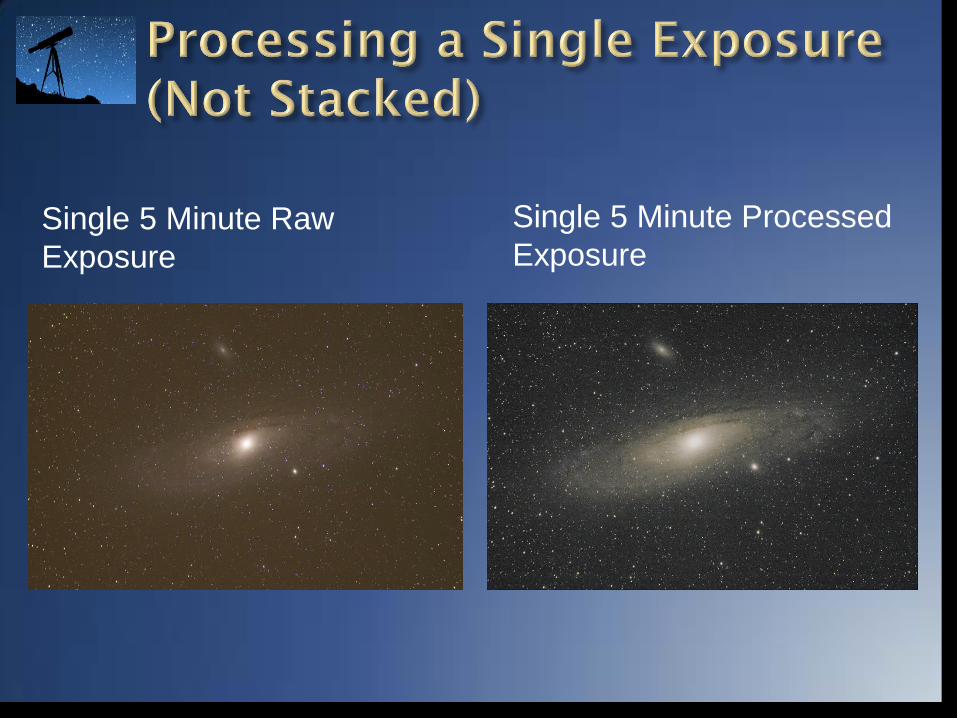
Single 5 Minute Raw
Exposure
Single 5 Minute Processed
Exposure
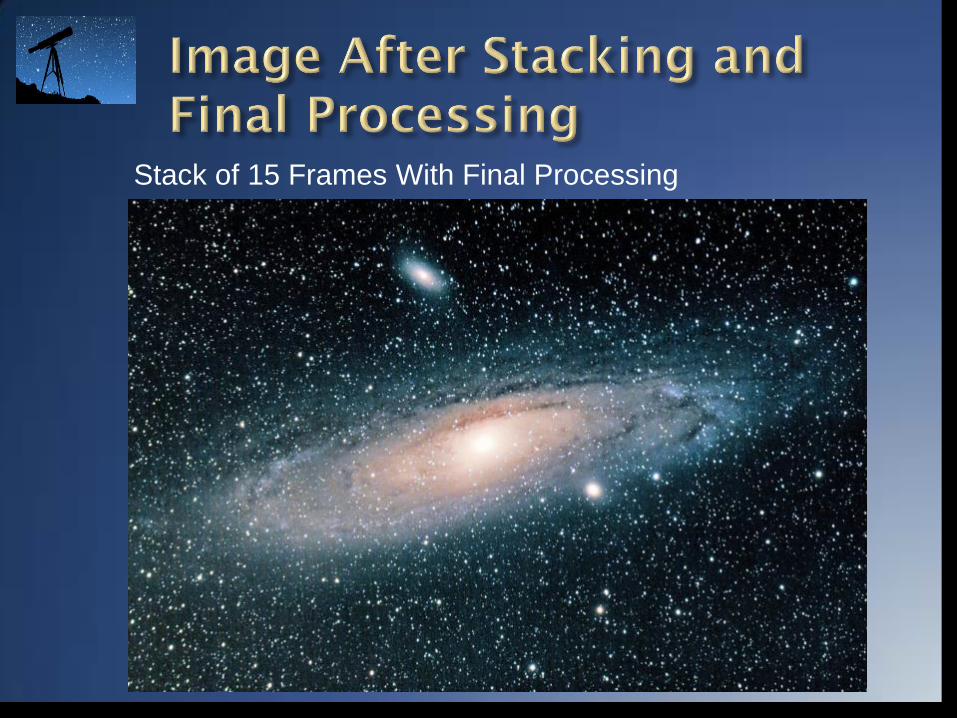
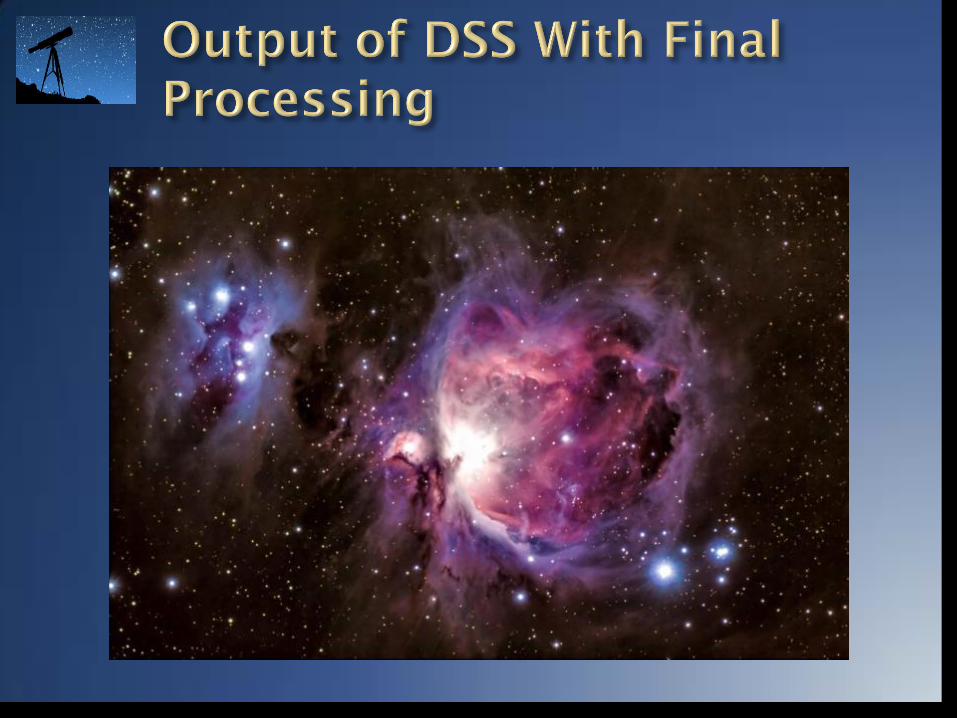
Stack of 15 Frames With Final Processing
Stacking programs like Deep Sky Stacker
(DSS) have some minimal image
processing like color saturation and
balance
For final processing, programs such as
Adobe Photoshop, Adobe Lightroom, or
Corel PaintShop, allow you to tease out
the fine details
The output from DSS is not bad, but it can
be improved …