oracle® application server 10g forms and reports services
TRANSCRIPT

Oracle® Application ServerForms and Reports Services Installation Guide
10g Release 2 (10.1.2) for Linux x86
B19314-02
August 2005
Oracle Application Server Forms and Reports Services Installation Guide, 10g Release 2 (10.1.2) for Linux x86
B19314-02
Copyright © 2003, 2005, Oracle. All rights reserved.
Primary Author: Panna Hegde
Contributors: Orlando Cordero, Rohit Marwaha, Thomas Jose, Rajesh Ramachandran, Navneet Singh, Ingrid Snedecor, Robin Zimmermann, Peter Lubbers, Vinayak Hegde, Ravikumar Venkatesan, Ratheesh Pai, Vinod Kumar Pandurangan
The Programs (which include both the software and documentation) contain proprietary information; they are provided under a license agreement containing restrictions on use and disclosure and are also protected by copyright, patent, and other intellectual and industrial property laws. Reverse engineering, disassembly, or decompilation of the Programs, except to the extent required to obtain interoperability with other independently created software or as specified by law, is prohibited.
The information contained in this document is subject to change without notice. If you find any problems in the documentation, please report them to us in writing. This document is not warranted to be error-free. Except as may be expressly permitted in your license agreement for these Programs, no part of these Programs may be reproduced or transmitted in any form or by any means, electronic or mechanical, for any purpose.
If the Programs are delivered to the United States Government or anyone licensing or using the Programs on behalf of the United States Government, the following notice is applicable:
U.S. GOVERNMENT RIGHTS Programs, software, databases, and related documentation and technical data delivered to U.S. Government customers are "commercial computer software" or "commercial technical data" pursuant to the applicable Federal Acquisition Regulation and agency-specific supplemental regulations. As such, use, duplication, disclosure, modification, and adaptation of the Programs, including documentation and technical data, shall be subject to the licensing restrictions set forth in the applicable Oracle license agreement, and, to the extent applicable, the additional rights set forth in FAR 52.227-19, Commercial Computer Software—Restricted Rights (June 1987). Oracle Corporation, 500 Oracle Parkway, Redwood City, CA 94065
The Programs are not intended for use in any nuclear, aviation, mass transit, medical, or other inherently dangerous applications. It shall be the licensee's responsibility to take all appropriate fail-safe, backup, redundancy and other measures to ensure the safe use of such applications if the Programs are used for such purposes, and we disclaim liability for any damages caused by such use of the Programs.
Oracle, JD Edwards, PeopleSoft, and Retek are registered trademarks of Oracle Corporation and/or its affiliates. Other names may be trademarks of their respective owners.
The Programs may provide links to Web sites and access to content, products, and services from third parties. Oracle is not responsible for the availability of, or any content provided on, third-party Web sites. You bear all risks associated with the use of such content. If you choose to purchase any products or services from a third party, the relationship is directly between you and the third party. Oracle is not responsible for: (a) the quality of third-party products or services; or (b) fulfilling any of the terms of the agreement with the third party, including delivery of products or services and warranty obligations related to purchased products or services. Oracle is not responsible for any loss or damage of any sort that you may incur from dealing with any third party.

iii
Contents
Preface ................................................................................................................................................................ vii
Audience...................................................................................................................................................... viiDocumentation Accessibility .................................................................................................................... viiRelated Documents ................................................................................................................................... viiiConventions ............................................................................................................................................... viii
1 What's New in the Installation
1.1 New Screen for Specifying the staticports.ini File ................................................................. 1-11.2 New Element for Specifying Port Numbers for CORBA Communication ........................ 1-21.3 Configuring Forms and Reports Services to Use the Services of an Oracle Application
Server Infrastructure 1-21.4 Cloning Forms and Reports Services Instances...................................................................... 1-21.5 Additional Tool for Deinstallation ........................................................................................... 1-21.6 Recording Feature for Silent Installations ............................................................................... 1-31.7 Generating Installation Statistics .............................................................................................. 1-31.8 Change in the Default Port Range............................................................................................ 1-31.9 What's New in Oracle Application Server Forms Services................................................... 1-41.10 What's New in Oracle Application Server Reports Services ................................................ 1-4
2 Introduction to Forms and Reports Services
2.1 Restrictions with This Installation Type.................................................................................. 2-12.2 Available Features with This Installation Type...................................................................... 2-12.2.1 Oracle Application Server Forms Services....................................................................... 2-22.2.2 Oracle Application Server Reports Services .................................................................... 2-22.2.3 Oracle HTTP Server............................................................................................................. 2-22.2.4 Oracle Application Server Web Cache ............................................................................. 2-22.2.5 Oracle Application Server Containers for J2EE............................................................... 2-22.2.6 Oracle Enterprise Manager................................................................................................. 2-22.2.7 Oracle Process and Management Notification ................................................................ 2-32.2.8 Distributed Configuration Management.......................................................................... 2-3
3 Requirements
3.1 System Requirements ................................................................................................................. 3-13.2 Software Requirements .............................................................................................................. 3-43.2.1 Software Requirements for Red Hat Enterprise Linux AS/ES 2.1 Systems................ 3-4

iv
3.2.2 Software Requirements for Red Hat Enterprise Linux AS/ES 3.0 Systems................ 3-63.2.3 Software Requirements for Red Hat Enterprise Linux AS/ES 4.0 Systems................ 3-83.2.4 Software Requirements for SUSE Linux Enterprise Server 8 Systems ........................ 3-93.2.5 Software Requirements for SUSE Linux Enterprise Server 9 Systems ..................... 3-123.3 Kernel Parameters.................................................................................................................... 3-163.3.1 Kernel Parameter Settings for OracleAS Web Cache .................................................. 3-163.4 Shell Limits for the oracle User .............................................................................................. 3-173.5 Ports ........................................................................................................................................... 3-183.5.1 Checking If a Port Is in Use ............................................................................................. 3-183.5.2 Using Default Port Numbers .......................................................................................... 3-183.5.3 Using Custom Port Numbers (the Static Ports Feature) ............................................. 3-183.5.3.1 Format of the staticports.ini File.............................................................................. 3-193.5.3.2 Error Conditions That Cause the Installer to Use Default Ports Instead of Specified
Ports 3-213.5.3.3 Ports for Oracle HTTP Server and OracleAS Web Cache.................................... 3-213.5.3.4 Examples..................................................................................................................... 3-223.5.3.4.1 Configuring Oracle HTTP Server to Use Ports 80 and 443 With OracleAS Web
Cache as the Front-End 3-233.5.3.4.2 Configuring Oracle HTTP Server to Use Ports 80 and 443 Without OracleAS
Web Cache 3-233.6 Operating System Groups ...................................................................................................... 3-233.7 Operating System User ........................................................................................................... 3-243.8 Environment Variables ........................................................................................................... 3-253.8.1 Tips on Environment Variables ...................................................................................... 3-253.8.2 ORACLE_HOME and ORACLE_SID............................................................................ 3-263.8.3 PATH, CLASSPATH, and LD_LIBRARY_PATH ........................................................ 3-263.8.4 DISPLAY ............................................................................................................................ 3-263.8.5 TMP..................................................................................................................................... 3-263.8.6 TNS_ADMIN..................................................................................................................... 3-273.8.7 REPORTS_DEFAULT_DISPLAY ................................................................................... 3-273.8.8 LD_ASSUME_KERNEL................................................................................................... 3-283.9 The Hosts File ........................................................................................................................... 3-283.10 Network Topics ........................................................................................................................ 3-283.10.1 Installing on DHCP Computers ..................................................................................... 3-283.10.2 Installing on Multihomed (Multi-IP) Computers ........................................................ 3-293.10.3 Copying CD-ROMs or DVD-ROM to Hard Drive, and Installing from the Hard Drive..
3-293.10.4 Installing from a Remote CD-ROM or DVD-ROM Drive........................................... 3-303.10.5 Installing on Remote Computers.................................................................................... 3-303.10.6 Installing on NFS-Mounted Storage .............................................................................. 3-313.10.7 Running Multiple Instances from One Installation ..................................................... 3-313.10.8 Support for NIS and NIS+ ............................................................................................... 3-313.10.9 Installing on Computers with Multiple Network Cards ............................................ 3-323.11 Prerequisite Checks Performed by the Installer .................................................................. 3-32
4 Considerations Before Starting the Installation
4.1 Oracle Home Directory .............................................................................................................. 4-14.2 First-Time Installation of Any Oracle Product ....................................................................... 4-1

v
4.3 Installing Additional Languages .............................................................................................. 4-24.4 Forms and Reports Services Instances and Instance Names ................................................ 4-24.5 The ias_admin User .................................................................................................................... 4-34.6 Installer File Locations ............................................................................................................... 4-34.7 Why Should I Log In as Root at Certain Times During Installation?.................................. 4-44.8 Setting the Mount Point for the CD-ROM or DVD-ROM..................................................... 4-44.9 Starting Oracle Universal Installer ........................................................................................... 4-5
5 Installation Overview
6 Configuring Forms and Reports Services to Use an Oracle Application Server Infrastructure
6.1 Configuring Forms and Reports Services to Use Oracle Identity Management ............... 6-26.2 Configuring Forms and Reports Services to Use OracleAS Metadata Repository ........... 6-36.3 Making the Reports Server Secure ........................................................................................... 6-46.4 Starting OPMN Services ............................................................................................................ 6-56.5 Testing the Configuration on Oracle Application Server Forms Services.......................... 6-56.6 Testing the Configuration on Oracle Application Server Reports Services ....................... 6-6
7 Post-Installation Tasks
7.1 State of Forms and Reports Services Instances After Installation........................................ 7-17.2 NFS Installations ......................................................................................................................... 7-17.3 Testing the Forms and Reports Services Installation............................................................. 7-17.4 Backup and Recovery................................................................................................................. 7-27.5 SSL................................................................................................................................................. 7-27.6 NLS_LANG Environment Variable ......................................................................................... 7-27.7 Deployment of Forms and Reports .......................................................................................... 7-2
8 Upgrading 9.0.4 Forms and Reports Services to 10.1.2 Forms and Reports Services
8.1 Compatibility Matrix .................................................................................................................. 8-18.2 Upgrading a 9.0.4 Standalone Forms and Reports Services Instance ................................. 8-28.3 Completing the Oracle Application Server Forms Services Upgrade................................. 8-58.3.1 Upgrading Forms *.fmx Files ............................................................................................. 8-58.3.2 Upgrading forms90app.ear Deployed in User-defined OC4J Instances ..................... 8-58.4 Completing the Oracle Application Server Reports Services Upgrade .............................. 8-68.4.1 Enabling Management of Oracle Application Server Reports Services from Application
Server Control Console 8-68.4.2 Upgrading User-Defined OC4J Instances With Oracle Reports Deployments .......... 8-78.5 Configuring the 10.1.2 Standalone Instance of Forms and Reports Services to Use Oracle
Application Server Infrastructure Services 8-7
9 Compatibility with Earlier Versions
9.1 Compatibility with Earlier Versions and Release 10g (10.1.2).............................................. 9-19.2 Interoperability Issues and Workarounds............................................................................... 9-2

vi
9.2.1 Oracle Enterprise Manager for 9.0.2, 9.0.3, or 9.0.4 and 10g Release 2 (10.1.2) Uses the Same Port (Port 1810) 9-2
9.2.2 dcmctl getState Command from an Oracle Application Server Forms Services Instance Cannot Be Used With 9.0.2, 9.0.3, and 9.0.4 Instances 9-3
9.2.3 Oracle Enterprise Manager: No Rollup Metrics for 9.0.2 Middle Tiers ....................... 9-3
A Troubleshooting
A.1 Verifying Requirements ............................................................................................................ A-1A.2 Resolving Installation Errors.................................................................................................... A-1A.3 Troubleshooting Configuration Assistants ............................................................................ A-2A.3.1 Configuration Assistant Failure ....................................................................................... A-2A.3.2 Failure During Component Configuration and Startup ............................................... A-2A.3.3 Fatal Errors........................................................................................................................... A-3A.3.4 OC4J Instance Configuration Assistant Errors............................................................... A-4A.4 Descriptions of Forms and Reports Services Configuration Assistants ............................ A-5
B Deinstallation and Reinstallation
B.1 Deinstallation of Forms and Reports Services Instances...................................................... B-1B.2 Reinstallation .............................................................................................................................. B-1
C Default Port Numbers
C.1 Method of Assigning Default Port Numbers......................................................................... C-1C.2 Default Port Numbers ............................................................................................................... C-1
D URLs for Components
Index

vii
Preface
Oracle Application Server Forms and Reports Services Installation Guide covers requirements, new features in the installer, concepts that affect installation, compatibility with other products, post-installation tasks, and troubleshooting tips.
AudienceThis guide is intended for users who are comfortable performing system administration operations such as creating users and groups, adding users to groups, and installing operating system patches on the computer on which Forms and Reports Services will be installed. Users installing Forms and Reports Services need root access to run some scripts.
Documentation AccessibilityOur goal is to make Oracle products, services, and supporting documentation accessible, with good usability, to the disabled community. To that end, our documentation includes features that make information available to users of assistive technology. This documentation is available in HTML format, and contains markup to facilitate access by the disabled community. Accessibility standards will continue to evolve over time, and Oracle is actively engaged with other market-leading technology vendors to address technical obstacles so that our documentation can be accessible to all of our customers. For more information, visit the Oracle Accessibility Program Web site at
http://www.oracle.com/accessibility/
Accessibility of Code Examples in DocumentationScreen readers may not always correctly read the code examples in this document. The conventions for writing code require that closing braces should appear on an otherwise empty line; however, some screen readers may not always read a line of text that consists solely of a bracket or brace.
Accessibility of Links to External Web Sites in DocumentationThis documentation may contain links to Web sites of other companies or organizations that Oracle does not own or control. Oracle neither evaluates nor makes any representations regarding the accessibility of these Web sites.
viii
TTY Access to Oracle Support ServicesOracle provides dedicated Text Telephone (TTY) access to Oracle Support Services within the United States of America 24 hours a day, seven days a week. For TTY support, call 800.446.2398.
Related DocumentsFor more information, see the following documents:
■ Oracle Application Server Forms and Reports Services Release Notes
■ Oracle Application Server Reports Services Publishing Reports to the Web
■ Oracle Reports Building Reports
■ Getting Started with Oracle Reports, available on the Oracle Technology Network (http://www.oracle.com/technology/products/reports/)
The Index of Getting Started with Oracle Reports provides access to Reports documentation not available on the main OTN Reports Documentation page. You can select from the Topic and Collateral Type lists to view any Reports document, including online help and tech notes.
■ Oracle Application Server Forms Services Deployment Guide
ConventionsThe following text conventions are used in this document:
Convention Meaning
boldface Boldface type indicates graphical user interface elements associated with an action, or terms defined in text or the glossary.
italic Italic type indicates book titles, emphasis, or placeholder variables for which you supply particular values.
monospace Monospace type indicates commands within a paragraph, URLs, code in examples, text that appears on the screen, or text that you enter.

What's New in the Installation 1-1
1What's New in the Installation
This chapter describes new features in Oracle Application Server 10g Forms and Reports Services. This chapter is mostly of interest to users who have installed previous versions of Forms and Reports Services.
To see a list of new features in the product itself, visit the Oracle Technology Network site (http://www.oracle.com/technology). For frequently asked questions (FAQ) about the installation of Forms and Reports Services, visit the Forms and Reports Services Installation FAQ page on the Oracle Technology Network site (http://www.oracle.com/technology/products/reports/htdocs/faq/faq_fr_services.htm).
This chapter includes the following topics:
■ New Screen for Specifying the staticports.ini File
■ New Element for Specifying Port Numbers for CORBA Communication
■ Configuring Forms and Reports Services to Use the Services of an Oracle Application Server Infrastructure
■ Cloning Forms and Reports Services Instances
■ Additional Tool for Deinstallation
■ Recording Feature for Silent Installations
■ Generating Installation Statistics
■ Change in the Default Port Range
■ What's New in Oracle Application Server Forms Services
■ What's New in Oracle Application Server Reports Services
1.1 New Screen for Specifying the staticports.ini FileIn earlier releases, for components to use custom ports, you created a staticports.ini file to map components and port numbers. When you started the installer, you used a command-line option to specify the file.
In this release, you specify the staticports.ini file in the new "Select Port Configuration Options" screen in the installer. You do not use the command-line options to specify the file.
New Element for Specifying Port Numbers for CORBA Communication
1-2 Oracle Application Server Forms and Reports Services Installation Guide
1.2 New Element for Specifying Port Numbers for CORBA Communication
This release introduces the ORBPorts element in the server configuration file to enable you to explicitly specify the port numbers used by Reports Server and engines for communication through CORBA. You can specify either a range of ports or individual ports separated by commas. For example:
<ORBPorts value="15000-15010"/> (Range of values)
<ORBPorts value="15000,16000,17000,18000"/> (Comma-separated values)
By default, the ORBPorts element is not present in the Reports Server configuration file. If this element is missing, Reports Server chooses a random port for CORBA communication. For more information about the ORBPorts element, see the chapter "Configuring OracleAS Reports Services" in the Oracle Application Server Reports Services Publishing Reports to the Web manual.
1.3 Configuring Forms and Reports Services to Use the Services of an Oracle Application Server Infrastructure
In this release, you can configure Forms and Reports Services to use the services of an Oracle Application Server Infrastructure. Forms and Reports Services can then use the services of an OracleAS Infrastructure in the same way as used by the Business Intelligence and Forms components. For more information on the configuration, see Chapter 6, "Configuring Forms and Reports Services to Use an Oracle Application Server Infrastructure".
1.4 Cloning Forms and Reports Services InstancesCloning is the process of copying an existing installation to a different location while preserving its configuration. In this release, cloning an installation of Forms and Reports Services instance is possible. For more information on cloning, see the Oracle Application Server Administrator’s Guide.
1.5 Additional Tool for DeinstallationIn this release, there is a new tool called the Deconfig tool that removes entries from Oracle Internet Directory and the Oracle Application Server Metadata Repository. You run this tool before you deinstall an Oracle Application Server instance using the installer. For more information about the Deconfig tool, see the Oracle Application Server Installation Guide.
Note: The ORBPorts element should be defined only if the TCP port filtering has been enabled on the server where Reports Server is running. If port filtering is enabled, and a few ports can be opened for Reports Server, then use ORBPorts to specify them in the server configuration file for Reports Server and engine communication. If any of the ports are not available, Reports Server or engines may fail to start and an error displays.

Change in the Default Port Range
What's New in the Installation 1-3
1.6 Recording Feature for Silent InstallationsThe installer has a record mode, in which it saves your inputs to a response file. You can then use the generated response file to install Forms and Reports Services on different computers using the same values.
For details, see the Oracle Application Server Installation Guide.
1.7 Generating Installation StatisticsThe installer provides command-line options for monitoring resources used for installation. Table 1–1 lists the options that are supported.
For example, the following command provides information for the time taken, memory used, and disk space used for the installation:
runInstaller -printtime -printmemory -printdiskusage
1.8 Change in the Default Port RangeThe default port ranges for the following components have changed:
■ Oracle Application Server Reports Services
■ Oracle Internet Directory
■ Oracle Application Server Certificate Authority
■ Oracle Application Server Containers for J2EE
■ Oracle Enterprise Manager 10g
■ Oracle Application Server Web Cache
For details, see Appendix C, "Default Port Numbers".
Table 1–1 Installer Options for Generating Installation Statistics
Option Description
-printtime Retrieves information on the time taken for the installation. The installer writes the information in the following file:
oraInventory/logs/timetimestamp.log
oraInventory specifies the location of your oraInventory directory. You can look in the /etc/oraInst.loc file to find out the location of this directory on your computer.
-printmemory Retrieves information on the memory used for the installation. The installer writes the information in the following file:
oraInventory/logs/memorytimestamp.log
oraInventory specifies the location of your oraInventory directory. You can look in the /etc/oraInst.loc file to find out the location of this directory on your computer.
-printdiskusage Retrieves information on the disk space used for the installation. The installer writes the information in the following file:
oraInventory/logs/diskusagetimestamp.log
oraInventory specifies the location of your oraInventory directory. You can look in the /etc/oraInst.loc file to find out the location of this directory on your computer.
What's New in Oracle Application Server Forms Services
1-4 Oracle Application Server Forms and Reports Services Installation Guide
1.9 What's New in Oracle Application Server Forms ServicesMuch of the functionality that was handled by the Web server in Oracle 6i Forms has been assumed by components that are delivered with Oracle Application Server. For example, load balancing, security, scalability, HTTP/S communication handling, and deployment of Java servlets are all performed by various components delivered with Oracle Application Server, such as the Oracle HTTP Server and Oracle Application Server Containers for J2EE (OC4J).
The Forms Services component of Oracle Application Server handles all processing specific to Forms Developer applications, such as running the business logic defined in the Forms Developer application and providing the connection to the Oracle Database. A Java applet provides the client user interface.
New features for OracleAS Forms Services include:
■ Improved Integration with Enterprise Manager for easier administration and manageability such as End User Monitoring.
■ Java Virtual Machine (JVM) Pooling.
■ Upgrade Assistant. For more information on the Upgrade Assistant, see Chapter 8, "Upgrading 9.0.4 Forms and Reports Services to 10.1.2 Forms and Reports Services".
For more information about these features, see the Oracle Application Server Forms Services Deployment Guide.
1.10 What's New in Oracle Application Server Reports ServicesThe new features of OracleAS Reports Services include:
■ A new output format SPREADSHEET, using which you can generate spreadsheet output directly from existing paper layout reports, while preserving the paper layout information such as colors, fonts, and conditional formatting in the output.
■ Formatting enhancements that allow you to use a defined set of inline HTML formatting tags to format text style attributes, and generate formatted text objects in all bitmap output formats.
■ Support for specifying table attributes for paper-based reports generated to HTML output.
■ Improvements to right-alignment of text in PDF output, as required by languages that read from right to left.
■ Standards compliance for HTML/HTMLCSS output and XML output.
■ The capability to apply external style sheets and user-defined styles to your report or report objects when you generate HTMLCSS output.
■ Enhanced implementation of font subsetting and improved font support to generate PDF output that is clearer, smoother, searchable, and accessible.
■ Several graphing enhancements like support for dashed and dotted line graph.
■ WebDAV destination enhancement to enable you to send report output to a specific Virtual Private Portal (VPP).
■ Migration from Borland's VisiBroker to Sun Microsystems' industry-standard Java Developer's Kit Object Request Broker (JDK ORB).
■ Improved integration with Oracle Application Server Control.

What's New in Oracle Application Server Reports Services
What's New in the Installation 1-5
■ New documentation that provides information and step-by-step instructions for cross-platform report deployment. Refer to the Oracle Application Server Reports Services Publishing Reports to the Web manual.
For more information about these features, refer to the Oracle Reports online Help.

What's New in Oracle Application Server Reports Services
1-6 Oracle Application Server Forms and Reports Services Installation Guide

Introduction to Forms and Reports Services 2-1
2Introduction to Forms and Reports Services
Oracle Application Server Forms and Reports Services enables you to install and configure Forms and Reports Services without the need to install and configure the entire Oracle Application Server. This is called a standalone installation of Forms and Reports Services. You can also configure the standalone Forms and Reports Services instance to use the Oracle Identity Management and Oracle Application Server Metadata Repository services of an Oracle Application Server Infrastructure.
Forms and Reports Services standalone installation is best suited for users who want to upgrade Forms and Reports applications to the Grid environment in two phases. In phase one, they move to the Grid environment by upgrading their client/server-based Forms and Reports applications to Web-based applications. In phase two, users can then choose to use the services offered by an existing OracleAS Infrastructure installation.
This chapter includes the following topics:
■ Restrictions with This Installation Type
■ Available Features with This Installation Type
2.1 Restrictions with This Installation TypeOnce you configure Forms and Reports Services to use the services of an OracleAS Infrastructure, you cannot reverse this configuration.
2.2 Available Features with This Installation TypeWhen you install Forms and Reports Services, you will have access to these features:
■ Oracle Application Server Forms Services
■ Oracle Application Server Reports Services
■ Oracle HTTP Server
■ Oracle Application Server Web Cache
■ Oracle Application Server Containers for J2EE
■ Oracle Enterprise Manager
■ Oracle Process and Management Notification
■ Distributed Configuration Management

Available Features with This Installation Type
2-2 Oracle Application Server Forms and Reports Services Installation Guide
2.2.1 Oracle Application Server Forms ServicesOracle Application Server Forms Services deploys Oracle Forms with database access to Java clients in a Web environment. OracleAS Forms Services automatically optimizes class downloads, network traffic, and interactions with the Oracle database. Forms applications are automatically load-balanced across multiple servers; thus, they can easily scale to service any number of requests.
2.2.2 Oracle Application Server Reports ServicesOracle Application Server Reports Services provides an easy-to-use, scalable, and manageable solution for high-quality enterprise reporting and publishing. Using Oracle Reports, you can publish data generated by multiple sources in various formats (paper layout, Web, or data interchange format). This provides flexibility in the presentation of data. OracleAS Reports Services is part of Oracle Application Server.
2.2.3 Oracle HTTP ServerOracle HTTP Server, built on Apache Web server technology, is the Web server that Oracle Application Server uses. It offers scalability, stability, speed, and extensibility. It also supports Java servlets, Java Server Pages (JSPs), Perl, PL/SQL, and CGI applications.
2.2.4 Oracle Application Server Web CacheOracle Application Server Web Cache is a server-accelerator caching service that improves the performance, scalability, and availability of frequently used Oracle E-business Web sites that run on the Oracle platform. By storing frequently accessed URLs in virtual memory, Oracle Application Server Web Cache eliminates the need to repeatedly process requests for those URLs on the Web server. It also caches both static and dynamically generated HTTP content from one or more applications Web servers.
2.2.5 Oracle Application Server Containers for J2EEOracle Application Server Containers for J2EE (OC4J) is a complete set of J2EE containers written entirely in Java that execute on the Java Virtual Machine (JVM) of the standard Java Development Kit (JDK).
2.2.6 Oracle Enterprise ManagerOracle Enterprise Manager Application Server Control (henceforth referred to as Application Server Control) provides you with Web-based management tools that you need to monitor, administer, and configure multiple Oracle Application Server instances and its components. By default, Application Server Control is installed with every instance of Oracle Application Server. You can deploy applications, manage security, and create and manage Oracle Application Server clusters.
Application Server Control consists of the following:
■ The Enterprise Manager home pages you use to manage Oracle Application Server and its components. These Web pages provide you with a high-level view of your Oracle Application Server environment. From these pages you can drill down for more detailed information on administration, configuration, and performance monitoring. These pages also let you administer Oracle Application Server, its components, and deployed applications.

Available Features with This Installation Type
Introduction to Forms and Reports Services 2-3
■ The underlying software technologies that keep track of your Oracle Application Server instances and components. These technologies automatically perform the necessary management tasks. For example, these technologies discover the components of each Oracle Application Server instance, gather and process performance data, and provide access to application configuration information.
2.2.7 Oracle Process and Management NotificationOracle Process and Management Notification (OPMN) provides process control and monitoring services for Oracle Application Server instances and their components such as Forms and Reports Services. It gathers component status information and distributes the information to the relevant components. Application Server Control uses OPMN for such tasks as starting and stopping the components of your Oracle Application Server instance.
2.2.8 Distributed Configuration ManagementDistributed Configuration Management (DCM) manages configurations among Oracle Application Server instances with a common Oracle Application Server Metadata Repository. It enables cluster-wide deployment of Oracle Application Server; thus, enabling you to deploy an application to one instance and have it automatically propagated to the entire cluster. You can also make a single host or instance configuration change to one instance and have it propagated across all instances in the cluster. Application Server Control uses DCM to make configuration changes and to propagate configuration changes and deployed applications across the cluster.

Available Features with This Installation Type
2-4 Oracle Application Server Forms and Reports Services Installation Guide

Requirements 3-1
3Requirements
Before installing Forms and Reports Services, ensure that your computer meets the requirements described in this chapter.
This chapter contains the following sections:
■ System Requirements
■ Software Requirements
■ Kernel Parameters
■ Shell Limits for the oracle User
■ Ports
■ Operating System Groups
■ Operating System User
■ Environment Variables
■ The Hosts File
■ Network Topics
■ Prerequisite Checks Performed by the Installer
3.1 System RequirementsTable 3–1 lists the system requirements for installing Forms and Reports Services. The installer checks many of these requirements at the start of the installation and displays a warning if any of the requirements is not met.
You can also run the system checks performed by the installer by running the runInstaller command. The runInstaller command is on the Forms and Reports Services CD-ROM (Disk 1) or DVD-ROM (in the forms_reports directory).
CD-ROM:
prompt> mount_point/forms_reports/runInstaller -executeSysPrereqs
DVD-ROM:
prompt> dvd_mount_point/forms_reports/runInstaller -executeSysPrereqs
The results are displayed on the screen as well as written to a log file. For more information on the types of checks performed, see Section 3.11, "Prerequisite Checks Performed by the Installer".

System Requirements
3-2 Oracle Application Server Forms and Reports Services Installation Guide
Table 3–1 System Requirements
Item RequirementChecked by the Installer
Operating system
■ Red Hat Enterprise Linux AS/ES 2.1
■ Red Hat Enterprise Linux AS/ES 3.0
■ Red Hat Enterprise Linux AS/ES 4.0
■ SUSE Linux Enterprise Server 8
■ SUSE Linux Enterprise Server 9
For the most current list of supported Linux Operating Systems, check OracleMetaLink. Oracle does not support customized kernels or modules not supported by the Linux vendor.
Yes
IP The computer's IP address can be static or allocated using DHCP. If you later change the IP configuration, then refer to Oracle Application Server Administrator’s Guide for information about reconfiguring Oracle Application Server.
No
Processor Type
Pentium (32-bit) No
Processor Speed
450 MHz or faster Yes
Memory 512 MB
To determine the amount of memory, enter the following command:
prompt> grep MemTotal /proc/meminfo
Note: These values assume you are running only one Forms and Reports Services instance on each computer.
If you do not meet the memory requirements, the installer displays a warning. The installer lets you to dismiss the warning and continue because you might configure some but not all components and thus require less memory. However, you should test your site to ensure that you have sufficient memory.
Yes
Disk space 1 GB
To determine the amount of free disk space, use the df command:
prompt> df -k dir
Replace dir with the directory in which you plan to install Forms and Reports Services or with the parent directory if the directory does not exist yet. For example, if you plan to install Forms and Reports Services in /opt/oracle/, replace dir with /opt/oracle or /opt/oracle/oralinfrs.
No
Space in /tmp directory
400 MB
To determine the amount of free space in the /tmp directory, use the df command:
prompt> df -k /tmp
If the /tmp directory does not have enough free space, you can specify a different directory by setting the TMP environment variable. See Section 3.8.5, "TMP" for details.
Yes
System Requirements
Requirements 3-3
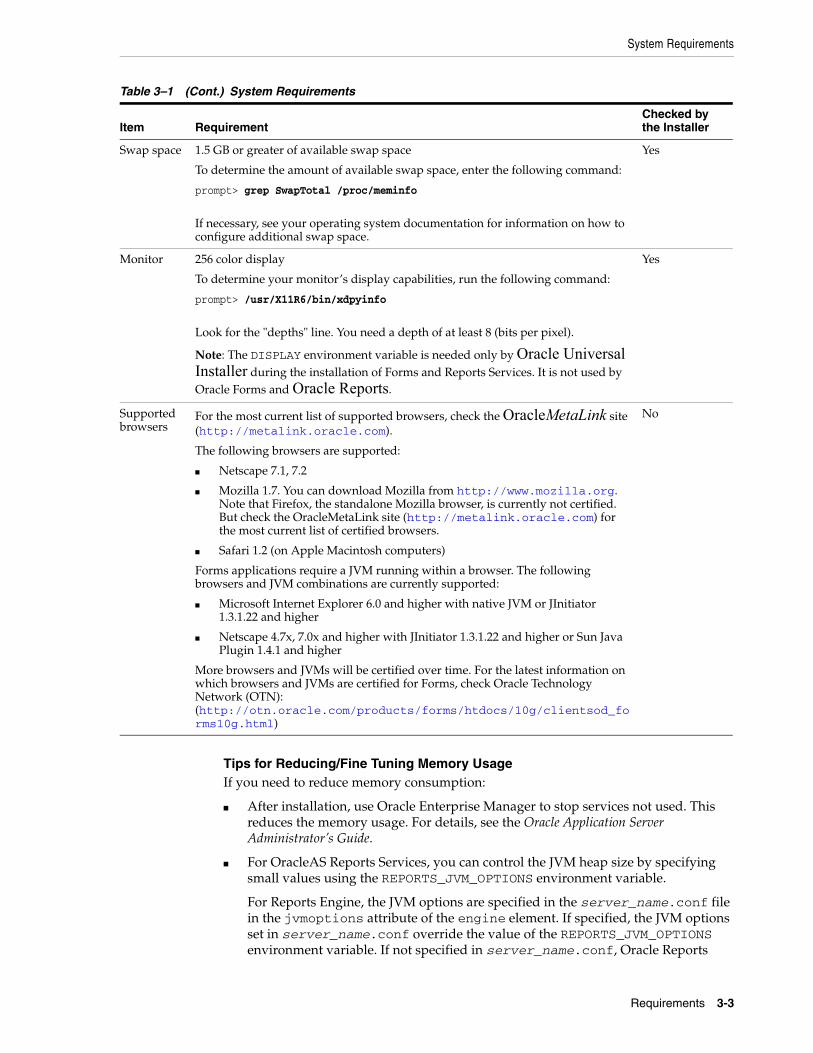
Tips for Reducing/Fine Tuning Memory UsageIf you need to reduce memory consumption:
■ After installation, use Oracle Enterprise Manager to stop services not used. This reduces the memory usage. For details, see the Oracle Application Server Administrator’s Guide.
■ For OracleAS Reports Services, you can control the JVM heap size by specifying small values using the REPORTS_JVM_OPTIONS environment variable.
For Reports Engine, the JVM options are specified in the server_name.conf file in the jvmoptions attribute of the engine element. If specified, the JVM options set in server_name.conf override the value of the REPORTS_JVM_OPTIONS environment variable. If not specified in server_name.conf, Oracle Reports
Swap space 1.5 GB or greater of available swap space
To determine the amount of available swap space, enter the following command:
prompt> grep SwapTotal /proc/meminfo
If necessary, see your operating system documentation for information on how to configure additional swap space.
Yes
Monitor 256 color display
To determine your monitor’s display capabilities, run the following command:
prompt> /usr/X11R6/bin/xdpyinfo
Look for the "depths" line. You need a depth of at least 8 (bits per pixel).
Note: The DISPLAY environment variable is needed only by Oracle Universal Installer during the installation of Forms and Reports Services. It is not used by Oracle Forms and Oracle Reports.
Yes
Supported browsers
For the most current list of supported browsers, check the OracleMetaLink site (http://metalink.oracle.com).
The following browsers are supported:
■ Netscape 7.1, 7.2
■ Mozilla 1.7. You can download Mozilla from http://www.mozilla.org. Note that Firefox, the standalone Mozilla browser, is currently not certified. But check the OracleMetaLink site (http://metalink.oracle.com) for the most current list of certified browsers.
■ Safari 1.2 (on Apple Macintosh computers)
Forms applications require a JVM running within a browser. The following browsers and JVM combinations are currently supported:
■ Microsoft Internet Explorer 6.0 and higher with native JVM or JInitiator 1.3.1.22 and higher
■ Netscape 4.7x, 7.0x and higher with JInitiator 1.3.1.22 and higher or Sun Java Plugin 1.4.1 and higher
More browsers and JVMs will be certified over time. For the latest information on which browsers and JVMs are certified for Forms, check Oracle Technology Network (OTN): (http://otn.oracle.com/products/forms/htdocs/10g/clientsod_forms10g.html)
No
Table 3–1 (Cont.) System Requirements
Item RequirementChecked by the Installer

Software Requirements
3-4 Oracle Application Server Forms and Reports Services Installation Guide
uses the JVM options specified by the REPORTS_JVM_OPTIONS environment variable. For Reports Server, you can use the command line to specify the JVM options. For details about JVM option support, see the Oracle Application Server Reports Services Publishing Reports to the Web manual.
3.2 Software RequirementsDepending on your distribution of Linux, see one of the following sections for information on checking the software requirements:
■ Software Requirements for Red Hat Enterprise Linux AS/ES 2.1 Systems
■ Software Requirements for Red Hat Enterprise Linux AS/ES 3.0 Systems
■ Software Requirements for Red Hat Enterprise Linux AS/ES 4.0 Systems
■ Software Requirements for SUSE Linux Enterprise Server 8 Systems
■ Software Requirements for SUSE Linux Enterprise Server 9 Systems
Oracle does not support customized kernels or modules not supported by the Linux vendor.
You can install Oracle Application Server 10g Forms and Reports Services 10g Release 2 (10.1.2) on a Linux system that is not on a network and you can install Oracle Application Server 10g Forms and Reports Services 10g Release 2 (10.1.2) on a Linux system that is configured to use DHCP. If you want to install Oracle Application Server on a computer that is not on a network you must configure the computer to use either a static IP address or a loopback IP address. Configure the computer to resolve the hostname of the computer to either a static IP address or a loopback IP address.
3.2.1 Software Requirements for Red Hat Enterprise Linux AS/ES 2.1 SystemsTable 3–2 lists the software requirements for Red Hat Enterprise Linux AS/ES 2.1 systems and the procedure that follows the table describes how to ensure your system meets these requirements and any additional requirements for installing Oracle Application Server 10g Forms and Reports Services.
Note: Oracle Application Server 10g Release 2 (10.1.2) is certified with the following Operating System specific software. For the most current list of supported Operating System specific software, for example JDK version, Operating System version, check OracleMetaLink (http://metalink.oracle.com).
Table 3–2 Software Requirements for Red Hat Enterprise Linux AS/ES 2.1 Systems
Item Requirement
Operating System
Red Hat Enterprise Linux AS/ES 2.1
For more information on Red Hat, see:
http://www.redhat.com
Red Hat Update Update 5

Software Requirements
Requirements 3-5
To ensure that the system meets all the requirements, follow these steps:
1. Log in as the root user.
2. To determine which distribution and version of Linux is installed, enter the following command:
# cat /etc/issueRed Hat Linux Advanced Server release 2.1AS/\m (Pensacola)
3. To check that Update 5 is installed:
# cat /etc/redhat-releaseRed Hat Linux Advanced Server release 2.1AS/\m (Pensacola Update 5)
If Update 5 is installed, errata 49 is installed and all the required software packages are installed.
4. To determine which version of the Linux kernel is installed, enter the following command:
# uname -rkernel-smp-2.4.9-e.49
In this example, the version shown is 2.4.9 with errata 49. If necessary, see your operating system documentation for information on upgrading the kernel.
Red Hat Patches Errata 49 kernel or a higher errata patch approved by Red Hat
For example, one of the following, depending on the type of Red Hat installation:
■ kernel-2.4.9-e.49
■ kernel-smp-2.4.9-e.49
■ kernel-enterprise-2.4.9-e.49
Software packages
(check that these versions orhigher versions are installed)
glibc-2.2.4-32.17glibc-common-2.2.4-32.17gcc-2.96-128.7.2gcc-c++-2.96-128.7.2pdksh-5.2.14-22openmotif-2.1.30-12sysstat-4.0.1-15.2.1ascompat-glibc-6.2-2.1.3.2compat-libstdc++-6.2-2.9.0.16libstdc++-2.96-128.7.2gnome-libs-1.2.13-16binutils-2.11.90.0.8-12.4make-3.79.1-8db1-1.85-7db3-3.3.11-5
Note: Red Hat Enterprise Linux AS/ES 2.1, 3.0 and SUSE Linux Enterprise Server 8 and 9 are certified and supported. For the most current list of supported Linux Operating Systems, check OracleMetaLink (http://metalink.oracle.com).
Table 3–2 (Cont.) Software Requirements for Red Hat Enterprise Linux AS/ES 2.1
Item Requirement

Software Requirements
3-6 Oracle Application Server Forms and Reports Services Installation Guide
For more information on Red Hat patches, see:
http://www.redhat.com
5. To determine whether any other package is installed, enter a command similar to the following:
# rpm -q package_name
If a package is missing, download it and install it using the following command:
# rpm -i package_name
When installing a package, make sure you are using the correct architecture and optimization rpm file. To check the architecture of an rpm file, run the following command:
# rpm -q package_name --queryformat "%{arch}\n"
In the following example, the glibc rpm file is suitable for an Intel architecture
# rpm -q glibc --queryformat "%{arch}\n" i686
3.2.2 Software Requirements for Red Hat Enterprise Linux AS/ES 3.0 SystemsTable 3–3 lists the software requirements for Red Hat Enterprise Linux AS/ES 3.0 systems and the procedure that follows the table describes how to ensure your system meets these requirements and any additional requirements for installing Oracle Application Server 10g Forms and Reports Services.
Note: Red Hat Enterprise Linux AS/ES 2.1, 3.0 and SUSE Linux Enterprise Server 8 and 9 are certified and supported. For the most current list of supported Linux Operating Systems, check OracleMetaLink (http://metalink.oracle.com).
Table 3–3 Software Requirements for Red Hat Enterprise Linux AS/ES 3.0 Systems
Item Requirement
Operating System
Red Hat Enterprise Linux AS/ES 3.0
For more information on Red Hat, see:
http://www.redhat.com
The minimum supported kernel versions are:
■ kernel-2.4.21-20.EL
■ kernel-smp-2.4.21-20.EL
■ kernel-hugemem-2.4.21-20.EL
Red Hat Update Update 3

Software Requirements
Requirements 3-7
To ensure that the system meets all the requirements, follow these steps:
1. Log in as the root user.
Software packages
(check that these versions orhigher versions are installed)
glibc-2.3.2-95.27glibc-common-2.3.2-95.27binutils-2.14.90.0.4-35compat-glibc-7.x-2.2.4.32.6compat-libstdc++-7.3-2.96.128compat-libstdc++-devel-7.3-2.96.128gcc-3.2.3-42gcc-c++-3.2.3-42libstdc++-3.2.3-42libstdc++-devel-3.2.3-42openmotif21-2.1.30-8pdksh-5.2.14-21setarch-1.3-1make-3.79.1-17gnome-libs-1.4.1.2.90-34.1sysstat-4.0.7-4.EL3.3compat-db-4.0.14-5
Note: For Red Hat Enterprise Linux AS/ES 3.0, the equivalent version of openmotif 2.1.30-8 is openmotif21-2.1.30-8. The openmotif21-2.1.30-8 package can be installed from disk number 3 of the Red Hat Enterprise Linux AS/ES 3.0 distribution by entering:
$ rpm -ivh openmotif21-2.1.30-8
64-bit Certification
Red Hat Enterprise Linux AS/ES 3.0, Update 3 or higher, is certified on AMD64 and Intel EM64T. The following packages (or higher versions) are required:
glibc-2.3.2-95.27.x86_64.rpmglibc-3.2.3-95.27.i686.rpm (32-bit)glibc-devel-3.2.3-95.27.x86_64.rpmglibc-devel-3.2.3-95.27.i386.rpm (32-bit)gcc-3.2.3-20.x86_64.rpmlibgcc-3.2.3-20.x86_64.rpmlibgcc-3.2.3-20.i386.rpm (32-bit)setarch-1.3-1.x86_64.rpmpdksh-5.2.14-21.x86_64.rpmopenmotif21-2.1.30-8.i386.rpmcompat-glibc-7.x-2.2.4.32.5.i386.rpm (32-bit)compat-gcc-7.3-2.96.122.i386.rpmsysstat-4.0.7-4.x86_64.rpmgnome-libs-1.4.1.2.90-34.1.i386.rpm (32-bit)compat-db-4.0.14-5.1.i386.rpm (32-bit)
Note the following:
■ To install 32-bit packages on a 64-bit system, you may need to use the --force option and the --nodeps option of the rpm utility.
■ Always use 32-bit shell emulation, use the following command before running the installer and any other Oracle Application Server commands or scripts:
# linux32 bash
Table 3–3 (Cont.) Software Requirements for Red Hat Enterprise Linux AS/ES 3.0
Item Requirement
Software Requirements
3-8 Oracle Application Server Forms and Reports Services Installation Guide
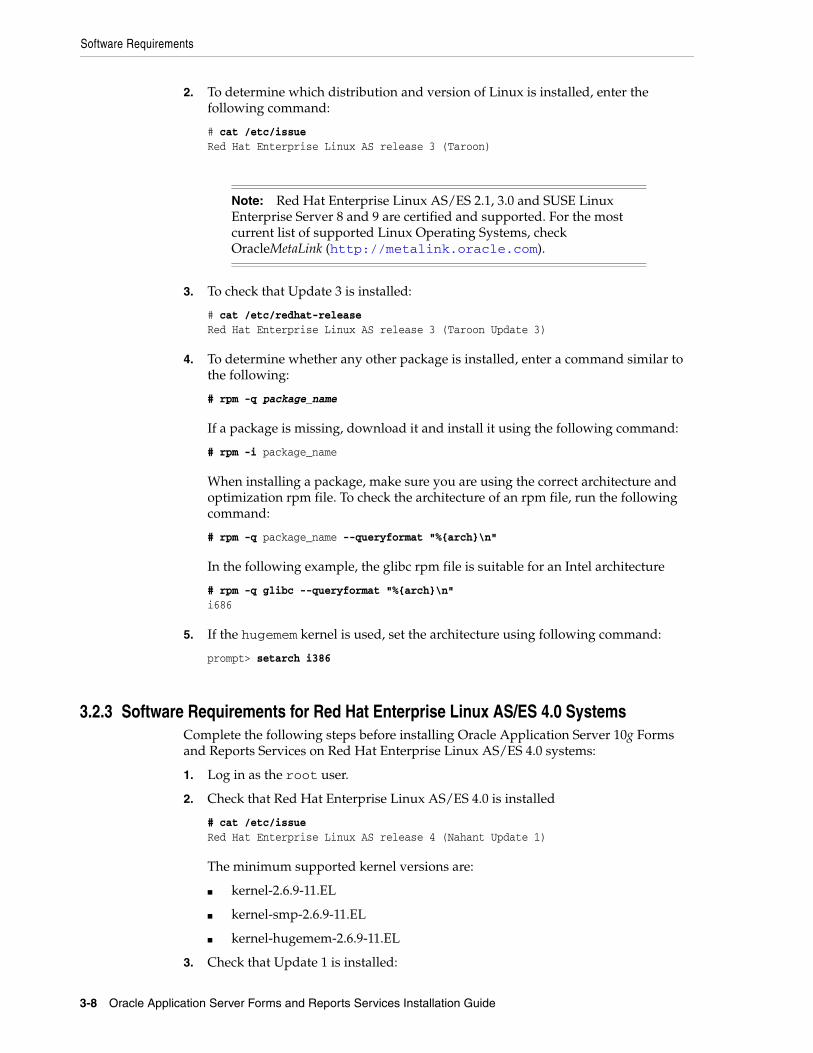
2. To determine which distribution and version of Linux is installed, enter the following command:
# cat /etc/issueRed Hat Enterprise Linux AS release 3 (Taroon)
3. To check that Update 3 is installed:
# cat /etc/redhat-releaseRed Hat Enterprise Linux AS release 3 (Taroon Update 3)
4. To determine whether any other package is installed, enter a command similar to the following:
# rpm -q package_name
If a package is missing, download it and install it using the following command:
# rpm -i package_name
When installing a package, make sure you are using the correct architecture and optimization rpm file. To check the architecture of an rpm file, run the following command:
# rpm -q package_name --queryformat "%{arch}\n"
In the following example, the glibc rpm file is suitable for an Intel architecture
# rpm -q glibc --queryformat "%{arch}\n" i686
5. If the hugemem kernel is used, set the architecture using following command:
prompt> setarch i386
3.2.3 Software Requirements for Red Hat Enterprise Linux AS/ES 4.0 SystemsComplete the following steps before installing Oracle Application Server 10g Forms and Reports Services on Red Hat Enterprise Linux AS/ES 4.0 systems:
1. Log in as the root user.
2. Check that Red Hat Enterprise Linux AS/ES 4.0 is installed
# cat /etc/issueRed Hat Enterprise Linux AS release 4 (Nahant Update 1)
The minimum supported kernel versions are:
■ kernel-2.6.9-11.EL
■ kernel-smp-2.6.9-11.EL
■ kernel-hugemem-2.6.9-11.EL
3. Check that Update 1 is installed:
Note: Red Hat Enterprise Linux AS/ES 2.1, 3.0 and SUSE Linux Enterprise Server 8 and 9 are certified and supported. For the most current list of supported Linux Operating Systems, check OracleMetaLink (http://metalink.oracle.com).

Software Requirements
Requirements 3-9
# cat /etc/redhat-releaseRed Hat Enterprise Linux AS release 4 (Nahant Update 1)
4. Check that the following software packages, or higher versions, are installed:
glibc-2.3.4-2.9glibc-common-2.3.4-2.9binutils-2.15.92.0.2-13compat-libstdc++-296-2.96-132.7.2gcc-3.4.3-22.1gcc-c++-3.4.3-22.1libstdc++-3.4.3-22.1libstdc++-devel-3.4.3-22.1openmotif21-2.1.30-11.RHEL4.4pdksh-5.2.14-30setarch-1.6-1make-3.80-5gnome-libs-1.4.1.2.90-44.1sysstat-5.0.5-1compat-db-4.1.25-9control-center-2.8.0-12xscreensaver-4.18-5.rhel4.2
For latest status on Red Hat Enterprise Linux AS/ES 4.0 (64-bit) certification on AMD64 and Intel EM64T, check the Certification status on Oracle Metalink (http://metalink.oracle.com)
To determine whether any other package is installed, enter a command similar to the following:
# rpm -q package_name
If a package is missing, download it and install it using the following command:
# rpm -i package_name
When installing a package, make sure you are using the correct architecture and optimization rpm file. To check the architecture of an rpm file, run the following command:
# rpm -q package_name --queryformat "%{arch}\n"
In the following example, the glibc rpm file is suitable for an Intel architecture
# rpm -q glibc --queryformat "%{arch}\n" i686
5. If the hugemem kernel is used, set the architecture using following command:
prompt> setarch i386
3.2.4 Software Requirements for SUSE Linux Enterprise Server 8 SystemsTable 3–4 lists the software requirements for SUSE Linux Enterprise Server 8 systems and the procedure that follows the table describes how to ensure your system meets these requirements and any additional requirements for installing Oracle Application Server 10g Forms and Reports Services.

Software Requirements
3-10 Oracle Application Server Forms and Reports Services Installation Guide
To ensure that the system meets all the requirements, follow these steps:
1. Log in as the root user.
2. To determine which distribution and version of Linux is installed, enter the following command:
prompt> cat /etc/issueWelcome to SUSE Linux Enterprise Server 8 (i586) - Kernel \r (\l)
3. To determine the service pack version, enter the following command:
prompt> uname -rk_smp-2.4.21-138
Note: Oracle Application Server 10g Release 2 (10.1.2) is certified with the following Operating System specific software. For the most current list of supported Operating System specific software, for example JDK version, Operating System version, check OracleMetaLink (http://metalink.oracle.com).
Table 3–4 Software Requirements for SUSE Linux Enterprise Server 8 Systems
Item Requirement
Operating System
SUSE Linux Enterprise Server 8
For more information on SUSE Linux Enterprise Server, see:
http://www.suse.com
SP3 is certified for Oracle Application Server 10g Forms and Reports Services 10g Release 2 (10.1.2).
For SUSE Linux Enterprise Server 8 SP3, the minimum supported kernel versions are:
■ k_smp-2.4.21-138
■ k_deflt-2.4.21-138
■ k_psmp-2.4.21-138
Software packages
(check that these versions orhigher versions are installed)
glibc-2.2.2-124gcc-3.2.2-38gcc-c++-3.2.2-38pdksh-5.2.14openmotif-2.1.30MLI4sysstat-4.0.3libstdc++-3.2.2make-3.79.1-407binutils-2.12.90.0.15-50compat-2003.1.10-0
Note: Red Hat Enterprise Linux AS/ES 2.1, 3.0 and SUSE Linux Enterprise Server 8 and 9 are certified and supported. For the most current list of supported Linux Operating Systems, check OracleMetaLink (http://metalink.oracle.com).

Software Requirements
Requirements 3-11
If the kernel version contains the string 2.4.21, SP3 is installed. SP3 is certified for Oracle Application Server 10g Forms and Reports Services 10g Release 2 (10.1.2).
4. To determine whether any other package is installed, enter a command similar to the following:
prompt> rpm -q package_name
If a package is missing, download it and install it using the following command:
prompt> rpm -i package_name
When installing a package, make sure you are using the correct architecture and optimization rpm file. To check the architecture of an rpm file, run the following command:
prompt> rpm -q package_name --queryformat "%{arch}\n"
In the following example, the glibc rpm file is suitable for an Intel architecture
prompt> rpm -q glibc --queryformat "%{arch}\n" i686
5. Create the following symbolic link for the Perl executable if it does not already exist:
prompt> ln -sf /usr/bin/perl /usr/local/bin/perl
6. Create the following symbolic link for the fuser executable if it does not already exist:
prompt> ln -sf /bin/fuser /sbin/fuser
7. If the orarun package was installed on a SUSE Linux Enterprise Server system, complete the following steps as the oracle user to reset the environment:
a. Enter the following commands:
prompt> cd /etc/profile.d prompt> mv oracle.csh oracle.csh.bakprompt> mv oracle.sh oracle.sh.bakprompt> mv alljava.sh alljava.sh.bakprompt> mv alljava.csh alljava.csh.bak
b. Use any text editor to comment out the following line from the $HOME/.profile file:
. ./.oracle
c. Log out of the oracle user account.
d. Log into the oracle user account for the changes to take effect.
8. If any Java packages are installed on the system, unset the Java environment variables, for example JAVA_HOME.
9. Check the /etc/services file to make sure that the following port ranges are available on the system:
Note: Oracle recommends that you do not install any of the Java packages supplied with the SUSE Linux Enterprise Server distribution.
Software Requirements
3-12 Oracle Application Server Forms and Reports Services Installation Guide
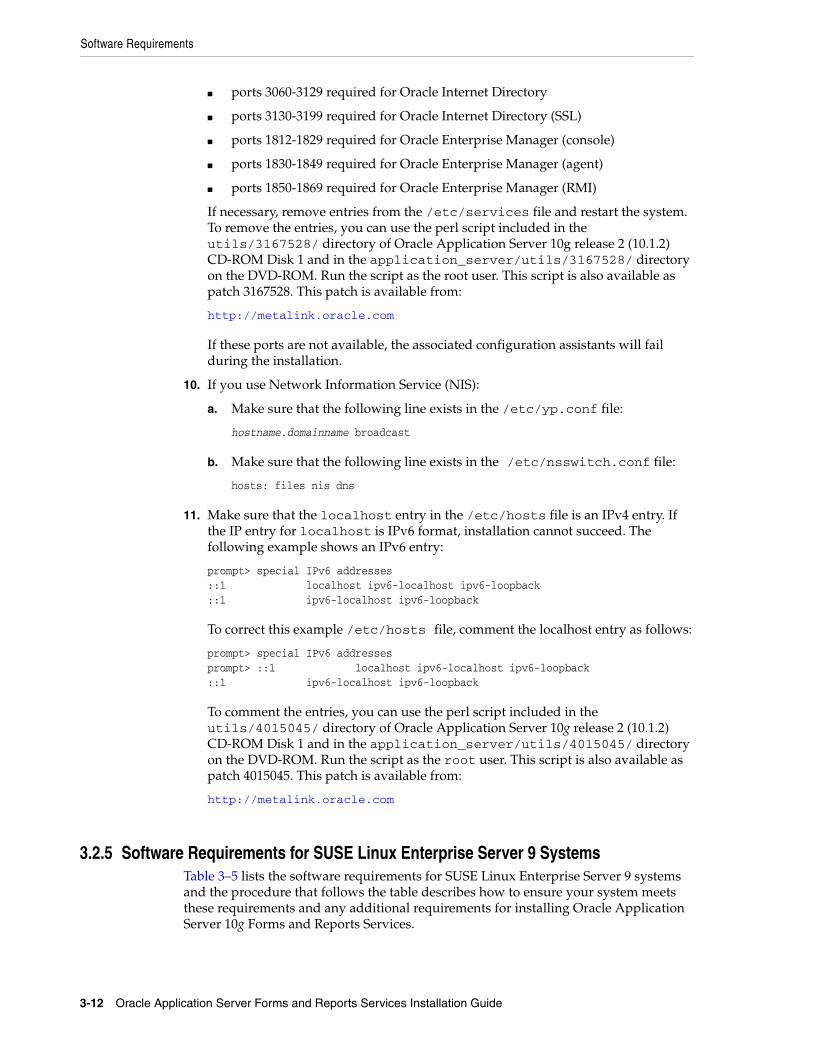
■ ports 3060-3129 required for Oracle Internet Directory
■ ports 3130-3199 required for Oracle Internet Directory (SSL)
■ ports 1812-1829 required for Oracle Enterprise Manager (console)
■ ports 1830-1849 required for Oracle Enterprise Manager (agent)
■ ports 1850-1869 required for Oracle Enterprise Manager (RMI)
If necessary, remove entries from the /etc/services file and restart the system. To remove the entries, you can use the perl script included in the utils/3167528/ directory of Oracle Application Server 10g release 2 (10.1.2) CD-ROM Disk 1 and in the application_server/utils/3167528/ directory on the DVD-ROM. Run the script as the root user. This script is also available as patch 3167528. This patch is available from:
http://metalink.oracle.com
If these ports are not available, the associated configuration assistants will fail during the installation.
10. If you use Network Information Service (NIS):
a. Make sure that the following line exists in the /etc/yp.conf file:
hostname.domainname broadcast
b. Make sure that the following line exists in the /etc/nsswitch.conf file:
hosts: files nis dns
11. Make sure that the localhost entry in the /etc/hosts file is an IPv4 entry. If the IP entry for localhost is IPv6 format, installation cannot succeed. The following example shows an IPv6 entry:
prompt> special IPv6 addresses::1 localhost ipv6-localhost ipv6-loopback::1 ipv6-localhost ipv6-loopback
To correct this example /etc/hosts file, comment the localhost entry as follows:
prompt> special IPv6 addressesprompt> ::1 localhost ipv6-localhost ipv6-loopback::1 ipv6-localhost ipv6-loopback
To comment the entries, you can use the perl script included in the utils/4015045/ directory of Oracle Application Server 10g release 2 (10.1.2) CD-ROM Disk 1 and in the application_server/utils/4015045/ directory on the DVD-ROM. Run the script as the root user. This script is also available as patch 4015045. This patch is available from:
http://metalink.oracle.com
3.2.5 Software Requirements for SUSE Linux Enterprise Server 9 SystemsTable 3–5 lists the software requirements for SUSE Linux Enterprise Server 9 systems and the procedure that follows the table describes how to ensure your system meets these requirements and any additional requirements for installing Oracle Application Server 10g Forms and Reports Services.

Software Requirements
Requirements 3-13
Note: Oracle Application Server 10g Release 2 (10.1.2) is certified with the following Operating System specific software. For the most current list of supported Operating System specific software, for example JDK version, Operating System version, check OracleMetaLink (http://metalink.oracle.com).
Table 3–5 Software Requirements for SUSE Linux Enterprise Server 9 Systems
Item Requirement
Operating System
SUSE Linux Enterprise Server 9
For more information on SUSE Linux Enterprise Server, see:
http://www.suse.com
For SUSE Linux Enterprise Server 9, the minimum supported kernel versions are:
■ kernel-bigsmp-2.6.5-7.97
■ kernel-default-2.6.5-7.97
■ kernel-smp-2.6.5-7.97
Software packages
(check that these versions orhigher versions are installed)
glibc-2.3.3-98.28gcc-3.3.3-43.24gcc-c++-3.3.3-43.24libstdc++-3.3.3-43.24libstdc++-devel-3.3.3-43.24openmotif21-libs-2.1.30MLI4-119.1pdksh-5.2.14-780.1make-3.80-184.1gnome-libs-1.4.1.7-671.1gnome-libs-devel-1.4.1.7-671.1sysstat-5.0.1-35.1binutils-2.15.90.0.1.1-32.5db1-1.85-85.1compat-2004.7.1-1.2

Software Requirements
3-14 Oracle Application Server Forms and Reports Services Installation Guide
To ensure that the system meets all the requirements, follow these steps:
1. Log in as the root user.
2. To determine which distribution and version of Linux is installed, enter the following command:
prompt> cat /etc/issueWelcome to SuSE Linux 9.0 (i686) - Kernel \r (\l).
3. To determine the kernel version, enter the following command:
prompt> uname -rkernel-bigsmp-2.6.5-7.97
64-bit Certification
SUSE Linux Enterprise Server is certified on AMD64 and Intel EM64T. The following packages (or higher versions) are required:
glibc-2.3.3-98.28.x86_64.rpmglibc-32bit-9-200407011233.x86_64.rpmglibc-devel-32bit-9-200407011229.x86_64.rpmgcc-3.3.3-43.24.x86_64.rpmgcc-c++-3.3.3-43.24.x86_64.rpmlibstdc++-3.3.3-43.24.x86_64.rpmlibstdc++-devel-3.3.3-43.24.x86_64.rpmlibstdc++-devel-32bit-9-200407011229.x86_64.rpmgnome-libs-1.4.1.7-671.1.x86_64.rpmgnome-libs-devel-1.4.1.7-671.1.x86_64.rpmgnome-libs-32bit-9-200407011229.x86_64.rpmbinutils-2.15.90.0.1.1-32.5.x86_64.rpmbinutils-32bit-9-200407011229.x86_64.rpmcompat-32bit-9-200407011229.x86_64.rpmcompat-sles8-1.3-93.3.x86_64.rpmcompat-2004.7.1-1.2.x86_64.rpmpdksh-5.2.14-780.1.x86_64.rpmmake-3.80-184.1.x86_64.rpmsysstat-5.0.1-35.1.x86_64.rpmperl-32bit-9-200407011229.x86_64.rpmlibaio-devel-32bit-9-200407011229.x86_64.rpmXFree86-devel-32bit-9-200407011229.x86_64.rpmlinux32-1.0-341.1.x86_64.rpmdb-32bit-9-200407011229.x86_64.rpmdb1-32bit-9-200407011229.x86_64.rpmcompat-32bit-9-200407011229.x86_64.rpm
Always use 32-bit shell emulation, use the following command before running the installer and any other Oracle Application Server commands or scripts:
# linux32 bash
Note: Red Hat Enterprise Linux AS/ES 2.1, 3.0 and SUSE Linux Enterprise Server 8 and 9 are certified and supported. For the most current list of supported Linux Operating Systems, check OracleMetaLink (http://metalink.oracle.com).
Table 3–5 (Cont.) Software Requirements for SUSE Linux Enterprise Server 9 Systems
Item Requirement

Software Requirements
Requirements 3-15
4. To determine whether any other package is installed, enter a command similar to the following:
prompt> rpm -q package_name
If a package is missing, download it and install it using the following command:
prompt> rpm -i package_name
When installing a package, make sure you are using the correct architecture and optimization rpm file. To check the architecture of an rpm file, run the following command:
prompt> rpm -q package_name --queryformat "%{arch}\n"
In the following example, the glibc rpm file is suitable for an Intel architecture
prompt> rpm -q glibc --queryformat "%{arch}\n" i686
5. Create the following symbolic link for the Perl executable if it does not already exist:
prompt> ln -sf /usr/bin/perl /usr/local/bin/perl
6. Create the following symbolic link for the fuser executable if it does not already exist:
prompt> ln -sf /bin/fuser /sbin/fuser
7. If the orarun package was installed on a SUSE Linux Enterprise Server system, complete the following steps as the oracle user to reset the environment:
a. Enter the following commands:
prompt> cd /etc/profile.d prompt> mv oracle.csh oracle.csh.bakprompt> mv oracle.sh oracle.sh.bakprompt> mv alljava.sh alljava.sh.bakprompt> mv alljava.csh alljava.csh.bak
b. Use any text editor to comment out the following line from the $HOME/.profile file:
. ./.oracle
c. Log out of the oracle user account.
d. Log into the oracle user account for the changes to take effect.
8. If any Java packages are installed on the system, unset the Java environment variables, for example JAVA_HOME.
9. Check the /etc/services file to make sure that the following port ranges are available on the system:
■ ports 3060-3129 required for Oracle Internet Directory
Note: Oracle recommends that you do not install any of the Java packages supplied with the SUSE Linux Enterprise Server distribution.

Kernel Parameters
3-16 Oracle Application Server Forms and Reports Services Installation Guide
■ ports 3130-3199 required for Oracle Internet Directory (SSL)
■ ports 1812-1829 required for Oracle Enterprise Manager (console)
■ ports 1830-1849 required for Oracle Enterprise Manager (agent)
■ ports 1850-1869 required for Oracle Enterprise Manager (RMI)
If necessary, remove entries from the /etc/services file and restart the system. To remove the entries, you can use the perl script included in the utils/3167528/ directory of Oracle Application Server 10g release 2 (10.1.2) CD-ROM Disk 1 and in the application_server/utils/3167528/ directory on the DVD-ROM. Run the script as the root user. This script is also available as patch 3167528. This patch is available from:
http://metalink.oracle.com
If these ports are not available, the associated configuration assistants will fail during the installation.
10. If you use Network Information Service (NIS):
a. Make sure that the following line exists in the /etc/yp.conf file:
hostname.domainname broadcast
b. Make sure that the following line exists in the /etc/nsswitch.conf file:
hosts: files nis dns
11. Make sure that the localhost entry in the /etc/hosts file is an IPv4 entry. If the IP entry for localhost is IPv6 format, installation cannot succeed. The following example shows an IPv6 entry:
prompt> special IPv6 addresses::1 localhost ipv6-localhost ipv6-loopback::1 ipv6-localhost ipv6-loopback
To correct this example /etc/hosts file, comment the localhost entry as follows:
prompt> special IPv6 addressesprompt> ::1 localhost ipv6-localhost ipv6-loopback::1 ipv6-localhost ipv6-loopback
To comment the entries, you can use the perl script included in the utils/4015045/ directory of Oracle Application Server 10g release 2 (10.1.2) CD-ROM Disk 1 and in the application_server/utils/4015045/ directory on the DVD-ROM. Run the script as the root user. This script is also available as patch 4015045. This patch is available from:
http://metalink.oracle.com
3.3 Kernel ParametersThe computers on which you plan to install OracleAS Web Cache require their kernel parameters to be set to the minimum values listed in the following section.
3.3.1 Kernel Parameter Settings for OracleAS Web CacheComplete the following tasks to set the kernel parameters for OracleAS Web Cache:

Shell Limits for the oracle User
Requirements 3-17
1. Run the following command to check that the nofile kernel parameter is set to at least 65536:
prompt> ulimit -Hn
2. If the command returns a value less than 65536, add this line to the /etc/security/limits.conf file (use a text editor to edit the file):
* hard nofile 65536
You need to be the root user to edit the /etc/security/limits.conf file.
3. Restart the computer for the new value to take effect.
3.4 Shell Limits for the oracle UserTo improve the performance of the software on Linux systems, you must increase the following shell limits for the oracle user, depending on the user’s default shell:
To increase the shell limits:
1. Add the following lines to /etc/security/limits.conf file:
* soft nproc 2047* hard nproc 16384* soft nofile 2048* hard nofile 65536
2. Add the following line to the /etc/pam.d/login file, if it does not already exist:
session required /lib/security/pam_limits.so
3. Depending on the oracle user's default shell, make the following changes to the default shell start-up file:
■ For the Bourne, Bash, or Korn shell, add the following lines to the /etc/profile file:
if [ $USER = "oracle" ]; then if [ $SHELL = "/bin/ksh" ]; then ulimit -p 16384 ulimit -n 65536 else ulimit -u 16384 -n 65536 fifi
■ For the C or tcsh shell, add the following lines to the /etc/csh.login file:
if ( $USER == "oracle" ) then limit maxproc 16384 limit descriptors 65536endif
Bourne or Bash Shell Limit Korn Shell Limit C or tcsh Shell Limit Hard Limit
nofile nofile descriptors 65536
noproc processes maxproc 16384

Ports
3-18 Oracle Application Server Forms and Reports Services Installation Guide
3.5 PortsMany Oracle Application Server components, such as Oracle HTTP Server, OracleAS Web Cache, and Oracle Enterprise Manager 10g, use ports. You can have the installer assign default port numbers, or use port numbers that you specify.
■ Section 3.5.1, "Checking If a Port Is in Use"
■ Section 3.5.2, "Using Default Port Numbers"
■ Section 3.5.3, "Using Custom Port Numbers (the Static Ports Feature)"
Why the Default Port for Oracle HTTP Server Is Port 7777 and Not Port 80By default, the installer configures Oracle HTTP Server to use port 7777, not port 80. Port 7777 is the default port because on UNIX, components that use port numbers lower than 1024 require additional steps to be done as the root user before the components can run. Because the installer does not have root access, it has to use a port greater than 1024.
If you want Oracle HTTP Server to use a different port, such as port 80, use the static ports feature, which enables you to specify port numbers for components. Although you can change the port number after installation, it is easier to set the port number during installation.
3.5.1 Checking If a Port Is in UseTo check if a port is being used, run the netstat command as follows:
prompt> netstat -an | grep portnum
3.5.2 Using Default Port NumbersIf you want to use the default port numbers for components, you do not have to do anything. Ensure that at least one port is available in the port range for each component. If the installer is unable to find a free port in the range, the installation fails.
3.5.3 Using Custom Port Numbers (the Static Ports Feature)To instruct the installer to assign custom port numbers for components:
1. Create a file containing the component names and port numbers. Section 3.5.3.1, "Format of the staticports.ini File" describes the file format. This file is typically called staticports.ini, but you can name it anything you want.
2. In the installer, on the Specify Port Configuration Options screen, select Manual and enter the complete path to the staticports.ini file.
If you do not specify the complete path to the file, the installer will not be able to find the file. The installer then assigns default ports for all the components, and it does this without displaying any warning.
Difference from Previous Release: In Release 10g (9.0.4), you used command-line options to specify the staticports.ini file. In this release, you specify the file in the new Specify Port Configuration Options screen.

Ports
Requirements 3-19
3.5.3.1 Format of the staticports.ini FileThe staticports.ini file has the following format. Replace port_num with the port number that you want to use for the component.
# J2EE and Web CacheOracle HTTP Server port = port_numOracle HTTP Server Listen port = port_numOracle HTTP Server SSL port = port_numOracle HTTP Server Listen (SSL) port = port_numOracle HTTP Server Diagnostic port = port_numJava Object Cache port = port_numDCM Java Object Cache port = port_numDCM Discovery port = port_numOracle Notification Server Request port = port_numOracle Notification Server Local port = port_numOracle Notification Server Remote port = port_numApplication Server Control port = port_numApplication Server Control RMI port = port_numOracle Management Agent port = port_numWeb Cache HTTP Listen port = port_numWeb Cache HTTP Listen (SSL) port = port_numWeb Cache Administration port = port_numWeb Cache Invalidation port = port_numWeb Cache Statistics port = port_numLog Loader port = port_numASG port = port_num
# Business Intelligence and FormsReports Services SQL*Net port = port_numReports Services discoveryService port = port_numReports Services bridge port = port_num
# InfrastructureOracle Internet Directory port = port_numOracle Internet Directory (SSL) port = port_numOracle Certificate Authority SSL Server Authentication port = port_numOracle Certificate Authority SSL Mutual Authentication port = port_numUltra Search HTTP port number = port_num
The easiest way to create the file is to use the staticports.ini file on the CD-ROM (Disk 1) or DVD-ROM as a template:
1. Copy the staticports.ini file from the CD-ROM or DVD-ROM to your hard disk.
2. Edit the local copy (the file on the hard disk) to include the required port numbers.
You do not need to specify port numbers for all components in the staticports.ini file. If a component is not listed in the file, the installer uses the default port number for that component.
Table 3–6 Location of the staticports.ini File on CD-ROM and DVD-ROM
Media Location of staticports.ini File
CD-ROM Disk 1: mount_point/1012disk1/stage/Response/staticports.ini
DVD-ROM dvd_mount_point/forms_reports/stage/Response/staticports.ini

Ports
3-20 Oracle Application Server Forms and Reports Services Installation Guide
The following example sets the Application Server Control port and some OracleAS Web Cache ports. For components not specified, the installer assigns the default port numbers.
Application Server Control port = 2000Web Cache Administration port = 2001Web Cache Invalidation port = 2002Web Cache Statistics port = 2003
When installation is complete, you can check the ORACLE_HOME/install/portlist.ini file to see the assigned ports.
The installer verifies that the ports specified in the file are available by checking the memory. This means that it can only detect ports that are being used by running processes. It does not look in configuration files to determine which ports an application is using.
If the installer detects that a specified port is not available, it displays an alert. The installer does not assign a port that is not available. To fix this:
1. Edit the staticports.ini file to specify a different port, or shut down the application using the port.
2. Click Retry. The installer rereads the staticports.ini file and verifies the entries in the file again.
Using portlist.ini as the staticports.ini FileThe staticports.ini file uses the same format as the ORACLE_HOME/install/portlist.ini file, which is created after a Forms and Reports Services installation. If you have installed Forms and Reports Services and want to use the same port numbers in another installation, use the portlist.ini file from the first installation as the staticports.ini file for subsequent installations.
Note on Choosing Port Numbers:
■ Port numbers cannot be greater than 65535.
■ If you use a port number less than 1024 for a component, you must run the component as the root user.
■ If you use a port number less than 1024 for a component, the installer will not be able to start up the component at the end of installation. You may need to configure the component first before starting it. See the appropriate component documentation for details.
■ You still have to comment out ports 389 and 636 in the /etc/services file if you want to use these port numbers for Oracle Internet Directory.
■ If you plan to set port numbers for Oracle HTTP Server and OracleAS Web Cache, be sure you read Section 3.5.3.3, "Ports for Oracle HTTP Server and OracleAS Web Cache".
Note: In staticports.ini, the Oracle Management Agent port line corresponds to the Enterprise Manager Agent port line in portlist.ini.
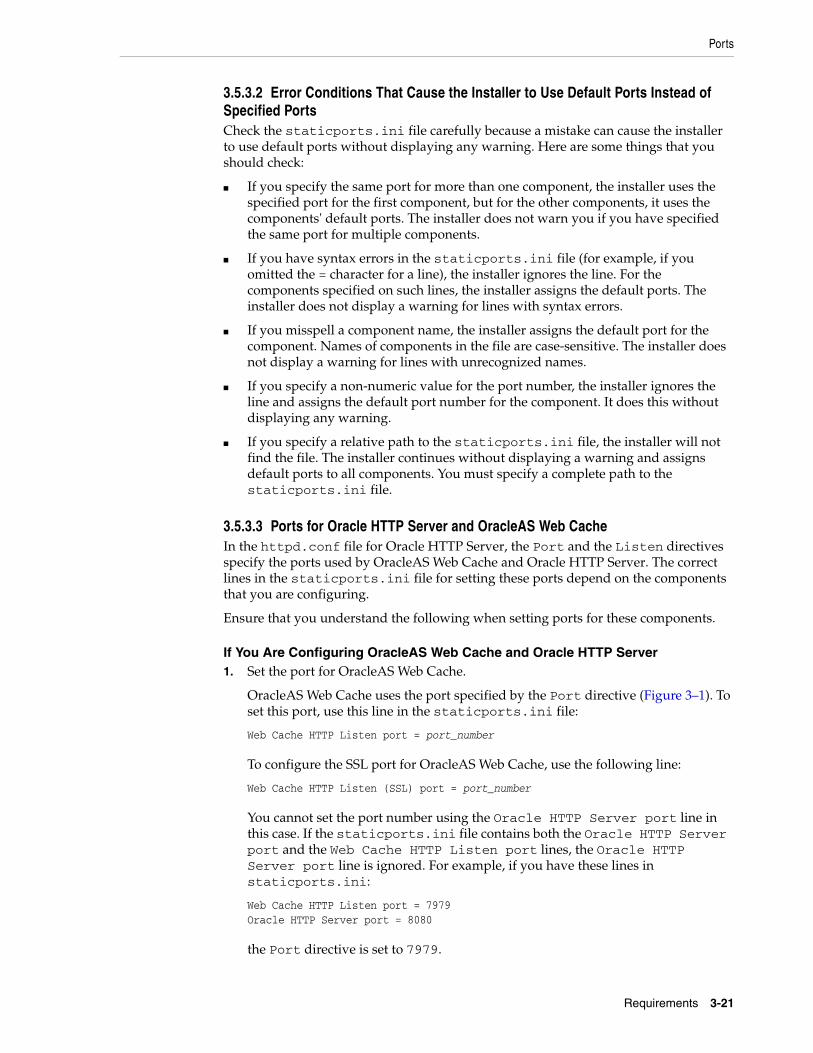
Ports
Requirements 3-21
3.5.3.2 Error Conditions That Cause the Installer to Use Default Ports Instead of Specified PortsCheck the staticports.ini file carefully because a mistake can cause the installer to use default ports without displaying any warning. Here are some things that you should check:
■ If you specify the same port for more than one component, the installer uses the specified port for the first component, but for the other components, it uses the components' default ports. The installer does not warn you if you have specified the same port for multiple components.
■ If you have syntax errors in the staticports.ini file (for example, if you omitted the = character for a line), the installer ignores the line. For the components specified on such lines, the installer assigns the default ports. The installer does not display a warning for lines with syntax errors.
■ If you misspell a component name, the installer assigns the default port for the component. Names of components in the file are case-sensitive. The installer does not display a warning for lines with unrecognized names.
■ If you specify a non-numeric value for the port number, the installer ignores the line and assigns the default port number for the component. It does this without displaying any warning.
■ If you specify a relative path to the staticports.ini file, the installer will not find the file. The installer continues without displaying a warning and assigns default ports to all components. You must specify a complete path to the staticports.ini file.
3.5.3.3 Ports for Oracle HTTP Server and OracleAS Web CacheIn the httpd.conf file for Oracle HTTP Server, the Port and the Listen directives specify the ports used by OracleAS Web Cache and Oracle HTTP Server. The correct lines in the staticports.ini file for setting these ports depend on the components that you are configuring.
Ensure that you understand the following when setting ports for these components.
If You Are Configuring OracleAS Web Cache and Oracle HTTP Server1. Set the port for OracleAS Web Cache.
OracleAS Web Cache uses the port specified by the Port directive (Figure 3–1). To set this port, use this line in the staticports.ini file:
Web Cache HTTP Listen port = port_number
To configure the SSL port for OracleAS Web Cache, use the following line:
Web Cache HTTP Listen (SSL) port = port_number
You cannot set the port number using the Oracle HTTP Server port line in this case. If the staticports.ini file contains both the Oracle HTTP Server port and the Web Cache HTTP Listen port lines, the Oracle HTTP Server port line is ignored. For example, if you have these lines in staticports.ini:
Web Cache HTTP Listen port = 7979Oracle HTTP Server port = 8080
the Port directive is set to 7979.

Ports
3-22 Oracle Application Server Forms and Reports Services Installation Guide
2. Set the port for Oracle HTTP Server.
Oracle HTTP Server uses the port specified by the Listen directive. To set this port, use this line in the staticports.ini file:
Oracle HTTP Server Listen port = port_number
To configure the SSL Listen port, use the following line:
Oracle HTTP Server Listen (SSL) port = port_number
Figure 3–1 Configuring Both OracleAS Web Cache and Oracle HTTP Server
If You Are Configuring Oracle HTTP Server Only (no OracleAS Web Cache)If you are configuring Oracle HTTP Server only, then Oracle HTTP Server uses both Port and Listen directives (Figure 3–2). In this case, you must set both directives to use the same port number.
To set these ports, use the Oracle HTTP Server port and Oracle HTTP Server Listen port lines in the staticports.ini file. For example:
Oracle HTTP Server port = 8080Oracle HTTP Server Listen port = 8080
To set the SSL version of these ports, use the following lines. As in the non-SSL version, the port numbers must be the same.
Oracle HTTP Server SSL port = 443Oracle HTTP Server Listen (SSL) port = 443
If you also specify the Web Cache lines in staticports.ini, they are ignored because you are not configuring OracleAS Web Cache.
Figure 3–2 Configuring Only Oracle HTTP Server
3.5.3.4 ExamplesThis section describes some common scenarios for using staticports.ini.
■ Configuring Oracle HTTP Server to Use Ports 80 and 443 With OracleAS Web Cache as the Front-End
■ Configuring Oracle HTTP Server to Use Ports 80 and 443 Without OracleAS Web Cache

Operating System Groups
Requirements 3-23
3.5.3.4.1 Configuring Oracle HTTP Server to Use Ports 80 and 443 With OracleAS Web Cache as the Front-End In this scenario, create a staticports.ini file that includes the following lines:
Web Cache HTTP Listen port = 80Oracle HTTP Server Listen port = 81Web Cache HTTP Listen (SSL) port = 443Oracle HTTP Server Listen (SSL) port = 444
The ports for Oracle HTTP Server Listen and SSL Listen can be any available port. The example uses ports 81 and 444. These port numbers do not have to be less than 1024. If you select port numbers less than 1024, start Oracle HTTP Server and OracleAS Web Cache as the root user.
3.5.3.4.2 Configuring Oracle HTTP Server to Use Ports 80 and 443 Without OracleAS Web Cache In this scenario, create a staticports.ini file that includes the following lines:
Oracle HTTP Server port = 80Oracle HTTP Server Listen port = 80Oracle HTTP Server SSL port = 443Oracle HTTP Server Listen (SSL) port = 443
3.6 Operating System GroupsYou must create operating system groups if you plan to install Forms and Reports Services on a computer that does not have Oracle products installed. In this case, create a group to own the inventory directory. See "Creating a Group for the Inventory Directory" in Section 3.6, "Operating System Groups".
To create a local operating system group:
Enter the following command to create the oinstall group:
# /usr/sbin/groupadd oinstall
You have created a local operating system group. For more information about operating system users and groups, see your operating system documentation or contact your system administrator.
Note: Because you are using ports less than 1024, you have to configure Oracle HTTP Server and OracleAS Web Cache to run as the root user. You can perform the configuration during installation or after installation.
If you perform the configuration after installation, then the installer does not start the components (because they are not yet configured).
For details, see these guides: Oracle HTTP Server Administrator’s Guide and Oracle Application Server Web Cache Administrator’s Guide.
Note: Because you are using ports less than 1024, you have to configure Oracle HTTP Server to run as the root user. See the Note on page 3-22 for details.

Operating System User
3-24 Oracle Application Server Forms and Reports Services Installation Guide
Creating a Group for the Inventory DirectoryIf you plan to install Forms and Reports Services on a computer that does not have Oracle products installed, create a group to own the inventory directory. The installer writes its files in the inventory directory to keep track of the Oracle products installed on the computer.
This guide uses the oinstall name for this operating system group.
By having a separate group for the inventory directory, different users can install Oracle products on the computer. Users must have write permission for the inventory directory. To have write permission, users must belong to the oinstall group.
When an Oracle product is installed for the first time on a computer, the installer displays a screen where you enter a group name for the inventory directory. After this the installer displays a screen where you enter the location of the inventory directory.
The default name of the inventory directory is oraInventory.
If you are not sure whether an inventory directory already exists on the computer, check the /etc/oraInst.loc file. This file lists the location of the inventory directory and the group that owns it. If this file does not exist, it means that no Oracle products are installed on the computer.
3.7 Operating System UserCreate an operating system user to install and upgrade Oracle products. The operating system user running the installer must have write permission for the following directories:
■ ORACLE_HOME, which contains files for the product you are installing
■ The inventory directory, which is used by the installer for all Oracle products
If the computer contains other Oracle products, then it means that you may already have an operating system user. Check the /etc/oraInst.loc file. This file lists the location of the inventory directory and the group that owns it. If this file does not exist, it means that no Oracle products are installed on your computer.
If you do not already have a user for installing Oracle products, create a user with the properties listed in Table 3–7.
Table 3–7 Properties of the Operating System User Who Runs the Installer
Item Description
Login name You can use any name for the user. This guide refers to the user as the oracle user.
Group identifier The primary group of the oracle user must have write permission for the oraInventory directory.
You can use any name for the group. This guide uses the name oinstall.
Home directory The home directory for the oracle user can be consistent with the home directories of other users.
Login shell The default login shell can be the C, Bourne, or Korn shell.
Note: Use the oracle user only for installing and maintaining Oracle products. Never use the oracle user for purposes unrelated to the installer. Do not use root as the oracle user.
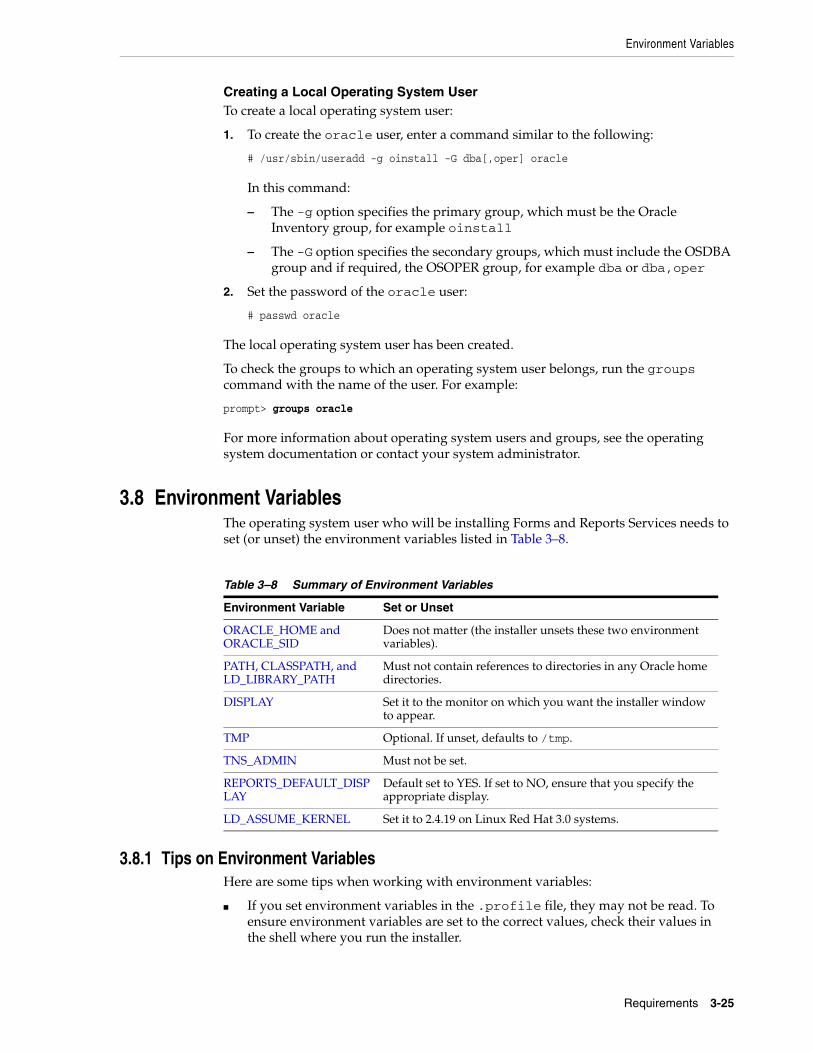
Environment Variables
Requirements 3-25
Creating a Local Operating System UserTo create a local operating system user:
1. To create the oracle user, enter a command similar to the following:
# /usr/sbin/useradd -g oinstall -G dba[,oper] oracle
In this command:
– The -g option specifies the primary group, which must be the Oracle Inventory group, for example oinstall
– The -G option specifies the secondary groups, which must include the OSDBA group and if required, the OSOPER group, for example dba or dba,oper
2. Set the password of the oracle user:
# passwd oracle
The local operating system user has been created.
To check the groups to which an operating system user belongs, run the groups command with the name of the user. For example:
prompt> groups oracle
For more information about operating system users and groups, see the operating system documentation or contact your system administrator.
3.8 Environment VariablesThe operating system user who will be installing Forms and Reports Services needs to set (or unset) the environment variables listed in Table 3–8.
3.8.1 Tips on Environment VariablesHere are some tips when working with environment variables:
■ If you set environment variables in the .profile file, they may not be read. To ensure environment variables are set to the correct values, check their values in the shell where you run the installer.
Table 3–8 Summary of Environment Variables
Environment Variable Set or Unset
ORACLE_HOME and ORACLE_SID
Does not matter (the installer unsets these two environment variables).
PATH, CLASSPATH, and LD_LIBRARY_PATH
Must not contain references to directories in any Oracle home directories.
DISPLAY Set it to the monitor on which you want the installer window to appear.
TMP Optional. If unset, defaults to /tmp.
TNS_ADMIN Must not be set.
REPORTS_DEFAULT_DISPLAY
Default set to YES. If set to NO, ensure that you specify the appropriate display.
LD_ASSUME_KERNEL Set it to 2.4.19 on Linux Red Hat 3.0 systems.

Environment Variables
3-26 Oracle Application Server Forms and Reports Services Installation Guide
■ To check the value of environment variables, use the env command. This command displays all the currently defined environment variables and their values.
% env
■ If you use the su command to switch users (for example, switching from the root user to the oracle user), check the environment variables when you are the new user because the environment variables may not be passed to the new user. This can happen even if you run su with the - parameter (su - user).
# /* root user */# su - oracle% env
3.8.2 ORACLE_HOME and ORACLE_SIDIt does not matter if these environment variables are set or unset when you start the installer because the installer unsets these environment variables.
3.8.3 PATH, CLASSPATH, and LD_LIBRARY_PATHEdit the PATH, CLASSPATH, and LD_LIBRARY_PATH environment variables so that they do not reference any Oracle home directories.
3.8.4 DISPLAYSet the DISPLAY environment variable to point to the X server that displays the installer. The format of the DISPLAY environment variable is:
hostname:display_number.screen_number
Example (C shell):
% setenv DISPLAY test.mydomain.com:0.0
Example (Bourne or Korn shell):
$ DISPLAY=test.mydomain.com:0.0; export DISPLAY
You can test the display by running the xclock program:
$ /usr/X11R6/bin/xclock &
Forms and Reports Services requires a running X server during installation only. The frame buffer X server installed with your operating system requires that you remain logged in and have the frame buffer running during installation. If you do not want to do this, then use a virtual frame buffer, such as X Virtual Frame Buffer (XVFB) or Virtual Network Computing (VNC).
Visit OTN at http://www.oracle.com/technology/products/ for information about obtaining and installing XVFB or other virtual frame buffer solutions. Search OTN for "frame buffer".
3.8.5 TMPDuring installation, the installer needs to write temporary files to a temporary directory. By default, the temporary directory is /tmp.

Environment Variables
Requirements 3-27
If you want the installer to use a directory other than /tmp, set the TMP environment variable to the full path of the alternate directory. This directory must meet the requirements listed in Table 3–1.
Example (C shell):
% setenv TMP /tmp2
Example (Bourne or Korn shell):
$ TMP=/tmp2; export TMP
If you do not set this environment variable, and the default directory does not have enough space, then the installer displays an error message that says the environment variable is not set. You can either set the environment variable to point to a different directory or free up enough space in the default directory. In either case, you have to restart the installation.
3.8.6 TNS_ADMINThis section describes two requirements:
■ The TNS_ADMIN environment variable must not be set.
■ The /etc directory must not contain a tnsnames.ora file.
These requirements are necessary to prevent conflicts between the Net configuration files for different Oracle products.
If you need to set TNS_ADMIN or have the tnsnames.ora file in /etc directory, perform the following steps before installing Forms and Reports Services.
1. If you have the tnsnames.ora file in /etc directory, move the file from this directory to a different directory. Alternatively, you can rename the file.
2. Ensure the TNS_ADMIN environment variable is not set.
Example (C shell):
% unsetenv TNS_ADMIN
Example (Bourne or Korn shell):
$ unset TNS_ADMIN
After installation, you can merge the contents of the newly created tnsnames.ora file with the existing tnsnames.ora file.
3.8.7 REPORTS_DEFAULT_DISPLAYThe REPORTS_DEFAULT_DISPLAY environment variable specifies whether to implement the following for Oracle Reports:
■ Elimination of dependency on DISPLAY
■ Elimination of dependency on having a valid printer defined for font information
■ ScreenPrinter (screenprinter.ppd) for surface resolution for images and font information
■ Advanced Imaging Support
For Oracle Reports, if REPORTS_DEFAULT_DISPLAY=YES, it overrides any value set for the DISPLAY environment variable. For more information about

The Hosts File
3-28 Oracle Application Server Forms and Reports Services Installation Guide
REPORTS_DEFAULT_DISPLAY, see the Oracle Application Server Reports Services Publishing Reports to the Web manual.
3.8.8 LD_ASSUME_KERNELOn Red Hat 3.0 systems, add following line to the $ORACLE_HOME/forms/server/default.env file:
LD_ASSUME_KERNEL=2.4.19
3.9 The Hosts FileThe contents of the /etc/hosts file affect the location of the default Oracle Identity Management realm and the host name for Oracle Application Server Single Sign-On.
The installer provides alternative methods for you to enter the values that you want without editing the hosts file. For more information, see the Oracle Application Server Installation Guide.
3.10 Network TopicsTypically, the computer on which you want to install Forms and Reports Services is connected to the network, has local storage to contain the Forms and Reports Services installation, has a display monitor, and has a CD-ROM or DVD-ROM drive.
This section describes the procedure to install Forms and Reports Services on computers that do not meet the typical scenario. It covers the following cases:
■ Installing on DHCP Computers
■ Installing on Multihomed (Multi-IP) Computers
■ Copying CD-ROMs or DVD-ROM to Hard Drive, and Installing from the Hard Drive
■ Installing from a Remote CD-ROM or DVD-ROM Drive
■ Installing on Remote Computers
■ Installing on NFS-Mounted Storage
■ Running Multiple Instances from One Installation
■ Support for NIS and NIS+
■ Installing on Computers with Multiple Network Cards
3.10.1 Installing on DHCP ComputersNote this limitation when running Forms and Reports Services on DHCP computers: Forms and Reports Services instances on DHCP computers cannot communicate with instances running on other computers. All the instances that need to communicate with each other must run on the same computer. There are no limitations on clients;
Note: REPORTS_DEFAULT_DISPLAY is used for Oracle Reports only and is not applicable to the Oracle Application Server installer. The installer continues to use the DISPLAY environment variable even if REPORTS_DEFAULT_DISPLAY is set to YES.

Network Topics
Requirements 3-29
clients from other computers can access instances running on the DHCP computer, as long as the client computer can resolve the DHCP computer on the network.
3.10.2 Installing on Multihomed (Multi-IP) ComputersA multihomed computer is associated with multiple IP addresses. This is achieved by having multiple network cards on the computer. Each IP address is associated with a hostname; additionally, you can set up aliases for the hostname. By default, Oracle Universal Installer uses the ORACLE_HOSTNAME environment variable setting to find the hostname. If ORACLE_HOSTNAME is not set and you are installing Forms and Reports Services on a computer that has multiple network cards, Oracle Universal Installer determines the hostname by using the first name in the /etc/hosts file.
Clients must be able to access the computer using this hostname (or using aliases for this hostname). To check, ping the hostname from the client computers using the short name (hostname only) and the full name (hostname and domain name). Both must work.
3.10.3 Copying CD-ROMs or DVD-ROM to Hard Drive, and Installing from the Hard Drive
Instead of installing from the Forms and Reports Services CD-ROMs or DVD-ROM, you can copy the contents of the CD-ROMs or DVD-ROM to a hard drive and install from the hard drive. This might be easier if you plan to install many instances of Forms and Reports Services on your network, or if the computers on which you want to install Forms and Reports Services do not have CD-ROM or DVD-ROM drives.
You can also install from remote CD-ROM or DVD-ROM drives. See Installing from a Remote CD-ROM or DVD-ROM Drive.
When you install from the hard drive, the installer does not prompt you to swap CD-ROMs. It can find all the files if they are in the proper locations.
To copy the CD-ROMs:1. Create a parent directory (for example, oralinfrs) and, under the parent
directory, create subdirectories called Disk1, Disk2, and so on. The names of the subdirectories must be DiskN, where N is the CD-ROM number.
2. Copy the contents of each CD-ROM into the corresponding directory.
prompt> cp -pr /cdrom_mount_point/10.1.2disk1/* /path/to/hard/drive/Disk1/prompt> cp -pr /cdrom_mount_point/10.1.2disk2/* /path/to/hard/drive/Disk2/... Repeat for each CD-ROM.
To run the installer from the copied files, invoke the runInstaller executable from the Disk1 directory. Run it from the computer that will be running Forms and Reports Services.
prompt> /path/to/hard/drive/Disk1/runInstaller
To copy the oralinfrs Directory from the DVD-ROMCopy the oralinfrs directory from the DVD-ROM to your hard disk:
prompt> cp -pr /dvd_mount_point/oralinfrs /path/to/hard/drive
To run the installer from the copied files, invoke the runInstaller executable from the computer that will be running Forms and Reports Services:

Network Topics
3-30 Oracle Application Server Forms and Reports Services Installation Guide
prompt> /path/to/hard/drive/oralinfrs/runInstaller
3.10.4 Installing from a Remote CD-ROM or DVD-ROM DriveYou can run the installer on a remote computer ("remote_computer"), but have the installer screens display on your local computer ("local_computer"). The installer will install Forms and Reports Services on the remote computer.
1. Allow remote_computer to display on local_computer. You need to run this command on the local computer’s console.
local_computer> xhost +remote_computer
If you do not run xhost, you might get an Xlib error similar to "Failed to connect to server", "Connection refused by server," or "Can’t open display" when starting the installer.
2. On local_computer, perform a remote login (using telnet or rlogin) to remote_computer. Log in as the oracle user, as described in Section 3.7, "Operating System User". Ensure that the user has set the environment variables correctly, as described in Section 3.8, "Environment Variables".
local_computer> rlogin -l oracle remote_computer.mydomain.com- OR -local_computer> telnet remote_computer.mydomain.com
3. Set the DISPLAY environment variable on remote_computer to point to local_computer.
Example (C shell):
remote_computer> setenv DISPLAY local_computer.mydomain.com:0.0
Example (Bourne or Korn shell):
remote_computer> DISPLAY=local_computer.mydomain.com:0.0; export DISPLAY
4. Run the installer. See Section 4.9, "Starting Oracle Universal Installer".
3.10.5 Installing on Remote ComputersYou can run the installer on a remote computer (remote_computer), but have the installer screens display on your local computer (local_computer). The installer installs Forms and Reports Services on the remote computer.
1. Allow remote_computer to display on local_computer. Run this command on the local computer’s console.
local_computer> xhost +remote_computer
If you do not run xhost, you may get an Xlib error similar to Failed to connect to server, Connection refused by server, or Can’t open display when starting the installer.
Note: You can use a PC X emulator to run the installer if it supports a PseudoColor color model or PseudoColor visual. Set the PC X emulator to use a PseudoColor visual, and then start the installer. Refer to the X emulator documentation for instructions on how to change the color model or visual settings.

Network Topics
Requirements 3-31
2. On local_computer, perform a remote login (using telnet or rlogin) to remote_computer. Log on as the oracle user, as described in Section 3.7, "Operating System User". Ensure that the user has set the environment variables correctly, as described in Section 3.8, "Environment Variables".
local_computer> rlogin -l oracle remote_computer.mydomain.com- OR -local_computer> telnet remote_computer.mydomain.com
3. Set the DISPLAY environment variable on remote_computer to point to local_computer.
Example (C shell):
remote_computer> setenv DISPLAY local_computer.mydomain.com:0.0
Example (Bourne or Korn shell):
remote_computer> DISPLAY=local_computer.mydomain.com:0.0; export DISPLAY
4. Run the installer. For information on running the installer, see Section 4.9, "Starting Oracle Universal Installer".
3.10.6 Installing on NFS-Mounted StorageYou cannot install and run Forms and Reports Services on computers with standard NFS. You must use a certified NFS-mounted storage system, such as Network Appliance (NetApp) Filers. Forms and Reports Services is certified to run on NFS-mounted storage systems.
The NetApp system must be exported to at least the remote install user and remote root user. You can do this using exportfs command:
prompt> exportfs -i /vol/vol1
To check the latest certification list for any updates, visit Oracle Technology Network (http://www.oracle.com/technology).
3.10.7 Running Multiple Instances from One InstallationForms and Reports Services components are intended to be run only on the computer on which they are installed. You cannot run the components on remote computers even though the computers can access the files through NFS.
3.10.8 Support for NIS and NIS+You can install and run Forms and Reports Services in NIS and NIS+ environments. See the Oracle Application Server Installation Guide for more information on these environments.
Note: You can use a PC X emulator to run the installer if it supports a PseudoColor color model or PseudoColor visual. Set the PC X emulator to use a PseudoColor visual, and then start the installer. Refer to the X emulator documentation for instructions on changing the color model or visual settings.

Prerequisite Checks Performed by the Installer
3-32 Oracle Application Server Forms and Reports Services Installation Guide
3.10.9 Installing on Computers with Multiple Network CardsIf you are installing Forms and Reports Services on a computer with multiple network cards, the installer uses the first name in the /etc/hosts file. You may need to reorder the lines in this file so the required hostname appears first. You can change the file back to its original state after installation.
3.11 Prerequisite Checks Performed by the InstallerTable 3–9 lists the checks performed by the installer:
Table 3–9 Prerequisite Checks Performed by the Installer
Item Description
CPU Checks that the CPU meets the minimum speed requirement.
Operating system version See Table 3–1 for supported versions.
Operating system See Section 3.2, "Software Requirements" for a list of supported operating systems, operating system patches, software packages, and Linux x86-64 certification information.
Memory See Table 3–1 for recommended values.
Swap space See Table 3–1 for recommended values.
TMP space See Table 3–1 for recommended values.
Instance name The installer checks that the computer on which you are installing Forms and Reports Services does not already have an instance of the same name.
Oracle home directory name The installer checks that the Oracle home directory name does not contain any spaces.
Path to Oracle home directory The installer checks that the path to the Oracle home directory is not longer than 127 characters.
Oracle home directory contents
The installer checks that the Oracle home directory does not contain any files that may interfere with the installation.

Prerequisite Checks Performed by the Installer
Requirements 3-33
Oracle home directory You should install Forms and Reports Services in a new directory, unless you are expanding middle tier or installing middle tier in an Oracle home that contains Oracle Developer Suite. Here are some examples of installations that are not allowed:
■ Any type of Oracle Application Server 10g into an 8.0, 8i, 9.0.1, or 9.2 database Oracle home
■ Any type of Oracle Application Server 10g into an Oracle Management Service Oracle home
■ Any type of Oracle Application Server 10g into an Oracle Collaboration Suite Oracle home
■ Any type of Oracle Application Server 10g into an Oracle HTTP Server standalone Oracle home
■ Any type of Oracle Application Server 10g into an OracleAS Web Cache standalone Oracle home
■ Any type of Oracle Application Server 10g into an Oracle9i Developer Suite 9.0.2 Oracle home
■ Any type of Oracle Application Server 10g into an Oracle Application Server Containers for J2EE standalone Oracle home
■ Any type of Oracle Application Server 10g into an Oracle9iAS 1.0.2.2 Oracle home
■ Oracle Application Server 10g Forms and Reports Services middle tier into an Oracle9iAS9.0.2 or 9.0.3 middle tier Oracle home
■ OracleAS Developer Kits 10g into an OracleAS Infrastructure 9.0.2 or Release 10g Oracle home
■ OracleAS Developer Kits 10g into an Oracle9iAS middle tier 9.0.2 or 9.0.3 Oracle home
■ OracleAS Developer Kits 10g into an Oracle Developer Suite 9.0.2 or Release 10g Oracle home
■ OracleAS Infrastructure 10g into any Oracle9iAS 9.0.2 Oracle home
■ OracleAS Infrastructure 10g into an Oracle Application Server 10g Forms and Reports Services middle tier or OracleAS Developer Kits 10g Oracle home
■ OracleAS Infrastructure 10g into an Oracle Developer Suite 9.0.2 or Release 10g Oracle home
Port 1521 The installer displays a warning if port 1521 is in use by any application, including database listeners of any version. You must stop the application using port 1521, then click Retry in the warning dialog box.
If a database listener is using port 1521, you may be able to use it for the metadata repository database.
If another application is using port 1521, stop it or configure it to use a different port. Alternatively, you can change the database listener to use a port other than 1521, but you can do this only after installation. See the Oracle Application Server Administrator’s Guide for details.
Static port conflicts The installer checks the ports listed in the staticports.ini file, if specified. For more information about the staticports.ini file, see Section 3.5, "Ports".
Monitor The installer checks that the monitor is configured to display at least 256 colors.
Display permission The installer checks that the user has permissions to display on the monitor specified by the DISPLAY environment variable.
Table 3–9 (Cont.) Prerequisite Checks Performed by the Installer
Item Description

Prerequisite Checks Performed by the Installer
3-34 Oracle Application Server Forms and Reports Services Installation Guide
DISPLAY environment variable
The installer checks that the DISPLAY environment variable is set.
TNS_ADMIN environment variable
The TNS_ADMIN environment variable must not be set.
There must not be a tnsnames.ora file in the /etc directory.
Oracle Enterprise Manager directories are writable
The installer runs this check only if you are expanding a middle tier or reinstalling Forms and Reports Services in the same Oracle home. The installer checks that these directories are writable by the operating system user running the installer:
■ ORACLE_HOME/sysman/emd
■ ORACLE_HOME/sysman/config
■ ORACLE_HOME/sysman/webapps/emd/WEB-INF/config
Oracle Enterprise Manager files exist
The installer runs this check only if you are expanding a middle tier or if you are reinstalling Forms and Reports Services in the same Oracle home. The installer checks that these files exist:
■ ORACLE_HOME/sysman/config/iasadmin.properties
■ ORACLE_HOME/sysman/webapps/emd/WEB-INF/config/consoleConfig.xml
Table 3–9 (Cont.) Prerequisite Checks Performed by the Installer
Item Description

Considerations Before Starting the Installation 4-1
4Considerations Before Starting the
Installation
This chapter contains the following topics:
■ Oracle Home Directory
■ First-Time Installation of Any Oracle Product
■ Installing Additional Languages
■ Forms and Reports Services Instances and Instance Names
■ The ias_admin User
■ Installer File Locations
■ Why Should I Log In as Root at Certain Times During Installation?
■ Setting the Mount Point for the CD-ROM or DVD-ROM
■ Starting Oracle Universal Installer
4.1 Oracle Home DirectoryThe directory in which you install Forms and Reports Services is called the Oracle home. During installation, you must specify the full path to this directory and a name for this Oracle home.
For example, you can install Forms and Reports Services in /opt/oracle/ and you can name it oralinfrs.
4.2 First-Time Installation of Any Oracle ProductIf Forms and Reports Services is the first Oracle product to be installed on a computer, the installer displays a screen where you specify an "inventory" directory (also called the "oraInventory" directory). This inventory directory is used by the installer to keep track of all Oracle products installed on the computer.
The inventory directory is separate from the Oracle home directory for Forms and Reports Services.
To ensure that other users in the oinstall group have access to the inventory directory (so that they can install Oracle products), do not use the oracle user’s home directory as the inventory directory because home directories might not have the proper permissions set up for the oinstall group. Instead, you can put the inventory directory in the /opt/oracle directory (for example, /opt/oracle/oraInventory).

Installing Additional Languages
4-2 Oracle Application Server Forms and Reports Services Installation Guide
If you have installed an Oracle product on the computer previously, the installer uses the existing inventory directory. Ensure that you have write permissions on that directory. The best way of ensuring this is to run the installer as the same operating system user who installed the existing Oracle products.
It is recommended that you create an operating system user to perform all tasks related to installation of Oracle products. See Section 3.7, "Operating System User".
4.3 Installing Additional LanguagesBy default, the installer installs Forms and Reports Services with text in English and in the operating system language. If you need to install additional languages, click Product Languages on the Available Product Components screen.
Note that you cannot install additional languages after installation. You must install additional languages only during installation. If you run Forms and Reports Services in an environment that uses a language you did not install, the user interface may display text in that language and in English, or it may display square boxes (caused by missing fonts) instead of text.
4.4 Forms and Reports Services Instances and Instance NamesWhen you install Forms and Reports Services, an instance of Forms and Reports Services is created. The installer prompts you to provide a name for this new instance that you are installing. For example, you can name an instance oralinfrs or J2EE_1012. This name can be different from the Oracle home name. You cannot change this name after installation.
The Enterprise Manager appends the hostname and domain name to the given instance name to form a complete instance name. For example, if you are installing an instance on a computer named c1, and you name the instance frs1, then the full name of the instance is frs1.c1.mydomain.com, assuming the domain name is mydomain.com.
Valid Characters in Instance NamesInstance names can consist only of the alphanumeric characters (A-Z, a-z, 0-9) and the $ or _ (underscore) characters.
There is no maximum length restriction for instance names.
How Forms and Reports Services Uses Instance NamesInstance names are important because Forms and Reports Services uses them to uniquely identify instances. This means that if you install multiple Forms and Reports Services instances on the same computer (for example, an OracleAS Infrastructure 10g and a J2EE and Web Cache instance), you must give them different names.
When you administer Forms and Reports Services using Oracle Enterprise Manager Application Server Control, the instance name appears on the screens. You can click the instance name to see details about the instance, such as the components that are installed in that instance, whether the components are running or stopped, and the log files for the components. The Application Server Control is a browser-based administration tool for Forms and Reports Services. See the Oracle Application Server Administrator’s Guide for details about this administration tool.

Installer File Locations
Considerations Before Starting the Installation 4-3
4.5 The ias_admin UserThe installer prompts you to specify a password for the ias_admin user. The ias_admin user is the administrative user for Forms and Reports Services instances. To manage Forms and Reports Services instances using Application Server Control, log on as ias_admin.
On a computer, you can install multiple Forms and Reports Services instances, each with its own unique instance name, but the name of the administrative user is ias_admin for all instances. The password for the ias_admin user can be different for each instance.
Each Forms and Reports Services instance has its own password. Even if you install multiple Forms and Reports Services instances on the same computer using the same operating system user, you have to enter a new password for each instance on the same computer.
Password for the ias_admin UserThe password for the ias_admin user must conform to the following password policy:
■ The minimum length is five alphanumeric characters.
■ At least one of the characters must be a number.
The password for the ias_admin user has these restrictions:
■ Passwords must be shorter than 30 characters.
■ Passwords can contain only alphanumeric characters from your database character set, the underscore (_), the dollar sign ($), and the number sign (#).
■ Passwords must begin with an alphabetic character. Passwords cannot begin with a number, the underscore (_), the dollar sign ($), or the number sign (#).
■ Passwords cannot be Oracle reserved words. Appendix C in the Oracle9i SQL Reference guide lists the reserved words. You can find this guide on Oracle Technology Network (http://www.oracle.com/technology). Alternatively, avoid using words that sound as though they may be reserved words.
You must remember the password because you need to enter it to perform the following task:
■ When you log on to Application Server Control to manage Forms and Reports Services, you log on as the ias_admin user.
If you forget the password, you can reset it. See the Oracle Application Server Administrator’s Guide for details.
4.6 Installer File LocationsThe installer writes files to the following directories:
Table 4–1 Directories to Which the Installer Writes Files
Directory Description
Oracle home directory Directory in which you install Oracle Application Server 10g Forms and Reports Services.
Inventory directory Directory that the installer uses to keep track of the Oracle products installed on the computer. In subsequent installations, the installer uses the same inventory directory.

Why Should I Log In as Root at Certain Times During Installation?
4-4 Oracle Application Server Forms and Reports Services Installation Guide
4.7 Why Should I Log In as Root at Certain Times During Installation?At least once during installation, the installer prompts you to log in as the root user and run a script. You need to be the root user because the script edits files in the /etc directory.
The installer prompts you to run the root.sh script in a separate window. This script creates files in the local bin directory (/usr/local/bin, by default).
If the script finds files of the same name, it prompts you if you want to override the existing files. You should back up these files (you can do this from another window), and then overwrite them.
The following lines show the prompts from the root.sh script. The default values are enclosed in square brackets.
Enter the full pathname of the local bin directory: [/usr/local/bin]:The file "dbhome" already exists in /usr/local/bin. Overwrite it? (y/n)[n]: y Copying dbhome to /usr/local/bin ...The file "oraenv" already exists in /usr/local/bin. Overwrite it? (y/n)[n]: y Copying oraenv to /usr/local/bin ...The file "coraenv" already exists in /usr/local/bin. Overwrite it? (y/n)[n]: y Copying coraenv to /usr/local/bin ...
After running root.sh, you may see warnings that begin with "chmod: WARNING: Corresponding set-ID also disabled...". You may ignore these warnings.
4.8 Setting the Mount Point for the CD-ROM or DVD-ROMThe Forms and Reports Services CD-ROMs are in RockRidge format. The DVD is in DVD-ROM format.
On most Linux systems, the disk mounts automatically when you insert it into the disk drive. To mount the first disk, follow these steps:
1. Insert Oracle Application Server 10g Forms and Reports Services disk 1 into the disk drive.
2. To verify that the disk mounted automatically, enter the following command:
■ Red Hat:
# ls /mnt/cdrom
■ SUSE Linux Enterprise Server:
# ls /media/cdrom
/etc directory Contains information on locations of Oracle homes on the computer.
If you installed Oracle Application Server on your computer, this directory also contains files that provide information for Oracle Enterprise Manager.
/tmp directory Writes files needed only during installation to a temporary directory. By default, the temporary directory is /tmp. To specify a different directory, set the TMP environment variable. See Section 3.8.5, "TMP" for details.
Table 4–1 (Cont.) Directories to Which the Installer Writes Files
Directory Description
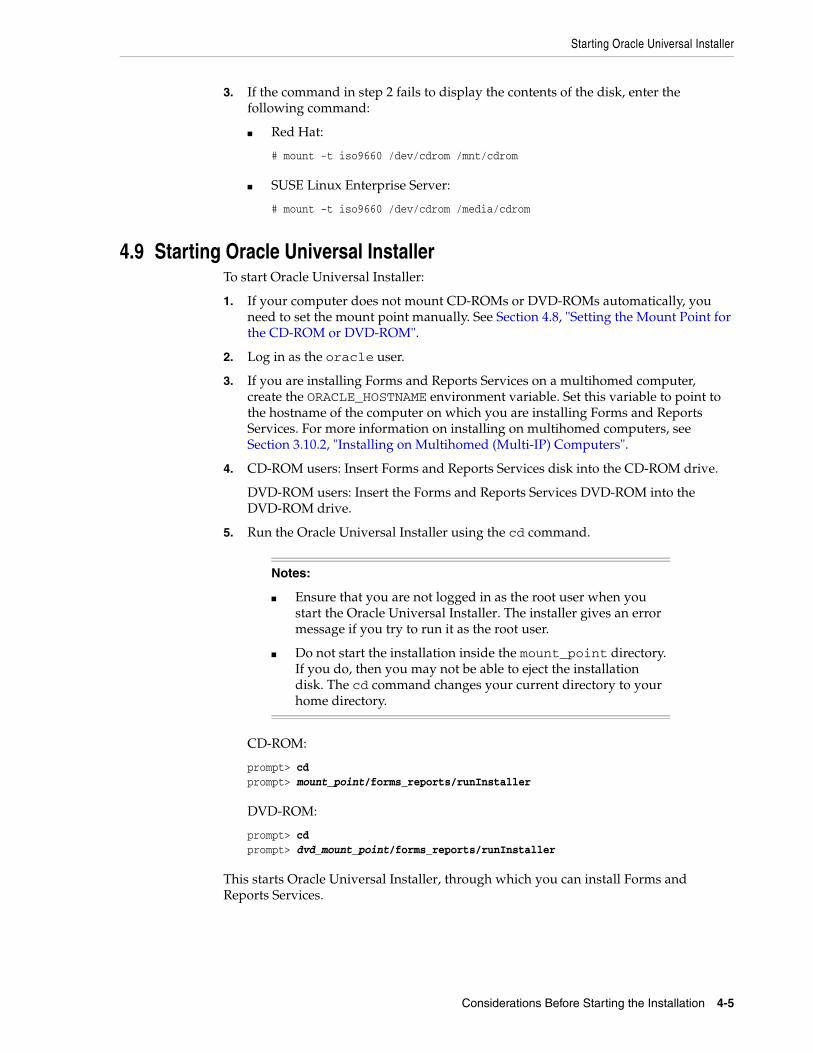
Starting Oracle Universal Installer
Considerations Before Starting the Installation 4-5
3. If the command in step 2 fails to display the contents of the disk, enter the following command:
■ Red Hat:
# mount -t iso9660 /dev/cdrom /mnt/cdrom
■ SUSE Linux Enterprise Server:
# mount -t iso9660 /dev/cdrom /media/cdrom
4.9 Starting Oracle Universal InstallerTo start Oracle Universal Installer:
1. If your computer does not mount CD-ROMs or DVD-ROMs automatically, you need to set the mount point manually. See Section 4.8, "Setting the Mount Point for the CD-ROM or DVD-ROM".
2. Log in as the oracle user.
3. If you are installing Forms and Reports Services on a multihomed computer, create the ORACLE_HOSTNAME environment variable. Set this variable to point to the hostname of the computer on which you are installing Forms and Reports Services. For more information on installing on multihomed computers, see Section 3.10.2, "Installing on Multihomed (Multi-IP) Computers".
4. CD-ROM users: Insert Forms and Reports Services disk into the CD-ROM drive.
DVD-ROM users: Insert the Forms and Reports Services DVD-ROM into the DVD-ROM drive.
5. Run the Oracle Universal Installer using the cd command.
CD-ROM:
prompt> cdprompt> mount_point/forms_reports/runInstaller
DVD-ROM:
prompt> cdprompt> dvd_mount_point/forms_reports/runInstaller
This starts Oracle Universal Installer, through which you can install Forms and Reports Services.
Notes:
■ Ensure that you are not logged in as the root user when you start the Oracle Universal Installer. The installer gives an error message if you try to run it as the root user.
■ Do not start the installation inside the mount_point directory. If you do, then you may not be able to eject the installation disk. The cd command changes your current directory to your home directory.

Starting Oracle Universal Installer
4-6 Oracle Application Server Forms and Reports Services Installation Guide

Installation Overview 5-1
5Installation Overview
It is highly recommended that you read this guide in its entirety to ensure a successful installation and to optimize the capabilities of this release.
There are a few restrictions with this installation. For more information about these restrictions, see Section 2.1, "Restrictions with This Installation Type".
To install Forms and Reports Services, follow these steps:
1. Read the latest versions of the following Release Notes:
■ Oracle Application Server Forms and Reports Services Release Notes contains release notes for OracleAS Forms Services, Oracle Forms Developer, OracleAS Reports Services, and Oracle Reports Developer. In addition, Oracle Application Server Forms and Reports Services Release Notes contains information about the features available in this installation type.
■ Oracle Application Server Release Notes contains general information about Oracle Application Server 10g Release 2 (10.1.2), as well as references to other sources of information. You can find the latest version of the release notes document on the Oracle Technology Network (http://www.oracle.com/technology/documentation/ias.html).
2. Start Oracle Universal Installer (OUI).
For information about starting OUI, see Section 4.9, "Starting Oracle Universal Installer".
3. The Welcome screen appears. Click Next.
4. The Specify File Locations screen appears. On the Specify File Locations screen, enter the following information:
■ Name: A name to identify this Oracle home. This name cannot contain spaces and can have a maximum length of 16 characters.
Example: oralinfrs
■ Path: The full path to the destination directory (Oracle home). If the directory specified does not exist, the installer creates it with administrative privileges.
Example: /opt/oracle/oralinfrs
5. Click Next.
6. The Product-Specific Prerequisite Checks screen appears. Verify that all product prerequisite checks complete successfully.
7. Click Next.

5-2 Oracle Application Server Forms and Reports Services Installation Guide
8. The Language Selection screen appears. This screen lists the additional languages that you can install to run Forms and Reports Services. Select the required language from the Available Languages list.
9. Click Next.
10. The Specify Port Configuration Options screen appears.
■ Select Automatic to assign default ports to Forms and Reports Services. For more information about default ports, see the Oracle Application Server Installation Guide.
■ Select Manual if you want to manually configure the ports. If you select Manual, then create a port configuration file that specifies the port numbers that you want to use. Enter the entire path of the port configuration file in the field provided. For more information about the port configuration file, see the Oracle Application Server Installation Guide.
11. Click Next.
12. The Provide Outgoing Mail Server Information screen appears. Enter the outgoing mail (SMTP) server to be used by Forms and Reports Services.
Example: smtp.oracle.com
13. The Specify Instance Name and ias_admin Password screen appears.
■ Instance Name: Enter a name for this instance. Instance names can contain only alphanumeric and underscore characters. If you have more than one Forms and Reports Services instance on a computer, then the instance names must be unique.
■ ias_admin Password and Confirm Password: Enter a password for the ias_admin user. This is the administrative user for the instance. By default, the password must have a minimum of five alphanumeric characters and at least one of the characters must be a number.
14. Click Next.
15. The Summary screen appears and lists all the components that will be installed. Click Install to complete the installation. The Summary screen shows the progress of the installation.
Note: By default, the installer installs Forms and Reports Services with text in English and in the operating system language.
Note: This field is optional. However, you cannot distribute reports through e-mail until you have configured the mail server information. Refer to the Oracle Application Server Reports Services Publishing Reports to the Web manual for more information on specifying the outgoing mail server information.
Note: Each Forms and Reports Services instance has its own password, regardless of the user performing the installation. Passwords are not shared across instances even if the instances are installed by the same user.

Installation Overview 5-3
When you install OracleAS Reports Services, the broadcast mechanism is configured for server communication. For information on changing this to the Common Object Service (COS) naming mechanism, see the Oracle Application Server Reports Services Publishing Reports to the Web manual.
If you want to retain the broadcast mechanism for communication, but if your Reports Server is located across subnets, configure the Oracle Reports bridge. For information on configuring the Oracle Reports bridge, see the Oracle Application Server Reports Services Publishing Reports to the Web manual. In case of the COS naming service, the Oracle Reports bridge is not needed even if your servers are located across subnets.
To configure Oracle Reports security, you must have OracleAS Portal installed, as the security information is stored in the OracleAS Portal repository. For information about configuring OracleAS Portal to store OracleAS Reports Services security information, refer to the Securing Oracle Reports white paper on OTN (http://www.oracle.com/technology/products/reports/htdocs/getstart/whitepapers/securing9i.pdf).
Note: At any time during the installation, click Stop Installation to exit.

5-4 Oracle Application Server Forms and Reports Services Installation Guide

Configuring Forms and Reports Services to Use an Oracle Application Server Infrastructure 6-1
6Configuring Forms and Reports Services to
Use an Oracle Application ServerInfrastructure
In this release, you can configure Forms and Reports Services to use the services of an Oracle Application Server Infrastructure. This configuration enables Forms and Reports Services to be a part of an Oracle Application Server Farm. Forms and Reports Services can then use the services of an OracleAS Infrastructure in the same way as used by the Business Intelligence and Forms components.
Forms and Reports Services can be configured to use the following services:
■ Oracle Identity Management
This enables Forms and Reports Services to use Oracle Identity Management components such as Oracle Application Server Single Sign-On, Oracle Internet Directory, and so on.
To configure Forms and Reports Services to use Oracle Identity Management, refer to Section 6.1, "Configuring Forms and Reports Services to Use Oracle Identity Management".
■ Oracle Application Server Metadata Repository
This adds Forms and Reports Services to an OracleAS Farm, thus enabling it to join an OracleAS Cluster.
To configure Forms and Reports Services to use OracleAS Metadata Repository, refer to Section 6.2, "Configuring Forms and Reports Services to Use OracleAS Metadata Repository".
This chapter includes the following topics:
■ Configuring Forms and Reports Services to Use Oracle Identity Management
■ Configuring Forms and Reports Services to Use OracleAS Metadata Repository
■ Making the Reports Server Secure
■ Starting OPMN Services
■ Testing the Configuration on Oracle Application Server Forms Services
Note: Once you configure Forms and Reports Services, you cannot reverse this configuration, though you can reassociate to a different Oracle Identity Management and OracleAS Metadata Repository.

Configuring Forms and Reports Services to Use Oracle Identity Management
6-2 Oracle Application Server Forms and Reports Services Installation Guide
■ Testing the Configuration on Oracle Application Server Reports Services
6.1 Configuring Forms and Reports Services to Use Oracle Identity Management
This section describes the procedure to configure Oracle Identity Management. Oracle Identity Management components provide directory, security, and user-management functionality. Some of these components (such as OracleAS Single Sign-On) have schemas in the Oracle Application Server Metadata Repository.
Before starting the configuration, ensure that:
■ The Oracle Identity Management instance is started (status is Up)
■ You know the Oracle Internet Directory host and port numbers
■ You know the password for cn=orcladmin, or another user who is a member of the iASAdmins group
To configure Oracle Identity Management:
1. Navigate to the Application Server Control home page.
2. Click Infrastructure.
Internet Directory Host in the Identity Management section and Default Metadata Repository in the Metadata Repository section display Not Configured as shown in Figure 6–1.
Figure 6–1 Identity Management and Metadata Repository Sections
3. In the Identity Management section, click Configure to display the Configure Identity Management: Internet Directory page.
4. On the Configure Identity Management: Internet Directory page:
a. In the Host field, enter the name of the computer on which Oracle Internet Directory and Identity Management are running.
For example, host.oracle.com
b. In the Port field, enter the port at which Oracle Internet Directory is listening. The default port number is 389.
c. Select Use Only SSL Connections with Internet Directory if you want to use only SSL to connect to Oracle Internet Directory.
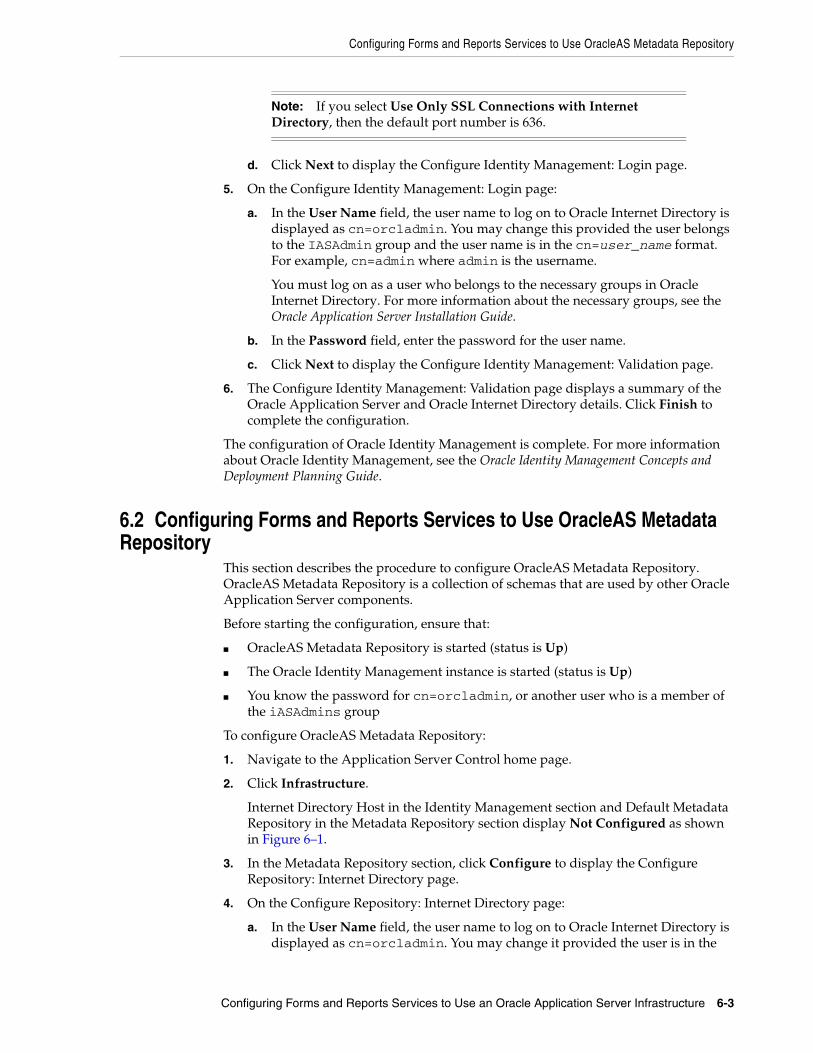
Configuring Forms and Reports Services to Use OracleAS Metadata Repository
Configuring Forms and Reports Services to Use an Oracle Application Server Infrastructure 6-3
d. Click Next to display the Configure Identity Management: Login page.
5. On the Configure Identity Management: Login page:
a. In the User Name field, the user name to log on to Oracle Internet Directory is displayed as cn=orcladmin. You may change this provided the user belongs to the IASAdmin group and the user name is in the cn=user_name format. For example, cn=admin where admin is the username.
You must log on as a user who belongs to the necessary groups in Oracle Internet Directory. For more information about the necessary groups, see the Oracle Application Server Installation Guide.
b. In the Password field, enter the password for the user name.
c. Click Next to display the Configure Identity Management: Validation page.
6. The Configure Identity Management: Validation page displays a summary of the Oracle Application Server and Oracle Internet Directory details. Click Finish to complete the configuration.
The configuration of Oracle Identity Management is complete. For more information about Oracle Identity Management, see the Oracle Identity Management Concepts and Deployment Planning Guide.
6.2 Configuring Forms and Reports Services to Use OracleAS Metadata Repository
This section describes the procedure to configure OracleAS Metadata Repository. OracleAS Metadata Repository is a collection of schemas that are used by other Oracle Application Server components.
Before starting the configuration, ensure that:
■ OracleAS Metadata Repository is started (status is Up)
■ The Oracle Identity Management instance is started (status is Up)
■ You know the password for cn=orcladmin, or another user who is a member of the iASAdmins group
To configure OracleAS Metadata Repository:
1. Navigate to the Application Server Control home page.
2. Click Infrastructure.
Internet Directory Host in the Identity Management section and Default Metadata Repository in the Metadata Repository section display Not Configured as shown in Figure 6–1.
3. In the Metadata Repository section, click Configure to display the Configure Repository: Internet Directory page.
4. On the Configure Repository: Internet Directory page:
a. In the User Name field, the user name to log on to Oracle Internet Directory is displayed as cn=orcladmin. You may change it provided the user is in the
Note: If you select Use Only SSL Connections with Internet Directory, then the default port number is 636.
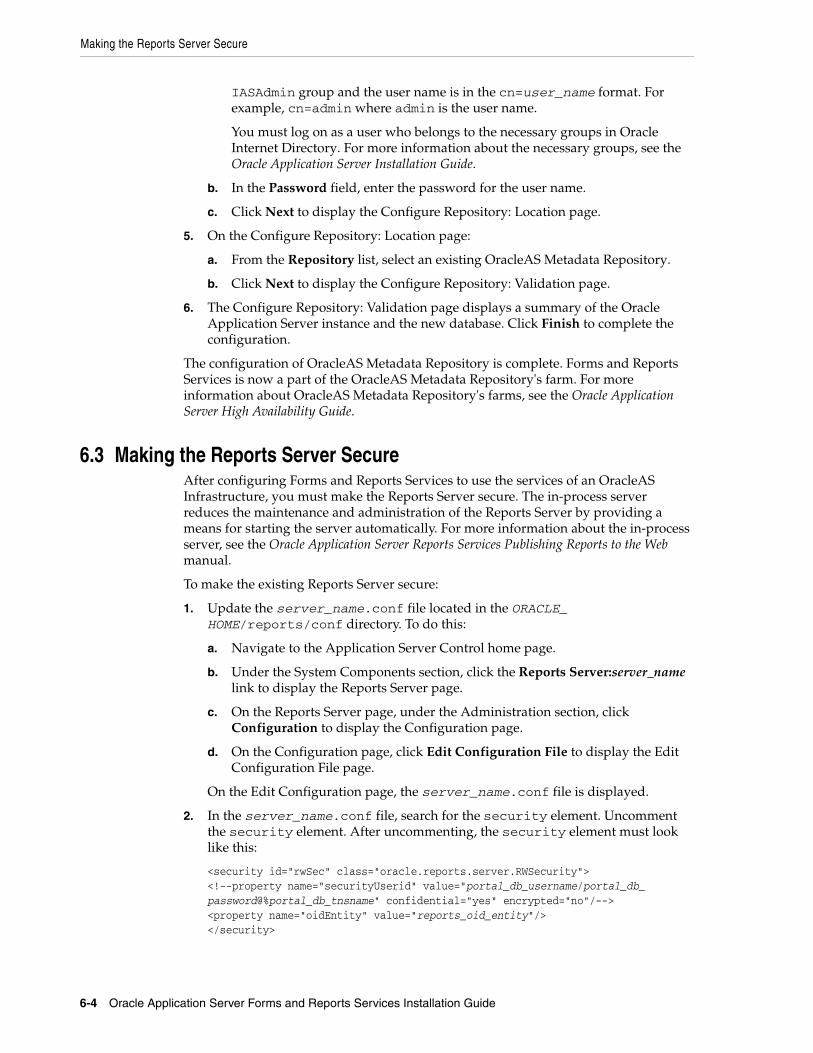
Making the Reports Server Secure
6-4 Oracle Application Server Forms and Reports Services Installation Guide
IASAdmin group and the user name is in the cn=user_name format. For example, cn=admin where admin is the user name.
You must log on as a user who belongs to the necessary groups in Oracle Internet Directory. For more information about the necessary groups, see the Oracle Application Server Installation Guide.
b. In the Password field, enter the password for the user name.
c. Click Next to display the Configure Repository: Location page.
5. On the Configure Repository: Location page:
a. From the Repository list, select an existing OracleAS Metadata Repository.
b. Click Next to display the Configure Repository: Validation page.
6. The Configure Repository: Validation page displays a summary of the Oracle Application Server instance and the new database. Click Finish to complete the configuration.
The configuration of OracleAS Metadata Repository is complete. Forms and Reports Services is now a part of the OracleAS Metadata Repository's farm. For more information about OracleAS Metadata Repository's farms, see the Oracle Application Server High Availability Guide.
6.3 Making the Reports Server SecureAfter configuring Forms and Reports Services to use the services of an OracleAS Infrastructure, you must make the Reports Server secure. The in-process server reduces the maintenance and administration of the Reports Server by providing a means for starting the server automatically. For more information about the in-process server, see the Oracle Application Server Reports Services Publishing Reports to the Web manual.
To make the existing Reports Server secure:
1. Update the server_name.conf file located in the ORACLE_HOME/reports/conf directory. To do this:
a. Navigate to the Application Server Control home page.
b. Under the System Components section, click the Reports Server:server_name link to display the Reports Server page.
c. On the Reports Server page, under the Administration section, click Configuration to display the Configuration page.
d. On the Configuration page, click Edit Configuration File to display the Edit Configuration File page.
On the Edit Configuration page, the server_name.conf file is displayed.
2. In the server_name.conf file, search for the security element. Uncomment the security element. After uncommenting, the security element must look like this:
<security id="rwSec" class="oracle.reports.server.RWSecurity"><!--property name="securityUserid" value="portal_db_username/portal_db_password@%portal_db_tnsname" confidential="yes" encrypted="no"/--><property name="oidEntity" value="reports_oid_entity"/></security>

Testing the Configuration on Oracle Application Server Forms Services
Configuring Forms and Reports Services to Use an Oracle Application Server Infrastructure 6-5
3. Ensure that the value of oidEntity is the same as the value of oidEntity in the rwserver.template file. The rwserver.template file is located in the ORACLE_HOME/reports/conf directory.
Save your changes and restart the Reports Server. To make the earlier servers secure, perform steps on the other servers.
All newly started servers will be secure by default.
6.4 Starting OPMN ServicesOnce the configuration of Oracle Identity Management and OracleAS Metadata Repository is complete, the status of the Oracle Process and Management Notification (OPMN) services is displayed as Down. You must restart the OPMN services.
To restart the OPMN services:
1. Navigate to the Application Server Control home page.
2. Click Start All to display the Processing: Start All page. The Processing: Start All page displays the progress of the Start All operation.
After the Start All operation is complete, the Application Server Control home page displays the earlier standalone Forms and Reports Services instance as part of an OracleAS Farm as shown in Figure 6–2.
Figure 6–2 Forms and Reports Services Part of an OracleAS Farm
6.5 Testing the Configuration on Oracle Application Server Forms Services
To test whether the configuration of Oracle Application Server Forms Services to use the services of an OracleAS Infrastructure is successful:
1. Navigate to the Application Server Control home page.
Note: OracleAS Reports Services enables Reports-related groups (prefixed RW_) such as RW_ADMINISTRATORS, RW_DEVELOPER and IASADMINS to run the certain Web commands such as getjobid, getserverinfo, showjobs, and showenv. If OracleAS Portal is not configured to use the services of the OracleAS Infrastructure that is configured with the Forms and Reports Services installation, RW_ groups are not created. In this case, to enable these users to run the Web commands, you have to create the RW_ groups manually and add users to these RW_ groups. For more information on the Reports-related (RW_) groups, refer to the chapter "Deploying Reports in OracleAS Portal" in the Oracle Application Server Reports Services Publishing Reports to the Web manual.

Testing the Configuration on Oracle Application Server Reports Services
6-6 Oracle Application Server Forms and Reports Services Installation Guide
2. In the System Components section, click Forms to display the Forms Overview page.
3. Click the Configuration tab on the Forms Overview page.
4. From the View list, select Forms Web Configuration (formsweb.cfg).
5. Click Create New Section. The section that you create will be added to the formsweb.cfg file.
6. In the Section Name You Want to Add field, enter a name for the section. For example, modosso.
7. Click OK.
8. The section that you added is displayed in the Configuration page. You can add comments in the field next to the section name. Select the section that you added and click Edit to display the Edit Section page.
9. On the Edit Section page, you must add parameters to the section you created. To add parameters:
a. In the Name field, enter a name for the parameter. For example, ssoMode.
b. In the Value field, enter true.
c. Click Add New Parameter.
d. The parameter name and value are displayed in the Edit Section page. Click Apply.
10. Run a form by typing the following URL to display the Oracle Single Sign-On page:
http://host-name:port-mumber/forms/frmservlet?config=modosso
For example,
http://host.oracle.com:7778/forms/frmservlet?config=modosso
11. On the Oracle Single Sign-On page, log on with the Oracle Internet Directory user name and password.
If the configuration is successful, an OracleAS Forms Services page is displayed.
6.6 Testing the Configuration on Oracle Application Server Reports Services
To test whether the configuration of Oracle Application Server Reports Services to use the services of an OracleAS Infrastructure is successful:
1. Navigate to the following URL to open the Reports demo page:
http://host-name:port-number/repdemo
For example,
http://host.oracle.com:80/repdemo
2. Click either the Test a JSP Web Report link or the Test a Paper Report on the Web link.
3. On the Getting Started with Oracle Reports page, click Run Report.
If the configuration is successful, a "Reports Ran Successfully" message is displayed.
Post-Installation Tasks 7-1
7Post-Installation Tasks
This chapter describes the post-installation tasks you need to perform to ensure complete installation of Forms and Reports Services.
This chapter contains the following topics:
■ State of Forms and Reports Services Instances After Installation
■ NFS Installations
■ Testing the Forms and Reports Services Installation
■ Backup and Recovery
■ SSL
■ NLS_LANG Environment Variable
■ Deployment of Forms and Reports
7.1 State of Forms and Reports Services Instances After InstallationAfter installation, the components that you have configured are started (unless you have configured them to use ports lower than 1024, in which case you have to start them up manually).
You can use scripts or the Oracle Enterprise Manager Application Server Control to start and stop Forms and Reports Services instances. See the Oracle Application Server Administrator’s Guide for details.
7.2 NFS InstallationsIf you installed Forms and Reports Services on an NFS disk, edit the LockFile directive in the ORACLE_HOME/Apache/Apache/conf/httpd.conf file so that it points to a local disk. This file is used by the Oracle HTTP Server component.
See the Oracle HTTP Server Administrator’s Guide for details.
7.3 Testing the Forms and Reports Services InstallationTesting the Forms and Reports Services installation requires you to use a Web browser to invoke the Enterprise Manager page of your installation.
To test your installation, perform the following steps:
1. Open the Oracle Application Server Welcome page (http://hostname:80).
2. Click the Demonstrations tab.

Backup and Recovery
7-2 Oracle Application Server Forms and Reports Services Installation Guide
3. Click the Forms Services or Reports Services link to run a test Form or a test Report.
7.4 Backup and RecoveryPost-installation is an ideal time to set up your backup and recovery strategies and implement them. See the Oracle Application Server Administrator’s Guide for details.
7.5 SSLBy default, most components are not configured for SSL. To enable SSL for the components, view the guide for the specific components. For example, to enable SSL for Oracle HTTP Server, see the Oracle HTTP Server Administrator’s Guide.
7.6 NLS_LANG Environment VariableCheck the value of the NLS_LANG environment variable to ensure that it is correct for your environment. See the Oracle Application Server Globalization Guide for details, including a list of files that set this variable. You may need to edit the value of the NLS_LANG variable in these files.
7.7 Deployment of Forms and ReportsTable 7–1 lists the guides that outline post-installation information on how to configure and deploy Forms and Reports applications. These guides are available on Oracle Technology Network (http://www.oracle.com/technology)
Note: If your computer is not on the network, then configure the Common Object Service (COS) naming service to access the Reports Server. For information about configuring the naming service, see the Oracle Application Server Reports Services Publishing Reports to the Web manual.
Table 7–1 Deploying Forms and Reports Applications
Component Guides
Oracle Reports Oracle Application Server Reports Services Publishing Reports to the Web
Oracle Application Server Forms Services
Oracle Application Server Forms Services Deployment Guide

Upgrading 9.0.4 Forms and Reports Services to 10.1.2 Forms and Reports Services 8-1
8Upgrading 9.0.4 Forms and Reports Services
to 10.1.2 Forms and Reports Services
You can upgrade a 10g Release 1 (9.0.4) standalone instance of Forms and Reports Services to a 10g Release 2 (10.1.2) Business Intelligence and Forms instance. For other supported upgrade scenarios, see the Oracle Application Server Upgrade and Compatibility Guide.
This chapter briefly describes the steps to accomplish 10g Release 1 (9.0.4) standalone instance of Forms and Reports Services to a 10g Release 2 (10.1.2) Business Intelligence and Forms instance upgrade in the following sections:
■ Compatibility Matrix
■ Upgrading a 9.0.4 Standalone Forms and Reports Services Instance
■ Completing the Oracle Application Server Forms Services Upgrade
■ Completing the Oracle Application Server Reports Services Upgrade
■ Configuring the 10.1.2 Standalone Instance of Forms and Reports Services to Use Oracle Application Server Infrastructure Services
For detailed information about the upgrade, see the Oracle Application Server Upgrade and Compatibility Guide.
8.1 Compatibility MatrixTable 8–1 shows the Release 2 (9.0.2) middle-tier installation types and the corresponding compatible 10g Release 2 (10.1.2) installation types.
Table 8–2 shows the 10g (9.0.4) middle-tier installation types and the corresponding compatible 10g Release 2 (10.1.2) installation types.
Table 8–1 Compatible 10g Release 2 (10.1.2) Middle-Tier Installation Types for Release 2 (9.0.2) Upgrades
Release 2 (9.0.2) Installation Type Compatible 10g Release 2 (10.1.2) Installation Types
Business Intelligence and Forms Forms and Reports Services

Upgrading a 9.0.4 Standalone Forms and Reports Services Instance
8-2 Oracle Application Server Forms and Reports Services Installation Guide
8.2 Upgrading a 9.0.4 Standalone Forms and Reports Services InstanceIt is assumed that you have a standalone 10g Release 1 (9.0.4) instance of Forms and Reports Services on your computer. To upgrade the 10g Release 1 (9.0.4) instance to 10g Release 2 (10.1.2):
1. Install Forms and Reports Services 10g Release 2 (10.1.2).
For information about installing Forms and Reports Services, see Chapter 5, "Installation Overview".
2. Navigate to the ORACLE_HOME/upgrade directory where ORACLE_HOME is your Oracle home directory in which you installed Forms and Reports Services 10g Release 2 (10.1.2).
3. Run the iasua.sh file. Running this file starts the Oracle Application Server Upgrade Assistant.
4. In the Oracle Application Server Upgrade Assistant - Welcome screen, click Next.
5. The Oracle Application Server Upgrade Assistant - Step 1 of 1: Oracle Homes screen appears as shown in Figure 8–1.
Table 8–2 Compatible 10g Release 2 (10.1.2) Middle-Tier Installation Types for 10g (9.0.4) Upgrades
10g (9.0.4) Installation Type Compatible 10g Release 2 (10.1.2) Installation Types
Business Intelligence and Forms Forms and Reports Services
Forms and Reports Services Forms and Reports Services
Note: Ensure that the Oracle home directory for your Forms and Reports Services 10g Release 2 (10.1.2) is different from the Oracle home directory for the Forms and Reports Services 9.0.4 installation.
Note: Do not run the iasua.sh script as the root user. Instead, run the script from the same user account that you used to install the destination Oracle home.

Upgrading a 9.0.4 Standalone Forms and Reports Services Instance
Upgrading 9.0.4 Forms and Reports Services to 10.1.2 Forms and Reports Services 8-3
Figure 8–1 Oracle Application Server Upgrade Assistant - Step 1 of 1:Oracle Homes Screen
The Source Oracle Home section contains the name and path of the 9.0.4 instance of Forms and Reports Services.
The Destination Oracle Home section contains the name and path of the 10g Release 2 (10.1.2) Oracle home of Forms and Reports Services in which the OracleAS Upgrade Assistant is running.
Click Next to display the Examining Components dialog box.
6. In the Examining Components dialog box, the OracleAS Upgrade Assistant examines each component in the source Oracle home to determine whether it needs to be upgraded as shown in Figure 8–2.
Figure 8–2 Examining Components Dialog Box
The Status column for each component contains one of the following:

Upgrading a 9.0.4 Standalone Forms and Reports Services Instance
8-4 Oracle Application Server Forms and Reports Services Installation Guide
After the examination of the components, the Oracle Application Server Upgrade Assistant - Summary screen appears as shown in Figure 8–3. You can click the plus symbol (+) to view the upgrade items for a particular component.
Figure 8–3 Oracle Application Server Upgrade Assistant - Summary Screen
7. Click Finish to start the upgrade process. The Upgrading Components screen appears and shows the status of the upgrade.
8. Click OK when the upgrade is complete.
9. Once the upgrade is complete, the Upgrade Succeeded or Upgrade Failed screen appears.
■ If the Upgrade Failed screen appears, click OK to close the screen and remedy the conditions that prevented the components from being upgraded. Start the OracleAS Upgrade Assistant again.
■ The Upgrade Succeeded screen specifies the location of the upgrade log file and lists the post-upgrade tasks to be performed for various components. Click OK to close the Upgrade Succeeded screen.
Table 8–3 Values of the Status column in the Examining Components Dialog Box
Status Meaning
Succeeded The component is valid for upgrade.
In Progress The OracleAS Upgrade Assistant is examining the validity of the component.
Pending The component will be examined when the OracleAS Upgrade Assistant finishes examining the current component.
Failed The component has upgrade items that are missing or did not meet upgrade criteria. The OracleAS Upgrade Assistant cannot upgrade the component.

Completing the Oracle Application Server Forms Services Upgrade
Upgrading 9.0.4 Forms and Reports Services to 10.1.2 Forms and Reports Services 8-5
For more information about the OracleAS Upgrade Assistant or reasons for the failure of an upgrade, see the Oracle Application Server Upgrade and Compatibility Guide.
8.3 Completing the Oracle Application Server Forms Services UpgradeThe OracleAS Upgrade Assistant moves most of the OracleAS Forms Services configuration data from the source to the destination Oracle home. However, there may be manual tasks remaining after the upgrade. This section explains how to perform these tasks. For more information about the OracleAS Upgrade Assistant, see the Oracle Application Server Upgrade and Compatibility Guide.
8.3.1 Upgrading Forms *.fmx FilesIf you have deployed these files within the source Oracle home, you must manually copy them to the same location in the destination Oracle home. If the *.fmx files are not under the Oracle home on the file system, then no action is needed, as FORMS90_PATH will be upgraded by the OracleAS Upgrade Assistant, and will be valid after the upgrade.
8.3.2 Upgrading forms90app.ear Deployed in User-defined OC4J InstancesThe forms90app.ear file is deployed by default into the OC4J_BI_Forms OC4J instance. Note that the OracleAS Upgrade Assistant upgrades all user-defined OC4J instances and the applications deployed under these instances to the destination Oracle home.
Thus, if you have deployed the forms90app.ear file into one of the user-defined OC4J instances in the source Oracle home, the OracleAS Upgrade Assistant will upgrade this deployment into the corresponding OC4J instance in the destination Oracle home.
As a result, the source Oracle home Release 1 (9.0.4) forms90app.ear file is deployed into the destination Oracle home. This causes the configuration of OracleAS Forms Services 10g Release 2 (10.1.2) to be incorrect, because it requires the 10g Release 2 (10.1.2) EAR file in order to function properly.
Therefore, you must undeploy the forms90app.ear file from these upgraded OC4J instances in the destination Oracle home, and then deploy forms90app.ear in the destination Oracle home again.
The Oracle Application Server Forms Services 10g Release 2 (10.1.2) forms90app.ear file is located in the following directory:
ORACLE_HOME/forms/j2ee
Note: After the upgrade, the default.env file contains the default OracleAS Forms Services environment variables and user-defined environment variables if any. The Upgrade Assistant upgrades any user-defined environment variables to the destination Oracle home default.env file. Any user modifications to the default variables in the source Oracle home default.env file will be extracted and appended to the default environment variable values that the installer puts in the destination Oracle home default.env file.
Completing the Oracle Application Server Reports Services Upgrade
8-6 Oracle Application Server Forms and Reports Services Installation Guide
8.4 Completing the Oracle Application Server Reports Services UpgradeThe OracleAS Upgrade Assistant performs most of the Oracle Reports upgrade. However, it does not process the following:
■ The .sh script files in the following source Oracle home location:
ORACLE_HOME/bin/rw*.shORACLE_HOME/bin/reports.sh
■ The template file in the following source Oracle home location:
ORACLE_HOME/reports/conf/rwserver.template
■ The jdbcpds.conf configuration file in the following source Oracle home location:
ORACLE_HOME/reports/conf/jdbcpds.conf
If you have customized any of these files, you must apply the customizations to the corresponding files in the destination Oracle home.
In addition, to preserve the cache files and the cache directory from source Oracle home, copy the reports server cache directory from the source Oracle home to the destination Oracle home.
8.4.1 Enabling Management of Oracle Application Server Reports Services from Application Server Control Console
After you upgrade OracleAS Reports Services in the middle tier, make the following changes to the targets.xml configuration file to manage the upgraded in-process server from the Application Server Control Console. These changes are necessary for the Oracle Enterprise Manager integration to work with the upgraded Reports in-process server.
1. Open the targets.xml file in a text editor. This file is located in the ORACLE_HOME/sysman/emd directory.
2. Locate the following entry in the targets.xml file for the Reports in-process server:
TYPE="oracle_repserv" and DISPLAY_NAME="Reports Server: new_server_name
Note that new_server_name will be in the rep_hostname_newOracleHome format.
In this example, hostname is the name of host computer without the domain name and newOracleHome is the Oracle home directory.
3. For the oracle_repserv entry, replace all occurrences of new_server_name with the original server name that was used in the source Oracle home before you performed the middle-tier upgrade.
Caution: To apply customizations, you must copy the individual customized entries from the file in the source Oracle home to the file in the destination Oracle home. Do not replace any 10g Release 2 (10.1.2) files with the files from the source Oracle home, because the organization and content of the files are different in 10g Release 2 (10.1.2).
Configuring the 10.1.2 Standalone Instance of Forms and Reports Services to Use Oracle Application Server Infrastructure Ser-
Upgrading 9.0.4 Forms and Reports Services to 10.1.2 Forms and Reports Services 8-7
This example uses boldface type to identify the typical occurrences of new server name in the oracle_repserv entry in the targets.xml file. The original server name can be found in the rwservlet.properties file located at ORACLE_HOME/reports/conf.
<Target TYPE="oracle_repserv"NAME="appserv1.acme.com_Reports_Server: new_server_name"DISPLAY_NAME="Reports Server: new_server_name"VERSION="1.0"ON_HOST="appserv1.acme.com"><Property NAME="IASInternalName" VALUE="new_server_name"/><Property NAME="Password" VALUE="77c1ed41793a5ce6" ENCRYPTED="TRUE"/><Property NAME="Server" VALUE="new_server_name"/><Property NAME="Servlet"VALUE="http://appserv1.acme.com:port/reports/rwservlet"/>......</Target>
4. Stop and restart Enterprise Manager for the changes to take effect.
8.4.2 Upgrading User-Defined OC4J Instances With Oracle Reports DeploymentsThe OracleAS Upgrade Assistant upgrades your Release 1 (9.0.4) Forms and Reports Services configuration to a 10g Release 2 (10.1.2) Forms and Reports Services configuration. The OracleAS Upgrade Assistant is not aware of OC4J instances outside of these configurations that may contain deployed reports, or of customizations made to those instances in order to enable the deployed reports to run.
Therefore, if you are using OC4J instances other than the standard Forms and Reports Services OC4J instance, you must apply any manual deployment steps that you performed on those instances to the equivalent instances in Forms and Reports Services 10g Release 2 (10.1.2).
8.5 Configuring the 10.1.2 Standalone Instance of Forms and Reports Services to Use Oracle Application Server Infrastructure Services
After upgrading your standalone 10g Release 1 (9.0.4) Forms and Reports Services instance to a 10g Release 2 (10.1.2) Forms and Reports Services instance, you can configure this 10g Release 2 (10.1.2) instance to use the services of an Oracle Application Server Infrastructure. For information about configuring a standalone 10g Release 2 (10.1.2) Forms and Reports Services instance to use the services of an OracleAS Infrastructure, see Chapter 6, "Configuring Forms and Reports Services to Use an Oracle Application Server Infrastructure".

Configuring the 10.1.2 Standalone Instance of Forms and Reports Services to Use Oracle Application Server Infrastructure Ser-
8-8 Oracle Application Server Forms and Reports Services Installation Guide
Compatibility with Earlier Versions 9-1
9Compatibility with Earlier Versions
This chapter outlines the compatibility matrix, known issues and workarounds that you should be aware of when you have a configuration that includes different versions of Oracle Forms and Oracle Reports with Oracle Application Server 10g Release 2 (10.1.2) Forms and Reports Services in the following topics:
■ Compatibility with Earlier Versions and Release 10g (10.1.2)
■ Interoperability Issues and Workarounds
9.1 Compatibility with Earlier Versions and Release 10g (10.1.2)Table 9–1 shows a compatibility matrix of earlier versions of Oracle Forms and Oracle Reports.
Notes about the table:
■ The Clients column refers to all the clients of Oracle Reports and Oracle Forms.
■ The Reports/Forms Server column refers to the different releases of Oracle Forms and Oracle Reports server.
■ The Supported column refers to backward compatibility between client and server.

Interoperability Issues and Workarounds
9-2 Oracle Application Server Forms and Reports Services Installation Guide
9.2 Interoperability Issues and WorkaroundsThis section describes the known issues and workarounds that you should be aware of when you have a configuration that includes different versions of Oracle Application Server instances:
■ Oracle Enterprise Manager for 9.0.2, 9.0.3, or 9.0.4 and 10g Release 2 (10.1.2) Uses the Same Port (Port 1810)
■ dcmctl getState Command from an Oracle Application Server Forms Services Instance Cannot Be Used With 9.0.2, 9.0.3, and 9.0.4 Instances
■ Oracle Enterprise Manager: No Rollup Metrics for 9.0.2 Middle Tiers
9.2.1 Oracle Enterprise Manager for 9.0.2, 9.0.3, or 9.0.4 and 10g Release 2 (10.1.2) Uses the Same Port (Port 1810)
In 9.0.2, 9.0.3, and 9.0.4, the installer assigns port 1810 to the Oracle Enterprise Manager Web Site, regardless of whether or not the port is already in use. If the computer on which you plan to install the 10g Release 2 (10.1.2) instance already has a 9.0.2, 9.0.3, or 9.0.4 instance, the Application Server Control component for the 10g Release 2 (10.1.2) instance might already be using port 1810.
For the case where Oracle Enterprise Manager 9.0.2, 9.0.3, or 9.0.4, and 10g Release 2 (10.1.2) are configured on the same port (1810), you can change the port used by the 10g Release 2 (10.1.2) Oracle Enterprise Manager to a different port. You can then run both Oracle Enterprise Managers at the same time. To change the port on the Oracle Enterprise Manager Release 10g, perform these steps:
Table 9–1 Forms and Reports Services Compatibility Matrix
Clients Reports/Forms Server Supported? Comments
Oracle6i Reports
■ rwcgi60
■ rwcli60
■ rwrqv60
■ rwservlet
AS 10g Release 2 (10.1.2) Reports Services
No None
Oracle9i Reports (9.0.2) Clients
■ rwcgi
■ rwclient
■ rwrqv
■ rwservlet
AS 10g Release 2 (10.1.2) Reports Services
No None
Oracle Reports 10g Release 1 (9.0.4) Clients
■ rwcgi
■ rwclient
■ rwrqv
■ rwservlet
AS 10g Release 2 (10.1.2) Reports Services
Yes None
Tip: In 10g Release 2 (10.1.2), you can specify custom port numbers to use for each component. See Section 3.5.3, "Using Custom Port Numbers (the Static Ports Feature)".
Interoperability Issues and Workarounds
Compatibility with Earlier Versions 9-3
1. In the 10g Release 2 (10.1.2) home, edit the ORACLE_HOME/sysman/j2ee/config/emd-web-site.xml file and change the port value from 1810 to an unused port. The following example sets the port to 1814:
<web-site host="[ALL]" port="1814" display-name="Oracle Enterprise Manager iAS Console Website" secure="false">
If the 9.0.2/9.0.3/9.0.4 instance is using 1810, it is also likely that the instance is using port 1811 for RMI operations. With the 9.0.2, 9.0.3, or 9.0.4 Oracle Enterprise Manager running, check which port in the 1810-1829 range is unused, and use this value.
You can run the netstat command to determine which ports are in use. The following example checks if port 1814 is in use.
prompt> netstat -n | grep 1814
2. Also in the 10g Release 2 (10.1.2) home, enter the same port number in the ORACLE_HOME/sysman/emd/targets.xml file. The port number is specified in the StandaloneConsoleURL property of the oracle_ias target.
<Target TYPE="oracle_ias" NAME="infra.myhost.oracle.com" VERSION="1.0"> ... lines not shown ... <Property NAME="StandaloneConsoleURL" VALUE="http://myhost.oracle.com:1814/emd/console"/>
Once you have updated these two files, you can run BOTH the 9.0.2, 9.0.3, or 9.0.4 and Oracle Enterprise Manager 10g Release 2 (10.1.2) at the same time.
9.2.2 dcmctl getState Command from an Oracle Application Server Forms Services Instance Cannot Be Used With 9.0.2, 9.0.3, and 9.0.4 Instances
If you run the dcmctl getState command from an OracleAS Forms Services instance to get information on a 9.0.2, 9.0.3, or 9.0.4 instance, you will get an ADMN-604104 error:
prompt> dcmctl getState -i name_of_902_or_903_instanceADMN-604104 Unable to connect to the OPMN process to obtain process status table
To get information on 9.0.2, 9.0.3, or 9.0.4 instances using the dcmctl command, use the 9.0.2, 9.0.3, or 9.0.4 dcmctl command.
9.2.3 Oracle Enterprise Manager: No Rollup Metrics for 9.0.2 Middle TiersOracle Enterprise Manager Application Server Control does not monitor 9.0.2.x or 9.0.3.x instances. You have to use Oracle Enterprise Manager 9.0.2 or 9.0.3 to manage these instances.

Interoperability Issues and Workarounds
9-4 Oracle Application Server Forms and Reports Services Installation Guide
Troubleshooting A-1
ATroubleshooting
This appendix lists some methods for troubleshooting your Forms and Reports Services installation. It includes the following topics:
■ Verifying Requirements
■ Resolving Installation Errors
■ Troubleshooting Configuration Assistants
■ Descriptions of Forms and Reports Services Configuration Assistants
A.1 Verifying RequirementsReview the following information before performing any of the troubleshooting steps in this appendix:
■ Ensure that the computer meets the requirements specified in Chapter 3, "Requirements".
Read the Release Notes■ Read Oracle Application Server Forms and Reports Services Release Notes, which
contains release notes for Oracle Forms Services, Oracle Forms Developer, Oracle Reports Services, and Oracle Reports Developer. In addition, Oracle Application Server Forms and Reports Services Release Notes contains information about the features that are available in this installation type.
■ Read Oracle Application Server Release Notes prior to installing Forms and Reports Services. The release notes are available with the platform-specific documentation. The latest version of the release notes is available on OTN at:
http://otn.oracle.com/documentation/ias.html
A.2 Resolving Installation ErrorsIf you encounter an error during installation of Forms and Reports Services:
■ Ensure that you entered correct information on all the installation screens. In case you entered wrong information on one of the screens, return to that screen by clicking Back and enter the correct information.
■ Exit the installer only if you want to access the component log files. The log files located in the ORACLE_HOME/cfgtoollogs directory are inaccessible if the installer is running.
■ If you encounter an error while the installer is copying or linking files, do the following:

Troubleshooting Configuration Assistants
A-2 Oracle Application Server Forms and Reports Services Installation Guide
1. Note the error and review the installation logs for causes:
* oraInventory_location/logs/installActionstimestamp.log
* oraInventory_location/logs/oraInstalltimestamp.err
* oraInventory_location/logs/oraInstalltimestamp.out
2. Remove the failed installation by following the steps in Appendix B, "Deinstallation and Reinstallation".
3. Correct the issue that caused the error.
4. Restart the installation.
A.3 Troubleshooting Configuration AssistantsTo troubleshoot an installation error that occurs when the configuration assistants are running:
■ Review the installation log files listed in Section A.2, "Resolving Installation Errors".
■ Review the configuration assistant log files located in the ORACLE_HOME/cfgtoollogs directory for a specific Forms and Reports Services configuration assistant. Section A.4, "Descriptions of Forms and Reports Services Configuration Assistants" also lists any other log file locations for a specific configuration assistant. Try to fix the issue that caused the error.
■ If you see a Fatal Error. Reinstall message, try to find the cause of the problem by analyzing the log files. Refer to Section A.3.3, "Fatal Errors" for further instructions.
A.3.1 Configuration Assistant FailureForms and Reports Services configuration assistant failures are noted at the bottom of the installation screen. The configuration assistant interface displays additional information when applicable. The configuration assistant's execution status is identified by the result. The result codes are:
This result code is written to the following log file:
oraInventory/logs/installActionstimestamp.log
A.3.2 Failure During Component Configuration and StartupDuring installation, configuration assistants run when the Configuration Assistants screen appears. If a configuration assistant fails, try the following procedure to correct the problem:
1. Review the installation log files for this Forms and Reports Services instance.
Status Result Code
Configuration Assistant Succeeded 0
Configuration Assistant Failed 1
Configuration Assistant Cancelled -1

Troubleshooting Configuration Assistants
Troubleshooting A-3
2. Review the log files for each configuration assistant located in the ORACLE_HOME/cfgtoollogs directory. Default log file locations are described in Section A.4, "Descriptions of Forms and Reports Services Configuration Assistants".
3. Refer to the section describing the configuration assistants in Section A.4, "Descriptions of Forms and Reports Services Configuration Assistants".
a. If the failing configuration assistant has any dependencies, then run the dependencies again. You must do this even if the dependency completed successfully.
b. Run the failing configuration assistant again. If you are using the installer, select the configuration assistant and click Retry.
If the configuration assistant fails again after you click Retry, then remove the /var/tmp/EM_CONFIG_INSTALL.lk lock entry and try running the configuration assistant again.
c. If an optional configuration assistant fails, and it does not have any dependencies, run the remaining configuration assistants. Deselect the cancelled optional configuration assistant, highlight and check the next listed configuration assistant, and click Retry.
d. If configuration assistant failure occurs when running configuration assistant execution commands on the command line, then run the configuration assistant execution command again.
You can use the generated script file named configToolCommands located in the ORACLE_HOME/cfgtoollogs directory to execute the failed configuration assistant again. The configToolCommands script is generated after you exit the installer. During silent or non-interactive installation of Forms and Reports Services, the configToolCommands script is generated immediately after configuration assistant failure.
You must set the following environment variables before using the generated script:
– Set the ORACLE_HOME environment variable to the ORACLE_HOME path.
– Append the LD_LIBRARY_PATH environment variable with ORACLE_HOME/lib and ORACLE_HOME/network/lib.
– For the Register DCM Plug-Ins With EM Configuration Assistant only, set the PERL5LIB environment variable to the ORACLE_HOME/perl/lib/5.6.1 directory.
A.3.3 Fatal ErrorsSome configuration assistant failures are "fatal errors". You cannot recover from a fatal error by correcting the problem and continuing. You must remove the current installation and reinstall Forms and Reports Services. The following tasks describe the recovery procedure:
1. Deinstall the failed installation using the procedure described in Section B.1, "Deinstallation of Forms and Reports Services Instances".
Note: If the description of a configuration assistant includes an "Initial Tasks" section, perform these tasks before running the configuration assistant.
Troubleshooting Configuration Assistants
A-4 Oracle Application Server Forms and Reports Services Installation Guide
2. Correct the cause of the fatal error.
3. Reinstall Forms and Reports Services.
4. If the fatal error reoccurs, then you must remove all Oracle installations from your computer.
A.3.4 OC4J Instance Configuration Assistant ErrorsIf you are installing a middle tier against an Oracle Internet Directory that was upgraded from 9.2.0.x to 10g Release 2 (10.1.2) and not all the upgrade steps were completed, then the OC4J Instance Configuration Assistant may fail with the following error:
Adding dependent libraries for application 'portal'...done. Deploying application 'oraudrepl' to OC4J instance 'OC4J_Portal'... ERROR: Caught exception during deploy. java.rmi.RemoteException: deploy failed!: ; nested exception is: oracle.oc4j.admin.internal.DeployerException: User specified for application-client uddirepl, 'uddi_replicator' not found at com.evermind.server.rmi.RMIConnection.EXCEPTION_ORIGINATES_FROM_THE_REMOTE_SERVER(RMIConnection.java:1520)... lines omitted ...
Ensure that you followed the steps on upgrading Oracle Internet Directory 9.2.0.x to 10g Release 2 (10.1.2) as documented in Oracle Application Server Upgrade and Compatibility Guide. The instructions are in the "Upgrading the Identity Management Services" chapter.
Reports Server Start/Stop ErrorsOracle Process and Management Notification (OPMN) checks the status of the Report in-process Server using a ping mechanism. The ping URL is specified in the OC4J_BI_Forms process-type in the ORACLE_HOME/opmn/conf/opmn.xml file. The urlping element is present in the ORACLE_HOME/opmn/conf/opmn.xml file:
<process-type id="OC4J_BI_Forms" module-id="OC4J">...<category id="urlping-parameters"><data id="/reports/rwservlet/pingserver?start=auto" value="200" /></category>...<start timeout="900" retry="2"/><stop timeout="120"/><restart timeout="720" retry="2"/>...</process-type>
OPMN sends the ping URL to the Reports Servlet and if the Reports Servlet is up, it responds to the ping. start=auto in the URL means that if the in-process Reports Server is not up while receiving the ping, the Reports Servlet starts the in-process server automatically.
Sometimes, the ping timeout is reached before the in-process Reports Server is fully started (for example, the Reports Server may not be able to start completely within time because of heavy load), as a result of which the URLPing request from OPMN may time out. The ping timeout is the measure that OPMN uses to determine the time that it must wait for a callback from an in-process Reports Server (in OC4J_BI_FORMS) before considering it a timeout. You can configure the ping timeout by

Descriptions of Forms and Reports Services Configuration Assistants
Troubleshooting A-5
adding a ping entry with sufficient timeout configured to the computer's load in the following element in opmn.xml:
<ias-component id="OC4J"><process-type id="OC4J_BI_Forms" module-id="OC4J">...<category id="urlping-parameters"><process-type id="OC4J_BI_Forms" module-id="OC4J"> <data id="/reports/rwservlet/pingserver?start=auto" value="200" /></category>...<start timeout="900" retry="2"/><stop timeout="120"/><restart timeout="720" retry="2" /><ping timeout="110" interval="30" retry="2" /> -- ping timeout...</process-type></ias-component>
Then, restart OC4J_BI_Forms. For more information on using OPMN with Reports Server, see the Oracle Application Server Reports Services Publishing Reports to the Web manual.
A.4 Descriptions of Forms and Reports Services Configuration Assistants
Table A–1 lists the Forms and Reports Services configuration assistants in alphabetical order. Different installations use different configuration assistants depending on installation type and configuration options you selected.
For information about configuring Oracle Reports, see the Oracle Application Server Reports Services Publishing Reports to the Web manual. For information about configuring Oracle Forms, see the Oracle Application Server Forms Services Deployment Guide.
Table A–1 Forms and Reports Services Configuration Assistants
Configuration Assistant Description Log File Location
Application Server Control Configuration Assistant
Starts the Oracle Management Agent and the Application Server Control to deploy applications through the Oracle Enterprise Manager Application Server Control.
not applicable
DCM Repository Backup Assistant
Enables you to back up your DCM repository.
not applicable
Forms Configuration Assistant
Configures the Oracle Application Server Forms Services server and integrates Oracle Application Server Forms Services with Oracle Enterprise Manager Application Server Control.
ORACLE_HOME/cfgtoollogs/formsConfig.log
HTTP Server Configuration Assistant
Configures Oracle HTTP Server and registers it with the Oracle Enterprise Manager Application Server Control.
ORACLE_HOME/Apache/Apache/logsORACLE_HOME/Apache/Apache/httpd.logORACLE_HOME/cfgtoollogs/configtoolstimestamp.log

Descriptions of Forms and Reports Services Configuration Assistants
A-6 Oracle Application Server Forms and Reports Services Installation Guide
Java Security Configuration Assistant
Changes default password and sets and reassigns new passwords for JAAS security.
ORACLE_HOME/cfgtoollogs/jaznca.log
OC4J Configuration Assistant
Integrates OC4J with the Oracle Enterprise Manager Application Server Control. It uses the Oracle Enterprise Manager Application Server Control-provided APIs to perform the following steps:
■ Add entries to the targets.xml file
■ Add entries to the iasadmin.properties file
■ This configuration assistant is dependent on the presence of the deploy.ini file.
not applicable
OC4J Instance Configuration Assistant
Configures OC4J instances for deployed Forms and Reports Services applications.
not applicable
OPMN Configuration Assistant- start DAS instance
Starts DAS instance through OPMN. ORACLE_HOME/opmn/logs/opmn.log
Oracle Net Configuration Assistant
Configures the database listener and Forms and Reports Services instances to use the LDAP naming by default.
ORACLE_HOME/oraInventory/logs/installActions<time.stamp>.log
OracleAS Instance Configuration Assistant
Adds Forms and Reports Services instance name into the ORACLE_HOME/config/ targets2add.xml file
not applicable
Register DCM Plug-Ins With Oracle Enterprise Manager Configuration Assistant
Registers DCM plug-ins with Enterprise Manager.
not applicable
Reports Configuration Assistant
Configures the Oracle Reports server and integrates Oracle Reports with Oracle Enterprise Manager Application Server Control.
ORACLE_HOME/cfgtoollogs/reportsConfig.log
Web Cache Configuration Assistant
Configures OracleAS Web Cache and registers it with Oracle Enterprise Manager Application Server Control.
ORACLE_HOME/cfgtoollogs/configtoolstimestamp.log
See Also: Appendix F, "Configuration Assistants" in the Oracle Application Server Installation Guide for more information on log file locations
Table A–1 (Cont.) Forms and Reports Services Configuration Assistants
Configuration Assistant Description Log File Location

Deinstallation and Reinstallation B-1
BDeinstallation and Reinstallation
This appendix guides you through the deinstallation and reinstallation process for Forms and Reports Services.
This appendix contains the following topics:
■ Deinstallation of Forms and Reports Services Instances
■ Reinstallation
B.1 Deinstallation of Forms and Reports Services InstancesTo deinstall Forms and Reports Services instances, you have to completely remove the items listed in Table B–1.
See the Oracle Application Server Installation Guide for more information on deinstallation of components.
B.2 ReinstallationThe installer does not allow reinstallation of an Forms and Reports Services instance in a directory that already contains a Forms and Reports Services instance. To reinstall
Note: Forms and Reports Services is a flexible product that you can start and stop in different ways, depending on your requirements. Before you either deinstall or reinstall the product, see the Oracle Application Server Administrator’s Guide for more information on stopping all related services or processes.
Table B–1 Items to Deinstall
Item to Clean Up Tool to Use
Files from the Oracle home directory Installer
If the installer does not remove all the files, you can remove the remaining files using the rm command.
Entries for the deleted instance in the Inventory directory
Installer
Instance name from Farm page Installer
Entries for the deleted instance in the /etc directory Installer

Reinstallation
B-2 Oracle Application Server Forms and Reports Services Installation Guide
Forms and Reports Services in the same directory, deinstall Forms and Reports Services and then install it again.

Default Port Numbers C-1
CDefault Port Numbers
By default, the installer assigns port numbers to components from a set of default port numbers. This appendix contains a list of these port numbers.
If you want to use a different set of port numbers, you have to create a file called staticports.ini, in which you list the port numbers that you want to use. See Section 3.5.3, "Using Custom Port Numbers (the Static Ports Feature)" for details.
This appendix contains the following topics:
■ Method of Assigning Default Port Numbers
■ Default Port Numbers
C.1 Method of Assigning Default Port NumbersThe installer assigns default port numbers to each component using the following method:
1. The installer checks if the default port number is in use. If it is not in use, the installer assigns it to the component.
2. If the default port number is already in use by an Oracle product or by any running application, the installer tries the lowest number in the port number range. It keeps trying the port numbers in the range until it finds one that is available.
C.2 Default Port NumbersTable C–1 lists the default port numbers for components. The last column, Name in staticports.ini, specifies the component name as it appears in the staticports.ini file, which enables you to override the default port numbers. See Section 3.5.3, "Using Custom Port Numbers (the Static Ports Feature)" for details.
Table C–1 Default Port Numbers and Ranges (Grouped by Component)
Component Default PortPort Number Range Name in staticports.ini
Oracle Process Manager and Notification Server (OPMN)
Oracle Notification Server Request Port 6003 6003 - 6099 Oracle Notification Server Request port
Oracle Notification Server Local Port 6100 6100 - 6199 Oracle Notification Server Local port

Default Port Numbers
C-2 Oracle Application Server Forms and Reports Services Installation Guide
Oracle Notification Server Remote Port 6200 6200 - 6299 Oracle Notification Server Remote port
Oracle Application Server Containers for J2EE (OC4J)
OC4J AJP 12501 12501 - 12600 Not settable through staticports.ini
OC4J RMI 12401 12401 - 12500 Not settable through staticports.ini
JMS 12601 12601 - 12700 Not settable through staticports.ini
IIOP 13301 13301 - 13400 Not settable through staticports.ini
IIOPS1 13401 13401 - 13500 Not settable through staticports.ini
IIOPS2 13501 13501 -13600 Not settable through staticports.ini
OracleAS Forms Services
OracleAS Forms Services Uses the same port as Oracle HTTP Server
Oracle HTTP Server
Oracle HTTP Server Listener (OracleAS Web Cache not configured)
7777 7777 - 7877 Oracle HTTP Server Listen port
Oracle HTTP Server Listener (SSL) 4443 4443 - 4543 Oracle HTTP Server Listen (SSL) port
Oracle HTTP Server Listener (non-SSL, OracleAS Web Cache configured)
7778 7777 - 7877 Oracle HTTP Server port
Oracle HTTP Server Listener (SSL, OracleAS Web Cache configured)
4444 4443 - 4543 Oracle HTTP Server SSL port
Java Object Cache 7000 7000 - 7099 Java Object Cache port
DCM Java Object Cache 7100 7100 - 7199 DCM Java Object Cache port
SOAP server 9998 9998 - 9999 Not settable through staticports.ini
Port Tunneling 7501 7501 - 7599 Not settable through staticports.ini
Oracle HTTP Server Diagnostic port 7200 7200 - 7299 Oracle HTTP Server Diagnostic port
OracleAS Reports Services
SQL*Net 14040 14040-14049 Reports Services SQL*Net port
discoveryService 14021-14030 14021-14030 Reports Services discoveryService port
Oracle Reports Bridge 14011-14020 14011-14020 Reports Services bridge port
Table C–1 (Cont.) Default Port Numbers and Ranges (Grouped by Component)
Component Default PortPort Number Range Name in staticports.ini

Default Port Numbers
Default Port Numbers C-3
OracleAS Web Cache
OracleAS Web Cache - HTTP Listener 7777 7777 - 7877 Web Cache HTTP Listen port
OracleAS Web Cache - HTTP Listener (SSL) 8250 8250 - 8350 Web Cache HTTP Listen (SSL) port
OracleAS Web Cache Administration 9400 9400 - 9499 Web Cache Administration port
OracleAS Web Cache Invalidation 9401 9400 - 9499 Web Cache Invalidation port
OracleAS Web Cache Statistics 9402 9400 - 9499 Web Cache Statistics port
Oracle Enterprise Manager 10g Application Server Control
Application Server Control 1156 1156; 1810 - 1829
Application Server Control port
Oracle Management Agent 1157 1157; 1830 - 1849
Not settable through staticports.ini
Application Server Control - RMI 1850 1850 - 1869 Application Server Control RMI port
Application Server Control - SSL 1810 1810 - 1829 This port number is assigned after installation, when you configure Application Server Control for SSL. See the Oracle Application Server Administrator’s Guide for details.
Enterprise Manager Console HTTP port (orcl) 5500 Not settable through staticports.ini
Enterprise Manager Agent port (orcl) 1831 Not settable through staticports.ini
Log Loader 44000 44000 - 44099 Log Loader port
Table C–1 (Cont.) Default Port Numbers and Ranges (Grouped by Component)
Component Default PortPort Number Range Name in staticports.ini
Default Port Numbers
C-4 Oracle Application Server Forms and Reports Services Installation Guide

URLs for Components D-1
DURLs for Components
Table D–1 shows the URLs and login IDs to use to access components after installation.
The URLs in the table use the default ports. The components in your environment might use different ports. To determine the port numbers for components, look in the ORACLE_HOME/install/portlist.ini file.
Table D–1 URLs for Components
Component URL Entry in portlist.ini Login and Password
OracleAS Welcome Pages
http://host:7777 Oracle HTTP Server port or Web Cache Listen port
not applicable
Oracle HTTP Server http://host:7777 (without Web Cache)
http://host:7778 (with Web Cache)
Oracle HTTP Server Listen port
not applicable
Oracle Application Server Forms Services
http://host:port/forms/frmservlet
Web Cache Listen port not applicable
Oracle Reports http://host:7777/reports/rwservlet/help?
Web Cache Listen port orcladmin
Password: The default password for orcladmin is the same as the ias_admin password you supplied during installation.
Oracle Enterprise Manager Application Server Control
http://host:1810 Application Server Control port
ias_admin
Password: Use the ias_admin password you supplied during installation.

D-2 Oracle Application Server Forms and Reports Services Installation Guide

Index-1
Index
Aadditional languages, 4-2additional tool
desinstallation, 1-2Application Server Control, 2-2
Bbackup and recovery
post-installation, 7-2Bash shell
setting shell limits, 3-17Bourne shell
setting shell limits, 3-17browser requirement, 3-3
CC shell
setting shell limits, 3-17CD-ROM
copying to hard drive, 3-29format of, 4-4mount point, 4-4
CLASSPATH environment variable, 3-26cloning Forms and Reports Services, 1-2compatibility
compatibility matrix, 9-1with earlier version and Release 10g (9.0.4), 9-1
componentsdefault port numbers, C-1how to assign custom port numbers, 3-18URLs for, D-1
configuration assistants, A-2dependencies, A-3descriptions, A-5error codes, A-2troubleshooting, A-2
copying CD-ROM/DVD to hard drive, 3-29CPU requirements, 3-2creating group
inventory directory, 3-24csh.login file, 3-17csh.login.local file, 3-17custom ports
see static ports
Ddefault port numbers, 3-18, C-1deinstallation, B-1deployment, 7-2df command, 3-2disk space requirements, 3-2DISPLAY environment variable, 3-26Distributed Configuration Management, 2-3DVD
copying to hard drive, 3-29format of, 4-4mount point, 4-4
Eenvironment variables, 3-25
CLASSPATH, 3-26DISPLAY, 3-26LD_LIBRARY_PATH, 3-26NLS_LANG, 7-2ORACLE_HOME, 3-26ORACLE_SID, 3-26PATH, 3-26set in .profile file, 3-25su command and, 3-26TMP, 3-26TNS_ADMIN, 3-27
error codes from configuration assistants, A-2/etc directory, 4-4/etc/csh.login file, 3-17/etc/csh.login.local file, 3-17/etc/pam.d/login file, 3-17/etc/profile file, 3-17/etc/profile.local file, 3-17/etc/security/limits.so file, 3-17
Ffatal errors, A-3files
default shell startup file, 3-17/etc/csh.login, 3-17/etc/csh.login.local, 3-17
Index-2
/etc/pam.d/login, 3-17/etc/profile, 3-17/etc/profile.local, 3-17/etc/security/limits.so, 3-17
first-time installation of any Oracle product, 4-1Forms and Reports Services
cloning, 1-2
Ggroupadd command, 3-23groups command, 3-25
Hhttpd.conf file, 3-21
Iias_admin user, 4-3
password for, 4-3installation errors, A-1installation statistics, generating, 1-3installation steps, summary of, 5-1installer
see Oracle Universal Installerinstaller file locations, 4-3installing additional languages, 4-2installing from hard drive, 3-29instance names, 4-2
how they are used, 4-2valid characters, 4-2
inventory directory, 4-1, 4-3creating group, 3-24determine where it is, 3-24
IPinstalling on a computer with multiple IP
addresses, 3-29requirements, 3-2
Kkernel parameters, 3-16Korn shell
setting shell limits, 3-17
Llanguages, installing additional, 4-2LD_LIBRARY_PATH environment variable, 3-26limit command, 3-17limits.so file, 3-17local operating system user
creating, 3-25log files, A-1login file, 3-17
Mmemory requirements, 3-2monitor requirements, 3-3
mount point for CD-ROM, 4-4mount point for DVD, 4-4multihomed computers, installing on, 3-29
Nnames of instances
see instance namesnetwork topics, 3-28
installing from hard drive, 3-29installing from remote CD-ROM/DVD
drive, 3-30installing on multihomed computers, 3-29
new elementORBPorts, 1-2
new features in the installation, 1-1NFS installations
configuring Oracle HTTP Server, 7-1NLS_LANG environment variable, 7-2nofile
shell limit on Linux, 3-17noproc
shell limit on Linux, 3-17
OOC4J, 2-2OC4J Instance configuration assistant errors, A-4oinstall group, 3-24, 4-1operating system
patches, 3-4version, 3-2
operating system groups, 3-23groups command, 3-25oinstall group, 3-24
operating system users, 3-24groups command, 3-25oracle user, 3-24
Oracle Application Server Containers for J2EE, 2-2Oracle Application Server Forms and Reports Services
features, 2-1Oracle Application Server Forms Services, 2-2Oracle Application Server Reports Services, 2-2Oracle Application Server Web Cache, 2-2Oracle Enterprise Manager, 2-2Oracle Home directory, 4-1Oracle HTTP Server, 2-2
configuring static ports, 3-21in NFS installations, 7-1
Oracle Process Manager and Notification Server, 2-3oracle software owner user
setting shell limits, 3-17Oracle Universal Installer
generating statistics, 1-3log files, A-1new features, 1-1prerequisite checks, 3-32
oracle user, 3-24setting shell limits, 3-17
ORACLE_HOME environment variable, 3-26

Index-3
ORACLE_SID environment variable, 3-26OracleAS Web Cache
configuring static ports, 3-21oraInst.loc file, 3-24oraInventory directory, 3-24, 4-1ORBPorts element, 1-2
Ppasswd command, 3-25passwords
for ias_admin user, 4-3patches. See operating system.PATH environment variable, 3-26portlist.ini file, 3-20ports, 3-18
choosing port numbers, 3-20list of default port numbers, C-1static ports, 3-18using default port numbers, 3-18
prerequisite checks, 3-32processor speed, 3-2processor type, 3-2.profile file, 3-25profile file, 3-17profile.local file, 3-17
RRAM requirements, 3-2reducing memory consumption, 3-3Release 10g (9.0.4) and earlier version
compatibility with, 9-1remote installations, 3-30requirements, 3-3
browser, 3-3disk space, 3-2environment variables, 3-25for multihomed computers, 3-29kernel parameters, 3-16memory, 3-2operating system patches, 3-4operating system version, 3-2processor speed, 3-2processor type, 3-2space in /tmp, 3-2static IP, 3-2swap space, 3-3
restrictions, 2-1root user, 4-4root.sh, 4-4runInstaller command
-executeSysPrereqs parameter, 3-1on CD-ROM, 4-5on DVD, 4-5
Ssetting shell limits, 3-17shell
default shell startup file, 3-17
shell limits, 3-17SSL
post-installation configuration, 7-2startup file
default shell startup file, 3-17static ports, 3-18
examples, 3-22for Oracle HTTP Server, 3-21, 3-22for OracleAS Web Cache, 3-21not working, 3-21
staticports.ini file, 3-18creating, 3-19format, 3-19
steps, summary of, 5-1su command, 3-26summary of installation steps, 5-1swap space requirement, 3-3
Ttcsh shell
setting shell limits, 3-17testing, 7-1/tmp directory, 3-26, 4-4
space required, 3-2TMP environment variable, 3-26TNS_ADMIN environment variable, 3-27tnsnames.ora file, 3-27troubleshooting, A-1, A-2
configuration assistants, A-2fatal errors, A-3installation errors, A-1verify requirements, A-1
Uulimit command, 3-17UNIX commands
groupadd, 3-23limit, 3-17passwd, 3-25ulimit, 3-17useradd, 3-25
UNIX userssetting shell limits, 3-17
URLs for components, D-1useradd command, 3-25users
setting shell limits for UNIX users, 3-17users (operating system)
see operating system users
V/var/opt/oracle directory
oraInst.loc file, 3-24

Index-4