oracle business intelligence applications migration with oracle data integrator in 7 easy...
TRANSCRIPT

Session ID:
Prepared by:
Oracle Business Intelligence
Applications Migration With
Oracle Data Integrator in 7 Easy
Steps
Tasks and dependencies that need
to be completed for a successful
migration
10637
Siva Velappan, Enterprise Architect, HRSD
Ashley Arnold, Staff Consultant, AST

Hampton Roads Sanitation District
HRSD is a regional wastewater treatment agency that
serves 17 counties and cities.
We protect public health
and the waters of Hampton
Roads by treating
wastewater effectively
13 plants can treat up
to 249 million gallons of
wastewater each day
Service area covers
over 2800 square miles
2

Our Brands Our Services Oracle Specialized
Enterprise Resource Planning
Business Intelligence
EPM-Hyperion
Middleware
CRM/CX
MDM-EDQ
Configure/Price/Quote
Managed Services
Education / Oracle University
Project Advisory Services
EBS Financial Management
EBS Human Capital Management
EBS Supply Chain Management
Database
BI Applications
BI Foundation Suite
Hyperion Planning & Financial Management
Essbase
Oracle Data Integration
Application Development Framework
Service Oriented Architecture
WebCenter Content
Access Management Suite Plus
Identity Governance Suite
WebLogic Server
2015, 2013, 2011, 2009 Oracle Excellence
Award Winner
2015, 2014 Chicago Tribune Top 100
Workplaces Award Winner
2014, 2013, 2012 Inc. 5000 Fastest Growing Companies Award Winner
2014, 2012 Best & Brightest Companies to
Work For Award Winner
Specialized. Recognized. Preferred.
3
Agenda
• Prerequisites
• Step 1: Migrate Custom ELT in ODI
• Step 2: Migrate Database Changes
• Step 3: Migrate Functional Setup Configuration
• Step 4: Migrate Customized RPD
• Step 5: Migrate/Setup Security
• Step 6: Migrate Web Catalog
• Step 7: Full Data Load
4

Prerequisites
• Functional setup has to be completed in source
environment
• Any customization needs to be completed in source
environment (DFFs, custom fields, database
objects, etc.)
• The target environment needs to be built and have
the basic setup completed
• Security should be built out in the source
environment
5

Step 1: Migrate Custom ELT in ODI
• Export custom objects from source environment
– Mappings, knowledge modules, load plan
components, models
• Export topology from target environment
– Assumption, target environment is already configured
• Import custom objects in to target environment
• Import topology in to target environment
6

Step 1: Migrate Custom ELT in ODI
• In the source environment from the designer tab,
click the icon and then ‘Export’
7

Step 1: Migrate Custom ELT in ODI
8
• Click on ‘Smart Export’ and ‘OK’

Step 1: Migrate Custom ELT in ODI
9
• Enter the name of the file, then drag the folder into
the selected objects section

Step 1: Migrate Custom ELT in ODI
10
• If prompted about the release tag, click ‘No’

Step 1: Migrate Custom ELT in ODI
11
• Once the folder appears, click ‘Export’

Step 1: Migrate Custom ELT in ODI
12
• Click ‘Close’ on the report that appears to continue

Step 1: Migrate Custom ELT in ODI
13
• In the target environment from the designer tab,
click the icon in the top right then ‘Import’

Step 1: Migrate Custom ELT in ODI
14
• Click ‘Smart Import’ then ‘OK’

Step 1: Migrate Custom ELT in ODI
15
• Select the file to be imported and click ‘Next’

Step 2: Migrate Database Changes
• Migrate table changes from source environment
• Execute them in target environment
16

Step 3: Migrate Functional Setup
Configuration
• Run domain only load plan
• Export functional setup from source environment
• Import functional setup in to target environment
17

Step 3: Migrate Functional Setup
Configuration
• After logging in to Configuration Manager in the
target environment, click on ‘Manage Load Plans’
18

Step 3: Migrate Functional Setup
Configuration
• Click the Add Icon to create a new load plan
19

Step 3: Migrate Functional Setup
Configuration
• Enter a name and set the type to ‘Domain Only,
Extract and Load (SDE and SIL)’
20

Step 3: Migrate Functional Setup
Configuration
• Check the boxes for all of the available fact groups
under ‘Available Selection’ and click ‘Generate’
21

Step 3: Migrate Functional Setup
Configuration
• Login to the source environment and click on
‘Export Setup Data’ and then the export icon
22

Step 3: Migrate Functional Setup
Configuration
• In the pop-up that appears, give a name to the new
file and check the top three boxes
23

Step 3: Migrate Functional Setup
Configuration
• Login to the target environment and click on ‘Import
Setup Data’ and then the import data icon
24

Step 3: Migrate Functional Setup
Configuration
• In the pop-up that appears, click ‘Choose File’ to
browse for the file and then ‘OK’ to start the process
25

Step 4: Migrate Customized RPD
• Edit connection strings to point to the target
environment
• Edit variables with connection information, if any, to
point to target environment
• Change RPD password
• Upload customized RPD to Enterprise Manager
26

Step 4: Migrate Customized RPD
27
• Double click the database connection

Step 4: Migrate Customized RPD
28
• Double click the connection pool to open it

Step 4: Migrate Customized RPD
29
• Update the ‘data source name’, ‘username’, and
‘password’ to point to the target environment

Step 4: Migrate Customized RPD
30
• Repeat as needed for additional connection pools
and database connections when applicable

Step 4: Migrate Customized RPD
31
• Click ‘Manage’ and ‘Variables’

Step 4: Migrate Customized RPD
32
• Select ‘Variables’ under ‘Repository’ and search for
OLAP_DSN

Step 4: Migrate Customized RPD
33
• Update the default initializer with the target
connection information

Step 4: Migrate Customized RPD
34
• Click ‘File’ and then ‘Change Password’

Step 4: Migrate Customized RPD
35
• Login to Enterprise Manager in the target
environment and navigate to ‘coreapplication’

Step 4: Migrate Customized RPD
36
• Click on ‘Deployment’ and then ‘Repository’
Step 4: Migrate Customized RPD
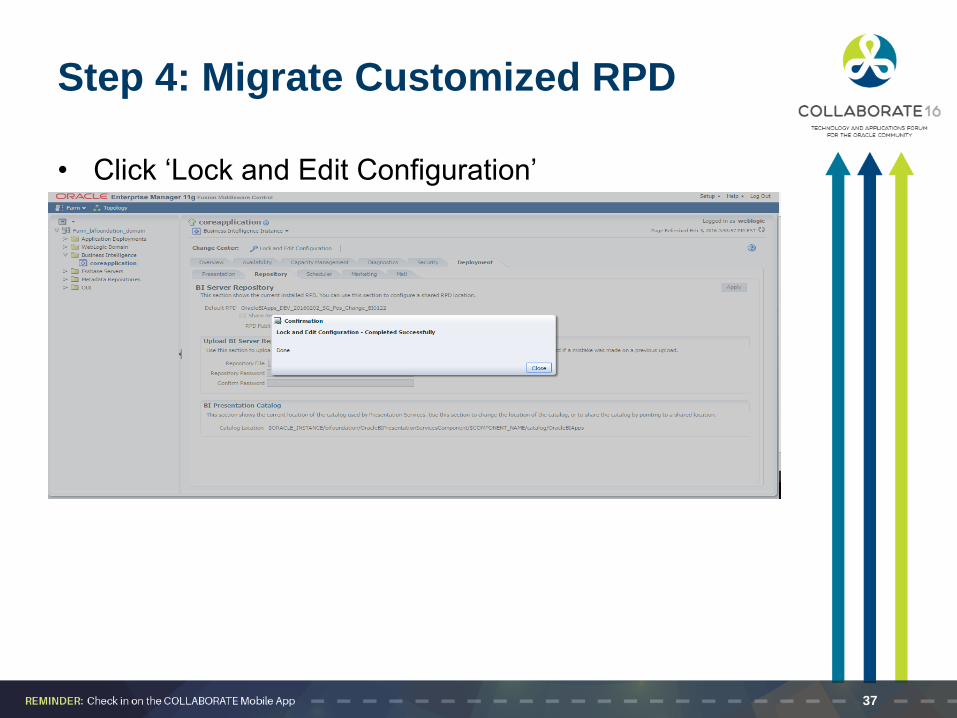
37
• Click ‘Lock and Edit Configuration’

Step 4: Migrate Customized RPD
38
• Select the RPD file, enter the password twice, and
click ‘Apply’

Step 4: Migrate Customized RPD
39
• Click ‘Activate Changes’ after the RPD is uploaded

Step 4: Migrate Customized RPD
40
• When a message appears saying ‘Restart to apply
recent changes’ click the ‘Availability’ tab

Step 4: Migrate Customized RPD
41
• Click ‘Restart All’ and ‘Yes’ to confirm the system
bounce

Step 5: Migrate/Setup Security
• Document security setup from source environment
• Setup groups in WebLogic Console
• Setup roles in Enterprise Manager
• Configure access in analytics
• Set folder level security in analytics
42

Step 5: Migrate/Setup Security
• Log in to WebLogic Console and click on ‘Security Realms’
43

Step 5: Migrate/Setup Security
• Click on ‘myrealm’
44
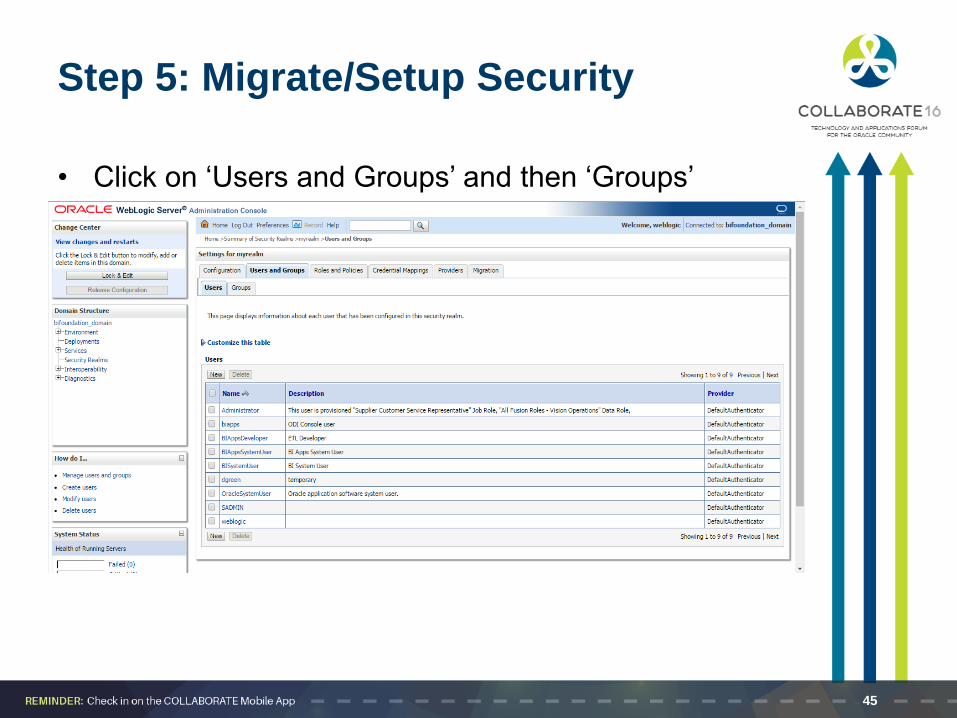
Step 5: Migrate/Setup Security
• Click on ‘Users and Groups’ and then ‘Groups’
45
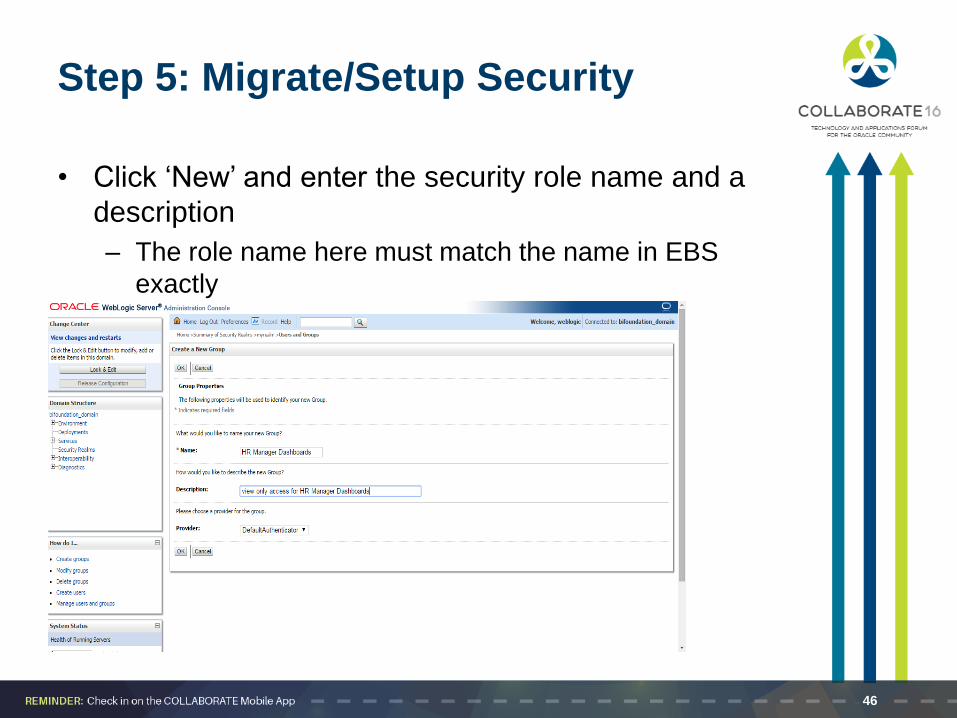
Step 5: Migrate/Setup Security
• Click ‘New’ and enter the security role name and a
description
– The role name here must match the name in EBS
exactly
46

Step 5: Migrate/Setup Security
• Log in to Enterprise Manager and navigate to the
application roles, then click ‘Create’
47

Step 5: Migrate/Setup Security
• Finish building out the role details and assign the
needed groups
48

Step 5: Migrate/Setup Security
• Log in to BI Analytics and click ‘Administration’
49

Step 5: Migrate/Setup Security
• Click ‘Manage Privileges’
50

Step 5: Migrate/Setup Security
• Add the new roles to the permissions as necessary
51

Step 5: Migrate/Setup Security
• In the permissions pop-up, click the + icon to add
the new roles
52

Step 5: Migrate/Setup Security
• Add the roles to the permission, and Grant or Deny
access as needed
53

Step 5: Migrate/Setup Security
• Go to the ‘Catalog’ and select ‘Permissions’ for any
folder that needs to be updated
54

Step 5: Migrate/Setup Security
• Click the + icon to add new roles to the folder’s
permissions
55

Step 6: Migrate Web Catalog
• Archive catalog folders from source environment
– Check ‘Keep Permissions’ if desired
• Unarchive catalog folders into target environment
– If you did keep permissions, ACL needs to be
preserved
56

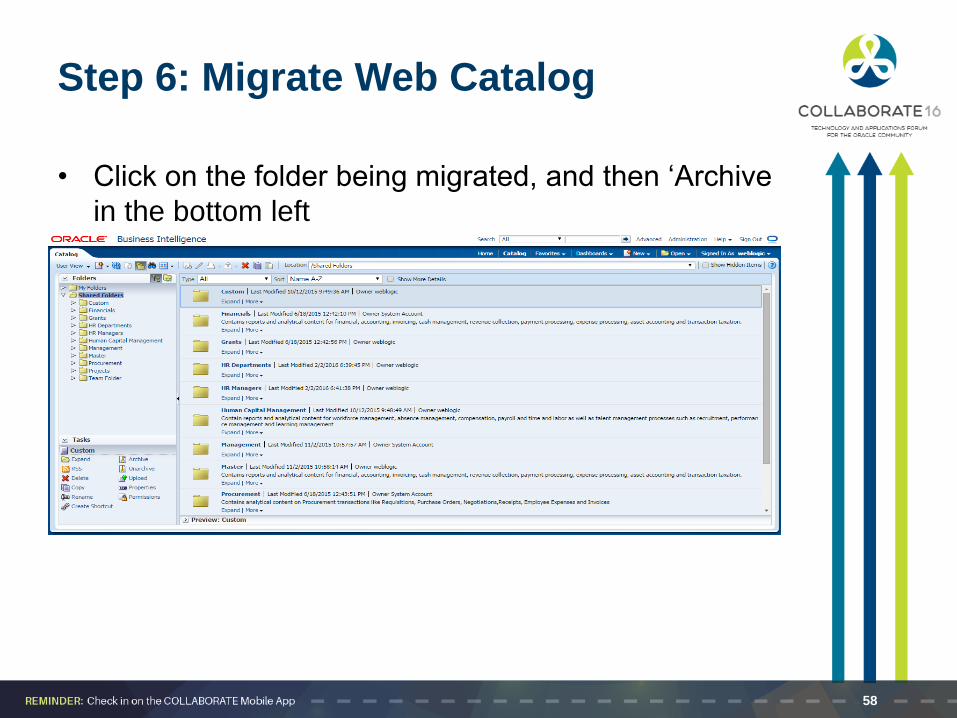
Step 6: Migrate Web Catalog
57
• Sign in to Analytics in the source environment and
click ‘Catalog’
Step 6: Migrate Web Catalog
58
• Click on the folder being migrated, and then ‘Archive
in the bottom left

Step 6: Migrate Web Catalog
59
• Check ‘Keep Permissions’ and ‘Keep Timestamps’ if
desired

Step 6: Migrate Web Catalog
60
• Log in to Analytics in the target environment, and
click ‘Catalog’

Step 6: Migrate Web Catalog
61
• Click on the parent folder of the one you are
migrating into and click ‘Unarchive’

Step 6: Migrate Web Catalog
62
• Find the archive file from earlier, change Replace to
‘All’ and ACL to ‘Create’

Step 7: Full Data Load
• Generate new load plan
• Reset data warehouse
• Execute load plan
63

Step 7: Full Data Load
• Log in to Configuration Manager in the target
environment and click ‘Manage Load Plans’
64

Step 7: Full Data Load
• Click the Add icon to create a new load plan
65

Step 7: Full Data Load
• Name the new load plan and set the load plan type
to ‘Source Extract and Load (SDE, SIL, and PLP)’
66

Step 7: Full Data Load
• Check the boxes for all of the available fact groups
under ‘Available Selection’ and click ‘Generate’
67

Step 7: Full Data Load
• Click on ‘Action’ then ‘Execute Reset Data
Warehouse’
• In the pop-up that appears, set the context, logical
agent, and work repository
68

Step 7: Full Data Load
• Click on the newly generated load plan and then
click ‘Run’
69
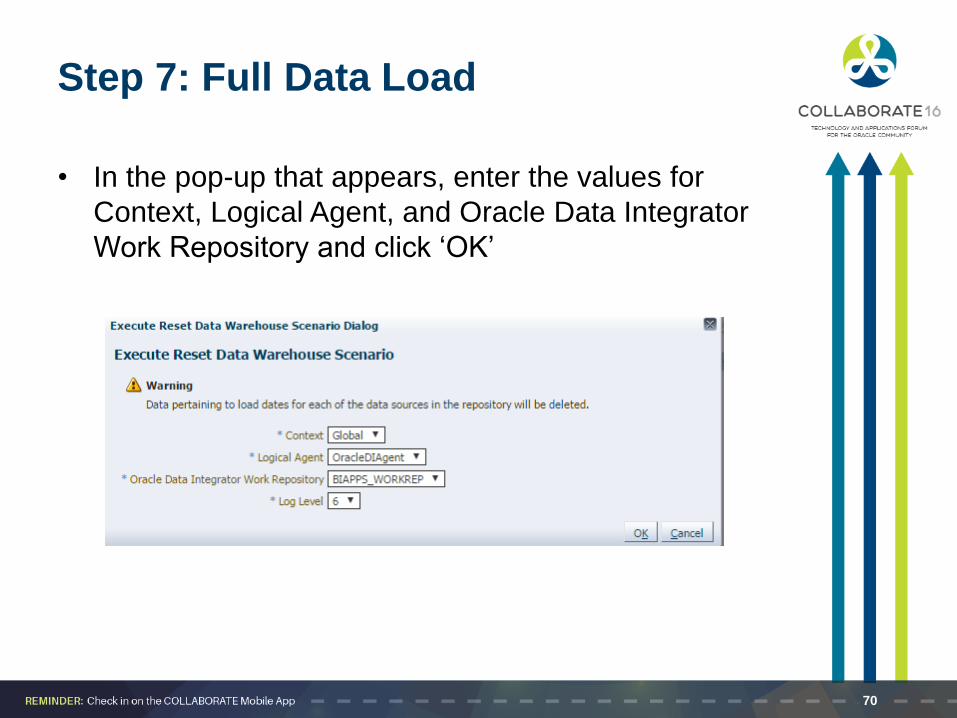
Step 7: Full Data Load
• In the pop-up that appears, enter the values for
Context, Logical Agent, and Oracle Data Integrator
Work Repository and click ‘OK’
70

Questions & Answers
71

Oracle Business Intelligence Applications
Migration With Oracle Data Integrator in 7
Easy Steps
• Please complete the session evaluation form in the
COLLABORATE 16 agenda builder and networking
app.
72
Siva Velappan , HRSD
Ashley Arnold , AST
SESSION ID :10637