oracle student learning (osl) installation and deployment guide
TRANSCRIPT
Oracle® Student LearningInstallation and Deployment Guide
Release 3.1.3
E20664-04
January 2012

Oracle Student Learning Installation and Deployment Guide, Release 3.1.3
E20664-04
Copyright © 2009, 2012, Oracle and/or its affiliates. All rights reserved.
This software and related documentation are provided under a license agreement containing restrictions on use and disclosure and are protected by intellectual property laws. Except as expressly permitted in your license agreement or allowed by law, you may not use, copy, reproduce, translate, broadcast, modify, license, transmit, distribute, exhibit, perform, publish, or display any part, in any form, or by any means. Reverse engineering, disassembly, or decompilation of this software, unless required by law for interoperability, is prohibited.
The information contained herein is subject to change without notice and is not warranted to be error-free. If you find any errors, please report them to us in writing.
If this is software or related documentation that is delivered to the U.S. Government or anyone licensing it on behalf of the U.S. Government, the following notice is applicable:
U.S. GOVERNMENT RIGHTS Programs, software, databases, and related documentation and technical data delivered to U.S. Government customers are "commercial computer software" or "commercial technical data" pursuant to the applicable Federal Acquisition Regulation and agency-specific supplemental regulations. As such, the use, duplication, disclosure, modification, and adaptation shall be subject to the restrictions and license terms set forth in the applicable Government contract, and, to the extent applicable by the terms of the Government contract, the additional rights set forth in FAR 52.227-19, Commercial Computer Software License (December 2007). Oracle USA, Inc., 500 Oracle Parkway, Redwood City, CA 94065.
This software or hardware is developed for general use in a variety of information management applications. It is not developed or intended for use in any inherently dangerous applications, including applications that may create a risk of personal injury. If you use this software or hardware in dangerous applications, then you shall be responsible to take all appropriate fail-safe, backup, redundancy, and other measures to ensure its safe use. Oracle Corporation and its affiliates disclaim any liability for any damages caused by use of this software or hardware in dangerous applications.
Oracle is a registered trademark of Oracle Corporation and/or its affiliates. Other names may be trademarks of their respective owners.
This software and documentation may provide access to or information on content, products, and services from third parties. Oracle Corporation and its affiliates are not responsible for and expressly disclaim all warranties of any kind with respect to third-party content, products, and services. Oracle Corporation and its affiliates will not be responsible for any loss, costs, or damages incurred due to your access to or use of third-party content, products, or services.
iii
Contents
Preface ................................................................................................................................................................. xi
Audience....................................................................................................................................................... xiDocumentation Accessibility ..................................................................................................................... xiRelated Documents ..................................................................................................................................... xiConventions ................................................................................................................................................ xii
Part I Installing Oracle Student Learning
1 Installation and Deployment Requirements
1.1 Prerequisite Software for Oracle Student Learning Installer ............................................... 1-11.2 System Requirements for Oracle Student Learning.............................................................. 1-1
2 Installation Tasks
3 Using Installation Log and Supporting Files
4 Uninstallation Tasks
Part II Deploying the OSL Learning Tool
5 Configuring Oracle Internet Directory
5.1 Creating Groups in OID............................................................................................................. 5-15.1.1 Scenario 1: Using Existing Groups for OSL ..................................................................... 5-15.1.2 Scenario 2: Creating New Groups for OSL ...................................................................... 5-15.2 Understanding Pre-seeded Users and Institution in OSL Database ................................... 5-15.3 Assigning Data Loading User ................................................................................................... 5-25.4 Assigning Content Integration User ........................................................................................ 5-25.5 Creating a User and Assigning Department Administrator Role ....................................... 5-35.6 Updating the Name of Department ......................................................................................... 5-3
6 Configuring Oracle Universal Content Management Default Integration
6.1 Content Server 10g Configuration............................................................................................ 6-16.1.1 Configuring OID as Security Provider for UCM ............................................................ 6-16.1.2 Enabling Intradoc Communication................................................................................... 6-2

iv
6.2 Content Server 11g Configuration............................................................................................ 6-36.2.1 Configuring OID as Security Provider for Content Server 11g..................................... 6-36.2.2 Enabling Intradoc Communication................................................................................... 6-46.2.3 Setting the Content Type .................................................................................................... 6-46.3 Configuration of Content Servers 10g and 11g ....................................................................... 6-56.3.1 Configuring the Default Server Integration..................................................................... 6-56.3.1.1 Configuring Web Service End Point URLs............................................................... 6-56.3.1.2 Configuring General Content Storage and Access .................................................. 6-56.3.1.3 Configuring General Content Reference Metadata Tagging ................................. 6-56.3.1.4 Configuring OSL Content Storage and Access ........................................................ 6-66.3.1.5 Configuring Exported Learning Item Content Storage and Access...................... 6-76.3.2 Content UCM Reference Client Integration..................................................................... 6-7
7 Configuring Oracle Business Intelligence Enterprise Edition
7.1 Configuration for OBIEE 10g..................................................................................................... 7-17.1.1 Configuring OBIEE Data Source ....................................................................................... 7-17.1.2 Configuring OBIEE for OID Authentication ................................................................... 7-27.1.3 Setting Administrator Password for Student Reporting................................................ 7-27.1.4 Importing OSL Repository into OBIEE ............................................................................ 7-27.1.5 Importing Error Messages into OBIEE ............................................................................. 7-37.1.6 Configuring OBIEE.............................................................................................................. 7-37.2 Configuration for OBIEE 11g..................................................................................................... 7-57.2.1 Configuring the Data Source.............................................................................................. 7-57.2.2 Configuring Security ........................................................................................................... 7-67.2.3 Configuring OBIEE.............................................................................................................. 7-7
8 Configuring WebLogic Server
8.1 Installing ADF Runtime Libraries ............................................................................................ 8-18.2 Configuring ADF Domain with Oracle Enterprise Manager ............................................... 8-18.3 Configuring OSL LT Data Source............................................................................................. 8-18.4 Storing Credentials in OSL Credential Store .......................................................................... 8-28.4.1 Creating a Credential Map ................................................................................................. 8-28.4.2 Storing Credentials for Content Integration .................................................................... 8-38.4.2.1 Creating the JMS Server Credential Key................................................................... 8-38.4.2.2 Granting Codebase Permission to the Credential Store ......................................... 8-38.5 Configuring OID as Security Provider .................................................................................... 8-4
9 Deploying OSL Learning Tool Admin and OSL Learning Tool
9.1 Customizing OSL Settings......................................................................................................... 9-19.1.1 Modifying Labels ................................................................................................................. 9-19.1.2 Modifying Icons ................................................................................................................... 9-29.1.3 Modifying Background Images ......................................................................................... 9-29.1.4 Updating Security Role Mappings.................................................................................... 9-29.1.4.1 Updating ADF Security Role Mappings ................................................................... 9-29.1.4.2 Updating EJB Security Role Mappings ..................................................................... 9-39.1.5 Updating Content Integration Configuration ................................................................. 9-3
v
9.1.6 Updating OBIEE Integration Configuration.................................................................... 9-69.1.7 Updating Logout URL for Learning Tool and Learning Tool Admin......................... 9-79.1.8 Updating Curriculum Framework Caching Configuration .......................................... 9-79.1.9 Updating JPA Cache Isolation Configuration ................................................................ 9-79.1.10 Controlling the display of Learning Item Types in Teacher UI .................................... 9-79.1.11 Customizing the CKEditor toolbar ................................................................................... 9-89.2 Deployment Configuration ....................................................................................................... 9-89.2.1 Recommended Configuration for OSL Deployment in a WebLogic Cluster ............. 9-99.2.2 Recommended Configuration for OSL Deployment in a Single WebLogic Instance 9-99.2.3 File Upload Limit.............................................................................................................. 9-109.2.4 Configuring authentication mechanism for non-SSO environment ......................... 9-109.3 Running the OSL Learning Tool Configurator.................................................................... 9-119.4 Running the Deployment Script ............................................................................................ 9-129.5 Disabling WSDL Files Access in WebLogic Server............................................................. 9-13
10 Configuring OSSO Solution
10.1 Installing Oracle Single Sign-On and Oracle Delegated Administration Services......... 10-110.2 Configuring SSO for Learning Tool ...................................................................................... 10-110.2.1 Installing HTTP Server..................................................................................................... 10-110.2.2 Configuring mod_wl_ohs................................................................................................ 10-110.2.3 Registering OHS mod_osso with OSSO Server............................................................ 10-410.2.4 Configuring mod_osso to Protect Web Resources....................................................... 10-410.2.5 Setting Up Providers for OSSO in a WebLogic Domain............................................. 10-710.2.6 Configuring web.xml for the OSSO Identity Asserter ................................................ 10-810.3 Configuring SSO for OBIEE ................................................................................................... 10-810.3.1 Installing HTTP Server..................................................................................................... 10-910.3.2 Configuring mod_wl_ohs................................................................................................ 10-910.3.3 Registering OHS mod_osso with OSSO Server............................................................ 10-910.3.4 Configuring mod_osso to Protect Web Resources..................................................... 10-1010.3.5 Creating Oracle BI Server Impersonator User............................................................ 10-1010.3.6 Adding the Impersonator Credentials to Oracle BI Presentation Services Credential
Store 10-1110.3.7 Configuring Oracle BI Presentation Services to Identify the Credential Store and
Decryption Passphrase 10-1110.3.8 Configuring BI Presentation Services to Operate in the SSO Environment........... 10-1110.4 Configuring SSO for UCM 10g............................................................................................. 10-1210.4.1 Installing HTTP Server................................................................................................... 10-1210.4.2 Configuring OHS as Web Server for UCM................................................................. 10-1210.4.3 Registering OHS mod_osso with OSSO Server.......................................................... 10-1210.4.4 Configuring mod_osso to Protect Web Resources..................................................... 10-1310.5 Configuring SSO for Oracle UCM 11g ................................................................................ 10-1310.5.1 Installing HTTP Server................................................................................................... 10-1310.5.2 Configuring mod_wl_ohs.............................................................................................. 10-1310.5.3 Registering OHS mod_osso with OSSO Server.......................................................... 10-1410.5.4 Configuring mod_osso to protect Web Resource ...................................................... 10-1410.5.5 Setting Up Providers for OSSO in a WebLogic Domain........................................... 10-1410.6 Updating the OSL Configuration ........................................................................................ 10-14
vi
11 Configuring Oracle Access Manager 10g
11.1 Configuring OAM 10g............................................................................................................. 11-111.2 Required Components ............................................................................................................ 11-111.3 Installing OAM 10g Components .......................................................................................... 11-111.4 Configuring SSO for Learning Tool ...................................................................................... 11-111.4.1 Installing HTTP Server..................................................................................................... 11-111.4.2 Configuring mod_wl_ohs................................................................................................ 11-211.4.3 Creating an AccessGate Object on OAM Access Server ............................................. 11-211.4.4 Configuring WebGate for Global SSO Logout ............................................................. 11-311.4.5 Configuring the Redirection URL for Learning Tool .................................................. 11-411.4.6 Modifying the Challenge Parameter to Support Java Applet .................................... 11-511.4.7 Installing the WebGate Plug-in for the HTTP Server .................................................. 11-511.4.8 Setting up Providers for OAM SSO in a WebLogic Domain...................................... 11-611.4.9 Configuring the Session Time-out.................................................................................. 11-711.4.10 Calling Learning Tool Logout from other Applications ............................................. 11-811.5 Configuring SSO for OBIEE ................................................................................................... 11-811.5.1 Installing HTTP Server..................................................................................................... 11-811.5.2 Configure mod_wl_ohs ................................................................................................... 11-811.5.3 Creating an AccessGate Object on OAM Access Server ............................................. 11-911.5.4 Installing the WebGate Plug-in for the HTTP Server .................................................. 11-911.5.5 Creating Oracle BI Server Impersonator User.............................................................. 11-911.5.6 Adding the Impersonator Credentials to Oracle BI Presentation Services Credential
Store 11-911.5.7 Configuring Oracle BI Presentation Services to Identify the Credential Store and
Decryption Passphrase 11-911.5.8 Configuring BI Presentation Services to Operate in the SSO Environment............. 11-911.6 Configuring SSO for UCM 11g............................................................................................. 11-1011.6.1 Installing HTTP Server................................................................................................... 11-1011.6.2 Configure mod_wl_ohs ................................................................................................. 11-1011.6.3 Creating an AccessGate Object on OAM Access Server ........................................... 11-1011.6.4 Configuring WebGate for Global SSO Logout ........................................................... 11-1111.6.5 Installing the WebGate Plug-in for the HTTP Server ................................................ 11-1111.6.6 Setting up Providers for OAM SSO in a WebLogic Domain.................................... 11-1111.7 Updating the OSL Configuration ........................................................................................ 11-11
12 Installing and Configuring Oracle Access Manager 11g
12.1 Installing Required Components........................................................................................... 12-112.1.1 Installing Oracle Sun JDK................................................................................................ 12-212.1.2 Installing Oracle Database............................................................................................... 12-212.1.3 Installing WebLogic Server ............................................................................................. 12-312.1.4 Creating Database Schema for OAM Using the Repository Creation Utility (RCU) ........
12-312.1.5 Installing Oracle Access Manager 11.1.1.5.0 or 11.1.1.3.0 ........................................... 12-312.1.6 Installing Oracle HTTP Server ........................................................................................ 12-412.1.7 Installing and Configuring Oracle HTTP Server Webgate 11g .................................. 12-512.2 Configuring SSO for OSL Learning Tool.............................................................................. 12-512.2.1 Step 1: Configuring mod_wl_ohs.conf file.................................................................... 12-5
vii
12.2.2 Step 2: Creating an AccessGate Object on OAM Access Server ................................ 12-612.2.3 Step 3: Setting up Providers for OAM SSO in the WebLogic Domain ................... 12-1212.2.4 Step 4: Copying the Webgate Artifacts........................................................................ 12-1312.2.5 Step 5: Configuring web.xml for the OAM Identity Asserter ................................. 12-1312.2.6 Step 6: Configuring the Session Timeout .................................................................... 12-1412.2.7 Step 7: Calling Learning Tool Logout from other Applications .............................. 12-1512.3 Configuring SSO for OBIEE ................................................................................................. 12-1512.3.1 Installing HTTP Server................................................................................................... 12-1512.3.2 Configure mod_wl_ohs ................................................................................................. 12-1512.3.3 Creating an AccessGate Object on OAM Access Server ........................................... 12-1612.3.4 Installing the WebGate Plug-in for the HTTP Server ................................................ 12-1612.3.5 Creating Oracle BI Server Impersonator User............................................................ 12-1612.3.6 Adding the Impersonator Credentials to Oracle BI Presentation Services Credential
Store 12-1612.3.7 Configuring BI Presentation Services to Operate in the SSO Environment........... 12-1612.3.8 Setting up Providers for OAM SSO in a Weblogic domain...................................... 12-1712.4 Configuring SSO for UCM.................................................................................................... 12-1712.4.1 Installing HTTP Server................................................................................................... 12-1712.4.2 Configure mod_wl_ohs ................................................................................................. 12-1712.4.3 Creating an AccessGate Object on OAM Access Server ........................................... 12-1812.4.4 Configuring WebGate for Global SSO Logout ........................................................... 12-1812.4.5 Installing the WebGate Plug-in for the HTTP Server ................................................ 12-1812.4.6 Setting up Providers for OAM SSO in a WebLogic Domain.................................... 12-1812.5 Updating the OSL Configuration ........................................................................................ 12-1812.6 Modifying Oracle Access Manager Cache Settings .......................................................... 12-19
Part III Migrating Content from UCM 10g to ECM 11g
13 Migrating Content from UCM 10g to ECM 11g
Part IV Upgrading OSL Release 3.1.2 to OSL Release 3.1.3
14 Upgrading Oracle Student Learning from Release 3.1.2 to Release 3.1.3
14.1 Prerequisite ............................................................................................................................... 14-114.2 Updating OSL Learning Tool Database................................................................................ 14-114.3 Installing WLS 10.3.5 and ADF 11.1.1.5.0 ............................................................................ 14-114.4 Deploying the new OSL .ear file............................................................................................ 14-114.5 Redploying OBIEE Catalogs................................................................................................... 14-2

viii

ix
List of Tables
2–1 OSL Installation Footprint ..................................................................................................... 2-133–1 Installation Log and Supporting Files..................................................................................... 3-16–1 Provider Specific Properties ..................................................................................................... 6-36–2 Configuring OSL Metadata User ............................................................................................. 6-66–3 Configuring OSL Content User ............................................................................................... 6-76–4 Configuring TeacherGroup ...................................................................................................... 6-76–5 List of configuration variables ................................................................................................. 6-87–1 Data Items ................................................................................................................................... 7-27–2 OSLDataSource Data ................................................................................................................. 7-67–3 Configuration of OBIEE Application Roles ........................................................................... 7-78–1 Data Source Properties .............................................................................................................. 8-28–2 Provider Specific Properties ..................................................................................................... 8-49–1 Default Mappings between LDAP Groups and OSL Roles................................................. 9-29–2 List of EJB Roles Mapped to the LDAP Groups .................................................................... 9-39–3 List of Mandatory Properties ................................................................................................... 9-49–4 List of Mandatory Properties for Oracle UCM Server.......................................................... 9-59–5 List of Mandatory Properties for Configuration of Content Storage and Access ............ 9-59–6 List of Properties Related to Web Service URI ...................................................................... 9-69–7 Properties for configuring OBIEE integration ....................................................................... 9-69–8 Properties for configuring the logout URL for Learning Tool and Learning Tool Admin.....
9-79–9 Property for Configuration of Curriculum Framework Caching ....................................... 9-79–10 List of Properties ........................................................................................................................ 9-79–11 Configure the following properties......................................................................................... 9-99–12 Configure the following properties......................................................................................... 9-99–13 OSL LT Configurator Properties........................................................................................... 9-119–14 Deployment Properties .......................................................................................................... 9-1210–1 Updating OSL_PROFILE_OPTION_VALUES ................................................................. 10-1511–1 Updating OSL_PROFILE_OPTION_VALUES ................................................................. 11-1112–1 Disabling ssoCookie:httponly challenge parameter in OAM versions 11.1.1.3.0 and
11.1.1.5.0 12-1112–2 Updating OSL_PROFILE_OPTION_VALUES ................................................................. 12-19

x
List of Figures
2–1 Welcome Screen .......................................................................................................................... 2-12–2 Selecting a Product to Install ..................................................................................................... 2-22–3 Specify installation directory details ........................................................................................ 2-32–4 Choose whether to upgrade the database ............................................................................... 2-42–5 Specify the Oracle DB Home path............................................................................................ 2-52–6 Specify the SQL*Plus Directory Path ....................................................................................... 2-52–7 Specify Database Information ................................................................................................... 2-62–8 Choose Whether to Initialize the Database ............................................................................. 2-72–9 Specify the Oracle DB Home path............................................................................................ 2-82–10 Specify the SQL*Plus Path ......................................................................................................... 2-92–11 Specify the Database Information.......................................................................................... 2-102–12 Create a DB Account for OSL................................................................................................. 2-112–13 Begin the Installation............................................................................................................... 2-112–14 Wait for Installation to Complete .......................................................................................... 2-122–15 Viewing the Configuration Assistants.................................................................................. 2-122–16 Exiting the Installation Wizard .............................................................................................. 2-134–1 Welcome Screen .......................................................................................................................... 4-14–2 Inventory Panel ........................................................................................................................... 4-24–3 Confirmation Screen................................................................................................................... 4-28–1 Creating a Credential Map ........................................................................................................ 8-39–1 Apply JRF button ..................................................................................................................... 9-1310–1 Configuring mod_wl_ohs....................................................................................................... 10-210–2 Sample mod_wl_ohs configuration for LT Admin............................................................. 10-210–3 Sample mod_wl_ohs configuration for LT........................................................................... 10-310–4 Configuring mod_osso............................................................................................................ 10-510–5 Enabling mod_osso.................................................................................................................. 10-510–6 Setting up Advanced Server Configuration......................................................................... 10-610–7 Editing Content of mod_osso................................................................................................. 10-610–8 Configuring mod_wl_ohs....................................................................................................... 10-911–1 Configuring WebGate for Global SSO Logout .................................................................... 11-411–2 Configuring the Redirection URL ......................................................................................... 11-411–3 Access System Configuration Screen .................................................................................... 11-511–4 Modifying the Idle Session Time ........................................................................................... 11-812–1 Oracle Access Manager Installation - Verification of prerequisites ................................. 12-412–2 Authentication Policy.............................................................................................................. 12-712–3 Adding Resources .................................................................................................................... 12-812–4 Adding Resources to the Authentication Policy ................................................................. 12-912–5 Providing information about the data source.................................................................... 12-1012–6 Disabling ssoCookie:httponly challenge parameter in OAM 11.1.1.5.0......................... 12-1212–7 Enabling SSO .......................................................................................................................... 12-17
xi
Preface
This preface includes the following topics:
■ Audience
■ Documentation Accessibility
■ Related Documents
■ Conventions
AudienceThis document is intended for the deployment team who will deploy and implement the Oracle Student Learning (OSL) components.
Documentation AccessibilityFor information about Oracle's commitment to accessibility, visit the Oracle Accessibility Program website at http://www.oracle.com/pls/topic/lookup?ctx=acc&id=docacc.
Access to Oracle SupportOracle customers have access to electronic support through My Oracle Support. For information, visit http://www.oracle.com/pls/topic/lookup?ctx=acc&id=info or visit http://www.oracle.com/pls/topic/lookup?ctx=acc&id=trs if you are hearing impaired.
Related DocumentsFor more information, see the following documents in the Oracle Student Learning documentation set:
■ Oracle Student Learning (OSL) Implementation Guide
■ Oracle Student Learning (OSL) Learning Tool Admin User’s Guide
■ Oracle Student Learning (OSL) Learning Tool Customization Guide
■ Oracle Student Learning (OSL) Learning Tool User’s Guide
■ Oracle Student Learning (OSL) Programmer’s Guide
■ Oracle Student Learning (OSL) Release Notes
xii
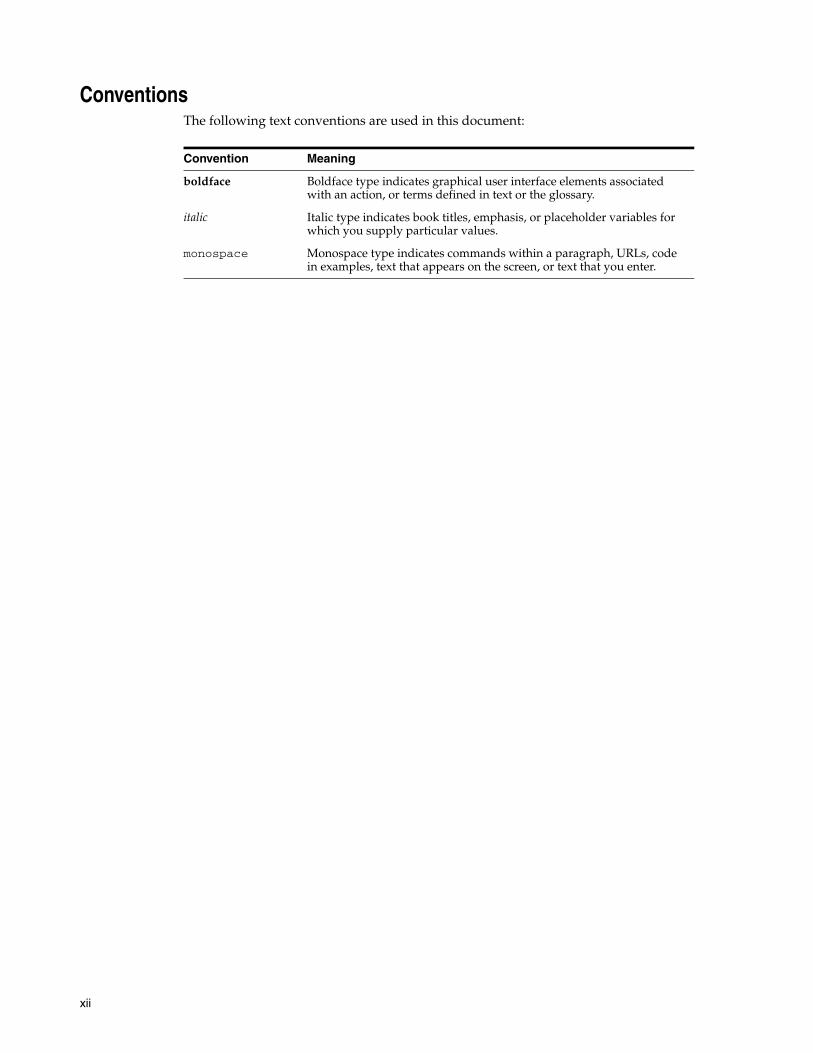
ConventionsThe following text conventions are used in this document:
Convention Meaning
boldface Boldface type indicates graphical user interface elements associated with an action, or terms defined in text or the glossary.
italic Italic type indicates book titles, emphasis, or placeholder variables for which you supply particular values.
monospace Monospace type indicates commands within a paragraph, URLs, code in examples, text that appears on the screen, or text that you enter.
Part IPart I Installing Oracle Student Learning
This section provides an overview of the Oracle Student Learning (OSL) installation. The chapters in this section provide information about installation requirements, installation tasks, and using the installation log files. This section includes the following chapters:
■ Chapter 1, "Installation and Deployment Requirements"
■ Chapter 2, "Installation Tasks"
■ Chapter 3, "Using Installation Log and Supporting Files"
■ Chapter 4, "Uninstallation Tasks"

1
Installation and Deployment Requirements 1-1
1Installation and Deployment Requirements
The Oracle Student Learning (OSL) installer is based on the Oracle Universal Installer (OUI). The OUI is a Java-based application with a graphical user interface. For this release, the certified operating system for OUI is Oracle Enterprise Linux 5.3 x86-64 bit.
This chapter lists software required for running the installer and for OSL to function successfully.
1.1 Prerequisite Software for Oracle Student Learning InstallerDuring the installation, you can choose to upgrade or initialize the Learning Tool Database required by OSL. Before the upgrade or initialization, ensure that the following prerequisites are met:
■ The Oracle Database 11g is installed on either of the following computers:
– The computer where the installer is run.
– A remote computer that is accessible from the computer where the installer is run.
■ SQL*Plus is available on the computer where you are running the OSL installer.
– If Oracle Database (Oracle DB) is installed on the computer, use the SQL*Plus distributed along with Oracle DB.
– If Oracle DB is not installed on the computer, use the SQL*Plus Instant Client.
You can download SQL*Plus Instant Client from the Oracle Technology Network (OTN).
1.2 System Requirements for Oracle Student LearningFor the list of requirements for OSL, refer to the OSL Certification Matrix.

System Requirements for Oracle Student Learning
1-2 Oracle Student Learning Installation and Deployment Guide
2
Installation Tasks 2-1
2Installation Tasks
This chapter describes the required and optional steps for installing Oracle Student Learning (OSL).
To install OSL, perform the following steps:
1. Open the Disk1/install directory.
2. Run the runInstaller executable file.
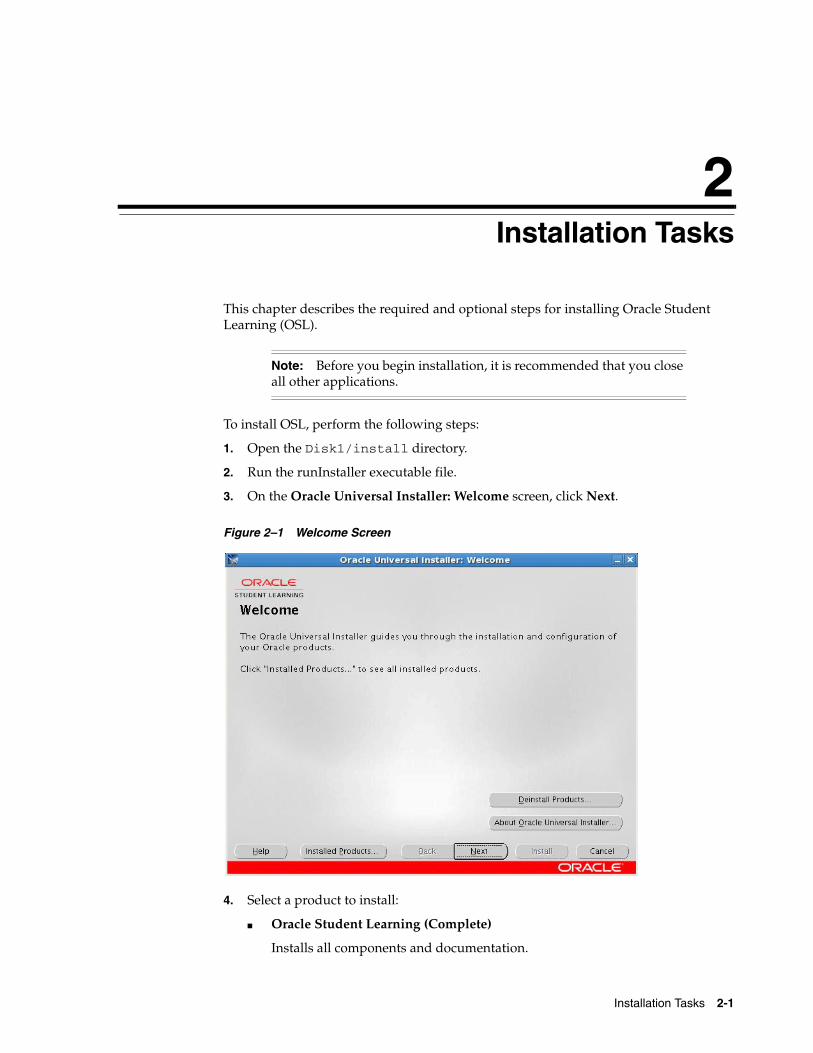
3. On the Oracle Universal Installer: Welcome screen, click Next.
Figure 2–1 Welcome Screen
4. Select a product to install:
■ Oracle Student Learning (Complete)
Installs all components and documentation.
Note: Before you begin installation, it is recommended that you close all other applications.
2-2 Oracle Student Learning Installation and Deployment Guide
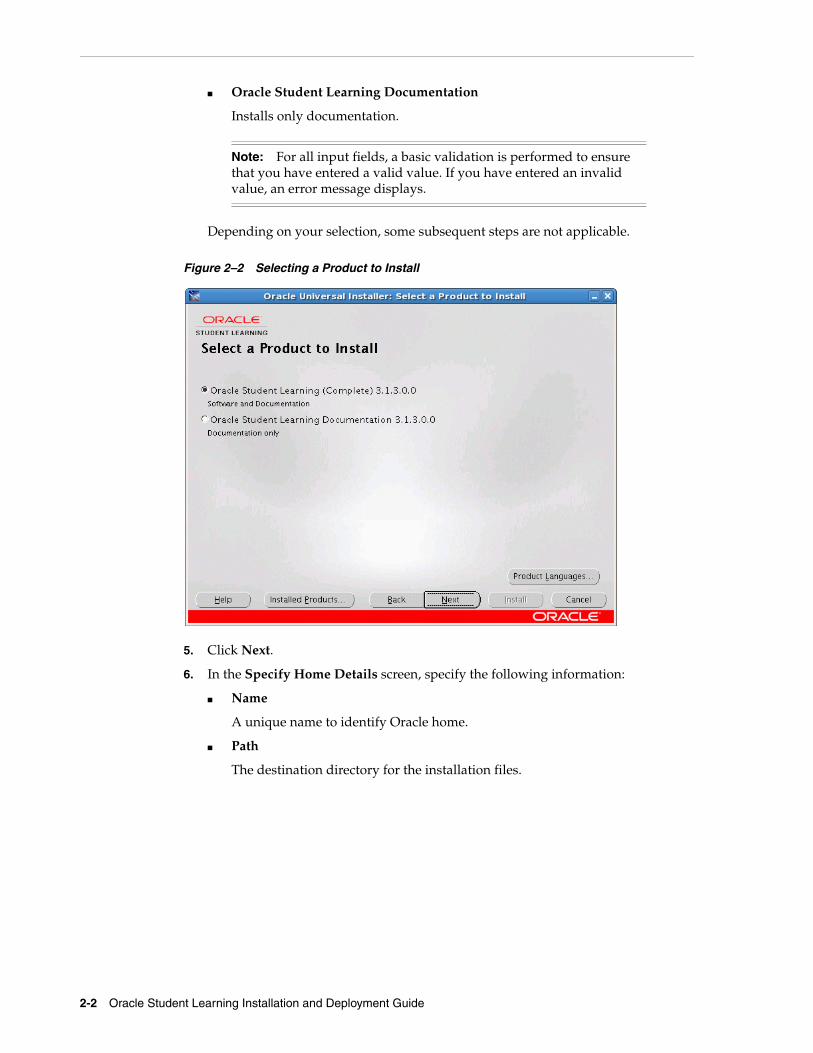
■ Oracle Student Learning Documentation
Installs only documentation.
Depending on your selection, some subsequent steps are not applicable.
Figure 2–2 Selecting a Product to Install
5. Click Next.
6. In the Specify Home Details screen, specify the following information:
■ Name
A unique name to identify Oracle home.
■ Path
The destination directory for the installation files.
Note: For all input fields, a basic validation is performed to ensure that you have entered a valid value. If you have entered an invalid value, an error message displays.
Installation Tasks 2-3
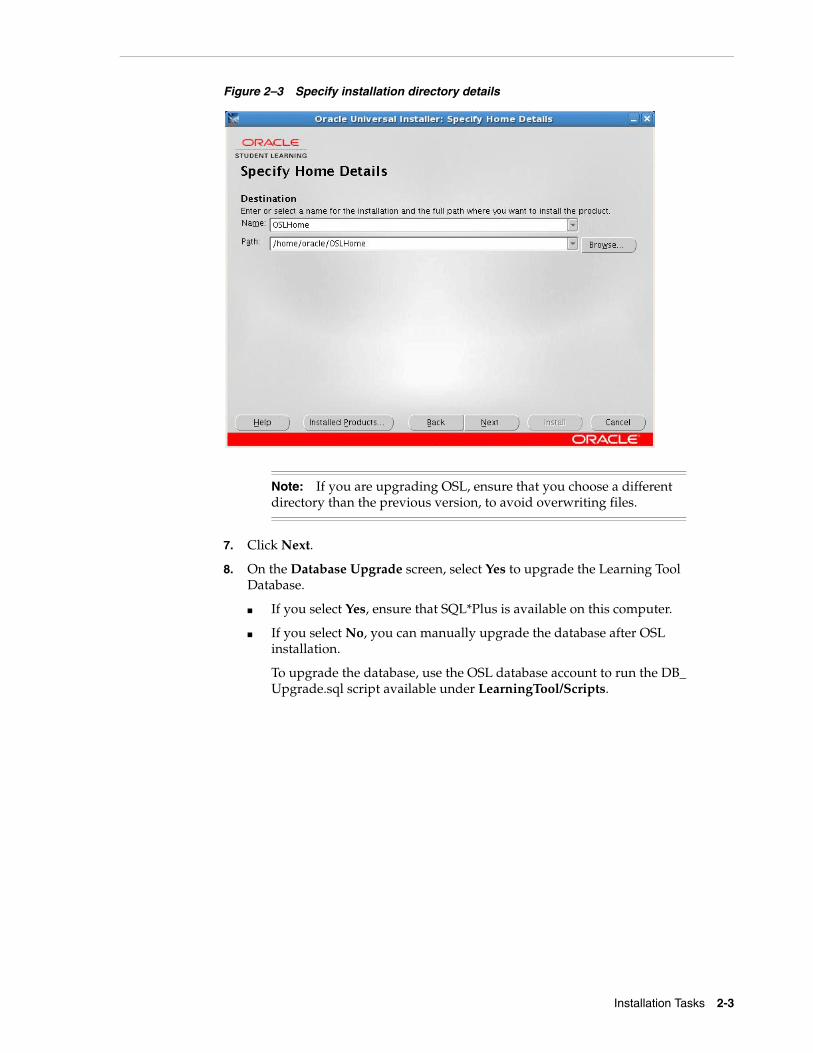
Figure 2–3 Specify installation directory details
7. Click Next.
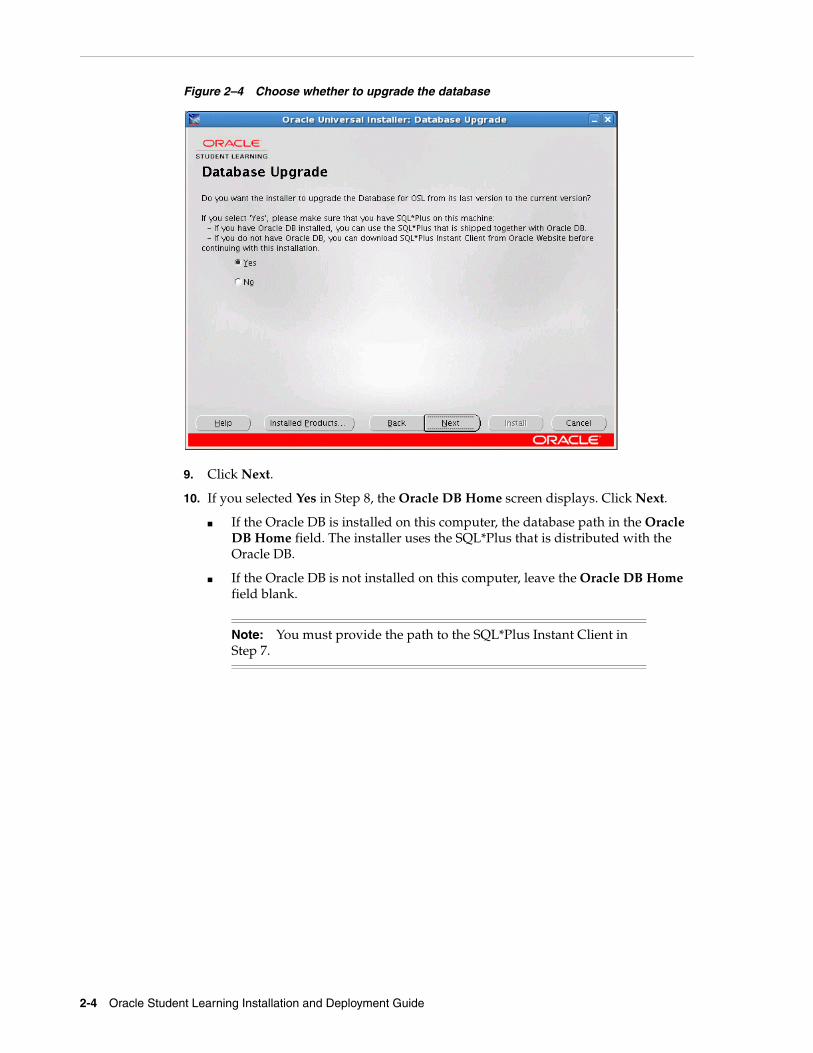
8. On the Database Upgrade screen, select Yes to upgrade the Learning Tool Database.
■ If you select Yes, ensure that SQL*Plus is available on this computer.
■ If you select No, you can manually upgrade the database after OSL installation.
To upgrade the database, use the OSL database account to run the DB_Upgrade.sql script available under LearningTool/Scripts.
Note: If you are upgrading OSL, ensure that you choose a different directory than the previous version, to avoid overwriting files.
2-4 Oracle Student Learning Installation and Deployment Guide
Figure 2–4 Choose whether to upgrade the database
9. Click Next.
10. If you selected Yes in Step 8, the Oracle DB Home screen displays. Click Next.
■ If the Oracle DB is installed on this computer, the database path in the Oracle DB Home field. The installer uses the SQL*Plus that is distributed with the Oracle DB.
■ If the Oracle DB is not installed on this computer, leave the Oracle DB Home field blank.
Note: You must provide the path to the SQL*Plus Instant Client in Step 7.
Installation Tasks 2-5
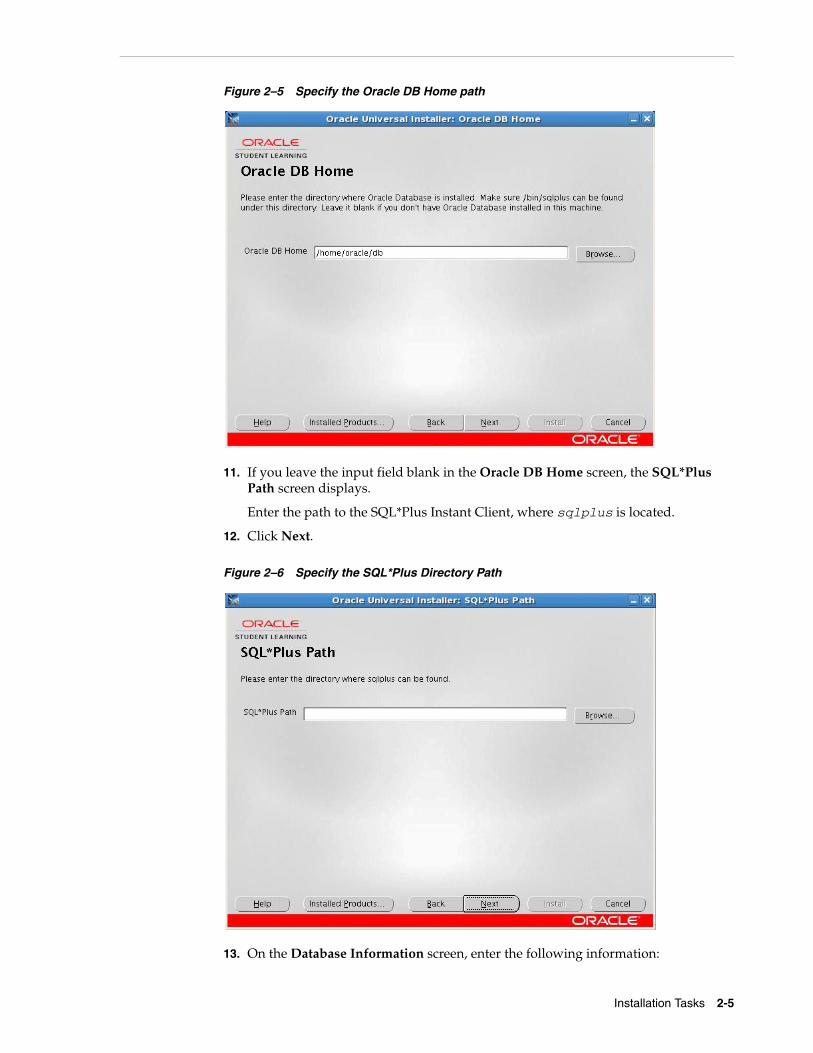
Figure 2–5 Specify the Oracle DB Home path
11. If you leave the input field blank in the Oracle DB Home screen, the SQL*Plus Path screen displays.
Enter the path to the SQL*Plus Instant Client, where sqlplus is located.
12. Click Next.
Figure 2–6 Specify the SQL*Plus Directory Path
13. On the Database Information screen, enter the following information:
2-6 Oracle Student Learning Installation and Deployment Guide
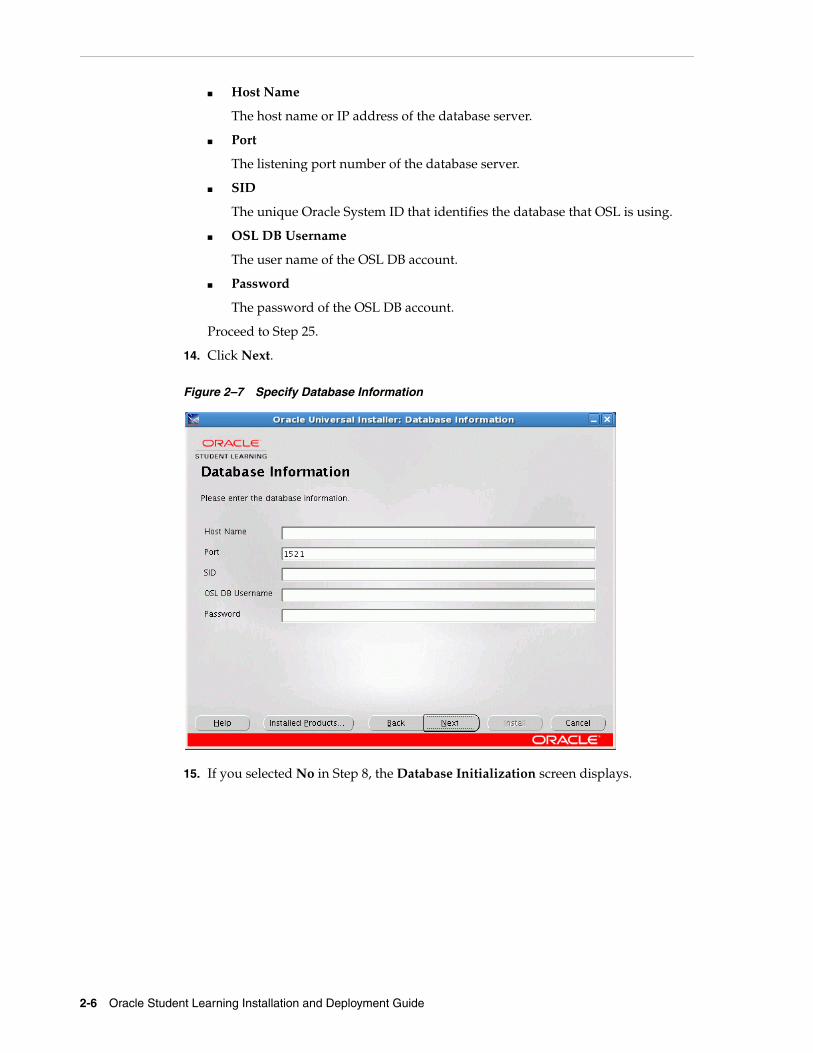
■ Host Name
The host name or IP address of the database server.
■ Port
The listening port number of the database server.
■ SID
The unique Oracle System ID that identifies the database that OSL is using.
■ OSL DB Username
The user name of the OSL DB account.
■ Password
The password of the OSL DB account.
Proceed to Step 25.
14. Click Next.
Figure 2–7 Specify Database Information
15. If you selected No in Step 8, the Database Initialization screen displays.
Installation Tasks 2-7
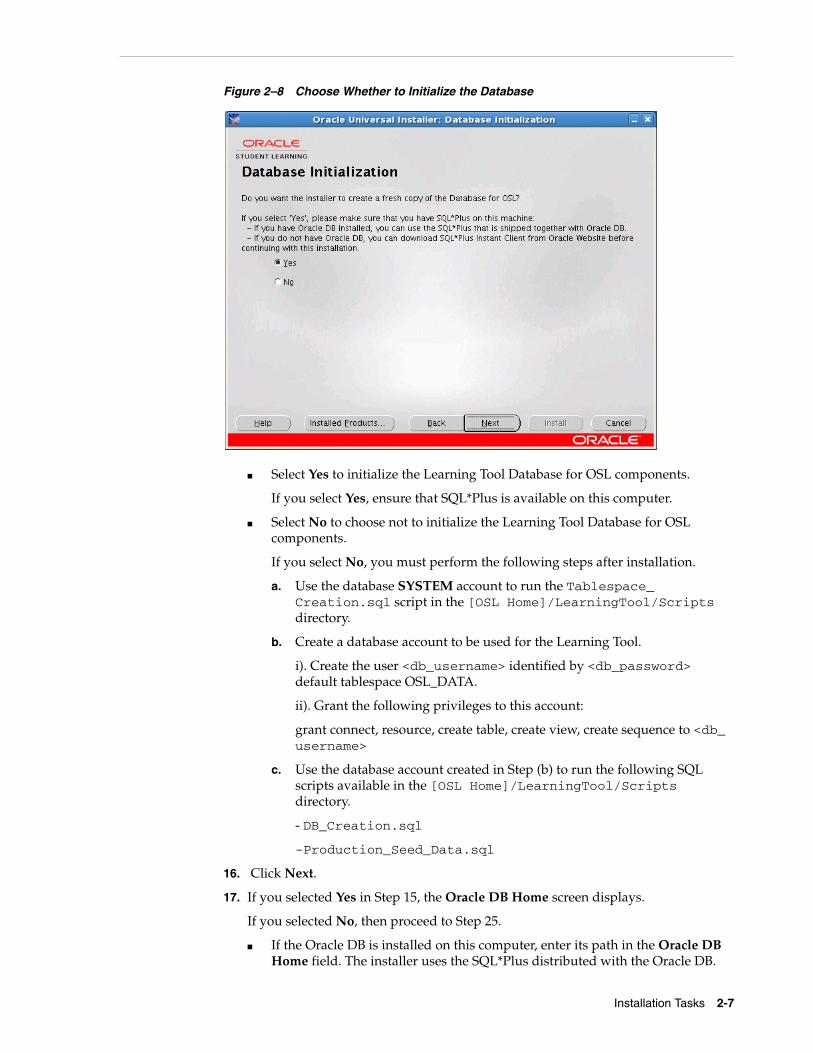
Figure 2–8 Choose Whether to Initialize the Database
■ Select Yes to initialize the Learning Tool Database for OSL components.
If you select Yes, ensure that SQL*Plus is available on this computer.
■ Select No to choose not to initialize the Learning Tool Database for OSL components.
If you select No, you must perform the following steps after installation.
a. Use the database SYSTEM account to run the Tablespace_Creation.sql script in the [OSL Home]/LearningTool/Scripts directory.
b. Create a database account to be used for the Learning Tool.
i). Create the user <db_username> identified by <db_password> default tablespace OSL_DATA.
ii). Grant the following privileges to this account:
grant connect, resource, create table, create view, create sequence to <db_username>
c. Use the database account created in Step (b) to run the following SQL scripts available in the [OSL Home]/LearningTool/Scripts directory.
- DB_Creation.sql
-Production_Seed_Data.sql
16. Click Next.
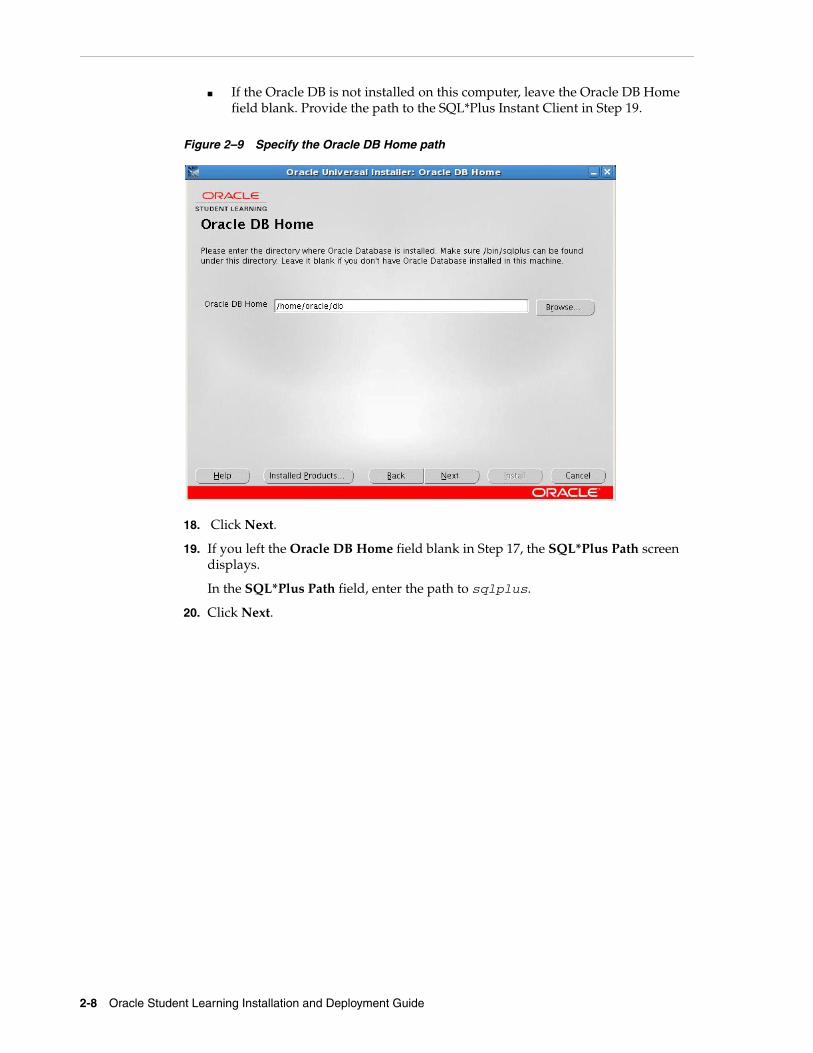
17. If you selected Yes in Step 15, the Oracle DB Home screen displays.
If you selected No, then proceed to Step 25.
■ If the Oracle DB is installed on this computer, enter its path in the Oracle DB Home field. The installer uses the SQL*Plus distributed with the Oracle DB.
2-8 Oracle Student Learning Installation and Deployment Guide
■ If the Oracle DB is not installed on this computer, leave the Oracle DB Home field blank. Provide the path to the SQL*Plus Instant Client in Step 19.
Figure 2–9 Specify the Oracle DB Home path
18. Click Next.
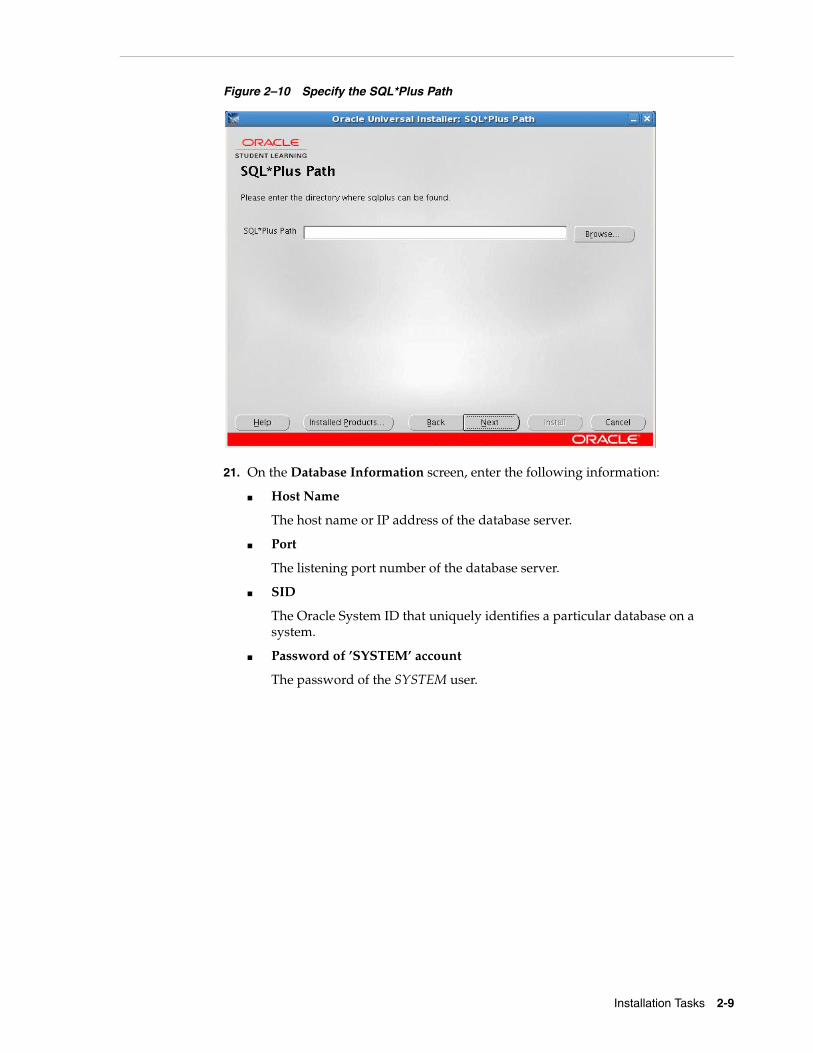
19. If you left the Oracle DB Home field blank in Step 17, the SQL*Plus Path screen displays.
In the SQL*Plus Path field, enter the path to sqlplus.
20. Click Next.
Installation Tasks 2-9
Figure 2–10 Specify the SQL*Plus Path
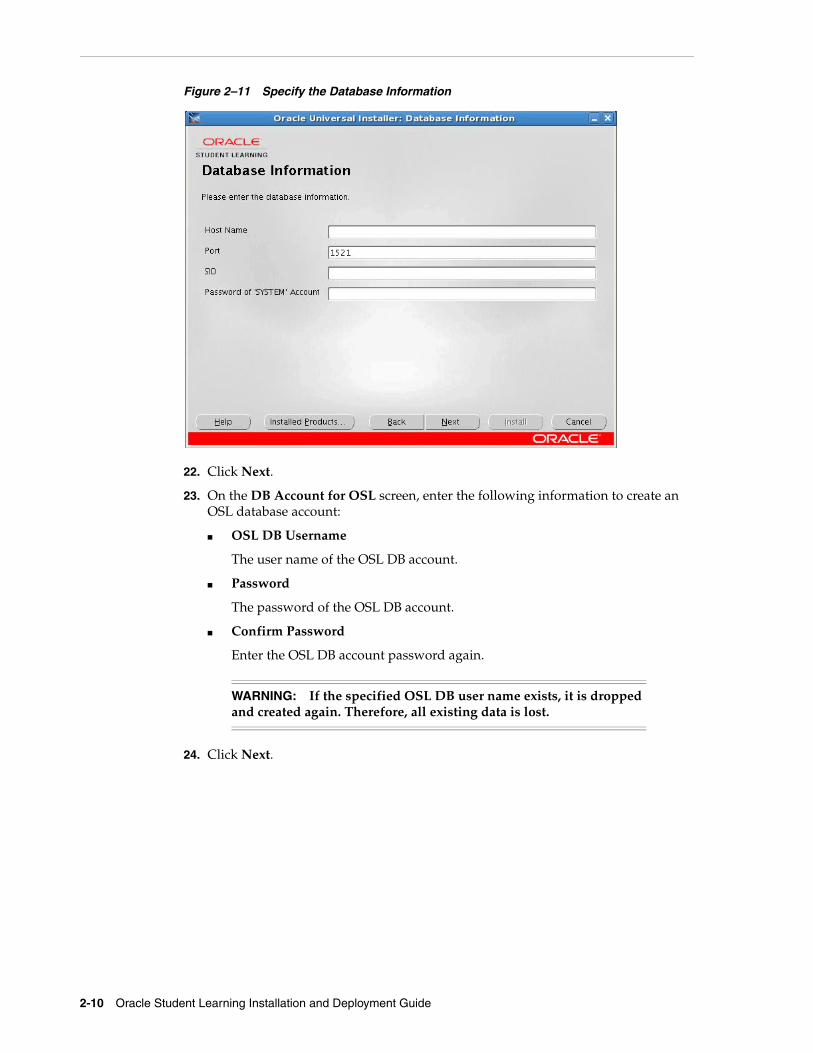
21. On the Database Information screen, enter the following information:
■ Host Name
The host name or IP address of the database server.
■ Port
The listening port number of the database server.
■ SID
The Oracle System ID that uniquely identifies a particular database on a system.
■ Password of ’SYSTEM’ account
The password of the SYSTEM user.
2-10 Oracle Student Learning Installation and Deployment Guide
Figure 2–11 Specify the Database Information
22. Click Next.
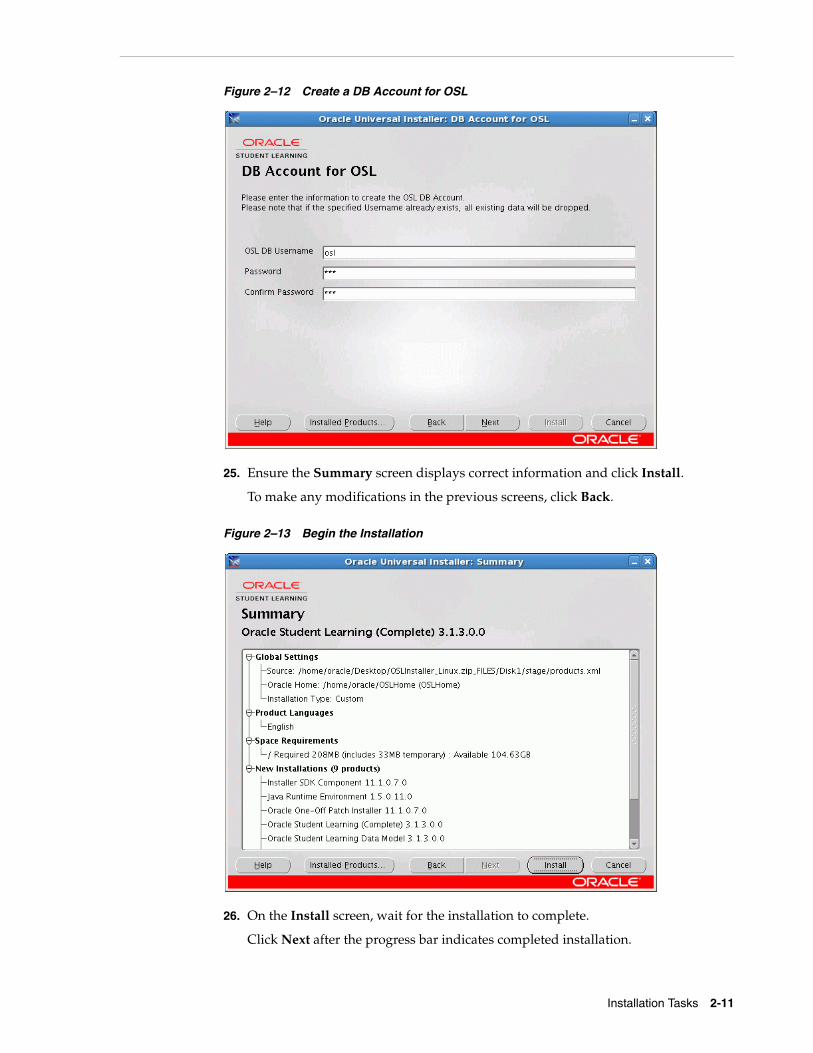
23. On the DB Account for OSL screen, enter the following information to create an OSL database account:
■ OSL DB Username
The user name of the OSL DB account.
■ Password
The password of the OSL DB account.
■ Confirm Password
Enter the OSL DB account password again.
24. Click Next.
WARNING: If the specified OSL DB user name exists, it is dropped and created again. Therefore, all existing data is lost.
Installation Tasks 2-11
Figure 2–12 Create a DB Account for OSL
25. Ensure the Summary screen displays correct information and click Install.
To make any modifications in the previous screens, click Back.
Figure 2–13 Begin the Installation
26. On the Install screen, wait for the installation to complete.
Click Next after the progress bar indicates completed installation.
2-12 Oracle Student Learning Installation and Deployment Guide
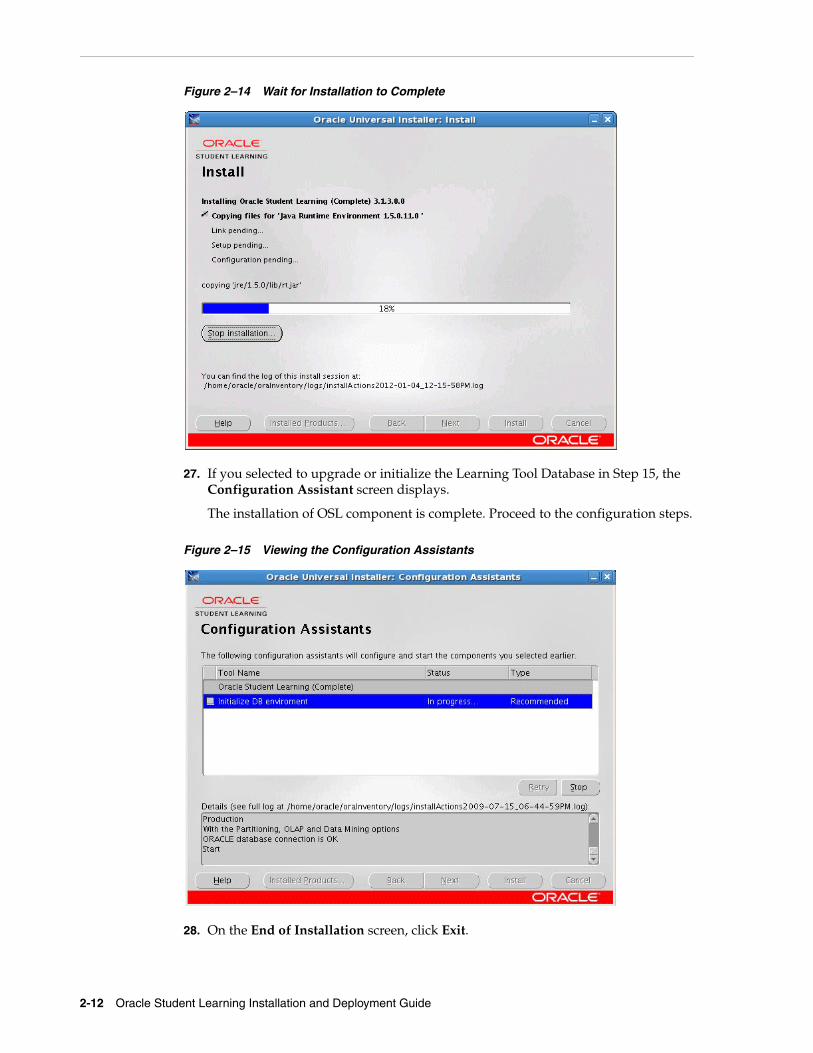
Figure 2–14 Wait for Installation to Complete
27. If you selected to upgrade or initialize the Learning Tool Database in Step 15, the Configuration Assistant screen displays.
The installation of OSL component is complete. Proceed to the configuration steps.
Figure 2–15 Viewing the Configuration Assistants
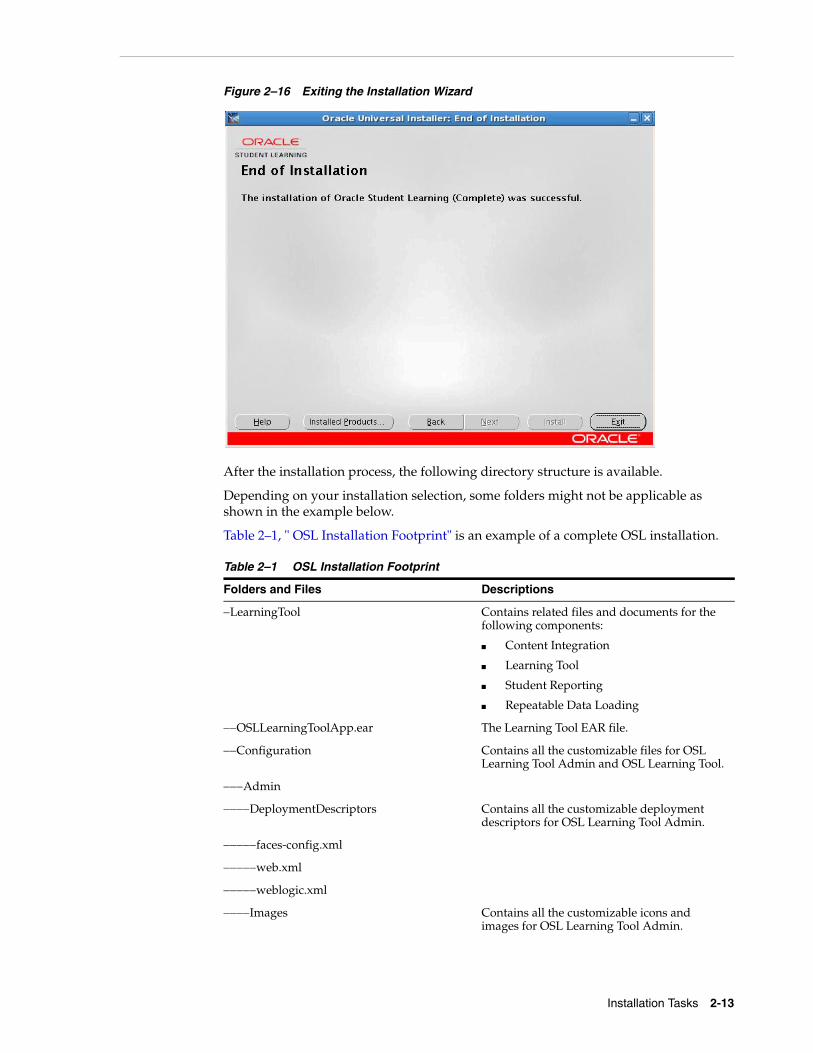
28. On the End of Installation screen, click Exit.
Installation Tasks 2-13
Figure 2–16 Exiting the Installation Wizard
After the installation process, the following directory structure is available.
Depending on your installation selection, some folders might not be applicable as shown in the example below.
Table 2–1, " OSL Installation Footprint" is an example of a complete OSL installation.
Table 2–1 OSL Installation Footprint
Folders and Files Descriptions
−LearningTool Contains related files and documents for the following components:
■ Content Integration
■ Learning Tool
■ Student Reporting
■ Repeatable Data Loading
−−OSLLearningToolApp.ear The Learning Tool EAR file.
−−Configuration Contains all the customizable files for OSL Learning Tool Admin and OSL Learning Tool.
−−−Admin
−−−−DeploymentDescriptors Contains all the customizable deployment descriptors for OSL Learning Tool Admin.
−−−−−faces-config.xml
−−−−−web.xml
−−−−−weblogic.xml
−−−−Images Contains all the customizable icons and images for OSL Learning Tool Admin.
2-14 Oracle Student Learning Installation and Deployment Guide
−−−−Labels Contains all the customizable labels and text for OSL Learning Tool Admin.
−−−Common
−−−−background Contains all background images
−−−−resources
−−−−−BackgroundImagesRes.properties Contains the location of the background images
−−−−−BackgroundTitle.properties Contains the title of the background images. The titles appear in the UI.
−−−LearningTool
−−−−−ckeditor
−−−−DeploymentDescriptors Contains all the customizable deployment descriptors for OSL Learning Tool.
−−−−−adf-config.xml
−−−−−faces-config.xml
−−−−−jazn-data.xml
−−−−−persistence.xml
−−−−−osl_configuration.properties
−−−−−osl_learning_item_types.xml
−−−−−web.xml
−−−−−weblogic.xml
−−−−−weblogic-ejb-jar.xml
−−−−Images Contains all the customizable icons and images for OSL Learning Tool.
−−−−Labels Contains all the customizable labels and text for OSL Learning Tool.
−−ContentIntegration Contains files related to Default Content Integration.
−−−components
−−−−OSL_Add_Cancel.zip
−−−−OSL_LocaleString.zip
−−−−OSL_CheckinLayout.zip
−−−−OSL_AdvSearchComponent.zip
−−−−OSL_SearchTemplate.zip
−−−−OSL_School.zip
−−−−OSL_Javascript.zip
−−−−OSL_DefaultEnv.zip
−−−−OSL_SelectivelyRefineAndIndex.zip
−−−−OSL_RemoveStandardProfileLinks.zip
−−−−OSL_RemoveSwitchProfile.zip
Table 2–1 (Cont.) OSL Installation Footprint
Folders and Files Descriptions
Installation Tasks 2-15
−−−−OSL_CustomAction.zip
−−−−OSL_Home_Page_Content.zip
−−−−OSL_InterfaceChanges.zip
−−−−OSL_ClassicSearchTemplate.zip
−−−−AdditionalSortFields.zip
−−−−OSL_SearchResults.zip
−−−DCI_Config_Assistant.zip Contains DCI Configuration Assistant for configure UCM server with the required rules, profiles, and search template.
−−−wsdl Contains the .wsdl and .xsd files for Content Integration Web Services. These Web services abstract all the interactions of OSL back-end with an integrated external Content Management System. These interactions include:
■ General Content Integration (links and images)
■ OSL Content Integration (attachments and audio)
■ Publishing Learning Item Services (exporting and importing a Learning Item)
−−−−OSLContentIntegrationService.wsdl
−−−−OSLContentIntegrationService.xsd
−−−−GeneralContentIntegrationService.wsdl
−−−−GeneralContentIntegrationService.xsd
−−−−PublishLearningItemService.wsdl
−−−−PublishLearningItemService.xsd
−−−scripts/oid Contains files for OID setup
−−−scripts/ucm Contains scripts for UCM setup
−−−−DB_insert.sql
−−StudentReporting Contains files related to Student Reporting.
−−−OSLCatalog.zip
−−−OSL.rpd
−−−OSL_error_messages.xml
−−Scripts Contains the Learning Tool configuration files.
−−−Tablespace_Creation.sql
−−−DB_Creation.sql
−−−Production_Seed_Data.sql
Table 2–1 (Cont.) OSL Installation Footprint
Folders and Files Descriptions
2-16 Oracle Student Learning Installation and Deployment Guide
After you install OSL, deploy it using the deployment steps.
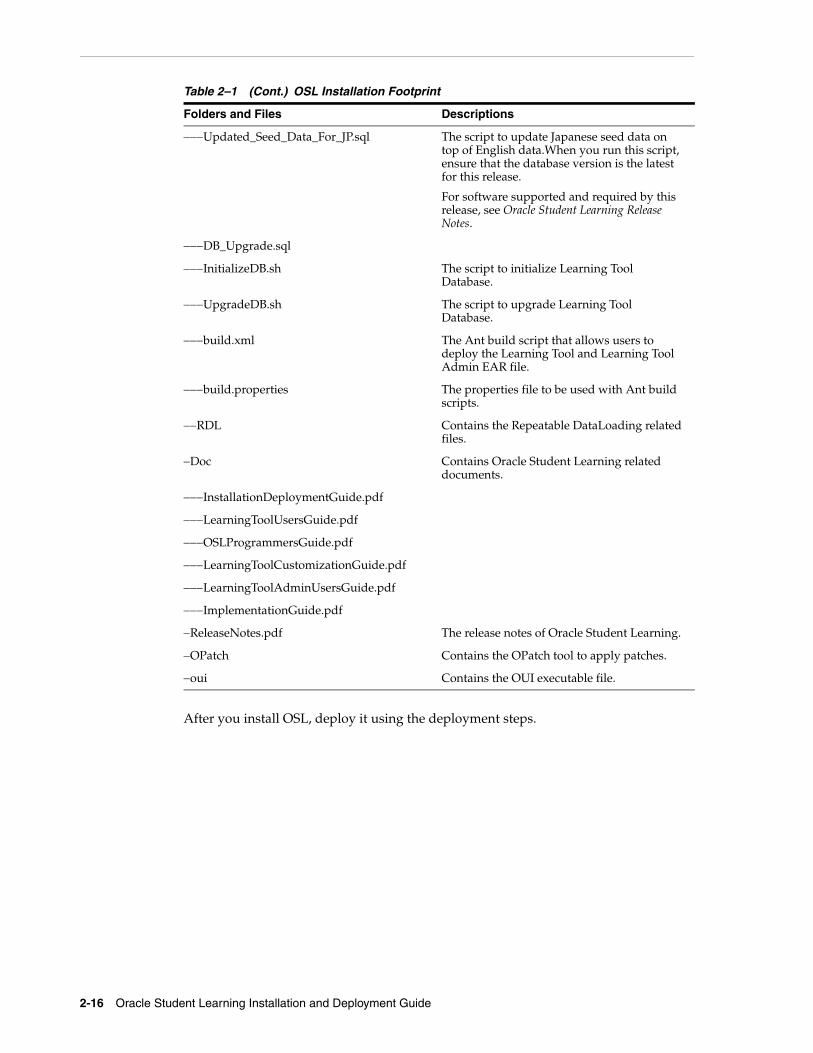
−−−Updated_Seed_Data_For_JP.sql The script to update Japanese seed data on top of English data.When you run this script, ensure that the database version is the latest for this release.
For software supported and required by this release, see Oracle Student Learning Release Notes.
−−−DB_Upgrade.sql
−−−InitializeDB.sh The script to initialize Learning Tool Database.
−−−UpgradeDB.sh The script to upgrade Learning Tool Database.
−−−build.xml The Ant build script that allows users to deploy the Learning Tool and Learning Tool Admin EAR file.
−−−build.properties The properties file to be used with Ant build scripts.
−−RDL Contains the Repeatable DataLoading related files.
−Doc Contains Oracle Student Learning related documents.
−−−InstallationDeploymentGuide.pdf
−−−LearningToolUsersGuide.pdf
−−−OSLProgrammersGuide.pdf
−−−LearningToolCustomizationGuide.pdf
−−−LearningToolAdminUsersGuide.pdf
−−−ImplementationGuide.pdf
−ReleaseNotes.pdf The release notes of Oracle Student Learning.
−OPatch Contains the OPatch tool to apply patches.
−oui Contains the OUI executable file.
Table 2–1 (Cont.) OSL Installation Footprint
Folders and Files Descriptions
3
Using Installation Log and Supporting Files 3-1
3Using Installation Log and Supporting Files
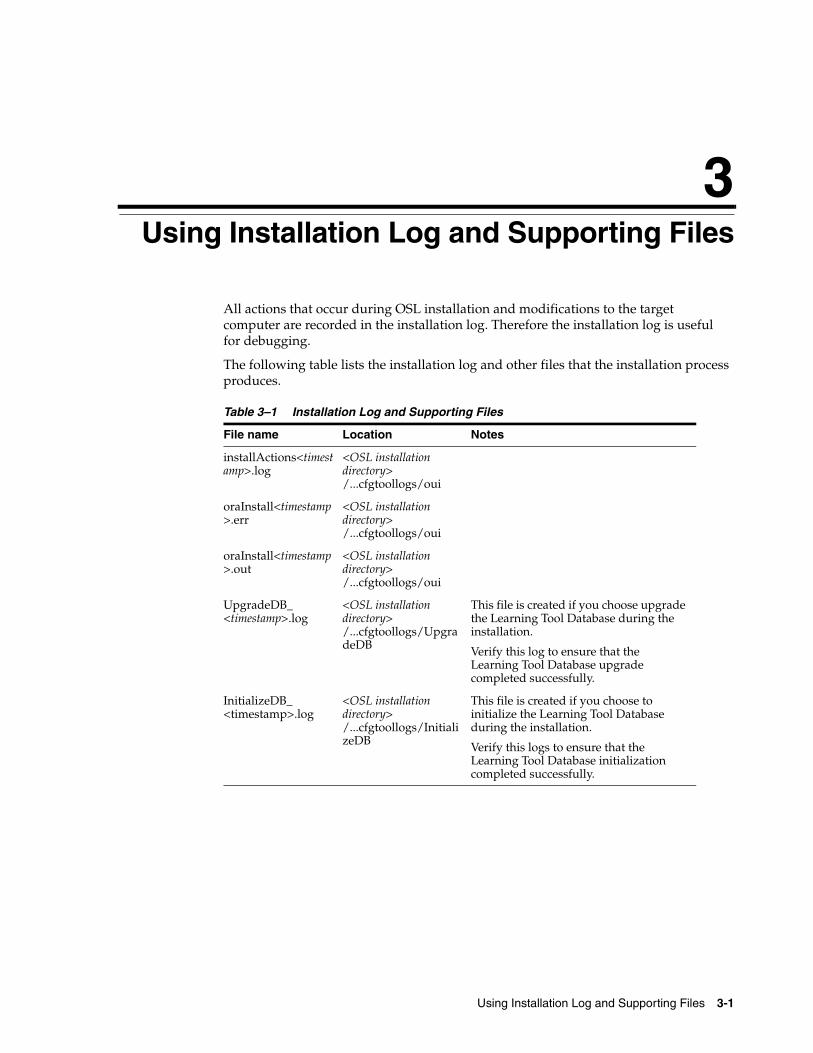
All actions that occur during OSL installation and modifications to the target computer are recorded in the installation log. Therefore the installation log is useful for debugging.
The following table lists the installation log and other files that the installation process produces.
Table 3–1 Installation Log and Supporting Files
File name Location Notes
installActions<timestamp>.log
<OSL installation directory> /...cfgtoollogs/oui
oraInstall<timestamp>.err
<OSL installation directory> /...cfgtoollogs/oui
oraInstall<timestamp>.out
<OSL installation directory> /...cfgtoollogs/oui
UpgradeDB_<timestamp>.log
<OSL installation directory> /...cfgtoollogs/UpgradeDB
This file is created if you choose upgrade the Learning Tool Database during the installation.
Verify this log to ensure that the Learning Tool Database upgrade completed successfully.
InitializeDB_<timestamp>.log
<OSL installation directory> /...cfgtoollogs/InitializeDB
This file is created if you choose to initialize the Learning Tool Database during the installation.
Verify this logs to ensure that the Learning Tool Database initialization completed successfully.

3-2 Oracle Student Learning Installation and Deployment Guide
4
Uninstallation Tasks 4-1
4Uninstallation Tasks
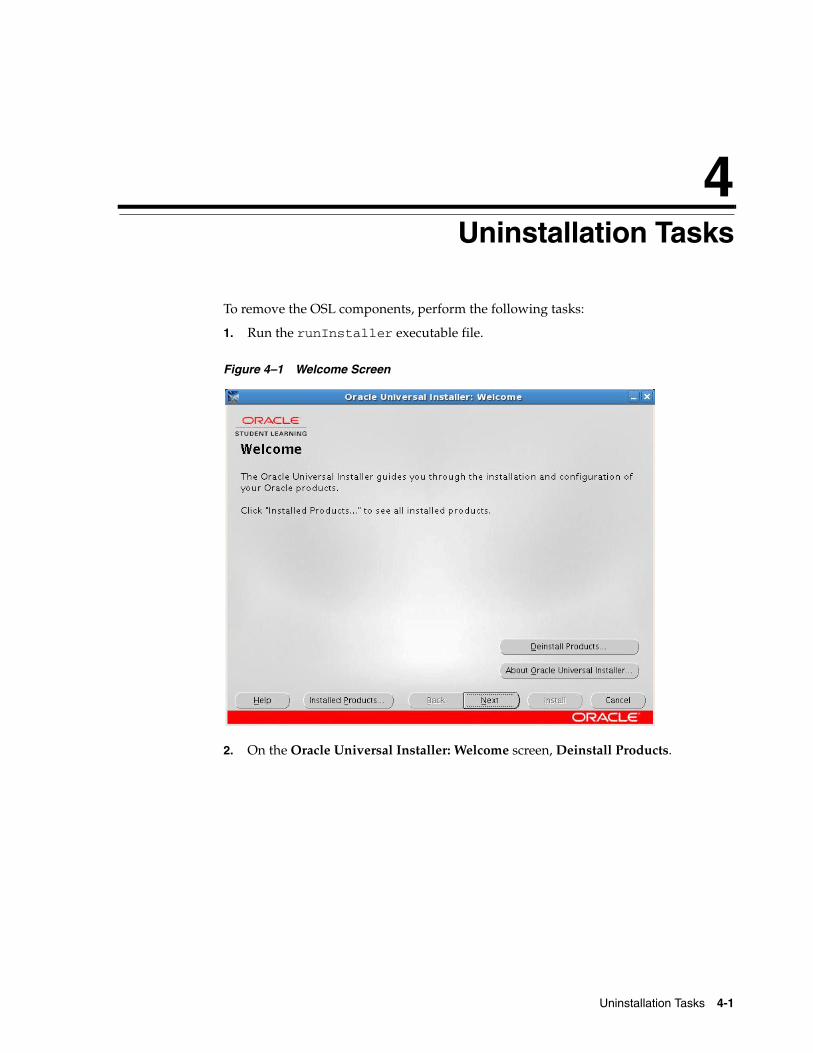
To remove the OSL components, perform the following tasks:
1. Run the runInstaller executable file.
Figure 4–1 Welcome Screen
2. On the Oracle Universal Installer: Welcome screen, Deinstall Products.
4-2 Oracle Student Learning Installation and Deployment Guide
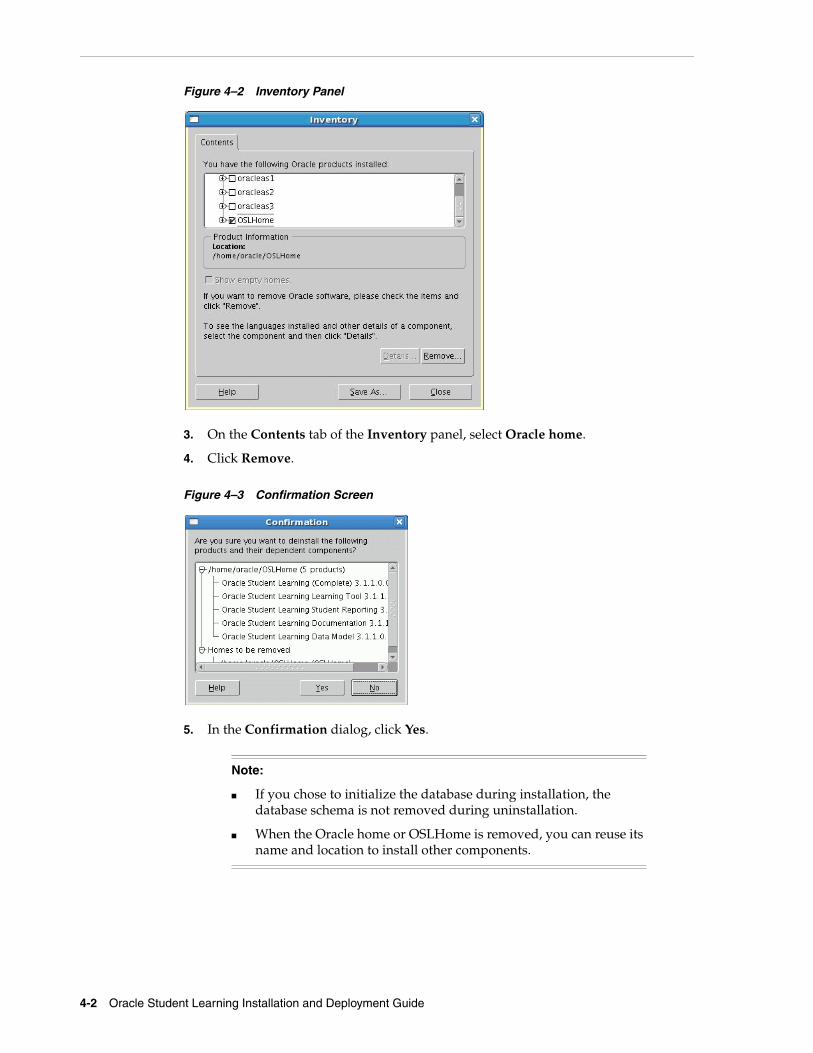
Figure 4–2 Inventory Panel
3. On the Contents tab of the Inventory panel, select Oracle home.
4. Click Remove.
Figure 4–3 Confirmation Screen
5. In the Confirmation dialog, click Yes.
Note:
■ If you chose to initialize the database during installation, the database schema is not removed during uninstallation.
■ When the Oracle home or OSLHome is removed, you can reuse its name and location to install other components.
Part IIPart II Deploying the OSL Learning Tool
You can deploy the OSL Learning Tool only after installing OSL. Ensure that the Oracle database is initialized.
This part contains the following chapters that describe the Learning Tool (LT) deployment:
■ Chapter 5, "Configuring Oracle Internet Directory"
■ Chapter 6, "Configuring Oracle Universal Content Management Default Integration"
■ Chapter 7, "Configuring Oracle Business Intelligence Enterprise Edition"
■ Chapter 8, "Configuring WebLogic Server"
■ Chapter 9, "Deploying OSL Learning Tool Admin and OSL Learning Tool"
■ Chapter 10, "Configuring OSSO Solution"
■ Chapter 11, "Configuring Oracle Access Manager 10g"
■ Chapter 12, "Installing and Configuring Oracle Access Manager 11g"
Note: In this guide, [OSL Home directory] refers to the OSL installation directory.

5
Configuring Oracle Internet Directory 5-1
5Configuring Oracle Internet Directory
Oracle Internet Directory (OID) is the default LDAP mechanism used by OSL Learning Tool (OSL LT) components for authentication and authorization.
OID is an LDAP Version 3 certified directory. Users are granted access and privileges within OSL based on the groups they are assigned in OID.
5.1 Creating Groups in OIDThere are two possible deployment scenarios.
5.1.1 Scenario 1: Using Existing Groups for OSLThis scenario applies when the deployment uses an OID instance with existing users assigned to predefined groups. In this scenario, creating new groups is not required. However, customization is required to map existing groups to OSL application-specific roles. For more information about mapping OID groups, see Section 9.1.4, "Updating Security Role Mappings".
5.1.2 Scenario 2: Creating New Groups for OSLThis scenario applies when the deployment uses an OID instance where users must be assigned to new groups. The following groups should be created:
■ DeptAdminGroup
■ DeptCurrAdminGroup
■ SchAdminGroup
■ SchCurrAdminGroup
■ TeacherGroup
■ StudentGroup
■ ParentGroup
■ DataLoadingGroup
■ ContentIntegrationGroup
5.2 Understanding Pre-seeded Users and Institution in OSL DatabaseOne institution and three users are pre-seeded into the OSL database during installation. These are described below:
■ Department
Assigning Data Loading User
5-2 Oracle Student Learning Installation and Deployment Guide
This is a special institution and is the root of the institution hierarchy. It is pre-seeded with a name of "Department Of Education" and organization type of "DEPARTMENT".
You can change the name Department after installation and deployment of OSL.
■ DataLoading
This is a user with access to the OSL LT DataLoading service.
■ ContentIntegration
This is a user with access to the OSL Content Management System (CMS) integration service.
For related information about configuring the two pre-seeded users in OID, see Section 5.4, "Assigning Content Integration User".
For related information about updating the name of Department, see Section 5.6, "Updating the Name of Department".
5.3 Assigning Data Loading UserThe user named DataLoading is created as part of database initialization during OSL installation. See Step 15 of the installation process in Chapter 2, "Installation Tasks". Access to the OSL LT DataLoading service is granted to an OID user belonging to the DataLoadingGroup (or the equivalent, mapped OID Group, as described in Scenario 1 of Section 5.1, "Creating Groups in OID"). This user has the DataLoading role in OSL.
Create a user named DataLoading as a member of the DataLoadingGroup of OID. See Section 5.1, "Creating Groups in OID" for detailed information.
Alternatively, create and assign a DataLoading user to the DataLoadingGroup in the WebLogic embedded LDAP server. Detailed instructions for creating users and groups in the embedded LDAP server are available at: http://download.oracle.com/docs/cd/E14571_01/apirefs.1111/e13952/taskhelp/security/ManageUsersAndGroups.html
If an LDAP server is also set up as a Security Provider (See Section 8.5, "Configuring OID as Security Provider" for more information), then the order of the providers must be as follows:
1. LDAP Authenticator (SUFFICIENT)
2. Default Authenticator (SUFFICIENT)
5.4 Assigning Content Integration UserThe user named ContentIntegration is created as part of database initialization during OSL installation. See Step 15 of the installation process in Chapter 2, "Installation Tasks". Access to the OSL CMS integration service is granted to an OID user belonging to the ContentIntegrationGroup (or the equivalent, mapped OID Group, as described in Scenario 1 of Section 5.1, "Creating Groups in OID".) This user has the ContentIntegration role in OSL.
Create a user named ContentIntegration as a member of the ContentIntegrationGroup of OID. See Section 5.1, "Creating Groups in OID" for detailed information.
Updating the Name of Department
Configuring Oracle Internet Directory 5-3
Alternatively, create and assign a ContentIntegration user to the ContentIntegrationGroup in the WebLogic embedded LDAP server as explained in Section 5.3, "Assigning Data Loading User".
5.5 Creating a User and Assigning Department Administrator RoleTo create and load users, use the createPersons method in DataLoadingpartyService of the OSL LT Data Loading service. At least one user must be the Department Administrator to access the department administration functionality in the OSL LT Admin user interface (UI). This user can assign other application roles and configure the OSL system in OSL LT Admin.
Following these steps to create a Department Administrator:
1. Use the createPersons method in DataLoadingpartyService.
2. Enter appropriate information for the following parameters:
■ firstName: for example, Robert
■ lastName: for example, Brown
■ Relationship action: Create
■ RelationshipType: DEPARTMENT_ADMIN_OF
■ TargetPartyId: ID of Department (Department in OSL database normally has an ID of 2)
The OSL LT Data Loading service assigns a login ID in the firstName.lastName format, for example, Robert.Brown.
A default password welcome1 is assigned. Use OID to manually replace this password with a secure password.
For information about deploying the OSL Learning Tool, see Part II, "Deploying the OSL Learning Tool".
For information about using the createPersons method, see Section 2.1.6, "createPersons," in Oracle Student Learning Programmer's Guide.
5.6 Updating the Name of DepartmentThe pre-seeded institution in the OSL database has the default organization type DEPARTMENT and default name Department Of Education. After OSL installation and deployment, you can change the name.
Log in to OSL LT Admin as the Department Administrator to change the institution name.
For information about creating the user with the role of Department Administrator, see Section 5.5, "Creating a User and Assigning Department Administrator Role".
For information about changing the name of Department using LT Admin, see Chapter 3, How to Manage Institutions, in Oracle Student Learning Learning Tool Admin User’s Guide.

Updating the Name of Department
5-4 Oracle Student Learning Installation and Deployment Guide
6
Configuring Oracle Universal Content Management Default Integration 6-1
6Configuring Oracle Universal ContentManagement Default Integration
Integrate the OSL Learning Tool with an External Content Management System (ECMS) from which users can add content when working with rich data. ECMS is also used as a file storage and delivery system to store and supply objects created and used in the OSL Learning Tool.
By default, this release is integrated with Oracle Universal Content Management (UCM). For information about the OSL content integration architecture, see Oracle Student Learning Programmer’s Guide.
Configuring the OSL default integration with Oracle UCM involves the following:
■ Configuring OSL users to use UCM
■ Configuring OSL-UCM back-end connectivity (Intradoc Communication)
■ Configuring OSL default back-end integration
■ Configuring OSL-UCM client-side integration
6.1 Content Server 10g ConfigurationTo configure Content Server 10g, perform the steps in the subsections.
6.1.1 Configuring OID as Security Provider for UCMTo allow access to all OSL users, configure UCM with an LDAP provider where the LDAP server is the OID used by OSL.
To configure the LDAP provider for UCM:
1. Open a Web browser.
Note: Section 6.1, "Content Server 10g Configuration", Section 6.2, "Content Server 11g Configuration", and Section 6.3, "Configuration of Content Servers 10g and 11g" are applicable for configuring the OSL default integration with Oracle UCM.
Note: All configuration on the OSL side is specified in the osl_configuration.properties file. The detailed description of each property is available in Section 9.1.5, "Updating Content Integration Configuration".
Content Server 10g Configuration
6-2 Oracle Student Learning Installation and Deployment Guide
2. Open the Oracle UCM URL.
3. Log in as sysadmin.
4. Choose Administration > Providers.
5. Choose Add in ldapuser.
6. Provide the following information:
a. Provider name: OID
b. Provider class: intradoc.provider.LdapUserProvider
c. Connection class: intradoc.provider.LdapConnection
d. Source Path: <A unique string that identifies the LDAP provider>
e. LDAP server: <Host name or IP address of the OID server used by OSL>
f. LDAP suffix: <LDAP suffix of user base DN. Example: dc=...>
g. LDAP port: <Port of the OID server used by OSL>
h. Use Group Filtering: select
i. Role Prefix: cn=Groups
j. LDAP Admin DN: <administrator account of OID, Example: cn=orcladmin>
k. LDAP Admin password: <password of the OID administrator>
7. Restart Oracle UCM.
8. Log in to Oracle UCM again.
9. Select Administration > Providers.
10. Verify that the connection status of the new LDAP Provider is Good.
You can find information about External Security:LDAP in Managing Security and User Access for Content Server in the Oracle Universal Content Management Documentation at
http://download.oracle.com/docs/cd/E10316_01/ouc.htm
6.1.2 Enabling Intradoc CommunicationCommunication between the default OSL content integration with Oracle UCM is made through the Intradoc protocol. To enable such communication, configure Oracle UCM to trust the OSL server.
1. Log in to the Oracle UCM server.
2. Open the $UCM_HOME/server/config/config.cfg file.
3. Add the IP address of the server where you want to deploy OSL Learning Tool, to the SocketHostAddressSecurityFilter property.
4. Restart the UCM server.
a. Log in to Oracle UCM web from browser as sysadmin.
b. Select Administration > Admin Server to launch the UCM Admin Server web.
c. Click Restart for the appropriate UCM server instance.
Content Server 11g Configuration
Configuring Oracle Universal Content Management Default Integration 6-3
6.2 Content Server 11g ConfigurationTo configure Content Server 11g, perform the steps in the subsections.
6.2.1 Configuring OID as Security Provider for Content Server 11gSet up the Content Server to use OID as the security provider.
To define a Security Provider for UCM WLS:
1. Open the UCM WLS Administration Console:
http://<UCM_WLSHostName>:<UCM_WLS_PORT>/console
2. Log in to the console using an administrator account.
3. In the UCM WLS console, select Security Realms > myrealm (default) > Providers (tab).
4. In the Authentication Providers table, select New.
5. Enter a name for the authentication provider in the Name field, for example OSL_OID.
6. Choose OracleInternetDirectoryAuthenticator from the Type list.
7. Click OK.
An authentication provider is created in UCM WLS.
8. On the Providers tab, select the new authentication provider instance to navigate to its configuration page.
9. Select the Provider Specific tab under the Configuration tab.
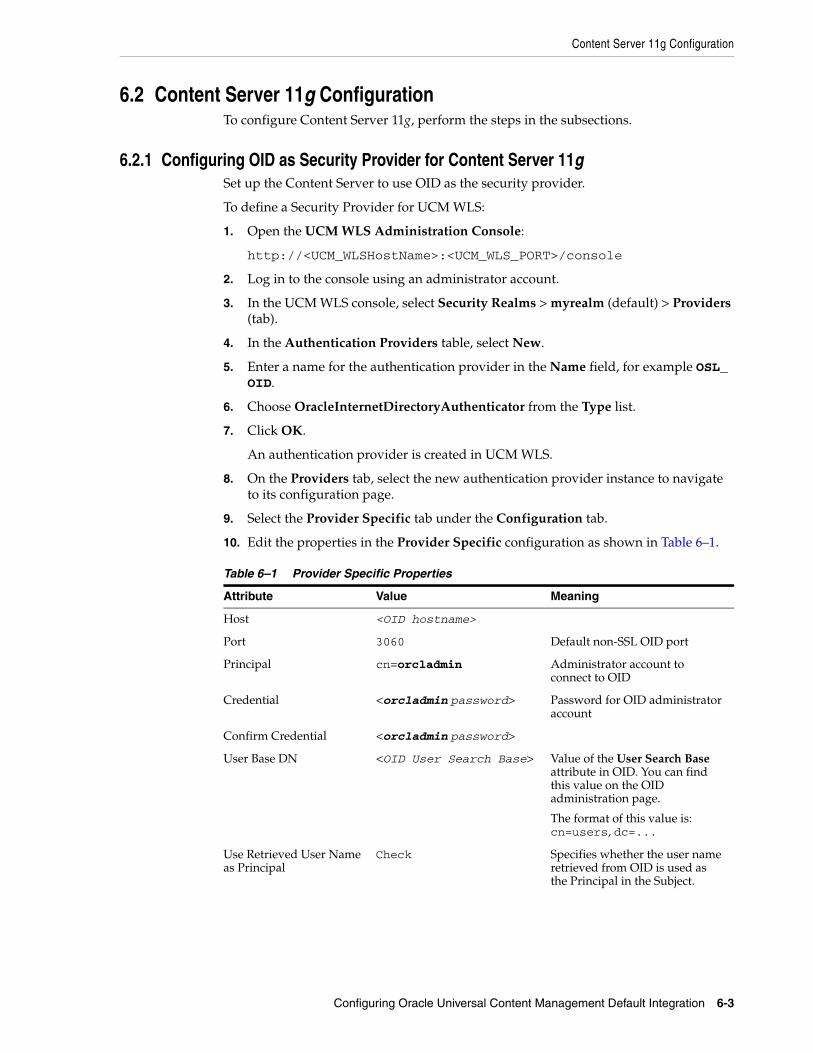
10. Edit the properties in the Provider Specific configuration as shown in Table 6–1.
Table 6–1 Provider Specific Properties
Attribute Value Meaning
Host <OID hostname>
Port 3060 Default non-SSL OID port
Principal cn=orcladmin Administrator account to connect to OID
Credential <orcladmin password> Password for OID administrator account
Confirm Credential <orcladmin password>
User Base DN <OID User Search Base> Value of the User Search Base attribute in OID. You can find this value on the OID administration page.
The format of this value is: cn=users, dc=...
Use Retrieved User Name as Principal
Check Specifies whether the user name retrieved from OID is used as the Principal in the Subject.

Content Server 11g Configuration
6-4 Oracle Student Learning Installation and Deployment Guide
11. Click Save.
12. Restart the UCM WLS instance.
13. Log in to the UCM WLS console.
14. Select Security Realms > myrealm (default) > Users and Groups (tab).
You can see the OID Users and Groups.
15. Modify the Control Flag attribute of the security provider so that OSL users must be authenticated only against OID:
a. Select Security Realms > myrealm (default) > Providers > [security provider name] > Configuration > Common.
b. Set Control Flag to Sufficient.
16. Reorder the new security provider to be the first authentication provider.
17. Restart the UCM WLS instance.
In addition to the above configuration, you must:
■ Add two users, oslcontent and oslmetadata, to the DefaultAuthenticator.
■ Set default passwords for these users.
6.2.2 Enabling Intradoc CommunicationTo enable Intradoc communication:
1. Log in to UCM Enterprise Manager.
2. Click Farm > Content Management > Universal Content Management > Content Server > Oracle UCM - Content Server.
3. From the menu, select the UCM > Configuration.
4. Enter a value for Intradoc ServerPort.
5. Add the IP address of the server to which to deploy OSL Learning Tool, to the IP Address Filter property.
6. Restart the Admin Server and Content Server.
6.2.3 Setting the Content TypeThe predefined document types available in Content Server 11g include Application, Digital Media, and Document. You can set one of these values in the OSL configuration properties file as follows:
Group Base DN <OID Group Search Base> Value of the Group Search Base attribute in OID, can be looked up in the OID administration page.
Value looks like: cn=Groups, dc=…
Propagate Cause for Login Exception
Check Propagates OID exceptions to ECM WLS to show in the console and logs.
Table 6–1 (Cont.) Provider Specific Properties
Attribute Value Meaning
Configuration of Content Servers 10g and 11g
Configuring Oracle Universal Content Management Default Integration 6-5
osl.lt.content.ucmIntegration.oslContentDoctype=Application
6.3 Configuration of Content Servers 10g and 11gBelow are the configuration steps for Content Server 10g and 11g.
6.3.1 Configuring the Default Server IntegrationOSL provides default implementation of the Content Integration Web Services Interface to communicate with Oracle UCM. To support this implementation, configure the following:
■ Web service end point URIs
■ Configurations related to General Content storage and access
■ Configurations related to General Content reference metadata tagging
■ Configurations related to OSL Content storage and access
■ Configurations related to exported learning item storage and access
Ensure that all the mandatory properties that do not have default values are assigned valid values. For more information, see Chapter 9, "Deploying OSL Learning Tool Admin and OSL Learning Tool".
6.3.1.1 Configuring Web Service End Point URLsBy default, the OSL content integration does not use Web service to communicate with the OSL Learning Tool server. You can ignore this section if you are using the default OSL content integration.
However, if you are developing a custom implementation of content integration, you must expose the implementation as a set of web services. This functionality is specified in the "Content Integration Web Services Interface" section of the Oracle Student Learning Programmer’s Guide. You must update the following properties in the OSL configuration file:
■ osl.lt.service.content.contentProxytype: set to WS
■ osl.lt.service.content.wsProxyGeneralContentServiceURL: service end point of the General Content Service implementation
■ osl.lt.service.content.wsProxyOSLContentServiceURL: service end point of the OSL Content Service implementation
■ osl.lt.service.content.wsProxyPublishServiceURL: service end point of the Publish Service implementation
6.3.1.2 Configuring General Content Storage and AccessInformation about configuring General Content Storage and access is available in Oracle Student Learning Implementation Guide.
6.3.1.3 Configuring General Content Reference Metadata TaggingThe default Content Integration supports metadata tagging for General Content. For detailed information about associateContent service, see Oracle Student Learning Programmer’s Guide. The default setting assumes that the required OSL related metadata fields are available in Oracle UCM. You must map these metadata fields to OSL context fields in the OSL configuration file. When a General Content document is
Configuration of Content Servers 10g and 11g
6-6 Oracle Student Learning Installation and Deployment Guide
referenced from OSL Learning Tool, context information is associated to that document as metadata for each mapping.
Configuring General Content Reference Metadata involves:
■ Configuring the mapping of OSL context to UCM metadata.
■ Configuring metadata users to tag General Content documents with the OSL context.
■ Configuring searchability based on the OSL context.
The following properties map the OSL context to UCM metadata:
■ osl.lt.content.ucmIntegration.metadata.OutcomeStatementId = xOSL_OutcomeStatementId
■ osl.lt.content.ucmIntegration.metadata.FrameworkItemId = xOSL_FrameworkItemId
■ osl.lt.content.ucmIntegration.metadata.CourseTagName = xOSL_Tag
The default values are given for each property. The naming of custom metadata can vary depending on individual UCM setup.
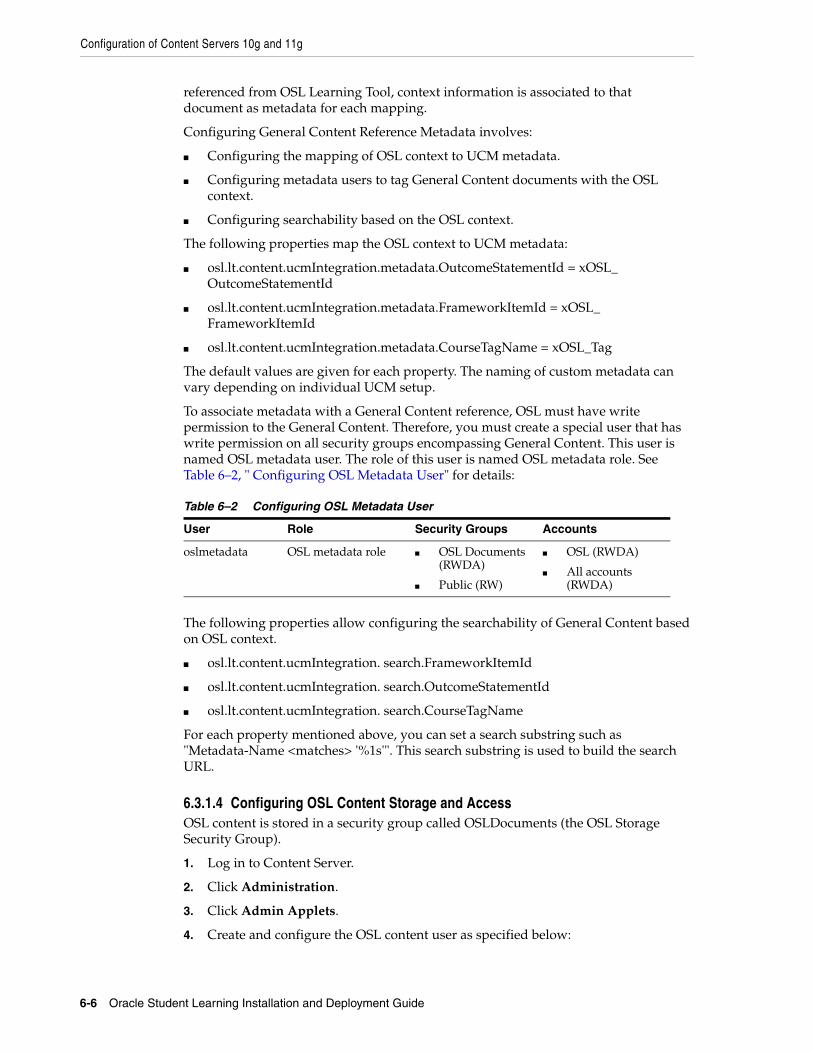
To associate metadata with a General Content reference, OSL must have write permission to the General Content. Therefore, you must create a special user that has write permission on all security groups encompassing General Content. This user is named OSL metadata user. The role of this user is named OSL metadata role. See Table 6–2, " Configuring OSL Metadata User" for details:
The following properties allow configuring the searchability of General Content based on OSL context.
■ osl.lt.content.ucmIntegration. search.FrameworkItemId
■ osl.lt.content.ucmIntegration. search.OutcomeStatementId
■ osl.lt.content.ucmIntegration. search.CourseTagName
For each property mentioned above, you can set a search substring such as "Metadata-Name <matches> '%1s'". This search substring is used to build the search URL.
6.3.1.4 Configuring OSL Content Storage and AccessOSL content is stored in a security group called OSLDocuments (the OSL Storage Security Group).
1. Log in to Content Server.
2. Click Administration.
3. Click Admin Applets.
4. Create and configure the OSL content user as specified below:
Table 6–2 Configuring OSL Metadata User
User Role Security Groups Accounts
oslmetadata OSL metadata role ■ OSL Documents (RWDA)
■ Public (RW)
■ OSL (RWDA)
■ All accounts (RWDA)
Configuration of Content Servers 10g and 11g
Configuring Oracle Universal Content Management Default Integration 6-7
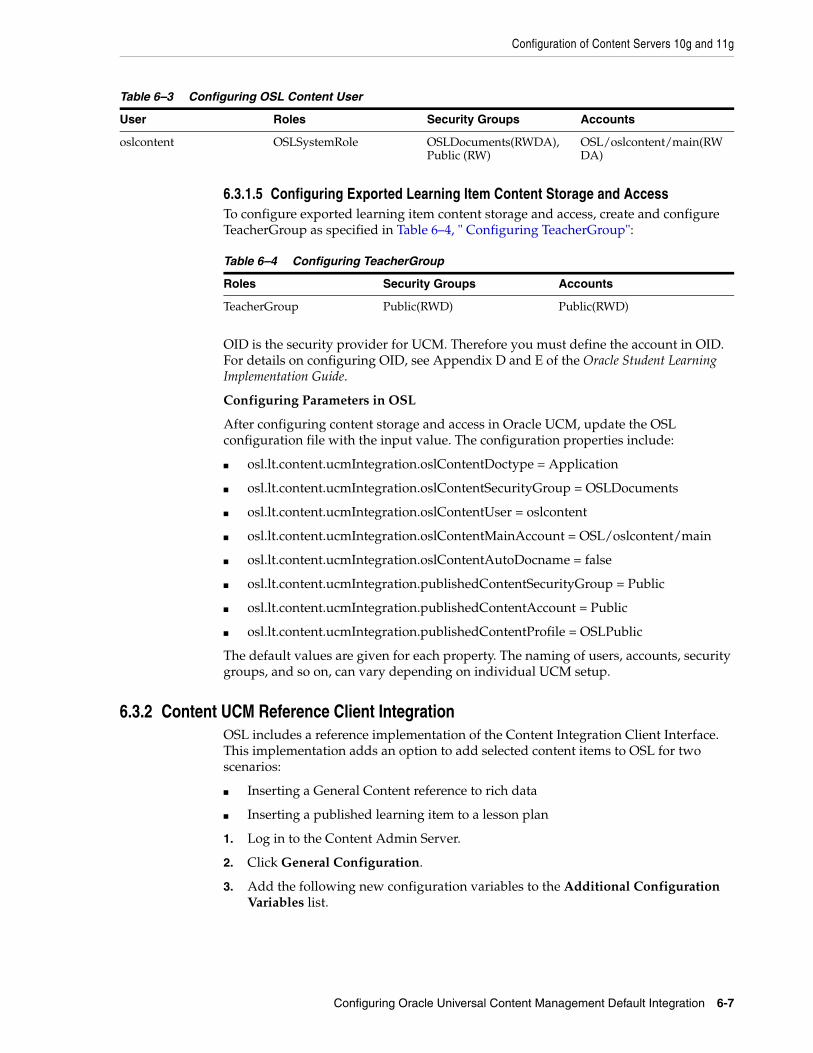
6.3.1.5 Configuring Exported Learning Item Content Storage and AccessTo configure exported learning item content storage and access, create and configure TeacherGroup as specified in Table 6–4, " Configuring TeacherGroup":
OID is the security provider for UCM. Therefore you must define the account in OID. For details on configuring OID, see Appendix D and E of the Oracle Student Learning Implementation Guide.
Configuring Parameters in OSL
After configuring content storage and access in Oracle UCM, update the OSL configuration file with the input value. The configuration properties include:
■ osl.lt.content.ucmIntegration.oslContentDoctype = Application
■ osl.lt.content.ucmIntegration.oslContentSecurityGroup = OSLDocuments
■ osl.lt.content.ucmIntegration.oslContentUser = oslcontent
■ osl.lt.content.ucmIntegration.oslContentMainAccount = OSL/oslcontent/main
■ osl.lt.content.ucmIntegration.oslContentAutoDocname = false
■ osl.lt.content.ucmIntegration.publishedContentSecurityGroup = Public
■ osl.lt.content.ucmIntegration.publishedContentAccount = Public
■ osl.lt.content.ucmIntegration.publishedContentProfile = OSLPublic
The default values are given for each property. The naming of users, accounts, security groups, and so on, can vary depending on individual UCM setup.
6.3.2 Content UCM Reference Client IntegrationOSL includes a reference implementation of the Content Integration Client Interface. This implementation adds an option to add selected content items to OSL for two scenarios:
■ Inserting a General Content reference to rich data
■ Inserting a published learning item to a lesson plan
1. Log in to the Content Admin Server.
2. Click General Configuration.
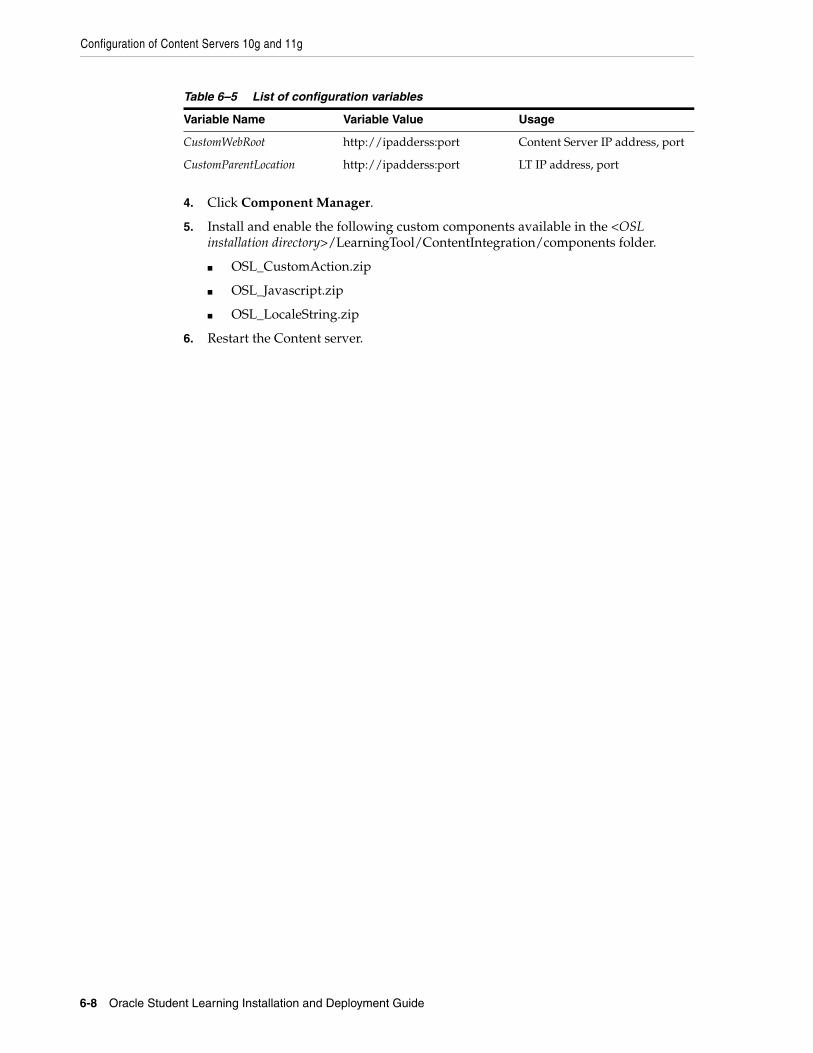
3. Add the following new configuration variables to the Additional Configuration Variables list.
Table 6–3 Configuring OSL Content User
User Roles Security Groups Accounts
oslcontent OSLSystemRole OSLDocuments(RWDA), Public (RW)
OSL/oslcontent/main(RWDA)
Table 6–4 Configuring TeacherGroup
Roles Security Groups Accounts
TeacherGroup Public(RWD) Public(RWD)
Configuration of Content Servers 10g and 11g
6-8 Oracle Student Learning Installation and Deployment Guide
4. Click Component Manager.
5. Install and enable the following custom components available in the <OSL installation directory>/LearningTool/ContentIntegration/components folder.
■ OSL_CustomAction.zip
■ OSL_Javascript.zip
■ OSL_LocaleString.zip
6. Restart the Content server.
Table 6–5 List of configuration variables
Variable Name Variable Value Usage
CustomWebRoot http://ipadderss:port Content Server IP address, port
CustomParentLocation http://ipadderss:port LT IP address, port
7
Configuring Oracle Business Intelligence Enterprise Edition 7-1
7Configuring Oracle Business IntelligenceEnterprise Edition
To access the learning tool reports, you must install and configure Oracle Business Intelligence Enterprise Edition (OBIEE). After installation, perform the following configuration steps.
For information about OBIEE 10g installation and configuration, see http://download.oracle.com/docs/cd/E10415_01/doc/nav/portal_booklist.htm.
For OBIEE 11g installation and configuration, follow the document guides available at http://download.oracle.com/docs/cd/E14571_01/bi.htm.
7.1 Configuration for OBIEE 10gThis section describes the configuration steps for OBIEE 10g.
7.1.1 Configuring OBIEE Data SourceEnsure that OBIEE is installed before configuration.
To configure data source in OBIEE 10g:
1. Open a command prompt.
2. Create the OSL Data Source using the Oracle Database 11g Client by running this command:
export ORACLE_HOME=<Your Oracle Client home>$ORACLE_HOME/bin/netmgr
3. Create a new data source under Oracle Net Configuration > Local > Service Naming, according to the data source you use for OSL.
Remember to test the database connection at the last step.
4. Update the connection pool of the OSL repository to point to the OSL data source:
a. Return to Windows.
b. Copy the OSL.rpd file from the [OSL Home directory]/LearningTool/StudentReporting directory to your Windows file system.
c. Open the Administration Tool by selecting Start > All Programs > Oracle Business Intelligence > Administration.
d. To open a repository for editing in an offline mode:

Configuration for OBIEE 10g
7-2 Oracle Student Learning Installation and Deployment Guide
i) Verify that the connection pool parameters for your data source OSL.rpd are correct.ii) Select File > Open > Offline.iii) Enter OBIEE Administrator account password.iv) Click Open. The repository layers appear.
e. Expand the OSLDataSource database object.
f. Right-click the Connection Pool object and select Properties.
g. Ensure that the data items listed in Table 7–1, " Data Items" are accurate.
h. Click OK.
This step completes the OBIEE data source configuration. All changes are saved in OSL.rpd.
i. When prompted to verify the password, enter the password of the OBIEE data source.
j. Click OK.
7.1.2 Configuring OBIEE for OID AuthenticationYou can control user access to OBIEE by the OID instance. Access control allows users to log in to OBIEE using their OID accounts.
In the OBIEE Security Manager, update the details of the OID instance LDAP_R3 used for OSL.
For the User name attribute type field under the Advanced tab of the LDAP server configuration, select Automatically generated.
All changes are saved in OSL.rpd.
7.1.3 Setting Administrator Password for Student ReportingThe administrator can configure Student Reporting settings. Secure the administrator user account is with a strong password.
In the OBIEE Security Manager, update the password of the administrator user.
7.1.4 Importing OSL Repository into OBIEETo import OSL Repository into OBIEE:
Table 7–1 Data Items
Object Description
Call Interface The call interface is the application program interface (API) used to access the data source. Use OCI for Oracle Database 10g/11g.
Data Source Name The data source name is the name that you configured to connect to the database. The data source name corresponds to the TNS Service Name.
Shared logon and User name Select Shared logon, and enter the user name and password.
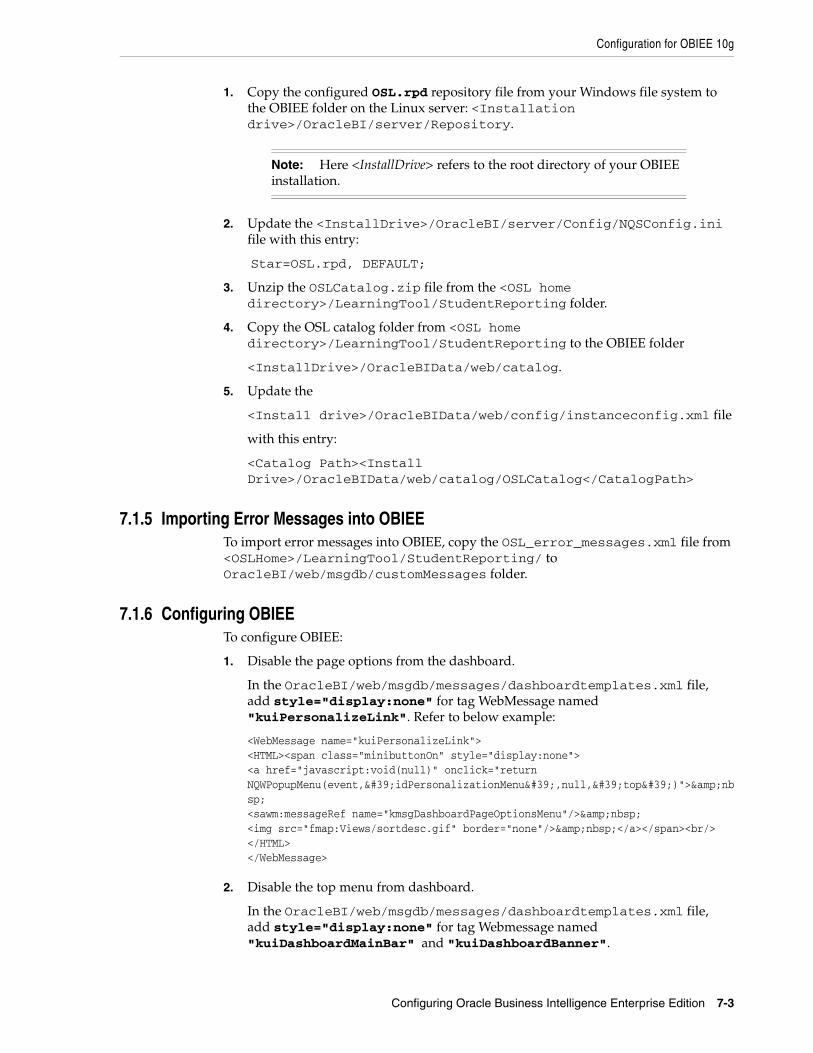
Configuration for OBIEE 10g
Configuring Oracle Business Intelligence Enterprise Edition 7-3
1. Copy the configured OSL.rpd repository file from your Windows file system to the OBIEE folder on the Linux server: <Installation drive>/OracleBI/server/Repository.
2. Update the <InstallDrive>/OracleBI/server/Config/NQSConfig.ini file with this entry:
Star=OSL.rpd, DEFAULT;
3. Unzip the OSLCatalog.zip file from the <OSL home directory>/LearningTool/StudentReporting folder.
4. Copy the OSL catalog folder from <OSL home directory>/LearningTool/StudentReporting to the OBIEE folder
<InstallDrive>/OracleBIData/web/catalog.
5. Update the
<Install drive>/OracleBIData/web/config/instanceconfig.xml file
with this entry:
<Catalog Path><Install Drive>/OracleBIData/web/catalog/OSLCatalog</CatalogPath>
7.1.5 Importing Error Messages into OBIEETo import error messages into OBIEE, copy the OSL_error_messages.xml file from <OSLHome>/LearningTool/StudentReporting/ to OracleBI/web/msgdb/customMessages folder.
7.1.6 Configuring OBIEETo configure OBIEE:
1. Disable the page options from the dashboard.
In the OracleBI/web/msgdb/messages/dashboardtemplates.xml file, add style="display:none" for tag WebMessage named "kuiPersonalizeLink". Refer to below example:
<WebMessage name="kuiPersonalizeLink"><HTML><span class="minibuttonOn" style="display:none"><a href="javascript:void(null)" onclick="return NQWPopupMenu(event,'idPersonalizationMenu',null,'top')">&nbsp;<sawm:messageRef name="kmsgDashboardPageOptionsMenu"/>&nbsp;<img src="fmap:Views/sortdesc.gif" border="none"/>&nbsp;</a></span><br/></HTML></WebMessage>
2. Disable the top menu from dashboard.
In the OracleBI/web/msgdb/messages/dashboardtemplates.xml file, add style="display:none" for tag Webmessage named "kuiDashboardMainBar" and "kuiDashboardBanner".
Note: Here <InstallDrive> refers to the root directory of your OBIEE installation.
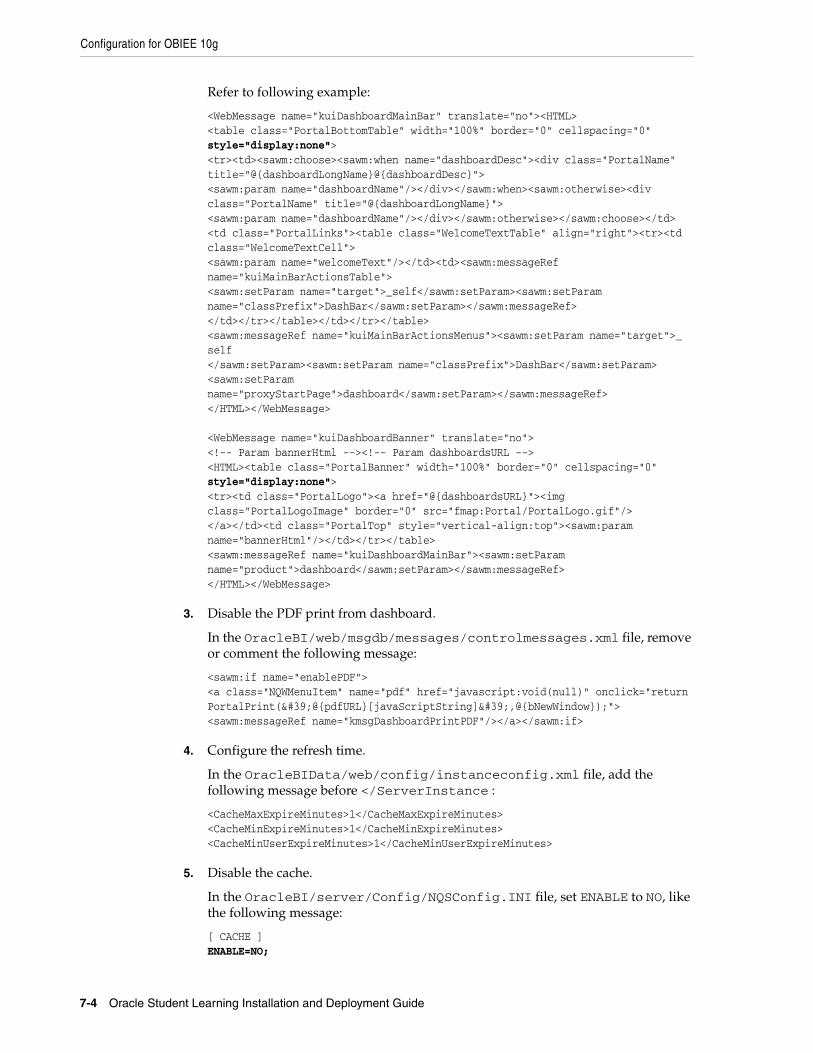
Configuration for OBIEE 10g
7-4 Oracle Student Learning Installation and Deployment Guide
Refer to following example:
<WebMessage name="kuiDashboardMainBar" translate="no"><HTML><table class="PortalBottomTable" width="100%" border="0" cellspacing="0" style="display:none"><tr><td><sawm:choose><sawm:when name="dashboardDesc"><div class="PortalName" title="@{dashboardLongName}@{dashboardDesc}"><sawm:param name="dashboardName"/></div></sawm:when><sawm:otherwise><div class="PortalName" title="@{dashboardLongName}"><sawm:param name="dashboardName"/></div></sawm:otherwise></sawm:choose></td><td class="PortalLinks"><table class="WelcomeTextTable" align="right"><tr><td class="WelcomeTextCell"><sawm:param name="welcomeText"/></td><td><sawm:messageRef name="kuiMainBarActionsTable"><sawm:setParam name="target">_self</sawm:setParam><sawm:setParam name="classPrefix">DashBar</sawm:setParam></sawm:messageRef></td></tr></table></td></tr></table><sawm:messageRef name="kuiMainBarActionsMenus"><sawm:setParam name="target">_self</sawm:setParam><sawm:setParam name="classPrefix">DashBar</sawm:setParam><sawm:setParam name="proxyStartPage">dashboard</sawm:setParam></sawm:messageRef></HTML></WebMessage> <WebMessage name="kuiDashboardBanner" translate="no"><!-- Param bannerHtml --><!-- Param dashboardsURL --><HTML><table class="PortalBanner" width="100%" border="0" cellspacing="0" style="display:none"><tr><td class="PortalLogo"><a href="@{dashboardsURL}"><img class="PortalLogoImage" border="0" src="fmap:Portal/PortalLogo.gif"/></a></td><td class="PortalTop" style="vertical-align:top"><sawm:param name="bannerHtml"/></td></tr></table><sawm:messageRef name="kuiDashboardMainBar"><sawm:setParam name="product">dashboard</sawm:setParam></sawm:messageRef></HTML></WebMessage>
3. Disable the PDF print from dashboard.
In the OracleBI/web/msgdb/messages/controlmessages.xml file, remove or comment the following message:
<sawm:if name="enablePDF"><a class="NQWMenuItem" name="pdf" href="javascript:void(null)" onclick="return PortalPrint('@{pdfURL}[javaScriptString]',@{bNewWindow});"><sawm:messageRef name="kmsgDashboardPrintPDF"/></a></sawm:if>
4. Configure the refresh time.
In the OracleBIData/web/config/instanceconfig.xml file, add the following message before </ServerInstance :
<CacheMaxExpireMinutes>1</CacheMaxExpireMinutes><CacheMinExpireMinutes>1</CacheMinExpireMinutes><CacheMinUserExpireMinutes>1</CacheMinUserExpireMinutes>
5. Disable the cache.
In the OracleBI/server/Config/NQSConfig.INI file, set ENABLE to NO, like the following message:
[ CACHE ]ENABLE=NO;
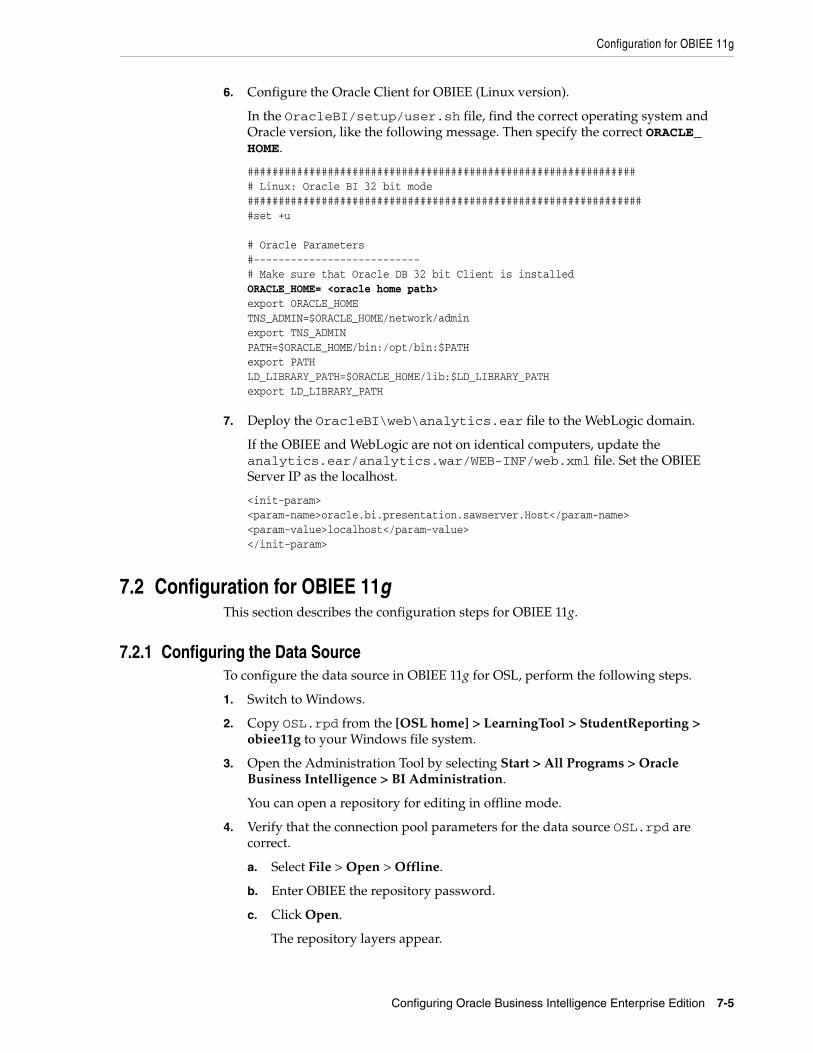
Configuration for OBIEE 11g
Configuring Oracle Business Intelligence Enterprise Edition 7-5
6. Configure the Oracle Client for OBIEE (Linux version).
In the OracleBI/setup/user.sh file, find the correct operating system and Oracle version, like the following message. Then specify the correct ORACLE_HOME.
################################################################ Linux: Oracle BI 32 bit mode#################################################################set +u # Oracle Parameters#---------------------------# Make sure that Oracle DB 32 bit Client is installedORACLE_HOME= <oracle home path>export ORACLE_HOMETNS_ADMIN=$ORACLE_HOME/network/adminexport TNS_ADMINPATH=$ORACLE_HOME/bin:/opt/bin:$PATHexport PATHLD_LIBRARY_PATH=$ORACLE_HOME/lib:$LD_LIBRARY_PATHexport LD_LIBRARY_PATH
7. Deploy the OracleBI\web\analytics.ear file to the WebLogic domain.
If the OBIEE and WebLogic are not on identical computers, update the analytics.ear/analytics.war/WEB-INF/web.xml file. Set the OBIEE Server IP as the localhost.
<init-param><param-name>oracle.bi.presentation.sawserver.Host</param-name><param-value>localhost</param-value></init-param>
7.2 Configuration for OBIEE 11gThis section describes the configuration steps for OBIEE 11g.
7.2.1 Configuring the Data SourceTo configure the data source in OBIEE 11g for OSL, perform the following steps.
1. Switch to Windows.
2. Copy OSL.rpd from the [OSL home] > LearningTool > StudentReporting > obiee11g to your Windows file system.
3. Open the Administration Tool by selecting Start > All Programs > Oracle Business Intelligence > BI Administration.
You can open a repository for editing in offline mode.
4. Verify that the connection pool parameters for the data source OSL.rpd are correct.
a. Select File > Open > Offline.
b. Enter OBIEE the repository password.
c. Click Open.
The repository layers appear.
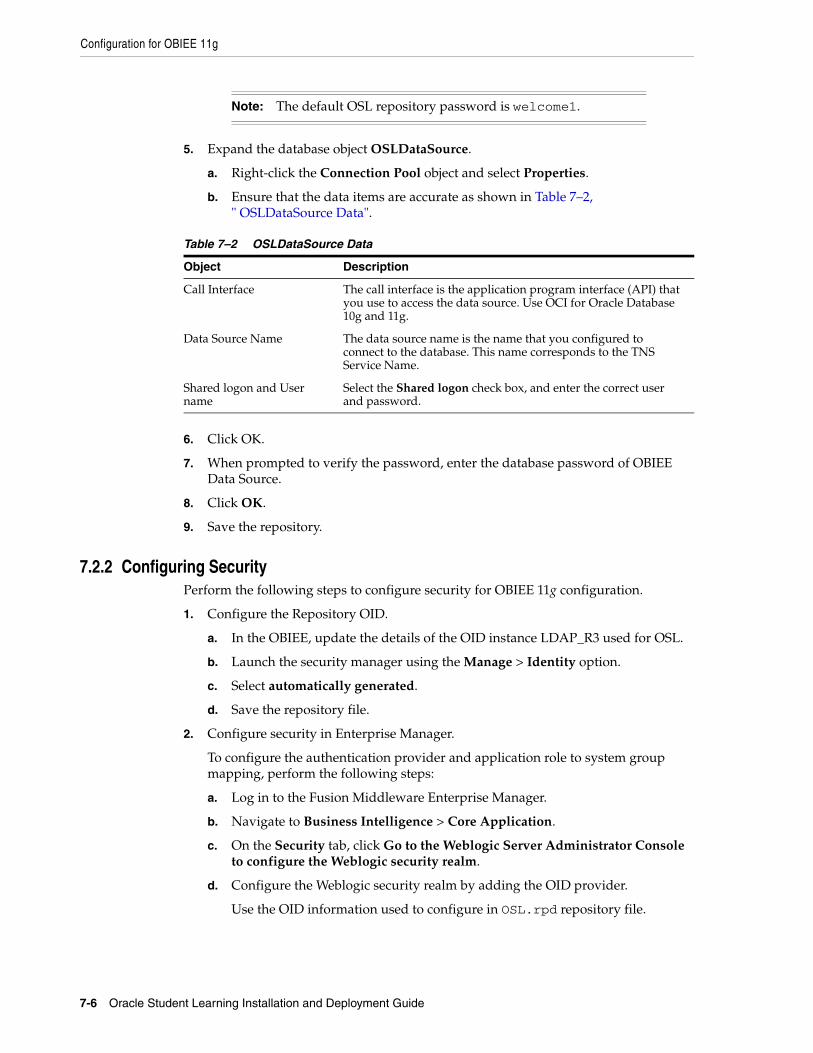
Configuration for OBIEE 11g
7-6 Oracle Student Learning Installation and Deployment Guide
5. Expand the database object OSLDataSource.
a. Right-click the Connection Pool object and select Properties.
b. Ensure that the data items are accurate as shown in Table 7–2, " OSLDataSource Data".
6. Click OK.
7. When prompted to verify the password, enter the database password of OBIEE Data Source.
8. Click OK.
9. Save the repository.
7.2.2 Configuring SecurityPerform the following steps to configure security for OBIEE 11g configuration.
1. Configure the Repository OID.
a. In the OBIEE, update the details of the OID instance LDAP_R3 used for OSL.
b. Launch the security manager using the Manage > Identity option.
c. Select automatically generated.
d. Save the repository file.
2. Configure security in Enterprise Manager.
To configure the authentication provider and application role to system group mapping, perform the following steps:
a. Log in to the Fusion Middleware Enterprise Manager.
b. Navigate to Business Intelligence > Core Application.
c. On the Security tab, click Go to the Weblogic Server Administrator Console to configure the Weblogic security realm.
d. Configure the Weblogic security realm by adding the OID provider.
Use the OID information used to configure in OSL.rpd repository file.
Note: The default OSL repository password is welcome1.
Table 7–2 OSLDataSource Data
Object Description
Call Interface The call interface is the application program interface (API) that you use to access the data source. Use OCI for Oracle Database 10g and 11g.
Data Source Name The data source name is the name that you configured to connect to the database. This name corresponds to the TNS Service Name.
Shared logon and User name
Select the Shared logon check box, and enter the correct user and password.
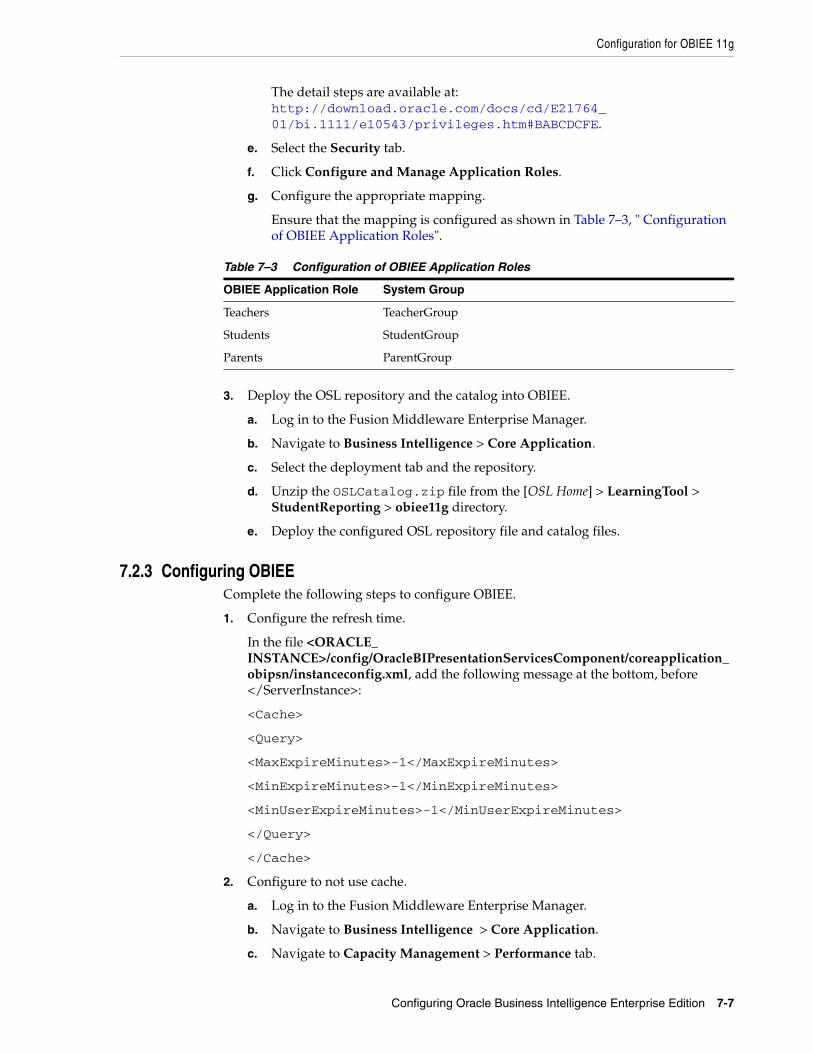
Configuration for OBIEE 11g
Configuring Oracle Business Intelligence Enterprise Edition 7-7
The detail steps are available at: http://download.oracle.com/docs/cd/E21764_01/bi.1111/e10543/privileges.htm#BABCDCFE.
e. Select the Security tab.
f. Click Configure and Manage Application Roles.
g. Configure the appropriate mapping.
Ensure that the mapping is configured as shown in Table 7–3, " Configuration of OBIEE Application Roles".
3. Deploy the OSL repository and the catalog into OBIEE.
a. Log in to the Fusion Middleware Enterprise Manager.
b. Navigate to Business Intelligence > Core Application.
c. Select the deployment tab and the repository.
d. Unzip the OSLCatalog.zip file from the [OSL Home] > LearningTool > StudentReporting > obiee11g directory.
e. Deploy the configured OSL repository file and catalog files.
7.2.3 Configuring OBIEEComplete the following steps to configure OBIEE.
1. Configure the refresh time.
In the file <ORACLE_INSTANCE>/config/OracleBIPresentationServicesComponent/coreapplication_obipsn/instanceconfig.xml, add the following message at the bottom, before </ServerInstance>:
<Cache>
<Query>
<MaxExpireMinutes>-1</MaxExpireMinutes>
<MinExpireMinutes>-1</MinExpireMinutes>
<MinUserExpireMinutes>-1</MinUserExpireMinutes>
</Query>
</Cache>
2. Configure to not use cache.
a. Log in to the Fusion Middleware Enterprise Manager.
b. Navigate to Business Intelligence > Core Application.
c. Navigate to Capacity Management > Performance tab.
Table 7–3 Configuration of OBIEE Application Roles
OBIEE Application Role System Group
Teachers TeacherGroup
Students StudentGroup
Parents ParentGroup
Configuration for OBIEE 11g
7-8 Oracle Student Learning Installation and Deployment Guide
d. Click Lock and Edit Configuration.
e. Clear the Cache Enabled check box.
f. Click Apply.
g. Click Activate Changes.
h. Restart the BI Server system component before activating it.
8
Configuring WebLogic Server 8-1
8Configuring WebLogic Server
This chapter describes the configuration steps in WebLogic Server before OSL deployment.
8.1 Installing ADF Runtime LibrariesTo install ADF 11g Runtime libraries in the existing WLS instance, see Section 35.6.1, "How to Install the ADF Runtime into an Existing WebLogic Server Using the Oracle Fusion Middleware Application Developer Installer" in the Oracle Fusion Middleware Fusion Developer's Guide for Oracle Application Development Framework 11g Release 1 (11.1.1.5.0) at:
http://download.oracle.com/docs/cd/E21764_01/web.1111/b31974/toc.htm.
8.2 Configuring ADF Domain with Oracle Enterprise ManagerTo create a domain or extend the existing domain in the WLS instance for ADF applications, see Section 35.7, "Creating and Extending WebLogic Domains" in the Oracle Fusion Middleware Fusion Developer's Guide for Oracle Application Development Framework 11g Release 1 (11.1.1.5.0) at
http://download.oracle.com/docs/cd/E21764_01/web.1111/b31974/toc.htm.
When you generate or extend a domain, ensure that the domain is configured to support Oracle Enterprise Manager, Oracle JRF, and Oracle WSM Policy Manager.
8.3 Configuring OSL LT Data SourceTo configure the OSL Learning Tool data source:
1. Open the WLS Administration Console:
http://<WLS host name>:7001/console
2. Log in to the WLS console using an administrator user name and password.
Note: For Oracle WSM Policy Manager, the schema DEV_MDS must exist in the Learning Tool database. Run the Oracle Fusion Middleware Repository Creation Utility 11g against the Learning Tool database. Ensure that Metadata Service under AS Common Schemas is selected.
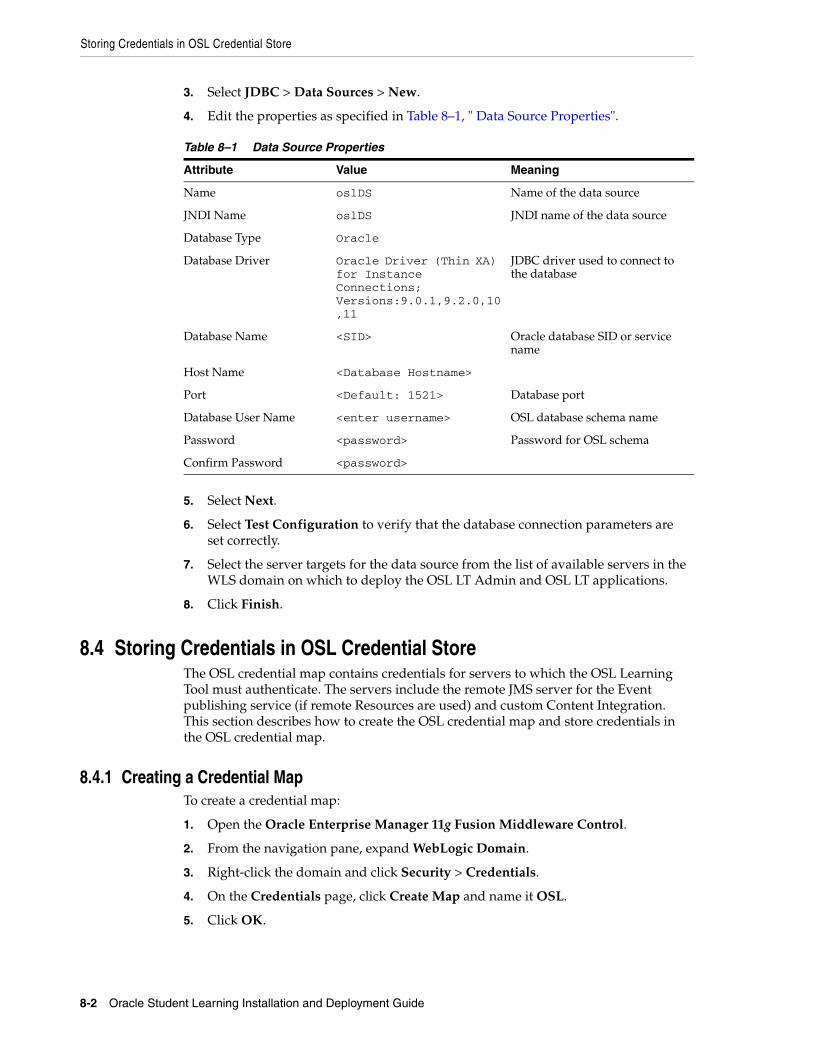
Storing Credentials in OSL Credential Store
8-2 Oracle Student Learning Installation and Deployment Guide
3. Select JDBC > Data Sources > New.
4. Edit the properties as specified in Table 8–1, " Data Source Properties".
5. Select Next.
6. Select Test Configuration to verify that the database connection parameters are set correctly.
7. Select the server targets for the data source from the list of available servers in the WLS domain on which to deploy the OSL LT Admin and OSL LT applications.
8. Click Finish.
8.4 Storing Credentials in OSL Credential StoreThe OSL credential map contains credentials for servers to which the OSL Learning Tool must authenticate. The servers include the remote JMS server for the Event publishing service (if remote Resources are used) and custom Content Integration. This section describes how to create the OSL credential map and store credentials in the OSL credential map.
8.4.1 Creating a Credential MapTo create a credential map:
1. Open the Oracle Enterprise Manager 11g Fusion Middleware Control.
2. From the navigation pane, expand WebLogic Domain.
3. Right-click the domain and click Security > Credentials.
4. On the Credentials page, click Create Map and name it OSL.
5. Click OK.
Table 8–1 Data Source Properties
Attribute Value Meaning
Name oslDS Name of the data source
JNDI Name oslDS JNDI name of the data source
Database Type Oracle
Database Driver Oracle Driver (Thin XA) for Instance Connections; Versions:9.0.1,9.2.0,10,11
JDBC driver used to connect to the database
Database Name <SID> Oracle database SID or service name
Host Name <Database Hostname>
Port <Default: 1521> Database port
Database User Name <enter username> OSL database schema name
Password <password> Password for OSL schema
Confirm Password <password>
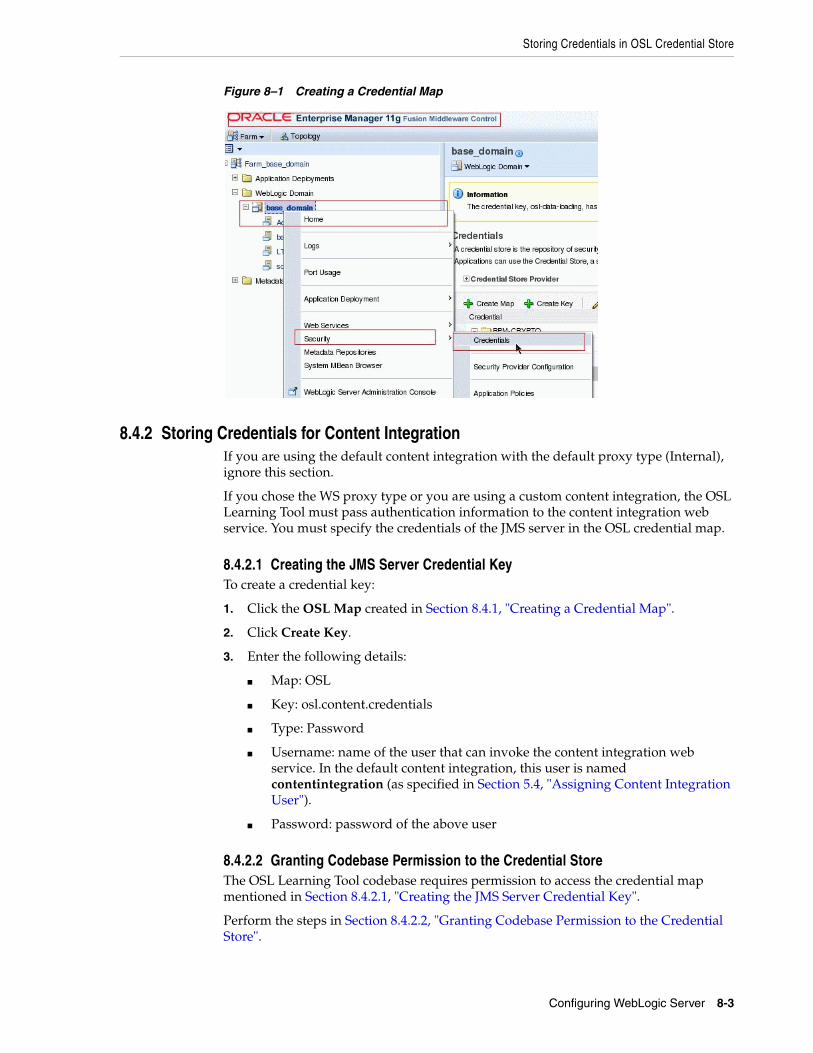
Storing Credentials in OSL Credential Store
Configuring WebLogic Server 8-3
Figure 8–1 Creating a Credential Map
8.4.2 Storing Credentials for Content IntegrationIf you are using the default content integration with the default proxy type (Internal), ignore this section.
If you chose the WS proxy type or you are using a custom content integration, the OSL Learning Tool must pass authentication information to the content integration web service. You must specify the credentials of the JMS server in the OSL credential map.
8.4.2.1 Creating the JMS Server Credential KeyTo create a credential key:
1. Click the OSL Map created in Section 8.4.1, "Creating a Credential Map".
2. Click Create Key.
3. Enter the following details:
■ Map: OSL
■ Key: osl.content.credentials
■ Type: Password
■ Username: name of the user that can invoke the content integration web service. In the default content integration, this user is named contentintegration (as specified in Section 5.4, "Assigning Content Integration User").
■ Password: password of the above user
8.4.2.2 Granting Codebase Permission to the Credential StoreThe OSL Learning Tool codebase requires permission to access the credential map mentioned in Section 8.4.2.1, "Creating the JMS Server Credential Key".
Perform the steps in Section 8.4.2.2, "Granting Codebase Permission to the Credential Store".
Configuring OID as Security Provider
8-4 Oracle Student Learning Installation and Deployment Guide
8.5 Configuring OID as Security ProviderConfigure the OID instance as the security provider for the WLS instance on which OSL is deployed so that OID users can access OSL.
To define a security provider for WLS:
1. Open the WLS Administration Console:
http://<WLSHostName>:port/console
2. Log in to the console using an administrator user name and password.
3. Select Security Realms > myrealm (default) > Providers (tab).
4. In the Authentication Providers table, select New.
5. Enter a name for the authentication provider in the Name field, for example OSL_OID.
6. Choose OracleInternetDirectoryAuthenticator as from the Type list.
7. Click OK.
8. Select the new authentication provider instance on the Providers tab to navigate to its configuration page.
9. Select the Provider Specific tab under the Configuration tab.
10. Edit the properties in the Provider Specific configuration as described in Table 8–2, " Provider Specific Properties".
Table 8–2 Provider Specific Properties
Attribute Value Meaning
Host <OID hostname>
Port 3060 Default non-SSL OID port.
Principal cn=orcladmin Administrator account to connect to OID.
Credential <orcladmin password> Password for OID administrator account.
Confirm Credential <orcladmin password>
User Base DN <OID User Search Base> Value of the User Search Base attribute in OID. You can find this value on the OID administration page.
The format of the value is: cn=users, dc=...
Use Retrieved User Name as Principal
Check Specifies whether the user name retrieved from OID use as the Principal in the Subject.
Group Base DN <OID Group Search Base> Value of the Group Search Base attribute in OID. You can find this value on the OID administration page.
The format of the value is: cn=Groups, dc=…
Propagate Cause for Login Exception
Check Propagates OID exceptions to WLS to show in the console and logs.
Configuring OID as Security Provider
Configuring WebLogic Server 8-5
11. Click Save.
12. Restart the WLS instance.
13. Log in to the WLS console and select Security Realms > myrealm (default) > Users and Groups (tab).
Ensure that the OID users and groups are listed under Users and Groups.
14. Change the Control Flag attribute of the security provider so that OSL users must authenticate only against OID:
a. Select Security Realms > myrealm (default) > Providers (tab) > [name of the security provider] > Configuration (tab) > Common (tab).
b. Set Control Flag to Sufficient.
15. Reorder the security provider to be the first authentication provider.
16. Restart the WLS instance.
Configuring OID as Security Provider
8-6 Oracle Student Learning Installation and Deployment Guide
9
Deploying OSL Learning Tool Admin and OSL Learning Tool 9-1
9Deploying OSL Learning Tool Admin andOSL Learning Tool
This chapter describes the steps in preparing and deploying OSL Learning Tool Admin and OSL Learning Tool to the WebLogic Server.
9.1 Customizing OSL SettingsCustomize the OSL Learning Tool before deploying it to the WebLogic Server. The customization capabilities include:
■ Labels: Updating the label text in the user interfaces of the OSL Learning Tool and OSL Learning Tool Admin.
■ Icon set: Replacing default icons in the user interfaces of the OSL Learning Tool and OSL Learning Tool Admin.
■ Background images: Replacing or adding background images of the OSL Learning Tool
■ Security roles mapping: Updating the mapping of LDAP groups to OSL application roles as mentioned in Scenario 1 of Section 5.1, "Creating Groups in OID". You can ignore this step if your LDAP groups follow the default naming convention described in Scenario 2 of Section 5.1, "Creating Groups in OID".
■ Oracle UCM integration configuration: Updating properties for integration with Oracle UCM as discussed in Chapter 6, "Configuring Oracle Universal Content Management Default Integration".
9.1.1 Modifying LabelsCustomizable label sets for OSL Learning Tool are located in the [OSL home directory]/LearningTool/Configuration/LearningTool/Labels folder. Customizable label sets for OSL Learning Tool Admin are located in the [OSL home directory]/LearningTool/Configuration/Admin/Labels folder. Each file in these two folders is a resource bundle file that consists of key-value pairs. You can modify the content of the value fields.
WARNING: Modify only the content of the value fields. Do not update the key fields or remove any key-value pairs.
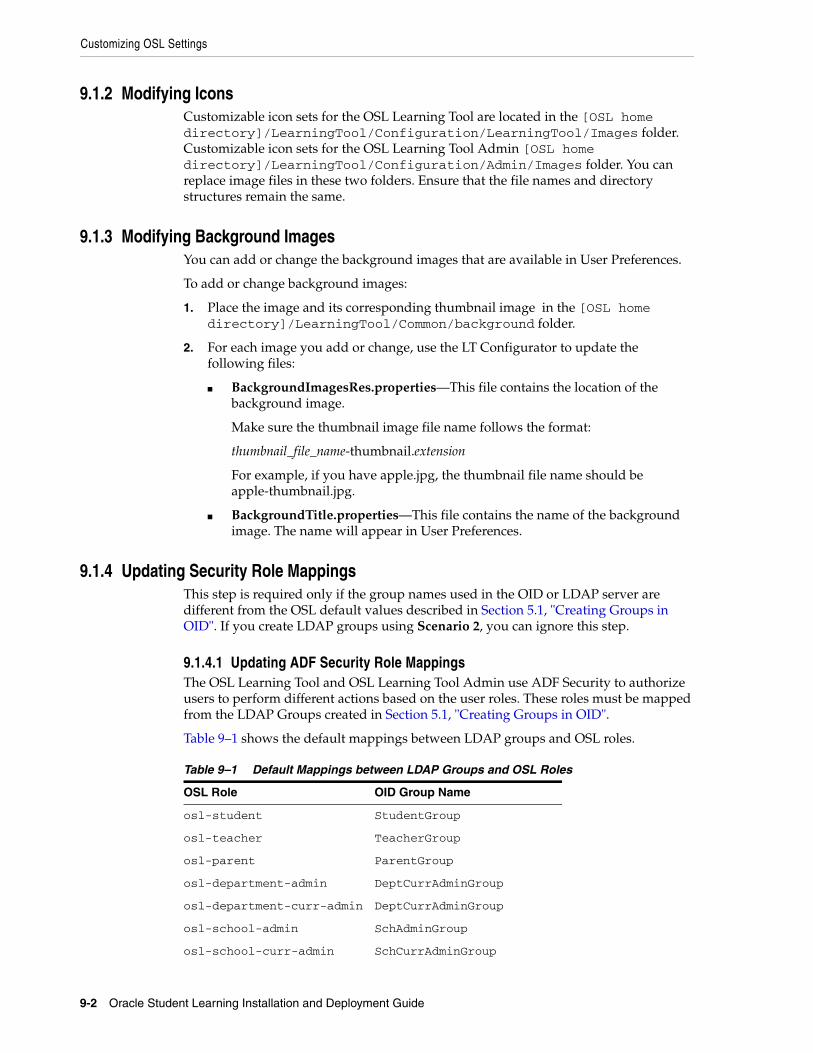
Customizing OSL Settings
9-2 Oracle Student Learning Installation and Deployment Guide
9.1.2 Modifying IconsCustomizable icon sets for the OSL Learning Tool are located in the [OSL home directory]/LearningTool/Configuration/LearningTool/Images folder. Customizable icon sets for the OSL Learning Tool Admin [OSL home directory]/LearningTool/Configuration/Admin/Images folder. You can replace image files in these two folders. Ensure that the file names and directory structures remain the same.
9.1.3 Modifying Background ImagesYou can add or change the background images that are available in User Preferences.
To add or change background images:
1. Place the image and its corresponding thumbnail image in the [OSL home directory]/LearningTool/Common/background folder.
2. For each image you add or change, use the LT Configurator to update the following files:
■ BackgroundImagesRes.properties—This file contains the location of the background image.
Make sure the thumbnail image file name follows the format:
thumbnail_file_name-thumbnail.extension
For example, if you have apple.jpg, the thumbnail file name should be apple-thumbnail.jpg.
■ BackgroundTitle.properties—This file contains the name of the background image. The name will appear in User Preferences.
9.1.4 Updating Security Role MappingsThis step is required only if the group names used in the OID or LDAP server are different from the OSL default values described in Section 5.1, "Creating Groups in OID". If you create LDAP groups using Scenario 2, you can ignore this step.
9.1.4.1 Updating ADF Security Role MappingsThe OSL Learning Tool and OSL Learning Tool Admin use ADF Security to authorize users to perform different actions based on the user roles. These roles must be mapped from the LDAP Groups created in Section 5.1, "Creating Groups in OID".
Table 9–1 shows the default mappings between LDAP groups and OSL roles.
Table 9–1 Default Mappings between LDAP Groups and OSL Roles
OSL Role OID Group Name
osl-student StudentGroup
osl-teacher TeacherGroup
osl-parent ParentGroup
osl-department-admin DeptCurrAdminGroup
osl-department-curr-admin DeptCurrAdminGroup
osl-school-admin SchAdminGroup
osl-school-curr-admin SchCurrAdminGroup
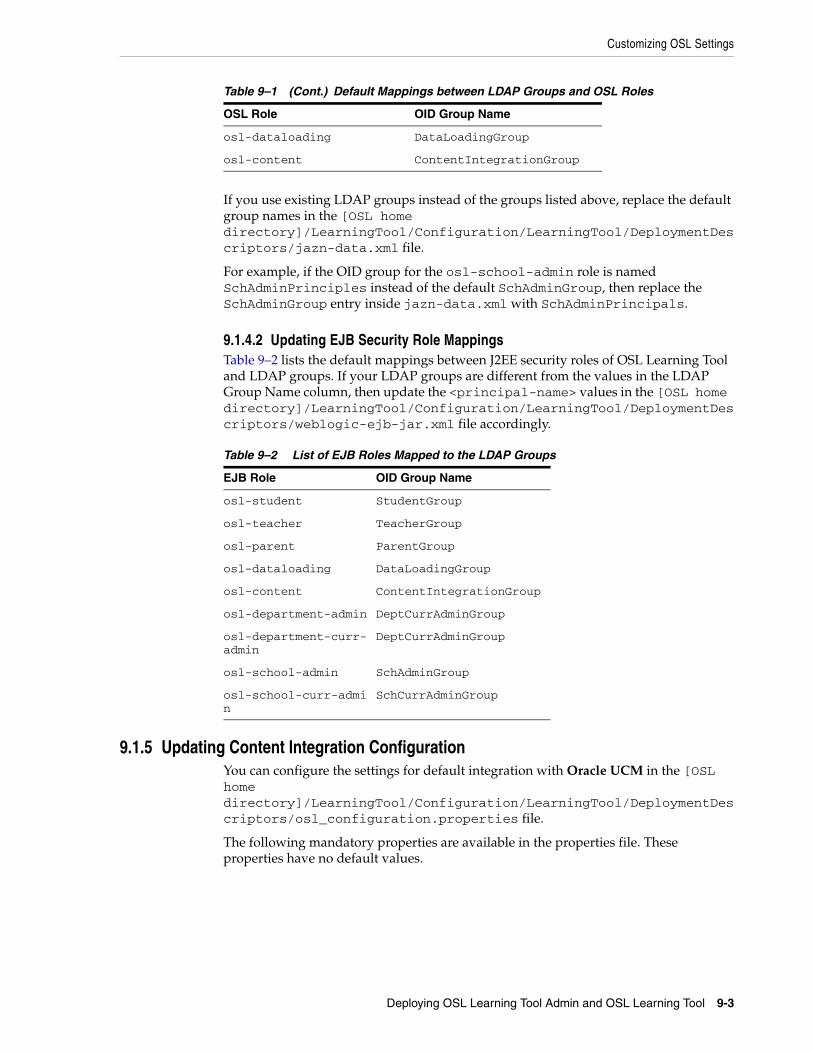
Customizing OSL Settings
Deploying OSL Learning Tool Admin and OSL Learning Tool 9-3
If you use existing LDAP groups instead of the groups listed above, replace the default group names in the [OSL home directory]/LearningTool/Configuration/LearningTool/DeploymentDescriptors/jazn-data.xml file.
For example, if the OID group for the osl-school-admin role is named SchAdminPrinciples instead of the default SchAdminGroup, then replace the SchAdminGroup entry inside jazn-data.xml with SchAdminPrincipals.
9.1.4.2 Updating EJB Security Role MappingsTable 9–2 lists the default mappings between J2EE security roles of OSL Learning Tool and LDAP groups. If your LDAP groups are different from the values in the LDAP Group Name column, then update the <principal-name> values in the [OSL home directory]/LearningTool/Configuration/LearningTool/DeploymentDescriptors/weblogic-ejb-jar.xml file accordingly.
9.1.5 Updating Content Integration ConfigurationYou can configure the settings for default integration with Oracle UCM in the [OSL home directory]/LearningTool/Configuration/LearningTool/DeploymentDescriptors/osl_configuration.properties file.
The following mandatory properties are available in the properties file. These properties have no default values.
osl-dataloading DataLoadingGroup
osl-content ContentIntegrationGroup
Table 9–2 List of EJB Roles Mapped to the LDAP Groups
EJB Role OID Group Name
osl-student StudentGroup
osl-teacher TeacherGroup
osl-parent ParentGroup
osl-dataloading DataLoadingGroup
osl-content ContentIntegrationGroup
osl-department-admin DeptCurrAdminGroup
osl-department-curr-admin
DeptCurrAdminGroup
osl-school-admin SchAdminGroup
osl-school-curr-admin
SchCurrAdminGroup
Table 9–1 (Cont.) Default Mappings between LDAP Groups and OSL Roles
OSL Role OID Group Name
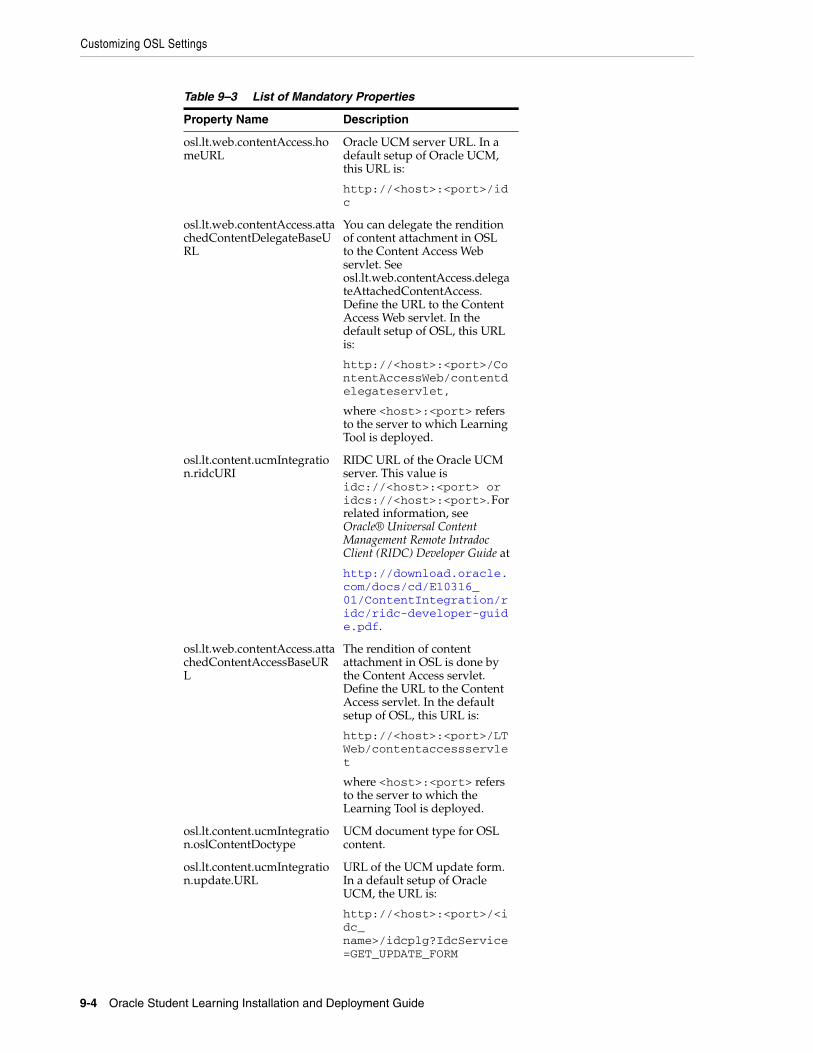
Customizing OSL Settings
9-4 Oracle Student Learning Installation and Deployment Guide
Table 9–3 List of Mandatory Properties
Property Name Description
osl.lt.web.contentAccess.homeURL
Oracle UCM server URL. In a default setup of Oracle UCM, this URL is:
http://<host>:<port>/idc
osl.lt.web.contentAccess.attachedContentDelegateBaseURL
You can delegate the rendition of content attachment in OSL to the Content Access Web servlet. See osl.lt.web.contentAccess.delegateAttachedContentAccess. Define the URL to the Content Access Web servlet. In the default setup of OSL, this URL is:
http://<host>:<port>/ContentAccessWeb/contentdelegateservlet,
where <host>:<port> refers to the server to which Learning Tool is deployed.
osl.lt.content.ucmIntegration.ridcURI
RIDC URL of the Oracle UCM server. This value is idc://<host>:<port> or idcs://<host>:<port>. For related information, see Oracle® Universal Content Management Remote Intradoc Client (RIDC) Developer Guide at
http://download.oracle.com/docs/cd/E10316_01/ContentIntegration/ridc/ridc-developer-guide.pdf.
osl.lt.web.contentAccess.attachedContentAccessBaseURL
The rendition of content attachment in OSL is done by the Content Access servlet. Define the URL to the Content Access servlet. In the default setup of OSL, this URL is:
http://<host>:<port>/LTWeb/contentaccessservlet
where <host>:<port> refers to the server to which the Learning Tool is deployed.
osl.lt.content.ucmIntegration.oslContentDoctype
UCM document type for OSL content.
osl.lt.content.ucmIntegration.update.URL
URL of the UCM update form. In a default setup of Oracle UCM, the URL is:
http://<host>:<port>/<idc_name>/idcplg?IdcService=GET_UPDATE_FORM
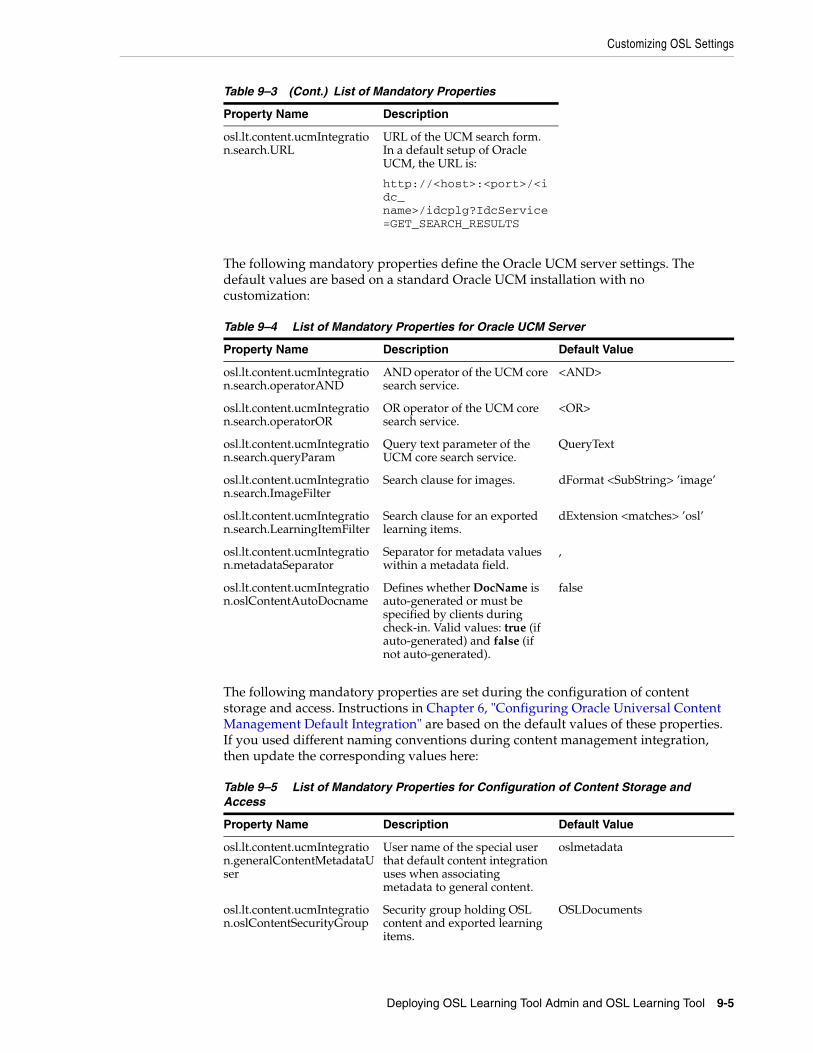
Customizing OSL Settings
Deploying OSL Learning Tool Admin and OSL Learning Tool 9-5
The following mandatory properties define the Oracle UCM server settings. The default values are based on a standard Oracle UCM installation with no customization:
The following mandatory properties are set during the configuration of content storage and access. Instructions in Chapter 6, "Configuring Oracle Universal Content Management Default Integration" are based on the default values of these properties. If you used different naming conventions during content management integration, then update the corresponding values here:
osl.lt.content.ucmIntegration.search.URL
URL of the UCM search form. In a default setup of Oracle UCM, the URL is:
http://<host>:<port>/<idc_name>/idcplg?IdcService=GET_SEARCH_RESULTS
Table 9–4 List of Mandatory Properties for Oracle UCM Server
Property Name Description Default Value
osl.lt.content.ucmIntegration.search.operatorAND
AND operator of the UCM core search service.
<AND>
osl.lt.content.ucmIntegration.search.operatorOR
OR operator of the UCM core search service.
<OR>
osl.lt.content.ucmIntegration.search.queryParam
Query text parameter of the UCM core search service.
QueryText
osl.lt.content.ucmIntegration.search.ImageFilter
Search clause for images. dFormat <SubString> ’image’
osl.lt.content.ucmIntegration.search.LearningItemFilter
Search clause for an exported learning items.
dExtension <matches> ’osl’
osl.lt.content.ucmIntegration.metadataSeparator
Separator for metadata values within a metadata field.
,
osl.lt.content.ucmIntegration.oslContentAutoDocname
Defines whether DocName is auto-generated or must be specified by clients during check-in. Valid values: true (if auto-generated) and false (if not auto-generated).
false
Table 9–5 List of Mandatory Properties for Configuration of Content Storage and Access
Property Name Description Default Value
osl.lt.content.ucmIntegration.generalContentMetadataUser
User name of the special user that default content integration uses when associating metadata to general content.
oslmetadata
osl.lt.content.ucmIntegration.oslContentSecurityGroup
Security group holding OSL content and exported learning items.
OSLDocuments
Table 9–3 (Cont.) List of Mandatory Properties
Property Name Description
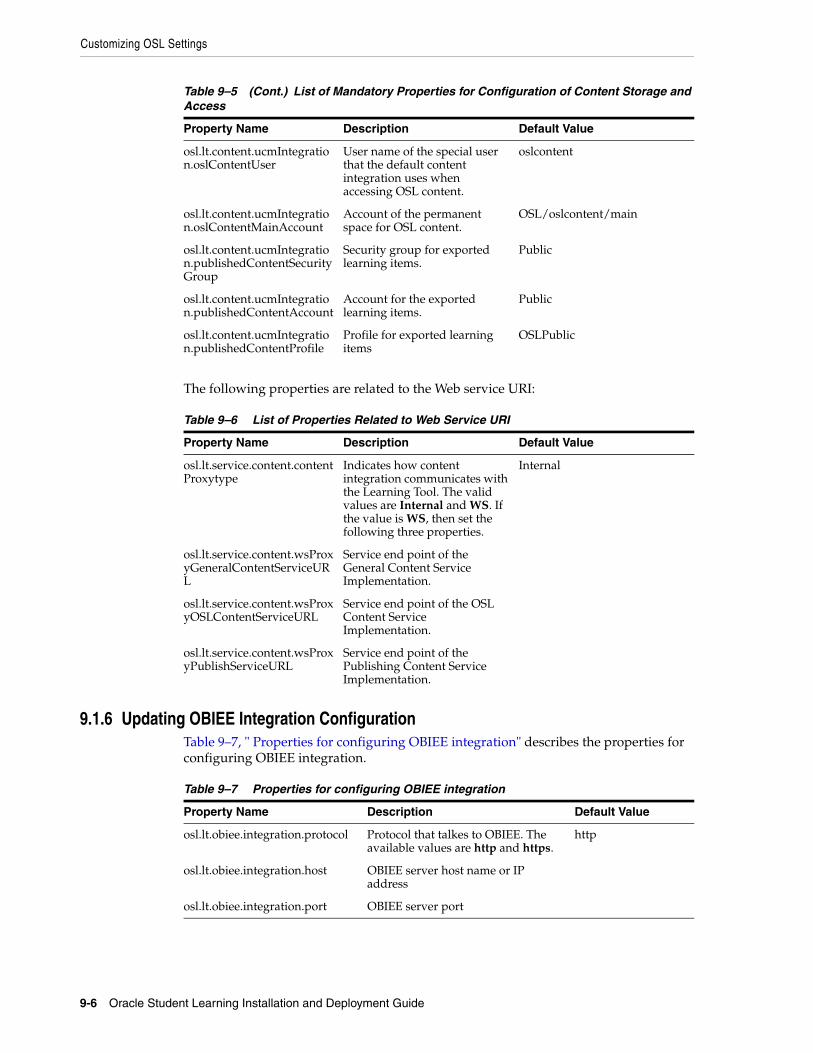
Customizing OSL Settings
9-6 Oracle Student Learning Installation and Deployment Guide
The following properties are related to the Web service URI:
9.1.6 Updating OBIEE Integration ConfigurationTable 9–7, " Properties for configuring OBIEE integration" describes the properties for configuring OBIEE integration.
osl.lt.content.ucmIntegration.oslContentUser
User name of the special user that the default content integration uses when accessing OSL content.
oslcontent
osl.lt.content.ucmIntegration.oslContentMainAccount
Account of the permanent space for OSL content.
OSL/oslcontent/main
osl.lt.content.ucmIntegration.publishedContentSecurityGroup
Security group for exported learning items.
Public
osl.lt.content.ucmIntegration.publishedContentAccount
Account for the exported learning items.
Public
osl.lt.content.ucmIntegration.publishedContentProfile
Profile for exported learning items
OSLPublic
Table 9–6 List of Properties Related to Web Service URI
Property Name Description Default Value
osl.lt.service.content.contentProxytype
Indicates how content integration communicates with the Learning Tool. The valid values are Internal and WS. If the value is WS, then set the following three properties.
Internal
osl.lt.service.content.wsProxyGeneralContentServiceURL
Service end point of the General Content Service Implementation.
osl.lt.service.content.wsProxyOSLContentServiceURL
Service end point of the OSL Content Service Implementation.
osl.lt.service.content.wsProxyPublishServiceURL
Service end point of the Publishing Content Service Implementation.
Table 9–7 Properties for configuring OBIEE integration
Property Name Description Default Value
osl.lt.obiee.integration.protocol Protocol that talkes to OBIEE. The available values are http and https.
http
osl.lt.obiee.integration.host OBIEE server host name or IP address
osl.lt.obiee.integration.port OBIEE server port
Table 9–5 (Cont.) List of Mandatory Properties for Configuration of Content Storage and Access
Property Name Description Default Value
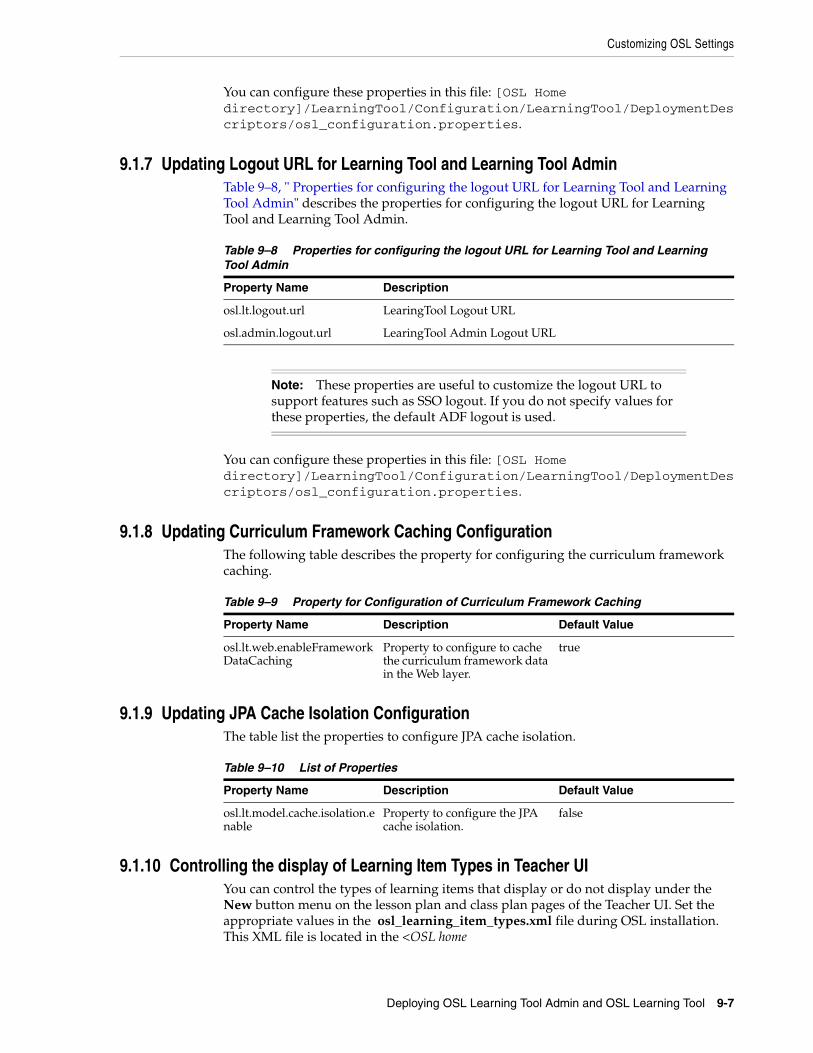
Customizing OSL Settings
Deploying OSL Learning Tool Admin and OSL Learning Tool 9-7
You can configure these properties in this file: [OSL Home directory]/LearningTool/Configuration/LearningTool/DeploymentDescriptors/osl_configuration.properties.
9.1.7 Updating Logout URL for Learning Tool and Learning Tool AdminTable 9–8, " Properties for configuring the logout URL for Learning Tool and Learning Tool Admin" describes the properties for configuring the logout URL for Learning Tool and Learning Tool Admin.
You can configure these properties in this file: [OSL Home directory]/LearningTool/Configuration/LearningTool/DeploymentDescriptors/osl_configuration.properties.
9.1.8 Updating Curriculum Framework Caching ConfigurationThe following table describes the property for configuring the curriculum framework caching.
9.1.9 Updating JPA Cache Isolation Configuration The table list the properties to configure JPA cache isolation.
9.1.10 Controlling the display of Learning Item Types in Teacher UIYou can control the types of learning items that display or do not display under the New button menu on the lesson plan and class plan pages of the Teacher UI. Set the appropriate values in the osl_learning_item_types.xml file during OSL installation. This XML file is located in the <OSL home
Table 9–8 Properties for configuring the logout URL for Learning Tool and Learning Tool Admin
Property Name Description
osl.lt.logout.url LearingTool Logout URL
osl.admin.logout.url LearingTool Admin Logout URL
Note: These properties are useful to customize the logout URL to support features such as SSO logout. If you do not specify values for these properties, the default ADF logout is used.
Table 9–9 Property for Configuration of Curriculum Framework Caching
Property Name Description Default Value
osl.lt.web.enableFrameworkDataCaching
Property to configure to cache the curriculum framework data in the Web layer.
true
Table 9–10 List of Properties
Property Name Description Default Value
osl.lt.model.cache.isolation.enable
Property to configure the JPA cache isolation.
false
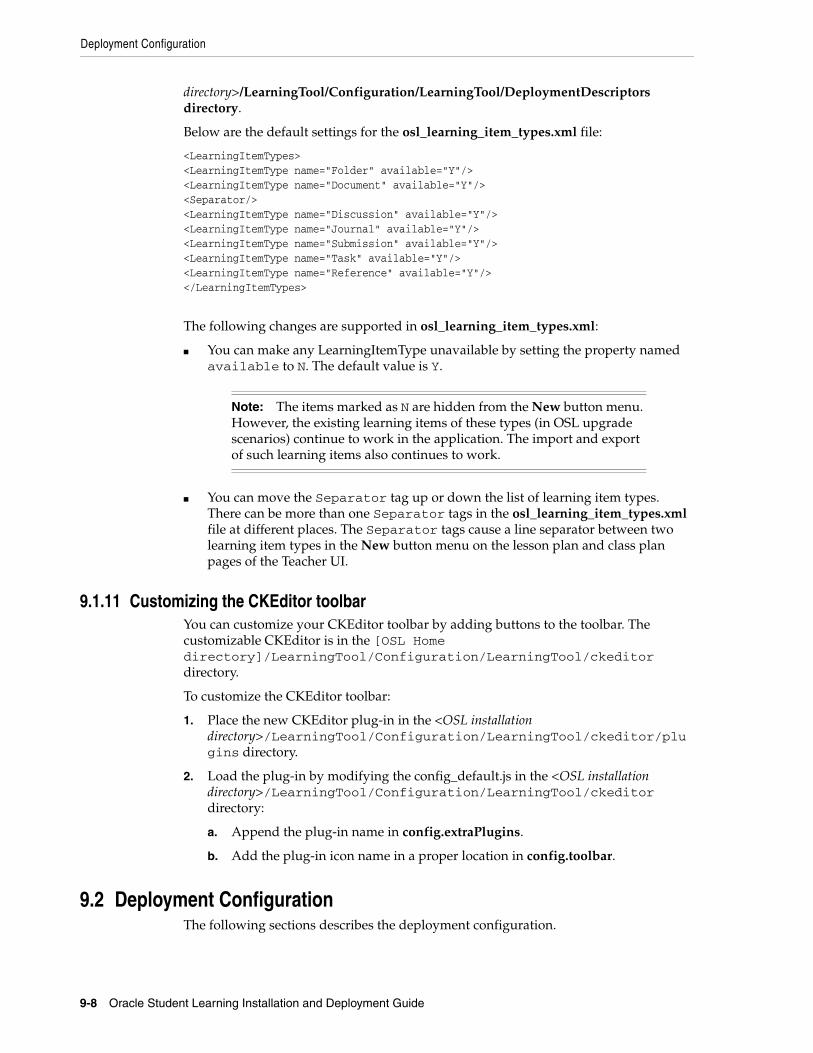
Deployment Configuration
9-8 Oracle Student Learning Installation and Deployment Guide
directory>/LearningTool/Configuration/LearningTool/DeploymentDescriptors directory.
Below are the default settings for the osl_learning_item_types.xml file:
<LearningItemTypes><LearningItemType name="Folder" available="Y"/><LearningItemType name="Document" available="Y"/><Separator/><LearningItemType name="Discussion" available="Y"/><LearningItemType name="Journal" available="Y"/><LearningItemType name="Submission" available="Y"/><LearningItemType name="Task" available="Y"/><LearningItemType name="Reference" available="Y"/></LearningItemTypes>
The following changes are supported in osl_learning_item_types.xml:
■ You can make any LearningItemType unavailable by setting the property named available to N. The default value is Y.
■ You can move the Separator tag up or down the list of learning item types. There can be more than one Separator tags in the osl_learning_item_types.xml file at different places. The Separator tags cause a line separator between two learning item types in the New button menu on the lesson plan and class plan pages of the Teacher UI.
9.1.11 Customizing the CKEditor toolbarYou can customize your CKEditor toolbar by adding buttons to the toolbar. The customizable CKEditor is in the [OSL Home directory]/LearningTool/Configuration/LearningTool/ckeditor directory.
To customize the CKEditor toolbar:
1. Place the new CKEditor plug-in in the <OSL installation directory>/LearningTool/Configuration/LearningTool/ckeditor/plugins directory.
2. Load the plug-in by modifying the config_default.js in the <OSL installation directory>/LearningTool/Configuration/LearningTool/ckeditor directory:
a. Append the plug-in name in config.extraPlugins.
b. Add the plug-in icon name in a proper location in config.toolbar.
9.2 Deployment ConfigurationThe following sections describes the deployment configuration.
Note: The items marked as N are hidden from the New button menu. However, the existing learning items of these types (in OSL upgrade scenarios) continue to work in the application. The import and export of such learning items also continues to work.
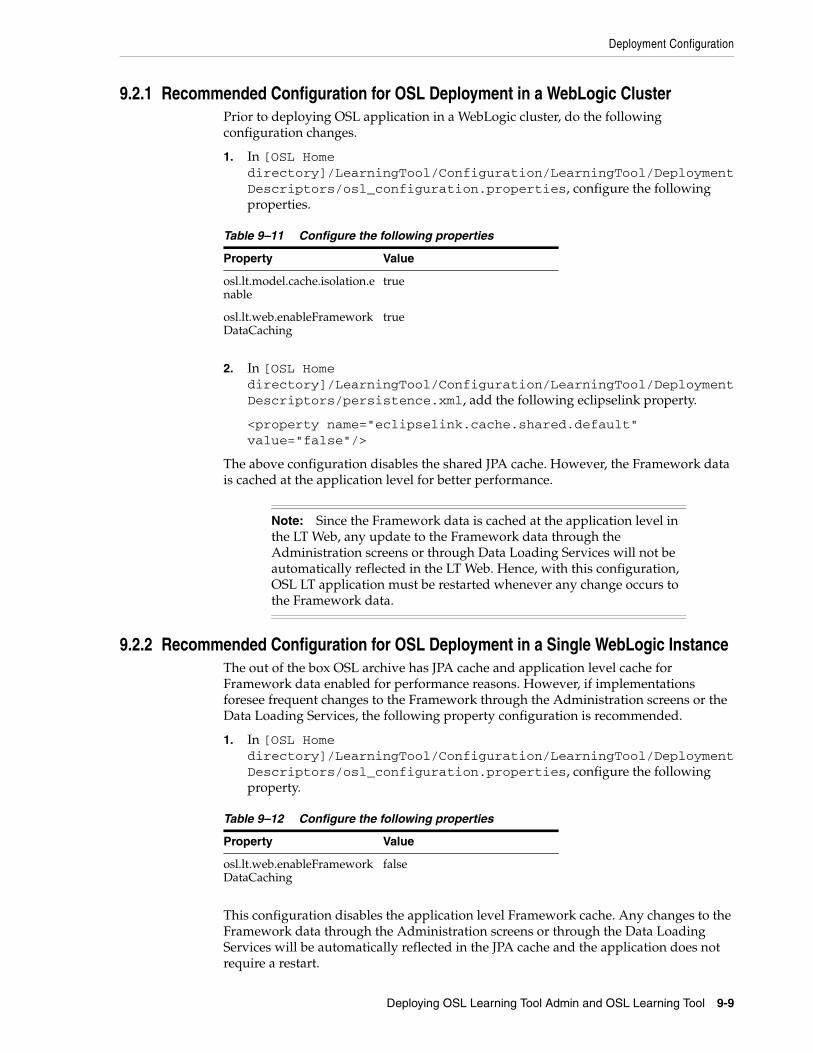
Deployment Configuration
Deploying OSL Learning Tool Admin and OSL Learning Tool 9-9
9.2.1 Recommended Configuration for OSL Deployment in a WebLogic ClusterPrior to deploying OSL application in a WebLogic cluster, do the following configuration changes.
1. In [OSL Home directory]/LearningTool/Configuration/LearningTool/DeploymentDescriptors/osl_configuration.properties, configure the following properties.
2. In [OSL Home directory]/LearningTool/Configuration/LearningTool/DeploymentDescriptors/persistence.xml, add the following eclipselink property.
<property name="eclipselink.cache.shared.default" value="false"/>
The above configuration disables the shared JPA cache. However, the Framework data is cached at the application level for better performance.
9.2.2 Recommended Configuration for OSL Deployment in a Single WebLogic InstanceThe out of the box OSL archive has JPA cache and application level cache for Framework data enabled for performance reasons. However, if implementations foresee frequent changes to the Framework through the Administration screens or the Data Loading Services, the following property configuration is recommended.
1. In [OSL Home directory]/LearningTool/Configuration/LearningTool/DeploymentDescriptors/osl_configuration.properties, configure the following property.
This configuration disables the application level Framework cache. Any changes to the Framework data through the Administration screens or through the Data Loading Services will be automatically reflected in the JPA cache and the application does not require a restart.
Table 9–11 Configure the following properties
Property Value
osl.lt.model.cache.isolation.enable
true
osl.lt.web.enableFrameworkDataCaching
true
Note: Since the Framework data is cached at the application level in the LT Web, any update to the Framework data through the Administration screens or through Data Loading Services will not be automatically reflected in the LT Web. Hence, with this configuration, OSL LT application must be restarted whenever any change occurs to the Framework data.
Table 9–12 Configure the following properties
Property Value
osl.lt.web.enableFrameworkDataCaching
false
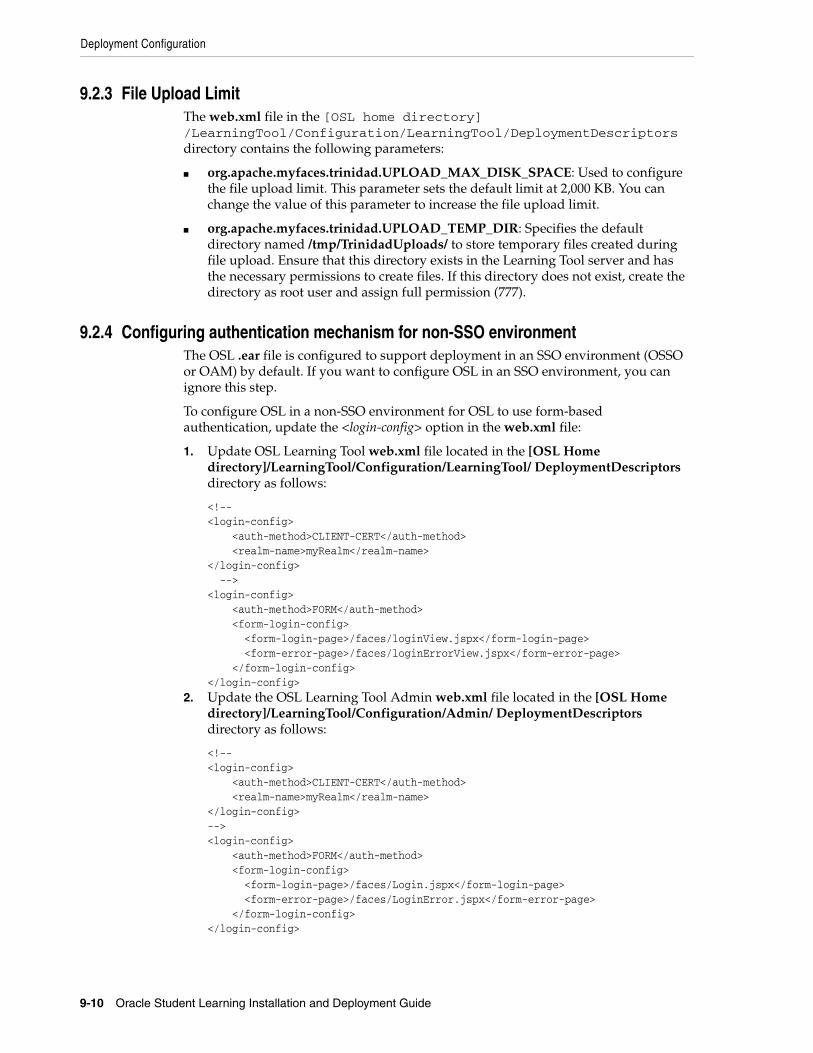
Deployment Configuration
9-10 Oracle Student Learning Installation and Deployment Guide
9.2.3 File Upload LimitThe web.xml file in the [OSL home directory] /LearningTool/Configuration/LearningTool/DeploymentDescriptors directory contains the following parameters:
■ org.apache.myfaces.trinidad.UPLOAD_MAX_DISK_SPACE: Used to configure the file upload limit. This parameter sets the default limit at 2,000 KB. You can change the value of this parameter to increase the file upload limit.
■ org.apache.myfaces.trinidad.UPLOAD_TEMP_DIR: Specifies the default directory named /tmp/TrinidadUploads/ to store temporary files created during file upload. Ensure that this directory exists in the Learning Tool server and has the necessary permissions to create files. If this directory does not exist, create the directory as root user and assign full permission (777).
9.2.4 Configuring authentication mechanism for non-SSO environmentThe OSL .ear file is configured to support deployment in an SSO environment (OSSO or OAM) by default. If you want to configure OSL in an SSO environment, you can ignore this step.
To configure OSL in a non-SSO environment for OSL to use form-based authentication, update the <login-config> option in the web.xml file:
1. Update OSL Learning Tool web.xml file located in the [OSL Home directory]/LearningTool/Configuration/LearningTool/ DeploymentDescriptors directory as follows:
<!--<login-config> <auth-method>CLIENT-CERT</auth-method> <realm-name>myRealm</realm-name></login-config> --><login-config> <auth-method>FORM</auth-method> <form-login-config> <form-login-page>/faces/loginView.jspx</form-login-page> <form-error-page>/faces/loginErrorView.jspx</form-error-page> </form-login-config></login-config>
2. Update the OSL Learning Tool Admin web.xml file located in the [OSL Home directory]/LearningTool/Configuration/Admin/ DeploymentDescriptors directory as follows:
<!--<login-config> <auth-method>CLIENT-CERT</auth-method> <realm-name>myRealm</realm-name></login-config>--><login-config> <auth-method>FORM</auth-method> <form-login-config> <form-login-page>/faces/Login.jspx</form-login-page> <form-error-page>/faces/LoginError.jspx</form-error-page> </form-login-config></login-config>
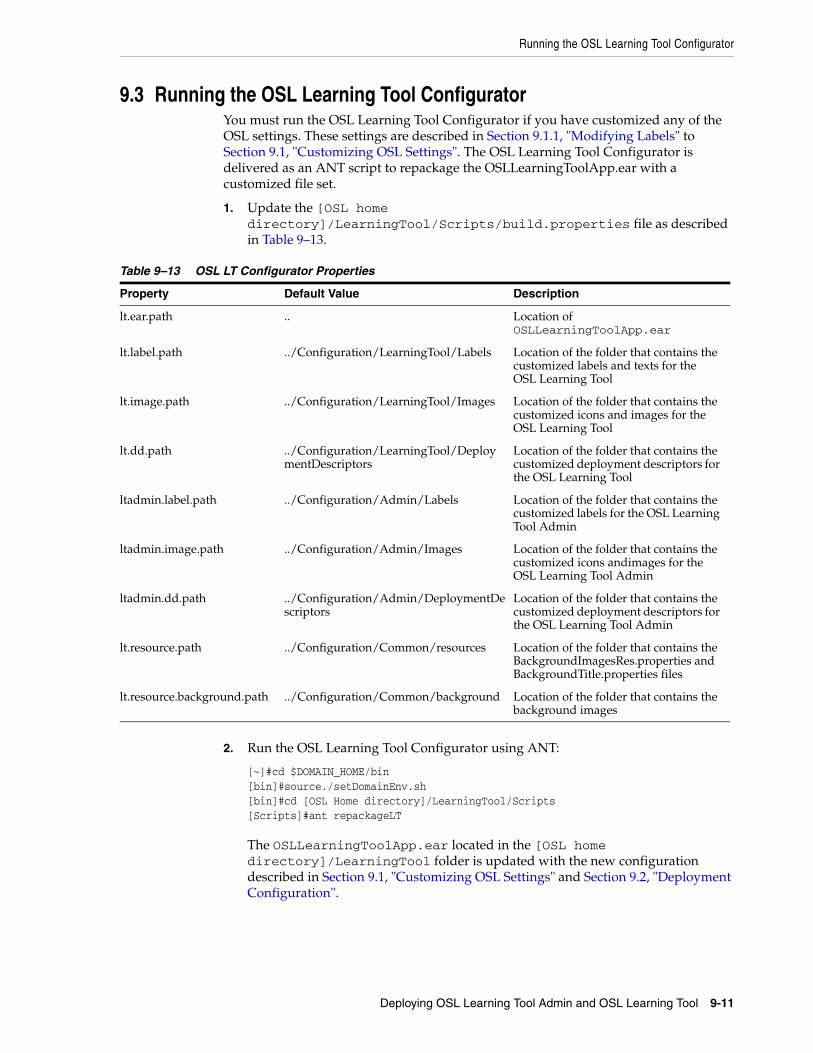
Running the OSL Learning Tool Configurator
Deploying OSL Learning Tool Admin and OSL Learning Tool 9-11
9.3 Running the OSL Learning Tool ConfiguratorYou must run the OSL Learning Tool Configurator if you have customized any of the OSL settings. These settings are described in Section 9.1.1, "Modifying Labels" to Section 9.1, "Customizing OSL Settings". The OSL Learning Tool Configurator is delivered as an ANT script to repackage the OSLLearningToolApp.ear with a customized file set.
1. Update the [OSL home directory]/LearningTool/Scripts/build.properties file as described in Table 9–13.
2. Run the OSL Learning Tool Configurator using ANT:
[~]#cd $DOMAIN_HOME/bin[bin]#source./setDomainEnv.sh[bin]#cd [OSL Home directory]/LearningTool/Scripts[Scripts]#ant repackageLT
The OSLLearningToolApp.ear located in the [OSL home directory]/LearningTool folder is updated with the new configuration described in Section 9.1, "Customizing OSL Settings" and Section 9.2, "Deployment Configuration".
Table 9–13 OSL LT Configurator Properties
Property Default Value Description
lt.ear.path .. Location of OSLLearningToolApp.ear
lt.label.path ../Configuration/LearningTool/Labels Location of the folder that contains the customized labels and texts for the OSL Learning Tool
lt.image.path ../Configuration/LearningTool/Images Location of the folder that contains the customized icons and images for the OSL Learning Tool
lt.dd.path ../Configuration/LearningTool/DeploymentDescriptors
Location of the folder that contains the customized deployment descriptors for the OSL Learning Tool
ltadmin.label.path ../Configuration/Admin/Labels Location of the folder that contains the customized labels for the OSL Learning Tool Admin
ltadmin.image.path ../Configuration/Admin/Images Location of the folder that contains the customized icons andimages for the OSL Learning Tool Admin
ltadmin.dd.path ../Configuration/Admin/DeploymentDescriptors
Location of the folder that contains the customized deployment descriptors for the OSL Learning Tool Admin
lt.resource.path ../Configuration/Common/resources Location of the folder that contains the BackgroundImagesRes.properties and BackgroundTitle.properties files
lt.resource.background.path ../Configuration/Common/background Location of the folder that contains the background images
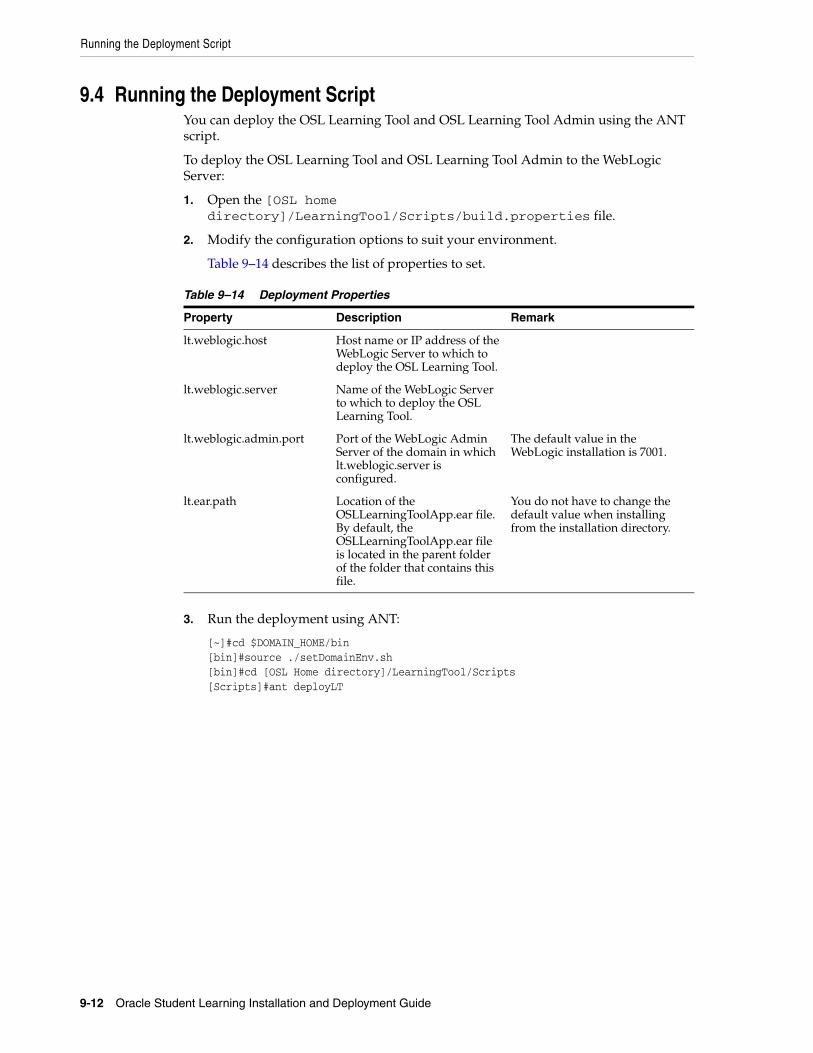
Running the Deployment Script
9-12 Oracle Student Learning Installation and Deployment Guide
9.4 Running the Deployment ScriptYou can deploy the OSL Learning Tool and OSL Learning Tool Admin using the ANT script.
To deploy the OSL Learning Tool and OSL Learning Tool Admin to the WebLogic Server:
1. Open the [OSL home directory]/LearningTool/Scripts/build.properties file.
2. Modify the configuration options to suit your environment.
Table 9–14 describes the list of properties to set.
3. Run the deployment using ANT:
[~]#cd $DOMAIN_HOME/bin[bin]#source ./setDomainEnv.sh[bin]#cd [OSL Home directory]/LearningTool/Scripts[Scripts]#ant deployLT
Table 9–14 Deployment Properties
Property Description Remark
lt.weblogic.host Host name or IP address of the WebLogic Server to which to deploy the OSL Learning Tool.
lt.weblogic.server Name of the WebLogic Server to which to deploy the OSL Learning Tool.
lt.weblogic.admin.port Port of the WebLogic Admin Server of the domain in which lt.weblogic.server is configured.
The default value in the WebLogic installation is 7001.
lt.ear.path Location of the OSLLearningToolApp.ear file. By default, the OSLLearningToolApp.ear file is located in the parent folder of the folder that contains this file.
You do not have to change the default value when installing from the installation directory.
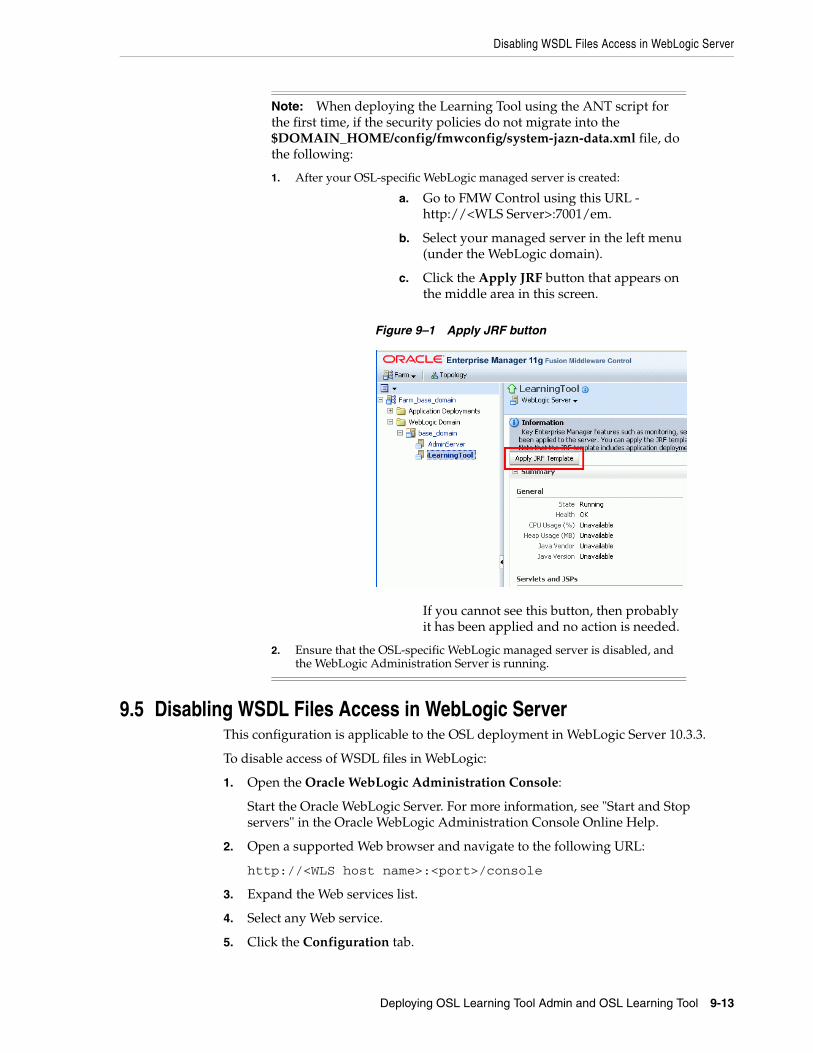
Disabling WSDL Files Access in WebLogic Server
Deploying OSL Learning Tool Admin and OSL Learning Tool 9-13
9.5 Disabling WSDL Files Access in WebLogic ServerThis configuration is applicable to the OSL deployment in WebLogic Server 10.3.3.
To disable access of WSDL files in WebLogic:
1. Open the Oracle WebLogic Administration Console:
Start the Oracle WebLogic Server. For more information, see "Start and Stop servers" in the Oracle WebLogic Administration Console Online Help.
2. Open a supported Web browser and navigate to the following URL:
http://<WLS host name>:<port>/console
3. Expand the Web services list.
4. Select any Web service.
5. Click the Configuration tab.
Note: When deploying the Learning Tool using the ANT script for the first time, if the security policies do not migrate into the $DOMAIN_HOME/config/fmwconfig/system-jazn-data.xml file, do the following:
1. After your OSL-specific WebLogic managed server is created:
a. Go to FMW Control using this URL - http://<WLS Server>:7001/em.
b. Select your managed server in the left menu (under the WebLogic domain).
c. Click the Apply JRF button that appears on the middle area in this screen.
Figure 9–1 Apply JRF button
If you cannot see this button, then probably it has been applied and no action is needed.
2. Ensure that the OSL-specific WebLogic managed server is disabled, and the WebLogic Administration Server is running.
Disabling WSDL Files Access in WebLogic Server
9-14 Oracle Student Learning Installation and Deployment Guide
6. Clear the View Dynamic WSDL Enabled check box.
7. Click Save.
The deployment plan is created.
8. Complete steps 1-7 for all Web services.
9. Access the WSDL URL.
The WSDL does not display.
10
Configuring OSSO Solution 10-1
10Configuring OSSO Solution
This chapter provides step-by-step instructions for configuring OSSO as the single sign-on solution for OSL. You can find complete explanation of the OSSO Solution in "Chapter 10 Configuring Single Sign-On in Oracle Fusion Middleware" in the Oracle® Fusion Middleware Security Guide 11g Release 1 (11.1.1) at
http://download.oracle.com/docs/cd/E12839_01/core.1111/e10043/toc.htm
10.1 Installing Oracle Single Sign-On and Oracle Delegated Administration Services
There are no 11g Release 1 (11.1.1) versions of Oracle Single Sign-On and Oracle Delegated Administration Services. However, both Oracle Single Sign-On and Oracle Delegated Administration Services Release 10g (10.1.4.3.0) are certified for use with Oracle Internet Directory 11g Release 1 (11.1.1).
You can find related information in "Chapter 10 Installing Oracle Single Sign-On and Oracle Delegated Administration Services Against Oracle Internet Directory" in the Oracle® Fusion Middleware Installation Guide for Oracle Identity Management 11g Release 1 (11.1.1) at
http://download.oracle.com/docs/cd/E12839_01/install.htm
10.2 Configuring SSO for Learning ToolTo configure SSO for Learning Tool, perform the steps in the subsequent sections.
10.2.1 Installing HTTP ServerInstall web server to be used as a front end to the Oracle WebLogic Server. In this guide, we use Oracle HTTP Server (OHS) 11g, which is available after the installation of Web Tier Utilities 11.1.1.2.0.
10.2.2 Configuring mod_wl_ohsIf you select the option “Associate Selected Components with WebLogic Domain” during the installation of Web Tier Utilities, you are able to manage the web server using Enterprise Manager (EM).
This section demonstrates the configuration of mod_wl_ohs using EM. However, it is also possible to do the same configuration by manually editing the configuration files.
To configure mod_wl_ohs from EM, perform the following:
1. Select the OHS instance on the left panel.
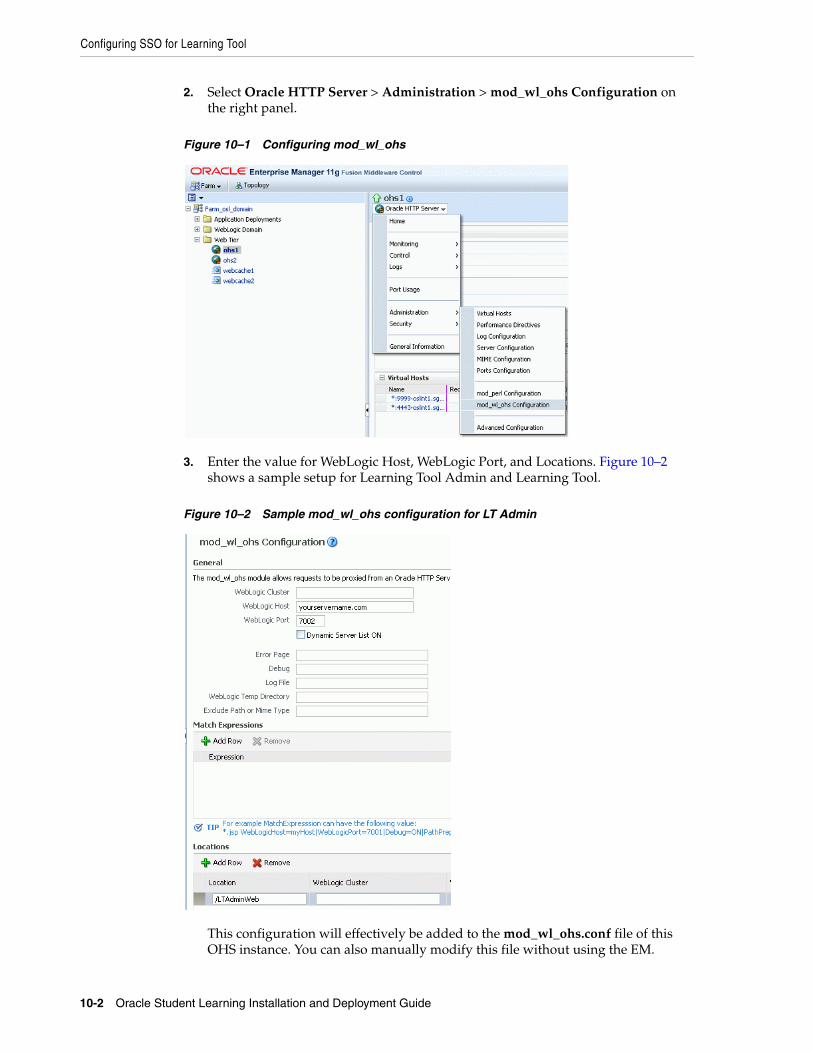
Configuring SSO for Learning Tool
10-2 Oracle Student Learning Installation and Deployment Guide
2. Select Oracle HTTP Server > Administration > mod_wl_ohs Configuration on the right panel.
Figure 10–1 Configuring mod_wl_ohs
3. Enter the value for WebLogic Host, WebLogic Port, and Locations. Figure 10–2 shows a sample setup for Learning Tool Admin and Learning Tool.
Figure 10–2 Sample mod_wl_ohs configuration for LT Admin
This configuration will effectively be added to the mod_wl_ohs.conf file of this OHS instance. You can also manually modify this file without using the EM.
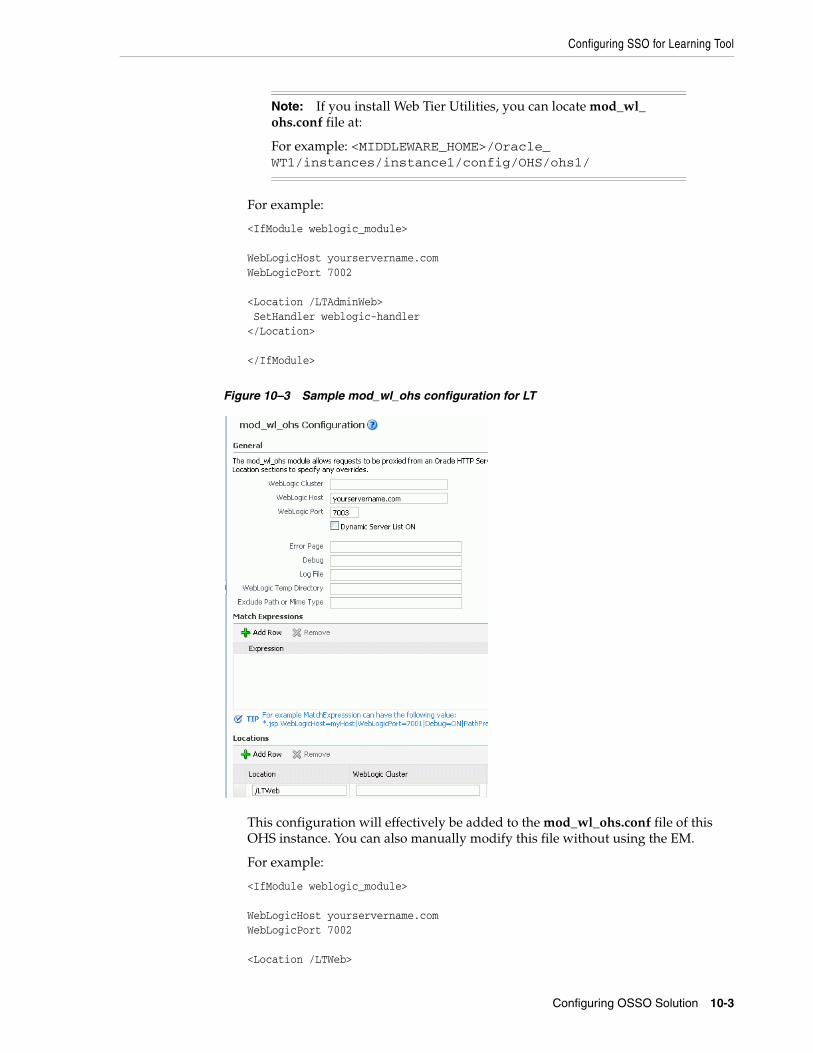
Configuring SSO for Learning Tool
Configuring OSSO Solution 10-3
For example:
<IfModule weblogic_module>
WebLogicHost yourservername.comWebLogicPort 7002
<Location /LTAdminWeb> SetHandler weblogic-handler </Location>
</IfModule>
Figure 10–3 Sample mod_wl_ohs configuration for LT
This configuration will effectively be added to the mod_wl_ohs.conf file of this OHS instance. You can also manually modify this file without using the EM.
For example:
<IfModule weblogic_module>
WebLogicHost yourservername.com WebLogicPort 7002
<Location /LTWeb>
Note: If you install Web Tier Utilities, you can locate mod_wl_ohs.conf file at:
For example: <MIDDLEWARE_HOME>/Oracle_WT1/instances/instance1/config/OHS/ohs1/
Configuring SSO for Learning Tool
10-4 Oracle Student Learning Installation and Deployment Guide
SetHandler weblogic-handler </Location>
</IfModule>
10.2.3 Registering OHS mod_osso with OSSO ServerTo register OHS mod_osso with OSSO server, perform the following:
1. Execute the ssoreg.sh tool, which can be found in <OSSO_HOME>/sso/bin, where <OSSO_HOME> is the directory to which Oracle Single Sign-On is installed.
$cd <OSSO_HOME>/sso/bin
$export ORACLE_HOME=<OSSO_HOME>
$./ssoreg.sh -oracle_home_path <OSSO_HOME> -site_name LearningToolAdmin -config_mod_osso TRUE -mod_osso_url http://<LT_WEB_HOST>:<LT_WEB_PORT> -update_mode CREATE -remote_midtier -config_file <OSSO_HOME>/temp/osso_admin.conf
$./ssoreg.sh -oracle_home_path <OSSO_HOME> -site_name LearningTool -config_mod_osso TRUE -mod_osso_url http://<LT_WEB_HOST>:<LT_WEB_PORT> -update_mode CREATE -remote_midtier -config_file <OSSO_HOME>/temp/osso_lt.conf
where:
<LT_WEB_HOST> and <LT_WEB_PORT> are the host name and port of the web server configured as a front end to provide access to the Learning Tool Admin application.
<LT_WEB_HOST> and <LT_WEB_PORT> are the host name and port of the web server configured as a front end to provide access to the Learning Tool application.
2. Copy this file to the web server instance location.
For example:
<MIDDLEWARE_HOME>/Oracle_WT1/instances/instance1/config/OHS/ohs1/osso/osso_admin.conf
<MIDDLEWARE_HOME>/Oracle_WT1/instances/instance2/config/OHS/ohs2/osso/osso_lt.conf
10.2.4 Configuring mod_osso to Protect Web ResourcesTo configure mod_osso to protect web resources, perform the following:
1. Enable mod_osso from EM.
Select the OHS instance on the left panel and select Oracle HTTP Server > Administration > Server Configuration on the right panel.
Note: The directory where you want to store the result config file must be created beforehand.
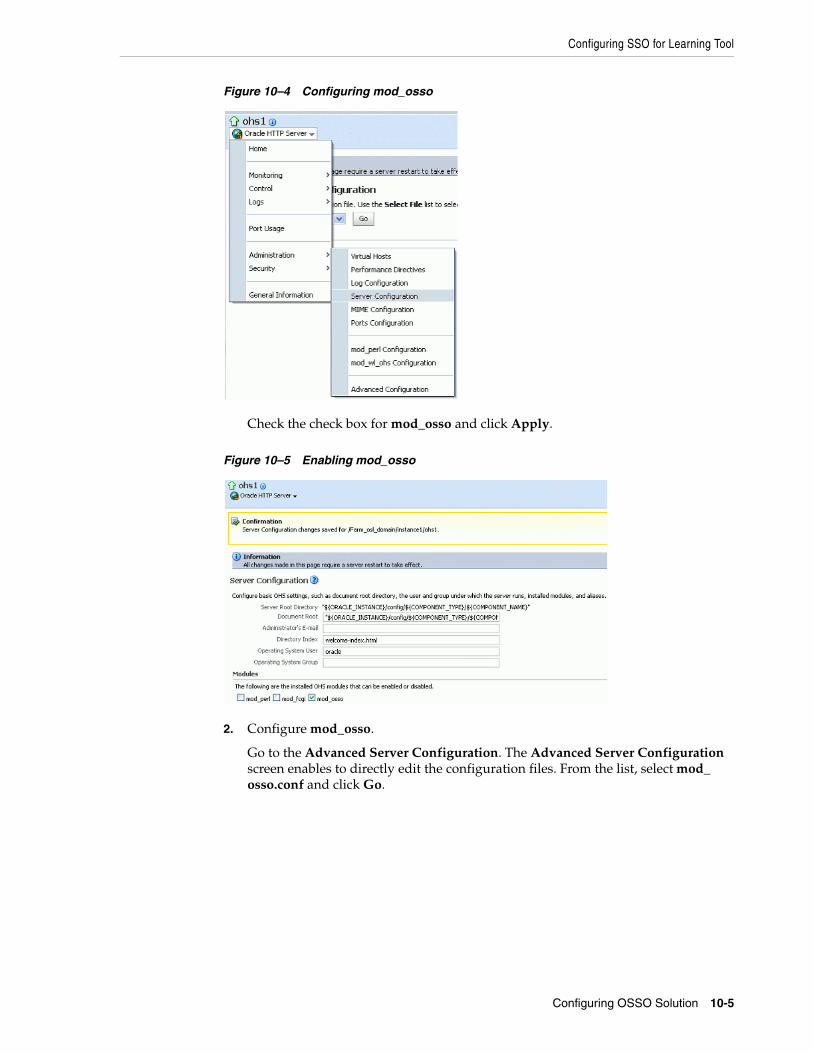
Configuring SSO for Learning Tool
Configuring OSSO Solution 10-5
Figure 10–4 Configuring mod_osso
Check the check box for mod_osso and click Apply.
Figure 10–5 Enabling mod_osso
2. Configure mod_osso.
Go to the Advanced Server Configuration. The Advanced Server Configuration screen enables to directly edit the configuration files. From the list, select mod_osso.conf and click Go.
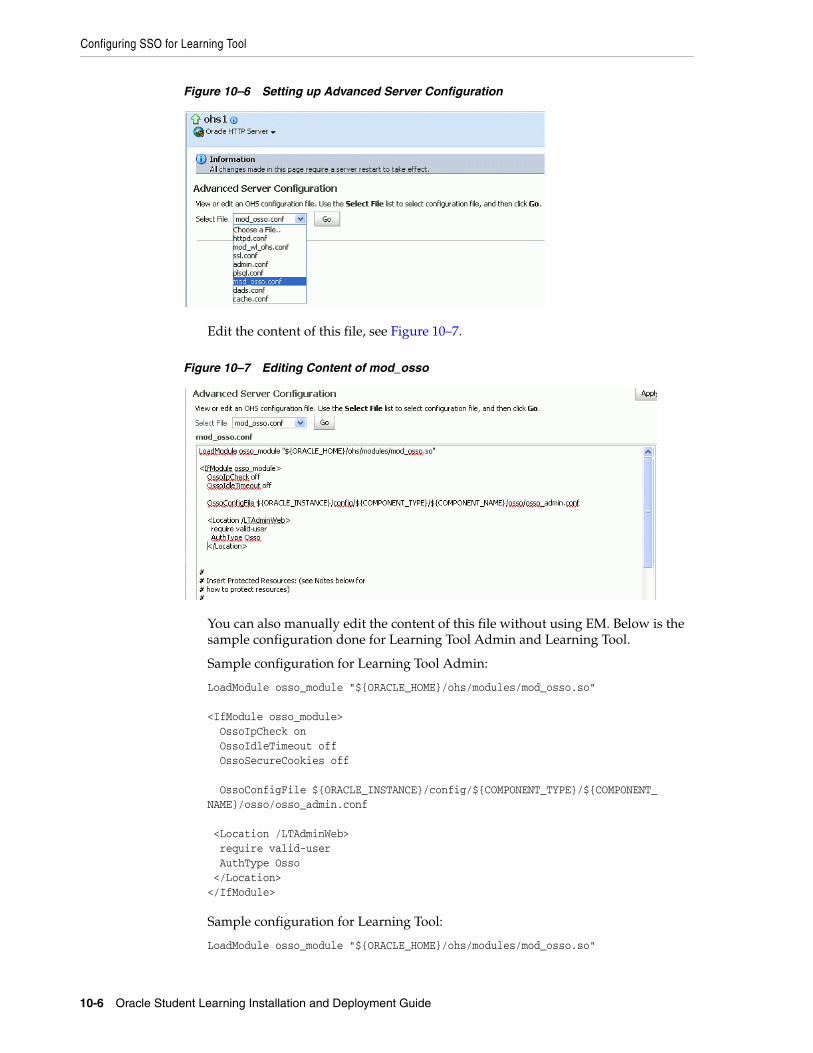
Configuring SSO for Learning Tool
10-6 Oracle Student Learning Installation and Deployment Guide
Figure 10–6 Setting up Advanced Server Configuration
Edit the content of this file, see Figure 10–7.
Figure 10–7 Editing Content of mod_osso
You can also manually edit the content of this file without using EM. Below is the sample configuration done for Learning Tool Admin and Learning Tool.
Sample configuration for Learning Tool Admin:
LoadModule osso_module "${ORACLE_HOME}/ohs/modules/mod_osso.so"
<IfModule osso_module> OssoIpCheck on OssoIdleTimeout off OssoSecureCookies off OssoConfigFile ${ORACLE_INSTANCE}/config/${COMPONENT_TYPE}/${COMPONENT_NAME}/osso/osso_admin.conf
<Location /LTAdminWeb> require valid-user AuthType Osso </Location></IfModule>
Sample configuration for Learning Tool:
LoadModule osso_module "${ORACLE_HOME}/ohs/modules/mod_osso.so"
Configuring SSO for Learning Tool
Configuring OSSO Solution 10-7
<IfModule osso_module> OssoIpCheck on OssoIdleTimeout off OssoSecureCookies off
OssoConfigFile ${ORACLE_INSTANCE}/config/${COMPONENT_TYPE}/ ${COMPONENT_NAME}/osso/osso_lt.conf OssoHTTPOnly Off
<Location /LTWeb> require valid-user AuthType Osso </Location></IfModule>
10.2.5 Setting Up Providers for OSSO in a WebLogic DomainOracle recommends the following Authentication providers:
■ OSSO Identity Asserter
■ OID Authenticator
■ DefaultAuthenticator
To add providers to your WebLogic domain for OSSO Identity Assertion, perform the following:
1. Log in to the WebLogic Administration Console.
2. OSSO Identity Asserter:
Go to Security Realms > Default Realm Name (Example: myrealm) and click Providers.
Select New under the Authentication Providers table.
Enter a name for the new provider, select its type, and click OK.
■ Name: OSSO Identity Asserter
■ Type: OSSOIdentityAsserter
Click the name of the newly added provider.
On the Common tab, set the appropriate values for common parameters and set the Control Flag to SUFFICIENT and then save the settings.
Note: The configuration directive OssoHTTPOnly must be turned off in the web server configured as a front end to provide access to the Learning Tool application. This is to allow the audio applet in the Learning Tool application to be able to read the OSSO cookies.
Note: For OSSOIdentityAsserter to appear in the list, you must copy ossoiap.jar to <DOMAIN_HOME>/lib.
The ossoiap.jar is available in <MIDDLEWARE_HOME>/oracle_common/modules/oracle.ossoiap_11.1.1 in the computer where an Oracle Fusion Middleware products such as Oracle Identity Management, Oracle SOA Suite, or Oracle WebCenter is installed.
Configuring SSO for OBIEE
10-8 Oracle Student Learning Installation and Deployment Guide
3. Default Authentication Provider:
Go to Security Realms > Default Realm Name (Example: myrealm) and click Providers.
Click DefaultAuthentication Provider.
Set the Control Flag to OPTIONAL and click Save.
4. OID Authenticator:
The instructions to create this provider are provided in Section 8.5, "Configuring OID as Security Provider".
If the OID Authenticator is configured successfully, you can change the Control Flag to SUFFICIENT.
5. Reorder Providers:
■ OSSO Identity Asserter (SUFFICIENT)
■ OID Authenticator (SUFFICIENT)
■ DefaultAuthenticator (OPTIONAL)
6. Save all configuration settings and restart the Oracle WebLogic Server for the changes to take effect.
10.2.6 Configuring web.xml for the OSSO Identity AsserterUpdate the <login-config> in web.xml for the application to support SSO as follows:
1. Modify the web.xml, which is located at
[OSL Home directory]/LearningTool/Configuration/LearningTool/DeploymentDescriptors/ for Learning Tool and at [OSL Home directory]/LearningTool/Configuration/Admin/DeploymentDescriptors/ for Learning Tool Admin to update the login-config as follows:
<login-config> <auth-method>CLIENT-CERT</auth-method> <realm-name>myRealm</realm-name></login-config>
<!--login-config><auth-method>FORM</auth-method><form-login-config><form-login-page>/faces/loginView.jspx</form-login-page><form-error-page>/faces/loginErrorView.jspx</form-error-page></form-login-config></login-config-->
2. Run the Configurator to update the EAR files as explained in Section 9.3, "Running the OSL Learning Tool Configurator".
10.3 Configuring SSO for OBIEETo configure SSO for OBIEE, perform the following steps in the subsequent sections:
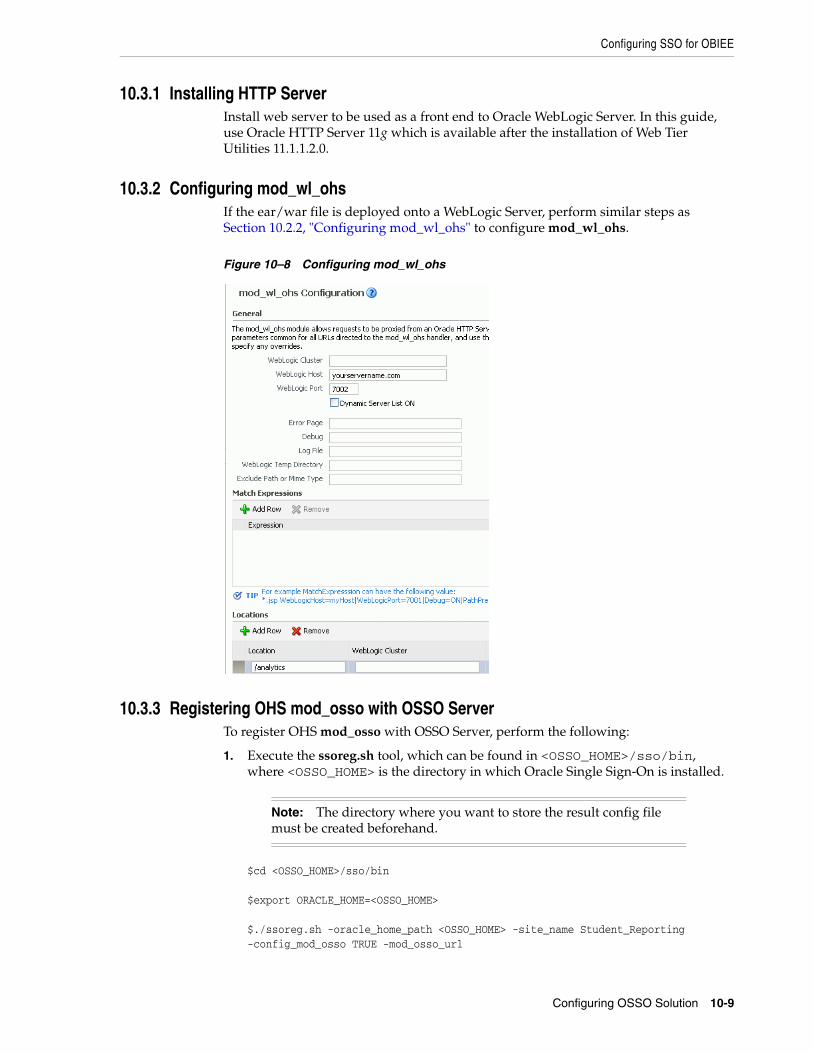
Configuring SSO for OBIEE
Configuring OSSO Solution 10-9
10.3.1 Installing HTTP ServerInstall web server to be used as a front end to Oracle WebLogic Server. In this guide, use Oracle HTTP Server 11g which is available after the installation of Web Tier Utilities 11.1.1.2.0.
10.3.2 Configuring mod_wl_ohsIf the ear/war file is deployed onto a WebLogic Server, perform similar steps as Section 10.2.2, "Configuring mod_wl_ohs" to configure mod_wl_ohs.
Figure 10–8 Configuring mod_wl_ohs
10.3.3 Registering OHS mod_osso with OSSO ServerTo register OHS mod_osso with OSSO Server, perform the following:
1. Execute the ssoreg.sh tool, which can be found in <OSSO_HOME>/sso/bin, where <OSSO_HOME> is the directory in which Oracle Single Sign-On is installed.
$cd <OSSO_HOME>/sso/bin
$export ORACLE_HOME=<OSSO_HOME>
$./ssoreg.sh -oracle_home_path <OSSO_HOME> -site_name Student_Reporting -config_mod_osso TRUE -mod_osso_url
Note: The directory where you want to store the result config file must be created beforehand.
Configuring SSO for OBIEE
10-10 Oracle Student Learning Installation and Deployment Guide
http://<OBIEE_WEB_HOST>:<OBIEE_WEB_PORT> -update_mode CREATE -remote_midtier -config_file <OSSO_HOME>/temp/osso_bi.conf
where:
<OBIEE_WEB_HOST> and <OBIEE_WEB_PORT> are the host name and port of the web server configured as a front end to provide access to the OBIEE application.
2. Copy this file to the web server instance location.
For Example:
<MIDDLEWARE_HOME>/Oracle_WT1/instances/instance3/config/OHS/ohs3/osso/osso_bi.conf
10.3.4 Configuring mod_osso to Protect Web ResourcesPerform similar steps as explained in Section 10.2.4, "Configuring mod_osso to Protect Web Resources" to configure the mod_osso as follows:
LoadModule osso_module "${ORACLE_HOME}/ohs/modules/mod_osso.so"
<IfModule osso_module> OssoIpCheck on OssoIdleTimeout off OssoSecureCookies off
OssoConfigFile ${ORACLE_INSTANCE}/config/${COMPONENT_TYPE}/ ${COMPONENT_NAME}/osso/osso_bi.conf
<Location /analytics> Header unset Pragma OssoSendCacheHeaders off require valid-user AuthType Osso </Location>
</IfModule>
10.3.5 Creating Oracle BI Server Impersonator UserFollow this procedure to create the impersonator user in the BI Server repository.
1. Open the BI Server repository file (.rpd) using BI Administration Tool.
2. Select Manage > Security to display the Security Manager.
3. Select Action > New > User to open the User dialog box.
4. Enter a name and password for this user.
For example:
Name = Impersonator
Password = secret
5. In the Group Membership portion of the dialog box, check the Administrators group to grant the user created as member to this group.
6. Click OK to create the user.
Configuring SSO for OBIEE
Configuring OSSO Solution 10-11
10.3.6 Adding the Impersonator Credentials to Oracle BI Presentation Services Credential Store
Perform this step to add the impersonator credentials to Oracle BI Presentation Services credential store.
1. Navigate to the OracleBI_HOME/web/bin directory.
$export LD_LIBRARY_PATH=$LD_LIBRARY_PATH:/OracleBI_HOME/web/bin$./cryptotools credstore -add -infile <OracleBIData>/web/config/credentialstore.xml>Credential Alias: impersonation>Username: Impersonator>Password: secret>Do you want to encrypt the password? y/n (y):>Passphrase for encryption: another_secret>Do you want to write the passphrase to the xml? y/n (n):
2. The CryptoTools utility updates the credentialstore.xml file. This file is located in the OracleBIData/web/config.
10.3.7 Configuring Oracle BI Presentation Services to Identify the Credential Store and Decryption Passphrase
Edit the OracleBIData/web/config/instanceconfig.xml file.
<WebConfig> <ServerInstance> <!-- other settings ... --> <CredentialStore> <CredentialStorage type="file” path="/<OracleBIData>/web/config/credentialstore.xml" passphrase="another_secret"/> </CredentialStore> <!-- other settings ... --> </ServerInstance></WebConfig>
10.3.8 Configuring BI Presentation Services to Operate in the SSO EnvironmentEdit the OracleBIData/web/config/instanceconfig.xml file.
<ServerInstance><!-- other settings ... --><Auth> <SSO enabled="true"> <ParamList> <!--IMPERSONATE param is used to get the authenticated user's username and is required --> <Param name="IMPERSONATE" source="httpHeader" nameInSource="Proxy-Remote-User"/> </ParamList> <LogoffUrl>http://<SSO_HOST>:<SSO_PORT>/pls/orasso/orasso.wwsso_app_admin.ls_logout?p_done_url=http%3A%2F%2F<OBIEE_WEB_HOST>:<OBIEE_WEB_PORT>%2Fanalytics%2F </LogoffUrl> <LogonUrl> http:// <OBIEE_WEB_HOST>:<OBIEE_WEB_PORT>/analytics </LogonUrl> </SSO>
Configuring SSO for UCM 10g
10-12 Oracle Student Learning Installation and Deployment Guide
</Auth><!-- other settings ... --></ServerInstance>
10.4 Configuring SSO for UCM 10gTo configure SSO for UCM 10g, perform the steps in the subsequent sections:
10.4.1 Installing HTTP ServerInstall web server to be used as a front end to UCM. In this guide, use Oracle HTTP Server 11g which is available after the installation of Web Tier Utilities 11.1.1.2.0.
10.4.2 Configuring OHS as Web Server for UCMInside the httpd.conf of the OHS instance, add the following to configure this OHS instance as the web server for UCM. Make sure that you use the correct library under linux64 or linux folder:
LoadModule IdcApacheAuth <UCM_INSTALLATION_FOLDER>/server/shared/os/linux64/lib/IdcApache22Auth.soIdcUserDB idc "<UCM_INSTALLATION_FOLDER>/server/data/users/userdb.txt"
Alias /idc "<UCM_INSTALLATION_FOLDER>/server/weblayout"<Location /idc>Order allow,denyAllow from allDirectoryIndex portal.htmIdcSecurity idc</Location>
10.4.3 Registering OHS mod_osso with OSSO ServerTo register OHS mod_osso with OSSO Server, perform the following:
1. Execute the ssoreg.sh tool, which can be found in <OSSO_HOME>/sso/bin, where <OSSO_HOME> is the directory in which Oracle Single Sign-On is installed.
$ cd <OSSO_HOME>/sso/bin
$export ORACLE_HOME=<OSSO_HOME>
Note: Ensure that the UCM Server is configured with the correct host name and port number of the Web Server to be used as its front end.
Check the <UCM_INSTALLATION_FOLDER>/server/config/config.cfg config file and make sure the value of HttpServerAddress is correct:
HttpServerAddress=<UCM_OHS_HOST>:<UCM_OHS_PORT>
Note: Please note that the directory where you want to store the result config file must be created beforehand.
Configuring SSO for Oracle UCM 11g
Configuring OSSO Solution 10-13
$./ssoreg.sh -oracle_home_path <OSSO_HOME> -site_name Stellent_UCM -config_mod_osso TRUE -mod_osso_url http://<UCM_OHS_HOST>:<UCM_OHS_PORT> -update_mode CREATE -remote_midtier -config_file <OSSO_HOME>/temp/osso_ucm.conf
2. Copy this file to the web server instance location.
For example:
<MIDDLEWARE_HOME>/Oracle_WT1/instances/instance1/config/OHS/ohs1/osso/osso_ucm.conf
10.4.4 Configuring mod_osso to Protect Web ResourcesPerform similar steps as explained in Section 10.2.4, "Configuring mod_osso to Protect Web Resources" to configure the mod_osso as follows:
LoadModule osso_module "${ORACLE_HOME}/ohs/modules/mod_osso.so"
<IfModule osso_module> OssoIpCheck on OssoIdleTimeout off OssoSecureCookies off OssoConfigFile ${ORACLE_INSTANCE}/config/${COMPONENT_TYPE}/${COMPONENT_NAME}/osso/osso_ucm.conf
<Location /idc> require valid-user AuthType Osso </Location> </IfModule>
10.5 Configuring SSO for Oracle UCM 11gOracle UCM 11g Release 1 (11.1.1) is deployed on an Oracle WebLogic Server. Therefore, the steps to configure OAM as the SSO solution for UCM is similar to the steps described in Section 10.2, "Configuring SSO for Learning Tool".
For more detailed explanation on configuring SSO for UCM 11g Release, you can read Chapter 4.2.3 "Configuring Oracle UCM to Use Single Sign-On" in the Oracle® Fusion Middleware System Administrator's Guide for Content Server 11g Release 1 (11.1.1) at
http://download.oracle.com/docs/cd/E14571_01/doc.1111/e10792/c03_security002.htm#insertedID3
10.5.1 Installing HTTP ServerInstall web server to be used as a front end to UCM 11g. In this guide, use Oracle HTTP Server 11g, which is available after the installation of Web Tier Utilities 11.1.1.2.0.
10.5.2 Configuring mod_wl_ohsPerform similar steps as Section 10.2.2, "Configuring mod_wl_ohs" to configure mod_wl_ohs.
LoadModule weblogic_module "${ORACLE_HOME}/ohs/modules/mod_wl_ohs.so"
<IfModule weblogic_module>
Updating the OSL Configuration
10-14 Oracle Student Learning Installation and Deployment Guide
<Location /cs> SetHandler weblogic-handler WebLogicHost <ucm-hostname> WebLogicPort <ucm-server-port>
</Location></IfModule>
Check the <UCM_INSTALLATION_FOLDER>/server/config/config.cfg config file and make sure the value of HttpServerAddress is correct:
HttpServerAddress=<UCM_OHS_HOST>:<UCM_OHS_PORT>
10.5.3 Registering OHS mod_osso with OSSO ServerTo register OHS mod_osso with OSSO Server, perform similar steps in Section 10.4.3, "Registering OHS mod_osso with OSSO Server".
10.5.4 Configuring mod_osso to protect Web ResourcePerform similar steps as Section 10.2.4, "Configuring mod_osso to Protect Web Resources" to configure mod_wl_ohs.
LoadModule osso_module "${ORACLE_HOME}/ohs/modules/mod_osso.so"
<IfModule osso_module>
OssoIpCheck onOssoIdleTimeout offOssoSecureCookies offOssoConfigFile ${ORACLE_INSTANCE}/config/${COMPONENT_TYPE}/${COMPONENT_NAME}/osso/osso_ucm.conf
<Location /cs>require valid-userAuthType Osso</Location>
</IfModule>
10.5.5 Setting Up Providers for OSSO in a WebLogic DomainPerform similar steps as Section 10.2.5, "Setting Up Providers for OSSO in a WebLogic Domain" to set up providers for OSSO in a WebLogic Domain that UCM is deployed to.
10.6 Updating the OSL ConfigurationThe following configuration is required for OSL to operate in an SSO environment:
1. Update the OSL_PROFILE_OPTION_VALUES:
Note: Ensure that the UCM Server is configured with the correct host name and port number of the Web Server to be used as its front end.

Updating the OSL Configuration
Configuring OSSO Solution 10-15
Set the values for OSL_SHOW_LOGOUT_LINK in OSL_PROFILE_OPTION_VALUES table as follows:
2. Update the logout URL for Learning Tool and Learning Tool Admin.
■ Set the OSL_ADMIN_LOGOUT_URL as follows:
http://<SSO_HOST>:<SSO_PORT>/pls/orasso/orasso.wwsso_app_admin.ls_logout?p_done_url=http%3A%2F%2F<LT_WEB_HOST>:<LT_WEB_PORT>%2FLTAdminWeb%2F
where: <LT_WEB_HOST> and <LT_WEB_PORT> are the host name and port of the web server configured as a front end to provide access to the Learning Tool Admin application.
■ Set the OSL_LOGOUT_URL as follows:
http://<SSO_HOST_NAME>:<SSO_PORT>/pls/orasso/orasso.wwsso_app_admin.ls_logout?p_done_url=http%3A%2F%2F<LT_WEB_HOST>:<LT_WEB_PORT>%2FLTWeb%2F
where: <LT_WEB_HOST> and <LT_WEB_PORT> are the host name and port of the web server configured as a front end to provide access to the Learning Tool application.
For information about the OSL configuration file where you must make these changes, see Section 9.1.7, "Updating Logout URL for Learning Tool and Learning Tool Admin".
Table 10–1 Updating OSL_PROFILE_OPTION_VALUES
Value Description
OSL_SHOW_LOGOUT_LINK ■ Y (to display the logout link in Learning Tool and Learning Tool Admin) or
■ N (to hide the logout link in Learning Tool and Learning Tool Admin)
Updating the OSL Configuration
10-16 Oracle Student Learning Installation and Deployment Guide
11
Configuring Oracle Access Manager 10g 11-1
11Configuring Oracle Access Manager 10g
This chapter describes the steps on how to configure Oracle Access Manager 10g.
11.1 Configuring OAM 10gThis chapter provides step-by-step instructions on how to configure OAM as the Single Sign-On solution for OSL. However, you can find complete explanation of the OAM 10g Solution in "Chapter 10 Configuring Single Sign-On in Oracle Fusion Middleware" in the Oracle® Fusion Middleware Security Guide 11g Release 1 (11.1.1) at
http://download.oracle.com/docs/cd/E12839_01/core.1111/e10043/toc.htm
The subsequent sections describes the required components and the steps on how to configure OAM 10g.
11.2 Required ComponentsOSL is certified to work with the following software components:
■ Oracle Access Manager (OAM) 10g (10.1.4.3.0)
■ Oracle Identity Management (11.1.1.3.0)
■ Web Tier Utilities 11.1.1.2.0 (for installation of HTTP Server)
■ Oracle WebLogic Server 10.3.3
11.3 Installing OAM 10g ComponentsPerform the instructions on how to install OAM at
http://download.oracle.com/docs/cd/E15217_01/doc.1014/e12493/toc.htm
11.4 Configuring SSO for Learning ToolTo configure SSO for Learning Tool, perform the steps in the subsequent sections.
11.4.1 Installing HTTP ServerInstall a web server to be used as the front end to the Oracle WebLogic Server. In this guide, we use Oracle HTTP Server (OHS) 11g, which is available after the installation of Web Tier Utilities 11.1.1.2.0

Configuring SSO for Learning Tool
11-2 Oracle Student Learning Installation and Deployment Guide
11.4.2 Configuring mod_wl_ohsIf you select the "Associate Selected Components with WebLogic Domain" option during the installation of Web Tier Utilities, you are able to manage the web server using Enterprise Manager (EM). It is also possible to do the same configuration by manually editing the configuration files.
This section demonstrates the configuration of mod_wl_ohs by manually editing the mod_wl_ohs.conf file.
Below is a sample mod_wl_ohs configuration for the web server to be used as a front end for both Learning Tool and Learning Tool Admin.
LoadModule weblogic_module "${ORACLE_HOME}/ohs/modules/mod_wl_ohs.so"
<IfModule weblogic_module>
<Location /LTWeb> SetHandler weblogic-handler WebLogicHost <lt-host-name> WebLogicPort <lt-port> WLCookieName OSLLTSESSIONID</Location>
<Location /LTAdminWeb> SetHandler weblogic-handler WebLogicHost <lt-host-name> WebLogicPort <lt-port> WLCookieName OSLLTASESSIONID</Location>
</IfModule>
11.4.3 Creating an AccessGate Object on OAM Access ServerBefore WebGate installation, an AccessGate object must be created in the Access Administration Console and associated with an Access Server. This task can be done manually in the OAM Access Administration Console or with the use of Oracle Access Manager Configuration tool.
Below are sample scripts to create the AccessGate object for Learning Tool and Learning Tool Admin’s HTTP Server:
java -jar oamcfgtool.jar mode=CREATE
Note: If you install Web Tier Utilities, you can locate mod_wl_ohs.conf file under the OHS instance folder.
For example:
<MIDDLEWARE_HOME>/Oracle_WT1/instances/instance1/config/OHS/ohs1/
Note: The Oracle Access Manager Configuration tool (OAM Configuration tool) is a command line utility that enables you to configure OAM. The OAM Configuration tool runs a series of scripts and sets up the required policies.
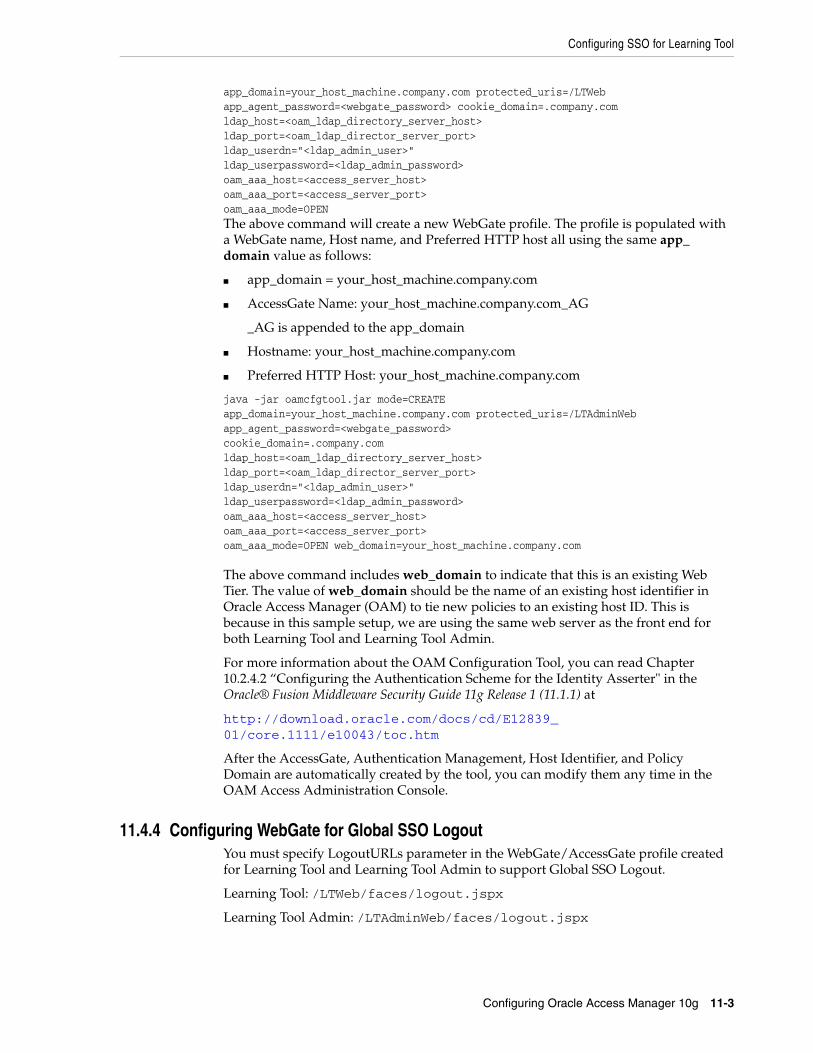
Configuring SSO for Learning Tool
Configuring Oracle Access Manager 10g 11-3
app_domain=your_host_machine.company.com protected_uris=/LTWeb app_agent_password=<webgate_password> cookie_domain=.company.com ldap_host=<oam_ldap_directory_server_host> ldap_port=<oam_ldap_director_server_port> ldap_userdn="<ldap_admin_user>" ldap_userpassword=<ldap_admin_password> oam_aaa_host=<access_server_host> oam_aaa_port=<access_server_port> oam_aaa_mode=OPENThe above command will create a new WebGate profile. The profile is populated with a WebGate name, Host name, and Preferred HTTP host all using the same app_domain value as follows:
■ app_domain = your_host_machine.company.com
■ AccessGate Name: your_host_machine.company.com_AG
_AG is appended to the app_domain
■ Hostname: your_host_machine.company.com
■ Preferred HTTP Host: your_host_machine.company.com
java -jar oamcfgtool.jar mode=CREATE app_domain=your_host_machine.company.com protected_uris=/LTAdminWeb app_agent_password=<webgate_password> cookie_domain=.company.com ldap_host=<oam_ldap_directory_server_host> ldap_port=<oam_ldap_director_server_port> ldap_userdn="<ldap_admin_user>" ldap_userpassword=<ldap_admin_password> oam_aaa_host=<access_server_host> oam_aaa_port=<access_server_port> oam_aaa_mode=OPEN web_domain=your_host_machine.company.com
The above command includes web_domain to indicate that this is an existing Web Tier. The value of web_domain should be the name of an existing host identifier in Oracle Access Manager (OAM) to tie new policies to an existing host ID. This is because in this sample setup, we are using the same web server as the front end for both Learning Tool and Learning Tool Admin.
For more information about the OAM Configuration Tool, you can read Chapter 10.2.4.2 “Configuring the Authentication Scheme for the Identity Asserter" in the Oracle® Fusion Middleware Security Guide 11g Release 1 (11.1.1) at
http://download.oracle.com/docs/cd/E12839_01/core.1111/e10043/toc.htm
After the AccessGate, Authentication Management, Host Identifier, and Policy Domain are automatically created by the tool, you can modify them any time in the OAM Access Administration Console.
11.4.4 Configuring WebGate for Global SSO LogoutYou must specify LogoutURLs parameter in the WebGate/AccessGate profile created for Learning Tool and Learning Tool Admin to support Global SSO Logout.
Learning Tool: /LTWeb/faces/logout.jspx
Learning Tool Admin: /LTAdminWeb/faces/logout.jspx
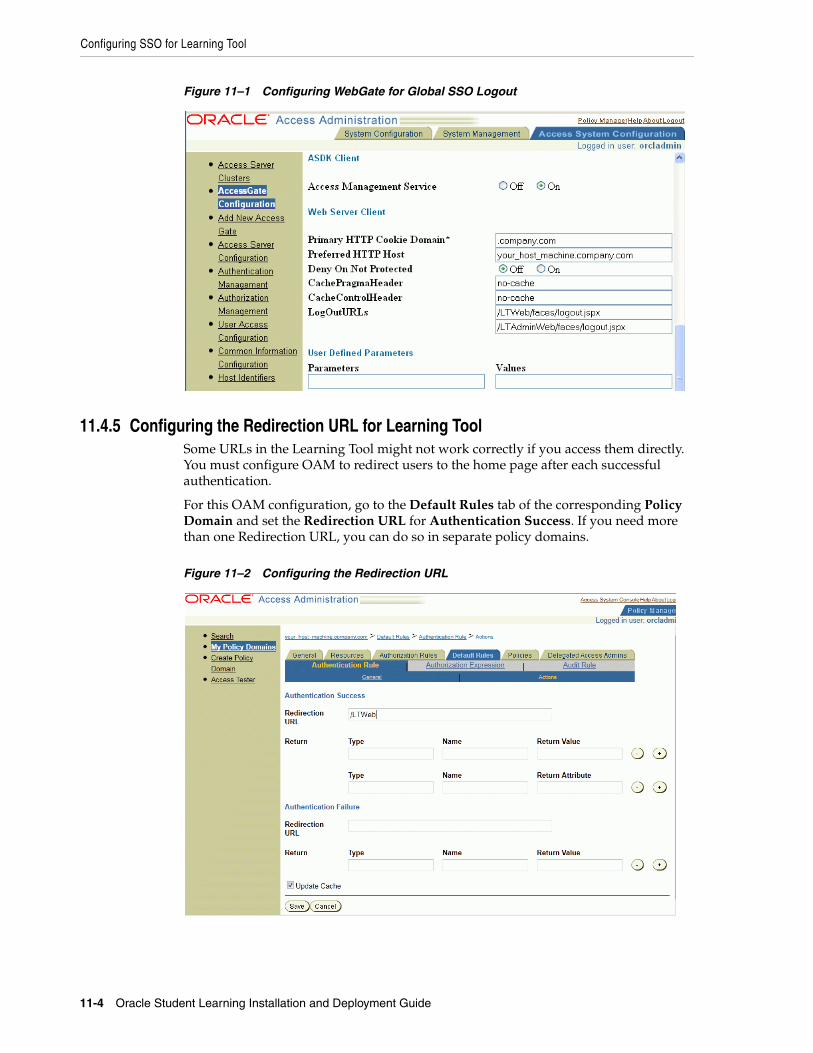
Configuring SSO for Learning Tool
11-4 Oracle Student Learning Installation and Deployment Guide
Figure 11–1 Configuring WebGate for Global SSO Logout
11.4.5 Configuring the Redirection URL for Learning ToolSome URLs in the Learning Tool might not work correctly if you access them directly. You must configure OAM to redirect users to the home page after each successful authentication.
For this OAM configuration, go to the Default Rules tab of the corresponding Policy Domain and set the Redirection URL for Authentication Success. If you need more than one Redirection URL, you can do so in separate policy domains.
Figure 11–2 Configuring the Redirection URL
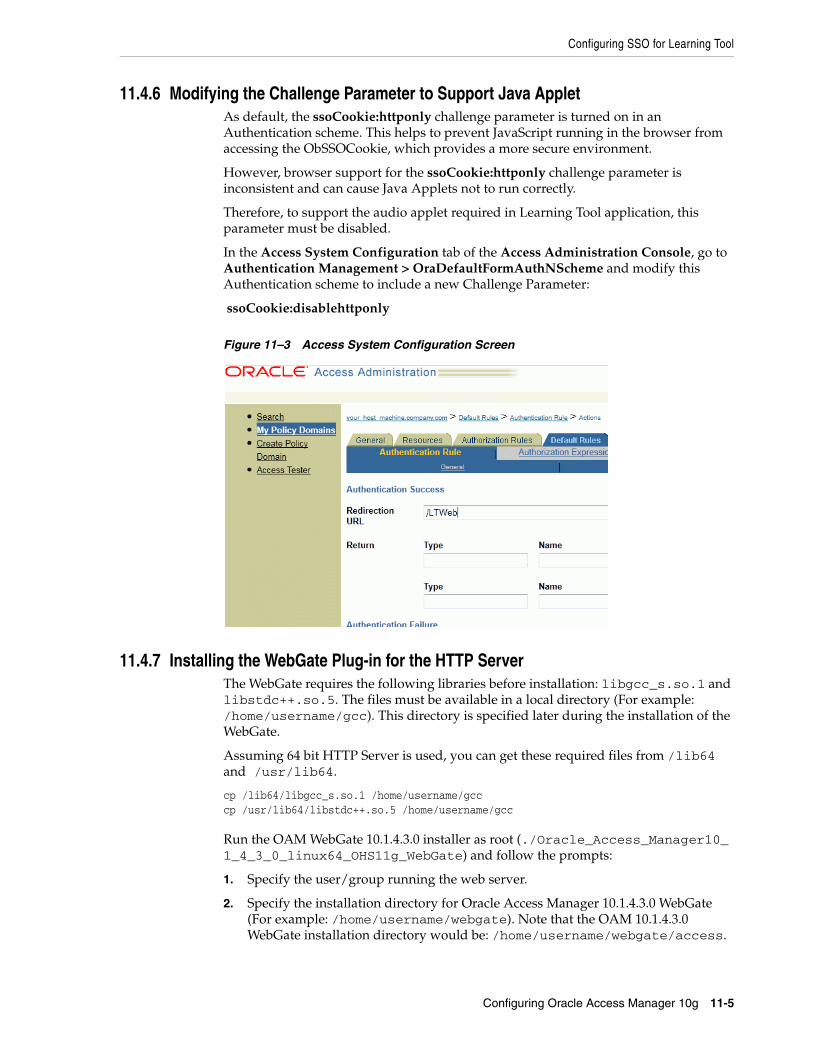
Configuring SSO for Learning Tool
Configuring Oracle Access Manager 10g 11-5
11.4.6 Modifying the Challenge Parameter to Support Java AppletAs default, the ssoCookie:httponly challenge parameter is turned on in an Authentication scheme. This helps to prevent JavaScript running in the browser from accessing the ObSSOCookie, which provides a more secure environment.
However, browser support for the ssoCookie:httponly challenge parameter is inconsistent and can cause Java Applets not to run correctly.
Therefore, to support the audio applet required in Learning Tool application, this parameter must be disabled.
In the Access System Configuration tab of the Access Administration Console, go to Authentication Management > OraDefaultFormAuthNScheme and modify this Authentication scheme to include a new Challenge Parameter:
ssoCookie:disablehttponly
Figure 11–3 Access System Configuration Screen
11.4.7 Installing the WebGate Plug-in for the HTTP ServerThe WebGate requires the following libraries before installation: libgcc_s.so.1 and libstdc++.so.5. The files must be available in a local directory (For example: /home/username/gcc). This directory is specified later during the installation of the WebGate.
Assuming 64 bit HTTP Server is used, you can get these required files from /lib64 and /usr/lib64.
cp /lib64/libgcc_s.so.1 /home/username/gcccp /usr/lib64/libstdc++.so.5 /home/username/gcc
Run the OAM WebGate 10.1.4.3.0 installer as root (./Oracle_Access_Manager10_1_4_3_0_linux64_OHS11g_WebGate) and follow the prompts:
1. Specify the user/group running the web server.
2. Specify the installation directory for Oracle Access Manager 10.1.4.3.0 WebGate (For example: /home/username/webgate). Note that the OAM 10.1.4.3.0 WebGate installation directory would be: /home/username/webgate/access.
Configuring SSO for Learning Tool
11-6 Oracle Student Learning Installation and Deployment Guide
3. For "Location of GCC runtime libraries", specify the directory where you installed libgcc_s.so.1 and libstdc++.so.5 as mentioned above.
4. For "Transport security mode'', select Open mode.
5. For "Webgate ID", enter the AccessGate Name you specified in Section 11.4.3, "Creating an AccessGate Object on OAM Access Server". For example: your_host_machine.company.com_AG.
6. For "Password for WebGate", enter the same password you specified in Section 11.4.3, "Creating an AccessGate Object on OAM Access Server".
7. For "Access Server ID", enter the name of the OAM Access Server.
8. For "Hostname where Access Server is installed", enter the host name where OAM Access Server is running.
9. For "Port number", enter the port for the OAM Access Server.
10. Select Automatic update of httpd.conf.
11. For "Enter the absolute path of httpd.conf in your Web server config directory", enter the OHS instance path. For example: <MIDDLEWARE_HOME>/Oracle_WT1/instances/instance1/config/OHS/ohs1/httpd.conf.
12. Restart the OHS instance.
11.4.8 Setting up Providers for OAM SSO in a WebLogic DomainThis section describes how to configure providers in the WebLogic security domain to perform single sign-on with the Oracle Access Manager Identity Asserter. Several Authentication provider types must be configured and ordered.
1. Log in to the WebLogic Administration Console.
2. Add the OAM Identity Asserter:
a. Click Security Realms, Default Realm Name (example: myrealm) and click Providers.
b. Click Authentication > New and then enter a name and select a type:
Name: OAM Identity Asserter
Type: OAMIdentityAsserter
c. In the Authentication Providers table, click the newly added authenticator.
d. Click the Common tab, set the Control Flag to REQUIRED, and click Save.
3. OID Authenticator:
The instructions to create this provider are provided in Section 8.5, "Configuring OID as Security Provider".
If the OID Authenticator is configured successfully, you can change the Control Flag to SUFFICIENT.
4. Default Authenticator:
Perform the following steps to set up the Default Authenticator for use with the Identity Asserter:
a. Go to Security Realms, Default Realm Name (example: myrealm) and click Providers.
Configuring SSO for Learning Tool
Configuring Oracle Access Manager 10g 11-7
b. Click Authentication and click DefaultAuthenticator to see its configuration page.
c. Click the Common tab and set the Control Flag to SUFFICIENT.
d. Click Save.
5. Reorder Providers:
a. Click Security Realms, Default Realm Name (example: myrealm) and click Providers.
b. On the Summary page where providers are listed, click the Reorder button.
c. On the Reorder Authentication Providers page, select a provider name and use the arrows beside the list to order the providers as follows:
OAM Identity Asserter (REQUIRED)
OID Authenticator (SUFFICIENT)
Default Authenticator (SUFFICIENT)
d. Click OK to save your changes.
6. Activate Changes:
In the Change Center, click Activate Changes.
7. Reboot Oracle WebLogic Server.
11.4.9 Configuring the Session Time-outFor proper behavior, WebLogic application session time-out values must be the same as WebGate session time-out values.
To set the WebLogic session time-out, modify the web.xml as follow:
<session-config> <session-timeout>60</session-timeout></session-config>
Note in web.xml the session time-out is set in minutes.
To set the WebGate session time out, modify the Idle Session Time (seconds):
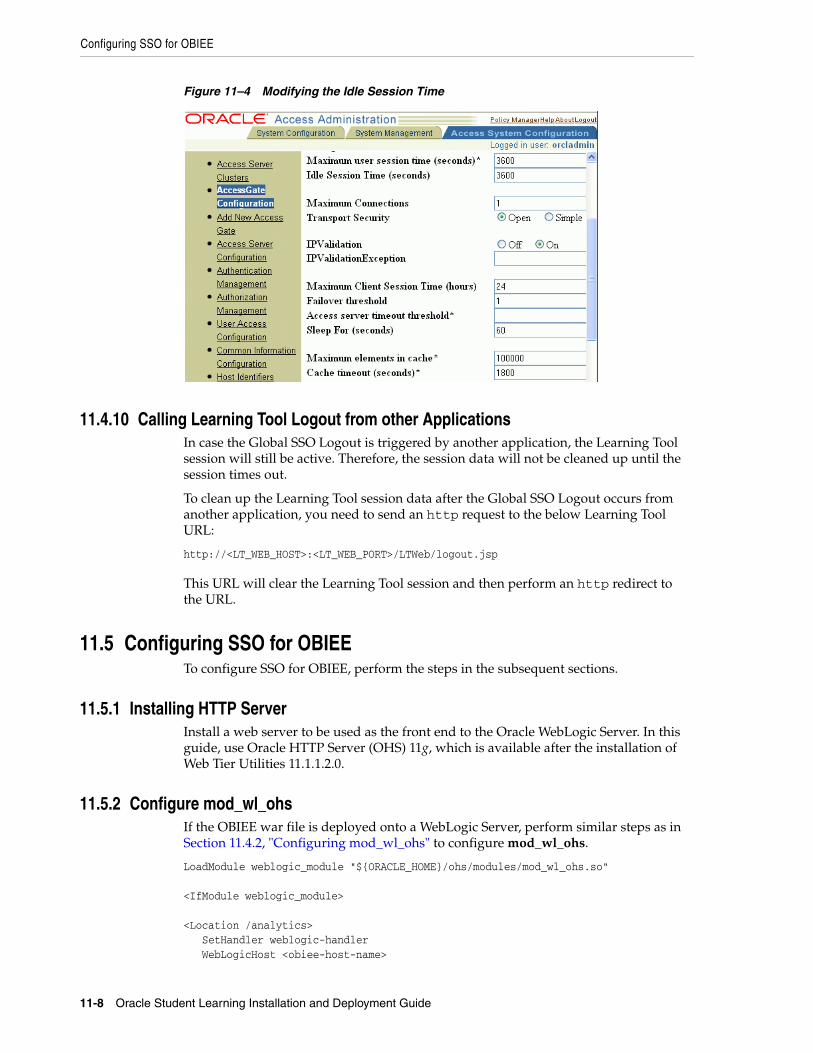
Configuring SSO for OBIEE
11-8 Oracle Student Learning Installation and Deployment Guide
Figure 11–4 Modifying the Idle Session Time
11.4.10 Calling Learning Tool Logout from other ApplicationsIn case the Global SSO Logout is triggered by another application, the Learning Tool session will still be active. Therefore, the session data will not be cleaned up until the session times out.
To clean up the Learning Tool session data after the Global SSO Logout occurs from another application, you need to send an http request to the below Learning Tool URL:
http://<LT_WEB_HOST>:<LT_WEB_PORT>/LTWeb/logout.jsp
This URL will clear the Learning Tool session and then perform an http redirect to the URL.
11.5 Configuring SSO for OBIEETo configure SSO for OBIEE, perform the steps in the subsequent sections.
11.5.1 Installing HTTP ServerInstall a web server to be used as the front end to the Oracle WebLogic Server. In this guide, use Oracle HTTP Server (OHS) 11g, which is available after the installation of Web Tier Utilities 11.1.1.2.0.
11.5.2 Configure mod_wl_ohsIf the OBIEE war file is deployed onto a WebLogic Server, perform similar steps as in Section 11.4.2, "Configuring mod_wl_ohs" to configure mod_wl_ohs.
LoadModule weblogic_module "${ORACLE_HOME}/ohs/modules/mod_wl_ohs.so"
<IfModule weblogic_module>
<Location /analytics> SetHandler weblogic-handler WebLogicHost <obiee-host-name>
Configuring SSO for OBIEE
Configuring Oracle Access Manager 10g 11-9
WebLogicPort <obiee-port></Location>
</IfModule>
11.5.3 Creating an AccessGate Object on OAM Access ServerPerform similar steps as Section 11.4.3, "Creating an AccessGate Object on OAM Access Server" to create the AccessGate object for OBIEE’s HTTP Server.
java -jar oamcfgtool.jar mode=CREATE app_domain=your_host_machine.company.com protected_uris=/analytics app_agent_password=<webgate_password> cookie_domain=.company.com ldap_host=<oam_ldap_directory_server_host> ldap_port=<oam_ldap_director_server_port> ldap_userdn="<ldap_admin_user>" ldap_userpassword=<ldap_admin_password> oam_aaa_host=<access_server_host> oam_aaa_port=<access_server_port> oam_aaa_mode=OPEN
11.5.4 Installing the WebGate Plug-in for the HTTP ServerPerform similar steps as Section 11.4.7, "Installing the WebGate Plug-in for the HTTP Server" to install the WebGate plug-in for OBIEE’s HTTP Server. You can skip this step if OBIEE uses an existing HTTP Server with WebGate plug-in.
11.5.5 Creating Oracle BI Server Impersonator UserPerform similar steps as Section 10.3.5, "Creating Oracle BI Server Impersonator User".
11.5.6 Adding the Impersonator Credentials to Oracle BI Presentation Services Credential Store
Perform similar steps as Section 10.3.6, "Adding the Impersonator Credentials to Oracle BI Presentation Services Credential Store".
11.5.7 Configuring Oracle BI Presentation Services to Identify the Credential Store and Decryption Passphrase
Perform similar steps as Section 10.3.7, "Configuring Oracle BI Presentation Services to Identify the Credential Store and Decryption Passphrase".
11.5.8 Configuring BI Presentation Services to Operate in the SSO EnvironmentEdit the OracleBIData/web/config/instanceconfig.xml file.
<ServerInstance><!-- other settings ... --><Auth> <SSO enabled="true"> <ParamList> <!--IMPERSONATE param is used to get the authenticated user's username and is required --> <Param name="IMPERSONATE" source="httpHeader" nameInSource="OAM_REMOTE_USER"/>
Note: Add web_domain to the script if this is an existing Web Tier.
Configuring SSO for UCM 11g
11-10 Oracle Student Learning Installation and Deployment Guide
</ParamList> <LogoffUrl> http http://<OBIEE_WEB_HOST>:<OBIEE_WEB_PORT>/oamsso/logout.html </LogoffUrl> <LogonUrl> http://<OBIEE_WEB_HOST>:<OBIEE_WEB_PORT>/analytics </LogonUrl> </SSO></Auth><!-- other settings ... --></ServerInstance>
11.6 Configuring SSO for UCM 11gOracle Universal Content Management (Oracle UCM) 11g Release 1 (11.1.1) is deployed on an Oracle WebLogic Server. The steps to configure OAM as the SSO solution for UCM is therefore similar to the steps described in section Section 10.2, "Configuring SSO for Learning Tool".
For more detailed explanation of configuring SSO for UCM 11g, you can read Chapter 4.2.3 "Configuring Oracle UCM to Use Single Sign-On" in the Oracle® Fusion Middleware System Administrator's Guide for Content Server 11g Release 1 (11.1.1) at
http://download.oracle.com/docs/cd/E14571_01/doc.1111/e10792/c03_security002.htm#insertedID3
11.6.1 Installing HTTP ServerInstall a web server to be used as the front end to the Oracle WebLogic Server. In this guide, use Oracle HTTP Server (OHS) 11g, which is available after the installation of Web Tier Utilities 11.1.1.2.0.
11.6.2 Configure mod_wl_ohsPerform similar steps as Section 11.4.2, "Configuring mod_wl_ohs" to configure mod_wl_ohs.
LoadModule weblogic_module "${ORACLE_HOME}/ohs/modules/mod_wl_ohs.so"
<IfModule weblogic_module><Location /cs> SetHandler weblogic-handler WebLogicHost <ucm-hostname> WebLogicPort <ucm-server-port></Location>
</IfModule>
11.6.3 Creating an AccessGate Object on OAM Access ServerPerform similar steps as Section 11.4.3, "Creating an AccessGate Object on OAM Access Server" to create the AccessGate object for UCM’s HTTP Server.
java -jar oamcfgtool.jar mode=CREATE app_domain=your_host_machine.company.com protected_uris=/cs app_agent_password=<webgate_password> cookie_domain=.company.com ldap_host=<oam_ldap_directory_server_host> ldap_port=<oam_ldap_director_server_port> ldap_userdn="<ldap_admin_user>"
Updating the OSL Configuration
Configuring Oracle Access Manager 10g 11-11
ldap_userpassword=<ldap_admin_password> oam_aaa_host=<access_server_host> oam_aaa_port=<access_server_port> oam_aaa_mode=OPEN
11.6.4 Configuring WebGate for Global SSO LogoutPerform similar steps as Section 11.4.4 to register the ECM logout link as a Global SSO Logout.
/cs/logout.htm
11.6.5 Installing the WebGate Plug-in for the HTTP ServerPerform similar steps as Section 11.4.8, "Setting up Providers for OAM SSO in a WebLogic Domain" to install the WebGate plug-in for UCM’s HTTP Server. You can skip this step if OBIEE uses an existing HTTP Server with WebGate plug-in.
11.6.6 Setting up Providers for OAM SSO in a WebLogic DomainPerform similar steps as in Section 11.6.6, "Setting up Providers for OAM SSO in a WebLogic Domain" to set up the providers for OAM SSO in a WebLogic domain that UCM is deployed to.
11.7 Updating the OSL ConfigurationThe following configuration is required for OSL to operate in an SSO environment:
1. Update the OSL_PROFILE_OPTION_VALUES:
Set the values for OSL_SHOW_LOGOUT_LINK in the OSL_PROFILE_OPTION_VALUES table as follows:
2. Update the logout URL for Learning Tool and Learning Tool Admin.
■ Set the OSL_ADMIN_LOGOUT_URL as follows:
http://<LT_WEB_HOST>:<LT_WEB_PORT>/LTAdminWeb/faces/logout.jspx
where: <LT_WEB_HOST> and <LT_WEB_PORT> are the host name and port of the web server configured as a front end to provide access to the Learning Tool Admin application..
■ Set the OSL_LOGOUT_URL as follows:
http://<LT_WEB_HOST>:<LT_WEB_PORT>/LTWeb/faces/logout.jsp
Note: Add web_domain to the script if this is an existing Web Tier.
Table 11–1 Updating OSL_PROFILE_OPTION_VALUES
Value Description
OSL_SHOW_LOGOUT_LINK ■ Y (to display the logout link in Learning Tool and Learning Tool Admin) or
■ N (to hide the logout link in Learning Tool and Learning Tool Admin)
Updating the OSL Configuration
11-12 Oracle Student Learning Installation and Deployment Guide
where: <LT_WEB_HOST> and <LT_WEB_PORT> are the host name and port of the web server configured as a front end to provide access to the Learning Tool application.
For information about the OSL configuration file where you must make these changes, see Section 9.1.7, "Updating Logout URL for Learning Tool and Learning Tool Admin".
12
Installing and Configuring Oracle Access Manager 11g 12-1
12Installing and Configuring Oracle AccessManager 11g
Oracle Access Manager 11g is the Oracle Fusion Middleware 11g single sign-on solution. Oracle Access Manager 11g is a Java-based enterprise-level security application that provides restricted access to confidential information and centralized authentication and authorization services. All existing access technologies in the Oracle Identity Management stack converge in Oracle Access Manager 11g.
A Web server, Application Server, or any third-party application must be protected by a WebGate or mod_osso instance that is registered with Oracle Access Manager as an agent to enforce policies. The agent acts as a filter for HTTP requests.
Oracle Access Manager 11g provides single sign-on (SSO), authentication, authorization, and other services to registered agents (in any combination) protecting resources. Agents include:
■ OAM 11g WebGates
■ OAM 10g WebGates
■ IDM Domain Agent
■ OSSO Agents (10g mod_osso)
Setting up OAM 11g is a two-step process. The setup includes installation of the necessary software components and configuration.
This chapter provides step-by-step instructions on how to configure OAM 11g as the single sign-on solution for OSL. Complete explanation of the OAM solution is available in "Part III, Single Sign-On, Policies, and Testing" in the Oracle® Fusion Middleware Security Guide 11g Release 1 (11.1.1) at: http://download.oracle.com/docs/cd/E14571_01/doc.1111/e15478/toc.htm.
12.1 Installing Required ComponentsOSL is certified to work with the following software components:
■ Oracle Sun JDK 160
■ Oracle Database 11.2
■ Oracle Weblogic Server 10.3.5 and 10.3.3
■ Oracle Fusion Middleware Repository Creation Utility 11.1.1.3.5 and 11.1.1.3.2
■ Oracle Access Manager 11.1.1.5.0 and 11.1.1.3.0
Installing Required Components
12-2 Oracle Student Learning Installation and Deployment Guide
■ Oracle HTTP Server (OHS) 11.1.1.5.0 and 11.1.1.3.0
■ OHS WebGate 11.1.1.5.0 and 11.1.1.3.0
12.1.1 Installing Oracle Sun JDKYou can obtain the Sun JDK 1.6.0 installation program from this URL: http://www.oracle.com/technetwork/java/javase/downloads/jdk-6u25-download-346242.html
12.1.2 Installing Oracle DatabaseTo install the Oracle database, ensure that the prerequisites are met and the necessary operating system packages are installed.
To install the database:
1. Complete the instructions in "Chapter 2, Oracle Database Preinstallation Requirements" and "Chapter 4, Installing Oracle Database" of the Oracle® Database Installation Guide 11g Release 2 (11.2) for Linux.
The installation instructions are available at http://download.oracle.com/docs/cd/E11882_01/install.112/e16763/toc.htm.
2. When the installation is complete, verify that the Oracle instance is running.
Run the following commands:
export JAVA_HOME=<java home>For example, /opt/jdk1.6.0_25/
export ORACLE_HOME= <Oracle home>For example, /u01/app/oracle/product/11.2.0/dbhome_1
export PATH=$ORACLE_HOME/bin:$JAVA_HOME/bin:$PATH
to append Oracle home and Java home to the existing path.
Export ORACLE_SID =<SID used with Oracle installation>
Then issue this statement to determine whether the Oracle instance is running:
lsnrctl status
If the listener is not started, then start it by issuing this command: lsnrctl startall.
Note: Oracle recommends that you set the Database Character Set to Unicode AL32UTF8 when installing the database.
Note: If you still cannot start the Oracle instance, ensure that the details provided in the tnsnames.ora and listener.ora files are correct. You can also run the network configuration assistant using the command netca.
Installing Required Components
Installing and Configuring Oracle Access Manager 11g 12-3
Verify the database installation in the Oracle installation directory you chose during the installation, for example, /u01/app/oracle/product.
12.1.3 Installing WebLogic ServerComplete the installation instructions at http://download.oracle.com/docs/cd/E14571_01/doc.1111/e14142/toc.htm.
After installing WebLogic Server, a middleware home directory is created, for example, /opt/oracle/Middleware/.
12.1.4 Creating Database Schema for OAM Using the Repository Creation Utility (RCU)To install RCU 11.1.1..5.0 or 11.1.1.3.2, complete the instructions at: http://download.oracle.com/docs/cd/E14571_01/install.1111/e12002/before002.htm#BABJDDEH.
When you run RCU, create and load only the Identity Manager - Oracle Access Manager schema for the Oracle Access Manager you are installing. By default, the AS Common Schema - Audit Services schema is also selected.
Do not select any other schema available in RCU.
When you create a schema, remember the schema owner and password shown in RCU.
12.1.5 Installing Oracle Access Manager 11.1.1.5.0 or 11.1.1.3.0The installation of Oracle Access Manager 11.1.1.5.0 or 11.1.1.3.0 is quick if you have installed the software listed in Section 12.1.1, "Installing Oracle Sun JDK" to Section 12.1.4, "Creating Database Schema for OAM Using the Repository Creation Utility (RCU)".
Follow these steps to complete the installation:
1. Ensure that the prerequisites are installed.
2. Install OAM by following the instructions at: http://download.oracle.com/docs/cd/E14571_01/install.1111/e12002/toc.htm.
The OAM installation program verifies whether the necessary operating system libraries are installed. The following screen illustrates how the OAM installation program identifies the missing libraries required for the installation.
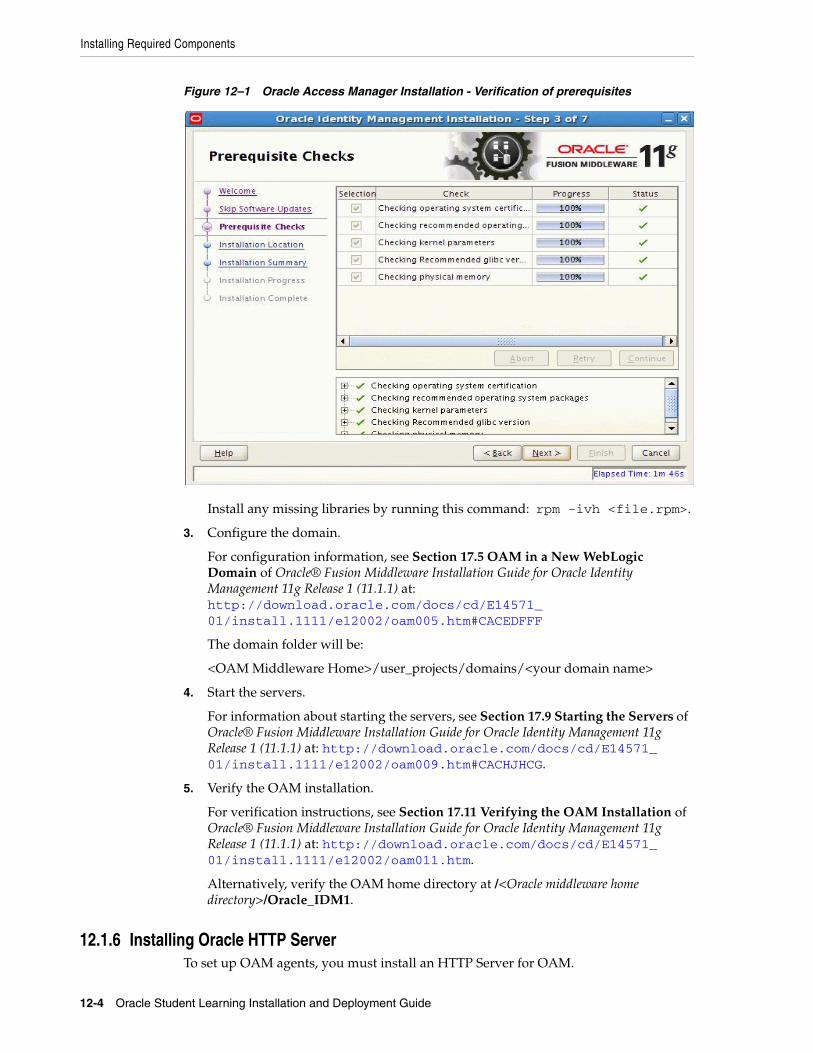
Installing Required Components
12-4 Oracle Student Learning Installation and Deployment Guide
Figure 12–1 Oracle Access Manager Installation - Verification of prerequisites
Install any missing libraries by running this command: rpm -ivh <file.rpm>.
3. Configure the domain.
For configuration information, see Section 17.5 OAM in a New WebLogic Domain of Oracle® Fusion Middleware Installation Guide for Oracle Identity Management 11g Release 1 (11.1.1) at: http://download.oracle.com/docs/cd/E14571_01/install.1111/e12002/oam005.htm#CACEDFFF
The domain folder will be:
<OAM Middleware Home>/user_projects/domains/<your domain name>
4. Start the servers.
For information about starting the servers, see Section 17.9 Starting the Servers of Oracle® Fusion Middleware Installation Guide for Oracle Identity Management 11g Release 1 (11.1.1) at: http://download.oracle.com/docs/cd/E14571_01/install.1111/e12002/oam009.htm#CACHJHCG.
5. Verify the OAM installation.
For verification instructions, see Section 17.11 Verifying the OAM Installation of Oracle® Fusion Middleware Installation Guide for Oracle Identity Management 11g Release 1 (11.1.1) at: http://download.oracle.com/docs/cd/E14571_01/install.1111/e12002/oam011.htm.
Alternatively, verify the OAM home directory at /<Oracle middleware home directory>/Oracle_IDM1.
12.1.6 Installing Oracle HTTP ServerTo set up OAM agents, you must install an HTTP Server for OAM.
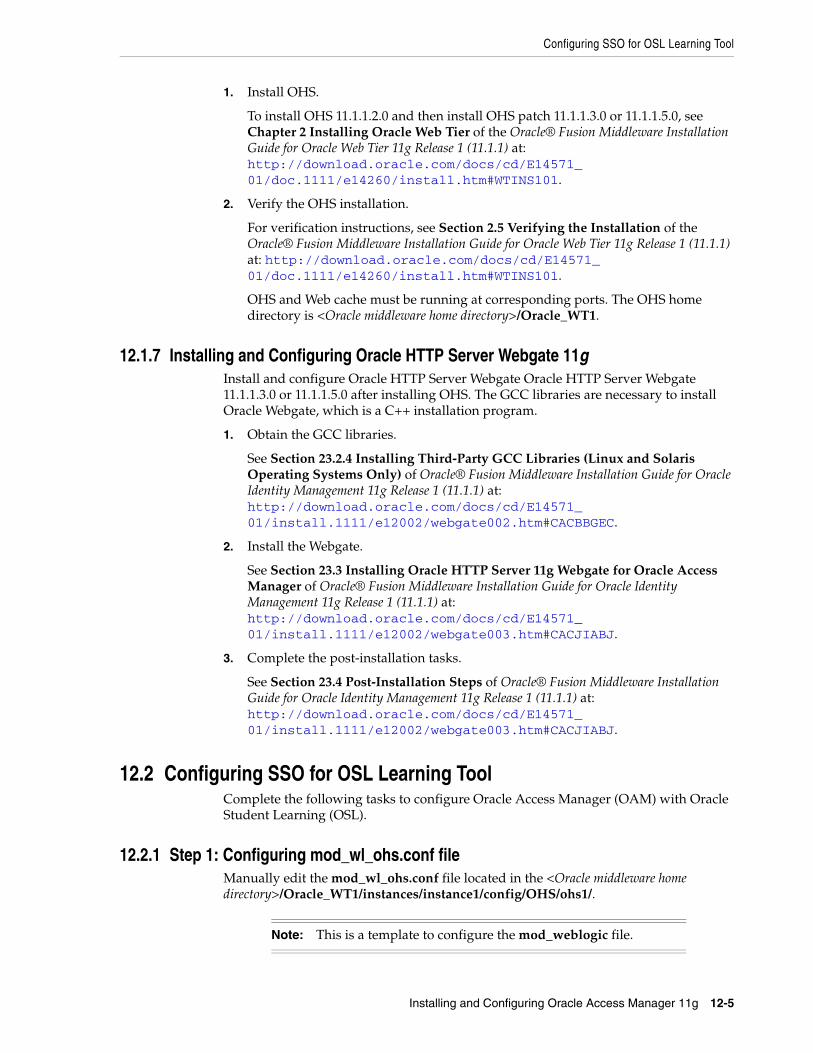
Configuring SSO for OSL Learning Tool
Installing and Configuring Oracle Access Manager 11g 12-5
1. Install OHS.
To install OHS 11.1.1.2.0 and then install OHS patch 11.1.1.3.0 or 11.1.1.5.0, see Chapter 2 Installing Oracle Web Tier of the Oracle® Fusion Middleware Installation Guide for Oracle Web Tier 11g Release 1 (11.1.1) at: http://download.oracle.com/docs/cd/E14571_01/doc.1111/e14260/install.htm#WTINS101.
2. Verify the OHS installation.
For verification instructions, see Section 2.5 Verifying the Installation of the Oracle® Fusion Middleware Installation Guide for Oracle Web Tier 11g Release 1 (11.1.1) at: http://download.oracle.com/docs/cd/E14571_01/doc.1111/e14260/install.htm#WTINS101.
OHS and Web cache must be running at corresponding ports. The OHS home directory is <Oracle middleware home directory>/Oracle_WT1.
12.1.7 Installing and Configuring Oracle HTTP Server Webgate 11gInstall and configure Oracle HTTP Server Webgate Oracle HTTP Server Webgate 11.1.1.3.0 or 11.1.1.5.0 after installing OHS. The GCC libraries are necessary to install Oracle Webgate, which is a C++ installation program.
1. Obtain the GCC libraries.
See Section 23.2.4 Installing Third-Party GCC Libraries (Linux and Solaris Operating Systems Only) of Oracle® Fusion Middleware Installation Guide for Oracle Identity Management 11g Release 1 (11.1.1) at: http://download.oracle.com/docs/cd/E14571_01/install.1111/e12002/webgate002.htm#CACBBGEC.
2. Install the Webgate.
See Section 23.3 Installing Oracle HTTP Server 11g Webgate for Oracle Access Manager of Oracle® Fusion Middleware Installation Guide for Oracle Identity Management 11g Release 1 (11.1.1) at: http://download.oracle.com/docs/cd/E14571_01/install.1111/e12002/webgate003.htm#CACJIABJ.
3. Complete the post-installation tasks.
See Section 23.4 Post-Installation Steps of Oracle® Fusion Middleware Installation Guide for Oracle Identity Management 11g Release 1 (11.1.1) at: http://download.oracle.com/docs/cd/E14571_01/install.1111/e12002/webgate003.htm#CACJIABJ.
12.2 Configuring SSO for OSL Learning ToolComplete the following tasks to configure Oracle Access Manager (OAM) with Oracle Student Learning (OSL).
12.2.1 Step 1: Configuring mod_wl_ohs.conf fileManually edit the mod_wl_ohs.conf file located in the <Oracle middleware home directory>/Oracle_WT1/instances/instance1/config/OHS/ohs1/.
Note: This is a template to configure the mod_weblogic file.
Configuring SSO for OSL Learning Tool
12-6 Oracle Student Learning Installation and Deployment Guide
This empty block is needed to save mod_wl related configuration from EM to this file when changes are made at the Base Virtual Host Level.
LoadModule weblogic_module "${ORACLE_HOME}/ohs/modules/mod_wl_ohs.so"<IfModule weblogic_module># WebLogicHost <WEBLOGIC_HOST># WebLogicPort <WEBLOGIC_PORT># Debug ON# WLLogFile /tmp/weblogic.log# MatchExpression *.jsp</IfModule>
<Location /LTWeb> SetHandler weblogic-handler WebLogicHost yourserver.com WebLogicPort 7003 WLCookieName OSLLTSESSIONID</Location><Location /LTAdminWeb> SetHandler weblogic-handler WebLogicHost yourserver.com WebLogicPort 7003 WLCookieName OSLLTASESSIONID</Location>
# <Location /weblogic># SetHandler weblogic-handler# PathTrim /weblogic# ErrorPage http:/WEBLOGIC_HOME:WEBLOGIC_PORT/# </Location>
12.2.2 Step 2: Creating an AccessGate Object on OAM Access ServerCreate an AccessGate object for the Learning Tool and Learning Tool Admin's HTTP Server. Then associate the object with OAM's Access Server.
1. Create a WebGate:
a. Log in to OAM 11g.
b. Click the System Configuration tab.
c. Navigate to Agents > OAM Agents > 11g Webgates.
d. Click Actions.
e. Select Create.
f. In the page that opens, do the following:
- Specify the name of the agent to be created. This name is is the host identifier and the preferred host. - Ensure that the option for Security is Open.
g. Click Apply.
h. Open the agent by navigating to Agents > OAM Agents > 11g Webgates > <name of the agent>.
i. Provide the following details:
* Access Client Password - password * Preferred Host - name of the agent
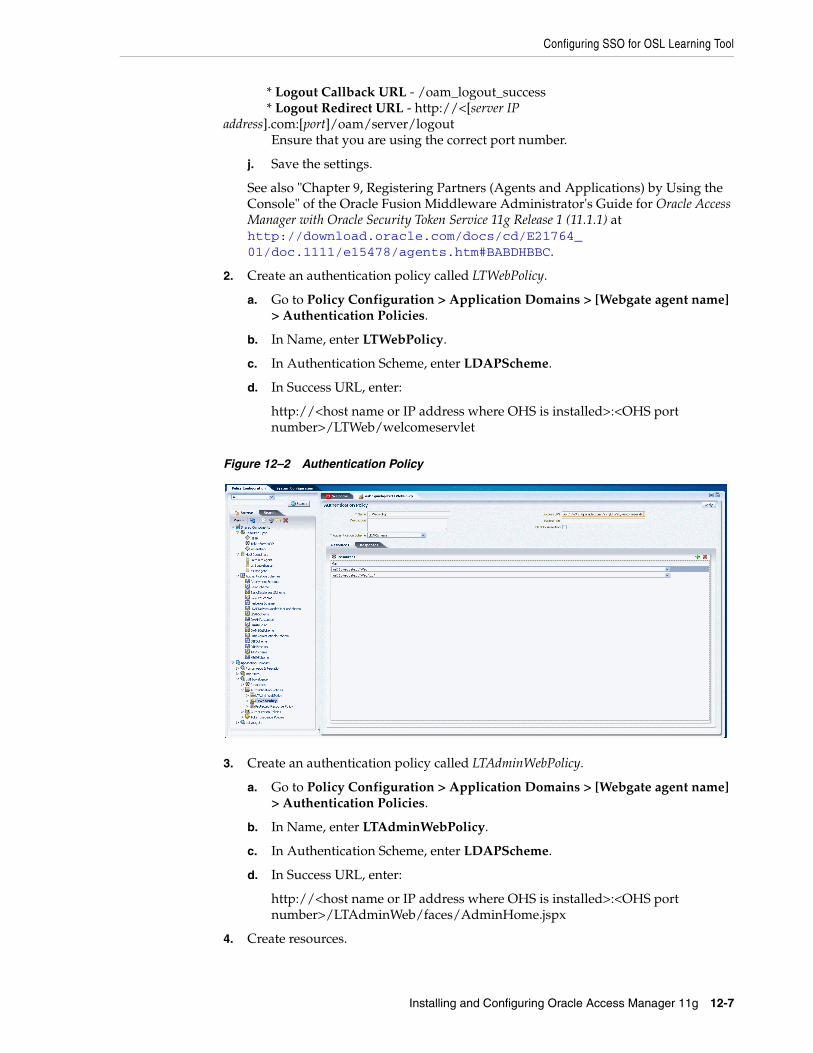
Configuring SSO for OSL Learning Tool
Installing and Configuring Oracle Access Manager 11g 12-7
* Logout Callback URL - /oam_logout_success * Logout Redirect URL - http://<[server IP address].com:[port]/oam/server/logout
Ensure that you are using the correct port number.
j. Save the settings.
See also "Chapter 9, Registering Partners (Agents and Applications) by Using the Console" of the Oracle Fusion Middleware Administrator's Guide for Oracle Access Manager with Oracle Security Token Service 11g Release 1 (11.1.1) at http://download.oracle.com/docs/cd/E21764_01/doc.1111/e15478/agents.htm#BABDHBBC.
2. Create an authentication policy called LTWebPolicy.
a. Go to Policy Configuration > Application Domains > [Webgate agent name] > Authentication Policies.
b. In Name, enter LTWebPolicy.
c. In Authentication Scheme, enter LDAPScheme.
d. In Success URL, enter:
http://<host name or IP address where OHS is installed>:<OHS port number>/LTWeb/welcomeservlet
Figure 12–2 Authentication Policy
3. Create an authentication policy called LTAdminWebPolicy.
a. Go to Policy Configuration > Application Domains > [Webgate agent name] > Authentication Policies.
b. In Name, enter LTAdminWebPolicy.
c. In Authentication Scheme, enter LDAPScheme.
d. In Success URL, enter:
http://<host name or IP address where OHS is installed>:<OHS port number>/LTAdminWeb/faces/AdminHome.jspx
4. Create resources.
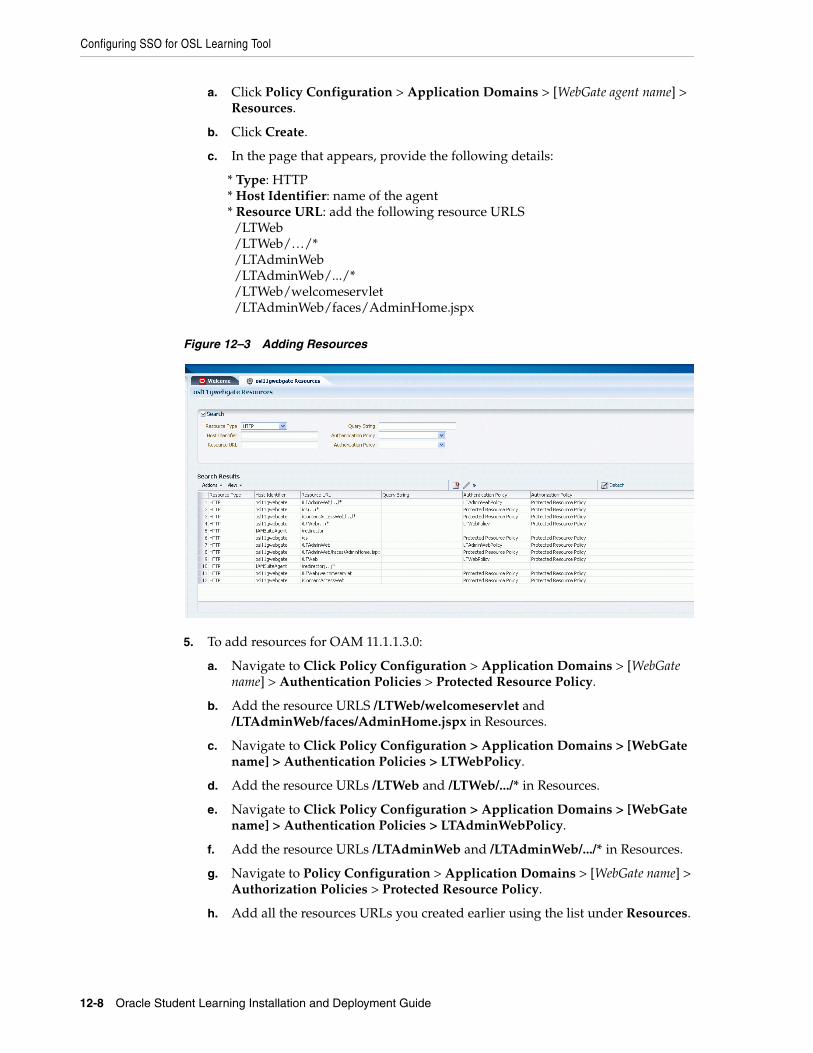
Configuring SSO for OSL Learning Tool
12-8 Oracle Student Learning Installation and Deployment Guide
a. Click Policy Configuration > Application Domains > [WebGate agent name] > Resources.
b. Click Create.
c. In the page that appears, provide the following details:
* Type: HTTP * Host Identifier: name of the agent * Resource URL: add the following resource URLS /LTWeb /LTWeb/…/* /LTAdminWeb /LTAdminWeb/.../* /LTWeb/welcomeservlet /LTAdminWeb/faces/AdminHome.jspx
Figure 12–3 Adding Resources
5. To add resources for OAM 11.1.1.3.0:
a. Navigate to Click Policy Configuration > Application Domains > [WebGate name] > Authentication Policies > Protected Resource Policy.
b. Add the resource URLS /LTWeb/welcomeservlet and /LTAdminWeb/faces/AdminHome.jspx in Resources.
c. Navigate to Click Policy Configuration > Application Domains > [WebGate name] > Authentication Policies > LTWebPolicy.
d. Add the resource URLs /LTWeb and /LTWeb/.../* in Resources.
e. Navigate to Click Policy Configuration > Application Domains > [WebGate name] > Authentication Policies > LTAdminWebPolicy.
f. Add the resource URLs /LTAdminWeb and /LTAdminWeb/.../* in Resources.
g. Navigate to Policy Configuration > Application Domains > [WebGate name] > Authorization Policies > Protected Resource Policy.
h. Add all the resources URLs you created earlier using the list under Resources.

Configuring SSO for OSL Learning Tool
Installing and Configuring Oracle Access Manager 11g 12-9
Figure 12–4 Adding Resources to the Authentication Policy
6. To add resources for OAM 11.1.1.5.0:
1. From the Protection Level list, choose Protected.
2. For resources /LTWeb and /LTweb/.../*: from the Authentication Policy list, choose LTWebPolicy.
3. For resources /LTAdminWeb and /LTAdminWeb/.../*: from the Authentication Policy list, choose LTAdminWebPolicy.
4. For resources /LTWeb/welcomeservlet and /LTAdminWeb/faces/AdminHome.jspx: from the Authentication Policy list, choose Protected Resource Policy.
5. From the Authorization Policy list, choose Protected Resource Policy.
For this version of OAM, you do not have to complete step 3.
7. Add the data source to point to the OID (used for LT) for the OAM agent.
a. Click the System Configuration tab.
b. Navigate to Data Sources > UserIdentityStore.
c. Click Create.
d. Enter the following information:
* Name - name of the data source * LDAP Provider - OID (Oracle Internet Directory)
e. Click Apply.
f. Open the data source you created.
g. Enter the following details:
* LDAP URL - LDAP server URL * Principal - LDAP user name * Credential - LDAP password * User Search Base - An example is: cn=Users,dc=sg,dc=oracle,dc=com * Group Search Base - An example is: cn=Groups,dc=sg,dc=oracle,dc=com
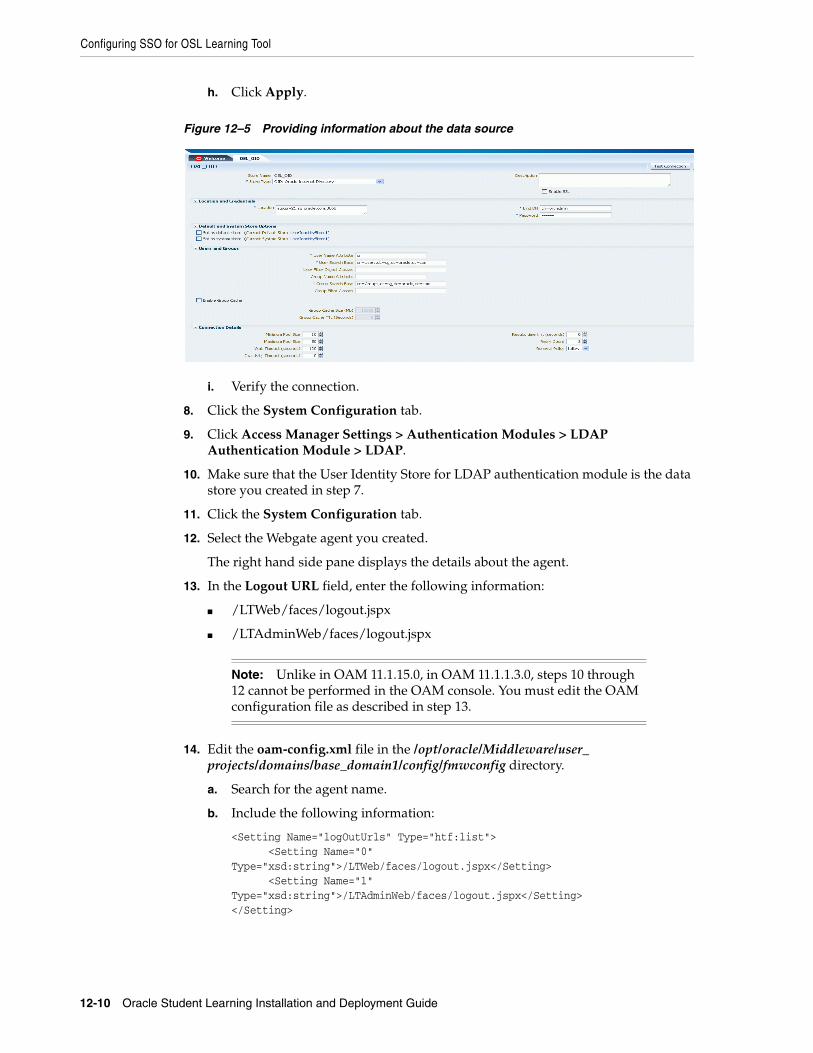
Configuring SSO for OSL Learning Tool
12-10 Oracle Student Learning Installation and Deployment Guide
h. Click Apply.
Figure 12–5 Providing information about the data source
i. Verify the connection.
8. Click the System Configuration tab.
9. Click Access Manager Settings > Authentication Modules > LDAP Authentication Module > LDAP.
10. Make sure that the User Identity Store for LDAP authentication module is the data store you created in step 7.
11. Click the System Configuration tab.
12. Select the Webgate agent you created.
The right hand side pane displays the details about the agent.
13. In the Logout URL field, enter the following information:
■ /LTWeb/faces/logout.jspx
■ /LTAdminWeb/faces/logout.jspx
14. Edit the oam-config.xml file in the /opt/oracle/Middleware/user_projects/domains/base_domain1/config/fmwconfig directory.
a. Search for the agent name.
b. Include the following information:
<Setting Name="logOutUrls" Type="htf:list"> <Setting Name="0" Type="xsd:string">/LTWeb/faces/logout.jspx</Setting> <Setting Name="1" Type="xsd:string">/LTAdminWeb/faces/logout.jspx</Setting></Setting>
Note: Unlike in OAM 11.1.15.0, in OAM 11.1.1.3.0, steps 10 through 12 cannot be performed in the OAM console. You must edit the OAM configuration file as described in step 13.
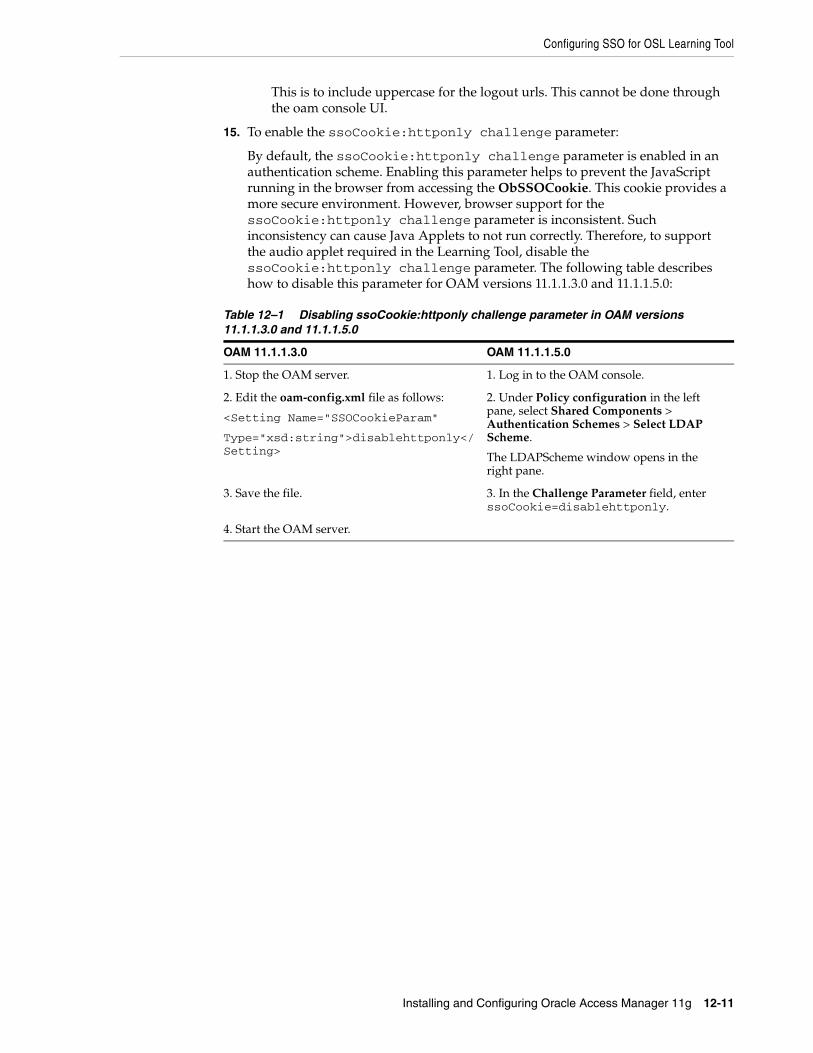
Configuring SSO for OSL Learning Tool
Installing and Configuring Oracle Access Manager 11g 12-11
This is to include uppercase for the logout urls. This cannot be done through the oam console UI.
15. To enable the ssoCookie:httponly challenge parameter:
By default, the ssoCookie:httponly challenge parameter is enabled in an authentication scheme. Enabling this parameter helps to prevent the JavaScript running in the browser from accessing the ObSSOCookie. This cookie provides a more secure environment. However, browser support for the ssoCookie:httponly challenge parameter is inconsistent. Such inconsistency can cause Java Applets to not run correctly. Therefore, to support the audio applet required in the Learning Tool, disable the ssoCookie:httponly challenge parameter. The following table describes how to disable this parameter for OAM versions 11.1.1.3.0 and 11.1.1.5.0:
Table 12–1 Disabling ssoCookie:httponly challenge parameter in OAM versions 11.1.1.3.0 and 11.1.1.5.0
OAM 11.1.1.3.0 OAM 11.1.1.5.0
1. Stop the OAM server. 1. Log in to the OAM console.
2. Edit the oam-config.xml file as follows:
<Setting Name="SSOCookieParam"
Type="xsd:string">disablehttponly</Setting>
2. Under Policy configuration in the left pane, select Shared Components > Authentication Schemes > Select LDAP Scheme.
The LDAPScheme window opens in the right pane.
3. Save the file. 3. In the Challenge Parameter field, enter ssoCookie=disablehttponly.
4. Start the OAM server.
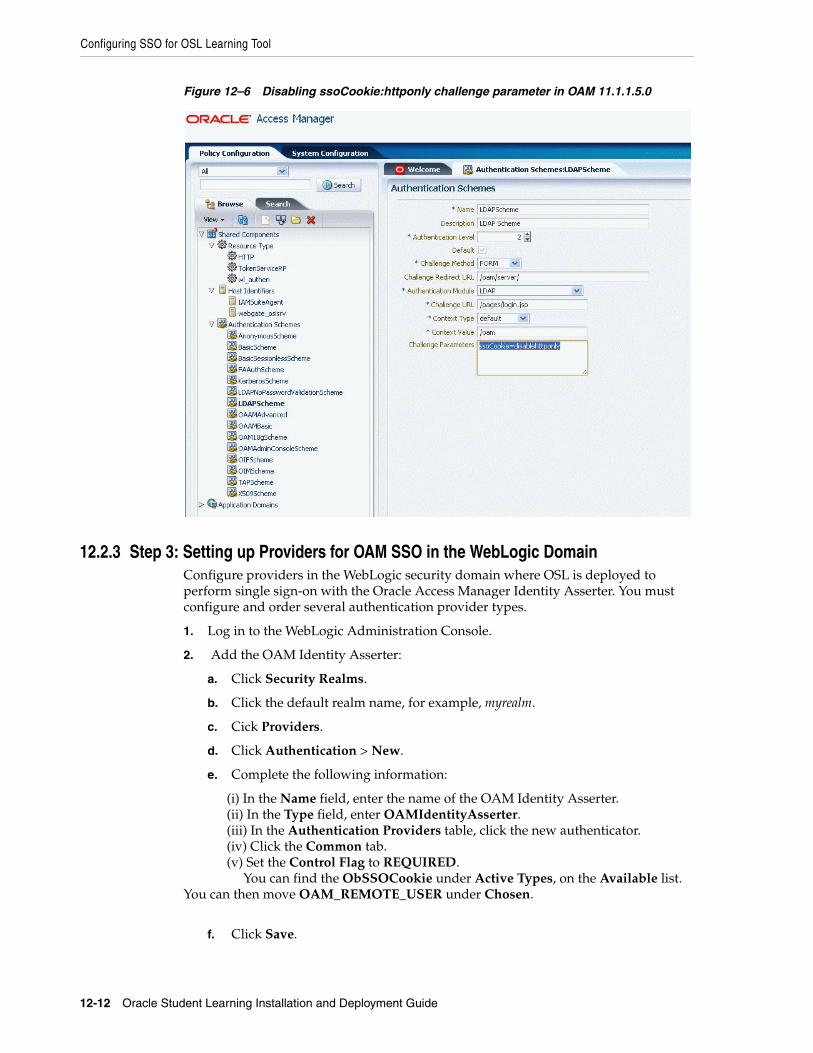
Configuring SSO for OSL Learning Tool
12-12 Oracle Student Learning Installation and Deployment Guide
Figure 12–6 Disabling ssoCookie:httponly challenge parameter in OAM 11.1.1.5.0
12.2.3 Step 3: Setting up Providers for OAM SSO in the WebLogic DomainConfigure providers in the WebLogic security domain where OSL is deployed to perform single sign-on with the Oracle Access Manager Identity Asserter. You must configure and order several authentication provider types.
1. Log in to the WebLogic Administration Console.
2. Add the OAM Identity Asserter:
a. Click Security Realms.
b. Click the default realm name, for example, myrealm.
c. Cick Providers.
d. Click Authentication > New.
e. Complete the following information:
(i) In the Name field, enter the name of the OAM Identity Asserter. (ii) In the Type field, enter OAMIdentityAsserter. (iii) In the Authentication Providers table, click the new authenticator. (iv) Click the Common tab. (v) Set the Control Flag to REQUIRED. You can find the ObSSOCookie under Active Types, on the Available list. You can then move OAM_REMOTE_USER under Chosen.
f. Click Save.
Configuring SSO for OSL Learning Tool
Installing and Configuring Oracle Access Manager 11g 12-13
3. For the remaining providers such as OID, Default Authenticator, and DefaultIdentityAsserter:
a. Click the Common tab.
b. Set the Control Flag to SUFFICIENT.
c. Click Save.
d. Reorder the providers:
(i) Click Security Realms. (ii) Click the default realm name, for example, myrealm. (ii) Click Providers. (iii) On the Summary page where providers are listed, click Reorder. (iv) On the Reorder Authentication Providers page, select a provider. (v) Use the arrows beside the list to order the providers as shown in the following table:
e. Click OK to save the changes.
f. In the Change Center, click Activate Changes.
g. Reboot Oracle WebLogic Server.
12.2.4 Step 4: Copying the Webgate ArtifactsPerform these steps to copy the Webgate artifacts.
1. In the IDM tier, go to <WebLogic_idm_domain>/output/webgate_oslsrv, and then copy ObAccessClient.xml and cwallet.sso.
2. Go to the Apps tier, and then paste the files in /instances/instance1/config/OHS/ohs1/webgate/config.
3. Restart the Web tier instance.
The OAM Webgate home directory is <Oracle Middleware home directory>/<Oracle_OAMWebgate>.
12.2.5 Step 5: Configuring web.xml for the OAM Identity AsserterThis section describes how to configure the web.xml file for the OAM Identity Asserter.
1. Find the web.xml file located in these directories:
■ OSL installation directory / LearningTool / Configuration / LearningTool / DeploymentDescriptors for Learning Tool
■ OSL installation directory / LearningTool / Configuration / Admin / DeploymentDescriptors for Learning Tool Admin
Provider Property
OAMIdentityAsserter (REQUIRED)
OID (SUFFICIENT)
Default Authenticator (SUFFICIENT)
DefaultIdentityAsserter (SUFFICIENT)
Configuring SSO for OSL Learning Tool
12-14 Oracle Student Learning Installation and Deployment Guide
2. Update the login-config section of the web.xml file with the following information:
<login-config><auth-method>CLIENT-CERT</auth-method><realm-name>myRealm</realm-name></login-config>
<!--login-config><auth-method>FORM</auth-method><form-login-config><form-login-page>/faces/loginView.jspx</form-login-page><form-error-page>/faces/loginErrorView.jspx</form-error-page></form-login-config></login-config-->
3. Run the OSL LT Configurator using Ant:
[~]#cd $DOMAIN_HOME/bin[bin]#source./setDomainEnv.sh[bin]#cd [OSL Home directory]/LearningTool/Scripts[Scripts]#ant repackageLT
The OSLLearningToolApp.ear located in [OSL Home directory]/LearningTool will be updated
4. Redeploy LT by running the deployment using Ant:
[~]#cd $DOMAIN_HOME/bin[bin]#source ./setDomainEnv.sh[bin]#cd [OSL Home directory]/LearningTool/Scripts[Scripts]#ant deployLT
If OSL is installed and configured, you can log in to LT using the SSO with this URL: http://<OHS host name>:<OHS port>/LTWeb.
Similarly, you can log into LTAdminWeb using the SSO with this URL
http://<OHS host name>:<OHS port>/LTAdminWeb
12.2.6 Step 6: Configuring the Session TimeoutThe WebLogic application session timeout value must be the same as the WebGate session timeout value.
To set the WebLogic session timeout, modify the web.xml as follow:
<session-config> <session-timeout>60</session-timeout></session-config>
Note in web.xml the session time-out is set in minutes.
To set the WebGate session time-out, modify the Max Session Time (seconds) in OAM console for the webgate created.
If the value you set in the WebLogic session timeout is greater than the current values specified in the OAM Session Lifetime and Idle Timeout, you must change the values of Session Lifetime and Idle Timeout accordingly.
To edit the OAM common session settings:
Configuring SSO for OBIEE
Installing and Configuring Oracle Access Manager 11g 12-15
1. Log in to Oracle Access Manager.
2. Click System Configuration.
3. From the Common Configuration panel, double-click Common Settings.
4. In the Session area:
a. In Session Lifetime, increase the current value.
b. In IdleTimeout (minutes), increase the current value.
5. Click Apply.
12.2.7 Step 7: Calling Learning Tool Logout from other ApplicationsIn case the Global SSO Logout is triggered by another application, the Learning Tool session will still be active. Therefore, the session data will not be cleaned up until the session times out.
To clean up the Learning Tool session data after the Global SSO Logout occurs from another application, you need to send an http request to the below Learning Tool URL:
http://<LT_WEB_HOST>:<LT_WEB_PORT>/LTWeb/logout.jsp
This URL will clear the Learning Tool session and then perform an http redirect to the URL.
12.3 Configuring SSO for OBIEEOracle Business Intelligence (OBIEE) 11g (11.1.1.5.0) is deployed on an Oracle WebLogic Server. For information on configuring OAM as the SSO solution for OBIEE, follow the steps in Section 12.2, "Configuring SSO for OSL Learning Tool."
12.3.1 Installing HTTP ServerWhen you install Web Tier Utilities 11.1.1.3.0, you can use Oracle HTTP Server (OHS) 11g as a Web server that acts as the front end to the Oracle WebLogic Server.
It is not necessary to perform this step if your OBIEE uses an existing HTTP server.
12.3.2 Configure mod_wl_ohsIf the OBIEE.ear file is deployed on a WebLogic Server, follow the steps in Section 12.2.1, "Step 1: Configuring mod_wl_ohs.conf file" to configure mod_wl_ohs.
LoadModule weblogic_module "${ORACLE_HOME}/ohs/modules/mod_wl_ohs.so"
<IfModule weblogic_module>
<Location /analytics> SetHandler weblogic-handler WebLogicHost <obiee-host-name> WebLogicPort <obiee-port></Location>
</IfModule>
Configuring SSO for OBIEE
12-16 Oracle Student Learning Installation and Deployment Guide
12.3.3 Creating an AccessGate Object on OAM Access ServerPerform similar steps as Section 12.2.2, "Step 2: Creating an AccessGate Object on OAM Access Server" to create the AccessGate object for the HTTP server of OBIEE.
To add protected resources:
1. Click Policy Configuration > Application Domains > [WebGate name] > Resources > Create.
2. Added resources:
- /analytics
- /analytics/…/*
Add the new resource to the following:
■ Authentication Policies > Protected Resource Policy
■ Authorization Policies > Protected Resource Policy
12.3.4 Installing the WebGate Plug-in for the HTTP ServerPerform similar steps as Section 12.1.7, "Installing and Configuring Oracle HTTP Server Webgate 11g" to install the WebGate plug-in for OBIEE’s HTTP Server. Ignore this step if OBIEE uses an existing HTTP Server with WebGate plug-in.
12.3.5 Creating Oracle BI Server Impersonator UserPerform similar steps as in Section 12.3.7, "Configuring BI Presentation Services to Operate in the SSO Environment".
12.3.6 Adding the Impersonator Credentials to Oracle BI Presentation Services Credential Store
Perform similar steps as Section 12.3.8, "Setting up Providers for OAM SSO in a Weblogic domain".
12.3.7 Configuring BI Presentation Services to Operate in the SSO EnvironmentTo enable SSO:
1. Log in to OBIEE at
http://[OBIEE server:port]/em.
2. Click Farm_<OBIEEDomain>_domain > Business Intelligence > Coreapplication.
3. Click the Security tab.
4. Select Enable SSO.
5. Select SSO Provider: Oracle Access Manager.
6. Click Apply and Activate Changes.
Note: You can use the same agent you created in Section 12.2.2.
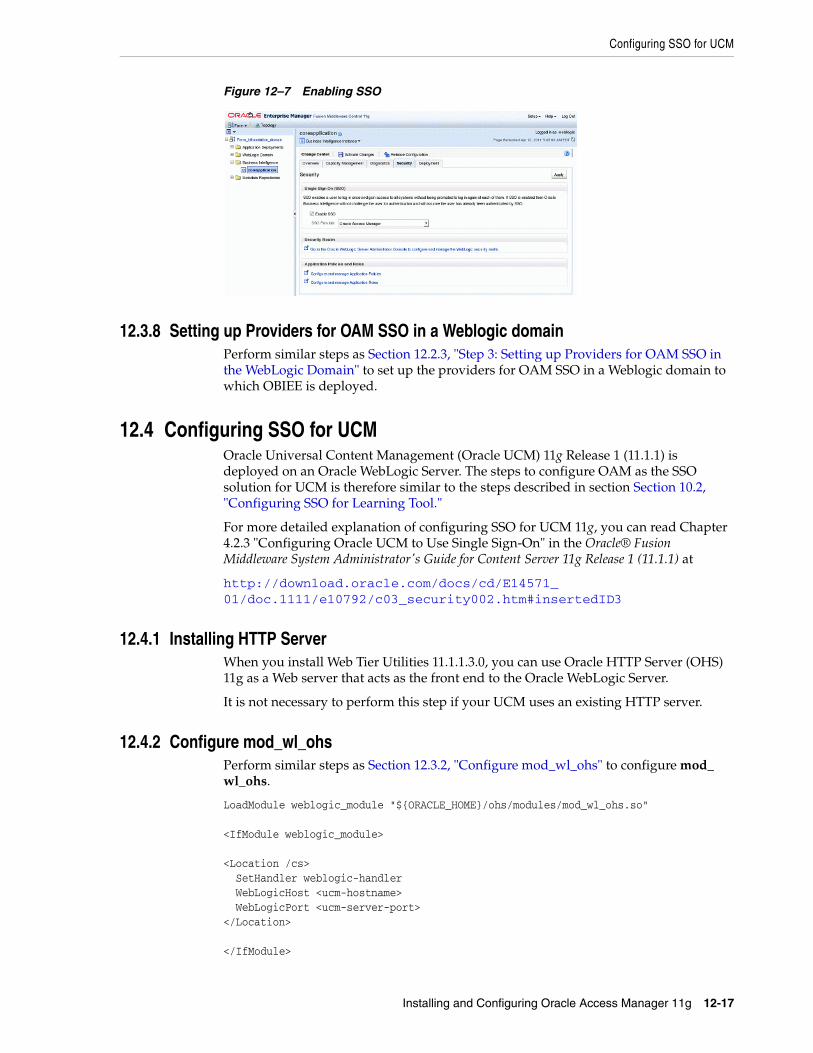
Configuring SSO for UCM
Installing and Configuring Oracle Access Manager 11g 12-17
Figure 12–7 Enabling SSO
12.3.8 Setting up Providers for OAM SSO in a Weblogic domainPerform similar steps as Section 12.2.3, "Step 3: Setting up Providers for OAM SSO in the WebLogic Domain" to set up the providers for OAM SSO in a Weblogic domain to which OBIEE is deployed.
12.4 Configuring SSO for UCMOracle Universal Content Management (Oracle UCM) 11g Release 1 (11.1.1) is deployed on an Oracle WebLogic Server. The steps to configure OAM as the SSO solution for UCM is therefore similar to the steps described in section Section 10.2, "Configuring SSO for Learning Tool."
For more detailed explanation of configuring SSO for UCM 11g, you can read Chapter 4.2.3 "Configuring Oracle UCM to Use Single Sign-On" in the Oracle® Fusion Middleware System Administrator's Guide for Content Server 11g Release 1 (11.1.1) at
http://download.oracle.com/docs/cd/E14571_01/doc.1111/e10792/c03_security002.htm#insertedID3
12.4.1 Installing HTTP ServerWhen you install Web Tier Utilities 11.1.1.3.0, you can use Oracle HTTP Server (OHS) 11g as a Web server that acts as the front end to the Oracle WebLogic Server.
It is not necessary to perform this step if your UCM uses an existing HTTP server.
12.4.2 Configure mod_wl_ohsPerform similar steps as Section 12.3.2, "Configure mod_wl_ohs" to configure mod_wl_ohs.
LoadModule weblogic_module "${ORACLE_HOME}/ohs/modules/mod_wl_ohs.so"
<IfModule weblogic_module>
<Location /cs> SetHandler weblogic-handler WebLogicHost <ucm-hostname> WebLogicPort <ucm-server-port></Location>
</IfModule>

Updating the OSL Configuration
12-18 Oracle Student Learning Installation and Deployment Guide
12.4.3 Creating an AccessGate Object on OAM Access ServerPerform similar steps as Section 12.3.3, "Creating an AccessGate Object on OAM Access Server" to create the AccessGate object for the HTTP server for UCM.
To add protected resources:
1. Click Policy Configuration > Application Domains > [WebGate name] > Resources > Create.
2. Added resources:
- /cs
- /cs/…/*
- /ContentAccessWeb
- / ContentAccessWeb/…/*
Add the new resource to the following:
■ Authentication Policies > Protected Resource Policy
■ Authorization Policies > Protected Resource Policy
12.4.4 Configuring WebGate for Global SSO LogoutPerform similar steps as Section 12.2.7, "Step 7: Calling Learning Tool Logout from other Applications" to register the ECM logout link as a Global SSO Logout.
/cs/logout.htm
12.4.5 Installing the WebGate Plug-in for the HTTP ServerPerform similar steps as Section 12.3.4, "Installing the WebGate Plug-in for the HTTP Server" to install the WebGate plug-in for UCM’s HTTP Server. You can skip this step if UCM uses an existing HTTP Server with WebGate plug-in.
12.4.6 Setting up Providers for OAM SSO in a WebLogic DomainPerform similar steps as Section 12.2.3, "Step 3: Setting up Providers for OAM SSO in the WebLogic Domain" to set up the providers for OAM SSO in a WebLogic domain that UCM is deployed to.
12.5 Updating the OSL ConfigurationThe following configuration is required for OSL to operate in an SSO environment:
1. Update the OSL_PROFILE_OPTION_VALUES:
Set the values for OSL_SHOW_LOGOUT_LINK in OSL_PROFILE_OPTION_VALUES table as follows:
Note: You can use the same agent you created in Section 12.2.2.
Modifying Oracle Access Manager Cache Settings
Installing and Configuring Oracle Access Manager 11g 12-19
2. Update the logout URL for LearningTool and LearningToolAdmin in osl_configuration.properties file located in:
[OSL Home directory]/LearningTool/Configuration/LearningTool/DeploymentDescriptors.
a. Set OSL_ADMIN_LOGOUT_URL as follows:
http://<LT_WEB_HOST>:<LT_WEB_PORT>/LTAdminWeb/faces/logout.jspx
where:
<LT_WEB_HOST> and <LT_WEB_PORT> are the host name and port of the Web server configured as a front end to provide access to the Learning Tool Admin application
b. Set OSL_LOGOUT_URL as follows:
http://<LT_WEB_HOST>:<LT_WEB_PORT>/LTWeb/faces/logout.jsp
where:
<LT_WEB_HOST> and <LT_WEB_PORT> are the host name and port of the web server configured as a front end to provide access to the Learning Tool application
For information about the OSL configuration file where you must make these changes, see Section 9.1.7, "Updating Logout URL for Learning Tool and Learning Tool Admin".
12.6 Modifying Oracle Access Manager Cache SettingsBy default, the Cache Pragma Header and Cache Control Header parameters are set to no-cache. This setting prevents Webgate from caching data at the Web server application and a user’s browser. To improve the performance of Webgate, you should set Cache Pragma Header and Cache Control Header values to public.
1. Log in to Oracle Access Manager.
2. Click System Configuration.
3. From Access Manager Settings, click SSO Agents > OAM Agents.
4. In the Search panel, click Search.
5. From the Search Results panel, select the Webgate agent you created.
6. In Cache Pragma Header, enter public.
7. In Cache Control Header, enter public.
8. Click Apply.
Table 12–2 Updating OSL_PROFILE_OPTION_VALUES
Value Description
OSL_SHOW_LOGOUT_LINK ■ Y (to display the logout link in Learning Tool and Learning Tool Admin) or
■ N (to hide the logout link in Learning Tool and Learning Tool Admin)

Modifying Oracle Access Manager Cache Settings
12-20 Oracle Student Learning Installation and Deployment Guide
Part IIIPart III Migrating Content from UCM 10g to ECM
11g
Part IV provides steps for migrating content from UCM 10g to ECM 11g.

13
Migrating Content from UCM 10g to ECM 11g 13-1
13Migrating Content from UCM 10g to ECM 11g
Follow these steps to migrate content from UCM 10g to ECM 11g.
1. Complete ECM 11g installation and verify that you can check in content. Complete the OSL setup using the deployment instructions.
2. Export schema from 10g ECM DB. In 10g, the unique IDs are stored in tables (COUNTERS). DocID, RevID, and RevClassID are Unique IDs.
The main tables that are needed are:
■ DOCMETA
■ DOCMETADEFINITION
■ DOCUMENTHISTORY
■ DOCUMENTS
■ REVISIONS
3. Import schema to 11g ECM DB. Before importing data from 10g, create OSL metadata in the database to match the 10g configuration.
In 11g, the unique IDs for Document and Revisions use the database sequence though the table COUNTERS is still available.
After schema import, set the values of the sequences IDCSEQDOCID, IDCSEQREVID, and IDCSEQREVCLASSID to start at a value higher than the imported data.
4. Create entries for the content in a new table called REVLCASSES based on the DID and DDOCNAME.
5. The vault and weblayout directories are:
■ ECM 10g:
<UCM_HOME>/server/vault<UCM_HOME>/server/weblayout
■ ECM 11g:
<MiddlewareHome>/user_projects/domains/<OSL_CS_Domain>/ucm/cs/vault<MiddlewareHome>/user_projects/domains/<OSL_CS_Domain>/ucm/cs/weblayout
6. The document type used by OSL in ECM 10g is ADACCT. The document type used by OSL in 11g is Application. To avoid renaming any vault and weblayout directories, create a document type ADACCT in 11g.
The vault and weblayout directories vary based on the document type.
13-2 Oracle Student Learning Installation and Deployment Guide
ECM 10g:
<UCM_HOME>/ucm/server/vault/adacct/@osl/@user.name1...Additional directories will be available for each user who has published content<UCM_HOME>/ucm/server/vault/adacct/@osl/@oslcontent/@main/<UCM_HOME>/ucm/server/vault/adacct/@osl/@oslcontent/@temp/<UCM_HOME>/ucm/server/weblayout/groups/osldocuments/@osl/@user.name1/documents/adacct<UCM_HOME>/ucm/server/weblayout/groups/osldocuments/@osl/@oslcontent/@main/documents/adacct<UCM_HOME>/ucm/server/weblayout/groups/osldocuments/@osl/@oslcontent/@temp/documents/adacct
ECM 11g:
<MiddlewareHome>/user_projects/domains/<OSL_CS_Domain>/ucm/server/vault/application/@osl/@user.name1...Additional directories will be created for each user who has published content <MiddlewareHome>/user_projects/domains/<OSL_CS_Domain>/ucm/server/vault/application/@osl/@oslcontent/@main <MiddlewareHome>/user_projects/domains/<OSL_CS_Domain>/ucm/server/vault/application/@osl/@oslcontent/@temp
<MiddlewareHome>/user_projects/domains/base_domain/ucm/cs/weblayout/groups/osldocuments/@osl/@user.name1/documents/application
<MiddlewareHome>/user_projects/domains/base_domain/ucm/cs/weblayout/groups/osldocuments/@osl/@oslcontent/@main
<MiddlewareHome>/user_projects/domains/base_domain/ucm/cs/weblayout/groups/osldocuments/@osl/@oslcontent/@temp
In addition, the directory structure varies based on different security groups.
7. Create the directory structure in ECM 11g vault and copy the files from individual folders to these from ECM 10g.
8. Create the directory structure in ECM 11g weblayout and copy the files from individual folders to these from ECM 10g.
9. Start the ECM component Repository Manager. Click the Indexer tab and start the Collection rebuild cycle.
10. On completion of indexing, restart the server.
11. Log in and click Search. All the migrated content is displayed.
12. Check in new content and search for the content. The file must be checked in and you must be able to view the content. Click Web Location and Native URL to view the file.
13. Review the files checked in to confirm that migration is successful.
Part IVPart IV Upgrading OSL Release 3.1.2 to OSL
Release 3.1.3
Part V provides the steps on how to upgrade OSL Release 3.1.2 to OSL Release 3.1.3.

14
Upgrading Oracle Student Learning from Release 3.1.2 to Release 3.1.3 14-1
14Upgrading Oracle Student Learning fromRelease 3.1.2 to Release 3.1.3
This chapter describes the steps for upgrading Oracle Student Learning (OSL) 3.1.2 to OSL 3.1.3.
14.1 PrerequisiteOSL 3.1.2 is installed and configured before you perform the upgrade process.
14.2 Updating OSL Learning Tool DatabaseTo update the OSL Learning Tool Database to the current version, use one of these methods:
■ Select Yes in the Database Upgrade screen during the installation process.
■ Manually update the database by running the DB_Upgrade.sql script in [OSL home directory]/LearningTool/Scripts after the installation. Ensure that your current database schema version is the same as the required version of the DB_Upgrade.sql script.
14.3 Installing WLS 10.3.5 and ADF 11.1.1.5.0OSL 3.1.3 is certified with WLS 10.3.5 and ADF 11.1.1.5.0. Ensure that you upgrade your environment to these versions.
14.4 Deploying the new OSL .ear fileCustomize and deploy the new OSL Learning Tool .ear file as explained in Chapter 9, "Deploying OSL Learning Tool Admin and OSL Learning Tool".
Notes:
■ The required database schema version for the database upgrade script is specified in the line starting with --required_version of DB_Upgrade.sql.
■ Your current database schema version is specified in the CURRENT_VERSION column of the OSL_PRODUCTS table.
Redploying OBIEE Catalogs
14-2 Oracle Student Learning Installation and Deployment Guide
14.5 Redploying OBIEE Catalogs1. Log in to the Fusion Middleware Enterprise Manager.
2. Navigate to Business Intelligence > Core Application.
3. Select the deployment tab and the repository.
4. Unzip the OSLCatalog.zip file from the [OSL Home directory] > LearningTool > StudentReporting > obiee11g directory.
5. Deploy the configured OSL repository file and catalog files.