origami angel.pdf
TRANSCRIPT
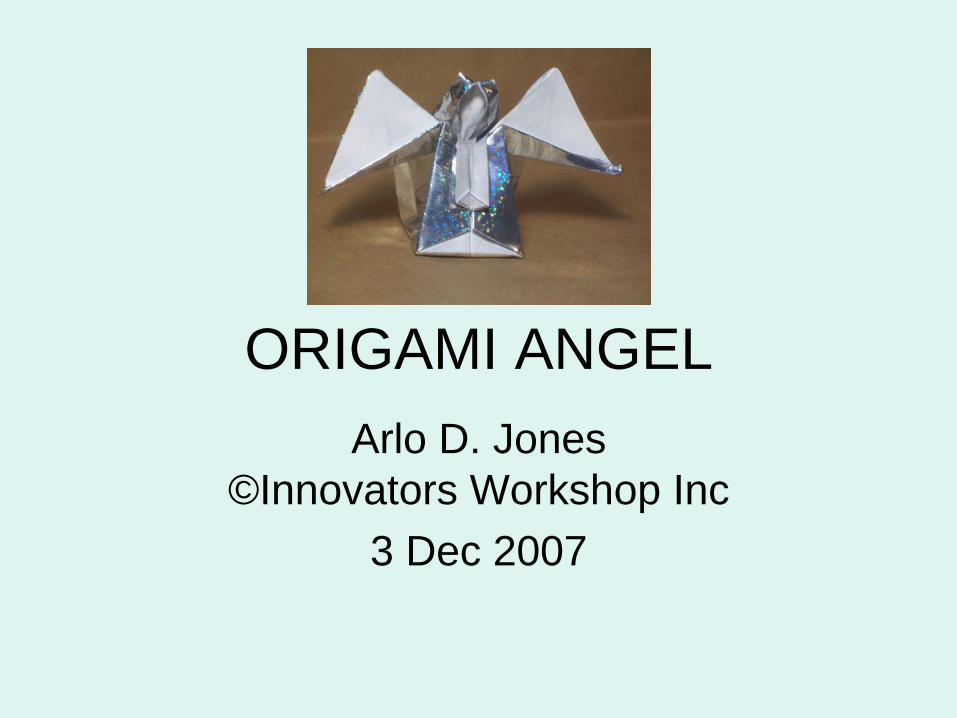
ORIGAMI ANGELArlo D. Jones
©Innovators Workshop Inc3 Dec 2007

2
Start with a square piece of paper. This example was made from a 12” square of wrapping paper.The body will be the color that is up, the wings the color that is down (white).Begin with a “bird base”.
Valley fold the diagonals.
Mountain fold the horizontal and vertical bisectors
3
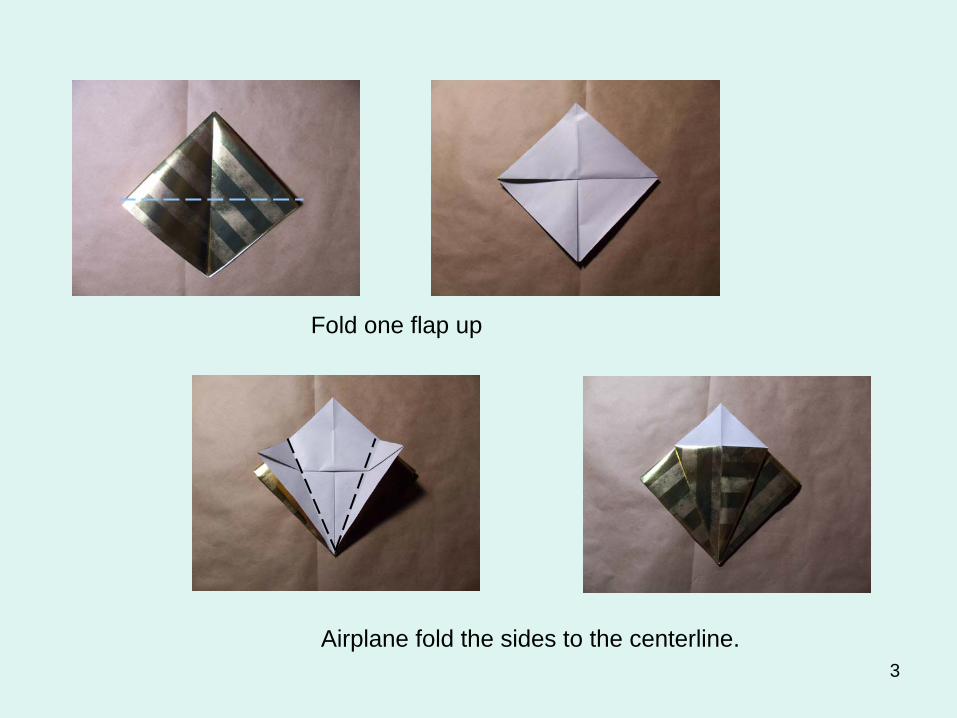
Fold one flap up
Airplane fold the sides to the centerline.
4
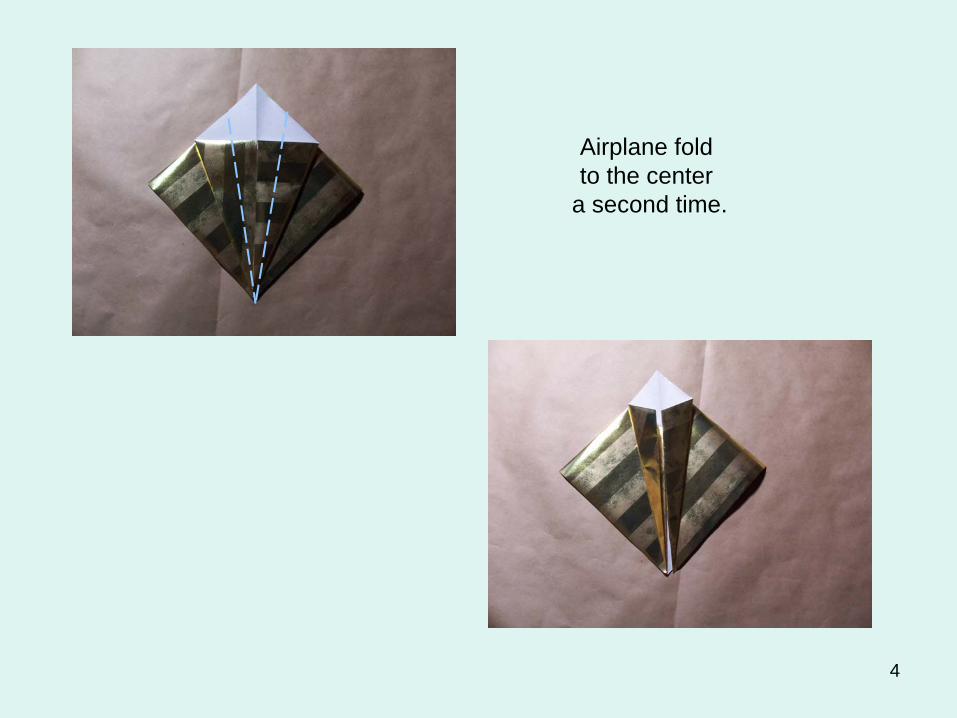
Airplane fold to the center
a second time.
5
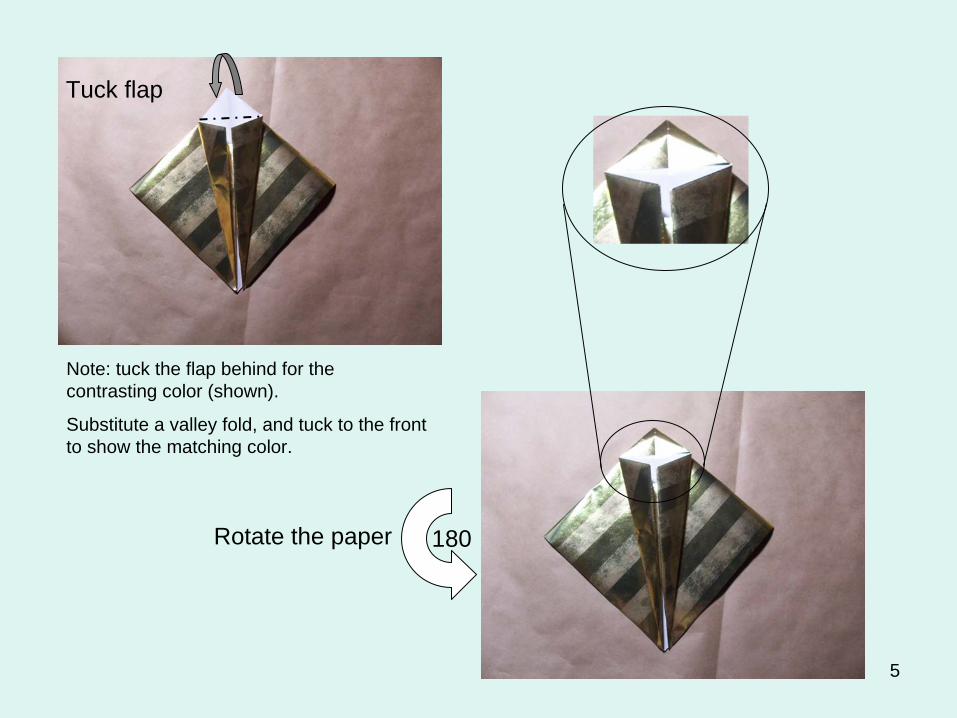
Tuck flap
180Rotate the paper
Note: tuck the flap behind for the contrasting color (shown).
Substitute a valley fold, and tuck to the front to show the matching color.
6
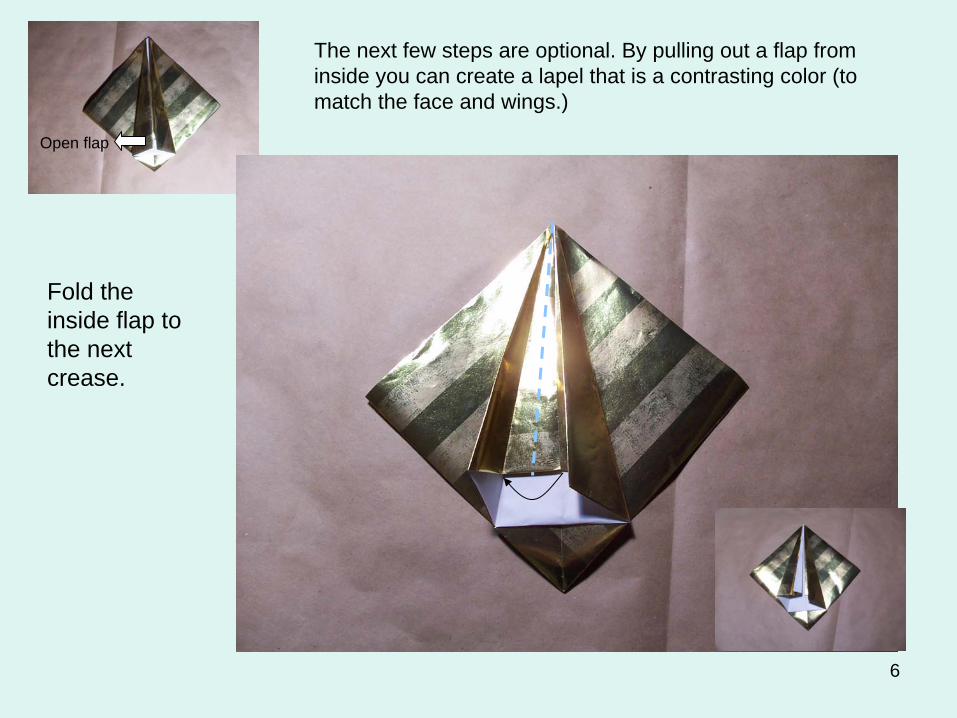
The next few steps are optional. By pulling out a flap from inside you can create a lapel that is a contrasting color (to match the face and wings.)
Open flap
Fold the inside flap to the next crease.
7
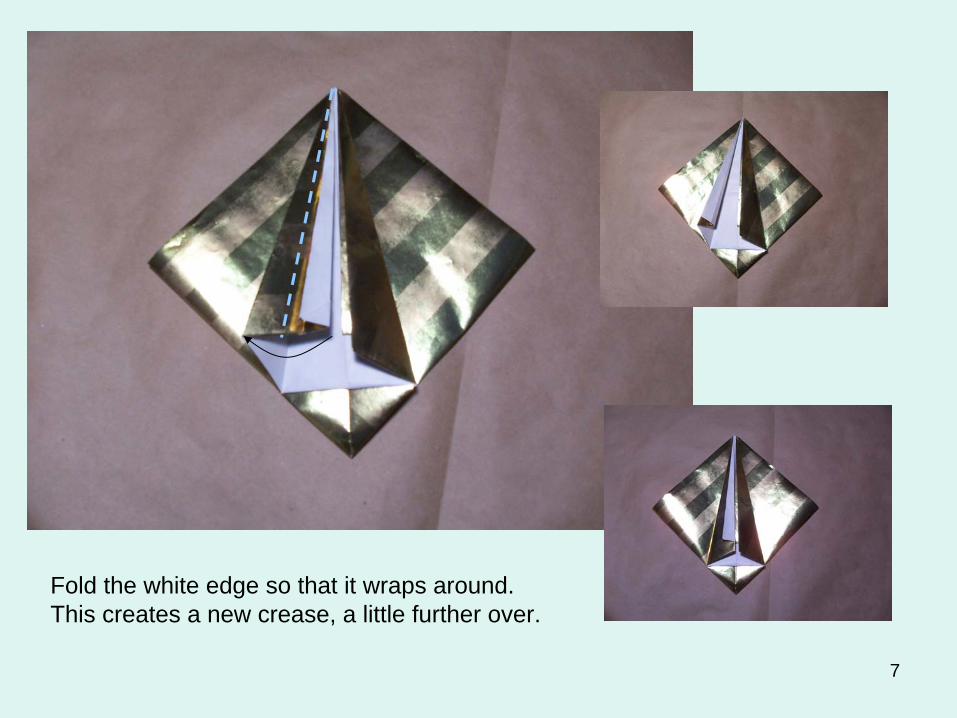
Fold the white edge so that it wraps around. This creates a new crease, a little further over.
8
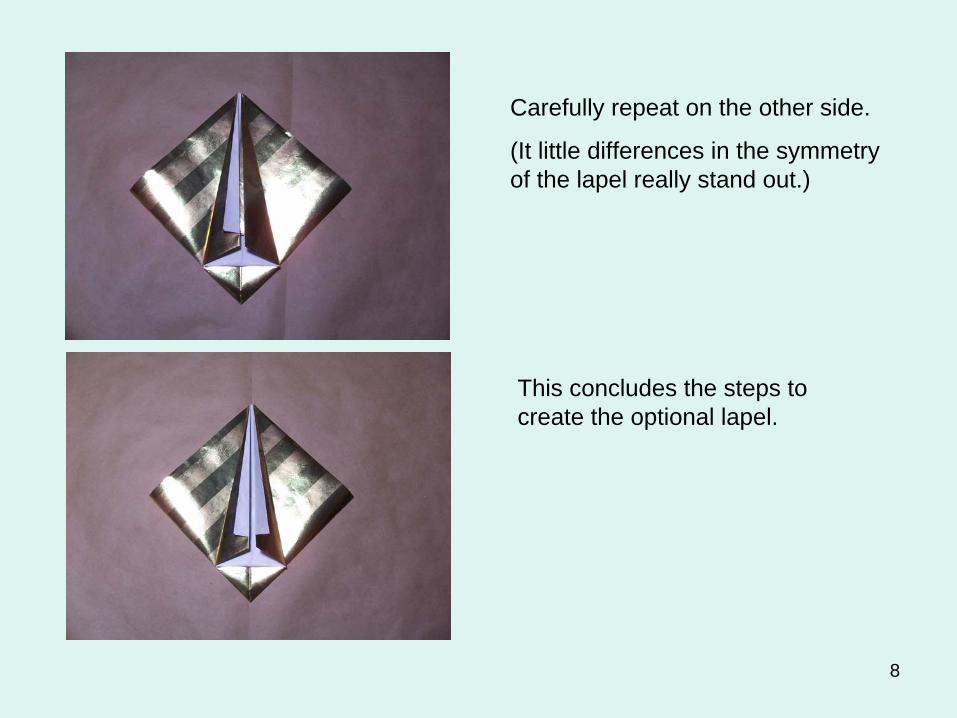
Carefully repeat on the other side.
(It little differences in the symmetry of the lapel really stand out.)
This concludes the steps to create the optional lapel.
9
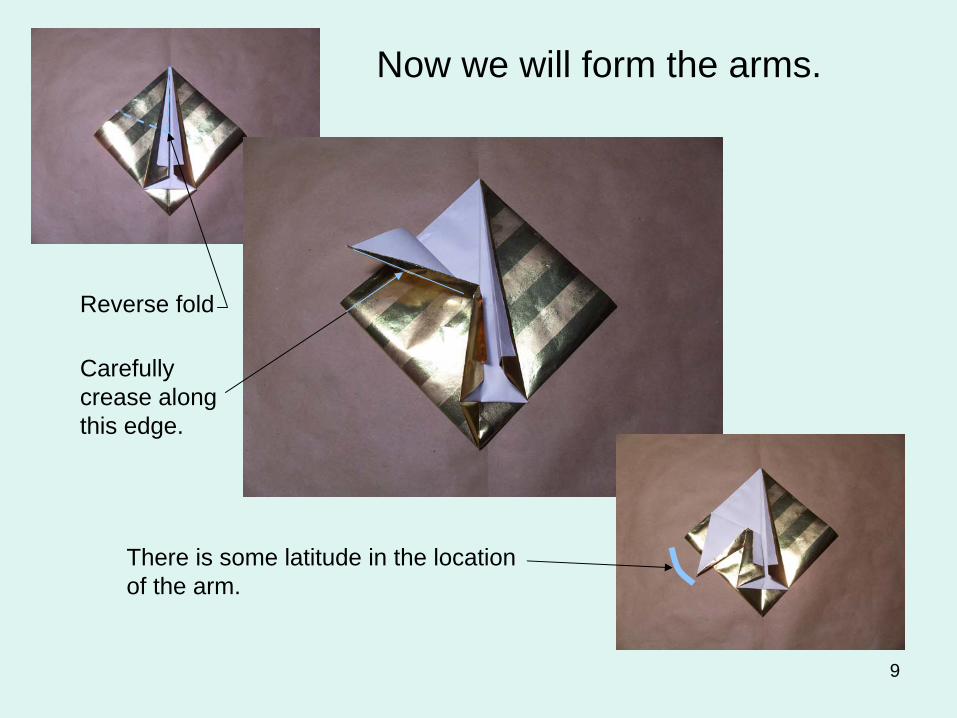
Now we will form the arms.
Reverse fold
Carefully crease along this edge.
There is some latitude in the location of the arm.
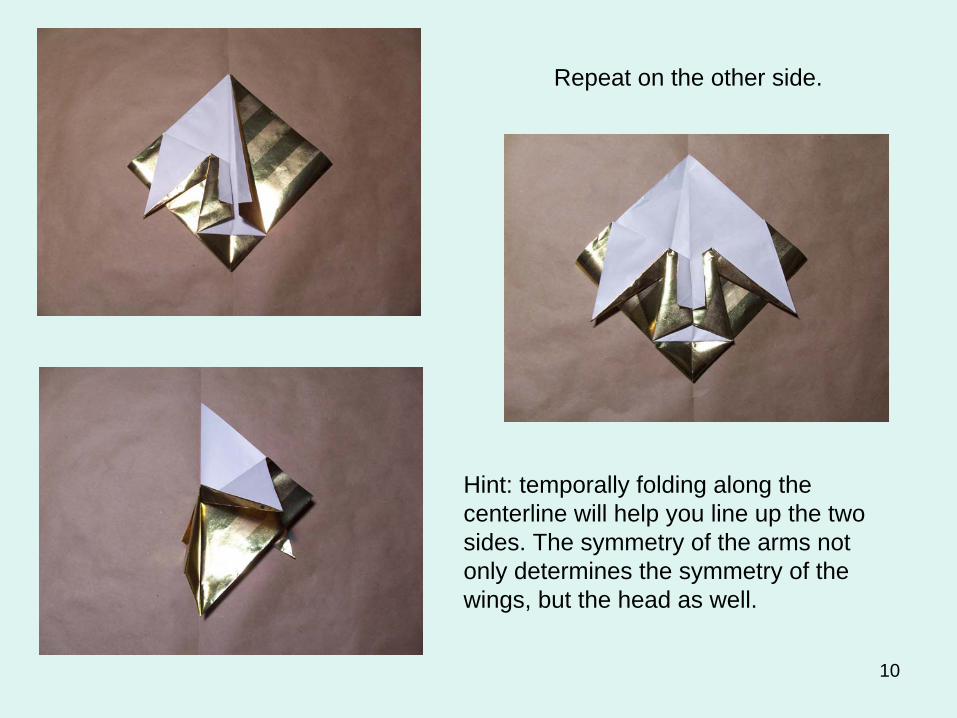
10
Hint: temporally folding along the centerline will help you line up the two sides. The symmetry of the arms not only determines the symmetry of the wings, but the head as well.
Repeat on the other side.
11
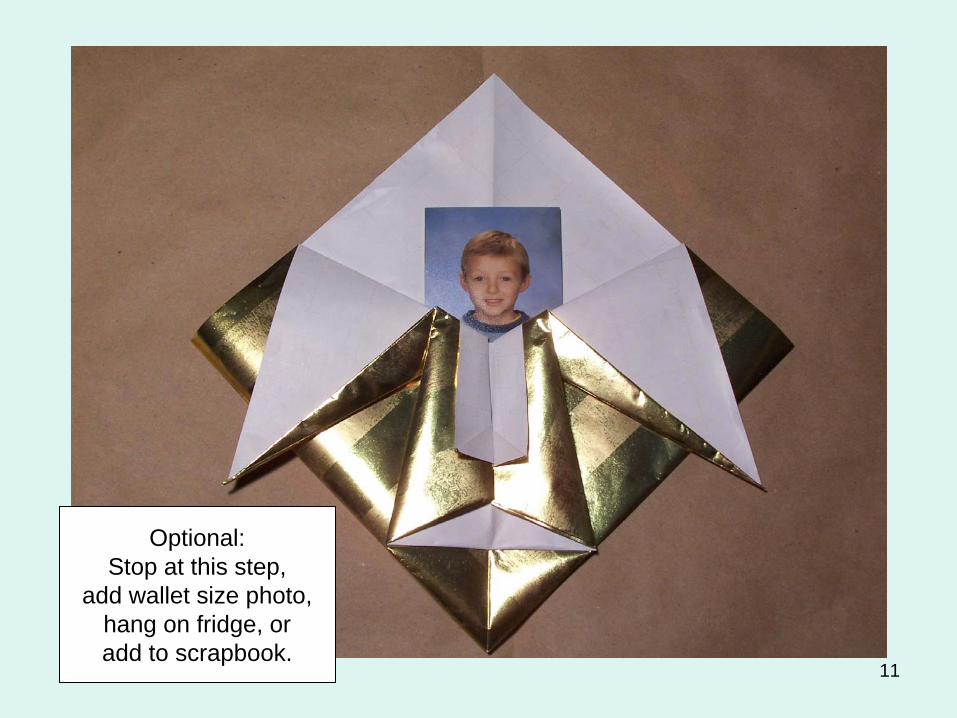
Optional: Stop at this step,
add wallet size photo, hang on fridge, or add to scrapbook.
12
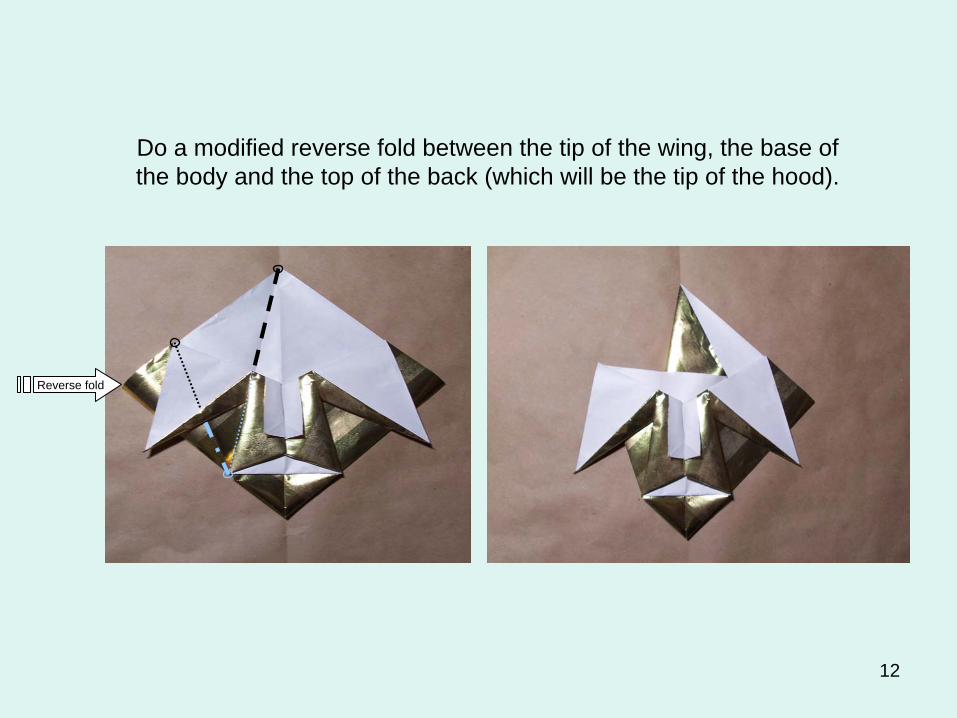
Reverse fold
Do a modified reverse fold between the tip of the wing, the base of the body and the top of the back (which will be the tip of the hood).
13
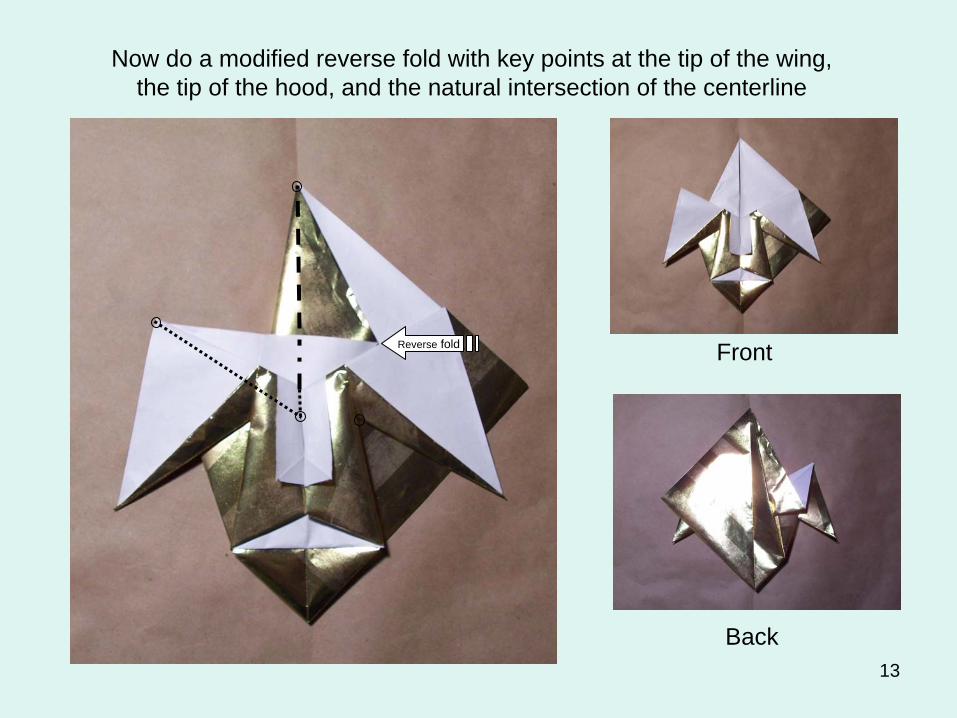
Now do a modified reverse fold with key points at the tip of the wing, the tip of the hood, and the natural intersection of the centerline
FrontReverse fold
Back
14
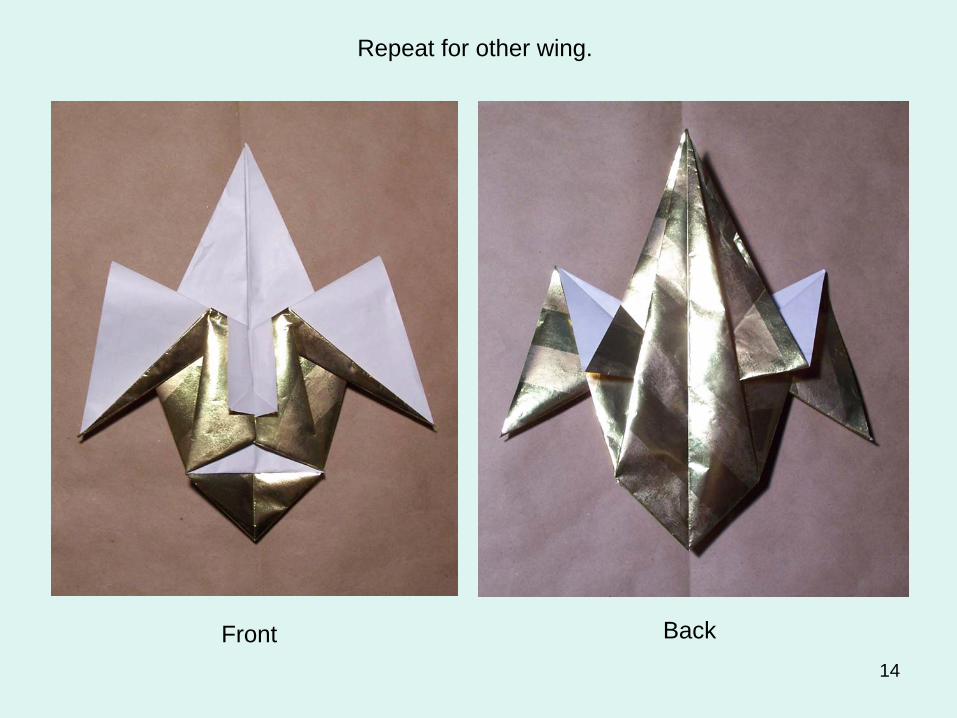
Front Back
Repeat for other wing.
15
B A C K
F R O N T
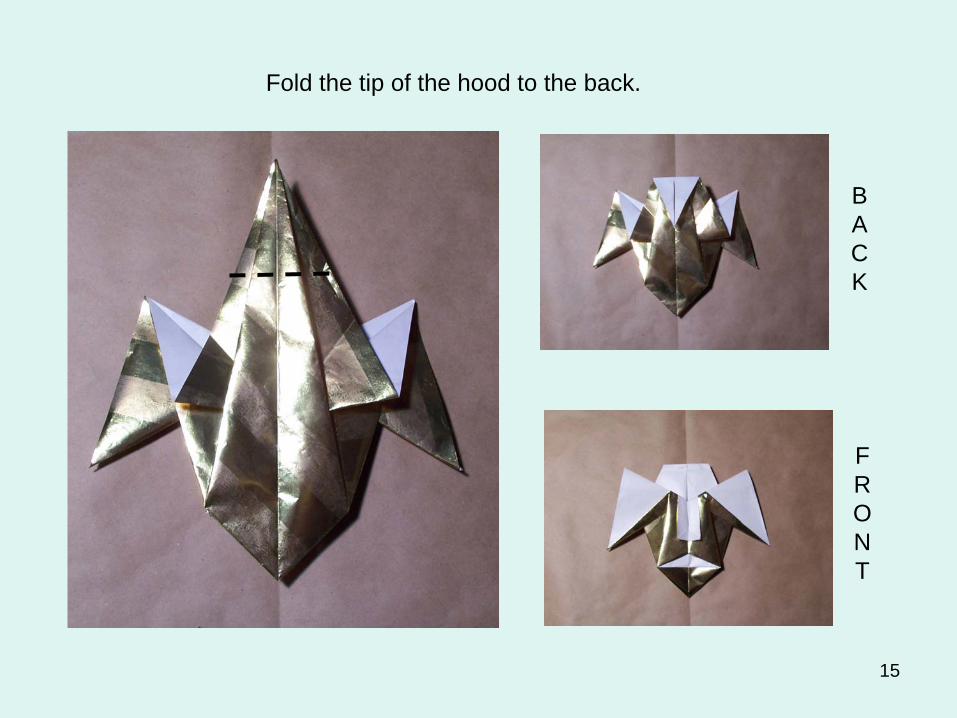
Fold the tip of the hood to the back.
16
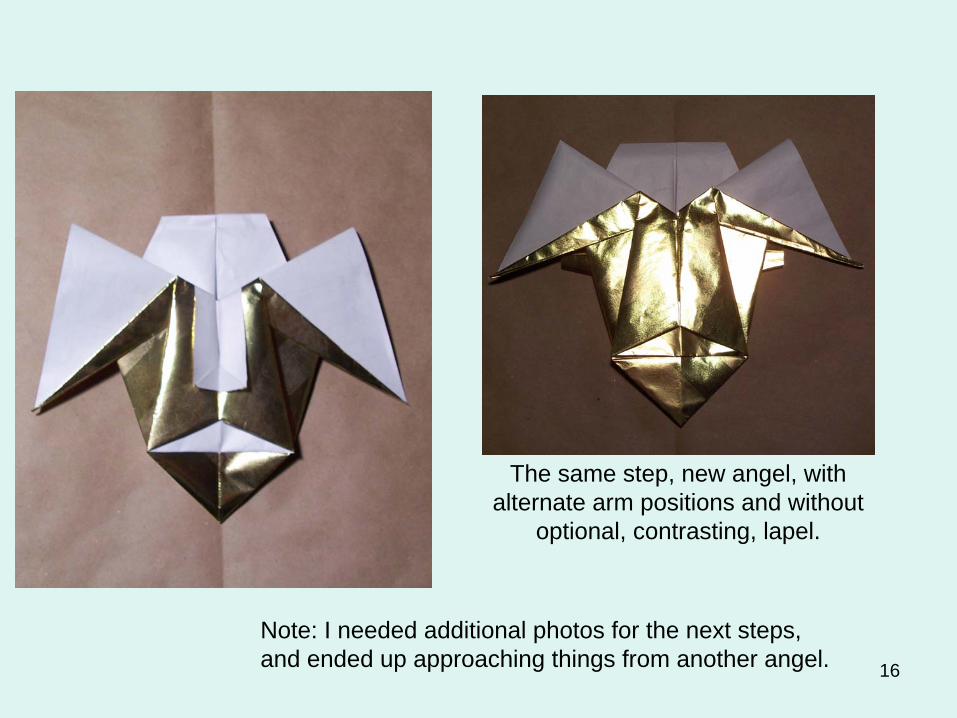
The same step, new angel, with alternate arm positions and without
optional, contrasting, lapel.
Note: I needed additional photos for the next steps, and ended up approaching things from another angel.
17
B A C K
F R O N T
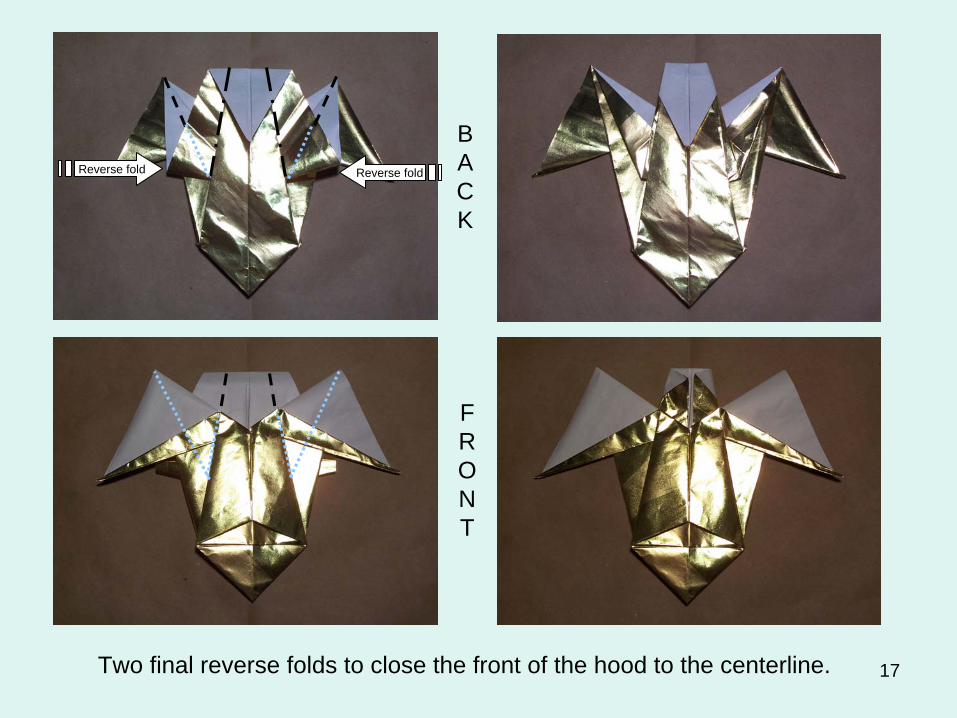
Two final reverse folds to close the front of the hood to the centerline.
Reverse fold Reverse fold
18
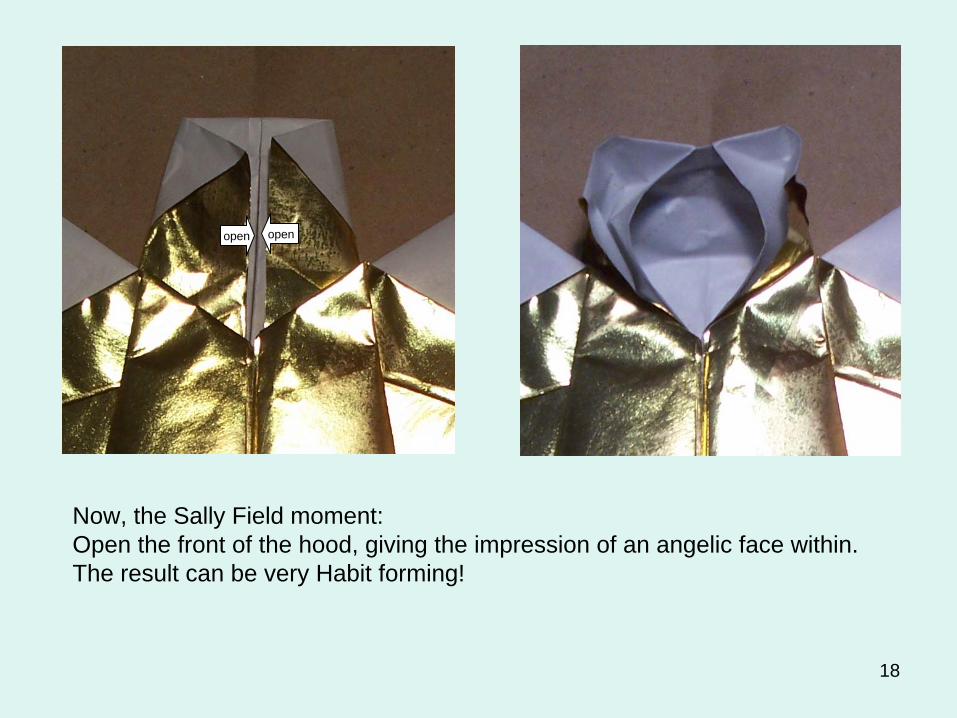
open open
Now, the Sally Field moment: Open the front of the hood, giving the impression of an angelic face within. The result can be very Habit forming!
19
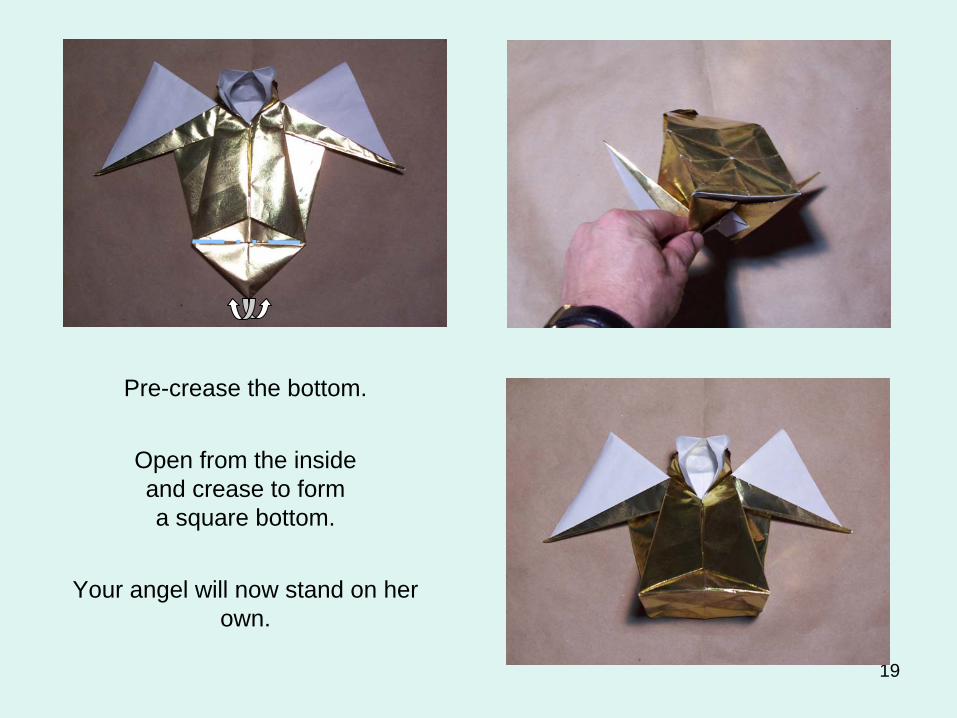
Pre-crease the bottom.
Open from the inside and crease to form a square bottom.
Your angel will now stand on her own.
20
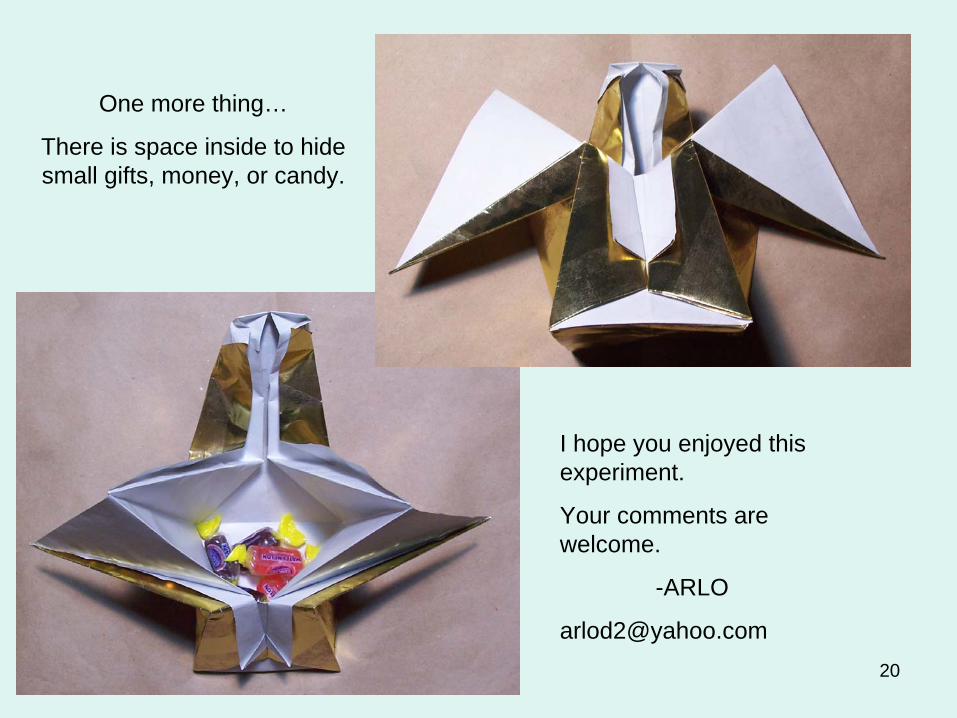
One more thing…
There is space inside to hide small gifts, money, or candy.
I hope you enjoyed this experiment.
Your comments are welcome.
-ARLO