owncloud user manual - csicinformatica.ibv.csic.es/normativa/owncloudusermanual.pdf · ... your...
TRANSCRIPT

ownCloud User ManualRelease 45
The ownCloud developers
April 08 2013
CONTENTS
1 Introduction 1
2 The ownCloud Web Interface 321 Overview 3
3 Mounting ownCloud via WebDAV 531 Windows 532 Mac OS X 733 Linux 7
4 Accessing your Files 1141 Desktop 1142 Mobile 11
5 Calendars 1351 Creating a calendar 1352 Synchronising Calendars with CalDav 1353 Creating events 1354 Exporting Importing events 1555 Why is the calendar app asking for my current location 15
6 Using the Contacts App 1761 Adding contacts 1762 Creating new address books 2063 Keeping your address book in sync 21
7 Using the Bookmarks App 2371 The main interface 2372 The bookmarklet 24
8 Desktop Synchronisation 25
9 Synchronizing with KDE SC 27
10 Synchronizing with OS X 33101 Setup synchronisation with Mountain Lion (108) 33102 Installation directions for Snow Leopard (106) 35
11 iOS - Synchronize iPhoneiPad 37111 Synchronizing the Calendar 37
i
112 Synchronizing the Address book 37113 Troubleshooting 38
12 Native Media Player Support 39
13 Version Control 41
14 Indices and tables 43
Index 45
ii
CHAPTER
ONE
INTRODUCTION
Welcome to ownCloud your self-hosted file sync and share solution
OwnCloud is open source file sync and share software for everyone from individuals operating the free CommunityEdition to large enterprises and service providers operating ownCloud Enterprise Edition ownCloud provides a safesecure and compliant file sync and share solution on servers you control
With ownCloud you can share one or more folders on your PC and sync them with your ownCloud server Place filesin your local shared directories and those files are immediately synced to the server and then to other PCs via thedesktop client Not near a desktop client No problem simply log in with the web client and manage your files thereThe Android and iOS mobile apps allow you to browse download and upload photos and videos On Android youmay also create download edit and upload any other files with the correct software installed
Whether using a mobile device a workstation or a web client ownCloud provides the ability to put the right files inthe right hands at the right time on any device in one simple-to-use secure private and controlled solution After allwith ownCloud itrsquos Your Cloud Your Data Your Way
1
ownCloud User Manual Release 45
2 Chapter 1 Introduction
CHAPTER
TWO
THE OWNCLOUD WEB INTERFACE
You can connect to ownCloud with your web browser by pointing it to the address that you have received from yourservice provider In case you are administering the server yourself have a look at ownCloud Administrators Manual
When you enter the URL you will receive a page that is similar to the one depicted below
Figure 21 The ownCloud login screen
Login with the user name and password with you have received from your service provider If you have set up theserver yourself log in with the user name which you have created during the setup process You can add further usersthrough the settings or by hooking up a user backend such as LDAP
21 Overview
After clicking the Log in button you will be redirected to ownCloudrsquos main web interface
The web interface comprises of the following items
1 Navigation bar Allows navigation between different parts of ownCloud provided by apps Not all appsdepicted in this screen shot are installed and enabled by default
2 Application view This is where apps show their content By default this will show the files and directory (fileview) of your user on the ownCloud installation
3 UploadCreate button This allows you to create new files or upload existing ones from your device Notethat you can also drop files from Explorer or Finder onto the ownCloud file view and they will get uploaded toownCloud
3
ownCloud User Manual Release 45
Figure 22 The ownCloud main interface with the essential elements numbered
4 SearchLogout Search allows you to look for files and directories Currently ownCloud does not provide afull text search but this may change in future releases
5 Settings This button provides access to the settings menu where you can change your personal settings suchas the interface language or your password You can also retrieve the WebDAV URL (see next chapter) andshow your quota Administrators will also get access to user management (Users) the apps settings (Apps) andadministrative settings (Admin) including access to ownCloudrsquos log
4 Chapter 2 The ownCloud Web Interface
CHAPTER
THREE
MOUNTING OWNCLOUD VIA WEBDAV
All major operating systems allow for mounting a users ownCloud via WebDAV a HTTP extension as specified inRFC 2518 This chapter describes how to setup WebDAV on different operating systems
31 Windows
On Windows you can assign ownCloud a drive letter This allows you to browse files stored on an ownCloudserverthe way you would files stored in a mapped network drive
Using this feature requires network connectivity If you want to store your files offline use the ownCloud Client tosync all files on your ownCloud to one or more directories of your local hard drive
Note Prior to mapping your drive you will need to permit the use of Basic Authentication in the Windows RegistryThe procedure is documented in KB841215 and differs between Windows XPServer 2003 and Windows Vista7Please follow the Knowledge Base article before proceeding and follow the Vista instructions if you run Windows 7
311 Mapping via the command line
Suppose your ownCloud is installed at httpswwwyourservercomowncloud that is entering this URLin your webbrowser will bring up the login screen Running
net use Z httpswwwyourservercomowncloudremotephpwebdav useryouruser yourpassword
will map the files of your ownCloud account to the drive letter Z An alternative syntax is
net use Z wwwyourservercomsslowncloudremotephpwebdav useryouruser yourpassword
Appending persistent makes the connection persistent across reboots
You can also mount your ownCloud via HTTP leaving the connection unencrypted Use either of the followingsyntaxes
net use Z httpwwwyourservercomowncloudremotephpwebdav useryouruser yourpasswordnet use Z wwwyourservercomowncloudremotephpwebdav useryouruser yourpassword
Please note that this allows anyone to sniff your ownCloud data with ease especially on public WiFi hotspots PlainHTTP should therefore only be used in conjunction with a VPN tunnel when used on Laptops
5
ownCloud User Manual Release 45
312 Using Windows Explorer
Right-click on Computer entry and select Map network drive Choose a local network drive to mapownCloud to Finally enter the address to your ownCloud instance followed by remotephpwebdav eg
httpswwwyourservercomowncloudremotephpwebdav
for an SSL protected server Check Reconnect at logon to make this mapping persistent across reboots If youwant to connect as another user check Connect using different credentials
Figure 31 Mapping WebDAV on Windows Explorer
After pressing Finish Windows Explorer will map the network drive and your ownCloud instance should be avail-able
313 Using Cyberduck (421)
Specify a server without any leading protocol information eg
Server owncloudhostcom
The port depends on whether your ownCloud server supports SSL or not Cyberduck requires that you select a differentconnection type depending on whethr SSL is to be used (lsquoWebDAVrsquo or lsquoWebDAV (HTTPSSSL)rsquo)
Port 80 (for WebDAV) 443 (for WebDAV (HTTPSSSL))
Use the lsquoMore Optionsrsquo drop-down menu to add the rest of your webdav URL into the lsquoPathrsquo field eg
Path remotephpwebdav
6 Chapter 3 Mounting ownCloud via WebDAV
ownCloud User Manual Release 45
314 Known Problems
Problem Windows refuses to connect via HTTPS
Solution The Windows WebDAV Client does not support Server Name Indication (SNI) on encrypted connectionsIf you encounter an error mounting an SSL-encrypted ownCloud instance please contact your provider aboutassigning a dedicated IP address for your SSL-based server
Problem I receive the error Error 0x800700DF The file size exceeds the limit allowedand cannot be saved
Solution Windows limits the maximum size a file transferred from or to a Web-DAV share may have You can increase the value FileSizeLimitInBytes inHKEY_LOCAL_MACHINESYSTEMCurrentControlSetServicesWebClientParametersby clicking on Modify In order to increase the limit to the maximum value of 4GB pick Decimal and enter4294967295 as value Afterwards reboot Windows or restart the WebClient service
Todo
document registry keys on file size limit and not complaining in no network cases
32 Mac OS X
Assuming your owncloud instance is installed at httpswwwyourservercomowncloud
In the Finder choose Go gt Connect to Server type the address of the server in the Server Addressfield and click Connect The server address should be in a form similar to this ADDRESSfileswebdavphpFor our example it would be
httpswwwyourservercomowncloudfileswebdavphp
For details check the respective vendor documentation at the Apple website
33 Linux
331 KDEDolphin
Assuming your owncloud instance is installed at httpwwwyourservercomowncloud
1 Open Dolphin and click on where it says Network in the left hand Places column
2 Click on the icon labeled Add a Network Folder
3 It should come up with WebDAV already selected Make sure it is and then click Next
4 Enter the following settings
bull Name The name yoursquoll see in the Places bookmark for example ownCloud
bull User Your ownCloud username you use to log in for example admin
bull Server Your ownCloud domain name for example wwwyourservercom (without http before ordirectories afterwards)
bull Folder Enter owncloudfileswebdavphp
5 Create icon checkbox Tick to get a bookmark in the Places column
32 Mac OS X 7
ownCloud User Manual Release 45
6 Port amp Encrypted checkbox Leave as it is unless you have special settings or an SSL certificate
332 UbuntuGnome (Nautilus)
Figure 32 Nautilus WebDAV mounting dialog
333 Mounting from command line
1 Install the WebDAV support using the davfs package On DebianUbuntu you can use sudo apt-getinstall davfs2
2 Reconfigure davfs2 to allow access to normal users sudo dpkg-reconfigure davfs2 (select Yes when prompted)
3 Add the users you want to be able to mount the share to the davfs2 group sudo usermod -aG davfs2ltusergt
4 Edit etcfstab and add the following line for each user who wants to mount the folder (with your de-tails where appropriate) ADDRESSfileswebdavphp homeltusernamegtowncloud davfsuserrwnoauto 0 0
Then as each user who wants to mount the folder
1 Create the folders owncloud and davfs2 in your home directory
2 Create the file secrets inside davfs2 fill it with the following (with your credentials where appropriate)ADDRESSfileswebdavphp ltusernamegt ltpasswordgt
3 Ensure the file is only writable by you either through the file manager or via chmod 600~davfs2secrets
4 Run the command mount ~owncloud
5 To automatically mount the folder on login add the command you used in step 4 to ~bashrc
8 Chapter 3 Mounting ownCloud via WebDAV
ownCloud User Manual Release 45
Known Issues
Problem Resource temporarily unavailable
Solution If you experience trouble when you create a file in the directory edit etcdavfs2davfs2conf andadd use_locks 0lsquo
Problem Certificate warnings
Solution If you use a self-signed certificate you will get a warning If you are willing to take the risk of a man in themiddle attack run this command instead echo y | mount ~owncloud gt devnull 2gtamp1
33 Linux 9
ownCloud User Manual Release 45
10 Chapter 3 Mounting ownCloud via WebDAV
CHAPTER
FOUR
ACCESSING YOUR FILES
41 Desktop
Your ownCloud instance can be accessed on every platform via the web interface There are also options to integrateit with your desktop
In most cases accessing ownCloud using your file manager will be sufficient
bull Connect to Server in your file manager webdavADDRESSfileswebdavphp
bull Change the protocol to dav in Nautilus or http in Finder
However some applications only allow you to save to a local folder To get around this issue you can
bull Sync your ownCloud folders and local folders
bull Mount ownCloud to a local folder without sync
The Desktop Syncing Client called Mirall is now released for Linux and Windows You can follow the current changesat the ownCloud Mirall repository We work on porting this to Mac OS and packaging for all major linux distributions
42 Mobile
To connect to your ownCloud server with the ownCloud mobile apps use the base URL and folder only
examplecomowncloud
No need to add remotephpwebdav as you do for any other WebDAV client
There are also apps in development for both Android and webOS Feel free to contribute if you can
You may also connect to ownCloud from your phone or tablet via WebDAV WebDAV Navigator is a good (proprietary)app for Android App iPhone amp BlackBerry The URL for these is
examplecomowncloudremotephpwebdav
11
ownCloud User Manual Release 45
12 Chapter 4 Accessing your Files
CHAPTER
FIVE
CALENDARS
51 Creating a calendar
If you use the calendar the first time there will be already a calendar called ldquoDefault calendarrdquo You can manage yourcalendars with a click on the ldquoCalendarrdquo button in the top right corner In the dialog which will appear you can addedit export enable disable and delete your calendars There will be also a link for CalDav access
52 Synchronising Calendars with CalDav
Assuming you access your web interface via an address like this
httpADDRESS
Then you can access your calendars with CalDAV-compatible programs like Kontact Evolution Thunderbird usingthe following URL
httpADDRESSremotephpcaldav
To use the ownCloud calendar with Apple iCal you will need to use the following URL including the trailing slash
httpADDRESSremotephpcaldavprincipalsusername
Mozilla Lightning users need to this URL scheme
httpsADDRESSremotephpcaldavcalendarsUSERNAMECALENDARNAME
Note The calendar name must alway be specified in URL-encoding
53 Creating events
To create an event just click on the date in the month view or choose the timeframe in the weekview In the dialogwhich will appear you can enter your information like title category etc
13
ownCloud User Manual Release 45
Figure 51 Example for a simple calendar The default calendar is always called ldquodefaultcalendarrdquo and the usersrsquoname here is ldquotestrdquo The full URL (which on the picture canrsquot be seen because of the short edit field) is then
httpslocalhostowncloudremotephpcaldavcalendarstestdefaultcalendar
14 Chapter 5 Calendars
ownCloud User Manual Release 45
With the advanced options you can set the description the location and the repetition rate of an event If the repeatingshould end you can choose between setting the end by date or by occurrences If you choose in the weekview all daysfrom Monday to Friday it will automatically set the repeat rule to ldquoevery weekdayrdquo If the interval of the weekviewcan be devided by two it automatically set the repeat rule to ldquoBi-Weeklyrdquo
54 Exporting Importing events
541 Export
You can export either a single event or a whole calendar If you want to export a single event click on it and press theexport button in the bottom right corner If you want to export a whole calendar use the ldquoCalendarrdquo button as describedin the chapter ldquoCreating a calendarrdquo
542 Import
Import your calendar as ical file using the files app Just click on the calendar file to open the import dialog You canimport the calendar into a new calendar or into an already existing calendar
Note If the progressbar does not work properly the folder appscalendarimport_tmp has probably nowrite permission
55 Why is the calendar app asking for my current location
The calendar needs your current position in order to detect your timezone Without the correct timezone there will bea time offset between the events in ownCloud and your desktop calendar you synchronise with ownCloud You can
54 Exporting Importing events 15
ownCloud User Manual Release 45
also set the timezone manually in the personal settings
16 Chapter 5 Calendars
CHAPTER
SIX
USING THE CONTACTS APP
The contacts app of ownCloud is like any other mobile contact app but with more functionality Just as you open youraccount you will get the a default addressbook available We will see later that Of course you can always add andremove addressbooks in here
61 Adding contacts
There are two ways in which you can add contacts
1 Add them manually
2 Import a VCF file
611 Importing
So first well check out how to import all the VCF files as they are a lot more faster way of creating contacts Justbelow the contact list 3 buttons The middle one let you upload files
Once yoursquove clicked it the upload window let you choose your files We can upload the files one by one or upload allof them at one go
Let me demonstrate Open the directory in which you store all the files and then do the following Keep pressingCTRL and select the files to upload After you are done just click on the open button After the upload it should looksomething like this in which all the names and contacts will be sorted alphabetically
17
ownCloud User Manual Release 45
Then the interface ask you where to put your imported contacts You have the ability to choose an existing addressbookor to create a new one Then click on ldquoOKrdquo and thatrsquos all for the import of contacts
612 Create contacts manually
In the picture of the bottom bar you could see the new contact button (first one) Click on it You can now see anempty contact in the main part of the interface You have the ability to add all your informations about the contact thename the address the e-mail the telephone nr
Just click on a field and start typing the information You can use the ldquoAdd Fieldrdquo button to add another types ofinformation for this contact
18 Chapter 6 Using the Contacts App
ownCloud User Manual Release 45
When you want to remove an information of your contact just click on little delete icon at the right of the field youwant to remove
613 Adding picture to the contact
There are two methods in which you can give a picture id to the specific contact
1 Direct upload
2 Select pics already uploaded in ownCloud files
After you have selected the picture for the contact you get an option to crop the picture to suit your requirements
61 Adding contacts 19
ownCloud User Manual Release 45
You can crop the picture however you wish and then press OK
As you can see it is really easy to set things right in this app It automatically pics up the First name Middle name (ifany) and the last name You may add or delete any section you want for your own convenience
62 Creating new address books
When you click on the third button of the bottom bar you will have access to the applicationrsquos settings Then presson the ldquoMore buttonrdquo to access the options of your Addressbooks
20 Chapter 6 Using the Contacts App
ownCloud User Manual Release 45
You have there the ability to add delete download or share your addressbooks Hover your cursor on every icon tosee what they mean
63 Keeping your address book in sync
One of the most important thing in any contact app is to keep it in Sync You can sync this contact app to your phonewhich has the following OSrsquos- Android and IOS
631 Syncing with Android
1 Install cardDav- Sync free from Google play store by visiting this link-httpsplaygooglecomstoreappsdetailsid=orgdmfscarddavsync
2 This app supports auto- configuration which is a Boon- after installing visit this link- card-davsowncloudexamplenetremotephpcarddav to auto configure the app
3 Enter your login details
4 After the app has checked your login details you may just select- Sync server to phone option
5 Thatrsquos it there is nothing else to do for Android )
632 Syncing your IOS device
Synchronizing the Address book
63 Keeping your address book in sync 21
ownCloud User Manual Release 45
1 Open the settings application
2 Select Mail Contacts Calendars
3 Select Add Account
4 Select other as account type
5 Select Add CardDAV account
6 For server type httpowncloudexamplenetremotephpcarddavprincipalsusername
7 Enter your user name and password
8 Select Next
9 If your server does not support SSL a warning will be displayed Select Continue
10 If the iPhone is unable to verify the account information perform the following
bull Select OK
bull Select advanced settings
bull Make sure Use SSL is set to OFF
bull Change port to 80
bull Go back to account information and hit Save
Now should now find your contacts in the address book of your iPhone
633 Other Syncing options provided by ownCloud
1 For android you may use their official android app- httpsowncloudcomoverviewmobileapps
2 And for IOS(Iphone and Ipad) use their app - httpsowncloudcomoverviewmobileapps
22 Chapter 6 Using the Contacts App
CHAPTER
SEVEN
USING THE BOOKMARKS APP
To add a bookmark to the application you have 2 possibilities use the main interface or the bookmarklet or use thebookmarklet
71 The main interface
The main owncloud interface contains 3 fields at the top where you can enter the website address (or URL) the titleof your bookmark and a serie of tags separated by a space
Here wersquove added the page httpwikipediaorg with the title ldquoWikipediardquo and some tags describing what wikipediais (for an easyier search later on)
711 Edition
You also have the possibility to edit or delete your bookmark For that just hover your mousersquos cursor over onebookmark and click on the little pencil to edit or the cross the delete
The bookmark will then be filled into the 3 fields at the top of the screen Modify your bookmark to your need thenhit the save button to persist the change
712 Search
If you click on a tag ownCloud will only display the bookmarks that are described with this tag
You can also use the search bar of owncloud in the top right of your screen
Simply click on the ldquoBookmarksrdquo menu in the sidebar to come back to the default view
23
ownCloud User Manual Release 45
72 The bookmarklet
The creator of this app understand that people wonrsquot come open the ownCloud page to add the bookmark when thesee a cool site This is why they have made this cool ldquobookmarkletrdquo
A bookmarklet is small button that you can drag and drop in your bookmarks The next time you see a cool new sitepress on this special bookmark it will add the site to your ownCloud bookmarks
To find this bookmark go to your personnal preference and search for the ldquoBookmarkletrdquo item
24 Chapter 7 Using the Bookmarks App
CHAPTER
EIGHT
DESKTOP SYNCHRONISATION
For synchronizing files with your desktop computer we recommend using the ownCloud Client for Windows MacOS X and Linux Its usage is documented separately in the ownCloud Desktop Client Manual
Furthermore It is possible to synchronize your ownCloud calendar and address book with a variety of different oper-ating systems and devices It is also possible to mount your ownCloud storage via WebDAV which is also documentedin the next chapters
25
ownCloud User Manual Release 45
26 Chapter 8 Desktop Synchronisation
CHAPTER
NINE
SYNCHRONIZING WITH KDE SC
From KDE SC 48 and forward setting up ownCloud is very easyFrom System Settings Personal InformationAkonadiResources Configuration select DAV Groupware resource
27
ownCloud User Manual Release 45
Enter your ownCloud username and password and click ldquoNextrdquo
Select ownCloud in the drop down list and click ldquoNextrdquo
28 Chapter 9 Synchronizing with KDE SC
ownCloud User Manual Release 45
Enter the host name and installation path If you do not use SSL remember to de-select ldquoUse secure connectionrdquo
Test the connection If everything went well you should see a message like the one below
29
ownCloud User Manual Release 45
Click ldquoFinishrdquo and you will be able to change the display name and refresh interval
Now you should see the Akonadi resource doing the first synchronization
You can find the Contacts and Calendars in Kontact (or KOrganizerKAddressbook if you run the programs separately)
30 Chapter 9 Synchronizing with KDE SC
ownCloud User Manual Release 45
31
ownCloud User Manual Release 45
32 Chapter 9 Synchronizing with KDE SC
CHAPTER
TEN
SYNCHRONIZING WITH OS X
101 Setup synchronisation with Mountain Lion (108)
Note Although these steps belong to Mountain Lion (108) they should be similar with Lion (107)
Open the System Preferences choose Mail Contacts amp Calendars and scroll down to select Add Other Account
33
ownCloud User Manual Release 45
1011 Synchronising the Calendar
Select Add a CalDAV account
Enter your ownCloud-username your password and the full URL-path to your ownCloud-installationADDRESSremotephpcaldavprincipalsUSERNAME (Replace ADDRESS and USERNAME)
1012 Synchronising the Addressbook
Select Add a CardDAV account
34 Chapter 10 Synchronizing with OS X
ownCloud User Manual Release 45
Enter your ownCloud-username your password and the full URL-path to your ownCloud-installationADDRESSremotephpcarddavprincipalsUSERNAME (Replace ADDRESS and USERNAME notethe url is slightly different to the URL in the previous step)
102 Installation directions for Snow Leopard (106)
While OS X Lion and Mountain Lion work fine OS X Snow Leopard (106) and older needs some fiddling to workA user contributed the following
1 Make sure Addressbook is not running If it is select the windows and press Command + Q to terminate it
2 Navigate to UsersYOUR_USERNAMELibraryApplication SupportAddressBookSourcesIf you have all ready some kind of address book setup it is likely you will see some folders named like thisBEA92826-FBF3-4E53-B5C6-ED7C2B454430 Note down what folders there are now and leave thewindow open
3 Open addressbook and try to add a new CardDav addressbook At this point it does not matter what informationyou enter It will come up with the same error message you mentioned before when you click ldquoCreaterdquo Ignoreit and click ldquoCreaterdquo again A non-functional address book will be added
4 Close Address-Book again using Command + Q
102 Installation directions for Snow Leopard (106) 35
ownCloud User Manual Release 45
5 Go back to the folder window from step 2 You will now see a newly created folder with another long string asits name
6 Navigate to the newly created folder and edit the Configurationplist with your favorite text editor
7 Search for a section looking like this
ltkeygtservernameltkeygt ltstringgthttp0(null)ltstringgtltkeygtusernameltkeygt ltstringgtWhatever_you_entered_beforeltstringgt
8 Make it look like this Please note the 80 after YOUR_DOMAIN it is important
ltkeygtservernameltkey ltstringgthttpYOUR_DOMAIN80owncloudremotephpcarddavprincipalsusernameltstringgtltkeygtusernameltkey ltstringgtusernameltstringgt
9 Save the file and open Address Book again It will not work yet
10 Open the preferences for your ownCloud CardDAV-Account and enter your password
11 You may have to restart Address Book once more After this it should work
There is also an easy HOWTO in the forum
36 Chapter 10 Synchronizing with OS X
CHAPTER
ELEVEN
IOS - SYNCHRONIZE IPHONEIPAD
111 Synchronizing the Calendar
1 Open the settings application
2 Select Mail Contacts Calendars
3 Select Add Account
4 Select Other as account type
5 Select Add CalDAV account
6 For server type ADDRESSremotephpcaldavprincipalsusername (Important Donrsquot includehttp or https)
7 Enter your username and password
8 Select Next
9 If your server does not support SSL a warning will be displayed Select Continue
10 If the iPhone is unable to verify the account information read the Troubleshooting paragraph on this page Ifthat doesnrsquot help try to turn off SSL (not recommended)
bull Select OK
bull Select advanced settings
bull Make sure Use SSL is set to OFF
bull Change port to 80
bull Go back to account information and hit Save
Your calendar should now be visible in the Calendar application (may take a few moments)
112 Synchronizing the Address book
1 Open the settings application
2 Select Mail Contacts Calendars
3 Select Add Account
4 Select Other as account type
5 Select Add CardDAV account
37
ownCloud User Manual Release 45
6 For server type ADDRESSremotephpcarddavprincipalsusername (Important Donrsquot includehttp or https)
7 Enter your username and password
8 Select Next
9 If your server does not support SSL a warning will be displayed Select Continue
10 If the iPhone is unable to verify the account information read the Troubleshooting paragraph on this page Ifthat doesnrsquot help try to turn off SSL (not recommended)
bull Select OK
bull Select advanced settings
bull Make sure Use SSL is set to OFF
bull Change port to 80
bull Go back to account information and hit Save
Now should now find your contacts in the address book of your iPhone (may take a few moments)
113 Troubleshooting
1 Check that you didnrsquot include http or https in the server address
2 Depending on your server setup the username-part of the server-address maybe case sensitive So for user Username the server-address may needto be ADDRESSremotephpcaldavprincipalsUsername instead ofADDRESSremotephpcaldavprincipalsusername
3 If you need to change the server-address and want to use SSL yoursquoll have to cancel the setup process and enteryour data again from the very beginning as iOS would prepend https to the server-address automatically
4 Problems have been reported for CardDAV and iOS 4X A possible solution is at the forum
38 Chapter 11 iOS - Synchronize iPhoneiPad
CHAPTER
TWELVE
NATIVE MEDIA PLAYER SUPPORT
You can access your music stored in ownCloud with every Ampache-compatible media player You can find theURL for your specific ownCloud installation in your personal settings or replace ADDRESS with the URL of yourownCloud installation yourself
Ampache-URL httpADDRESSappsmedia
Ampache-compatible players that work with ownCloud include
bull amaroK standard KDE music player
bull tomahawk cross platform player
bull justplayer music player for android
You can find more information about Ampache and other players at the Ampache wikipedia article
The current maintainer of the Media Player is Robin Appelman
39
ownCloud User Manual Release 45
40 Chapter 12 Native Media Player Support
CHAPTER
THIRTEEN
VERSION CONTROL
ownCloud supports simple version control for files Versioning is enabled by default and creates backups of fileswhich are accessible via the history tab This tab also links to the history page where you can roll back a file toany previous versionChanges made at intervals greater than two minutes are saved in data[user]versions and madeaccessible using the above pages
41
ownCloud User Manual Release 45
42 Chapter 13 Version Control
CHAPTER
FOURTEEN
INDICES AND TABLES
bull genindex
43
ownCloud User Manual Release 45
44 Chapter 14 Indices and tables
INDEX
RRFC
RFC 2518 5
45
- Introduction
- The ownCloud Web Interface
-
- Overview
-
- Mounting ownCloud via WebDAV
-
- Windows
- Mac OS X
- Linux
-
- Accessing your Files
-
- Desktop
- Mobile
-
- Calendars
-
- Creating a calendar
- Synchronising Calendars with CalDav
- Creating events
- Exporting Importing events
- Why is the calendar app asking for my current location
-
- Using the Contacts App
-
- Adding contacts
- Creating new address books
- Keeping your address book in sync
-
- Using the Bookmarks App
-
- The main interface
- The bookmarklet
-
- Desktop Synchronisation
- Synchronizing with KDE SC
- Synchronizing with OS X
-
- Setup synchronisation with Mountain Lion (108)
- Installation directions for Snow Leopard (106)
-
- iOS - Synchronize iPhoneiPad
-
- Synchronizing the Calendar
- Synchronizing the Address book
- Troubleshooting
-
- Native Media Player Support
- Version Control
- Indices and tables
- Index
-

CHAPTER
ONE
INTRODUCTION
Welcome to ownCloud your self-hosted file sync and share solution
OwnCloud is open source file sync and share software for everyone from individuals operating the free CommunityEdition to large enterprises and service providers operating ownCloud Enterprise Edition ownCloud provides a safesecure and compliant file sync and share solution on servers you control
With ownCloud you can share one or more folders on your PC and sync them with your ownCloud server Place filesin your local shared directories and those files are immediately synced to the server and then to other PCs via thedesktop client Not near a desktop client No problem simply log in with the web client and manage your files thereThe Android and iOS mobile apps allow you to browse download and upload photos and videos On Android youmay also create download edit and upload any other files with the correct software installed
Whether using a mobile device a workstation or a web client ownCloud provides the ability to put the right files inthe right hands at the right time on any device in one simple-to-use secure private and controlled solution After allwith ownCloud itrsquos Your Cloud Your Data Your Way
1
ownCloud User Manual Release 45
2 Chapter 1 Introduction
CHAPTER
TWO
THE OWNCLOUD WEB INTERFACE
You can connect to ownCloud with your web browser by pointing it to the address that you have received from yourservice provider In case you are administering the server yourself have a look at ownCloud Administrators Manual
When you enter the URL you will receive a page that is similar to the one depicted below
Figure 21 The ownCloud login screen
Login with the user name and password with you have received from your service provider If you have set up theserver yourself log in with the user name which you have created during the setup process You can add further usersthrough the settings or by hooking up a user backend such as LDAP
21 Overview
After clicking the Log in button you will be redirected to ownCloudrsquos main web interface
The web interface comprises of the following items
1 Navigation bar Allows navigation between different parts of ownCloud provided by apps Not all appsdepicted in this screen shot are installed and enabled by default
2 Application view This is where apps show their content By default this will show the files and directory (fileview) of your user on the ownCloud installation
3 UploadCreate button This allows you to create new files or upload existing ones from your device Notethat you can also drop files from Explorer or Finder onto the ownCloud file view and they will get uploaded toownCloud
3
ownCloud User Manual Release 45
Figure 22 The ownCloud main interface with the essential elements numbered
4 SearchLogout Search allows you to look for files and directories Currently ownCloud does not provide afull text search but this may change in future releases
5 Settings This button provides access to the settings menu where you can change your personal settings suchas the interface language or your password You can also retrieve the WebDAV URL (see next chapter) andshow your quota Administrators will also get access to user management (Users) the apps settings (Apps) andadministrative settings (Admin) including access to ownCloudrsquos log
4 Chapter 2 The ownCloud Web Interface
CHAPTER
THREE
MOUNTING OWNCLOUD VIA WEBDAV
All major operating systems allow for mounting a users ownCloud via WebDAV a HTTP extension as specified inRFC 2518 This chapter describes how to setup WebDAV on different operating systems
31 Windows
On Windows you can assign ownCloud a drive letter This allows you to browse files stored on an ownCloudserverthe way you would files stored in a mapped network drive
Using this feature requires network connectivity If you want to store your files offline use the ownCloud Client tosync all files on your ownCloud to one or more directories of your local hard drive
Note Prior to mapping your drive you will need to permit the use of Basic Authentication in the Windows RegistryThe procedure is documented in KB841215 and differs between Windows XPServer 2003 and Windows Vista7Please follow the Knowledge Base article before proceeding and follow the Vista instructions if you run Windows 7
311 Mapping via the command line
Suppose your ownCloud is installed at httpswwwyourservercomowncloud that is entering this URLin your webbrowser will bring up the login screen Running
net use Z httpswwwyourservercomowncloudremotephpwebdav useryouruser yourpassword
will map the files of your ownCloud account to the drive letter Z An alternative syntax is
net use Z wwwyourservercomsslowncloudremotephpwebdav useryouruser yourpassword
Appending persistent makes the connection persistent across reboots
You can also mount your ownCloud via HTTP leaving the connection unencrypted Use either of the followingsyntaxes
net use Z httpwwwyourservercomowncloudremotephpwebdav useryouruser yourpasswordnet use Z wwwyourservercomowncloudremotephpwebdav useryouruser yourpassword
Please note that this allows anyone to sniff your ownCloud data with ease especially on public WiFi hotspots PlainHTTP should therefore only be used in conjunction with a VPN tunnel when used on Laptops
5
ownCloud User Manual Release 45
312 Using Windows Explorer
Right-click on Computer entry and select Map network drive Choose a local network drive to mapownCloud to Finally enter the address to your ownCloud instance followed by remotephpwebdav eg
httpswwwyourservercomowncloudremotephpwebdav
for an SSL protected server Check Reconnect at logon to make this mapping persistent across reboots If youwant to connect as another user check Connect using different credentials
Figure 31 Mapping WebDAV on Windows Explorer
After pressing Finish Windows Explorer will map the network drive and your ownCloud instance should be avail-able
313 Using Cyberduck (421)
Specify a server without any leading protocol information eg
Server owncloudhostcom
The port depends on whether your ownCloud server supports SSL or not Cyberduck requires that you select a differentconnection type depending on whethr SSL is to be used (lsquoWebDAVrsquo or lsquoWebDAV (HTTPSSSL)rsquo)
Port 80 (for WebDAV) 443 (for WebDAV (HTTPSSSL))
Use the lsquoMore Optionsrsquo drop-down menu to add the rest of your webdav URL into the lsquoPathrsquo field eg
Path remotephpwebdav
6 Chapter 3 Mounting ownCloud via WebDAV
ownCloud User Manual Release 45
314 Known Problems
Problem Windows refuses to connect via HTTPS
Solution The Windows WebDAV Client does not support Server Name Indication (SNI) on encrypted connectionsIf you encounter an error mounting an SSL-encrypted ownCloud instance please contact your provider aboutassigning a dedicated IP address for your SSL-based server
Problem I receive the error Error 0x800700DF The file size exceeds the limit allowedand cannot be saved
Solution Windows limits the maximum size a file transferred from or to a Web-DAV share may have You can increase the value FileSizeLimitInBytes inHKEY_LOCAL_MACHINESYSTEMCurrentControlSetServicesWebClientParametersby clicking on Modify In order to increase the limit to the maximum value of 4GB pick Decimal and enter4294967295 as value Afterwards reboot Windows or restart the WebClient service
Todo
document registry keys on file size limit and not complaining in no network cases
32 Mac OS X
Assuming your owncloud instance is installed at httpswwwyourservercomowncloud
In the Finder choose Go gt Connect to Server type the address of the server in the Server Addressfield and click Connect The server address should be in a form similar to this ADDRESSfileswebdavphpFor our example it would be
httpswwwyourservercomowncloudfileswebdavphp
For details check the respective vendor documentation at the Apple website
33 Linux
331 KDEDolphin
Assuming your owncloud instance is installed at httpwwwyourservercomowncloud
1 Open Dolphin and click on where it says Network in the left hand Places column
2 Click on the icon labeled Add a Network Folder
3 It should come up with WebDAV already selected Make sure it is and then click Next
4 Enter the following settings
bull Name The name yoursquoll see in the Places bookmark for example ownCloud
bull User Your ownCloud username you use to log in for example admin
bull Server Your ownCloud domain name for example wwwyourservercom (without http before ordirectories afterwards)
bull Folder Enter owncloudfileswebdavphp
5 Create icon checkbox Tick to get a bookmark in the Places column
32 Mac OS X 7
ownCloud User Manual Release 45
6 Port amp Encrypted checkbox Leave as it is unless you have special settings or an SSL certificate
332 UbuntuGnome (Nautilus)
Figure 32 Nautilus WebDAV mounting dialog
333 Mounting from command line
1 Install the WebDAV support using the davfs package On DebianUbuntu you can use sudo apt-getinstall davfs2
2 Reconfigure davfs2 to allow access to normal users sudo dpkg-reconfigure davfs2 (select Yes when prompted)
3 Add the users you want to be able to mount the share to the davfs2 group sudo usermod -aG davfs2ltusergt
4 Edit etcfstab and add the following line for each user who wants to mount the folder (with your de-tails where appropriate) ADDRESSfileswebdavphp homeltusernamegtowncloud davfsuserrwnoauto 0 0
Then as each user who wants to mount the folder
1 Create the folders owncloud and davfs2 in your home directory
2 Create the file secrets inside davfs2 fill it with the following (with your credentials where appropriate)ADDRESSfileswebdavphp ltusernamegt ltpasswordgt
3 Ensure the file is only writable by you either through the file manager or via chmod 600~davfs2secrets
4 Run the command mount ~owncloud
5 To automatically mount the folder on login add the command you used in step 4 to ~bashrc
8 Chapter 3 Mounting ownCloud via WebDAV
ownCloud User Manual Release 45
Known Issues
Problem Resource temporarily unavailable
Solution If you experience trouble when you create a file in the directory edit etcdavfs2davfs2conf andadd use_locks 0lsquo
Problem Certificate warnings
Solution If you use a self-signed certificate you will get a warning If you are willing to take the risk of a man in themiddle attack run this command instead echo y | mount ~owncloud gt devnull 2gtamp1
33 Linux 9
ownCloud User Manual Release 45
10 Chapter 3 Mounting ownCloud via WebDAV
CHAPTER
FOUR
ACCESSING YOUR FILES
41 Desktop
Your ownCloud instance can be accessed on every platform via the web interface There are also options to integrateit with your desktop
In most cases accessing ownCloud using your file manager will be sufficient
bull Connect to Server in your file manager webdavADDRESSfileswebdavphp
bull Change the protocol to dav in Nautilus or http in Finder
However some applications only allow you to save to a local folder To get around this issue you can
bull Sync your ownCloud folders and local folders
bull Mount ownCloud to a local folder without sync
The Desktop Syncing Client called Mirall is now released for Linux and Windows You can follow the current changesat the ownCloud Mirall repository We work on porting this to Mac OS and packaging for all major linux distributions
42 Mobile
To connect to your ownCloud server with the ownCloud mobile apps use the base URL and folder only
examplecomowncloud
No need to add remotephpwebdav as you do for any other WebDAV client
There are also apps in development for both Android and webOS Feel free to contribute if you can
You may also connect to ownCloud from your phone or tablet via WebDAV WebDAV Navigator is a good (proprietary)app for Android App iPhone amp BlackBerry The URL for these is
examplecomowncloudremotephpwebdav
11
ownCloud User Manual Release 45
12 Chapter 4 Accessing your Files
CHAPTER
FIVE
CALENDARS
51 Creating a calendar
If you use the calendar the first time there will be already a calendar called ldquoDefault calendarrdquo You can manage yourcalendars with a click on the ldquoCalendarrdquo button in the top right corner In the dialog which will appear you can addedit export enable disable and delete your calendars There will be also a link for CalDav access
52 Synchronising Calendars with CalDav
Assuming you access your web interface via an address like this
httpADDRESS
Then you can access your calendars with CalDAV-compatible programs like Kontact Evolution Thunderbird usingthe following URL
httpADDRESSremotephpcaldav
To use the ownCloud calendar with Apple iCal you will need to use the following URL including the trailing slash
httpADDRESSremotephpcaldavprincipalsusername
Mozilla Lightning users need to this URL scheme
httpsADDRESSremotephpcaldavcalendarsUSERNAMECALENDARNAME
Note The calendar name must alway be specified in URL-encoding
53 Creating events
To create an event just click on the date in the month view or choose the timeframe in the weekview In the dialogwhich will appear you can enter your information like title category etc
13
ownCloud User Manual Release 45
Figure 51 Example for a simple calendar The default calendar is always called ldquodefaultcalendarrdquo and the usersrsquoname here is ldquotestrdquo The full URL (which on the picture canrsquot be seen because of the short edit field) is then
httpslocalhostowncloudremotephpcaldavcalendarstestdefaultcalendar
14 Chapter 5 Calendars
ownCloud User Manual Release 45
With the advanced options you can set the description the location and the repetition rate of an event If the repeatingshould end you can choose between setting the end by date or by occurrences If you choose in the weekview all daysfrom Monday to Friday it will automatically set the repeat rule to ldquoevery weekdayrdquo If the interval of the weekviewcan be devided by two it automatically set the repeat rule to ldquoBi-Weeklyrdquo
54 Exporting Importing events
541 Export
You can export either a single event or a whole calendar If you want to export a single event click on it and press theexport button in the bottom right corner If you want to export a whole calendar use the ldquoCalendarrdquo button as describedin the chapter ldquoCreating a calendarrdquo
542 Import
Import your calendar as ical file using the files app Just click on the calendar file to open the import dialog You canimport the calendar into a new calendar or into an already existing calendar
Note If the progressbar does not work properly the folder appscalendarimport_tmp has probably nowrite permission
55 Why is the calendar app asking for my current location
The calendar needs your current position in order to detect your timezone Without the correct timezone there will bea time offset between the events in ownCloud and your desktop calendar you synchronise with ownCloud You can
54 Exporting Importing events 15
ownCloud User Manual Release 45
also set the timezone manually in the personal settings
16 Chapter 5 Calendars
CHAPTER
SIX
USING THE CONTACTS APP
The contacts app of ownCloud is like any other mobile contact app but with more functionality Just as you open youraccount you will get the a default addressbook available We will see later that Of course you can always add andremove addressbooks in here
61 Adding contacts
There are two ways in which you can add contacts
1 Add them manually
2 Import a VCF file
611 Importing
So first well check out how to import all the VCF files as they are a lot more faster way of creating contacts Justbelow the contact list 3 buttons The middle one let you upload files
Once yoursquove clicked it the upload window let you choose your files We can upload the files one by one or upload allof them at one go
Let me demonstrate Open the directory in which you store all the files and then do the following Keep pressingCTRL and select the files to upload After you are done just click on the open button After the upload it should looksomething like this in which all the names and contacts will be sorted alphabetically
17
ownCloud User Manual Release 45
Then the interface ask you where to put your imported contacts You have the ability to choose an existing addressbookor to create a new one Then click on ldquoOKrdquo and thatrsquos all for the import of contacts
612 Create contacts manually
In the picture of the bottom bar you could see the new contact button (first one) Click on it You can now see anempty contact in the main part of the interface You have the ability to add all your informations about the contact thename the address the e-mail the telephone nr
Just click on a field and start typing the information You can use the ldquoAdd Fieldrdquo button to add another types ofinformation for this contact
18 Chapter 6 Using the Contacts App
ownCloud User Manual Release 45
When you want to remove an information of your contact just click on little delete icon at the right of the field youwant to remove
613 Adding picture to the contact
There are two methods in which you can give a picture id to the specific contact
1 Direct upload
2 Select pics already uploaded in ownCloud files
After you have selected the picture for the contact you get an option to crop the picture to suit your requirements
61 Adding contacts 19
ownCloud User Manual Release 45
You can crop the picture however you wish and then press OK
As you can see it is really easy to set things right in this app It automatically pics up the First name Middle name (ifany) and the last name You may add or delete any section you want for your own convenience
62 Creating new address books
When you click on the third button of the bottom bar you will have access to the applicationrsquos settings Then presson the ldquoMore buttonrdquo to access the options of your Addressbooks
20 Chapter 6 Using the Contacts App
ownCloud User Manual Release 45
You have there the ability to add delete download or share your addressbooks Hover your cursor on every icon tosee what they mean
63 Keeping your address book in sync
One of the most important thing in any contact app is to keep it in Sync You can sync this contact app to your phonewhich has the following OSrsquos- Android and IOS
631 Syncing with Android
1 Install cardDav- Sync free from Google play store by visiting this link-httpsplaygooglecomstoreappsdetailsid=orgdmfscarddavsync
2 This app supports auto- configuration which is a Boon- after installing visit this link- card-davsowncloudexamplenetremotephpcarddav to auto configure the app
3 Enter your login details
4 After the app has checked your login details you may just select- Sync server to phone option
5 Thatrsquos it there is nothing else to do for Android )
632 Syncing your IOS device
Synchronizing the Address book
63 Keeping your address book in sync 21
ownCloud User Manual Release 45
1 Open the settings application
2 Select Mail Contacts Calendars
3 Select Add Account
4 Select other as account type
5 Select Add CardDAV account
6 For server type httpowncloudexamplenetremotephpcarddavprincipalsusername
7 Enter your user name and password
8 Select Next
9 If your server does not support SSL a warning will be displayed Select Continue
10 If the iPhone is unable to verify the account information perform the following
bull Select OK
bull Select advanced settings
bull Make sure Use SSL is set to OFF
bull Change port to 80
bull Go back to account information and hit Save
Now should now find your contacts in the address book of your iPhone
633 Other Syncing options provided by ownCloud
1 For android you may use their official android app- httpsowncloudcomoverviewmobileapps
2 And for IOS(Iphone and Ipad) use their app - httpsowncloudcomoverviewmobileapps
22 Chapter 6 Using the Contacts App
CHAPTER
SEVEN
USING THE BOOKMARKS APP
To add a bookmark to the application you have 2 possibilities use the main interface or the bookmarklet or use thebookmarklet
71 The main interface
The main owncloud interface contains 3 fields at the top where you can enter the website address (or URL) the titleof your bookmark and a serie of tags separated by a space
Here wersquove added the page httpwikipediaorg with the title ldquoWikipediardquo and some tags describing what wikipediais (for an easyier search later on)
711 Edition
You also have the possibility to edit or delete your bookmark For that just hover your mousersquos cursor over onebookmark and click on the little pencil to edit or the cross the delete
The bookmark will then be filled into the 3 fields at the top of the screen Modify your bookmark to your need thenhit the save button to persist the change
712 Search
If you click on a tag ownCloud will only display the bookmarks that are described with this tag
You can also use the search bar of owncloud in the top right of your screen
Simply click on the ldquoBookmarksrdquo menu in the sidebar to come back to the default view
23
ownCloud User Manual Release 45
72 The bookmarklet
The creator of this app understand that people wonrsquot come open the ownCloud page to add the bookmark when thesee a cool site This is why they have made this cool ldquobookmarkletrdquo
A bookmarklet is small button that you can drag and drop in your bookmarks The next time you see a cool new sitepress on this special bookmark it will add the site to your ownCloud bookmarks
To find this bookmark go to your personnal preference and search for the ldquoBookmarkletrdquo item
24 Chapter 7 Using the Bookmarks App
CHAPTER
EIGHT
DESKTOP SYNCHRONISATION
For synchronizing files with your desktop computer we recommend using the ownCloud Client for Windows MacOS X and Linux Its usage is documented separately in the ownCloud Desktop Client Manual
Furthermore It is possible to synchronize your ownCloud calendar and address book with a variety of different oper-ating systems and devices It is also possible to mount your ownCloud storage via WebDAV which is also documentedin the next chapters
25
ownCloud User Manual Release 45
26 Chapter 8 Desktop Synchronisation
CHAPTER
NINE
SYNCHRONIZING WITH KDE SC
From KDE SC 48 and forward setting up ownCloud is very easyFrom System Settings Personal InformationAkonadiResources Configuration select DAV Groupware resource
27
ownCloud User Manual Release 45
Enter your ownCloud username and password and click ldquoNextrdquo
Select ownCloud in the drop down list and click ldquoNextrdquo
28 Chapter 9 Synchronizing with KDE SC
ownCloud User Manual Release 45
Enter the host name and installation path If you do not use SSL remember to de-select ldquoUse secure connectionrdquo
Test the connection If everything went well you should see a message like the one below
29
ownCloud User Manual Release 45
Click ldquoFinishrdquo and you will be able to change the display name and refresh interval
Now you should see the Akonadi resource doing the first synchronization
You can find the Contacts and Calendars in Kontact (or KOrganizerKAddressbook if you run the programs separately)
30 Chapter 9 Synchronizing with KDE SC
ownCloud User Manual Release 45
31
ownCloud User Manual Release 45
32 Chapter 9 Synchronizing with KDE SC
CHAPTER
TEN
SYNCHRONIZING WITH OS X
101 Setup synchronisation with Mountain Lion (108)
Note Although these steps belong to Mountain Lion (108) they should be similar with Lion (107)
Open the System Preferences choose Mail Contacts amp Calendars and scroll down to select Add Other Account
33
ownCloud User Manual Release 45
1011 Synchronising the Calendar
Select Add a CalDAV account
Enter your ownCloud-username your password and the full URL-path to your ownCloud-installationADDRESSremotephpcaldavprincipalsUSERNAME (Replace ADDRESS and USERNAME)
1012 Synchronising the Addressbook
Select Add a CardDAV account
34 Chapter 10 Synchronizing with OS X
ownCloud User Manual Release 45
Enter your ownCloud-username your password and the full URL-path to your ownCloud-installationADDRESSremotephpcarddavprincipalsUSERNAME (Replace ADDRESS and USERNAME notethe url is slightly different to the URL in the previous step)
102 Installation directions for Snow Leopard (106)
While OS X Lion and Mountain Lion work fine OS X Snow Leopard (106) and older needs some fiddling to workA user contributed the following
1 Make sure Addressbook is not running If it is select the windows and press Command + Q to terminate it
2 Navigate to UsersYOUR_USERNAMELibraryApplication SupportAddressBookSourcesIf you have all ready some kind of address book setup it is likely you will see some folders named like thisBEA92826-FBF3-4E53-B5C6-ED7C2B454430 Note down what folders there are now and leave thewindow open
3 Open addressbook and try to add a new CardDav addressbook At this point it does not matter what informationyou enter It will come up with the same error message you mentioned before when you click ldquoCreaterdquo Ignoreit and click ldquoCreaterdquo again A non-functional address book will be added
4 Close Address-Book again using Command + Q
102 Installation directions for Snow Leopard (106) 35
ownCloud User Manual Release 45
5 Go back to the folder window from step 2 You will now see a newly created folder with another long string asits name
6 Navigate to the newly created folder and edit the Configurationplist with your favorite text editor
7 Search for a section looking like this
ltkeygtservernameltkeygt ltstringgthttp0(null)ltstringgtltkeygtusernameltkeygt ltstringgtWhatever_you_entered_beforeltstringgt
8 Make it look like this Please note the 80 after YOUR_DOMAIN it is important
ltkeygtservernameltkey ltstringgthttpYOUR_DOMAIN80owncloudremotephpcarddavprincipalsusernameltstringgtltkeygtusernameltkey ltstringgtusernameltstringgt
9 Save the file and open Address Book again It will not work yet
10 Open the preferences for your ownCloud CardDAV-Account and enter your password
11 You may have to restart Address Book once more After this it should work
There is also an easy HOWTO in the forum
36 Chapter 10 Synchronizing with OS X
CHAPTER
ELEVEN
IOS - SYNCHRONIZE IPHONEIPAD
111 Synchronizing the Calendar
1 Open the settings application
2 Select Mail Contacts Calendars
3 Select Add Account
4 Select Other as account type
5 Select Add CalDAV account
6 For server type ADDRESSremotephpcaldavprincipalsusername (Important Donrsquot includehttp or https)
7 Enter your username and password
8 Select Next
9 If your server does not support SSL a warning will be displayed Select Continue
10 If the iPhone is unable to verify the account information read the Troubleshooting paragraph on this page Ifthat doesnrsquot help try to turn off SSL (not recommended)
bull Select OK
bull Select advanced settings
bull Make sure Use SSL is set to OFF
bull Change port to 80
bull Go back to account information and hit Save
Your calendar should now be visible in the Calendar application (may take a few moments)
112 Synchronizing the Address book
1 Open the settings application
2 Select Mail Contacts Calendars
3 Select Add Account
4 Select Other as account type
5 Select Add CardDAV account
37
ownCloud User Manual Release 45
6 For server type ADDRESSremotephpcarddavprincipalsusername (Important Donrsquot includehttp or https)
7 Enter your username and password
8 Select Next
9 If your server does not support SSL a warning will be displayed Select Continue
10 If the iPhone is unable to verify the account information read the Troubleshooting paragraph on this page Ifthat doesnrsquot help try to turn off SSL (not recommended)
bull Select OK
bull Select advanced settings
bull Make sure Use SSL is set to OFF
bull Change port to 80
bull Go back to account information and hit Save
Now should now find your contacts in the address book of your iPhone (may take a few moments)
113 Troubleshooting
1 Check that you didnrsquot include http or https in the server address
2 Depending on your server setup the username-part of the server-address maybe case sensitive So for user Username the server-address may needto be ADDRESSremotephpcaldavprincipalsUsername instead ofADDRESSremotephpcaldavprincipalsusername
3 If you need to change the server-address and want to use SSL yoursquoll have to cancel the setup process and enteryour data again from the very beginning as iOS would prepend https to the server-address automatically
4 Problems have been reported for CardDAV and iOS 4X A possible solution is at the forum
38 Chapter 11 iOS - Synchronize iPhoneiPad
CHAPTER
TWELVE
NATIVE MEDIA PLAYER SUPPORT
You can access your music stored in ownCloud with every Ampache-compatible media player You can find theURL for your specific ownCloud installation in your personal settings or replace ADDRESS with the URL of yourownCloud installation yourself
Ampache-URL httpADDRESSappsmedia
Ampache-compatible players that work with ownCloud include
bull amaroK standard KDE music player
bull tomahawk cross platform player
bull justplayer music player for android
You can find more information about Ampache and other players at the Ampache wikipedia article
The current maintainer of the Media Player is Robin Appelman
39
ownCloud User Manual Release 45
40 Chapter 12 Native Media Player Support
CHAPTER
THIRTEEN
VERSION CONTROL
ownCloud supports simple version control for files Versioning is enabled by default and creates backups of fileswhich are accessible via the history tab This tab also links to the history page where you can roll back a file toany previous versionChanges made at intervals greater than two minutes are saved in data[user]versions and madeaccessible using the above pages
41
ownCloud User Manual Release 45
42 Chapter 13 Version Control
CHAPTER
FOURTEEN
INDICES AND TABLES
bull genindex
43
ownCloud User Manual Release 45
44 Chapter 14 Indices and tables
INDEX
RRFC
RFC 2518 5
45
- Introduction
- The ownCloud Web Interface
-
- Overview
-
- Mounting ownCloud via WebDAV
-
- Windows
- Mac OS X
- Linux
-
- Accessing your Files
-
- Desktop
- Mobile
-
- Calendars
-
- Creating a calendar
- Synchronising Calendars with CalDav
- Creating events
- Exporting Importing events
- Why is the calendar app asking for my current location
-
- Using the Contacts App
-
- Adding contacts
- Creating new address books
- Keeping your address book in sync
-
- Using the Bookmarks App
-
- The main interface
- The bookmarklet
-
- Desktop Synchronisation
- Synchronizing with KDE SC
- Synchronizing with OS X
-
- Setup synchronisation with Mountain Lion (108)
- Installation directions for Snow Leopard (106)
-
- iOS - Synchronize iPhoneiPad
-
- Synchronizing the Calendar
- Synchronizing the Address book
- Troubleshooting
-
- Native Media Player Support
- Version Control
- Indices and tables
- Index
-

ownCloud User Manual Release 45
2 Chapter 1 Introduction
CHAPTER
TWO
THE OWNCLOUD WEB INTERFACE
You can connect to ownCloud with your web browser by pointing it to the address that you have received from yourservice provider In case you are administering the server yourself have a look at ownCloud Administrators Manual
When you enter the URL you will receive a page that is similar to the one depicted below
Figure 21 The ownCloud login screen
Login with the user name and password with you have received from your service provider If you have set up theserver yourself log in with the user name which you have created during the setup process You can add further usersthrough the settings or by hooking up a user backend such as LDAP
21 Overview
After clicking the Log in button you will be redirected to ownCloudrsquos main web interface
The web interface comprises of the following items
1 Navigation bar Allows navigation between different parts of ownCloud provided by apps Not all appsdepicted in this screen shot are installed and enabled by default
2 Application view This is where apps show their content By default this will show the files and directory (fileview) of your user on the ownCloud installation
3 UploadCreate button This allows you to create new files or upload existing ones from your device Notethat you can also drop files from Explorer or Finder onto the ownCloud file view and they will get uploaded toownCloud
3
ownCloud User Manual Release 45
Figure 22 The ownCloud main interface with the essential elements numbered
4 SearchLogout Search allows you to look for files and directories Currently ownCloud does not provide afull text search but this may change in future releases
5 Settings This button provides access to the settings menu where you can change your personal settings suchas the interface language or your password You can also retrieve the WebDAV URL (see next chapter) andshow your quota Administrators will also get access to user management (Users) the apps settings (Apps) andadministrative settings (Admin) including access to ownCloudrsquos log
4 Chapter 2 The ownCloud Web Interface
CHAPTER
THREE
MOUNTING OWNCLOUD VIA WEBDAV
All major operating systems allow for mounting a users ownCloud via WebDAV a HTTP extension as specified inRFC 2518 This chapter describes how to setup WebDAV on different operating systems
31 Windows
On Windows you can assign ownCloud a drive letter This allows you to browse files stored on an ownCloudserverthe way you would files stored in a mapped network drive
Using this feature requires network connectivity If you want to store your files offline use the ownCloud Client tosync all files on your ownCloud to one or more directories of your local hard drive
Note Prior to mapping your drive you will need to permit the use of Basic Authentication in the Windows RegistryThe procedure is documented in KB841215 and differs between Windows XPServer 2003 and Windows Vista7Please follow the Knowledge Base article before proceeding and follow the Vista instructions if you run Windows 7
311 Mapping via the command line
Suppose your ownCloud is installed at httpswwwyourservercomowncloud that is entering this URLin your webbrowser will bring up the login screen Running
net use Z httpswwwyourservercomowncloudremotephpwebdav useryouruser yourpassword
will map the files of your ownCloud account to the drive letter Z An alternative syntax is
net use Z wwwyourservercomsslowncloudremotephpwebdav useryouruser yourpassword
Appending persistent makes the connection persistent across reboots
You can also mount your ownCloud via HTTP leaving the connection unencrypted Use either of the followingsyntaxes
net use Z httpwwwyourservercomowncloudremotephpwebdav useryouruser yourpasswordnet use Z wwwyourservercomowncloudremotephpwebdav useryouruser yourpassword
Please note that this allows anyone to sniff your ownCloud data with ease especially on public WiFi hotspots PlainHTTP should therefore only be used in conjunction with a VPN tunnel when used on Laptops
5
ownCloud User Manual Release 45
312 Using Windows Explorer
Right-click on Computer entry and select Map network drive Choose a local network drive to mapownCloud to Finally enter the address to your ownCloud instance followed by remotephpwebdav eg
httpswwwyourservercomowncloudremotephpwebdav
for an SSL protected server Check Reconnect at logon to make this mapping persistent across reboots If youwant to connect as another user check Connect using different credentials
Figure 31 Mapping WebDAV on Windows Explorer
After pressing Finish Windows Explorer will map the network drive and your ownCloud instance should be avail-able
313 Using Cyberduck (421)
Specify a server without any leading protocol information eg
Server owncloudhostcom
The port depends on whether your ownCloud server supports SSL or not Cyberduck requires that you select a differentconnection type depending on whethr SSL is to be used (lsquoWebDAVrsquo or lsquoWebDAV (HTTPSSSL)rsquo)
Port 80 (for WebDAV) 443 (for WebDAV (HTTPSSSL))
Use the lsquoMore Optionsrsquo drop-down menu to add the rest of your webdav URL into the lsquoPathrsquo field eg
Path remotephpwebdav
6 Chapter 3 Mounting ownCloud via WebDAV
ownCloud User Manual Release 45
314 Known Problems
Problem Windows refuses to connect via HTTPS
Solution The Windows WebDAV Client does not support Server Name Indication (SNI) on encrypted connectionsIf you encounter an error mounting an SSL-encrypted ownCloud instance please contact your provider aboutassigning a dedicated IP address for your SSL-based server
Problem I receive the error Error 0x800700DF The file size exceeds the limit allowedand cannot be saved
Solution Windows limits the maximum size a file transferred from or to a Web-DAV share may have You can increase the value FileSizeLimitInBytes inHKEY_LOCAL_MACHINESYSTEMCurrentControlSetServicesWebClientParametersby clicking on Modify In order to increase the limit to the maximum value of 4GB pick Decimal and enter4294967295 as value Afterwards reboot Windows or restart the WebClient service
Todo
document registry keys on file size limit and not complaining in no network cases
32 Mac OS X
Assuming your owncloud instance is installed at httpswwwyourservercomowncloud
In the Finder choose Go gt Connect to Server type the address of the server in the Server Addressfield and click Connect The server address should be in a form similar to this ADDRESSfileswebdavphpFor our example it would be
httpswwwyourservercomowncloudfileswebdavphp
For details check the respective vendor documentation at the Apple website
33 Linux
331 KDEDolphin
Assuming your owncloud instance is installed at httpwwwyourservercomowncloud
1 Open Dolphin and click on where it says Network in the left hand Places column
2 Click on the icon labeled Add a Network Folder
3 It should come up with WebDAV already selected Make sure it is and then click Next
4 Enter the following settings
bull Name The name yoursquoll see in the Places bookmark for example ownCloud
bull User Your ownCloud username you use to log in for example admin
bull Server Your ownCloud domain name for example wwwyourservercom (without http before ordirectories afterwards)
bull Folder Enter owncloudfileswebdavphp
5 Create icon checkbox Tick to get a bookmark in the Places column
32 Mac OS X 7
ownCloud User Manual Release 45
6 Port amp Encrypted checkbox Leave as it is unless you have special settings or an SSL certificate
332 UbuntuGnome (Nautilus)
Figure 32 Nautilus WebDAV mounting dialog
333 Mounting from command line
1 Install the WebDAV support using the davfs package On DebianUbuntu you can use sudo apt-getinstall davfs2
2 Reconfigure davfs2 to allow access to normal users sudo dpkg-reconfigure davfs2 (select Yes when prompted)
3 Add the users you want to be able to mount the share to the davfs2 group sudo usermod -aG davfs2ltusergt
4 Edit etcfstab and add the following line for each user who wants to mount the folder (with your de-tails where appropriate) ADDRESSfileswebdavphp homeltusernamegtowncloud davfsuserrwnoauto 0 0
Then as each user who wants to mount the folder
1 Create the folders owncloud and davfs2 in your home directory
2 Create the file secrets inside davfs2 fill it with the following (with your credentials where appropriate)ADDRESSfileswebdavphp ltusernamegt ltpasswordgt
3 Ensure the file is only writable by you either through the file manager or via chmod 600~davfs2secrets
4 Run the command mount ~owncloud
5 To automatically mount the folder on login add the command you used in step 4 to ~bashrc
8 Chapter 3 Mounting ownCloud via WebDAV
ownCloud User Manual Release 45
Known Issues
Problem Resource temporarily unavailable
Solution If you experience trouble when you create a file in the directory edit etcdavfs2davfs2conf andadd use_locks 0lsquo
Problem Certificate warnings
Solution If you use a self-signed certificate you will get a warning If you are willing to take the risk of a man in themiddle attack run this command instead echo y | mount ~owncloud gt devnull 2gtamp1
33 Linux 9
ownCloud User Manual Release 45
10 Chapter 3 Mounting ownCloud via WebDAV
CHAPTER
FOUR
ACCESSING YOUR FILES
41 Desktop
Your ownCloud instance can be accessed on every platform via the web interface There are also options to integrateit with your desktop
In most cases accessing ownCloud using your file manager will be sufficient
bull Connect to Server in your file manager webdavADDRESSfileswebdavphp
bull Change the protocol to dav in Nautilus or http in Finder
However some applications only allow you to save to a local folder To get around this issue you can
bull Sync your ownCloud folders and local folders
bull Mount ownCloud to a local folder without sync
The Desktop Syncing Client called Mirall is now released for Linux and Windows You can follow the current changesat the ownCloud Mirall repository We work on porting this to Mac OS and packaging for all major linux distributions
42 Mobile
To connect to your ownCloud server with the ownCloud mobile apps use the base URL and folder only
examplecomowncloud
No need to add remotephpwebdav as you do for any other WebDAV client
There are also apps in development for both Android and webOS Feel free to contribute if you can
You may also connect to ownCloud from your phone or tablet via WebDAV WebDAV Navigator is a good (proprietary)app for Android App iPhone amp BlackBerry The URL for these is
examplecomowncloudremotephpwebdav
11
ownCloud User Manual Release 45
12 Chapter 4 Accessing your Files
CHAPTER
FIVE
CALENDARS
51 Creating a calendar
If you use the calendar the first time there will be already a calendar called ldquoDefault calendarrdquo You can manage yourcalendars with a click on the ldquoCalendarrdquo button in the top right corner In the dialog which will appear you can addedit export enable disable and delete your calendars There will be also a link for CalDav access
52 Synchronising Calendars with CalDav
Assuming you access your web interface via an address like this
httpADDRESS
Then you can access your calendars with CalDAV-compatible programs like Kontact Evolution Thunderbird usingthe following URL
httpADDRESSremotephpcaldav
To use the ownCloud calendar with Apple iCal you will need to use the following URL including the trailing slash
httpADDRESSremotephpcaldavprincipalsusername
Mozilla Lightning users need to this URL scheme
httpsADDRESSremotephpcaldavcalendarsUSERNAMECALENDARNAME
Note The calendar name must alway be specified in URL-encoding
53 Creating events
To create an event just click on the date in the month view or choose the timeframe in the weekview In the dialogwhich will appear you can enter your information like title category etc
13
ownCloud User Manual Release 45
Figure 51 Example for a simple calendar The default calendar is always called ldquodefaultcalendarrdquo and the usersrsquoname here is ldquotestrdquo The full URL (which on the picture canrsquot be seen because of the short edit field) is then
httpslocalhostowncloudremotephpcaldavcalendarstestdefaultcalendar
14 Chapter 5 Calendars
ownCloud User Manual Release 45
With the advanced options you can set the description the location and the repetition rate of an event If the repeatingshould end you can choose between setting the end by date or by occurrences If you choose in the weekview all daysfrom Monday to Friday it will automatically set the repeat rule to ldquoevery weekdayrdquo If the interval of the weekviewcan be devided by two it automatically set the repeat rule to ldquoBi-Weeklyrdquo
54 Exporting Importing events
541 Export
You can export either a single event or a whole calendar If you want to export a single event click on it and press theexport button in the bottom right corner If you want to export a whole calendar use the ldquoCalendarrdquo button as describedin the chapter ldquoCreating a calendarrdquo
542 Import
Import your calendar as ical file using the files app Just click on the calendar file to open the import dialog You canimport the calendar into a new calendar or into an already existing calendar
Note If the progressbar does not work properly the folder appscalendarimport_tmp has probably nowrite permission
55 Why is the calendar app asking for my current location
The calendar needs your current position in order to detect your timezone Without the correct timezone there will bea time offset between the events in ownCloud and your desktop calendar you synchronise with ownCloud You can
54 Exporting Importing events 15
ownCloud User Manual Release 45
also set the timezone manually in the personal settings
16 Chapter 5 Calendars
CHAPTER
SIX
USING THE CONTACTS APP
The contacts app of ownCloud is like any other mobile contact app but with more functionality Just as you open youraccount you will get the a default addressbook available We will see later that Of course you can always add andremove addressbooks in here
61 Adding contacts
There are two ways in which you can add contacts
1 Add them manually
2 Import a VCF file
611 Importing
So first well check out how to import all the VCF files as they are a lot more faster way of creating contacts Justbelow the contact list 3 buttons The middle one let you upload files
Once yoursquove clicked it the upload window let you choose your files We can upload the files one by one or upload allof them at one go
Let me demonstrate Open the directory in which you store all the files and then do the following Keep pressingCTRL and select the files to upload After you are done just click on the open button After the upload it should looksomething like this in which all the names and contacts will be sorted alphabetically
17
ownCloud User Manual Release 45
Then the interface ask you where to put your imported contacts You have the ability to choose an existing addressbookor to create a new one Then click on ldquoOKrdquo and thatrsquos all for the import of contacts
612 Create contacts manually
In the picture of the bottom bar you could see the new contact button (first one) Click on it You can now see anempty contact in the main part of the interface You have the ability to add all your informations about the contact thename the address the e-mail the telephone nr
Just click on a field and start typing the information You can use the ldquoAdd Fieldrdquo button to add another types ofinformation for this contact
18 Chapter 6 Using the Contacts App
ownCloud User Manual Release 45
When you want to remove an information of your contact just click on little delete icon at the right of the field youwant to remove
613 Adding picture to the contact
There are two methods in which you can give a picture id to the specific contact
1 Direct upload
2 Select pics already uploaded in ownCloud files
After you have selected the picture for the contact you get an option to crop the picture to suit your requirements
61 Adding contacts 19
ownCloud User Manual Release 45
You can crop the picture however you wish and then press OK
As you can see it is really easy to set things right in this app It automatically pics up the First name Middle name (ifany) and the last name You may add or delete any section you want for your own convenience
62 Creating new address books
When you click on the third button of the bottom bar you will have access to the applicationrsquos settings Then presson the ldquoMore buttonrdquo to access the options of your Addressbooks
20 Chapter 6 Using the Contacts App
ownCloud User Manual Release 45
You have there the ability to add delete download or share your addressbooks Hover your cursor on every icon tosee what they mean
63 Keeping your address book in sync
One of the most important thing in any contact app is to keep it in Sync You can sync this contact app to your phonewhich has the following OSrsquos- Android and IOS
631 Syncing with Android
1 Install cardDav- Sync free from Google play store by visiting this link-httpsplaygooglecomstoreappsdetailsid=orgdmfscarddavsync
2 This app supports auto- configuration which is a Boon- after installing visit this link- card-davsowncloudexamplenetremotephpcarddav to auto configure the app
3 Enter your login details
4 After the app has checked your login details you may just select- Sync server to phone option
5 Thatrsquos it there is nothing else to do for Android )
632 Syncing your IOS device
Synchronizing the Address book
63 Keeping your address book in sync 21
ownCloud User Manual Release 45
1 Open the settings application
2 Select Mail Contacts Calendars
3 Select Add Account
4 Select other as account type
5 Select Add CardDAV account
6 For server type httpowncloudexamplenetremotephpcarddavprincipalsusername
7 Enter your user name and password
8 Select Next
9 If your server does not support SSL a warning will be displayed Select Continue
10 If the iPhone is unable to verify the account information perform the following
bull Select OK
bull Select advanced settings
bull Make sure Use SSL is set to OFF
bull Change port to 80
bull Go back to account information and hit Save
Now should now find your contacts in the address book of your iPhone
633 Other Syncing options provided by ownCloud
1 For android you may use their official android app- httpsowncloudcomoverviewmobileapps
2 And for IOS(Iphone and Ipad) use their app - httpsowncloudcomoverviewmobileapps
22 Chapter 6 Using the Contacts App
CHAPTER
SEVEN
USING THE BOOKMARKS APP
To add a bookmark to the application you have 2 possibilities use the main interface or the bookmarklet or use thebookmarklet
71 The main interface
The main owncloud interface contains 3 fields at the top where you can enter the website address (or URL) the titleof your bookmark and a serie of tags separated by a space
Here wersquove added the page httpwikipediaorg with the title ldquoWikipediardquo and some tags describing what wikipediais (for an easyier search later on)
711 Edition
You also have the possibility to edit or delete your bookmark For that just hover your mousersquos cursor over onebookmark and click on the little pencil to edit or the cross the delete
The bookmark will then be filled into the 3 fields at the top of the screen Modify your bookmark to your need thenhit the save button to persist the change
712 Search
If you click on a tag ownCloud will only display the bookmarks that are described with this tag
You can also use the search bar of owncloud in the top right of your screen
Simply click on the ldquoBookmarksrdquo menu in the sidebar to come back to the default view
23
ownCloud User Manual Release 45
72 The bookmarklet
The creator of this app understand that people wonrsquot come open the ownCloud page to add the bookmark when thesee a cool site This is why they have made this cool ldquobookmarkletrdquo
A bookmarklet is small button that you can drag and drop in your bookmarks The next time you see a cool new sitepress on this special bookmark it will add the site to your ownCloud bookmarks
To find this bookmark go to your personnal preference and search for the ldquoBookmarkletrdquo item
24 Chapter 7 Using the Bookmarks App
CHAPTER
EIGHT
DESKTOP SYNCHRONISATION
For synchronizing files with your desktop computer we recommend using the ownCloud Client for Windows MacOS X and Linux Its usage is documented separately in the ownCloud Desktop Client Manual
Furthermore It is possible to synchronize your ownCloud calendar and address book with a variety of different oper-ating systems and devices It is also possible to mount your ownCloud storage via WebDAV which is also documentedin the next chapters
25
ownCloud User Manual Release 45
26 Chapter 8 Desktop Synchronisation
CHAPTER
NINE
SYNCHRONIZING WITH KDE SC
From KDE SC 48 and forward setting up ownCloud is very easyFrom System Settings Personal InformationAkonadiResources Configuration select DAV Groupware resource
27
ownCloud User Manual Release 45
Enter your ownCloud username and password and click ldquoNextrdquo
Select ownCloud in the drop down list and click ldquoNextrdquo
28 Chapter 9 Synchronizing with KDE SC
ownCloud User Manual Release 45
Enter the host name and installation path If you do not use SSL remember to de-select ldquoUse secure connectionrdquo
Test the connection If everything went well you should see a message like the one below
29
ownCloud User Manual Release 45
Click ldquoFinishrdquo and you will be able to change the display name and refresh interval
Now you should see the Akonadi resource doing the first synchronization
You can find the Contacts and Calendars in Kontact (or KOrganizerKAddressbook if you run the programs separately)
30 Chapter 9 Synchronizing with KDE SC
ownCloud User Manual Release 45
31
ownCloud User Manual Release 45
32 Chapter 9 Synchronizing with KDE SC
CHAPTER
TEN
SYNCHRONIZING WITH OS X
101 Setup synchronisation with Mountain Lion (108)
Note Although these steps belong to Mountain Lion (108) they should be similar with Lion (107)
Open the System Preferences choose Mail Contacts amp Calendars and scroll down to select Add Other Account
33
ownCloud User Manual Release 45
1011 Synchronising the Calendar
Select Add a CalDAV account
Enter your ownCloud-username your password and the full URL-path to your ownCloud-installationADDRESSremotephpcaldavprincipalsUSERNAME (Replace ADDRESS and USERNAME)
1012 Synchronising the Addressbook
Select Add a CardDAV account
34 Chapter 10 Synchronizing with OS X
ownCloud User Manual Release 45
Enter your ownCloud-username your password and the full URL-path to your ownCloud-installationADDRESSremotephpcarddavprincipalsUSERNAME (Replace ADDRESS and USERNAME notethe url is slightly different to the URL in the previous step)
102 Installation directions for Snow Leopard (106)
While OS X Lion and Mountain Lion work fine OS X Snow Leopard (106) and older needs some fiddling to workA user contributed the following
1 Make sure Addressbook is not running If it is select the windows and press Command + Q to terminate it
2 Navigate to UsersYOUR_USERNAMELibraryApplication SupportAddressBookSourcesIf you have all ready some kind of address book setup it is likely you will see some folders named like thisBEA92826-FBF3-4E53-B5C6-ED7C2B454430 Note down what folders there are now and leave thewindow open
3 Open addressbook and try to add a new CardDav addressbook At this point it does not matter what informationyou enter It will come up with the same error message you mentioned before when you click ldquoCreaterdquo Ignoreit and click ldquoCreaterdquo again A non-functional address book will be added
4 Close Address-Book again using Command + Q
102 Installation directions for Snow Leopard (106) 35
ownCloud User Manual Release 45
5 Go back to the folder window from step 2 You will now see a newly created folder with another long string asits name
6 Navigate to the newly created folder and edit the Configurationplist with your favorite text editor
7 Search for a section looking like this
ltkeygtservernameltkeygt ltstringgthttp0(null)ltstringgtltkeygtusernameltkeygt ltstringgtWhatever_you_entered_beforeltstringgt
8 Make it look like this Please note the 80 after YOUR_DOMAIN it is important
ltkeygtservernameltkey ltstringgthttpYOUR_DOMAIN80owncloudremotephpcarddavprincipalsusernameltstringgtltkeygtusernameltkey ltstringgtusernameltstringgt
9 Save the file and open Address Book again It will not work yet
10 Open the preferences for your ownCloud CardDAV-Account and enter your password
11 You may have to restart Address Book once more After this it should work
There is also an easy HOWTO in the forum
36 Chapter 10 Synchronizing with OS X
CHAPTER
ELEVEN
IOS - SYNCHRONIZE IPHONEIPAD
111 Synchronizing the Calendar
1 Open the settings application
2 Select Mail Contacts Calendars
3 Select Add Account
4 Select Other as account type
5 Select Add CalDAV account
6 For server type ADDRESSremotephpcaldavprincipalsusername (Important Donrsquot includehttp or https)
7 Enter your username and password
8 Select Next
9 If your server does not support SSL a warning will be displayed Select Continue
10 If the iPhone is unable to verify the account information read the Troubleshooting paragraph on this page Ifthat doesnrsquot help try to turn off SSL (not recommended)
bull Select OK
bull Select advanced settings
bull Make sure Use SSL is set to OFF
bull Change port to 80
bull Go back to account information and hit Save
Your calendar should now be visible in the Calendar application (may take a few moments)
112 Synchronizing the Address book
1 Open the settings application
2 Select Mail Contacts Calendars
3 Select Add Account
4 Select Other as account type
5 Select Add CardDAV account
37
ownCloud User Manual Release 45
6 For server type ADDRESSremotephpcarddavprincipalsusername (Important Donrsquot includehttp or https)
7 Enter your username and password
8 Select Next
9 If your server does not support SSL a warning will be displayed Select Continue
10 If the iPhone is unable to verify the account information read the Troubleshooting paragraph on this page Ifthat doesnrsquot help try to turn off SSL (not recommended)
bull Select OK
bull Select advanced settings
bull Make sure Use SSL is set to OFF
bull Change port to 80
bull Go back to account information and hit Save
Now should now find your contacts in the address book of your iPhone (may take a few moments)
113 Troubleshooting
1 Check that you didnrsquot include http or https in the server address
2 Depending on your server setup the username-part of the server-address maybe case sensitive So for user Username the server-address may needto be ADDRESSremotephpcaldavprincipalsUsername instead ofADDRESSremotephpcaldavprincipalsusername
3 If you need to change the server-address and want to use SSL yoursquoll have to cancel the setup process and enteryour data again from the very beginning as iOS would prepend https to the server-address automatically
4 Problems have been reported for CardDAV and iOS 4X A possible solution is at the forum
38 Chapter 11 iOS - Synchronize iPhoneiPad
CHAPTER
TWELVE
NATIVE MEDIA PLAYER SUPPORT
You can access your music stored in ownCloud with every Ampache-compatible media player You can find theURL for your specific ownCloud installation in your personal settings or replace ADDRESS with the URL of yourownCloud installation yourself
Ampache-URL httpADDRESSappsmedia
Ampache-compatible players that work with ownCloud include
bull amaroK standard KDE music player
bull tomahawk cross platform player
bull justplayer music player for android
You can find more information about Ampache and other players at the Ampache wikipedia article
The current maintainer of the Media Player is Robin Appelman
39
ownCloud User Manual Release 45
40 Chapter 12 Native Media Player Support
CHAPTER
THIRTEEN
VERSION CONTROL
ownCloud supports simple version control for files Versioning is enabled by default and creates backups of fileswhich are accessible via the history tab This tab also links to the history page where you can roll back a file toany previous versionChanges made at intervals greater than two minutes are saved in data[user]versions and madeaccessible using the above pages
41
ownCloud User Manual Release 45
42 Chapter 13 Version Control
CHAPTER
FOURTEEN
INDICES AND TABLES
bull genindex
43
ownCloud User Manual Release 45
44 Chapter 14 Indices and tables
INDEX
RRFC
RFC 2518 5
45
- Introduction
- The ownCloud Web Interface
-
- Overview
-
- Mounting ownCloud via WebDAV
-
- Windows
- Mac OS X
- Linux
-
- Accessing your Files
-
- Desktop
- Mobile
-
- Calendars
-
- Creating a calendar
- Synchronising Calendars with CalDav
- Creating events
- Exporting Importing events
- Why is the calendar app asking for my current location
-
- Using the Contacts App
-
- Adding contacts
- Creating new address books
- Keeping your address book in sync
-
- Using the Bookmarks App
-
- The main interface
- The bookmarklet
-
- Desktop Synchronisation
- Synchronizing with KDE SC
- Synchronizing with OS X
-
- Setup synchronisation with Mountain Lion (108)
- Installation directions for Snow Leopard (106)
-
- iOS - Synchronize iPhoneiPad
-
- Synchronizing the Calendar
- Synchronizing the Address book
- Troubleshooting
-
- Native Media Player Support
- Version Control
- Indices and tables
- Index
-

CHAPTER
TWO
THE OWNCLOUD WEB INTERFACE
You can connect to ownCloud with your web browser by pointing it to the address that you have received from yourservice provider In case you are administering the server yourself have a look at ownCloud Administrators Manual
When you enter the URL you will receive a page that is similar to the one depicted below
Figure 21 The ownCloud login screen
Login with the user name and password with you have received from your service provider If you have set up theserver yourself log in with the user name which you have created during the setup process You can add further usersthrough the settings or by hooking up a user backend such as LDAP
21 Overview
After clicking the Log in button you will be redirected to ownCloudrsquos main web interface
The web interface comprises of the following items
1 Navigation bar Allows navigation between different parts of ownCloud provided by apps Not all appsdepicted in this screen shot are installed and enabled by default
2 Application view This is where apps show their content By default this will show the files and directory (fileview) of your user on the ownCloud installation
3 UploadCreate button This allows you to create new files or upload existing ones from your device Notethat you can also drop files from Explorer or Finder onto the ownCloud file view and they will get uploaded toownCloud
3
ownCloud User Manual Release 45
Figure 22 The ownCloud main interface with the essential elements numbered
4 SearchLogout Search allows you to look for files and directories Currently ownCloud does not provide afull text search but this may change in future releases
5 Settings This button provides access to the settings menu where you can change your personal settings suchas the interface language or your password You can also retrieve the WebDAV URL (see next chapter) andshow your quota Administrators will also get access to user management (Users) the apps settings (Apps) andadministrative settings (Admin) including access to ownCloudrsquos log
4 Chapter 2 The ownCloud Web Interface
CHAPTER
THREE
MOUNTING OWNCLOUD VIA WEBDAV
All major operating systems allow for mounting a users ownCloud via WebDAV a HTTP extension as specified inRFC 2518 This chapter describes how to setup WebDAV on different operating systems
31 Windows
On Windows you can assign ownCloud a drive letter This allows you to browse files stored on an ownCloudserverthe way you would files stored in a mapped network drive
Using this feature requires network connectivity If you want to store your files offline use the ownCloud Client tosync all files on your ownCloud to one or more directories of your local hard drive
Note Prior to mapping your drive you will need to permit the use of Basic Authentication in the Windows RegistryThe procedure is documented in KB841215 and differs between Windows XPServer 2003 and Windows Vista7Please follow the Knowledge Base article before proceeding and follow the Vista instructions if you run Windows 7
311 Mapping via the command line
Suppose your ownCloud is installed at httpswwwyourservercomowncloud that is entering this URLin your webbrowser will bring up the login screen Running
net use Z httpswwwyourservercomowncloudremotephpwebdav useryouruser yourpassword
will map the files of your ownCloud account to the drive letter Z An alternative syntax is
net use Z wwwyourservercomsslowncloudremotephpwebdav useryouruser yourpassword
Appending persistent makes the connection persistent across reboots
You can also mount your ownCloud via HTTP leaving the connection unencrypted Use either of the followingsyntaxes
net use Z httpwwwyourservercomowncloudremotephpwebdav useryouruser yourpasswordnet use Z wwwyourservercomowncloudremotephpwebdav useryouruser yourpassword
Please note that this allows anyone to sniff your ownCloud data with ease especially on public WiFi hotspots PlainHTTP should therefore only be used in conjunction with a VPN tunnel when used on Laptops
5
ownCloud User Manual Release 45
312 Using Windows Explorer
Right-click on Computer entry and select Map network drive Choose a local network drive to mapownCloud to Finally enter the address to your ownCloud instance followed by remotephpwebdav eg
httpswwwyourservercomowncloudremotephpwebdav
for an SSL protected server Check Reconnect at logon to make this mapping persistent across reboots If youwant to connect as another user check Connect using different credentials
Figure 31 Mapping WebDAV on Windows Explorer
After pressing Finish Windows Explorer will map the network drive and your ownCloud instance should be avail-able
313 Using Cyberduck (421)
Specify a server without any leading protocol information eg
Server owncloudhostcom
The port depends on whether your ownCloud server supports SSL or not Cyberduck requires that you select a differentconnection type depending on whethr SSL is to be used (lsquoWebDAVrsquo or lsquoWebDAV (HTTPSSSL)rsquo)
Port 80 (for WebDAV) 443 (for WebDAV (HTTPSSSL))
Use the lsquoMore Optionsrsquo drop-down menu to add the rest of your webdav URL into the lsquoPathrsquo field eg
Path remotephpwebdav
6 Chapter 3 Mounting ownCloud via WebDAV
ownCloud User Manual Release 45
314 Known Problems
Problem Windows refuses to connect via HTTPS
Solution The Windows WebDAV Client does not support Server Name Indication (SNI) on encrypted connectionsIf you encounter an error mounting an SSL-encrypted ownCloud instance please contact your provider aboutassigning a dedicated IP address for your SSL-based server
Problem I receive the error Error 0x800700DF The file size exceeds the limit allowedand cannot be saved
Solution Windows limits the maximum size a file transferred from or to a Web-DAV share may have You can increase the value FileSizeLimitInBytes inHKEY_LOCAL_MACHINESYSTEMCurrentControlSetServicesWebClientParametersby clicking on Modify In order to increase the limit to the maximum value of 4GB pick Decimal and enter4294967295 as value Afterwards reboot Windows or restart the WebClient service
Todo
document registry keys on file size limit and not complaining in no network cases
32 Mac OS X
Assuming your owncloud instance is installed at httpswwwyourservercomowncloud
In the Finder choose Go gt Connect to Server type the address of the server in the Server Addressfield and click Connect The server address should be in a form similar to this ADDRESSfileswebdavphpFor our example it would be
httpswwwyourservercomowncloudfileswebdavphp
For details check the respective vendor documentation at the Apple website
33 Linux
331 KDEDolphin
Assuming your owncloud instance is installed at httpwwwyourservercomowncloud
1 Open Dolphin and click on where it says Network in the left hand Places column
2 Click on the icon labeled Add a Network Folder
3 It should come up with WebDAV already selected Make sure it is and then click Next
4 Enter the following settings
bull Name The name yoursquoll see in the Places bookmark for example ownCloud
bull User Your ownCloud username you use to log in for example admin
bull Server Your ownCloud domain name for example wwwyourservercom (without http before ordirectories afterwards)
bull Folder Enter owncloudfileswebdavphp
5 Create icon checkbox Tick to get a bookmark in the Places column
32 Mac OS X 7
ownCloud User Manual Release 45
6 Port amp Encrypted checkbox Leave as it is unless you have special settings or an SSL certificate
332 UbuntuGnome (Nautilus)
Figure 32 Nautilus WebDAV mounting dialog
333 Mounting from command line
1 Install the WebDAV support using the davfs package On DebianUbuntu you can use sudo apt-getinstall davfs2
2 Reconfigure davfs2 to allow access to normal users sudo dpkg-reconfigure davfs2 (select Yes when prompted)
3 Add the users you want to be able to mount the share to the davfs2 group sudo usermod -aG davfs2ltusergt
4 Edit etcfstab and add the following line for each user who wants to mount the folder (with your de-tails where appropriate) ADDRESSfileswebdavphp homeltusernamegtowncloud davfsuserrwnoauto 0 0
Then as each user who wants to mount the folder
1 Create the folders owncloud and davfs2 in your home directory
2 Create the file secrets inside davfs2 fill it with the following (with your credentials where appropriate)ADDRESSfileswebdavphp ltusernamegt ltpasswordgt
3 Ensure the file is only writable by you either through the file manager or via chmod 600~davfs2secrets
4 Run the command mount ~owncloud
5 To automatically mount the folder on login add the command you used in step 4 to ~bashrc
8 Chapter 3 Mounting ownCloud via WebDAV
ownCloud User Manual Release 45
Known Issues
Problem Resource temporarily unavailable
Solution If you experience trouble when you create a file in the directory edit etcdavfs2davfs2conf andadd use_locks 0lsquo
Problem Certificate warnings
Solution If you use a self-signed certificate you will get a warning If you are willing to take the risk of a man in themiddle attack run this command instead echo y | mount ~owncloud gt devnull 2gtamp1
33 Linux 9
ownCloud User Manual Release 45
10 Chapter 3 Mounting ownCloud via WebDAV
CHAPTER
FOUR
ACCESSING YOUR FILES
41 Desktop
Your ownCloud instance can be accessed on every platform via the web interface There are also options to integrateit with your desktop
In most cases accessing ownCloud using your file manager will be sufficient
bull Connect to Server in your file manager webdavADDRESSfileswebdavphp
bull Change the protocol to dav in Nautilus or http in Finder
However some applications only allow you to save to a local folder To get around this issue you can
bull Sync your ownCloud folders and local folders
bull Mount ownCloud to a local folder without sync
The Desktop Syncing Client called Mirall is now released for Linux and Windows You can follow the current changesat the ownCloud Mirall repository We work on porting this to Mac OS and packaging for all major linux distributions
42 Mobile
To connect to your ownCloud server with the ownCloud mobile apps use the base URL and folder only
examplecomowncloud
No need to add remotephpwebdav as you do for any other WebDAV client
There are also apps in development for both Android and webOS Feel free to contribute if you can
You may also connect to ownCloud from your phone or tablet via WebDAV WebDAV Navigator is a good (proprietary)app for Android App iPhone amp BlackBerry The URL for these is
examplecomowncloudremotephpwebdav
11
ownCloud User Manual Release 45
12 Chapter 4 Accessing your Files
CHAPTER
FIVE
CALENDARS
51 Creating a calendar
If you use the calendar the first time there will be already a calendar called ldquoDefault calendarrdquo You can manage yourcalendars with a click on the ldquoCalendarrdquo button in the top right corner In the dialog which will appear you can addedit export enable disable and delete your calendars There will be also a link for CalDav access
52 Synchronising Calendars with CalDav
Assuming you access your web interface via an address like this
httpADDRESS
Then you can access your calendars with CalDAV-compatible programs like Kontact Evolution Thunderbird usingthe following URL
httpADDRESSremotephpcaldav
To use the ownCloud calendar with Apple iCal you will need to use the following URL including the trailing slash
httpADDRESSremotephpcaldavprincipalsusername
Mozilla Lightning users need to this URL scheme
httpsADDRESSremotephpcaldavcalendarsUSERNAMECALENDARNAME
Note The calendar name must alway be specified in URL-encoding
53 Creating events
To create an event just click on the date in the month view or choose the timeframe in the weekview In the dialogwhich will appear you can enter your information like title category etc
13
ownCloud User Manual Release 45
Figure 51 Example for a simple calendar The default calendar is always called ldquodefaultcalendarrdquo and the usersrsquoname here is ldquotestrdquo The full URL (which on the picture canrsquot be seen because of the short edit field) is then
httpslocalhostowncloudremotephpcaldavcalendarstestdefaultcalendar
14 Chapter 5 Calendars
ownCloud User Manual Release 45
With the advanced options you can set the description the location and the repetition rate of an event If the repeatingshould end you can choose between setting the end by date or by occurrences If you choose in the weekview all daysfrom Monday to Friday it will automatically set the repeat rule to ldquoevery weekdayrdquo If the interval of the weekviewcan be devided by two it automatically set the repeat rule to ldquoBi-Weeklyrdquo
54 Exporting Importing events
541 Export
You can export either a single event or a whole calendar If you want to export a single event click on it and press theexport button in the bottom right corner If you want to export a whole calendar use the ldquoCalendarrdquo button as describedin the chapter ldquoCreating a calendarrdquo
542 Import
Import your calendar as ical file using the files app Just click on the calendar file to open the import dialog You canimport the calendar into a new calendar or into an already existing calendar
Note If the progressbar does not work properly the folder appscalendarimport_tmp has probably nowrite permission
55 Why is the calendar app asking for my current location
The calendar needs your current position in order to detect your timezone Without the correct timezone there will bea time offset between the events in ownCloud and your desktop calendar you synchronise with ownCloud You can
54 Exporting Importing events 15
ownCloud User Manual Release 45
also set the timezone manually in the personal settings
16 Chapter 5 Calendars
CHAPTER
SIX
USING THE CONTACTS APP
The contacts app of ownCloud is like any other mobile contact app but with more functionality Just as you open youraccount you will get the a default addressbook available We will see later that Of course you can always add andremove addressbooks in here
61 Adding contacts
There are two ways in which you can add contacts
1 Add them manually
2 Import a VCF file
611 Importing
So first well check out how to import all the VCF files as they are a lot more faster way of creating contacts Justbelow the contact list 3 buttons The middle one let you upload files
Once yoursquove clicked it the upload window let you choose your files We can upload the files one by one or upload allof them at one go
Let me demonstrate Open the directory in which you store all the files and then do the following Keep pressingCTRL and select the files to upload After you are done just click on the open button After the upload it should looksomething like this in which all the names and contacts will be sorted alphabetically
17
ownCloud User Manual Release 45
Then the interface ask you where to put your imported contacts You have the ability to choose an existing addressbookor to create a new one Then click on ldquoOKrdquo and thatrsquos all for the import of contacts
612 Create contacts manually
In the picture of the bottom bar you could see the new contact button (first one) Click on it You can now see anempty contact in the main part of the interface You have the ability to add all your informations about the contact thename the address the e-mail the telephone nr
Just click on a field and start typing the information You can use the ldquoAdd Fieldrdquo button to add another types ofinformation for this contact
18 Chapter 6 Using the Contacts App
ownCloud User Manual Release 45
When you want to remove an information of your contact just click on little delete icon at the right of the field youwant to remove
613 Adding picture to the contact
There are two methods in which you can give a picture id to the specific contact
1 Direct upload
2 Select pics already uploaded in ownCloud files
After you have selected the picture for the contact you get an option to crop the picture to suit your requirements
61 Adding contacts 19
ownCloud User Manual Release 45
You can crop the picture however you wish and then press OK
As you can see it is really easy to set things right in this app It automatically pics up the First name Middle name (ifany) and the last name You may add or delete any section you want for your own convenience
62 Creating new address books
When you click on the third button of the bottom bar you will have access to the applicationrsquos settings Then presson the ldquoMore buttonrdquo to access the options of your Addressbooks
20 Chapter 6 Using the Contacts App
ownCloud User Manual Release 45
You have there the ability to add delete download or share your addressbooks Hover your cursor on every icon tosee what they mean
63 Keeping your address book in sync
One of the most important thing in any contact app is to keep it in Sync You can sync this contact app to your phonewhich has the following OSrsquos- Android and IOS
631 Syncing with Android
1 Install cardDav- Sync free from Google play store by visiting this link-httpsplaygooglecomstoreappsdetailsid=orgdmfscarddavsync
2 This app supports auto- configuration which is a Boon- after installing visit this link- card-davsowncloudexamplenetremotephpcarddav to auto configure the app
3 Enter your login details
4 After the app has checked your login details you may just select- Sync server to phone option
5 Thatrsquos it there is nothing else to do for Android )
632 Syncing your IOS device
Synchronizing the Address book
63 Keeping your address book in sync 21
ownCloud User Manual Release 45
1 Open the settings application
2 Select Mail Contacts Calendars
3 Select Add Account
4 Select other as account type
5 Select Add CardDAV account
6 For server type httpowncloudexamplenetremotephpcarddavprincipalsusername
7 Enter your user name and password
8 Select Next
9 If your server does not support SSL a warning will be displayed Select Continue
10 If the iPhone is unable to verify the account information perform the following
bull Select OK
bull Select advanced settings
bull Make sure Use SSL is set to OFF
bull Change port to 80
bull Go back to account information and hit Save
Now should now find your contacts in the address book of your iPhone
633 Other Syncing options provided by ownCloud
1 For android you may use their official android app- httpsowncloudcomoverviewmobileapps
2 And for IOS(Iphone and Ipad) use their app - httpsowncloudcomoverviewmobileapps
22 Chapter 6 Using the Contacts App
CHAPTER
SEVEN
USING THE BOOKMARKS APP
To add a bookmark to the application you have 2 possibilities use the main interface or the bookmarklet or use thebookmarklet
71 The main interface
The main owncloud interface contains 3 fields at the top where you can enter the website address (or URL) the titleof your bookmark and a serie of tags separated by a space
Here wersquove added the page httpwikipediaorg with the title ldquoWikipediardquo and some tags describing what wikipediais (for an easyier search later on)
711 Edition
You also have the possibility to edit or delete your bookmark For that just hover your mousersquos cursor over onebookmark and click on the little pencil to edit or the cross the delete
The bookmark will then be filled into the 3 fields at the top of the screen Modify your bookmark to your need thenhit the save button to persist the change
712 Search
If you click on a tag ownCloud will only display the bookmarks that are described with this tag
You can also use the search bar of owncloud in the top right of your screen
Simply click on the ldquoBookmarksrdquo menu in the sidebar to come back to the default view
23
ownCloud User Manual Release 45
72 The bookmarklet
The creator of this app understand that people wonrsquot come open the ownCloud page to add the bookmark when thesee a cool site This is why they have made this cool ldquobookmarkletrdquo
A bookmarklet is small button that you can drag and drop in your bookmarks The next time you see a cool new sitepress on this special bookmark it will add the site to your ownCloud bookmarks
To find this bookmark go to your personnal preference and search for the ldquoBookmarkletrdquo item
24 Chapter 7 Using the Bookmarks App
CHAPTER
EIGHT
DESKTOP SYNCHRONISATION
For synchronizing files with your desktop computer we recommend using the ownCloud Client for Windows MacOS X and Linux Its usage is documented separately in the ownCloud Desktop Client Manual
Furthermore It is possible to synchronize your ownCloud calendar and address book with a variety of different oper-ating systems and devices It is also possible to mount your ownCloud storage via WebDAV which is also documentedin the next chapters
25
ownCloud User Manual Release 45
26 Chapter 8 Desktop Synchronisation
CHAPTER
NINE
SYNCHRONIZING WITH KDE SC
From KDE SC 48 and forward setting up ownCloud is very easyFrom System Settings Personal InformationAkonadiResources Configuration select DAV Groupware resource
27
ownCloud User Manual Release 45
Enter your ownCloud username and password and click ldquoNextrdquo
Select ownCloud in the drop down list and click ldquoNextrdquo
28 Chapter 9 Synchronizing with KDE SC
ownCloud User Manual Release 45
Enter the host name and installation path If you do not use SSL remember to de-select ldquoUse secure connectionrdquo
Test the connection If everything went well you should see a message like the one below
29
ownCloud User Manual Release 45
Click ldquoFinishrdquo and you will be able to change the display name and refresh interval
Now you should see the Akonadi resource doing the first synchronization
You can find the Contacts and Calendars in Kontact (or KOrganizerKAddressbook if you run the programs separately)
30 Chapter 9 Synchronizing with KDE SC
ownCloud User Manual Release 45
31
ownCloud User Manual Release 45
32 Chapter 9 Synchronizing with KDE SC
CHAPTER
TEN
SYNCHRONIZING WITH OS X
101 Setup synchronisation with Mountain Lion (108)
Note Although these steps belong to Mountain Lion (108) they should be similar with Lion (107)
Open the System Preferences choose Mail Contacts amp Calendars and scroll down to select Add Other Account
33
ownCloud User Manual Release 45
1011 Synchronising the Calendar
Select Add a CalDAV account
Enter your ownCloud-username your password and the full URL-path to your ownCloud-installationADDRESSremotephpcaldavprincipalsUSERNAME (Replace ADDRESS and USERNAME)
1012 Synchronising the Addressbook
Select Add a CardDAV account
34 Chapter 10 Synchronizing with OS X
ownCloud User Manual Release 45
Enter your ownCloud-username your password and the full URL-path to your ownCloud-installationADDRESSremotephpcarddavprincipalsUSERNAME (Replace ADDRESS and USERNAME notethe url is slightly different to the URL in the previous step)
102 Installation directions for Snow Leopard (106)
While OS X Lion and Mountain Lion work fine OS X Snow Leopard (106) and older needs some fiddling to workA user contributed the following
1 Make sure Addressbook is not running If it is select the windows and press Command + Q to terminate it
2 Navigate to UsersYOUR_USERNAMELibraryApplication SupportAddressBookSourcesIf you have all ready some kind of address book setup it is likely you will see some folders named like thisBEA92826-FBF3-4E53-B5C6-ED7C2B454430 Note down what folders there are now and leave thewindow open
3 Open addressbook and try to add a new CardDav addressbook At this point it does not matter what informationyou enter It will come up with the same error message you mentioned before when you click ldquoCreaterdquo Ignoreit and click ldquoCreaterdquo again A non-functional address book will be added
4 Close Address-Book again using Command + Q
102 Installation directions for Snow Leopard (106) 35
ownCloud User Manual Release 45
5 Go back to the folder window from step 2 You will now see a newly created folder with another long string asits name
6 Navigate to the newly created folder and edit the Configurationplist with your favorite text editor
7 Search for a section looking like this
ltkeygtservernameltkeygt ltstringgthttp0(null)ltstringgtltkeygtusernameltkeygt ltstringgtWhatever_you_entered_beforeltstringgt
8 Make it look like this Please note the 80 after YOUR_DOMAIN it is important
ltkeygtservernameltkey ltstringgthttpYOUR_DOMAIN80owncloudremotephpcarddavprincipalsusernameltstringgtltkeygtusernameltkey ltstringgtusernameltstringgt
9 Save the file and open Address Book again It will not work yet
10 Open the preferences for your ownCloud CardDAV-Account and enter your password
11 You may have to restart Address Book once more After this it should work
There is also an easy HOWTO in the forum
36 Chapter 10 Synchronizing with OS X
CHAPTER
ELEVEN
IOS - SYNCHRONIZE IPHONEIPAD
111 Synchronizing the Calendar
1 Open the settings application
2 Select Mail Contacts Calendars
3 Select Add Account
4 Select Other as account type
5 Select Add CalDAV account
6 For server type ADDRESSremotephpcaldavprincipalsusername (Important Donrsquot includehttp or https)
7 Enter your username and password
8 Select Next
9 If your server does not support SSL a warning will be displayed Select Continue
10 If the iPhone is unable to verify the account information read the Troubleshooting paragraph on this page Ifthat doesnrsquot help try to turn off SSL (not recommended)
bull Select OK
bull Select advanced settings
bull Make sure Use SSL is set to OFF
bull Change port to 80
bull Go back to account information and hit Save
Your calendar should now be visible in the Calendar application (may take a few moments)
112 Synchronizing the Address book
1 Open the settings application
2 Select Mail Contacts Calendars
3 Select Add Account
4 Select Other as account type
5 Select Add CardDAV account
37
ownCloud User Manual Release 45
6 For server type ADDRESSremotephpcarddavprincipalsusername (Important Donrsquot includehttp or https)
7 Enter your username and password
8 Select Next
9 If your server does not support SSL a warning will be displayed Select Continue
10 If the iPhone is unable to verify the account information read the Troubleshooting paragraph on this page Ifthat doesnrsquot help try to turn off SSL (not recommended)
bull Select OK
bull Select advanced settings
bull Make sure Use SSL is set to OFF
bull Change port to 80
bull Go back to account information and hit Save
Now should now find your contacts in the address book of your iPhone (may take a few moments)
113 Troubleshooting
1 Check that you didnrsquot include http or https in the server address
2 Depending on your server setup the username-part of the server-address maybe case sensitive So for user Username the server-address may needto be ADDRESSremotephpcaldavprincipalsUsername instead ofADDRESSremotephpcaldavprincipalsusername
3 If you need to change the server-address and want to use SSL yoursquoll have to cancel the setup process and enteryour data again from the very beginning as iOS would prepend https to the server-address automatically
4 Problems have been reported for CardDAV and iOS 4X A possible solution is at the forum
38 Chapter 11 iOS - Synchronize iPhoneiPad
CHAPTER
TWELVE
NATIVE MEDIA PLAYER SUPPORT
You can access your music stored in ownCloud with every Ampache-compatible media player You can find theURL for your specific ownCloud installation in your personal settings or replace ADDRESS with the URL of yourownCloud installation yourself
Ampache-URL httpADDRESSappsmedia
Ampache-compatible players that work with ownCloud include
bull amaroK standard KDE music player
bull tomahawk cross platform player
bull justplayer music player for android
You can find more information about Ampache and other players at the Ampache wikipedia article
The current maintainer of the Media Player is Robin Appelman
39
ownCloud User Manual Release 45
40 Chapter 12 Native Media Player Support
CHAPTER
THIRTEEN
VERSION CONTROL
ownCloud supports simple version control for files Versioning is enabled by default and creates backups of fileswhich are accessible via the history tab This tab also links to the history page where you can roll back a file toany previous versionChanges made at intervals greater than two minutes are saved in data[user]versions and madeaccessible using the above pages
41
ownCloud User Manual Release 45
42 Chapter 13 Version Control
CHAPTER
FOURTEEN
INDICES AND TABLES
bull genindex
43
ownCloud User Manual Release 45
44 Chapter 14 Indices and tables
INDEX
RRFC
RFC 2518 5
45
- Introduction
- The ownCloud Web Interface
-
- Overview
-
- Mounting ownCloud via WebDAV
-
- Windows
- Mac OS X
- Linux
-
- Accessing your Files
-
- Desktop
- Mobile
-
- Calendars
-
- Creating a calendar
- Synchronising Calendars with CalDav
- Creating events
- Exporting Importing events
- Why is the calendar app asking for my current location
-
- Using the Contacts App
-
- Adding contacts
- Creating new address books
- Keeping your address book in sync
-
- Using the Bookmarks App
-
- The main interface
- The bookmarklet
-
- Desktop Synchronisation
- Synchronizing with KDE SC
- Synchronizing with OS X
-
- Setup synchronisation with Mountain Lion (108)
- Installation directions for Snow Leopard (106)
-
- iOS - Synchronize iPhoneiPad
-
- Synchronizing the Calendar
- Synchronizing the Address book
- Troubleshooting
-
- Native Media Player Support
- Version Control
- Indices and tables
- Index
-

ownCloud User Manual Release 45
Figure 22 The ownCloud main interface with the essential elements numbered
4 SearchLogout Search allows you to look for files and directories Currently ownCloud does not provide afull text search but this may change in future releases
5 Settings This button provides access to the settings menu where you can change your personal settings suchas the interface language or your password You can also retrieve the WebDAV URL (see next chapter) andshow your quota Administrators will also get access to user management (Users) the apps settings (Apps) andadministrative settings (Admin) including access to ownCloudrsquos log
4 Chapter 2 The ownCloud Web Interface
CHAPTER
THREE
MOUNTING OWNCLOUD VIA WEBDAV
All major operating systems allow for mounting a users ownCloud via WebDAV a HTTP extension as specified inRFC 2518 This chapter describes how to setup WebDAV on different operating systems
31 Windows
On Windows you can assign ownCloud a drive letter This allows you to browse files stored on an ownCloudserverthe way you would files stored in a mapped network drive
Using this feature requires network connectivity If you want to store your files offline use the ownCloud Client tosync all files on your ownCloud to one or more directories of your local hard drive
Note Prior to mapping your drive you will need to permit the use of Basic Authentication in the Windows RegistryThe procedure is documented in KB841215 and differs between Windows XPServer 2003 and Windows Vista7Please follow the Knowledge Base article before proceeding and follow the Vista instructions if you run Windows 7
311 Mapping via the command line
Suppose your ownCloud is installed at httpswwwyourservercomowncloud that is entering this URLin your webbrowser will bring up the login screen Running
net use Z httpswwwyourservercomowncloudremotephpwebdav useryouruser yourpassword
will map the files of your ownCloud account to the drive letter Z An alternative syntax is
net use Z wwwyourservercomsslowncloudremotephpwebdav useryouruser yourpassword
Appending persistent makes the connection persistent across reboots
You can also mount your ownCloud via HTTP leaving the connection unencrypted Use either of the followingsyntaxes
net use Z httpwwwyourservercomowncloudremotephpwebdav useryouruser yourpasswordnet use Z wwwyourservercomowncloudremotephpwebdav useryouruser yourpassword
Please note that this allows anyone to sniff your ownCloud data with ease especially on public WiFi hotspots PlainHTTP should therefore only be used in conjunction with a VPN tunnel when used on Laptops
5
ownCloud User Manual Release 45
312 Using Windows Explorer
Right-click on Computer entry and select Map network drive Choose a local network drive to mapownCloud to Finally enter the address to your ownCloud instance followed by remotephpwebdav eg
httpswwwyourservercomowncloudremotephpwebdav
for an SSL protected server Check Reconnect at logon to make this mapping persistent across reboots If youwant to connect as another user check Connect using different credentials
Figure 31 Mapping WebDAV on Windows Explorer
After pressing Finish Windows Explorer will map the network drive and your ownCloud instance should be avail-able
313 Using Cyberduck (421)
Specify a server without any leading protocol information eg
Server owncloudhostcom
The port depends on whether your ownCloud server supports SSL or not Cyberduck requires that you select a differentconnection type depending on whethr SSL is to be used (lsquoWebDAVrsquo or lsquoWebDAV (HTTPSSSL)rsquo)
Port 80 (for WebDAV) 443 (for WebDAV (HTTPSSSL))
Use the lsquoMore Optionsrsquo drop-down menu to add the rest of your webdav URL into the lsquoPathrsquo field eg
Path remotephpwebdav
6 Chapter 3 Mounting ownCloud via WebDAV
ownCloud User Manual Release 45
314 Known Problems
Problem Windows refuses to connect via HTTPS
Solution The Windows WebDAV Client does not support Server Name Indication (SNI) on encrypted connectionsIf you encounter an error mounting an SSL-encrypted ownCloud instance please contact your provider aboutassigning a dedicated IP address for your SSL-based server
Problem I receive the error Error 0x800700DF The file size exceeds the limit allowedand cannot be saved
Solution Windows limits the maximum size a file transferred from or to a Web-DAV share may have You can increase the value FileSizeLimitInBytes inHKEY_LOCAL_MACHINESYSTEMCurrentControlSetServicesWebClientParametersby clicking on Modify In order to increase the limit to the maximum value of 4GB pick Decimal and enter4294967295 as value Afterwards reboot Windows or restart the WebClient service
Todo
document registry keys on file size limit and not complaining in no network cases
32 Mac OS X
Assuming your owncloud instance is installed at httpswwwyourservercomowncloud
In the Finder choose Go gt Connect to Server type the address of the server in the Server Addressfield and click Connect The server address should be in a form similar to this ADDRESSfileswebdavphpFor our example it would be
httpswwwyourservercomowncloudfileswebdavphp
For details check the respective vendor documentation at the Apple website
33 Linux
331 KDEDolphin
Assuming your owncloud instance is installed at httpwwwyourservercomowncloud
1 Open Dolphin and click on where it says Network in the left hand Places column
2 Click on the icon labeled Add a Network Folder
3 It should come up with WebDAV already selected Make sure it is and then click Next
4 Enter the following settings
bull Name The name yoursquoll see in the Places bookmark for example ownCloud
bull User Your ownCloud username you use to log in for example admin
bull Server Your ownCloud domain name for example wwwyourservercom (without http before ordirectories afterwards)
bull Folder Enter owncloudfileswebdavphp
5 Create icon checkbox Tick to get a bookmark in the Places column
32 Mac OS X 7
ownCloud User Manual Release 45
6 Port amp Encrypted checkbox Leave as it is unless you have special settings or an SSL certificate
332 UbuntuGnome (Nautilus)
Figure 32 Nautilus WebDAV mounting dialog
333 Mounting from command line
1 Install the WebDAV support using the davfs package On DebianUbuntu you can use sudo apt-getinstall davfs2
2 Reconfigure davfs2 to allow access to normal users sudo dpkg-reconfigure davfs2 (select Yes when prompted)
3 Add the users you want to be able to mount the share to the davfs2 group sudo usermod -aG davfs2ltusergt
4 Edit etcfstab and add the following line for each user who wants to mount the folder (with your de-tails where appropriate) ADDRESSfileswebdavphp homeltusernamegtowncloud davfsuserrwnoauto 0 0
Then as each user who wants to mount the folder
1 Create the folders owncloud and davfs2 in your home directory
2 Create the file secrets inside davfs2 fill it with the following (with your credentials where appropriate)ADDRESSfileswebdavphp ltusernamegt ltpasswordgt
3 Ensure the file is only writable by you either through the file manager or via chmod 600~davfs2secrets
4 Run the command mount ~owncloud
5 To automatically mount the folder on login add the command you used in step 4 to ~bashrc
8 Chapter 3 Mounting ownCloud via WebDAV
ownCloud User Manual Release 45
Known Issues
Problem Resource temporarily unavailable
Solution If you experience trouble when you create a file in the directory edit etcdavfs2davfs2conf andadd use_locks 0lsquo
Problem Certificate warnings
Solution If you use a self-signed certificate you will get a warning If you are willing to take the risk of a man in themiddle attack run this command instead echo y | mount ~owncloud gt devnull 2gtamp1
33 Linux 9
ownCloud User Manual Release 45
10 Chapter 3 Mounting ownCloud via WebDAV
CHAPTER
FOUR
ACCESSING YOUR FILES
41 Desktop
Your ownCloud instance can be accessed on every platform via the web interface There are also options to integrateit with your desktop
In most cases accessing ownCloud using your file manager will be sufficient
bull Connect to Server in your file manager webdavADDRESSfileswebdavphp
bull Change the protocol to dav in Nautilus or http in Finder
However some applications only allow you to save to a local folder To get around this issue you can
bull Sync your ownCloud folders and local folders
bull Mount ownCloud to a local folder without sync
The Desktop Syncing Client called Mirall is now released for Linux and Windows You can follow the current changesat the ownCloud Mirall repository We work on porting this to Mac OS and packaging for all major linux distributions
42 Mobile
To connect to your ownCloud server with the ownCloud mobile apps use the base URL and folder only
examplecomowncloud
No need to add remotephpwebdav as you do for any other WebDAV client
There are also apps in development for both Android and webOS Feel free to contribute if you can
You may also connect to ownCloud from your phone or tablet via WebDAV WebDAV Navigator is a good (proprietary)app for Android App iPhone amp BlackBerry The URL for these is
examplecomowncloudremotephpwebdav
11
ownCloud User Manual Release 45
12 Chapter 4 Accessing your Files
CHAPTER
FIVE
CALENDARS
51 Creating a calendar
If you use the calendar the first time there will be already a calendar called ldquoDefault calendarrdquo You can manage yourcalendars with a click on the ldquoCalendarrdquo button in the top right corner In the dialog which will appear you can addedit export enable disable and delete your calendars There will be also a link for CalDav access
52 Synchronising Calendars with CalDav
Assuming you access your web interface via an address like this
httpADDRESS
Then you can access your calendars with CalDAV-compatible programs like Kontact Evolution Thunderbird usingthe following URL
httpADDRESSremotephpcaldav
To use the ownCloud calendar with Apple iCal you will need to use the following URL including the trailing slash
httpADDRESSremotephpcaldavprincipalsusername
Mozilla Lightning users need to this URL scheme
httpsADDRESSremotephpcaldavcalendarsUSERNAMECALENDARNAME
Note The calendar name must alway be specified in URL-encoding
53 Creating events
To create an event just click on the date in the month view or choose the timeframe in the weekview In the dialogwhich will appear you can enter your information like title category etc
13
ownCloud User Manual Release 45
Figure 51 Example for a simple calendar The default calendar is always called ldquodefaultcalendarrdquo and the usersrsquoname here is ldquotestrdquo The full URL (which on the picture canrsquot be seen because of the short edit field) is then
httpslocalhostowncloudremotephpcaldavcalendarstestdefaultcalendar
14 Chapter 5 Calendars
ownCloud User Manual Release 45
With the advanced options you can set the description the location and the repetition rate of an event If the repeatingshould end you can choose between setting the end by date or by occurrences If you choose in the weekview all daysfrom Monday to Friday it will automatically set the repeat rule to ldquoevery weekdayrdquo If the interval of the weekviewcan be devided by two it automatically set the repeat rule to ldquoBi-Weeklyrdquo
54 Exporting Importing events
541 Export
You can export either a single event or a whole calendar If you want to export a single event click on it and press theexport button in the bottom right corner If you want to export a whole calendar use the ldquoCalendarrdquo button as describedin the chapter ldquoCreating a calendarrdquo
542 Import
Import your calendar as ical file using the files app Just click on the calendar file to open the import dialog You canimport the calendar into a new calendar or into an already existing calendar
Note If the progressbar does not work properly the folder appscalendarimport_tmp has probably nowrite permission
55 Why is the calendar app asking for my current location
The calendar needs your current position in order to detect your timezone Without the correct timezone there will bea time offset between the events in ownCloud and your desktop calendar you synchronise with ownCloud You can
54 Exporting Importing events 15
ownCloud User Manual Release 45
also set the timezone manually in the personal settings
16 Chapter 5 Calendars
CHAPTER
SIX
USING THE CONTACTS APP
The contacts app of ownCloud is like any other mobile contact app but with more functionality Just as you open youraccount you will get the a default addressbook available We will see later that Of course you can always add andremove addressbooks in here
61 Adding contacts
There are two ways in which you can add contacts
1 Add them manually
2 Import a VCF file
611 Importing
So first well check out how to import all the VCF files as they are a lot more faster way of creating contacts Justbelow the contact list 3 buttons The middle one let you upload files
Once yoursquove clicked it the upload window let you choose your files We can upload the files one by one or upload allof them at one go
Let me demonstrate Open the directory in which you store all the files and then do the following Keep pressingCTRL and select the files to upload After you are done just click on the open button After the upload it should looksomething like this in which all the names and contacts will be sorted alphabetically
17
ownCloud User Manual Release 45
Then the interface ask you where to put your imported contacts You have the ability to choose an existing addressbookor to create a new one Then click on ldquoOKrdquo and thatrsquos all for the import of contacts
612 Create contacts manually
In the picture of the bottom bar you could see the new contact button (first one) Click on it You can now see anempty contact in the main part of the interface You have the ability to add all your informations about the contact thename the address the e-mail the telephone nr
Just click on a field and start typing the information You can use the ldquoAdd Fieldrdquo button to add another types ofinformation for this contact
18 Chapter 6 Using the Contacts App
ownCloud User Manual Release 45
When you want to remove an information of your contact just click on little delete icon at the right of the field youwant to remove
613 Adding picture to the contact
There are two methods in which you can give a picture id to the specific contact
1 Direct upload
2 Select pics already uploaded in ownCloud files
After you have selected the picture for the contact you get an option to crop the picture to suit your requirements
61 Adding contacts 19
ownCloud User Manual Release 45
You can crop the picture however you wish and then press OK
As you can see it is really easy to set things right in this app It automatically pics up the First name Middle name (ifany) and the last name You may add or delete any section you want for your own convenience
62 Creating new address books
When you click on the third button of the bottom bar you will have access to the applicationrsquos settings Then presson the ldquoMore buttonrdquo to access the options of your Addressbooks
20 Chapter 6 Using the Contacts App
ownCloud User Manual Release 45
You have there the ability to add delete download or share your addressbooks Hover your cursor on every icon tosee what they mean
63 Keeping your address book in sync
One of the most important thing in any contact app is to keep it in Sync You can sync this contact app to your phonewhich has the following OSrsquos- Android and IOS
631 Syncing with Android
1 Install cardDav- Sync free from Google play store by visiting this link-httpsplaygooglecomstoreappsdetailsid=orgdmfscarddavsync
2 This app supports auto- configuration which is a Boon- after installing visit this link- card-davsowncloudexamplenetremotephpcarddav to auto configure the app
3 Enter your login details
4 After the app has checked your login details you may just select- Sync server to phone option
5 Thatrsquos it there is nothing else to do for Android )
632 Syncing your IOS device
Synchronizing the Address book
63 Keeping your address book in sync 21
ownCloud User Manual Release 45
1 Open the settings application
2 Select Mail Contacts Calendars
3 Select Add Account
4 Select other as account type
5 Select Add CardDAV account
6 For server type httpowncloudexamplenetremotephpcarddavprincipalsusername
7 Enter your user name and password
8 Select Next
9 If your server does not support SSL a warning will be displayed Select Continue
10 If the iPhone is unable to verify the account information perform the following
bull Select OK
bull Select advanced settings
bull Make sure Use SSL is set to OFF
bull Change port to 80
bull Go back to account information and hit Save
Now should now find your contacts in the address book of your iPhone
633 Other Syncing options provided by ownCloud
1 For android you may use their official android app- httpsowncloudcomoverviewmobileapps
2 And for IOS(Iphone and Ipad) use their app - httpsowncloudcomoverviewmobileapps
22 Chapter 6 Using the Contacts App
CHAPTER
SEVEN
USING THE BOOKMARKS APP
To add a bookmark to the application you have 2 possibilities use the main interface or the bookmarklet or use thebookmarklet
71 The main interface
The main owncloud interface contains 3 fields at the top where you can enter the website address (or URL) the titleof your bookmark and a serie of tags separated by a space
Here wersquove added the page httpwikipediaorg with the title ldquoWikipediardquo and some tags describing what wikipediais (for an easyier search later on)
711 Edition
You also have the possibility to edit or delete your bookmark For that just hover your mousersquos cursor over onebookmark and click on the little pencil to edit or the cross the delete
The bookmark will then be filled into the 3 fields at the top of the screen Modify your bookmark to your need thenhit the save button to persist the change
712 Search
If you click on a tag ownCloud will only display the bookmarks that are described with this tag
You can also use the search bar of owncloud in the top right of your screen
Simply click on the ldquoBookmarksrdquo menu in the sidebar to come back to the default view
23
ownCloud User Manual Release 45
72 The bookmarklet
The creator of this app understand that people wonrsquot come open the ownCloud page to add the bookmark when thesee a cool site This is why they have made this cool ldquobookmarkletrdquo
A bookmarklet is small button that you can drag and drop in your bookmarks The next time you see a cool new sitepress on this special bookmark it will add the site to your ownCloud bookmarks
To find this bookmark go to your personnal preference and search for the ldquoBookmarkletrdquo item
24 Chapter 7 Using the Bookmarks App
CHAPTER
EIGHT
DESKTOP SYNCHRONISATION
For synchronizing files with your desktop computer we recommend using the ownCloud Client for Windows MacOS X and Linux Its usage is documented separately in the ownCloud Desktop Client Manual
Furthermore It is possible to synchronize your ownCloud calendar and address book with a variety of different oper-ating systems and devices It is also possible to mount your ownCloud storage via WebDAV which is also documentedin the next chapters
25
ownCloud User Manual Release 45
26 Chapter 8 Desktop Synchronisation
CHAPTER
NINE
SYNCHRONIZING WITH KDE SC
From KDE SC 48 and forward setting up ownCloud is very easyFrom System Settings Personal InformationAkonadiResources Configuration select DAV Groupware resource
27
ownCloud User Manual Release 45
Enter your ownCloud username and password and click ldquoNextrdquo
Select ownCloud in the drop down list and click ldquoNextrdquo
28 Chapter 9 Synchronizing with KDE SC
ownCloud User Manual Release 45
Enter the host name and installation path If you do not use SSL remember to de-select ldquoUse secure connectionrdquo
Test the connection If everything went well you should see a message like the one below
29
ownCloud User Manual Release 45
Click ldquoFinishrdquo and you will be able to change the display name and refresh interval
Now you should see the Akonadi resource doing the first synchronization
You can find the Contacts and Calendars in Kontact (or KOrganizerKAddressbook if you run the programs separately)
30 Chapter 9 Synchronizing with KDE SC
ownCloud User Manual Release 45
31
ownCloud User Manual Release 45
32 Chapter 9 Synchronizing with KDE SC
CHAPTER
TEN
SYNCHRONIZING WITH OS X
101 Setup synchronisation with Mountain Lion (108)
Note Although these steps belong to Mountain Lion (108) they should be similar with Lion (107)
Open the System Preferences choose Mail Contacts amp Calendars and scroll down to select Add Other Account
33
ownCloud User Manual Release 45
1011 Synchronising the Calendar
Select Add a CalDAV account
Enter your ownCloud-username your password and the full URL-path to your ownCloud-installationADDRESSremotephpcaldavprincipalsUSERNAME (Replace ADDRESS and USERNAME)
1012 Synchronising the Addressbook
Select Add a CardDAV account
34 Chapter 10 Synchronizing with OS X
ownCloud User Manual Release 45
Enter your ownCloud-username your password and the full URL-path to your ownCloud-installationADDRESSremotephpcarddavprincipalsUSERNAME (Replace ADDRESS and USERNAME notethe url is slightly different to the URL in the previous step)
102 Installation directions for Snow Leopard (106)
While OS X Lion and Mountain Lion work fine OS X Snow Leopard (106) and older needs some fiddling to workA user contributed the following
1 Make sure Addressbook is not running If it is select the windows and press Command + Q to terminate it
2 Navigate to UsersYOUR_USERNAMELibraryApplication SupportAddressBookSourcesIf you have all ready some kind of address book setup it is likely you will see some folders named like thisBEA92826-FBF3-4E53-B5C6-ED7C2B454430 Note down what folders there are now and leave thewindow open
3 Open addressbook and try to add a new CardDav addressbook At this point it does not matter what informationyou enter It will come up with the same error message you mentioned before when you click ldquoCreaterdquo Ignoreit and click ldquoCreaterdquo again A non-functional address book will be added
4 Close Address-Book again using Command + Q
102 Installation directions for Snow Leopard (106) 35
ownCloud User Manual Release 45
5 Go back to the folder window from step 2 You will now see a newly created folder with another long string asits name
6 Navigate to the newly created folder and edit the Configurationplist with your favorite text editor
7 Search for a section looking like this
ltkeygtservernameltkeygt ltstringgthttp0(null)ltstringgtltkeygtusernameltkeygt ltstringgtWhatever_you_entered_beforeltstringgt
8 Make it look like this Please note the 80 after YOUR_DOMAIN it is important
ltkeygtservernameltkey ltstringgthttpYOUR_DOMAIN80owncloudremotephpcarddavprincipalsusernameltstringgtltkeygtusernameltkey ltstringgtusernameltstringgt
9 Save the file and open Address Book again It will not work yet
10 Open the preferences for your ownCloud CardDAV-Account and enter your password
11 You may have to restart Address Book once more After this it should work
There is also an easy HOWTO in the forum
36 Chapter 10 Synchronizing with OS X
CHAPTER
ELEVEN
IOS - SYNCHRONIZE IPHONEIPAD
111 Synchronizing the Calendar
1 Open the settings application
2 Select Mail Contacts Calendars
3 Select Add Account
4 Select Other as account type
5 Select Add CalDAV account
6 For server type ADDRESSremotephpcaldavprincipalsusername (Important Donrsquot includehttp or https)
7 Enter your username and password
8 Select Next
9 If your server does not support SSL a warning will be displayed Select Continue
10 If the iPhone is unable to verify the account information read the Troubleshooting paragraph on this page Ifthat doesnrsquot help try to turn off SSL (not recommended)
bull Select OK
bull Select advanced settings
bull Make sure Use SSL is set to OFF
bull Change port to 80
bull Go back to account information and hit Save
Your calendar should now be visible in the Calendar application (may take a few moments)
112 Synchronizing the Address book
1 Open the settings application
2 Select Mail Contacts Calendars
3 Select Add Account
4 Select Other as account type
5 Select Add CardDAV account
37
ownCloud User Manual Release 45
6 For server type ADDRESSremotephpcarddavprincipalsusername (Important Donrsquot includehttp or https)
7 Enter your username and password
8 Select Next
9 If your server does not support SSL a warning will be displayed Select Continue
10 If the iPhone is unable to verify the account information read the Troubleshooting paragraph on this page Ifthat doesnrsquot help try to turn off SSL (not recommended)
bull Select OK
bull Select advanced settings
bull Make sure Use SSL is set to OFF
bull Change port to 80
bull Go back to account information and hit Save
Now should now find your contacts in the address book of your iPhone (may take a few moments)
113 Troubleshooting
1 Check that you didnrsquot include http or https in the server address
2 Depending on your server setup the username-part of the server-address maybe case sensitive So for user Username the server-address may needto be ADDRESSremotephpcaldavprincipalsUsername instead ofADDRESSremotephpcaldavprincipalsusername
3 If you need to change the server-address and want to use SSL yoursquoll have to cancel the setup process and enteryour data again from the very beginning as iOS would prepend https to the server-address automatically
4 Problems have been reported for CardDAV and iOS 4X A possible solution is at the forum
38 Chapter 11 iOS - Synchronize iPhoneiPad
CHAPTER
TWELVE
NATIVE MEDIA PLAYER SUPPORT
You can access your music stored in ownCloud with every Ampache-compatible media player You can find theURL for your specific ownCloud installation in your personal settings or replace ADDRESS with the URL of yourownCloud installation yourself
Ampache-URL httpADDRESSappsmedia
Ampache-compatible players that work with ownCloud include
bull amaroK standard KDE music player
bull tomahawk cross platform player
bull justplayer music player for android
You can find more information about Ampache and other players at the Ampache wikipedia article
The current maintainer of the Media Player is Robin Appelman
39
ownCloud User Manual Release 45
40 Chapter 12 Native Media Player Support
CHAPTER
THIRTEEN
VERSION CONTROL
ownCloud supports simple version control for files Versioning is enabled by default and creates backups of fileswhich are accessible via the history tab This tab also links to the history page where you can roll back a file toany previous versionChanges made at intervals greater than two minutes are saved in data[user]versions and madeaccessible using the above pages
41
ownCloud User Manual Release 45
42 Chapter 13 Version Control
CHAPTER
FOURTEEN
INDICES AND TABLES
bull genindex
43
ownCloud User Manual Release 45
44 Chapter 14 Indices and tables
INDEX
RRFC
RFC 2518 5
45
- Introduction
- The ownCloud Web Interface
-
- Overview
-
- Mounting ownCloud via WebDAV
-
- Windows
- Mac OS X
- Linux
-
- Accessing your Files
-
- Desktop
- Mobile
-
- Calendars
-
- Creating a calendar
- Synchronising Calendars with CalDav
- Creating events
- Exporting Importing events
- Why is the calendar app asking for my current location
-
- Using the Contacts App
-
- Adding contacts
- Creating new address books
- Keeping your address book in sync
-
- Using the Bookmarks App
-
- The main interface
- The bookmarklet
-
- Desktop Synchronisation
- Synchronizing with KDE SC
- Synchronizing with OS X
-
- Setup synchronisation with Mountain Lion (108)
- Installation directions for Snow Leopard (106)
-
- iOS - Synchronize iPhoneiPad
-
- Synchronizing the Calendar
- Synchronizing the Address book
- Troubleshooting
-
- Native Media Player Support
- Version Control
- Indices and tables
- Index
-

CHAPTER
THREE
MOUNTING OWNCLOUD VIA WEBDAV
All major operating systems allow for mounting a users ownCloud via WebDAV a HTTP extension as specified inRFC 2518 This chapter describes how to setup WebDAV on different operating systems
31 Windows
On Windows you can assign ownCloud a drive letter This allows you to browse files stored on an ownCloudserverthe way you would files stored in a mapped network drive
Using this feature requires network connectivity If you want to store your files offline use the ownCloud Client tosync all files on your ownCloud to one or more directories of your local hard drive
Note Prior to mapping your drive you will need to permit the use of Basic Authentication in the Windows RegistryThe procedure is documented in KB841215 and differs between Windows XPServer 2003 and Windows Vista7Please follow the Knowledge Base article before proceeding and follow the Vista instructions if you run Windows 7
311 Mapping via the command line
Suppose your ownCloud is installed at httpswwwyourservercomowncloud that is entering this URLin your webbrowser will bring up the login screen Running
net use Z httpswwwyourservercomowncloudremotephpwebdav useryouruser yourpassword
will map the files of your ownCloud account to the drive letter Z An alternative syntax is
net use Z wwwyourservercomsslowncloudremotephpwebdav useryouruser yourpassword
Appending persistent makes the connection persistent across reboots
You can also mount your ownCloud via HTTP leaving the connection unencrypted Use either of the followingsyntaxes
net use Z httpwwwyourservercomowncloudremotephpwebdav useryouruser yourpasswordnet use Z wwwyourservercomowncloudremotephpwebdav useryouruser yourpassword
Please note that this allows anyone to sniff your ownCloud data with ease especially on public WiFi hotspots PlainHTTP should therefore only be used in conjunction with a VPN tunnel when used on Laptops
5
ownCloud User Manual Release 45
312 Using Windows Explorer
Right-click on Computer entry and select Map network drive Choose a local network drive to mapownCloud to Finally enter the address to your ownCloud instance followed by remotephpwebdav eg
httpswwwyourservercomowncloudremotephpwebdav
for an SSL protected server Check Reconnect at logon to make this mapping persistent across reboots If youwant to connect as another user check Connect using different credentials
Figure 31 Mapping WebDAV on Windows Explorer
After pressing Finish Windows Explorer will map the network drive and your ownCloud instance should be avail-able
313 Using Cyberduck (421)
Specify a server without any leading protocol information eg
Server owncloudhostcom
The port depends on whether your ownCloud server supports SSL or not Cyberduck requires that you select a differentconnection type depending on whethr SSL is to be used (lsquoWebDAVrsquo or lsquoWebDAV (HTTPSSSL)rsquo)
Port 80 (for WebDAV) 443 (for WebDAV (HTTPSSSL))
Use the lsquoMore Optionsrsquo drop-down menu to add the rest of your webdav URL into the lsquoPathrsquo field eg
Path remotephpwebdav
6 Chapter 3 Mounting ownCloud via WebDAV
ownCloud User Manual Release 45
314 Known Problems
Problem Windows refuses to connect via HTTPS
Solution The Windows WebDAV Client does not support Server Name Indication (SNI) on encrypted connectionsIf you encounter an error mounting an SSL-encrypted ownCloud instance please contact your provider aboutassigning a dedicated IP address for your SSL-based server
Problem I receive the error Error 0x800700DF The file size exceeds the limit allowedand cannot be saved
Solution Windows limits the maximum size a file transferred from or to a Web-DAV share may have You can increase the value FileSizeLimitInBytes inHKEY_LOCAL_MACHINESYSTEMCurrentControlSetServicesWebClientParametersby clicking on Modify In order to increase the limit to the maximum value of 4GB pick Decimal and enter4294967295 as value Afterwards reboot Windows or restart the WebClient service
Todo
document registry keys on file size limit and not complaining in no network cases
32 Mac OS X
Assuming your owncloud instance is installed at httpswwwyourservercomowncloud
In the Finder choose Go gt Connect to Server type the address of the server in the Server Addressfield and click Connect The server address should be in a form similar to this ADDRESSfileswebdavphpFor our example it would be
httpswwwyourservercomowncloudfileswebdavphp
For details check the respective vendor documentation at the Apple website
33 Linux
331 KDEDolphin
Assuming your owncloud instance is installed at httpwwwyourservercomowncloud
1 Open Dolphin and click on where it says Network in the left hand Places column
2 Click on the icon labeled Add a Network Folder
3 It should come up with WebDAV already selected Make sure it is and then click Next
4 Enter the following settings
bull Name The name yoursquoll see in the Places bookmark for example ownCloud
bull User Your ownCloud username you use to log in for example admin
bull Server Your ownCloud domain name for example wwwyourservercom (without http before ordirectories afterwards)
bull Folder Enter owncloudfileswebdavphp
5 Create icon checkbox Tick to get a bookmark in the Places column
32 Mac OS X 7
ownCloud User Manual Release 45
6 Port amp Encrypted checkbox Leave as it is unless you have special settings or an SSL certificate
332 UbuntuGnome (Nautilus)
Figure 32 Nautilus WebDAV mounting dialog
333 Mounting from command line
1 Install the WebDAV support using the davfs package On DebianUbuntu you can use sudo apt-getinstall davfs2
2 Reconfigure davfs2 to allow access to normal users sudo dpkg-reconfigure davfs2 (select Yes when prompted)
3 Add the users you want to be able to mount the share to the davfs2 group sudo usermod -aG davfs2ltusergt
4 Edit etcfstab and add the following line for each user who wants to mount the folder (with your de-tails where appropriate) ADDRESSfileswebdavphp homeltusernamegtowncloud davfsuserrwnoauto 0 0
Then as each user who wants to mount the folder
1 Create the folders owncloud and davfs2 in your home directory
2 Create the file secrets inside davfs2 fill it with the following (with your credentials where appropriate)ADDRESSfileswebdavphp ltusernamegt ltpasswordgt
3 Ensure the file is only writable by you either through the file manager or via chmod 600~davfs2secrets
4 Run the command mount ~owncloud
5 To automatically mount the folder on login add the command you used in step 4 to ~bashrc
8 Chapter 3 Mounting ownCloud via WebDAV
ownCloud User Manual Release 45
Known Issues
Problem Resource temporarily unavailable
Solution If you experience trouble when you create a file in the directory edit etcdavfs2davfs2conf andadd use_locks 0lsquo
Problem Certificate warnings
Solution If you use a self-signed certificate you will get a warning If you are willing to take the risk of a man in themiddle attack run this command instead echo y | mount ~owncloud gt devnull 2gtamp1
33 Linux 9
ownCloud User Manual Release 45
10 Chapter 3 Mounting ownCloud via WebDAV
CHAPTER
FOUR
ACCESSING YOUR FILES
41 Desktop
Your ownCloud instance can be accessed on every platform via the web interface There are also options to integrateit with your desktop
In most cases accessing ownCloud using your file manager will be sufficient
bull Connect to Server in your file manager webdavADDRESSfileswebdavphp
bull Change the protocol to dav in Nautilus or http in Finder
However some applications only allow you to save to a local folder To get around this issue you can
bull Sync your ownCloud folders and local folders
bull Mount ownCloud to a local folder without sync
The Desktop Syncing Client called Mirall is now released for Linux and Windows You can follow the current changesat the ownCloud Mirall repository We work on porting this to Mac OS and packaging for all major linux distributions
42 Mobile
To connect to your ownCloud server with the ownCloud mobile apps use the base URL and folder only
examplecomowncloud
No need to add remotephpwebdav as you do for any other WebDAV client
There are also apps in development for both Android and webOS Feel free to contribute if you can
You may also connect to ownCloud from your phone or tablet via WebDAV WebDAV Navigator is a good (proprietary)app for Android App iPhone amp BlackBerry The URL for these is
examplecomowncloudremotephpwebdav
11
ownCloud User Manual Release 45
12 Chapter 4 Accessing your Files
CHAPTER
FIVE
CALENDARS
51 Creating a calendar
If you use the calendar the first time there will be already a calendar called ldquoDefault calendarrdquo You can manage yourcalendars with a click on the ldquoCalendarrdquo button in the top right corner In the dialog which will appear you can addedit export enable disable and delete your calendars There will be also a link for CalDav access
52 Synchronising Calendars with CalDav
Assuming you access your web interface via an address like this
httpADDRESS
Then you can access your calendars with CalDAV-compatible programs like Kontact Evolution Thunderbird usingthe following URL
httpADDRESSremotephpcaldav
To use the ownCloud calendar with Apple iCal you will need to use the following URL including the trailing slash
httpADDRESSremotephpcaldavprincipalsusername
Mozilla Lightning users need to this URL scheme
httpsADDRESSremotephpcaldavcalendarsUSERNAMECALENDARNAME
Note The calendar name must alway be specified in URL-encoding
53 Creating events
To create an event just click on the date in the month view or choose the timeframe in the weekview In the dialogwhich will appear you can enter your information like title category etc
13
ownCloud User Manual Release 45
Figure 51 Example for a simple calendar The default calendar is always called ldquodefaultcalendarrdquo and the usersrsquoname here is ldquotestrdquo The full URL (which on the picture canrsquot be seen because of the short edit field) is then
httpslocalhostowncloudremotephpcaldavcalendarstestdefaultcalendar
14 Chapter 5 Calendars
ownCloud User Manual Release 45
With the advanced options you can set the description the location and the repetition rate of an event If the repeatingshould end you can choose between setting the end by date or by occurrences If you choose in the weekview all daysfrom Monday to Friday it will automatically set the repeat rule to ldquoevery weekdayrdquo If the interval of the weekviewcan be devided by two it automatically set the repeat rule to ldquoBi-Weeklyrdquo
54 Exporting Importing events
541 Export
You can export either a single event or a whole calendar If you want to export a single event click on it and press theexport button in the bottom right corner If you want to export a whole calendar use the ldquoCalendarrdquo button as describedin the chapter ldquoCreating a calendarrdquo
542 Import
Import your calendar as ical file using the files app Just click on the calendar file to open the import dialog You canimport the calendar into a new calendar or into an already existing calendar
Note If the progressbar does not work properly the folder appscalendarimport_tmp has probably nowrite permission
55 Why is the calendar app asking for my current location
The calendar needs your current position in order to detect your timezone Without the correct timezone there will bea time offset between the events in ownCloud and your desktop calendar you synchronise with ownCloud You can
54 Exporting Importing events 15
ownCloud User Manual Release 45
also set the timezone manually in the personal settings
16 Chapter 5 Calendars
CHAPTER
SIX
USING THE CONTACTS APP
The contacts app of ownCloud is like any other mobile contact app but with more functionality Just as you open youraccount you will get the a default addressbook available We will see later that Of course you can always add andremove addressbooks in here
61 Adding contacts
There are two ways in which you can add contacts
1 Add them manually
2 Import a VCF file
611 Importing
So first well check out how to import all the VCF files as they are a lot more faster way of creating contacts Justbelow the contact list 3 buttons The middle one let you upload files
Once yoursquove clicked it the upload window let you choose your files We can upload the files one by one or upload allof them at one go
Let me demonstrate Open the directory in which you store all the files and then do the following Keep pressingCTRL and select the files to upload After you are done just click on the open button After the upload it should looksomething like this in which all the names and contacts will be sorted alphabetically
17
ownCloud User Manual Release 45
Then the interface ask you where to put your imported contacts You have the ability to choose an existing addressbookor to create a new one Then click on ldquoOKrdquo and thatrsquos all for the import of contacts
612 Create contacts manually
In the picture of the bottom bar you could see the new contact button (first one) Click on it You can now see anempty contact in the main part of the interface You have the ability to add all your informations about the contact thename the address the e-mail the telephone nr
Just click on a field and start typing the information You can use the ldquoAdd Fieldrdquo button to add another types ofinformation for this contact
18 Chapter 6 Using the Contacts App
ownCloud User Manual Release 45
When you want to remove an information of your contact just click on little delete icon at the right of the field youwant to remove
613 Adding picture to the contact
There are two methods in which you can give a picture id to the specific contact
1 Direct upload
2 Select pics already uploaded in ownCloud files
After you have selected the picture for the contact you get an option to crop the picture to suit your requirements
61 Adding contacts 19
ownCloud User Manual Release 45
You can crop the picture however you wish and then press OK
As you can see it is really easy to set things right in this app It automatically pics up the First name Middle name (ifany) and the last name You may add or delete any section you want for your own convenience
62 Creating new address books
When you click on the third button of the bottom bar you will have access to the applicationrsquos settings Then presson the ldquoMore buttonrdquo to access the options of your Addressbooks
20 Chapter 6 Using the Contacts App
ownCloud User Manual Release 45
You have there the ability to add delete download or share your addressbooks Hover your cursor on every icon tosee what they mean
63 Keeping your address book in sync
One of the most important thing in any contact app is to keep it in Sync You can sync this contact app to your phonewhich has the following OSrsquos- Android and IOS
631 Syncing with Android
1 Install cardDav- Sync free from Google play store by visiting this link-httpsplaygooglecomstoreappsdetailsid=orgdmfscarddavsync
2 This app supports auto- configuration which is a Boon- after installing visit this link- card-davsowncloudexamplenetremotephpcarddav to auto configure the app
3 Enter your login details
4 After the app has checked your login details you may just select- Sync server to phone option
5 Thatrsquos it there is nothing else to do for Android )
632 Syncing your IOS device
Synchronizing the Address book
63 Keeping your address book in sync 21
ownCloud User Manual Release 45
1 Open the settings application
2 Select Mail Contacts Calendars
3 Select Add Account
4 Select other as account type
5 Select Add CardDAV account
6 For server type httpowncloudexamplenetremotephpcarddavprincipalsusername
7 Enter your user name and password
8 Select Next
9 If your server does not support SSL a warning will be displayed Select Continue
10 If the iPhone is unable to verify the account information perform the following
bull Select OK
bull Select advanced settings
bull Make sure Use SSL is set to OFF
bull Change port to 80
bull Go back to account information and hit Save
Now should now find your contacts in the address book of your iPhone
633 Other Syncing options provided by ownCloud
1 For android you may use their official android app- httpsowncloudcomoverviewmobileapps
2 And for IOS(Iphone and Ipad) use their app - httpsowncloudcomoverviewmobileapps
22 Chapter 6 Using the Contacts App
CHAPTER
SEVEN
USING THE BOOKMARKS APP
To add a bookmark to the application you have 2 possibilities use the main interface or the bookmarklet or use thebookmarklet
71 The main interface
The main owncloud interface contains 3 fields at the top where you can enter the website address (or URL) the titleof your bookmark and a serie of tags separated by a space
Here wersquove added the page httpwikipediaorg with the title ldquoWikipediardquo and some tags describing what wikipediais (for an easyier search later on)
711 Edition
You also have the possibility to edit or delete your bookmark For that just hover your mousersquos cursor over onebookmark and click on the little pencil to edit or the cross the delete
The bookmark will then be filled into the 3 fields at the top of the screen Modify your bookmark to your need thenhit the save button to persist the change
712 Search
If you click on a tag ownCloud will only display the bookmarks that are described with this tag
You can also use the search bar of owncloud in the top right of your screen
Simply click on the ldquoBookmarksrdquo menu in the sidebar to come back to the default view
23
ownCloud User Manual Release 45
72 The bookmarklet
The creator of this app understand that people wonrsquot come open the ownCloud page to add the bookmark when thesee a cool site This is why they have made this cool ldquobookmarkletrdquo
A bookmarklet is small button that you can drag and drop in your bookmarks The next time you see a cool new sitepress on this special bookmark it will add the site to your ownCloud bookmarks
To find this bookmark go to your personnal preference and search for the ldquoBookmarkletrdquo item
24 Chapter 7 Using the Bookmarks App
CHAPTER
EIGHT
DESKTOP SYNCHRONISATION
For synchronizing files with your desktop computer we recommend using the ownCloud Client for Windows MacOS X and Linux Its usage is documented separately in the ownCloud Desktop Client Manual
Furthermore It is possible to synchronize your ownCloud calendar and address book with a variety of different oper-ating systems and devices It is also possible to mount your ownCloud storage via WebDAV which is also documentedin the next chapters
25
ownCloud User Manual Release 45
26 Chapter 8 Desktop Synchronisation
CHAPTER
NINE
SYNCHRONIZING WITH KDE SC
From KDE SC 48 and forward setting up ownCloud is very easyFrom System Settings Personal InformationAkonadiResources Configuration select DAV Groupware resource
27
ownCloud User Manual Release 45
Enter your ownCloud username and password and click ldquoNextrdquo
Select ownCloud in the drop down list and click ldquoNextrdquo
28 Chapter 9 Synchronizing with KDE SC
ownCloud User Manual Release 45
Enter the host name and installation path If you do not use SSL remember to de-select ldquoUse secure connectionrdquo
Test the connection If everything went well you should see a message like the one below
29
ownCloud User Manual Release 45
Click ldquoFinishrdquo and you will be able to change the display name and refresh interval
Now you should see the Akonadi resource doing the first synchronization
You can find the Contacts and Calendars in Kontact (or KOrganizerKAddressbook if you run the programs separately)
30 Chapter 9 Synchronizing with KDE SC
ownCloud User Manual Release 45
31
ownCloud User Manual Release 45
32 Chapter 9 Synchronizing with KDE SC
CHAPTER
TEN
SYNCHRONIZING WITH OS X
101 Setup synchronisation with Mountain Lion (108)
Note Although these steps belong to Mountain Lion (108) they should be similar with Lion (107)
Open the System Preferences choose Mail Contacts amp Calendars and scroll down to select Add Other Account
33
ownCloud User Manual Release 45
1011 Synchronising the Calendar
Select Add a CalDAV account
Enter your ownCloud-username your password and the full URL-path to your ownCloud-installationADDRESSremotephpcaldavprincipalsUSERNAME (Replace ADDRESS and USERNAME)
1012 Synchronising the Addressbook
Select Add a CardDAV account
34 Chapter 10 Synchronizing with OS X
ownCloud User Manual Release 45
Enter your ownCloud-username your password and the full URL-path to your ownCloud-installationADDRESSremotephpcarddavprincipalsUSERNAME (Replace ADDRESS and USERNAME notethe url is slightly different to the URL in the previous step)
102 Installation directions for Snow Leopard (106)
While OS X Lion and Mountain Lion work fine OS X Snow Leopard (106) and older needs some fiddling to workA user contributed the following
1 Make sure Addressbook is not running If it is select the windows and press Command + Q to terminate it
2 Navigate to UsersYOUR_USERNAMELibraryApplication SupportAddressBookSourcesIf you have all ready some kind of address book setup it is likely you will see some folders named like thisBEA92826-FBF3-4E53-B5C6-ED7C2B454430 Note down what folders there are now and leave thewindow open
3 Open addressbook and try to add a new CardDav addressbook At this point it does not matter what informationyou enter It will come up with the same error message you mentioned before when you click ldquoCreaterdquo Ignoreit and click ldquoCreaterdquo again A non-functional address book will be added
4 Close Address-Book again using Command + Q
102 Installation directions for Snow Leopard (106) 35
ownCloud User Manual Release 45
5 Go back to the folder window from step 2 You will now see a newly created folder with another long string asits name
6 Navigate to the newly created folder and edit the Configurationplist with your favorite text editor
7 Search for a section looking like this
ltkeygtservernameltkeygt ltstringgthttp0(null)ltstringgtltkeygtusernameltkeygt ltstringgtWhatever_you_entered_beforeltstringgt
8 Make it look like this Please note the 80 after YOUR_DOMAIN it is important
ltkeygtservernameltkey ltstringgthttpYOUR_DOMAIN80owncloudremotephpcarddavprincipalsusernameltstringgtltkeygtusernameltkey ltstringgtusernameltstringgt
9 Save the file and open Address Book again It will not work yet
10 Open the preferences for your ownCloud CardDAV-Account and enter your password
11 You may have to restart Address Book once more After this it should work
There is also an easy HOWTO in the forum
36 Chapter 10 Synchronizing with OS X
CHAPTER
ELEVEN
IOS - SYNCHRONIZE IPHONEIPAD
111 Synchronizing the Calendar
1 Open the settings application
2 Select Mail Contacts Calendars
3 Select Add Account
4 Select Other as account type
5 Select Add CalDAV account
6 For server type ADDRESSremotephpcaldavprincipalsusername (Important Donrsquot includehttp or https)
7 Enter your username and password
8 Select Next
9 If your server does not support SSL a warning will be displayed Select Continue
10 If the iPhone is unable to verify the account information read the Troubleshooting paragraph on this page Ifthat doesnrsquot help try to turn off SSL (not recommended)
bull Select OK
bull Select advanced settings
bull Make sure Use SSL is set to OFF
bull Change port to 80
bull Go back to account information and hit Save
Your calendar should now be visible in the Calendar application (may take a few moments)
112 Synchronizing the Address book
1 Open the settings application
2 Select Mail Contacts Calendars
3 Select Add Account
4 Select Other as account type
5 Select Add CardDAV account
37
ownCloud User Manual Release 45
6 For server type ADDRESSremotephpcarddavprincipalsusername (Important Donrsquot includehttp or https)
7 Enter your username and password
8 Select Next
9 If your server does not support SSL a warning will be displayed Select Continue
10 If the iPhone is unable to verify the account information read the Troubleshooting paragraph on this page Ifthat doesnrsquot help try to turn off SSL (not recommended)
bull Select OK
bull Select advanced settings
bull Make sure Use SSL is set to OFF
bull Change port to 80
bull Go back to account information and hit Save
Now should now find your contacts in the address book of your iPhone (may take a few moments)
113 Troubleshooting
1 Check that you didnrsquot include http or https in the server address
2 Depending on your server setup the username-part of the server-address maybe case sensitive So for user Username the server-address may needto be ADDRESSremotephpcaldavprincipalsUsername instead ofADDRESSremotephpcaldavprincipalsusername
3 If you need to change the server-address and want to use SSL yoursquoll have to cancel the setup process and enteryour data again from the very beginning as iOS would prepend https to the server-address automatically
4 Problems have been reported for CardDAV and iOS 4X A possible solution is at the forum
38 Chapter 11 iOS - Synchronize iPhoneiPad
CHAPTER
TWELVE
NATIVE MEDIA PLAYER SUPPORT
You can access your music stored in ownCloud with every Ampache-compatible media player You can find theURL for your specific ownCloud installation in your personal settings or replace ADDRESS with the URL of yourownCloud installation yourself
Ampache-URL httpADDRESSappsmedia
Ampache-compatible players that work with ownCloud include
bull amaroK standard KDE music player
bull tomahawk cross platform player
bull justplayer music player for android
You can find more information about Ampache and other players at the Ampache wikipedia article
The current maintainer of the Media Player is Robin Appelman
39
ownCloud User Manual Release 45
40 Chapter 12 Native Media Player Support
CHAPTER
THIRTEEN
VERSION CONTROL
ownCloud supports simple version control for files Versioning is enabled by default and creates backups of fileswhich are accessible via the history tab This tab also links to the history page where you can roll back a file toany previous versionChanges made at intervals greater than two minutes are saved in data[user]versions and madeaccessible using the above pages
41
ownCloud User Manual Release 45
42 Chapter 13 Version Control
CHAPTER
FOURTEEN
INDICES AND TABLES
bull genindex
43
ownCloud User Manual Release 45
44 Chapter 14 Indices and tables
INDEX
RRFC
RFC 2518 5
45
- Introduction
- The ownCloud Web Interface
-
- Overview
-
- Mounting ownCloud via WebDAV
-
- Windows
- Mac OS X
- Linux
-
- Accessing your Files
-
- Desktop
- Mobile
-
- Calendars
-
- Creating a calendar
- Synchronising Calendars with CalDav
- Creating events
- Exporting Importing events
- Why is the calendar app asking for my current location
-
- Using the Contacts App
-
- Adding contacts
- Creating new address books
- Keeping your address book in sync
-
- Using the Bookmarks App
-
- The main interface
- The bookmarklet
-
- Desktop Synchronisation
- Synchronizing with KDE SC
- Synchronizing with OS X
-
- Setup synchronisation with Mountain Lion (108)
- Installation directions for Snow Leopard (106)
-
- iOS - Synchronize iPhoneiPad
-
- Synchronizing the Calendar
- Synchronizing the Address book
- Troubleshooting
-
- Native Media Player Support
- Version Control
- Indices and tables
- Index
-

ownCloud User Manual Release 45
6 Port amp Encrypted checkbox Leave as it is unless you have special settings or an SSL certificate
332 UbuntuGnome (Nautilus)
Figure 32 Nautilus WebDAV mounting dialog
333 Mounting from command line
1 Install the WebDAV support using the davfs package On DebianUbuntu you can use sudo apt-getinstall davfs2
2 Reconfigure davfs2 to allow access to normal users sudo dpkg-reconfigure davfs2 (select Yes when prompted)
3 Add the users you want to be able to mount the share to the davfs2 group sudo usermod -aG davfs2ltusergt
4 Edit etcfstab and add the following line for each user who wants to mount the folder (with your de-tails where appropriate) ADDRESSfileswebdavphp homeltusernamegtowncloud davfsuserrwnoauto 0 0
Then as each user who wants to mount the folder
1 Create the folders owncloud and davfs2 in your home directory
2 Create the file secrets inside davfs2 fill it with the following (with your credentials where appropriate)ADDRESSfileswebdavphp ltusernamegt ltpasswordgt
3 Ensure the file is only writable by you either through the file manager or via chmod 600~davfs2secrets
4 Run the command mount ~owncloud
5 To automatically mount the folder on login add the command you used in step 4 to ~bashrc
8 Chapter 3 Mounting ownCloud via WebDAV
ownCloud User Manual Release 45
Known Issues
Problem Resource temporarily unavailable
Solution If you experience trouble when you create a file in the directory edit etcdavfs2davfs2conf andadd use_locks 0lsquo
Problem Certificate warnings
Solution If you use a self-signed certificate you will get a warning If you are willing to take the risk of a man in themiddle attack run this command instead echo y | mount ~owncloud gt devnull 2gtamp1
33 Linux 9
ownCloud User Manual Release 45
10 Chapter 3 Mounting ownCloud via WebDAV
CHAPTER
FOUR
ACCESSING YOUR FILES
41 Desktop
Your ownCloud instance can be accessed on every platform via the web interface There are also options to integrateit with your desktop
In most cases accessing ownCloud using your file manager will be sufficient
bull Connect to Server in your file manager webdavADDRESSfileswebdavphp
bull Change the protocol to dav in Nautilus or http in Finder
However some applications only allow you to save to a local folder To get around this issue you can
bull Sync your ownCloud folders and local folders
bull Mount ownCloud to a local folder without sync
The Desktop Syncing Client called Mirall is now released for Linux and Windows You can follow the current changesat the ownCloud Mirall repository We work on porting this to Mac OS and packaging for all major linux distributions
42 Mobile
To connect to your ownCloud server with the ownCloud mobile apps use the base URL and folder only
examplecomowncloud
No need to add remotephpwebdav as you do for any other WebDAV client
There are also apps in development for both Android and webOS Feel free to contribute if you can
You may also connect to ownCloud from your phone or tablet via WebDAV WebDAV Navigator is a good (proprietary)app for Android App iPhone amp BlackBerry The URL for these is
examplecomowncloudremotephpwebdav
11
ownCloud User Manual Release 45
12 Chapter 4 Accessing your Files
CHAPTER
FIVE
CALENDARS
51 Creating a calendar
If you use the calendar the first time there will be already a calendar called ldquoDefault calendarrdquo You can manage yourcalendars with a click on the ldquoCalendarrdquo button in the top right corner In the dialog which will appear you can addedit export enable disable and delete your calendars There will be also a link for CalDav access
52 Synchronising Calendars with CalDav
Assuming you access your web interface via an address like this
httpADDRESS
Then you can access your calendars with CalDAV-compatible programs like Kontact Evolution Thunderbird usingthe following URL
httpADDRESSremotephpcaldav
To use the ownCloud calendar with Apple iCal you will need to use the following URL including the trailing slash
httpADDRESSremotephpcaldavprincipalsusername
Mozilla Lightning users need to this URL scheme
httpsADDRESSremotephpcaldavcalendarsUSERNAMECALENDARNAME
Note The calendar name must alway be specified in URL-encoding
53 Creating events
To create an event just click on the date in the month view or choose the timeframe in the weekview In the dialogwhich will appear you can enter your information like title category etc
13
ownCloud User Manual Release 45
Figure 51 Example for a simple calendar The default calendar is always called ldquodefaultcalendarrdquo and the usersrsquoname here is ldquotestrdquo The full URL (which on the picture canrsquot be seen because of the short edit field) is then
httpslocalhostowncloudremotephpcaldavcalendarstestdefaultcalendar
14 Chapter 5 Calendars
ownCloud User Manual Release 45
With the advanced options you can set the description the location and the repetition rate of an event If the repeatingshould end you can choose between setting the end by date or by occurrences If you choose in the weekview all daysfrom Monday to Friday it will automatically set the repeat rule to ldquoevery weekdayrdquo If the interval of the weekviewcan be devided by two it automatically set the repeat rule to ldquoBi-Weeklyrdquo
54 Exporting Importing events
541 Export
You can export either a single event or a whole calendar If you want to export a single event click on it and press theexport button in the bottom right corner If you want to export a whole calendar use the ldquoCalendarrdquo button as describedin the chapter ldquoCreating a calendarrdquo
542 Import
Import your calendar as ical file using the files app Just click on the calendar file to open the import dialog You canimport the calendar into a new calendar or into an already existing calendar
Note If the progressbar does not work properly the folder appscalendarimport_tmp has probably nowrite permission
55 Why is the calendar app asking for my current location
The calendar needs your current position in order to detect your timezone Without the correct timezone there will bea time offset between the events in ownCloud and your desktop calendar you synchronise with ownCloud You can
54 Exporting Importing events 15
ownCloud User Manual Release 45
also set the timezone manually in the personal settings
16 Chapter 5 Calendars
CHAPTER
SIX
USING THE CONTACTS APP
The contacts app of ownCloud is like any other mobile contact app but with more functionality Just as you open youraccount you will get the a default addressbook available We will see later that Of course you can always add andremove addressbooks in here
61 Adding contacts
There are two ways in which you can add contacts
1 Add them manually
2 Import a VCF file
611 Importing
So first well check out how to import all the VCF files as they are a lot more faster way of creating contacts Justbelow the contact list 3 buttons The middle one let you upload files
Once yoursquove clicked it the upload window let you choose your files We can upload the files one by one or upload allof them at one go
Let me demonstrate Open the directory in which you store all the files and then do the following Keep pressingCTRL and select the files to upload After you are done just click on the open button After the upload it should looksomething like this in which all the names and contacts will be sorted alphabetically
17
ownCloud User Manual Release 45
Then the interface ask you where to put your imported contacts You have the ability to choose an existing addressbookor to create a new one Then click on ldquoOKrdquo and thatrsquos all for the import of contacts
612 Create contacts manually
In the picture of the bottom bar you could see the new contact button (first one) Click on it You can now see anempty contact in the main part of the interface You have the ability to add all your informations about the contact thename the address the e-mail the telephone nr
Just click on a field and start typing the information You can use the ldquoAdd Fieldrdquo button to add another types ofinformation for this contact
18 Chapter 6 Using the Contacts App
ownCloud User Manual Release 45
When you want to remove an information of your contact just click on little delete icon at the right of the field youwant to remove
613 Adding picture to the contact
There are two methods in which you can give a picture id to the specific contact
1 Direct upload
2 Select pics already uploaded in ownCloud files
After you have selected the picture for the contact you get an option to crop the picture to suit your requirements
61 Adding contacts 19
ownCloud User Manual Release 45
You can crop the picture however you wish and then press OK
As you can see it is really easy to set things right in this app It automatically pics up the First name Middle name (ifany) and the last name You may add or delete any section you want for your own convenience
62 Creating new address books
When you click on the third button of the bottom bar you will have access to the applicationrsquos settings Then presson the ldquoMore buttonrdquo to access the options of your Addressbooks
20 Chapter 6 Using the Contacts App
ownCloud User Manual Release 45
You have there the ability to add delete download or share your addressbooks Hover your cursor on every icon tosee what they mean
63 Keeping your address book in sync
One of the most important thing in any contact app is to keep it in Sync You can sync this contact app to your phonewhich has the following OSrsquos- Android and IOS
631 Syncing with Android
1 Install cardDav- Sync free from Google play store by visiting this link-httpsplaygooglecomstoreappsdetailsid=orgdmfscarddavsync
2 This app supports auto- configuration which is a Boon- after installing visit this link- card-davsowncloudexamplenetremotephpcarddav to auto configure the app
3 Enter your login details
4 After the app has checked your login details you may just select- Sync server to phone option
5 Thatrsquos it there is nothing else to do for Android )
632 Syncing your IOS device
Synchronizing the Address book
63 Keeping your address book in sync 21
ownCloud User Manual Release 45
1 Open the settings application
2 Select Mail Contacts Calendars
3 Select Add Account
4 Select other as account type
5 Select Add CardDAV account
6 For server type httpowncloudexamplenetremotephpcarddavprincipalsusername
7 Enter your user name and password
8 Select Next
9 If your server does not support SSL a warning will be displayed Select Continue
10 If the iPhone is unable to verify the account information perform the following
bull Select OK
bull Select advanced settings
bull Make sure Use SSL is set to OFF
bull Change port to 80
bull Go back to account information and hit Save
Now should now find your contacts in the address book of your iPhone
633 Other Syncing options provided by ownCloud
1 For android you may use their official android app- httpsowncloudcomoverviewmobileapps
2 And for IOS(Iphone and Ipad) use their app - httpsowncloudcomoverviewmobileapps
22 Chapter 6 Using the Contacts App
CHAPTER
SEVEN
USING THE BOOKMARKS APP
To add a bookmark to the application you have 2 possibilities use the main interface or the bookmarklet or use thebookmarklet
71 The main interface
The main owncloud interface contains 3 fields at the top where you can enter the website address (or URL) the titleof your bookmark and a serie of tags separated by a space
Here wersquove added the page httpwikipediaorg with the title ldquoWikipediardquo and some tags describing what wikipediais (for an easyier search later on)
711 Edition
You also have the possibility to edit or delete your bookmark For that just hover your mousersquos cursor over onebookmark and click on the little pencil to edit or the cross the delete
The bookmark will then be filled into the 3 fields at the top of the screen Modify your bookmark to your need thenhit the save button to persist the change
712 Search
If you click on a tag ownCloud will only display the bookmarks that are described with this tag
You can also use the search bar of owncloud in the top right of your screen
Simply click on the ldquoBookmarksrdquo menu in the sidebar to come back to the default view
23
ownCloud User Manual Release 45
72 The bookmarklet
The creator of this app understand that people wonrsquot come open the ownCloud page to add the bookmark when thesee a cool site This is why they have made this cool ldquobookmarkletrdquo
A bookmarklet is small button that you can drag and drop in your bookmarks The next time you see a cool new sitepress on this special bookmark it will add the site to your ownCloud bookmarks
To find this bookmark go to your personnal preference and search for the ldquoBookmarkletrdquo item
24 Chapter 7 Using the Bookmarks App
CHAPTER
EIGHT
DESKTOP SYNCHRONISATION
For synchronizing files with your desktop computer we recommend using the ownCloud Client for Windows MacOS X and Linux Its usage is documented separately in the ownCloud Desktop Client Manual
Furthermore It is possible to synchronize your ownCloud calendar and address book with a variety of different oper-ating systems and devices It is also possible to mount your ownCloud storage via WebDAV which is also documentedin the next chapters
25
ownCloud User Manual Release 45
26 Chapter 8 Desktop Synchronisation
CHAPTER
NINE
SYNCHRONIZING WITH KDE SC
From KDE SC 48 and forward setting up ownCloud is very easyFrom System Settings Personal InformationAkonadiResources Configuration select DAV Groupware resource
27
ownCloud User Manual Release 45
Enter your ownCloud username and password and click ldquoNextrdquo
Select ownCloud in the drop down list and click ldquoNextrdquo
28 Chapter 9 Synchronizing with KDE SC
ownCloud User Manual Release 45
Enter the host name and installation path If you do not use SSL remember to de-select ldquoUse secure connectionrdquo
Test the connection If everything went well you should see a message like the one below
29
ownCloud User Manual Release 45
Click ldquoFinishrdquo and you will be able to change the display name and refresh interval
Now you should see the Akonadi resource doing the first synchronization
You can find the Contacts and Calendars in Kontact (or KOrganizerKAddressbook if you run the programs separately)
30 Chapter 9 Synchronizing with KDE SC
ownCloud User Manual Release 45
31
ownCloud User Manual Release 45
32 Chapter 9 Synchronizing with KDE SC
CHAPTER
TEN
SYNCHRONIZING WITH OS X
101 Setup synchronisation with Mountain Lion (108)
Note Although these steps belong to Mountain Lion (108) they should be similar with Lion (107)
Open the System Preferences choose Mail Contacts amp Calendars and scroll down to select Add Other Account
33
ownCloud User Manual Release 45
1011 Synchronising the Calendar
Select Add a CalDAV account
Enter your ownCloud-username your password and the full URL-path to your ownCloud-installationADDRESSremotephpcaldavprincipalsUSERNAME (Replace ADDRESS and USERNAME)
1012 Synchronising the Addressbook
Select Add a CardDAV account
34 Chapter 10 Synchronizing with OS X
ownCloud User Manual Release 45
Enter your ownCloud-username your password and the full URL-path to your ownCloud-installationADDRESSremotephpcarddavprincipalsUSERNAME (Replace ADDRESS and USERNAME notethe url is slightly different to the URL in the previous step)
102 Installation directions for Snow Leopard (106)
While OS X Lion and Mountain Lion work fine OS X Snow Leopard (106) and older needs some fiddling to workA user contributed the following
1 Make sure Addressbook is not running If it is select the windows and press Command + Q to terminate it
2 Navigate to UsersYOUR_USERNAMELibraryApplication SupportAddressBookSourcesIf you have all ready some kind of address book setup it is likely you will see some folders named like thisBEA92826-FBF3-4E53-B5C6-ED7C2B454430 Note down what folders there are now and leave thewindow open
3 Open addressbook and try to add a new CardDav addressbook At this point it does not matter what informationyou enter It will come up with the same error message you mentioned before when you click ldquoCreaterdquo Ignoreit and click ldquoCreaterdquo again A non-functional address book will be added
4 Close Address-Book again using Command + Q
102 Installation directions for Snow Leopard (106) 35
ownCloud User Manual Release 45
5 Go back to the folder window from step 2 You will now see a newly created folder with another long string asits name
6 Navigate to the newly created folder and edit the Configurationplist with your favorite text editor
7 Search for a section looking like this
ltkeygtservernameltkeygt ltstringgthttp0(null)ltstringgtltkeygtusernameltkeygt ltstringgtWhatever_you_entered_beforeltstringgt
8 Make it look like this Please note the 80 after YOUR_DOMAIN it is important
ltkeygtservernameltkey ltstringgthttpYOUR_DOMAIN80owncloudremotephpcarddavprincipalsusernameltstringgtltkeygtusernameltkey ltstringgtusernameltstringgt
9 Save the file and open Address Book again It will not work yet
10 Open the preferences for your ownCloud CardDAV-Account and enter your password
11 You may have to restart Address Book once more After this it should work
There is also an easy HOWTO in the forum
36 Chapter 10 Synchronizing with OS X
CHAPTER
ELEVEN
IOS - SYNCHRONIZE IPHONEIPAD
111 Synchronizing the Calendar
1 Open the settings application
2 Select Mail Contacts Calendars
3 Select Add Account
4 Select Other as account type
5 Select Add CalDAV account
6 For server type ADDRESSremotephpcaldavprincipalsusername (Important Donrsquot includehttp or https)
7 Enter your username and password
8 Select Next
9 If your server does not support SSL a warning will be displayed Select Continue
10 If the iPhone is unable to verify the account information read the Troubleshooting paragraph on this page Ifthat doesnrsquot help try to turn off SSL (not recommended)
bull Select OK
bull Select advanced settings
bull Make sure Use SSL is set to OFF
bull Change port to 80
bull Go back to account information and hit Save
Your calendar should now be visible in the Calendar application (may take a few moments)
112 Synchronizing the Address book
1 Open the settings application
2 Select Mail Contacts Calendars
3 Select Add Account
4 Select Other as account type
5 Select Add CardDAV account
37
ownCloud User Manual Release 45
6 For server type ADDRESSremotephpcarddavprincipalsusername (Important Donrsquot includehttp or https)
7 Enter your username and password
8 Select Next
9 If your server does not support SSL a warning will be displayed Select Continue
10 If the iPhone is unable to verify the account information read the Troubleshooting paragraph on this page Ifthat doesnrsquot help try to turn off SSL (not recommended)
bull Select OK
bull Select advanced settings
bull Make sure Use SSL is set to OFF
bull Change port to 80
bull Go back to account information and hit Save
Now should now find your contacts in the address book of your iPhone (may take a few moments)
113 Troubleshooting
1 Check that you didnrsquot include http or https in the server address
2 Depending on your server setup the username-part of the server-address maybe case sensitive So for user Username the server-address may needto be ADDRESSremotephpcaldavprincipalsUsername instead ofADDRESSremotephpcaldavprincipalsusername
3 If you need to change the server-address and want to use SSL yoursquoll have to cancel the setup process and enteryour data again from the very beginning as iOS would prepend https to the server-address automatically
4 Problems have been reported for CardDAV and iOS 4X A possible solution is at the forum
38 Chapter 11 iOS - Synchronize iPhoneiPad
CHAPTER
TWELVE
NATIVE MEDIA PLAYER SUPPORT
You can access your music stored in ownCloud with every Ampache-compatible media player You can find theURL for your specific ownCloud installation in your personal settings or replace ADDRESS with the URL of yourownCloud installation yourself
Ampache-URL httpADDRESSappsmedia
Ampache-compatible players that work with ownCloud include
bull amaroK standard KDE music player
bull tomahawk cross platform player
bull justplayer music player for android
You can find more information about Ampache and other players at the Ampache wikipedia article
The current maintainer of the Media Player is Robin Appelman
39
ownCloud User Manual Release 45
40 Chapter 12 Native Media Player Support
CHAPTER
THIRTEEN
VERSION CONTROL
ownCloud supports simple version control for files Versioning is enabled by default and creates backups of fileswhich are accessible via the history tab This tab also links to the history page where you can roll back a file toany previous versionChanges made at intervals greater than two minutes are saved in data[user]versions and madeaccessible using the above pages
41
ownCloud User Manual Release 45
42 Chapter 13 Version Control
CHAPTER
FOURTEEN
INDICES AND TABLES
bull genindex
43
ownCloud User Manual Release 45
44 Chapter 14 Indices and tables
INDEX
RRFC
RFC 2518 5
45
- Introduction
- The ownCloud Web Interface
-
- Overview
-
- Mounting ownCloud via WebDAV
-
- Windows
- Mac OS X
- Linux
-
- Accessing your Files
-
- Desktop
- Mobile
-
- Calendars
-
- Creating a calendar
- Synchronising Calendars with CalDav
- Creating events
- Exporting Importing events
- Why is the calendar app asking for my current location
-
- Using the Contacts App
-
- Adding contacts
- Creating new address books
- Keeping your address book in sync
-
- Using the Bookmarks App
-
- The main interface
- The bookmarklet
-
- Desktop Synchronisation
- Synchronizing with KDE SC
- Synchronizing with OS X
-
- Setup synchronisation with Mountain Lion (108)
- Installation directions for Snow Leopard (106)
-
- iOS - Synchronize iPhoneiPad
-
- Synchronizing the Calendar
- Synchronizing the Address book
- Troubleshooting
-
- Native Media Player Support
- Version Control
- Indices and tables
- Index
-
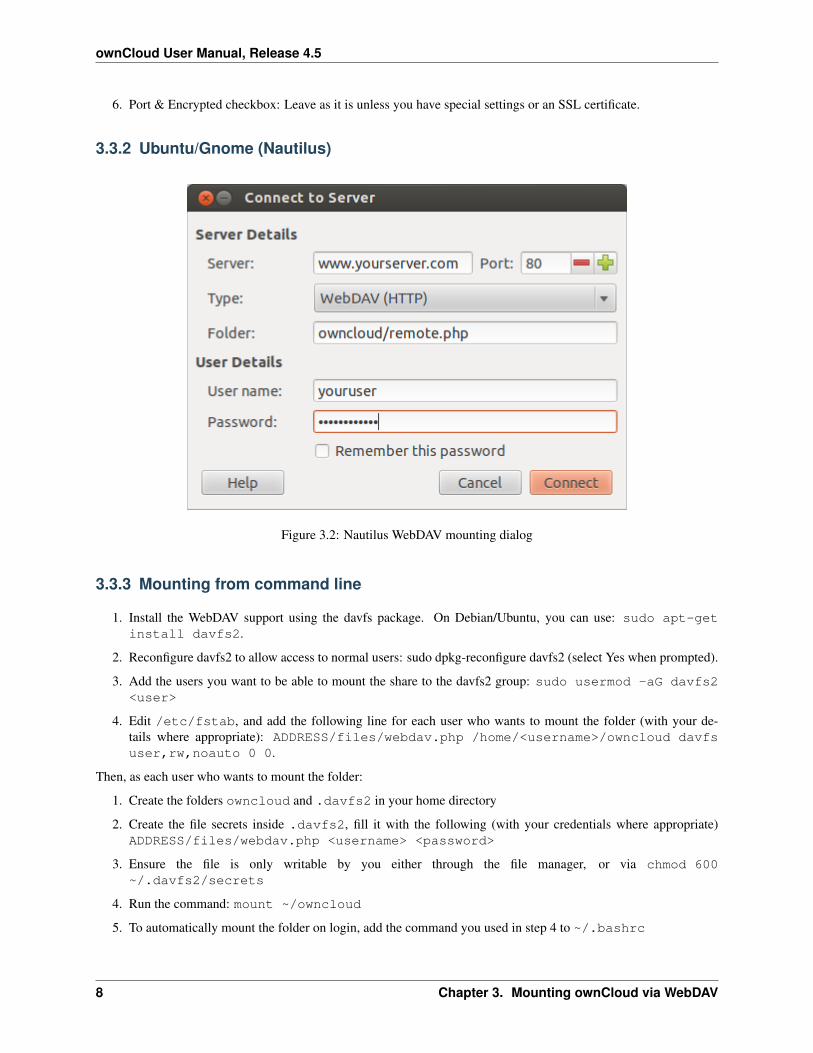
ownCloud User Manual Release 45
10 Chapter 3 Mounting ownCloud via WebDAV
CHAPTER
FOUR
ACCESSING YOUR FILES
41 Desktop
Your ownCloud instance can be accessed on every platform via the web interface There are also options to integrateit with your desktop
In most cases accessing ownCloud using your file manager will be sufficient
bull Connect to Server in your file manager webdavADDRESSfileswebdavphp
bull Change the protocol to dav in Nautilus or http in Finder
However some applications only allow you to save to a local folder To get around this issue you can
bull Sync your ownCloud folders and local folders
bull Mount ownCloud to a local folder without sync
The Desktop Syncing Client called Mirall is now released for Linux and Windows You can follow the current changesat the ownCloud Mirall repository We work on porting this to Mac OS and packaging for all major linux distributions
42 Mobile
To connect to your ownCloud server with the ownCloud mobile apps use the base URL and folder only
examplecomowncloud
No need to add remotephpwebdav as you do for any other WebDAV client
There are also apps in development for both Android and webOS Feel free to contribute if you can
You may also connect to ownCloud from your phone or tablet via WebDAV WebDAV Navigator is a good (proprietary)app for Android App iPhone amp BlackBerry The URL for these is
examplecomowncloudremotephpwebdav
11
ownCloud User Manual Release 45
12 Chapter 4 Accessing your Files
CHAPTER
FIVE
CALENDARS
51 Creating a calendar
If you use the calendar the first time there will be already a calendar called ldquoDefault calendarrdquo You can manage yourcalendars with a click on the ldquoCalendarrdquo button in the top right corner In the dialog which will appear you can addedit export enable disable and delete your calendars There will be also a link for CalDav access
52 Synchronising Calendars with CalDav
Assuming you access your web interface via an address like this
httpADDRESS
Then you can access your calendars with CalDAV-compatible programs like Kontact Evolution Thunderbird usingthe following URL
httpADDRESSremotephpcaldav
To use the ownCloud calendar with Apple iCal you will need to use the following URL including the trailing slash
httpADDRESSremotephpcaldavprincipalsusername
Mozilla Lightning users need to this URL scheme
httpsADDRESSremotephpcaldavcalendarsUSERNAMECALENDARNAME
Note The calendar name must alway be specified in URL-encoding
53 Creating events
To create an event just click on the date in the month view or choose the timeframe in the weekview In the dialogwhich will appear you can enter your information like title category etc
13
ownCloud User Manual Release 45
Figure 51 Example for a simple calendar The default calendar is always called ldquodefaultcalendarrdquo and the usersrsquoname here is ldquotestrdquo The full URL (which on the picture canrsquot be seen because of the short edit field) is then
httpslocalhostowncloudremotephpcaldavcalendarstestdefaultcalendar
14 Chapter 5 Calendars
ownCloud User Manual Release 45
With the advanced options you can set the description the location and the repetition rate of an event If the repeatingshould end you can choose between setting the end by date or by occurrences If you choose in the weekview all daysfrom Monday to Friday it will automatically set the repeat rule to ldquoevery weekdayrdquo If the interval of the weekviewcan be devided by two it automatically set the repeat rule to ldquoBi-Weeklyrdquo
54 Exporting Importing events
541 Export
You can export either a single event or a whole calendar If you want to export a single event click on it and press theexport button in the bottom right corner If you want to export a whole calendar use the ldquoCalendarrdquo button as describedin the chapter ldquoCreating a calendarrdquo
542 Import
Import your calendar as ical file using the files app Just click on the calendar file to open the import dialog You canimport the calendar into a new calendar or into an already existing calendar
Note If the progressbar does not work properly the folder appscalendarimport_tmp has probably nowrite permission
55 Why is the calendar app asking for my current location
The calendar needs your current position in order to detect your timezone Without the correct timezone there will bea time offset between the events in ownCloud and your desktop calendar you synchronise with ownCloud You can
54 Exporting Importing events 15
ownCloud User Manual Release 45
also set the timezone manually in the personal settings
16 Chapter 5 Calendars
CHAPTER
SIX
USING THE CONTACTS APP
The contacts app of ownCloud is like any other mobile contact app but with more functionality Just as you open youraccount you will get the a default addressbook available We will see later that Of course you can always add andremove addressbooks in here
61 Adding contacts
There are two ways in which you can add contacts
1 Add them manually
2 Import a VCF file
611 Importing
So first well check out how to import all the VCF files as they are a lot more faster way of creating contacts Justbelow the contact list 3 buttons The middle one let you upload files
Once yoursquove clicked it the upload window let you choose your files We can upload the files one by one or upload allof them at one go
Let me demonstrate Open the directory in which you store all the files and then do the following Keep pressingCTRL and select the files to upload After you are done just click on the open button After the upload it should looksomething like this in which all the names and contacts will be sorted alphabetically
17
ownCloud User Manual Release 45
Then the interface ask you where to put your imported contacts You have the ability to choose an existing addressbookor to create a new one Then click on ldquoOKrdquo and thatrsquos all for the import of contacts
612 Create contacts manually
In the picture of the bottom bar you could see the new contact button (first one) Click on it You can now see anempty contact in the main part of the interface You have the ability to add all your informations about the contact thename the address the e-mail the telephone nr
Just click on a field and start typing the information You can use the ldquoAdd Fieldrdquo button to add another types ofinformation for this contact
18 Chapter 6 Using the Contacts App
ownCloud User Manual Release 45
When you want to remove an information of your contact just click on little delete icon at the right of the field youwant to remove
613 Adding picture to the contact
There are two methods in which you can give a picture id to the specific contact
1 Direct upload
2 Select pics already uploaded in ownCloud files
After you have selected the picture for the contact you get an option to crop the picture to suit your requirements
61 Adding contacts 19
ownCloud User Manual Release 45
You can crop the picture however you wish and then press OK
As you can see it is really easy to set things right in this app It automatically pics up the First name Middle name (ifany) and the last name You may add or delete any section you want for your own convenience
62 Creating new address books
When you click on the third button of the bottom bar you will have access to the applicationrsquos settings Then presson the ldquoMore buttonrdquo to access the options of your Addressbooks
20 Chapter 6 Using the Contacts App
ownCloud User Manual Release 45
You have there the ability to add delete download or share your addressbooks Hover your cursor on every icon tosee what they mean
63 Keeping your address book in sync
One of the most important thing in any contact app is to keep it in Sync You can sync this contact app to your phonewhich has the following OSrsquos- Android and IOS
631 Syncing with Android
1 Install cardDav- Sync free from Google play store by visiting this link-httpsplaygooglecomstoreappsdetailsid=orgdmfscarddavsync
2 This app supports auto- configuration which is a Boon- after installing visit this link- card-davsowncloudexamplenetremotephpcarddav to auto configure the app
3 Enter your login details
4 After the app has checked your login details you may just select- Sync server to phone option
5 Thatrsquos it there is nothing else to do for Android )
632 Syncing your IOS device
Synchronizing the Address book
63 Keeping your address book in sync 21
ownCloud User Manual Release 45
1 Open the settings application
2 Select Mail Contacts Calendars
3 Select Add Account
4 Select other as account type
5 Select Add CardDAV account
6 For server type httpowncloudexamplenetremotephpcarddavprincipalsusername
7 Enter your user name and password
8 Select Next
9 If your server does not support SSL a warning will be displayed Select Continue
10 If the iPhone is unable to verify the account information perform the following
bull Select OK
bull Select advanced settings
bull Make sure Use SSL is set to OFF
bull Change port to 80
bull Go back to account information and hit Save
Now should now find your contacts in the address book of your iPhone
633 Other Syncing options provided by ownCloud
1 For android you may use their official android app- httpsowncloudcomoverviewmobileapps
2 And for IOS(Iphone and Ipad) use their app - httpsowncloudcomoverviewmobileapps
22 Chapter 6 Using the Contacts App
CHAPTER
SEVEN
USING THE BOOKMARKS APP
To add a bookmark to the application you have 2 possibilities use the main interface or the bookmarklet or use thebookmarklet
71 The main interface
The main owncloud interface contains 3 fields at the top where you can enter the website address (or URL) the titleof your bookmark and a serie of tags separated by a space
Here wersquove added the page httpwikipediaorg with the title ldquoWikipediardquo and some tags describing what wikipediais (for an easyier search later on)
711 Edition
You also have the possibility to edit or delete your bookmark For that just hover your mousersquos cursor over onebookmark and click on the little pencil to edit or the cross the delete
The bookmark will then be filled into the 3 fields at the top of the screen Modify your bookmark to your need thenhit the save button to persist the change
712 Search
If you click on a tag ownCloud will only display the bookmarks that are described with this tag
You can also use the search bar of owncloud in the top right of your screen
Simply click on the ldquoBookmarksrdquo menu in the sidebar to come back to the default view
23
ownCloud User Manual Release 45
72 The bookmarklet
The creator of this app understand that people wonrsquot come open the ownCloud page to add the bookmark when thesee a cool site This is why they have made this cool ldquobookmarkletrdquo
A bookmarklet is small button that you can drag and drop in your bookmarks The next time you see a cool new sitepress on this special bookmark it will add the site to your ownCloud bookmarks
To find this bookmark go to your personnal preference and search for the ldquoBookmarkletrdquo item
24 Chapter 7 Using the Bookmarks App
CHAPTER
EIGHT
DESKTOP SYNCHRONISATION
For synchronizing files with your desktop computer we recommend using the ownCloud Client for Windows MacOS X and Linux Its usage is documented separately in the ownCloud Desktop Client Manual
Furthermore It is possible to synchronize your ownCloud calendar and address book with a variety of different oper-ating systems and devices It is also possible to mount your ownCloud storage via WebDAV which is also documentedin the next chapters
25
ownCloud User Manual Release 45
26 Chapter 8 Desktop Synchronisation
CHAPTER
NINE
SYNCHRONIZING WITH KDE SC
From KDE SC 48 and forward setting up ownCloud is very easyFrom System Settings Personal InformationAkonadiResources Configuration select DAV Groupware resource
27
ownCloud User Manual Release 45
Enter your ownCloud username and password and click ldquoNextrdquo
Select ownCloud in the drop down list and click ldquoNextrdquo
28 Chapter 9 Synchronizing with KDE SC
ownCloud User Manual Release 45
Enter the host name and installation path If you do not use SSL remember to de-select ldquoUse secure connectionrdquo
Test the connection If everything went well you should see a message like the one below
29
ownCloud User Manual Release 45
Click ldquoFinishrdquo and you will be able to change the display name and refresh interval
Now you should see the Akonadi resource doing the first synchronization
You can find the Contacts and Calendars in Kontact (or KOrganizerKAddressbook if you run the programs separately)
30 Chapter 9 Synchronizing with KDE SC
ownCloud User Manual Release 45
31
ownCloud User Manual Release 45
32 Chapter 9 Synchronizing with KDE SC
CHAPTER
TEN
SYNCHRONIZING WITH OS X
101 Setup synchronisation with Mountain Lion (108)
Note Although these steps belong to Mountain Lion (108) they should be similar with Lion (107)
Open the System Preferences choose Mail Contacts amp Calendars and scroll down to select Add Other Account
33
ownCloud User Manual Release 45
1011 Synchronising the Calendar
Select Add a CalDAV account
Enter your ownCloud-username your password and the full URL-path to your ownCloud-installationADDRESSremotephpcaldavprincipalsUSERNAME (Replace ADDRESS and USERNAME)
1012 Synchronising the Addressbook
Select Add a CardDAV account
34 Chapter 10 Synchronizing with OS X
ownCloud User Manual Release 45
Enter your ownCloud-username your password and the full URL-path to your ownCloud-installationADDRESSremotephpcarddavprincipalsUSERNAME (Replace ADDRESS and USERNAME notethe url is slightly different to the URL in the previous step)
102 Installation directions for Snow Leopard (106)
While OS X Lion and Mountain Lion work fine OS X Snow Leopard (106) and older needs some fiddling to workA user contributed the following
1 Make sure Addressbook is not running If it is select the windows and press Command + Q to terminate it
2 Navigate to UsersYOUR_USERNAMELibraryApplication SupportAddressBookSourcesIf you have all ready some kind of address book setup it is likely you will see some folders named like thisBEA92826-FBF3-4E53-B5C6-ED7C2B454430 Note down what folders there are now and leave thewindow open
3 Open addressbook and try to add a new CardDav addressbook At this point it does not matter what informationyou enter It will come up with the same error message you mentioned before when you click ldquoCreaterdquo Ignoreit and click ldquoCreaterdquo again A non-functional address book will be added
4 Close Address-Book again using Command + Q
102 Installation directions for Snow Leopard (106) 35
ownCloud User Manual Release 45
5 Go back to the folder window from step 2 You will now see a newly created folder with another long string asits name
6 Navigate to the newly created folder and edit the Configurationplist with your favorite text editor
7 Search for a section looking like this
ltkeygtservernameltkeygt ltstringgthttp0(null)ltstringgtltkeygtusernameltkeygt ltstringgtWhatever_you_entered_beforeltstringgt
8 Make it look like this Please note the 80 after YOUR_DOMAIN it is important
ltkeygtservernameltkey ltstringgthttpYOUR_DOMAIN80owncloudremotephpcarddavprincipalsusernameltstringgtltkeygtusernameltkey ltstringgtusernameltstringgt
9 Save the file and open Address Book again It will not work yet
10 Open the preferences for your ownCloud CardDAV-Account and enter your password
11 You may have to restart Address Book once more After this it should work
There is also an easy HOWTO in the forum
36 Chapter 10 Synchronizing with OS X
CHAPTER
ELEVEN
IOS - SYNCHRONIZE IPHONEIPAD
111 Synchronizing the Calendar
1 Open the settings application
2 Select Mail Contacts Calendars
3 Select Add Account
4 Select Other as account type
5 Select Add CalDAV account
6 For server type ADDRESSremotephpcaldavprincipalsusername (Important Donrsquot includehttp or https)
7 Enter your username and password
8 Select Next
9 If your server does not support SSL a warning will be displayed Select Continue
10 If the iPhone is unable to verify the account information read the Troubleshooting paragraph on this page Ifthat doesnrsquot help try to turn off SSL (not recommended)
bull Select OK
bull Select advanced settings
bull Make sure Use SSL is set to OFF
bull Change port to 80
bull Go back to account information and hit Save
Your calendar should now be visible in the Calendar application (may take a few moments)
112 Synchronizing the Address book
1 Open the settings application
2 Select Mail Contacts Calendars
3 Select Add Account
4 Select Other as account type
5 Select Add CardDAV account
37
ownCloud User Manual Release 45
6 For server type ADDRESSremotephpcarddavprincipalsusername (Important Donrsquot includehttp or https)
7 Enter your username and password
8 Select Next
9 If your server does not support SSL a warning will be displayed Select Continue
10 If the iPhone is unable to verify the account information read the Troubleshooting paragraph on this page Ifthat doesnrsquot help try to turn off SSL (not recommended)
bull Select OK
bull Select advanced settings
bull Make sure Use SSL is set to OFF
bull Change port to 80
bull Go back to account information and hit Save
Now should now find your contacts in the address book of your iPhone (may take a few moments)
113 Troubleshooting
1 Check that you didnrsquot include http or https in the server address
2 Depending on your server setup the username-part of the server-address maybe case sensitive So for user Username the server-address may needto be ADDRESSremotephpcaldavprincipalsUsername instead ofADDRESSremotephpcaldavprincipalsusername
3 If you need to change the server-address and want to use SSL yoursquoll have to cancel the setup process and enteryour data again from the very beginning as iOS would prepend https to the server-address automatically
4 Problems have been reported for CardDAV and iOS 4X A possible solution is at the forum
38 Chapter 11 iOS - Synchronize iPhoneiPad
CHAPTER
TWELVE
NATIVE MEDIA PLAYER SUPPORT
You can access your music stored in ownCloud with every Ampache-compatible media player You can find theURL for your specific ownCloud installation in your personal settings or replace ADDRESS with the URL of yourownCloud installation yourself
Ampache-URL httpADDRESSappsmedia
Ampache-compatible players that work with ownCloud include
bull amaroK standard KDE music player
bull tomahawk cross platform player
bull justplayer music player for android
You can find more information about Ampache and other players at the Ampache wikipedia article
The current maintainer of the Media Player is Robin Appelman
39
ownCloud User Manual Release 45
40 Chapter 12 Native Media Player Support
CHAPTER
THIRTEEN
VERSION CONTROL
ownCloud supports simple version control for files Versioning is enabled by default and creates backups of fileswhich are accessible via the history tab This tab also links to the history page where you can roll back a file toany previous versionChanges made at intervals greater than two minutes are saved in data[user]versions and madeaccessible using the above pages
41
ownCloud User Manual Release 45
42 Chapter 13 Version Control
CHAPTER
FOURTEEN
INDICES AND TABLES
bull genindex
43
ownCloud User Manual Release 45
44 Chapter 14 Indices and tables
INDEX
RRFC
RFC 2518 5
45
- Introduction
- The ownCloud Web Interface
-
- Overview
-
- Mounting ownCloud via WebDAV
-
- Windows
- Mac OS X
- Linux
-
- Accessing your Files
-
- Desktop
- Mobile
-
- Calendars
-
- Creating a calendar
- Synchronising Calendars with CalDav
- Creating events
- Exporting Importing events
- Why is the calendar app asking for my current location
-
- Using the Contacts App
-
- Adding contacts
- Creating new address books
- Keeping your address book in sync
-
- Using the Bookmarks App
-
- The main interface
- The bookmarklet
-
- Desktop Synchronisation
- Synchronizing with KDE SC
- Synchronizing with OS X
-
- Setup synchronisation with Mountain Lion (108)
- Installation directions for Snow Leopard (106)
-
- iOS - Synchronize iPhoneiPad
-
- Synchronizing the Calendar
- Synchronizing the Address book
- Troubleshooting
-
- Native Media Player Support
- Version Control
- Indices and tables
- Index
-

CHAPTER
FOUR
ACCESSING YOUR FILES
41 Desktop
Your ownCloud instance can be accessed on every platform via the web interface There are also options to integrateit with your desktop
In most cases accessing ownCloud using your file manager will be sufficient
bull Connect to Server in your file manager webdavADDRESSfileswebdavphp
bull Change the protocol to dav in Nautilus or http in Finder
However some applications only allow you to save to a local folder To get around this issue you can
bull Sync your ownCloud folders and local folders
bull Mount ownCloud to a local folder without sync
The Desktop Syncing Client called Mirall is now released for Linux and Windows You can follow the current changesat the ownCloud Mirall repository We work on porting this to Mac OS and packaging for all major linux distributions
42 Mobile
To connect to your ownCloud server with the ownCloud mobile apps use the base URL and folder only
examplecomowncloud
No need to add remotephpwebdav as you do for any other WebDAV client
There are also apps in development for both Android and webOS Feel free to contribute if you can
You may also connect to ownCloud from your phone or tablet via WebDAV WebDAV Navigator is a good (proprietary)app for Android App iPhone amp BlackBerry The URL for these is
examplecomowncloudremotephpwebdav
11
ownCloud User Manual Release 45
12 Chapter 4 Accessing your Files
CHAPTER
FIVE
CALENDARS
51 Creating a calendar
If you use the calendar the first time there will be already a calendar called ldquoDefault calendarrdquo You can manage yourcalendars with a click on the ldquoCalendarrdquo button in the top right corner In the dialog which will appear you can addedit export enable disable and delete your calendars There will be also a link for CalDav access
52 Synchronising Calendars with CalDav
Assuming you access your web interface via an address like this
httpADDRESS
Then you can access your calendars with CalDAV-compatible programs like Kontact Evolution Thunderbird usingthe following URL
httpADDRESSremotephpcaldav
To use the ownCloud calendar with Apple iCal you will need to use the following URL including the trailing slash
httpADDRESSremotephpcaldavprincipalsusername
Mozilla Lightning users need to this URL scheme
httpsADDRESSremotephpcaldavcalendarsUSERNAMECALENDARNAME
Note The calendar name must alway be specified in URL-encoding
53 Creating events
To create an event just click on the date in the month view or choose the timeframe in the weekview In the dialogwhich will appear you can enter your information like title category etc
13
ownCloud User Manual Release 45
Figure 51 Example for a simple calendar The default calendar is always called ldquodefaultcalendarrdquo and the usersrsquoname here is ldquotestrdquo The full URL (which on the picture canrsquot be seen because of the short edit field) is then
httpslocalhostowncloudremotephpcaldavcalendarstestdefaultcalendar
14 Chapter 5 Calendars
ownCloud User Manual Release 45
With the advanced options you can set the description the location and the repetition rate of an event If the repeatingshould end you can choose between setting the end by date or by occurrences If you choose in the weekview all daysfrom Monday to Friday it will automatically set the repeat rule to ldquoevery weekdayrdquo If the interval of the weekviewcan be devided by two it automatically set the repeat rule to ldquoBi-Weeklyrdquo
54 Exporting Importing events
541 Export
You can export either a single event or a whole calendar If you want to export a single event click on it and press theexport button in the bottom right corner If you want to export a whole calendar use the ldquoCalendarrdquo button as describedin the chapter ldquoCreating a calendarrdquo
542 Import
Import your calendar as ical file using the files app Just click on the calendar file to open the import dialog You canimport the calendar into a new calendar or into an already existing calendar
Note If the progressbar does not work properly the folder appscalendarimport_tmp has probably nowrite permission
55 Why is the calendar app asking for my current location
The calendar needs your current position in order to detect your timezone Without the correct timezone there will bea time offset between the events in ownCloud and your desktop calendar you synchronise with ownCloud You can
54 Exporting Importing events 15
ownCloud User Manual Release 45
also set the timezone manually in the personal settings
16 Chapter 5 Calendars
CHAPTER
SIX
USING THE CONTACTS APP
The contacts app of ownCloud is like any other mobile contact app but with more functionality Just as you open youraccount you will get the a default addressbook available We will see later that Of course you can always add andremove addressbooks in here
61 Adding contacts
There are two ways in which you can add contacts
1 Add them manually
2 Import a VCF file
611 Importing
So first well check out how to import all the VCF files as they are a lot more faster way of creating contacts Justbelow the contact list 3 buttons The middle one let you upload files
Once yoursquove clicked it the upload window let you choose your files We can upload the files one by one or upload allof them at one go
Let me demonstrate Open the directory in which you store all the files and then do the following Keep pressingCTRL and select the files to upload After you are done just click on the open button After the upload it should looksomething like this in which all the names and contacts will be sorted alphabetically
17
ownCloud User Manual Release 45
Then the interface ask you where to put your imported contacts You have the ability to choose an existing addressbookor to create a new one Then click on ldquoOKrdquo and thatrsquos all for the import of contacts
612 Create contacts manually
In the picture of the bottom bar you could see the new contact button (first one) Click on it You can now see anempty contact in the main part of the interface You have the ability to add all your informations about the contact thename the address the e-mail the telephone nr
Just click on a field and start typing the information You can use the ldquoAdd Fieldrdquo button to add another types ofinformation for this contact
18 Chapter 6 Using the Contacts App
ownCloud User Manual Release 45
When you want to remove an information of your contact just click on little delete icon at the right of the field youwant to remove
613 Adding picture to the contact
There are two methods in which you can give a picture id to the specific contact
1 Direct upload
2 Select pics already uploaded in ownCloud files
After you have selected the picture for the contact you get an option to crop the picture to suit your requirements
61 Adding contacts 19
ownCloud User Manual Release 45
You can crop the picture however you wish and then press OK
As you can see it is really easy to set things right in this app It automatically pics up the First name Middle name (ifany) and the last name You may add or delete any section you want for your own convenience
62 Creating new address books
When you click on the third button of the bottom bar you will have access to the applicationrsquos settings Then presson the ldquoMore buttonrdquo to access the options of your Addressbooks
20 Chapter 6 Using the Contacts App
ownCloud User Manual Release 45
You have there the ability to add delete download or share your addressbooks Hover your cursor on every icon tosee what they mean
63 Keeping your address book in sync
One of the most important thing in any contact app is to keep it in Sync You can sync this contact app to your phonewhich has the following OSrsquos- Android and IOS
631 Syncing with Android
1 Install cardDav- Sync free from Google play store by visiting this link-httpsplaygooglecomstoreappsdetailsid=orgdmfscarddavsync
2 This app supports auto- configuration which is a Boon- after installing visit this link- card-davsowncloudexamplenetremotephpcarddav to auto configure the app
3 Enter your login details
4 After the app has checked your login details you may just select- Sync server to phone option
5 Thatrsquos it there is nothing else to do for Android )
632 Syncing your IOS device
Synchronizing the Address book
63 Keeping your address book in sync 21
ownCloud User Manual Release 45
1 Open the settings application
2 Select Mail Contacts Calendars
3 Select Add Account
4 Select other as account type
5 Select Add CardDAV account
6 For server type httpowncloudexamplenetremotephpcarddavprincipalsusername
7 Enter your user name and password
8 Select Next
9 If your server does not support SSL a warning will be displayed Select Continue
10 If the iPhone is unable to verify the account information perform the following
bull Select OK
bull Select advanced settings
bull Make sure Use SSL is set to OFF
bull Change port to 80
bull Go back to account information and hit Save
Now should now find your contacts in the address book of your iPhone
633 Other Syncing options provided by ownCloud
1 For android you may use their official android app- httpsowncloudcomoverviewmobileapps
2 And for IOS(Iphone and Ipad) use their app - httpsowncloudcomoverviewmobileapps
22 Chapter 6 Using the Contacts App
CHAPTER
SEVEN
USING THE BOOKMARKS APP
To add a bookmark to the application you have 2 possibilities use the main interface or the bookmarklet or use thebookmarklet
71 The main interface
The main owncloud interface contains 3 fields at the top where you can enter the website address (or URL) the titleof your bookmark and a serie of tags separated by a space
Here wersquove added the page httpwikipediaorg with the title ldquoWikipediardquo and some tags describing what wikipediais (for an easyier search later on)
711 Edition
You also have the possibility to edit or delete your bookmark For that just hover your mousersquos cursor over onebookmark and click on the little pencil to edit or the cross the delete
The bookmark will then be filled into the 3 fields at the top of the screen Modify your bookmark to your need thenhit the save button to persist the change
712 Search
If you click on a tag ownCloud will only display the bookmarks that are described with this tag
You can also use the search bar of owncloud in the top right of your screen
Simply click on the ldquoBookmarksrdquo menu in the sidebar to come back to the default view
23
ownCloud User Manual Release 45
72 The bookmarklet
The creator of this app understand that people wonrsquot come open the ownCloud page to add the bookmark when thesee a cool site This is why they have made this cool ldquobookmarkletrdquo
A bookmarklet is small button that you can drag and drop in your bookmarks The next time you see a cool new sitepress on this special bookmark it will add the site to your ownCloud bookmarks
To find this bookmark go to your personnal preference and search for the ldquoBookmarkletrdquo item
24 Chapter 7 Using the Bookmarks App
CHAPTER
EIGHT
DESKTOP SYNCHRONISATION
For synchronizing files with your desktop computer we recommend using the ownCloud Client for Windows MacOS X and Linux Its usage is documented separately in the ownCloud Desktop Client Manual
Furthermore It is possible to synchronize your ownCloud calendar and address book with a variety of different oper-ating systems and devices It is also possible to mount your ownCloud storage via WebDAV which is also documentedin the next chapters
25
ownCloud User Manual Release 45
26 Chapter 8 Desktop Synchronisation
CHAPTER
NINE
SYNCHRONIZING WITH KDE SC
From KDE SC 48 and forward setting up ownCloud is very easyFrom System Settings Personal InformationAkonadiResources Configuration select DAV Groupware resource
27
ownCloud User Manual Release 45
Enter your ownCloud username and password and click ldquoNextrdquo
Select ownCloud in the drop down list and click ldquoNextrdquo
28 Chapter 9 Synchronizing with KDE SC
ownCloud User Manual Release 45
Enter the host name and installation path If you do not use SSL remember to de-select ldquoUse secure connectionrdquo
Test the connection If everything went well you should see a message like the one below
29
ownCloud User Manual Release 45
Click ldquoFinishrdquo and you will be able to change the display name and refresh interval
Now you should see the Akonadi resource doing the first synchronization
You can find the Contacts and Calendars in Kontact (or KOrganizerKAddressbook if you run the programs separately)
30 Chapter 9 Synchronizing with KDE SC
ownCloud User Manual Release 45
31
ownCloud User Manual Release 45
32 Chapter 9 Synchronizing with KDE SC
CHAPTER
TEN
SYNCHRONIZING WITH OS X
101 Setup synchronisation with Mountain Lion (108)
Note Although these steps belong to Mountain Lion (108) they should be similar with Lion (107)
Open the System Preferences choose Mail Contacts amp Calendars and scroll down to select Add Other Account
33
ownCloud User Manual Release 45
1011 Synchronising the Calendar
Select Add a CalDAV account
Enter your ownCloud-username your password and the full URL-path to your ownCloud-installationADDRESSremotephpcaldavprincipalsUSERNAME (Replace ADDRESS and USERNAME)
1012 Synchronising the Addressbook
Select Add a CardDAV account
34 Chapter 10 Synchronizing with OS X
ownCloud User Manual Release 45
Enter your ownCloud-username your password and the full URL-path to your ownCloud-installationADDRESSremotephpcarddavprincipalsUSERNAME (Replace ADDRESS and USERNAME notethe url is slightly different to the URL in the previous step)
102 Installation directions for Snow Leopard (106)
While OS X Lion and Mountain Lion work fine OS X Snow Leopard (106) and older needs some fiddling to workA user contributed the following
1 Make sure Addressbook is not running If it is select the windows and press Command + Q to terminate it
2 Navigate to UsersYOUR_USERNAMELibraryApplication SupportAddressBookSourcesIf you have all ready some kind of address book setup it is likely you will see some folders named like thisBEA92826-FBF3-4E53-B5C6-ED7C2B454430 Note down what folders there are now and leave thewindow open
3 Open addressbook and try to add a new CardDav addressbook At this point it does not matter what informationyou enter It will come up with the same error message you mentioned before when you click ldquoCreaterdquo Ignoreit and click ldquoCreaterdquo again A non-functional address book will be added
4 Close Address-Book again using Command + Q
102 Installation directions for Snow Leopard (106) 35
ownCloud User Manual Release 45
5 Go back to the folder window from step 2 You will now see a newly created folder with another long string asits name
6 Navigate to the newly created folder and edit the Configurationplist with your favorite text editor
7 Search for a section looking like this
ltkeygtservernameltkeygt ltstringgthttp0(null)ltstringgtltkeygtusernameltkeygt ltstringgtWhatever_you_entered_beforeltstringgt
8 Make it look like this Please note the 80 after YOUR_DOMAIN it is important
ltkeygtservernameltkey ltstringgthttpYOUR_DOMAIN80owncloudremotephpcarddavprincipalsusernameltstringgtltkeygtusernameltkey ltstringgtusernameltstringgt
9 Save the file and open Address Book again It will not work yet
10 Open the preferences for your ownCloud CardDAV-Account and enter your password
11 You may have to restart Address Book once more After this it should work
There is also an easy HOWTO in the forum
36 Chapter 10 Synchronizing with OS X
CHAPTER
ELEVEN
IOS - SYNCHRONIZE IPHONEIPAD
111 Synchronizing the Calendar
1 Open the settings application
2 Select Mail Contacts Calendars
3 Select Add Account
4 Select Other as account type
5 Select Add CalDAV account
6 For server type ADDRESSremotephpcaldavprincipalsusername (Important Donrsquot includehttp or https)
7 Enter your username and password
8 Select Next
9 If your server does not support SSL a warning will be displayed Select Continue
10 If the iPhone is unable to verify the account information read the Troubleshooting paragraph on this page Ifthat doesnrsquot help try to turn off SSL (not recommended)
bull Select OK
bull Select advanced settings
bull Make sure Use SSL is set to OFF
bull Change port to 80
bull Go back to account information and hit Save
Your calendar should now be visible in the Calendar application (may take a few moments)
112 Synchronizing the Address book
1 Open the settings application
2 Select Mail Contacts Calendars
3 Select Add Account
4 Select Other as account type
5 Select Add CardDAV account
37
ownCloud User Manual Release 45
6 For server type ADDRESSremotephpcarddavprincipalsusername (Important Donrsquot includehttp or https)
7 Enter your username and password
8 Select Next
9 If your server does not support SSL a warning will be displayed Select Continue
10 If the iPhone is unable to verify the account information read the Troubleshooting paragraph on this page Ifthat doesnrsquot help try to turn off SSL (not recommended)
bull Select OK
bull Select advanced settings
bull Make sure Use SSL is set to OFF
bull Change port to 80
bull Go back to account information and hit Save
Now should now find your contacts in the address book of your iPhone (may take a few moments)
113 Troubleshooting
1 Check that you didnrsquot include http or https in the server address
2 Depending on your server setup the username-part of the server-address maybe case sensitive So for user Username the server-address may needto be ADDRESSremotephpcaldavprincipalsUsername instead ofADDRESSremotephpcaldavprincipalsusername
3 If you need to change the server-address and want to use SSL yoursquoll have to cancel the setup process and enteryour data again from the very beginning as iOS would prepend https to the server-address automatically
4 Problems have been reported for CardDAV and iOS 4X A possible solution is at the forum
38 Chapter 11 iOS - Synchronize iPhoneiPad
CHAPTER
TWELVE
NATIVE MEDIA PLAYER SUPPORT
You can access your music stored in ownCloud with every Ampache-compatible media player You can find theURL for your specific ownCloud installation in your personal settings or replace ADDRESS with the URL of yourownCloud installation yourself
Ampache-URL httpADDRESSappsmedia
Ampache-compatible players that work with ownCloud include
bull amaroK standard KDE music player
bull tomahawk cross platform player
bull justplayer music player for android
You can find more information about Ampache and other players at the Ampache wikipedia article
The current maintainer of the Media Player is Robin Appelman
39
ownCloud User Manual Release 45
40 Chapter 12 Native Media Player Support
CHAPTER
THIRTEEN
VERSION CONTROL
ownCloud supports simple version control for files Versioning is enabled by default and creates backups of fileswhich are accessible via the history tab This tab also links to the history page where you can roll back a file toany previous versionChanges made at intervals greater than two minutes are saved in data[user]versions and madeaccessible using the above pages
41
ownCloud User Manual Release 45
42 Chapter 13 Version Control
CHAPTER
FOURTEEN
INDICES AND TABLES
bull genindex
43
ownCloud User Manual Release 45
44 Chapter 14 Indices and tables
INDEX
RRFC
RFC 2518 5
45
- Introduction
- The ownCloud Web Interface
-
- Overview
-
- Mounting ownCloud via WebDAV
-
- Windows
- Mac OS X
- Linux
-
- Accessing your Files
-
- Desktop
- Mobile
-
- Calendars
-
- Creating a calendar
- Synchronising Calendars with CalDav
- Creating events
- Exporting Importing events
- Why is the calendar app asking for my current location
-
- Using the Contacts App
-
- Adding contacts
- Creating new address books
- Keeping your address book in sync
-
- Using the Bookmarks App
-
- The main interface
- The bookmarklet
-
- Desktop Synchronisation
- Synchronizing with KDE SC
- Synchronizing with OS X
-
- Setup synchronisation with Mountain Lion (108)
- Installation directions for Snow Leopard (106)
-
- iOS - Synchronize iPhoneiPad
-
- Synchronizing the Calendar
- Synchronizing the Address book
- Troubleshooting
-
- Native Media Player Support
- Version Control
- Indices and tables
- Index
-

ownCloud User Manual Release 45
12 Chapter 4 Accessing your Files
CHAPTER
FIVE
CALENDARS
51 Creating a calendar
If you use the calendar the first time there will be already a calendar called ldquoDefault calendarrdquo You can manage yourcalendars with a click on the ldquoCalendarrdquo button in the top right corner In the dialog which will appear you can addedit export enable disable and delete your calendars There will be also a link for CalDav access
52 Synchronising Calendars with CalDav
Assuming you access your web interface via an address like this
httpADDRESS
Then you can access your calendars with CalDAV-compatible programs like Kontact Evolution Thunderbird usingthe following URL
httpADDRESSremotephpcaldav
To use the ownCloud calendar with Apple iCal you will need to use the following URL including the trailing slash
httpADDRESSremotephpcaldavprincipalsusername
Mozilla Lightning users need to this URL scheme
httpsADDRESSremotephpcaldavcalendarsUSERNAMECALENDARNAME
Note The calendar name must alway be specified in URL-encoding
53 Creating events
To create an event just click on the date in the month view or choose the timeframe in the weekview In the dialogwhich will appear you can enter your information like title category etc
13
ownCloud User Manual Release 45
Figure 51 Example for a simple calendar The default calendar is always called ldquodefaultcalendarrdquo and the usersrsquoname here is ldquotestrdquo The full URL (which on the picture canrsquot be seen because of the short edit field) is then
httpslocalhostowncloudremotephpcaldavcalendarstestdefaultcalendar
14 Chapter 5 Calendars
ownCloud User Manual Release 45
With the advanced options you can set the description the location and the repetition rate of an event If the repeatingshould end you can choose between setting the end by date or by occurrences If you choose in the weekview all daysfrom Monday to Friday it will automatically set the repeat rule to ldquoevery weekdayrdquo If the interval of the weekviewcan be devided by two it automatically set the repeat rule to ldquoBi-Weeklyrdquo
54 Exporting Importing events
541 Export
You can export either a single event or a whole calendar If you want to export a single event click on it and press theexport button in the bottom right corner If you want to export a whole calendar use the ldquoCalendarrdquo button as describedin the chapter ldquoCreating a calendarrdquo
542 Import
Import your calendar as ical file using the files app Just click on the calendar file to open the import dialog You canimport the calendar into a new calendar or into an already existing calendar
Note If the progressbar does not work properly the folder appscalendarimport_tmp has probably nowrite permission
55 Why is the calendar app asking for my current location
The calendar needs your current position in order to detect your timezone Without the correct timezone there will bea time offset between the events in ownCloud and your desktop calendar you synchronise with ownCloud You can
54 Exporting Importing events 15
ownCloud User Manual Release 45
also set the timezone manually in the personal settings
16 Chapter 5 Calendars
CHAPTER
SIX
USING THE CONTACTS APP
The contacts app of ownCloud is like any other mobile contact app but with more functionality Just as you open youraccount you will get the a default addressbook available We will see later that Of course you can always add andremove addressbooks in here
61 Adding contacts
There are two ways in which you can add contacts
1 Add them manually
2 Import a VCF file
611 Importing
So first well check out how to import all the VCF files as they are a lot more faster way of creating contacts Justbelow the contact list 3 buttons The middle one let you upload files
Once yoursquove clicked it the upload window let you choose your files We can upload the files one by one or upload allof them at one go
Let me demonstrate Open the directory in which you store all the files and then do the following Keep pressingCTRL and select the files to upload After you are done just click on the open button After the upload it should looksomething like this in which all the names and contacts will be sorted alphabetically
17
ownCloud User Manual Release 45
Then the interface ask you where to put your imported contacts You have the ability to choose an existing addressbookor to create a new one Then click on ldquoOKrdquo and thatrsquos all for the import of contacts
612 Create contacts manually
In the picture of the bottom bar you could see the new contact button (first one) Click on it You can now see anempty contact in the main part of the interface You have the ability to add all your informations about the contact thename the address the e-mail the telephone nr
Just click on a field and start typing the information You can use the ldquoAdd Fieldrdquo button to add another types ofinformation for this contact
18 Chapter 6 Using the Contacts App
ownCloud User Manual Release 45
When you want to remove an information of your contact just click on little delete icon at the right of the field youwant to remove
613 Adding picture to the contact
There are two methods in which you can give a picture id to the specific contact
1 Direct upload
2 Select pics already uploaded in ownCloud files
After you have selected the picture for the contact you get an option to crop the picture to suit your requirements
61 Adding contacts 19
ownCloud User Manual Release 45
You can crop the picture however you wish and then press OK
As you can see it is really easy to set things right in this app It automatically pics up the First name Middle name (ifany) and the last name You may add or delete any section you want for your own convenience
62 Creating new address books
When you click on the third button of the bottom bar you will have access to the applicationrsquos settings Then presson the ldquoMore buttonrdquo to access the options of your Addressbooks
20 Chapter 6 Using the Contacts App
ownCloud User Manual Release 45
You have there the ability to add delete download or share your addressbooks Hover your cursor on every icon tosee what they mean
63 Keeping your address book in sync
One of the most important thing in any contact app is to keep it in Sync You can sync this contact app to your phonewhich has the following OSrsquos- Android and IOS
631 Syncing with Android
1 Install cardDav- Sync free from Google play store by visiting this link-httpsplaygooglecomstoreappsdetailsid=orgdmfscarddavsync
2 This app supports auto- configuration which is a Boon- after installing visit this link- card-davsowncloudexamplenetremotephpcarddav to auto configure the app
3 Enter your login details
4 After the app has checked your login details you may just select- Sync server to phone option
5 Thatrsquos it there is nothing else to do for Android )
632 Syncing your IOS device
Synchronizing the Address book
63 Keeping your address book in sync 21
ownCloud User Manual Release 45
1 Open the settings application
2 Select Mail Contacts Calendars
3 Select Add Account
4 Select other as account type
5 Select Add CardDAV account
6 For server type httpowncloudexamplenetremotephpcarddavprincipalsusername
7 Enter your user name and password
8 Select Next
9 If your server does not support SSL a warning will be displayed Select Continue
10 If the iPhone is unable to verify the account information perform the following
bull Select OK
bull Select advanced settings
bull Make sure Use SSL is set to OFF
bull Change port to 80
bull Go back to account information and hit Save
Now should now find your contacts in the address book of your iPhone
633 Other Syncing options provided by ownCloud
1 For android you may use their official android app- httpsowncloudcomoverviewmobileapps
2 And for IOS(Iphone and Ipad) use their app - httpsowncloudcomoverviewmobileapps
22 Chapter 6 Using the Contacts App
CHAPTER
SEVEN
USING THE BOOKMARKS APP
To add a bookmark to the application you have 2 possibilities use the main interface or the bookmarklet or use thebookmarklet
71 The main interface
The main owncloud interface contains 3 fields at the top where you can enter the website address (or URL) the titleof your bookmark and a serie of tags separated by a space
Here wersquove added the page httpwikipediaorg with the title ldquoWikipediardquo and some tags describing what wikipediais (for an easyier search later on)
711 Edition
You also have the possibility to edit or delete your bookmark For that just hover your mousersquos cursor over onebookmark and click on the little pencil to edit or the cross the delete
The bookmark will then be filled into the 3 fields at the top of the screen Modify your bookmark to your need thenhit the save button to persist the change
712 Search
If you click on a tag ownCloud will only display the bookmarks that are described with this tag
You can also use the search bar of owncloud in the top right of your screen
Simply click on the ldquoBookmarksrdquo menu in the sidebar to come back to the default view
23
ownCloud User Manual Release 45
72 The bookmarklet
The creator of this app understand that people wonrsquot come open the ownCloud page to add the bookmark when thesee a cool site This is why they have made this cool ldquobookmarkletrdquo
A bookmarklet is small button that you can drag and drop in your bookmarks The next time you see a cool new sitepress on this special bookmark it will add the site to your ownCloud bookmarks
To find this bookmark go to your personnal preference and search for the ldquoBookmarkletrdquo item
24 Chapter 7 Using the Bookmarks App
CHAPTER
EIGHT
DESKTOP SYNCHRONISATION
For synchronizing files with your desktop computer we recommend using the ownCloud Client for Windows MacOS X and Linux Its usage is documented separately in the ownCloud Desktop Client Manual
Furthermore It is possible to synchronize your ownCloud calendar and address book with a variety of different oper-ating systems and devices It is also possible to mount your ownCloud storage via WebDAV which is also documentedin the next chapters
25
ownCloud User Manual Release 45
26 Chapter 8 Desktop Synchronisation
CHAPTER
NINE
SYNCHRONIZING WITH KDE SC
From KDE SC 48 and forward setting up ownCloud is very easyFrom System Settings Personal InformationAkonadiResources Configuration select DAV Groupware resource
27
ownCloud User Manual Release 45
Enter your ownCloud username and password and click ldquoNextrdquo
Select ownCloud in the drop down list and click ldquoNextrdquo
28 Chapter 9 Synchronizing with KDE SC
ownCloud User Manual Release 45
Enter the host name and installation path If you do not use SSL remember to de-select ldquoUse secure connectionrdquo
Test the connection If everything went well you should see a message like the one below
29
ownCloud User Manual Release 45
Click ldquoFinishrdquo and you will be able to change the display name and refresh interval
Now you should see the Akonadi resource doing the first synchronization
You can find the Contacts and Calendars in Kontact (or KOrganizerKAddressbook if you run the programs separately)
30 Chapter 9 Synchronizing with KDE SC
ownCloud User Manual Release 45
31
ownCloud User Manual Release 45
32 Chapter 9 Synchronizing with KDE SC
CHAPTER
TEN
SYNCHRONIZING WITH OS X
101 Setup synchronisation with Mountain Lion (108)
Note Although these steps belong to Mountain Lion (108) they should be similar with Lion (107)
Open the System Preferences choose Mail Contacts amp Calendars and scroll down to select Add Other Account
33
ownCloud User Manual Release 45
1011 Synchronising the Calendar
Select Add a CalDAV account
Enter your ownCloud-username your password and the full URL-path to your ownCloud-installationADDRESSremotephpcaldavprincipalsUSERNAME (Replace ADDRESS and USERNAME)
1012 Synchronising the Addressbook
Select Add a CardDAV account
34 Chapter 10 Synchronizing with OS X
ownCloud User Manual Release 45
Enter your ownCloud-username your password and the full URL-path to your ownCloud-installationADDRESSremotephpcarddavprincipalsUSERNAME (Replace ADDRESS and USERNAME notethe url is slightly different to the URL in the previous step)
102 Installation directions for Snow Leopard (106)
While OS X Lion and Mountain Lion work fine OS X Snow Leopard (106) and older needs some fiddling to workA user contributed the following
1 Make sure Addressbook is not running If it is select the windows and press Command + Q to terminate it
2 Navigate to UsersYOUR_USERNAMELibraryApplication SupportAddressBookSourcesIf you have all ready some kind of address book setup it is likely you will see some folders named like thisBEA92826-FBF3-4E53-B5C6-ED7C2B454430 Note down what folders there are now and leave thewindow open
3 Open addressbook and try to add a new CardDav addressbook At this point it does not matter what informationyou enter It will come up with the same error message you mentioned before when you click ldquoCreaterdquo Ignoreit and click ldquoCreaterdquo again A non-functional address book will be added
4 Close Address-Book again using Command + Q
102 Installation directions for Snow Leopard (106) 35
ownCloud User Manual Release 45
5 Go back to the folder window from step 2 You will now see a newly created folder with another long string asits name
6 Navigate to the newly created folder and edit the Configurationplist with your favorite text editor
7 Search for a section looking like this
ltkeygtservernameltkeygt ltstringgthttp0(null)ltstringgtltkeygtusernameltkeygt ltstringgtWhatever_you_entered_beforeltstringgt
8 Make it look like this Please note the 80 after YOUR_DOMAIN it is important
ltkeygtservernameltkey ltstringgthttpYOUR_DOMAIN80owncloudremotephpcarddavprincipalsusernameltstringgtltkeygtusernameltkey ltstringgtusernameltstringgt
9 Save the file and open Address Book again It will not work yet
10 Open the preferences for your ownCloud CardDAV-Account and enter your password
11 You may have to restart Address Book once more After this it should work
There is also an easy HOWTO in the forum
36 Chapter 10 Synchronizing with OS X
CHAPTER
ELEVEN
IOS - SYNCHRONIZE IPHONEIPAD
111 Synchronizing the Calendar
1 Open the settings application
2 Select Mail Contacts Calendars
3 Select Add Account
4 Select Other as account type
5 Select Add CalDAV account
6 For server type ADDRESSremotephpcaldavprincipalsusername (Important Donrsquot includehttp or https)
7 Enter your username and password
8 Select Next
9 If your server does not support SSL a warning will be displayed Select Continue
10 If the iPhone is unable to verify the account information read the Troubleshooting paragraph on this page Ifthat doesnrsquot help try to turn off SSL (not recommended)
bull Select OK
bull Select advanced settings
bull Make sure Use SSL is set to OFF
bull Change port to 80
bull Go back to account information and hit Save
Your calendar should now be visible in the Calendar application (may take a few moments)
112 Synchronizing the Address book
1 Open the settings application
2 Select Mail Contacts Calendars
3 Select Add Account
4 Select Other as account type
5 Select Add CardDAV account
37
ownCloud User Manual Release 45
6 For server type ADDRESSremotephpcarddavprincipalsusername (Important Donrsquot includehttp or https)
7 Enter your username and password
8 Select Next
9 If your server does not support SSL a warning will be displayed Select Continue
10 If the iPhone is unable to verify the account information read the Troubleshooting paragraph on this page Ifthat doesnrsquot help try to turn off SSL (not recommended)
bull Select OK
bull Select advanced settings
bull Make sure Use SSL is set to OFF
bull Change port to 80
bull Go back to account information and hit Save
Now should now find your contacts in the address book of your iPhone (may take a few moments)
113 Troubleshooting
1 Check that you didnrsquot include http or https in the server address
2 Depending on your server setup the username-part of the server-address maybe case sensitive So for user Username the server-address may needto be ADDRESSremotephpcaldavprincipalsUsername instead ofADDRESSremotephpcaldavprincipalsusername
3 If you need to change the server-address and want to use SSL yoursquoll have to cancel the setup process and enteryour data again from the very beginning as iOS would prepend https to the server-address automatically
4 Problems have been reported for CardDAV and iOS 4X A possible solution is at the forum
38 Chapter 11 iOS - Synchronize iPhoneiPad
CHAPTER
TWELVE
NATIVE MEDIA PLAYER SUPPORT
You can access your music stored in ownCloud with every Ampache-compatible media player You can find theURL for your specific ownCloud installation in your personal settings or replace ADDRESS with the URL of yourownCloud installation yourself
Ampache-URL httpADDRESSappsmedia
Ampache-compatible players that work with ownCloud include
bull amaroK standard KDE music player
bull tomahawk cross platform player
bull justplayer music player for android
You can find more information about Ampache and other players at the Ampache wikipedia article
The current maintainer of the Media Player is Robin Appelman
39
ownCloud User Manual Release 45
40 Chapter 12 Native Media Player Support
CHAPTER
THIRTEEN
VERSION CONTROL
ownCloud supports simple version control for files Versioning is enabled by default and creates backups of fileswhich are accessible via the history tab This tab also links to the history page where you can roll back a file toany previous versionChanges made at intervals greater than two minutes are saved in data[user]versions and madeaccessible using the above pages
41
ownCloud User Manual Release 45
42 Chapter 13 Version Control
CHAPTER
FOURTEEN
INDICES AND TABLES
bull genindex
43
ownCloud User Manual Release 45
44 Chapter 14 Indices and tables
INDEX
RRFC
RFC 2518 5
45
- Introduction
- The ownCloud Web Interface
-
- Overview
-
- Mounting ownCloud via WebDAV
-
- Windows
- Mac OS X
- Linux
-
- Accessing your Files
-
- Desktop
- Mobile
-
- Calendars
-
- Creating a calendar
- Synchronising Calendars with CalDav
- Creating events
- Exporting Importing events
- Why is the calendar app asking for my current location
-
- Using the Contacts App
-
- Adding contacts
- Creating new address books
- Keeping your address book in sync
-
- Using the Bookmarks App
-
- The main interface
- The bookmarklet
-
- Desktop Synchronisation
- Synchronizing with KDE SC
- Synchronizing with OS X
-
- Setup synchronisation with Mountain Lion (108)
- Installation directions for Snow Leopard (106)
-
- iOS - Synchronize iPhoneiPad
-
- Synchronizing the Calendar
- Synchronizing the Address book
- Troubleshooting
-
- Native Media Player Support
- Version Control
- Indices and tables
- Index
-

CHAPTER
FIVE
CALENDARS
51 Creating a calendar
If you use the calendar the first time there will be already a calendar called ldquoDefault calendarrdquo You can manage yourcalendars with a click on the ldquoCalendarrdquo button in the top right corner In the dialog which will appear you can addedit export enable disable and delete your calendars There will be also a link for CalDav access
52 Synchronising Calendars with CalDav
Assuming you access your web interface via an address like this
httpADDRESS
Then you can access your calendars with CalDAV-compatible programs like Kontact Evolution Thunderbird usingthe following URL
httpADDRESSremotephpcaldav
To use the ownCloud calendar with Apple iCal you will need to use the following URL including the trailing slash
httpADDRESSremotephpcaldavprincipalsusername
Mozilla Lightning users need to this URL scheme
httpsADDRESSremotephpcaldavcalendarsUSERNAMECALENDARNAME
Note The calendar name must alway be specified in URL-encoding
53 Creating events
To create an event just click on the date in the month view or choose the timeframe in the weekview In the dialogwhich will appear you can enter your information like title category etc
13
ownCloud User Manual Release 45
Figure 51 Example for a simple calendar The default calendar is always called ldquodefaultcalendarrdquo and the usersrsquoname here is ldquotestrdquo The full URL (which on the picture canrsquot be seen because of the short edit field) is then
httpslocalhostowncloudremotephpcaldavcalendarstestdefaultcalendar
14 Chapter 5 Calendars
ownCloud User Manual Release 45
With the advanced options you can set the description the location and the repetition rate of an event If the repeatingshould end you can choose between setting the end by date or by occurrences If you choose in the weekview all daysfrom Monday to Friday it will automatically set the repeat rule to ldquoevery weekdayrdquo If the interval of the weekviewcan be devided by two it automatically set the repeat rule to ldquoBi-Weeklyrdquo
54 Exporting Importing events
541 Export
You can export either a single event or a whole calendar If you want to export a single event click on it and press theexport button in the bottom right corner If you want to export a whole calendar use the ldquoCalendarrdquo button as describedin the chapter ldquoCreating a calendarrdquo
542 Import
Import your calendar as ical file using the files app Just click on the calendar file to open the import dialog You canimport the calendar into a new calendar or into an already existing calendar
Note If the progressbar does not work properly the folder appscalendarimport_tmp has probably nowrite permission
55 Why is the calendar app asking for my current location
The calendar needs your current position in order to detect your timezone Without the correct timezone there will bea time offset between the events in ownCloud and your desktop calendar you synchronise with ownCloud You can
54 Exporting Importing events 15
ownCloud User Manual Release 45
also set the timezone manually in the personal settings
16 Chapter 5 Calendars
CHAPTER
SIX
USING THE CONTACTS APP
The contacts app of ownCloud is like any other mobile contact app but with more functionality Just as you open youraccount you will get the a default addressbook available We will see later that Of course you can always add andremove addressbooks in here
61 Adding contacts
There are two ways in which you can add contacts
1 Add them manually
2 Import a VCF file
611 Importing
So first well check out how to import all the VCF files as they are a lot more faster way of creating contacts Justbelow the contact list 3 buttons The middle one let you upload files
Once yoursquove clicked it the upload window let you choose your files We can upload the files one by one or upload allof them at one go
Let me demonstrate Open the directory in which you store all the files and then do the following Keep pressingCTRL and select the files to upload After you are done just click on the open button After the upload it should looksomething like this in which all the names and contacts will be sorted alphabetically
17
ownCloud User Manual Release 45
Then the interface ask you where to put your imported contacts You have the ability to choose an existing addressbookor to create a new one Then click on ldquoOKrdquo and thatrsquos all for the import of contacts
612 Create contacts manually
In the picture of the bottom bar you could see the new contact button (first one) Click on it You can now see anempty contact in the main part of the interface You have the ability to add all your informations about the contact thename the address the e-mail the telephone nr
Just click on a field and start typing the information You can use the ldquoAdd Fieldrdquo button to add another types ofinformation for this contact
18 Chapter 6 Using the Contacts App
ownCloud User Manual Release 45
When you want to remove an information of your contact just click on little delete icon at the right of the field youwant to remove
613 Adding picture to the contact
There are two methods in which you can give a picture id to the specific contact
1 Direct upload
2 Select pics already uploaded in ownCloud files
After you have selected the picture for the contact you get an option to crop the picture to suit your requirements
61 Adding contacts 19
ownCloud User Manual Release 45
You can crop the picture however you wish and then press OK
As you can see it is really easy to set things right in this app It automatically pics up the First name Middle name (ifany) and the last name You may add or delete any section you want for your own convenience
62 Creating new address books
When you click on the third button of the bottom bar you will have access to the applicationrsquos settings Then presson the ldquoMore buttonrdquo to access the options of your Addressbooks
20 Chapter 6 Using the Contacts App
ownCloud User Manual Release 45
You have there the ability to add delete download or share your addressbooks Hover your cursor on every icon tosee what they mean
63 Keeping your address book in sync
One of the most important thing in any contact app is to keep it in Sync You can sync this contact app to your phonewhich has the following OSrsquos- Android and IOS
631 Syncing with Android
1 Install cardDav- Sync free from Google play store by visiting this link-httpsplaygooglecomstoreappsdetailsid=orgdmfscarddavsync
2 This app supports auto- configuration which is a Boon- after installing visit this link- card-davsowncloudexamplenetremotephpcarddav to auto configure the app
3 Enter your login details
4 After the app has checked your login details you may just select- Sync server to phone option
5 Thatrsquos it there is nothing else to do for Android )
632 Syncing your IOS device
Synchronizing the Address book
63 Keeping your address book in sync 21
ownCloud User Manual Release 45
1 Open the settings application
2 Select Mail Contacts Calendars
3 Select Add Account
4 Select other as account type
5 Select Add CardDAV account
6 For server type httpowncloudexamplenetremotephpcarddavprincipalsusername
7 Enter your user name and password
8 Select Next
9 If your server does not support SSL a warning will be displayed Select Continue
10 If the iPhone is unable to verify the account information perform the following
bull Select OK
bull Select advanced settings
bull Make sure Use SSL is set to OFF
bull Change port to 80
bull Go back to account information and hit Save
Now should now find your contacts in the address book of your iPhone
633 Other Syncing options provided by ownCloud
1 For android you may use their official android app- httpsowncloudcomoverviewmobileapps
2 And for IOS(Iphone and Ipad) use their app - httpsowncloudcomoverviewmobileapps
22 Chapter 6 Using the Contacts App
CHAPTER
SEVEN
USING THE BOOKMARKS APP
To add a bookmark to the application you have 2 possibilities use the main interface or the bookmarklet or use thebookmarklet
71 The main interface
The main owncloud interface contains 3 fields at the top where you can enter the website address (or URL) the titleof your bookmark and a serie of tags separated by a space
Here wersquove added the page httpwikipediaorg with the title ldquoWikipediardquo and some tags describing what wikipediais (for an easyier search later on)
711 Edition
You also have the possibility to edit or delete your bookmark For that just hover your mousersquos cursor over onebookmark and click on the little pencil to edit or the cross the delete
The bookmark will then be filled into the 3 fields at the top of the screen Modify your bookmark to your need thenhit the save button to persist the change
712 Search
If you click on a tag ownCloud will only display the bookmarks that are described with this tag
You can also use the search bar of owncloud in the top right of your screen
Simply click on the ldquoBookmarksrdquo menu in the sidebar to come back to the default view
23
ownCloud User Manual Release 45
72 The bookmarklet
The creator of this app understand that people wonrsquot come open the ownCloud page to add the bookmark when thesee a cool site This is why they have made this cool ldquobookmarkletrdquo
A bookmarklet is small button that you can drag and drop in your bookmarks The next time you see a cool new sitepress on this special bookmark it will add the site to your ownCloud bookmarks
To find this bookmark go to your personnal preference and search for the ldquoBookmarkletrdquo item
24 Chapter 7 Using the Bookmarks App
CHAPTER
EIGHT
DESKTOP SYNCHRONISATION
For synchronizing files with your desktop computer we recommend using the ownCloud Client for Windows MacOS X and Linux Its usage is documented separately in the ownCloud Desktop Client Manual
Furthermore It is possible to synchronize your ownCloud calendar and address book with a variety of different oper-ating systems and devices It is also possible to mount your ownCloud storage via WebDAV which is also documentedin the next chapters
25
ownCloud User Manual Release 45
26 Chapter 8 Desktop Synchronisation
CHAPTER
NINE
SYNCHRONIZING WITH KDE SC
From KDE SC 48 and forward setting up ownCloud is very easyFrom System Settings Personal InformationAkonadiResources Configuration select DAV Groupware resource
27
ownCloud User Manual Release 45
Enter your ownCloud username and password and click ldquoNextrdquo
Select ownCloud in the drop down list and click ldquoNextrdquo
28 Chapter 9 Synchronizing with KDE SC
ownCloud User Manual Release 45
Enter the host name and installation path If you do not use SSL remember to de-select ldquoUse secure connectionrdquo
Test the connection If everything went well you should see a message like the one below
29
ownCloud User Manual Release 45
Click ldquoFinishrdquo and you will be able to change the display name and refresh interval
Now you should see the Akonadi resource doing the first synchronization
You can find the Contacts and Calendars in Kontact (or KOrganizerKAddressbook if you run the programs separately)
30 Chapter 9 Synchronizing with KDE SC
ownCloud User Manual Release 45
31
ownCloud User Manual Release 45
32 Chapter 9 Synchronizing with KDE SC
CHAPTER
TEN
SYNCHRONIZING WITH OS X
101 Setup synchronisation with Mountain Lion (108)
Note Although these steps belong to Mountain Lion (108) they should be similar with Lion (107)
Open the System Preferences choose Mail Contacts amp Calendars and scroll down to select Add Other Account
33
ownCloud User Manual Release 45
1011 Synchronising the Calendar
Select Add a CalDAV account
Enter your ownCloud-username your password and the full URL-path to your ownCloud-installationADDRESSremotephpcaldavprincipalsUSERNAME (Replace ADDRESS and USERNAME)
1012 Synchronising the Addressbook
Select Add a CardDAV account
34 Chapter 10 Synchronizing with OS X
ownCloud User Manual Release 45
Enter your ownCloud-username your password and the full URL-path to your ownCloud-installationADDRESSremotephpcarddavprincipalsUSERNAME (Replace ADDRESS and USERNAME notethe url is slightly different to the URL in the previous step)
102 Installation directions for Snow Leopard (106)
While OS X Lion and Mountain Lion work fine OS X Snow Leopard (106) and older needs some fiddling to workA user contributed the following
1 Make sure Addressbook is not running If it is select the windows and press Command + Q to terminate it
2 Navigate to UsersYOUR_USERNAMELibraryApplication SupportAddressBookSourcesIf you have all ready some kind of address book setup it is likely you will see some folders named like thisBEA92826-FBF3-4E53-B5C6-ED7C2B454430 Note down what folders there are now and leave thewindow open
3 Open addressbook and try to add a new CardDav addressbook At this point it does not matter what informationyou enter It will come up with the same error message you mentioned before when you click ldquoCreaterdquo Ignoreit and click ldquoCreaterdquo again A non-functional address book will be added
4 Close Address-Book again using Command + Q
102 Installation directions for Snow Leopard (106) 35
ownCloud User Manual Release 45
5 Go back to the folder window from step 2 You will now see a newly created folder with another long string asits name
6 Navigate to the newly created folder and edit the Configurationplist with your favorite text editor
7 Search for a section looking like this
ltkeygtservernameltkeygt ltstringgthttp0(null)ltstringgtltkeygtusernameltkeygt ltstringgtWhatever_you_entered_beforeltstringgt
8 Make it look like this Please note the 80 after YOUR_DOMAIN it is important
ltkeygtservernameltkey ltstringgthttpYOUR_DOMAIN80owncloudremotephpcarddavprincipalsusernameltstringgtltkeygtusernameltkey ltstringgtusernameltstringgt
9 Save the file and open Address Book again It will not work yet
10 Open the preferences for your ownCloud CardDAV-Account and enter your password
11 You may have to restart Address Book once more After this it should work
There is also an easy HOWTO in the forum
36 Chapter 10 Synchronizing with OS X
CHAPTER
ELEVEN
IOS - SYNCHRONIZE IPHONEIPAD
111 Synchronizing the Calendar
1 Open the settings application
2 Select Mail Contacts Calendars
3 Select Add Account
4 Select Other as account type
5 Select Add CalDAV account
6 For server type ADDRESSremotephpcaldavprincipalsusername (Important Donrsquot includehttp or https)
7 Enter your username and password
8 Select Next
9 If your server does not support SSL a warning will be displayed Select Continue
10 If the iPhone is unable to verify the account information read the Troubleshooting paragraph on this page Ifthat doesnrsquot help try to turn off SSL (not recommended)
bull Select OK
bull Select advanced settings
bull Make sure Use SSL is set to OFF
bull Change port to 80
bull Go back to account information and hit Save
Your calendar should now be visible in the Calendar application (may take a few moments)
112 Synchronizing the Address book
1 Open the settings application
2 Select Mail Contacts Calendars
3 Select Add Account
4 Select Other as account type
5 Select Add CardDAV account
37
ownCloud User Manual Release 45
6 For server type ADDRESSremotephpcarddavprincipalsusername (Important Donrsquot includehttp or https)
7 Enter your username and password
8 Select Next
9 If your server does not support SSL a warning will be displayed Select Continue
10 If the iPhone is unable to verify the account information read the Troubleshooting paragraph on this page Ifthat doesnrsquot help try to turn off SSL (not recommended)
bull Select OK
bull Select advanced settings
bull Make sure Use SSL is set to OFF
bull Change port to 80
bull Go back to account information and hit Save
Now should now find your contacts in the address book of your iPhone (may take a few moments)
113 Troubleshooting
1 Check that you didnrsquot include http or https in the server address
2 Depending on your server setup the username-part of the server-address maybe case sensitive So for user Username the server-address may needto be ADDRESSremotephpcaldavprincipalsUsername instead ofADDRESSremotephpcaldavprincipalsusername
3 If you need to change the server-address and want to use SSL yoursquoll have to cancel the setup process and enteryour data again from the very beginning as iOS would prepend https to the server-address automatically
4 Problems have been reported for CardDAV and iOS 4X A possible solution is at the forum
38 Chapter 11 iOS - Synchronize iPhoneiPad
CHAPTER
TWELVE
NATIVE MEDIA PLAYER SUPPORT
You can access your music stored in ownCloud with every Ampache-compatible media player You can find theURL for your specific ownCloud installation in your personal settings or replace ADDRESS with the URL of yourownCloud installation yourself
Ampache-URL httpADDRESSappsmedia
Ampache-compatible players that work with ownCloud include
bull amaroK standard KDE music player
bull tomahawk cross platform player
bull justplayer music player for android
You can find more information about Ampache and other players at the Ampache wikipedia article
The current maintainer of the Media Player is Robin Appelman
39
ownCloud User Manual Release 45
40 Chapter 12 Native Media Player Support
CHAPTER
THIRTEEN
VERSION CONTROL
ownCloud supports simple version control for files Versioning is enabled by default and creates backups of fileswhich are accessible via the history tab This tab also links to the history page where you can roll back a file toany previous versionChanges made at intervals greater than two minutes are saved in data[user]versions and madeaccessible using the above pages
41
ownCloud User Manual Release 45
42 Chapter 13 Version Control
CHAPTER
FOURTEEN
INDICES AND TABLES
bull genindex
43
ownCloud User Manual Release 45
44 Chapter 14 Indices and tables
INDEX
RRFC
RFC 2518 5
45
- Introduction
- The ownCloud Web Interface
-
- Overview
-
- Mounting ownCloud via WebDAV
-
- Windows
- Mac OS X
- Linux
-
- Accessing your Files
-
- Desktop
- Mobile
-
- Calendars
-
- Creating a calendar
- Synchronising Calendars with CalDav
- Creating events
- Exporting Importing events
- Why is the calendar app asking for my current location
-
- Using the Contacts App
-
- Adding contacts
- Creating new address books
- Keeping your address book in sync
-
- Using the Bookmarks App
-
- The main interface
- The bookmarklet
-
- Desktop Synchronisation
- Synchronizing with KDE SC
- Synchronizing with OS X
-
- Setup synchronisation with Mountain Lion (108)
- Installation directions for Snow Leopard (106)
-
- iOS - Synchronize iPhoneiPad
-
- Synchronizing the Calendar
- Synchronizing the Address book
- Troubleshooting
-
- Native Media Player Support
- Version Control
- Indices and tables
- Index
-

ownCloud User Manual Release 45
also set the timezone manually in the personal settings
16 Chapter 5 Calendars
CHAPTER
SIX
USING THE CONTACTS APP
The contacts app of ownCloud is like any other mobile contact app but with more functionality Just as you open youraccount you will get the a default addressbook available We will see later that Of course you can always add andremove addressbooks in here
61 Adding contacts
There are two ways in which you can add contacts
1 Add them manually
2 Import a VCF file
611 Importing
So first well check out how to import all the VCF files as they are a lot more faster way of creating contacts Justbelow the contact list 3 buttons The middle one let you upload files
Once yoursquove clicked it the upload window let you choose your files We can upload the files one by one or upload allof them at one go
Let me demonstrate Open the directory in which you store all the files and then do the following Keep pressingCTRL and select the files to upload After you are done just click on the open button After the upload it should looksomething like this in which all the names and contacts will be sorted alphabetically
17
ownCloud User Manual Release 45
Then the interface ask you where to put your imported contacts You have the ability to choose an existing addressbookor to create a new one Then click on ldquoOKrdquo and thatrsquos all for the import of contacts
612 Create contacts manually
In the picture of the bottom bar you could see the new contact button (first one) Click on it You can now see anempty contact in the main part of the interface You have the ability to add all your informations about the contact thename the address the e-mail the telephone nr
Just click on a field and start typing the information You can use the ldquoAdd Fieldrdquo button to add another types ofinformation for this contact
18 Chapter 6 Using the Contacts App
ownCloud User Manual Release 45
When you want to remove an information of your contact just click on little delete icon at the right of the field youwant to remove
613 Adding picture to the contact
There are two methods in which you can give a picture id to the specific contact
1 Direct upload
2 Select pics already uploaded in ownCloud files
After you have selected the picture for the contact you get an option to crop the picture to suit your requirements
61 Adding contacts 19
ownCloud User Manual Release 45
You can crop the picture however you wish and then press OK
As you can see it is really easy to set things right in this app It automatically pics up the First name Middle name (ifany) and the last name You may add or delete any section you want for your own convenience
62 Creating new address books
When you click on the third button of the bottom bar you will have access to the applicationrsquos settings Then presson the ldquoMore buttonrdquo to access the options of your Addressbooks
20 Chapter 6 Using the Contacts App
ownCloud User Manual Release 45
You have there the ability to add delete download or share your addressbooks Hover your cursor on every icon tosee what they mean
63 Keeping your address book in sync
One of the most important thing in any contact app is to keep it in Sync You can sync this contact app to your phonewhich has the following OSrsquos- Android and IOS
631 Syncing with Android
1 Install cardDav- Sync free from Google play store by visiting this link-httpsplaygooglecomstoreappsdetailsid=orgdmfscarddavsync
2 This app supports auto- configuration which is a Boon- after installing visit this link- card-davsowncloudexamplenetremotephpcarddav to auto configure the app
3 Enter your login details
4 After the app has checked your login details you may just select- Sync server to phone option
5 Thatrsquos it there is nothing else to do for Android )
632 Syncing your IOS device
Synchronizing the Address book
63 Keeping your address book in sync 21
ownCloud User Manual Release 45
1 Open the settings application
2 Select Mail Contacts Calendars
3 Select Add Account
4 Select other as account type
5 Select Add CardDAV account
6 For server type httpowncloudexamplenetremotephpcarddavprincipalsusername
7 Enter your user name and password
8 Select Next
9 If your server does not support SSL a warning will be displayed Select Continue
10 If the iPhone is unable to verify the account information perform the following
bull Select OK
bull Select advanced settings
bull Make sure Use SSL is set to OFF
bull Change port to 80
bull Go back to account information and hit Save
Now should now find your contacts in the address book of your iPhone
633 Other Syncing options provided by ownCloud
1 For android you may use their official android app- httpsowncloudcomoverviewmobileapps
2 And for IOS(Iphone and Ipad) use their app - httpsowncloudcomoverviewmobileapps
22 Chapter 6 Using the Contacts App
CHAPTER
SEVEN
USING THE BOOKMARKS APP
To add a bookmark to the application you have 2 possibilities use the main interface or the bookmarklet or use thebookmarklet
71 The main interface
The main owncloud interface contains 3 fields at the top where you can enter the website address (or URL) the titleof your bookmark and a serie of tags separated by a space
Here wersquove added the page httpwikipediaorg with the title ldquoWikipediardquo and some tags describing what wikipediais (for an easyier search later on)
711 Edition
You also have the possibility to edit or delete your bookmark For that just hover your mousersquos cursor over onebookmark and click on the little pencil to edit or the cross the delete
The bookmark will then be filled into the 3 fields at the top of the screen Modify your bookmark to your need thenhit the save button to persist the change
712 Search
If you click on a tag ownCloud will only display the bookmarks that are described with this tag
You can also use the search bar of owncloud in the top right of your screen
Simply click on the ldquoBookmarksrdquo menu in the sidebar to come back to the default view
23
ownCloud User Manual Release 45
72 The bookmarklet
The creator of this app understand that people wonrsquot come open the ownCloud page to add the bookmark when thesee a cool site This is why they have made this cool ldquobookmarkletrdquo
A bookmarklet is small button that you can drag and drop in your bookmarks The next time you see a cool new sitepress on this special bookmark it will add the site to your ownCloud bookmarks
To find this bookmark go to your personnal preference and search for the ldquoBookmarkletrdquo item
24 Chapter 7 Using the Bookmarks App
CHAPTER
EIGHT
DESKTOP SYNCHRONISATION
For synchronizing files with your desktop computer we recommend using the ownCloud Client for Windows MacOS X and Linux Its usage is documented separately in the ownCloud Desktop Client Manual
Furthermore It is possible to synchronize your ownCloud calendar and address book with a variety of different oper-ating systems and devices It is also possible to mount your ownCloud storage via WebDAV which is also documentedin the next chapters
25
ownCloud User Manual Release 45
26 Chapter 8 Desktop Synchronisation
CHAPTER
NINE
SYNCHRONIZING WITH KDE SC
From KDE SC 48 and forward setting up ownCloud is very easyFrom System Settings Personal InformationAkonadiResources Configuration select DAV Groupware resource
27
ownCloud User Manual Release 45
Enter your ownCloud username and password and click ldquoNextrdquo
Select ownCloud in the drop down list and click ldquoNextrdquo
28 Chapter 9 Synchronizing with KDE SC
ownCloud User Manual Release 45
Enter the host name and installation path If you do not use SSL remember to de-select ldquoUse secure connectionrdquo
Test the connection If everything went well you should see a message like the one below
29
ownCloud User Manual Release 45
Click ldquoFinishrdquo and you will be able to change the display name and refresh interval
Now you should see the Akonadi resource doing the first synchronization
You can find the Contacts and Calendars in Kontact (or KOrganizerKAddressbook if you run the programs separately)
30 Chapter 9 Synchronizing with KDE SC
ownCloud User Manual Release 45
31
ownCloud User Manual Release 45
32 Chapter 9 Synchronizing with KDE SC
CHAPTER
TEN
SYNCHRONIZING WITH OS X
101 Setup synchronisation with Mountain Lion (108)
Note Although these steps belong to Mountain Lion (108) they should be similar with Lion (107)
Open the System Preferences choose Mail Contacts amp Calendars and scroll down to select Add Other Account
33
ownCloud User Manual Release 45
1011 Synchronising the Calendar
Select Add a CalDAV account
Enter your ownCloud-username your password and the full URL-path to your ownCloud-installationADDRESSremotephpcaldavprincipalsUSERNAME (Replace ADDRESS and USERNAME)
1012 Synchronising the Addressbook
Select Add a CardDAV account
34 Chapter 10 Synchronizing with OS X
ownCloud User Manual Release 45
Enter your ownCloud-username your password and the full URL-path to your ownCloud-installationADDRESSremotephpcarddavprincipalsUSERNAME (Replace ADDRESS and USERNAME notethe url is slightly different to the URL in the previous step)
102 Installation directions for Snow Leopard (106)
While OS X Lion and Mountain Lion work fine OS X Snow Leopard (106) and older needs some fiddling to workA user contributed the following
1 Make sure Addressbook is not running If it is select the windows and press Command + Q to terminate it
2 Navigate to UsersYOUR_USERNAMELibraryApplication SupportAddressBookSourcesIf you have all ready some kind of address book setup it is likely you will see some folders named like thisBEA92826-FBF3-4E53-B5C6-ED7C2B454430 Note down what folders there are now and leave thewindow open
3 Open addressbook and try to add a new CardDav addressbook At this point it does not matter what informationyou enter It will come up with the same error message you mentioned before when you click ldquoCreaterdquo Ignoreit and click ldquoCreaterdquo again A non-functional address book will be added
4 Close Address-Book again using Command + Q
102 Installation directions for Snow Leopard (106) 35
ownCloud User Manual Release 45
5 Go back to the folder window from step 2 You will now see a newly created folder with another long string asits name
6 Navigate to the newly created folder and edit the Configurationplist with your favorite text editor
7 Search for a section looking like this
ltkeygtservernameltkeygt ltstringgthttp0(null)ltstringgtltkeygtusernameltkeygt ltstringgtWhatever_you_entered_beforeltstringgt
8 Make it look like this Please note the 80 after YOUR_DOMAIN it is important
ltkeygtservernameltkey ltstringgthttpYOUR_DOMAIN80owncloudremotephpcarddavprincipalsusernameltstringgtltkeygtusernameltkey ltstringgtusernameltstringgt
9 Save the file and open Address Book again It will not work yet
10 Open the preferences for your ownCloud CardDAV-Account and enter your password
11 You may have to restart Address Book once more After this it should work
There is also an easy HOWTO in the forum
36 Chapter 10 Synchronizing with OS X
CHAPTER
ELEVEN
IOS - SYNCHRONIZE IPHONEIPAD
111 Synchronizing the Calendar
1 Open the settings application
2 Select Mail Contacts Calendars
3 Select Add Account
4 Select Other as account type
5 Select Add CalDAV account
6 For server type ADDRESSremotephpcaldavprincipalsusername (Important Donrsquot includehttp or https)
7 Enter your username and password
8 Select Next
9 If your server does not support SSL a warning will be displayed Select Continue
10 If the iPhone is unable to verify the account information read the Troubleshooting paragraph on this page Ifthat doesnrsquot help try to turn off SSL (not recommended)
bull Select OK
bull Select advanced settings
bull Make sure Use SSL is set to OFF
bull Change port to 80
bull Go back to account information and hit Save
Your calendar should now be visible in the Calendar application (may take a few moments)
112 Synchronizing the Address book
1 Open the settings application
2 Select Mail Contacts Calendars
3 Select Add Account
4 Select Other as account type
5 Select Add CardDAV account
37
ownCloud User Manual Release 45
6 For server type ADDRESSremotephpcarddavprincipalsusername (Important Donrsquot includehttp or https)
7 Enter your username and password
8 Select Next
9 If your server does not support SSL a warning will be displayed Select Continue
10 If the iPhone is unable to verify the account information read the Troubleshooting paragraph on this page Ifthat doesnrsquot help try to turn off SSL (not recommended)
bull Select OK
bull Select advanced settings
bull Make sure Use SSL is set to OFF
bull Change port to 80
bull Go back to account information and hit Save
Now should now find your contacts in the address book of your iPhone (may take a few moments)
113 Troubleshooting
1 Check that you didnrsquot include http or https in the server address
2 Depending on your server setup the username-part of the server-address maybe case sensitive So for user Username the server-address may needto be ADDRESSremotephpcaldavprincipalsUsername instead ofADDRESSremotephpcaldavprincipalsusername
3 If you need to change the server-address and want to use SSL yoursquoll have to cancel the setup process and enteryour data again from the very beginning as iOS would prepend https to the server-address automatically
4 Problems have been reported for CardDAV and iOS 4X A possible solution is at the forum
38 Chapter 11 iOS - Synchronize iPhoneiPad
CHAPTER
TWELVE
NATIVE MEDIA PLAYER SUPPORT
You can access your music stored in ownCloud with every Ampache-compatible media player You can find theURL for your specific ownCloud installation in your personal settings or replace ADDRESS with the URL of yourownCloud installation yourself
Ampache-URL httpADDRESSappsmedia
Ampache-compatible players that work with ownCloud include
bull amaroK standard KDE music player
bull tomahawk cross platform player
bull justplayer music player for android
You can find more information about Ampache and other players at the Ampache wikipedia article
The current maintainer of the Media Player is Robin Appelman
39
ownCloud User Manual Release 45
40 Chapter 12 Native Media Player Support
CHAPTER
THIRTEEN
VERSION CONTROL
ownCloud supports simple version control for files Versioning is enabled by default and creates backups of fileswhich are accessible via the history tab This tab also links to the history page where you can roll back a file toany previous versionChanges made at intervals greater than two minutes are saved in data[user]versions and madeaccessible using the above pages
41
ownCloud User Manual Release 45
42 Chapter 13 Version Control
CHAPTER
FOURTEEN
INDICES AND TABLES
bull genindex
43
ownCloud User Manual Release 45
44 Chapter 14 Indices and tables
INDEX
RRFC
RFC 2518 5
45
- Introduction
- The ownCloud Web Interface
-
- Overview
-
- Mounting ownCloud via WebDAV
-
- Windows
- Mac OS X
- Linux
-
- Accessing your Files
-
- Desktop
- Mobile
-
- Calendars
-
- Creating a calendar
- Synchronising Calendars with CalDav
- Creating events
- Exporting Importing events
- Why is the calendar app asking for my current location
-
- Using the Contacts App
-
- Adding contacts
- Creating new address books
- Keeping your address book in sync
-
- Using the Bookmarks App
-
- The main interface
- The bookmarklet
-
- Desktop Synchronisation
- Synchronizing with KDE SC
- Synchronizing with OS X
-
- Setup synchronisation with Mountain Lion (108)
- Installation directions for Snow Leopard (106)
-
- iOS - Synchronize iPhoneiPad
-
- Synchronizing the Calendar
- Synchronizing the Address book
- Troubleshooting
-
- Native Media Player Support
- Version Control
- Indices and tables
- Index
-

CHAPTER
SIX
USING THE CONTACTS APP
The contacts app of ownCloud is like any other mobile contact app but with more functionality Just as you open youraccount you will get the a default addressbook available We will see later that Of course you can always add andremove addressbooks in here
61 Adding contacts
There are two ways in which you can add contacts
1 Add them manually
2 Import a VCF file
611 Importing
So first well check out how to import all the VCF files as they are a lot more faster way of creating contacts Justbelow the contact list 3 buttons The middle one let you upload files
Once yoursquove clicked it the upload window let you choose your files We can upload the files one by one or upload allof them at one go
Let me demonstrate Open the directory in which you store all the files and then do the following Keep pressingCTRL and select the files to upload After you are done just click on the open button After the upload it should looksomething like this in which all the names and contacts will be sorted alphabetically
17
ownCloud User Manual Release 45
Then the interface ask you where to put your imported contacts You have the ability to choose an existing addressbookor to create a new one Then click on ldquoOKrdquo and thatrsquos all for the import of contacts
612 Create contacts manually
In the picture of the bottom bar you could see the new contact button (first one) Click on it You can now see anempty contact in the main part of the interface You have the ability to add all your informations about the contact thename the address the e-mail the telephone nr
Just click on a field and start typing the information You can use the ldquoAdd Fieldrdquo button to add another types ofinformation for this contact
18 Chapter 6 Using the Contacts App
ownCloud User Manual Release 45
When you want to remove an information of your contact just click on little delete icon at the right of the field youwant to remove
613 Adding picture to the contact
There are two methods in which you can give a picture id to the specific contact
1 Direct upload
2 Select pics already uploaded in ownCloud files
After you have selected the picture for the contact you get an option to crop the picture to suit your requirements
61 Adding contacts 19
ownCloud User Manual Release 45
You can crop the picture however you wish and then press OK
As you can see it is really easy to set things right in this app It automatically pics up the First name Middle name (ifany) and the last name You may add or delete any section you want for your own convenience
62 Creating new address books
When you click on the third button of the bottom bar you will have access to the applicationrsquos settings Then presson the ldquoMore buttonrdquo to access the options of your Addressbooks
20 Chapter 6 Using the Contacts App
ownCloud User Manual Release 45
You have there the ability to add delete download or share your addressbooks Hover your cursor on every icon tosee what they mean
63 Keeping your address book in sync
One of the most important thing in any contact app is to keep it in Sync You can sync this contact app to your phonewhich has the following OSrsquos- Android and IOS
631 Syncing with Android
1 Install cardDav- Sync free from Google play store by visiting this link-httpsplaygooglecomstoreappsdetailsid=orgdmfscarddavsync
2 This app supports auto- configuration which is a Boon- after installing visit this link- card-davsowncloudexamplenetremotephpcarddav to auto configure the app
3 Enter your login details
4 After the app has checked your login details you may just select- Sync server to phone option
5 Thatrsquos it there is nothing else to do for Android )
632 Syncing your IOS device
Synchronizing the Address book
63 Keeping your address book in sync 21
ownCloud User Manual Release 45
1 Open the settings application
2 Select Mail Contacts Calendars
3 Select Add Account
4 Select other as account type
5 Select Add CardDAV account
6 For server type httpowncloudexamplenetremotephpcarddavprincipalsusername
7 Enter your user name and password
8 Select Next
9 If your server does not support SSL a warning will be displayed Select Continue
10 If the iPhone is unable to verify the account information perform the following
bull Select OK
bull Select advanced settings
bull Make sure Use SSL is set to OFF
bull Change port to 80
bull Go back to account information and hit Save
Now should now find your contacts in the address book of your iPhone
633 Other Syncing options provided by ownCloud
1 For android you may use their official android app- httpsowncloudcomoverviewmobileapps
2 And for IOS(Iphone and Ipad) use their app - httpsowncloudcomoverviewmobileapps
22 Chapter 6 Using the Contacts App
CHAPTER
SEVEN
USING THE BOOKMARKS APP
To add a bookmark to the application you have 2 possibilities use the main interface or the bookmarklet or use thebookmarklet
71 The main interface
The main owncloud interface contains 3 fields at the top where you can enter the website address (or URL) the titleof your bookmark and a serie of tags separated by a space
Here wersquove added the page httpwikipediaorg with the title ldquoWikipediardquo and some tags describing what wikipediais (for an easyier search later on)
711 Edition
You also have the possibility to edit or delete your bookmark For that just hover your mousersquos cursor over onebookmark and click on the little pencil to edit or the cross the delete
The bookmark will then be filled into the 3 fields at the top of the screen Modify your bookmark to your need thenhit the save button to persist the change
712 Search
If you click on a tag ownCloud will only display the bookmarks that are described with this tag
You can also use the search bar of owncloud in the top right of your screen
Simply click on the ldquoBookmarksrdquo menu in the sidebar to come back to the default view
23
ownCloud User Manual Release 45
72 The bookmarklet
The creator of this app understand that people wonrsquot come open the ownCloud page to add the bookmark when thesee a cool site This is why they have made this cool ldquobookmarkletrdquo
A bookmarklet is small button that you can drag and drop in your bookmarks The next time you see a cool new sitepress on this special bookmark it will add the site to your ownCloud bookmarks
To find this bookmark go to your personnal preference and search for the ldquoBookmarkletrdquo item
24 Chapter 7 Using the Bookmarks App
CHAPTER
EIGHT
DESKTOP SYNCHRONISATION
For synchronizing files with your desktop computer we recommend using the ownCloud Client for Windows MacOS X and Linux Its usage is documented separately in the ownCloud Desktop Client Manual
Furthermore It is possible to synchronize your ownCloud calendar and address book with a variety of different oper-ating systems and devices It is also possible to mount your ownCloud storage via WebDAV which is also documentedin the next chapters
25
ownCloud User Manual Release 45
26 Chapter 8 Desktop Synchronisation
CHAPTER
NINE
SYNCHRONIZING WITH KDE SC
From KDE SC 48 and forward setting up ownCloud is very easyFrom System Settings Personal InformationAkonadiResources Configuration select DAV Groupware resource
27
ownCloud User Manual Release 45
Enter your ownCloud username and password and click ldquoNextrdquo
Select ownCloud in the drop down list and click ldquoNextrdquo
28 Chapter 9 Synchronizing with KDE SC
ownCloud User Manual Release 45
Enter the host name and installation path If you do not use SSL remember to de-select ldquoUse secure connectionrdquo
Test the connection If everything went well you should see a message like the one below
29
ownCloud User Manual Release 45
Click ldquoFinishrdquo and you will be able to change the display name and refresh interval
Now you should see the Akonadi resource doing the first synchronization
You can find the Contacts and Calendars in Kontact (or KOrganizerKAddressbook if you run the programs separately)
30 Chapter 9 Synchronizing with KDE SC
ownCloud User Manual Release 45
31
ownCloud User Manual Release 45
32 Chapter 9 Synchronizing with KDE SC
CHAPTER
TEN
SYNCHRONIZING WITH OS X
101 Setup synchronisation with Mountain Lion (108)
Note Although these steps belong to Mountain Lion (108) they should be similar with Lion (107)
Open the System Preferences choose Mail Contacts amp Calendars and scroll down to select Add Other Account
33
ownCloud User Manual Release 45
1011 Synchronising the Calendar
Select Add a CalDAV account
Enter your ownCloud-username your password and the full URL-path to your ownCloud-installationADDRESSremotephpcaldavprincipalsUSERNAME (Replace ADDRESS and USERNAME)
1012 Synchronising the Addressbook
Select Add a CardDAV account
34 Chapter 10 Synchronizing with OS X
ownCloud User Manual Release 45
Enter your ownCloud-username your password and the full URL-path to your ownCloud-installationADDRESSremotephpcarddavprincipalsUSERNAME (Replace ADDRESS and USERNAME notethe url is slightly different to the URL in the previous step)
102 Installation directions for Snow Leopard (106)
While OS X Lion and Mountain Lion work fine OS X Snow Leopard (106) and older needs some fiddling to workA user contributed the following
1 Make sure Addressbook is not running If it is select the windows and press Command + Q to terminate it
2 Navigate to UsersYOUR_USERNAMELibraryApplication SupportAddressBookSourcesIf you have all ready some kind of address book setup it is likely you will see some folders named like thisBEA92826-FBF3-4E53-B5C6-ED7C2B454430 Note down what folders there are now and leave thewindow open
3 Open addressbook and try to add a new CardDav addressbook At this point it does not matter what informationyou enter It will come up with the same error message you mentioned before when you click ldquoCreaterdquo Ignoreit and click ldquoCreaterdquo again A non-functional address book will be added
4 Close Address-Book again using Command + Q
102 Installation directions for Snow Leopard (106) 35
ownCloud User Manual Release 45
5 Go back to the folder window from step 2 You will now see a newly created folder with another long string asits name
6 Navigate to the newly created folder and edit the Configurationplist with your favorite text editor
7 Search for a section looking like this
ltkeygtservernameltkeygt ltstringgthttp0(null)ltstringgtltkeygtusernameltkeygt ltstringgtWhatever_you_entered_beforeltstringgt
8 Make it look like this Please note the 80 after YOUR_DOMAIN it is important
ltkeygtservernameltkey ltstringgthttpYOUR_DOMAIN80owncloudremotephpcarddavprincipalsusernameltstringgtltkeygtusernameltkey ltstringgtusernameltstringgt
9 Save the file and open Address Book again It will not work yet
10 Open the preferences for your ownCloud CardDAV-Account and enter your password
11 You may have to restart Address Book once more After this it should work
There is also an easy HOWTO in the forum
36 Chapter 10 Synchronizing with OS X
CHAPTER
ELEVEN
IOS - SYNCHRONIZE IPHONEIPAD
111 Synchronizing the Calendar
1 Open the settings application
2 Select Mail Contacts Calendars
3 Select Add Account
4 Select Other as account type
5 Select Add CalDAV account
6 For server type ADDRESSremotephpcaldavprincipalsusername (Important Donrsquot includehttp or https)
7 Enter your username and password
8 Select Next
9 If your server does not support SSL a warning will be displayed Select Continue
10 If the iPhone is unable to verify the account information read the Troubleshooting paragraph on this page Ifthat doesnrsquot help try to turn off SSL (not recommended)
bull Select OK
bull Select advanced settings
bull Make sure Use SSL is set to OFF
bull Change port to 80
bull Go back to account information and hit Save
Your calendar should now be visible in the Calendar application (may take a few moments)
112 Synchronizing the Address book
1 Open the settings application
2 Select Mail Contacts Calendars
3 Select Add Account
4 Select Other as account type
5 Select Add CardDAV account
37
ownCloud User Manual Release 45
6 For server type ADDRESSremotephpcarddavprincipalsusername (Important Donrsquot includehttp or https)
7 Enter your username and password
8 Select Next
9 If your server does not support SSL a warning will be displayed Select Continue
10 If the iPhone is unable to verify the account information read the Troubleshooting paragraph on this page Ifthat doesnrsquot help try to turn off SSL (not recommended)
bull Select OK
bull Select advanced settings
bull Make sure Use SSL is set to OFF
bull Change port to 80
bull Go back to account information and hit Save
Now should now find your contacts in the address book of your iPhone (may take a few moments)
113 Troubleshooting
1 Check that you didnrsquot include http or https in the server address
2 Depending on your server setup the username-part of the server-address maybe case sensitive So for user Username the server-address may needto be ADDRESSremotephpcaldavprincipalsUsername instead ofADDRESSremotephpcaldavprincipalsusername
3 If you need to change the server-address and want to use SSL yoursquoll have to cancel the setup process and enteryour data again from the very beginning as iOS would prepend https to the server-address automatically
4 Problems have been reported for CardDAV and iOS 4X A possible solution is at the forum
38 Chapter 11 iOS - Synchronize iPhoneiPad
CHAPTER
TWELVE
NATIVE MEDIA PLAYER SUPPORT
You can access your music stored in ownCloud with every Ampache-compatible media player You can find theURL for your specific ownCloud installation in your personal settings or replace ADDRESS with the URL of yourownCloud installation yourself
Ampache-URL httpADDRESSappsmedia
Ampache-compatible players that work with ownCloud include
bull amaroK standard KDE music player
bull tomahawk cross platform player
bull justplayer music player for android
You can find more information about Ampache and other players at the Ampache wikipedia article
The current maintainer of the Media Player is Robin Appelman
39
ownCloud User Manual Release 45
40 Chapter 12 Native Media Player Support
CHAPTER
THIRTEEN
VERSION CONTROL
ownCloud supports simple version control for files Versioning is enabled by default and creates backups of fileswhich are accessible via the history tab This tab also links to the history page where you can roll back a file toany previous versionChanges made at intervals greater than two minutes are saved in data[user]versions and madeaccessible using the above pages
41
ownCloud User Manual Release 45
42 Chapter 13 Version Control
CHAPTER
FOURTEEN
INDICES AND TABLES
bull genindex
43
ownCloud User Manual Release 45
44 Chapter 14 Indices and tables
INDEX
RRFC
RFC 2518 5
45
- Introduction
- The ownCloud Web Interface
-
- Overview
-
- Mounting ownCloud via WebDAV
-
- Windows
- Mac OS X
- Linux
-
- Accessing your Files
-
- Desktop
- Mobile
-
- Calendars
-
- Creating a calendar
- Synchronising Calendars with CalDav
- Creating events
- Exporting Importing events
- Why is the calendar app asking for my current location
-
- Using the Contacts App
-
- Adding contacts
- Creating new address books
- Keeping your address book in sync
-
- Using the Bookmarks App
-
- The main interface
- The bookmarklet
-
- Desktop Synchronisation
- Synchronizing with KDE SC
- Synchronizing with OS X
-
- Setup synchronisation with Mountain Lion (108)
- Installation directions for Snow Leopard (106)
-
- iOS - Synchronize iPhoneiPad
-
- Synchronizing the Calendar
- Synchronizing the Address book
- Troubleshooting
-
- Native Media Player Support
- Version Control
- Indices and tables
- Index
-

ownCloud User Manual Release 45
1 Open the settings application
2 Select Mail Contacts Calendars
3 Select Add Account
4 Select other as account type
5 Select Add CardDAV account
6 For server type httpowncloudexamplenetremotephpcarddavprincipalsusername
7 Enter your user name and password
8 Select Next
9 If your server does not support SSL a warning will be displayed Select Continue
10 If the iPhone is unable to verify the account information perform the following
bull Select OK
bull Select advanced settings
bull Make sure Use SSL is set to OFF
bull Change port to 80
bull Go back to account information and hit Save
Now should now find your contacts in the address book of your iPhone
633 Other Syncing options provided by ownCloud
1 For android you may use their official android app- httpsowncloudcomoverviewmobileapps
2 And for IOS(Iphone and Ipad) use their app - httpsowncloudcomoverviewmobileapps
22 Chapter 6 Using the Contacts App
CHAPTER
SEVEN
USING THE BOOKMARKS APP
To add a bookmark to the application you have 2 possibilities use the main interface or the bookmarklet or use thebookmarklet
71 The main interface
The main owncloud interface contains 3 fields at the top where you can enter the website address (or URL) the titleof your bookmark and a serie of tags separated by a space
Here wersquove added the page httpwikipediaorg with the title ldquoWikipediardquo and some tags describing what wikipediais (for an easyier search later on)
711 Edition
You also have the possibility to edit or delete your bookmark For that just hover your mousersquos cursor over onebookmark and click on the little pencil to edit or the cross the delete
The bookmark will then be filled into the 3 fields at the top of the screen Modify your bookmark to your need thenhit the save button to persist the change
712 Search
If you click on a tag ownCloud will only display the bookmarks that are described with this tag
You can also use the search bar of owncloud in the top right of your screen
Simply click on the ldquoBookmarksrdquo menu in the sidebar to come back to the default view
23
ownCloud User Manual Release 45
72 The bookmarklet
The creator of this app understand that people wonrsquot come open the ownCloud page to add the bookmark when thesee a cool site This is why they have made this cool ldquobookmarkletrdquo
A bookmarklet is small button that you can drag and drop in your bookmarks The next time you see a cool new sitepress on this special bookmark it will add the site to your ownCloud bookmarks
To find this bookmark go to your personnal preference and search for the ldquoBookmarkletrdquo item
24 Chapter 7 Using the Bookmarks App
CHAPTER
EIGHT
DESKTOP SYNCHRONISATION
For synchronizing files with your desktop computer we recommend using the ownCloud Client for Windows MacOS X and Linux Its usage is documented separately in the ownCloud Desktop Client Manual
Furthermore It is possible to synchronize your ownCloud calendar and address book with a variety of different oper-ating systems and devices It is also possible to mount your ownCloud storage via WebDAV which is also documentedin the next chapters
25
ownCloud User Manual Release 45
26 Chapter 8 Desktop Synchronisation
CHAPTER
NINE
SYNCHRONIZING WITH KDE SC
From KDE SC 48 and forward setting up ownCloud is very easyFrom System Settings Personal InformationAkonadiResources Configuration select DAV Groupware resource
27
ownCloud User Manual Release 45
Enter your ownCloud username and password and click ldquoNextrdquo
Select ownCloud in the drop down list and click ldquoNextrdquo
28 Chapter 9 Synchronizing with KDE SC
ownCloud User Manual Release 45
Enter the host name and installation path If you do not use SSL remember to de-select ldquoUse secure connectionrdquo
Test the connection If everything went well you should see a message like the one below
29
ownCloud User Manual Release 45
Click ldquoFinishrdquo and you will be able to change the display name and refresh interval
Now you should see the Akonadi resource doing the first synchronization
You can find the Contacts and Calendars in Kontact (or KOrganizerKAddressbook if you run the programs separately)
30 Chapter 9 Synchronizing with KDE SC
ownCloud User Manual Release 45
31
ownCloud User Manual Release 45
32 Chapter 9 Synchronizing with KDE SC
CHAPTER
TEN
SYNCHRONIZING WITH OS X
101 Setup synchronisation with Mountain Lion (108)
Note Although these steps belong to Mountain Lion (108) they should be similar with Lion (107)
Open the System Preferences choose Mail Contacts amp Calendars and scroll down to select Add Other Account
33
ownCloud User Manual Release 45
1011 Synchronising the Calendar
Select Add a CalDAV account
Enter your ownCloud-username your password and the full URL-path to your ownCloud-installationADDRESSremotephpcaldavprincipalsUSERNAME (Replace ADDRESS and USERNAME)
1012 Synchronising the Addressbook
Select Add a CardDAV account
34 Chapter 10 Synchronizing with OS X
ownCloud User Manual Release 45
Enter your ownCloud-username your password and the full URL-path to your ownCloud-installationADDRESSremotephpcarddavprincipalsUSERNAME (Replace ADDRESS and USERNAME notethe url is slightly different to the URL in the previous step)
102 Installation directions for Snow Leopard (106)
While OS X Lion and Mountain Lion work fine OS X Snow Leopard (106) and older needs some fiddling to workA user contributed the following
1 Make sure Addressbook is not running If it is select the windows and press Command + Q to terminate it
2 Navigate to UsersYOUR_USERNAMELibraryApplication SupportAddressBookSourcesIf you have all ready some kind of address book setup it is likely you will see some folders named like thisBEA92826-FBF3-4E53-B5C6-ED7C2B454430 Note down what folders there are now and leave thewindow open
3 Open addressbook and try to add a new CardDav addressbook At this point it does not matter what informationyou enter It will come up with the same error message you mentioned before when you click ldquoCreaterdquo Ignoreit and click ldquoCreaterdquo again A non-functional address book will be added
4 Close Address-Book again using Command + Q
102 Installation directions for Snow Leopard (106) 35
ownCloud User Manual Release 45
5 Go back to the folder window from step 2 You will now see a newly created folder with another long string asits name
6 Navigate to the newly created folder and edit the Configurationplist with your favorite text editor
7 Search for a section looking like this
ltkeygtservernameltkeygt ltstringgthttp0(null)ltstringgtltkeygtusernameltkeygt ltstringgtWhatever_you_entered_beforeltstringgt
8 Make it look like this Please note the 80 after YOUR_DOMAIN it is important
ltkeygtservernameltkey ltstringgthttpYOUR_DOMAIN80owncloudremotephpcarddavprincipalsusernameltstringgtltkeygtusernameltkey ltstringgtusernameltstringgt
9 Save the file and open Address Book again It will not work yet
10 Open the preferences for your ownCloud CardDAV-Account and enter your password
11 You may have to restart Address Book once more After this it should work
There is also an easy HOWTO in the forum
36 Chapter 10 Synchronizing with OS X
CHAPTER
ELEVEN
IOS - SYNCHRONIZE IPHONEIPAD
111 Synchronizing the Calendar
1 Open the settings application
2 Select Mail Contacts Calendars
3 Select Add Account
4 Select Other as account type
5 Select Add CalDAV account
6 For server type ADDRESSremotephpcaldavprincipalsusername (Important Donrsquot includehttp or https)
7 Enter your username and password
8 Select Next
9 If your server does not support SSL a warning will be displayed Select Continue
10 If the iPhone is unable to verify the account information read the Troubleshooting paragraph on this page Ifthat doesnrsquot help try to turn off SSL (not recommended)
bull Select OK
bull Select advanced settings
bull Make sure Use SSL is set to OFF
bull Change port to 80
bull Go back to account information and hit Save
Your calendar should now be visible in the Calendar application (may take a few moments)
112 Synchronizing the Address book
1 Open the settings application
2 Select Mail Contacts Calendars
3 Select Add Account
4 Select Other as account type
5 Select Add CardDAV account
37
ownCloud User Manual Release 45
6 For server type ADDRESSremotephpcarddavprincipalsusername (Important Donrsquot includehttp or https)
7 Enter your username and password
8 Select Next
9 If your server does not support SSL a warning will be displayed Select Continue
10 If the iPhone is unable to verify the account information read the Troubleshooting paragraph on this page Ifthat doesnrsquot help try to turn off SSL (not recommended)
bull Select OK
bull Select advanced settings
bull Make sure Use SSL is set to OFF
bull Change port to 80
bull Go back to account information and hit Save
Now should now find your contacts in the address book of your iPhone (may take a few moments)
113 Troubleshooting
1 Check that you didnrsquot include http or https in the server address
2 Depending on your server setup the username-part of the server-address maybe case sensitive So for user Username the server-address may needto be ADDRESSremotephpcaldavprincipalsUsername instead ofADDRESSremotephpcaldavprincipalsusername
3 If you need to change the server-address and want to use SSL yoursquoll have to cancel the setup process and enteryour data again from the very beginning as iOS would prepend https to the server-address automatically
4 Problems have been reported for CardDAV and iOS 4X A possible solution is at the forum
38 Chapter 11 iOS - Synchronize iPhoneiPad
CHAPTER
TWELVE
NATIVE MEDIA PLAYER SUPPORT
You can access your music stored in ownCloud with every Ampache-compatible media player You can find theURL for your specific ownCloud installation in your personal settings or replace ADDRESS with the URL of yourownCloud installation yourself
Ampache-URL httpADDRESSappsmedia
Ampache-compatible players that work with ownCloud include
bull amaroK standard KDE music player
bull tomahawk cross platform player
bull justplayer music player for android
You can find more information about Ampache and other players at the Ampache wikipedia article
The current maintainer of the Media Player is Robin Appelman
39
ownCloud User Manual Release 45
40 Chapter 12 Native Media Player Support
CHAPTER
THIRTEEN
VERSION CONTROL
ownCloud supports simple version control for files Versioning is enabled by default and creates backups of fileswhich are accessible via the history tab This tab also links to the history page where you can roll back a file toany previous versionChanges made at intervals greater than two minutes are saved in data[user]versions and madeaccessible using the above pages
41
ownCloud User Manual Release 45
42 Chapter 13 Version Control
CHAPTER
FOURTEEN
INDICES AND TABLES
bull genindex
43
ownCloud User Manual Release 45
44 Chapter 14 Indices and tables
INDEX
RRFC
RFC 2518 5
45
- Introduction
- The ownCloud Web Interface
-
- Overview
-
- Mounting ownCloud via WebDAV
-
- Windows
- Mac OS X
- Linux
-
- Accessing your Files
-
- Desktop
- Mobile
-
- Calendars
-
- Creating a calendar
- Synchronising Calendars with CalDav
- Creating events
- Exporting Importing events
- Why is the calendar app asking for my current location
-
- Using the Contacts App
-
- Adding contacts
- Creating new address books
- Keeping your address book in sync
-
- Using the Bookmarks App
-
- The main interface
- The bookmarklet
-
- Desktop Synchronisation
- Synchronizing with KDE SC
- Synchronizing with OS X
-
- Setup synchronisation with Mountain Lion (108)
- Installation directions for Snow Leopard (106)
-
- iOS - Synchronize iPhoneiPad
-
- Synchronizing the Calendar
- Synchronizing the Address book
- Troubleshooting
-
- Native Media Player Support
- Version Control
- Indices and tables
- Index
-

CHAPTER
SEVEN
USING THE BOOKMARKS APP
To add a bookmark to the application you have 2 possibilities use the main interface or the bookmarklet or use thebookmarklet
71 The main interface
The main owncloud interface contains 3 fields at the top where you can enter the website address (or URL) the titleof your bookmark and a serie of tags separated by a space
Here wersquove added the page httpwikipediaorg with the title ldquoWikipediardquo and some tags describing what wikipediais (for an easyier search later on)
711 Edition
You also have the possibility to edit or delete your bookmark For that just hover your mousersquos cursor over onebookmark and click on the little pencil to edit or the cross the delete
The bookmark will then be filled into the 3 fields at the top of the screen Modify your bookmark to your need thenhit the save button to persist the change
712 Search
If you click on a tag ownCloud will only display the bookmarks that are described with this tag
You can also use the search bar of owncloud in the top right of your screen
Simply click on the ldquoBookmarksrdquo menu in the sidebar to come back to the default view
23
ownCloud User Manual Release 45
72 The bookmarklet
The creator of this app understand that people wonrsquot come open the ownCloud page to add the bookmark when thesee a cool site This is why they have made this cool ldquobookmarkletrdquo
A bookmarklet is small button that you can drag and drop in your bookmarks The next time you see a cool new sitepress on this special bookmark it will add the site to your ownCloud bookmarks
To find this bookmark go to your personnal preference and search for the ldquoBookmarkletrdquo item
24 Chapter 7 Using the Bookmarks App
CHAPTER
EIGHT
DESKTOP SYNCHRONISATION
For synchronizing files with your desktop computer we recommend using the ownCloud Client for Windows MacOS X and Linux Its usage is documented separately in the ownCloud Desktop Client Manual
Furthermore It is possible to synchronize your ownCloud calendar and address book with a variety of different oper-ating systems and devices It is also possible to mount your ownCloud storage via WebDAV which is also documentedin the next chapters
25
ownCloud User Manual Release 45
26 Chapter 8 Desktop Synchronisation
CHAPTER
NINE
SYNCHRONIZING WITH KDE SC
From KDE SC 48 and forward setting up ownCloud is very easyFrom System Settings Personal InformationAkonadiResources Configuration select DAV Groupware resource
27
ownCloud User Manual Release 45
Enter your ownCloud username and password and click ldquoNextrdquo
Select ownCloud in the drop down list and click ldquoNextrdquo
28 Chapter 9 Synchronizing with KDE SC
ownCloud User Manual Release 45
Enter the host name and installation path If you do not use SSL remember to de-select ldquoUse secure connectionrdquo
Test the connection If everything went well you should see a message like the one below
29
ownCloud User Manual Release 45
Click ldquoFinishrdquo and you will be able to change the display name and refresh interval
Now you should see the Akonadi resource doing the first synchronization
You can find the Contacts and Calendars in Kontact (or KOrganizerKAddressbook if you run the programs separately)
30 Chapter 9 Synchronizing with KDE SC
ownCloud User Manual Release 45
31
ownCloud User Manual Release 45
32 Chapter 9 Synchronizing with KDE SC
CHAPTER
TEN
SYNCHRONIZING WITH OS X
101 Setup synchronisation with Mountain Lion (108)
Note Although these steps belong to Mountain Lion (108) they should be similar with Lion (107)
Open the System Preferences choose Mail Contacts amp Calendars and scroll down to select Add Other Account
33
ownCloud User Manual Release 45
1011 Synchronising the Calendar
Select Add a CalDAV account
Enter your ownCloud-username your password and the full URL-path to your ownCloud-installationADDRESSremotephpcaldavprincipalsUSERNAME (Replace ADDRESS and USERNAME)
1012 Synchronising the Addressbook
Select Add a CardDAV account
34 Chapter 10 Synchronizing with OS X
ownCloud User Manual Release 45
Enter your ownCloud-username your password and the full URL-path to your ownCloud-installationADDRESSremotephpcarddavprincipalsUSERNAME (Replace ADDRESS and USERNAME notethe url is slightly different to the URL in the previous step)
102 Installation directions for Snow Leopard (106)
While OS X Lion and Mountain Lion work fine OS X Snow Leopard (106) and older needs some fiddling to workA user contributed the following
1 Make sure Addressbook is not running If it is select the windows and press Command + Q to terminate it
2 Navigate to UsersYOUR_USERNAMELibraryApplication SupportAddressBookSourcesIf you have all ready some kind of address book setup it is likely you will see some folders named like thisBEA92826-FBF3-4E53-B5C6-ED7C2B454430 Note down what folders there are now and leave thewindow open
3 Open addressbook and try to add a new CardDav addressbook At this point it does not matter what informationyou enter It will come up with the same error message you mentioned before when you click ldquoCreaterdquo Ignoreit and click ldquoCreaterdquo again A non-functional address book will be added
4 Close Address-Book again using Command + Q
102 Installation directions for Snow Leopard (106) 35
ownCloud User Manual Release 45
5 Go back to the folder window from step 2 You will now see a newly created folder with another long string asits name
6 Navigate to the newly created folder and edit the Configurationplist with your favorite text editor
7 Search for a section looking like this
ltkeygtservernameltkeygt ltstringgthttp0(null)ltstringgtltkeygtusernameltkeygt ltstringgtWhatever_you_entered_beforeltstringgt
8 Make it look like this Please note the 80 after YOUR_DOMAIN it is important
ltkeygtservernameltkey ltstringgthttpYOUR_DOMAIN80owncloudremotephpcarddavprincipalsusernameltstringgtltkeygtusernameltkey ltstringgtusernameltstringgt
9 Save the file and open Address Book again It will not work yet
10 Open the preferences for your ownCloud CardDAV-Account and enter your password
11 You may have to restart Address Book once more After this it should work
There is also an easy HOWTO in the forum
36 Chapter 10 Synchronizing with OS X
CHAPTER
ELEVEN
IOS - SYNCHRONIZE IPHONEIPAD
111 Synchronizing the Calendar
1 Open the settings application
2 Select Mail Contacts Calendars
3 Select Add Account
4 Select Other as account type
5 Select Add CalDAV account
6 For server type ADDRESSremotephpcaldavprincipalsusername (Important Donrsquot includehttp or https)
7 Enter your username and password
8 Select Next
9 If your server does not support SSL a warning will be displayed Select Continue
10 If the iPhone is unable to verify the account information read the Troubleshooting paragraph on this page Ifthat doesnrsquot help try to turn off SSL (not recommended)
bull Select OK
bull Select advanced settings
bull Make sure Use SSL is set to OFF
bull Change port to 80
bull Go back to account information and hit Save
Your calendar should now be visible in the Calendar application (may take a few moments)
112 Synchronizing the Address book
1 Open the settings application
2 Select Mail Contacts Calendars
3 Select Add Account
4 Select Other as account type
5 Select Add CardDAV account
37
ownCloud User Manual Release 45
6 For server type ADDRESSremotephpcarddavprincipalsusername (Important Donrsquot includehttp or https)
7 Enter your username and password
8 Select Next
9 If your server does not support SSL a warning will be displayed Select Continue
10 If the iPhone is unable to verify the account information read the Troubleshooting paragraph on this page Ifthat doesnrsquot help try to turn off SSL (not recommended)
bull Select OK
bull Select advanced settings
bull Make sure Use SSL is set to OFF
bull Change port to 80
bull Go back to account information and hit Save
Now should now find your contacts in the address book of your iPhone (may take a few moments)
113 Troubleshooting
1 Check that you didnrsquot include http or https in the server address
2 Depending on your server setup the username-part of the server-address maybe case sensitive So for user Username the server-address may needto be ADDRESSremotephpcaldavprincipalsUsername instead ofADDRESSremotephpcaldavprincipalsusername
3 If you need to change the server-address and want to use SSL yoursquoll have to cancel the setup process and enteryour data again from the very beginning as iOS would prepend https to the server-address automatically
4 Problems have been reported for CardDAV and iOS 4X A possible solution is at the forum
38 Chapter 11 iOS - Synchronize iPhoneiPad
CHAPTER
TWELVE
NATIVE MEDIA PLAYER SUPPORT
You can access your music stored in ownCloud with every Ampache-compatible media player You can find theURL for your specific ownCloud installation in your personal settings or replace ADDRESS with the URL of yourownCloud installation yourself
Ampache-URL httpADDRESSappsmedia
Ampache-compatible players that work with ownCloud include
bull amaroK standard KDE music player
bull tomahawk cross platform player
bull justplayer music player for android
You can find more information about Ampache and other players at the Ampache wikipedia article
The current maintainer of the Media Player is Robin Appelman
39
ownCloud User Manual Release 45
40 Chapter 12 Native Media Player Support
CHAPTER
THIRTEEN
VERSION CONTROL
ownCloud supports simple version control for files Versioning is enabled by default and creates backups of fileswhich are accessible via the history tab This tab also links to the history page where you can roll back a file toany previous versionChanges made at intervals greater than two minutes are saved in data[user]versions and madeaccessible using the above pages
41
ownCloud User Manual Release 45
42 Chapter 13 Version Control
CHAPTER
FOURTEEN
INDICES AND TABLES
bull genindex
43
ownCloud User Manual Release 45
44 Chapter 14 Indices and tables
INDEX
RRFC
RFC 2518 5
45
- Introduction
- The ownCloud Web Interface
-
- Overview
-
- Mounting ownCloud via WebDAV
-
- Windows
- Mac OS X
- Linux
-
- Accessing your Files
-
- Desktop
- Mobile
-
- Calendars
-
- Creating a calendar
- Synchronising Calendars with CalDav
- Creating events
- Exporting Importing events
- Why is the calendar app asking for my current location
-
- Using the Contacts App
-
- Adding contacts
- Creating new address books
- Keeping your address book in sync
-
- Using the Bookmarks App
-
- The main interface
- The bookmarklet
-
- Desktop Synchronisation
- Synchronizing with KDE SC
- Synchronizing with OS X
-
- Setup synchronisation with Mountain Lion (108)
- Installation directions for Snow Leopard (106)
-
- iOS - Synchronize iPhoneiPad
-
- Synchronizing the Calendar
- Synchronizing the Address book
- Troubleshooting
-
- Native Media Player Support
- Version Control
- Indices and tables
- Index
-

ownCloud User Manual Release 45
72 The bookmarklet
The creator of this app understand that people wonrsquot come open the ownCloud page to add the bookmark when thesee a cool site This is why they have made this cool ldquobookmarkletrdquo
A bookmarklet is small button that you can drag and drop in your bookmarks The next time you see a cool new sitepress on this special bookmark it will add the site to your ownCloud bookmarks
To find this bookmark go to your personnal preference and search for the ldquoBookmarkletrdquo item
24 Chapter 7 Using the Bookmarks App
CHAPTER
EIGHT
DESKTOP SYNCHRONISATION
For synchronizing files with your desktop computer we recommend using the ownCloud Client for Windows MacOS X and Linux Its usage is documented separately in the ownCloud Desktop Client Manual
Furthermore It is possible to synchronize your ownCloud calendar and address book with a variety of different oper-ating systems and devices It is also possible to mount your ownCloud storage via WebDAV which is also documentedin the next chapters
25
ownCloud User Manual Release 45
26 Chapter 8 Desktop Synchronisation
CHAPTER
NINE
SYNCHRONIZING WITH KDE SC
From KDE SC 48 and forward setting up ownCloud is very easyFrom System Settings Personal InformationAkonadiResources Configuration select DAV Groupware resource
27
ownCloud User Manual Release 45
Enter your ownCloud username and password and click ldquoNextrdquo
Select ownCloud in the drop down list and click ldquoNextrdquo
28 Chapter 9 Synchronizing with KDE SC
ownCloud User Manual Release 45
Enter the host name and installation path If you do not use SSL remember to de-select ldquoUse secure connectionrdquo
Test the connection If everything went well you should see a message like the one below
29
ownCloud User Manual Release 45
Click ldquoFinishrdquo and you will be able to change the display name and refresh interval
Now you should see the Akonadi resource doing the first synchronization
You can find the Contacts and Calendars in Kontact (or KOrganizerKAddressbook if you run the programs separately)
30 Chapter 9 Synchronizing with KDE SC
ownCloud User Manual Release 45
31
ownCloud User Manual Release 45
32 Chapter 9 Synchronizing with KDE SC
CHAPTER
TEN
SYNCHRONIZING WITH OS X
101 Setup synchronisation with Mountain Lion (108)
Note Although these steps belong to Mountain Lion (108) they should be similar with Lion (107)
Open the System Preferences choose Mail Contacts amp Calendars and scroll down to select Add Other Account
33
ownCloud User Manual Release 45
1011 Synchronising the Calendar
Select Add a CalDAV account
Enter your ownCloud-username your password and the full URL-path to your ownCloud-installationADDRESSremotephpcaldavprincipalsUSERNAME (Replace ADDRESS and USERNAME)
1012 Synchronising the Addressbook
Select Add a CardDAV account
34 Chapter 10 Synchronizing with OS X
ownCloud User Manual Release 45
Enter your ownCloud-username your password and the full URL-path to your ownCloud-installationADDRESSremotephpcarddavprincipalsUSERNAME (Replace ADDRESS and USERNAME notethe url is slightly different to the URL in the previous step)
102 Installation directions for Snow Leopard (106)
While OS X Lion and Mountain Lion work fine OS X Snow Leopard (106) and older needs some fiddling to workA user contributed the following
1 Make sure Addressbook is not running If it is select the windows and press Command + Q to terminate it
2 Navigate to UsersYOUR_USERNAMELibraryApplication SupportAddressBookSourcesIf you have all ready some kind of address book setup it is likely you will see some folders named like thisBEA92826-FBF3-4E53-B5C6-ED7C2B454430 Note down what folders there are now and leave thewindow open
3 Open addressbook and try to add a new CardDav addressbook At this point it does not matter what informationyou enter It will come up with the same error message you mentioned before when you click ldquoCreaterdquo Ignoreit and click ldquoCreaterdquo again A non-functional address book will be added
4 Close Address-Book again using Command + Q
102 Installation directions for Snow Leopard (106) 35
ownCloud User Manual Release 45
5 Go back to the folder window from step 2 You will now see a newly created folder with another long string asits name
6 Navigate to the newly created folder and edit the Configurationplist with your favorite text editor
7 Search for a section looking like this
ltkeygtservernameltkeygt ltstringgthttp0(null)ltstringgtltkeygtusernameltkeygt ltstringgtWhatever_you_entered_beforeltstringgt
8 Make it look like this Please note the 80 after YOUR_DOMAIN it is important
ltkeygtservernameltkey ltstringgthttpYOUR_DOMAIN80owncloudremotephpcarddavprincipalsusernameltstringgtltkeygtusernameltkey ltstringgtusernameltstringgt
9 Save the file and open Address Book again It will not work yet
10 Open the preferences for your ownCloud CardDAV-Account and enter your password
11 You may have to restart Address Book once more After this it should work
There is also an easy HOWTO in the forum
36 Chapter 10 Synchronizing with OS X
CHAPTER
ELEVEN
IOS - SYNCHRONIZE IPHONEIPAD
111 Synchronizing the Calendar
1 Open the settings application
2 Select Mail Contacts Calendars
3 Select Add Account
4 Select Other as account type
5 Select Add CalDAV account
6 For server type ADDRESSremotephpcaldavprincipalsusername (Important Donrsquot includehttp or https)
7 Enter your username and password
8 Select Next
9 If your server does not support SSL a warning will be displayed Select Continue
10 If the iPhone is unable to verify the account information read the Troubleshooting paragraph on this page Ifthat doesnrsquot help try to turn off SSL (not recommended)
bull Select OK
bull Select advanced settings
bull Make sure Use SSL is set to OFF
bull Change port to 80
bull Go back to account information and hit Save
Your calendar should now be visible in the Calendar application (may take a few moments)
112 Synchronizing the Address book
1 Open the settings application
2 Select Mail Contacts Calendars
3 Select Add Account
4 Select Other as account type
5 Select Add CardDAV account
37
ownCloud User Manual Release 45
6 For server type ADDRESSremotephpcarddavprincipalsusername (Important Donrsquot includehttp or https)
7 Enter your username and password
8 Select Next
9 If your server does not support SSL a warning will be displayed Select Continue
10 If the iPhone is unable to verify the account information read the Troubleshooting paragraph on this page Ifthat doesnrsquot help try to turn off SSL (not recommended)
bull Select OK
bull Select advanced settings
bull Make sure Use SSL is set to OFF
bull Change port to 80
bull Go back to account information and hit Save
Now should now find your contacts in the address book of your iPhone (may take a few moments)
113 Troubleshooting
1 Check that you didnrsquot include http or https in the server address
2 Depending on your server setup the username-part of the server-address maybe case sensitive So for user Username the server-address may needto be ADDRESSremotephpcaldavprincipalsUsername instead ofADDRESSremotephpcaldavprincipalsusername
3 If you need to change the server-address and want to use SSL yoursquoll have to cancel the setup process and enteryour data again from the very beginning as iOS would prepend https to the server-address automatically
4 Problems have been reported for CardDAV and iOS 4X A possible solution is at the forum
38 Chapter 11 iOS - Synchronize iPhoneiPad
CHAPTER
TWELVE
NATIVE MEDIA PLAYER SUPPORT
You can access your music stored in ownCloud with every Ampache-compatible media player You can find theURL for your specific ownCloud installation in your personal settings or replace ADDRESS with the URL of yourownCloud installation yourself
Ampache-URL httpADDRESSappsmedia
Ampache-compatible players that work with ownCloud include
bull amaroK standard KDE music player
bull tomahawk cross platform player
bull justplayer music player for android
You can find more information about Ampache and other players at the Ampache wikipedia article
The current maintainer of the Media Player is Robin Appelman
39
ownCloud User Manual Release 45
40 Chapter 12 Native Media Player Support
CHAPTER
THIRTEEN
VERSION CONTROL
ownCloud supports simple version control for files Versioning is enabled by default and creates backups of fileswhich are accessible via the history tab This tab also links to the history page where you can roll back a file toany previous versionChanges made at intervals greater than two minutes are saved in data[user]versions and madeaccessible using the above pages
41
ownCloud User Manual Release 45
42 Chapter 13 Version Control
CHAPTER
FOURTEEN
INDICES AND TABLES
bull genindex
43
ownCloud User Manual Release 45
44 Chapter 14 Indices and tables
INDEX
RRFC
RFC 2518 5
45
- Introduction
- The ownCloud Web Interface
-
- Overview
-
- Mounting ownCloud via WebDAV
-
- Windows
- Mac OS X
- Linux
-
- Accessing your Files
-
- Desktop
- Mobile
-
- Calendars
-
- Creating a calendar
- Synchronising Calendars with CalDav
- Creating events
- Exporting Importing events
- Why is the calendar app asking for my current location
-
- Using the Contacts App
-
- Adding contacts
- Creating new address books
- Keeping your address book in sync
-
- Using the Bookmarks App
-
- The main interface
- The bookmarklet
-
- Desktop Synchronisation
- Synchronizing with KDE SC
- Synchronizing with OS X
-
- Setup synchronisation with Mountain Lion (108)
- Installation directions for Snow Leopard (106)
-
- iOS - Synchronize iPhoneiPad
-
- Synchronizing the Calendar
- Synchronizing the Address book
- Troubleshooting
-
- Native Media Player Support
- Version Control
- Indices and tables
- Index
-

CHAPTER
EIGHT
DESKTOP SYNCHRONISATION
For synchronizing files with your desktop computer we recommend using the ownCloud Client for Windows MacOS X and Linux Its usage is documented separately in the ownCloud Desktop Client Manual
Furthermore It is possible to synchronize your ownCloud calendar and address book with a variety of different oper-ating systems and devices It is also possible to mount your ownCloud storage via WebDAV which is also documentedin the next chapters
25
ownCloud User Manual Release 45
26 Chapter 8 Desktop Synchronisation
CHAPTER
NINE
SYNCHRONIZING WITH KDE SC
From KDE SC 48 and forward setting up ownCloud is very easyFrom System Settings Personal InformationAkonadiResources Configuration select DAV Groupware resource
27
ownCloud User Manual Release 45
Enter your ownCloud username and password and click ldquoNextrdquo
Select ownCloud in the drop down list and click ldquoNextrdquo
28 Chapter 9 Synchronizing with KDE SC
ownCloud User Manual Release 45
Enter the host name and installation path If you do not use SSL remember to de-select ldquoUse secure connectionrdquo
Test the connection If everything went well you should see a message like the one below
29
ownCloud User Manual Release 45
Click ldquoFinishrdquo and you will be able to change the display name and refresh interval
Now you should see the Akonadi resource doing the first synchronization
You can find the Contacts and Calendars in Kontact (or KOrganizerKAddressbook if you run the programs separately)
30 Chapter 9 Synchronizing with KDE SC
ownCloud User Manual Release 45
31
ownCloud User Manual Release 45
32 Chapter 9 Synchronizing with KDE SC
CHAPTER
TEN
SYNCHRONIZING WITH OS X
101 Setup synchronisation with Mountain Lion (108)
Note Although these steps belong to Mountain Lion (108) they should be similar with Lion (107)
Open the System Preferences choose Mail Contacts amp Calendars and scroll down to select Add Other Account
33
ownCloud User Manual Release 45
1011 Synchronising the Calendar
Select Add a CalDAV account
Enter your ownCloud-username your password and the full URL-path to your ownCloud-installationADDRESSremotephpcaldavprincipalsUSERNAME (Replace ADDRESS and USERNAME)
1012 Synchronising the Addressbook
Select Add a CardDAV account
34 Chapter 10 Synchronizing with OS X
ownCloud User Manual Release 45
Enter your ownCloud-username your password and the full URL-path to your ownCloud-installationADDRESSremotephpcarddavprincipalsUSERNAME (Replace ADDRESS and USERNAME notethe url is slightly different to the URL in the previous step)
102 Installation directions for Snow Leopard (106)
While OS X Lion and Mountain Lion work fine OS X Snow Leopard (106) and older needs some fiddling to workA user contributed the following
1 Make sure Addressbook is not running If it is select the windows and press Command + Q to terminate it
2 Navigate to UsersYOUR_USERNAMELibraryApplication SupportAddressBookSourcesIf you have all ready some kind of address book setup it is likely you will see some folders named like thisBEA92826-FBF3-4E53-B5C6-ED7C2B454430 Note down what folders there are now and leave thewindow open
3 Open addressbook and try to add a new CardDav addressbook At this point it does not matter what informationyou enter It will come up with the same error message you mentioned before when you click ldquoCreaterdquo Ignoreit and click ldquoCreaterdquo again A non-functional address book will be added
4 Close Address-Book again using Command + Q
102 Installation directions for Snow Leopard (106) 35
ownCloud User Manual Release 45
5 Go back to the folder window from step 2 You will now see a newly created folder with another long string asits name
6 Navigate to the newly created folder and edit the Configurationplist with your favorite text editor
7 Search for a section looking like this
ltkeygtservernameltkeygt ltstringgthttp0(null)ltstringgtltkeygtusernameltkeygt ltstringgtWhatever_you_entered_beforeltstringgt
8 Make it look like this Please note the 80 after YOUR_DOMAIN it is important
ltkeygtservernameltkey ltstringgthttpYOUR_DOMAIN80owncloudremotephpcarddavprincipalsusernameltstringgtltkeygtusernameltkey ltstringgtusernameltstringgt
9 Save the file and open Address Book again It will not work yet
10 Open the preferences for your ownCloud CardDAV-Account and enter your password
11 You may have to restart Address Book once more After this it should work
There is also an easy HOWTO in the forum
36 Chapter 10 Synchronizing with OS X
CHAPTER
ELEVEN
IOS - SYNCHRONIZE IPHONEIPAD
111 Synchronizing the Calendar
1 Open the settings application
2 Select Mail Contacts Calendars
3 Select Add Account
4 Select Other as account type
5 Select Add CalDAV account
6 For server type ADDRESSremotephpcaldavprincipalsusername (Important Donrsquot includehttp or https)
7 Enter your username and password
8 Select Next
9 If your server does not support SSL a warning will be displayed Select Continue
10 If the iPhone is unable to verify the account information read the Troubleshooting paragraph on this page Ifthat doesnrsquot help try to turn off SSL (not recommended)
bull Select OK
bull Select advanced settings
bull Make sure Use SSL is set to OFF
bull Change port to 80
bull Go back to account information and hit Save
Your calendar should now be visible in the Calendar application (may take a few moments)
112 Synchronizing the Address book
1 Open the settings application
2 Select Mail Contacts Calendars
3 Select Add Account
4 Select Other as account type
5 Select Add CardDAV account
37
ownCloud User Manual Release 45
6 For server type ADDRESSremotephpcarddavprincipalsusername (Important Donrsquot includehttp or https)
7 Enter your username and password
8 Select Next
9 If your server does not support SSL a warning will be displayed Select Continue
10 If the iPhone is unable to verify the account information read the Troubleshooting paragraph on this page Ifthat doesnrsquot help try to turn off SSL (not recommended)
bull Select OK
bull Select advanced settings
bull Make sure Use SSL is set to OFF
bull Change port to 80
bull Go back to account information and hit Save
Now should now find your contacts in the address book of your iPhone (may take a few moments)
113 Troubleshooting
1 Check that you didnrsquot include http or https in the server address
2 Depending on your server setup the username-part of the server-address maybe case sensitive So for user Username the server-address may needto be ADDRESSremotephpcaldavprincipalsUsername instead ofADDRESSremotephpcaldavprincipalsusername
3 If you need to change the server-address and want to use SSL yoursquoll have to cancel the setup process and enteryour data again from the very beginning as iOS would prepend https to the server-address automatically
4 Problems have been reported for CardDAV and iOS 4X A possible solution is at the forum
38 Chapter 11 iOS - Synchronize iPhoneiPad
CHAPTER
TWELVE
NATIVE MEDIA PLAYER SUPPORT
You can access your music stored in ownCloud with every Ampache-compatible media player You can find theURL for your specific ownCloud installation in your personal settings or replace ADDRESS with the URL of yourownCloud installation yourself
Ampache-URL httpADDRESSappsmedia
Ampache-compatible players that work with ownCloud include
bull amaroK standard KDE music player
bull tomahawk cross platform player
bull justplayer music player for android
You can find more information about Ampache and other players at the Ampache wikipedia article
The current maintainer of the Media Player is Robin Appelman
39
ownCloud User Manual Release 45
40 Chapter 12 Native Media Player Support
CHAPTER
THIRTEEN
VERSION CONTROL
ownCloud supports simple version control for files Versioning is enabled by default and creates backups of fileswhich are accessible via the history tab This tab also links to the history page where you can roll back a file toany previous versionChanges made at intervals greater than two minutes are saved in data[user]versions and madeaccessible using the above pages
41
ownCloud User Manual Release 45
42 Chapter 13 Version Control
CHAPTER
FOURTEEN
INDICES AND TABLES
bull genindex
43
ownCloud User Manual Release 45
44 Chapter 14 Indices and tables
INDEX
RRFC
RFC 2518 5
45
- Introduction
- The ownCloud Web Interface
-
- Overview
-
- Mounting ownCloud via WebDAV
-
- Windows
- Mac OS X
- Linux
-
- Accessing your Files
-
- Desktop
- Mobile
-
- Calendars
-
- Creating a calendar
- Synchronising Calendars with CalDav
- Creating events
- Exporting Importing events
- Why is the calendar app asking for my current location
-
- Using the Contacts App
-
- Adding contacts
- Creating new address books
- Keeping your address book in sync
-
- Using the Bookmarks App
-
- The main interface
- The bookmarklet
-
- Desktop Synchronisation
- Synchronizing with KDE SC
- Synchronizing with OS X
-
- Setup synchronisation with Mountain Lion (108)
- Installation directions for Snow Leopard (106)
-
- iOS - Synchronize iPhoneiPad
-
- Synchronizing the Calendar
- Synchronizing the Address book
- Troubleshooting
-
- Native Media Player Support
- Version Control
- Indices and tables
- Index
-

ownCloud User Manual Release 45
26 Chapter 8 Desktop Synchronisation
CHAPTER
NINE
SYNCHRONIZING WITH KDE SC
From KDE SC 48 and forward setting up ownCloud is very easyFrom System Settings Personal InformationAkonadiResources Configuration select DAV Groupware resource
27
ownCloud User Manual Release 45
Enter your ownCloud username and password and click ldquoNextrdquo
Select ownCloud in the drop down list and click ldquoNextrdquo
28 Chapter 9 Synchronizing with KDE SC
ownCloud User Manual Release 45
Enter the host name and installation path If you do not use SSL remember to de-select ldquoUse secure connectionrdquo
Test the connection If everything went well you should see a message like the one below
29
ownCloud User Manual Release 45
Click ldquoFinishrdquo and you will be able to change the display name and refresh interval
Now you should see the Akonadi resource doing the first synchronization
You can find the Contacts and Calendars in Kontact (or KOrganizerKAddressbook if you run the programs separately)
30 Chapter 9 Synchronizing with KDE SC
ownCloud User Manual Release 45
31
ownCloud User Manual Release 45
32 Chapter 9 Synchronizing with KDE SC
CHAPTER
TEN
SYNCHRONIZING WITH OS X
101 Setup synchronisation with Mountain Lion (108)
Note Although these steps belong to Mountain Lion (108) they should be similar with Lion (107)
Open the System Preferences choose Mail Contacts amp Calendars and scroll down to select Add Other Account
33
ownCloud User Manual Release 45
1011 Synchronising the Calendar
Select Add a CalDAV account
Enter your ownCloud-username your password and the full URL-path to your ownCloud-installationADDRESSremotephpcaldavprincipalsUSERNAME (Replace ADDRESS and USERNAME)
1012 Synchronising the Addressbook
Select Add a CardDAV account
34 Chapter 10 Synchronizing with OS X
ownCloud User Manual Release 45
Enter your ownCloud-username your password and the full URL-path to your ownCloud-installationADDRESSremotephpcarddavprincipalsUSERNAME (Replace ADDRESS and USERNAME notethe url is slightly different to the URL in the previous step)
102 Installation directions for Snow Leopard (106)
While OS X Lion and Mountain Lion work fine OS X Snow Leopard (106) and older needs some fiddling to workA user contributed the following
1 Make sure Addressbook is not running If it is select the windows and press Command + Q to terminate it
2 Navigate to UsersYOUR_USERNAMELibraryApplication SupportAddressBookSourcesIf you have all ready some kind of address book setup it is likely you will see some folders named like thisBEA92826-FBF3-4E53-B5C6-ED7C2B454430 Note down what folders there are now and leave thewindow open
3 Open addressbook and try to add a new CardDav addressbook At this point it does not matter what informationyou enter It will come up with the same error message you mentioned before when you click ldquoCreaterdquo Ignoreit and click ldquoCreaterdquo again A non-functional address book will be added
4 Close Address-Book again using Command + Q
102 Installation directions for Snow Leopard (106) 35
ownCloud User Manual Release 45
5 Go back to the folder window from step 2 You will now see a newly created folder with another long string asits name
6 Navigate to the newly created folder and edit the Configurationplist with your favorite text editor
7 Search for a section looking like this
ltkeygtservernameltkeygt ltstringgthttp0(null)ltstringgtltkeygtusernameltkeygt ltstringgtWhatever_you_entered_beforeltstringgt
8 Make it look like this Please note the 80 after YOUR_DOMAIN it is important
ltkeygtservernameltkey ltstringgthttpYOUR_DOMAIN80owncloudremotephpcarddavprincipalsusernameltstringgtltkeygtusernameltkey ltstringgtusernameltstringgt
9 Save the file and open Address Book again It will not work yet
10 Open the preferences for your ownCloud CardDAV-Account and enter your password
11 You may have to restart Address Book once more After this it should work
There is also an easy HOWTO in the forum
36 Chapter 10 Synchronizing with OS X
CHAPTER
ELEVEN
IOS - SYNCHRONIZE IPHONEIPAD
111 Synchronizing the Calendar
1 Open the settings application
2 Select Mail Contacts Calendars
3 Select Add Account
4 Select Other as account type
5 Select Add CalDAV account
6 For server type ADDRESSremotephpcaldavprincipalsusername (Important Donrsquot includehttp or https)
7 Enter your username and password
8 Select Next
9 If your server does not support SSL a warning will be displayed Select Continue
10 If the iPhone is unable to verify the account information read the Troubleshooting paragraph on this page Ifthat doesnrsquot help try to turn off SSL (not recommended)
bull Select OK
bull Select advanced settings
bull Make sure Use SSL is set to OFF
bull Change port to 80
bull Go back to account information and hit Save
Your calendar should now be visible in the Calendar application (may take a few moments)
112 Synchronizing the Address book
1 Open the settings application
2 Select Mail Contacts Calendars
3 Select Add Account
4 Select Other as account type
5 Select Add CardDAV account
37
ownCloud User Manual Release 45
6 For server type ADDRESSremotephpcarddavprincipalsusername (Important Donrsquot includehttp or https)
7 Enter your username and password
8 Select Next
9 If your server does not support SSL a warning will be displayed Select Continue
10 If the iPhone is unable to verify the account information read the Troubleshooting paragraph on this page Ifthat doesnrsquot help try to turn off SSL (not recommended)
bull Select OK
bull Select advanced settings
bull Make sure Use SSL is set to OFF
bull Change port to 80
bull Go back to account information and hit Save
Now should now find your contacts in the address book of your iPhone (may take a few moments)
113 Troubleshooting
1 Check that you didnrsquot include http or https in the server address
2 Depending on your server setup the username-part of the server-address maybe case sensitive So for user Username the server-address may needto be ADDRESSremotephpcaldavprincipalsUsername instead ofADDRESSremotephpcaldavprincipalsusername
3 If you need to change the server-address and want to use SSL yoursquoll have to cancel the setup process and enteryour data again from the very beginning as iOS would prepend https to the server-address automatically
4 Problems have been reported for CardDAV and iOS 4X A possible solution is at the forum
38 Chapter 11 iOS - Synchronize iPhoneiPad
CHAPTER
TWELVE
NATIVE MEDIA PLAYER SUPPORT
You can access your music stored in ownCloud with every Ampache-compatible media player You can find theURL for your specific ownCloud installation in your personal settings or replace ADDRESS with the URL of yourownCloud installation yourself
Ampache-URL httpADDRESSappsmedia
Ampache-compatible players that work with ownCloud include
bull amaroK standard KDE music player
bull tomahawk cross platform player
bull justplayer music player for android
You can find more information about Ampache and other players at the Ampache wikipedia article
The current maintainer of the Media Player is Robin Appelman
39
ownCloud User Manual Release 45
40 Chapter 12 Native Media Player Support
CHAPTER
THIRTEEN
VERSION CONTROL
ownCloud supports simple version control for files Versioning is enabled by default and creates backups of fileswhich are accessible via the history tab This tab also links to the history page where you can roll back a file toany previous versionChanges made at intervals greater than two minutes are saved in data[user]versions and madeaccessible using the above pages
41
ownCloud User Manual Release 45
42 Chapter 13 Version Control
CHAPTER
FOURTEEN
INDICES AND TABLES
bull genindex
43
ownCloud User Manual Release 45
44 Chapter 14 Indices and tables
INDEX
RRFC
RFC 2518 5
45
- Introduction
- The ownCloud Web Interface
-
- Overview
-
- Mounting ownCloud via WebDAV
-
- Windows
- Mac OS X
- Linux
-
- Accessing your Files
-
- Desktop
- Mobile
-
- Calendars
-
- Creating a calendar
- Synchronising Calendars with CalDav
- Creating events
- Exporting Importing events
- Why is the calendar app asking for my current location
-
- Using the Contacts App
-
- Adding contacts
- Creating new address books
- Keeping your address book in sync
-
- Using the Bookmarks App
-
- The main interface
- The bookmarklet
-
- Desktop Synchronisation
- Synchronizing with KDE SC
- Synchronizing with OS X
-
- Setup synchronisation with Mountain Lion (108)
- Installation directions for Snow Leopard (106)
-
- iOS - Synchronize iPhoneiPad
-
- Synchronizing the Calendar
- Synchronizing the Address book
- Troubleshooting
-
- Native Media Player Support
- Version Control
- Indices and tables
- Index
-
CHAPTER
NINE
SYNCHRONIZING WITH KDE SC
From KDE SC 48 and forward setting up ownCloud is very easyFrom System Settings Personal InformationAkonadiResources Configuration select DAV Groupware resource
27
ownCloud User Manual Release 45
Enter your ownCloud username and password and click ldquoNextrdquo
Select ownCloud in the drop down list and click ldquoNextrdquo
28 Chapter 9 Synchronizing with KDE SC
ownCloud User Manual Release 45
Enter the host name and installation path If you do not use SSL remember to de-select ldquoUse secure connectionrdquo
Test the connection If everything went well you should see a message like the one below
29
ownCloud User Manual Release 45
Click ldquoFinishrdquo and you will be able to change the display name and refresh interval
Now you should see the Akonadi resource doing the first synchronization
You can find the Contacts and Calendars in Kontact (or KOrganizerKAddressbook if you run the programs separately)
30 Chapter 9 Synchronizing with KDE SC
ownCloud User Manual Release 45
31
ownCloud User Manual Release 45
32 Chapter 9 Synchronizing with KDE SC
CHAPTER
TEN
SYNCHRONIZING WITH OS X
101 Setup synchronisation with Mountain Lion (108)
Note Although these steps belong to Mountain Lion (108) they should be similar with Lion (107)
Open the System Preferences choose Mail Contacts amp Calendars and scroll down to select Add Other Account
33
ownCloud User Manual Release 45
1011 Synchronising the Calendar
Select Add a CalDAV account
Enter your ownCloud-username your password and the full URL-path to your ownCloud-installationADDRESSremotephpcaldavprincipalsUSERNAME (Replace ADDRESS and USERNAME)
1012 Synchronising the Addressbook
Select Add a CardDAV account
34 Chapter 10 Synchronizing with OS X
ownCloud User Manual Release 45
Enter your ownCloud-username your password and the full URL-path to your ownCloud-installationADDRESSremotephpcarddavprincipalsUSERNAME (Replace ADDRESS and USERNAME notethe url is slightly different to the URL in the previous step)
102 Installation directions for Snow Leopard (106)
While OS X Lion and Mountain Lion work fine OS X Snow Leopard (106) and older needs some fiddling to workA user contributed the following
1 Make sure Addressbook is not running If it is select the windows and press Command + Q to terminate it
2 Navigate to UsersYOUR_USERNAMELibraryApplication SupportAddressBookSourcesIf you have all ready some kind of address book setup it is likely you will see some folders named like thisBEA92826-FBF3-4E53-B5C6-ED7C2B454430 Note down what folders there are now and leave thewindow open
3 Open addressbook and try to add a new CardDav addressbook At this point it does not matter what informationyou enter It will come up with the same error message you mentioned before when you click ldquoCreaterdquo Ignoreit and click ldquoCreaterdquo again A non-functional address book will be added
4 Close Address-Book again using Command + Q
102 Installation directions for Snow Leopard (106) 35
ownCloud User Manual Release 45
5 Go back to the folder window from step 2 You will now see a newly created folder with another long string asits name
6 Navigate to the newly created folder and edit the Configurationplist with your favorite text editor
7 Search for a section looking like this
ltkeygtservernameltkeygt ltstringgthttp0(null)ltstringgtltkeygtusernameltkeygt ltstringgtWhatever_you_entered_beforeltstringgt
8 Make it look like this Please note the 80 after YOUR_DOMAIN it is important
ltkeygtservernameltkey ltstringgthttpYOUR_DOMAIN80owncloudremotephpcarddavprincipalsusernameltstringgtltkeygtusernameltkey ltstringgtusernameltstringgt
9 Save the file and open Address Book again It will not work yet
10 Open the preferences for your ownCloud CardDAV-Account and enter your password
11 You may have to restart Address Book once more After this it should work
There is also an easy HOWTO in the forum
36 Chapter 10 Synchronizing with OS X
CHAPTER
ELEVEN
IOS - SYNCHRONIZE IPHONEIPAD
111 Synchronizing the Calendar
1 Open the settings application
2 Select Mail Contacts Calendars
3 Select Add Account
4 Select Other as account type
5 Select Add CalDAV account
6 For server type ADDRESSremotephpcaldavprincipalsusername (Important Donrsquot includehttp or https)
7 Enter your username and password
8 Select Next
9 If your server does not support SSL a warning will be displayed Select Continue
10 If the iPhone is unable to verify the account information read the Troubleshooting paragraph on this page Ifthat doesnrsquot help try to turn off SSL (not recommended)
bull Select OK
bull Select advanced settings
bull Make sure Use SSL is set to OFF
bull Change port to 80
bull Go back to account information and hit Save
Your calendar should now be visible in the Calendar application (may take a few moments)
112 Synchronizing the Address book
1 Open the settings application
2 Select Mail Contacts Calendars
3 Select Add Account
4 Select Other as account type
5 Select Add CardDAV account
37
ownCloud User Manual Release 45
6 For server type ADDRESSremotephpcarddavprincipalsusername (Important Donrsquot includehttp or https)
7 Enter your username and password
8 Select Next
9 If your server does not support SSL a warning will be displayed Select Continue
10 If the iPhone is unable to verify the account information read the Troubleshooting paragraph on this page Ifthat doesnrsquot help try to turn off SSL (not recommended)
bull Select OK
bull Select advanced settings
bull Make sure Use SSL is set to OFF
bull Change port to 80
bull Go back to account information and hit Save
Now should now find your contacts in the address book of your iPhone (may take a few moments)
113 Troubleshooting
1 Check that you didnrsquot include http or https in the server address
2 Depending on your server setup the username-part of the server-address maybe case sensitive So for user Username the server-address may needto be ADDRESSremotephpcaldavprincipalsUsername instead ofADDRESSremotephpcaldavprincipalsusername
3 If you need to change the server-address and want to use SSL yoursquoll have to cancel the setup process and enteryour data again from the very beginning as iOS would prepend https to the server-address automatically
4 Problems have been reported for CardDAV and iOS 4X A possible solution is at the forum
38 Chapter 11 iOS - Synchronize iPhoneiPad
CHAPTER
TWELVE
NATIVE MEDIA PLAYER SUPPORT
You can access your music stored in ownCloud with every Ampache-compatible media player You can find theURL for your specific ownCloud installation in your personal settings or replace ADDRESS with the URL of yourownCloud installation yourself
Ampache-URL httpADDRESSappsmedia
Ampache-compatible players that work with ownCloud include
bull amaroK standard KDE music player
bull tomahawk cross platform player
bull justplayer music player for android
You can find more information about Ampache and other players at the Ampache wikipedia article
The current maintainer of the Media Player is Robin Appelman
39
ownCloud User Manual Release 45
40 Chapter 12 Native Media Player Support
CHAPTER
THIRTEEN
VERSION CONTROL
ownCloud supports simple version control for files Versioning is enabled by default and creates backups of fileswhich are accessible via the history tab This tab also links to the history page where you can roll back a file toany previous versionChanges made at intervals greater than two minutes are saved in data[user]versions and madeaccessible using the above pages
41
ownCloud User Manual Release 45
42 Chapter 13 Version Control
CHAPTER
FOURTEEN
INDICES AND TABLES
bull genindex
43
ownCloud User Manual Release 45
44 Chapter 14 Indices and tables
INDEX
RRFC
RFC 2518 5
45
- Introduction
- The ownCloud Web Interface
-
- Overview
-
- Mounting ownCloud via WebDAV
-
- Windows
- Mac OS X
- Linux
-
- Accessing your Files
-
- Desktop
- Mobile
-
- Calendars
-
- Creating a calendar
- Synchronising Calendars with CalDav
- Creating events
- Exporting Importing events
- Why is the calendar app asking for my current location
-
- Using the Contacts App
-
- Adding contacts
- Creating new address books
- Keeping your address book in sync
-
- Using the Bookmarks App
-
- The main interface
- The bookmarklet
-
- Desktop Synchronisation
- Synchronizing with KDE SC
- Synchronizing with OS X
-
- Setup synchronisation with Mountain Lion (108)
- Installation directions for Snow Leopard (106)
-
- iOS - Synchronize iPhoneiPad
-
- Synchronizing the Calendar
- Synchronizing the Address book
- Troubleshooting
-
- Native Media Player Support
- Version Control
- Indices and tables
- Index
-

ownCloud User Manual Release 45
32 Chapter 9 Synchronizing with KDE SC
CHAPTER
TEN
SYNCHRONIZING WITH OS X
101 Setup synchronisation with Mountain Lion (108)
Note Although these steps belong to Mountain Lion (108) they should be similar with Lion (107)
Open the System Preferences choose Mail Contacts amp Calendars and scroll down to select Add Other Account
33
ownCloud User Manual Release 45
1011 Synchronising the Calendar
Select Add a CalDAV account
Enter your ownCloud-username your password and the full URL-path to your ownCloud-installationADDRESSremotephpcaldavprincipalsUSERNAME (Replace ADDRESS and USERNAME)
1012 Synchronising the Addressbook
Select Add a CardDAV account
34 Chapter 10 Synchronizing with OS X
ownCloud User Manual Release 45
Enter your ownCloud-username your password and the full URL-path to your ownCloud-installationADDRESSremotephpcarddavprincipalsUSERNAME (Replace ADDRESS and USERNAME notethe url is slightly different to the URL in the previous step)
102 Installation directions for Snow Leopard (106)
While OS X Lion and Mountain Lion work fine OS X Snow Leopard (106) and older needs some fiddling to workA user contributed the following
1 Make sure Addressbook is not running If it is select the windows and press Command + Q to terminate it
2 Navigate to UsersYOUR_USERNAMELibraryApplication SupportAddressBookSourcesIf you have all ready some kind of address book setup it is likely you will see some folders named like thisBEA92826-FBF3-4E53-B5C6-ED7C2B454430 Note down what folders there are now and leave thewindow open
3 Open addressbook and try to add a new CardDav addressbook At this point it does not matter what informationyou enter It will come up with the same error message you mentioned before when you click ldquoCreaterdquo Ignoreit and click ldquoCreaterdquo again A non-functional address book will be added
4 Close Address-Book again using Command + Q
102 Installation directions for Snow Leopard (106) 35
ownCloud User Manual Release 45
5 Go back to the folder window from step 2 You will now see a newly created folder with another long string asits name
6 Navigate to the newly created folder and edit the Configurationplist with your favorite text editor
7 Search for a section looking like this
ltkeygtservernameltkeygt ltstringgthttp0(null)ltstringgtltkeygtusernameltkeygt ltstringgtWhatever_you_entered_beforeltstringgt
8 Make it look like this Please note the 80 after YOUR_DOMAIN it is important
ltkeygtservernameltkey ltstringgthttpYOUR_DOMAIN80owncloudremotephpcarddavprincipalsusernameltstringgtltkeygtusernameltkey ltstringgtusernameltstringgt
9 Save the file and open Address Book again It will not work yet
10 Open the preferences for your ownCloud CardDAV-Account and enter your password
11 You may have to restart Address Book once more After this it should work
There is also an easy HOWTO in the forum
36 Chapter 10 Synchronizing with OS X
CHAPTER
ELEVEN
IOS - SYNCHRONIZE IPHONEIPAD
111 Synchronizing the Calendar
1 Open the settings application
2 Select Mail Contacts Calendars
3 Select Add Account
4 Select Other as account type
5 Select Add CalDAV account
6 For server type ADDRESSremotephpcaldavprincipalsusername (Important Donrsquot includehttp or https)
7 Enter your username and password
8 Select Next
9 If your server does not support SSL a warning will be displayed Select Continue
10 If the iPhone is unable to verify the account information read the Troubleshooting paragraph on this page Ifthat doesnrsquot help try to turn off SSL (not recommended)
bull Select OK
bull Select advanced settings
bull Make sure Use SSL is set to OFF
bull Change port to 80
bull Go back to account information and hit Save
Your calendar should now be visible in the Calendar application (may take a few moments)
112 Synchronizing the Address book
1 Open the settings application
2 Select Mail Contacts Calendars
3 Select Add Account
4 Select Other as account type
5 Select Add CardDAV account
37
ownCloud User Manual Release 45
6 For server type ADDRESSremotephpcarddavprincipalsusername (Important Donrsquot includehttp or https)
7 Enter your username and password
8 Select Next
9 If your server does not support SSL a warning will be displayed Select Continue
10 If the iPhone is unable to verify the account information read the Troubleshooting paragraph on this page Ifthat doesnrsquot help try to turn off SSL (not recommended)
bull Select OK
bull Select advanced settings
bull Make sure Use SSL is set to OFF
bull Change port to 80
bull Go back to account information and hit Save
Now should now find your contacts in the address book of your iPhone (may take a few moments)
113 Troubleshooting
1 Check that you didnrsquot include http or https in the server address
2 Depending on your server setup the username-part of the server-address maybe case sensitive So for user Username the server-address may needto be ADDRESSremotephpcaldavprincipalsUsername instead ofADDRESSremotephpcaldavprincipalsusername
3 If you need to change the server-address and want to use SSL yoursquoll have to cancel the setup process and enteryour data again from the very beginning as iOS would prepend https to the server-address automatically
4 Problems have been reported for CardDAV and iOS 4X A possible solution is at the forum
38 Chapter 11 iOS - Synchronize iPhoneiPad
CHAPTER
TWELVE
NATIVE MEDIA PLAYER SUPPORT
You can access your music stored in ownCloud with every Ampache-compatible media player You can find theURL for your specific ownCloud installation in your personal settings or replace ADDRESS with the URL of yourownCloud installation yourself
Ampache-URL httpADDRESSappsmedia
Ampache-compatible players that work with ownCloud include
bull amaroK standard KDE music player
bull tomahawk cross platform player
bull justplayer music player for android
You can find more information about Ampache and other players at the Ampache wikipedia article
The current maintainer of the Media Player is Robin Appelman
39
ownCloud User Manual Release 45
40 Chapter 12 Native Media Player Support
CHAPTER
THIRTEEN
VERSION CONTROL
ownCloud supports simple version control for files Versioning is enabled by default and creates backups of fileswhich are accessible via the history tab This tab also links to the history page where you can roll back a file toany previous versionChanges made at intervals greater than two minutes are saved in data[user]versions and madeaccessible using the above pages
41
ownCloud User Manual Release 45
42 Chapter 13 Version Control
CHAPTER
FOURTEEN
INDICES AND TABLES
bull genindex
43
ownCloud User Manual Release 45
44 Chapter 14 Indices and tables
INDEX
RRFC
RFC 2518 5
45
- Introduction
- The ownCloud Web Interface
-
- Overview
-
- Mounting ownCloud via WebDAV
-
- Windows
- Mac OS X
- Linux
-
- Accessing your Files
-
- Desktop
- Mobile
-
- Calendars
-
- Creating a calendar
- Synchronising Calendars with CalDav
- Creating events
- Exporting Importing events
- Why is the calendar app asking for my current location
-
- Using the Contacts App
-
- Adding contacts
- Creating new address books
- Keeping your address book in sync
-
- Using the Bookmarks App
-
- The main interface
- The bookmarklet
-
- Desktop Synchronisation
- Synchronizing with KDE SC
- Synchronizing with OS X
-
- Setup synchronisation with Mountain Lion (108)
- Installation directions for Snow Leopard (106)
-
- iOS - Synchronize iPhoneiPad
-
- Synchronizing the Calendar
- Synchronizing the Address book
- Troubleshooting
-
- Native Media Player Support
- Version Control
- Indices and tables
- Index
-

CHAPTER
TEN
SYNCHRONIZING WITH OS X
101 Setup synchronisation with Mountain Lion (108)
Note Although these steps belong to Mountain Lion (108) they should be similar with Lion (107)
Open the System Preferences choose Mail Contacts amp Calendars and scroll down to select Add Other Account
33
ownCloud User Manual Release 45
1011 Synchronising the Calendar
Select Add a CalDAV account
Enter your ownCloud-username your password and the full URL-path to your ownCloud-installationADDRESSremotephpcaldavprincipalsUSERNAME (Replace ADDRESS and USERNAME)
1012 Synchronising the Addressbook
Select Add a CardDAV account
34 Chapter 10 Synchronizing with OS X
ownCloud User Manual Release 45
Enter your ownCloud-username your password and the full URL-path to your ownCloud-installationADDRESSremotephpcarddavprincipalsUSERNAME (Replace ADDRESS and USERNAME notethe url is slightly different to the URL in the previous step)
102 Installation directions for Snow Leopard (106)
While OS X Lion and Mountain Lion work fine OS X Snow Leopard (106) and older needs some fiddling to workA user contributed the following
1 Make sure Addressbook is not running If it is select the windows and press Command + Q to terminate it
2 Navigate to UsersYOUR_USERNAMELibraryApplication SupportAddressBookSourcesIf you have all ready some kind of address book setup it is likely you will see some folders named like thisBEA92826-FBF3-4E53-B5C6-ED7C2B454430 Note down what folders there are now and leave thewindow open
3 Open addressbook and try to add a new CardDav addressbook At this point it does not matter what informationyou enter It will come up with the same error message you mentioned before when you click ldquoCreaterdquo Ignoreit and click ldquoCreaterdquo again A non-functional address book will be added
4 Close Address-Book again using Command + Q
102 Installation directions for Snow Leopard (106) 35
ownCloud User Manual Release 45
5 Go back to the folder window from step 2 You will now see a newly created folder with another long string asits name
6 Navigate to the newly created folder and edit the Configurationplist with your favorite text editor
7 Search for a section looking like this
ltkeygtservernameltkeygt ltstringgthttp0(null)ltstringgtltkeygtusernameltkeygt ltstringgtWhatever_you_entered_beforeltstringgt
8 Make it look like this Please note the 80 after YOUR_DOMAIN it is important
ltkeygtservernameltkey ltstringgthttpYOUR_DOMAIN80owncloudremotephpcarddavprincipalsusernameltstringgtltkeygtusernameltkey ltstringgtusernameltstringgt
9 Save the file and open Address Book again It will not work yet
10 Open the preferences for your ownCloud CardDAV-Account and enter your password
11 You may have to restart Address Book once more After this it should work
There is also an easy HOWTO in the forum
36 Chapter 10 Synchronizing with OS X
CHAPTER
ELEVEN
IOS - SYNCHRONIZE IPHONEIPAD
111 Synchronizing the Calendar
1 Open the settings application
2 Select Mail Contacts Calendars
3 Select Add Account
4 Select Other as account type
5 Select Add CalDAV account
6 For server type ADDRESSremotephpcaldavprincipalsusername (Important Donrsquot includehttp or https)
7 Enter your username and password
8 Select Next
9 If your server does not support SSL a warning will be displayed Select Continue
10 If the iPhone is unable to verify the account information read the Troubleshooting paragraph on this page Ifthat doesnrsquot help try to turn off SSL (not recommended)
bull Select OK
bull Select advanced settings
bull Make sure Use SSL is set to OFF
bull Change port to 80
bull Go back to account information and hit Save
Your calendar should now be visible in the Calendar application (may take a few moments)
112 Synchronizing the Address book
1 Open the settings application
2 Select Mail Contacts Calendars
3 Select Add Account
4 Select Other as account type
5 Select Add CardDAV account
37
ownCloud User Manual Release 45
6 For server type ADDRESSremotephpcarddavprincipalsusername (Important Donrsquot includehttp or https)
7 Enter your username and password
8 Select Next
9 If your server does not support SSL a warning will be displayed Select Continue
10 If the iPhone is unable to verify the account information read the Troubleshooting paragraph on this page Ifthat doesnrsquot help try to turn off SSL (not recommended)
bull Select OK
bull Select advanced settings
bull Make sure Use SSL is set to OFF
bull Change port to 80
bull Go back to account information and hit Save
Now should now find your contacts in the address book of your iPhone (may take a few moments)
113 Troubleshooting
1 Check that you didnrsquot include http or https in the server address
2 Depending on your server setup the username-part of the server-address maybe case sensitive So for user Username the server-address may needto be ADDRESSremotephpcaldavprincipalsUsername instead ofADDRESSremotephpcaldavprincipalsusername
3 If you need to change the server-address and want to use SSL yoursquoll have to cancel the setup process and enteryour data again from the very beginning as iOS would prepend https to the server-address automatically
4 Problems have been reported for CardDAV and iOS 4X A possible solution is at the forum
38 Chapter 11 iOS - Synchronize iPhoneiPad
CHAPTER
TWELVE
NATIVE MEDIA PLAYER SUPPORT
You can access your music stored in ownCloud with every Ampache-compatible media player You can find theURL for your specific ownCloud installation in your personal settings or replace ADDRESS with the URL of yourownCloud installation yourself
Ampache-URL httpADDRESSappsmedia
Ampache-compatible players that work with ownCloud include
bull amaroK standard KDE music player
bull tomahawk cross platform player
bull justplayer music player for android
You can find more information about Ampache and other players at the Ampache wikipedia article
The current maintainer of the Media Player is Robin Appelman
39
ownCloud User Manual Release 45
40 Chapter 12 Native Media Player Support
CHAPTER
THIRTEEN
VERSION CONTROL
ownCloud supports simple version control for files Versioning is enabled by default and creates backups of fileswhich are accessible via the history tab This tab also links to the history page where you can roll back a file toany previous versionChanges made at intervals greater than two minutes are saved in data[user]versions and madeaccessible using the above pages
41
ownCloud User Manual Release 45
42 Chapter 13 Version Control
CHAPTER
FOURTEEN
INDICES AND TABLES
bull genindex
43
ownCloud User Manual Release 45
44 Chapter 14 Indices and tables
INDEX
RRFC
RFC 2518 5
45
- Introduction
- The ownCloud Web Interface
-
- Overview
-
- Mounting ownCloud via WebDAV
-
- Windows
- Mac OS X
- Linux
-
- Accessing your Files
-
- Desktop
- Mobile
-
- Calendars
-
- Creating a calendar
- Synchronising Calendars with CalDav
- Creating events
- Exporting Importing events
- Why is the calendar app asking for my current location
-
- Using the Contacts App
-
- Adding contacts
- Creating new address books
- Keeping your address book in sync
-
- Using the Bookmarks App
-
- The main interface
- The bookmarklet
-
- Desktop Synchronisation
- Synchronizing with KDE SC
- Synchronizing with OS X
-
- Setup synchronisation with Mountain Lion (108)
- Installation directions for Snow Leopard (106)
-
- iOS - Synchronize iPhoneiPad
-
- Synchronizing the Calendar
- Synchronizing the Address book
- Troubleshooting
-
- Native Media Player Support
- Version Control
- Indices and tables
- Index
-

ownCloud User Manual Release 45
5 Go back to the folder window from step 2 You will now see a newly created folder with another long string asits name
6 Navigate to the newly created folder and edit the Configurationplist with your favorite text editor
7 Search for a section looking like this
ltkeygtservernameltkeygt ltstringgthttp0(null)ltstringgtltkeygtusernameltkeygt ltstringgtWhatever_you_entered_beforeltstringgt
8 Make it look like this Please note the 80 after YOUR_DOMAIN it is important
ltkeygtservernameltkey ltstringgthttpYOUR_DOMAIN80owncloudremotephpcarddavprincipalsusernameltstringgtltkeygtusernameltkey ltstringgtusernameltstringgt
9 Save the file and open Address Book again It will not work yet
10 Open the preferences for your ownCloud CardDAV-Account and enter your password
11 You may have to restart Address Book once more After this it should work
There is also an easy HOWTO in the forum
36 Chapter 10 Synchronizing with OS X
CHAPTER
ELEVEN
IOS - SYNCHRONIZE IPHONEIPAD
111 Synchronizing the Calendar
1 Open the settings application
2 Select Mail Contacts Calendars
3 Select Add Account
4 Select Other as account type
5 Select Add CalDAV account
6 For server type ADDRESSremotephpcaldavprincipalsusername (Important Donrsquot includehttp or https)
7 Enter your username and password
8 Select Next
9 If your server does not support SSL a warning will be displayed Select Continue
10 If the iPhone is unable to verify the account information read the Troubleshooting paragraph on this page Ifthat doesnrsquot help try to turn off SSL (not recommended)
bull Select OK
bull Select advanced settings
bull Make sure Use SSL is set to OFF
bull Change port to 80
bull Go back to account information and hit Save
Your calendar should now be visible in the Calendar application (may take a few moments)
112 Synchronizing the Address book
1 Open the settings application
2 Select Mail Contacts Calendars
3 Select Add Account
4 Select Other as account type
5 Select Add CardDAV account
37
ownCloud User Manual Release 45
6 For server type ADDRESSremotephpcarddavprincipalsusername (Important Donrsquot includehttp or https)
7 Enter your username and password
8 Select Next
9 If your server does not support SSL a warning will be displayed Select Continue
10 If the iPhone is unable to verify the account information read the Troubleshooting paragraph on this page Ifthat doesnrsquot help try to turn off SSL (not recommended)
bull Select OK
bull Select advanced settings
bull Make sure Use SSL is set to OFF
bull Change port to 80
bull Go back to account information and hit Save
Now should now find your contacts in the address book of your iPhone (may take a few moments)
113 Troubleshooting
1 Check that you didnrsquot include http or https in the server address
2 Depending on your server setup the username-part of the server-address maybe case sensitive So for user Username the server-address may needto be ADDRESSremotephpcaldavprincipalsUsername instead ofADDRESSremotephpcaldavprincipalsusername
3 If you need to change the server-address and want to use SSL yoursquoll have to cancel the setup process and enteryour data again from the very beginning as iOS would prepend https to the server-address automatically
4 Problems have been reported for CardDAV and iOS 4X A possible solution is at the forum
38 Chapter 11 iOS - Synchronize iPhoneiPad
CHAPTER
TWELVE
NATIVE MEDIA PLAYER SUPPORT
You can access your music stored in ownCloud with every Ampache-compatible media player You can find theURL for your specific ownCloud installation in your personal settings or replace ADDRESS with the URL of yourownCloud installation yourself
Ampache-URL httpADDRESSappsmedia
Ampache-compatible players that work with ownCloud include
bull amaroK standard KDE music player
bull tomahawk cross platform player
bull justplayer music player for android
You can find more information about Ampache and other players at the Ampache wikipedia article
The current maintainer of the Media Player is Robin Appelman
39
ownCloud User Manual Release 45
40 Chapter 12 Native Media Player Support
CHAPTER
THIRTEEN
VERSION CONTROL
ownCloud supports simple version control for files Versioning is enabled by default and creates backups of fileswhich are accessible via the history tab This tab also links to the history page where you can roll back a file toany previous versionChanges made at intervals greater than two minutes are saved in data[user]versions and madeaccessible using the above pages
41
ownCloud User Manual Release 45
42 Chapter 13 Version Control
CHAPTER
FOURTEEN
INDICES AND TABLES
bull genindex
43
ownCloud User Manual Release 45
44 Chapter 14 Indices and tables
INDEX
RRFC
RFC 2518 5
45
- Introduction
- The ownCloud Web Interface
-
- Overview
-
- Mounting ownCloud via WebDAV
-
- Windows
- Mac OS X
- Linux
-
- Accessing your Files
-
- Desktop
- Mobile
-
- Calendars
-
- Creating a calendar
- Synchronising Calendars with CalDav
- Creating events
- Exporting Importing events
- Why is the calendar app asking for my current location
-
- Using the Contacts App
-
- Adding contacts
- Creating new address books
- Keeping your address book in sync
-
- Using the Bookmarks App
-
- The main interface
- The bookmarklet
-
- Desktop Synchronisation
- Synchronizing with KDE SC
- Synchronizing with OS X
-
- Setup synchronisation with Mountain Lion (108)
- Installation directions for Snow Leopard (106)
-
- iOS - Synchronize iPhoneiPad
-
- Synchronizing the Calendar
- Synchronizing the Address book
- Troubleshooting
-
- Native Media Player Support
- Version Control
- Indices and tables
- Index
-

CHAPTER
ELEVEN
IOS - SYNCHRONIZE IPHONEIPAD
111 Synchronizing the Calendar
1 Open the settings application
2 Select Mail Contacts Calendars
3 Select Add Account
4 Select Other as account type
5 Select Add CalDAV account
6 For server type ADDRESSremotephpcaldavprincipalsusername (Important Donrsquot includehttp or https)
7 Enter your username and password
8 Select Next
9 If your server does not support SSL a warning will be displayed Select Continue
10 If the iPhone is unable to verify the account information read the Troubleshooting paragraph on this page Ifthat doesnrsquot help try to turn off SSL (not recommended)
bull Select OK
bull Select advanced settings
bull Make sure Use SSL is set to OFF
bull Change port to 80
bull Go back to account information and hit Save
Your calendar should now be visible in the Calendar application (may take a few moments)
112 Synchronizing the Address book
1 Open the settings application
2 Select Mail Contacts Calendars
3 Select Add Account
4 Select Other as account type
5 Select Add CardDAV account
37
ownCloud User Manual Release 45
6 For server type ADDRESSremotephpcarddavprincipalsusername (Important Donrsquot includehttp or https)
7 Enter your username and password
8 Select Next
9 If your server does not support SSL a warning will be displayed Select Continue
10 If the iPhone is unable to verify the account information read the Troubleshooting paragraph on this page Ifthat doesnrsquot help try to turn off SSL (not recommended)
bull Select OK
bull Select advanced settings
bull Make sure Use SSL is set to OFF
bull Change port to 80
bull Go back to account information and hit Save
Now should now find your contacts in the address book of your iPhone (may take a few moments)
113 Troubleshooting
1 Check that you didnrsquot include http or https in the server address
2 Depending on your server setup the username-part of the server-address maybe case sensitive So for user Username the server-address may needto be ADDRESSremotephpcaldavprincipalsUsername instead ofADDRESSremotephpcaldavprincipalsusername
3 If you need to change the server-address and want to use SSL yoursquoll have to cancel the setup process and enteryour data again from the very beginning as iOS would prepend https to the server-address automatically
4 Problems have been reported for CardDAV and iOS 4X A possible solution is at the forum
38 Chapter 11 iOS - Synchronize iPhoneiPad
CHAPTER
TWELVE
NATIVE MEDIA PLAYER SUPPORT
You can access your music stored in ownCloud with every Ampache-compatible media player You can find theURL for your specific ownCloud installation in your personal settings or replace ADDRESS with the URL of yourownCloud installation yourself
Ampache-URL httpADDRESSappsmedia
Ampache-compatible players that work with ownCloud include
bull amaroK standard KDE music player
bull tomahawk cross platform player
bull justplayer music player for android
You can find more information about Ampache and other players at the Ampache wikipedia article
The current maintainer of the Media Player is Robin Appelman
39
ownCloud User Manual Release 45
40 Chapter 12 Native Media Player Support
CHAPTER
THIRTEEN
VERSION CONTROL
ownCloud supports simple version control for files Versioning is enabled by default and creates backups of fileswhich are accessible via the history tab This tab also links to the history page where you can roll back a file toany previous versionChanges made at intervals greater than two minutes are saved in data[user]versions and madeaccessible using the above pages
41
ownCloud User Manual Release 45
42 Chapter 13 Version Control
CHAPTER
FOURTEEN
INDICES AND TABLES
bull genindex
43
ownCloud User Manual Release 45
44 Chapter 14 Indices and tables
INDEX
RRFC
RFC 2518 5
45
- Introduction
- The ownCloud Web Interface
-
- Overview
-
- Mounting ownCloud via WebDAV
-
- Windows
- Mac OS X
- Linux
-
- Accessing your Files
-
- Desktop
- Mobile
-
- Calendars
-
- Creating a calendar
- Synchronising Calendars with CalDav
- Creating events
- Exporting Importing events
- Why is the calendar app asking for my current location
-
- Using the Contacts App
-
- Adding contacts
- Creating new address books
- Keeping your address book in sync
-
- Using the Bookmarks App
-
- The main interface
- The bookmarklet
-
- Desktop Synchronisation
- Synchronizing with KDE SC
- Synchronizing with OS X
-
- Setup synchronisation with Mountain Lion (108)
- Installation directions for Snow Leopard (106)
-
- iOS - Synchronize iPhoneiPad
-
- Synchronizing the Calendar
- Synchronizing the Address book
- Troubleshooting
-
- Native Media Player Support
- Version Control
- Indices and tables
- Index
-

ownCloud User Manual Release 45
6 For server type ADDRESSremotephpcarddavprincipalsusername (Important Donrsquot includehttp or https)
7 Enter your username and password
8 Select Next
9 If your server does not support SSL a warning will be displayed Select Continue
10 If the iPhone is unable to verify the account information read the Troubleshooting paragraph on this page Ifthat doesnrsquot help try to turn off SSL (not recommended)
bull Select OK
bull Select advanced settings
bull Make sure Use SSL is set to OFF
bull Change port to 80
bull Go back to account information and hit Save
Now should now find your contacts in the address book of your iPhone (may take a few moments)
113 Troubleshooting
1 Check that you didnrsquot include http or https in the server address
2 Depending on your server setup the username-part of the server-address maybe case sensitive So for user Username the server-address may needto be ADDRESSremotephpcaldavprincipalsUsername instead ofADDRESSremotephpcaldavprincipalsusername
3 If you need to change the server-address and want to use SSL yoursquoll have to cancel the setup process and enteryour data again from the very beginning as iOS would prepend https to the server-address automatically
4 Problems have been reported for CardDAV and iOS 4X A possible solution is at the forum
38 Chapter 11 iOS - Synchronize iPhoneiPad
CHAPTER
TWELVE
NATIVE MEDIA PLAYER SUPPORT
You can access your music stored in ownCloud with every Ampache-compatible media player You can find theURL for your specific ownCloud installation in your personal settings or replace ADDRESS with the URL of yourownCloud installation yourself
Ampache-URL httpADDRESSappsmedia
Ampache-compatible players that work with ownCloud include
bull amaroK standard KDE music player
bull tomahawk cross platform player
bull justplayer music player for android
You can find more information about Ampache and other players at the Ampache wikipedia article
The current maintainer of the Media Player is Robin Appelman
39
ownCloud User Manual Release 45
40 Chapter 12 Native Media Player Support
CHAPTER
THIRTEEN
VERSION CONTROL
ownCloud supports simple version control for files Versioning is enabled by default and creates backups of fileswhich are accessible via the history tab This tab also links to the history page where you can roll back a file toany previous versionChanges made at intervals greater than two minutes are saved in data[user]versions and madeaccessible using the above pages
41
ownCloud User Manual Release 45
42 Chapter 13 Version Control
CHAPTER
FOURTEEN
INDICES AND TABLES
bull genindex
43
ownCloud User Manual Release 45
44 Chapter 14 Indices and tables
INDEX
RRFC
RFC 2518 5
45
- Introduction
- The ownCloud Web Interface
-
- Overview
-
- Mounting ownCloud via WebDAV
-
- Windows
- Mac OS X
- Linux
-
- Accessing your Files
-
- Desktop
- Mobile
-
- Calendars
-
- Creating a calendar
- Synchronising Calendars with CalDav
- Creating events
- Exporting Importing events
- Why is the calendar app asking for my current location
-
- Using the Contacts App
-
- Adding contacts
- Creating new address books
- Keeping your address book in sync
-
- Using the Bookmarks App
-
- The main interface
- The bookmarklet
-
- Desktop Synchronisation
- Synchronizing with KDE SC
- Synchronizing with OS X
-
- Setup synchronisation with Mountain Lion (108)
- Installation directions for Snow Leopard (106)
-
- iOS - Synchronize iPhoneiPad
-
- Synchronizing the Calendar
- Synchronizing the Address book
- Troubleshooting
-
- Native Media Player Support
- Version Control
- Indices and tables
- Index
-

CHAPTER
TWELVE
NATIVE MEDIA PLAYER SUPPORT
You can access your music stored in ownCloud with every Ampache-compatible media player You can find theURL for your specific ownCloud installation in your personal settings or replace ADDRESS with the URL of yourownCloud installation yourself
Ampache-URL httpADDRESSappsmedia
Ampache-compatible players that work with ownCloud include
bull amaroK standard KDE music player
bull tomahawk cross platform player
bull justplayer music player for android
You can find more information about Ampache and other players at the Ampache wikipedia article
The current maintainer of the Media Player is Robin Appelman
39
ownCloud User Manual Release 45
40 Chapter 12 Native Media Player Support
CHAPTER
THIRTEEN
VERSION CONTROL
ownCloud supports simple version control for files Versioning is enabled by default and creates backups of fileswhich are accessible via the history tab This tab also links to the history page where you can roll back a file toany previous versionChanges made at intervals greater than two minutes are saved in data[user]versions and madeaccessible using the above pages
41
ownCloud User Manual Release 45
42 Chapter 13 Version Control
CHAPTER
FOURTEEN
INDICES AND TABLES
bull genindex
43
ownCloud User Manual Release 45
44 Chapter 14 Indices and tables
INDEX
RRFC
RFC 2518 5
45
- Introduction
- The ownCloud Web Interface
-
- Overview
-
- Mounting ownCloud via WebDAV
-
- Windows
- Mac OS X
- Linux
-
- Accessing your Files
-
- Desktop
- Mobile
-
- Calendars
-
- Creating a calendar
- Synchronising Calendars with CalDav
- Creating events
- Exporting Importing events
- Why is the calendar app asking for my current location
-
- Using the Contacts App
-
- Adding contacts
- Creating new address books
- Keeping your address book in sync
-
- Using the Bookmarks App
-
- The main interface
- The bookmarklet
-
- Desktop Synchronisation
- Synchronizing with KDE SC
- Synchronizing with OS X
-
- Setup synchronisation with Mountain Lion (108)
- Installation directions for Snow Leopard (106)
-
- iOS - Synchronize iPhoneiPad
-
- Synchronizing the Calendar
- Synchronizing the Address book
- Troubleshooting
-
- Native Media Player Support
- Version Control
- Indices and tables
- Index
-
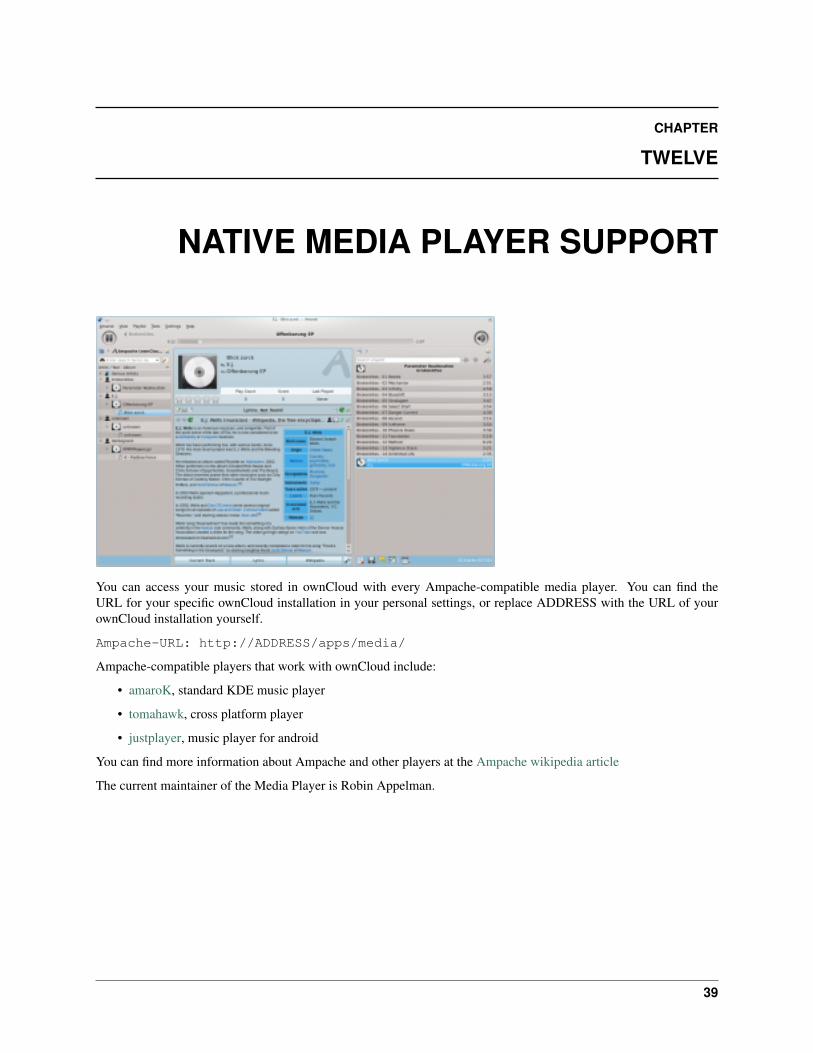
ownCloud User Manual Release 45
40 Chapter 12 Native Media Player Support
CHAPTER
THIRTEEN
VERSION CONTROL
ownCloud supports simple version control for files Versioning is enabled by default and creates backups of fileswhich are accessible via the history tab This tab also links to the history page where you can roll back a file toany previous versionChanges made at intervals greater than two minutes are saved in data[user]versions and madeaccessible using the above pages
41
ownCloud User Manual Release 45
42 Chapter 13 Version Control
CHAPTER
FOURTEEN
INDICES AND TABLES
bull genindex
43
ownCloud User Manual Release 45
44 Chapter 14 Indices and tables
INDEX
RRFC
RFC 2518 5
45
- Introduction
- The ownCloud Web Interface
-
- Overview
-
- Mounting ownCloud via WebDAV
-
- Windows
- Mac OS X
- Linux
-
- Accessing your Files
-
- Desktop
- Mobile
-
- Calendars
-
- Creating a calendar
- Synchronising Calendars with CalDav
- Creating events
- Exporting Importing events
- Why is the calendar app asking for my current location
-
- Using the Contacts App
-
- Adding contacts
- Creating new address books
- Keeping your address book in sync
-
- Using the Bookmarks App
-
- The main interface
- The bookmarklet
-
- Desktop Synchronisation
- Synchronizing with KDE SC
- Synchronizing with OS X
-
- Setup synchronisation with Mountain Lion (108)
- Installation directions for Snow Leopard (106)
-
- iOS - Synchronize iPhoneiPad
-
- Synchronizing the Calendar
- Synchronizing the Address book
- Troubleshooting
-
- Native Media Player Support
- Version Control
- Indices and tables
- Index
-

CHAPTER
THIRTEEN
VERSION CONTROL
ownCloud supports simple version control for files Versioning is enabled by default and creates backups of fileswhich are accessible via the history tab This tab also links to the history page where you can roll back a file toany previous versionChanges made at intervals greater than two minutes are saved in data[user]versions and madeaccessible using the above pages
41
ownCloud User Manual Release 45
42 Chapter 13 Version Control
CHAPTER
FOURTEEN
INDICES AND TABLES
bull genindex
43
ownCloud User Manual Release 45
44 Chapter 14 Indices and tables
INDEX
RRFC
RFC 2518 5
45
- Introduction
- The ownCloud Web Interface
-
- Overview
-
- Mounting ownCloud via WebDAV
-
- Windows
- Mac OS X
- Linux
-
- Accessing your Files
-
- Desktop
- Mobile
-
- Calendars
-
- Creating a calendar
- Synchronising Calendars with CalDav
- Creating events
- Exporting Importing events
- Why is the calendar app asking for my current location
-
- Using the Contacts App
-
- Adding contacts
- Creating new address books
- Keeping your address book in sync
-
- Using the Bookmarks App
-
- The main interface
- The bookmarklet
-
- Desktop Synchronisation
- Synchronizing with KDE SC
- Synchronizing with OS X
-
- Setup synchronisation with Mountain Lion (108)
- Installation directions for Snow Leopard (106)
-
- iOS - Synchronize iPhoneiPad
-
- Synchronizing the Calendar
- Synchronizing the Address book
- Troubleshooting
-
- Native Media Player Support
- Version Control
- Indices and tables
- Index
-

ownCloud User Manual Release 45
42 Chapter 13 Version Control
CHAPTER
FOURTEEN
INDICES AND TABLES
bull genindex
43
ownCloud User Manual Release 45
44 Chapter 14 Indices and tables
INDEX
RRFC
RFC 2518 5
45
- Introduction
- The ownCloud Web Interface
-
- Overview
-
- Mounting ownCloud via WebDAV
-
- Windows
- Mac OS X
- Linux
-
- Accessing your Files
-
- Desktop
- Mobile
-
- Calendars
-
- Creating a calendar
- Synchronising Calendars with CalDav
- Creating events
- Exporting Importing events
- Why is the calendar app asking for my current location
-
- Using the Contacts App
-
- Adding contacts
- Creating new address books
- Keeping your address book in sync
-
- Using the Bookmarks App
-
- The main interface
- The bookmarklet
-
- Desktop Synchronisation
- Synchronizing with KDE SC
- Synchronizing with OS X
-
- Setup synchronisation with Mountain Lion (108)
- Installation directions for Snow Leopard (106)
-
- iOS - Synchronize iPhoneiPad
-
- Synchronizing the Calendar
- Synchronizing the Address book
- Troubleshooting
-
- Native Media Player Support
- Version Control
- Indices and tables
- Index
-