owner’s manual pro-line 26 walkaround introduction congratulations! you are now the proud owner of...
TRANSCRIPT

1
Owner’s Manual
Pro-Line 26 Walkaround
Copyright 1996 Pro-Line Boats Inc.,P.O. box 1348, Crystal River Fla.34423 All rights reserved. rev. 7-28-00 Specifications subject to change without notice. Actual boats may vary from drawings.
2
Table of Contents I Introduction Pg. 4 Dealer / Customer responsibilities Registration Insurance II Safety Pg 5 Regulations Equipment Passenger safety Rules of the road Hazardous conditions Alcohol Carbon monoxide Fire Flooding III Controls Pg 8 Ignition Choke Safety shut down Shift / Throttle / Trim Steering Instruments: Fuel Gauge, Water Temperature, Volt, Tachometer, Speedometer, Trim, Options Switches: Windshield Wipers, Windlass, Bilge Pump, Lights, Breaker, Trim Tabs IV Systems Pg. 13 Fresh Water Raw Water Head/ Waste AC/ Heat Fuel/ Oil Electrical (AC, DC) After Market Accessories V Trailering and Launching Pg. 17 Classification and Capacity Hitch Load Distribution Launching and Retrieving VI Operation and Performance Pg. 19 Loading Fueling Starting Torque Trim Prop VII Service and Care Pg. 22

3
Fiberglass / Gel coat Marine growth Plexiglas Stainless Steel/ Aluminum Canvas Upholstery: Vinyl, Fabric Corrosion Protection Winterization, Storage, Mooring VIII Appendix Pg. 25 Boat ID Trouble Shooting Chart Nautical Terms

4
Introduction Congratulations!
You are now the proud owner of a new Pro-Line 26 Walk-around sport fishing boat. Welcome into the proud family of satisfied Pro-Line owners. Every expedition lets you enjoy the outstanding features designed into every boat we construct. Your new Pro-Line is more than just a boat, it's a lifestyle. Pro-Line's commitment to the needs and wishes of the professional sport fisherman has resulted in a superior fishing craft, providing you with comfort, performance, security and fishability. All of our boats comply with U.S. Coast Guard (USCG) safety regulations, and are designed, and crafted in accordance with the National Marine Manufacturers Association (NMMA) and the American Boat and Yacht Council (ABYC) standards.
This manual (to be kept onboard your Pro-Line) is designed to provide you with information necessary for safe, efficient operation, and care of your new Pro-Line. To maximize your enjoyment and safety, take the time now to carefully review the documentation in your owners pack and this manual, and really get to know your boat. Dealer's Duties Your dealer's responsibilities include but are not limited to:
Pre-delivery verification of proper rigging and operation. Providing adequate orientation in general operation of your Pro-Line,
including explanation of specific safety considerations regarding the use of systems and components.
An explanation of owners packet literature and warranty registration cards for all separately warranted equipment and accessories.
Explaining local and out of area service procedures during and out of warranty periods.
Customer Responsibilities Be proficient in boat handling and safety.- THIS MANUAL IS NOT INTENDED TO PROVIDE COMPLETE TRAINING ON
ALL ASPECTS OF GENERAL BOAT OPERATION. Read and understand the limited warranty. Read all literature and instructions, and use and maintain all equipment as
directed. Examine the boat at time of delivery to ensure that all systems are
functioning normally. Learn about and operate boat in accordance with local, state and federal
laws, regulations and registration requirements. The owner is legally responsible for all liabilities of operation - secure
insurance protection.
5
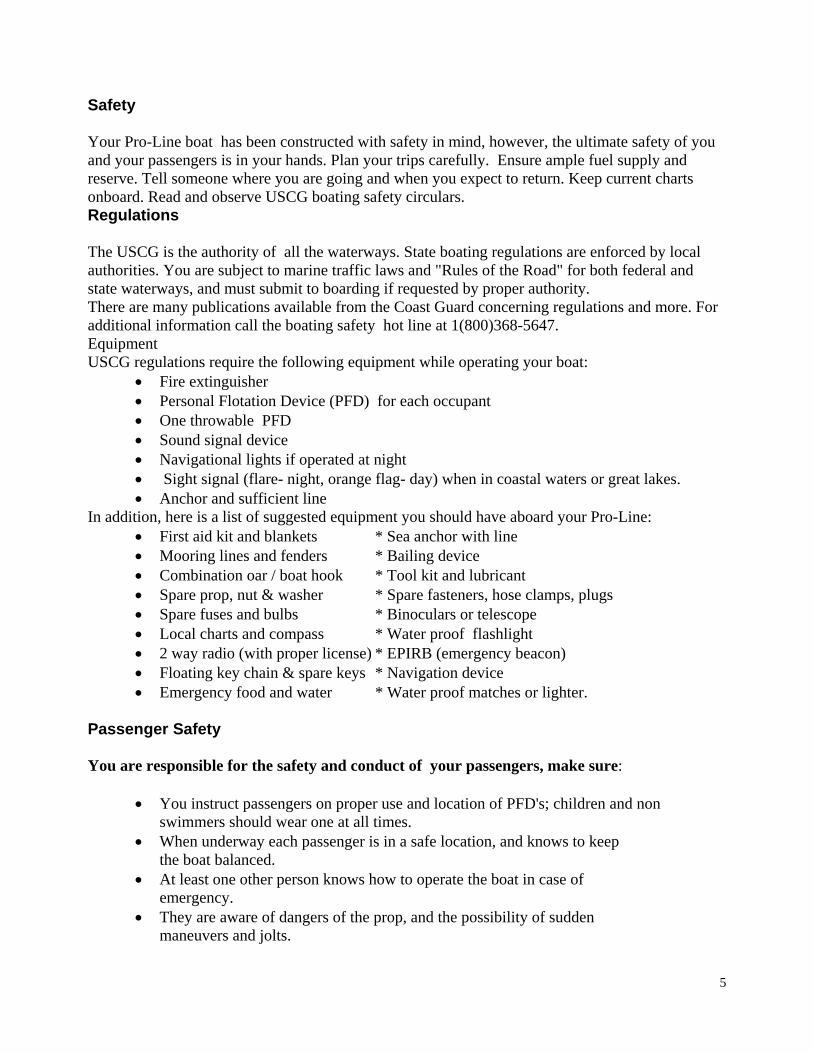
Safety Your Pro-Line boat has been constructed with safety in mind, however, the ultimate safety of you and your passengers is in your hands. Plan your trips carefully. Ensure ample fuel supply and reserve. Tell someone where you are going and when you expect to return. Keep current charts onboard. Read and observe USCG boating safety circulars. Regulations The USCG is the authority of all the waterways. State boating regulations are enforced by local authorities. You are subject to marine traffic laws and "Rules of the Road" for both federal and state waterways, and must submit to boarding if requested by proper authority. There are many publications available from the Coast Guard concerning regulations and more. For additional information call the boating safety hot line at 1(800)368-5647. Equipment USCG regulations require the following equipment while operating your boat:
Fire extinguisher Personal Flotation Device (PFD) for each occupant One throwable PFD Sound signal device Navigational lights if operated at night Sight signal (flare- night, orange flag- day) when in coastal waters or great lakes. Anchor and sufficient line
In addition, here is a list of suggested equipment you should have aboard your Pro-Line: First aid kit and blankets * Sea anchor with line Mooring lines and fenders * Bailing device Combination oar / boat hook * Tool kit and lubricant Spare prop, nut & washer * Spare fasteners, hose clamps, plugs Spare fuses and bulbs * Binoculars or telescope Local charts and compass * Water proof flashlight 2 way radio (with proper license) * EPIRB (emergency beacon) Floating key chain & spare keys * Navigation device Emergency food and water * Water proof matches or lighter.
Passenger Safety You are responsible for the safety and conduct of your passengers, make sure:
You instruct passengers on proper use and location of PFD's; children and non swimmers should wear one at all times.
When underway each passenger is in a safe location, and knows to keep the boat balanced.
At least one other person knows how to operate the boat in case of emergency.
They are aware of dangers of the prop, and the possibility of sudden maneuvers and jolts.

6
To turn the engine off and remove key when swimmers are near the prop or using the dive platform.
All stay away from lines under stress should they break and recoil. Rules of the Road Know and use the rules of the road, the information here is only a brief overview. For detailed information contact the USCG. Audible warning signals:
One short horn blast: starboard course change. Two short horn blasts: port course change. Three short horn blasts: astern operation. Five horn blasts: doubt about previous signal, or danger. One Five second blast every minute: for fog operation
When overtaking, give- way vessel announces intention with horn blast(s) and waits for same response, then completes maneuver. When approaching head on both boats give way after giving appropriate horn blast. (preferably to starboard). When crossing a vessel converging from starboard has right of way, port vessel gives way (both acknowledge with one short horn blast). Know and observe navigational buoys and markers. Give way to craft under sail. Hazardous Conditions Keep track of weather developments and avoid hazardous conditions if possible. When forced to operate your Pro-Line in storm conditions:
Wear PFD's Stow loose gear and equipment. Place heavy items as low as possible. Head for the easiest to reach safe location. Reduce speed. If the boat leaves the water you're moving too fast. If power fails rig a sea anchor off the bow (an empty ice chest will work). Stay with boat if it capsizes, unless it is burning out of control.
Alcohol Don't drink and drive. If you have been drinking have someone drive who has not been drinking. Never operate a boat under the influence of drugs or alcohol. Carbon Monoxide Be aware of and avoid conditions that can cause carbon monoxide poisoning (see USCG boating safety circular 77). Sources of carbon monoxide include any gas or diesel engine, any flame such

7
as a charcoal grill, stove or heater. Carbon monoxide can accumulate to deadly levels in enclosed spaces. Always ventilate occupied areas of vessel with fresh air. Fire Be aware of and avoid conditions that lead to accidental fire. Guard against and watch for fuel spills and leaks. Inspect wiring for damage or exposure that could lead to short circuits or arcing. Make sure those who smoke are vigilant against their ignition source starting a fire. Don't allow smoking while fueling. Keep a USCG approved fire extinguisher aboard at all times. Inspect the fire extinguisher regularly, learn how (and instruct others) to properly use it. Only use water to fight a fire as a last resort and then only after making arrangements to abandon the boat if a fire should start and get out of control. If a fire is burning out of control and you must abandon the boat keep the following in mind:
Abandon the boat into the wind to minimize burn risk from floating fuel. Wear a PFD unless you must swim under burning fuel. If swimming under burning fuel throw a PFD outside of the burning area and swim
under the burning fuel to it..
Flooding Be aware of and avoid conditions that can cause your boat to flood with water. Possible causes of flooding include; damage to hull or thru-hull fitting, waves washing into the boat, water entering cockpit due to improper loading. If you allow water to enter the boat faster than the bilge pump can expel it, the boat will become flooded and may swamp, capsize, or sink.
8
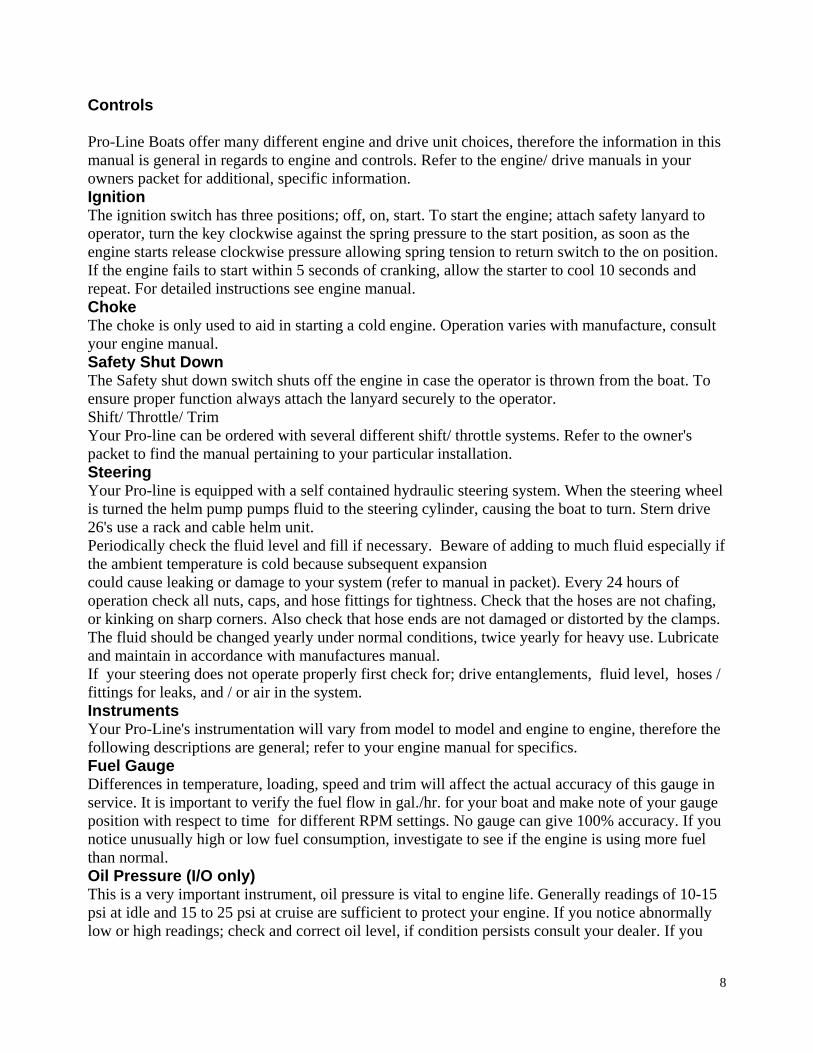
Controls Pro-Line Boats offer many different engine and drive unit choices, therefore the information in this manual is general in regards to engine and controls. Refer to the engine/ drive manuals in your owners packet for additional, specific information. Ignition The ignition switch has three positions; off, on, start. To start the engine; attach safety lanyard to operator, turn the key clockwise against the spring pressure to the start position, as soon as the engine starts release clockwise pressure allowing spring tension to return switch to the on position. If the engine fails to start within 5 seconds of cranking, allow the starter to cool 10 seconds and repeat. For detailed instructions see engine manual. Choke The choke is only used to aid in starting a cold engine. Operation varies with manufacture, consult your engine manual. Safety Shut Down The Safety shut down switch shuts off the engine in case the operator is thrown from the boat. To ensure proper function always attach the lanyard securely to the operator. Shift/ Throttle/ Trim Your Pro-line can be ordered with several different shift/ throttle systems. Refer to the owner's packet to find the manual pertaining to your particular installation. Steering Your Pro-line is equipped with a self contained hydraulic steering system. When the steering wheel is turned the helm pump pumps fluid to the steering cylinder, causing the boat to turn. Stern drive 26's use a rack and cable helm unit. Periodically check the fluid level and fill if necessary. Beware of adding to much fluid especially if the ambient temperature is cold because subsequent expansion could cause leaking or damage to your system (refer to manual in packet). Every 24 hours of operation check all nuts, caps, and hose fittings for tightness. Check that the hoses are not chafing, or kinking on sharp corners. Also check that hose ends are not damaged or distorted by the clamps. The fluid should be changed yearly under normal conditions, twice yearly for heavy use. Lubricate and maintain in accordance with manufactures manual. If your steering does not operate properly first check for; drive entanglements, fluid level, hoses / fittings for leaks, and / or air in the system. Instruments Your Pro-Line's instrumentation will vary from model to model and engine to engine, therefore the following descriptions are general; refer to your engine manual for specifics. Fuel Gauge Differences in temperature, loading, speed and trim will affect the actual accuracy of this gauge in service. It is important to verify the fuel flow in gal./hr. for your boat and make note of your gauge position with respect to time for different RPM settings. No gauge can give 100% accuracy. If you notice unusually high or low fuel consumption, investigate to see if the engine is using more fuel than normal. Oil Pressure (I/O only) This is a very important instrument, oil pressure is vital to engine life. Generally readings of 10-15 psi at idle and 15 to 25 psi at cruise are sufficient to protect your engine. If you notice abnormally low or high readings; check and correct oil level, if condition persists consult your dealer. If you

9
lose oil pressure; shut down the engine immediately. Find and correct the problem before restarting engine. Running your engine without oil pressure will result in serious and costly damage. Water Temperature The water temperature gauge indicates the internal water temperature of your engine. Your engine is equipped with a thermostat to quickly bring the engine up to its optimum operating temperature range of 150 to 170 degrees f. All outboard engines are also equipped with an audio alarm system indicating an overheat condition. If the gauge or alarm indicates an overheat condition, immediately shut the engine off, lift the drive and inspect water intakes for obstructions such as aquatic vegetation or mud. After finding the source of the overheating, restart engine and confirm water flow, if water does not flow within five seconds shut the engine off. Volt The volt meter indicates battery voltage; normal reading is between 12 to 15.5 volts. A low reading indicates to heavy of a load or a dysfunction in the charging system. Too high of a voltage indicates a fault of the charging circuitry and continued operation will damage the battery. Tachometer The tachometer indicates the revolutions per minute (RPM) of your engine. Do not operate the engine beyond the limits stated in your engine manual. Abnormally low tach. readings (for a given throttle setting) indicates loss of power, or a prop entangled with weeds or trash; check the prop first. A reading higher than normal indicates a ventilating or cavitating prop, or prop/ drive damage. Speedometer The speedometer indicates the speed of your boat in miles per hour (MPH). The gauge operates by sensing water impact pressure from the pitot tube mounted on the transom. (or integrated into the lower drive unit of the motor). If the gauge fails to give a reading, suspect a blocked pickup. Trim The trim gauge indicates the in (down) and out (up) position of the drive unit in relation to the hull. (see Trimming your boat p.27,28 ) Options Optional instrumentation for your Pro-Line includes: fish locator / depth finder, VHF radio, GPS , compass, etc. Refer to the manuals supplied.
10
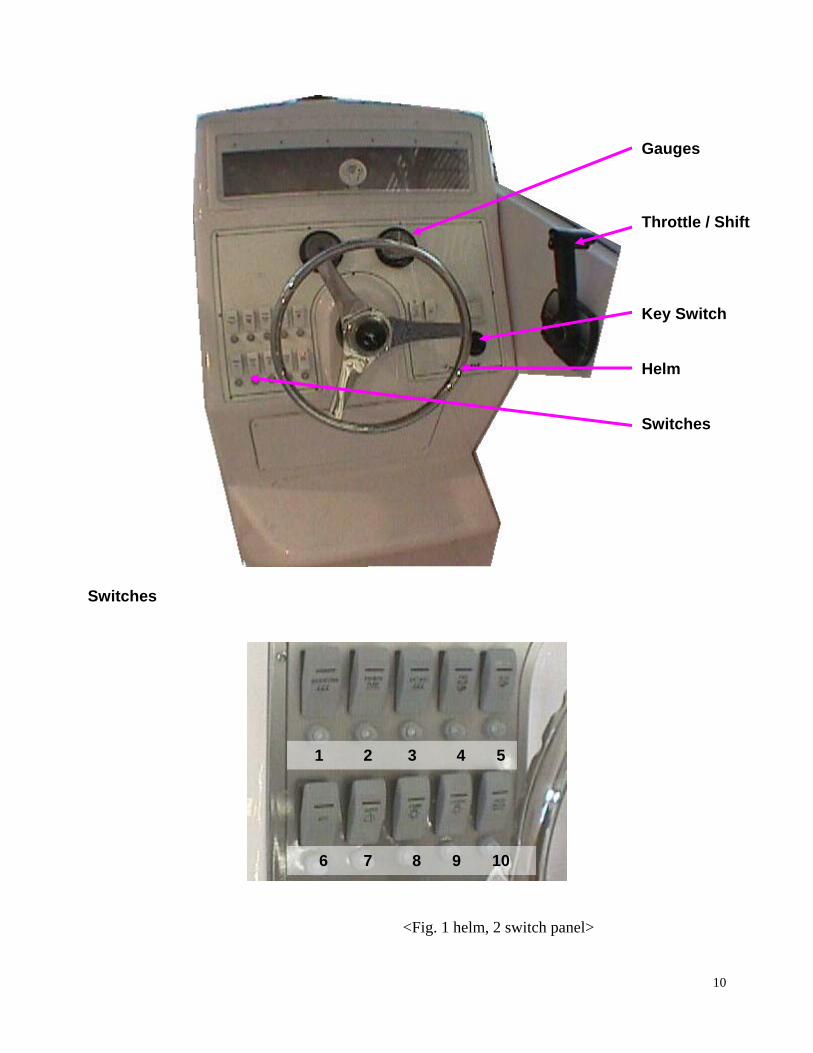
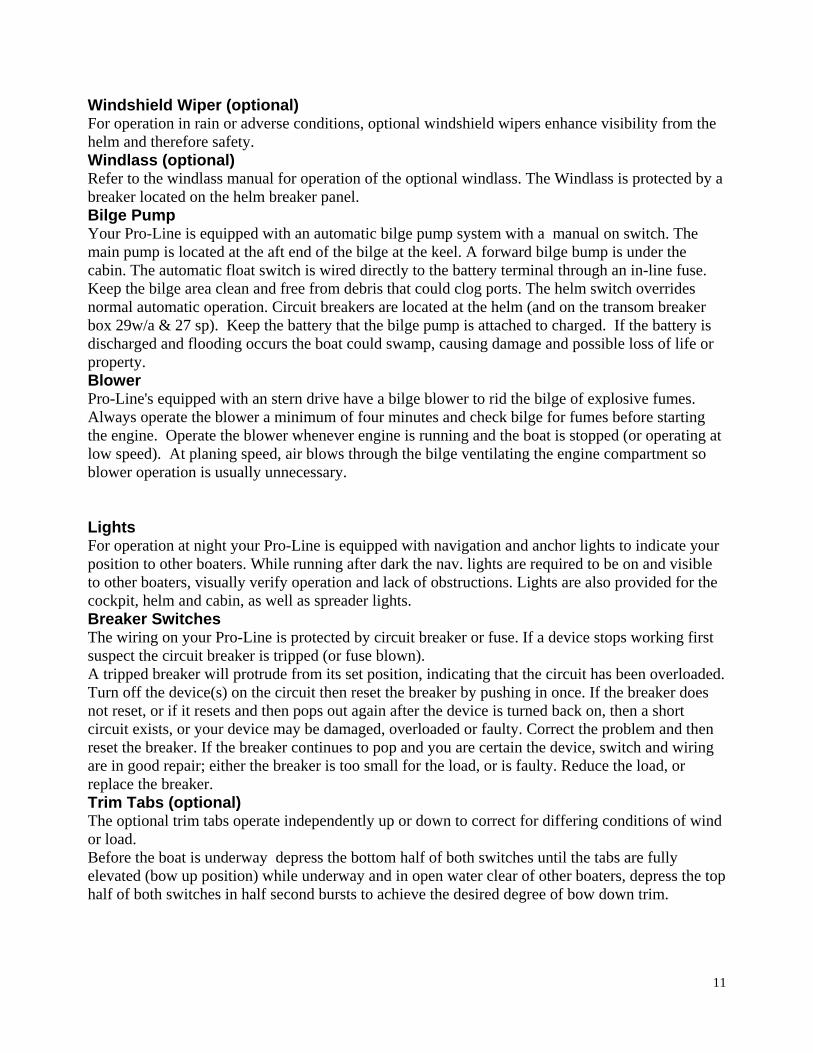
Switches
<Fig. 1 helm, 2 switch panel>
Gauges Throttle / Shift Key Switch Helm Switches
1 2 3 4 5
6 7 8 9 10
11
Windshield Wiper (optional) For operation in rain or adverse conditions, optional windshield wipers enhance visibility from the helm and therefore safety. Windlass (optional) Refer to the windlass manual for operation of the optional windlass. The Windlass is protected by a breaker located on the helm breaker panel. Bilge Pump Your Pro-Line is equipped with an automatic bilge pump system with a manual on switch. The main pump is located at the aft end of the bilge at the keel. A forward bilge bump is under the cabin. The automatic float switch is wired directly to the battery terminal through an in-line fuse. Keep the bilge area clean and free from debris that could clog ports. The helm switch overrides normal automatic operation. Circuit breakers are located at the helm (and on the transom breaker box 29w/a & 27 sp). Keep the battery that the bilge pump is attached to charged. If the battery is discharged and flooding occurs the boat could swamp, causing damage and possible loss of life or property. Blower Pro-Line's equipped with an stern drive have a bilge blower to rid the bilge of explosive fumes. Always operate the blower a minimum of four minutes and check bilge for fumes before starting the engine. Operate the blower whenever engine is running and the boat is stopped (or operating at low speed). At planing speed, air blows through the bilge ventilating the engine compartment so blower operation is usually unnecessary. Lights For operation at night your Pro-Line is equipped with navigation and anchor lights to indicate your position to other boaters. While running after dark the nav. lights are required to be on and visible to other boaters, visually verify operation and lack of obstructions. Lights are also provided for the cockpit, helm and cabin, as well as spreader lights. Breaker Switches The wiring on your Pro-Line is protected by circuit breaker or fuse. If a device stops working first suspect the circuit breaker is tripped (or fuse blown). A tripped breaker will protrude from its set position, indicating that the circuit has been overloaded. Turn off the device(s) on the circuit then reset the breaker by pushing in once. If the breaker does not reset, or if it resets and then pops out again after the device is turned back on, then a short circuit exists, or your device may be damaged, overloaded or faulty. Correct the problem and then reset the breaker. If the breaker continues to pop and you are certain the device, switch and wiring are in good repair; either the breaker is too small for the load, or is faulty. Reduce the load, or replace the breaker. Trim Tabs (optional) The optional trim tabs operate independently up or down to correct for differing conditions of wind or load. Before the boat is underway depress the bottom half of both switches until the tabs are fully elevated (bow up position) while underway and in open water clear of other boaters, depress the top half of both switches in half second bursts to achieve the desired degree of bow down trim.

12
To correct a starboard list give the top half of the port switch a series of bursts until the list is corrected. To avoid over trim allow a few seconds between bursts to allow the boat to respond (if you over trim simply give the over trimmed tab a burst or two in the opposite direction). Warning: trim tabs can cause a dramatic change in the attitude and heading of your boat, adjust them only when in open water, clear of any obstructions, and then only in small increments.
<Fig. 3 trim tabs>
Trim Tabs
13
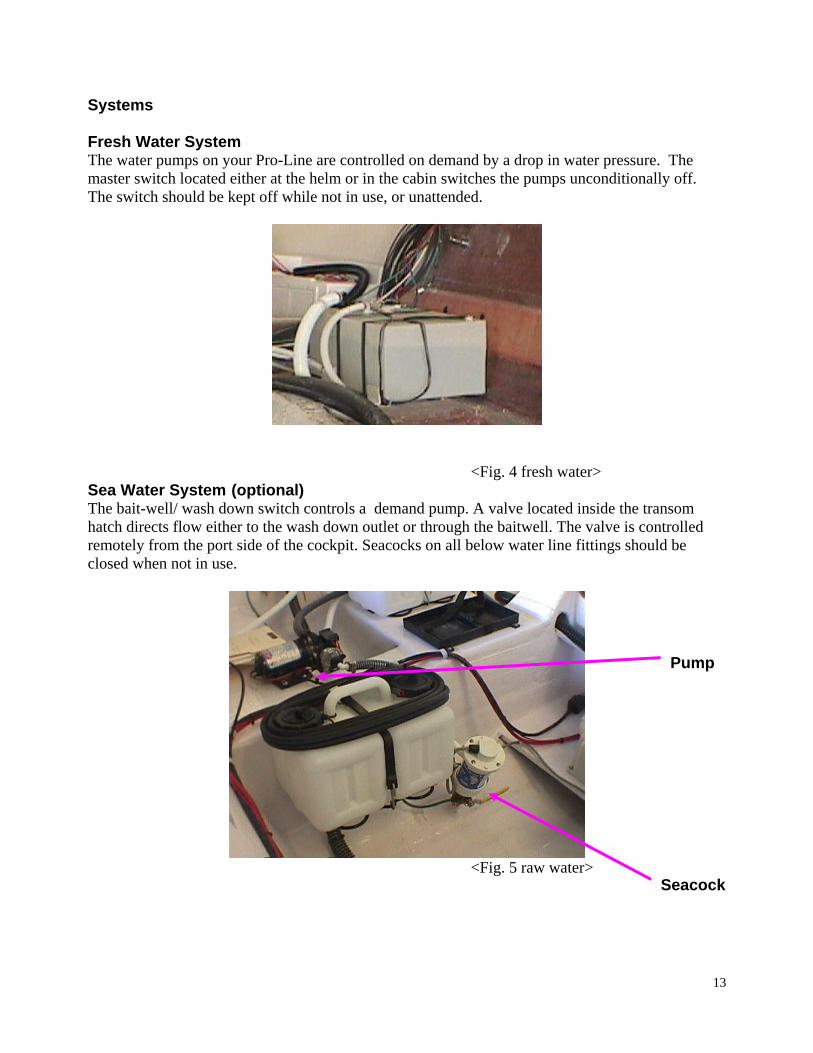
Systems Fresh Water System The water pumps on your Pro-Line are controlled on demand by a drop in water pressure. The master switch located either at the helm or in the cabin switches the pumps unconditionally off. The switch should be kept off while not in use, or unattended.
<Fig. 4 fresh water> Sea Water System (optional) The bait-well/ wash down switch controls a demand pump. A valve located inside the transom hatch directs flow either to the wash down outlet or through the baitwell. The valve is controlled remotely from the port side of the cockpit. Seacocks on all below water line fittings should be closed when not in use.
<Fig. 5 raw water>
Pump
Seacock

14
Head / Waste If your Pro-Line is equipped with a portable or electric head refer to the manual supplied in your owner's packet. Do not put anything other than toilet paper in the head or clogging or damage to the system may occur. The electric head utilizes a macerator / waste pump and clean-out fittings for dock side operation. A sea valve is provided for offshore operation. A raw water pump with an intake seacock is used for flushing. Air conditioner (optional) The optional air conditioner uses raw water for cooling. The seacock is located in the bilge. A strainer is located between the seacock and the cooling (raw water) pump. When the boat is put in the water the raw water pump must be primed by removing the hose from the pump outlet until the pump is full of water. Do not operate the unit if cooling water is not flowing or the pump will be damaged. If the unit fails to cool inspect the intake and strainer for blockage. Make sure that the seacock is open when in use and closed when not in use. If the boat is removed from the water and the seacock is not closed the raw water pump will lose its prime. Fuel / Oil System The fuel tank on your Pro-Line is made of aluminum with internal baffling to minimize sloshing. The tank is vented at the fill, inspect the vent for obstructions regularly. 'Deck plate' access ports are placed over the hose connections and the sending unit. Inspect the hose connections on a regular basis. If you notice fuel odor or see fuel in the bilge there may be a leak somewhere in the fuel system. Correct any fuel leaks before operating vessel. Pro-Line boats equipped with oil injected outboard engines have on board oil tanks located in the port transom hatch or the bilge. Ensure that the tanks are well stocked with the recommended 2 stroke oil - refer to your engine manual. It is imperative that the oil supply remain clean and uncontaminated by water or dirt. Check to make sure that the oil lines are free from leaks, kinks, and chafing.
Fuel Tank Oil Tanks

15
Electrical Alternating Current Shore power is used for the operation of AC devices like your air conditioner, refrigerator (110v dockside), battery charger, and 110v outlets for other appliances. The panel is located in the cabin. If the reverse polarity light is on, unplug shore power and do not use it until this potentially dangerous situation is corrected by a qualified technician.
<Fig. 9 a.c. panel> Direct Current 12 volt direct current provides electrical power for all lighting, refrigerator (12v at sea), pumps, electronics, and DC devices. A main breaker is located on the transom. Battery selector switches are on the transom for battery isolation, parallel operation and disconnect. Caution: To avoid possible alternator / battery damage on twin engine installations, ensure that the optional dual battery switches are never left so both engines are connected together (never leave a switch on 'both'). The preferred switch position is port engine to port battery, starboard to starboard. <Fig. 10 d.c. panels>

16
<Fig. 11 battery switch> After market Accessories Your Pro-Line electrical system was designed for factory tested and approved dealer installed optional accessories. Pro-Line makes no recommendations to the suitability of accessories that are not listed in the Pro-Line sales literature. Any unapproved modifications or additions to the standard or optional system are done at the owners risk and may diminish the warranty. Unapproved modifications could cause risk of fire or failure of the electrical system.
Battery Switch

17
Trailering and Launching Consult your trailer manufacturer for specific information relating to your particular trailer. Pro-Line does not make trailers. Make sure the trailer you use is certified. The use of roller trailers is not recommended, bunk type trailers offer more uniform support. Consult your state authority for state regulations pertaining to trailering a boat. Use the following towing check list:
Check brakes if equipped. Check springs and under carriage for cracks, loose parts and fasteners. Ensure tires are inflated to proper pressure, and in good condition. Check wheel bearings and lug nuts. Verify light and signal operation. Make sure boat is tied down from bow and stern eyes. Stow bimini top and other items likely to blow off or out. Carry a spare tire and tools for changing. (spare bearing and race set for
long trips) Securely brace O/B motors. Go slow over bumps. Check tires and hubs often for excessive heat, service if required. When backing have an assistant watch blind spots and guide with hand
signals. Capacity The trailer you choose should be a proper match for your boat with regard to capacity and hull design, consult your dealer when making your selection. The tow vehicle must have sufficient towing capacity for the combined load of boat, trailer and accessories. Check the certification label on the forward port (left) side of your trailer to ensure that it has adequate gross vehicle weight rating (GVWR) for the combined boat and trailer. Hitch Ensure that the hitch in the tow vehicle is rated for the GTW or greater, and that the ball size matches the trailer receiver. Load Distribution Generally speaking, the tongue weight should be from 5 to 10 % of the GVWR. Make certain that the hull is evenly supported along the length and width with no load concentrations. Make sure that the bottom of the transom is supported and not hanging past the end of the trailer. Load the boat so it is centered side to side, and straight on the supports. Launching and Retrieving Pre- Launch Check List-
Install drain plug. Remove covers and tie downs. (leave bow winch strap in place) Place lines and fenders if needed. Disconnect lights to avoid shorting. Verify that safety equipment is aboard.

18
Launching- If possible use a lookout. Back down the ramp until wheels are under water or the stern of the boat just starts to
float ( keeping perpendicular to the shore). Loosen bow strap, board the boat, lower the drive unit (and operate the
blower 4 min if stern drive). Start the engine and check the bilge for leaks. Remove winch strap from bow eye. Back boat off of trailer. Dock the boat and park the tow vehicle.
Retrieving- Back down the ramp so trailer is half submerged. Carefully line up boat, slowly maneuvering with short bursts of power. When the keel is centered and boat is just touching the trailer, winch (or
smoothly apply power) until the boat eases to rest on the bow rest. Secure the bow strap. Haul the boat out of the water and park out of the way of others. Remove the bilge plug. Rinse off salt water if fresh water is available (or as soon as possible
otherwise). Stow equipment and canvas, affix tie downs and covers. Hook up trailer lights and verify operation.

19
Operation and Performance Loading The capacity plate states the maximum persons and the maximum weight in pounds for persons, engine and gear that the boat will safely accommodate under normal conditions. These load capacity ratings are computed using USCG formulas. For operation in rough and adverse conditions reduce the boats load to permit safe operation. The performance of any boat is a function of the amount of load carried, great loads reduce performance. Depending upon conditions and what engine / hull combination you have selected, your boat may not be able to stay on plane when loaded to its maximum rated capacity. When loading your Pro-Line always:
Maintain a balance both port to starboard and bow to stern. Keep heavy items as low as possible. When boarding, step (never jump) into the boat one at a time. Pass gear from the dock to someone in the boat, do not carry gear while
boarding. Never allow passengers to ride with feet hanging over the side of the boat. Do not allow passengers to sit or stand on top of the stern, or gunwales
of the boat. Fueling Due to the explosive nature of gasoline certain precautions must be observed when fueling. Before Fueling-
Secure the boat to the dock with adequate moorings. Turn off engine and any equipment having brush type (spark producing)
contacts. Close cabin, doors, and hatches, so fumes don't enter boat. Disembark all persons not necessary for the fueling operation. Prohibit all smoking and open flame on board and nearby. Have a fire extinguisher close by.
While Fueling- Keep nozzle in contact with fill opening to minimize chance of sparks. Do not leave unattended. Do not spill fuel. Do not over fill, filling a tank until fuel is vented is dangerous. Allow room for
expansion. After Fueling-
Close fill opening. Wipe up any spilled fuel. Properly dispose of rags on shore. Open cabin door, ventilate boat and run blower (stern drive & inboard)
for a minimum of four minutes before starting. Check for fumes in bilge, continue to ventilate if present.

20
Verify proper fuel selector valve position (dual tanks only).
Starting Follow the information in your engine manual if it deviates from the following instructions. Before Starting Engine-
Ventilate all enclosed space, and run blower a minimum of four minutes. Visually inspect bilge for raw fuel, and smell for vapors. Visually make sure propeller is clear of obstructions or swimmers. Make sure engine cooling water intakes are submerged. Lock helm seats to face straight forward.
For a Cold Engine- Pump the throttle two or three times to prime (stern drive only). Advance the throttle approximately 1/4 open (out of gear). Activate the choke while cranking. Release the choke as engine smoothes out.
For a Hot Engine- Leave the throttle closed and choke off. If engine fails to start in 5 seconds, partially open throttle (out of gear) and try again. If flooded, keep throttle open for a few minutes and then crank. When
engine starts close throttle smoothly as the engine clears to prevent over revving. After your engine starts make sure to observe a few basic rules to ensure that the engine is functioning properly:
Verify oil pressure and water circulation. Check the water temperature gauge for the first few minutes to make sure the engine is
warming properly. Check for leaks especially fuel, shut down and correct if found. Follow the break- in procedures for your engine. After engine is warm and after the necessary break- in, drive the boat at
full throttle for a few moments ( if conditions permit) to verify engine is developing full RPM.
Torque The twisting force that the engine applies to the prop lists the hull of your boat in the opposite direction the propeller is turning. For a large engine or light hull this list can be considerable. A listing hull has more drag on the side that is deeper in the water causing boat to turn in the direction of the list. The trim tab on your out drive should be adjusted to counteract the torque steer for the load and speed the boat is most often operated at. Consult your engine manual for specific information on trim tab adjustment. Torque induced list can also be corrected by shifting the load in your boat. Twin engines, when counter rotating, cancel the torque and no correction is required.

21
Trim The power trim system allows the operator to raise and lower the drive unit or motor throughout an infinite number of settings between its upper and lower limits. For every throttle setting there is a trim setting that will yield optimal speed, stability or maneuverability. For most conditions the best all-round performance is obtained when the bow of the boat is slightly out of the water. General trim down (or "in") characteristics are:
Starting position for best acceleration to plane. Lowers bow in the water providing better stability and ride in rough water. Reduces boat speed and economy due to increased drag of hull and drive. More spray over bow.
General trim up (or "out") characteristics are: Raises the bow of the boat in the water, resulting in less hull in the water. Greater speed and economy for a given throttle setting. Greater maneuverability (provided prop does not ventilate during the
maneuver) In excess, the reduced stability can lead to bouncing, porpoiseing and
propeller ventilation. In addition to providing ideal boat performance, the power trim enables the motor or drive unit to be raised (tilted up) for trailering, beaching, and launching. The electric motor that drives the hydraulic pump is protected by an internal thermal circuit breaker that interrupts the power when overheated. Avoid continued pressure on the switch after the unit has reached the limits of travel (you can hear the difference in sound as the pump strains against the increased load). Prop If your Pro-Line was ordered with a factory installed engine it will have a propeller that has been performance tested to provide the best all-round performance for your engine /hull combination at sea level. In some situations, it may be desirable to re- prop your Pro-Line to enhance desired performance needs. For instance:
Decreasing pitch will enhance acceleration and power at high loads. Increasing pitch will increase speed at light loads. Decreasing diameter will compensate for loss of power at high altitudes. Increasing diameter results in higher efficiency at low speeds at the expense of top
speed and acceleration. When re- propping to a lower pitch or smaller diameter be sure not to over rev the engine at top speed, engine damage could result. Operating your engine with a damaged prop will decrease top speed, increase fuel consumption and may introduce undesirable handling characteristics. The vibration caused by running a damaged prop could cause costly damage to your lower drive unit.

22
Service and Care To enjoy trouble free use of your Pro-Line, follow the recommended procedures and instructions relating to the service and care of your boat. Failure to follow the following maintenance practices will result in shorter life of your equipment and may void your warranty. Much of the installed equipment on your Pro-Line is separately warranted, follow the care instructions found in your owners packet to keep these warranties in force. Your engine manual contains service information relating to your particular engine installation. Follow the provided recommendations for trouble free service, and to preserve your warranty. Fiberglass / Gel Coat The gel coated fiberglass on your Pro-Line provides a smooth, easy to clean and maintain surface. Regular cleaning and waxing will preserve the finish on your boat for many years to come. Use a mild detergent and plenty of fresh clean water to swab down the exposed gelcoat of your boat, don't use harsh cleaners containing ammonia, chlorine or abrasives. Do not use acetone or any ketone solvents. Stubborn stains can be removed with alcohol or kerosene provided they are washed off immediately with mild detergent and water. Wax all gel coated surfaces a minimum of twice a year, more often if the boat is stored in the sun. If due to neglect, the surface takes on a dull appearance that is not restorable by waxing, hand buff with a rubbing compound such as Dupont No. 7, or power buff with Mirror-Glaze No. 1 then wax. Caution: when power buffing, use care not to leave swirl marks or "burn" the surface. You may want to leave power buffing to a professional. The gel coat on your Pro-Line is approximately 25 mil thick. Minor scratches and deep stains that do not penetrate the gel coat can be lightly wet sanded with 600 grit, buffed and waxed to remove. If a deep gouge to the surface occurs that goes all the way through the gel coat into the fiberglass it must be repaired promptly to avoid further damage. Your dealer is best equipped to handle this repair and achieve good bonding and color match. There are many different gel coat repair kits on the market for this use, however, results obtained may not be satisfactory. For damage to fiberglass that goes deeper than 1/16 inch see your Pro-Line dealer. Marine Growth If marine growth is a problem, consult your dealer about an anti-fouling finish for the portions of the hull below the water line. When moored in salt or brackish water it is recommended that you haul the boat out and scrub the bottom every 30 days to prevent the acclimation of marine growth. Windows and Hatches To clean acrylic, rinse with fresh water to remove as much grime as possible. Use your bare hand with lots of water so you can feel any grit and avoid grinding it in to the surface as you dislodge it. When all material that may scratch is gone, use a soft clean cloth with a non abrasive mild detergent and clean fresh water. Rinse and blot dry with a clean dry chamois. Grease and adhesives may be removed with kerosene, hexane or white gas ( not gas you burn in your boat, car or lawnmower ). Never use solvents like acetone, silicone spray, benzene, carbon tetrachloride, dry cleaning fluid, lacquer or paint thinner, or any chlorinated solvent, on acrylic, since they dissolve the material. Stainless Steel / Aluminum Stainless steel is used on bow rail and deck fittings on your Pro-Line. Stainless is corrosion resistant but not corrosion proof. If used in contact with sulfides, chloride salts, or rusting metals, stainless will show rust spots, discolor or corrode. The grain structure of stainless, when modified
23
by welding processes has increased susceptibility to micro- corrosion (invisible to the unaided eye) and embrittelment. Proper care will preserve the weld strength and beauty of your stainless:
Always clean frequently with soap and water, most glass cleaners work. Always protect with a wax or oil film, especially around welds to guard
against micro- corrosion cracking and rust spots. Always remove rust spots as they appear with brass, silver or chrome cleaner. Never use coarse abrasives like sandpaper or steel wool, as these can cause rusting. Never clean with acids or bleaches. Never permit contact with iron, steel or other metals which could cause
rust or corrosion.
Canvas Cleaning: Brush the canvas with a soft bristle brush and hose down at regular intervals to remove bird droppings, dust and dirt particles. It may be washed with a mild solution of natural soap in lukewarm water (less than 100 deg. F.) DO NOT USE DETERGENTS. For more stubborn stains soak the canvas in a solution of 4oz. non-chlorine bleach, 4oz. natural soap and one gallon warm water, for about 20 min. Rinse with cold water. Note: If the water repellence is lost due to cleaning, apply a water repellent treatment as necessary. The canvas may be washed in a automatic washing machine set on 'cold' using 2 cups non chlorine bleach 1 cup natural soap. DO NOT DRY IN A DRYER, LINE DRY ONLY to prevent shrinkage. If water won't bead on dry surface, re treat with water repellent. Storage: Do not fold or store any canvas while wet. All canvas should be rolled or folded when dry and kept in a clean dry location. Upholstery Vinyl An occasional wipe down with mild soap and water is all your interior and exterior vinyls need to remain in good condition for many years. We do not recommend the use of any special cleaners sealers or treatments for interior and exterior vinyls. Refer to the provided brochure. Fabric For all fabrics use dry cleaning fluid only. Corrosion Protection If you moor your Pro-Line in salt water for extended periods make sure to check the transom mounted anti-corrosion anode often for operation. Check the electrical connections (green wire) on all metallic fittings with anode for conductivity with a ohm meter. Make sure the anode surface is exposed and not caked with corrosion and scale. If the anode is more than 50% eroded renew it. Your motor / drive unit has a sacrificial anode made of zinc to mitigate the effects of corrosion causing electrolysis. Maintain this anode in accordance with the maintenance schedule in your engine manual. Winterization and Storage Pre-Storage Check List
Remove drain plug, keep bow high to drain any water accumulation. Run a pint of RV antifreeze through bilge pump.

24
Drain all water from water systems and head, and pump an approved antifreeze through all pumps, valves, drains and lines.
Fill fuel tank and add a stabilizer such as 'STA-BIL' to the gasoline. Prepare the engine in accordance with manufactures recommendations found in your
engine manual (drain cooling system). Treat metal parts with rust inhibitor. Remove the battery and protect from freezing. Trickle charge overnight
once a month. Place under cover, if on a trailer loosen tie down straps, and unload the
tires with blocks. Pull prop and grease prop shaft.
Fitting Out After Storage- Check entire fuel system for loose fittings, leaks and damage. Examine the exhaust system on stern drives for rust, loose fittings, and
leaks (recheck after starting engine). Clean battery terminals, install battery(s), and coat terminals with
deoxidizing agent. Check all through hull fittings and hoses for obstructions, water tightness and condition. Test navigation, anchor and other lights for operation. Check wiring, terminal blocks and plugs for loose connections and
corrosion. Verify switch and equipment operation. Check line condition and inspect anchor and rode. Install hull drain plug, clean out any debris from bilge and cockpit. Remove antifreeze and flush water system. Refit prop.

25
Appendix Boat Identification Information Owner:___________________________________________________________ Home Port:________________________________________________________ Dealer:___________________________________________________________ Boat Name:_______________________________________________________ Registration No:___________________________________________________ Hull No:__________________________________________________________ Boat model:_______LOA:___________Beam:__________Draft:____________ Vertical Clearance:_______-Hull:________-Deck:_________-Interior:_______ Warranty Registration Date:________________________________________ Fuel Capacity Gal.:________________________________________________ Ignition Key No:___________________________________________________ Radio Call Letters:_____________________Bat. ________________________ Engine Make & Model:________________________________HP:__________ Engine S/N:_______________________________________________________ Drive S/N:_________________________________________________________ Prop: Dia:____________Pitch:___________P/N:_________________________ Trailer Make & Model:______________________________________________ Trailer S/N:___________________________GVWR:_____________________ Insurance Company:_______________________________________________ Agent:___________________________________________________________ Policy No.:________________________Phone No.:_______________________
26
Trouble Shooting Chart PROBLEM: POSSIBLE CAUSE: Poor speed or fuel economy: *Wrong propeller for load or conditions. *Trim is in to far. *Load is to far forward or to heavy, or boat has taken on water. *Marine growth on hull, Line or anchor dragging. *Fuel is stale or partially blocked, engine is worn, out of tune or under powered . *Improper rigging, air intake or exhaust partially blocked. Engine cranks but will not start: *Out of fuel, filter is clogged, fuel line kinked, fuel vent plugged. *Water in fuel. *Engine problem, (electrical, fuel pump, blockage, etc.). *Safety shut down switch lanyard not installed. Engine will not crank: *Drive is in gear (check operation of the throttle release). *Battery is weak or terminals corroded or loose. *Engine or drive damage. Engine runs but boat wont go: *Throttle release is engaged. *Disconnected shift linkage. *Damaged prop, or lower drive unit. *Entangled in lines or weeds, or Anchor is down! Prop cavities: *Trim out too far, motor to high. *Weeds on prop. *Bow heavy, damage to hull. *Motor mounted to high *Prop wrong or damaged. Excessive vibration: *Propeller, engine, or drive unit damaged. *Hull damage. Boat won't turn: *Steering unit needs fluid or has trapped air, tiller is Disconnected. (helm turns) *Steering trunion or mechanism jammed, (helm won't turn). Electrical problems *Corroded wires, terminals, or plugs. (see wiring diagram) *Broken, loose or short circuited wires. *Circuit breaker tripped. *Defective switch, device or breaker. *Inline fuse burnt out. *Overloaded circuit.

27
Handling problems like: Porpoises *Trimmed out too far, damaged hull (rocker), trim tabs up, stern Heavy. Runs wet *Trimmed in too far, bow heavy, trim tabs down, overloaded for Conditions. Hard ride *Stern heavy, trimmed in too far, going to fast for conditions. Lists *Loaded to one side, trim tabs set wrong, trimmed to far in, fuel Tanks uneven. Overbank in turn *Trimmed in too far, improperly located load, throttle advanced Too far. Catches in turns *Damaged hull (hook), stern heavy, trim tabs down.

28
Nautical Terms Abeam: At 90 degrees to the center line of the boat, exactly to either side of the boat. Abaft: A point on a boat that is aft of a another. Aft: Toward the rear of the boat. Beam: The widest part of the boat. Bilge: The lower interior of the hull. Bow: The fore part of a boat. Bulkhead: A vertical partition or reinforcement in a boat usually perpendicular to the keel. Chine: The juncture of the bottom and the side of the boat. Chock: Deck fitting used to guide a line. Cleat: Deck fitting used to secure a line to. Deck: Upper structure of a boat that covers the hull. Draft: The distance the lowest part (usually the keel) of the boat projects into the water. Fathom: A unit of measure equal to six feet. Freeboard: The height of the deck above the water line. Gunwale or Gunnel: The Juncture of the side of the cockpit, deck and hull. Hatch: An opening used for access to an interior space. Head: Toilet or toilet area in a boat. Helm: Steering wheel or console area of a boat. Hull: The basic structure of a boat, that provides flotation by displacing and excluding water. Keel: The major lengthwise member of the hull, the lowest portion of the hull. Knot: A measure of speed in nautical miles per hour, equal to 1.15 MPH Lee: The side sheltered from the wind. Port: The left side of the boat when aboard the boat facing the bow. Scupper: Duct to drain water from the cockpit, usually with a check valve to sea water intrusion. Sheer: The juncture of the deck and the hull, generally covered by the rub rail. Starboard: The right side of the boat when aboard the boat facing the bow. Stern: The back of the boat. Stern Drive: Inboard /outboard I/O drive unit. Stringer: Lengthwise reinforcing members of the hull. Transom: Vertical part of the stern. Wake: Waves produced by a boat moving through the water. Windward: Toward the direction that the wind is blowing from.