panasonic kx-tg6711 manual
DESCRIPTION
User manual and guide for the Panasonic KX-TG6711 Cordless TelephoneTRANSCRIPT
Operating Instructions
Model No. KX-TG6721EKX-TG6722E
KX-TG6723EKX-TG6724E
Digital Cordless Answering System
Model No. KX-TG6711EKX-TG6712EKX-TG6713E
Digital Cordless Phone
Model shown is KX-TG6711.
Before initial use, see “Getting Started”on page 11.
Thank you for purchasing a Panasonic product.
Please read these operating instructions before using the unit and save them forfuture reference.
Please access our online customer survey: http://panasonic.net/pcc/tel/q
TG67xxE(en)_1226_ver022.pdf 1 2011/12/26 11:45:55

IntroductionModel composition .......................................3Accessory information ..................................4General information ......................................6
Important InformationFor your safety .............................................7Important safety instructions ........................8For best performance ...................................8Other information .........................................9Specifications .............................................10
Getting StartedSetting up ...................................................11Note when setting up .................................12Controls ......................................................13Display .......................................................14Turning the power on/off ............................16Initial settings .............................................16Smart function key (Top Key) .....................16One touch eco mode ..................................17Wall mounting ............................................18
Making/Answering CallsMaking calls ...............................................19Answering calls ..........................................19Useful features during a call .......................20Key lock ......................................................21
PhonebookHandset phonebook ...................................22Copying phonebook entries .......................23
ProgrammingProgrammable settings ..............................24Special programming .................................28Registering a unit .......................................31
Caller ID ServiceUsing Caller ID service ...............................33Caller list ....................................................33
Answering SystemAnswering system ......................................35Turning the answering system on/off ...............................................................35Greeting message ......................................35Listening to messages using the baseunit .............................................................36
Listening to messages using thehandset ......................................................36Remote operation .......................................37Answering system settings .........................38
Voice Mail ServiceVoice mail service ......................................40
Intercom/LocatorIntercom .....................................................41Handset locator ..........................................41Transferring calls, conference calls ............41
Useful InformationCharacter entry ..........................................42Error messages ..........................................44Troubleshooting .........................................45Conditions of guarantee .............................49
IndexIndex...........................................................50
2
Table of Contents
TG67xxE(en)_1226_ver022.pdf 2 2011/12/26 11:45:55

Model composition
Series Model No.Base unit HandsetPart No. Part No. Quantity
KX-TG6711series
KX-TG6711 KX-TG6711 KX-TGA672 1KX-TG6712 KX-TG6711 KX-TGA672 2KX-TG6713 KX-TG6711 KX-TGA672 3
KX-TG6721series
KX-TG6721 KX-TG6721 KX-TGA672 1KX-TG6722 KX-TG6721 KX-TGA672 2KX-TG6723 KX-TG6721 KX-TGA672 3KX-TG6724 KX-TG6721 KX-TGA672 4
R The suffix (E) in the following model numbers will be omitted in these instructions:KX-TG6711E/KX-TG6712E/KX-TG6713E/KX-TG6721E/KX-TG6722E/KX-TG6723E/KX-TG6724E
Feature differences
Series Answering systemIntercomBetween handsets
KX-TG6711 series – U*1
KX-TG6721 series U U*1
*1 Single handset models: Intercom calls can be made between handsets by purchasing andregistering one or more optional handsets (page 5).
Helpline Tel. No.: U.K. 0844 844 3899 Ireland 01289 8333 3
Introduction
TG67xxE(en)_1226_ver022.pdf 3 2011/12/26 11:45:55
Accessory information
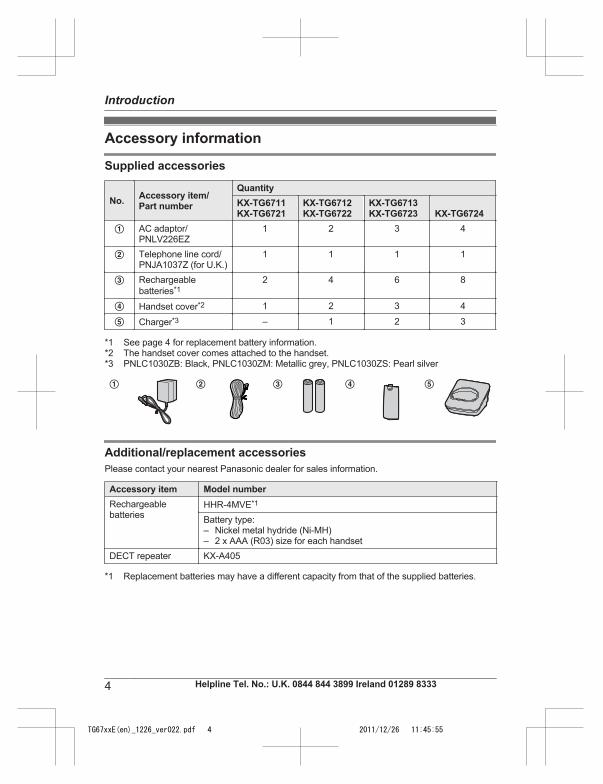
Supplied accessories
No. Accessory item/ Part number
QuantityKX-TG6711KX-TG6721
KX-TG6712KX-TG6722
KX-TG6713KX-TG6723 KX-TG6724
A AC adaptor/PNLV226EZ
1 2 3 4
B Telephone line cord/PNJA1037Z (for U.K.)
1 1 1 1
C Rechargeablebatteries*1
2 4 6 8
D Handset cover*2 1 2 3 4
E Charger*3 – 1 2 3
*1 See page 4 for replacement battery information.*2 The handset cover comes attached to the handset.*3 PNLC1030ZB: Black, PNLC1030ZM: Metallic grey, PNLC1030ZS: Pearl silver
A B C D E
Additional/replacement accessoriesPlease contact your nearest Panasonic dealer for sales information.
Accessory item Model numberRechargeablebatteries
HHR-4MVE*1
Battery type:– Nickel metal hydride (Ni-MH)– 2 x AAA (R03) size for each handset
DECT repeater KX-A405
*1 Replacement batteries may have a different capacity from that of the supplied batteries.
4 Helpline Tel. No.: U.K. 0844 844 3899 Ireland 01289 8333
Introduction
TG67xxE(en)_1226_ver022.pdf 4 2011/12/26 11:45:55

Expanding your phone system
Handset (optional): KX-TGA671EYou can expand your phone system byregistering optional handsets (6 max.) to asingle base unit.R Optional handsets may be a different
colour from that of the supplied handsets.
Sales and support information
Customer Communications CentreR For customers within the U.K.: 0844 844 3899R For customers within Ireland: 01289 8333R For further support on your product, please visit our website: www.panasonic.co.uk
Direct Sales at Panasonic U.K.R Order accessory and consumable items for your product with ease and confidence by phoning
our Customer Communications Centre Monday - Thursday 9:00am - 5:30pm, Friday 9:30am - 5:30pm (Excluding public holidays).
R Or go on line through our Internet Accessory ordering application at www.pas-europe.comR Most major credit and debit cards accepted.R All enquiries transactions and distribution facilities are provided directly by Panasonic U.K.R It couldn’t be simpler!R Also available through our Internet is direct shopping for a wide range of finished products.
Take a browse on our website for further details.
Helpline Tel. No.: U.K. 0844 844 3899 Ireland 01289 8333 5
Introduction
TG67xxE(en)_1226_ver022.pdf 5 2011/12/26 11:45:55
General informationR This equipment is designed for use on the U.K. and Ireland analogue telephone network.R In the event of problems, you should contact your equipment supplier in the first instance.Declaration of Conformity:R Panasonic System Networks Co., Ltd. declares that this equipment is in compliance with the
essential requirements and other relevant provisions of Radio & Telecommunications TerminalEquipment (R&TTE) Directive 1999/5/EC.Declarations of Conformity for the relevant Panasonic products described in this manual areavailable for download by visiting:http://www.doc.panasonic.deContact to Authorised Representative:Panasonic Testing CentrePanasonic Marketing Europe GmbHWinsbergring 15, 22525 Hamburg, Germany
For your future referenceWe recommend keeping a record of the following information to assist with any repair underwarranty.
Serial No. Date of purchase(found on the bottom of the base unit)Name and address of dealer
Attach your purchase receipt here.
6 Helpline Tel. No.: U.K. 0844 844 3899 Ireland 01289 8333
Introduction
TG67xxE(en)_1226_ver022.pdf 6 2011/12/26 11:45:55
For your safetyTo prevent severe injury and loss of life/property, read this section carefully beforeusing the product to ensure proper and safeoperation of your product.
WARNING
Power connectionR Use only the power source marked on the
product.R Do not overload power outlets and
extension cords. This can result in the riskof fire or electric shock.
R Completely insert the AC adaptor/powerplug into the power outlet. Failure to do somay cause electric shock and/or excessiveheat resulting in a fire.
R Regularly remove any dust, etc. from theAC adaptor/power plug by pulling it fromthe power outlet, then wiping with a drycloth. Accumulated dust may cause aninsulation defect from moisture, etc.resulting in a fire.
R Unplug the product from power outlets if itemits smoke, an abnormal smell, or makesan unusual noise. These conditions cancause fire or electric shock. Confirm thatsmoke has stopped emitting and contact anauthorised service centre.
R Unplug from power outlets and never touchthe inside of the product if its casing hasbeen broken open.
R Never touch the plug with wet hands.Danger of electric shock exists.
InstallationR To prevent the risk of fire or electrical
shock, do not expose the product to rain orany type of moisture.
R Do not place or use this product nearautomatically controlled devices such asautomatic doors and fire alarms. Radiowaves emitted from this product may causesuch devices to malfunction resulting in anaccident.
R Do not allow the AC adaptor or telephoneline cord to be excessively pulled, bent orplaced under heavy objects.
Operating safeguardsR Unplug the product from power outlets
before cleaning. Do not use liquid oraerosol cleaners.
R Do not disassemble the product.R Do not spill liquids (detergents, cleansers,
etc.) onto the telephone line cord plug, orallow it to become wet at all. This maycause a fire. If the telephone line cord plugbecomes wet, immediately pull it from thetelephone wall jack, and do not use.
MedicalR Consult the manufacturer of any personal
medical devices, such as pacemakers orhearing aids, to determine if they areadequately shielded from external RF(radio frequency) energy. (The productoperates in the frequency range of1.88 GHz to 1.90 GHz, and the RFtransmission power is 250 mW (max.).)
R Do not use the product in health carefacilities if any regulations posted in thearea instruct you not to do so. Hospitals orhealth care facilities may be usingequipment that could be sensitive toexternal RF energy.
CAUTION
Installation and locationR Never install telephone wiring during an
electrical storm.R Never install telephone line jacks in wet
locations unless the jack is specificallydesigned for wet locations.
R Never touch uninsulated telephone wires orterminals unless the telephone line hasbeen disconnected at the network interface.
R Use caution when installing or modifyingtelephone lines.
R The AC adaptor is used as the maindisconnect device. Ensure that the ACoutlet is installed near the product and iseasily accessible.
R This product is unable to make calls when:Helpline Tel. No.: U.K. 0844 844 3899 Ireland 01289 8333 7
Important Information
TG67xxE(en)_1226_ver022.pdf 7 2011/12/26 11:45:56
– the handset batteries need recharging orhave failed.
– there is a power failure.– the key lock feature is turned on.
BatteryR We recommend using the batteries noted
on page 4. USE ONLY rechargeableNi-MH batteries AAA (R03) size.
R Do not mix old and new batteries.R Do not open or mutilate the batteries.
Released electrolyte from the batteries iscorrosive and may cause burns or injury tothe eyes or skin. The electrolyte is toxic andmay be harmful if swallowed.
R Exercise care when handling the batteries.Do not allow conductive materials such asrings, bracelets, or keys to touch thebatteries, otherwise a short circuit maycause the batteries and/or the conductivematerial to overheat and cause burns.
R Charge the batteries provided with oridentified for use with this product only, inaccordance with the instructions andlimitations specified in this manual.
R Only use a compatible base unit (orcharger) to charge the batteries. Do nottamper with the base unit (or charger).Failure to follow these instructions maycause the batteries to swell or explode.
Important safetyinstructionsWhen using your product, basic safetyprecautions should always be followed toreduce the risk of fire, electric shock, andinjury to persons, including the following:1. Do not use this product near water for
example, near a bathtub, washbowl,kitchen sink, or laundry tub, in a wetbasement or near a swimming pool.
2. Avoid using a telephone (other than acordless type) during an electrical storm.There may be a remote risk of electricshock from lightning.
3. Do not use the telephone to report a gasleak in the vicinity of the leak.
4. Use only the power cord and batteriesindicated in this manual. Do not dispose ofbatteries in a fire. They may explode.Check with local codes for possible specialdisposal instructions.
SAVE THESE INSTRUCTIONS
For best performanceBase unit location/avoiding noiseThe base unit and other compatible Panasonicunits use radio waves to communicate witheach other.R For maximum coverage and noise-free
communications, place your base unit:– at a convenient, high, and central
location with no obstructions betweenthe handset and base unit in an indoorenvironment.
– away from electronic appliances such asTVs, radios, personal computers,wireless devices, or other phones.
– facing away from radio frequencytransmitters, such as external antennasof mobile phone cell stations. (Avoidputting the base unit on a bay window ornear a window.)
R Coverage and voice quality depends on thelocal environmental conditions.
R If the reception for a base unit location isnot satisfactory, move the base unit toanother location for better reception.
EnvironmentR Keep the product away from electrical noise
generating devices, such as fluorescentlamps and motors.
R The product should be kept free fromexcessive smoke, dust, high temperature,and vibration.
R The product should not be exposed todirect sunlight.
R Do not place heavy objects on top of theproduct.
R When you leave the product unused for along period of time, unplug the product fromthe power outlet.
R The product should be kept away from heatsources such as radiators, cookers, etc. It
8 Helpline Tel. No.: U.K. 0844 844 3899 Ireland 01289 8333
Important Information
TG67xxE(en)_1226_ver022.pdf 8 2011/12/26 11:45:56
should not be placed in rooms where thetemperature is less than 0 °C or greaterthan 40 °C. Damp basements should alsobe avoided.
R The maximum calling distance may beshortened when the product is used in thefollowing places: Near obstacles such ashills, tunnels, underground, near metalobjects such as wire fences, etc.
R Operating the product near electricalappliances may cause interference. Moveaway from the electrical appliances.
Routine careR Wipe the outer surface of the product
with a soft moist cloth.R Do not use benzine, thinner, or any
abrasive powder.
Other informationCAUTION: Risk of explosion if battery isreplaced by an incorrect type. Dispose of usedbatteries according to the instructions.
Notice for product disposal, transfer,or returnR This product can store your private/
confidential information. To protect yourprivacy/confidentiality, we recommend thatyou erase information such as phonebookor caller list entries from the memory beforeyou dispose of, transfer, or return theproduct.
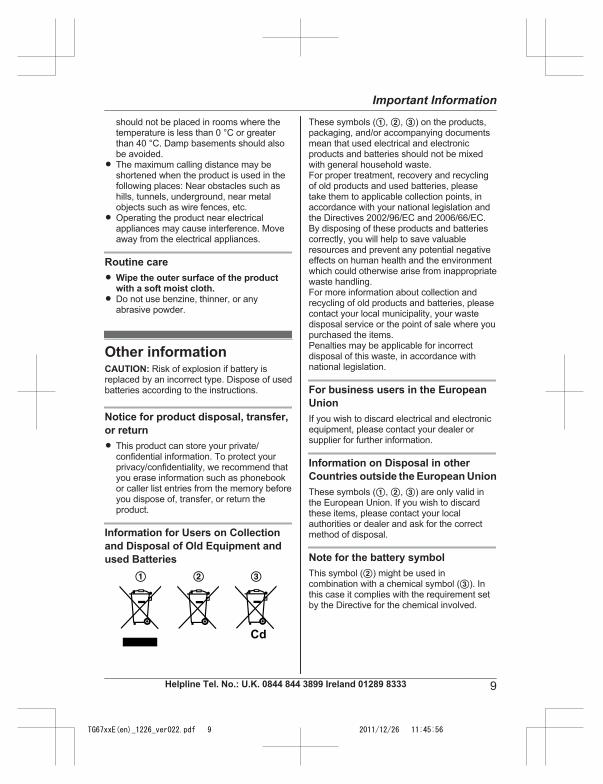
Information for Users on Collectionand Disposal of Old Equipment andused Batteries
1 2 3
These symbols (A, B, C) on the products,packaging, and/or accompanying documentsmean that used electrical and electronicproducts and batteries should not be mixedwith general household waste.For proper treatment, recovery and recyclingof old products and used batteries, pleasetake them to applicable collection points, inaccordance with your national legislation andthe Directives 2002/96/EC and 2006/66/EC.By disposing of these products and batteriescorrectly, you will help to save valuableresources and prevent any potential negativeeffects on human health and the environmentwhich could otherwise arise from inappropriatewaste handling.For more information about collection andrecycling of old products and batteries, pleasecontact your local municipality, your wastedisposal service or the point of sale where youpurchased the items.Penalties may be applicable for incorrectdisposal of this waste, in accordance withnational legislation.
For business users in the EuropeanUnionIf you wish to discard electrical and electronicequipment, please contact your dealer orsupplier for further information.
Information on Disposal in otherCountries outside the European UnionThese symbols (A, B, C) are only valid inthe European Union. If you wish to discardthese items, please contact your localauthorities or dealer and ask for the correctmethod of disposal.
Note for the battery symbolThis symbol (B) might be used incombination with a chemical symbol (C). Inthis case it complies with the requirement setby the Directive for the chemical involved.
Helpline Tel. No.: U.K. 0844 844 3899 Ireland 01289 8333 9
Important Information
TG67xxE(en)_1226_ver022.pdf 9 2011/12/26 11:45:56
SpecificationsR Standard:
DECT (Digital Enhanced CordlessTelecommunications),GAP (Generic Access Profile)
R Frequency range:1.88 GHz to 1.90 GHz
R RF transmission power:Approx. 10 mW (average power perchannel)
R Power source:220–240 V AC, 50/60 Hz
R Power consumption:Base unit*1:Standby: Approx. 0.38 WMaximum: Approx. 2.4 WBase unit*2:Standby: Approx. 0.48 WMaximum: Approx. 2.5 WCharger:Standby: Approx. 0.1 WMaximum: Approx. 1.8 W
R Operating conditions:0 °C–40 °C, 20 %–80 % relative airhumidity (dry)
*1 KX-TG6711 series: page 3*2 KX-TG6721 series: page 3
Note:R Design and specifications are subject to
change without notice.R The illustrations in these instructions may
vary slightly from the actual product.
10 Helpline Tel. No.: U.K. 0844 844 3899 Ireland 01289 8333
Important Information
TG67xxE(en)_1226_ver022.pdf 10 2011/12/26 11:45:56

Setting up
ConnectionsR Use only the supplied Panasonic AC
adaptor PNLV226E.R When mounting the unit on a wall, see
page 18.n Base unit
*DSL/ADSL filter (not supplied) is required ifyou have DSL/ADSL service.
“Click”
To telephone line
(DSL/ADSL filter*)
Press plug firmly.
To power outlet
IncorrectCorrect
Use only the supplied
telephone line cord.
Hook
n Charger
To power outlet
Hooks
Battery installationR USE ONLY Ni-MH batteries AAA (R03)
size.R Do NOT use Alkaline/Manganese/Ni-Cd
batteries.R Confirm correct polarities ( , ).
Rechargeable Ni-MH ONLY
R When the date and time setting isdisplayed, see page 16.
Battery chargingCharge for about 7 hours.R When the batteries are fully charged,
“Fully charged” is displayed.
Confirm “Charging” is displayed.
Helpline Tel. No.: U.K. 0844 844 3899 Ireland 01289 8333 11
Getting Started
TG67xxE(en)_1226_ver022.pdf 11 2011/12/26 11:45:56
Note when setting upNote for connectionsR The AC adaptor must remain connected at
all times. (It is normal for the adaptor to feelwarm during use.)
R The AC adaptor should be connected to avertically oriented or floor-mounted ACoutlet. Do not connect the AC adaptor to aceiling-mounted AC outlet, as the weight ofthe adaptor may cause it to becomedisconnected.
During a power failureThe unit will not work during a power failure.We recommend connecting a corded-typetelephone (without AC adaptor) to the sametelephone line or to the same telephone linejack using a T-adaptor. Your Panasonic salesshop can offer you more information aboutconnection possibilities.
Note for battery installationR Use the supplied rechargeable batteries.
For replacement, we recommend using thePanasonic rechargeable batteries noted onpage 4, 8.
R Wipe the battery ends ( , ) with a drycloth.
R Avoid touching the battery ends( , ) or the unit contacts.
Note for battery chargingR It is normal for the handset to feel warm
during charging.R Clean the charge contacts of the handset,
base unit, and charger with a soft and drycloth once a month. Before cleaning theunit, disconnect from power outlets and anytelephone line cords. Clean more often ifthe unit is exposed to grease, dust, or highhumidity.
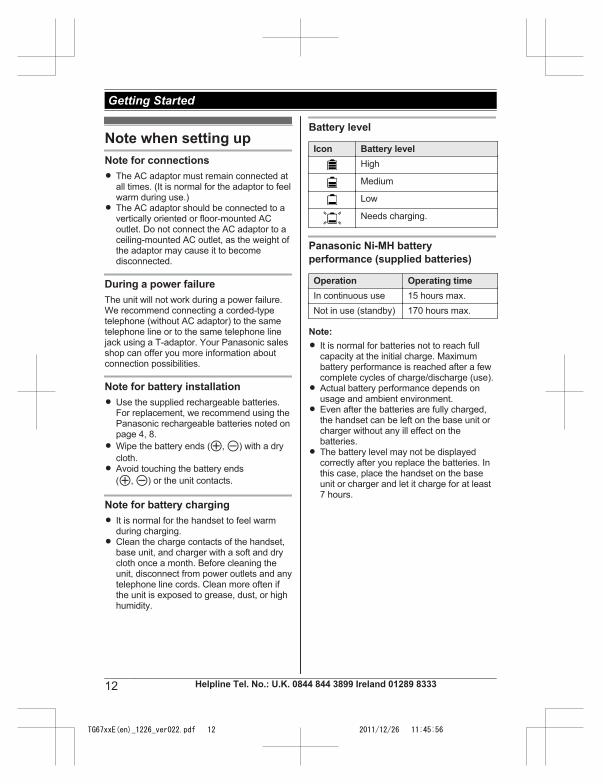
Battery level
Icon Battery levelHigh
Medium
Low
Needs charging.
Panasonic Ni-MH batteryperformance (supplied batteries)
Operation Operating timeIn continuous use 15 hours max.Not in use (standby) 170 hours max.
Note:R It is normal for batteries not to reach full
capacity at the initial charge. Maximumbattery performance is reached after a fewcomplete cycles of charge/discharge (use).
R Actual battery performance depends onusage and ambient environment.
R Even after the batteries are fully charged,the handset can be left on the base unit orcharger without any ill effect on thebatteries.
R The battery level may not be displayedcorrectly after you replace the batteries. Inthis case, place the handset on the baseunit or charger and let it charge for at least7 hours.
12 Helpline Tel. No.: U.K. 0844 844 3899 Ireland 01289 8333
Getting Started
TG67xxE(en)_1226_ver022.pdf 12 2011/12/26 11:45:56

Controls
Handset
B C
A
H
I
J
L
E
G
K
D
F
MSmart functionN (Top Key)Smart function indicatorSecure gripR Secure grip offers support when you
cradle the handset between yourshoulder and ear.
SpeakerM N (Speakerphone)M N (Talk)Dial keypad
ReceiverDisplayMR/ECON R: Recall/Flash ECO: Eco mode shortcut keyM N (Off/Power)MicrophoneCharge contacts
n Control type Soft keys
The handset features 3 soft keys. Bypressing a soft key, you can select thefeature shown directly above it on thedisplay.
Navigator key– MDN, MCN, MFN, or MEN: Scroll through
various lists and items.– (Volume: MDN or MCN): Adjust the
receiver or speaker volume whiletalking.
– MFN ( : Caller list): View the caller list.– MEN (T: Redial): View the redial list.
Base unitn KX-TG6711 series: page 3
BA
Charge contactsM N (Locator)
Helpline Tel. No.: U.K. 0844 844 3899 Ireland 01289 8333 13
Getting Started
TG67xxE(en)_1226_ver022.pdf 13 2011/12/26 11:45:56
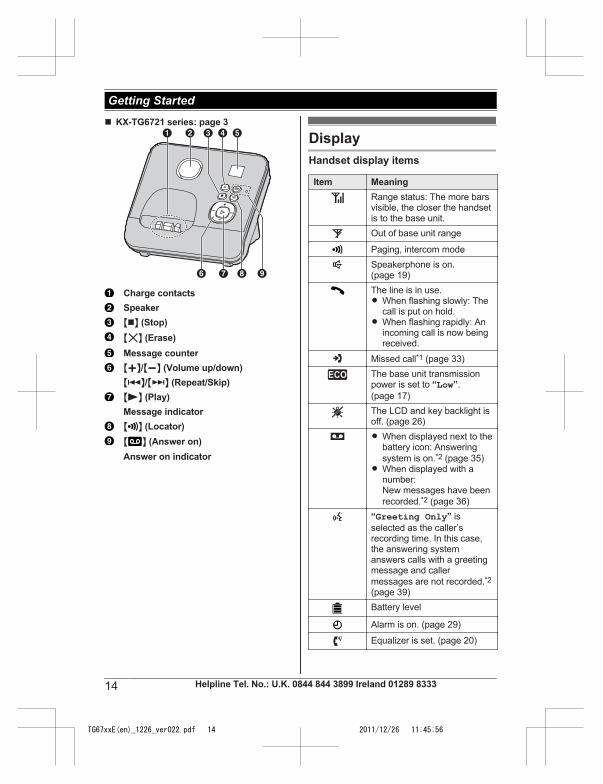
n KX-TG6721 series: page 3A B EC D
G HF I
Charge contactsSpeakerMnN (Stop)M N (Erase)Message counterMjN/MkN (Volume up/down)M N/M N (Repeat/Skip)M N (Play)Message indicatorM N (Locator)M N (Answer on)Answer on indicator
DisplayHandset display items
Item MeaningRange status: The more barsvisible, the closer the handsetis to the base unit.Out of base unit range
Paging, intercom modeSpeakerphone is on.(page 19)The line is in use.R When flashing slowly: The
call is put on hold.R When flashing rapidly: An
incoming call is now beingreceived.
Missed call*1 (page 33)The base unit transmissionpower is set to “Low”.(page 17)The LCD and key backlight isoff. (page 26)R When displayed next to the
battery icon: Answeringsystem is on.*2 (page 35)
R When displayed with anumber:New messages have beenrecorded.*2 (page 36)
“Greeting Only” isselected as the caller’srecording time. In this case,the answering systemanswers calls with a greetingmessage and callermessages are not recorded.*2(page 39)Battery level
Alarm is on. (page 29)
Equalizer is set. (page 20)
14 Helpline Tel. No.: U.K. 0844 844 3899 Ireland 01289 8333
Getting Started
TG67xxE(en)_1226_ver022.pdf 14 2011/12/26 11:45:56
Item MeaningPrivacy mode is on.(page 27)Ringer volume is off.(page 26)Night mode is on. (page 29)
Blocked call*1 (page 30,33)New voice mail messagereceived.*3 (page 40)
Line inuse
Someone is using the line.
IN USE Answering system is beingused by another handset orthe base unit.*2
*1 Caller ID subscribers only*2 KX-TG6721 series: page 3*3 Voice mail subscribers only
Base unit display itemsn KX-TG6721 series: page 3
Item Meaning- - “Greeting Only” is
selected as the caller’srecording time. In this case,the answering systemanswers calls with a greetingmessage and callermessages are not recorded.(page 39)
Handset soft key icons
Icon ActionReturns to the previous screen oroutside call.Displays the menu.
Accepts the current selection.
Displays a previously dialledphone number.Makes a call. (page 19)
Icon ActionTemporarily turns off the ringerfor incoming calls. (page 20)Sets 24-hour or 12-hour clockformat. (page 16)Places a call on hold.
Opens the phonebook.
Allows you to edit phonenumbers. (page 30, 34)Adds new entry. (page 22, 30)
Displays the character entrymode for phonebook search.(page 22)Turns the key lock feature off.(page 21)Stops alarm. (page 29)
Snooze button on the alarm.(page 29)Selects a character entry mode.
Selects entries or handsets.(page 17, 29)
Stops recording or playback.*1
Stores phone numbers.(page 30, 34)Inserts a dialling pause.
Erases the selected item orreturns to the outside call.Allows you to make an intercomcall. (page 41)Erases a number/character.
Puts the call on mute.
*1 KX-TG6721 series: page 3
Helpline Tel. No.: U.K. 0844 844 3899 Ireland 01289 8333 15
Getting Started
TG67xxE(en)_1226_ver022.pdf 15 2011/12/26 11:45:56

Handset main menu iconsThe following icons are shown when youpress (middle soft key) in standby mode.
Icon FeatureCaller ListAnswer System*1
Time SettingsIntercomInitial SetupRinger SetupCaller Barred*2
*1 KX-TG6721 series: page 3*2 KX-TG6711 series: page 3
Turning the power on/offPower onPress M N for about 1 second.
Power offPress M N for about 2 seconds.
Initial settingsn Direct command code:Programmable settings can be accessed bypressing , # and then thecorresponding code on the dial keypad(page 24).Example: Press #101.n Symbol meaning:Example: MbN: “Off”Press MCN or MDN to select the words inquotations.
Display language1 #110
2 MbN: Select your desired language. a
3 M N
Date and timeImportant:R When you install the batteries for the first
time, the handset may prompt you to setdate and time. First press , thenproceed to step 2.
1 #101
2 Enter the current date, month, and year.a Example: 15 July, 201215 07 12
3 Enter the current hour and minute.Example: 9:3009 30R You can select 24-hour or 12-hour
clock format (“AM” or “PM”) bypressing .
4 a M N
Note:R The date and time may be incorrect after a
power failure. In this case, set the date andtime again.
Smart function key (TopKey)The smart function key (Top Key) is locatedon the top of the handset and informs you withits flashing to allow you to activate thefollowing features by simply pressing this key.n When the smart function indicator
flashes rapidly, you can:– Answer the call (outside call, intercom).
(page 19, 41)– Stop the alarm sound. (page 29)– Stop paging. (page 41)
n When the smart function indicatorflashes slowly in standby mode, you can:– Listen to new messages.*1 (page 37)
16 Helpline Tel. No.: U.K. 0844 844 3899 Ireland 01289 8333
Getting Started
TG67xxE(en)_1226_ver022.pdf 16 2011/12/26 11:45:56
– View the caller list when there aremissed calls. (page 33)
To activate these features, their Top keysetup must be “On”. (page 17)
*1 KX-TG6721 series: page 3
Using the smart function key(Top Key)When the smart function indicator flashesrapidly/slowly, press MSmart functionN.R The above features can be activated
depending the situation.R If you answer a call using the smart
function key, the speakerphone is activated.R Even if the handset is placed on the base
unit or charger, the feature can beactivated. You can talk or listen to newmessages*1 without lifting up the handset. Ifyou want to perform further operations, liftup the handset.
R When the unit has new messages*1 andmissed calls, the unit can be operated toplay the new messages first and then showthe missed calls.
*1 KX-TG6721 series: page 3
Note:R While key lock is on (page 21), incoming
calls can be answered, but the followingfeatures are disabled even when the smartfunction indicator flashes slowly.– Listen to new messages.*1 (page 37)– View the caller list when there are
missed calls. (page 33)*1 KX-TG6721 series: page 3
Setting the smart function key (TopKey Setup)The Top key setup for the following featuresmust be “On”.– “New Message”*1 (Default: On)– “Missed Call” (Default: Off)The settings can be set for each handset.*1 KX-TG6721 series: page 3
1 #278
2 MbN: Select the desired setting and press.
R “ ” is displayed next to the selectedfeatures.
R To cancel a selected feature, press again. “ ” disappears.
3 a M N
Note:R If the smart function indicator flashes when
the handset is not placed on the base unitor charger, battery consumption is fasterthan usual.
One touch eco modeThe MR/ECON button on the handset enablesyou to activate the eco function with onetouch.By activating eco mode, your unit can reducethe base unit transmission power by up to90 % in standby mode.You can turn on/off one touch eco mode byjust pressing MR/ECON. The default setting is“Normal”.– When the one touch eco mode is on: “Low”
is temporarily displayed and is shownon the handset display instead of .
– When the one touch eco mode is off:“Normal” is temporarily displayed and
goes off from the handset display.Note:R When there is another cordless phone
nearby and it is in use, the base unittransmission power may not be reduced.
R Activating one touch eco mode reduces therange of the base unit in standby mode.
R If you set the repeater mode to “On” (page 32):– One touch eco mode is cancelled.– “Eco Setup” is not shown in the
display menu (page 26).
Helpline Tel. No.: U.K. 0844 844 3899 Ireland 01289 8333 17
Getting Started
TG67xxE(en)_1226_ver022.pdf 17 2011/12/26 11:45:56
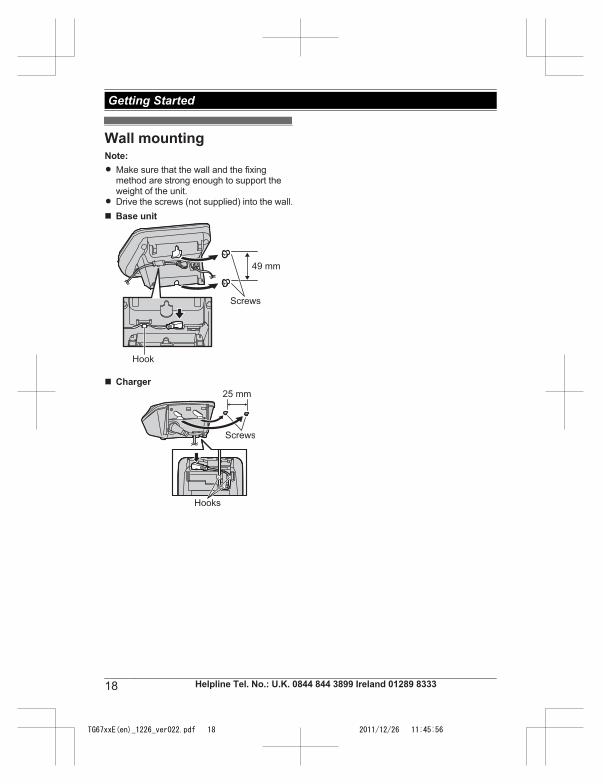
Wall mountingNote:R Make sure that the wall and the fixing
method are strong enough to support theweight of the unit.
R Drive the screws (not supplied) into the wall.n Base unit
Hook
Screws
49 mm
n Charger25 mm
Screws
Hooks
18 Helpline Tel. No.: U.K. 0844 844 3899 Ireland 01289 8333
Getting Started
TG67xxE(en)_1226_ver022.pdf 18 2011/12/26 11:45:56

Making calls1 Lift the handset and dial the phone
number.R To correct a digit, press .
2 Press M N or .
3 When you finish talking, press M N orplace the handset on the base unit orcharger.
Using the speakerphone1 Dial the phone number and press M N.R Speak alternately with the other party.
2 When you finish talking, press M N.Note:R For best performance, use the
speakerphone in a quiet environment.R To switch back to the receiver, press M N/M N.
Adjusting the receiver or speakervolumePress MDN or MCN repeatedly while talking.
Making a call using the redial listThe last 10 phone numbers dialled are storedin the redial list (each 24 digits max.).1 or MEN (T)
2 MbN: Select the desired phone number.3 M N
Erasing a number in the redial list1 or MEN (T)
2 MbN: Select the desired phone number.a
3 MbN: “Yes” a a M N
Pause (for PBX/long distance serviceusers)A pause is sometimes required when makingcalls using a PBX or long distance service.
When storing a calling card access numberand/or PIN in the phonebook, a pause is alsoneeded (page 23).Example: If you need to dial the line accessnumber “0” when making outside calls with aPBX:1 0 a 2 Dial the phone number. a M N
Note:R A 3 second pause is inserted each time
is pressed.
Answering callsWhen a call is being received, the smartfunction indicator flashes rapidly.1 Lift the handset and press M N or M N
when the unit rings.R You can also answer the call by
pressing any dial key from 0 to 9,*, or #. (Any key answer feature)
2 When you finish talking, press M N orplace the handset on the base unit orcharger.
Using the smart function keyWhen the smart function indicator flashesrapidly, press MSmart functionN.R You can answer the call even if the handset
is placed on the base unit or charger(page 17).
You can finish talking by pressing M Nwithout lifting up the handset.
Auto talkYou can answer calls simply by lifting thehandset off the base unit or charger. You donot need to press M N. To turn this featureon, see page 26.
Adjusting the handset ringer volumen While the handset is ringing for an
incoming call:Press MDN or MCN repeatedly to select thedesired volume.
Helpline Tel. No.: U.K. 0844 844 3899 Ireland 01289 8333 19
Making/Answering Calls
TG67xxE(en)_1226_ver022.pdf 19 2011/12/26 11:45:56

n Programming the volume beforehand:1 #160
2 MbN: Select the desired volume.3 a M N
Temporary handset ringer offWhile the handset is ringing for a call, you canturn the ringer off temporarily by pressing
.
Useful features during acall
HoldThis feature allows you to put an outside callon hold.1 Press during an outside call.
2 MbN: “Hold” a
3 To release hold, press M N.R Another handset user can take the call
by pressing M N.Note:R If a call is kept on hold for more than 9
minutes, an alarm tone starts to sound andthe smart function indicator flashes rapidly.After 1 additional minute on hold, the call isdisconnected.
R If another phone is connected to the sameline, you can also take the call by lifting itshandset.
MuteWhile mute is turned on, you can hear theother party, but the other party cannot hearyou.1 Press during conversation.R flashes.
2 To return to the conversation, press again.
Recall/flashMR/ECON allows you to use the specialfeatures of your host PBX such as transferringan extension call, or accessing optionaltelephone services.Note:R To change the recall/flash time, see
page 27.
For call waiting or Call WaitingCaller ID service usersTo use call waiting or Call Waiting Caller ID,you must first subscribe with your serviceprovider/telephone company.This feature allows you to receive calls whileyou are already talking on the phone. If youreceive a call while on the phone, you will heara call waiting tone.If you subscribe to both Caller ID and CallWaiting with Caller ID services, the 2ndcaller’s information is displayed after you hearthe call waiting tone on the handset.1 Press MR/ECON to answer the 2nd call.2 To switch between calls, press MR/ECON.Note:R Please contact your service provider/
telephone company for details andavailability of this service in your area.
Handset equalizerThis feature clarifies the voice of the personyou are talking to, producing a morenatural-sounding voice that is easier to hearand understand.1 Press while talking.
2 MbN: “Equalizer” a
3 MbN: Select the desired setting.4 Press to exit.Note:R When this feature is turned on, is
displayed while talking.R Depending on the condition and quality of
your telephone line, this feature may
20 Helpline Tel. No.: U.K. 0844 844 3899 Ireland 01289 8333
Making/Answering Calls
TG67xxE(en)_1226_ver022.pdf 20 2011/12/26 11:45:56

emphasise existing line noise. If it becomesdifficult to hear, turn this feature off.
R This feature is not available while using thespeakerphone.
Call shareYou can join an existing outside call.To join the conversation, press M N whenthe other handset is on an outside call.Note:R To prevent other users from joining your
conversations with outside callers, turn theprivacy mode on (page 27).
Key lockThe handset can be locked so that no calls orsettings can be made. Incoming calls can beanswered, but all other functions are disabledwhile key lock is on.To turn key lock on, press for about 3seconds.R is displayed.R To turn key lock off, press for about 3
seconds.Note:R Calls to emergency numbers cannot be
made until key lock is turned off.
Helpline Tel. No.: U.K. 0844 844 3899 Ireland 01289 8333 21
Making/Answering Calls
TG67xxE(en)_1226_ver022.pdf 21 2011/12/26 11:45:56
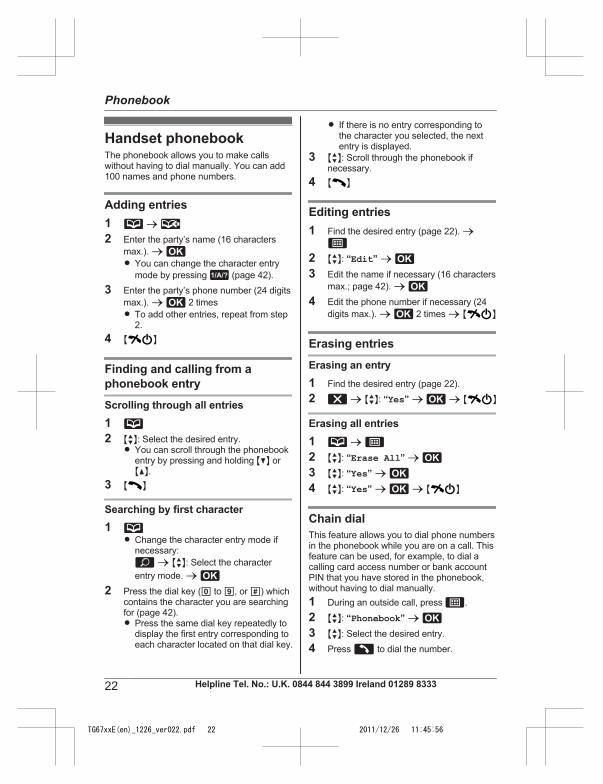
Handset phonebookThe phonebook allows you to make callswithout having to dial manually. You can add100 names and phone numbers.
Adding entries1 a 2 Enter the party’s name (16 characters
max.). a R You can change the character entry
mode by pressing (page 42).3 Enter the party’s phone number (24 digits
max.). a 2 timesR To add other entries, repeat from step
2.4 M N
Finding and calling from aphonebook entry
Scrolling through all entries12 MbN: Select the desired entry.R You can scroll through the phonebook
entry by pressing and holding MCN orMDN.
3 M N
Searching by first character1R Change the character entry mode if
necessary: a MbN: Select the character
entry mode. a
2 Press the dial key (0 to 9, or #) whichcontains the character you are searchingfor (page 42).R Press the same dial key repeatedly to
display the first entry corresponding toeach character located on that dial key.
R If there is no entry corresponding tothe character you selected, the nextentry is displayed.
3 MbN: Scroll through the phonebook ifnecessary.
4 M N
Editing entries1 Find the desired entry (page 22). a
2 MbN: “Edit” a
3 Edit the name if necessary (16 charactersmax.; page 42). a
4 Edit the phone number if necessary (24digits max.). a 2 times a M N
Erasing entries
Erasing an entry1 Find the desired entry (page 22).2 a MbN: “Yes” a a M N
Erasing all entries1 a
2 MbN: “Erase All” a
3 MbN: “Yes” a
4 MbN: “Yes” a a M N
Chain dialThis feature allows you to dial phone numbersin the phonebook while you are on a call. Thisfeature can be used, for example, to dial acalling card access number or bank accountPIN that you have stored in the phonebook,without having to dial manually.1 During an outside call, press .
2 MbN: “Phonebook” a
3 MbN: Select the desired entry.4 Press to dial the number.
22 Helpline Tel. No.: U.K. 0844 844 3899 Ireland 01289 8333
Phonebook
TG67xxE(en)_1226_ver022.pdf 22 2011/12/26 11:45:56

Note:R When storing a calling card access number
and your PIN in the phonebook as onephonebook entry, press to addpauses after the number and PIN asnecessary (page 19).
Copying phonebookentriesYou can copy phonebook entries between 2handsets.
Copying an entry1 Find the desired entry (page 22). a
2 MbN: “Copy” a
3 MbN: Select the handset you want to sendthe phonebook entry to. a R When an entry has been copied,
“Completed” is displayed.R To continue copying another entry:MbN: “Yes” a a MbN: Selectthe desired entry. a
4 M N
Copying all entries1 a
2 MbN: “Copy All” a
3 MbN: Select the handset you want to sendthe phonebook entry to. a R When all entries have been copied,
“Completed” is displayed.4 M N
Helpline Tel. No.: U.K. 0844 844 3899 Ireland 01289 8333 23
Phonebook
TG67xxE(en)_1226_ver022.pdf 23 2011/12/26 11:45:56

Programmable settingsYou can customise the unit by programming the following features using the handset.To access the features, there are 2 methods.n Scrolling through the display menus
12 Press MCN, MDN, MEN, or MFN to select the desired main menu. a
3 Press MCN or MDN to select the desired item from the next sub-menus. a
4 Press MCN or MDN to select the desired setting. a R This step may vary depending on the feature being programmed.R To exit the operation, press M N.
n Using the direct command code1 a Enter the desired code.
Example: Press #101.
2 Select the desired setting. a R This step may vary depending on the feature being programmed.R To exit the operation, press M N.
Note:R In the following table, < > indicates the default settings.R In the following table, indicates the reference page number.R Display menu order and sub-menu may vary depending on your model.
Display the menu tree and direct command code table
Main menu: “Caller List”
Operation CodeViewing the caller list. #213 33
Main menu: “Answer System”*1
Sub-menu 1 Sub-menu 2 Settings CodePlay New Msg.(Msg.: message)
– – #323 36
Play All Msg. – – #324 36
Erase All Msg.*2 – – #325 37
Greeting Start REC*2
(Record greeting)– #302 36
Play Greeting – #303 36
Default*2 (Reset to pre-recordedgreeting)
– #304 36
24 Helpline Tel. No.: U.K. 0844 844 3899 Ireland 01289 8333
Programming
TG67xxE(en)_1226_ver022.pdf 24 2011/12/26 11:45:56
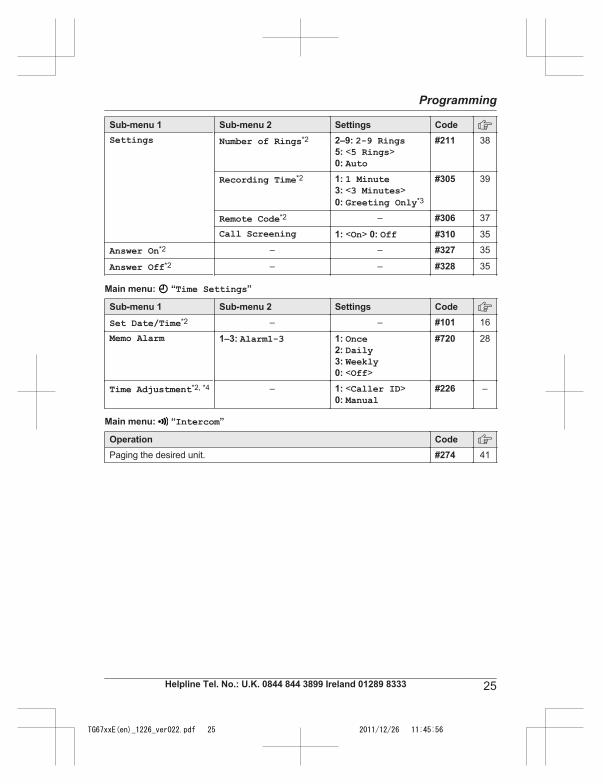
Sub-menu 1 Sub-menu 2 Settings CodeSettings Number of Rings*2 2–9: 2-9 Rings
5: <5 Rings>0: Auto
#211 38
Recording Time*2 1: 1 Minute3: <3 Minutes>0: Greeting Only*3
#305 39
Remote Code*2 – #306 37
Call Screening 1: <On> 0: Off #310 35
Answer On*2 – – #327 35
Answer Off*2 – – #328 35
Main menu: “Time Settings”
Sub-menu 1 Sub-menu 2 Settings Code
Set Date/Time*2 – – #101 16
Memo Alarm 1–3: Alarm1-3 1: Once2: Daily3: Weekly0: <Off>
#720 28
Time Adjustment*2, *4 – 1: <Caller ID>0: Manual
#226 –
Main menu: “Intercom”
Operation CodePaging the desired unit. #274 41
Helpline Tel. No.: U.K. 0844 844 3899 Ireland 01289 8333 25
Programming
TG67xxE(en)_1226_ver022.pdf 25 2011/12/26 11:45:56

Main menu: “Initial Setup”
Sub-menu 1 Sub-menu 2 Settings CodeRinger Setup Ringer Volume
– Handset0–6: Off–6 <6> #160 20
Ringer Volume– Base Unit*1, *2
0–6: Off–6 <3> #G160 –
Ringtone*5, *6 (Handset) <Ringtone 1> #161 –
Night Mode– On/Off
1: On 0: <Off> #238 29
Night Mode– Start/End
<23:00/06:00> #237 29
Night Mode– Ring Delay
1: 30 sec.2: <60 sec.>3: 90 sec.4: 120 sec.0: No Ringing
#239 29
First Ring*2, *7 1: <On> 0: Off #173 –
Time Settings Set Date/Time*2 – #101 16
Memo Alarm– 1–3: Alarm1-3
1: Once2: Daily3: Weekly0: <Off>
#720 28
Time Adjustment*2, *4 1: <Caller ID> 0: Manual
#226 –
Handset Name – – #104 29
Caller Barred*2 – – #217 30
Eco Setup Transmission Power*2 1: <Normal> 2: Low #725 17
Display Setup LCD & Key Backlight 1: <On> 0: Off #276 –
Contrast(Display contrast)
1–6: Level 1-6<3>
#145 –
Top Key Setup – – #278 17
Keytones*8 – 1: <On> 0: Off #165 –
Call Restrict*2 – – #256 30
Auto Talk*9 – 1: On 0: <Off> #200 19
26 Helpline Tel. No.: U.K. 0844 844 3899 Ireland 01289 8333
Programming
TG67xxE(en)_1226_ver022.pdf 26 2011/12/26 11:45:57
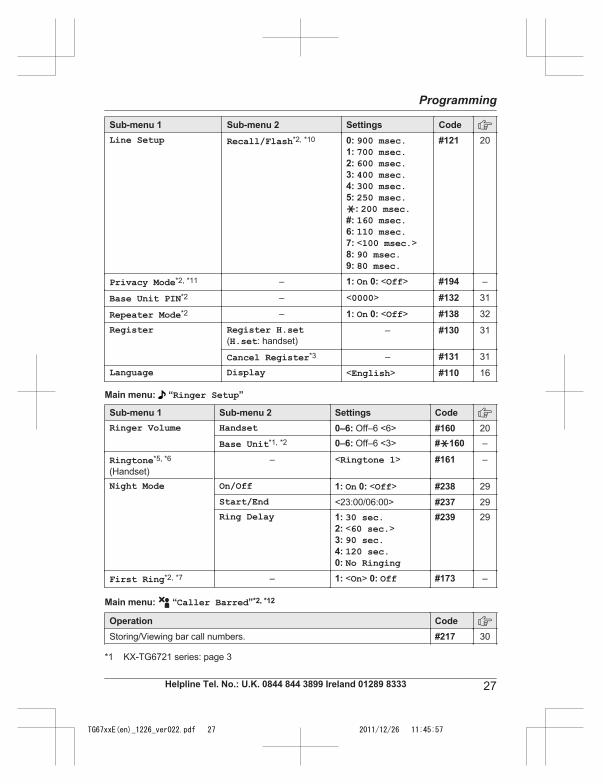
Sub-menu 1 Sub-menu 2 Settings CodeLine Setup Recall/Flash*2, *10 0: 900 msec.
1: 700 msec.2: 600 msec.3: 400 msec.4: 300 msec.5: 250 msec.G: 200 msec.#: 160 msec.6: 110 msec.7: <100 msec.>8: 90 msec.9: 80 msec.
#121 20
Privacy Mode*2, *11 – 1: On 0: <Off> #194 –
Base Unit PIN*2 – <0000> #132 31
Repeater Mode*2 – 1: On 0: <Off> #138 32
Register Register H.set(H.set: handset)
– #130 31
Cancel Register*3 – #131 31
Language Display <English> #110 16
Main menu: “Ringer Setup”
Sub-menu 1 Sub-menu 2 Settings CodeRinger Volume Handset 0–6: Off–6 <6> #160 20
Base Unit*1, *2 0–6: Off–6 <3> #G160 –
Ringtone*5, *6
(Handset)– <Ringtone 1> #161 –
Night Mode On/Off 1: On 0: <Off> #238 29Start/End <23:00/06:00> #237 29Ring Delay 1: 30 sec.
2: <60 sec.>3: 90 sec.4: 120 sec.0: No Ringing
#239 29
First Ring*2, *7 – 1: <On> 0: Off #173 –
Main menu: “Caller Barred”*2, *12
Operation CodeStoring/Viewing bar call numbers. #217 30
*1 KX-TG6721 series: page 3
Helpline Tel. No.: U.K. 0844 844 3899 Ireland 01289 8333 27
Programming
TG67xxE(en)_1226_ver022.pdf 27 2011/12/26 11:45:57
*2 If you program these settings using one of the handsets, you do not need to program thesame item using another handset.
*3 This menu is not displayed when scrolling through the display menus. It is only available indirect command code.
*4 This feature allows the unit to automatically adjust the date and time each time callerinformation including date and time is received.To turn this feature on, select “Caller ID”. To turn this feature off, select “Manual”.(Caller ID subscribers only)To use this feature, set the date and time first (page 16).
*5 The ringer tone may continue to play for several seconds even if the caller has already hungup. You may either hear a dial tone or no one on the line when you answer the call.
*6 The preset melodies in this product are used with permission of © 2010 Copyrights VisionInc.
*7 If you do not want the unit to ring before the caller information is received, set to “Off”.(Caller ID subscribers only)You can only remove the first ring if the unit rings two times or more by default, whichdepends on your service provider/telephone company.
*8 Turn this feature off if you prefer not to hear key tones while you are dialling or pressing anykeys, including confirmation tones and error tones.
*9 If you subscribe to a Caller ID service and want to view the caller’s information after lifting upthe handset to answer a call, turn off this feature.
*10 The recall/flash time depends on your telephone exchange or host PBX. Contact your PBXsupplier if necessary.
*11 To prevent other users from joining your conversations with outside callers, turn this featureon.
*12 KX-TG6711 series: page 3
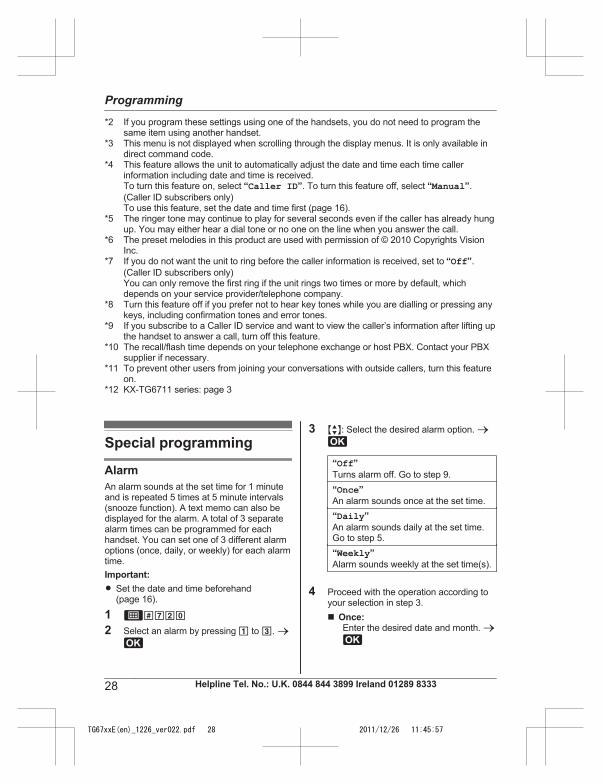
Special programming
AlarmAn alarm sounds at the set time for 1 minuteand is repeated 5 times at 5 minute intervals(snooze function). A text memo can also bedisplayed for the alarm. A total of 3 separatealarm times can be programmed for eachhandset. You can set one of 3 different alarmoptions (once, daily, or weekly) for each alarmtime.Important:R Set the date and time beforehand
(page 16).
1 #720
2 Select an alarm by pressing 1 to 3. a
3 MbN: Select the desired alarm option. a
“Off”Turns alarm off. Go to step 9.“Once”An alarm sounds once at the set time.“Daily”An alarm sounds daily at the set time.Go to step 5.“Weekly”Alarm sounds weekly at the set time(s).
4 Proceed with the operation according toyour selection in step 3.n Once:
Enter the desired date and month. a
28 Helpline Tel. No.: U.K. 0844 844 3899 Ireland 01289 8333
Programming
TG67xxE(en)_1226_ver022.pdf 28 2011/12/26 11:45:57

n Weekly:MbN: Select the desired day of theweek and press . a
5 Set the desired time. a
6 Enter a text memo (10 characters max.;page 42). a
7 MbN: Select the desired alarm tone. a
R We recommend selecting a differentringer tone from the one used foroutside calls.
8 MbN: Select the desired snooze setting.a
9 a M NR When the alarm is set, is displayed.
Note:R Press to stop the alarm completely.R When the handset is in use, the alarm will
not sound until the handset is in standbymode.
R Press any dial key, MSmart functionN, or to stop the sound but keep the
snooze function activated.R If you want to make an outside call when
the snooze function is activated, pleasestop the snooze function before making thecall.
Night modeNight mode allows you to select a period oftime during which the handset will not ring foroutside calls. This feature is useful for timeperiods when you do not want to be disturbed,for example, while sleeping. Night mode canbe set for each handset.Important:R Set the date and time beforehand
(page 16).R We recommend turning the base unit ringer
off (page 26) in addition to turning the nightmode on. (KX-TG6721 series: page 3)
R If you have set the alarm, the alarm soundseven if the night mode is turned on.
Turning night mode on/off1 #238
2 MbN: Select the desired setting. a R If you select “Off”, press M N to
exit.3 Enter the desired hour and minute you
wish to start this feature. a R You can select 24-hour or 12-hour
clock format (“AM” or “PM”) bypressing .
4 Enter the desired hour and minute youwish to end this feature. a
5 M N
R When the night mode is set, isdisplayed.
Changing the start and end time1 #237
2 Continue from step 3, “Turning nightmode on/off”, page 29.
Setting the ring delayThis setting allows the handset to ring duringnight mode if the caller waits long enough.After the selected amount of time passes, thehandset rings. If you select “No Ringing”,the handset never rings during night mode.1 #239
2 MbN: Select the desired setting. a a M N
Note:R When the answering system answers the
call, this feature does not work.(KX-TG6721 series: page 3)
Changing the handset nameEach handset can be given a customisedname (“Bob”, “Kitchen”, etc.). This is usefulwhen you make intercom calls betweenhandsets. You can also select whether or notthe handset name is displayed in standbymode. The default setting is “No”. If you select
Helpline Tel. No.: U.K. 0844 844 3899 Ireland 01289 8333 29
Programming
TG67xxE(en)_1226_ver022.pdf 29 2011/12/26 11:45:57
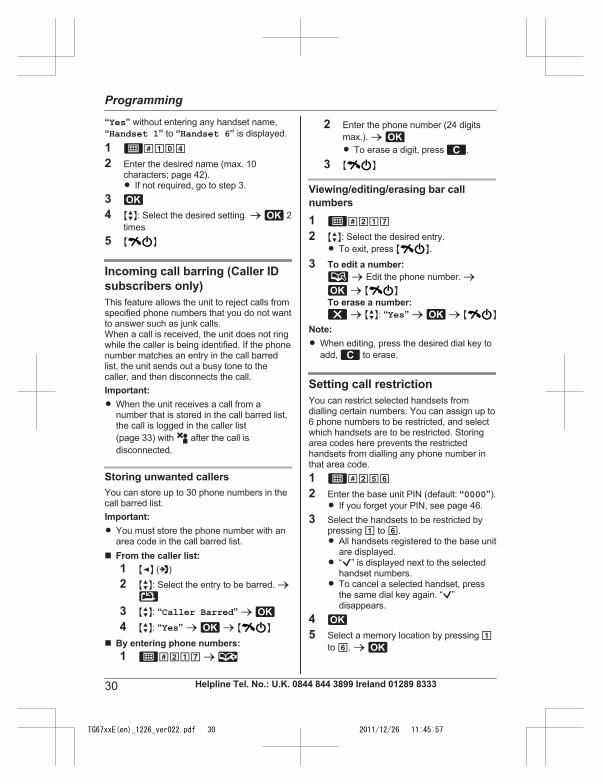
“Yes” without entering any handset name,“Handset 1” to “Handset 6” is displayed.1 #104
2 Enter the desired name (max. 10characters; page 42).R If not required, go to step 3.
34 MbN: Select the desired setting. a 2
times5 M N
Incoming call barring (Caller IDsubscribers only)This feature allows the unit to reject calls fromspecified phone numbers that you do not wantto answer such as junk calls.When a call is received, the unit does not ringwhile the caller is being identified. If the phonenumber matches an entry in the call barredlist, the unit sends out a busy tone to thecaller, and then disconnects the call.Important:R When the unit receives a call from a
number that is stored in the call barred list,the call is logged in the caller list(page 33) with after the call isdisconnected.
Storing unwanted callersYou can store up to 30 phone numbers in thecall barred list.Important:R You must store the phone number with an
area code in the call barred list.n From the caller list:
1 MFN ( )2 MbN: Select the entry to be barred. a
3 MbN: “Caller Barred” a
4 MbN: “Yes” a a M N
n By entering phone numbers:1 #217 a
2 Enter the phone number (24 digitsmax.). a R To erase a digit, press .
3 M N
Viewing/editing/erasing bar callnumbers1 #217
2 MbN: Select the desired entry.R To exit, press M N.
3 To edit a number: a Edit the phone number. a a M N
To erase a number: a MbN: “Yes” a a M N
Note:R When editing, press the desired dial key to
add, to erase.
Setting call restrictionYou can restrict selected handsets fromdialling certain numbers. You can assign up to6 phone numbers to be restricted, and selectwhich handsets are to be restricted. Storingarea codes here prevents the restrictedhandsets from dialling any phone number inthat area code.1 #256
2 Enter the base unit PIN (default: “0000”).R If you forget your PIN, see page 46.
3 Select the handsets to be restricted bypressing 1 to 6.R All handsets registered to the base unit
are displayed.R “ ” is displayed next to the selected
handset numbers.R To cancel a selected handset, press
the same dial key again. “ ”disappears.
45 Select a memory location by pressing 1
to 6. a
30 Helpline Tel. No.: U.K. 0844 844 3899 Ireland 01289 8333
Programming
TG67xxE(en)_1226_ver022.pdf 30 2011/12/26 11:45:57
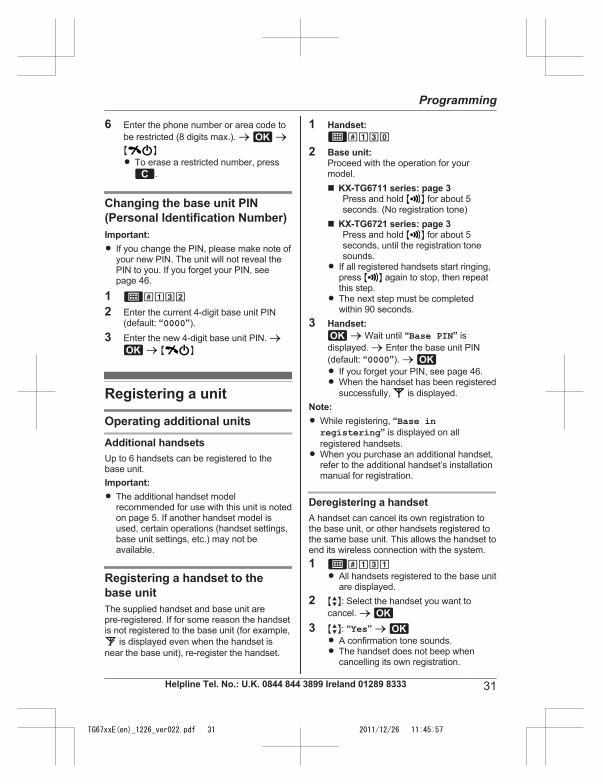
6 Enter the phone number or area code tobe restricted (8 digits max.). a aM NR To erase a restricted number, press
.
Changing the base unit PIN(Personal Identification Number)Important:R If you change the PIN, please make note of
your new PIN. The unit will not reveal thePIN to you. If you forget your PIN, seepage 46.
1 #132
2 Enter the current 4-digit base unit PIN(default: “0000”).
3 Enter the new 4-digit base unit PIN. a a M N
Registering a unit
Operating additional units
Additional handsetsUp to 6 handsets can be registered to thebase unit.Important:R The additional handset model
recommended for use with this unit is notedon page 5. If another handset model isused, certain operations (handset settings,base unit settings, etc.) may not beavailable.
Registering a handset to thebase unitThe supplied handset and base unit arepre-registered. If for some reason the handsetis not registered to the base unit (for example,
is displayed even when the handset isnear the base unit), re-register the handset.
1 Handset:#130
2 Base unit:Proceed with the operation for yourmodel.n KX-TG6711 series: page 3
Press and hold M N for about 5seconds. (No registration tone)
n KX-TG6721 series: page 3Press and hold M N for about 5seconds, until the registration tonesounds.
R If all registered handsets start ringing,press M N again to stop, then repeatthis step.
R The next step must be completedwithin 90 seconds.
3 Handset: a Wait until “Base PIN” is
displayed. a Enter the base unit PIN(default: “0000”). a R If you forget your PIN, see page 46.R When the handset has been registered
successfully, is displayed.Note:R While registering, “Base in
registering” is displayed on allregistered handsets.
R When you purchase an additional handset,refer to the additional handset’s installationmanual for registration.
Deregistering a handsetA handset can cancel its own registration tothe base unit, or other handsets registered tothe same base unit. This allows the handset toend its wireless connection with the system.1 #131R All handsets registered to the base unit
are displayed.2 MbN: Select the handset you want to
cancel. a
3 MbN: “Yes” a R A confirmation tone sounds.R The handset does not beep when
cancelling its own registration.
Helpline Tel. No.: U.K. 0844 844 3899 Ireland 01289 8333 31
Programming
TG67xxE(en)_1226_ver022.pdf 31 2011/12/26 11:45:57
4 M N
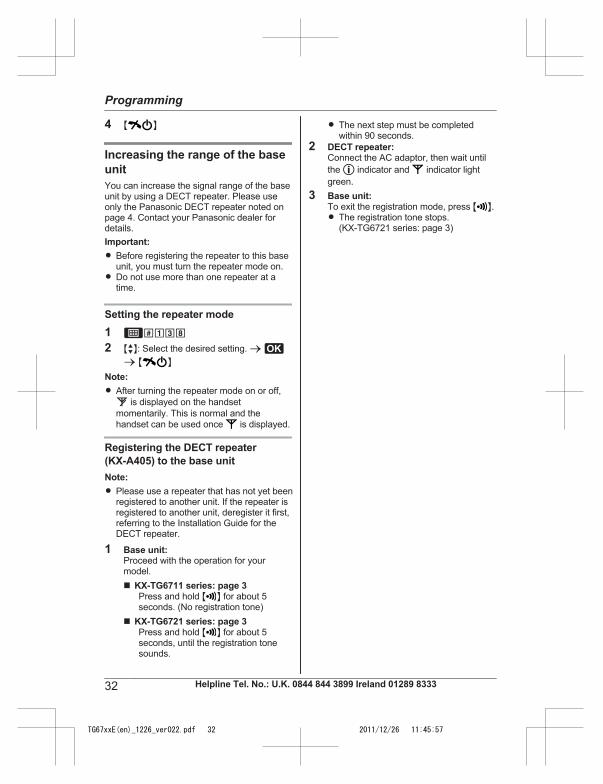
Increasing the range of the baseunitYou can increase the signal range of the baseunit by using a DECT repeater. Please useonly the Panasonic DECT repeater noted onpage 4. Contact your Panasonic dealer fordetails.Important:R Before registering the repeater to this base
unit, you must turn the repeater mode on.R Do not use more than one repeater at a
time.
Setting the repeater mode1 #138
2 MbN: Select the desired setting. a a M N
Note:R After turning the repeater mode on or off,
is displayed on the handsetmomentarily. This is normal and thehandset can be used once is displayed.
Registering the DECT repeater(KX-A405) to the base unitNote:R Please use a repeater that has not yet been
registered to another unit. If the repeater isregistered to another unit, deregister it first,referring to the Installation Guide for theDECT repeater.
1 Base unit:Proceed with the operation for yourmodel.n KX-TG6711 series: page 3
Press and hold M N for about 5seconds. (No registration tone)
n KX-TG6721 series: page 3Press and hold M N for about 5seconds, until the registration tonesounds.
R The next step must be completedwithin 90 seconds.
2 DECT repeater:Connect the AC adaptor, then wait untilthe indicator and indicator lightgreen.
3 Base unit:To exit the registration mode, press M N.R The registration tone stops.
(KX-TG6721 series: page 3)
32 Helpline Tel. No.: U.K. 0844 844 3899 Ireland 01289 8333
Programming
TG67xxE(en)_1226_ver022.pdf 32 2011/12/26 11:45:57
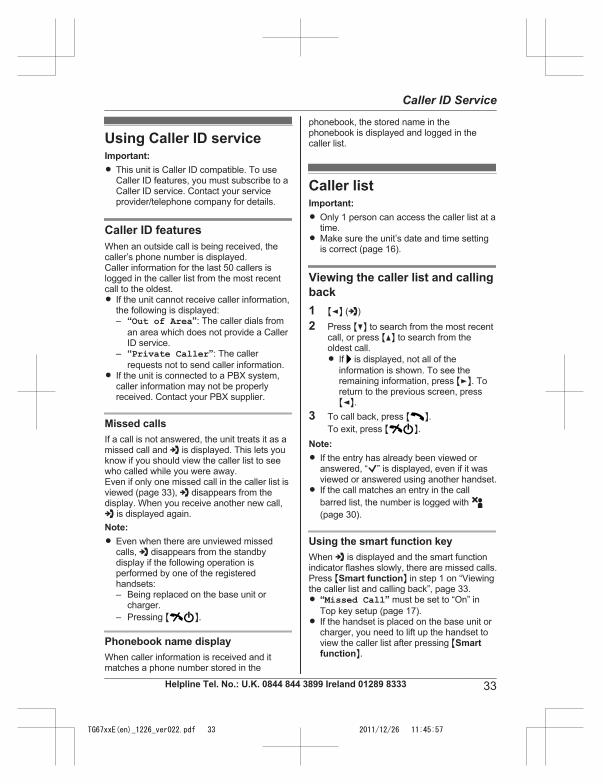
Using Caller ID serviceImportant:R This unit is Caller ID compatible. To use
Caller ID features, you must subscribe to aCaller ID service. Contact your serviceprovider/telephone company for details.
Caller ID featuresWhen an outside call is being received, thecaller’s phone number is displayed.Caller information for the last 50 callers islogged in the caller list from the most recentcall to the oldest.R If the unit cannot receive caller information,
the following is displayed:– “Out of Area”: The caller dials from
an area which does not provide a CallerID service.
– “Private Caller”: The callerrequests not to send caller information.
R If the unit is connected to a PBX system,caller information may not be properlyreceived. Contact your PBX supplier.
Missed callsIf a call is not answered, the unit treats it as amissed call and is displayed. This lets youknow if you should view the caller list to seewho called while you were away.Even if only one missed call in the caller list isviewed (page 33), disappears from thedisplay. When you receive another new call,
is displayed again.Note:R Even when there are unviewed missed
calls, disappears from the standbydisplay if the following operation isperformed by one of the registeredhandsets:– Being replaced on the base unit or
charger.– Pressing M N.
Phonebook name displayWhen caller information is received and itmatches a phone number stored in the
phonebook, the stored name in thephonebook is displayed and logged in thecaller list.
Caller listImportant:R Only 1 person can access the caller list at a
time.R Make sure the unit’s date and time setting
is correct (page 16).
Viewing the caller list and callingback1 MFN ( )2 Press MCN to search from the most recent
call, or press MDN to search from theoldest call.R If is displayed, not all of the
information is shown. To see theremaining information, press MEN. Toreturn to the previous screen, pressMFN.
3 To call back, press M N.To exit, press M N.
Note:R If the entry has already been viewed or
answered, “ ” is displayed, even if it wasviewed or answered using another handset.
R If the call matches an entry in the callbarred list, the number is logged with (page 30).
Using the smart function keyWhen is displayed and the smart functionindicator flashes slowly, there are missed calls.Press MSmart functionN in step 1 on “Viewingthe caller list and calling back”, page 33.R “Missed Call” must be set to “On” in
Top key setup (page 17).R If the handset is placed on the base unit or
charger, you need to lift up the handset toview the caller list after pressing MSmartfunctionN.
Helpline Tel. No.: U.K. 0844 844 3899 Ireland 01289 8333 33
Caller ID Service
TG67xxE(en)_1226_ver022.pdf 33 2011/12/26 11:45:57
R When the unit has new messages*1 andmissed calls, the unit can be operated toplay the new messages first and then showthe missed calls.
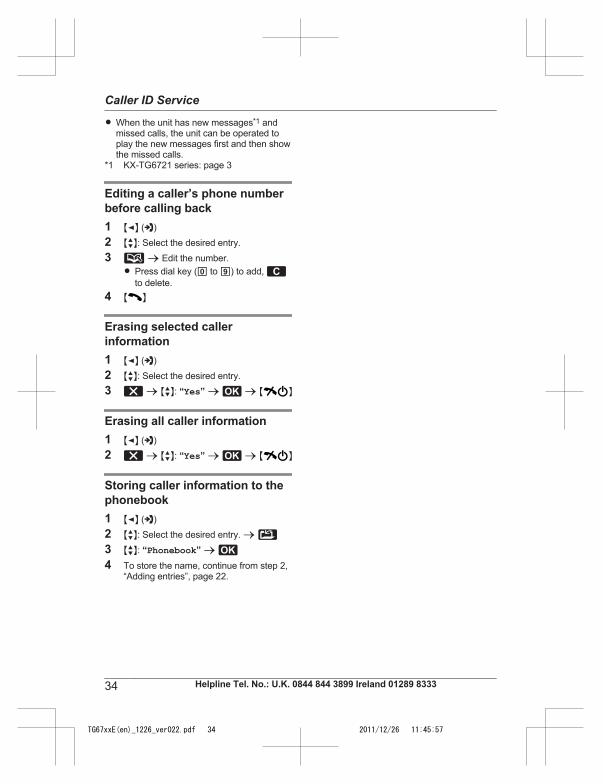
*1 KX-TG6721 series: page 3
Editing a caller’s phone numberbefore calling back1 MFN ( )2 MbN: Select the desired entry.3 a Edit the number.R Press dial key (0 to 9) to add,
to delete.4 M N
Erasing selected callerinformation1 MFN ( )2 MbN: Select the desired entry.3 a MbN: “Yes” a a M N
Erasing all caller information1 MFN ( )2 a MbN: “Yes” a a M N
Storing caller information to thephonebook1 MFN ( )2 MbN: Select the desired entry. a 3 MbN: “Phonebook” a
4 To store the name, continue from step 2,“Adding entries”, page 22.
34 Helpline Tel. No.: U.K. 0844 844 3899 Ireland 01289 8333
Caller ID Service
TG67xxE(en)_1226_ver022.pdf 34 2011/12/26 11:45:57
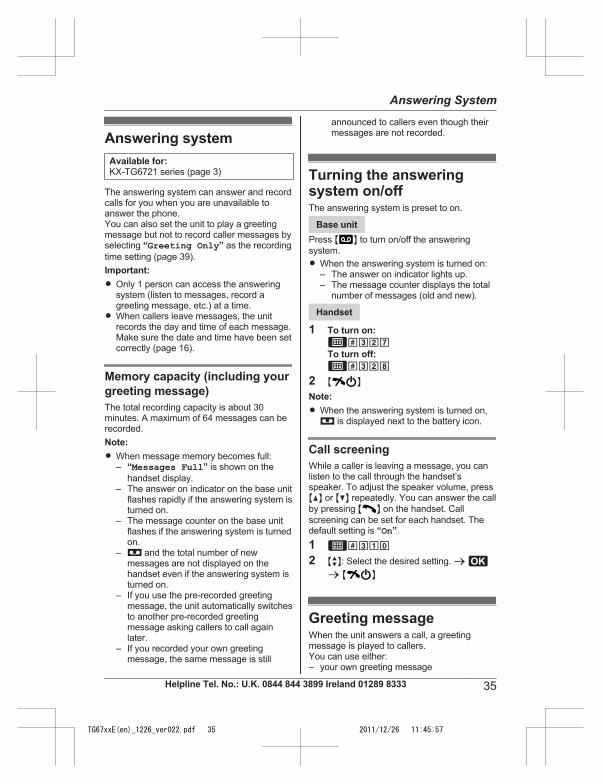
Answering systemAvailable for:KX-TG6721 series (page 3)
The answering system can answer and recordcalls for you when you are unavailable toanswer the phone.You can also set the unit to play a greetingmessage but not to record caller messages byselecting “Greeting Only” as the recordingtime setting (page 39).Important:R Only 1 person can access the answering
system (listen to messages, record agreeting message, etc.) at a time.
R When callers leave messages, the unitrecords the day and time of each message.Make sure the date and time have been setcorrectly (page 16).
Memory capacity (including yourgreeting message)The total recording capacity is about 30minutes. A maximum of 64 messages can berecorded.Note:R When message memory becomes full:
– “Messages Full” is shown on thehandset display.
– The answer on indicator on the base unitflashes rapidly if the answering system isturned on.
– The message counter on the base unitflashes if the answering system is turnedon.
– and the total number of newmessages are not displayed on thehandset even if the answering system isturned on.
– If you use the pre-recorded greetingmessage, the unit automatically switchesto another pre-recorded greetingmessage asking callers to call againlater.
– If you recorded your own greetingmessage, the same message is still
announced to callers even though theirmessages are not recorded.
Turning the answeringsystem on/offThe answering system is preset to on.
Base unitPress M N to turn on/off the answeringsystem.R When the answering system is turned on:
– The answer on indicator lights up.– The message counter displays the total
number of messages (old and new).
Handset
1 To turn on:#327
To turn off:#328
2 M N
Note:R When the answering system is turned on,
is displayed next to the battery icon.
Call screeningWhile a caller is leaving a message, you canlisten to the call through the handset’sspeaker. To adjust the speaker volume, pressMDN or MCN repeatedly. You can answer the callby pressing M N on the handset. Callscreening can be set for each handset. Thedefault setting is “On”.1 #310
2 MbN: Select the desired setting. a a M N
Greeting messageWhen the unit answers a call, a greetingmessage is played to callers.You can use either:– your own greeting message
Helpline Tel. No.: U.K. 0844 844 3899 Ireland 01289 8333 35
Answering System
TG67xxE(en)_1226_ver022.pdf 35 2011/12/26 11:45:57

– a pre-recorded greeting message
Recording your greeting message1 #302
2 MbN: “Yes” a
3 After a beep sounds, hold the handsetabout 20 cm away and speak clearly intothe microphone (2 minutes and 30seconds max.).
4 Press to stop recording.
5 M N
Using a pre-recorded greetingmessageThe unit provides 2 pre-recorded greetingmessages:– If you erase or do not record your own
greeting message, the unit plays apre-recorded greeting asking callers toleave a message.
– If the message recording time (page 39)is set to “Greeting Only”, callers’messages are not recorded and the unitplays a different pre-recorded greetingmessage asking callers to call again.
Resetting to a pre-recorded greetingmessageIf you want to use a pre-recorded greetingmessage once you record your own greetingmessage, you need to erase your owngreeting message.1 #304
2 a M N
Playing back the greetingmessage1 #303
2 M N
Listening to messagesusing the base unitWhen new messages have been recorded,M N on the base unit flashes.Press M N.R If new messages have been recorded, the
base unit plays back new messages.R If there are no new messages, the base
unit plays back all messages.
Operating the answering systemduring playback
Key OperationMjN or MkN Adjust the speaker volumeM N Repeat message*1
M N Skip messageMnN Stop playback
M N Erase currently playingmessage
*1 If pressed within the first 5 seconds of amessage, the previous message isplayed.
Erasing all messagesPress M N 2 times while the unit is not in use.
Listening to messagesusing the handsetWhen new messages have been recorded,
is displayed on the handset with the totalnumber of new messages.1 To listen to new messages:
#323To listen to all messages:#324
2 When finished, press M N.Note:R To switch to the receiver, press M N.
36 Helpline Tel. No.: U.K. 0844 844 3899 Ireland 01289 8333
Answering System
TG67xxE(en)_1226_ver022.pdf 36 2011/12/26 11:45:57
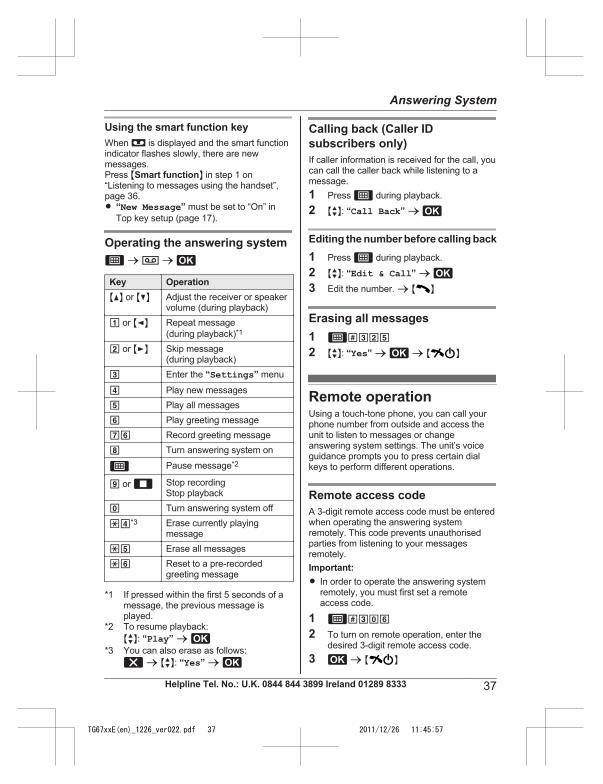
Using the smart function keyWhen is displayed and the smart functionindicator flashes slowly, there are newmessages.Press MSmart functionN in step 1 on“Listening to messages using the handset”,page 36.R “New Message” must be set to “On” in
Top key setup (page 17).
Operating the answering system a a
Key OperationMDN or MCN Adjust the receiver or speaker
volume (during playback)1 or MFN Repeat message
(during playback)*1
2 or MEN Skip message(during playback)
3 Enter the “Settings” menu
4 Play new messages5 Play all messages6 Play greeting message76 Record greeting message8 Turn answering system on
Pause message*2
9 or Stop recording Stop playback
0 Turn answering system off
*4*3 Erase currently playingmessage
*5 Erase all messages*6 Reset to a pre-recorded
greeting message
*1 If pressed within the first 5 seconds of amessage, the previous message isplayed.
*2 To resume playback:MbN: “Play” a
*3 You can also erase as follows: a MbN: “Yes” a
Calling back (Caller IDsubscribers only)If caller information is received for the call, youcan call the caller back while listening to amessage.1 Press during playback.
2 MbN: “Call Back” a
Editing the number before calling back1 Press during playback.
2 MbN: “Edit & Call” a
3 Edit the number. a M N
Erasing all messages1 #325
2 MbN: “Yes” a a M N
Remote operationUsing a touch-tone phone, you can call yourphone number from outside and access theunit to listen to messages or changeanswering system settings. The unit’s voiceguidance prompts you to press certain dialkeys to perform different operations.
Remote access codeA 3-digit remote access code must be enteredwhen operating the answering systemremotely. This code prevents unauthorisedparties from listening to your messagesremotely.Important:R In order to operate the answering system
remotely, you must first set a remoteaccess code.
1 #306
2 To turn on remote operation, enter thedesired 3-digit remote access code.
3 a M N
Helpline Tel. No.: U.K. 0844 844 3899 Ireland 01289 8333 37
Answering System
TG67xxE(en)_1226_ver022.pdf 37 2011/12/26 11:45:57
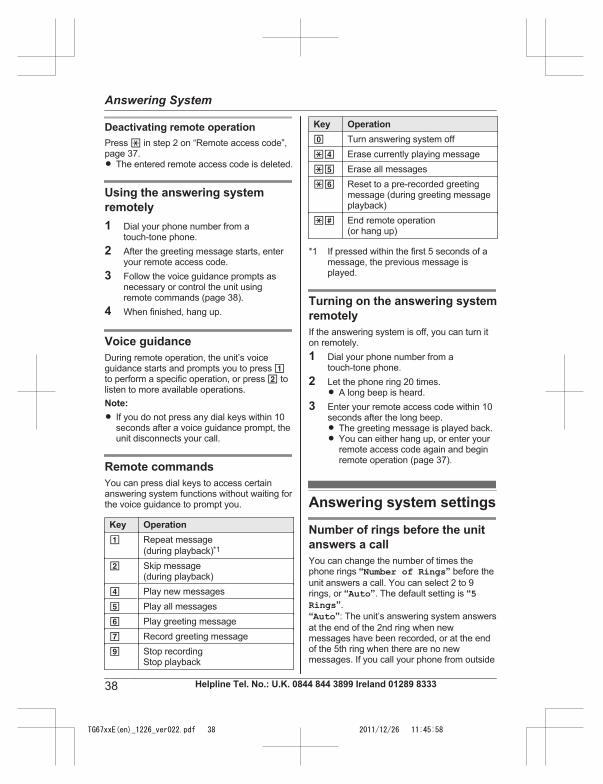
Deactivating remote operationPress * in step 2 on “Remote access code”,page 37.R The entered remote access code is deleted.
Using the answering systemremotely1 Dial your phone number from a
touch-tone phone.2 After the greeting message starts, enter
your remote access code.3 Follow the voice guidance prompts as
necessary or control the unit usingremote commands (page 38).
4 When finished, hang up.
Voice guidanceDuring remote operation, the unit’s voiceguidance starts and prompts you to press 1to perform a specific operation, or press 2 tolisten to more available operations.Note:R If you do not press any dial keys within 10
seconds after a voice guidance prompt, theunit disconnects your call.
Remote commandsYou can press dial keys to access certainanswering system functions without waiting forthe voice guidance to prompt you.
Key Operation1 Repeat message
(during playback)*1
2 Skip message(during playback)
4 Play new messages5 Play all messages6 Play greeting message7 Record greeting message9 Stop recording
Stop playback
Key Operation0 Turn answering system off*4 Erase currently playing message*5 Erase all messages*6 Reset to a pre-recorded greeting
message (during greeting messageplayback)
*# End remote operation(or hang up)
*1 If pressed within the first 5 seconds of amessage, the previous message isplayed.
Turning on the answering systemremotelyIf the answering system is off, you can turn iton remotely.1 Dial your phone number from a
touch-tone phone.2 Let the phone ring 20 times.R A long beep is heard.
3 Enter your remote access code within 10seconds after the long beep.R The greeting message is played back.R You can either hang up, or enter your
remote access code again and beginremote operation (page 37).
Answering system settings
Number of rings before the unitanswers a callYou can change the number of times thephone rings “Number of Rings” before theunit answers a call. You can select 2 to 9rings, or “Auto”. The default setting is “5Rings”.“Auto”: The unit’s answering system answersat the end of the 2nd ring when newmessages have been recorded, or at the endof the 5th ring when there are no newmessages. If you call your phone from outside
38 Helpline Tel. No.: U.K. 0844 844 3899 Ireland 01289 8333
Answering System
TG67xxE(en)_1226_ver022.pdf 38 2011/12/26 11:45:58

to listen to new messages (page 38), youknow that there are no new messages whenthe phone rings for the 3rd time. You can thenhang up without being charged for the call.1 #211
2 MbN: Select the desired setting. a a M N
For voice mail service subscribersTo receive voice mail and use answeringsystem properly, please note the following:R To use the voice mail service (page 40)
provided by your service provider/telephonecompany rather than the unit’s answeringsystem, turn off the answering system(page 35).
R To use this unit’s answering system ratherthan the voice mail service provided byyour service provider/telephone company,please contact your service provider/telephone company to deactivate yourvoice mail service.If your service provider/telephone companycannot do this:– Set this unit’s “Number of Rings”
setting so that this unit’s answeringsystem answers calls before the voicemail service of your service provider/telephone company does. It is necessaryto check the number of rings required toactivate the voice mail service providedby your service provider/telephonecompany before changing this setting.
– Change the number of rings of the voicemail service so that the answeringsystem can answer the call first. To doso, contact your service provider/telephone company.
Caller’s recording timeYou can change the maximum messagerecording time allowed for each caller. Thedefault setting is “3 Minutes”.1 #305
2 MbN: Select the desired setting. a a M N
Selecting “Greeting Only”You can select “Greeting Only” which setsthe unit to announce a greeting message tocallers but not record messages.Select “Greeting Only” in step 2 on“Caller’s recording time”, page 39.Note:R When you select “Greeting Only”:
– If you do not record your own message,the unit will play the pre-recordedgreeting-only message asking callers tocall again later.
– If you use your own message, record thegreeting-only message asking callers tocall again later (page 36).
Helpline Tel. No.: U.K. 0844 844 3899 Ireland 01289 8333 39
Answering System
TG67xxE(en)_1226_ver022.pdf 39 2011/12/26 11:45:58

Voice mail serviceVoice mail is an automatic answering serviceoffered by your service provider/telephonecompany. After you subscribe to this service,your service provider/telephone company’svoice mail system answers calls for you whenyou are unavailable to answer the phone orwhen your line is busy. Messages arerecorded by your service provider/telephonecompany, not your telephone. When you havenew messages, is displayed on thehandset if message indication service isavailable. Please contact your service provider/telephone company for details of this service.Important:R If still remains on the display even after
you have listened to new messages, turn itoff by pressing and holding # for 2seconds.
R To use the voice mail service provided byyour service provider/telephone companyrather than the unit’s answering system,turn off the answering system (page 35).For details, see page 39. (KX-TG6721 series: page 3)
40 Helpline Tel. No.: U.K. 0844 844 3899 Ireland 01289 8333
Voice Mail Service
TG67xxE(en)_1226_ver022.pdf 40 2011/12/26 11:45:58

IntercomIntercom calls can be made betweenhandsets.Note:R When paging the handset, the paged
handset beeps for 1 minute.R If you receive an outside call while talking
on the intercom, you hear 2 tones. Toanswer the call, press M N, then pressM N.
Making an intercom call1 a
2 MbN: Select the desired unit. a R To stop paging, press M N.
3 When you finish talking, press M N.
Answering an intercom call1 Press M N to answer the page.2 When you finish talking, press M N.
Using the smart function keyPress MSmart functionN to answer the page.
Handset locatorYou can locate a misplaced handset bypaging it.1 Base unit: Press M N.R All registered handsets beep for 1
minute.2 To stop paging:
Base unit: Press M N.Handset: Press M N.
Using the smart function keyYou can also stop paging by pressing MSmartfunctionN.
Transferring calls,conference callsOutside calls can be transferred or aconference call with an outside party can bemade between 2 handsets.1 During an outside call, press to put
the call on hold.2 MbN: Select the desired unit. a
3 Wait for the paged party to answer.R If the paged party does not answer,
press to return to the outside call.
4 To complete the transfer:Press M N.R The outside call is being routed to the
destination unit.To establish a conference call:
a MbN: “Conference” a R To leave the conference, pressM N. The other 2 parties cancontinue the conversation.
R To put the outside call on hold: a MbN: “Hold” a To resume the conference: aMbN: “Conference” a
Note:R If you want to return to the outside call after
the paged party answers, press .
Answering a transferred callPress M N to answer the page.
Using the smart function keyPress MSmart functionN to answer the page.
Helpline Tel. No.: U.K. 0844 844 3899 Ireland 01289 8333 41
Intercom/Locator
TG67xxE(en)_1226_ver022.pdf 41 2011/12/26 11:45:58
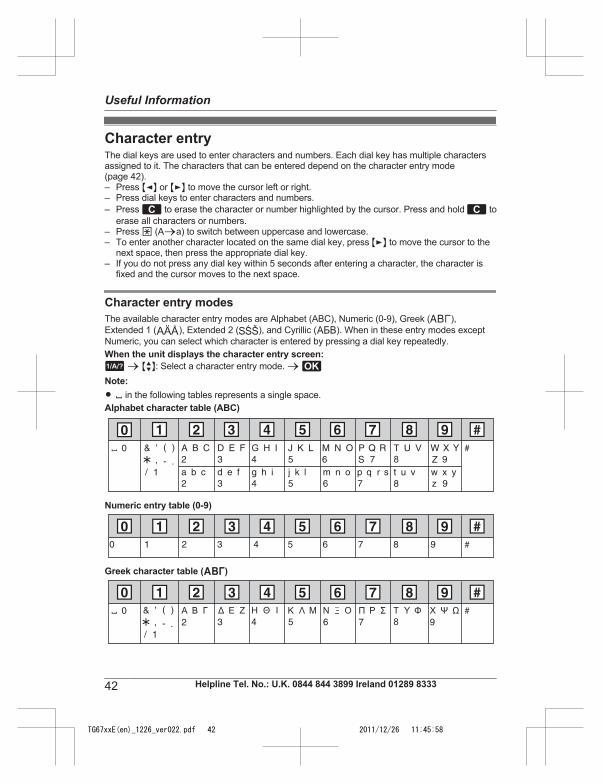
Character entryThe dial keys are used to enter characters and numbers. Each dial key has multiple charactersassigned to it. The characters that can be entered depend on the character entry mode(page 42).– Press MFN or MEN to move the cursor left or right.– Press dial keys to enter characters and numbers.– Press to erase the character or number highlighted by the cursor. Press and hold to
erase all characters or numbers.– Press * (Aaa) to switch between uppercase and lowercase.– To enter another character located on the same dial key, press MEN to move the cursor to the
next space, then press the appropriate dial key.– If you do not press any dial key within 5 seconds after entering a character, the character is
fixed and the cursor moves to the next space.
Character entry modesThe available character entry modes are Alphabet (ABC), Numeric (0-9), Greek ( ),Extended 1 ( ), Extended 2 ( ), and Cyrillic ( ). When in these entry modes exceptNumeric, you can select which character is entered by pressing a dial key repeatedly.When the unit displays the character entry screen:
a MbN: Select a character entry mode. a Note:R in the following tables represents a single space.Alphabet character table (ABC)
z y1 2 3 4 5 6 7 8 9
Numeric entry table (0-9)
z y1 2 3 4 5 6 7 8 9
Greek character table ( )
z y1 2 3 4 5 6 7 8 9
42 Helpline Tel. No.: U.K. 0844 844 3899 Ireland 01289 8333
Useful Information
TG67xxE(en)_1226_ver022.pdf 42 2011/12/26 11:45:58

Extended 1 character table ( )
z y1 2 3 4 5 6 7 8 9
R The following are used for both uppercase and lowercase:
Extended 2 character table ( )
z y1 2 3 4 5 6 7 8 9
R The following are used for both uppercase and lowercase:
Cyrillic character table ( )
z y1 2 3 4 5 6 7 8 9
Helpline Tel. No.: U.K. 0844 844 3899 Ireland 01289 8333 43
Useful Information
TG67xxE(en)_1226_ver022.pdf 43 2011/12/26 11:45:58
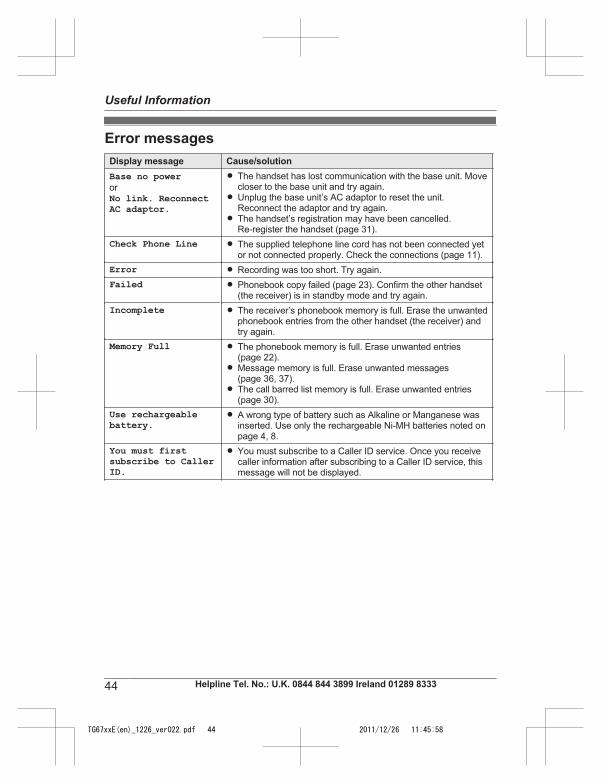
Error messagesDisplay message Cause/solutionBase no power or No link. ReconnectAC adaptor.
R The handset has lost communication with the base unit. Movecloser to the base unit and try again.
R Unplug the base unit’s AC adaptor to reset the unit.Reconnect the adaptor and try again.
R The handset’s registration may have been cancelled.Re-register the handset (page 31).
Check Phone Line R The supplied telephone line cord has not been connected yetor not connected properly. Check the connections (page 11).
Error R Recording was too short. Try again.Failed R Phonebook copy failed (page 23). Confirm the other handset
(the receiver) is in standby mode and try again.Incomplete R The receiver’s phonebook memory is full. Erase the unwanted
phonebook entries from the other handset (the receiver) andtry again.
Memory Full R The phonebook memory is full. Erase unwanted entries(page 22).
R Message memory is full. Erase unwanted messages(page 36, 37).
R The call barred list memory is full. Erase unwanted entries(page 30).
Use rechargeablebattery.
R A wrong type of battery such as Alkaline or Manganese wasinserted. Use only the rechargeable Ni-MH batteries noted onpage 4, 8.
You must firstsubscribe to CallerID.
R You must subscribe to a Caller ID service. Once you receivecaller information after subscribing to a Caller ID service, thismessage will not be displayed.
44 Helpline Tel. No.: U.K. 0844 844 3899 Ireland 01289 8333
Useful Information
TG67xxE(en)_1226_ver022.pdf 44 2011/12/26 11:45:58

TroubleshootingIf you still have difficulties after following the instructions in this section, disconnect the base unit’sAC adaptor and turn off the handset, then reconnect the base unit’s AC adaptor and turn on thehandset.
General use
Problem Cause/solutionThe handset does not turnon even after installingcharged batteries.
R Place the handset on the base unit or charger to turn on thehandset.
The unit does not work. R Make sure the batteries are installed correctly (page 11).R Fully charge the batteries (page 11).R Check the connections (page 11).R Unplug the base unit’s AC adaptor to reset the unit and turn off
the handset. Reconnect the adaptor, turn on the handset andtry again.
R The handset has not been registered to the base unit. Registerthe handset (page 31).
The handset display isblank.
R The handset is not turned on. Turn the power on (page 16).
I cannot hear a dial tone. R Make sure that you are using the supplied telephone line cord.Your old telephone line cord may have a different wiringconfiguration.
R The base unit’s AC adaptor or telephone line cord is notconnected. Check the connections.
R Disconnect the base unit from the telephone line and connectthe line to a known working telephone. If the workingtelephone operates properly, contact our service personnel tohave the unit repaired. If the working telephone does notoperate properly, contact your service provider/telephonecompany.
I cannot use the smartfunction key even if thesmart function indicator isflashing slowly.
R Another unit is in use. Wait and try again later.R The key lock feature is turned on. Turn it off (page 21).
Programmable settings
Problem Cause/solutionThe display is in alanguage I cannot read.
R Change the display language (page 16).
I cannot activate the ecomode.
R You cannot set eco mode when you set the repeater mode“On”. If required, set the repeater mode to “Off” (page 32).
Helpline Tel. No.: U.K. 0844 844 3899 Ireland 01289 8333 45
Useful Information
TG67xxE(en)_1226_ver022.pdf 45 2011/12/26 11:45:58

Problem Cause/solutionI cannot register a handsetto a base unit.
R The maximum number of handsets (6) is already registered tothe base unit. Cancel unused handset registrations from thebase unit (page 31).
R You entered the wrong PIN. If you forget your PIN, see “Icannot remember the PIN.” (page 46).
I cannot remember thePIN.
R Change the PIN using the following method.1 #132
2 *7000
3 Enter the new 4-digit base unit PIN. a a M N
Battery recharge
Problem Cause/solutionThe handset beeps and/or
flashes.R Battery charge is low. Fully charge the batteries (page 11).
I fully charged thebatteries, but– still flashes or– the operating time
seems to be shorter.
R Clean the battery ends ( , ) and the charge contacts witha dry cloth and charge again.
R It is time to replace the batteries (page 11).
Making/answering calls, intercom
Problem Cause/solution is displayed. R The handset is too far from the base unit. Move closer.
R The base unit’s AC adaptor is not properly connected.Reconnect AC adaptor to the base unit.
R The handset is not registered to the base unit. Register it(page 31).
R Activating one touch eco mode reduces the range of the baseunit in standby mode. If required, turn eco mode off (page 17).
Noise is heard, sound cutsin and out.
R You are using the handset or base unit in an area with highelectrical interference. Re-position the base unit and use thehandset away from sources of interference.
R Move closer to the base unit.R If you use a DSL/ADSL service, we recommend connecting a
DSL/ADSL filter between the base unit and the telephone linejack. Contact your DSL/ADSL provider for details.
Sound quality seems to begetting worse.
R You have registered a handset that is not recommended(page 5). The clearest sound quality is only possible byregistering the recommended handset.
The handset does not ring. R The ringer volume is turned off. Adjust ringer volume (page 19).R Night mode is turned on. Turn it off (page 29).
46 Helpline Tel. No.: U.K. 0844 844 3899 Ireland 01289 8333
Useful Information
TG67xxE(en)_1226_ver022.pdf 46 2011/12/26 11:45:58
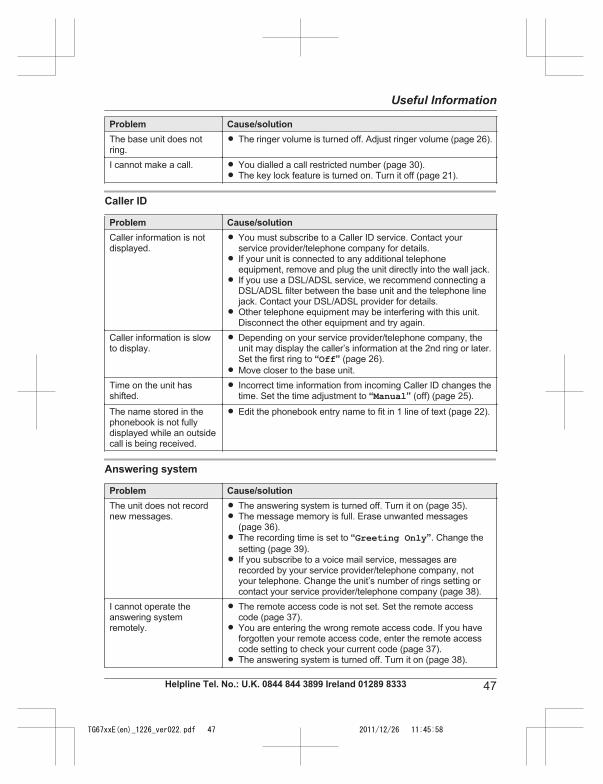
Problem Cause/solutionThe base unit does notring.
R The ringer volume is turned off. Adjust ringer volume (page 26).
I cannot make a call. R You dialled a call restricted number (page 30).R The key lock feature is turned on. Turn it off (page 21).
Caller ID
Problem Cause/solutionCaller information is notdisplayed.
R You must subscribe to a Caller ID service. Contact yourservice provider/telephone company for details.
R If your unit is connected to any additional telephoneequipment, remove and plug the unit directly into the wall jack.
R If you use a DSL/ADSL service, we recommend connecting aDSL/ADSL filter between the base unit and the telephone linejack. Contact your DSL/ADSL provider for details.
R Other telephone equipment may be interfering with this unit.Disconnect the other equipment and try again.
Caller information is slowto display.
R Depending on your service provider/telephone company, theunit may display the caller’s information at the 2nd ring or later.Set the first ring to “Off” (page 26).
R Move closer to the base unit.Time on the unit hasshifted.
R Incorrect time information from incoming Caller ID changes thetime. Set the time adjustment to “Manual” (off) (page 25).
The name stored in thephonebook is not fullydisplayed while an outsidecall is being received.
R Edit the phonebook entry name to fit in 1 line of text (page 22).
Answering system
Problem Cause/solutionThe unit does not recordnew messages.
R The answering system is turned off. Turn it on (page 35).R The message memory is full. Erase unwanted messages
(page 36).R The recording time is set to “Greeting Only”. Change the
setting (page 39).R If you subscribe to a voice mail service, messages are
recorded by your service provider/telephone company, notyour telephone. Change the unit’s number of rings setting orcontact your service provider/telephone company (page 38).
I cannot operate theanswering systemremotely.
R The remote access code is not set. Set the remote accesscode (page 37).
R You are entering the wrong remote access code. If you haveforgotten your remote access code, enter the remote accesscode setting to check your current code (page 37).
R The answering system is turned off. Turn it on (page 38).
Helpline Tel. No.: U.K. 0844 844 3899 Ireland 01289 8333 47
Useful Information
TG67xxE(en)_1226_ver022.pdf 47 2011/12/26 11:45:58
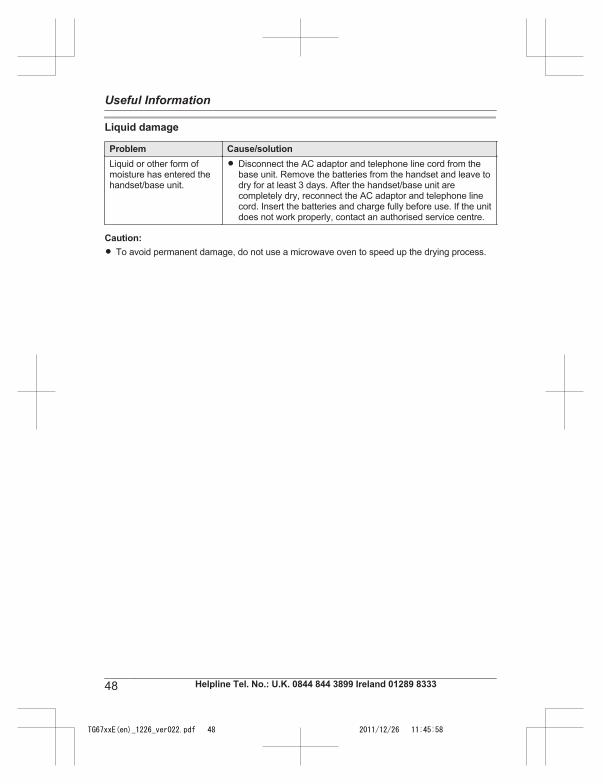
Liquid damage
Problem Cause/solutionLiquid or other form ofmoisture has entered thehandset/base unit.
R Disconnect the AC adaptor and telephone line cord from thebase unit. Remove the batteries from the handset and leave todry for at least 3 days. After the handset/base unit arecompletely dry, reconnect the AC adaptor and telephone linecord. Insert the batteries and charge fully before use. If the unitdoes not work properly, contact an authorised service centre.
Caution:R To avoid permanent damage, do not use a microwave oven to speed up the drying process.
48 Helpline Tel. No.: U.K. 0844 844 3899 Ireland 01289 8333
Useful Information
TG67xxE(en)_1226_ver022.pdf 48 2011/12/26 11:45:58

Conditions of guarantee
Receipt No. Date of purchase
Model No. Serial No.
This guarantee is in addition to and does not in any way affect any statutory or other rights of
consumer purchasers. If within the applicable guarantee period, the product proves to be
defective by reason of faulty design, workmanship or materials, we undertake subject to the
following conditions to have the defective product (or any part or parts there of) repaired or
replaced free of charge.
1. The product shall have been purchased and used solely within either the U.K. or Ireland
and in accordance with standard operating instructions and the technical and/or Safety
Standards required in the U.K.
2. On being found defective, please consult with the retailer from where it was purchased for
assistance.
3. This guarantee shall not apply to damage caused through fire, accident, lightning, misuse,
wear and tear, neglect, incorrect adjustment or repair, to damage caused through
installation, adaption, modification or use in an improper manner or inconsistent with the
technical and/or safety standards required in the country where this product is used, or to
damage occurred during transit to or from the purchaser.
4. If at any time during the guarantee period any part or parts of the product are replaced
with a part or parts not supplied or approved by us or of an objective quality safe and
suitable for the product, or the product has been dismantled or repaired by any person not
authorised by us, we shall have the right to terminate this guarantee in whole or in part
immediately without further notice.
5. The purchaser’s sole and exclusive remedy under this guarantee against us is for the
repair or replacement of the product or any defective part or parts and no other remedy,
including, but not limited to, incidental or consequential damage or loss of whatsoever
nature shall be available to the purchaser.
6. This guarantee shall not apply to batteries and any other items of limited natural life.
7. Our decision on all matters relating to complaints shall be final. Any product or defective
part which has been replaced shall become our property.
8. The guarantee period applicable to this product shall be 12 months.
Please keep these operating instructions with your receipt.
Panasonic U.K. a branch of Panasonic Marketing Europe GmbH
Helpline Tel. No.: U.K. 0844 844 3899 Ireland 01289 8333 49
Useful Information
TG67xxE(en)_1226_ver022.pdf 49 2011/12/26 11:45:58
IndexA Additional handsets: 31
Alarm: 28Answering calls: 19Answering system: 35
Call screening: 35Erasing messages: 36, 37, 38Greeting message: 35Greeting only: 39Listening to messages: 36, 38Number of rings: 38Recording time: 39Remote access code: 37Remote operation: 37Turning on/off: 35, 37, 38
Auto talk: 19, 26B Battery: 11, 12C Call restriction: 30
Call share: 21Call waiting: 20Call Waiting Caller ID: 20Caller ID service: 33Caller list: 33Caller list edit: 34Chain dial: 22Character entry: 42Conference calls: 41Control type: 13
D Date and time: 16Direct command code: 24Display
Contrast: 26Language: 16
E Eco mode: 17Equalizer: 20Error messages: 44
F First ring: 26H Handset
Deregistration: 31Locator: 41Name: 29Registration: 31
Hold: 20I Incoming call barring: 30
Intercom: 41K Key lock: 21
Keytones: 26M Making calls: 19
Missed calls: 33Mute: 20
N Night mode: 29P Pause: 19
Phonebook: 22PIN: 31Power failure: 12Power on/off: 16Privacy mode: 27
R Recall/flash: 20Redialling: 19Repeater: 32Ringer tone: 26
S Smart function key (Top key): 16Speakerphone: 19
T Time adjustment: 25Transferring calls: 41Troubleshooting: 45
V Voice mail: 40Volume
Receiver: 19Ringer (Base unit): 26Ringer (Handset): 19, 26Speaker: 19
W Wall mounting: 18
50
Index
TG67xxE(en)_1226_ver022.pdf 50 2011/12/26 11:45:58
51
Notes
TG67xxE(en)_1226_ver022.pdf 51 2011/12/26 11:45:58
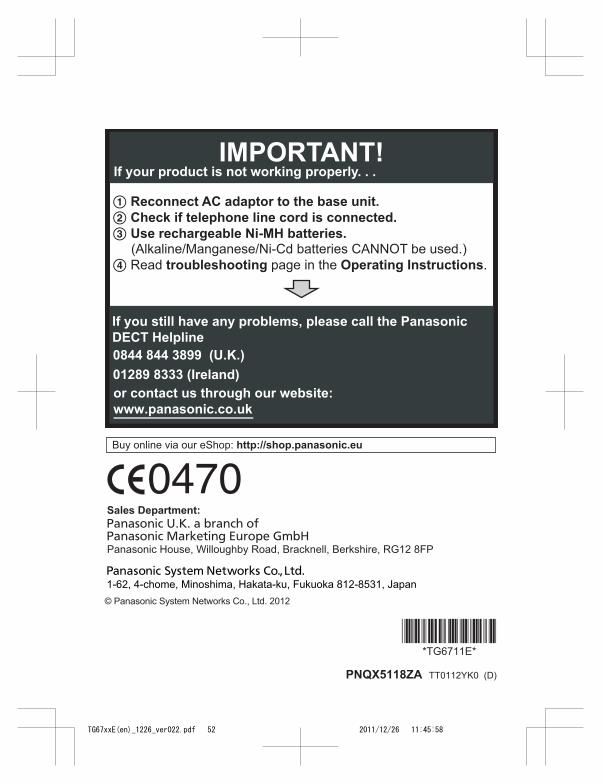
1 Reconnect AC adaptor to the base unit.
2 Check if telephone line cord is connected.
3 Use rechargeable Ni-MH batteries. (Alkaline/Manganese/Ni-Cd batteries CANNOT be used.)
4 Read troubleshooting page in the Operating Instructions.
If your product is not working properly. . .IMPORTANT!
If you still have any problems, please call the Panasonic
DECT Helpline
0844 844 3899 (U.K.)
01289 8333 (Ireland)
or contact us through our website:
www.panasonic.co.uk
Buy online via our eShop: http://shop.panasonic.eu
Sales Department:
Panasonic House, Willoughby Road, Bracknell, Berkshire, RG12 8FP
1-62, 4-chome, Minoshima, Hakata-ku, Fukuoka 812-8531, Japan
© Panasonic System Networks Co., Ltd. 2012
*TG6711E**TG6711E*
PNQX5118ZA TT0112YK0 (D)
TG67xxE(en)_1226_ver022.pdf 52 2011/12/26 11:45:58