part 1 slide 1 sign in on the roster to take part in a marcopolo training, you must sign in on the...
TRANSCRIPT

Part 1 Slide 1
Sign in on the RosterTo take part in a MarcoPolo training, you must sign in on the roster for the session you will attend. Beginning at the MarcoPolo Homepage (http://www.marcopolo-education.org), click on the red tab entitled “Professional Development.” Once the page refreshes, select the “Training Logistics Forms” link in the left navigation bar. Then, on the Training Logistics page, in the Attendees section, select the “Sign In on the Roster” link to begin the roster process.
Part 1 Slide 2
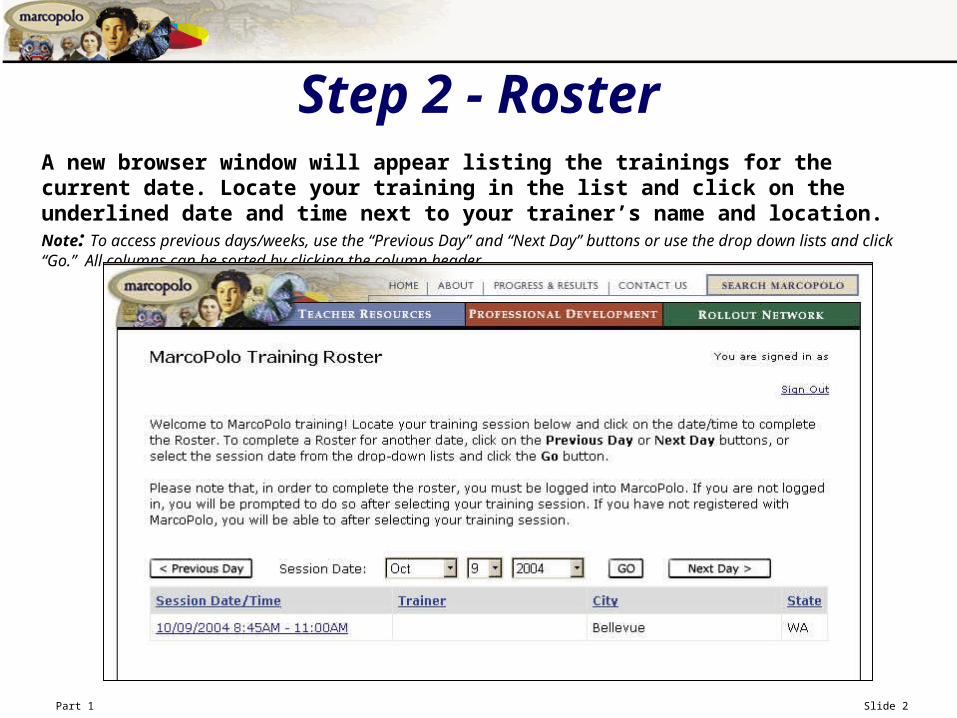
A new browser window will appear listing the trainings for the current date. Locate your training in the list and click on the underlined date and time next to your trainer’s name and location. Note: To access previous days/weeks, use the “Previous Day” and “Next Day” buttons or use the drop down lists and click “Go.” All columns can be sorted by clicking the column header.
Step 2 - Roster

Part 1 Slide 3
Once you have selected a training, you must log in to MarcoPolo. If you have already logged in, you will be taken directly to the form on the following slide. If you have never registered for MarcoPolo before, you can click on the “Register for free” link on this page and complete all of the fields. Be sure to select your Organization when registering as it is a necessary field for Rostering into a Training Session.
Step 2 - Roster

Part 1 Slide 4
Once logged in, the attendee will be asked to verify the selected training and their personal information. If they have not yet chosen an organization, they will also be asked to do this at this time – see the following slide for more information. If the attendee wishes to edit any of their information, they can do that on this page as well.
Step 2 - Roster
Use these links to edit personal information
Part 1 Slide 5
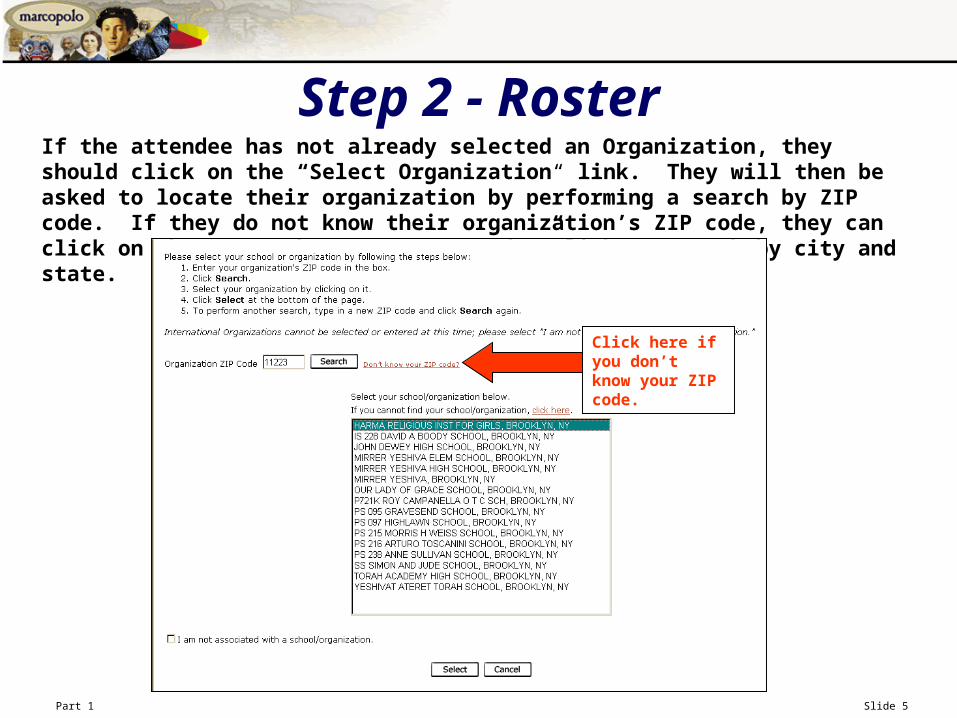
If the attendee has not already selected an Organization, they should click on the “Select Organization“ link. They will then be asked to locate their organization by performing a search by ZIP code. If they do not know their organization’s ZIP code, they can click on the “Don’t know your ZIP code?” link to search by city and state.
Step 2 - Roster
Click here if you don’t know your ZIP code.

Part 1 Slide 6
Once you have completed all of the necessary fields, click on the Confirm button at the bottom of the page and you are done!
Step 2 - Roster