photo transfers 101 - ba(hons)illustration at...
TRANSCRIPT
1
PHOTO TRANSFERS 101
BYNITSA
A part of the book “So much more than photography”For more image transfers and many other processes
go to: www.nonphotography.com/blog
copyright © June 2010Copyediting: Ryan Malone
Ideas suggestions and techniques discussed in this file are free to use
but no part of this file may reproduced in any form or means.
This PDF file cannot be resold or distributed and is for personal use only.

2
Contents
Inkjet transfer...................................................3Basic image transfer (inkjet).....................................4Perfect photo transfers...........................................7Transferring with transparencies..................................8Xerox (photocopy) image transfer..................................9Test transfer.....................................................10Packing tape transfer.............................................11Paint transfer....................................................12Mixed media transfer..............................................13Transfer to mirror or ceramic tile................................17Gel Layer transfer................................................18Aluminum foil transfer............................................21Transfer to Polaroid..............................................22Paint a transfer..................................................24More transfer ideas...............................................26
Camera: Nikon N75 Film: Kodak EL-2 Tequnique: Cross-processed, inkjet transfer Place: Venice Beach, California
3
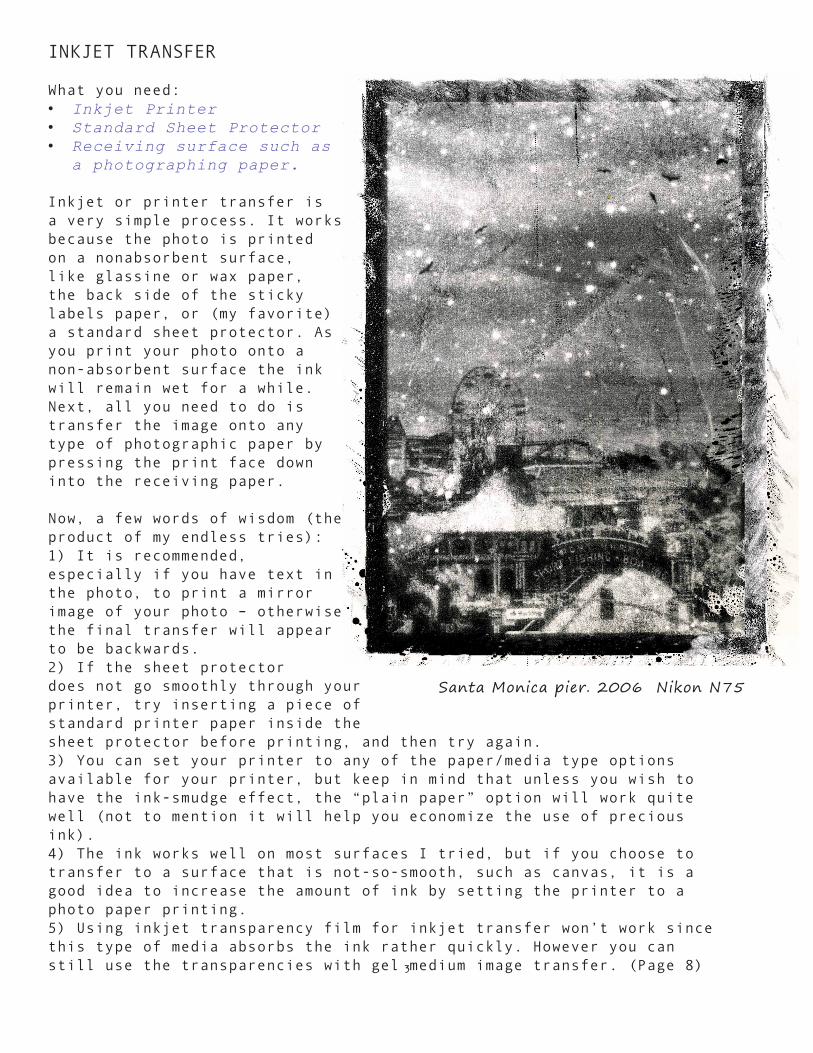
INKJET TRANSFER
What you need:• Inkjet Printer • Standard Sheet Protector• Receiving surface such as
a photographing paper.
Inkjet or printer transfer is a very simple process. It works because the photo is printed on a nonabsorbent surface, like glassine or wax paper, the back side of the sticky labels paper, or (my favorite) a standard sheet protector. As you print your photo onto a non-absorbent surface the ink will remain wet for a while. Next, all you need to do is transfer the image onto any type of photographic paper by pressing the print face down into the receiving paper.
Now, a few words of wisdom (the product of my endless tries):1) It is recommended, especially if you have text in the photo, to print a mirror image of your photo – otherwise the final transfer will appear to be backwards. 2) If the sheet protector does not go smoothly through your printer, try inserting a piece of standard printer paper inside the sheet protector before printing, and then try again. 3) You can set your printer to any of the paper/media type options available for your printer, but keep in mind that unless you wish to have the ink-smudge effect, the “plain paper” option will work quite well (not to mention it will help you economize the use of precious ink).4) The ink works well on most surfaces I tried, but if you choose to transfer to a surface that is not-so-smooth, such as canvas, it is a good idea to increase the amount of ink by setting the printer to a photo paper printing.5) Using inkjet transparency film for inkjet transfer won’t work since this type of media absorbs the ink rather quickly. However you can still use the transparencies with gel medium image transfer. (Page 8)
Santa Monica pier. 2006 Nikon N75
4
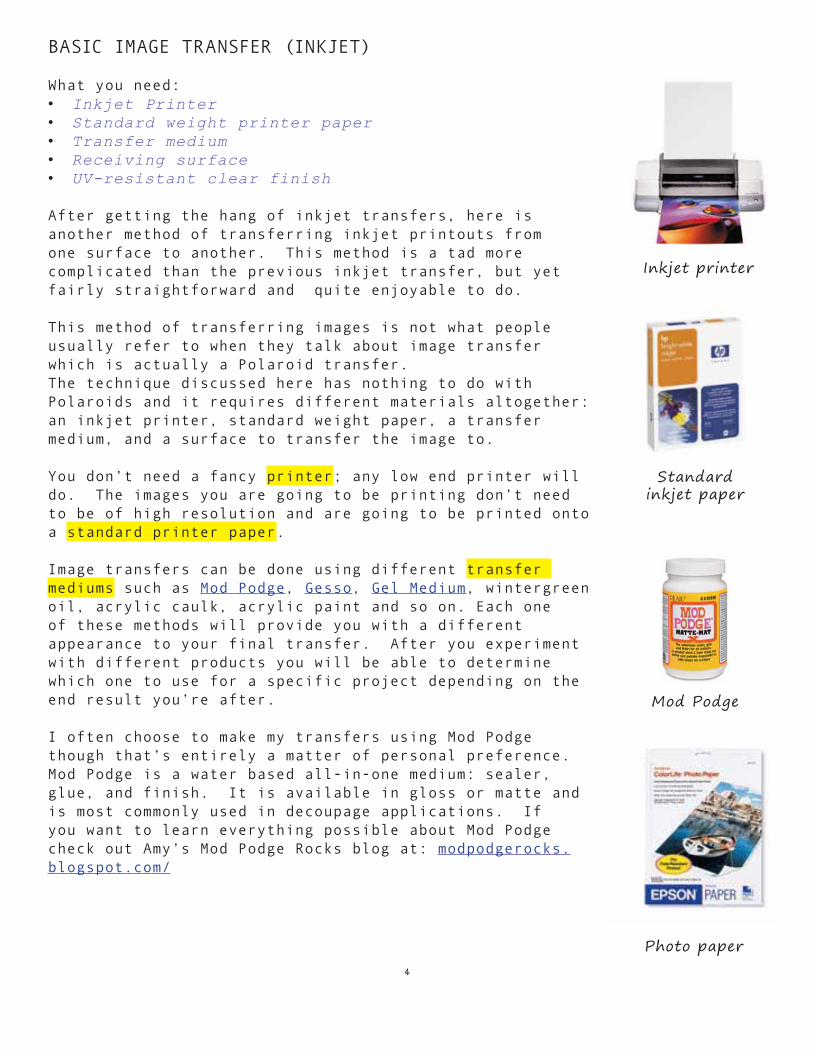
BASIC IMAGE TRANSFER (INKJET)
What you need:• Inkjet Printer • Standard weight printer paper• Transfer medium • Receiving surface• UV-resistant clear finish
After getting the hang of inkjet transfers, here is another method of transferring inkjet printouts from one surface to another. This method is a tad more complicated than the previous inkjet transfer, but yet fairly straightforward and quite enjoyable to do.
This method of transferring images is not what people usually refer to when they talk about image transfer which is actually a Polaroid transfer. The technique discussed here has nothing to do with Polaroids and it requires different materials altogether: an inkjet printer, standard weight paper, a transfer medium, and a surface to transfer the image to.
You don’t need a fancy printer; any low end printer will do. The images you are going to be printing don’t need to be of high resolution and are going to be printed onto a standard printer paper. Image transfers can be done using different transfer mediums such as Mod Podge, Gesso, Gel Medium, wintergreen oil, acrylic caulk, acrylic paint and so on. Each one of these methods will provide you with a different appearance to your final transfer. After you experiment with different products you will be able to determine which one to use for a specific project depending on the end result you’re after.
I often choose to make my transfers using Mod Podge though that’s entirely a matter of personal preference. Mod Podge is a water based all-in-one medium: sealer, glue, and finish. It is available in gloss or matte and is most commonly used in decoupage applications. If you want to learn everything possible about Mod Podge check out Amy’s Mod Podge Rocks blog at: modpodgerocks.blogspot.com/
Inkjet printer
Standard inkjet paper
Mod Podge
Photo paper

5
The receiving surface can be anything from card stock, photo paper, canvas, watercolor, wood panel, ceramic tile, mirror, etc. Experimenting with different surfaces can be one of the best things about image transfers.
After your transfer is done, it’s a good idea to protect it with a UV-resistant clear coating or a product called Preserve It! (Krylon), so that your transfer has a longer, happier life span.
George. Washington’s Headquarters, Valley Forge. Mod Podge image transfer.

6
Now on to the details:
1. Set your printer to normal or standard settings. Next, print a mirror image of your photo onto a standard weight printer paper (it is very important that you don’t print your image on a photo paper,or it is just not going to work!)
2. Brush a good amount (but not too much) of Mod Podge on the printout photo. You can substitute the Mod Podge with any other transfer medium like gel medium or gesso.
3. Place the wet printout face-down onto the photo paper you want to transfer your image to (or any other surface of your choice) and press down on it with your fingers,
4. Some people use a brayer to smooth the paper and get rid of the air bubbles, but you can just use your fingers or any other similar tool.
5. At this point you can place a heavy book on top of your transfer to flatten and strengthen the bond between the printout and the background surface (And you thought you’ll never pick up that book off the shelf! Ha!)
6. Wait a few minutes for the Mod Podge to dry (but don’t wait too long, as the Mod Podge acts just like glue) and then peel off the original printout as much as you can.
7. Now, the final step is to moisten your fingers or spray the back of the printout with water, and GENTLY rub off the left-over paper until you have the transfer entirely revealed.
DONE!
Cover your printout with the transfer medium
Place the printout face-down into the receiving surface.
When the transfer is dry begin peeling off the paper.
Moisten the back of the image and rub off the access paper.

7
Perfect Photo Transfers
As I have acquired some experience with the different methods of image transfers, I eventually realized my transfers were too… well, too perfect. And a perfect transfer can be quite dull.In fact, one of the best traits of image transfers is their flawed appearance that makes each transfer unique.As a result I decided that the outcome and quality of a transfer now depends on the image I choose to transfer and that I don’t have to be restricted to selecting high quality flawless images.So at this point I choose to transfer images taken with film cameras, especially classic or toy cameras which as a rule produce mysterious, dreamy wonderful images.If you only shoot digital you can simply modify your images in Photoshop, age them or process them in any way you wish, before printing out and transferring them.
Windowsill. G. Washington’s Headquarters, Valley Forge. Mod Podge image transfer.
8
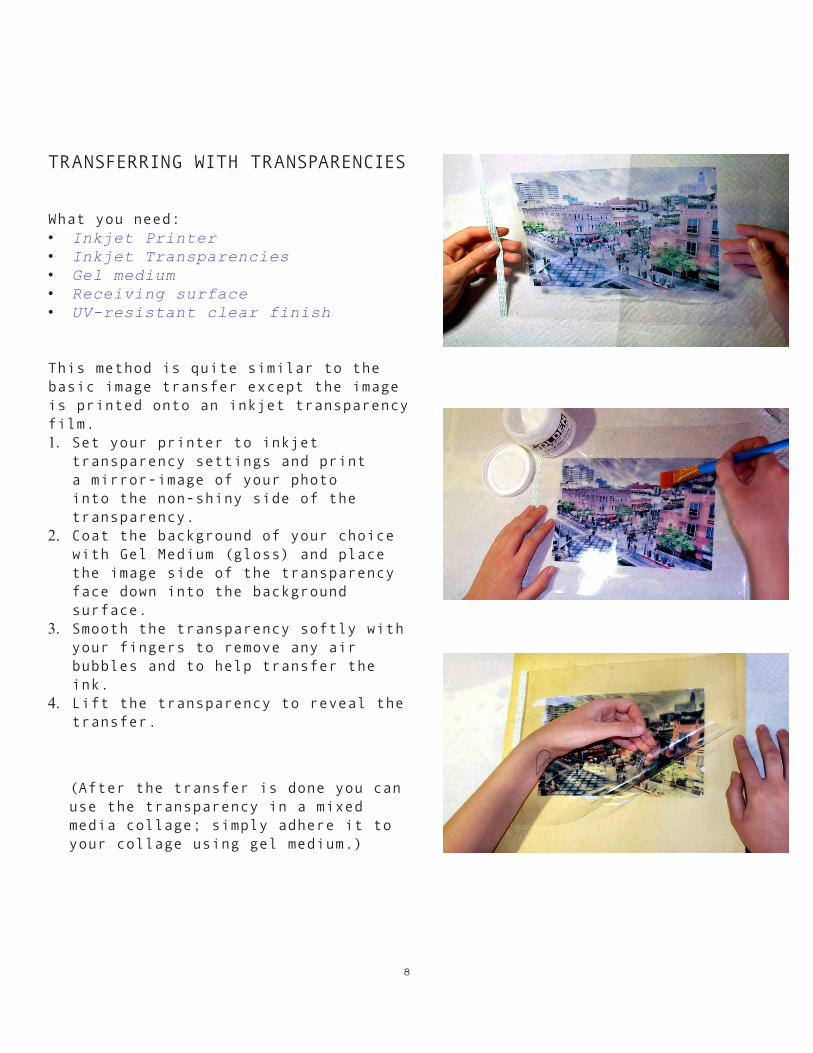
TRANSFERRING WITH TRANSPARENCIES
What you need:• Inkjet Printer • Inkjet Transparencies• Gel medium • Receiving surface • UV-resistant clear finish
This method is quite similar to the basic image transfer except the image is printed onto an inkjet transparency film.1. Set your printer to inkjet
transparency settings and print a mirror-image of your photo into the non-shiny side of the transparency.
2. Coat the background of your choice with Gel Medium (gloss) and place the image side of the transparency face down into the background surface.
3. Smooth the transparency softly with your fingers to remove any air bubbles and to help transfer the ink.
4. Lift the transparency to reveal the transfer.
(After the transfer is done you can use the transparency in a mixed media collage; simply adhere it to your collage using gel medium.)

9
XEROX (PHOTOCOPY) IMAGE TRANSFER
A Xerox photocopy is a toner based copy of an image or a photo made on a xerographic copying machine, which can be made at any copy center such as Kinkos.
1. Select a color or black and white photo that has a good contrast, (make sure it is a mirror image, especially if it has text)and make a photocopy of it.2. Brush a good amount of the transfer medium on the background surface, place the photocopy face down into the background and smooth out any air bubbles. 3. Let the transfer completely dry for as much as 24 hours. 4. Spray the back of the photocopy with water and begin rubbing the paper off with your fingers. You can also use a soft sand paper or anything else that might help you rub off the paper. You will need to repeat this step a few times until all the paper is gone.5. Protect the transfer with a clear UV-resistant finish.
Click here for one of my early Xerox transfers
What you need:• Laser photocopy (black and
white or color) • Transfer medium such as Mod
Podge, gel medium or gesso • Receiving surface• A water spray bottle• UV-resistant clear finish

10
TEST TRANSFER
This collage is a test piece where I experimented with different materials.I chose an 11X14 canvas board and partially covered it with pieces of an old newspaper and different textured papers. I used mod podge to adhere the papers to the canvas. The mod podge also acts as a protective finish. In order to add some color to the mix I used acrylic paints which I often favor as they dry quite fast.I experimented with two different type of printed cutouts: inkjet and professional photo prints. I also experimented with two types of image transfer; inkjet and Xerox. Both type of transfers were done using Mod Podge.And I even tried my hand in drawing. Conclusions: 1. Inkjet prints are frailer than professional prints and smear when they come in contact with any moisture.2. The inkjet transfer was weaker and somewhat faded. 3. The Xerox transfer turned out a higher contrast.4. Image transfers blend in nicely with the other elements of the collage while the photo prints tend to stand out of the collage background.5. I can’t draw!

11
PACKING TAPE TRANSFER
What you need:• Laser photocopy (black and white or color) • Scotch clear packing tape • Burnishing tool • A water spray bottle
1. Layer the packing tape over the photocopy.2. Turn the photocopy over and burnish its back with a spoon in order to completely transfer the ink to the tape.3. Spray the back of the photocopy with water and begin rubbing off the paper back to reveal the transfer. 4. When you are done your photo will be merged into the sticky side of the tape which can now be used in a collage.
Layer the tape over the image
Burnish the back with a spoon Spray the back with water
Rub off the paper to reveal transfer

12
PAINT TRANSFER
What you need:• Laser photocopy (black &
white or color) • Acrylic paints• Receiving surface• A water spray bottle• UV-resistant clear
finish
1) The very first step is to choose the right image to transfer. Images with good contrast and a plenty of light areas where the paint will show through, work best.2) Cover the photocopy with a generous amount of any standard acrylic paints, place it face down and press it down onto the background surface.3) After a few hours when the transfer it dry, spray the back of the photocopy with water and rub off the paper to reveal the transfer. Repeat this step as many times as needed until the excess paper is completely gone. 4) The final step, as always is to protect the image with clear UV protection.
Broadway, NYC. Paint transfer to 5”X7” canvas panel

13
MIXED TRANSFER (I.E. MIXED MEDIA TRANSFER)
One of the main ideas behind my endless quest through the land of experiments is a search for a technique to combine photography with other forms of the visual arts.Therefore I was quite happy when it occurred to me to try combining mixed media and image transfer; two methods I’ve been doing independently until now.Transferring to a mixed media collage works well owing to the fact that I typically brush a generous amount of Mod Podge over the mixed media collage (not only to make sure the different pieces are glued well but also to finish and seal the whole thing), this practice creates the perfect surface to transfer an image onto.Also I would like to recommend that if you are interested in doing image transfers, do consider the mixed-media thing. I myself like it very much because of the special appearance of the end result and because it involves the therapeutic process of tearing, assembling and pasting. I often use found objects, meaning movie tickets, used stamps, spam mail, newspapers etc. Actually one of my favorite things to use is the little paper bag they put my sushi in at Whole Foods, it has red stripes and it states “stay cool” so I try to stay cool and I use these paper bags in every mixed media piece I make. The reason I mention it is that not only the mixed-media-transfer has a unique appearance; it is also Earth friendly and a much better way to recycle; which makes it a top energy efficient recycling method.And don’t forget, before you transfer the image onto these mixed media things, you can scan them and use them as backgrounds with your texture layer technique (page 92)
Turn page for details

14
MIXED MEDIA TRANSFER
What you need:• Inkjet photo or laser photocopy• Collage materials such as: newspaper clippings, designer
or hand-made papers, stamps, ticket stubs, brown paper bags, wrapping paper, etc.
• Acrylic or water paints• Mod Podge• Gesso• Canvas or wood panel • A water spray bottle• UV-resistant clear finish
1) Gather your collage materials and lay them out in a design of your choice on any size canvas or wood panel. Adhere the collage pieces onto the surface using Mod Podge.2) Make sure to cover the collage pieces with Mod Podge so it doesn’t only adhere the papers to the canvas but also protects it to all eternity (or at least a few years). 3) Next, cover the collage layer with watered-down gesso. It will mute the layer a bit and also will tie the pieces together. 4) Add a thin layer of acrylic or water paint of your choice. Don’t overdo it so that it doesn’t overwhelm the other layers. 5) Let the collage dry thoroughly. 6) Convert the photo of your choice to black and white (not grayscale) by adding brightness and 100% contrast. In some cases color photos will work as well but black and white often works better. 7) If you are using an inkjet, print out a mirror version of your image into a standard printer paper.8) Cover your image with Mod Podge and press it face down into the collage. Rub gently with your fingers to smooth out any air bubbles.9) If you are using an inkjet photo you will have to wait only about 15-30 minutes for the Mod Podge to dry and for the transfer to complete. If you are using a photocopy Leave it alone for a few hours, preferably over night. 10) Spray the back of your photo with water and gently rub off the excess paper with your fingers in order to reveal the transfer. If you are using a photocopy you will have to repeat this step until the access paper is completely gone.11) For the final touch you can add text, letters, gesso and paints. 12) Preserve your art work with a protective finish such as “preserve it!” by Krylon for inkjet or Krylon Crystal Clear if you used a toner-based photocopy.13) CLEAN UP THIS MESS!
15
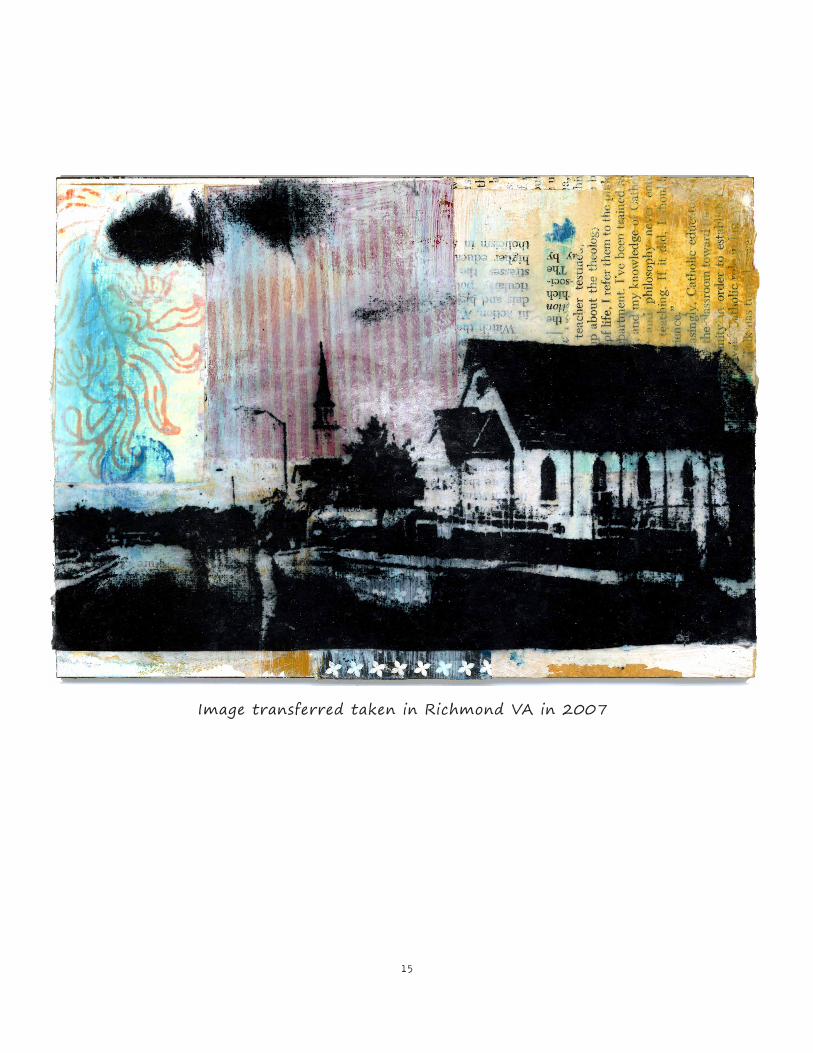
Image transferred taken in Richmond VA in 2007

16
TRANSFER TO MIRROR OR CERAMIC TILE
What you need:• Laser photocopy (black and white or color) • Gel medium• Glass and Tile primer• Mirror surface or a white ceramic tile• A water spray bottle• UV-resistant clear finish
Evening in Brooklyn. Transfer to ceramic tile
17
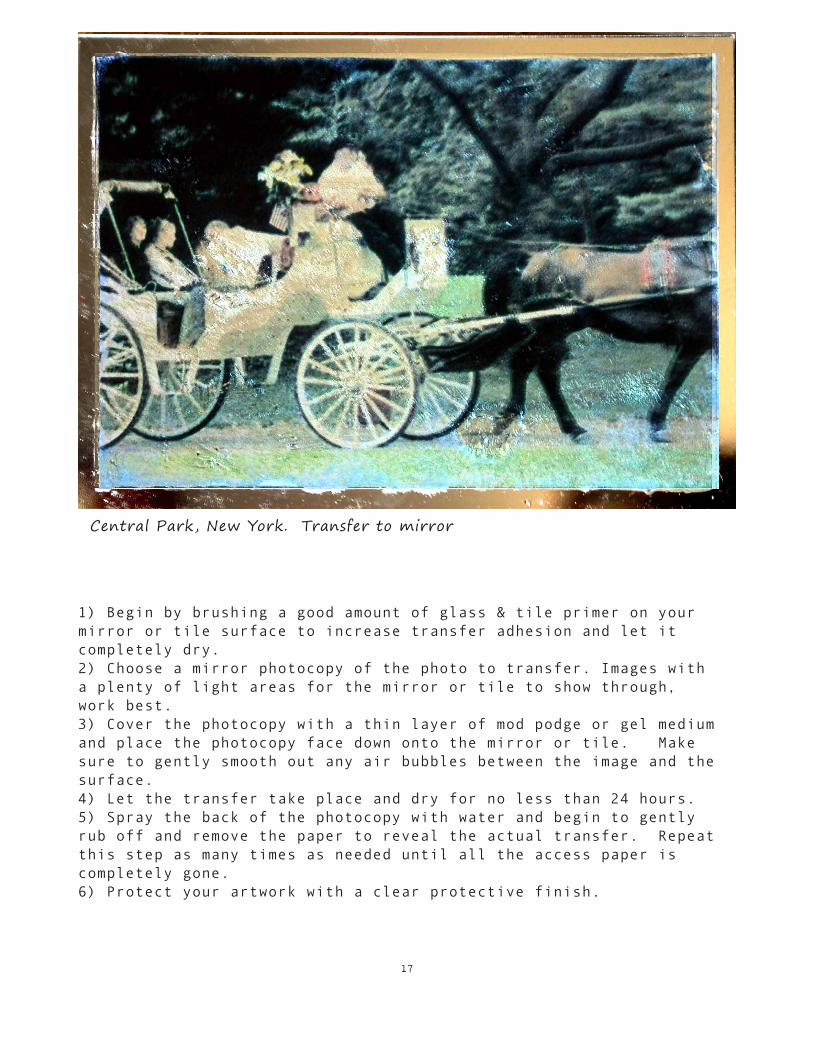
1) Begin by brushing a good amount of glass & tile primer on your mirror or tile surface to increase transfer adhesion and let it completely dry.2) Choose a mirror photocopy of the photo to transfer. Images with a plenty of light areas for the mirror or tile to show through, work best.3) Cover the photocopy with a thin layer of mod podge or gel medium and place the photocopy face down onto the mirror or tile. Make sure to gently smooth out any air bubbles between the image and the surface.4) Let the transfer take place and dry for no less than 24 hours.5) Spray the back of the photocopy with water and begin to gently rub off and remove the paper to reveal the actual transfer. Repeat this step as many times as needed until all the access paper is completely gone.6) Protect your artwork with a clear protective finish.
Central Park, New York. Transfer to mirror

18
GEL LAYER TRANSFER
What you need:• Laser photocopy
(black and white or color)
• Gel medium (heavy or regular)
• Water spray bottle
1) Brush a generous amount of gel medium over your photocopy. Let it dry completely; the gel medium dries clear. 2) Brush a second layer of gel medium. Let it dry again and brush a third layer. 3) Turn the photocopy over and spray its back with water. 4) Rub off the paper backing with your fingers. Repeat this step as many times as needed until the paper is completely gone and your photo is transferred to the gel skin.
19
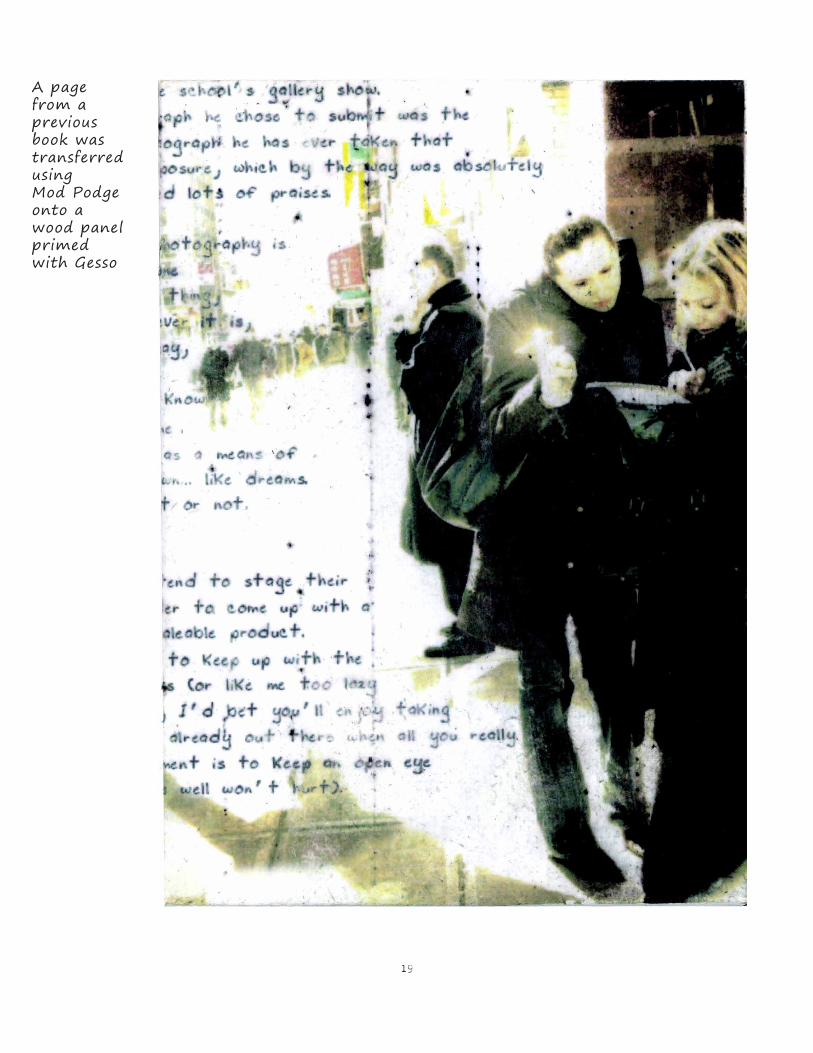
A page from a previous book was transferred using Mod Podge onto a wood panelprimed with Gesso

20
The metropolitan museum, NY. Transfer to aluminum foil
21
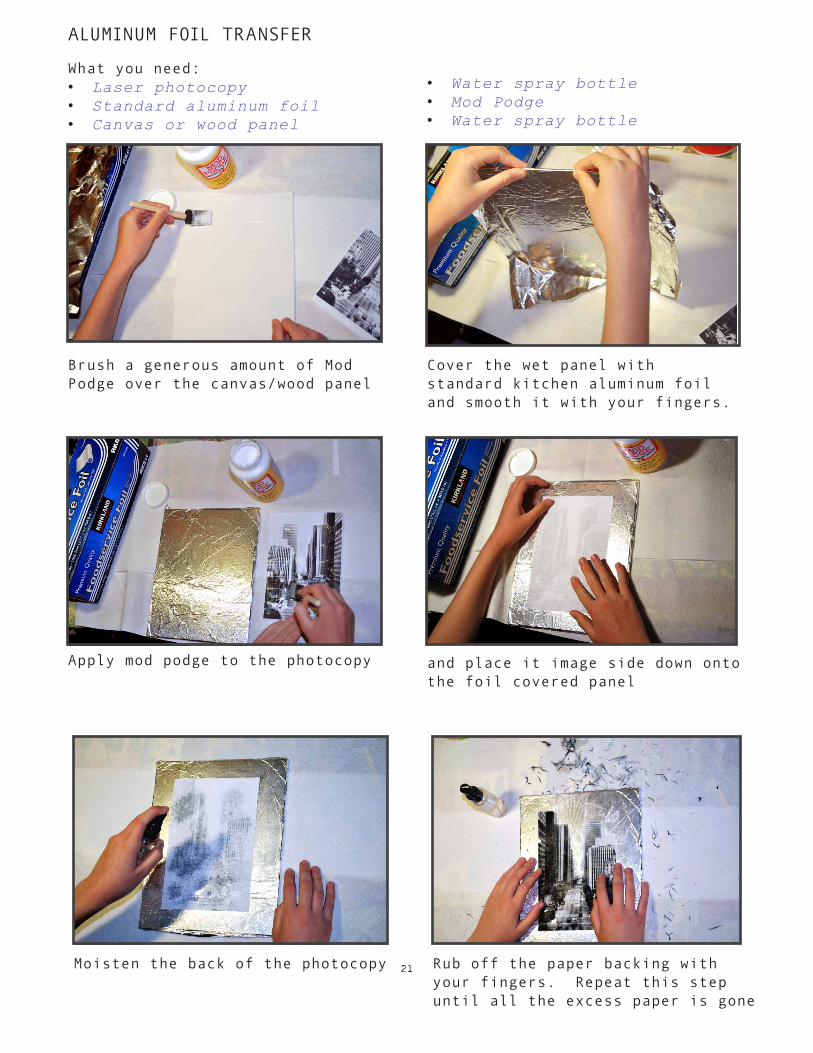
Brush a generous amount of Mod Podge over the canvas/wood panel
Cover the wet panel with standard kitchen aluminum foil and smooth it with your fingers.
Apply mod podge to the photocopy and place it image side down onto the foil covered panel
Moisten the back of the photocopy Rub off the paper backing with your fingers. Repeat this step until all the excess paper is gone
ALUMINUM FOIL TRANSFER
What you need:• Laser photocopy • Standard aluminum foil• Canvas or wood panel
• Water spray bottle • Mod Podge• Water spray bottle
22
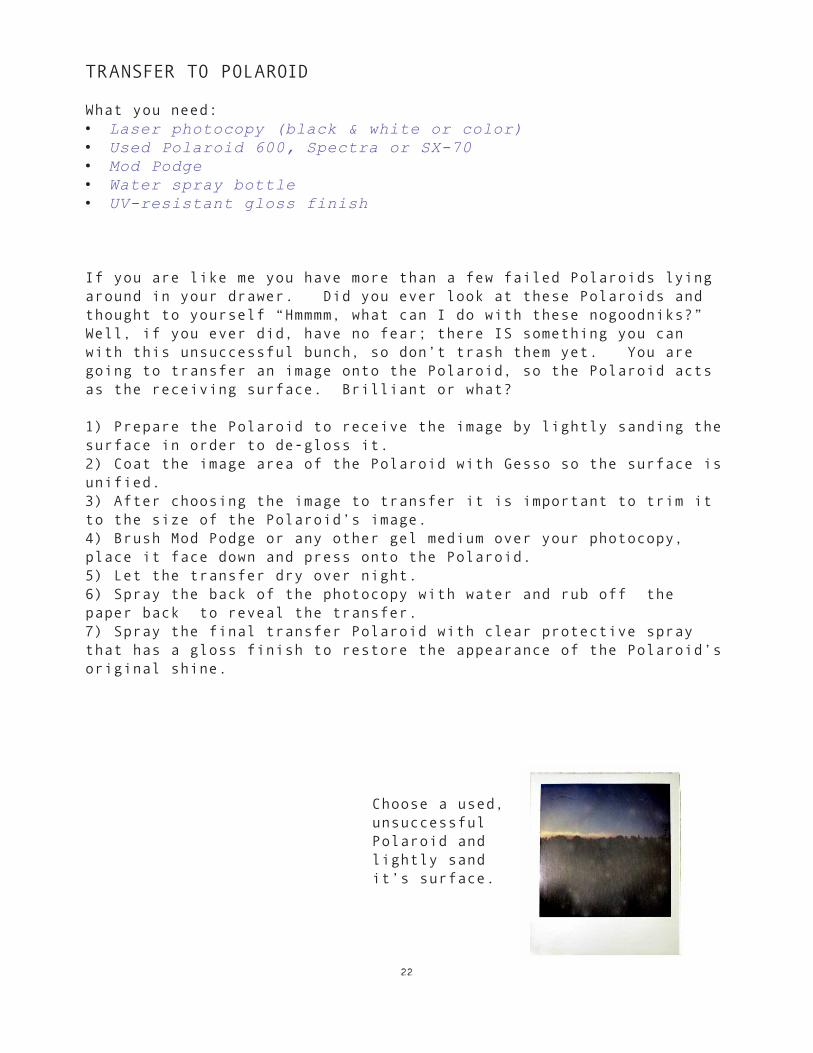
TRANSFER TO POLAROID
What you need:• Laser photocopy (black & white or color)• Used Polaroid 600, Spectra or SX-70 • Mod Podge• Water spray bottle• UV-resistant gloss finish
If you are like me you have more than a few failed Polaroids lying around in your drawer. Did you ever look at these Polaroids and thought to yourself “Hmmmm, what can I do with these nogoodniks?” Well, if you ever did, have no fear; there IS something you can with this unsuccessful bunch, so don’t trash them yet. You are going to transfer an image onto the Polaroid, so the Polaroid acts as the receiving surface. Brilliant or what?
1) Prepare the Polaroid to receive the image by lightly sanding the surface in order to de-gloss it.2) Coat the image area of the Polaroid with Gesso so the surface is unified.3) After choosing the image to transfer it is important to trim it to the size of the Polaroid’s image.4) Brush Mod Podge or any other gel medium over your photocopy, place it face down and press onto the Polaroid.5) Let the transfer dry over night.6) Spray the back of the photocopy with water and rub off the paper back to reveal the transfer.7) Spray the final transfer Polaroid with clear protective spray that has a gloss finish to restore the appearance of the Polaroid’s original shine.
Choose a used, unsuccessful Polaroid and lightly sand it’s surface.

23
Cover the image area of the Polaroid with Gesso.
Choose a photocopy of your image, trim to size, cover with Mod Podge and place it face down into the Gesso covered Polaroid
The really nice thing about this transfer technique is that after it is done you end up holding an actual Polaroid in your hand.
24
PAINT A TRANSFER
What you need:• Laser photocopy (black and white)• Watercolor heavy weight paper • Gel Medium• Water colors • Water spray bottle• UV-resistant gloss finish
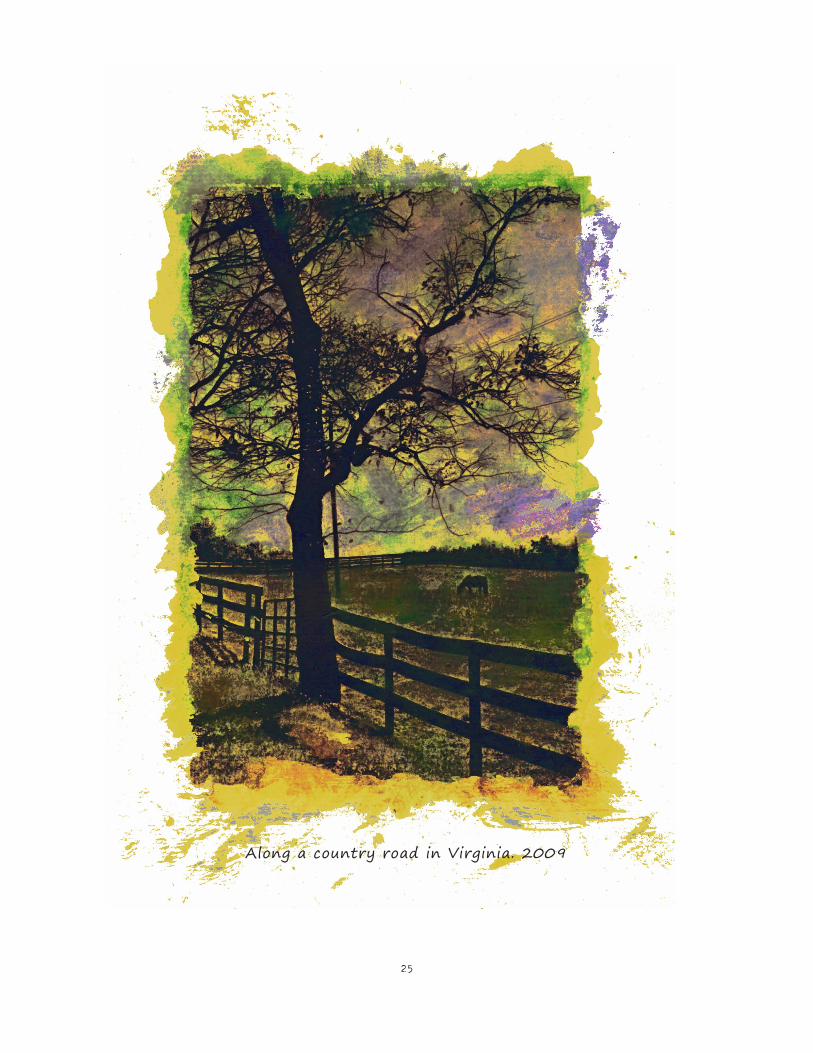
The instructions here are for a watercolor painted transfer but for a different appearance you can replace the watercolor paper with real canvas paper and the water paints with acrylic paints.
1) Make a black and white mirror photocopy of the photo of your choice.2) Cover the photocopy with gel medium and put it face down onto a watercolor paper.3) Wait a few hours until the gel medium is dry.4) Spray the back of the photocopy with water and rub off the access paper to reveal the photo which is now transferred to the watercolor paper.5) Repeat step 4 as many times as needed until all the access paper is completely gone.6) Use water colors to color your photo anyway you wish.7) Make sure to protect your artwork with a clear protective finish.
25
Along a country road in Virginia. 2009

26
MORE TRANSFER IDEAS
Texture transferPaper napkin pieces were layered over a canvas panel using mod podge. After they were covered with Gesso these layers formed a nice textured background surface for a photo transfer.
Winter in Westwood. 2002
Distressed transferCreate a distressed background surface as described on page 95. When the surface is ready you can transfer a photocopy of your image into the surface using gel medium or Mod Podge. Images with a lot of white space or big sky area work best with this method.
Am
ish country, P
A 2
009
Gold transferCover any size canvas or wood panel with any shiny gold metallic tissue paper, gold wrapping paper or gold leaf. Alternatively, you can simply paint the surface with a metallic gold acrylic paint. Next, using Mod Podge transfer a photo onto this shiny/metallic golden surface.
Downtown Los Angeles 2009

27
Metallic paint transferWhen I discovered I have metallic paints in my art box I decided to use these paints to experiment with paint transfer.The very first step is to choose an image with plenty of light areas. Cover a photocopy of the image with any color metallic acrylic paint, place it face down and press onto the background surface (medium texture real artist canvas, in this case) .When the paint is completely dry, spray water on the back and rub off the excess paper to reveal the image. The final step, as always is to protect the image with clear UV protection.
Three in oneA 9X12 photocopy was sliced into three 3X4 pieces and each section was then transferred onto the same size wood panel. Next, using wood glue, the 3 panels were assembled on a larger a black painted wood panel.
Mount Vernon, Virginia 2009
Rainy day at the Grove, Los Angeles 2010
28
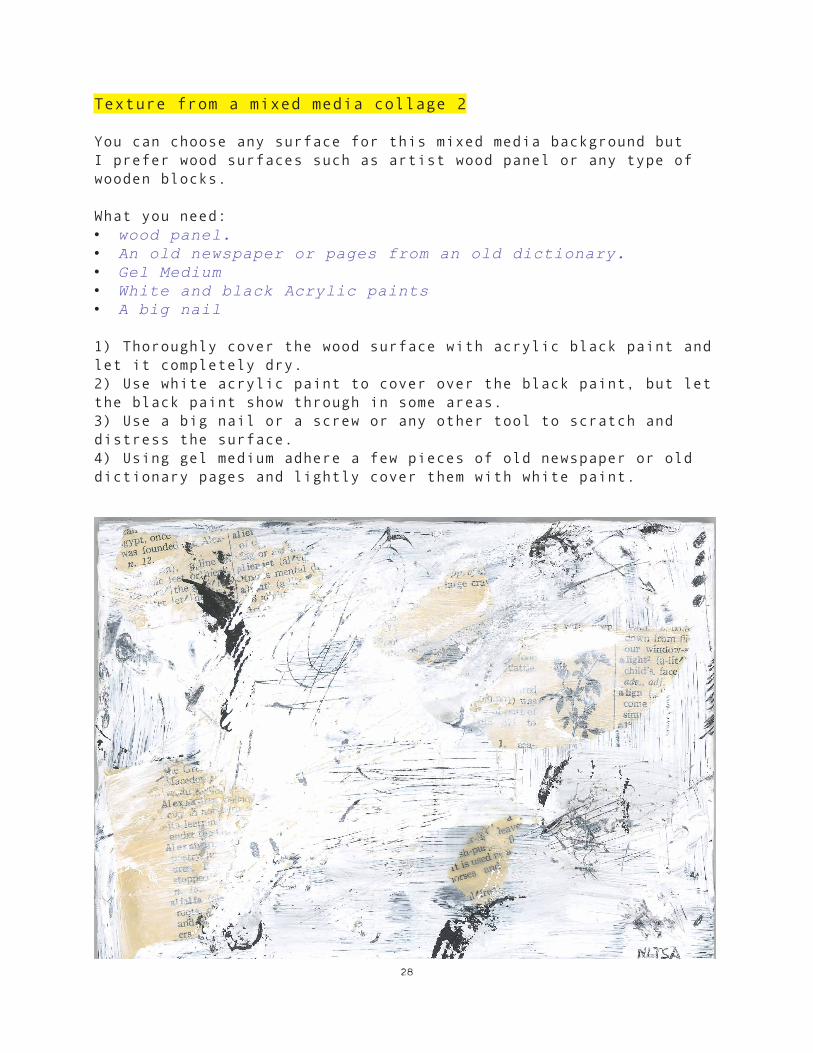
Texture from a mixed media collage 2
You can choose any surface for this mixed media background but I prefer wood surfaces such as artist wood panel or any type of wooden blocks.
What you need:• wood panel.• An old newspaper or pages from an old dictionary.• Gel Medium• White and black Acrylic paints• A big nail
1) Thoroughly cover the wood surface with acrylic black paint and let it completely dry.2) Use white acrylic paint to cover over the black paint, but let the black paint show through in some areas.3) Use a big nail or a screw or any other tool to scratch and distress the surface.4) Using gel medium adhere a few pieces of old newspaper or old dictionary pages and lightly cover them with white paint.

29
The photo transfer techniques presented here are just a few ideas to encourage you to experiment with image transfers of your favorite photos. Feel free to use any idea presented here to jumpstart the artistic presentation to your photographs. Image transfers allow you to take your ordinary photos to the next level while having fun experimenting and getting to have a direct contact with the artwork.Photo transfers support the idea that photography does not have to be limited to the camera or the darkroom. And again, just like everything else in my latest book “so much more than photography”, no exceptional talent or skill is required, although a bit of enthusiasm is definitely a must.More information about this book and other photo processes can be found at: Blog.nonphotography.com
Nitsa. June 2010