photography: image text -...
TRANSCRIPT
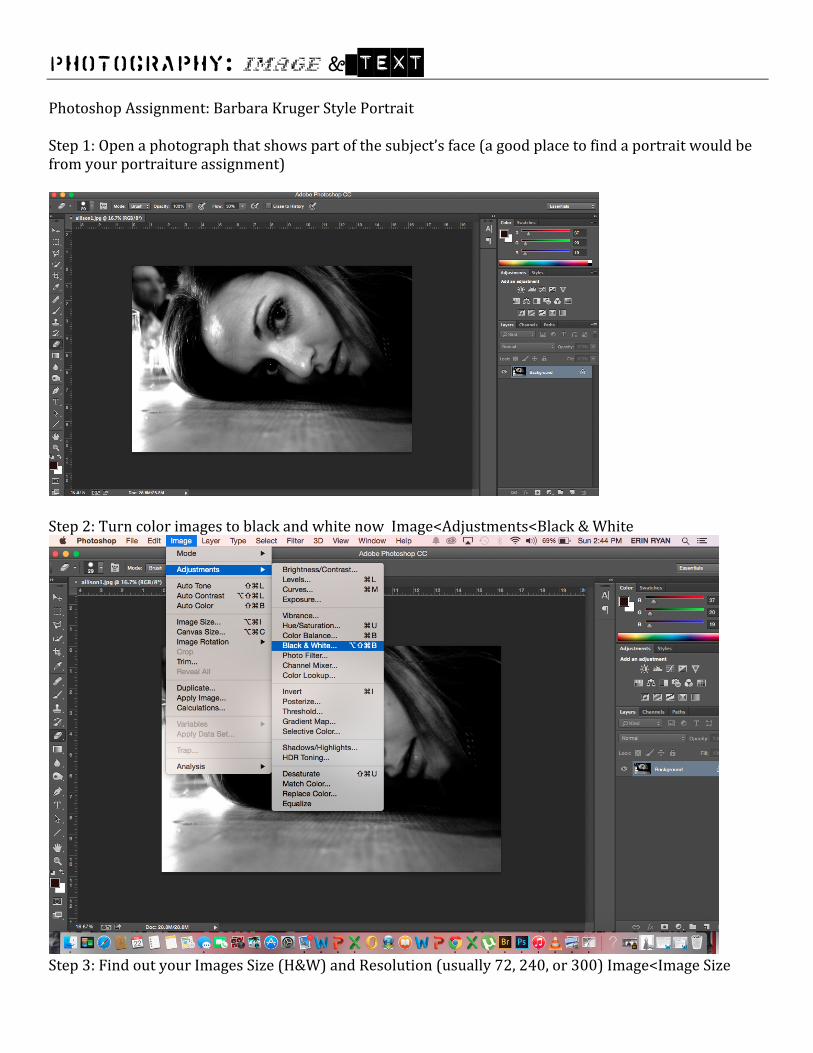
Photography: image & TEXT Photoshop Assignment: Barbara Kruger Style Portrait Step 1: Open a photograph that shows part of the subject’s face (a good place to find a portrait would be from your portraiture assignment)
Step 2: Turn color images to black and white now Image<Adjustments<Black & White
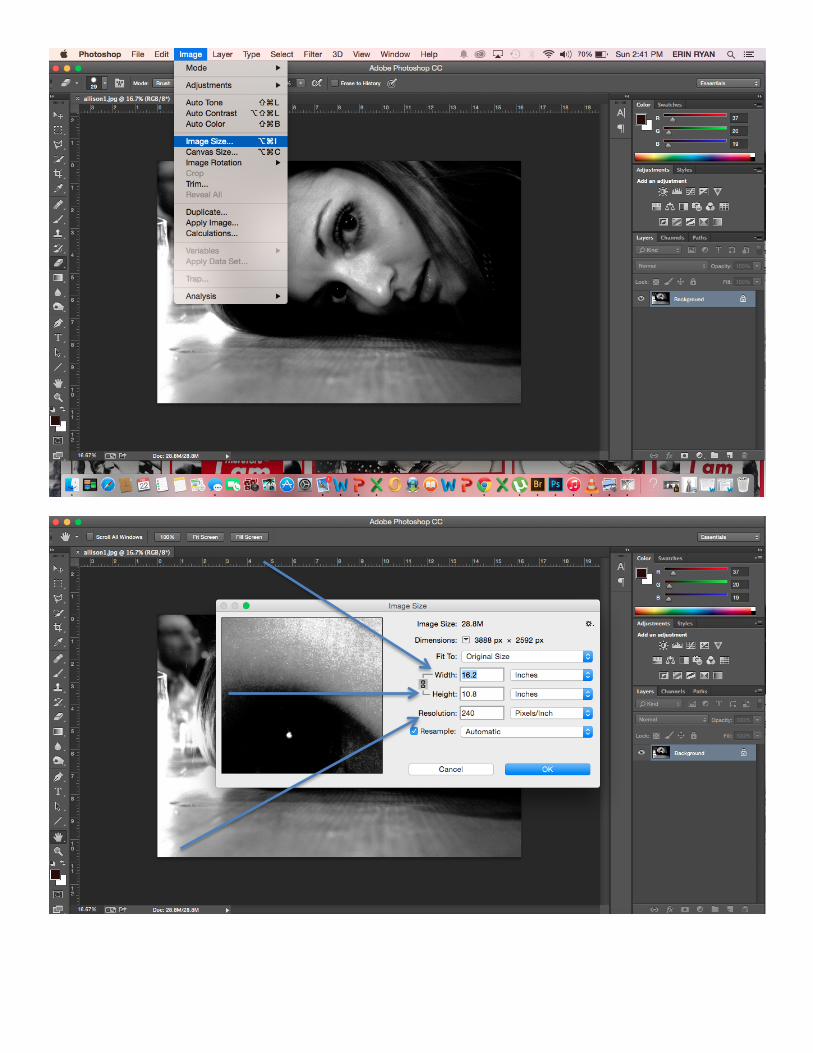
Step 3: Find out your Images Size (H&W) and Resolution (usually 72, 240, or 300) Image<Image Size
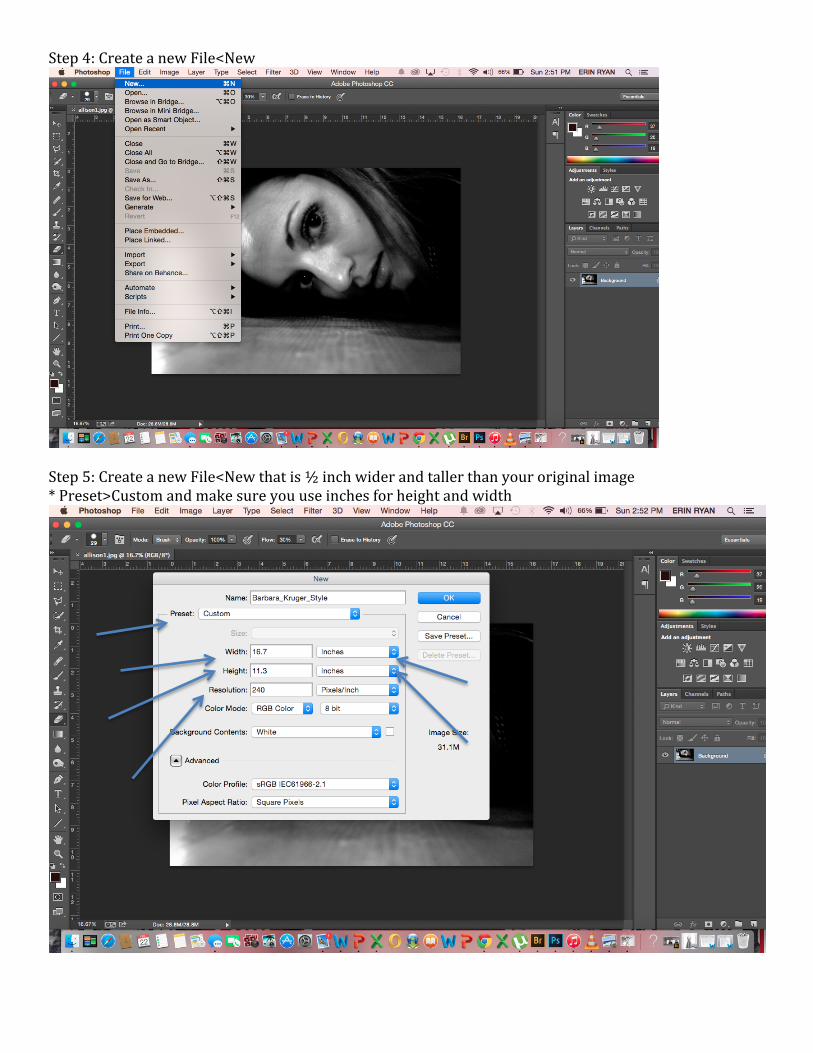
Step 4: Create a new File<New
Step 5: Create a new File<New that is ½ inch wider and taller than your original image * Preset>Custom and make sure you use inches for height and width
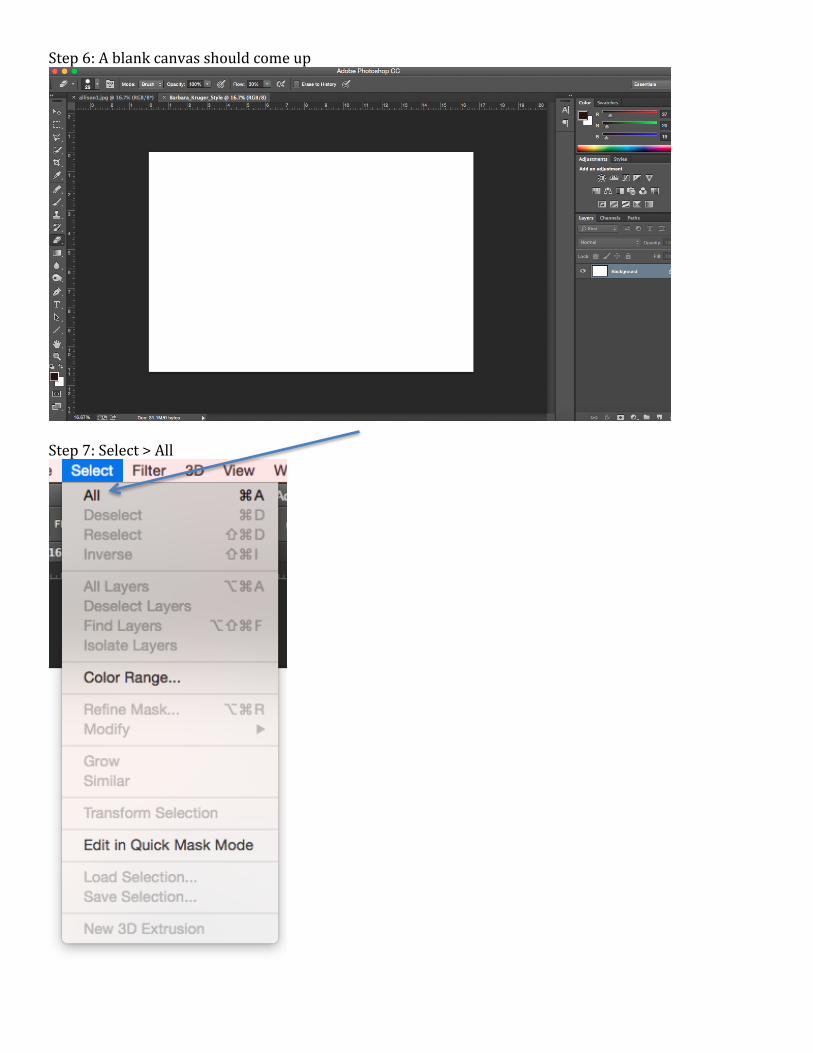
Step 6: A blank canvas should come up
Step 7: Select > All
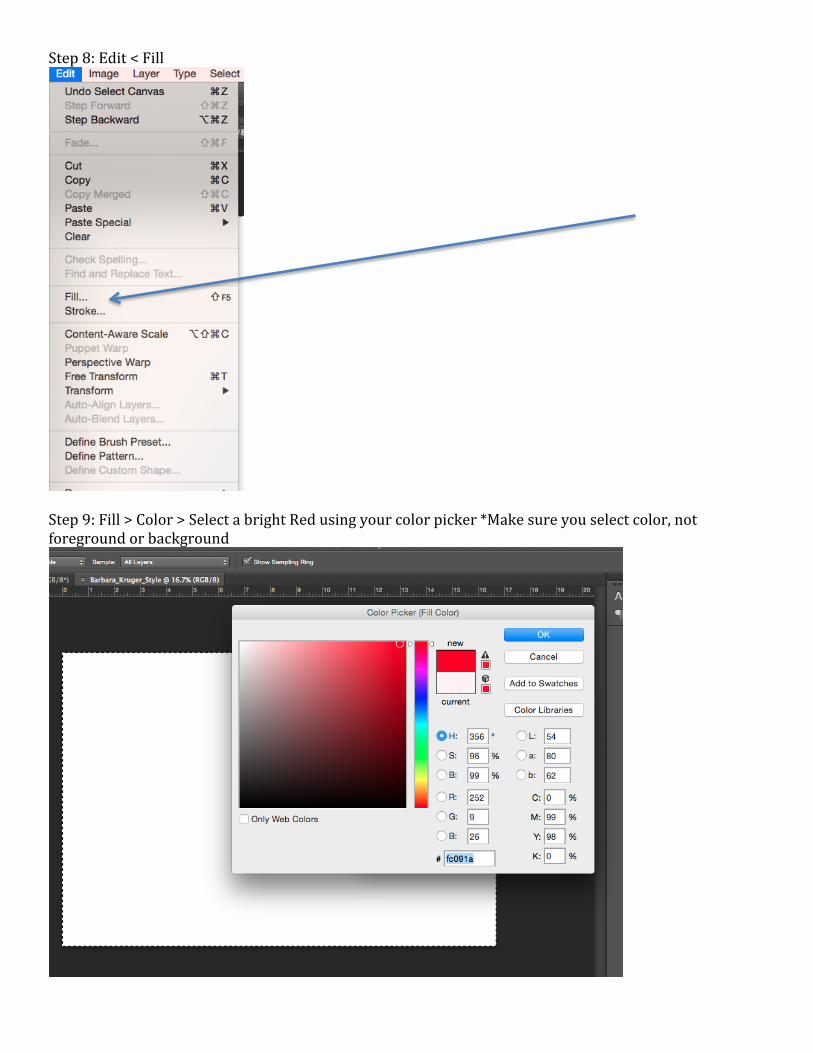
Step 8: Edit < Fill
Step 9: Fill > Color > Select a bright Red using your color picker *Make sure you select color, not foreground or background
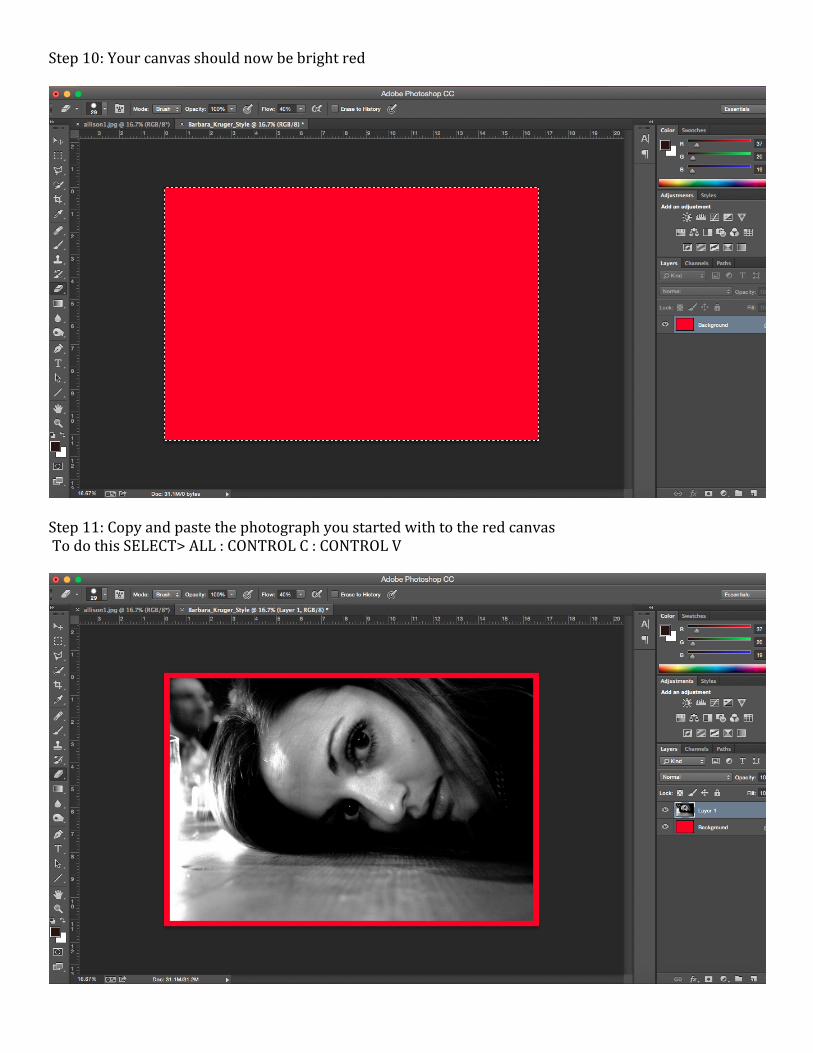
Step 10: Your canvas should now be bright red
Step 11: Copy and paste the photograph you started with to the red canvas To do this SELECT> ALL : CONTROL C : CONTROL V
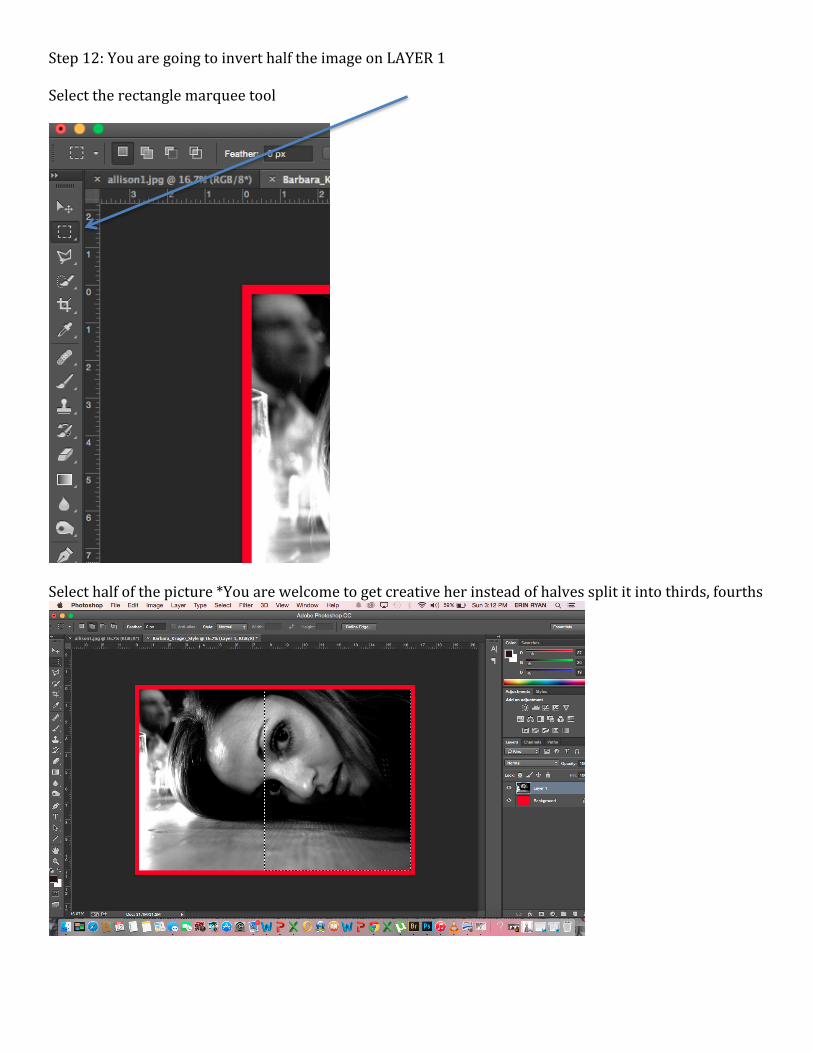
Step 12: You are going to invert half the image on LAYER 1 Select the rectangle marquee tool
Select half of the picture *You are welcome to get creative her instead of halves split it into thirds, fourths

IMAGE > ADJUSTMENTS> INVERT
Your image should now be half inverted
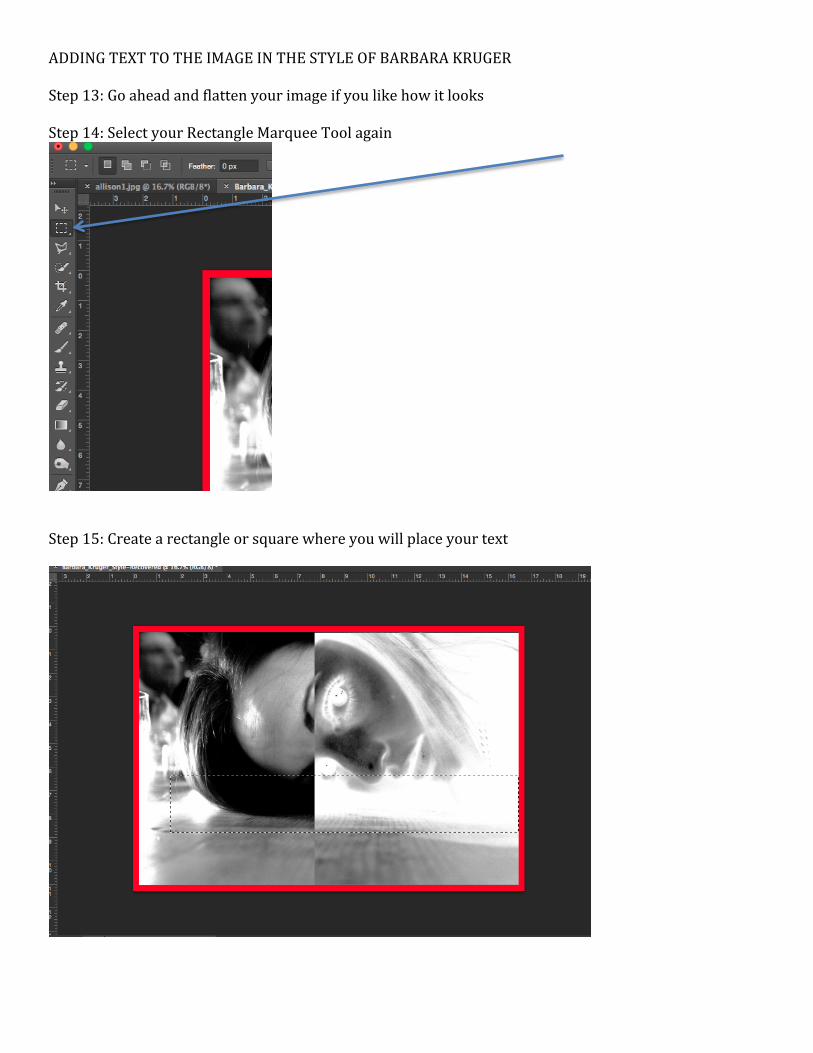
ADDING TEXT TO THE IMAGE IN THE STYLE OF BARBARA KRUGER Step 13: Go ahead and flatten your image if you like how it looks Step 14: Select your Rectangle Marquee Tool again
Step 15: Create a rectangle or square where you will place your text
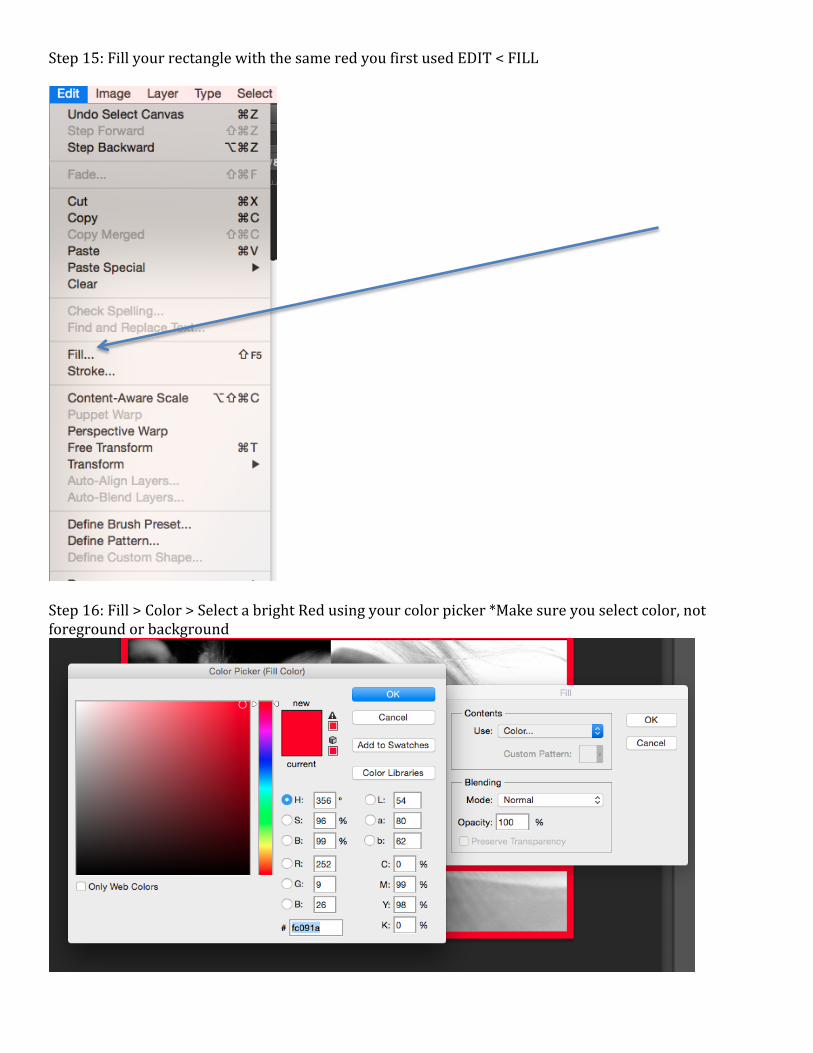
Step 15: Fill your rectangle with the same red you first used EDIT < FILL
Step 16: Fill > Color > Select a bright Red using your color picker *Make sure you select color, not foreground or background
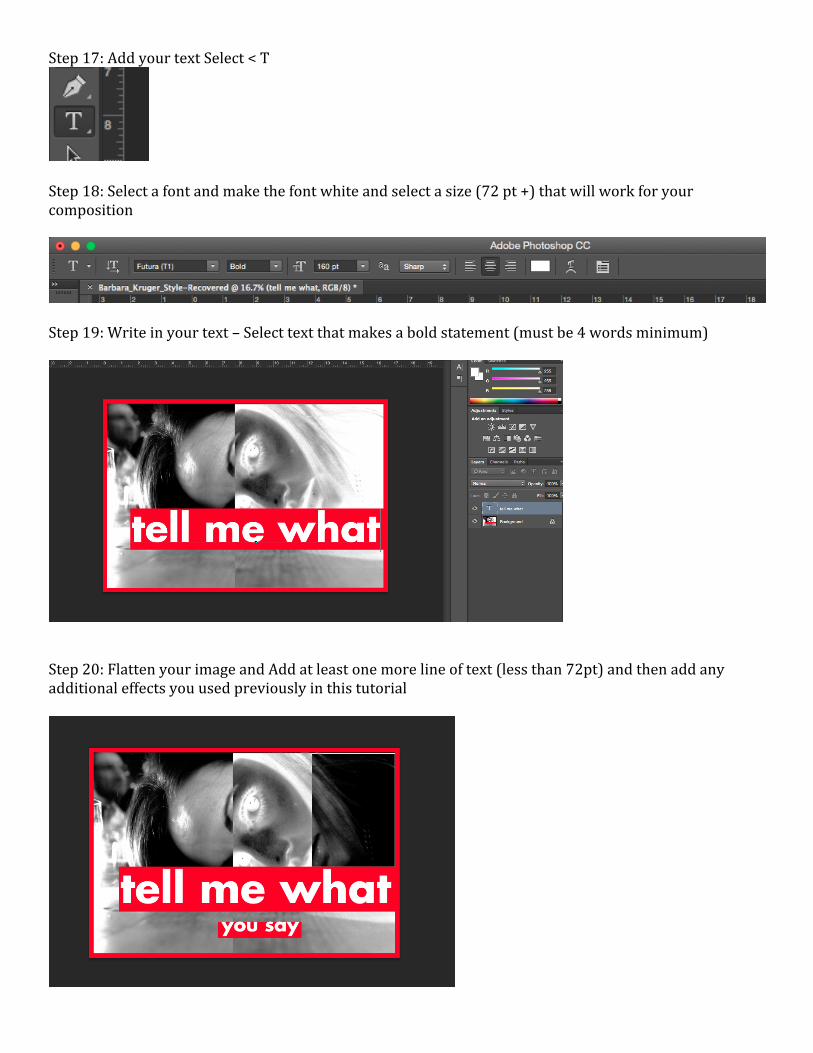
Step 17: Add your text Select < T
Step 18: Select a font and make the font white and select a size (72 pt +) that will work for your composition
Step 19: Write in your text – Select text that makes a bold statement (must be 4 words minimum)
Step 20: Flatten your image and Add at least one more line of text (less than 72pt) and then add any additional effects you used previously in this tutorial

Final Step!! Flatten you image < save your image < post to your blog