photoshop action tutorial final - lib.utexas.edu actions are basically shortcuts that allow...
TRANSCRIPT

Photoshop / Using Actions to edit pictures Photoshop Actions are basically shortcuts that allow photographers, at the click of a button, to enhance and enrich their photos in a fast and efficient way. Today we’re going to apply some Actions to an image. I’ll be using this as an example (feel free to use any other):
1. First, choose a picture and save it on the desktop.
2. Then, open Photoshop.

3. Drag the photo from your desktop to Photoshop.
Your image should appear.

4. We now have to make sure your Action window is open.
Go to Window and make sure Action is Selected.
These are all of our available actions.
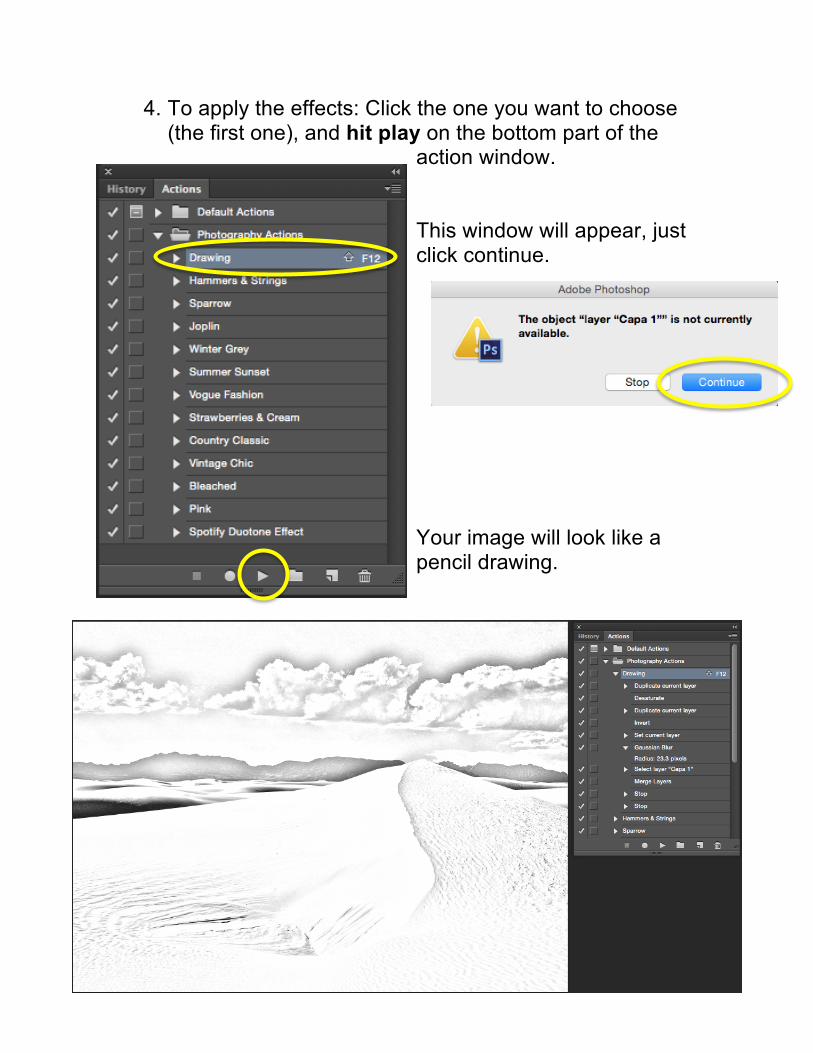
4. To apply the effects: Click the one you want to choose (the first one), and hit play on the bottom part of the
action window. This window will appear, just click continue.
Your image will look like a pencil drawing.
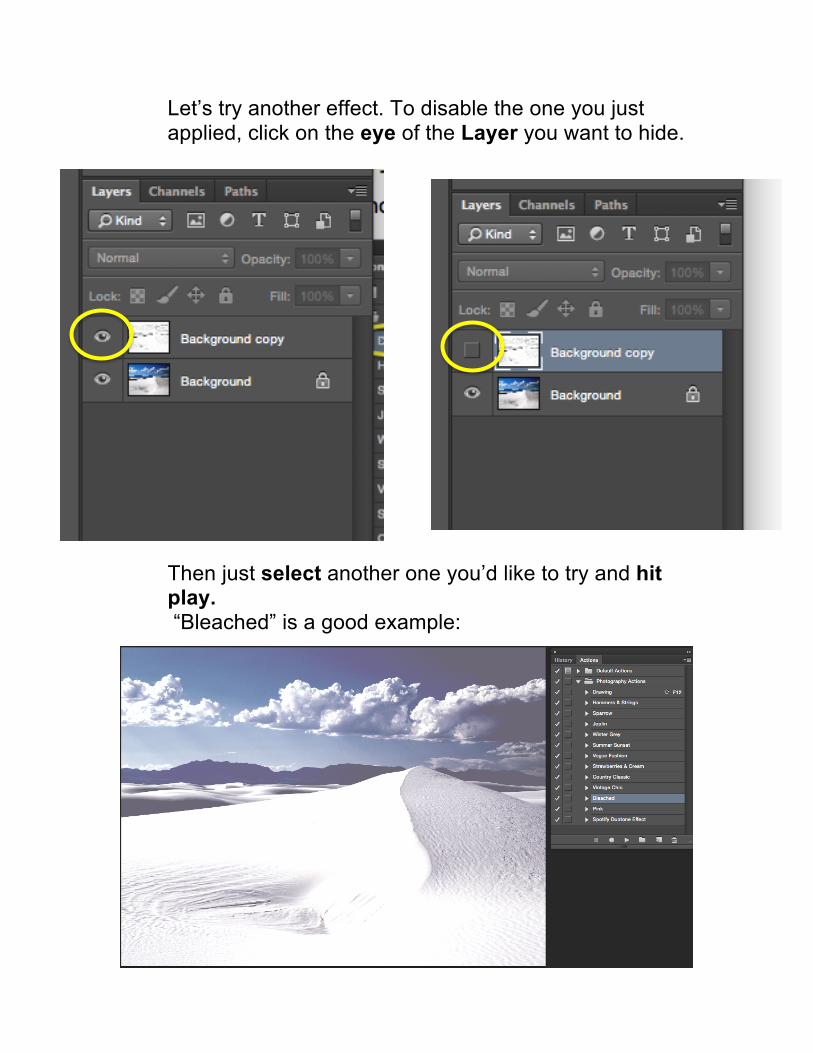
Let’s try another effect. To disable the one you just applied, click on the eye of the Layer you want to hide.
Then just select another one you’d like to try and hit play. “Bleached” is a good example:
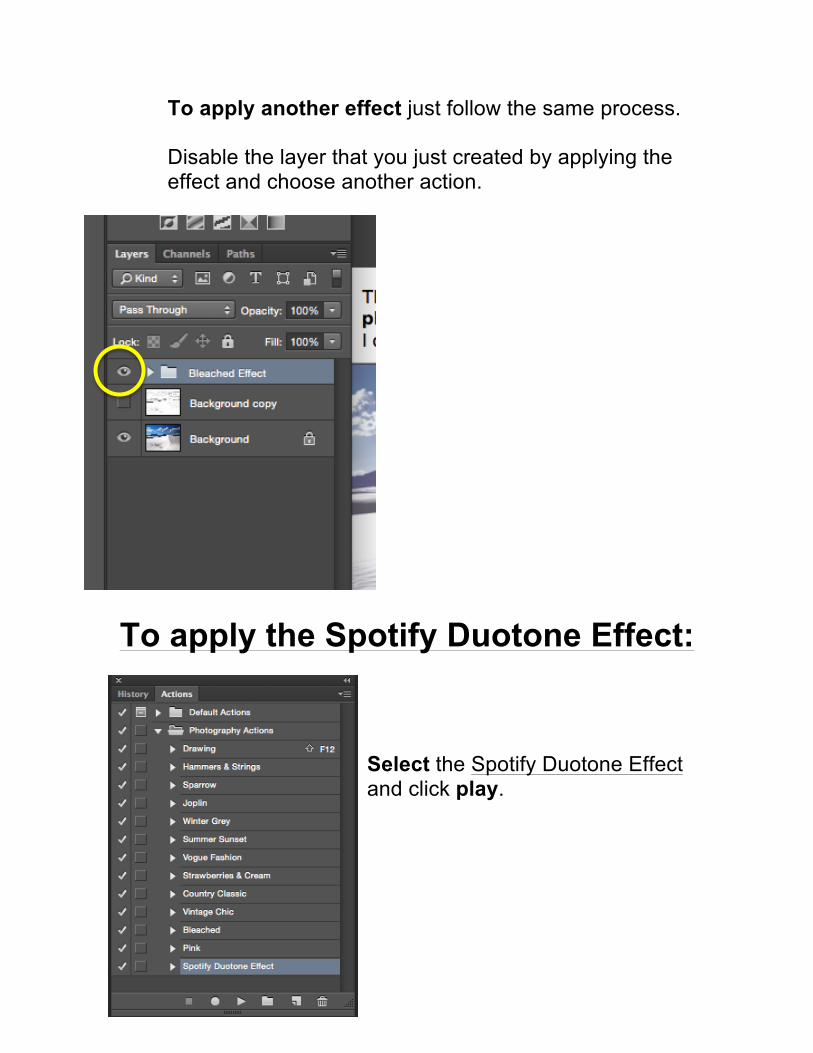
To apply another effect just follow the same process. Disable the layer that you just created by applying the effect and choose another action.
To apply the Spotify Duotone Effect: Select the Spotify Duotone Effect and click play.
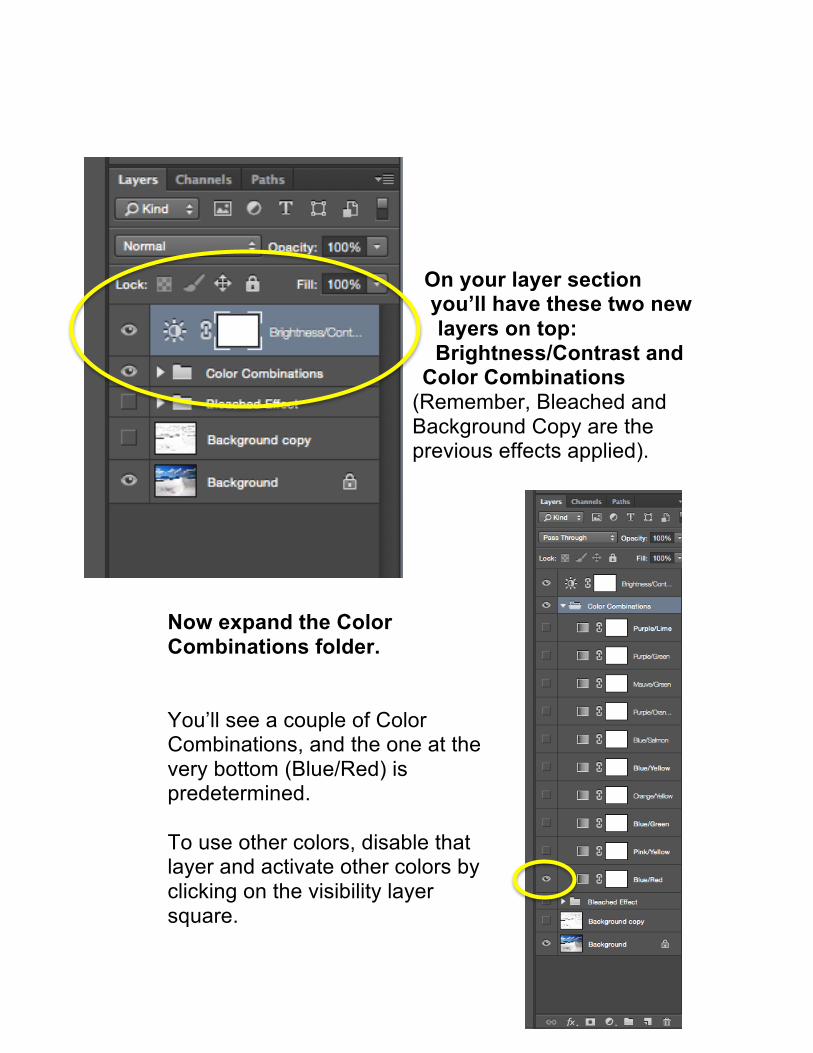
On your layer section you’ll have these two new layers on top: Brightness/Contrast and
Color Combinations (Remember, Bleached and Background Copy are the previous effects applied).
Now expand the Color Combinations folder. You’ll see a couple of Color Combinations, and the one at the very bottom (Blue/Red) is predetermined. To use other colors, disable that layer and activate other colors by clicking on the visibility layer square.
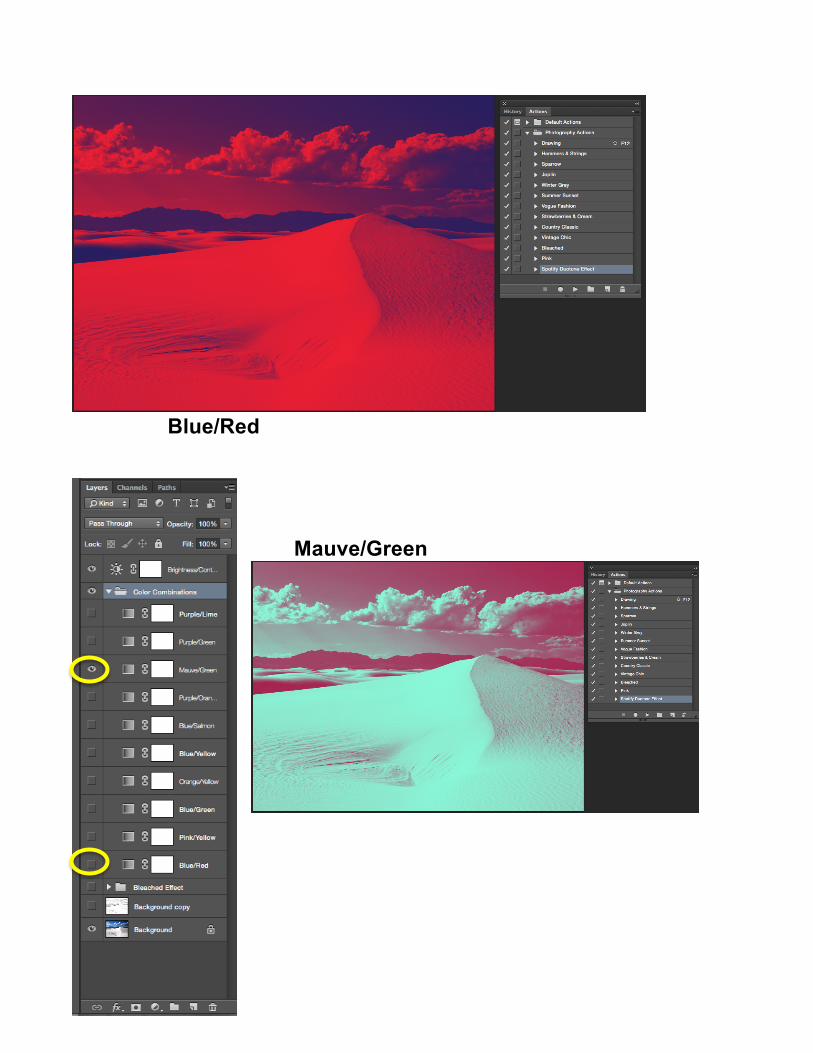
Blue/Red
Mauve/Green

TO SAVE AND EXPORT YOUR PICTURE
Click on “Save As”
Choose Desktop as your destination – and JPEG as your format.

If JPEG options appear, Choose the Quality you want, (I’d recommend Maximum) then just click okay.
Your picture will be saved on your Desktop.
Photoshop / Using Actions to edit pictures