phpservermon documentation - read the docs · each server has its own settings regarding...
TRANSCRIPT

phpservermon DocumentationRelease 3.2.0
Pepijn Over
May 30, 2018


Contents
1 Introduction 31.1 Summary . . . . . . . . . . . . . . . . . . . . . . . . . . . . . . . . . . . . . . . . . . . . . . . . . 31.2 Features . . . . . . . . . . . . . . . . . . . . . . . . . . . . . . . . . . . . . . . . . . . . . . . . . . 31.3 Download . . . . . . . . . . . . . . . . . . . . . . . . . . . . . . . . . . . . . . . . . . . . . . . . . 4
2 Requirements 5
3 Installation 73.1 Install . . . . . . . . . . . . . . . . . . . . . . . . . . . . . . . . . . . . . . . . . . . . . . . . . . . 73.2 Upgrade . . . . . . . . . . . . . . . . . . . . . . . . . . . . . . . . . . . . . . . . . . . . . . . . . 83.3 Installing from GitHub . . . . . . . . . . . . . . . . . . . . . . . . . . . . . . . . . . . . . . . . . . 83.4 Setting up a cronjob . . . . . . . . . . . . . . . . . . . . . . . . . . . . . . . . . . . . . . . . . . . 83.5 Troubleshooting . . . . . . . . . . . . . . . . . . . . . . . . . . . . . . . . . . . . . . . . . . . . . 9
4 Frequently Asked Questions 114.1 Users . . . . . . . . . . . . . . . . . . . . . . . . . . . . . . . . . . . . . . . . . . . . . . . . . . . 114.2 Servers . . . . . . . . . . . . . . . . . . . . . . . . . . . . . . . . . . . . . . . . . . . . . . . . . . 114.3 Configuration . . . . . . . . . . . . . . . . . . . . . . . . . . . . . . . . . . . . . . . . . . . . . . . 124.4 Notifications . . . . . . . . . . . . . . . . . . . . . . . . . . . . . . . . . . . . . . . . . . . . . . . 13
5 Developers 155.1 Languages . . . . . . . . . . . . . . . . . . . . . . . . . . . . . . . . . . . . . . . . . . . . . . . . 155.2 Getting started . . . . . . . . . . . . . . . . . . . . . . . . . . . . . . . . . . . . . . . . . . . . . . 16
6 Credits 176.1 Credits . . . . . . . . . . . . . . . . . . . . . . . . . . . . . . . . . . . . . . . . . . . . . . . . . . 176.2 Translators . . . . . . . . . . . . . . . . . . . . . . . . . . . . . . . . . . . . . . . . . . . . . . . . 186.3 Vendors . . . . . . . . . . . . . . . . . . . . . . . . . . . . . . . . . . . . . . . . . . . . . . . . . . 19
7 Copyright 21
8 Indices and tables 23
i

ii

phpservermon Documentation, Release 3.2.0
Contents:
Contents 1

phpservermon Documentation, Release 3.2.0
2 Contents

CHAPTER 1
Introduction
1.1 Summary
PHP Server Monitor is a script that checks whether your websites and servers are up and running. It comes with aweb based user interface where you can manage your services and websites, and you can manage users for each serverwith a mobile number and email address.
1.2 Features
• Monitor services and websites (see below).
• Email, SMS, Pushover and Telegram notifications.
• View history graphs of uptime and latency.
• User authentication with 2 levels (administrator and regular user).
• Logs of connection errors, outgoing emails and text messages.
• Easy cronjob implementation to automatically check your servers.
1.2.1 Servers
There are two different ways to monitor a server:
• Service
A connection will be made to the entered ip or domain, on the given port. This way you can check if certainservices on your machine are still running. To check your IMAP service for example, enter port 143.
• Website
You can enter a link to a website, it will then use cURL to open the website and check the HTTP status code.If the HTTP status code is in the 4xx range, it means an error occurred and the website is not accessible to the
3

phpservermon Documentation, Release 3.2.0
public. You can also set a regular expression to match for content on the page itself. If the regular expressionreturns no matches, the website is considered down. In both cases the script will return a “status offline”, andwill start sending out notifications.
1.2.2 Notifications
Each server has its own settings regarding notification. You can choose for email, text message (SMS), Pushover.netand Telegram notifications. The following SMS gateways are currently available:
• Clickatell - <https://www.clickatell.com>
• Inetworx - <https://www.inetworx.ch>
• Messagebird - <https://www.messagebird.com>
• Mosms - <https://www.mosms.com>
• Smsglobal - <https://smsglobal.com/>
• SMSit - <https://www.smsit.dk/>
• Spryng - <https://www.spryng.nl>
• Textmarketer - <https://www.textmarketer.co.uk>
• FreeVoipDeal - <https://www.freevoipdeal.com>
• Nexmo - <https://www.nexmo.com/>
• OctoPush - <https://www.octopush.com/>
• FreeMobile (FR) - <https://mobile.free.fr/>
• Twilio - <https://twilio.com>
• CM Telecom - <https://www.cm.com/>
• GatewayAPI - <https://gatewayapi.com/>
• SolutionsInfini - <https://solutionsinfini.com/>
• Plivo - <https://www.plivo.com/>
• Callr - <https://www.callr.com/>
Please note: for these gateways you will need an account with sufficient credits.
1.3 Download
The latest version can be downloaded from http://www.phpservermonitor.org/.
4 Chapter 1. Introduction
CHAPTER 2
Requirements
• Web server
• MySQL database
• PHP 5.3.7+
• PHP cURL package
• PHP PDO mysql driver
5

phpservermon Documentation, Release 3.2.0
6 Chapter 2. Requirements
CHAPTER 3
Installation
3.1 Install
3.1.1 Upload files
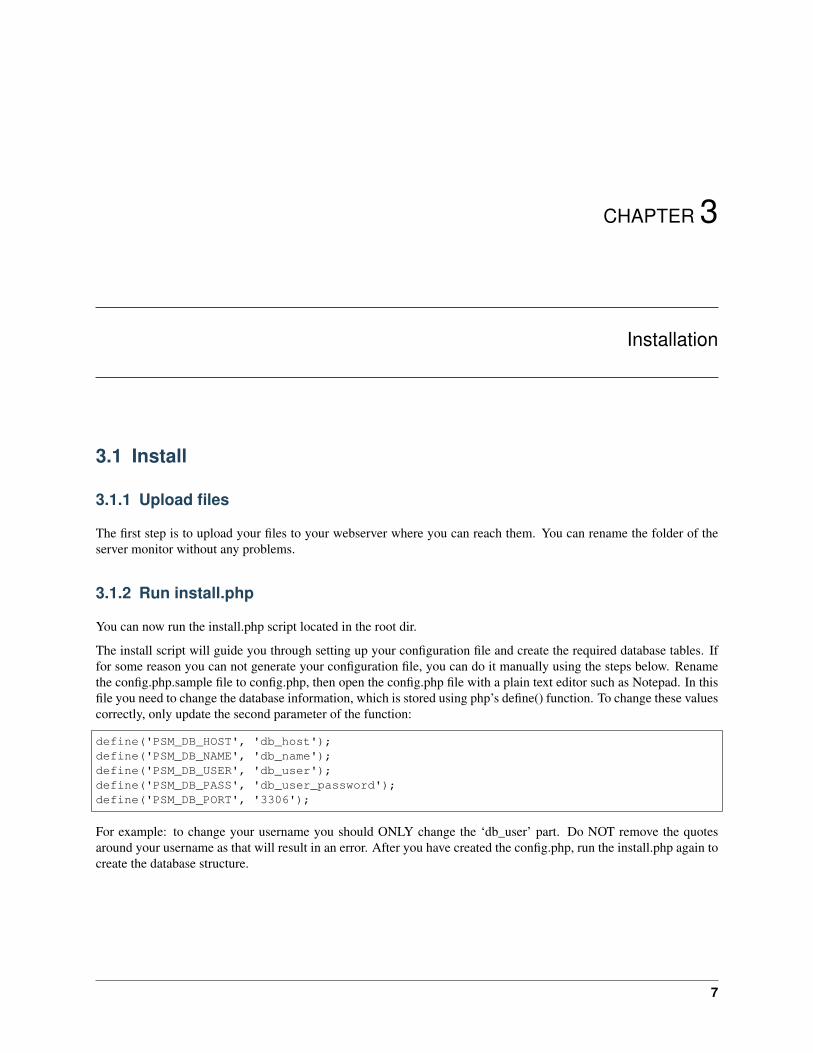
The first step is to upload your files to your webserver where you can reach them. You can rename the folder of theserver monitor without any problems.
3.1.2 Run install.php
You can now run the install.php script located in the root dir.
The install script will guide you through setting up your configuration file and create the required database tables. Iffor some reason you can not generate your configuration file, you can do it manually using the steps below. Renamethe config.php.sample file to config.php, then open the config.php file with a plain text editor such as Notepad. In thisfile you need to change the database information, which is stored using php’s define() function. To change these valuescorrectly, only update the second parameter of the function:
define('PSM_DB_HOST', 'db_host');define('PSM_DB_NAME', 'db_name');define('PSM_DB_USER', 'db_user');define('PSM_DB_PASS', 'db_user_password');define('PSM_DB_PORT', '3306');
For example: to change your username you should ONLY change the ‘db_user’ part. Do NOT remove the quotesaround your username as that will result in an error. After you have created the config.php, run the install.php again tocreate the database structure.
7

phpservermon Documentation, Release 3.2.0
3.1.3 Configure your installation
Open the main page of the server monitor, by simply navigating to index.php. In the menu on the top find “Config”, itwill open a page where you can change the necessary information for your tool.
3.2 Upgrade
For a regular upgrade, follow these steps:
• Replace all files except(!) config.php
• Navigate to install.php
• Follow the steps
• Enjoy
3.2.1 From 2.0
The structure of the project has changed quite a bit since 2.0, but if you have not made any local changes the upgradeis quite easy. The best thing to do is to replace all your current files with the new release, except for the config.inc.phpfile. The config file has actually been renamed since 2.0, but if you keep it there while upgrading the install script willuse it to prefill your database information. The rest of the steps are identical to a regular upgrade (see above), exceptthat you can remove the old config.inc.php file afterwards.
3.2.2 From 2.1
One of the new features introduced in 3.0 is a user authentication system. Because the users in previous versions donot have a password, after upgrading you would not be able to login. For that reason the upgrade script will ask youto create a new account during the upgrade, which you can then use to change the password for the existing accounts.If, for whatever reason this does not work, the upgrade script automatically changes the username of all existing usersto their email addresses, which you could use for the forgot password screen.
3.3 Installing from GitHub
If you have downloaded the source from GitHub (and not a pre-built package), the dependencies are not included. Tobe able to run an installation from the repo, you need to run the following command to install the dependencies:
php composer.phar install
3.4 Setting up a cronjob
In order to keep the server monitor up to date, the status updater has to run regularly. If you’re running this on a linuxmachine, the easiest way is to add a cronjob. If it is your own server or you have shell access and permission to openthe crontab, locate the “crontab” file (usually in /etc/crontab, but depends on distro). Open the file (vi /etc/crontab),and add the following (change the paths to match your installation directories) to run it every 15 minutes:
*/15 * * * * root /usr/bin/php /var/www/html/phpservermon/cron/status.cron.php
8 Chapter 3. Installation

phpservermon Documentation, Release 3.2.0
As you can see, this line will run the status.cron.php script every 15 minutes. Change the line to suit your needs. Ifyou do not have shell access, ask your web hosting provider to set it up for you.
Please note that some distros have user-specific crontabs (e.g. Debian). If that is the case, you need to omit the userpart:
*/15 * * * * /usr/bin/php /var/www/html/phpservermon/cron/status.cron.php
The update script has been designed to prevent itself from running multiple times. It has a maximum timeout of 10minutes. After that the script is assumed dead and the cronjob will run again. If you want to change the 10 minutestimeout, find the constant “PSM_CRON_TIMEOUT” in src/includes/psmconfig.inc.php. You can also provide it asan argument (in seconds!). The following example would change to timeout to 10 seconds:
php status.cron.php --timeout=10
By default, no URLs are generated for notifications created in the cronjob. To specify the base url to your monitorinstallation, use the “–uri” argument, like so:
php status.cron.php --uri="http://www.phpservermonitor.org/mymonitor/"
3.4.1 CPanel
If you’re work with cPanel you can follow these steps:
1. Log into your cPanel account
2. Go to cron jobs
3. Add a new cronjob
• Type */15 in the minute field
• Type * in the other field
• Type php /home2/<Type here your cPanel username>/public_html/phpservermon/cron/status.cron.php in thecommand field
4. Submit
3.5 Troubleshooting
If you have problems setting up or accessing your monitor and do not know why, enable debug mode to turn on errorreporting. To enable debug mode, add the following line to your config.php file:
define('PSM_DEBUG', true);
3.5. Troubleshooting 9

phpservermon Documentation, Release 3.2.0
10 Chapter 3. Installation

CHAPTER 4
Frequently Asked Questions
4.1 Users
4.1.1 What are the differences between the user levels?
There are 2 user levels available: regular user and administrator.
Administrators:
• Manage servers.
• Manage users.
• Edit global configuration.
Regular users:
• View the status of their assigned servers.
• View the history and logs of their assigned servers.
• Run the updater on their assigned servers.
4.2 Servers
4.2.1 What is the difference between a service and a website?
For websites, the monitor attempts to open a regular web page, just like you do in your browser. It will attempt toretrieve its contents, and also check the HTTP status code (for example “404 not found” will cause an error). You canthen even add a check to make sure the content of the website includes a certain string or matches a certain regularexpression. Please note, it only retrieves the contents and does not execute any Javascript. Your search pattern will notwork if it depends on Javascript being executed.
11

phpservermon Documentation, Release 3.2.0
For services, the monitor only attempts to connect to the IP address and specified port to check whether the serveris listening on that port. For example, if you are running a webserver it will usually listen on port 80 for incomingconnections. So if the monitor is able to connect to the server on port 80, you know the webserver is running andaccepting connections. It does not, however, mean that your website is available to your users, because it might havePHP errors or database problems. This can be monitored using the website type with a pattern search as describedabove.
4.2.2 Are requests made by the monitor included in my website statistics?
There are two different ways to gather statistics. One way is to include a piece of Javascript in your HTML, e.g. forGoogle Analytics and Piwik. The other way is to parse the access logs created by your webserver software, whichdoes not require any changes to your code, and is done by tools like Awstats.
When using tools such as Google Analytics, the monitor requests will not show up in your statistics, because themonitor does not execute any Javascript. Tools that parse your raw access logs like Awstats, will include the requestsmade by the monitor. To make sure these requests can be identified, the monitor uses a custom user agent, which youcan usually filter out. The user agent of the monitor looks like:
Mozilla/5.0 (compatible; phpservermon/3.0.1; +http://www.phpservermonitor.org)
4.2.3 What is the log retention period?
The monitor uses 2 different tables in the database to store history information regarding servers. The first one iscalled the “uptime” table. This one keeps full track of the past 7 days, so that detailed information is available (e.g.which checks failed/passed etc). This allows the monitor to create a detailed graph on the server info page. In order toprevent the uptime table growing beyond reasonable, after a week the uptime records are archived to a different table.Archiving means that per day only one record is stored with averages. This still allows some basic statistics, althoughthey are not as detailed as the uptime records.
The retention period tells the monitor how long to keep records in the archive table.
4.3 Configuration
4.3.1 How can I change the text of the email / SMS?
Go to the folder “src/lang”, open the language file that corresponds to the selected language (default is English(“en_US.lang.php”)). Scroll all the way to the bottom until you spot this line:
'notifications' => array(
After that you will see the lines that hold the notification messages. For example:
'off_sms' => 'Server \'%LABEL%\' is DOWN: ip=%IP%, port=%PORT%. Error=%ERROR%',
The first part of this line, ‘off_sms’, is the name of the notification. You should not change this. The second part is theactual message. There are a few variables you can use in your message:
• %LABEL% - The name of the server
• %IP% - The ip of the server
• %PORT% - The port of the server
• %ERROR% - This one only works for the off_* messages and contains the error returned by the monitor
12 Chapter 4. Frequently Asked Questions

phpservermon Documentation, Release 3.2.0
4.4 Notifications
4.4.1 How do I setup Telegram?
A few steps are required to get Telegram notifications working. You need to be an administrator for this part.
1. Go to @botfather (https://t.me/BotFather) and type /start .
2. Type /newbot and give your bot an unique name.
3. Save the API token.
4.4.2 How do I sent Telegram notifications to a person?
1. Go to @cid_bot (https://t.me/cid_bot) and start.
2. Save your chat id.
3. Press the activation button.
4. Go to your chat with the bot and press start of type /start.
4.4.3 How do I sent Telegram notifications to a group?
1. Add @cid_bot (https://t.me/cid_bot) to the group.
2. Save the chat id (including the -).
3. Remove @cid_bot from the group.
4. Add your bot to the group.
4.4.4 How do I sent Telegram notifications to a channel?
1. Create a public channel.
2. Add the bot as an administator to the channel.
3. Save chat id as: @channelname.
4.4.5 What is the username of my bot?
1. Go to profile on the monitor.
2. Press activate.
3. A button will appear, this will direct you to your Telegram bot.
4.4. Notifications 13
phpservermon Documentation, Release 3.2.0
14 Chapter 4. Frequently Asked Questions

CHAPTER 5
Developers
The code is available from https://github.com/phpservermon/phpservermon. There is a master branch, which is sta-ble and always reflects the latest release. The develop branch is used for ongoing development and should not beconsidered stable. If you would like to contribute a patch or feature, please fork the develop branch and send a pullrequest.
5.1 Languages
The server monitor uses language files, which are stored in the directory “src/lang”. The name of the language fileconsists of the language code (ISO 639-1) and the country code (ISO 3166-1), separated by an underscore. Theextension is “.lang.php”.
5.1.1 Locales
Each language file should contain a ‘locale’ key which can be used for formatting dates and times. This ‘locale’ keymust include the locales for different server environments:
• Linux / OS X: same as filename (language code and country code separated by underscore)
• Windows: http://msdn.microsoft.com/en-US/library/39cwe7zf%28v=vs.80%29.aspx
For more information, see http://www.php.net/manual/en/function.setlocale.php
For display purposes, the language file should also provide the text direction (ltr / rtl) and language subtag. Un-fortunately they do not match 1:1 with the locales used for the server. Valid language subtags can be found onhttp://www.iana.org/assignments/language-subtag-registry/language-subtag-registry.
5.1.2 Adding a new language
To add a new language, follow these steps:
• Create a new file in the directory “src/lang” named “{locale}.lang.php”.
15

phpservermon Documentation, Release 3.2.0
• Copy the contents of the file “en_US.lang.php” to your new file.
• Your new language should now be available on the config page.
• Translate :-)
• Please send a pull request on github (https://github.com/phpservermon/phpservermon) so it can be included inthe next release :-)
5.2 Getting started
5.2.1 Vagrant
If you are not familiar with Vagrant, have a look at https://www.vagrantup.com/ for more information (it is awesome).To ease development, a Vagrantfile has been included along with a full provisioning profile generated using PuPHPet(https://puphpet.com). The Vagrantfile is configured to set up a CentOS 6.5 box with PHP 5.6 and MySQL installed,with a local port forward on port 8080. To set up the development environment, make sure you have Vagrant andVirtualBox (https://www.virtualbox.org/) installed, then run:
vagrant up
The initial setup may take some time as the virtual machine needs to be provisioned. After that, you can access yourdevelopment environment by navigating to http://localhost:8080/psm/ or http://192.158.56.101/psm/. The config.phpfile has been created automatically, but the first time you do need to run through the install wizard.
5.2.2 Code
All code related to phpservermon lives in the “psm” namespace, which can be found under “src/psm”.
The Router (https://github.com/phpservermon/phpservermon/blob/develop/src/psm/Router.class.php) is used to loadthe modules. All modules are registered inside the Router class with a unique ID (see getModules()), and can eitherbe loaded manually ($router->run(‘mod’)), or if no module is given it will attempt to discover the module from the$_GET[‘mod’] var. If no valid module or controller is found, it will fall back to the default module.
The module var may exist of 2 parts, separated by an underscore. The first part is the ID of the module, and thesecond part is the ID of the controller registered in the module. If no controller ID is found, it will attempt to load thecontroller with the same ID as the module.
Examples
$router->run('config'); // module ID "config" and controller ID also "config" (same→˓as $router->run('config_config'))$router->run('server_status'); // module ID "server" and controller ID "status"
If the user is not logged in and login is required, it will automatically load the user login controller without throwingan error.
16 Chapter 5. Developers

CHAPTER 6
Credits
6.1 Credits
The following people have contributed to the development of PHP Server Monitor:
• Pepijn Over - https://github.com/dopeh
– Creator
• Samuel Denis-D’Ortun - https://github.com/sadortun
– Project developer
• Tim Zandbergen - https://github.com/TimZ99
– Project developer & maintainer
• Jérôme Cabanis - https://github.com/Abawell
– History graphs
– Date localization
– Mobile compatibility
– Various fixes and improvements
• Ward Pieters - https://github.com/WardPieters
– GatewayAPI, Plivo, Callr and SolutionsInfini SMS Gateway
– Other SMS Gateways rewritten
• Perri Vardy-Mason - https://github.com/VeoPVM
– Textmarketer SMS gateway
– Various fixes and improvements
• Luiz Alberto S. Ribeiro - https://github.com/madeinnordeste
– Bootstrap implementation
17
phpservermon Documentation, Release 3.2.0
– Portuguese Brazilian translation
• Michael Greenhill - https://github.com/doctorjbeam
– Status page
• Andreas Ek - https://github.com/EkAndreas
– Mosms SMS gateway
• Paul Feakins
– Website pattern / regular expression search
• nerdalertdk - https://github.com/nerdalertdk
– Smsit SMS gateway
• Victor Macko - https://github.com/victormacko
– SMSGlobal SMS gateway
• Julien Lebouteiller - https://github.com/Halvra
– Custom time-out per server
• Mathias Lange - https://github.com/remmedia
– Pushover.net support
• Alexander Moore - http://www.famfamfam.com
– Icon
• Michiel van der Wulp - https://github.com/mvdw
– FreeVoipDeal SMS gateway
• Luis Rodriguez - https://github.com/ldrrp
– Nexmo SMS gateway
6.2 Translators
The following people have contributed to the translation of PHP Server Monitor:
• Bulgarian
– Plamen Vasilev - https://github.com/PVasileff
• Chinese
– manhere - https://github.com/manhere
• Czech
– Simon Berka - https://github.com/berkas1
• Danish
– nerdalertdk
• Estonian
– Richard A. - https://github.com/ItsRichardRaz
• Finnish
18 Chapter 6. Credits

phpservermon Documentation, Release 3.2.0
– Sami Nieminen - https://github.com/celeroncool
• French
– David Ribeiro
– Jérôme Cabanis
• German
– Brunbaur Herbert
– Jean Pierre Kolb - https://github.com/JPKCom
• Italian
– Marco Gargani
• Japanese
– Vus520 - https://github.com/vus520
– Rht0910 - https://github.com/rht0910
• Korean
– Ik-Jun
• Persian
– Javad Evazzadeh Kakroudi - https://github.com/evazzadeh
• Polish
– Arkadiusz Klenczar - https://github.com/aklenczar
• Portuguese (Brazil)
– Luiz Alberto S. Ribeiro
• Russian
– Roman Beylin - https://github.com/roman-beylin
– Yuriy Lyutov - https://github.com/delysh
• Spanish
– Klemens Häckel - http://clickdimension.wordpress.com
– Luis Rodriguez - https://github.com/ldrrp
– Mauro Vietri - https://github.com/Esselans
• Swedish
– Andlil - https://github.com/andlil
• Turkish
– Haydar Kulekci - https://github.com/hkulekci
6.3 Vendors
The following libraries are being used by PHP Server Monitor:
• jqPlot - http://www.jqplot.com
6.3. Vendors 19

phpservermon Documentation, Release 3.2.0
• Twitter Bootstrap - http://getbootstrap.com
• Bootstrap Multiselect - https://github.com/davidstutz/bootstrap-multiselect
• PHP Mailer - https://github.com/PHPMailer/PHPMailer
• php-pushover - https://github.com/kryap/php-pushover
• Twig - http://twig.sensiolabs.org
20 Chapter 6. Credits

CHAPTER 7
Copyright
Copyright (C) 2008-2017 Pepijn Over <pep_at_mailbox_org>
PHP Server Monitor is free software: you can redistribute it and/or modify it under the terms of the GNU GeneralPublic License as published by the Free Software Foundation, either version 3 of the License, or (at your option) anylater version.
PHP Server Monitor is distributed in the hope that it will be useful, but WITHOUT ANY WARRANTY; withouteven the implied warranty of MERCHANTABILITY or FITNESS FOR A PARTICULAR PURPOSE. See the GNUGeneral Public License for more details.
You should have received a copy of the GNU General Public License along with PHP Server Monitor. If not, see<http://www.gnu.org/licenses/>.
21

phpservermon Documentation, Release 3.2.0
22 Chapter 7. Copyright
CHAPTER 8
Indices and tables
• genindex
• modindex
• search
23