realbooksoftware.comrealbooksoftware.com/guides/installing plugins.pdfrealbook plugin modules work...
TRANSCRIPT


Installing Plugin Modules For The RealBook Software RealBook Plugin Modules work on either Mac or PC. Most examples in this guide are from the Windows version although you’ll have no trouble following the steps on the Mac. If you downloaded the Plugin then you’ll first need to Unzip/UnStuff the file. After that is done you can start the process. Open the RealBook Software Go to the File Menu>Materials>Import New Plugins command
A window will pop up with a dialog similar to this…
Don’t worry about this. The program doesn’t know where the bundle file is located so you will have to direct the program to the plugin’s location. Click OK to close the window and begin to browse to the Plugin’s location on your computer.
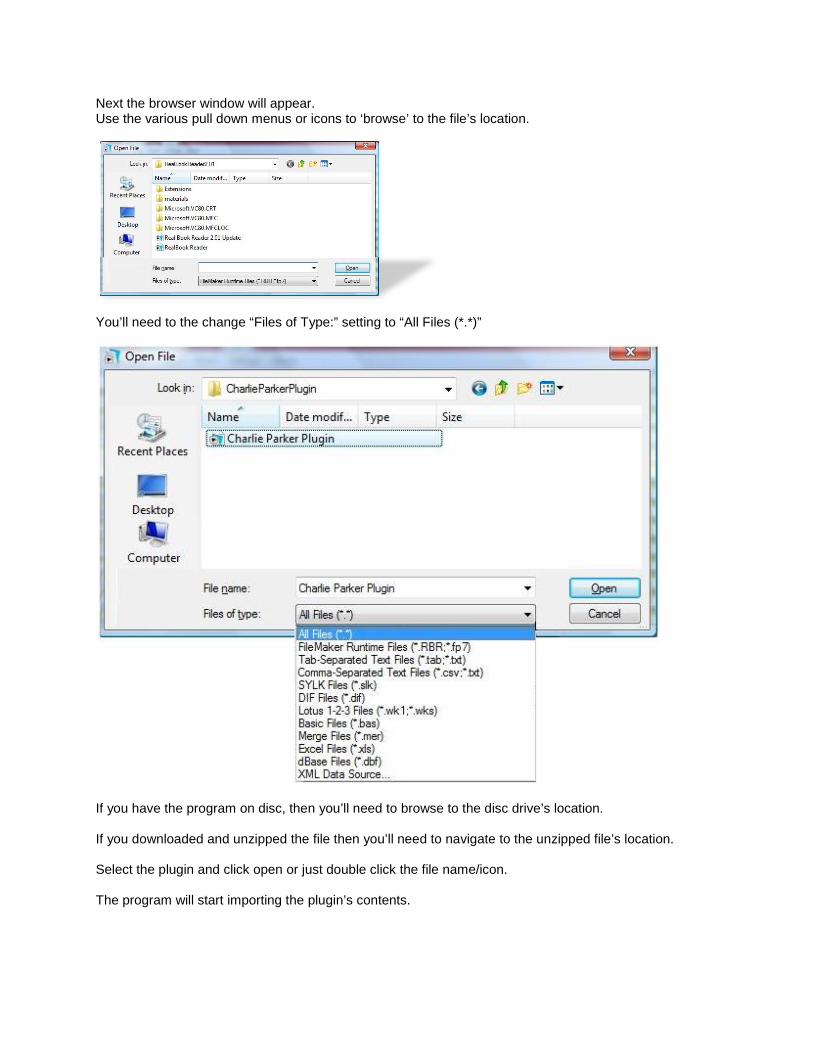
Next the browser window will appear. Use the various pull down menus or icons to ‘browse’ to the file’s location.
You’ll need to the change “Files of Type:” setting to “All Files (*.*)”
If you have the program on disc, then you’ll need to browse to the disc drive’s location. If you downloaded and unzipped the file then you’ll need to navigate to the unzipped file’s location. Select the plugin and click open or just double click the file name/icon. The program will start importing the plugin’s contents.

A window with a progress bar will appear.
Let the program continue the import until it has finished this step. If you stop this process then there will be files that have imported into the RealBook Software. That means if you start the import process at another time, then there will be duplicates for many of the items. See the appendix for instructions on how to eliminate the extra files. When the import has finished then the RealBook Software’s songlist page comes up.
You are halfway done. So far you have imported the song list and the charts. Now it is time to import the media files. The next few pages contain instructions for the various plugins Locate the instructions for the appropriate Plugin you are trying to install.
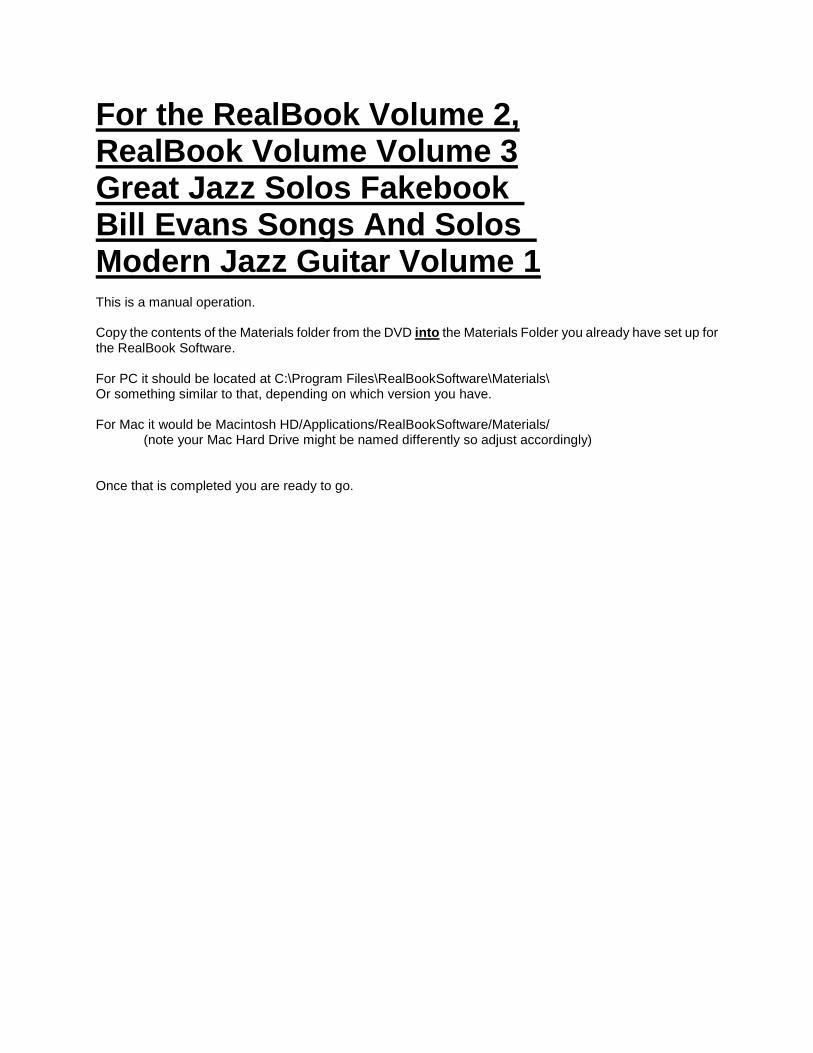
For the RealBook Volume 2, RealBook Volume Volume 3 Great Jazz Solos Fakebook Bill Evans Songs And Solos Modern Jazz Guitar Volume 1 This is a manual operation. Copy the contents of the Materials folder from the DVD into the Materials Folder you already have set up for the RealBook Software. For PC it should be located at C:\Program Files\RealBookSoftware\Materials\ Or something similar to that, depending on which version you have. For Mac it would be Macintosh HD/Applications/RealBookSoftware/Materials/ (note your Mac Hard Drive might be named differently so adjust accordingly) Once that is completed you are ready to go.

For The Charlie Parker Fakebook For this plugin, the media files are embedded in the installer. You will need to ‘unpack’ the embedded audio materials. These will be placed into your “Materials” folder that should already be defined for your program. To verify your Folder location go to the Setup menu>Setup command
If everything is fine with your Materials folder then you can proceed. Go to the File Menu>Materials>Unpack command
The program will show the location of your materials folder.

Note: changing the location from this window is only valid for folders that already exist on your computer. This will not create a new folder. It is best that you import the plugin’s media files into the same folder that you have already established for the RealBook Software. When the program is finished unpacking, then the Songlist page will display again.
To verify the import and unpack routines, simply click on one of the Play buttons (the green or blue buttons with the indicator dot). For the Charlie Parker Plugin, Button 1 is regular speed and Button 2 is half speed. At the moment the only songs that are displaying on the songlist are those from the plugin. To expand the list to include all of the songs in the RealBook Software, select the Find Menu>Show All Items command
This will show all of the songs in the collection with the new songs from the plugin appearing at the end of songs that were already in the list. You can use the Sort or Find commands to display or arrange the contents in various ways.
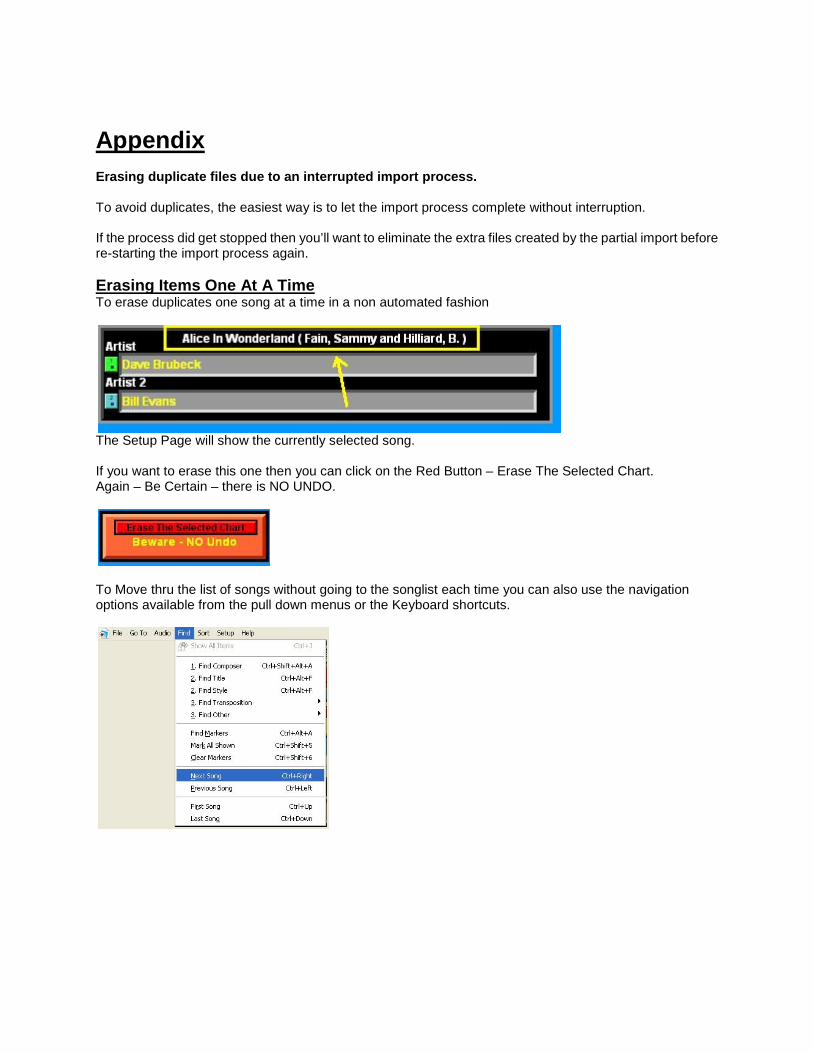
Appendix Erasing duplicate files due to an interrupted import process. To avoid duplicates, the easiest way is to let the import process complete without interruption. If the process did get stopped then you’ll want to eliminate the extra files created by the partial import before re-starting the import process again. Erasing Items One At A Time To erase duplicates one song at a time in a non automated fashion
The Setup Page will show the currently selected song. If you want to erase this one then you can click on the Red Button – Erase The Selected Chart. Again – Be Certain – there is NO UNDO.
To Move thru the list of songs without going to the songlist each time you can also use the navigation options available from the pull down menus or the Keyboard shortcuts.

Erasing Multiple Items At Once If you haven’t used the ‘Show All’ command yet, then the files that are displaying should be the potential duplicates that you are targeting. Verify that this is the case by viewing the Songlist screen. If the potential duplicates are all the only songs that are showing then you can use a batch command for erasing. To Erase potential duplicates, go to the Setup Menu>Set Up Page command. Toward the bottom of the screen you’ll see two buttons that can be used to erase unwanted files.
If you have absolutely verified that only the unwanted songs are showing in the songlist, then you can use the Yellow Button – Erase the Found Set. Be very sure here, since this button will erase everything that is shown with NO UNDO.
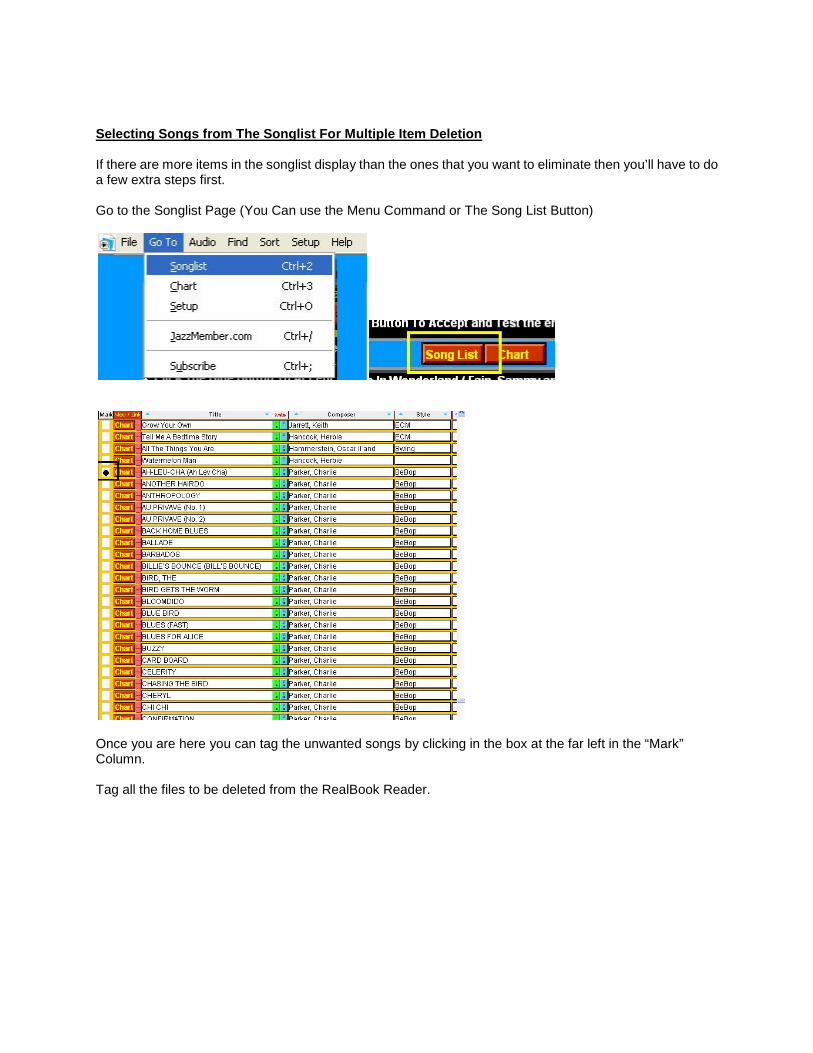
Selecting Songs from The Songlist For Multiple Item Deletion If there are more items in the songlist display than the ones that you want to eliminate then you’ll have to do a few extra steps first. Go to the Songlist Page (You Can use the Menu Command or The Song List Button)
Once you are here you can tag the unwanted songs by clicking in the box at the far left in the “Mark” Column. Tag all the files to be deleted from the RealBook Reader.

Your screen will now look something like this….
Next we will isolate those items from the pack.
Go to the Find Menu>Find Markers command. Upon returning to the Songlist page you should see that only the songs that you tagged for deletion are being displayed. If this is the case then you can follow the previous steps for deleting multiple items.