pnadf043
TRANSCRIPT
TALULARA USER’S GUIDE
Teaching and learning using locally available resources
MIEMalawi Education Support Activity

TALULARA USER’S GUIDE
Teaching and learning using locally available resources

Prepared and published by
Malawi Institute of EducationPO Box 50DomasiMalawi
© Malawi Institute of Education 2004
All rights reserved. No part of this publication may be reproduced,stored in a retrieval system, or transmitted in any form or by anymeans, electronic, mechanical, photocopying, recording or otherwise, without the permission of the copyright owner.
ISBN 99908-24-95-9
Printed by Malawi Institute of Education

ContentsPage
Preface (v)Acknowledgements (vi)
Unit 1 TALULAR 1Meaning of the term TALULAR 1Types of locally available resources 1Benefits of TALULAR 3Challenges of using TALULAR 4Creating a Talular bank 4
Unit 2 Benefits of TALULAR 5
Unit 3 Designing, developing and using TALULAR 7Introduction 7Criteria for designing Talular 7Stages in the design process 7Aspects of designing to be born in mind 8Design elements 8Advantages of designing and producing your own TALULAR 8
Unit 4 Drawing skills, a TALULAR resource forclassroom communication 9Introduction 9The meaning of drawing 9Using the drawing alphabet 10Drawing other things step-by-step 12Drawing action matchstick figures 13Drawing and shading 14Resources required in the production of TALULAR paints 15
Unit 5 The community, a TALULAR resource forthe school 18Introduction 18The school, a resource for the community 18The community, a TALULAR for the school 18
(iii)

Unit 6 TALULAR for developing numeracy 20Introduction 20Pre-number work for numeracy 20Developing numeracy through TALULAR 21Sample TALULAR for teaching numeracy 21
Unit 7 TALULAR for developing literacy 32Introduction 32Importance of using locally available resources for teaching language 32Making sample TALULAR for literacy development 32
Unit 8: TALULAR techniques and aids for chalkboard work 43Introduction 43Making chalkboard TALULAR 44
Unit 9: Basic TALULAR display and storage techniques Introduction 45TALULAR display techniques 45Causes of damage to resources 49Storage facilities 49
Bibliography 51
(iv)

PrefaceAll education is based on the conviction that human thought can be developed andexpanded. In the classroom, the teacher, through conversation and constructivequestioning, can stir the children’s imagination and thoughts, and stimulate theirminds into activity. The teacher’s ability to think and reason in terms of what can befetched, made and used grows with experience and commitment, which will bringabout expertise and excellence. To give the child the opportunity to create and toobtain experience with knowledge is the best preparation for future creative work.A very important part of this manual is how to obtain, prepare and use locally available resources to promote quality teaching and learning in the classroom. Thisguide can be used as both a training guide and reference resource for teachers andother educational professionals.
In order to make the work participatory, some activities have been included in theunits. Participants are expected to work as individuals, or as groups. A plenary session sometimes follows group work and is meant for consolidation of the groupwork. The feedback session is for both checking participants’ competence in theactivities and sharing some experiences about the topic at hand. Teachers areencouraged to be creative and use TALULAR as variously as they can to suit different learners, situations and subjects. For instance, the resources that aresuggested for use in developing literacy can also be used in teaching numeracy,HIV/AIDS, democracy, continuous assessment and many other topics. Teachers canalso develop their own TALULAR over and above those suggested which bestaddress their needs. It is hoped that participants as well as practising teachers willfind the work inspiring and stimulating.
(v)

Acknowledgements Malawi Institute of Education is deeply indebted to a number of organisations andindividuals that generously contributed to the development and production of thisuser’s guide. The Institute has the pleasure of acknowledging the financial supportof USAID through American Institutes for Research (AIR) during the developmentas well as the printing of the guide through their IEQ and MESA initiatives.
The Institute is grateful to Gibson Zembeni and Andy Byers for preparing the original draft of the guide. Dr Jane Schubert and Dr Shirley Miske both of AIRdeserve thanks for encouragement and reading parts of the original draft respectively. Gratitude should also go to Charmaine Llagas for assembling variousTalular materials by Zembeni and Byers into the first draft of the Talular user’sguide.
Cecilia Kamlongera, Eastman Katoki Simbeye, Joyce Kasambara and Max J Iphanireviewed in a workshop setting the whole manual and made many useful suggestions.Rawlings Demba re-drew some of the illustrations in the original manual. JayneMatemba Bvumbwe and Masozi Christina Chisambi typed and typeset the final draft.The whole work of reviewing and preparing the manual for printing was coordinatedby Max J Iphani of Malawi Institute of Education who also edited the final draft.Finally, the Institute is grateful to many other individuals too numerous to list butwhose contributions were nonetheless invaluable.
(vi)

Unit 1TALULAR
IntroductionMany teachers think of teaching and learning resources as commercially produced instructional materials only, such as printed charts, pupils’ books, teachers’guides, globes, marker pens and radios. The government is normally seen as the onlysource of these materials. If they are not provided, teachers have a readay excuse for not using teaching and learning resources. Such anarrow view of what constitutes educational resources can negatively affect thequality of teaching and learning.
This unit provides insights into what constitutes a teaching and leaning resource andthe justification for the use of TALULAR. Emphasis is on effective and efficient use of what is locally available.
ObjectivesBy the end of this unit you will be able to:• explain the meaning of the term talular• identify types of locally available teaching and learning resources• explain the purpose of TALULAR• identify the challenges of using TALULAR• create a TALULAR bank
The meaning of the term TTAALLUULLAARRTALULAR (pronounced ta-lu-lar or talu-lar) is an acronym that stands for TeachingAnd Learning Using Locally Available Resources.
Types of locally available resourcesAAccttiivviittyy 11Identify locally available resources around your school which can be used in teachingand learning.
The resources you may have identified can be categorized as follows:
Human resourcesHuman resources are people who facilitate learning apart from the class teacher.For example, guest speakers from the community such as craft persons to assist in skills development; village heads to talk about their duties orsome cultural practices or historical events; medical personnel to discuss healthissues and the police to talk about crimes. Teachers may also collaborate with other
1
teachers through joint planning, team teaching, mentorship, pear observation and supervision. Pupils can be used to facilitate theirown living through demonstration, experiences, sharing their dramatizing events andcollecting or producing learning resources.
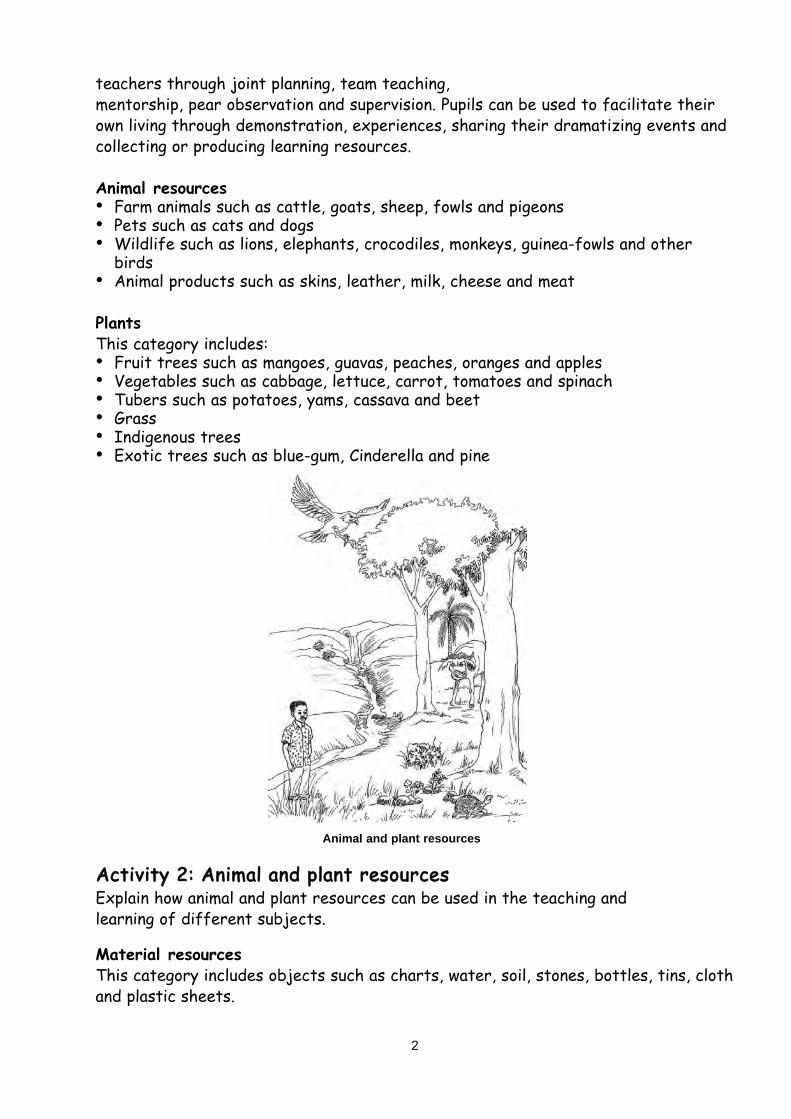
Animal resources• Farm animals such as cattle, goats, sheep, fowls and pigeons• Pets such as cats and dogs• Wildlife such as lions, elephants, crocodiles, monkeys, guinea-fowls and other
birds• Animal products such as skins, leather, milk, cheese and meat
PlantsThis category includes:• Fruit trees such as mangoes, guavas, peaches, oranges and apples• Vegetables such as cabbage, lettuce, carrot, tomatoes and spinach• Tubers such as potatoes, yams, cassava and beet• Grass • Indigenous trees• Exotic trees such as blue-gum, Cinderella and pine
AAccttiivviittyy 22:: AAnniimmaall aanndd ppllaanntt rreessoouurrcceessExplain how animal and plant resources can be used in the teaching and learning of different subjects.
Material resourcesThis category includes objects such as charts, water, soil, stones, bottles, tins, clothand plastic sheets.
Animal and plant resources
2
Non-material resourcesTALULAR also involves the use of non-material resources such as • Time• Personal knowledge, skills, talents and experiences• Personal qualities such as sense of humour, perseverance• Language• Culture eg games, songs, dances, art, proverbs
Other types of resourcesRReelliiaa:: These are real objects used as teaching and learning resources. For example,showing a stone, a car, a leaf or a goat during language teaching when these formpart of the topic for discussion. Sometimes relia may be difficult to use. For instance, some of them may be dangerous to handle such as livesnakes, bees or crocodiles. Other relia may be too large to be brought into theclassroom or too small to be seen with the naked eye. In such circumstances it isconvenient to use a model.MMooddeellss:: a model is a recognizable representation of something real.PPiiccttuurreess aanndd ddrraawwiinnggss:: Photographs or drawings may be used as teaching and learning resources. Pictures or drawings can be obtained from newspapers, magazines and textbooks or may be specially drawn.
Benefits of TALULARAAccttiivviittyy 33Explain why teachers should use TALULAR in their lessons.
The use of TALULAR serves to:• promote meaningful communication• ensure better retention of knowledge• provide first-hand or direct experience with the realities of the social and
physical environment• stimulate and motivate students to learn• help develop interest in other areas of learning• encourage active participation, especially if students are allowed to
manipulate the materials• help simplify complicated topics• reduce the need for a teacher’s verbal expression• consolidate knowledge, skills and attitudes that students have already learned • help summarise main points• encourage creativity• cost little or nothing, thus increasing sustainability• encourage the reduction, recycling and reuse of litter hence they are
environmentally friendlyAAccttiivviittyy 44Identify ten things from your local environment that you could use in teaching a particular subject.How many subjects could you use each one of the things for?How could you use each one of the items?
3

Challenges of TALULARThe provision of resources that are locally available is a challenge for the following reasons.• It is a challenge to know which resources can be used for teaching and learning.• It is a challenge to know which one thing can be used in several situations or
subjects. For example, bottle caps can be used in several situations such as counting, identification of numbers, identification of letters of the alphabet and word formation, as containers, as coins and as wheels to a car model.
• It is a challenge to know which different things can be used in the same situation.For instance, sticks, stones, seeds, leaves, coins, bottle caps, tins, clay balls and seed pods can be used as counters.
• It is a challenge to know how to use talular appropriately.
Creating a TALULAR bankA teacher can create a TALULAR bank in the following way:• Study syllabuses, teachers’ guides and pupils’ textbooks and identify the teaching
and learning resources that have been suggested • Visit the local environment and identify resources available• Collect the objects you have identified. You may use pupils or the
community to help you• Sort out the resources into those to be used directly and those that require
modification or recycling to suit your convenience• Record the samples for easy access during production or use in teaching• Keep the collected TALULAR in a storage place. Containers are needed. Label the
containers for easy access. This is your TALULAR bank.
4
Unit 2BENEFITS OF TALULAR
IntroductionAs implied in the previous unit, there are many benefits of using TALULAR. This unitdiscusses these benefits in more detail.
ObjectivesBy the end of this unit, you will be able to: • describe the benefits of using TALULAR
AAccttiivviittyy 11Suggest the benefits of using TALULAR.
The benefits of using TALULAR may be summarize as follows:
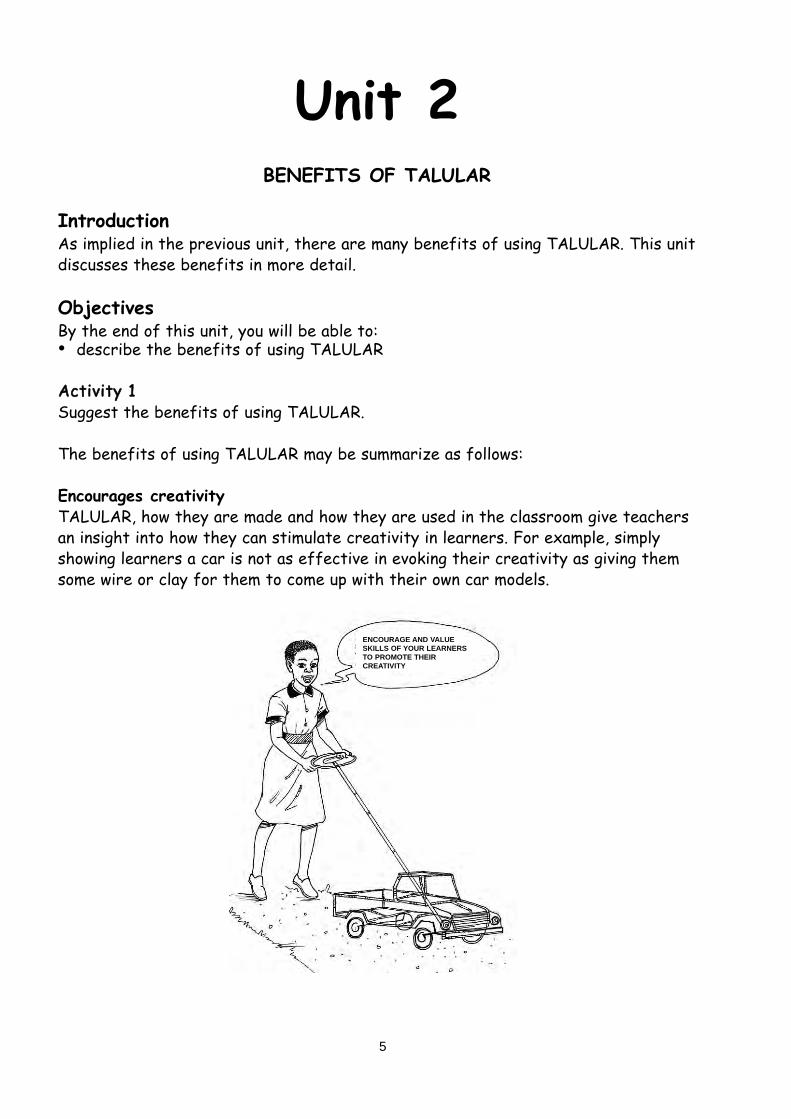
Encourages creativityTALULAR, how they are made and how they are used in the classroom give teachersan insight into how they can stimulate creativity in learners. For example, simplyshowing learners a car is not as effective in evoking their creativity as giving themsome wire or clay for them to come up with their own car models.
5
ENCOURAGE AND VALUESKILLS OF YOUR LEARNERSTO PROMOTE THEIR CREATIVITY

Motivates learnersSince talular are readily available in the local environment, they are within the experience of the student and using them fulfills the principle of going from theknown to the unknown to capture learners’ interest and captivate them to learn.
Promotes varietyTALULAR enables the teacher to organize a variety of activities and contexts toenhance the effectiveness of teaching and learning.
Promotes productivityAn educated community or society is a productive society. The community benefitsfrom it and this evokes their interest in the education of their children. Consequently, community members are encouraged to contribute variousobjects for modification and use in the school.
TransformationTALULAR promote effective transformation through acquisition of knowledge, skillsand positive change in attitudes and behaviours.
Cost effectiveTALULAR are affordable, often costing little or nothing since the materials areobtained from the local environment.
SustainabilityTALULAR encourage reduction of litter, recycling and reusing of materials whileemphasizing the value of resources in the local environment.
Community participationTALULAR promotes community participation in the education of their children andthus promotes ownership of schools and what goes on there.
Promotes success in school TALULAR are instrumental to bringing about success in teaching and learningbecause the teacher is encouraged to:• use learners’ experiences as a learning resource• not to view the classroom walls as a boundary• involve all learners in the learning process • develop learners’ confidence in their ability to investigate
6

Unit 3DESIGNING, DEVELOPING AND USING TALULAR
IntroductionThis unit is concerned with the designing and development of TALULAR. It is usefulfor teachers to be able to design and develop their own talular because they arefamiliar with their pupils and the environment they work in.
ObjectivesBy the end of this unit, you will be able to:• explain the meaning of the term design • describe criteria for designing TALULAR• explain stages in the design process• explain aspects of designing• explain the advantages of designing and producing your own TALULAR
Criteria for designing TALULARTo design is to prepare a plan or sketch of something to be made or assembled. Design, as a noun, is a drawing or an outline which is used as a guide tomaking of something. The following criteria should be considered when designing and producing TALULAR. They should be:• attractive to hold learners’ interest• accurate and up-to-date• appropriate for learners’ level of understanding• suit different learning styles• relevant to the syllabus topic• bold and bright so that everyone can see• clear for learners to get the message• brief; carrying essential information only
Stages in the design process
AAccttiivviittyy 22Working in groups, identify the stages you would go through when designing TALULAR.
The following are the stages in the design process:
Analysing the situation• identify the need • put yourself in the situation and image how learners would feel• record your observations and thoughts
7
Answering questionsThe following questions are useful when designing TALULAR:1 Who will use it?2 What is the practical function of the design?3 What part does appearance play in the design?4 What materials are suitable for the design?5 What construction methods are appropriate to the design?6 What are the likely social and environmental effects of the design?
PlanningCome up with an outline of how you are going to design.
Aspects of designing to be born in mindSymmetry and asymmetrySymmetry refers to a situation in which elements in a layout can be grouped intotwo equal parts by drawing a line through the central point of a design or picture. Apicture can be symmetrical with regard to the horizontal or the vertical axis orboth. Asymmetry, on the other hand, refers to a situation in which any line drawnthrough the central point divides the picture or design into two unique parts.
Design elementsTo achieve a desired effect one can use design elements. These are colour, shape,size, space, line, arrows and italics.
ProductionProduction can include taking measurements, marking out, cutting, moulding, casting,fabricating, blazing, welding, pinning and joining.
LabellingWhen labeling, the following guidelines may be useful:• write names of equal values in the same style and size• in general, keep your labelling in the horizontal• You could number places in a map or part of a diagram and write the names/labelsoutside it.
Advantages of designing and producing your own TALULARDesigning and producing your own TALULAR has the following advantages:• It is less expensive than buying commercially produced resources.• You can design and produce TALULAR to suit your purposes and your
learners’ needs.• You can choose those that are directly relevant and appropriate to your local
community or situation.• Learners can work with you in planning and making the TALULAR available.• Using your own TALULAR develops a sense of ownership and pride.
8
Unit 4DRAWING SKILLS, A TALULAR RESOURCE FOR
CLASSROOM COMMUNICATION
IntroductionClassroom communication is enhanced by visuals, either through objects or illustrations. Visuals are resources that can be used in a lesson for pupils to seewhat the teacher is describing. Illustrations are drawings on the chalkboard or on chart paper. The art of drawing for classroom communication is extremely important to teachers and those who are interested in effective visual communication. Unfortunately, drawing is an underestimated talular resource because many teachers say drawing is difficult because they are not artists. This unit is intended to demonstrate howdrawing can be done more effectively.
ObjectivesBy the end of this unit, you will be able to:• explain the meaning of the term drawing• explain the meaning of the term proportion• draw various objects for use in teaching• apply knowledge to different teaching situations• produce TALULAR paints for drawing
The meaning of drawingIn order to make drawing simple, it is important to understand drawing and what itentails. Emphasis is on exercises that promote flexibility of the hand, freehanddrawing, and the fact that the best drawings are made when the artist relaxeshis/her body and limbs. The basic structures that constitute the drawing alphabetmake it easy to draw step-by-step by simply joining lines to create desired objects.
AAccttiivviittyy 11Express in your own words what you understand by the term drawing.
Drawing can be defined as the organization or arrangement of lines. Arrangement oflines refers to joining lines such as verticle, horizontal, slanting, zigzag and curved. The basic shapes produced by joining lines make thedrawing alphabet. In order to make drawings simple, an artist draws the general outline of an object first and adds details later. Everyone can draw, only that thosewhose drawing skills are dormant or latent appear less artistic whereas those whosedrawing skills are active or practised appear more artistic.
9

Freehand drawingThe art of drawing for communication is important to teachers and those who areengaged in the delivery of instructions. The introductory exercises here are part ofa stage by stage approach to simple drawing. Relax and try these to start:
The other important aspect is the size. Make drawings big. Muscle flexibility worksbetter with sizeable artwork. Allow the body and limbs to move freely at a goodspeed. Now try to work on these structures fast:
Using the drawing alphabetThe drawing alphabet comprises lines and basic structures used to create simpledrawings. Any possible shapes you can make with the basic structures mark thebeginning of your ability to draw. There is no limit to the number of shapes you canproduce.
AAccttiivviittyy1 Explain what you undertstand by the term proportion.
10
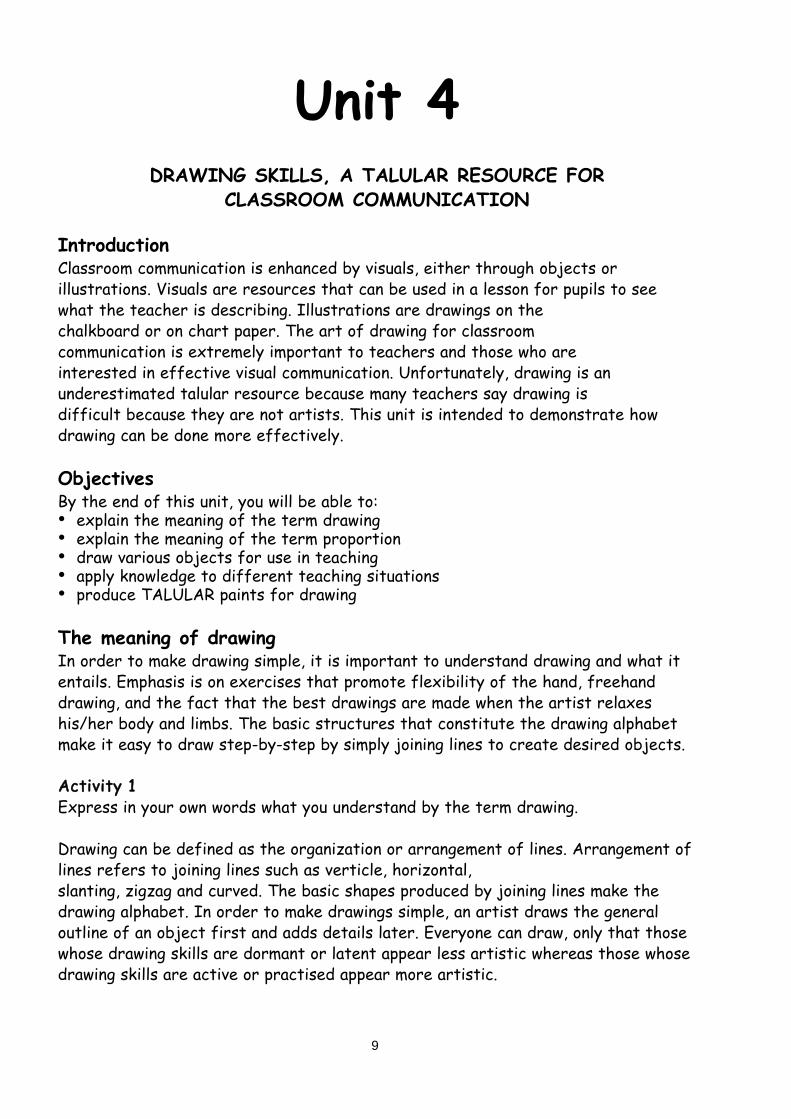
2 Practise drawing basic structures and geomentric shapes such as rect angles,squares, triangles, cones, circles, cylinders, spheres and cuboids.
• Propotion is the relative size of an object. This means the size of what is drawn compared to other parts or objects around it.
• Make drawings big to allow for its development.• Practise regularly throughout the period you are engaged in drawing
activities and application of drawing skills in particular contexts.• Draw freehand various objects as much as possible to develop confidence.• Allow the body and limbs to move freely at a good speed.• Do not cancel a drawing unnecessarily.• Use your imagination to discover other possibilities in coming up with other
shapes.• You can use pencil, charcoal or chalk to make your drawings.• More complicated shapes can be built up from simple shapes such as square boxes
or spheres, circles or cylinders, triangles, cones and pyramids.
11

Drawing other things step-by-stepThe basic structures and geometrical shapes that you have made are important in drawing. They create a starting point for other drawings by combining selected or appropriate structures that make meaningful representations.
AAccttiivviittyy 331 Explain why it is important to draw something step by step. 2 List down the basic structures you would use to draw a human figure step by
step.Draw some match stick figures.
Human figures are often regarded as the most difficult to draw because they havecomplicated shapes and can move into a considerable diversity of positions. Simplemethods of drawing make the drawing of human and animal figures less frightening. Thinking of the general outline or the whole first beforeadding details is the norm. Drawing anything step-by-step simplifies the process ofcoming up with drawings. For example, the human figure may basically be made up ofthree ovals, two curved lines and some lines for the limbs. This can be summarizedas:
• head – small oval• chest – a big oval• hips – a small oval• neck – curved lines• spine – long lines• foot – a triangle
The body outline can then be added to give the frame some flesh. Finally, clothesmay be added to complete the figure. Birds and other animals can also be drawnfrom basic shapes step-by-step.
12
Drawing step by step
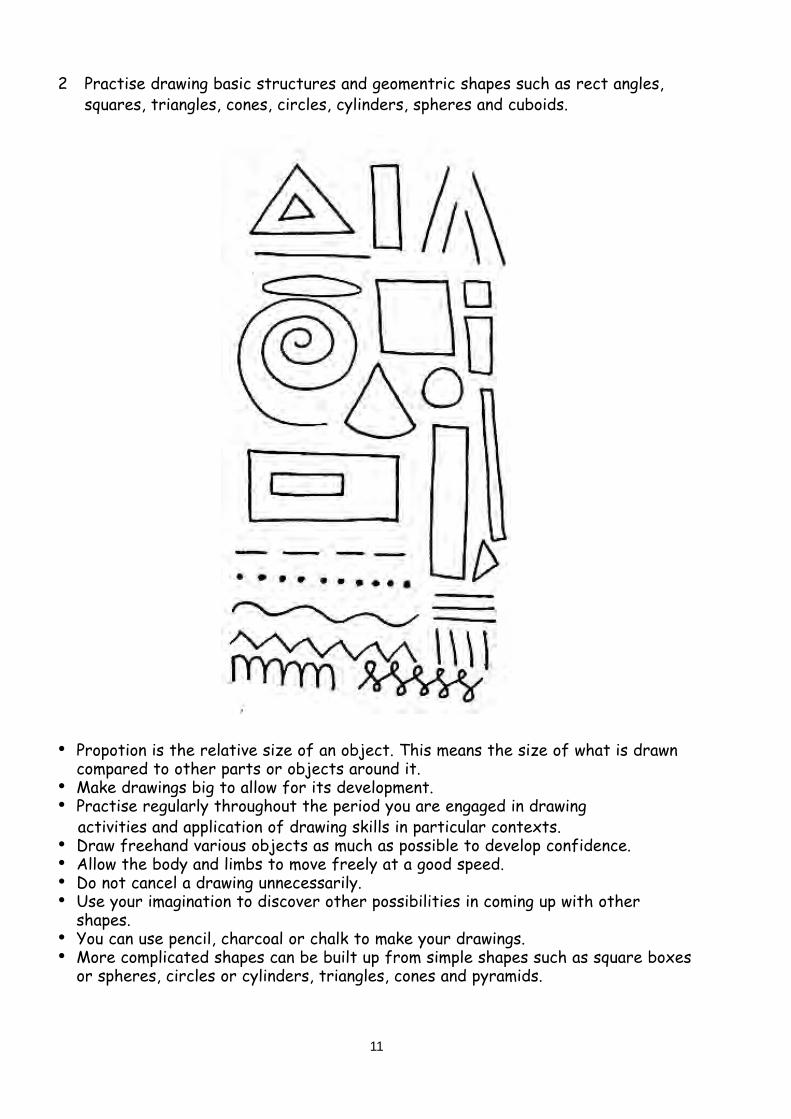
Drawing action matchstick figuresTeachers often need illustrations to make a point clearer or reduce the amount oftalking when explaining something. Action matchstick figures drawn quickly areequally as attractive as advanced action figures. Matchstick figures are simple and time is saved for actual teaching, instead of drawing anadvanced figure.
AAccttiivviittyy 44Draw matchstick figures to illustrate running, kicking a ball, digging, jumping, dancing, cooking and writing.
AAccttiivviittyy 551 Draw matchstick figures with body parts such as head, neck, trunk, arm, hands,
legs and feet as shown.2 Add a few more lines and change the match stick figure into a woman.3 Draw another matchstick figure and change it into a man.
13
Action figures

Drawing and shadingShading can be done in pencil or charcoal to improve the impact of a drawing. Whenshading, use a soft lead pencil or sharpened charcoal to give a wide range of tonesfrom light grey to dense black. Tone refers to the quality of colour or shading.
Colour is used in a drawing for a variety of purposes:• through colour we see detail and variation in the features of what is drawn, as our
attention is drawn from one part of the drawing to another• making a drawing look attractive• emphasis or highlighting, that is, making some features stand out• representation, that is, using colour to stand for something, for example, green
for vegetation, blue for water and brown for high ground• expressing emotions. For example, colours can give a sense of warmth or coldness;
warm colours include red, orange, and yellow; cool colours include violet or purple,blue and green
14
Advancing a matchstick figure 2
Changing a matchstick figure 1
• association, that is, through our experiences, we come to associate different colours with particular situations, products or designs; examples includered for danger, green for safety, white for cleanliness, and so on
Resources required in the production of talular paintsThe following are some of the resources required in making talular paints:
• clean bottles with lids for storage• stones for crashing• mortar and pestle for grinding• scissors for cutting • hoes for digging • leaves, roots, stems• bricks• soils • sieve• water for mixing as well as washing • a stove and tins for boiling as well as washing• a sieve for refining the powder from brick, chalk, charcoal, soil, lime or white
wash• a piece of loosely woven cotton cloth or silk for filtering • a funnel for filtering• tissue paper for filtering• cups for storage• plates for storage• tins with or without lids for storage• plastic bottles cut to size for storage
AAccttiivviittyy 991 Go into the immediate environment and experiment making paints with soil/clay,
vegetables (flowers, fruits, leaves, bark, roots) and other dyes or colours.2 Take some of the materials, process them and make your own samples of
talular paints. Store your paints in containers.
15

Producing talular paint
The following tips may also be useful• Crush and soak flowers, leaves, fruits, bark or roots in water for two or more
days• filter the liquid with a loosely woven cloth• boil the remaining soil particles with a little water for one or two minutes; add
this to the liquid you obtained from crushing• store dyes in sealed bottles or tins; label and store away from strong light• add sugar to the water to make the paint more adhesive• crush chalk, clay/soil, and brick or grind into powder, then mix the powder with
glue• mix clay with charcoal to produce different shades• grind charcoal into powder, mix it with glue and paint; this can be used for writing
numbers, letters, words and sentences• crush and squeeze berries to produce a red colour• crush hibiscus flowers to produce a red colour• crush green pawpaw, pumpkin and avocado leaves to produce a green colour• soak mango bark to produce a yellow colour• crush curry, dry it and produce a yellow colour; the powder that is made should be
stored in bottles or tins• over-roast some nuts; use these to create a brown colour in your drawing• mix ash with glue to obtain different shades of grey
1. GRIND MATERIALWITH STONE
2. SIEVE IF NECESSARY
3. ADD WATER 4. ADD STARCH ORSUGAR TO THICKEN
5. STIR
16

Continue to experiment with colours with materials such as ink, crayon, colouredchalk, and felt pens or dead markers.
TALULAR resources for continuous assessmentTALULAR can contribute to effective teaching through the production of valid continuous assessment instruments, construction and administration of remediationtasks and enrichment tasks.
AAccttiivviittyy 33State reasons why some pupils may not do well in continuous assessment.Report your work in a plenary session.
17

UNIT 5THE COMMUNITY, A TALULAR FOR THE SCHOOL
IntroductionIt is necessary for local communities in which schools are situated to participate in managing the schools. In order to achieve this, there should be a cordial relationship between the school and the community. This unit discusses how the school can use its community as a source of teaching and learningresources.
ObjectivesBy the end of this unity, you will be able to:• state in what way the school is a resource to the community• describe different ways in which the community is a talular resource for the
school• explain the importance of visits to the community by school staff
The school, a resource for the communityThe school is an important resource for the community.
AAccttiivviittyy 11Discuss in what way the school is a resource for the community.
The school is an important resource for the community in the following ways:• can function as a centre for adult literacy classes• members of the community can use school buildings for meetings• community members use school grounds for sports• schools compile the history of the area and make the information
accessible to members of the community• schools sensitise the community on various issues• school leavers take up leadership positions in the community and participate more
effectively in development activities
The community, a talular for the schoolThe community is an important resource for the school.
18
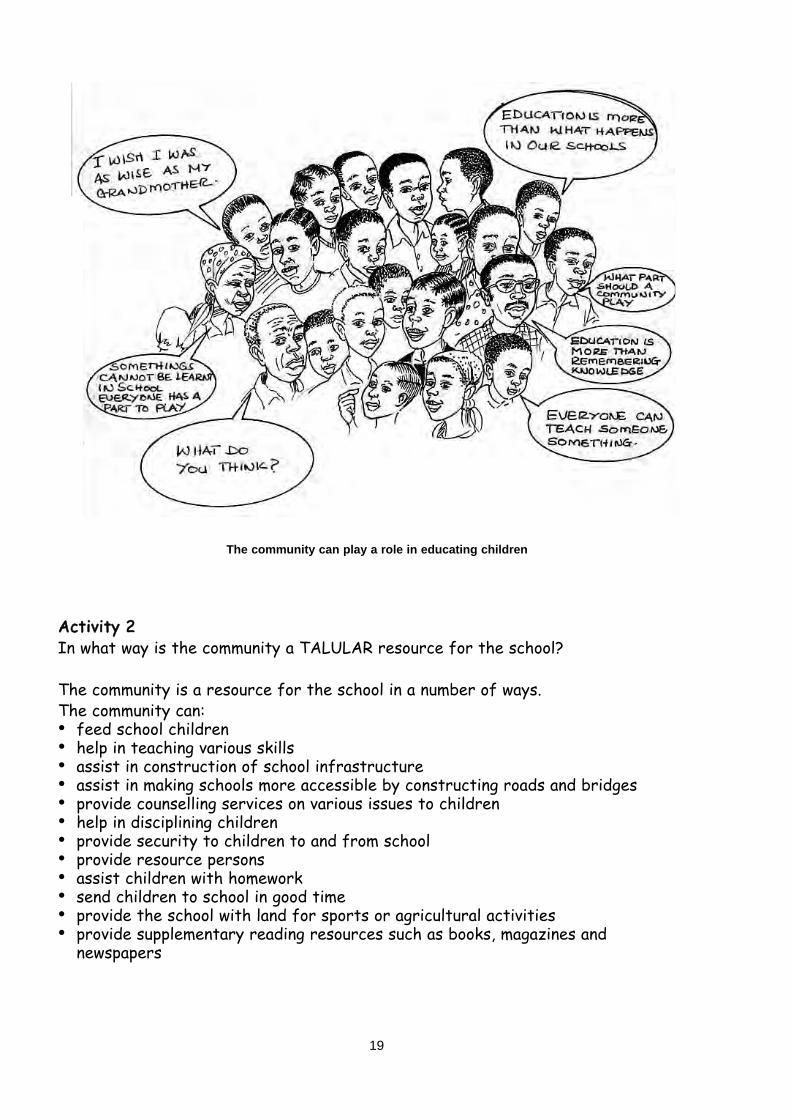
AAccttiivviittyy 22In what way is the community a TALULAR resource for the school?
The community is a resource for the school in a number of ways.The community can:• feed school children• help in teaching various skills• assist in construction of school infrastructure• assist in making schools more accessible by constructing roads and bridges• provide counselling services on various issues to children• help in disciplining children• provide security to children to and from school• provide resource persons• assist children with homework • send children to school in good time• provide the school with land for sports or agricultural activities• provide supplementary reading resources such as books, magazines and
newspapers
The community can play a role in educating children
19

UNIT 6TALULAR FOR DEVELOPING NUMERACY
IntroductionNumeracy is essential in the life of every individual and the society to which theybelong. It is therefore important that every effort be made to develop numeracy inevery member of a community or society or nation. Many strategies can be employed in the development of numeracy. One of such strategiesis TALULAR. This unit will discuss in detail how TALULAR can be used in the development of numeracy.
ObjectivesBy the end of this unit, you will be able to:• describe TALULAR for teaching pre-number work• explain how TALULAR can be used for developing numeracy• make sample TALULAR for teaching numeracy• use TALULAR to develop numeracy
Pre-number work for numeracyTALULAR can help to prepare children for learning numeracy.
AAccttiivviittyy 11Identify and describe pre-number activities for developing numeracy.
The following are some of the pre-number activities that pupils can do as a foundation for numeracy development:
Sorting/classifying objects – Pupils can collect various TALULAR from the schoolenvironment such as bottle tops, beans, stones, sticks, leaves and seedpods. They can be asked to name the objects collected and put them intogroups according to similarities and differences in terms of size, colour, use, andshape.
Matching objects – This involves putting objects similar in characteristics side byside. Pupils are given two groups of objects and are asked to pair objects from onegroup to other objects in another group.
Comparing and contrasting objects – This is a process of describing similarities anddifferences between objects. Some of the features to consider in comparing andcontrasting include size, weight, length, volume, colour and height.
20
Ordering objects – Ordering objects involves arranging things according to givencharacteristics such as length, size, volume, weight and height. For instance, pupilscan arrange groups of objects from that which has the least number to that whichhas the most.
Mixing objects – This is putting objectives of different characteristics in onegroup. For example, pupils can put bottle tops, beans, stones and coins in one container and later find out the quantity of each kind of object in the mixture.
Joining objects – This involves fixing one or two objects onto another in order toextend its length or width or to form a given shape.
Developing numeracy through TALULARThe need to give learners the experience of handling concrete objects cannot beoveremphasized. Numbers do not mean anything unless they are associated with real objects. TALULAR is one of the most convenient vehicles in promoting the link between reality and numbers. For example, manipulation of objects is easier than the use of symbols.
Working with TALULAR is real and interesting, so the learner can be motivated to go further. In this way, learners will learn to perform and understandmathematical operations.
Sample TALULAR for teaching numeracyChart paper and other forms of paper are among the TALULAR that are mostly usedin producing number cards, number grids, word cards, and reading charts. Here aresome tips on making chart paper and other forms of TALULAR.
Chart paperMMaatteerriiaallss• maize porridge• A4 size sheets of paper printed on one side, exercise book sheets or
covers• Brushes• Scissors or razor blades• Chart paper written on one side• Large board paper eg old calendars and used posters• Large envelopes
MMeetthhoodd• With a brush, apply some porridge along the length of an A4 size sheet of paper 2
cm from the edge, with the blank side of the sheet facing upwards• Take another sheet and let 2 cm from the edge along the length fall over the
porridge area with the blank side facing upwards. Exercise book sheets, exercise
21
book covers, calendars or large envelopes may be used.• Press over the joint for the two sheets to stick together. Two sheets of A4 size
paper make an A3 size sheet. You can make chart paper of your size by pasting them with the brush and the porridge.
• Cut out any pieces that may be sticking out along the edges after pasting in orderto have straight edges.
Number cardsMMaatteerriiaallss• Scissors, razor blades or knives• Biscuit boxes, surf boxes, milk boxes, shoe boxes, fruit juice boxes• Cartons or cardboard• Used envelopes (large and small sizes)• Exercise book sheets, A4 size sheets printed on one side • Porridge• Brushes• Used chart paper written on one side• Old calendars• Wrapping or mahewu packets
MMeetthhoodd• Open the boxes and clean them if necessary• Cut strips according to the size you want• Longer strips may be cut out of old calendars or used chart paper (written on one
side), chart paper, cartons or cardboard• If the strips have prints, the prints may be covered by pasting small pieces of
paper from the A4 size sheets with the blank side facing upwards.• Envelopes are normally written on one side. The reverse side can be used for
writing. Smear some porridge inside the envelope to close it and make it stiff.• If the envelope is written on both sides, open it out. Cut out the flaps or paste
them so that the inside part is free for writing.• Some strips may be cut from exercise book sheets, exercise book covers, A4 size
sheets printed on one side, or off-cuts from a printery.• If the strips are flimsy, several pieces may be pasted together with the porridge
to create stiff strips.
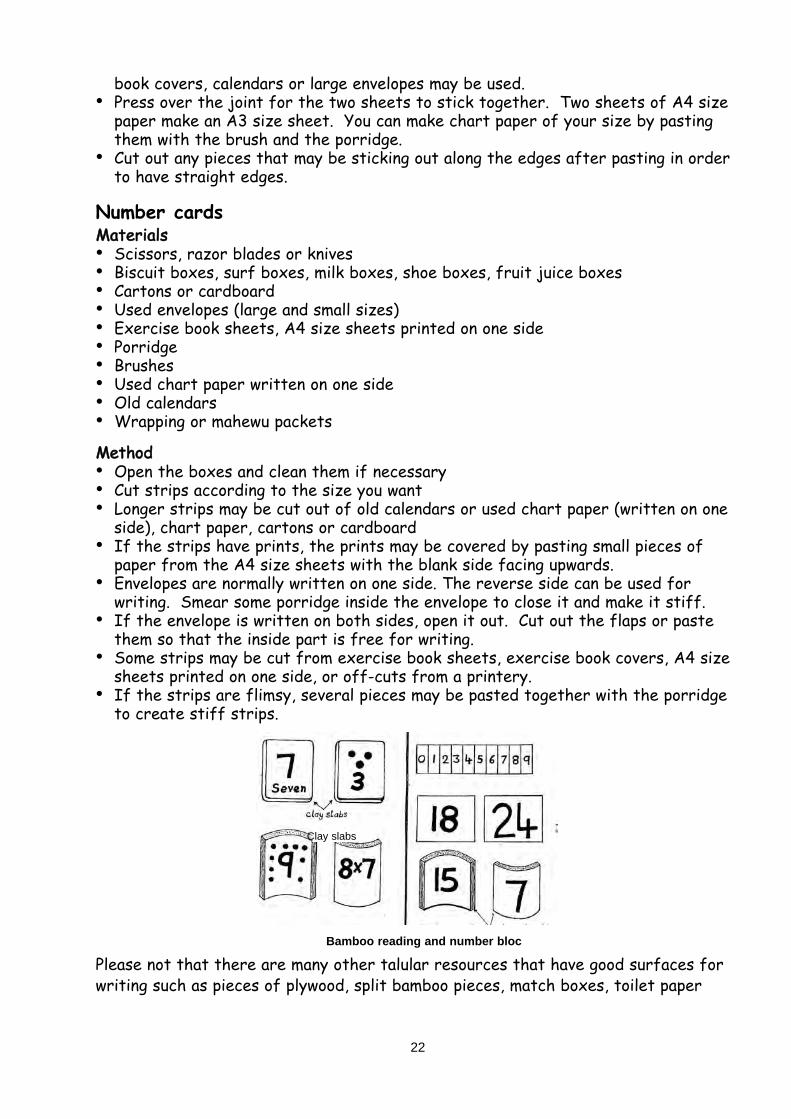
Please not that there are many other talular resources that have good surfaces forwriting such as pieces of plywood, split bamboo pieces, match boxes, toilet paper
22
Bamboo reading and number bloc
Clay slabs

tubes, old files, milk bottles, white or yellow plastic sheets and planks.
Number lineA number line is a line drawn on a strip of paper, or wood. It is used for teachingpositive and negative numbers. The number line may also be used as an introductionto graphs.
Sometimes it is difficult to understand why –8 + 6 = -2, or –4-2 = -6 without thenumber line. By means of the number line the above expressions can easily be explained. For example, in –8 + 6 = -2, find –8 on the number line, thenmove six spaces to the right, and you will discover that you stop at –2. Similarly –4–2 = -6, find –4 on the number line, then move two spaces to the left. You will stopat –6.
MMaatteerriiaallss• Sheets of paper• Pencils, crayons or pens• Scissors, razor blades or knife• Selo tape, gum, thick maize porridge
MMeetthhoodd• Cut strips of paper 1 metre long and 8 cm wide• Draw a straight line along the top edge of the strip• Find the mid-point of the number line and write a zero and all the negative
numbers –1 to –10 on the left hand side of the zero• Stick the strip of paper to the wall with selo tape or thick maize porridge
Please note that a piece of cardboard or wood may be used instead of paper. It isalso possible to draw the number line on the floor or ground to make the lessonmore participatory by letting learners walk along the number line to arrive at a certain number.
Number stripThis is a long strip of paper made by joining several strips of paper. It consists ofnumbers from zero to whatever limit. It is used for number recognition as well as dealing with the four mathematics processes of addition, subtraction, division and multiplication.
MMaatteerriiaallss• Sheets of paper• Chart paper• Pair of scissors, razor blades or knives• Selo tape, gum, maize porridge or latex • Sticks• Cartons
23
MMeetthhoodd• Cut several strips of paper and join them with selo tape or porridge (or other
forms of glue)• Several A4 size sheets of paper (written on one side) may be joined together to
make a long strip of paper• Write numbers on the strip of paper. Make the numbers big and bold to enhance
legibility• Provide rollers by fitting one stick to the left hand side of the strip and another
stick to the right hand side, along its width, with glue, porridge, selo tape or by simply tying with a string.
• Make four holes, two at the roof of the carton and two other holes at the bottompart of the carton
• Fit the lower ends of the sticks into the bottom holes and the upper ends of the sticks into the roof of the carton
• The number strip is now ready for use• Make sure that the number strip is fitted in such a way that only one
number is shown or seen at a time• With the rollers (sticks) you should be able to move backwards and
forwards, and be able to do the following activities:– What number is this? (recognition)– If we move forward two steps, at which number will we be? (addition)– If we move backwards four steps, at which number will we stop?
(subtraction)– What is this number multiplied by 8? (multiplication)– How many times does 5 go into this number? (division)
Mathematics puzzle cardsA mathematical puzzle is a number problem the teacher gives to learners to practiseall mathematical processes in order to their learners’ thinking or consolidate a particular concept. There are many different kinds of mathematical puzzles. The form they take is determined by whoever devises them.
MMaatteerriiaallss• Sheets of paper• Used envelopes• Cardboard• Pencils, crayons or pens• Pair of scissors, razor blades or knives
MMeetthhoodd• Cut 15 cm square pieces of paper. • Write appropriate numbers on the cards to suit each number puzzle you want.You may also write on the reverse side of used envelopes as shown below:
• Cut as may pieces of paper as possible. Cardboard is useful here. Learners may complete the mathematical puzzle cards in groups.
24
Number gridA number grid is a chart with numbers written in boxes or squares. The numbers may range from 1 to 100 or they may go beyond 100. Learners are asked toidentify or recognise numbers. The number grid can also be used to practise all fourmathematical processes. It is also possible to have blank squares or boxes on thegrid and have the numbers for those squares written on separate cards for pupils tochoose and put in the appropriate blank square.
MMaatteerriiaallss• chart paper• cardboard• ruler (split bamboo pieces make good rulers)• pencils, crayons or pens• maize porridge or glue• string• pair of scissors, razor blades or knives
MMeetthhooddDraw a hundred squares on chart paperWrite numbers ranging from 1 to 100Paste the chart to the cardboardTie a string along the top edge of the cardboard for hangingYou can stick gum or thick maize porridge on the back of each card that is to bematched with a blank square or with another number on the grid
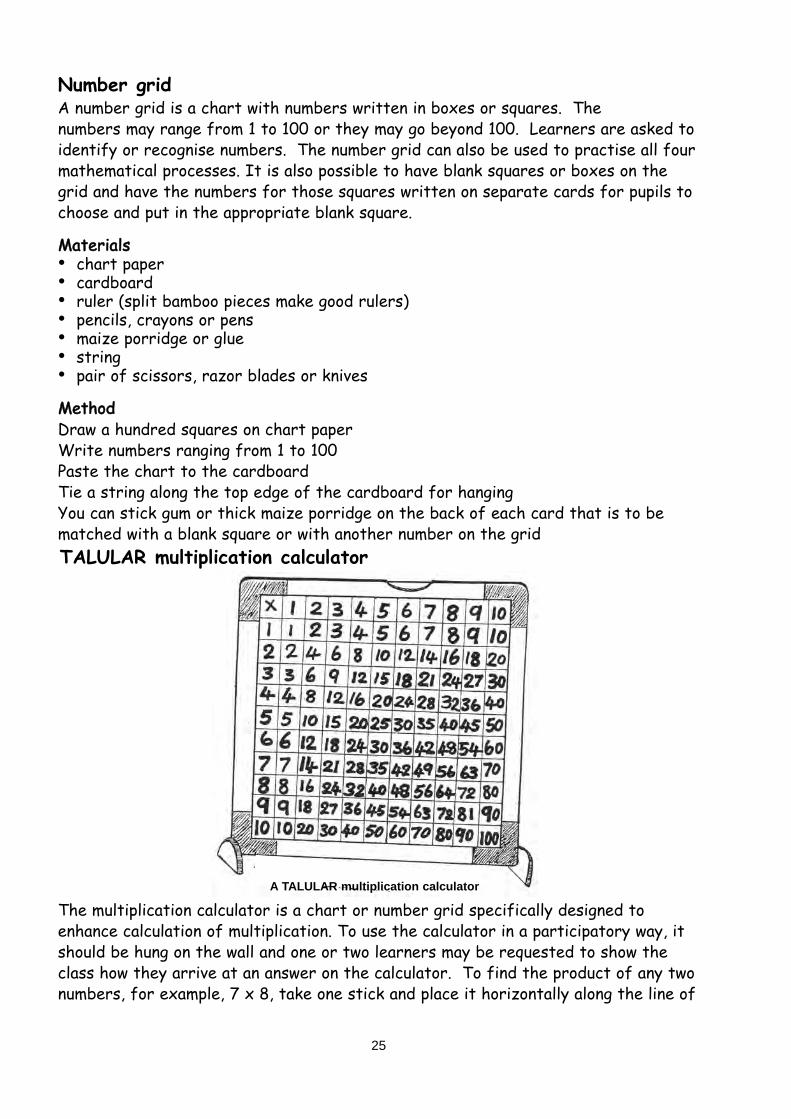
The multiplication calculator is a chart or number grid specifically designed toenhance calculation of multiplication. To use the calculator in a participatory way, itshould be hung on the wall and one or two learners may be requested to show theclass how they arrive at an answer on the calculator. To find the product of any twonumbers, for example, 7 x 8, take one stick and place it horizontally along the line of
25
A TALULAR multiplication calculator
TALULAR multiplication calculator

squares where 8 marks the first square. The two sticks will cross each other at 56.Therefore, 7 x 8 = 56. The answer to any multiplication sum or sentence is foundwhere the sticks cross each other when one is placed horizontally and the other oneis placed vertically on the calculator.
MMaatteerriiaallss• chart paper• cardboards• rulers• pencils, crayons or pens• porridge, gum or glue• scissors, razor blades or knives• strings • two sticks
MMeetthhoodd• Draw 121 squares on chart paper• Leave the first top square blank• Write numbers 1 to 10 along the top line of squares• Write numbers 1 to 10 below the blank square, along the left hand side line of
squares• Then for every number on the left hand side of the chart, write all the multiples
of that number until you get to the last line of squares on the right hand side of the chart
• Paste the chart to a cardboard• Tie a string along the top edge of the cardboard for hanging
Number place value boxA number place value box or number tray is a talular resource used for teaching number values. In counting, relationships between ones, tens, and hundredscan be shown during the early stages of learning numeracy. Normally, it consists ofthree compartments marked HTO, respectively (Hundreds, Tens and Ones). Piecesof paper, sticks, stones, bottle tops, and seeds can be used to represent ones, tensand hundreds.
26
1
2
3
4
Number place value box

MMaatteerriiaallss• Cardboard• Crayons, paints and brushes• A sheet of paper• A pair of scissors, razor blades or knives• Glue, porridge or sap from plants• Bottle tops, stones, seed pods, beans, maize, bottles and maize cobs
MMeetthhoodd• Make a box with rectangular sides, each side measuring 20cm long and 10cm wide• Cut the box from one of the top corners diagonally• Make 3 compartments by pasting triangular pieces of cardboard inside the struc
ture obtained after cutting • Sew the triangular pieces of cardboard with thread and needle if glue is not
available for pasting• Label the compartments H,T,O respectively to stand for Hundreds, Tens, and
Ones• Use the stones, bottle tops, seed pods, beans, sticks, maize or bottles to
illustrate number values
Zigzag number book/vertical number ladderThe zigzag number book is a strip of paper folded into pages. It is made in such away that it can stand. Learners can be asked to recognise or identify the numbers.Also, they can put articles that correspond to particular numbers beside it.
MMaatteerriiaallss• Sheets of paper• Pencils, crayons or pens• Pair of scissors, knives or razor blades• Porridge
27
Learners identify thenumber theystand on asthey climb upthe ladder
Learners recognisethe number theylook at on each pageof the book
MMeetthhoodd• Cut strips of paper 1 metre by 10cm. Cut as many as possible• Paste small pieces of paper with porridge to make a long piece, if chart paper for
making the strips is not available• Fold each strip at regular points to make the pages of the zigzag book• Write numbers 1 to 10 or more, one number written on each page. The zigzag
book is now ready for use• Make a vertical number ladder by simply changing the position of the zigzag
number book. Place the zigzag number book on the floor with the side numbers facing upwards to change it to a vertical number ladder
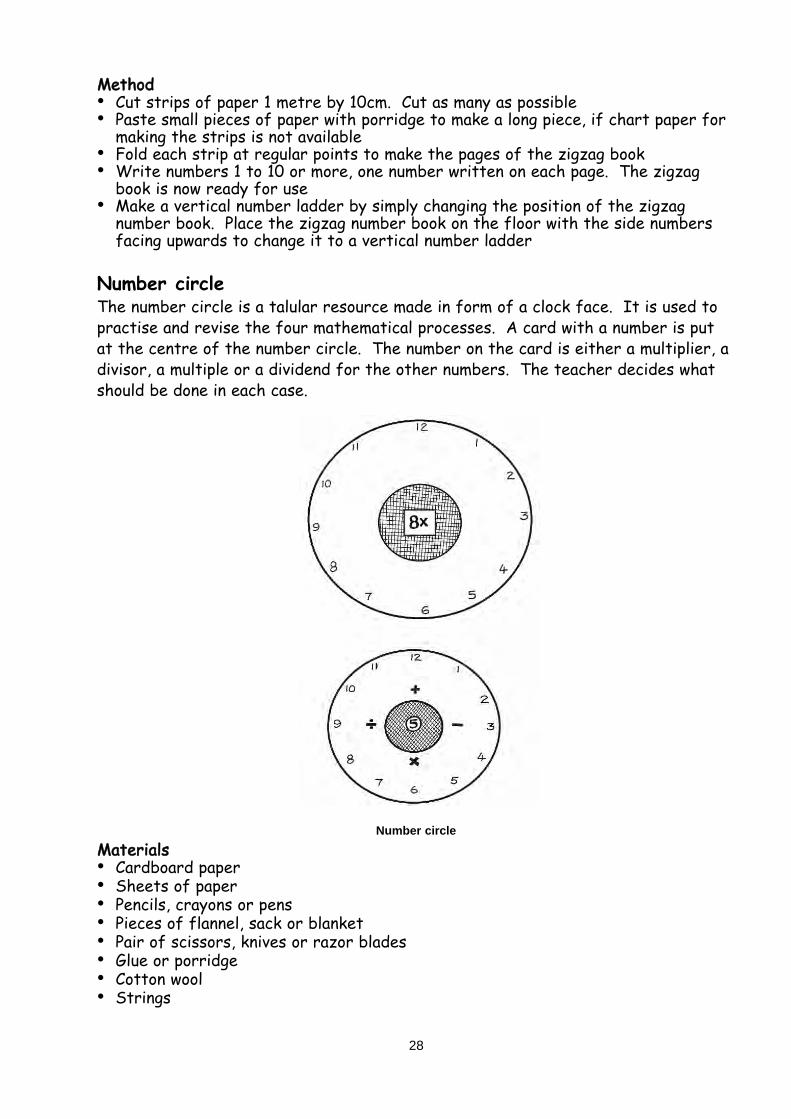
Number circleThe number circle is a talular resource made in form of a clock face. It is used topractise and revise the four mathematical processes. A card with a number is putat the centre of the number circle. The number on the card is either a multiplier, adivisor, a multiple or a dividend for the other numbers. The teacher decides whatshould be done in each case.
Number circle
MMaatteerriiaallss• Cardboard paper• Sheets of paper• Pencils, crayons or pens• Pieces of flannel, sack or blanket• Pair of scissors, knives or razor blades• Glue or porridge• Cotton wool• Strings
28
MMeetthhoodd • Cut a 30cm square piece of cardboard • Cut a 30cm square piece of paper • Stick the piece of paper on the front surface of the cardboard to give a
background for the numbers that will be written on it• Draw a circle with a string and a pencil or chalk• Write numbers 1 to 12 along the circle• Cut a piece of flannel, blanket or sack 10cm square or 5cm radius• Stick the piece of flannel or blanket in the centre of the circle• Cut pieces of paper 6cm square. Cut as many as possible, up to 30• Stick cotton wool at random with the porridge, on the back of each card to be
used with the number circle. It is possible to stick pieces of the same material you stick at the centre on the back of each card instead of cotton wool
• Stick an envelope on the back of the number circle for keeping the cards or the envelope may be kept separate. A separate box or tray may be used instead of anenvelope
• Use sand paper, gum or pins instead of cotton wool, if available• The number circle may be changed into a clock face for teaching time by pinning
clock hands made from paper, cardboard, wood or bamboo in the centre of the circle
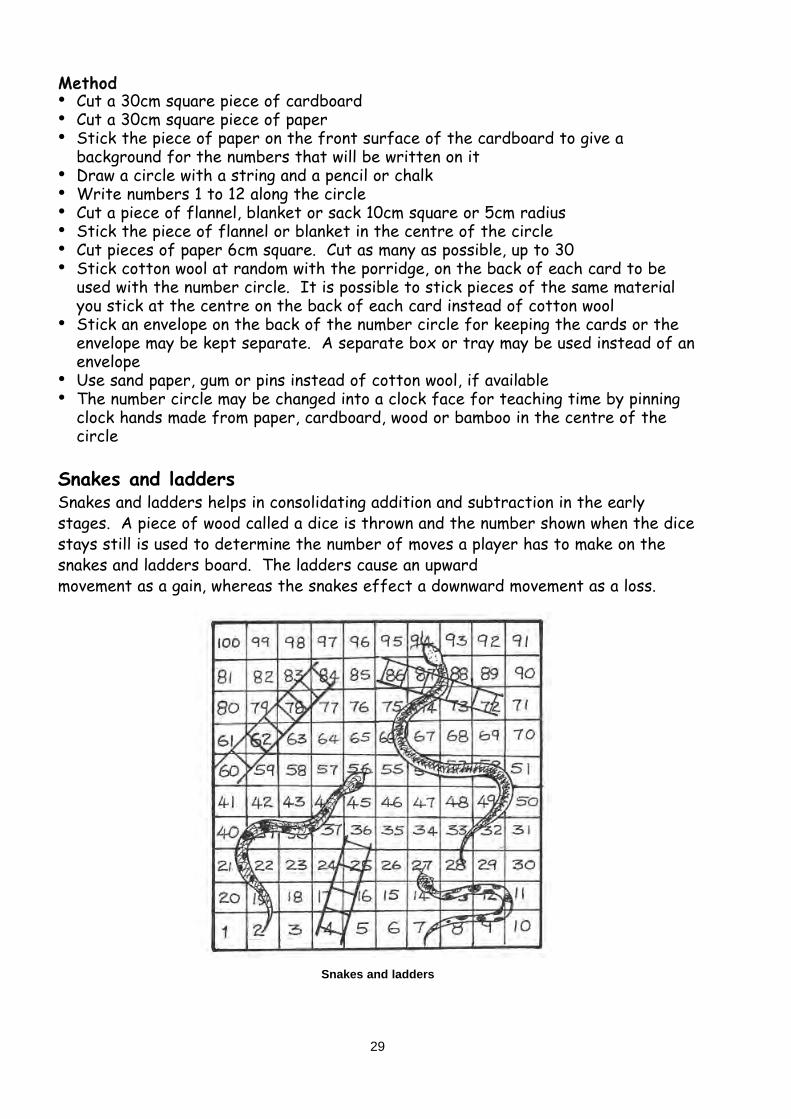
Snakes and laddersSnakes and ladders helps in consolidating addition and subtraction in the earlystages. A piece of wood called a dice is thrown and the number shown when the dicestays still is used to determine the number of moves a player has to make on thesnakes and ladders board. The ladders cause an upward movement as a gain, whereas the snakes effect a downward movement as a loss.
29
Snakes and ladders
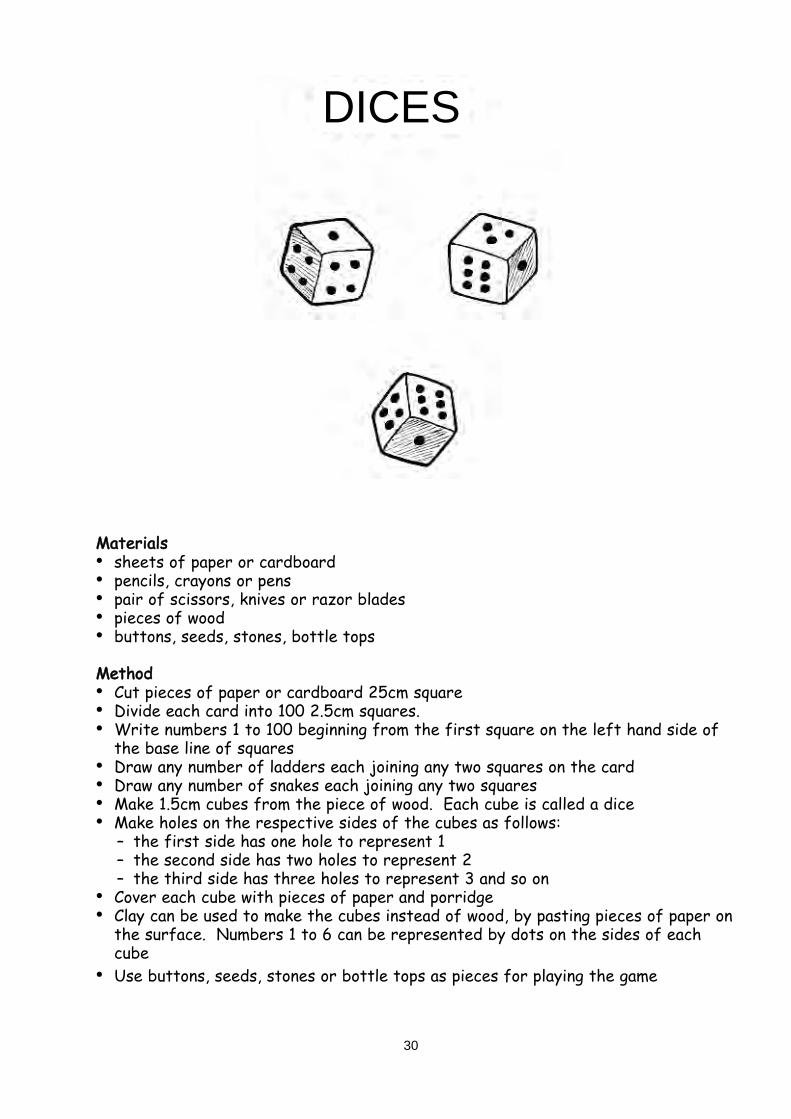
MMaatteerriiaallss• sheets of paper or cardboard• pencils, crayons or pens• pair of scissors, knives or razor blades• pieces of wood• buttons, seeds, stones, bottle tops
MMeetthhoodd• Cut pieces of paper or cardboard 25cm square• Divide each card into 100 2.5cm squares.• Write numbers 1 to 100 beginning from the first square on the left hand side of
the base line of squares• Draw any number of ladders each joining any two squares on the card• Draw any number of snakes each joining any two squares• Make 1.5cm cubes from the piece of wood. Each cube is called a dice• Make holes on the respective sides of the cubes as follows:
– the first side has one hole to represent 1– the second side has two holes to represent 2– the third side has three holes to represent 3 and so on
• Cover each cube with pieces of paper and porridge • Clay can be used to make the cubes instead of wood, by pasting pieces of paper on
the surface. Numbers 1 to 6 can be represented by dots on the sides of each cube
• Use buttons, seeds, stones or bottle tops as pieces for playing the game
30
DICES

A geo-board is a wooden board made up of squares with nails or tacks hammered into each of the corners of every square. It may be used for:making geometrical shapes with a rubber bandfinding the perimeter, that is, the distance around somethingrelating the geo-board to other areas where knowledge about surface area is useful.For example, associating it with the area of the walls of a house
MMaatteerriiaallss• wood• pencils or pens• nails or tacks• hammers• rubber bands or strings
MMeetthhoodd• Get a large square piece of thick wood• Draw a large square on this piece of wood• Divide the large square into small squares• Hammer carefully a tack or nail into the wood wherever the two lines cross. Be
sure that there is a nail or tack at every point where the lines cross• Try to hammer each nail so that the heads of all the nails are the same height• Put thin rubber bands over the nails to form rubber band squares of
different sizes• Record the number of small squares inside the rubber band squares. This
procedure may be used to explain the area of a surface.
A geo-board
31

UNIT 7TALULAR FOR DEVELOPING LITERACY
IntroductionIn the previous unit you learnt how TALULAR helps to develop numeracy. In thisunit, you will learn how TALULAR helps in developing literacy.
ObjectivesBy the end of this unit, you will be able to:• explain why it is important to use locally available resources for teaching language• make sample TALULAR for literacy development
Importance of using locally available resources for teaching language
AAccttiivviittyy 11List some TALULAR you have used in language teaching. Explain why it is importantto use locally available resources for teaching language.
Using the local environment as a source of TALULAR is important in the following ways.• It is a means of exposing children to various forms of writing• The children are already familiar with the local environment• When the local environment is used, children learn that reading is an
activity that goes beyond the classroom• There are many reading materials available that can be easily acquired by pupils at
little or no cost• Using local resources is one way of involving the community in the school’s literacy
work
Making sample TALULAR for literacy development
A vowel gridA vowel grid is a reading chart where vowels are written repeatedly, at random.Learners are asked to recognise the vowels.
Materials• chart paper or cardboard• pencils, crayons or coloured chalk• tablets of soap
MMeetthhooddWrite the first line of vowels a e i o u in the normal order
32
Write the same vowels in the second line in reverse order beginning with u and ending with aWrite the line of vowels a third time beginning with O and so onWrite the vowels on individual cards for use side by side Use a tablet of soap to run it over the writing if you write with coloured chalk. Thesoap prevents the writing from getting rubbed off
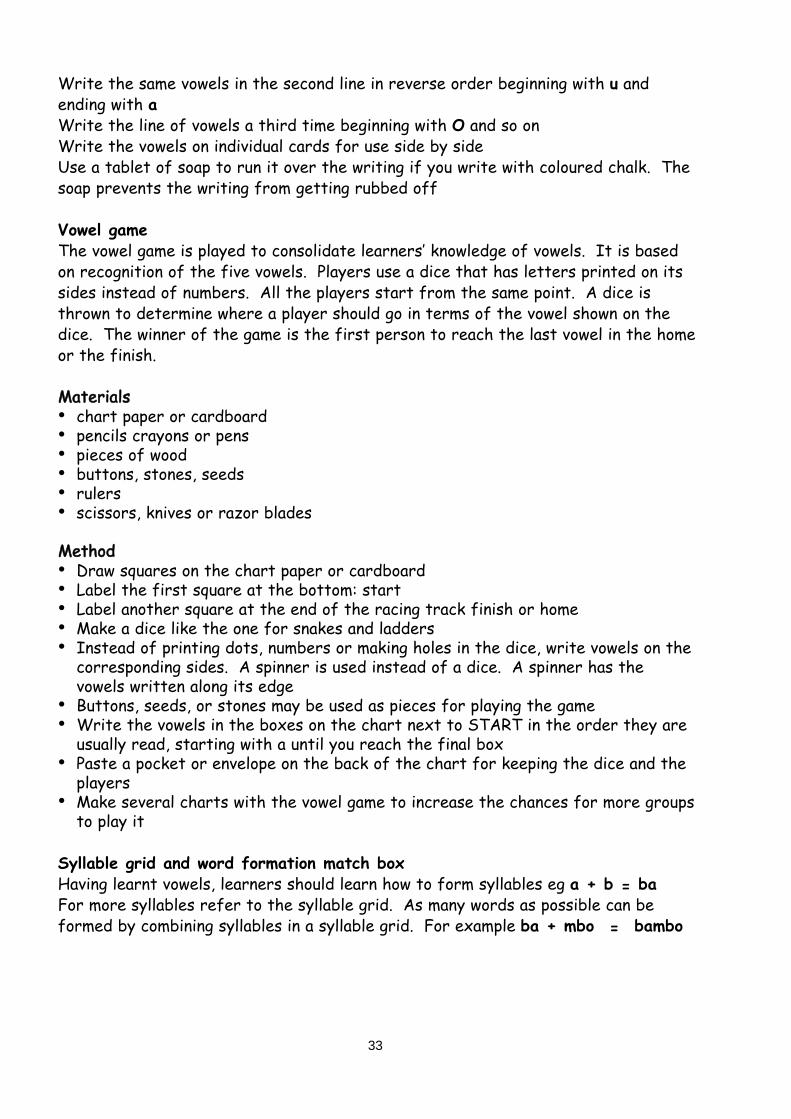
Vowel gameThe vowel game is played to consolidate learners’ knowledge of vowels. It is basedon recognition of the five vowels. Players use a dice that has letters printed on itssides instead of numbers. All the players start from the same point. A dice isthrown to determine where a player should go in terms of the vowel shown on thedice. The winner of the game is the first person to reach the last vowel in the homeor the finish.
MMaatteerriiaallss• chart paper or cardboard• pencils crayons or pens• pieces of wood• buttons, stones, seeds• rulers• scissors, knives or razor blades
MMeetthhoodd• Draw squares on the chart paper or cardboard• Label the first square at the bottom: start• Label another square at the end of the racing track finish or home• Make a dice like the one for snakes and ladders• Instead of printing dots, numbers or making holes in the dice, write vowels on the
corresponding sides. A spinner is used instead of a dice. A spinner has the vowels written along its edge
• Buttons, seeds, or stones may be used as pieces for playing the game• Write the vowels in the boxes on the chart next to START in the order they are
usually read, starting with a until you reach the final box• Paste a pocket or envelope on the back of the chart for keeping the dice and the
players• Make several charts with the vowel game to increase the chances for more groups
to play it
Syllable grid and word formation match boxHaving learnt vowels, learners should learn how to form syllables eg a + b = baFor more syllables refer to the syllable grid. As many words as possible can beformed by combining syllables in a syllable grid. For example ba + mbo = bambo
33

Syllable grid and word formation match box
MMaatteerriiaallss• chart paper or cardboard• pencils, crayons or pens• scissors, knives, or razor blades• match boxes• porridge• reeds• strings
MMeetthhoodd• Draw lines to make 8cm squares on the chart paper or cardboard• Write syllables in the squares from ba to zu• Vary the consonant combinations ranging from single consonants to multiple
consonant combinations• Take another piece of chart paper and cut it into pieces of cards, the same size
as the boxes on the syllable grid
34
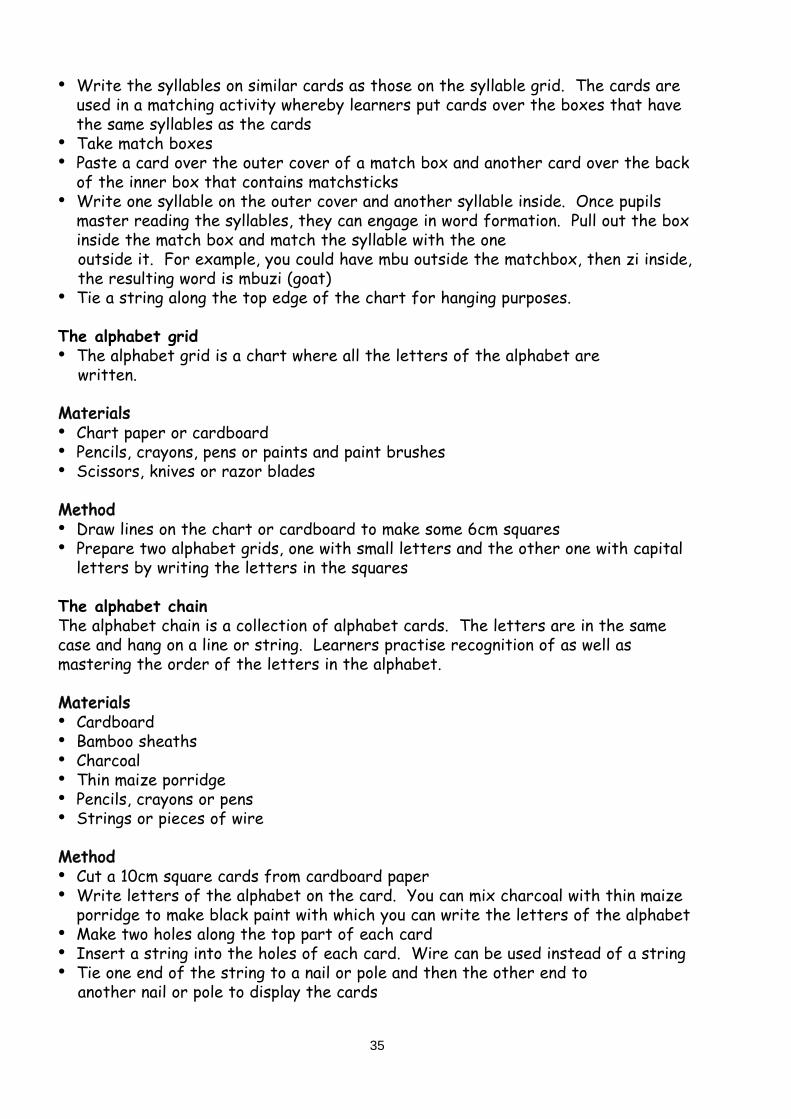
• Write the syllables on similar cards as those on the syllable grid. The cards are used in a matching activity whereby learners put cards over the boxes that have the same syllables as the cards
• Take match boxes• Paste a card over the outer cover of a match box and another card over the back
of the inner box that contains matchsticks• Write one syllable on the outer cover and another syllable inside. Once pupils
master reading the syllables, they can engage in word formation. Pull out the box inside the match box and match the syllable with the one outside it. For example, you could have mbu outside the matchbox, then zi inside,the resulting word is mbuzi (goat)
• Tie a string along the top edge of the chart for hanging purposes.
The alphabet grid• The alphabet grid is a chart where all the letters of the alphabet are
written.
MMaatteerriiaallss• Chart paper or cardboard• Pencils, crayons, pens or paints and paint brushes• Scissors, knives or razor blades
MMeetthhoodd• Draw lines on the chart or cardboard to make some 6cm squares• Prepare two alphabet grids, one with small letters and the other one with capital
letters by writing the letters in the squares
The alphabet chainThe alphabet chain is a collection of alphabet cards. The letters are in the samecase and hang on a line or string. Learners practise recognition of as well as mastering the order of the letters in the alphabet.
MMaatteerriiaallss• Cardboard• Bamboo sheaths• Charcoal• Thin maize porridge• Pencils, crayons or pens• Strings or pieces of wire
MMeetthhoodd• Cut a 10cm square cards from cardboard paper• Write letters of the alphabet on the card. You can mix charcoal with thin maize
porridge to make black paint with which you can write the letters of the alphabet • Make two holes along the top part of each card• Insert a string into the holes of each card. Wire can be used instead of a string• Tie one end of the string to a nail or pole and then the other end to
another nail or pole to display the cards
35

A vocabulary chart with or without picturesThe vocabulary chart has a variety of words written on it for reading practice. Normally, the smaller vocabulary charts or cards contain related words bysound or spelling features in order to enhance learning by association. For example:
Chichewadzanja (arm)dzana (the day before yesterday)dzala (full/ground for disposing waste)
tsatsa (stick for beating/advertise)tsaya (cheek)tsala (stay behind/land left fallow)
Englishback chalk rough delightsack walk bough lightblack talk although fightlack stalk cough tight
MMaatteerriiaallss• chart paper or cardboard• pencils, crayons or pens• newspaper cutouts in the shape of pictures• maize porridge
MMeetthhoodd• Select and write words on chart paper or cardboard• Make cards and write the same words as those on the chart paper • Draw or paste pictures or place real objects on the chart that correspond to the
words• Display the chart on the wall for use
36
pocketVocabulary cardWord maker/sentence maker

A word/sentence maker is a board with pockets where learners make words with letter cards, or words are combined to make sentences. When the teacher calls outa word, learners pick out appropriate cards and arrange them in the pockets of theword and sentence maker. Similarly, when the teacher reads out a sentence, learners find a appropriate cards that bear the words of the sentence and arrangethe word cards to make the sentence.
MMaatteerriiaallss• char paper, cardboard paper or old calendars• pencils, crayons, or pens• glue or porridge• pair of scissors, knives or razor blades• an envelope
MMeetthhoodd• Cut a 80cm by 50cm piece of cardboard or of an old calendar, 60cm by 40cm• Cut strips of paper the same width as the board. Short strips may be pasted
together to make the required length• Fold along one length of the strip and apply some porridge on the outer part of
the folded area.• Stick the area with porridge to the board across its width and press over the
entire strip• Close the ends of the strip with some porridge to make a pocket• Do the same with other strips• Space the pockets in such a way that the letter cards or word cards do not
obstract each other when put into the pockets • Cut the chart paper or old calendar into letter cards and word cads. There
should be several cards written with the same letters. The word cards are usually related to a story. Learners therefore can practise building up a story
• Paste an envelope on the back of the word and sentence maker for keeping the cards
• Make several word and sentence makers for practise on word formation and sentence construction.
Word boardThis board consists of a piece of wood or plank, nails and letter cards with holes forhanging. Learners form words on the board using letter cards. Learners can alsopractise making sentences with the words they form on the word board. The wordboard is sometimes called a sentence board because it is also used for sentencebuilding.
MMaatteerriiaallss• planks • nails• paper• ruler• pencils, crayons or pens• scissors, knives or razor blades• punching machine• paint and brushes
37

MMeetthhoodd• Cut a plank into pieces one metre or half a metre long, and 60mm or 90mm wide• Fix nails 2.5 or 5cm long, along the top edge of each board• Fix the nails at intervals equal to the width of each letter card• Cut pieces of paper into cards 60mm by 36mm• Divide the length of each card into four parts. The top part should be 15 mm
wide for punching purposes. The second part should be 12 mm wide. The third division should be 18mm wide and the fourth division should be 15mm wide
• Write letters of the alphabet on the second, third and fourth divisions for each card
• Make the holes in the cards wider than the heads of the nails• Paint the boards black or blue to create a background for the letter cards
The reading clockA reading clock is a chart that has the shape of a clock. Words are indicated bymeans of a pointer that resembles the hand of a clock. The pointer is moved eitherclockwise or anticlockwise pointing to words for learners to read. The reading clockis also known as a reading wheel.
• MMaatteerriiaallss• chart paper or cardboard• pencils, crayons or pens• reed or bamboo• pair of scissors, knives or razor blades• thread or strings• glue or porridge
MMeetthhoodd• Draw two circles, one 8cm radius and another one outside the first, 30cm radius• Join the two circles with straight lines in such a way that you can write words
38
Reading clocks

between the lines• Make a pointer like the hand of a clock by tying one end of a piece of reed or
bamboo with the thread or string• Make a hole through the centre of the inner circle• Insert the thread or string into the hole and tie a knot on the back of the
reading clock so that the pointer can move freely around without being detached from the surface of the reading clock
• Paste the reading clock to a piece of cardboard to support it• Tie a string for hanging on the wall
A reading text or passageThis is a chart with a passage for reading or poems copied from other textbooks to create supplementary and complementary readers. Not all the language learners ought to know can come from a single book. Some passages andpoems can be composed by the teacher as well as pupils and bound into booklets. Tocompose a poem, write sentences on strips of paper each based on the theme youhave selected for the poem. Arrange the strips into a logical sequence to form a coherent set of ideas.
Normally, it is expected that the passages contain vocabulary that suits the level ofthe learners. There is need to simplify the vocabulary especially if the passages areadopted from other texts. In other words, difficult passages should be adapted to the level of the class.
A cinema box/televisionA cinema box is a carton which consists of a long strip of paper with a series of pictures or words rolled inside the carton or box and fitted with sticks for movingthe pictures backwards and forward. The long strip of paper is the film. The sticksare used as rollers. The cinema box is also known as a diorama, a television set or a concertina.
A cinema box
MMaatteerriiaallss• carton• pencils, crayons or pens• pins, nails, thorns
39

• porridge• sticks• pairs of scissors, knives or razor blades
MMeetthhoodd• Make a screen by means of a carton or use planks to make a wooden box with nails• Draw pictures on paper strips in the order of the scenes of the story. The
pictures may be coloured to make them more attractive• Join the strips of paper with porridge to make a continuous piece. This is
the film.• Fit a stick at either end of the film by pasting the ends of the film to the sticks.
Thumbtucks or pins may be used to hold the ends of the film to the sticks. Sometimes the ends may simply be tied to the sticks with a string.
• Make four holes in the box, two at the roof of the box, two at the bottom.• Roll the long strip of paper (film) in place and fit the top ends of the sticks into
the two holes at the roof of the box and the lower ends of the sticks into the bottom holes.
• Roll the film backwards and forwards to check how it works• Make several films for use with the same screen
A calendar and weather chartA calendar and weather chart is for reading dates and weather conditions for eachday. It also provides a meaningful context for discussing events in relation to the dates or weather conditions as well as writing about them.
40

MMaatteerriiaallss• sheets of paper or cardboard• pencils, crayons or pens• glue or maize porridge• pairs of scissors, knives or razor blades• Cut a piece of cardboard into a 30cm square• Cut the sheet of paper into cards each measuring 5cm square or a little bigger
than this• Write numbers 1 to 31 for dates• Write names of the days of the week• Write names of the months of the year• Write the year in which the cards will be used• Write words describing weather conditions such as sunny, windy, cold, hot and
cloudy• Make pockets on the front surface of the cardboard• Make an envelope or pocket and paste it on the back of the cardboard for keeping
cards• Make illustrations to match with the words which describe the weather, if
need beBingo
Bingo can be based on vocabulary or word building exercises. It is the teacher whodetermines what form the game should take. For example, the players’ cards maycontain words whose definitions are on the master card. In other words, the play-
41
Bingo B: master
Games stimulate and motivatethe learners
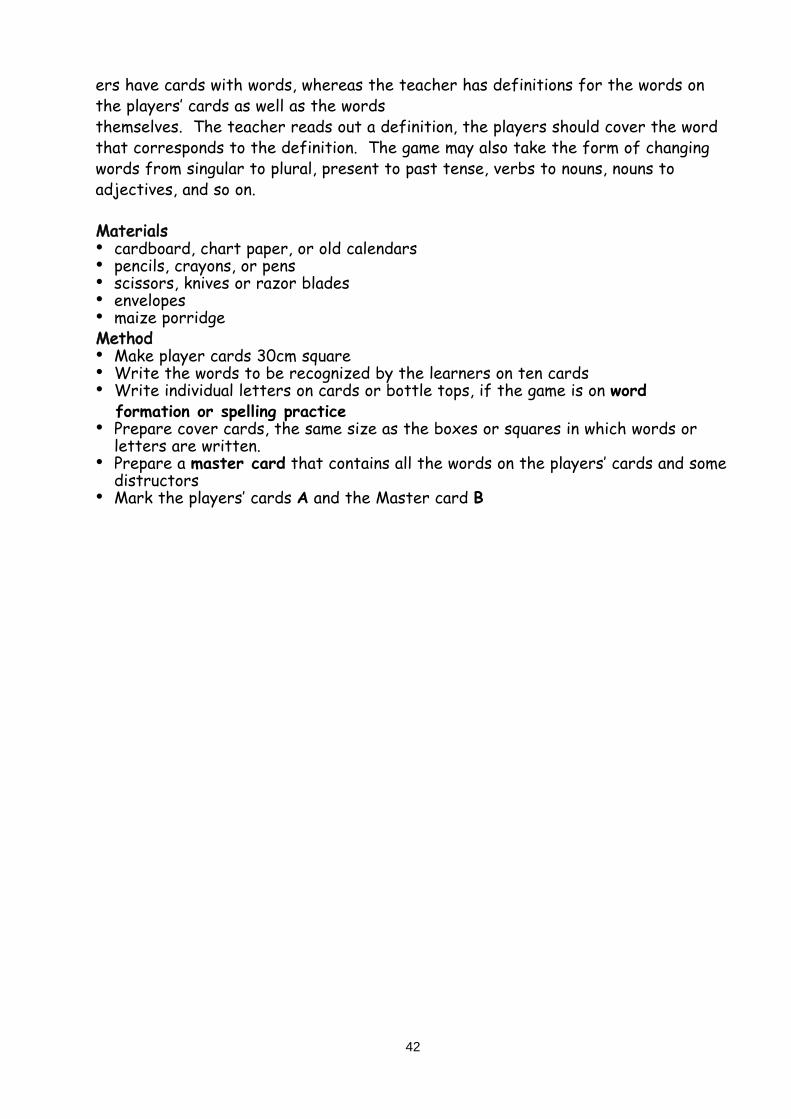
ers have cards with words, whereas the teacher has definitions for the words onthe players’ cards as well as the words themselves. The teacher reads out a definition, the players should cover the wordthat corresponds to the definition. The game may also take the form of changingwords from singular to plural, present to past tense, verbs to nouns, nouns to adjectives, and so on.
MMaatteerriiaallss• cardboard, chart paper, or old calendars• pencils, crayons, or pens• scissors, knives or razor blades• envelopes• maize porridgeMMeetthhoodd• Make player cards 30cm square• Write the words to be recognized by the learners on ten cards• Write individual letters on cards or bottle tops, if the game is on word
formation or spelling practice• Prepare cover cards, the same size as the boxes or squares in which words or
letters are written.• Prepare a master card that contains all the words on the players’ cards and some
distructors• Mark the players’ cards A and the Master card B
42
UNIT 8TALULAR TECHNIQUES AND AIDS FOR CHALKBOARD WORK
IntroductionThe chalkboard is the most commonly used teaching and learning resource availableto teachers. Talular techniques and aids are essential in enriching the teacher’sexpertise in chalkboard work. Effective use of the chalkboard can contribute toattracting learners’ attention in the classroom. This unit discusses how TALULARcan help in using the chalkboard effectively.
ObjectivesBy the end of this unit, you will be able to:make chalkboard talularlist down chalkboard talular
Making chalkboard TALULAR
AAccttiivviittyy 11List down as many chalkboard talular as you can.
Chalkboard TALULAR are materials that can be used when working on the chalk-board. The following are some of the chalkboard TALULAR that can be made:
CChhaallkk Cassava can be used in the absence of conventional chalk. The outer cover should beremoved. The cassava can be shaped to size and dried for use.
CChhaallkkbbooaarrdd dduusstteerrIn the absence of the conventional duster, pieces of cloth can be. Make a small bagwith a piece of cloth or blanket by it sewing with a needle and thread. Fill the bagwith cotton wool, or small pieces of cloth or blanket or an old sweater and completethe sewing.
SSttrriinnggssStrings can be made from sisal or other plant fibres. Straight lines and geometrical shapes can be drawn on the chalkboard using the strings.
SStteenncciillssStencils can be made from cardboard or a thin sheet of metal. Letters of thealphabet, numbers or geometrical shapes such as squares, circles,
43
triangles and rectangles can be drawn using the stencils. Cut out the letters, numbers orgeometrical shapes with a knife or razor blade to make stencils.
CChhaallkkbbooaarrdd rruulleerrA piece of plank with a straight edge or a broken window frame can makea ruler.
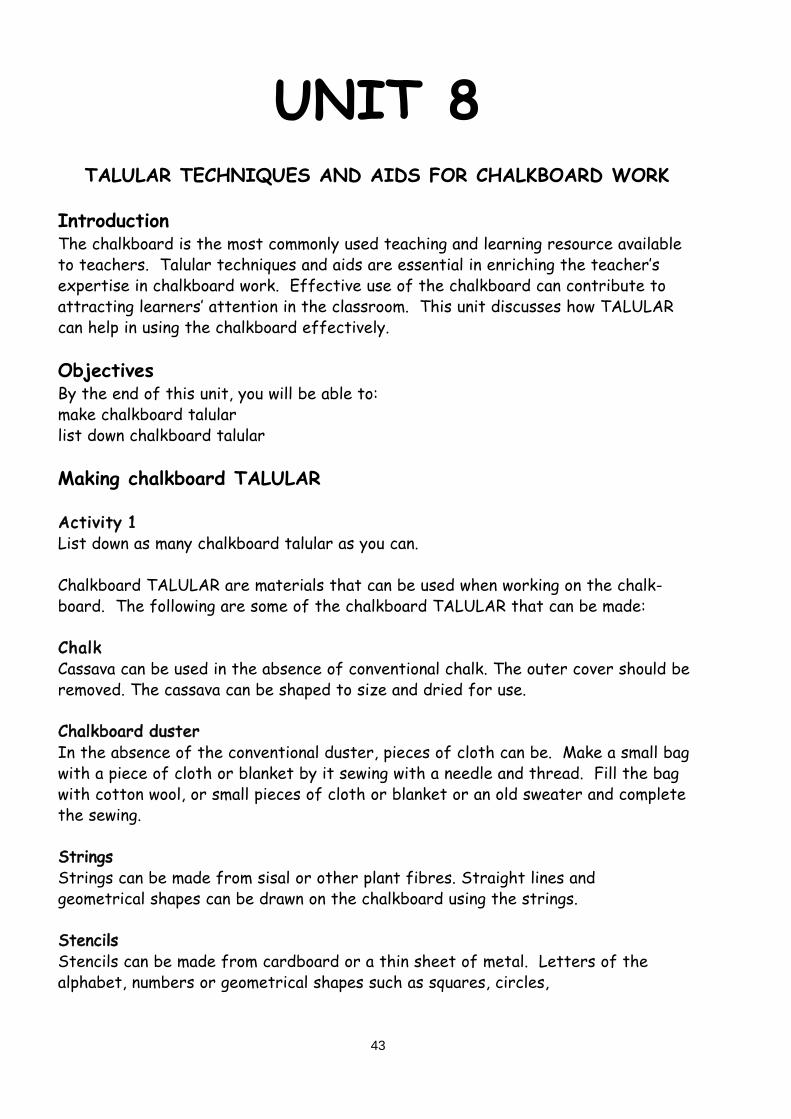
TTeemmppllaatteessTemplates can be made from cardboard, plywood or a plank. A map, a human figure,or animal figure or a geometrical outline can be drawn to make a template by cutting out the drawing along the outline. You can use the templates to quickly draw various respective diagrams on the chalkboard. You canalso make a template by perforating outlines of various pictures or diagrams.
Examples of templates
PPooiinntteerrA stick can be used as a pointer. Other talular pointers include rolled pieces ofpaper pasted together with porridge to make a long piece, an iron rod from an oldumbrella, a piece of wire, a piece of bamboo, reed and an old radio aerial.
44

Unit 9BASIC TALULAR DISPLAY AND STORAGE TECHNIQUES
IntroductionProper storage of teaching and learning resources is important in order to sustainthe use of the resources. This unit will discuss basic TALULAR display and storagetechniques.
ObjectivesBy the end of this unit, you will be able to:make various talular displaysdisplay talular resources in the classroomstore talular appropriately
Talular display techniquesBy displaying teaching and learning resources, learners are given the opportunity to see, feel, taste and satisfy their learning styles and curiosity.
AAccttiivviittyy 11Identify various talular display techniques.Collect some of your resources you made in one of the earlier units and demonstratehow to display them appropriately.
The following are some of the basic talular display techniques.
Table display• sticks, grass, reeds, or bamboos• a string or rope• make a table-like structure by building the grass, stick, reeds or bamboos
together with the string or rope
45
Table display
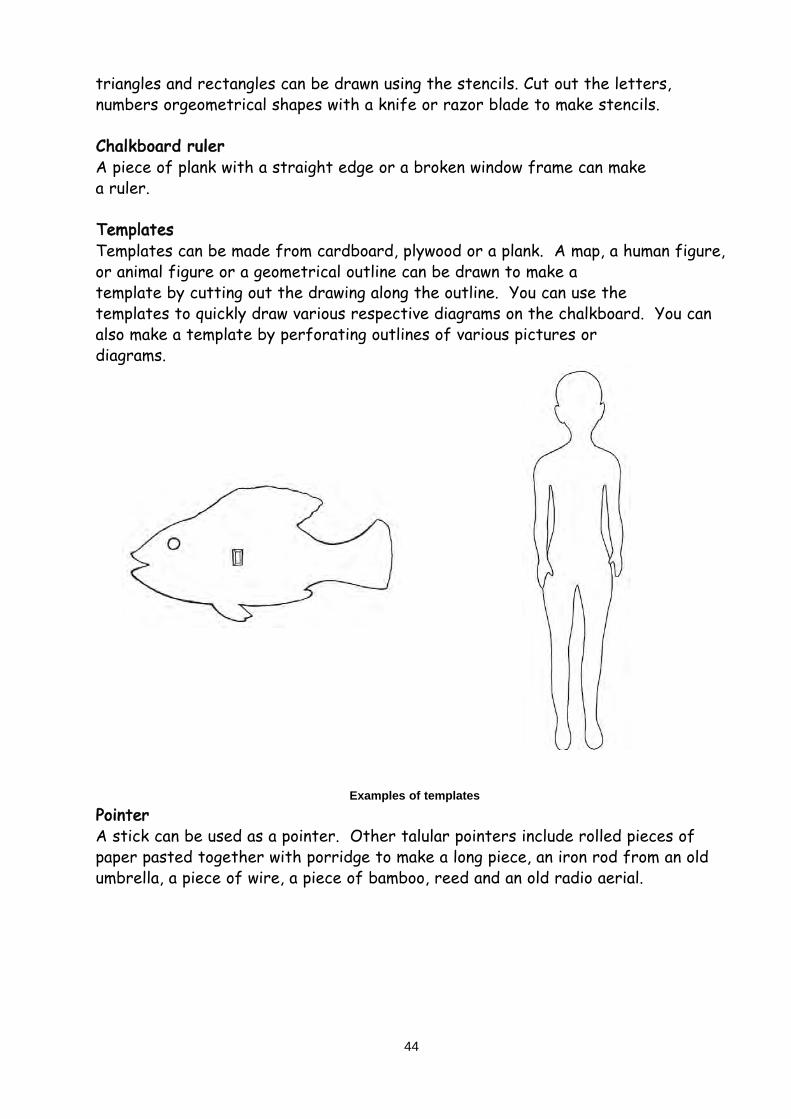
Wall display• demarcate the walls of the classroom• fix nails for hanging charts and other talular resources• make frames around charts and tie strings for hanging• use pins if the walls of the classroom have a soft board on the surface• a wall like structure may be constructed with grass, reeds, ticks or
bamboos for displaying illustrations outside the classroom
Mat display• find a reed mat or palm leaves mat• fit tails on the back of pictures with pieces of paper and porridge• use pins, needles, or thorns to display on the mat• post the tails into the spaces of the reed mat to display the pictures
Ground display• demarcate the ground or floor• spread sacks, cloth, cardboard or newspapers
Plastic sheet display• find a sheet of plastic, preferably black in colour• support the sheet of plastic with a piece of cardboard by sewing or tying the
sheet of plastic onto the surface • use selo tape or gum to display illustrations on the plastic sheet
Bulletin board display• find a piece of cardboard• make a frame along the edge of the cardboard with a reed or bamboo and a string• use porridge to paste newspaper or magazine cuttings onto the cardboard• write a caption or title for the bulletin board, for example, “What’s up?” or
“What’s new?”• collect learners’ stories, and your own descriptions or instructions for the bulletin
board
46
Wall display

Flannel is a piece of cloth that is hairy on the surface. In the absence of flannel material, use a sack or piece of blanket.• a piece of cardboard, a sack or piece of blanket• cover the cardboard with the sack or piece of blanket• make a frame with pieces of a reed or bamboo along the edge of the
cardboard by binding the pieces of reed together with a string• paste cottonwool on the back of every illustration to be displayed on the flannel
board, the flannel board works on the principles of “rough sticks to rough”• keep illustrations in clearly marked envelopes
47
Flannel board display
Washing line display
A string or wire is used to display word cards, pictures or other illustrations especially for lessons held in open air. • find a string or wire and two poles • dig two holes, put one pole in each• tie one end of the string to one pole and the other end to the other pole• find pegs, safety pins or paper clips and use them to hold the illustrations on the
line or string• find two nails and fix them apart on the wall of the classroom; tie the string to
the nails
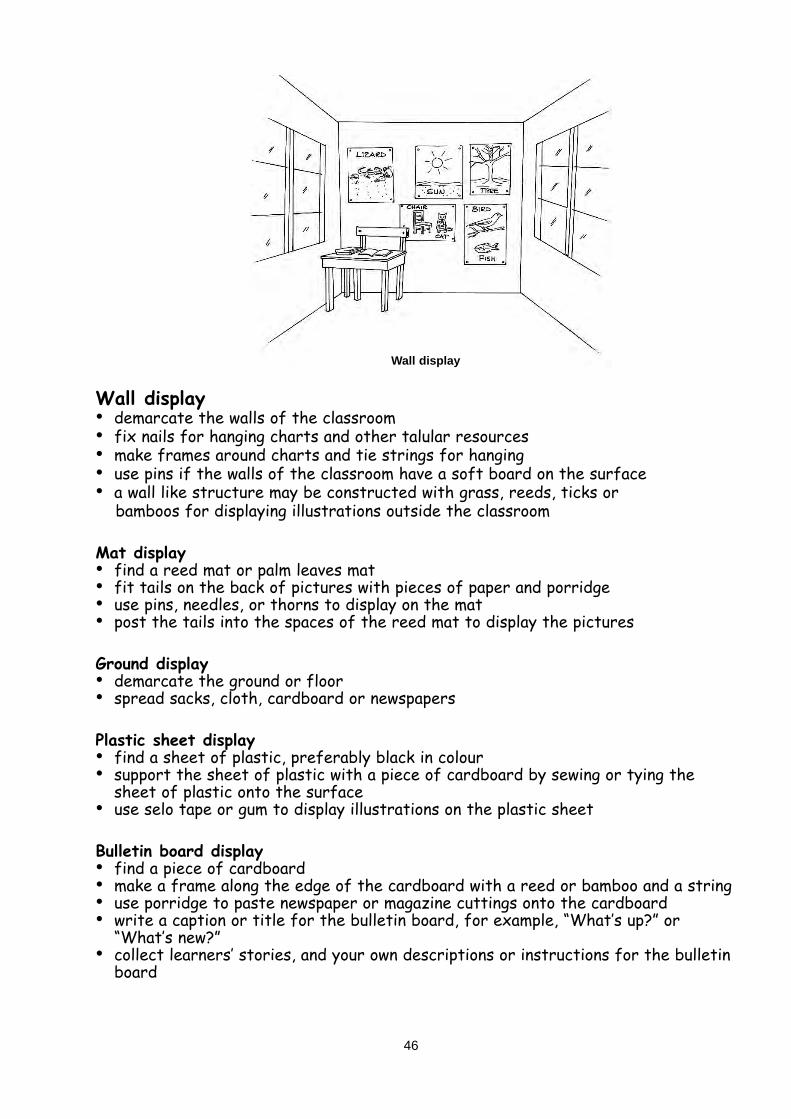
Tree display is done on the branch of a tree.• find a branch, a tin and stones• put the lower end of the main stem into a tin and support it with the stones; the
tin forms the base of the branch• make word cards, number cards, cutout pictures and information from newspapers • find paper clips, safety pins, thread and use them to hang the illustrations on the
branch
MobilesPieces of wood and string are used to create a display in which the items displayed balance when suspended on one of the beam of the roof or a hook on theceiling.• find pieces of wood and string or thread• tie the illustrations to the sticks in such a way that you create a network that
balances • fix a nail on one of the classroom roof or fix a hook on the ceiling
48
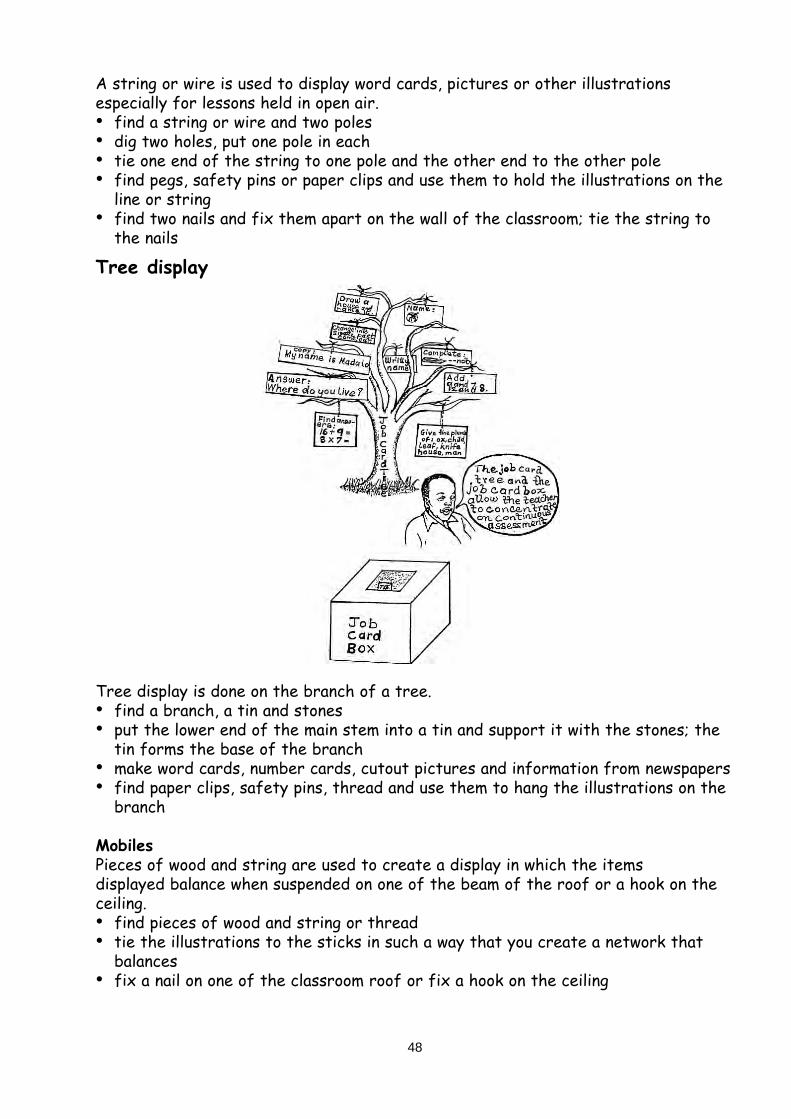
Tree display

• hang the mobile made on the nail or hook
Causes of damage to resourcesAAccttiivviittyy 221 Describe agents which might destroy teaching and learning resources2 Give examples of what you can use for storage to avoid making them every now
and then.The following might destroy talular resources:• termites• borers• moisture which encourages the growth of fungi• wind• rain• dust• mishandling• vermin such as rats or mice
The following may be used to store talular:• cartons• hangers• wooden boxes• old suitcases• sacks • carrier bags (plastic or cloth)
49
Storage facilities
Store your TALULARfor sustainability andrelieve yourself of theburden of making thesame resources all the time!

• tins• baskets• buckets• trays• plates• lids• shoe polish cans• match boxes• envelopes • folders• shelves made with sticks, reeds, bamboos, wood or bricks• cupboards made with bamboo, nails and cardboord• sleeves of old shirts tied or sewn at one end to make pockets• trousers cut and tied or sewn at one end to make pockets
50

BibliographyBarth, JL et al (1987). Audio visual handbook. Domasi: Malawi Institute of Education.Byers, A (2002). What is TALULAR? Domasi: Malawi Institute of Education. Byers, A (2001). An Introduction to TALULAR. Domasi: Malawi Institute of
Education.Njangi, S and A Berluti, (1991). Primary art and craft. Macmillan Kenya Publishers
Limited.Saunders, DJ (1984). Visual communication handbook. Surrey: Lutterwoth Education
Guildford.Seliger, M (1982). Handbook for educational graphics. Domasi: Malawi Institute of
Education.Tony and Bell, ME (1997). Maths now! teachers resource file. London: John Murray
Publishers Ltd.
51

52
DO YOU KNOW THATHIV/AIDS CAN BE
AVOIDED?