poct.04.11a accu-chek inform ii training powerpoint...
TRANSCRIPT
Accu-Chek Inform II: Training Powerpoint
ACCU-CHEK Inform IIACCU CHEK Inform IIOperator Training
Provincial Health Services Authority
ACCU-CHEK, ACCU-CHEK INFORM, ACCU-CHEK PERFORMA and COBAS are trademarks of Roche. All other trademarks are the property of their respective owners.

Accu-Chek Inform IIPreliminary Review for Hands On TrainingPreliminary Review for Hands On TrainingComplete Quiz at the end of this session1. AccuChek Inform II System Components2. AccuChek Inform II Meter3. AccuChek Inform II Test Strip & Quality Control Material4. Key Points5. Cleaning the meter 6 Operator ID & ongoing competency6. Operator ID & ongoing competency 7. Perform a quality control test (QC) – Hands On8. Perform a patient test – Hands On8. Perform a patient test Hands On9. AccuChek Inform II Meter ranges10. PHSA Normal/Critical ranges
Accu-Chek Inform II Operator Training211.View results 12.Quiz

Accu-Chek Inform IISystem ComponentsSystem Components
Base Unit (BU)Base Unit (BU)
•Automatic data transfer and battery charge.
C t d t t k &
Tote Box
Meter strips disinfectant
•Connected to network & power outlet
•Blue light – indicates data transfer.Meter, strips, disinfectant swabs, Control 1 & 2, lancets, capillary pipettes.
Quick Reference Guide
Accu-Chek Inform II•Green light - charging and properly placed in BU
•Red light – BU is first plugged into
Accu-Chek Inform II Operator Training3
Quick Reference Guideg p ggpower outlet with no meter seated.

Accu-Chek Inform IIMeter Components – meter front viewMeter Components – meter front view
Test Strip Port
B d S (L )
p
Barcode Scanner (Laser)
•Operator ID
•Patient ID (in future)
Touchscreen-Main menu with 3 options (finger touch ( )
•Control Solution 1 & 2
•Inform II test strips
(finger touch only )
Accu-Chek Inform II Operator Training4On/Off Button

Accu-Chek Inform II Meter Components – meter back view
• Meter re-set button (for meter freeze situation, press gently with paperclip a few seconds to re-boot)
•Re-Chargeable Battery Pack
•Charging Contacts(To Base Unit)
•Infra-red contact to upload lot information
Accu-Chek Inform II Operator Training5

Accu-Chek Inform II - Quality Control (QC) Accu-Chek Performa Controls Levels 1 & 2
•Provided by Point of Care Testing - LAB
Accu Chek Performa Controls Levels 1 & 2
•All Lot #’s validated by Point of Care Testing
•Control 1 and Control 2
One Lot # per ear•One Lot # per year
•Stored @ Room Temperature
•Expiry date on vial is for “closed” vial expiryp y p y
•Open vial Expiry is 3 months – Point of Care –
Lab will date the vials with open date
•Shake vial well before each use. Replace cap immediately.
Caution: Blue dye- will stain clothing
Accu-Chek Inform II Operator Training6
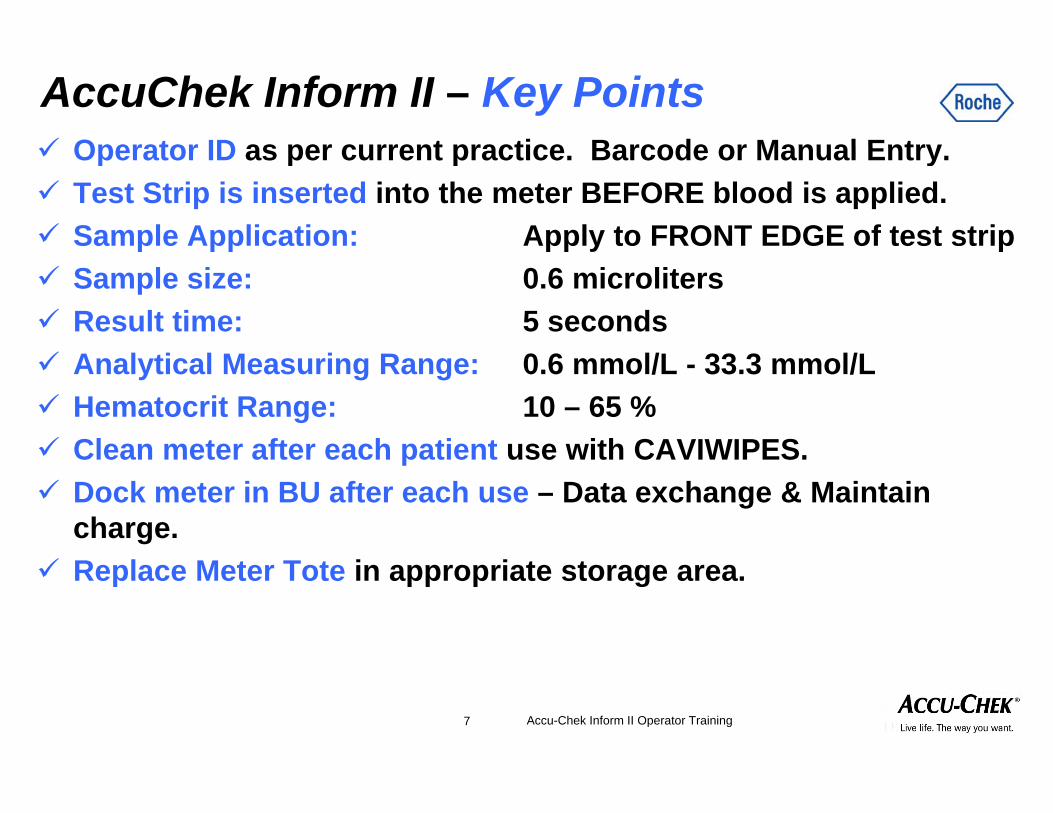
AccuChek Inform II – Key Points Operator ID as per current practice Barcode or Manual Entry Operator ID as per current practice. Barcode or Manual Entry. Test Strip is inserted into the meter BEFORE blood is applied. Sample Application: Apply to FRONT EDGE of test stripp pp pp y p Sample size: 0.6 microliters Result time: 5 seconds A l ti l M i R 0 6 l/L 33 3 l/L Analytical Measuring Range: 0.6 mmol/L - 33.3 mmol/L Hematocrit Range: 10 – 65 % Clean meter after each patient use with CAVIWIPES.Clean meter after each patient use with CAVIWIPES. Dock meter in BU after each use – Data exchange & Maintain
charge. R l M t T t i i t t Replace Meter Tote in appropriate storage area.
Accu-Chek Inform II Operator Training7

AccuChek Inform II – Glucose Meter
Ongoing Operator Competency
Consistent with Current Protocol:Consistent with Current Protocol: Maintain with the use of your unique Operator ID # Enter with Barcode Scan or Manual Entry Not shared with other staff
Minimum Requirements: 2 sets of Quality Control (Control 1 and Control 2) per year 2 Patient Tests per year Operator Lock out if requirements are not met within the yearOperator Lock out if requirements are not met within the year
Accu-Chek Inform II Operator Training8

Accu-Chek Inform II Cleaning the Glucose Meter Base UnitCleaning the Glucose Meter, Base Unit
Only use the Manufacturer approved Cleaning WipeCaviwipes @ PHSA – pre-moistened cleaning wipe
with Cavicide Surface Disinfectant/Decontaminant Cleaner
Glucose meters are cleaned & disinfected: After each patient use After each patient use When visibly soiled
Base Unit & Supply totes are cleaned & disinfected: Weekly at a minimum
Accu-Chek Inform II Operator Training9
When visibly soiled
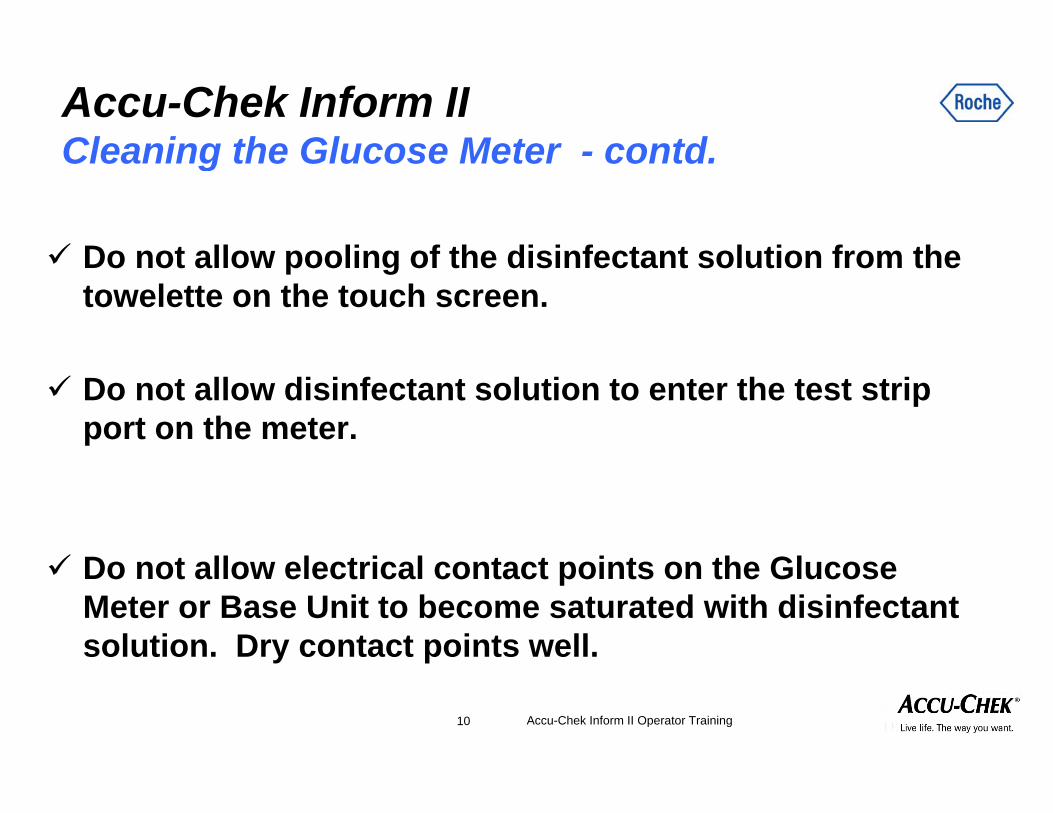
Accu-Chek Inform II Cleaning the Glucose Meter contdCleaning the Glucose Meter - contd.
D t ll li f th di i f t t l ti f th Do not allow pooling of the disinfectant solution from the towelette on the touch screen.
Do not allow disinfectant solution to enter the test strip port on the meter.
Do not allow electrical contact points on the Glucose Do not allow electrical contact points on the Glucose Meter or Base Unit to become saturated with disinfectant solution. Dry contact points well.
Accu-Chek Inform II Operator Training10
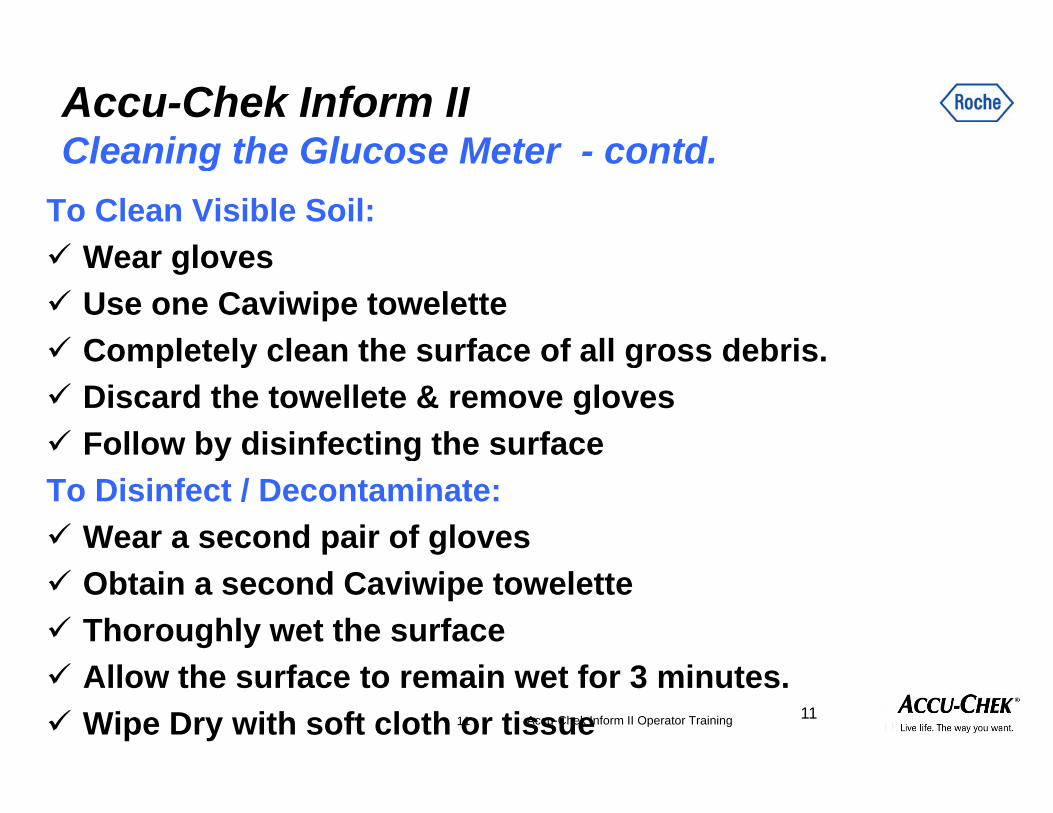
Accu-Chek Inform II Cleaning the Glucose Meter contdCleaning the Glucose Meter - contd.
To Clean Visible Soil: W l Wear gloves Use one Caviwipe towelette Completely clean the surface of all gross debris Completely clean the surface of all gross debris. Discard the towellete & remove gloves Follow by disinfecting the surfacey gTo Disinfect / Decontaminate: Wear a second pair of gloves Obtain a second Caviwipe towelette Thoroughly wet the surface All th f t i t f 3 i t
Accu-Chek Inform II Operator Training11
Allow the surface to remain wet for 3 minutes. Wipe Dry with soft cloth or tissue 11

Performing a Quality Control TestGlucose Meters, Base Units & Supply Totes are labeled
Obtain corresponding Supply Tote
Remove meter from base unit.1. Press and release the On/Off button
2. Meter performs a Self Check
3. ‘Power Up’ screen appears
4. Confirm date and time
5. View battery “life” symbol in bottom right corner
6 P d t th t6. Proceed to the next screen
• Manually - touch the arrow symbol
• Automatically after 5 seconds
Accu-Chek Inform II Operator Training12
• Automatically - after 5 seconds

Entering an Operator ID -M l E tManual Entry
• Touch the symbol to backspace andTouch the symbol to backspace and delete a character entered incorrectly
• Touch symbol to confirm
Picture with operator ID
Once entry is complete, the main menu appearsID screen-not QC
Accu-Chek Inform II Operator Training13

Entering an Operator ID –Barcode ScannerBarcode Scanner
To SCAN the Operator ID using the barcode reader:
1. Touch and release the ‘Scan’ symbol in top right corner of screen (black background=scan mode)
2. Hold meter so window of scanner is 4-8 inches above barcode you wish to read.above barcode you wish to read.
Meter beeps once the barcode has been read successfully and info scanned appears on screen. Scanner turns off after 5 secondsScanner turns off after 5 seconds.
Accu-Chek Inform II Operator Training14
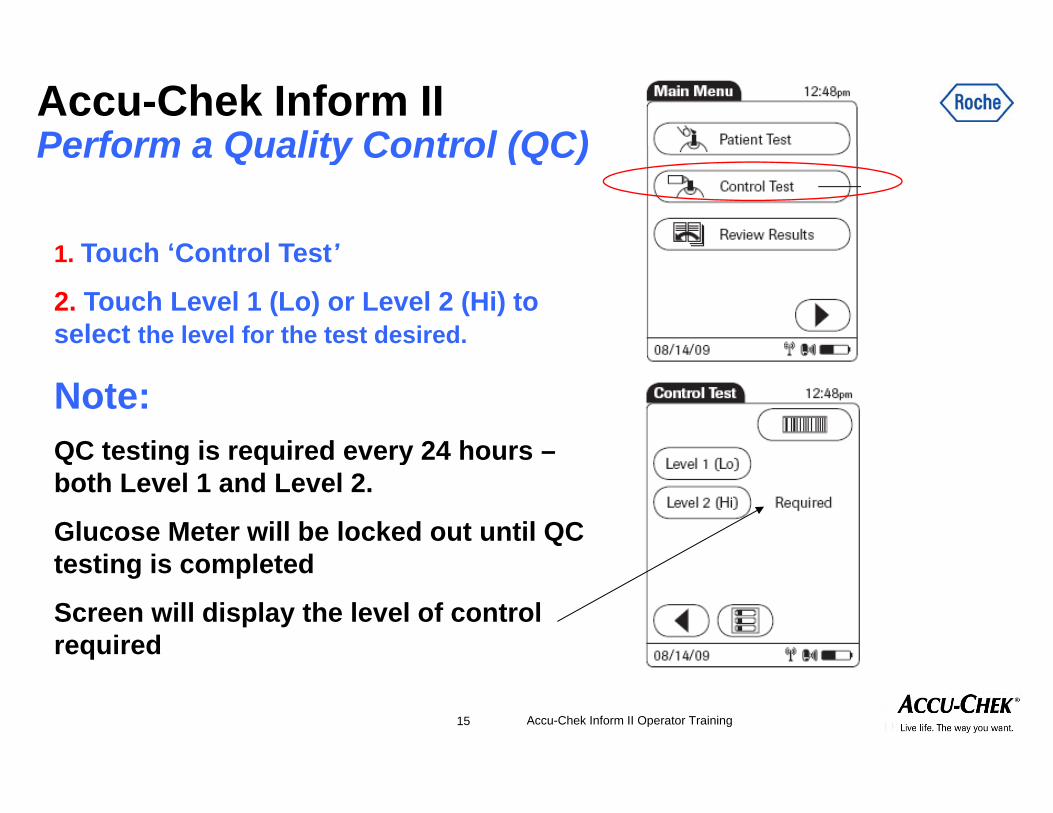
Accu-Chek Inform IIPerform a Quality Control (QC)Perform a Quality Control (QC)
1 Touch ‘Control Test’1. Touch Control Test
2. Touch Level 1 (Lo) or Level 2 (Hi) to select the level for the test desired.
Note:QC testing is required every 24 hours –QC testing is required every 24 hours both Level 1 and Level 2.
Glucose Meter will be locked out until QC testing is completedtesting is completed
Screen will display the level of control required
Accu-Chek Inform II Operator Training15

Accu-Chek Inform IIPerform a Quality Control (QC) contdPerform a Quality Control (QC) contd.
Lot number entry – QC solution & Test Strip
3. Touch the barcode symbol at top right corner of screen to enter the lot number of the Quality Control Solution
Scan the lot number on the control solution vial - hold meter so scanner is 4-8 inches in front of vial barcode
T h t fi th d l t bTouch to confirm the scanned lot number.
Repeat procedure to scan the test strip vial.
4. Touch the barcode symbol at top right corner of screen to enter the lot number of the Test Strip Vial.
NOTE L t b t b ll t dAccu-Chek Inform II Operator Training16
NOTE: Lot numbers cannot be manually entered
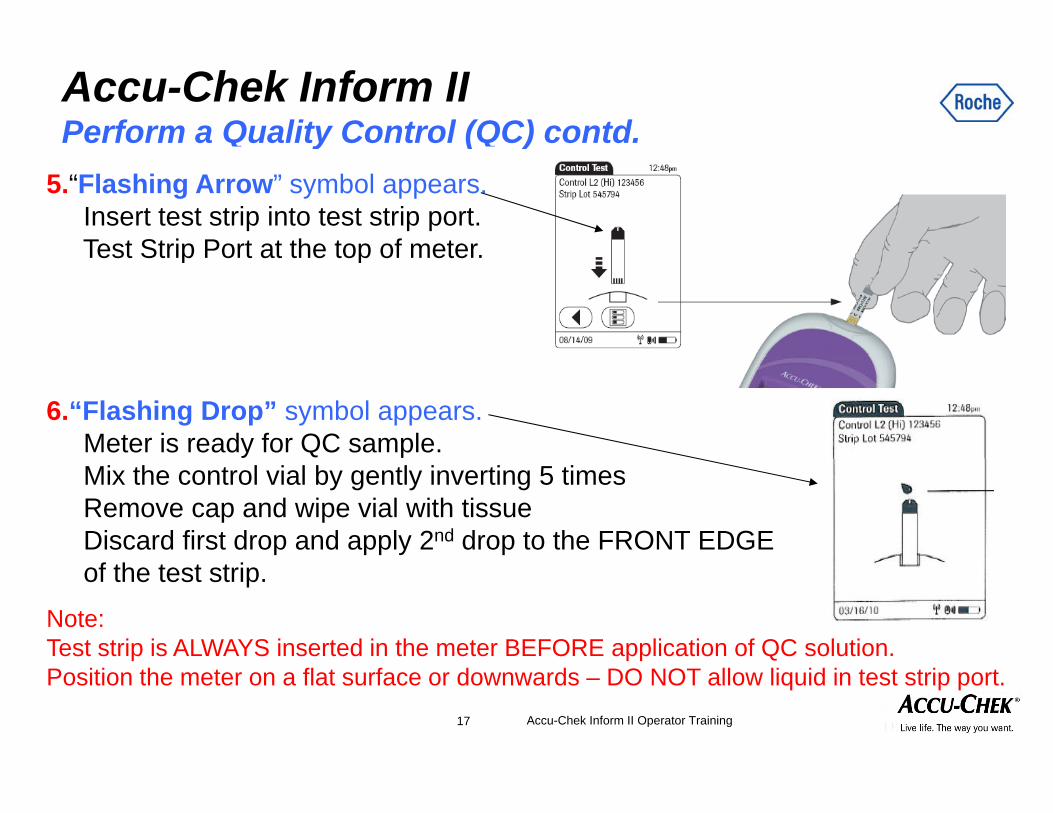
Accu-Chek Inform II Perform a Quality Control (QC) contd.
5.“Flashing Arrow” symbol appears.Insert test strip into test strip port.Test Strip Port at the top of meter
y ( )
Test Strip Port at the top of meter.
6.“Flashing Drop” symbol appears.Meter is ready for QC sample.Mix the control vial by gently inverting 5 timesRemove cap and wipe vial with tissueDiscard first drop and apply 2nd drop to the FRONT EDGE
f th t t t i
Note: Test strip is ALWAYS inserted in the meter BEFORE application of QC solution.
of the test strip.
Accu-Chek Inform II Operator Training17
Position the meter on a flat surface or downwards – DO NOT allow liquid in test strip port.
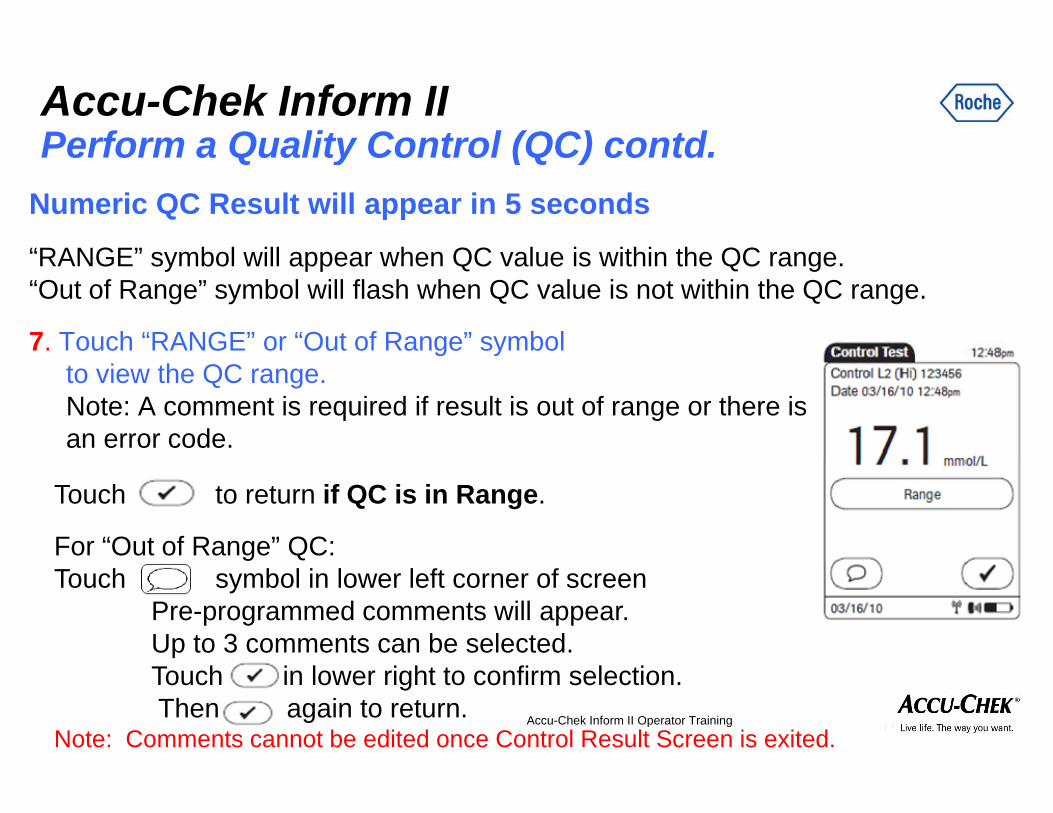
Accu-Chek Inform II Perform a Quality Control (QC) contdPerform a Quality Control (QC) contd.
Numeric QC Result will appear in 5 seconds
“RANGE” b l ill h QC l i ithi th QC“RANGE” symbol will appear when QC value is within the QC range.“Out of Range” symbol will flash when QC value is not within the QC range.
7. Touch “RANGE” or “Out of Range” symbolg yto view the QC range.Note: A comment is required if result is out of range or there isan error code.
Touch to return if QC is in Range.
For “Out of Range” QC:Touch symbol in lower left corner of screen
Pre-programmed comments will appear.Up to 3 comments can be selected.T h i l i ht t fi l ti
Accu-Chek Inform II Operator Training
Touch in lower right to confirm selection.Then again to return.
Note: Comments cannot be edited once Control Result Screen is exited.

Accu-Chek Inform IIPerform a Patient TestPerform a Patient Test
1 Touch ‘Patient Test’1. Touch Patient Test
2 Ne t Screen displa ed ill ask for Patient ID2. Next Screen displayed will ask for Patient ID.
Pass through this page.
Note: Use of Patient ID is not activated @ PHSANote: Use of Patient ID is not activated @ PHSA
3. Confirm selection of Patient Test3. Confirm selection of Patient Test
Touch in lower right corner of screen.
Accu-Chek Inform II Operator Training19
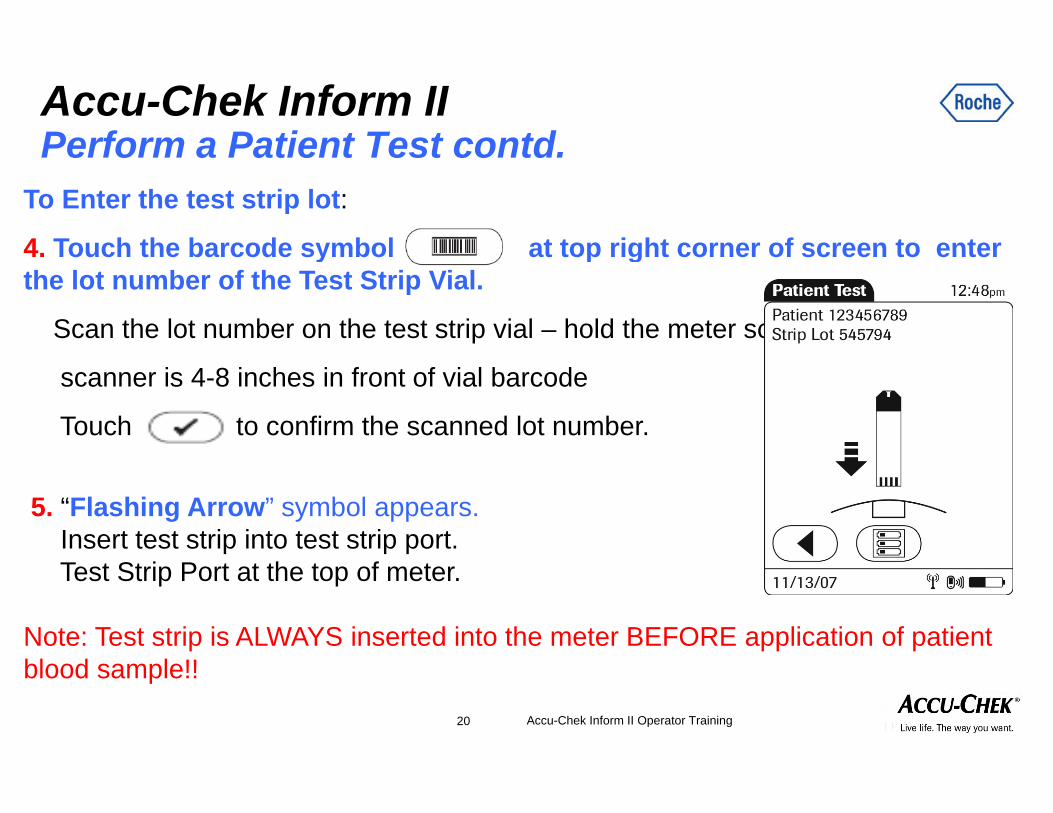
Accu-Chek Inform IIPerform a Patient Test contdPerform a Patient Test contd.
To Enter the test strip lot:
4 Touch the barcode symbol at top right corner of screen to enter4. Touch the barcode symbol at top right corner of screen to enter the lot number of the Test Strip Vial.
Scan the lot number on the test strip vial – hold the meter so
scanner is 4-8 inches in front of vial barcode
Touch to confirm the scanned lot number.
5. “Flashing Arrow” symbol appears.Insert test strip into test strip port.T t St i P t t th t f tTest Strip Port at the top of meter.
Note: Test strip is ALWAYS inserted into the meter BEFORE application of patient blood sample!!
Accu-Chek Inform II Operator Training20
blood sample!!

Accu-Chek Inform IIPerform a Patient Test – contdPerform a Patient Test – contd.
6.“Flashing Drop” symbol appears.(up to 10 minutes to apply sample before meter times out)C i l t ith Li it l d i t i iCan simulate with a Linearity sample during training.Meter is ready for Patient sample.Follow institutional guidelines for the capillary puncture.Select puncture siteSelect puncture siteChoose appropriate capillary puncture devicePuncture site is clean. If required, clean site with soap & water.Disinfect with 2% chlorhexidine in 70% isopropyl alcoholDisinfect with 2% chlorhexidine in 70% isopropyl alcoholPerform skin punctureAllow puncture site to Air Dry.Remove first drop of blood. (removes contaminants/residual disinfectants & any possible dilution effect).
Apply 2nd drop to the FRONT EDGE of the test strip.
Note: Arterial or line samples may be used. Touch the first drop to a gauze/tissue before application to the front edge of the test strip
Accu-Chek Inform II Operator Training21
Touch the first drop to a gauze/tissue before application to the front edge of the test strip.Result appears after 5 seconds
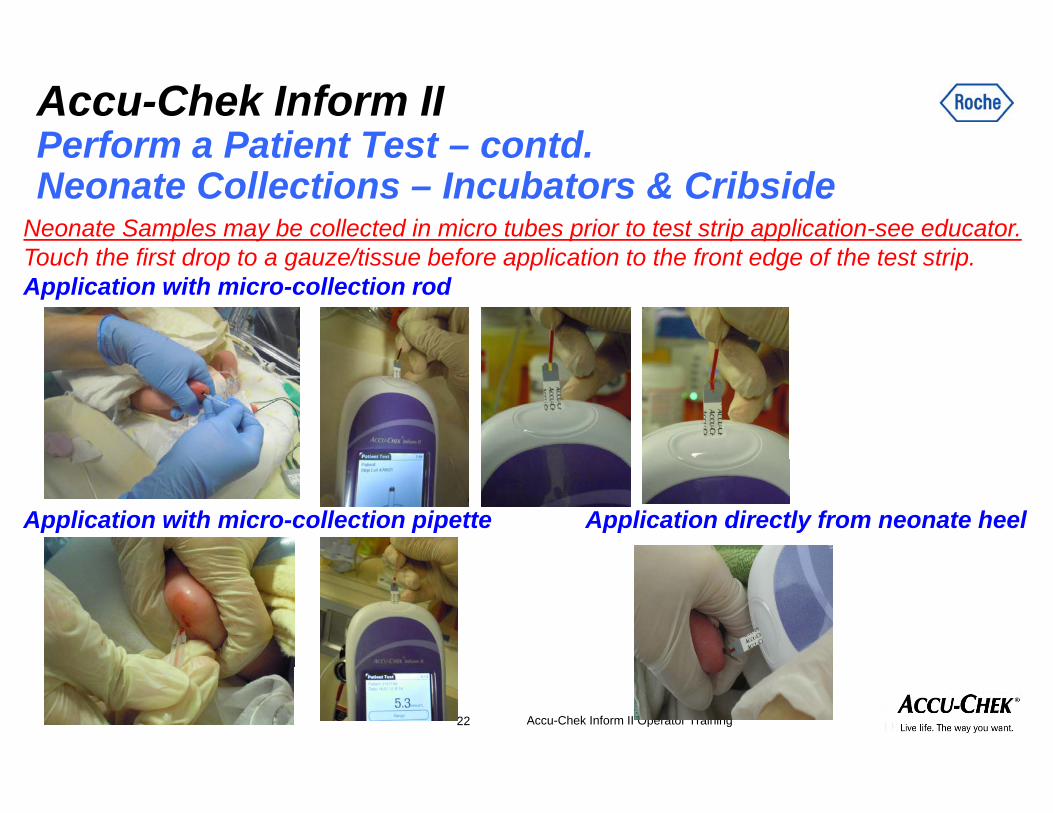
Accu-Chek Inform IIPerform a Patient Test – contdPerform a Patient Test – contd.Neonate Collections – Incubators & Cribside
Neonate Samples may be collected in micro tubes prior to test strip application-see educator.T h th fi t d t /ti b f li ti t th f t d f th t t t iTouch the first drop to a gauze/tissue before application to the front edge of the test strip.Application with micro-collection rod
Application with micro-collection pipette Application directly from neonate heel
Accu-Chek Inform II Operator Training22
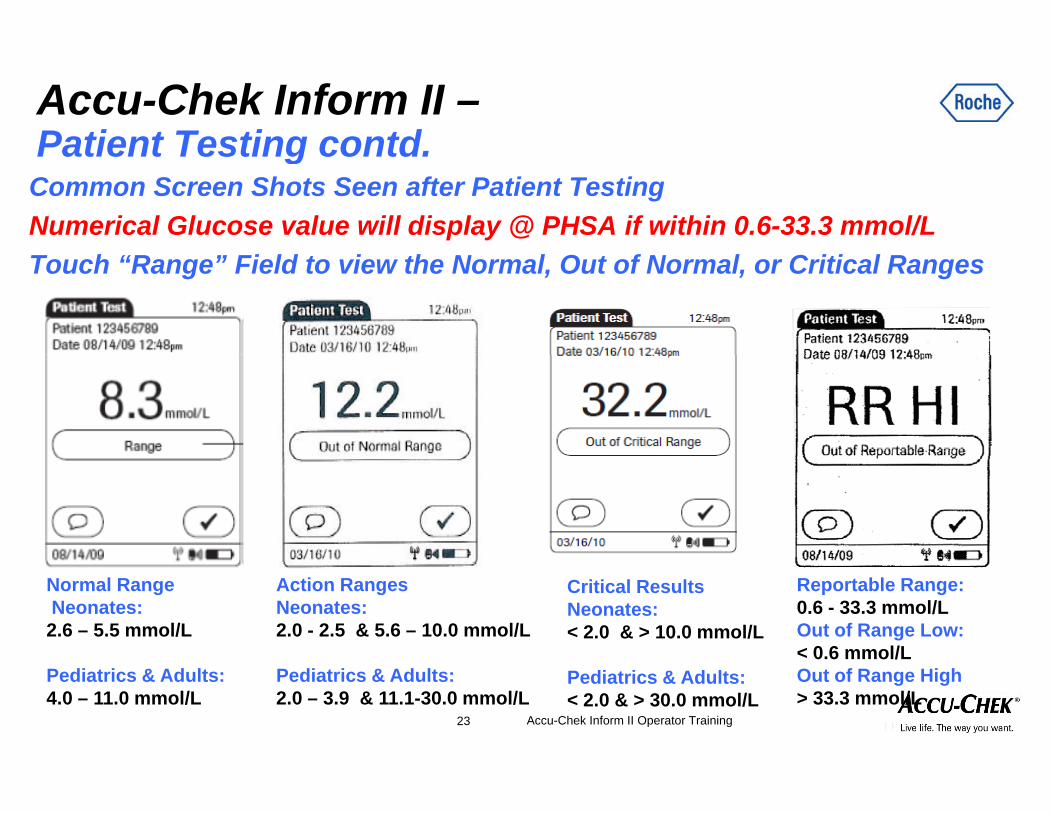
Accu-Chek Inform II –Patient Testing contdPatient Testing contd.
Common Screen Shots Seen after Patient TestingNumerical Glucose value will display @ PHSA if within 0.6-33.3 mmol/LTouch “Range” Field to view the Normal, Out of Normal, or Critical Ranges
Critical Results Neonates:< 2.0 & > 10.0 mmol/L
Reportable Range:0.6 - 33.3 mmol/LOut of Range Low:< 0.6 mmol/L
Normal RangeNeonates:2.6 – 5.5 mmol/L
Action RangesNeonates:2.0 - 2.5 & 5.6 – 10.0 mmol/L
Accu-Chek Inform II Operator Training
Pediatrics & Adults:< 2.0 & > 30.0 mmol/L
Out of Range High> 33.3 mmol/L
Pediatrics & Adults:4.0 – 11.0 mmol/L
Pediatrics & Adults:2.0 – 3.9 & 11.1-30.0 mmol/L
23

Accu-Chek Inform II Perform a Patient Test contdPerform a Patient Test contd.
7. Touch “Range” Field to view the Reference, Action, or Critical Results g , ,Ranges.
Note: A comment is required if result is out of range or there is an error code.
Touch to return to the Main Menu and accept the patient test result.
OR Touch symbol in lower left corner of screen if Comment required.
Pre-programmed comments will appearPre-programmed comments will appear.Up to 3 comments can be selected.Touch in lower right to confirm selection. Then again to return.
Accu-Chek Inform II Operator Training
Note: Comments cannot be edited once Control Result Screen is exited.
24

Accu-Chek Inform II Results ReviewPatient or Quality ControlPatient or Quality ControlFrom main menu screen touch ‘Review Results’.
Stored test results are displayed in a sequential listStored test results are displayed in a sequential list.
Touch or to scroll up or down in the list. Results are grouped by date.
Accu-Chek Inform II Operator Training25

Accu-Chek Inform II Results ReviewPatient or Quality Control contdPatient or Quality Control contd.
•Touch an entry in list to display related details.
•Touch ‘Patient’ symbol to display results for a specific patient only.
Accu-Chek Inform II Operator Training26

Accu-Chek Inform IIT t St i Li it ti
• Galactose
Test Strip Limitations
Elevated Galactose can occur in neonates with inherited galactosemia (1 per 40,000 in BC).The first glucose value for neonates > 5 5 mmol/L is checkedThe first glucose value for neonates > 5.5 mmol/L is checked simultaneously with a lab glucose during the first 5 days of life. Collect a lab draw prior to next scheduled feed.
•Triglycerides – Interference of meter is > 20 mmol/L far beyond average values.
•Ascorbic Acid – Interference of meter is > 0.17 mmol/L ICU patients receiving high dose IV ascorbic acid as support
Accu-Chek Inform II Operator Training27
patients receiving high dose IV ascorbic acid as support.

Accu-Chek Inform II –On line educational material review, quiz, hands on training with a competency checklist will complete training requirements.q
Once the requirements are met your Operator ID’s are validated
Hands on Training – Nursing Educators or Leaders will provide a schedule of classes or roaming edu-quick times.
•Print name and ward on Sign in sheet.•Complete and sign the Competency Check List•Include Operator IDInclude Operator ID•Include PHSA location – ward or clinic area.•Include work email
Accu-Chek Inform II Operator Training28
Return Check List to Trainer for POCT records