popcorn maker with melting station - the … series popcorn maker with melting station for your...
TRANSCRIPT
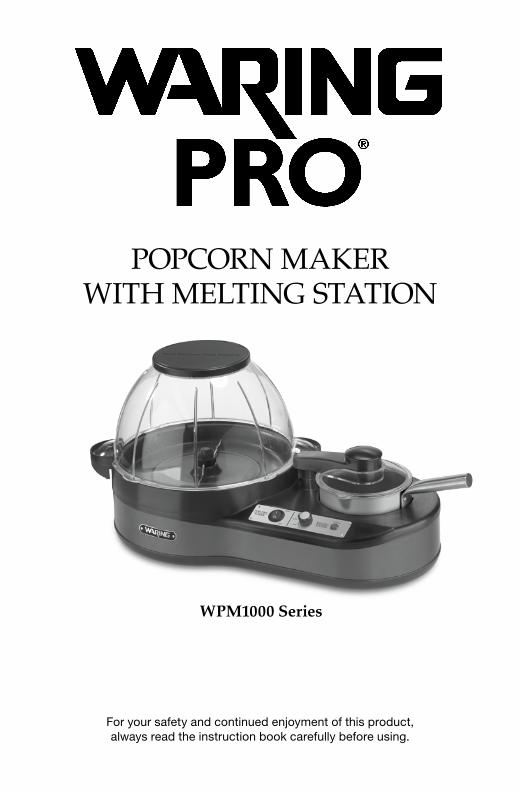
WPM1000 Series
POPCORN MAKER WITH MELTING STATION
For your safety and continued enjoyment of this product, always read the instruction book carefully before using.
2
Table of ContentsImportant Safeguards ................................................................ 2Special Cord Set Instructions ..................................................... 4Parts ............................................................................................ 5Popping Instructions ................................................................... 6Popping Chart ............................................................................. 6Popping Additional Batches of Popcorn ..................................... 7Melting Station Instructions ........................................................ 8Tips & Hints ................................................................................. 9Cleaning & Maintenance ........................................................... 10Recipes ..................................................................................... 12
IMPORTANT SAFEGUARDSWhen using any electrical appliance, basic safety precautions should always be taken, including the following:
1. READ ALL INSTRUCTIONS. 2. Always unplug this appliance when not in use. 3. Do not use this appliance for other than intended use. 4. The use of accessory attachments not recommended
by Waring may cause injuries. 5. KEEP OUT OF REACH OF CHILDREN. Close supervision
is necessary when this appliance is used by or near children.
6. Do not allow cord to hang over any edge where a child can reach it. Arrange cord to avoid pulling, tripping or entanglement.
7. Do not operate the appliance with a damaged cord or plug, or after the appliance malfunctions or has been damaged in any manner. Send the unit to the nearest authorized service center for examination, repair or adjustment. (ONLY technicians should open up the unit.)
8. EXTREME CAUTION must be used when emptying popcorn maker. Always empty popcorn over a countertop so that residual hot oil or water will not drip out. Always turn the popping plate away from you when turning. POPPING PLATE SURFACE IS VERY HOT.
3
9. Extreme caution must be used when moving an appliance containing hot oil or other hot liquids. Allow hot parts to cool down before handling or moving the appliance.
10. Do not attempt to repair this appliance yourself. 11. Do not attempt to pop corn kernels without using oil. 12. Do not touch hot surfaces. Always use handles or knobs
to operate. 13. This popcorn maker will not shut off automatically.
To avoid overheating, add oil and then corn kernels before plugging in and turning on the unit (as specified in the Popping Instructions on page 6).
14. Do not use this appliance or any parts on the stovetop, under the broiler, in the freezer, or in the oven.
15. Do not use this appliance outdoors.
16. To protect against electric shock, do not immerse cord, plug or other electrical parts in water or other liquids.
17. Turn both switches to OFF position before disconnecting power plug from the wall outlet.
18. After popping OR melting, unplug cord from wall outlet.
19. Never leave appliance unattended when it is plugged into an outlet.
20. Keep the cord away from hot parts of the appliance and hot surfaces during operation.
21. Do not clean using any abrasive material.
22. Never force any part or gear into position.
23. Do not operate popcorn maker without popcorn kernels, oil, popping pan and bowl.
24. Do not operate the melting station without ingredients.
25. ALL PARTS ARE NOT DISHWASHER SAFE. See Cleaning & Maintenance for instructions.
26. Unit should be in the OFF position when the popping pan is removed.
27. Do not operate your appliance in an appliance garage or under a wall cabinet. When storing in an appliance garage, always unplug the unit from the electrical outlet. Not doing so could create a risk of fire, especially if the appliance touches the walls of the garage or the door touches the unit as it closes.
4
28. Unplug from outlet when not in use and before cleaning. Allow to cool before putting on or taking off parts, and before cleaning the appliance.
29. Do not place on or near a hot gas or electric burner, or in a heated oven.
30. Do not let cord hang over edge of table or counter, or touch hot surfaces.
31. The melting station is not a fondue pot or deep fryer and is not intended for use with oil.
32. Do not operate melting station for more than 10 consecutive minutes.
SAVE THESE INSTRUCTIONS FOR HOUSEHOLD USE ONLY
SPECIAL CORD SET INSTRUCTIONSThis appliance is for 120 volts only and should not be used with a converter.
This appliance has a polarized plug (one blade is wider than the other). To reduce the risk of electric shock, this plug will fit in a polarized outlet only one way. If the plug does not fit fully in the outlet, reverse the plug. If it still does not fit, contact a qualified electrician. Do not modify the plug in any way.
1. A short power supply cord is provided to reduce the risk of becoming entangled in or tripping over a long cord.
2. Extension cords may be used if care is exercised in their use.
3. If an extension cord is used:
A. The marked electrical rating of the extension cord should be at least as great as the electrical rating of the appliance.
B. The longer cord should be arranged so that it will not drape over the countertop or tabletop where it can be pulled on by children or tripped over unintentionally.
5
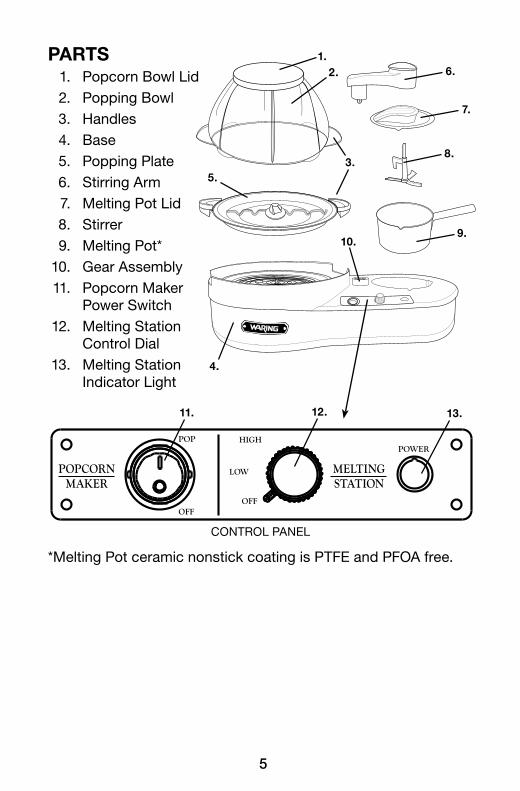
PARTS 1. Popcorn Bowl Lid 2. Popping Bowl 3. Handles 4. Base 5. Popping Plate 6. Stirring Arm 7. Melting Pot Lid 8. Stirrer 9. Melting Pot* 10. Gear Assembly 11. Popcorn Maker Power Switch 12. Melting Station Control Dial 13. Melting Station Indicator Light
1.2.
3.
4.
5.
6.
7.
8.
9.10.
CONTROL PANEL
11. 12. 13.
POWER
POPCORNMAKER
MELTINGSTATION
OFF
POP
LOW
HIGH
OFF
* Melting Pot ceramic nonstick coating is PTFE and PFOA free.
6
BEFORE FIRST USEAfter unpacking the Popcorn Maker with Melting Station, follow the Cleaning & Maintenance instructions on page 10.
POPPING INSTRUCTIONS 1. Place the popcorn maker and melting station base on a
flat, dry surface. 2. Place popping plate on base. 3. It is not necessary to preheat the unit. 4. Pour the recommended amount of oil onto the popping
plate (do not add more oil than recommended and do not substitute with butter, margarine, shortening or lard, as these will burn and cause excessive smoking).
NOTE: You may use either vegetable, peanut or canola oil for popping.
5. Add the recommended amount of corn kernels spread out evenly across the popping plate.
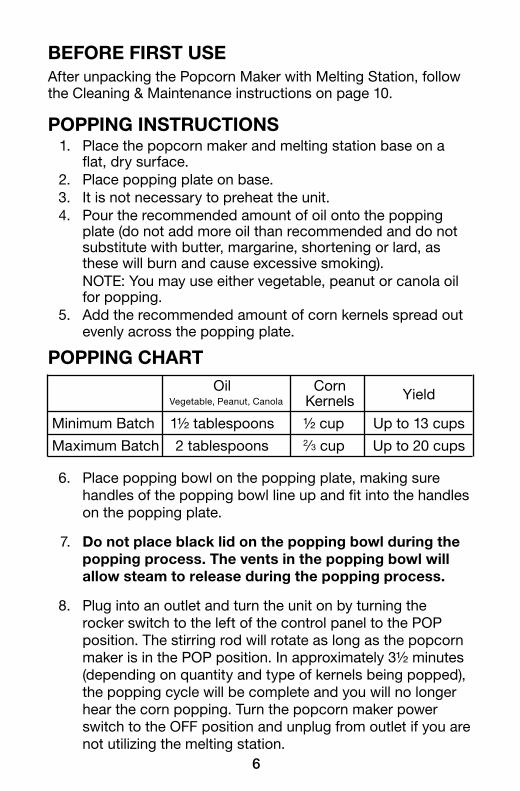
POPPING CHART Oil Corn Vegetable, Peanut, Canola Kernels Yield
Minimum Batch 1½ tablespoons ½ cup Up to 13 cups
Maximum Batch 2 tablespoons 2∕3 cup Up to 20 cups
6. Place popping bowl on the popping plate, making sure handles of the popping bowl line up and fit into the handles on the popping plate.
7. Do not place black lid on the popping bowl during the popping process. The vents in the popping bowl will allow steam to release during the popping process.
8. Plug into an outlet and turn the unit on by turning the rocker switch to the left of the control panel to the POP position. The stirring rod will rotate as long as the popcorn maker is in the POP position. In approximately 3½ minutes (depending on quantity and type of kernels being popped), the popping cycle will be complete and you will no longer hear the corn popping. Turn the popcorn maker power switch to the OFF position and unplug from outlet if you are not utilizing the melting station.
7
NOTE: Do not shake the popcorn maker during the popping cycle.
9. Immediately after the popping cycle is complete, firmly place the black lid on the top of the popping bowl, grasp handles and flip the popping bowl along with the popping plate upside down, turning the popping plate away from you (the popping bowl becomes a serving bowl).
WARNING: POPPING PLATE IS HOT. TOUCH ONLY DESIGNATED HANDLES.
NOTE: Do not leave popped corn on the popping plate after the popping cycle has been completed, as the popping plate surface is still hot and could cause the popped corn to overcook or burn.
10. Popcorn is now ready to serve. Top with salt or follow the melting pot instructions to top popcorn with butter, chocolate, caramel and more!
11. For consecutive batches, wipe popping plate with clean cloth after each batch.
POPPING ADDITIONAL BATCHES OF POPCORN If you plan to pop multiple batches, transfer popcorn from popping bowl to another serving bowl. Follow steps 1 through 11.
CAUTION: Popping plate is extremely hot after multiple batches.
8
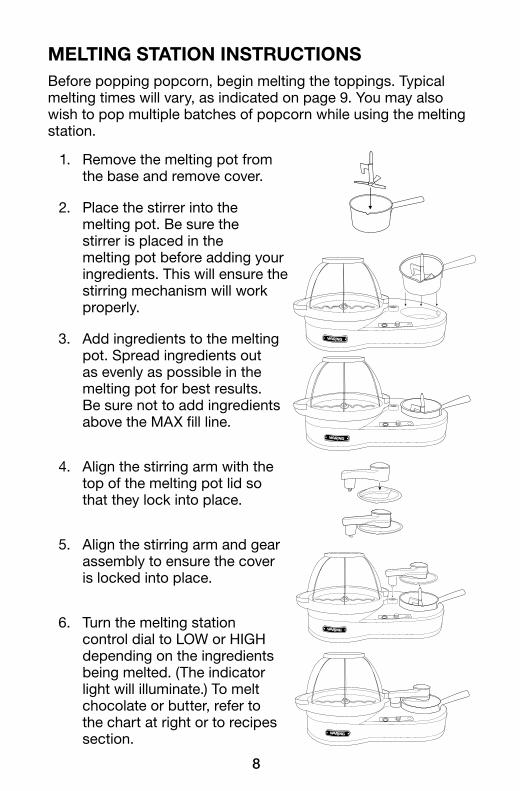
MELTING STATION INSTRUCTIONSBefore popping popcorn, begin melting the toppings. Typical melting times will vary, as indicated on page 9. You may also wish to pop multiple batches of popcorn while using the melting station.
1. Remove the melting pot from the base and remove cover.
2. Place the stirrer into the melting pot. Be sure the stirrer is placed in the melting pot before adding your ingredients. This will ensure the stirring mechanism will work properly.
3. Add ingredients to the melting pot. Spread ingredients out as evenly as possible in the melting pot for best results. Be sure not to add ingredients above the MAX fill line.
4. Align the stirring arm with the top of the melting pot lid so that they lock into place.
5. Align the stirring arm and gear assembly to ensure the cover is locked into place.
6. Turn the melting station control dial to LOW or HIGH depending on the ingredients being melted. (The indicator light will illuminate.) To melt chocolate or butter, refer to the chart at right or to recipes section.
9
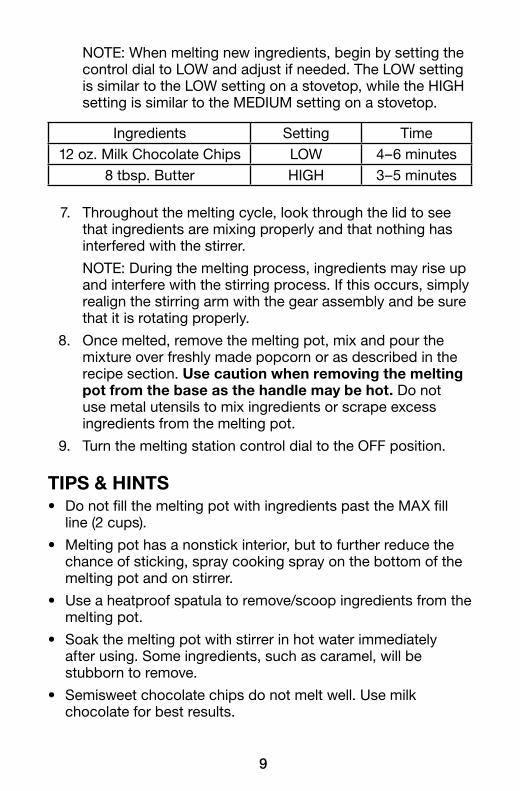
NOTE: When melting new ingredients, begin by setting the control dial to LOW and adjust if needed. The LOW setting is similar to the LOW setting on a stovetop, while the HIGH setting is similar to the MEDIUM setting on a stovetop.
Ingredients Setting Time12 oz. Milk Chocolate Chips LOW 4–6 minutes
8 tbsp. Butter HIGH 3–5 minutes
7. Throughout the melting cycle, look through the lid to see that ingredients are mixing properly and that nothing has interfered with the stirrer.
NOTE: During the melting process, ingredients may rise up and interfere with the stirring process. If this occurs, simply realign the stirring arm with the gear assembly and be sure that it is rotating properly.
8. Once melted, remove the melting pot, mix and pour the mixture over freshly made popcorn or as described in the recipe section. Use caution when removing the melting pot from the base as the handle may be hot. Do not use metal utensils to mix ingredients or scrape excess ingredients from the melting pot.
9. Turn the melting station control dial to the OFF position.
TIPS & HINTS• Do not fill the melting pot with ingredients past the MAX fill
line (2 cups).
• Melting pot has a nonstick interior, but to further reduce the chance of sticking, spray cooking spray on the bottom of the melting pot and on stirrer.
• Use a heatproof spatula to remove/scoop ingredients from the melting pot.
• Soak the melting pot with stirrer in hot water immediately after using. Some ingredients, such as caramel, will be stubborn to remove.
• Semisweet chocolate chips do not melt well. Use milk chocolate for best results.
10
• Spread ingredients out as evenly as possible in the melting pot for faster results.
• During the melting process, ingredients may rise up and interfere with the stirring process. If this occurs, simply realign the stirring mechanism and be sure that it is rotating properly.
• While ingredients are melting, minimize the amount of times that you open the lid, as this will interfere with the stirring mechanism and ingredients may get dislodged.
CLEANING & MAINTENANCEBefore performing any cleaning and maintenance operations, be sure that the popcorn maker and melting station controls are both in the OFF position and that the unit is unplugged and cooled. Clean the popcorn maker and melting pot after every use.
NOTE: Do NOT place parts in an automatic dishwasher. Melting pot is NOT dishwasher safe.
To Clean the Popcorn Maker 1. Wash popping bowl, popping plate and lid in warm, soapy
water with a dishcloth or sponge. Rinse thoroughly and dry. Do not use scouring pads or abrasive powder on lid as these could cause scratching.
2. Clean surface of base with a damp, soapy dishcloth, sponge or nylon scouring pad such as Scotch Brite Cookware Scrub ’n Sponge®. Wipe surface with a damp cloth and dry. Do not use abrasive scouring pads or powders on nonstick finish, as scratching may occur. After consistent use, the nonstick finish may discolor. To remove discoloration, use a soft cloth saturated with lemon juice or vinegar and rub over finish. Then wipe the finish with a damp cloth and dry.
11
To Clean the Melting StationDue to the type of ingredients being melted in the melting pot, it is best to empty and clean the melting pot immediately after each melting cycle is complete. Clean all parts by hand as described below. Melting pot and parts are not dishwasher safe.
1. Remove the melting pot from the base and remove the lid. CAUTION: Melting pot and base are hot.
2. Remove the stirring arm from the lid by releasing the tabs on the inside of the lid. Press down and out on the tabs and gently pull the lid off. Wipe the stirring arm clean with a damp, non-abrasive cloth. Do not submerge the stirring arm in water.
3. Wash the lid, stirrer and melting pot in the sink with warm soapy water, being sure to remove all residue. Do not use metal utensils to scrape the inside of the melting pot.
NOTE: If you find that ingredients are sticking to the bottom of the melting pot, you can fill the melting pot with hot water up to the max fill line. Replace the melting pot into the base, along with the stirrer, lid and stirring arm properly assembled. Turn the control knob to HIGH and run for approximately 3–5 minutes. This will help to release any stubborn ingredients. After this, repeat steps 1–3 above.
4. If any ingredients drip into the base of the melting pot, use a damp, non-abrasive cloth to wipe clean. CAUTION: HOT.
5. Be sure that all parts are thoroughly dry before reassembling.
Any other servicing should be performed by an Authorized Service Representative.
12
RECIPESAll recipes are meant to be eaten with 18 cups of popcorn.
Simply Chocolate Popcorn 12 oz. (1 bag) milk chocolate chips (or chocolate made
for melting) With the stirrer in place, pour milk chocolate chips into the melting pot.
Align the cover with the gear in the housing and the center of the stirrer. Set the control dial to LOW and melt for approximately 5½ minutes. Mix the chocolate and drizzle over popcorn.
It is best to clean the melting pot immediately after melting cycle is complete. To clean the melting pot and stirrer, refer to the Cleaning & Maintenance instructions on page 11.
Simply Butter Popcorn 8 tablespoons butter (for quicker results use
room-temperature butter)With the stirrer in place, cut butter into ¼-inch pieces and evenly place them in the melting pot. Align the cover with the gear in the housing and the center of the stirrer. Set the control dial to HIGH until the butter is melted. This will take approximately 5 minutes. Turn the control dial to the OFF position. Remove the cover and mix until you have a smooth consistency. Drizzle melted butter over popcorn.
It is best to clean the melting pot immediately after melting cycle is complete. To clean the melting pot and stirrer, refer to the Cleaning & Maintenance instructions on page 11.
13
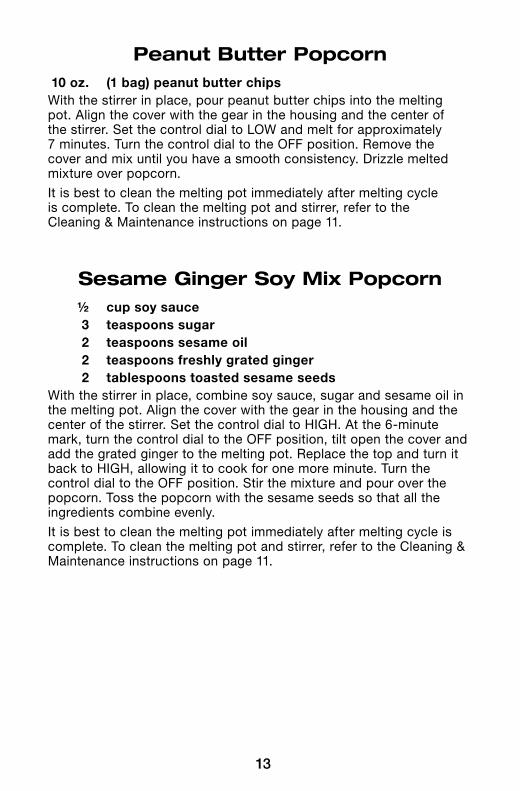
Peanut Butter Popcorn 10 oz. (1 bag) peanut butter chipsWith the stirrer in place, pour peanut butter chips into the melting pot. Align the cover with the gear in the housing and the center of the stirrer. Set the control dial to LOW and melt for approximately 7 minutes. Turn the control dial to the OFF position. Remove the cover and mix until you have a smooth consistency. Drizzle melted mixture over popcorn.
It is best to clean the melting pot immediately after melting cycle is complete. To clean the melting pot and stirrer, refer to the Cleaning & Maintenance instructions on page 11.
Sesame Ginger Soy Mix Popcorn ½ cup soy sauce 3 teaspoons sugar 2 teaspoons sesame oil 2 teaspoons freshly grated ginger 2 tablespoons toasted sesame seedsWith the stirrer in place, combine soy sauce, sugar and sesame oil in the melting pot. Align the cover with the gear in the housing and the center of the stirrer. Set the control dial to HIGH. At the 6-minute mark, turn the control dial to the OFF position, tilt open the cover and add the grated ginger to the melting pot. Replace the top and turn it back to HIGH, allowing it to cook for one more minute. Turn the control dial to the OFF position. Stir the mixture and pour over the popcorn. Toss the popcorn with the sesame seeds so that all the ingredients combine evenly.
It is best to clean the melting pot immediately after melting cycle is complete. To clean the melting pot and stirrer, refer to the Cleaning & Maintenance instructions on page 11.
14
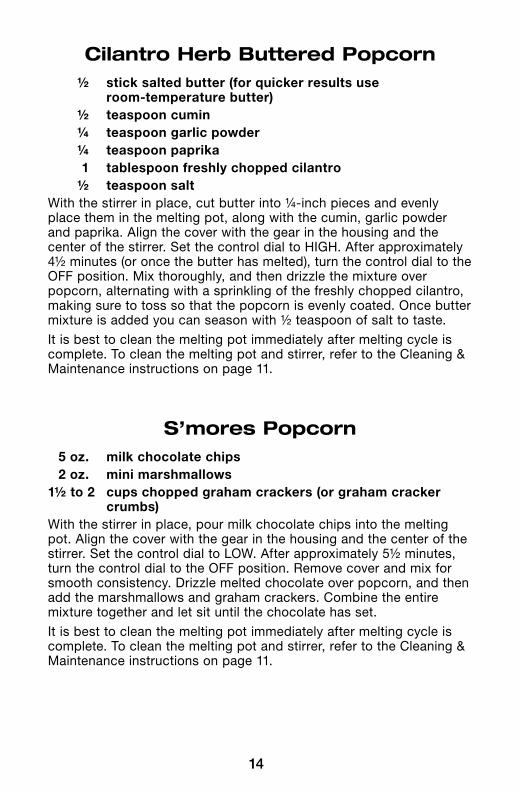
Cilantro Herb Buttered Popcorn ½ stick salted butter (for quicker results use
room-temperature butter) ½ teaspoon cumin ¼ teaspoon garlic powder ¼ teaspoon paprika 1 tablespoon freshly chopped cilantro ½ teaspoon saltWith the stirrer in place, cut butter into ¼-inch pieces and evenly place them in the melting pot, along with the cumin, garlic powder and paprika. Align the cover with the gear in the housing and the center of the stirrer. Set the control dial to HIGH. After approximately 4½ minutes (or once the butter has melted), turn the control dial to the OFF position. Mix thoroughly, and then drizzle the mixture over popcorn, alternating with a sprinkling of the freshly chopped cilantro, making sure to toss so that the popcorn is evenly coated. Once butter mixture is added you can season with ½ teaspoon of salt to taste.
It is best to clean the melting pot immediately after melting cycle is complete. To clean the melting pot and stirrer, refer to the Cleaning & Maintenance instructions on page 11.
S’mores Popcorn 5 oz. milk chocolate chips 2 oz. mini marshmallows 1½ to 2 cups chopped graham crackers (or graham cracker
crumbs)With the stirrer in place, pour milk chocolate chips into the melting pot. Align the cover with the gear in the housing and the center of the stirrer. Set the control dial to LOW. After approximately 5½ minutes, turn the control dial to the OFF position. Remove cover and mix for smooth consistency. Drizzle melted chocolate over popcorn, and then add the marshmallows and graham crackers. Combine the entire mixture together and let sit until the chocolate has set.
It is best to clean the melting pot immediately after melting cycle is complete. To clean the melting pot and stirrer, refer to the Cleaning & Maintenance instructions on page 11.
15
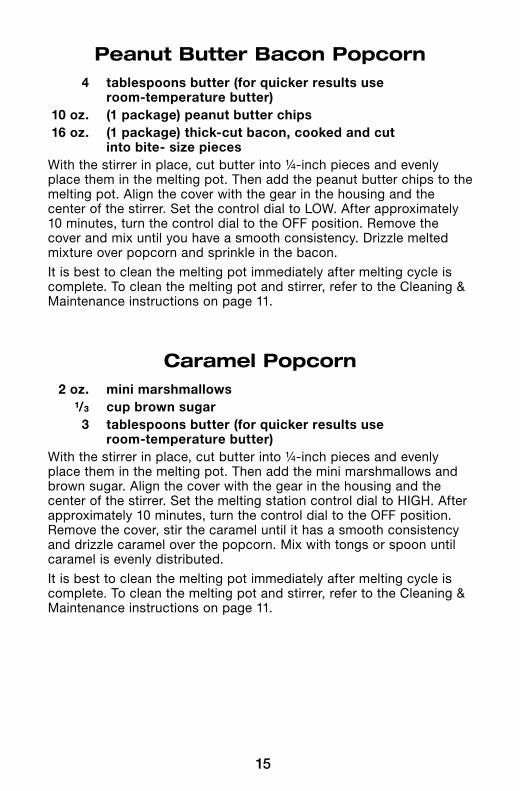
Peanut Butter Bacon Popcorn 4 tablespoons butter (for quicker results use
room-temperature butter) 10 oz. (1 package) peanut butter chips 16 oz. (1 package) thick-cut bacon, cooked and cut
into bite- size piecesWith the stirrer in place, cut butter into ¼-inch pieces and evenly place them in the melting pot. Then add the peanut butter chips to the melting pot. Align the cover with the gear in the housing and the center of the stirrer. Set the control dial to LOW. After approximately 10 minutes, turn the control dial to the OFF position. Remove the cover and mix until you have a smooth consistency. Drizzle melted mixture over popcorn and sprinkle in the bacon.
It is best to clean the melting pot immediately after melting cycle is complete. To clean the melting pot and stirrer, refer to the Cleaning & Maintenance instructions on page 11.
Caramel Popcorn 2 oz. mini marshmallows ¹/³ cup brown sugar 3 tablespoons butter (for quicker results use
room-temperature butter)With the stirrer in place, cut butter into ¼-inch pieces and evenly place them in the melting pot. Then add the mini marshmallows and brown sugar. Align the cover with the gear in the housing and the center of the stirrer. Set the melting station control dial to HIGH. After approximately 10 minutes, turn the control dial to the OFF position. Remove the cover, stir the caramel until it has a smooth consistency and drizzle caramel over the popcorn. Mix with tongs or spoon until caramel is evenly distributed.
It is best to clean the melting pot immediately after melting cycle is complete. To clean the melting pot and stirrer, refer to the Cleaning & Maintenance instructions on page 11.
16
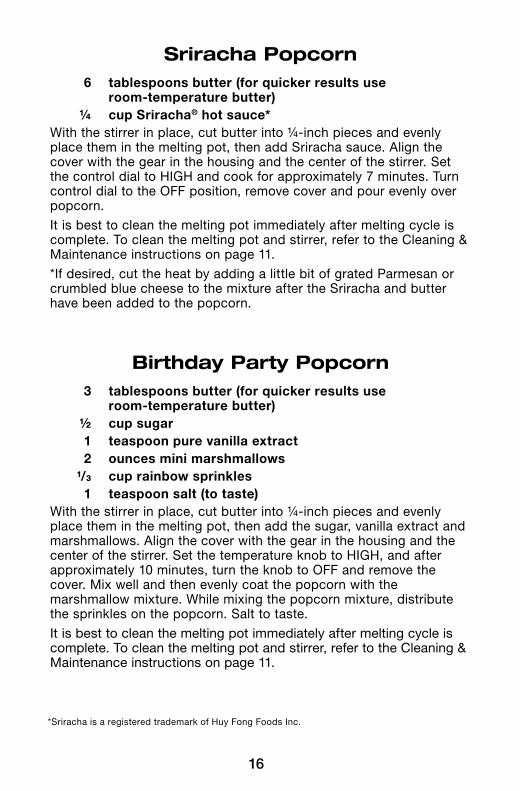
*Sriracha is a registered trademark of Huy Fong Foods Inc.
Sriracha Popcorn 6 tablespoons butter (for quicker results use
room-temperature butter) ¼ cup Sriracha® hot sauce*With the stirrer in place, cut butter into ¼-inch pieces and evenly place them in the melting pot, then add Sriracha sauce. Align the cover with the gear in the housing and the center of the stirrer. Set the control dial to HIGH and cook for approximately 7 minutes. Turn control dial to the OFF position, remove cover and pour evenly over popcorn.
It is best to clean the melting pot immediately after melting cycle is complete. To clean the melting pot and stirrer, refer to the Cleaning & Maintenance instructions on page 11.
*If desired, cut the heat by adding a little bit of grated Parmesan or crumbled blue cheese to the mixture after the Sriracha and butter have been added to the popcorn.
Birthday Party Popcorn 3 tablespoons butter (for quicker results use
room-temperature butter) ½ cup sugar 1 teaspoon pure vanilla extract 2 ounces mini marshmallows ¹/³ cup rainbow sprinkles 1 teaspoon salt (to taste)With the stirrer in place, cut butter into ¼-inch pieces and evenly place them in the melting pot, then add the sugar, vanilla extract and marshmallows. Align the cover with the gear in the housing and the center of the stirrer. Set the temperature knob to HIGH, and after approximately 10 minutes, turn the knob to OFF and remove the cover. Mix well and then evenly coat the popcorn with the marshmallow mixture. While mixing the popcorn mixture, distribute the sprinkles on the popcorn. Salt to taste.
It is best to clean the melting pot immediately after melting cycle is complete. To clean the melting pot and stirrer, refer to the Cleaning & Maintenance instructions on page 11.

17
NOTES_______________________________________________________________________________________
_______________________________________________________________________________________
_______________________________________________________________________________________
_______________________________________________________________________________________
_______________________________________________________________________________________
_______________________________________________________________________________________
_______________________________________________________________________________________
_______________________________________________________________________________________
_______________________________________________________________________________________
_______________________________________________________________________________________
_______________________________________________________________________________________
_______________________________________________________________________________________
_______________________________________________________________________________________
_______________________________________________________________________________________
_______________________________________________________________________________________
_______________________________________________________________________________________
_______________________________________________________________________________________
_______________________________________________________________________________________
_______________________________________________________________________________________
_______________________________________________________________________________________
_______________________________________________________________________________________
_______________________________________________________________________________________
_______________________________________________________________________________________
_______________________________________________________________________________________
_______________________________________________________________________________________
_______________________________________________________________________________________
_______________________________________________________________________________________
_______________________________________________________________________________________
_______________________________________________________________________________________
_______________________________________________________________________________________
_______________________________________________________________________________________
_______________________________________________________________________________________
_______________________________________________________________________________________

18
NOTES_______________________________________________________________________________________
_______________________________________________________________________________________
_______________________________________________________________________________________
_______________________________________________________________________________________
_______________________________________________________________________________________
_______________________________________________________________________________________
_______________________________________________________________________________________
_______________________________________________________________________________________
_______________________________________________________________________________________
_______________________________________________________________________________________
_______________________________________________________________________________________
_______________________________________________________________________________________
_______________________________________________________________________________________
_______________________________________________________________________________________
_______________________________________________________________________________________
_______________________________________________________________________________________
_______________________________________________________________________________________
_______________________________________________________________________________________
_______________________________________________________________________________________
_______________________________________________________________________________________
_______________________________________________________________________________________
_______________________________________________________________________________________
_______________________________________________________________________________________
_______________________________________________________________________________________
_______________________________________________________________________________________
_______________________________________________________________________________________
_______________________________________________________________________________________
_______________________________________________________________________________________
_______________________________________________________________________________________
_______________________________________________________________________________________
_______________________________________________________________________________________
_______________________________________________________________________________________
_______________________________________________________________________________________

19
NOTES_______________________________________________________________________________________
_______________________________________________________________________________________
_______________________________________________________________________________________
_______________________________________________________________________________________
_______________________________________________________________________________________
_______________________________________________________________________________________
_______________________________________________________________________________________
_______________________________________________________________________________________
_______________________________________________________________________________________
_______________________________________________________________________________________
_______________________________________________________________________________________
_______________________________________________________________________________________
_______________________________________________________________________________________
_______________________________________________________________________________________
_______________________________________________________________________________________
_______________________________________________________________________________________
_______________________________________________________________________________________
_______________________________________________________________________________________
_______________________________________________________________________________________
_______________________________________________________________________________________
_______________________________________________________________________________________
_______________________________________________________________________________________
_______________________________________________________________________________________
_______________________________________________________________________________________
_______________________________________________________________________________________
_______________________________________________________________________________________
_______________________________________________________________________________________
_______________________________________________________________________________________
_______________________________________________________________________________________
_______________________________________________________________________________________
_______________________________________________________________________________________
_______________________________________________________________________________________
_______________________________________________________________________________________

Trademarks or service marks of third parties used herein are the trademarks or service marks of their respective owners.
©2014 Waring Consumer Products 150 Milford Road
East Windsor, NJ 08520
www.waringpro.com
Printed in ChinaWPM1000 Series IB
14WR002761
IB-12415