praat scripting - uni-stuttgart.de · praat scripting antje schweitzer, nov. 2013, revised sep....
TRANSCRIPT
Praat Scripting
Antje Schweitzer, Nov. 2013, revised Sep. 2014, June 2015, Nov. 2015, Dec. 2015, Nov [email protected]
Version: December 8, 2016 - 10:14
Intended users
This tutorial was originally intended for students of Computational Lingustics atthe Institute of Natural Language Processing (IMS) at Stuttgart University. It provides only a very short introduction to praat in general, and then explains step by step how to write scripts for specific tasks in phonetic analysis.
These scripts work on all platforms, however they are written in a way that allows to run them in a Linux terminal eventually, without the praat GUI, i.e. on the command line. In such a setting, it's convenient to have scripts that deal with one sound file at a time, because processing many files with the same script can be done via the shell instead of in the script. Anyway, for Windows or Mac, one would probably want to extend the scripts a bit and include functions to run the scripts on several files at once.
Disclaimer
This tutorial and the scripts in it were written with care. It is however entirely possible that there are some errors or incorrect claims that I have overlooked. You are welcome to use these scripts in whichever way you like, but I do not take responsibility if they produce incorrect results – this tutorial is meant as a guide to get to know some typical tasks in phonetics research and how they can be solved using praat scripts. The solutions provided are meant to be easy solutions to accompany the tutorial, and I do not claim that they are perfectly accomplished, or applicable to arbitrary kinds of data.
If you find any errors, you are welcome to report them – any feedback is highly appreciated.
Data
The data that this tutorial refers to are available in the IMS file system, at
/mount/studenten/praat-scripting/data/
or as an archive at

http://www.ims.uni-stuttgart.de/phonetik/helps/praat-scripting/data.zip
All solutions mentioned below can be found at
/mount/studenten/praat-scripting/scripts/
in the IMS file system, or as an archive at
http://www.ims.uni-stuttgart.de/phonetik/helps/praat-scripting/scripts.zip
(but try to write the scripts yourself first, the solutions are only for emergencies!!!)
So much for the technical details – have fun with the tutorial now!
Getting started
Starting Praat
To start praat, invoke a Terminal, go to the folder in which you unpacked the data for this tutorial, for instance by typing:
cd /path/to/where/I/unpacked/the/archive/
At IMS, you can do
cd /mount/studenten/praat-scripting/
Then start praat by typing in your Terminal
praat &
Two windows come up – close the picture window, we do not need it yet.
Read in a sound, and the accompanying praat label file: Select
Open -> Read from file...
from the praat Objects menu. Load data/selbstmordverein_04.mp3 for data/selbstmordverein_04.TextGrid (they can be selected together for loading).
You now have a sound object (loaded from the .mp3 file) and a TextGrid object (loaded from the .TextGrid file).
Very first script
Select
Praat -> New praat script
from the Objects menu.
This opens a Script editor window. You're supposed to write your code into thiswindow. Select
Edit -> Paste history
from the Script editor's window.
This inserts the code corresponding to the commands you did into the editor.

You can see that the commands in your script correspond exactly to the way they were named in the menu.
Eliminate the line that opened the new script, and save:
File -> Save as...
Name the script open.example.praat and save it somewhere where you are allowed to write (somewhere below your home directory). Now close and restart praat.
praat &
Select
Praat -> Open praat script...
from the Objects menu, select the saved script. This opens the script in the editor window. Select
Run
from the menu.
This will load the two files into the objects menu. Tadaa!
A copy of this script (open.example.praat) can be found in the data directory (seefirst page of this tutorial). In this copy, I have removed the full path name, because the path in my system is different from the path where you will have it stored. As a consequence, this copy of the script will only work if you have it in the directory in which you have your data. You will see later why that is. Anyway, it's the reason why I put it in the data directory instead of into the scripts directory with the other scripts.
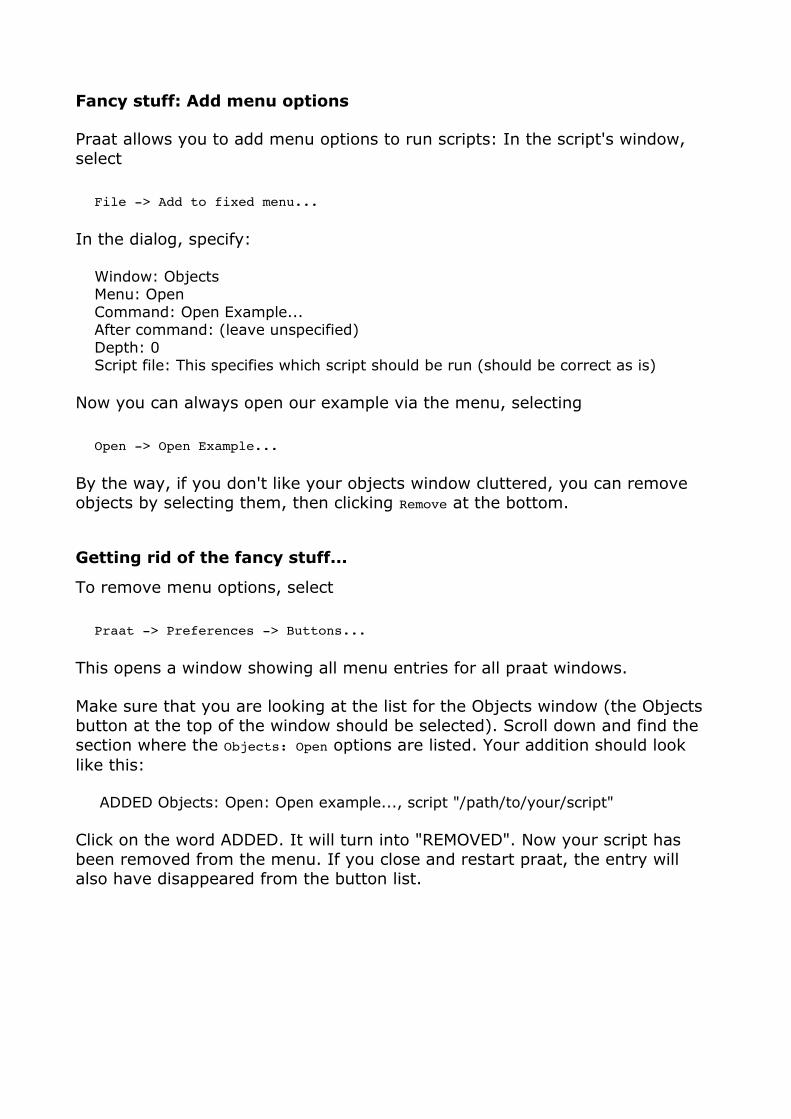
Fancy stuff: Add menu options
Praat allows you to add menu options to run scripts: In the script's window, select
File -> Add to fixed menu...
In the dialog, specify:
Window: ObjectsMenu: OpenCommand: Open Example...After command: (leave unspecified)Depth: 0Script file: This specifies which script should be run (should be correct as is)
Now you can always open our example via the menu, selecting
Open -> Open Example...
By the way, if you don't like your objects window cluttered, you can remove objects by selecting them, then clicking Remove at the bottom.
Getting rid of the fancy stuff...
To remove menu options, select
Praat -> Preferences -> Buttons...
This opens a window showing all menu entries for all praat windows.
Make sure that you are looking at the list for the Objects window (the Objects button at the top of the window should be selected). Scroll down and find the section where the Objects: Open options are listed. Your addition should look like this:
ADDED Objects: Open: Open example..., script "/path/to/your/script"
Click on the word ADDED. It will turn into "REMOVED". Now your script has been removed from the menu. If you close and restart praat, the entry will also have disappeared from the button list.

Getting familiar with sound objects and the TextGrid Editor
Load our examples. In the Objects window, select TextGrid and sound together. Click View & Edit. This opens TextGrid and Sound together in a TextGrid Editor window.
You will see the waveform at the top, and the labels at the bottom.
Depending on your settings, you will additionally see a spectrogram, a pitch contour, formants, an intensity curve, and pulses (corresponding to glottal cycles). These can be switched on or off using the menu commands
Spectrum -> Show SpectrogramPitch -> Show PitchIntensity -> Show intensityFormant -> Show FormantsPulses -> Show Pulses.
(These menus also contain options to change the settings for these analyses.)
Some of these analyses require plotting of very many data points, which takes time, so Praat usually does not show all analyses if you are looking at a larger stretch of sound. It informs you if it's omitting analyses (the message is "To see the analyses, zoom in to at most X seconds). If you see this message, zoom in to a portion shorter than X seconds.
The default for X is 10.0 seconds. You can adjust this by selecting
View -> Show Analyses...
from the menu. The X is the value for Longest analysis (s). You can also decidehere which analyses should be shown, instead of going to each menu option separately.
You can select parts of the sound by left-clicking and dragging the mouse. Buttons for zooming are at the bottom of the window ("sel" is for zoom to selection, the other names should be self-explaining). You can play parts of thesound by clicking on the bars at the bottom. Clicking on the top bar plays the part of the visible sound corresponding to the length of the bar, the middle baris for playing the contents of the window, and the bottom bar for playing the whole file.
The selection determines how the top bar is split: for instance, clicking into a label selects the part corresponding to this label, and splits the bar so that the middle corresponds to the selected label.

Note: SoundEditor and TextGridEditor windows in scripting
SoundEditor: the window you get when you open a sound alone.
TextGridEditor: the window you get when you open a textGrid with or without a sound object.
In praat scripts, we can in general use all commands available in the Object, Picture, and SoundEditor or TextGridEditor windows.
However, the commands from the Sound/TextGridEditor are not available if you want to run the scripts from the command line (i.e. from your terminal).
Since we ultimately want to run scripts mostly from the terminal, we will focus on writing scripts for the Object and Picture windows.

Functions in the Object window
You can manipulate, convert, analyze objects using the buttons in the object window. Depending on the object(s) selected, the available functions (buttons)differ.
An example: Sound duration
Select the Sound object. Click
Query - Query time domain -> Get total duration
This gives the total duration in an Info window.
Select the TextGrid object. We can query its total duration just as we did for the sound: click
Query - Query time domain -> Get total duration
But now, we can also query the number of intervals in its tiers: click
Query - Query interval tier -> Get number of intervals...
and confirm the suggested settings. This gives the number of intervals in the first interval tier within the TextGrid.
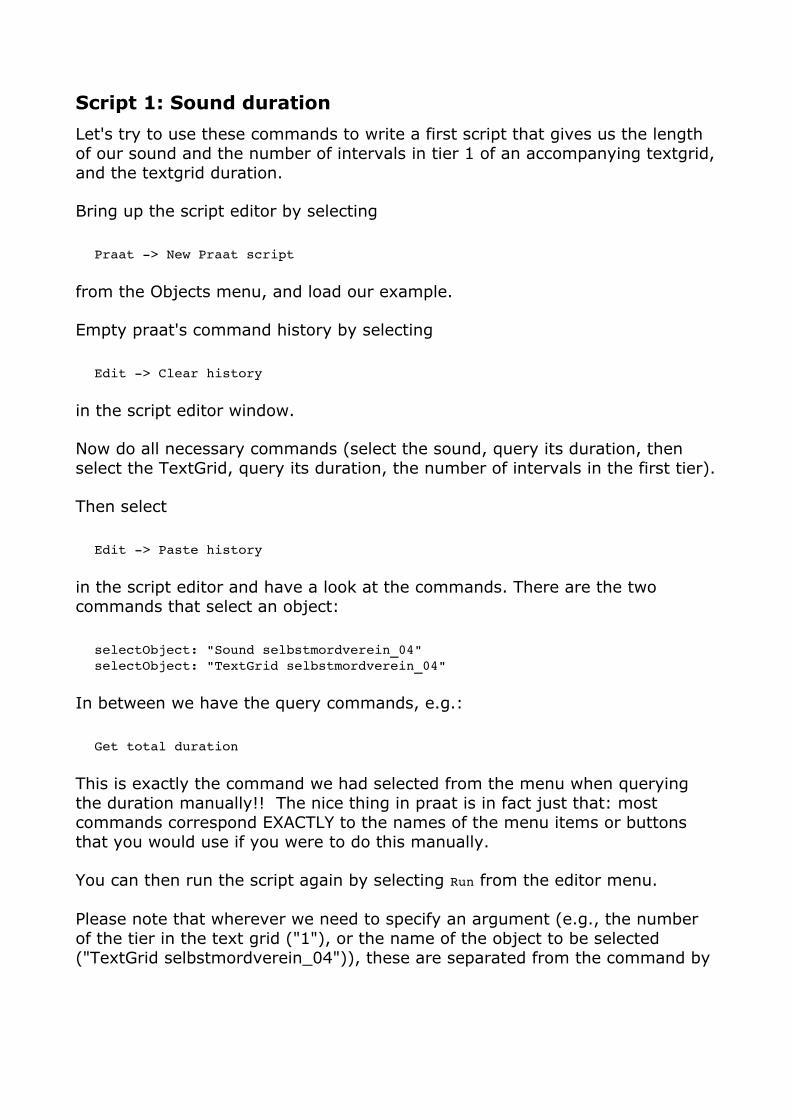
Script 1: Sound duration
Let's try to use these commands to write a first script that gives us the length of our sound and the number of intervals in tier 1 of an accompanying textgrid,and the textgrid duration.
Bring up the script editor by selecting
Praat -> New Praat script
from the Objects menu, and load our example.
Empty praat's command history by selecting
Edit -> Clear history
in the script editor window.
Now do all necessary commands (select the sound, query its duration, then select the TextGrid, query its duration, the number of intervals in the first tier).
Then select
Edit -> Paste history
in the script editor and have a look at the commands. There are the two commands that select an object:
selectObject: "Sound selbstmordverein_04"selectObject: "TextGrid selbstmordverein_04"
In between we have the query commands, e.g.:
Get total duration
This is exactly the command we had selected from the menu when querying the duration manually!! The nice thing in praat is in fact just that: most commands correspond EXACTLY to the names of the menu items or buttons that you would use if you were to do this manually.
You can then run the script again by selecting Run from the editor menu.
Please note that wherever we need to specify an argument (e.g., the number of the tier in the text grid ("1"), or the name of the object to be selected ("TextGrid selbstmordverein_04")), these are separated from the command by
a colon, and separated from other arguments by commas1.
One problem with this script is that we can only see the result of the last queryin the Info window, because each new query clears the info window before printing.
To fix this, we need to use an explicit print command, and give the result as anargument to the command. To this end, we have to capture the values in variables, e.g.:
duration = Get total duration
Then give them as arguments to appendInfoLine or writeInfoLine, again using the colon to separate the arguments from the command itself, e.g.:
writeInfoLine: "Sound duration ", durationappendInfoLine: "Sound duration ", duration
The difference is that writeInfoLine clears the info window before printing, just as the queries themselves did before, while appendInfoLine shows the behavior we need here: it just appends the last output to the output of previous commands, leaving existing content untouched.
Adapt the script so the output looks like this:
Sound duration 90.94419501133787TextGrid duration 90.90116664431869Number of intervals 206
If you use writeInfoLine instead of appendInfoLine for outputting the first result, the info window will contain only the results of this first script.
(Final script at this point: duration.and.intervals.praat – this one will work if you have a Sound object selbstmordverein_04 and a TextGrid selbstmordverein_04 in your object list, which you should, after having workedthrough the above examples, or after running the previous script.)
Note that the textgrid and sound duration do not necessarily have to be identical. In this particular case this is because the textgrid has been generated from an ESPS label file, and its length is exactly the label time of thelast label in the ESPS label file. If the textgrid had been created by praat's
1 Older praat scripts may have a different syntax, and they are still functional. One older version of the praat scripting language uses a notation where there is no colon, and arguments are separated by blanks. In this case, praat will assume that the string before the first blank is the command, and following arguments are separated by more blanks. This has the disadvantage that string arguments containing blanks must be enclosed in quotes. A slightly newer, but by now also outdated version uses a notation where arguments are written in brackets and separated by commas. Even though both notations are outdated, the commands should still work, so if you come across older praat scripts that contain code that you want to re-use, you should usually be able to re-use it as-is.

annotation function, it would have had exactly the length of the sound.
Debugging
The command
Run -> Run selection
is a feature very useful for debugging: select parts of the script, then have praat execute just these lines.
Take care that the lines are "stand-alone": for instance, if they use functions that are only available for specific objects, make sure that you have a suitable object selected. If the commands access variables, then the part of the code you execute must assign them some value.
Verify: selecting the sound object, then executing the line
number = Get number of intervals: 1
gives you an error. Similarly, executing the line
appendInfoLine: "TextGrid duration ", duration
alone will give an error because the variable duration is not defined. For debugging, you could either insert a line before the appendInfoLine command, for instance duration = 10, and execute both lines (for instance if you just want to check that your appendInfoLine command works in principle), or make sure that you include all lines starting from the point where this variable was assigned a value.
Strings
So far we have only queried and written numerical values. If we deal with strings, we need to change the notation a bit: Let's include the name of the tier in the output of our script.
To query the name of the tier, do
Query -> Get tier name...
Confirm the suggested settings.
Integrate the command into your script using the history. Capture the output in a variable, and try to write its value to the info window.

What we want is output like this ("words" happens to be the name of tier 1):
Sound duration 90.94419501133787TextGrid duration 90.90116664431869Number of intervals in words tier: 206
However, if you try something like:
name = Get tier name: 1intervals = Get number of intervals: 1appendInfoLine: "Number of intervals in ", name, " tier: ", intervals
then this is what you get:
Number of intervals in --undefined-- tier: 206
The reason is you have to distinguish variables that contain strings from other variables by appending a $, i.e., we need to call the variable to contain the tiername
name$
instead of just "name". Otherwise, we get only the first numerical value in the output of the command into our variable. In this case, there is no numerical value in the output, so we get –undefined--. Strange, I know. But this can be useful if you want to use only a numerical value returned by a command, but not the rest. For instance, the command "Get intensity (dB)" - yes, that's the command, including "(dB)"!!!! - for our sound will produce this output in the info window:
68.7555114904066 dB
Now we can either get the whole string including dB by assigning the result of this to a variable that ends in $, or just the number by saving the result in a variable without the $.
Let's go on and fix the script by adding a $ to the name variable:
name$ = Get tier name: 1appendInfoLine: "Number of intervals in ", name$, " tier: ", intervals
A solution for our final script is in duration.tiername.intervals.praat.
Again, this one will work if you have a Sound object selbstmordverein_04 and a TextGrid selbstmordverein_04 in your object list, which you should, after having worked through the above examples, or after running the open.example.praat script.

Script 2: Labels and durations
Let's try to write a first useful script; one that, for a selected textgrid object, outputs all labels in the second label tier, and their duration.
To prepare, find commands to give you:
- the label of a specific interval in tier 2 of a textgrid- the start time of a label interval in tier 2- the end time of a label interval in tier 2
Get the corresponding commands into a new script using the history of the script editor.
These commands will have to be executed in a loop for all intervals in tier number 2. So we will have to iterate, by way of a "for" loop, from interval 1 in tier 2 to the last interval in tier 2. Let's first do this for intervals 1 to 10. The syntax is:
for i from 1 to 10 command1 command2 ...endfor
(Note: Yes, it is not necessary to increment the i, praat automatically increments by one in for loops. In "while" and "repeat until" loops, which we will not discuss here, you would have to take care of that yourself.)
Now, include the commands that you pasted into the script into the loop: in each iteration, output the label of interval i in tier 2, and its duration. Beware that the label name needs a string variable. You need to calculate the duration from the start and end times.
When this works, query the number of intervals in tier 2 first, and iterate from 1 to the number of intervals.
To empty the info window before outputting the labels, add a line
writeInfo: ""
before entering the loop.
Solution at this point: get.durations.praat. BTW, tier 2 in this particular example contains syllables; so we are dealing with syllable durations here.
Arguments to scripts
So far, our script accessed objects that were already opened in the object window. If we want to run a script from the terminal, we need a way to tell thescript which files it should open to create these objects. The way this is done inpraat is to create a dialog (a "form") in which we prompt the user for the required information. Then, we can either run the script from within praat, as before, and have the user enter the information, or we can run the script from the terminal, and in this case, all fields that the user would fill in in the dialog are arguments to the script.
This is how we create a dialog, for instance:
form Title of the dialog window sentence a_short_string integer some_integer_variableendform
This will create two variables, one string variable with the name a_short_string$, and a numerical variable called some_integer_variable.
Try inserting these lines into your script.
Run the script via "Run": the dialog box will have the title as in your form (in recent versions of praat, you cannot use "Run selection" for forms, it will complain about no text being selected). Using "Run", you should see that in the two variable names, the _ characters have been replaced by spaces. This is a way to give the user nice looking descriptions of what to enter. A common trickis to shorten these variables right after the form, for instance:
shortstring$ = a_very_long_but_more_informative_string_that_I_really_do_not_want_to_write_too_often$
Important: variables in praat are always in lower case. However, in forms, they can be capitalized for aesthetic reasons, BUT in the following code, they must be referred to in the lower-case variant!!!!! So even if you call the variable
sentence A_short_string
it will be known to praat as a_short_string$. Check it out.
Ok, let's adapt our script so it prompts the user for the file name (and keep that in a string) and the number of the tier to extract durations for (an integer).
To make our life easier, we can specify default values for the variables in a
form. These will be suggested in the dialog box when you run the script from within praat (but these defaults do not affect the behavior on the shell, here you still have to give all arguments!). In this particular case, we could specify that the default should be to open selbstmordverein_04.TextGrid. Then we don't have to enter this name every time we try to run the script:
form Get durations sentence Filename_of_textgrid /path/to/selbstmordverein_04.TextGrid integer Tier_number 2endform
Adapt the path to the file to point to the directory where you saved the textgrid.
Once we have the file name, we can use the "Read from file:" command on this string. And we get the labels and durations from the variable specified in the form instead of always using tier number 2. Adapt the commands accordingly (don't forget the commands in the loop!)
One pitfall here is that the user has to enter the file name including the path, i.e. something like
/path/to/your/directory/selbstmordverein_04.TextGrid
which is tedious, especially as we don't have filename completion in praat's dialog box (praat is not even aware that it's dealing with a file name, it's just astring for praat!).
One way out is the predefined variable shellDirectory$. This variable is always available in praat, and it keeps the name of the directory from which praat wasstarted. If we issue a praat script in a terminal, shellDirectory$ is just the directory that the script is run in! So instead of giving the full path, we can use the current directory and then append the filename (which may include a path relative to the current directory).
To do this, we simplify and have the user just specify the filename without the path, then we create a string for the actual filename including the path by concatenating the shellDirectory$ and the file name entered by the user using the + operator:
form Get durations sentence Filename_of_textgrid selbstmordverein_04.TextGrid integer Tier_number 2endformfilename$ = shellDirectory$ + "/" + filename_of_textgrid$
If you have started praat from the directory where you have stored your textgrid file, then filename$ should now contain the correct path. If not, you

need to specify the relative path from the directory where you started to the textgrid (e.g., "data/selbstmordverein_04.TextGrid", if you have it in a subdirectory called data, or "../selbstmordverein_04.TextGrid", if you have it onedirectory higher).
We then open the file in our script, which will create a textgrid object, by giving the string as an argument instead of the full file name as before.
Read from file: filename$
Now the only thing left to do is to select this textgrid (actually, this is not vital because as we've just loaded it, it will already be selected. However, let's select it explicitly anyway, it might come in handy in later scripts). So far we have done this by the name of the object in the object window. However, we are not sure what praat might call the object. So instead, we save the ID of the object in a variable, in this way:
textgrid = Read from file: filename$
So now we have the ID of the object created by the "Read from file command" in the variable textgrid. And we can now select it using
selectObject: textgrid
One last thing to make this script a little nicer: there's a function to determine the number of places after the decimal point when outputting numbers, and that function is called fixed$. Funnily, here you still need the older notation with arguments in brackets (to my knowledge). Anyway, it takes a numerical variable as an argument, as well as the number of decimal places. Let's restrictthis to three decimal places, i.e. output
fixed$(duration,3)
instead of just duration.
Here's the result so far: get.durations.shell.praat
Running scripts from the terminal
Once this is working in praat, we can try it from the terminal:
praat --run get.durations.shell.praat selbstmordverein_04.TextGrid 1
The first option, --run, is a new option that you should add for all praat versions starting from 6.0. It was introduced to unify the way you start praat

from the command line on Windows, Mac OS, and Linux2. Next, we have the name of the script, and finally, the two arguments to this script, the filename and the tier number. The above command works if you have the praat script and the example in the current directory. But the way we have written the script, with the shellDirectory$ variable, we can also call it from anywhere, given we give the paths to the script and to the example (however, the path tothe example must be a relative path - why is explained below):
praat --run ../scripts/get.durations.shell.praat selbstmordverein_04.TextGrid1
or
praat ~/bin/get.durations.shell.praat data/selbstmordverein_04.TextGrid 1
works, given you have put the script either into a scripts directory one directory up, and the data in the current directory (in the first example), or thescript into your ~/bin and the data in a data directory below your current directory (in the latter example). It will create the file name by concatenating your current directory with the path to the example, which creates a valid (but possibly redundant) path, for instance
/where/you/started/the/script/data/selbstmordverein_04.TextGrid
Why do we need a relative path? That's because only then appending the current directory and the path will give a valid path, otherwise we get something like
/where/you/started/the/script//where/you/stored/the/data/selbstmordverein_04.TextGrid
which does not work (note the two subsequent // characters in the path). We will later have a look at how to check if a path is absolute or relative, and handle both cases.
Making it executable (not mandatory!)
Finally, you can make your script executable by adding the following line as a header, as in other shell scripts:
#!/usr/bin/praat --run
and making it executable in your Terminal:
2 Note that if you just call praat with the script and its arguments, as above, this should still work on Linux even without the --run option. This is different when integrating the call into a pipe or redirecting the output to some file. However starting from version 6.0.08, the --run option can be left out even in a pipe or in a redirect, except if you redirect both standard out and standard error (Boersma, p.c., Dec. 4, 2015).
chmod +x get.durations.shell.praat
Note that this first line need to state where praat is installed in your system – if it is not in /usr/bin/ in your case, find out where it is by typing:
which praat
in the Terminal. This shows you where praat is in your case, and you can adaptaccordingly.
Then you can run it like this:
./get.durations.shell.praat relative/path/to/selbstmordverein_04.TextGrid 1
if it's in your current directory or
../scripts/get.durations.shell.praat selbstmordverein_04.TextGrid 1
if you have it in the scripts folder next to your data directory or
~/bla/get.durations.shell.praat relative/path/selbstmordverein_04.TextGrid 1
if it's in the bla directory in your home directory. If you put it in a place where the Terminal looks for executables (for instance your ~/bin directory), you don't even need to specify the place where it is located:
get.durations.shell.praat relative/path/selbstmordverein_04.TextGrid 1
The benefit of making it executable is just this last variant: calling the script now is more convenient because you don't have to know where you actually have put your script, it's enough to know that it is at some place where your Terminal looks for it (the directories listed in your $PATH variable). In the other cases, the benefit is tiny and probably not worth it: it only saves you typing "praat" in front of the call to your script.
if - then - else
So let's try to integrate this last bit - let's check whether the file name was given with an absolute or a relative path. We need an if statement. The syntax is as follows:
if sometest command1 command2else command3 command4endif

And to check whether your file name starts with a "/", use this function:
startsWith (filename_of_textgrid$, "/")
This gives true in case we have an absolute path. In this case, we'll just take the path as specified, in all other cases, we want to concatenate the current directory and the relative path, as before. Try to integrate this into your script.
As we are getting more and more complex scripts, I recommend commenting the code using the # character for comments. Anything following # in a line will be ignored.
The solution is in get.durations.shell.anypath.praat
Doing phonetics!!!
Script 3: Pitch properties
Let's start with a Pitch analysis. Create a Pitch Object using
To Pitch...
for a sound (it's in the Analyze periodicity - menu). Let's accept the suggestedrange of between 75 and 600 Hz for this first look.
You can look at the pitch object using View & Edit. You can see lots of numbers there, they are candidates for the fundamental frequency (I assume), and the thick pink dots are obviously the candidates that were estimated to be the most likely ones.
You can query pitch values at certain times, as well as statistics over the pitch contour, using the Query - buttons when the pitch object is selected in the Objects window.
Let's try and find the pitch range in our example - let's check the F0 min and max first. They are in the Query - collection of buttons.
The two values we get seem suspicious - 76 Hz is very low for pitch in a femalevoice, and 530 quite high (but possible). Check the contour in the usual sound editor window (select the sound object, and click View & Edit). Make sure that you take the same suggested range for calculating the pitch in the sound editor window: go to
Pitch -> Pitch Settings
and set the parameters accordingly. You can see that the values below 180, 190 Hz seem to be outliers or errors rather than true F0 values (zoom into the signal, then you can see that many of the suspicious values occur very suddenly, resulting in jumps). Let's say we don't expect this speaker to produce anything below 180. Same for the higher values. Find a reasonable cut-off (500 Hz can happen in emotional speech but is unlikely in read news). Change the parameters in your Pitch settings accordingly.
Once you have the pitch object, you can find out the pitch range. There are some commands that can serve this purpose; for instance you can query its maximum and its minimum value. Note that you can specify a time interval forwhich you want these values, so you can query min and max values for specificintervals, or for the whole object. I recommend to query the 0.95 and 0.05 percentiles for estimating the pitch range instead of querying the max and min. The 0.05 percentile is the pitch value for which we find that 5% of the
values in the range we queried are below that value – this is like discarding th 5% lowes values. Similarly, the 0.95 percentile is the value where 95% of all values are below that value – so again, we ignore the 5% that are higher. This is reasonable because min and max are often outliers. Using the percentiles reduces noise. Note that praat uses the more general term "quantiles" instead of "percentiles" when you look for the command.
We know that pitch range is usually specified phrase by phrase, and changes inthe course of an utterance. We should therefore retrieve the pitch range for all phrases in our utterance separately. Unfortunately, we don't know where phrases end. But we could approximate them by finding small gaps of silence in the speech signal, and assuming that these are phrase breaks. Then we could estimate the pitch range for each phrase separately.
Finding silence intervals
Let's first see how to mark silence and speech intervals. Select the Sound, and create an Intensity object using the
To intensity...
button (adjust the pitch minimum!). Subtracting the mean is advisable in case the microphone adds a constant (i.e. you observe somewhat constant non-zeroamplitudes in silent parts of the speech signal). In this example, this is not the case, so you need not subtract the mean, but it does not hurt either.
For the intensity object, do
To TextGrid (silences)...
You have to specify a silence threshold, i.e. the intensity difference to expect indB between silent and speech parts; the minimum silent interval duration is the minimum duration of silences (if this value is too small, you may wrongly interpret stop closures as pauses); and the minimum sounding interval duration is how long the intervals with higher intensity must be at least in order to be interpreted as speech. Finally, you can choose the labels you want in your TextGrid for the silence and the non-silence parts. Optimal values for this specific example in my opinion: -35 dB, 0.1 s, 0.05 s.
At this point, we have everything needed to write a script that finds an approximation of the phrases in the utterance, and estimates the pitch range phrase by phrase. Let's output some kind of table: first a header like this: a line containing "start end base top". Then, in the loop, we output one line for every phrase: its start and end time, and its pitch baseline and topline. Load a sound, generate a silent/sounding textgrid, then iterate over its intervals and output the desired parameters for every non-silent interval. In the loop you willhave to select the textgrid if you want to access start and end time and check
the label name, but select the pitch object to get the pitch values. This only works if you have saved the IDs for both objects in variables.
We can use get.durations.shell.anypath.praat script and adapt, filling in commands from the history where necessary.
As we are testing, we can see that the object window gets somewhat cluttered.In this script, we finally tidy up after ourselves: the function removeObject takes one or more objects as arguments. So this could be used to remove our objects at the end of the script:
removeObject: textgrid, intensity, pitch, sound
Of course, if we run scripts from the terminal only, this may be pointless...
Final result: get.pitch.range.praat
For people who have some knowledge in shell commands: You can run this script on many files at once, e.g. for all .wav files in the data directory:
foreach f ( data/*.wav )praat --run get.pitch.range.praat $f >! $f:r.pitch.range.tableend
This creates a corresponding .pitch.range.table file fore every .wav file.

Script 4: Formants
You will notice when we plot formant measurements later on that there are many, many outliers. This is to some extent because automatic methods for formant detection will sometimes produce errors. Also, we used data for which phone (and word) annotations were generated completely automatically. Somelabels are just wrong. And finally, we will blindly measure in the temporal middle of the vowels, because we have only phone boundaries available. In addition to the audio book data that we used so far, I have provided data from a radio news story, for which the annotations were at least partly manually corrected (dlf950728.1030.n1.wav and the corresponding phones). They should work better than the data above (but still not perfect!).
Load the .wav file into a Sound object.
To analyze the formants in it, create a Formant object first. The command
To Formant (burg)...
is the default, and it is available via the
Analyse spectrum -
button for sound objects. Please note that in the most recent versions of praat,there are three new buttons labeled "To Formant (interval)" available when a sound object is selected, however, these new functions are not documented anywhere in the manual, and there is no explanation on the parameter settings. We will therefore stick to the more established "To Formant (burg)" command mentioned above. If you click the button, a dialog box comes up. There is some information on suggested parameters if you click on the Help button. Praat suggests 5500 as maximal frequency for female voices (and 5000 for male ones), and to restrict the number of formants in that range to 5.
Once you have a formant object, you can query formant values at arbitrary times. So in principle, we could do this completely analogously to the pitch range script: calculate formants for the complete sound object, then query it atthe times where we have vowels in the label tier. However, there is a function that allows us to only calculate formant objects for those parts of the speech signal that we are interested in, so we need not calculate formants for the complete sound, which can take long for long sounds: Select the sound object and the textgrid together. The
Extract -
button hosts a function that is very useful:

Extract intervals where...
This function cuts those parts from the signal where the labels meet some criterion. We can specify a tier and then specify this criterion. It even allows specifying a regular expression for that! Praat then extracts the sound corresponding to the intervals meeting the criterion, and we end up with a list of several newly created (and already selected) sound objects in the object window. Try extracting only intervals for some vowels (e.g. a:, e:, i:, o:, u:), but keep the times because we need them.
The next step is to create a formant object for only these selected sounds. The To Formant...(burg) function works even if several objects are selected, and we end up with several newly created formant objects, again all of them selected.
Now, before we integrate this into a script, let's assume the typical scenario that we want to do this for a larger database consisting of many audio files with corresponding ESPS label files. This means our script should be able to deal with ESPS label files instead of textgrids. This is no problem, praat has a function to read in ESPS label files; it is hidden in the Open menu, in a submenu called
Read from special tier file...
We now need to decide whether we are dealing with labels for intervals (an interval tier), or labels for point events (a text tier). In the case of phone label files, we are of course dealing with an interval tier. Load the example dlf950728.1030.n1.phones. This will create an object called IntervalTier. You can convert this to a textgrid using the function
To TextGrid...
OK. Load the get.durations.shell.anypath.praat script, and save it as get.formant.praat.
Clear your script editor history, then lets's start: open the sound, the corresponding phones label file, convert the label file into a textgrid, extract parts corresponding to all the labels that match some regular expression, convert them into formant objects, and paste all this below your old script, then insert the new commands in the appropriate places. (Note that the little check box from the Extract intervals where... dialog corresponds to a "yes" or "no" argument in the script command that indicates whether or not the box should be checked.)
Once you have that, adapt the dialog box to get the file names for the sound, the ESPS labelfile, and the regular expression from the user (we need a string variable for all of them, just as for the file names). To make testing easier, specify some useful default values.
Now we need a way to iterate over all the selected objects. One way to do this in praat is to get the IDs of all selected objects. The following piece of code is suggested on the praat website. It goes through the list of selected objects andgets each object's ID into an array called formant, so that they can be selectedagain later.
# get number of selected objectsn = numberOfSelected ()# save IDs of all selected objects in an array
for i to n # this gets the ID of the i-th selected object formant[i] = selected (i) endfor
No we can again iterate from i to n, select the corresponding formant object, and query F1, F2, and F3 at some point in time. I'd suggest to query the formants at the time point in the middle of sound segments. For determining the middle, we need to get the start time and end time, or start time and total duration. Let's again output a table, this time containing in each line the label, F1, F2, and F3.
Last thing to make this perfect: we can't determine the original label from the Formant objects anymore (we can just see in their names that they matched (a:|E:|i:|o:|u:), for instance. But we do have the labels if we query the textgrid's labels at sample times. To do this in our loop, we have to select the textgrid, then query the label.
Note: this will only work if you keep the original times when extracting the intervals from the sound files (so check "yes" in the corresponding dialog). Otherwise, the time in the Formant object will start at 0, and you cannot identifythe corresponding label interval in the textgrid using this time stamp.
Finally, in case you want to clean up properly, the command
plusObject
may be useful as it allows us to add more and more objects to the current selection. Thus we can iterate through all Formant objects and all Sound segments, adding them to the selection one by one. At the end, we delete everything in one step using the Remove command.
Solution: get.formants.praat
Shell experts: Do this for many files at once (note that this particular example assumes English phoneme labels in DARPA notation, but never mind):
echo "Vowel F1 F2 F3" >! formants.table
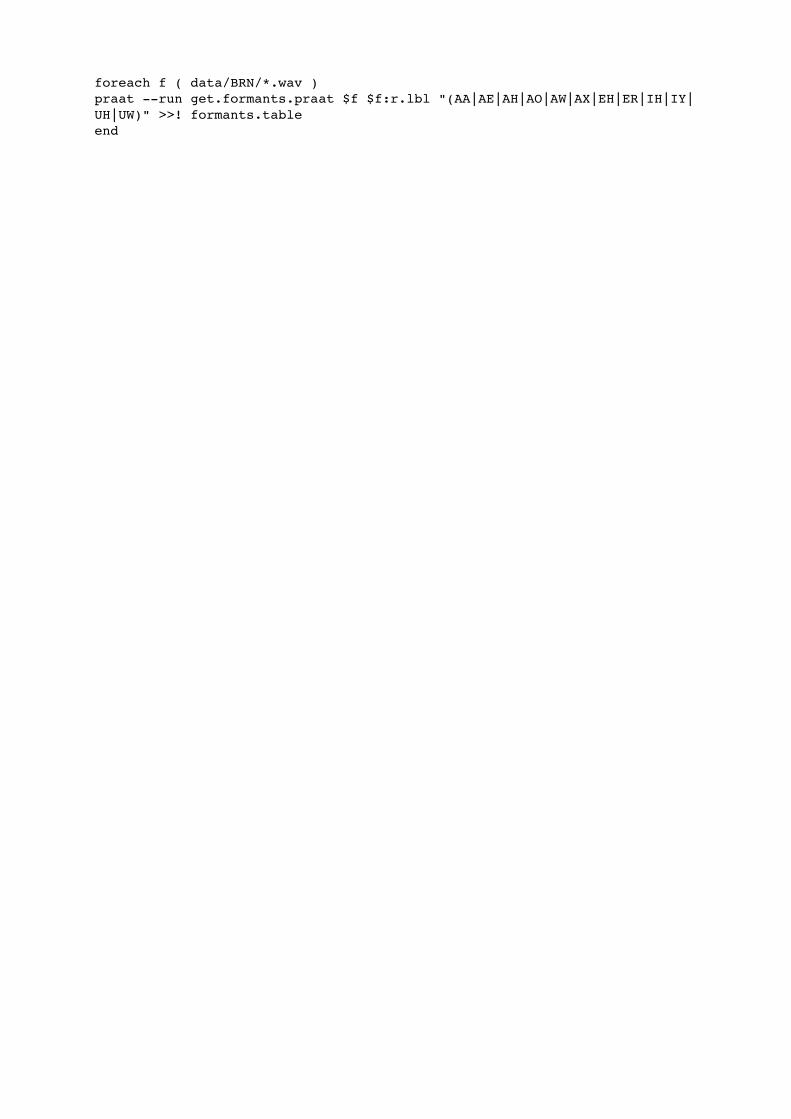
foreach f ( data/BRN/*.wav )praat --run get.formants.praat $f $f:r.lbl "(AA|AE|AH|AO|AW|AX|EH|ER|IH|IY|UH|UW)" >>! formants.tableend

Printing
Praat can produce very good graphics, and you should always prefer these to screenshots of the praat GUI!!
Let's first look at printing when working with praat in general, not necessarily when scripting. Since you most often want to print something you have been looking at in the textGrid editor, we'll write an editor script this time.
Look at selbstmordverein_04.wav together with its textgrid. Zoom in so you can see a part of 2 or 3 seconds.
In the TextEditor, you can either print specific analyses (i.e.,
Pitch -> Draw visible pitch contour...Pitch -> Draw visible pitch contour and TextGrid...Spectrum -> Paint visible spectrogram...
or the waveform
File -> Draw visible sound...File -> Draw visible sound and TextGrid...
In all cases, you get a dialog asking for some details: Whether you want to erase the part of the picture window where you will plot the new analyses (unchecking the box "Erase first" would allow you to plot several analyses on top of each other), whether the title of the window should be relatively "far" from the plot, "near" the plot, or whether there should be no title at all, whether you want the time points of the selected parts plotted, whether the corrsponding selection "hairs" (dotted lines at the times of the selection) should be plotted, and whether there should be a box around the plot, and the axes labeled ("Garnish").
The plot will then always appear in the region in the picture window that is indicated by the red shaded area (on Mac, it's blue). The diagram itself will go inside the region (in the white area), whereas the labels on the axes and the title will go within the shaded area. This allows you to plot several analyses side by side (or one below the other). Try to plot the waveform with the TextGrid at the top. Then below that, plot the pitch contour, without a title. To do this, select the region for the pitch contour before plotting. Then below that plot the spectrogram with the formants overlayed (print the spectrogram first, then the formants). Before plotting the formants, switch to the picture window,select
Pen -> blue
then plot the formants, but without title, labels, garnish.

You can also plot lines, circles, ellipses, ... into your plot. For plotting anyting in the margins of the selected region, use the Margin menu, for plotting anything inside the diagram area, select the World menu.
Let's try and plot a circle around the suspicious F0 values in the pitch contour. We need to know that the units for plotting these additions are in the domain of the last plot. The last plot was the spectrogram, so the plot area now rangesfrom 0 to 5000 on the y axis, as we plotted the spectrogram that way. The time range on the x axis is still ok because we plotted the same time span in the spectrogram as in the F0 plot.
So to make things easier, let's plot the pitch contour once again into the area where we plotted it before (we plot the contour on top of the old one). Leave the region for the pitch contour selected, and use
World -> Draw circle
You need to specify the coordinates of the circle center. You can get them fromthe TextGrid editor: the x value is the time where we have the suspicious values, and the y value should be the corresponding F0 value. We also need tospecify the radius - select a region that would be appropriate for the radius andread off its length at the top of the TextGrid editor. This works if you leave the selection unchanged after plotting the pitch contour.
As plotting may involve quite a number of steps, it makes sense to make this into a script. Try pasting the commands you used into an editor script (i.e. open the new script using the File menu of the TextGrid editor, not in the File menu of the Objects Window!).
You can see all commands you did, however, the ones you did in the picture window are not available in the TextGrid editor. To make this collection of commands work as a script, insert
endeditor
before the commands that refer to the picture window and switch back to the TextGrid editor afterwards using
editor
And finally, when you are satisfied with the plot, save it in a .pdf file using the File menu.
Solution at this point: plot.praat (open in File menu of TextGrid editor and run there, not in the Objects window!)
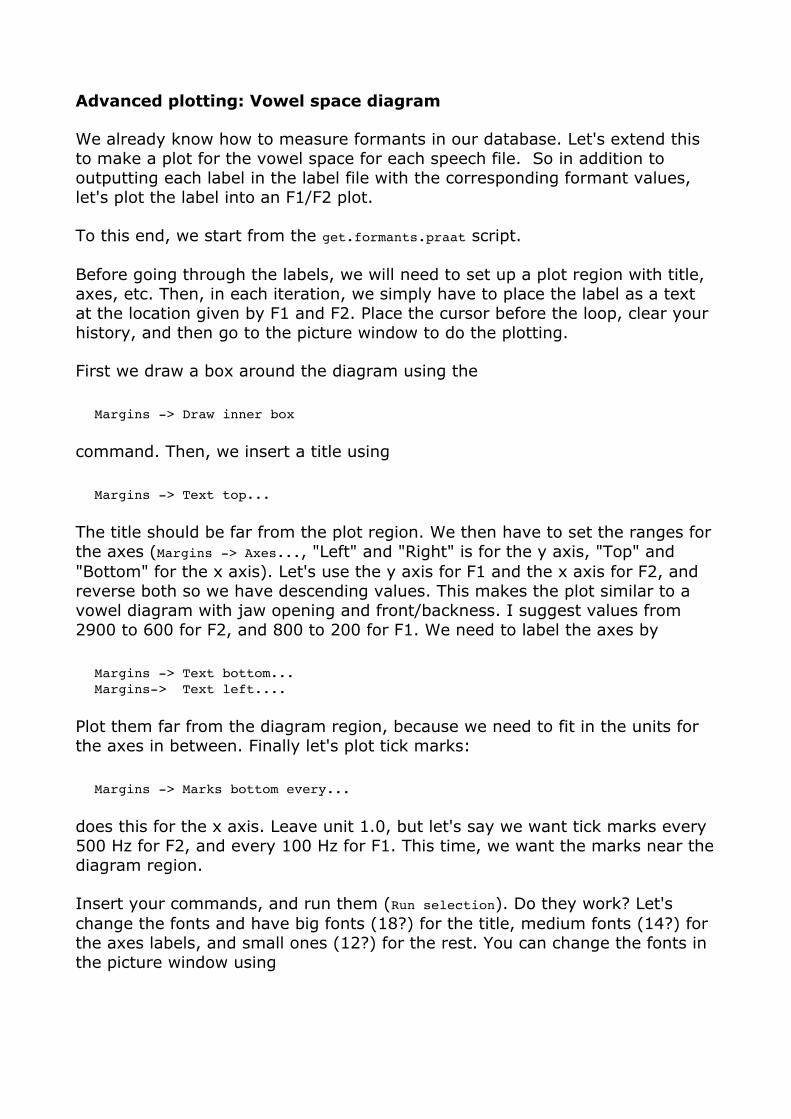
Advanced plotting: Vowel space diagram
We already know how to measure formants in our database. Let's extend this to make a plot for the vowel space for each speech file. So in addition to outputting each label in the label file with the corresponding formant values, let's plot the label into an F1/F2 plot.
To this end, we start from the get.formants.praat script.
Before going through the labels, we will need to set up a plot region with title, axes, etc. Then, in each iteration, we simply have to place the label as a text at the location given by F1 and F2. Place the cursor before the loop, clear your history, and then go to the picture window to do the plotting.
First we draw a box around the diagram using the
Margins -> Draw inner box
command. Then, we insert a title using
Margins -> Text top...
The title should be far from the plot region. We then have to set the ranges forthe axes (Margins -> Axes..., "Left" and "Right" is for the y axis, "Top" and "Bottom" for the x axis). Let's use the y axis for F1 and the x axis for F2, and reverse both so we have descending values. This makes the plot similar to a vowel diagram with jaw opening and front/backness. I suggest values from 2900 to 600 for F2, and 800 to 200 for F1. We need to label the axes by
Margins -> Text bottom... Margins-> Text left....
Plot them far from the diagram region, because we need to fit in the units for the axes in between. Finally let's plot tick marks:
Margins -> Marks bottom every...
does this for the x axis. Leave unit 1.0, but let's say we want tick marks every 500 Hz for F2, and every 100 Hz for F1. This time, we want the marks near thediagram region.
Insert your commands, and run them (Run selection). Do they work? Let's change the fonts and have big fonts (18?) for the title, medium fonts (14?) for the axes labels, and small ones (12?) for the rest. You can change the fonts in the picture window using
Font size...
or select the font directly by specifying the size:
12
Insert these font changes, then run the selection again. You will see that it may be necessary to clear the picture window first, so insert an
Erase all
before printing. If you mix fonts, be sure to change them just for the commands that print text, and switch back to the font used for printing the inner box when plotting marks, axes, etc., because axes and marks may appear in the wrong place relative to the inner box otherwise.
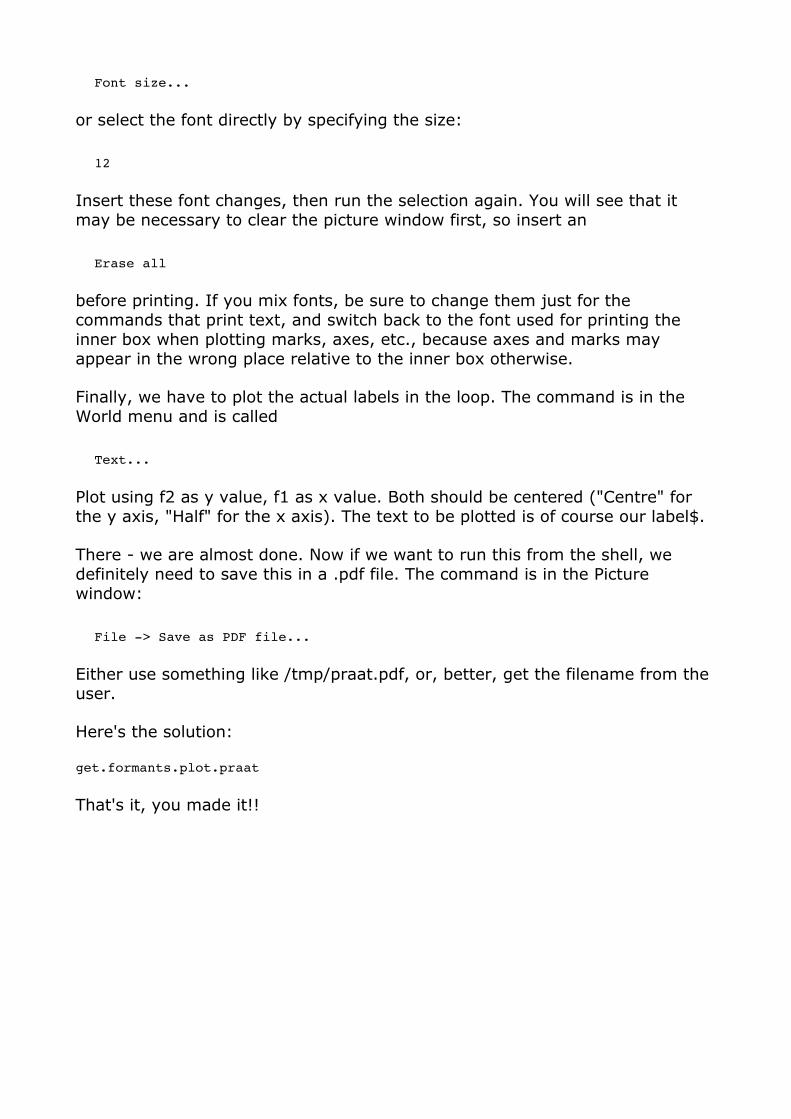
Finally, we have to plot the actual labels in the loop. The command is in the World menu and is called
Text...
Plot using f2 as y value, f1 as x value. Both should be centered ("Centre" for the y axis, "Half" for the x axis). The text to be plotted is of course our label$.
There - we are almost done. Now if we want to run this from the shell, we definitely need to save this in a .pdf file. The command is in the Picture window:
File -> Save as PDF file...
Either use something like /tmp/praat.pdf, or, better, get the filename from the user.
Here's the solution:
get.formants.plot.praat
That's it, you made it!!

Feedback on, or problems with this tutorial?
I am sure that I have missed some errors in this tutorial, and I'd be grateful if you could point them out to me.
Any other kind of feedback, comments, thoughts is also most welcome!
Please e-mail me: [email protected]