prepared by: ms. catherine m. catamora ias - it. what’s new in word 2007 new user...
TRANSCRIPT

Prepared by: Ms. Catherine M. CatamoraIAS - IT

What’s New in Word 2007New user interface
Traditional menus and toolbars have been replaced by the Ribbon, a single mechanism that makes all thecommands needed to perform a task readily available.
Live Preview Allows you to preview how a formatting change will look before applying it. Simply point to the selection on the Ribbon or Mini Toolbar and Word 2007 shows you a preview of what your document would look like if the selected changes were applied.
XML compatibility
The new Word 2007 XML format (.docx) is much smaller in file size and makes it easier to recover damaged or corrupted files. Files based on XML have the potential to be more robust and integrated with information systems and external data.

Improved styles and themes
Preset styles and themes let you change the overall look and feel of a document in just a few clicks.
Enhanced special effects Now you can apply reflection, glow, bevel, and 3-D rotation effects to shapes, and warping to text and images.
SmartArt The new SmartArt graphics feature offers new diagram types and more layout options, and lets you convert text such as a bulleted list into a diagram.
Save as PDF Now you can install a Word add-in that allows you to save a document as a PDF without using third party software. PDF format allows you to share your document with users on any platform.

Document Inspector
Removes comments, tracked changes, metadata (document history such as the author and editors) and other information that you don’t want to appear in the finished document.
Digital Signature Adding a digital signature to a document prevents inadvertent changes, ensuring that your contentcannot be altered.
Better sharing capabilities
Microsoft Office SharePoint Server 2007 makes it easier to share and manage documents from within Word 2007.
Macro detection A special file format is used for macro-enabled documents, so it’s easy to tell if a file is capable ofrunning macros.

Starting Word 2007Windows XP1. Click the Windows Start button.
The Start menu appears.2. Point to All Programs.
A menu appears. The programs and menus listed here
will depend on the programs installed on yourcomputer.
3. Point to Microsoft Office.4. Click Microsoft Office Word 2007.
The Word 2007 program screen appears.

Understanding the Word 2007 Program Screen

Office Button: Replaces the File menu found in previous versions of Word.
Document window: This is where you enter and work on document content.
Quick Access Toolbar: Contains common commands such as Save and Undo. You can add more commands as well.
Zoom slider: Click and drag the slider to zoom in or out of a slide. You can also use the + and – buttons.
Title bar: Displays the name of the program you are using and the name of the document you are currently working on.
View shortcuts: Quickly switch between Print Layout, Full Screen Reading, Web Layout, Outline, and Draft views.
Close button: Click here to close the current document. If only one document is open, clicking this button will close the Word program as well.
Status bar: Displays information about your document. Right-click it to specify which information is shown.
Ribbon: The tabs on the Ribbon replace the menus and toolbars found in previous versions of Word.
Insertion Point: The small, blinking bar controls where document content is entered. Move the insertion point withthe mouse, or the arrow keys on the keyboard.
Scroll bar: There are both vertical and horizontal scroll bars:you use them to view and move in your document.
Ruler: Displays left and right paragraph intents, document margins, and tab stops. Click the View Ruler button abovethe vertical scroll bar to view or hide the ruler.

Understanding the RibbonWord 2007 provides easy access to commands
through
the Ribbon, which replaces the menus and
toolbars found in previous versions of Word 2007.
The Ribbon keeps commands visible while you
work instead of hiding them under menus or
toolbars.

The Ribbon is made up of three basic components:Tabs Groups Buttons
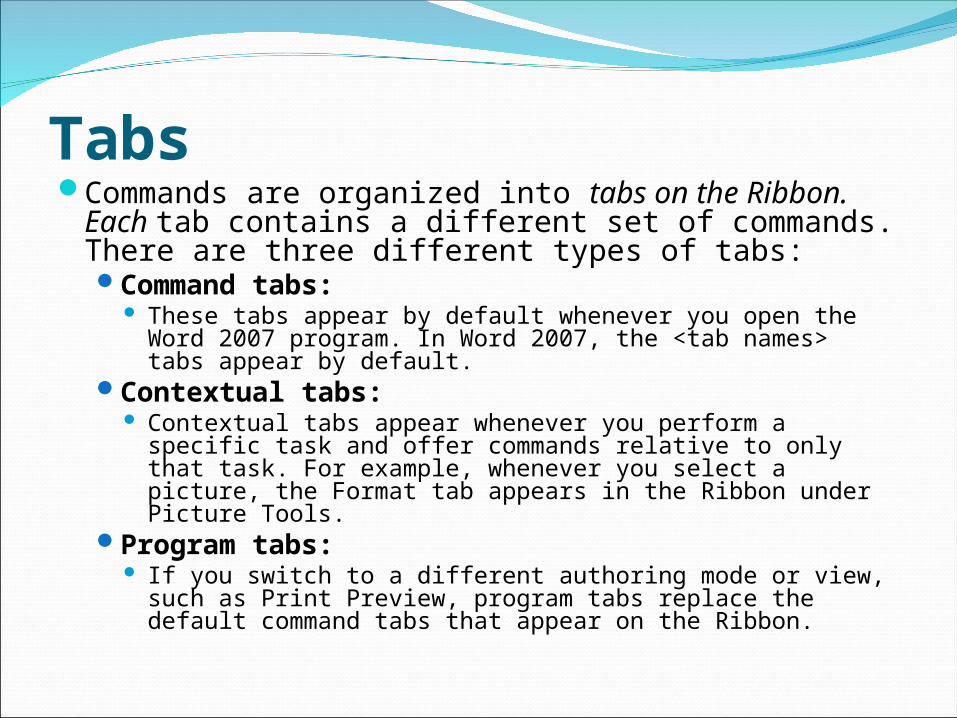
TabsCommands are organized into tabs on the
Ribbon. Each tab contains a different set of commands. There are three different types of tabs:Command tabs:
These tabs appear by default whenever you open the Word 2007 program. In Word 2007, the <tab names> tabs appear by default.
Contextual tabs: Contextual tabs appear whenever you perform a specific
task and offer commands relative to only that task. For example, whenever you select a picture, the Format tab appears in the Ribbon under Picture Tools.
Program tabs: If you switch to a different authoring mode or view, such
as Print Preview, program tabs replace the default command tabs that appear on the Ribbon.
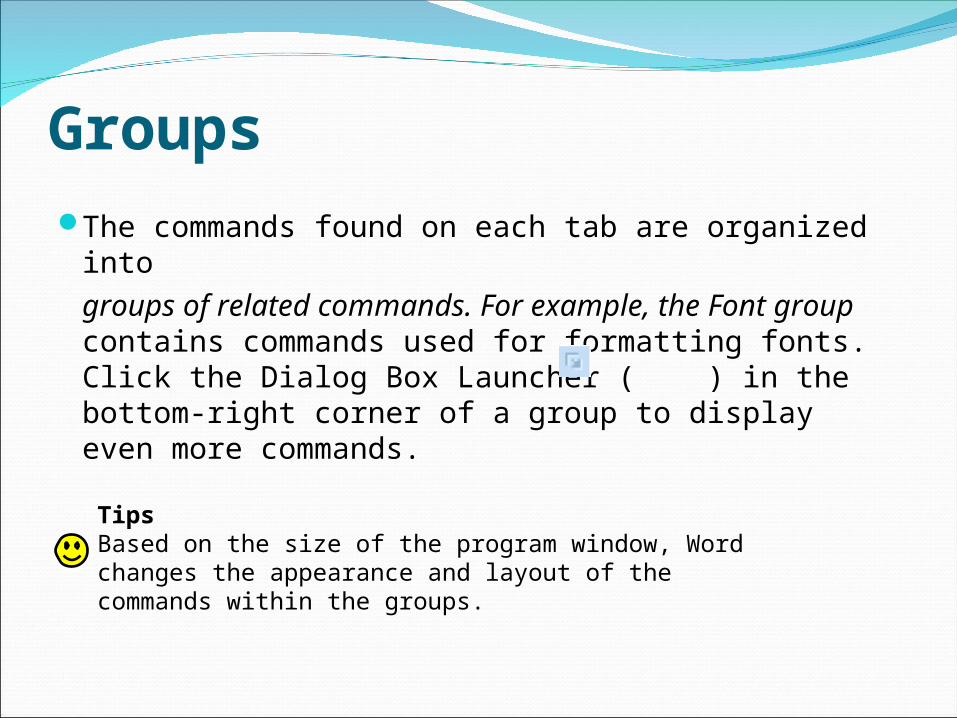
GroupsThe commands found on each tab are organized
intogroups of related commands. For example, the Font group contains commands used for formatting fonts. Click the Dialog Box Launcher ( ) in the bottom-right corner of a group to display even more commands.
TipsBased on the size of the program window, Word changes the appearance and layout of the commands within the groups.

Buttons
One way to issue a command is by clicking its button on the Ribbon. Buttons are the smallest element of the
Ribbon and change color when clicked.
TipsYou can hide the Ribbon so that only tab names appear, giving you more room in the program window. To do this, double-click the currentlydisplayed command tab. To display the Ribbon again, click any tab.

Home Tab, Groups and Buttons
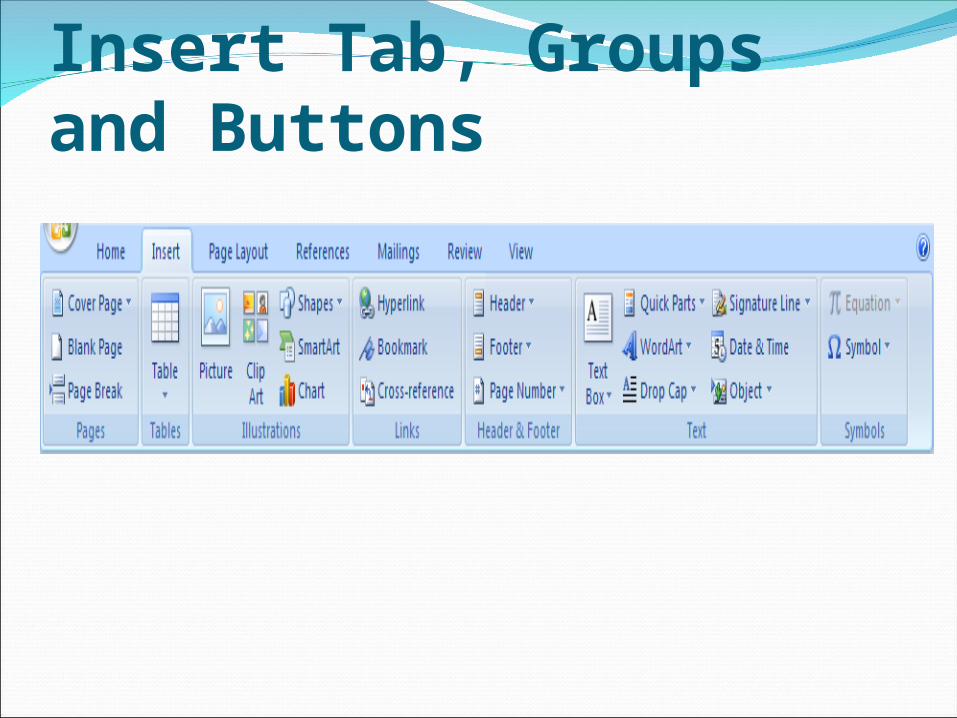
Insert Tab, Groups and Buttons

Page Layout Tab, Groups and Buttons

References Tab, Groups and Buttons

Mailings Tab, Groups and Buttons

Review Tab, Groups and Buttons

View Tab, Groups and Buttons
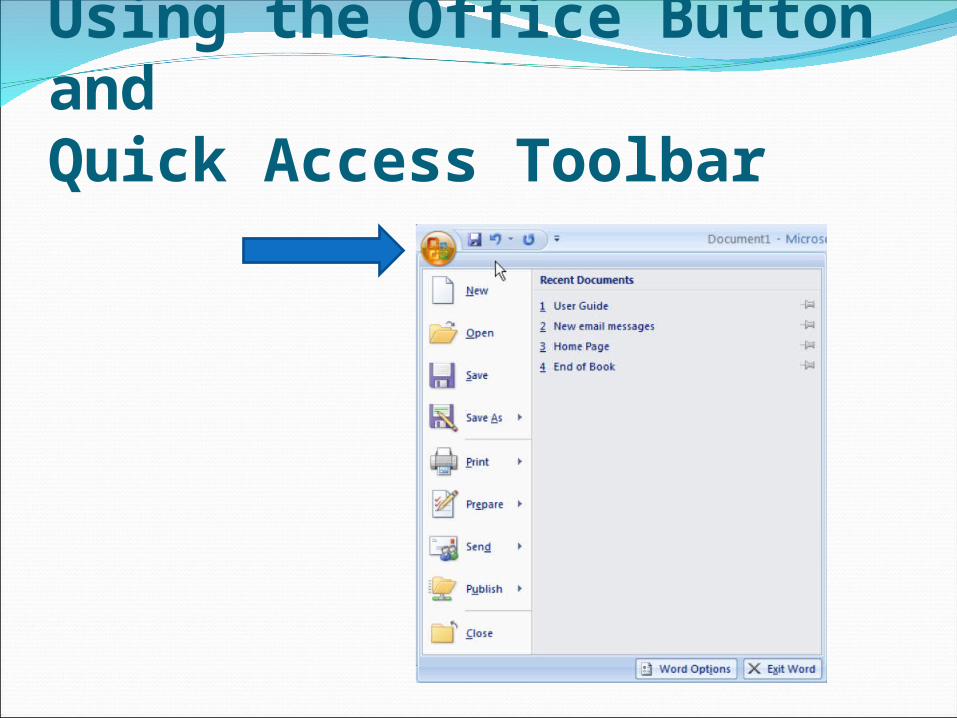
Using the Office Button andQuick Access Toolbar

Office ButtonThe Office Button appears in the upper-left
corner of the program window and contains basic file management commands including New, which creates a new file; Open, which opens a file; Save, which saves the currently opened file; and Close, which closes the currently opened file.
TipsThe Office Button replaces the File menu found in previous versions of Word 2007.

Quick Access ToolbarThe Quick Access Toolbar
appears to the right of theOffice Button and provides easy access to the commands you use most frequently. By default, the Save, Undo, and Redo buttons appear on the toolbar; however, you can customize this toolbar to meet your needs by adding or removing buttons.
To customize it:Click the
Customize Quick Access Toolbar button at the end of the Quick Access Toolbar and select the commands you want to add or remove.
TipsYou can change where the Quick Access Toolbarappears in the program window. To do this, click theCustomize Quick Access Toolbar button at the endof the Quick Access Toolbar. Select Show Below theRibbon or Show Above the Ribbon, depending onthe toolbar’s current location.

Using Keyboard CommandsKeystroke shortcuts
Keystroke shortcuts are one of the fastest ways to give commands in Word 2007. They’re especially great for issuing common commands, such as saving a document or undoing your last action.
In order to issue a command using a keystroke shortcut, you simply press a combination of keys on your keyboard. For example, rather than clicking the Copy button on the Ribbon to copy text, you could press and hold the copy keystroke shortcut, <Ctrl> + <C>.

Common Keystroke Shortcuts

Key TipsNew in Word 2007, Key Tips appear whenever
you press the <Alt> key. You can use Key Tips to perform just about any action in Word 2007, without ever having to use the mouse.
To issue a command using a Key Tip, first press the <Alt> key. Tiny letters and numbers, called badges, appear on the Office Button, the Quick Access Toolbar, and all of the tabs on the Ribbon. Depending on the command you want to issue, press the letter or number key indicated on the badge. Repeat this step as necessary until the desired command has been issued.

Key Tips


Contextual menusA contextual menu displays a list of commands
related to a specific object or area. To open a contextual menu:1. Right-click an object or area of the
document orprogram screen. A contextual menu appears, displaying commands that are relevant to the object or area that you right clicked.
2. Select an option from the contextual menu, or click anywhere outside the contextual menu to close itwithout selecting anything.

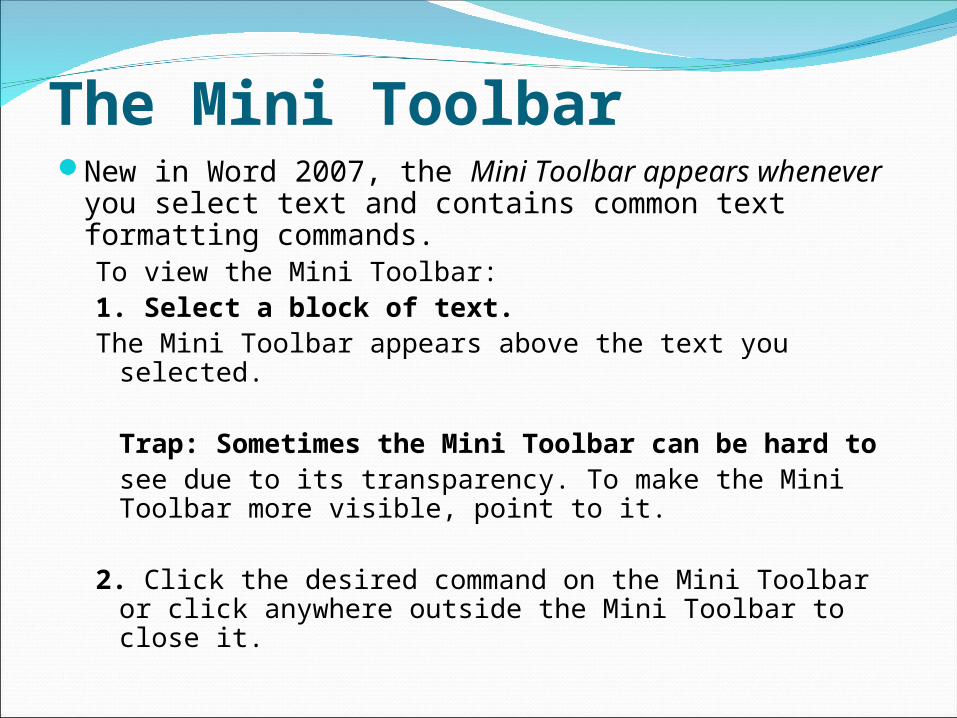
The Mini ToolbarNew in Word 2007, the Mini Toolbar appears
whenever you select text and contains common text formatting commands. To view the Mini Toolbar:1. Select a block of text.The Mini Toolbar appears above the text you selected.
Trap: Sometimes the Mini Toolbar can be hard tosee due to its transparency. To make the Mini Toolbar more visible, point to it.
2. Click the desired command on the Mini Toolbar or click anywhere outside the Mini Toolbar to close it.

Tip:If you don’t want the Mini Toolbar to appear every time you select a block of text, click the Office Button and click the Word 2007 Optionsbutton. Click the Personalize category, uncheck the Show Mini Toolbar on selection check box, and click OK.

Exiting Word 20071. Click the Office Button.2. Click the Exit Word
2007 button.The Word 2007 program
closes.Other Ways to Exit Word
2007:If you only have one document open in Word 2007, click the Close button in the upper-right corner of the program window.
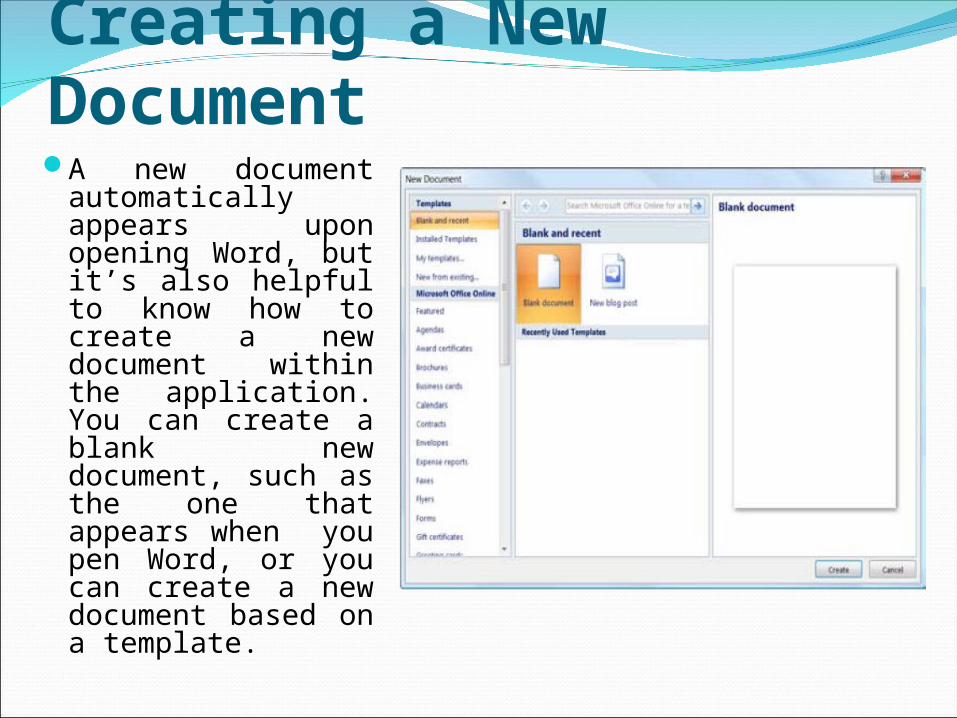
Creating a New DocumentA new document
automatically appears upon opening Word, but it’s also helpful to know how to create a new document within the application. You can create a blank new document, such as the one that appears when you pen Word, or you can create a new document based on a template.

Create a new blank document1. Click the Office Button and select New.
The New Document dialog box appears. By default, the Blank document option is already selected.
2. Make sure the Blank document option is selectedand click Create.The new blank document appears in the Wordapplication screen.
Other Ways to Create a Blank Document:Double-click the Blank document option. Orpress <Ctrl> + <N>.

Create a document from a templateClick the Office Button and select New.
The New Document dialog box appears. There are several ways you can create a new document from a template. Different categories are listed to the left:
Blank and recent: This category is selected by default. Select a template in the Recently Used Templates area and click Create.
Installed Templates: Click this category to view templates that were installed on your computer with Microsoft Office. Select the template from which you want to create a new document and click Create.
My templates: Select My Templates to open a dialog box that displays templates you have created and saved on your computer.
New from existing: Select New from Existing to open a dialog box that allows you to browse for a document on your computer that you want to base a new document on. This is essentially like creating a copy of an existing file.
Microsoft Office Online: Click a category to view templates that you can download from Office Online. Find the template you want to download and click Download.


Insert textClick the insertion point where you want to insert
the text and then type the text you want to insert.

Delete textTo delete a single character:
Place the insertion point next to the text that you want to delete. Press the <Delete> key to delete text after, or to the right of, the insertion point. Press the <Backspace> key to delete text before, or to the left of, the insertion point.
To delete a block of text: Select the text you want to delete and press Delete> or <Backspace>.
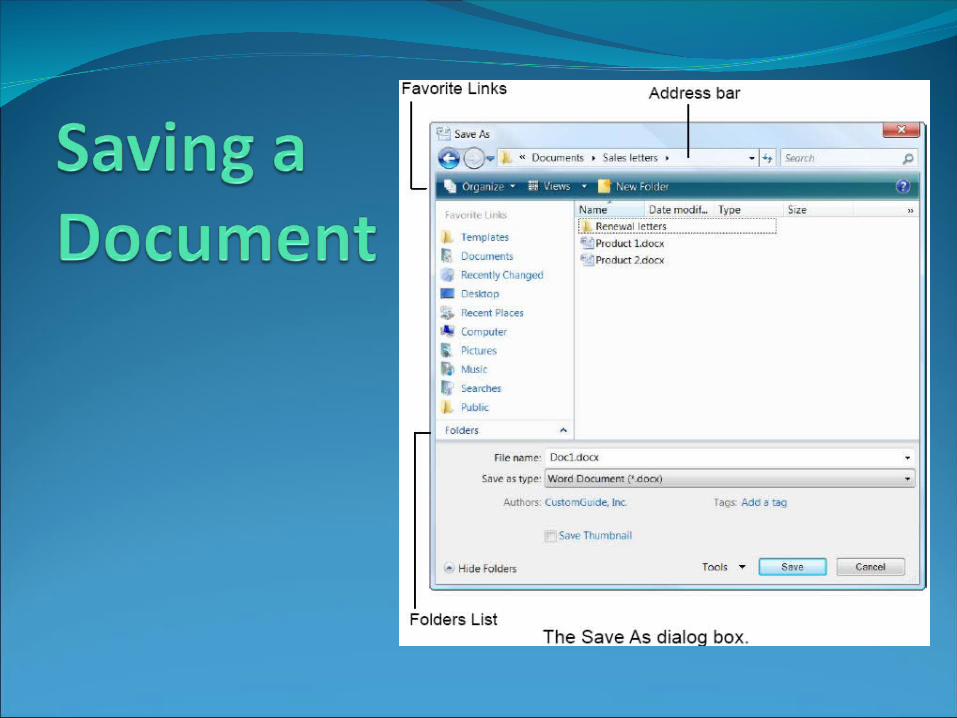

Save a new document1. Click the Save button on the Quick Access Toolbar.
The Save As dialog box appears.2. Enter the file name in the File name text box.3. Specify the drive and/or folder where you want to save
your document.The Save As dialog box has several controls that make it easy to navigate to locations on your computer:Address bar: Click a link in the Address bar to open it.
Click the arrow to the right of a link to open a list of folder within that location. Select a folder from the list to open it.
Favorite Links: Shortcuts to common locations on your computer, such as the Desktop and Documents Folder.
Folders List: View the hierarchy of drives and folders on your computer by expanding the Folders list.
4. Click Save.
Other Ways to Save:Press <Ctrl> + <S>. Or, click the Office Button and select Save.

Save document changesClick the Save button on the Quick Access Toolbar. Any
changes you have made to the document are saved.
Save a document under a different name and/or location1. Click the Office Button and select Save As.
The Save As dialog box appears.2. Enter a different name for the file in the File name
text box and/or navigate to a new location to save the file.3. Click Save.
Save a document as a different file type1. Click the Office Button and select Save As.The Save As dialog box appears.2. Click the Save as type list arrow and select a file
format.3. Click Save.

Common Word File Formats
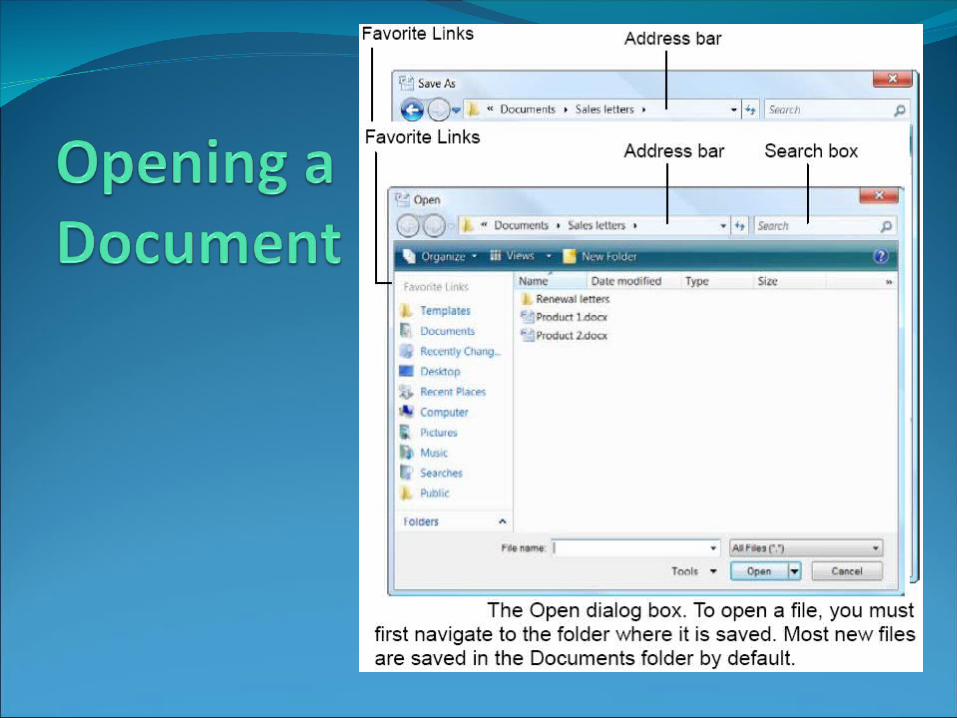

1. Click the Office Button and select Open.The Open dialog box appears. Next, you have to tell Word where the file you want to open is located.
2. Navigate to the location of the saved file.The Open dialog box has several controls that make it easy to navigate to locations and find files on your computer:
Address bar: Click a link in the Address bar to open it. Click the arrow to the right of a link to open a list of folder within that location. Select a folder from the list to open it.
Favorite Links: Shortcuts to common locations on your computer, such as the Desktop and Documents Folder.
Search box: This searches the contents— including subfolders—of that window for the text that you type. If a file’s name, file content, tags, or other file properties match the searched text, it will appear in the search results. Search results appear as you enter text in the search box.
3. Select the file you want to open and click Open.Word displays the file in the application window.
Other Ways to Open a Document:Press <Ctrl> + <O>.