presentation on adobe photoshop
TRANSCRIPT

ContentsBasic concepts…What is Photoshop?, other options, types of image files, The Photoshop workspace (toolbox, options bar, palettes)
Basic photo manipulation …Opening, cropping, resizing, saving as .jpeg
Creating new images…New image dialogue box, pencil and paintbrush tools, paintbucket and gradient tools, saving as .gifs, dither
Transparency…Creating transparent backgrounds, saving transparent images, transparency dither
Layers…Layer basics, moving layers, naming layers, copying layers, compositing images, transforming layers, layer via copy/cut, adding text

What is Photoshop?
Image editing programPixel = “Picture element” - smallest unit of an imageSize of pixel depends on resolutionTypical web image: 72 dpiTypical print image: 300 dpi or higherEnd result can be saved in variety of ways: .bmp, .jpeg, .gif, .tif

Types of image files
.gifOften good for B & WSupports transparency
.jpegSlightly longer to download (decompression time)LossyDoesn’t support transparency
.pngGood for web, best of both worlds (lossless, supports complex photographs)Not supported by older browsers

Color modesImage, ModesRGB is almost always best betDefault choiceCMYK for high end professional printersGrayscale for B&WIndex greatly reduces file sizeIMPORTANT: If Photoshop is not allowing you to use a tool, change mode from index to RGB8-bit is usually adequate
16-bit only for very high resolution picturesVery large file size

6
The Photoshop workspace
image
Options palette
toolbox
History palette
Layers palette

The toolbox
Commonly used tools arranged as iconsTriangle in lower right means multiple tools are nested there
Left-click the icon and hold down the button to see all tools nested there
Paintbucket icon Expanded: Gradient and paintbucket tools

The options palette
Just below the Menu choicesChanges depending on which tool you’ve chosen from the toolbox
Allows greater control of that tool by changing settings
Options palette for paintbucket tool

Basic photo manipulation
Opening, cropping, resizing, saving as .jpeg

The File browser
Thumbnails
Folder browser
Metadata
Rotate Flag DeleteSearch

Cropping an imageBring up imageFile, Open (if you know the name of file)Window, File Browser (to see thumbnails of all images in a folder)Choose cropping toolLeft-click and drag to define crop areaUncropped area will be shadedUse sizing boxes to fine-tune crop area

Cropping an image
When done with crop, double-click inside itCursor will change to solid black triangleThe cropped image will be displayedRename the image and save it

Resizing an image
Images will not necessarily be shown actual size in PhotoshopLook at title bar to see percentageCtrl and + to zoom inCtrl and – to zoom out

Resizing an imageImage menu, Image SizeMake sure “Constrain proportions” is checked to avoid stretchingLink icon appearsChange width (in pixels), height will automatically changeUse document size box for print (set in inches, not pixels)Save as new file name, so as not to overwrite original image

Creating new images
New image dialogue box, pencil and paintbrush tools, paintbucket and gradient tools, saving as .gifs, dither

New image dialogue boxWidth, height in pixels, inches, cm, etc.Resolution: 72 ppi for web work,300 or higher for printColor mode: RGB best default, grayscale for B&W, CMYK for high-end print workBackground content: transparent for gifs only, background color needs to be set beforehand

The pencil and paintbrush toolsLeft-click and hold down icon to choosePencil has hard edgesBrush has feathered edgesBrush pulldown in options bar controls diameter, hardnessBrush palette has presets for stars, leaves, grass, etc.

The color picker 1
On toolboxFlips background and foregroundForeground color pickerBackground color pickerDefault (in this case B&W)Click background or foreground to bring up color picker

The color picker 2
Color sliderColor fieldField/slider combo gives you access to all colorsNumeric color valuesWeb safe colors option (important!)You can sample colors with the CP eyedropper

The paintbucket tool
Left-click and hold down to choose between paintbucket and gradientPaintbucket is for solid fill backgrounds and patterns Solid fill – choose color from options bar Patterns – lots to chose from: cloth and paper textures, nature images (rocks, flowers), abstract patternsSelect proper layer, choose paintbucket, click on area to fillCan’t paint a background – change to layer first

The gradient tool
Gradient = gradual transition between two or more colorsChoose gradient tool, choose preset from options bar
“Draw” gradient with a left click and dragStarting and stopping points and direction of dragged line will define gradientUse History panel to back up, try againClick on Gradient box in toolbar to create own gradient

Custom gradients
Preset gradients are hereClick on these boxes to change opacity (for a fade to transparency)Click on these to change color of gradientSlide them to change when gradient endsThis changes midpoint of transition
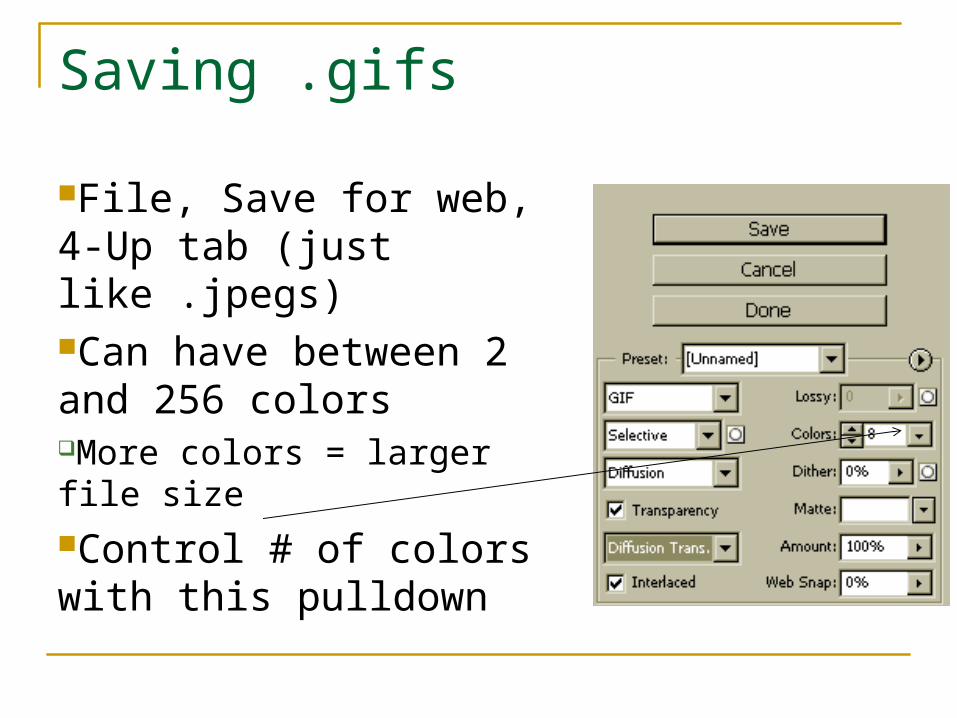
Saving .gifs
File, Save for web, 4-Up tab (just like .jpegs)Can have between 2 and 256 colorsMore colors = larger file sizeControl # of colors with this pulldown

Adjusting and retouching photos
Rotation, adjustments, the clone tool, the filters menu

Transparency
Creating transparent backgrounds, saving transparent images, transparency dither

Creating transparent backgroundsBring up imageNeed a flat color backgroundLeft-click and hold down eraser tool to get all optionsChoose Magic Eraser toolSet tolerance to 5 in options bar (a starting point)Anti-alias should be checked (gets rid of “jaggies” on edges)Uncheck contiguous to make insides of letters transparent

Creating transparent backgroundsClick on backgroundBackground will disappear, checkerboard will appearNo checkerboard in actual imageIf some background remains, Ctrl + Z, raise tolerance–If some logo is gone, Ctrl + Z, lower toleranceImage menu, choose Mode, choose RGB

Layers
Layer basics, moving layers, naming layers, copying layers, compositing images, transforming layers, layer via copy/cut, adding text

Layer basics
Layers are like sheets of glass stacked on top of each otherFrom top to bottom:Text layerText effect/Drop shadowPhoto at leftGray backgroundL-click and drag layers to move them up or down
