principles of intramedullary nailing - aotrauma...
TRANSCRIPT

Principles of intramedullary nailing
Eakachit Sikarinklul ,MD Basic Principles of Fracture
Management for ORP Bangkok Medical Center Bangkok, 22- 24 July 2016

Learning outcomes
At the end of this lecture you will be able to:
• Explain how an intramedullary nail works
• Discuss the design of different nails
• Describe the surgical technique
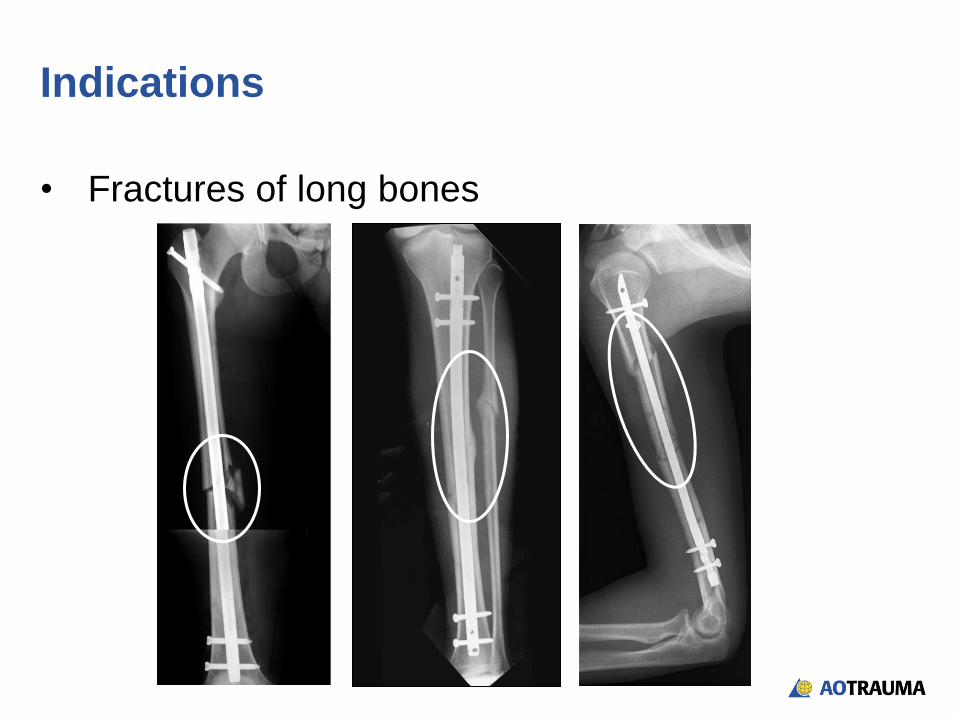
Indications
• Fractures of long bones

• Restoration of length of limb
Objectives of treatment with a nail

• Restoration of length of limb
• Restoration of load axis
Objectives of treatment with a nail

• Restoration of length of limb
• Restoration of axis of limb
• Restoration of rotation of limb
Objectives of treatment with a nail

Indirect bone healing—relative stability
Callus
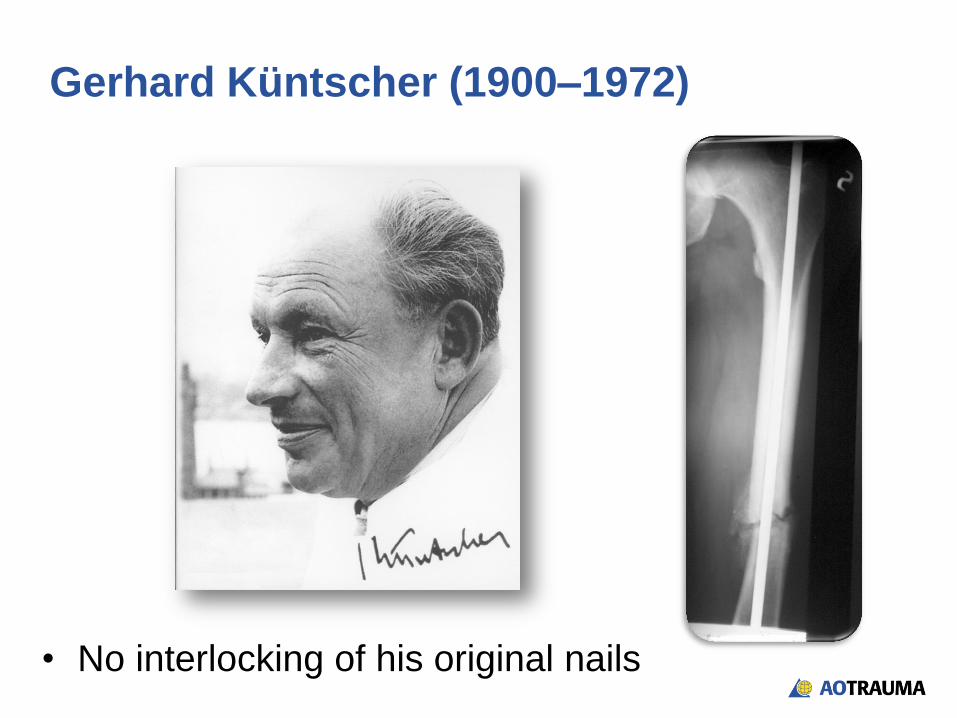
• No interlocking of his original nails
Gerhard Küntscher (1900–1972)
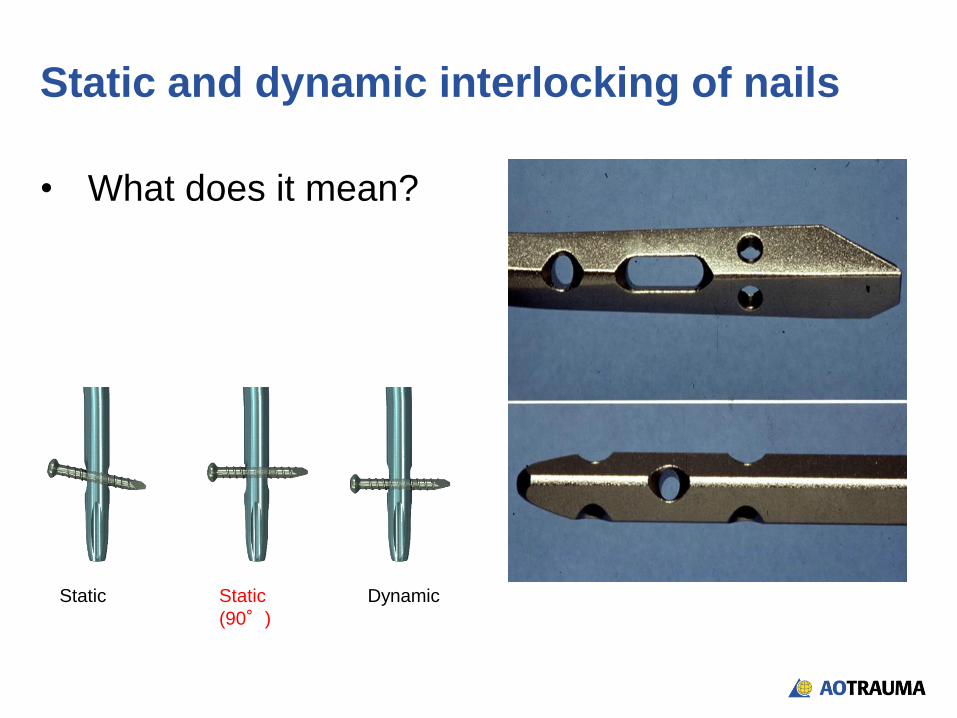
Static and dynamic interlocking of nails
• What does it mean?
Static
(90°)
Static Dynamic
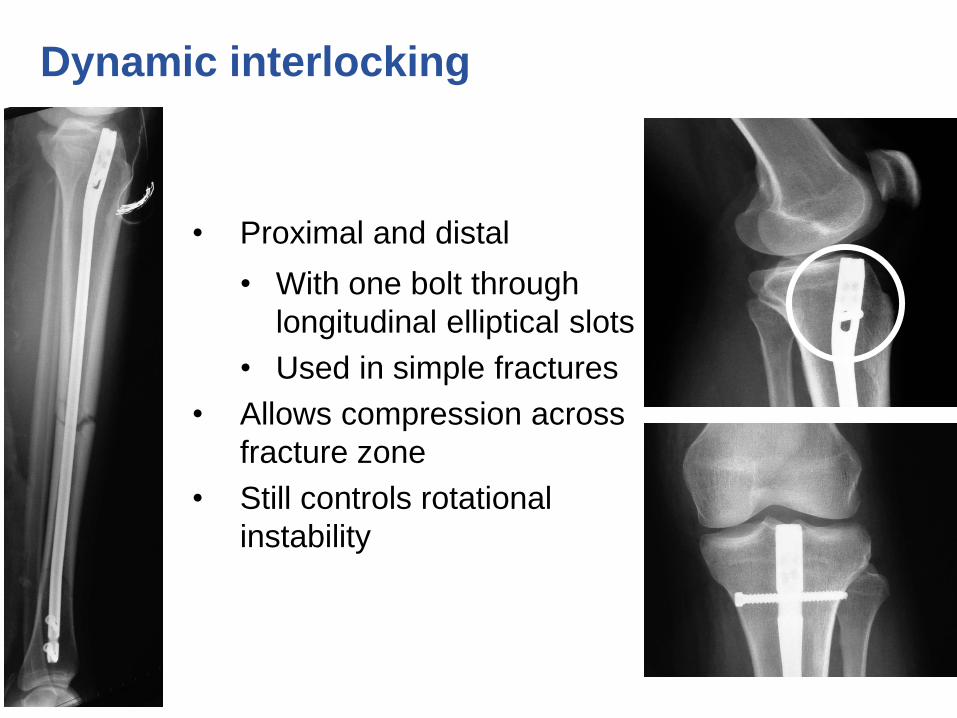
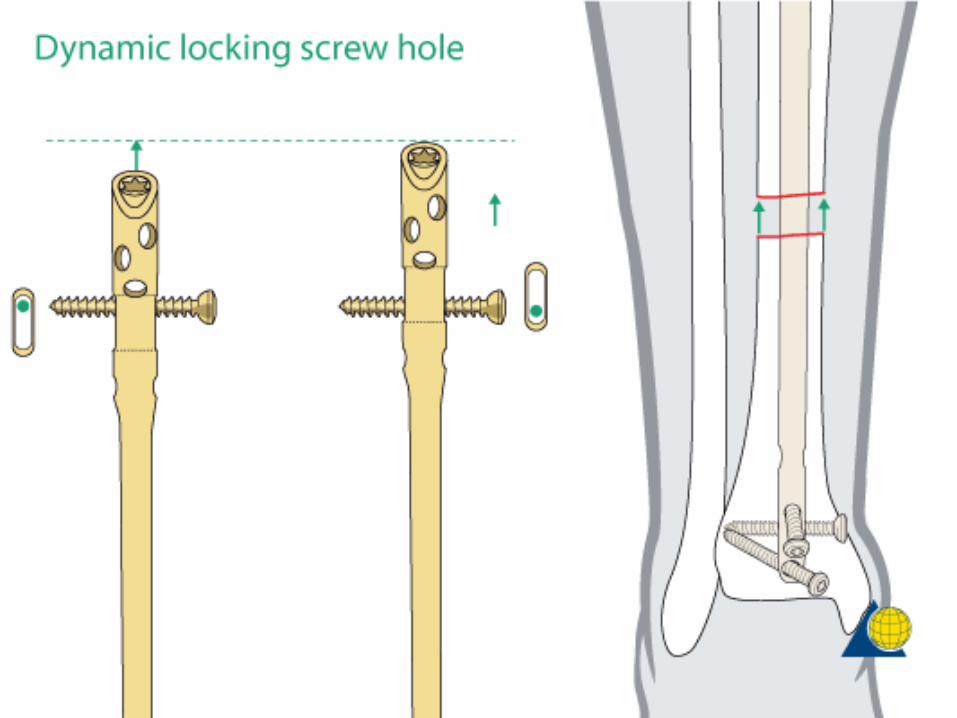
Dynamic interlocking
• Proximal and distal
• With one bolt through
longitudinal elliptical slots
• Used in simple fractures
• Allows compression across
fracture zone
• Still controls rotational
instability
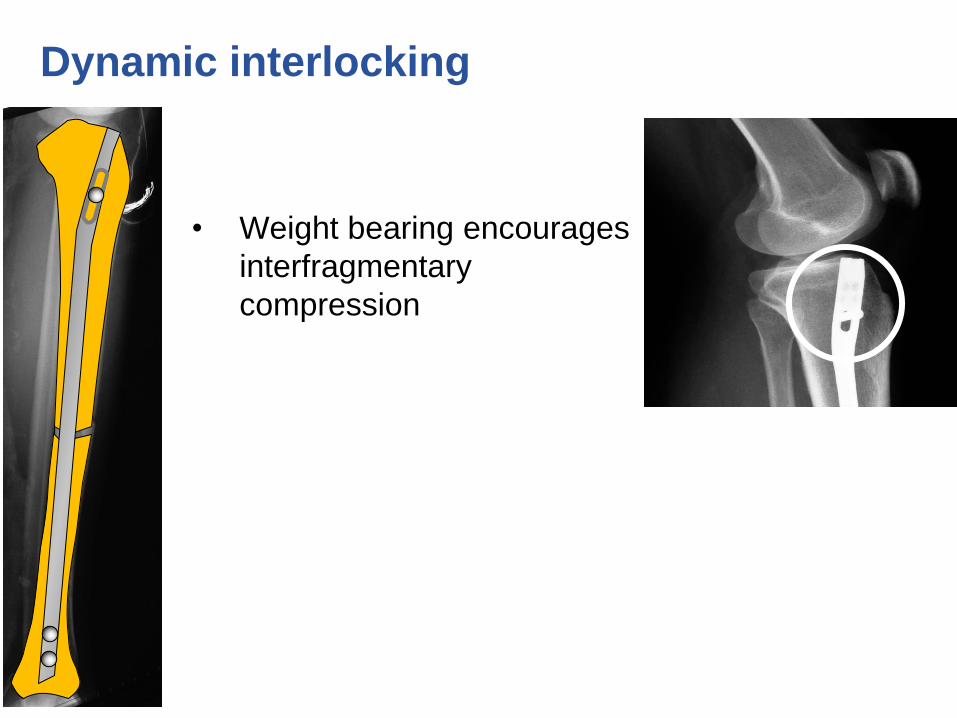
Dynamic interlocking
• Weight bearing encourages
interfragmentary
compression

Dynamic interlocking
• Weight bearing encourages
interfragmentary
compression
• Callus formation in fracture
zone

Static interlocking
• Proximal and distal:
• With two or more bolts
• Used in severe
fractures with rotational
and/or longitudinal
instability
• Reduces collapse in
fracture zone

To ream or not to ream?
• In the reamed technique, intramedullary blood
supply is compromised.
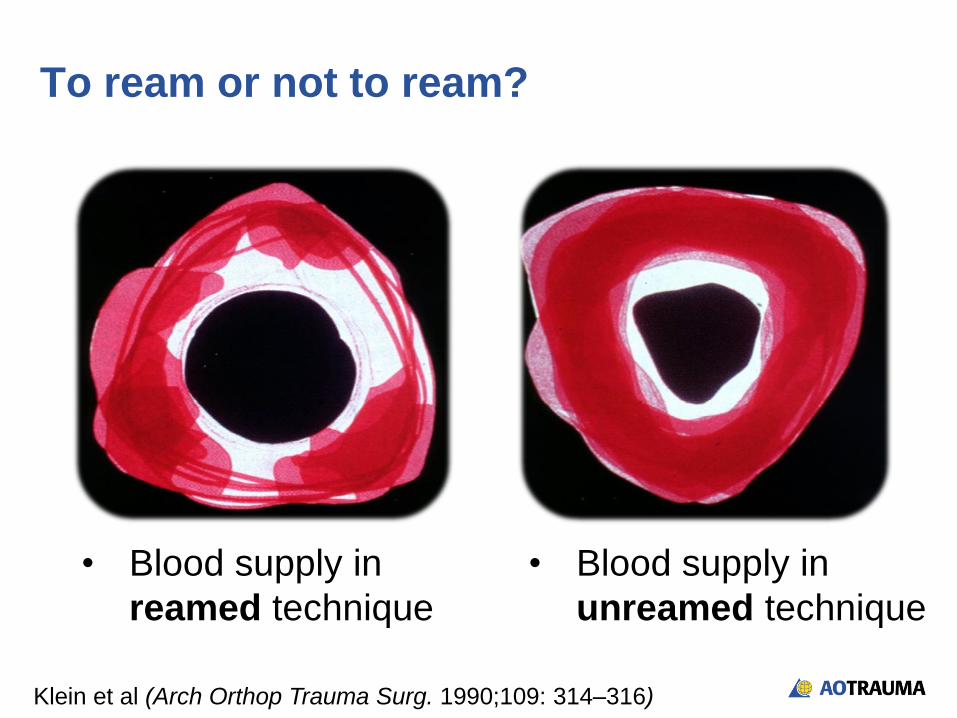
To ream or not to ream?
• Blood supply in
reamed technique
• Blood supply in
unreamed technique
Klein et al (Arch Orthop Trauma Surg. 1990;109: 314–316)

Why reaming?
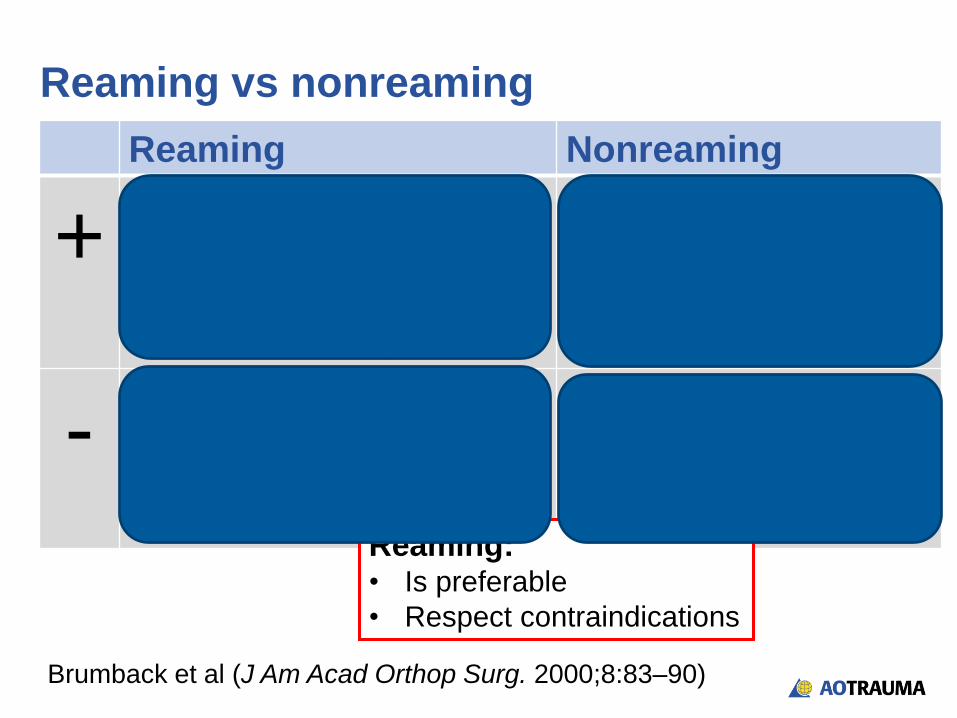
Reaming vs nonreaming
Reaming Nonreaming
+ • Allows insertion of larger
diameter nail
• High union rates
• Shorter healing process
• Shorter procedure
• Less damage to blood
supply
-
• Endosteal blood supply is
damaged
• High pressure within IM
canal
• Lower union rates
• Longer healing process
• More implant failures
Reaming: • Is preferable
• Respect contraindications
Brumback et al (J Am Acad Orthop Surg. 2000;8:83–90)

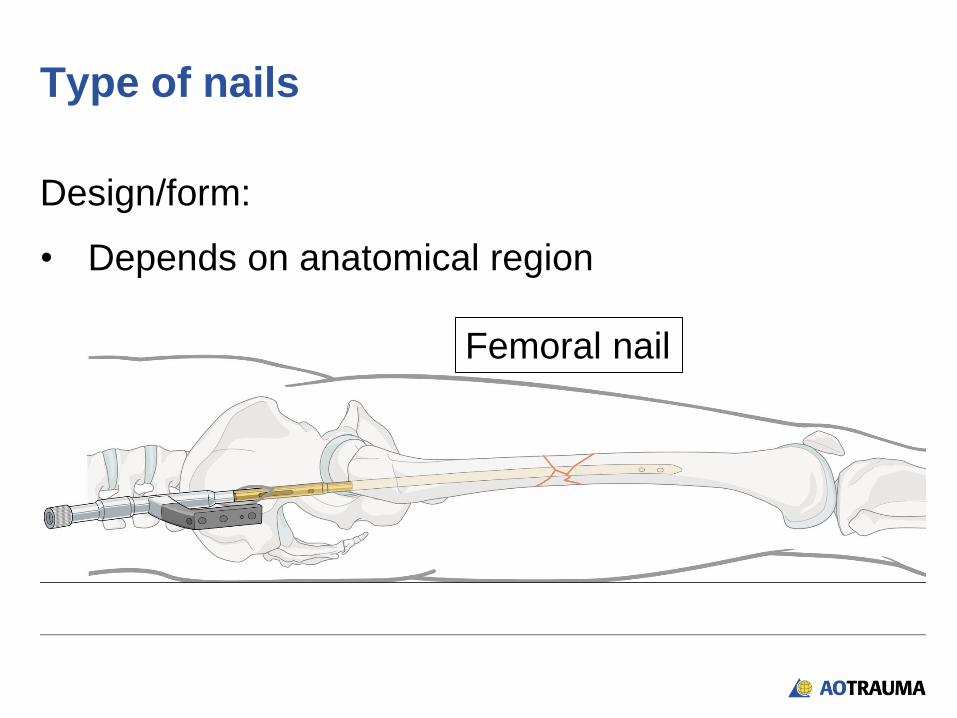
Type of nails
Design/form:
• Depends on anatomical region
Tibia nail
Femoral nail
Design/form:
• Depends on anatomical region
Type of nails
Femoral nail

Design/form:
• Depends on
anatomical
region
Type of nails
Tibial nail
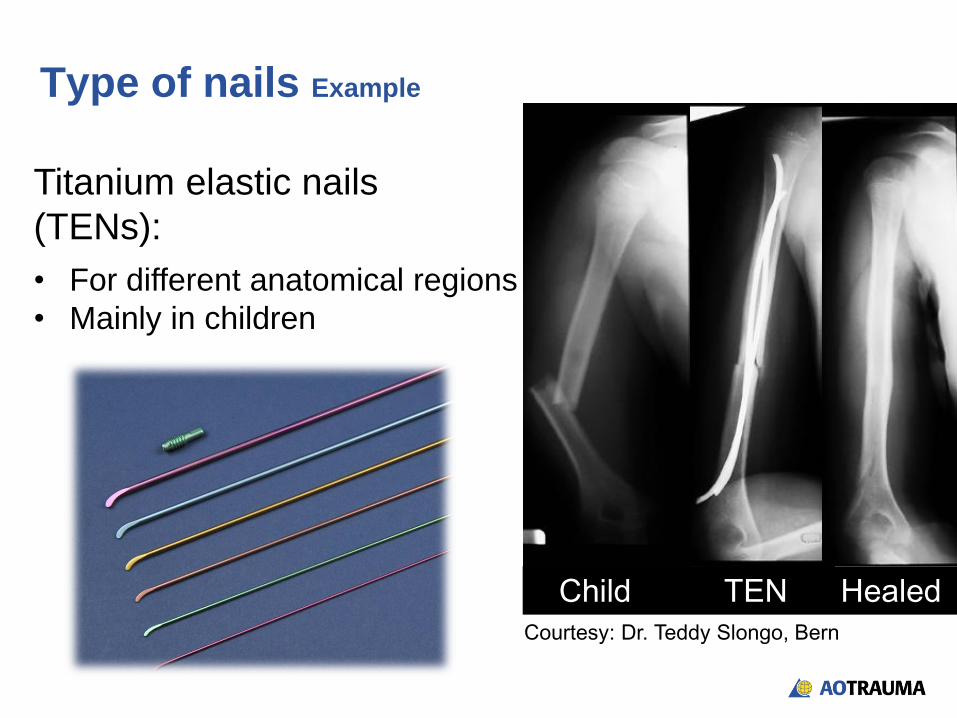
Child TEN Healed Courtesy: Dr. Teddy Slongo, Bern
Type of nails Example
Titanium elastic nails
(TENs):
• For different anatomical regions
• Mainly in children
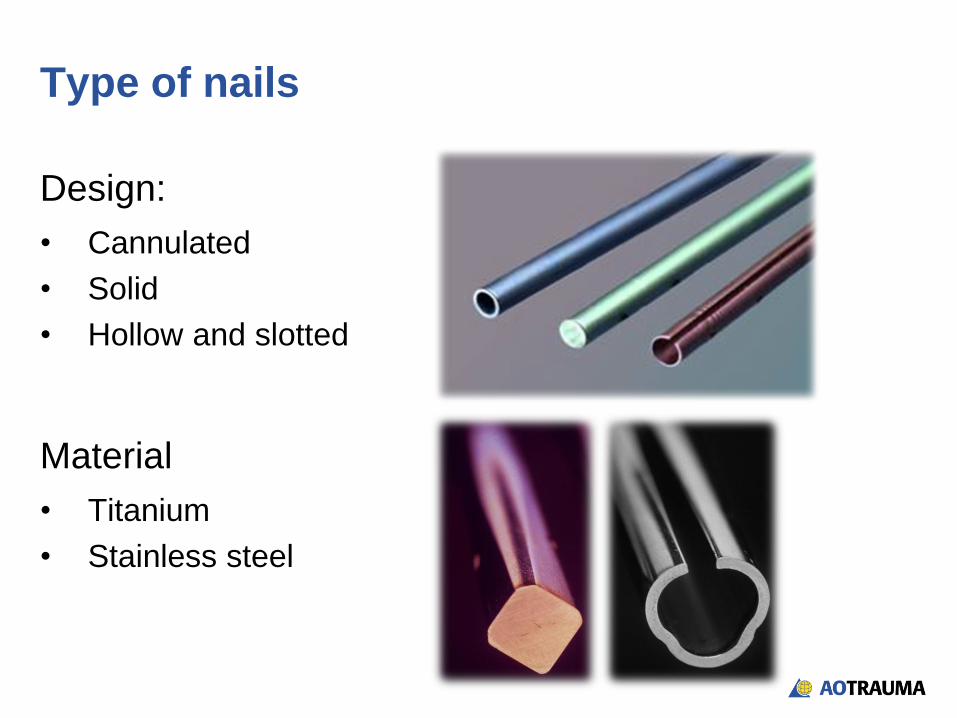
Design:
• Cannulated
• Solid
• Hollow and slotted
Material
• Titanium
• Stainless steel
Type of nails

Surgical technique step-by-step
Reduction 1
Opening of canal 2
(Reaming) 3
Insertion of nail 4
Locking of nail 5
Final x-ray check 6

• Indirect—closed:
• Before operation
• Traction table
1. Reduction
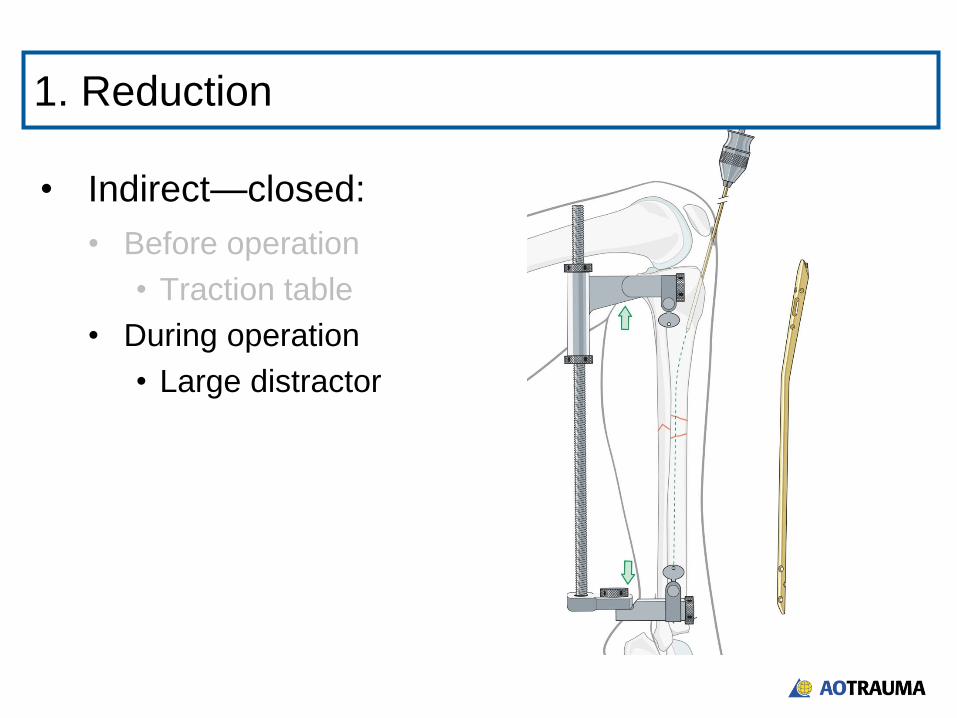
• Indirect—closed:
• Before operation
• Traction table
• During operation
• Large distractor
1. Reduction

• Indirect—closed:
• Before operation
• Traction table
• During operation
• Large distractor
• Joysticks
1. Reduction

• Indirect—closed:
• Before operation
• Traction table
• During operation
• Large distractor
• Joysticks
• Direct—open:
• Small incision into fracture zone
• Rarely used
1. Reduction

• Correct entry point depends on:
• Anatomical region
• Type of nail
UFN
2. Opening of canal
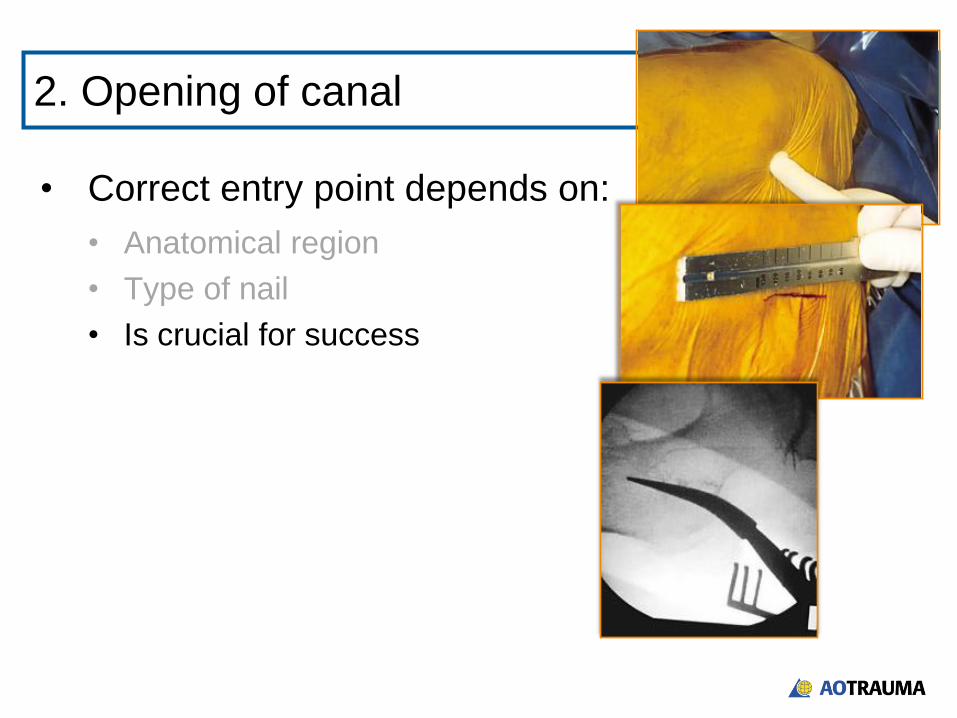
• Correct entry point depends on:
• Anatomical region
• Type of nail
• Is crucial for success
PFN
UFN
PFN
2. Opening of canal
UFN

• Risks of incorrect entry:
• Malalignment
• Difficulty to insert the nail
• Extension of the fracture
• Problems with proximal locking
• Articular damage
2. Opening of canal

• In this case of retrograde
nailing, the entry point was too
anterior and caused an
additional femoral fracture.
2. Opening of canal
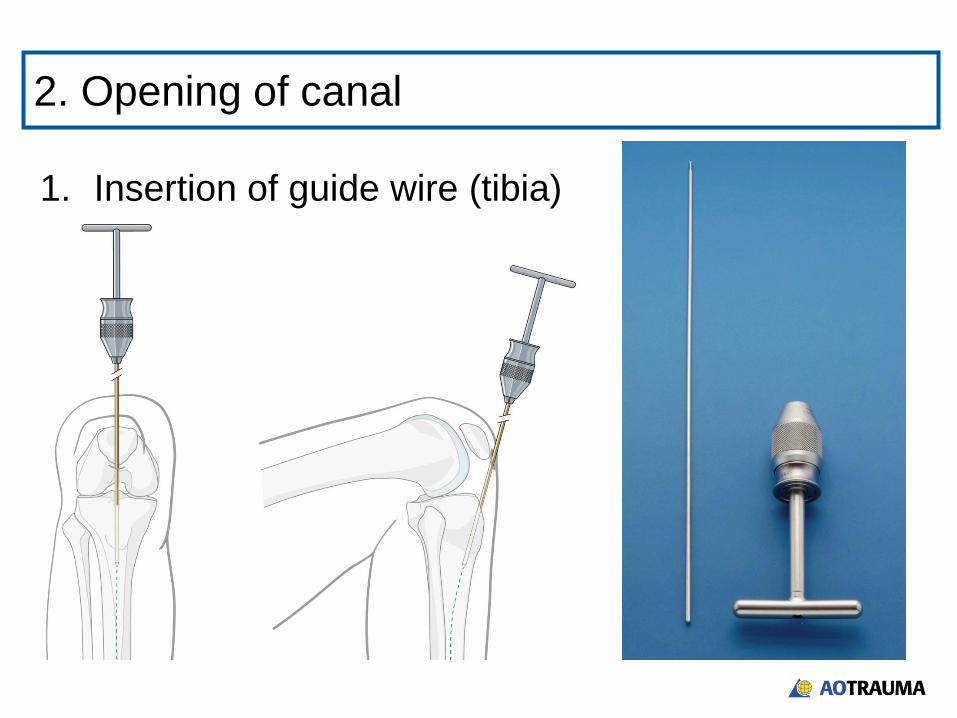
1. Insertion of guide wire (tibia)
2. Opening of canal
1. Insertion of guide wire (tibia)
2. Opening of canal
2. Opening of canal

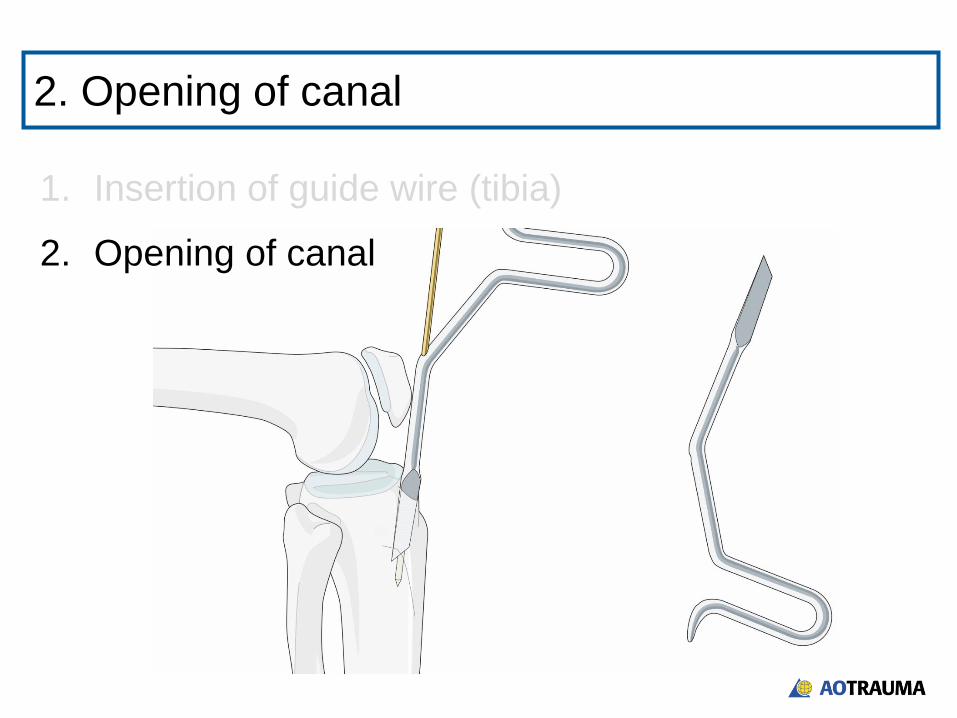
1. Insertion of guide wire (tibia)
2. Opening of canal
2. Opening of canal
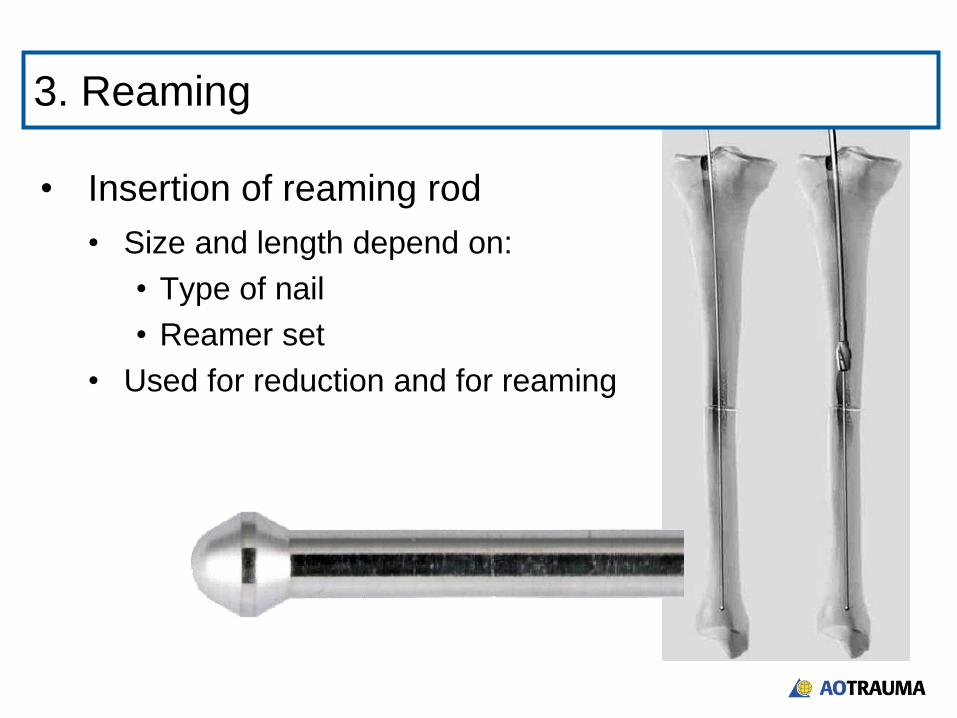
• Insertion of reaming rod
• Size and length depend on:
• Type of nail
• Reamer set
• Used for reduction and for reaming
3. Reaming
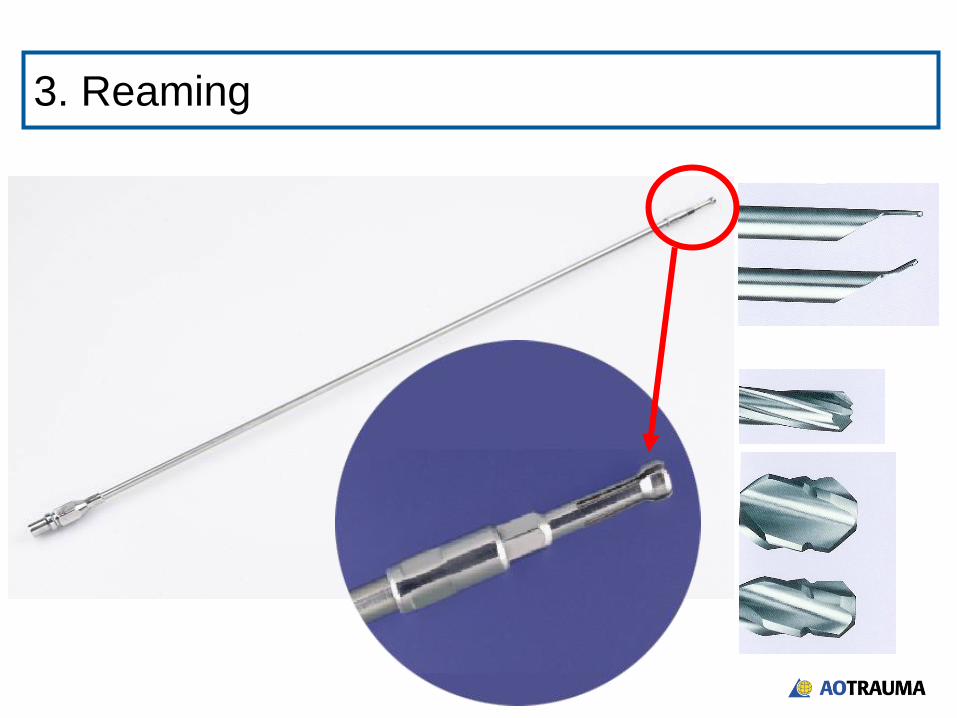
3. Reaming

• First reamer head to be used is front-cutting
• Next reamer heads to be used are side-cutting
(front is blunt)
9.0 –19.0 mm
8.5 mm
Overream to 1mm larger than diameter of nail
3. Reaming

4. Insertion of nail
• Determination of nail size:
• Intramedullary:
• Length—with 2 rods of
same length
Length of nail

• Determination of nail size:
• Intramedullary:
• Length—with 2 rods of
same length
• Extramedullary:
• Length
• Size
4. Insertion of nail
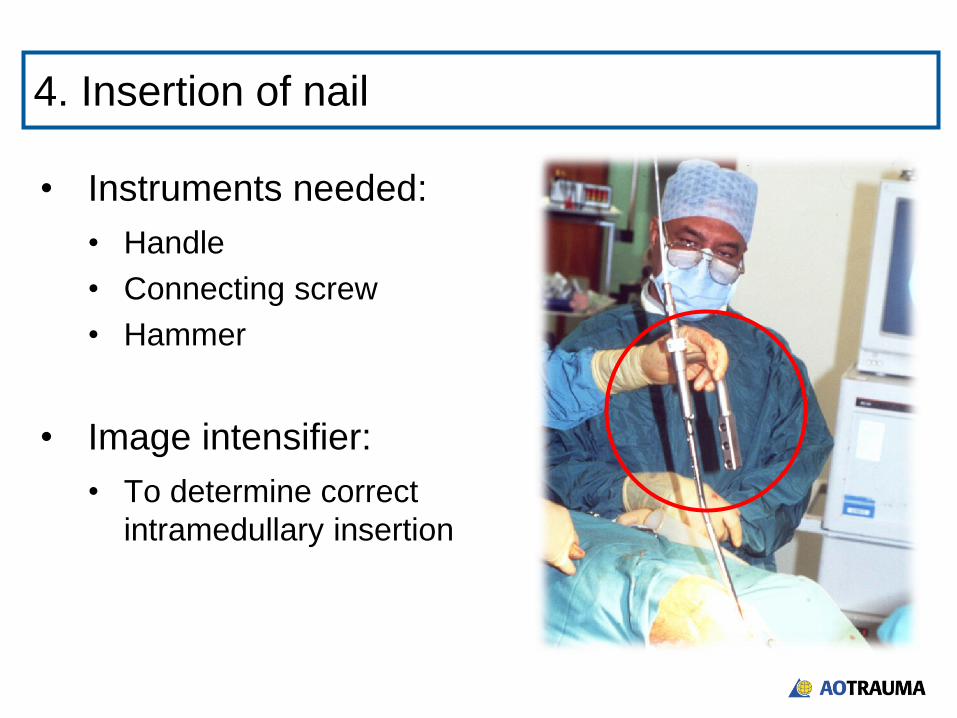
• Instruments needed:
• Handle
• Connecting screw
• Hammer
• Image intensifier:
• To determine correct
intramedullary insertion
4. Insertion of nail

• Which bolt size? Which drill bit?
• Which bolt length?
5. Locking of nail

Proximal:
• Aiming arm
• Triple drill sleeve
• Drill bit
5. Locking of nail

Distal:
• Radiolucent drive
• Pointed drill bit
5. Locking of nail
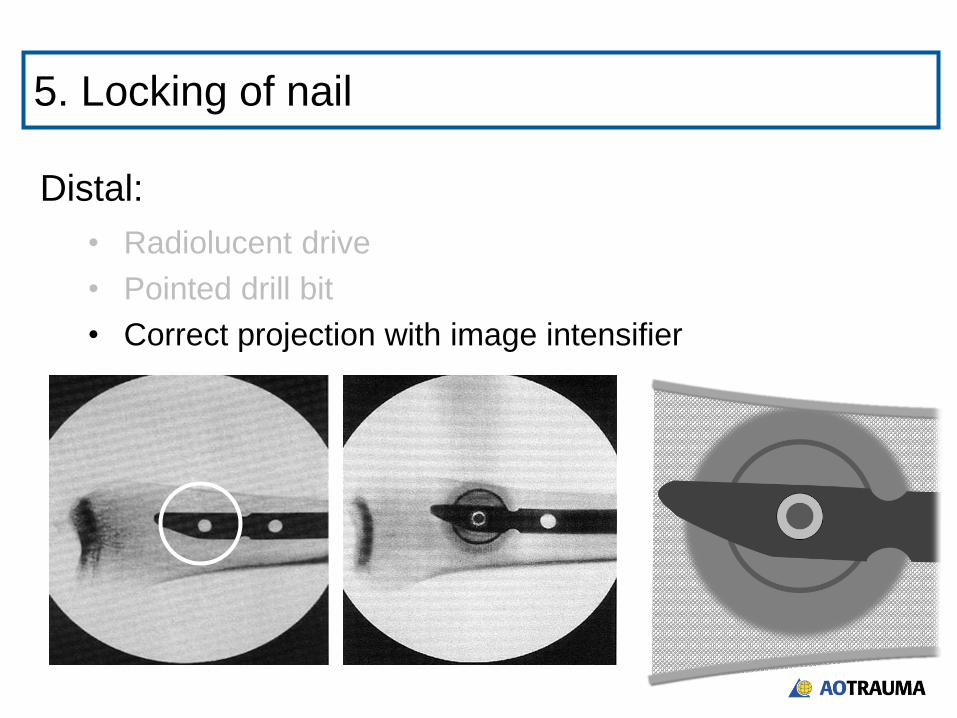
Distal:
• Radiolucent drive
• Pointed drill bit
• Correct projection with image intensifier
5. Locking of nail

• Insertion of nail end cap
5. Locking of nail

6. Final check
• Reduction:
• Alignment
• Angulation
• Rotation
• Fixation:
• Interlocking of bolts
• Fracture pattern
Summary
At the end of this lecture you will be able to:
• Explain how an intramedullary nail works
• Discuss the design of different nails
• Describe the surgical technique