private well testing act program electronic environmental ... · private well testing act program...
TRANSCRIPT

Private Well Testing Act Program
Electronic Environmental (E2) Reporting Manual
Bureau of Safe Drinking Water
New Jersey Department of Environmental Protection
January 2008

Last Updated on: 1/28/08
Page 2 of 144
NOTE TO READER The instructions provided in this electronic Data Reporting Manual presume that users have a basic working knowledge of computers and Windows 2000 or higher. In addition, users should also have a thorough working knowledge of their own software and the application(s) that will be used to prepare their data for submittal to the Private Well Testing Act Program. The PWTA Program suggests that, for basic computer and/or software training, the users contact their computer/software vendor, software or Internet help lines or their local library or community college.

Last Updated on: 1/28/08
Page 3 of 144
TABLE OF CONTENTS
1.0 SUMMARY: THE NEW JERSEY PRIVATE WELL TESTING ACT & RULES......... 6
2.0 INTRODUCTION: A NEW PWTA ELECTRONIC DATA SYSTEM ....................... 10 2.1 THE NEW PWTA XML FORMAT.............................................................................. 10 2.2 THE E2 ELECTRONIC DELIVERY SYSTEM ................................................................. 11 2.3 GENERATING AN ACCEPTABLE PWTA XML DATA FILE(S) ....................................... 15 2.4 SUBMITTING AN ACCEPTABLE PWTA XML DATA FILE(S)......................................... 16 2.5 SUBMITTING MULTIPLE XML FILES TO THE NJDEP IN ONE SUBMITTAL ..................... 16 2.6 THE NEW FIELD DEFINITION CONVENTIONS.............................................................. 17
3.0 ELECTRONIC PWTA DATA SUBMITTAL REQUIREMENTS AND PROCESS.... 19 3.1 REGISTERING A LABORATORY FOR ELECTRONIC PWTA DATA REPORTING................ 35 3.2 REQUEST ACCESS FOR ADDITIONAL USERS ............................................................ 41 3.3 ACCEPTANCE AND USE OF A PIN ........................................................................... 45 3.4 GENERATING AN XML FILE CONTAINING PWTA DATA ............................................. 48 3.5 SUBMITTING AN XML FILE CONTAINING PWTA DATA .............................................. 49
4.0 FREQUENTLY ASKED QUESTIONS CONCERNING THE ELECTRONIC PWTA SUBMITTAL PROCESS ............................................................................................... 50
4.1 HOW ARE DUPLICATE PWTA SUBMISSIONS HANDLED BY THE E2 SYSTEM? ................ 50 4.2 HOW ARE CORRECTED PWTA SUBMISSIONS HANDLED BY THE E2 SYSTEM? .............. 50 4.3 HOW DO I CHECK ON THE STATUS OF MY PWTA FILE SUBMISSION?........................... 50 4.4 HOW ARE NON-PWTA ANALYTES HANDLED BY THE E2 SYSTEM? .............................. 52 4.5 WHAT ARE THE MINIMUM COMPUTER SYSTEM REQUIREMENTS NEEDED BY A PWTA REPORTING LAB?......................................................................................................... 52 4.6 WHAT IF MY COMPUTER OPERATING SYSTEM IS MAC AND NOT WINDOWS? ................. 52 4.7 HOW CAN I OBTAIN TECHNICAL ASSISTANCE FROM THE NJDEP? .............................. 53
5.0 XML FILE FORMAT REQUIREMENTS FOR DATA SUBMITTAL VIA LABORATORY INFORMATION MANAGEMENT SYSTEM (LIMS) ............................ 54
5.1 XML FORMAT SUMMARY ........................................................................................ 54 5.2 HEADER SECTION .................................................................................................. 54 5.3 DEMOGRAPHIC SECTION......................................................................................... 54 5.4 WELL AND SAMPLE INFORMATION SECTION: ............................................................ 55 5.5 RESULTS SECTION: ................................................................................................ 55 5.6 FULL PWTA XML SUBMISSION.............................................................................. 57
5.6.1 HEADER Information Section .................................................................... 57 5.6.2 Demographic Information Section............................................................. 58 5.6.3 Well and Sample Information Section ....................................................... 61 5.6.4 Results Information .................................................................................... 64
5.7 PARTIAL PWTA XML SUBMISSIONS....................................................................... 65 6.0 PWTA DATA SUBMITTAL UTILIZING THE E2 ONLINE FORM ........................... 67
6.1 THE E2 ON-LINE ENTRY FORM................................................................................ 67 6.2 GETTING STARTED ................................................................................................. 67

Last Updated on: 1/28/08
Page 4 of 144
6.3 BASIC INFORMATION .............................................................................................. 68 6.4 DEMOGRAPHIC INFORMATION PAGE....................................................................... 71
6.4.1 General Information Section ...................................................................... 71 6.4.2 PWTA Test Requestor Section................................................................... 72 6.4.3 Property Information Section..................................................................... 72
6.5 WELL AND SAMPLE INFORMATION PAGE ................................................................ 72 6.5.1 Well Information Section ............................................................................ 73 6.5.2 Sample Collection Information Section..................................................... 74
6.6 RESULTS AND SUBMIT PAGE ................................................................................. 74 6.6.1 Submitting a File to the NJDEP Through the E2 Online Form ................ 78
7.0 PWTA DATA SUBMITTAL UTILIZING THE EXCEL SPREADSHEET.................. 80 7.1 THE EXCEL SPREADSHEET TEMPLATE ENTRY FORM................................................. 80 7.2 GETTING STARTED ................................................................................................. 80 7.3 BASIC INFORMATION .............................................................................................. 81 7.4 DEMOGRAPHIC INFORMATION PAGE....................................................................... 84
7.4.1 General Information Section ...................................................................... 84 7.4.2 PWTA Test Requestor Section................................................................... 84 7.4.3 Property Information Section..................................................................... 85
7.5 WELL AND SAMPLE INFORMATION PAGE ................................................................ 85 7.5.1 Well Information Section ............................................................................ 86 7.5.2 Sample Collection Information Section..................................................... 87
7.6 RESULTS AND SUBMIT PAGE ................................................................................. 87 7.6.1 Important Facts about the Results Screen ............................................... 89
8.0 VIEWING, OBTAINING THE STATUS OF, AND EDITING PWTA ELECTRONIC SUBMISSIONS ............................................................................................................. 94
8.1 CHECKING THE STATUS OF A SUBMITTED PWTA ELECTRONIC SUBMISSION............... 94 8.2 VIEWING A PWTA ELECTRONIC SUBMISSION IN E2 .................................................. 96 8.3 EDITING A FULL AND PARTIAL PWTA ELECTRONIC SUBMISSION............................... 99 8.4 RESUBMITTING CORRECTED FULL AND PARTIAL PWTA ELECTRONIC SUBMISSIONS. 101 8.5 CHAIN OF CUSTODY ............................................................................................. 108 8.6 EDITING AND DELETING AN INCOMPLETE REPORT ORIGINALLY CREATED WITH THE ON-LINE FORM ................................................................................................................ 108
8.6.1 Editing an Incomplete Report Originally Created Using the Online Form............................................................................................................................. 109 8.6.2 Deleting an Incomplete Report ................................................................ 109
9.0 DEFINITION OF FIELDS AND TERMS ................................................................ 111
APPENDIX 1: ACCEPTABLE COUNTY REFERENCE CODES FOR ELECTRONIC PWTA DATA REPORTING ........................................................................................ 116
APPENDIX 2: MUNICIPAL REFERENCE CODES FOR ELECTRONIC PWTA DATA REPORTING............................................................................................................... 118
APPENDIX 3: VALID VALUES FOR TEST REQUESTOR TYPE............................. 130
APPENDIX 4: VALID VALUES FOR SAMPLE REQUESTOR .................................. 130

Last Updated on: 1/28/08
Page 5 of 144
APPENDIX 5: VALID VALUES FOR TYPE OF TREATMENT.................................. 130
APPENDIX 6: VALID VALUES FOR COORDINATE METHOD ............................... 131
APPENDIX 7: VALID VALUES FOR GPS REFERENCE POINT ............................. 131
APPENDIX 8: VALID VALUES FOR FULL OR PARTIAL FILE ............................... 131
APPENDIX 9: VALID VALUES FOR UNTREATED SAMPLE LOCATION .............. 131
APPENDIX 10: VALID VALUES FOR FLUSHING LOCATION ................................ 132
APPENDIX 11: VALID VALUES FOR DETECT FLAG............................................. 132
APPENDIX 12: VALID VALUES FOR QUALIFIER CODE ....................................... 132
APPENDIX 13: ACCEPTABLE REFERENCE CODES FOR PWTA ANALYTICAL METHODS .................................................................................................................. 133
APPENDIX 14: ACCEPTABLE REFERENCE CODES FOR PWTA.......................... 136
APPENDIX 15:REQUIRED PRIVATE WELL TESTING PARAMETERS LISTED BY COUNTY ..................................................................................................................... 137
APPENDIX 16: MAPPING TO THE EDWR V2.0 XML SCHEMA............................... 138

Last Updated on: 1/28/08
Page 6 of 144
1.0 Summary: The New Jersey Private Well Testing Act & Rules The following summaries of the Private Well Testing Act (PWTA) and the Private Well Testing Act Rule are meant to provide the reader with a limited understanding of the provisions and requirements of the New Jersey Private Well Testing Act Program. For a complete reading of the Act and related rules, please see the listed resources and website locations at the end of this chapter. The rules were adopted and published in the New Jersey Register on September 16th, 2002. Summary of the New Jersey Private Well Testing Act The Private Well Testing Act (Act) was signed into law on March 23, 2001. A copy of the PWTA is available online at http://www.njleg.state.nj.us/2000/Bills/PL01/40.HTM. Although some parts of the Act became effective immediately, the testing requirements of this Act were delayed until 540 days after the signing date. Effective September 14, 2002, certain real estate transactions involving properties with private wells and some public wells will require testing of the water supply. In addition, the PWTA requires the Buyer and Seller (or in some cases Lessor and Lessee) to be notified of the test results. The required parameters for testing are listed in the Act and supplemented by the regulations. Once testing is completed, the certified laboratory must submit the test results to the New Jersey Department of Environmental Protection (NJDEP) within five business days. The types of sales covered by the Act involve real property where the potable water supply is a private well located on that property; or other real property where the potable water supply is a well that has less than 15 service connections or that does not regularly serve an average of 25 people daily at least 60 days out of the year. The closing of title may not take place on these types of properties until testing of the water supply has taken place, and until both the buyer and seller have received and reviewed a copy of the test results. Buyer and Seller must both certify in writing at closing that they have received and reviewed the test results. The buyer and seller will determine who pays for the water test as well as what actions, if any, will occur if the test indicates a failure for any parameter. This new law functions more as a “notice” type of provision. The Act also applies to certain lessors and lessees in New Jersey. The Lessor of real property where the water supply is a private well for which testing of the water is not required pursuant to any other State law, must also have the water tested for the required parameters. Lessors are required to complete testing by March 2004 and thereafter at least once every five years. The Lessor is required to provide a copy of new test results to each rental unit within 30 days of receiving those results. Any new Lessee of a rental unit is to be provided by the Lessor with a written copy of the most recent test results. This section of the Act, N.J.S.A. 58:12A-32, serves mainly as a notice to lessees. The Act specifies that the well samples must be analyzed by a New Jersey certified laboratory for the following parameters: bacteria (total coliform), nitrate, iron, manganese, pH, lead, and all volatile organic compounds for which maximum

Last Updated on: 1/28/08
Page 7 of 144
contaminant levels (MCLs) have been established according to state law. In addition, the Act states that testing shall include a short term 48-hour gross alpha test to screen for the presence of radium, provided that the NJDEP determines that there are a sufficient number of laboratories certified to perform this test. The NJDEP has the authority to limit the areas required to perform radium testing based upon the availability of certified laboratories and cost of analysis. In accordance with the Private Well Testing Act, the NJDEP has adopted rules which: Require testing (N.J.A.C. 7:9E) for those specifically named parameters in the Act
AND included additional parameters to test for, such as, fecal coliform or E. coli, mercury and arsenic. (N.J.A.C. 7:9E is available online at www.state.nj.us/dep/pwta) Mercury and arsenic are required to be tested only in specified NJ counties (See Appendix 15);
Developed a protocol for testing for gross alpha using a new method called the 48-Hour Rapid Gross Alpha Test. Refer to the companion rule proposal, Regulations Governing the Certification of Laboratories and Environmental Measurements (N.J.A.C.7:18) appearing in the New Jersey Register September 16th, 2002 ;
Developed a timeframe for the length of time the data remains valid before re-testing is required;
Developed a standardized Private Well Water Test Reporting Form for laboratories to use to convey well test results to their clients. This most recent version of the form is available on the NJDEP's PWTA website: www.state.nj.us/dep/pwta
Further, the NJDEP conducts the following activities: ♦ Receives test results electronically from laboratories; ♦ Within 5 business days of receiving a report of water test failure, provides the
appropriate local health authority with notice of same; ♦ Conducts a public information and education program regarding this Act; ♦ Evaluates the data from the test results to conduct groundwater and contamination
studies; ♦ Provides a general compilation of water test result data arranged by municipality,
county, etc. Also under this Act, health authorities may (but are not required to) notify property owners within the vicinity of people who receive a failing test result for one or more of the parameters. However, because these individual tests are considered confidential, the exact location cannot be identified. The health authority's notice would recommend testing for the parameter(s) at issue. This Act and its implementation will most likely result in increased public awareness of the desirability of testing private drinking water wells. Summary of the New Jersey Private Well Testing Act Rules The Private Well Testing Act Regulations (N.J.A.C. 7:9E) were adopted on September 16th, 2002. The final rules are found on the NJDEP PWTA website: www.state.nj.us/dep/pwta. The regulations require wells subject to the Act to be

Last Updated on: 1/28/08
Page 8 of 144
analyzed for those parameters listed in the Act by a New Jersey certified laboratory certified in drinking water methods. The rules require laboratories to submit test results including additional pertinent information, to the NJDEP electronically within five business days after completion of the analyses. The well sample may be collected by an employee of the certified laboratory or by the laboratory's authorized representative. In addition, the individual who analyzes for pH in the field must be certified, in accordance with N.J.A.C. 7:18-8, for analyze immediately parameters which include pH. As part of the electronic submission to the NJDEP, the X, Y coordinate location of the well must be determined using the Global Positioning System (GPS) in accordance with NJDEP standards N.J.A.C. 7:1D. The PWTA rules do not limit who may collect these coordinates provided the NJDEP standards are met. Well water samples must be collected from an untreated (raw), cold, non-aerated spigot or tap. If a treatment device is on the spigot or tap, the device must be disabled before a sample is collected or collected from a spigot or tap where a treatment device is not present. If the treatment device is on the plumbing entering the house (e.g. POET) and cannot be disabled, the well water sample shall be collected from a location outside the house or dwelling and must represent untreated water. Treated samples do not meet the requirements of N.J.A.C. 7:9E and therefore, are not considered to be in compliance with the PWTA rules. When collecting the well sample for lead, a flushed sample must be collected by running the water through the plumbing first for at least two minutes. This is done so that the analysis represents the raw (untreated) water quality of the well and does not represent lead leached from the plumbing system of the house or dwelling. The requirement in the rules to analyze for mercury, arsenic, and gross alpha particle activity varies depending upon the county where the property containing the well is located (See Appendix 15). In addition, the requirement to analyze for gross alpha particle activity is being phased-in over time beginning in March 2003, and is also based on the county location of the property (See Appendix 15). Cumberland and Gloucester counties are the first counties subject to performing gross alpha testing. Once the analyses are complete, one laboratory (known as the reporting laboratory) has five business days to provide the analytical results to their client on a standardized form (Private Well Water Test Reporting Form) developed by the NJDEP. This most recent version of this form is available on the NJDEP PWTA website: www.state.nj.us/dep/pwta. In addition, also within the five business days, the reporting laboratory must also electronically submit the analytical results as one complete analytical package to the NJDEP. This manual describes how the reporting laboratory transmits the data to the NJDEP. The NJDEP will forward all well test results to the appropriate local health authority within five business days of electronically receiving the results from the reporting laboratory. A well test failure is defined as any result that exceeds a primary or secondary safe drinking water standard. Laboratories are required to notify directly the local health authority of well test failures for acute parameters, nitrate and coliform.

Last Updated on: 1/28/08
Page 9 of 144
Local health authorities may choose to issue notification to surrounding homeowners to sample for the parameter(s) of concern. All individual well results submitted in compliance with the PWTA must be kept confidential by state and local government entities. Only compilations of the data will be made available to the general public as part of public outreach efforts by the NJDEP. Resources: For a copy of the NJ Private Well Testing Act, N.J.S.A. 58:12A-26 et seq: http://www.njleg.state.nj.us/2000/Bills/PL01/40.HTM. For a copy of the NJ Private Well Testing Act Rule, N.J.A.C. 9:E: http://www.state.nj.us/dep/pwta For a copy of the revisions to the Regulations Governing the Certification of Laboratories and Environmental Measurements, N.J.A.C.7:18: http://www.state.nj.us/dep/pwta

Last Updated on: 1/28/08
Page 10 of 144
2.0 Introduction: A New PWTA Electronic Data System The NJDEP's Bureau of Safe Drinking Water-Private Well Testing Act (PWTA) Program provides this manual to furnish assistance to certified PWTA reporting laboratories on how to submit data to the NJDEP electronically. The NJDEP is pleased to inform you that we have an entirely new database delivery and management system. The new system consists of two applications working together to receive, validate, and store electronic PWTA data. The “front end” application is a new web based electronic data delivery system called the Electronic Environment (E2) Reporting System to facilitate submitting your PWTA data to the NJDEP. This manual will explain in detail how certified laboratories will utilize the E2 reporting system to submit PWTA sample data to the NJDEP in a new electronic format. In addition, the NJDEP has also designed and developed an entirely new “backend” database management system in conjunction with E2 known as Compass to store the submitted PWTA data. The NJDEP will use Compass to permanently store all PWTA sample results, run additional validations on PWTA data, and construct various reports and queries on the data. This new manual is designed to make it easier to understand how to submit your electronic data to the NJDEP and how the data is validated and incorporated into our new database management system. This new data management system will be used to help the PWTA Program make more informed decisions about regional and statewide water quality issues, improve our ability to review your data more quickly and accurately, and to communicate this data to health officials more effectively. Requirements for electronic data are included in the Private Well Testing regulations which are part of the New Jersey Administrative Code (N.J.A.C. 7:9E). The regulations require that results from the analysis of private well water samples be provided to the NJDEP in an electronic format. The NJDEP and its software vendor developed a new and improved electronic data entry and reporting system to ensure that laboratories enter data results that comply with the requirements of the PWTA law. Under the E2 application of the new PWTA database system, reporting laboratories will have three options to generate the data in an acceptable format and then submit it to the NJDEP electronically. They include the new online entry form, Excel spreadsheet template, or uploading a data file in the new XML file format directly into the system. Each one of these methods will be described in detail in this manual. As required in the previous data format, the GPS coordinate location of every well will be determined in accordance with NJDEP standards and be submitted in State Plane Survey Feet. In this way, accurate coordinate information can be entered into our data management system that will be accessible through the NJDEP's GIS System for data sharing and evaluation.
2.1 The New PWTA XML Format All analytical data submitted from the laboratory for the purposes of complying with the Private Well Testing Regulations must be received electronically by the NJDEP. The new PWTA data format uses a schema based on the eXtensible Markup Language (XML) format. An XML schema is a format that defines the data elements, required fields, order, and data types in an XML file. General information regarding specifications, syntax, guidelines and programming recommendations about XML

Last Updated on: 1/28/08
Page 11 of 144
schema can be found on the World Wide Web Consortium (W3C) at: http://www.w3c.org/XML/Schema The NJDEP chose to use the XML file format because it represents a powerful, flexible, and standardized format in today's computer industry. The XML schema defines the relationship of the data element names, order, required fields, data types for all elements, and the XML files provide the actual data in the manner requested by the schema file. In order to submit data electronically, it is absolutely essential that the XML schema file outlined in this manual is strictly adhered to.
2.2 The E2 Electronic Delivery System The New Jersey Electronic Environmental (E2) reporting system is a web based system that allows reporting laboratories to submit various reports to the NJDEP. The main screen of the E2 system in illustrated in Figure 2.1. Laboratories can access the E2 system at minimal costs using existing Internet access. The system provides reporting laboratories with the following capabilities: Ability to submit original or revised laboratory reports. E2 allows laboratories to
either create submission files online, create submission files using an Excel spreadsheet template, or upload XML submission files created from a programmed LIMS (using a DEP provided XML Schema).
Ability to view validation results online. All report submissions can be quickly
validated to verify that they meet minimum reporting criteria. Meaningful validation messages help pinpoint reporting errors so they can be corrected and resubmitted.
Ability to save incomplete reports. If a laboratory representative does not finish
filling out a report in one session, they can save the report and resume filling it out at a later time. DEP will not review incomplete reports. The laboratory representative must submit the completed report in order for the data to be processed by the E2 system.
Ability to view and print previously submitted reports. All submissions made through
the E2 reporting system are saved for later retrieval. Ability to monitor the status of all submissions. Users can log into the system to see
the current processing status of all submissions (Pending, Processed, Resubmitted, Rejected). Users also receive an email notification upon receipt of the sample data. In addition, program specific processing statuses can also be tracked.
In essence, the E2 system serves as an electronic filing cabinet, allowing laboratories to manage their own reporting to NJDEP and monitor the status of past report submissions. In order to provide sufficient security for all submitted information, access to the E2 system is restricted in the following ways:

Last Updated on: 1/28/08
Page 12 of 144
Any person that wants to have any access to the E2 system must have an
authorized NJDEP Online account. Any person that wants to submit reports for a particular laboratory must request
and be granted an association with their laboratory. Any person that wishes to certify laboratory results must fill out an Electronic
Signature Agreement to obtain a Personal Identification Number (PIN).
Figure 2.1 The Main E2 screen.
As shown in Figure 2.1, the main screen of the E2 system has a status bar across
the top containing a , , and links: The icon allows the user to return to the E2 default homepage as shown above from any place within the E2 program.
The content of the icon will change depending upon the screen the user is currently on. The help provides a general set of instructions or information on the page in E2 a user is currently in. For more detailed help, a user should refer to the PWTA website (www.state.nj.us/pwta) or the NJDEP general E2 website (www.state.nj.us/dep/online/e2) where an electronic copy of this manual and other helpful information regarding the E2 system can be accessed. The icon allows you to logout of the E2 system once a user has completed their E2 related activities. There are several modules with links under each one located along the left hand side of the main screen as shown in Figure 2.1. The modules and links that you will

Last Updated on: 1/28/08
Page 13 of 144
be able to see will depend on your current access rights. When you start using E2 for the first time, you will only see the “My Account” module. After your account has been associated with a laboratory (See Chapter 3.2), a user will gain access to the Laboratory module. The main modules are the “Laboratory” and “My Account” modules. Other modules include “Water System” which is only used for the Safe Drinking water program and the “Admin” module. Laboratory Administrators will have limited access to this module to approve the requests of other individuals within their lab to become certifiers or preparers for their lab. A brief explanation of each of the links in the “Laboratory” and “My Account” modules is provided below. Detailed information on each of these links is provided in various chapters throughout this manual.
The following links are found under the Laboratory Module:
• The Create New Reports screen provides laboratories with several methods for generating a submission in XML file format:
Download a blank Microsoft Excel template, fill out, generate XML and upload to system;
Download a blank XML file, fill out, and upload; Enter PWTA data directly in the Online form; A laboratory can also view and print paper-based PWTA forms
using this link.
• The Upload XML Reports link allows a user to select and upload a saved PWTA file in XML format that has been generated in compliance with the NJDEP’s PWTA XML Schema file format. Additionally, a laboratory has the option to test the XML file they wish to upload for completeness and compliance with the PWTA XML schema.
• This screen allows users to access incomplete PWTA reports that have been saved and not yet submitted to the NJDEP. A laboratory may also delete a saved, incomplete report from this link. You can only view incomplete reports originally created utilizing the Online Form.
• This link lists in chronological order the PWTA files that have
been submitted to the NJDEP by a laboratory. The XML files from each submission can be viewed and downloaded on this screen. A laboratory can also search for a submission using various criteria.
• This link contains reference information regarding water systems. It also contains data about method and parameter information for safe drinking water data submissions. This link is not used by the PWTA program.
The “My Account” Module contains the following links:

Last Updated on: 1/28/08
Page 14 of 144
• The user’s basic account information including User ID and e-mail address can be seen by clicking on Basic Information. This is illustrated in Figure 2.2.
Figure 2.2 This Screen Shows Basic Information About the Current User.
• The user can request a new PIN if they forgot their original one or it’s security has been compromised after clicking on this icon. This is illustrated in Figure 2.3.

Last Updated on: 1/28/08
Page 15 of 144
Figure 2.3 The Request New PIN Screen.
• This link is intended for Water System purveyors to link their E2 accounts with a Water System. This screen is not used by the PWTA program.
• This link provides information about the laboratory including certification number, laboratory name, program the laboratory is associated with and can send in electronic data (e.g. PWTA, EDWR, NJQL), the role and status E2 participation.
2.3 Generating an Acceptable PWTA XML Data File(s)
There are three (3) ways for reporting labs to generate PWTA .XML data files (See Chapter 3.4 for more detailed information): 1.) Web Entry Online - the user (reporting lab) enters and validates PWTA data directly
using the online web entry form in the E2 application via the Internet. 2.) Excel Spreadsheet Template- the user (reporting lab) enters PWTA data directly
into a newly designed Excel spreadsheet template and converts the data to XML file format through a button on the spreadsheet.
3.) LIMS XML Schema Programming - the user (reporting lab) generates the XML
(.xml) file utilizing a LIMS programmed according to the PWTA XML schema criteria. Similarly, a user may also download a blank XML file to fill out PWTA

Last Updated on: 1/28/08
Page 16 of 144
submissions using XML file format (for advanced users only who are proficient with the XML programming language).
2.4 Submitting an Acceptable PWTA XML Data File(s)
There are two ways for reporting labs submit PWTA electronically (See Chapter 3.5 for more detailed information): 1.) Web Entry Online Form - the user (reporting lab) having entered PWTA data on the
online form may submit the data files directly through the E2 web based application by clicking the button once the data has been validated (See Chapter 6.0).
2.) Single or Batch Online Upload - the user (reporting lab) may upload the XML file(s)
created by a Laboratory Information and Management System (LIMS) or Excel spreadsheet template by clicking the upload button on the E2 web based application and browsing for the file(s) to be submitted. If multiple files are to be submitted via batch upload, they must first be compressed into a .zip file and submitted. Once multiple XML files have been compressed into a .zip file, they can be uploaded to the E2 system as discussed below.
2.5 Submitting Multiple XML Files to the NJDEP in One Submittal
The new E2 data delivery system allows a lab to submit multiple XML files containing PWTA data in one submission. In order for a PWTA certified laboratory to submit multiple files to the NJDEP in one submission they must do the following: 1.) Compress all of the XML files into a .ZIP file format utilizing WinZip or other similar program. 2.) Under the Laboratory module, click on the link as shown in Figure 2.4. Browse for the location of the .ZIP file. Click the check box
and click the button. 3.) The E2 program will automatically unzip and validate each set of sample results. You can check the status of each PWTA sample result set by clicking on the
link under the Laboratory module as seen in Figure 2.1. 4.) Note: If some of the XML files in a batch upload fail validation checks, then only those files need to be corrected and resubmitted to the E2 system. Do not resend all of the files in the original .zip file. For example, a laboratory uploads six PWTA XML files in a single .zip to the E2 system. If two of the six PWTA XML files fail the validation checks, then the laboratory must make the necessary corrections to the two files that failed and upload only these two corrected files in a new .zip file. The other four original XML files successfully made it into the system and do not have to be uploaded again to the E2 system.
After each PWTA report is submitted, the E2 system will send a confirmation email to the submitter notifying them that the report has been received by NJDEP. The E2

Last Updated on: 1/28/08
Page 17 of 144
system will then perform a series of validation checks to ensure the data elements, required field values, and structure of the PWTA XML data file are correct. The validation process may take several minutes to complete. If the submission is accepted, E2 will send out 2 additional emails:
• The laboratory will receive a confirmation email notifying them of the accepted submission
• The appropriate health official will receive an email notifying them of the sample results. This email will contain 2 attachments:
o Copy of the PWTA test results in .PDF format o Copy of the PWTA test results in .XML format
The text of this email will also identify any of the test results which exceed the standards.
Figure 2.4 Click on the Upload XML Reports Link Under the Laboratory Module to Obtain the Status of a Specific PWTA Electronic Submission.
2.6 The New Field Definition Conventions
There are several mandatory fields necessary for the submittal and acceptance of PWTA data. If any of the required fields are not completed or incorrect, then the laboratory will be required to revise and resubmit the data. The designation for all of the fields in this manual are described below. Please refer to Chapter 5.0 for a complete list of all required, conditionally required, and optional fields.

Last Updated on: 1/28/08
Page 18 of 144
♦ Fields marked with an "X" are REQUIRED fields, and must contain a correct entry or the file will be rejected by the E2 delivery system.
♦ Fields marked with "XX" are conditionally required fields. Examples of
conditionally required fields include: new well construction, treatment, contract of sale, etc. Entries into conditionally required fields are dependent upon the values listed in other required fields. For example, if a value of “Alternative Location” (Alt-Lo) is entered in the Flushing Location field, then an entry must be made into the Flushing Information Comments field. Failure by the user to complete such fields will result in the rejection of a data file.
♦ Fields marked with an "N" are optional information fields and will only apply
under limited circumstances, for example when a second address field is needed. Validation of the data file does not rely on the completion of optional fields.

Last Updated on: 1/28/08
Page 19 of 144
3.0 Electronic PWTA Data Submittal Requirements and Process In order to submit PWTA sampling results electronically to the NJDEP, the following procedures must be completed:
1. Obtain an NJDEP Online account through the myNewJersey portal. 2. Register the laboratory for electronic reporting and establish a Laboratory
Administrator. 3. Administrator makes a laboratory association request in the E2 system.
4. Obtain a PIN to upload PWTA XML Files for the Certifier of the results. Note: The password you create with your NJDEP Online account is not the same as your PIN to upload PWTA XML files. The password allows you to access the E2 system and the PIN allows you to upload PWTA data to the E2 system.
5. Certifier makes a laboratory association request in the E2 System. 6. Laboratory Administrator approves/rejects Certifiers lab association request in
the E2 system. In accordance with N.J.A.C. 7:9E, all Private Well Testing Act analytical data are required to be submitted electronically to the NJDEP. This section outlines the necessary steps to be taken by a N.J. Certified PWTA reporting laboratory before they can submit electronic data through NJDEP's new E2 Reporting System. Before PWTA results can be submitted to the NJDEP, the reporting laboratory must create an NJDEP Online account through the myNewJersey portal as discussed below.
3.1 Registering a Laboratory for Electronic PWTA Data Reporting
Step 1. Obtain an NJDEP Online Account Through the myNewJersey Portal
NJDEP Online is the NJDEP’s application that provides user account management for a number of the NJDEP’s on-line systems. Any person that wants to have any access to the E2 system must first have an authorized NJDEP Online account. A new version of NJDEP Online was put into production in October 2007. Both current and new users must set-up a new account through the new NJDEP Online application in order to access the E2 system to submit electronic data. Under the new NJDEP Online process, all access to NJDEP Online (www.njdeponline.com) will be managed by the myNewJersey portal (www.nj.gov). Think of myNewJersey as a central place to log in and get access to a variety of services or systems across many state departments. This is a change from the previous version of NJDEP Online where users were granted access via the NJDEP Online application itself. Prior to anyone using NJDEP Online, users must have two things:
1. A valid account with myNewJersey 2. An authentication code for the NJDEP Online service.
A myNewJersey account is free and can be created at any time. Some users may have

Last Updated on: 1/28/08
Page 20 of 144
an existing myNewJersey account and some may not. Both scenarios will be addressed in this section. Once you create an account (or if you have one already) on myNewJersey you still will not be able to access the new NJDEP Online. In order to gain access to NJDEP Online (or any other protected service) you will need an authentication code. The authentication code can only be obtained via an email generated from the portal. The authentication code grants the user access to a specific service on the myNewJersey Portal (i.e. NJDEP Online).
Because we don't know who needs or wants access to NJDEP Online, new users will need to initiate a request for an authentication code. This will be done from a page which is linked right from ‘www.njdeponline.com’. The requestor will enter their name, email, and organization and an email will be sent to them. This email has detailed instructions telling them what to do which involves entering the authentication code and creating a myNewJersey account if necessary.
All existing NJDEP Online users who logged into NJDEP Online in the past year will receive authentication codes via email. Users will simply need to follow the instructions within this email to gain access to NJDEP Online and will not need to request an authentication code. The authentication code will be sent to the e-mail address they originally set-up in NJDEP Online application.
Please follow the instructions below to set up your new NJDEP Online account. These same instructions can also be found on the NJDEP Online page at ‘www.njdeponline.com’.
The following instructions cover several scenarios (Please see below to find your scenario):
1. New NJDEP Online Users: Begin at Step 1, Page 21. 2. Existing NJDEP Online Users – You should receive an email as noted above
containing an authorization code and instructions: Begin at Step 3, Page 23.

Last Updated on: 1/28/08
Page 21 of 144
STEP 1: REQUESTING ACCESS (New Users – Users who do not have a NJDEP Online account)
1. Go to ‘www.njdeponline.com’ and follow the link labeled ‘here’ within the following sentence: “New users should request access to DEP Online here.” This will take you to the screen shown below.
2. Fill in the following fields: ‘Contact Name’, ‘Organization Name’, ‘Email Address’, and ‘Confirm E-Mail’.
3. Click on the “Request” button.
Figure 3.1 Request access to NJDEP Online screen

Last Updated on: 1/28/08
Page 22 of 144
STEP 2: ACCESS CONFIRMATION
1. You will receive on-screen confirmation that your request is being processed. 2. You should receive an email from ‘[email protected]’ that
contains your Authorization Code and login instructions for NJDEP Online. 3. Click on the “Continue” button to log out of the system at this time.
Figure 3.2 Request confirmation screen in NJDEP Online
The email you receive from ‘[email protected]’ should contain a unique Authorization Code as well as instructions for accessing DEP Online through myNewJersey. Please note that, authorization codes are account and e-mail address specific and may not be shared or used more than once.

Last Updated on: 1/28/08
Page 23 of 144
STEP 3: REGISTRATION (Users who have NOT registered with MyNewJersey)
1. Go to ‘www.nj.gov’ and click the “Register” button in the upper left-hand corner.
Figure 3.3 Register for a myNewJersey account on the New Jersey state home page

Last Updated on: 1/28/08
Page 24 of 144
2. Fill in the following fields: ‘Log On ID’, ‘Password’, ‘Retype your password’, ‘First name’, ‘Last name’, ‘Question you want us to ask’, ‘Your answer’, ‘Email address’, ‘Retype your email address’. 3. Click on “Create myNewJersey Account”. 4. Logout of the system. Note: You are now registered with myNewJersey
Figure 3.4 Complete the creation of a myNewJersey account

Last Updated on: 1/28/08
Page 25 of 144
STEP 4: LOGGING IN & USING AUTHENTICATION CODE (Users who have registered with myNewJersey)
1. Go to ‘http://www.nj.gov’ and click “Login”.
Figure 3.4 Log-in to the New Jersey state home page to enter authorization code

Last Updated on: 1/28/08
Page 26 of 144
2. Enter your ‘Log On ID’ and ‘Password’ and click “Log On”.
Figure 3.5 Enter logon ID and password

Last Updated on: 1/28/08
Page 27 of 144
3. Click on ‘enter authorization code’.
Figure 3.6 Enter authorization code

Last Updated on: 1/28/08
Page 28 of 144
4. ‘Enter your authorization code’ and click “Finished” (you should receive your authorization code and instructions via email from ‘[email protected]’ as noted above).
Note: The system will automatically log you out after clicking “Finished”.
Figure 3.7 Complete authorization code process

Last Updated on: 1/28/08
Page 29 of 144
STEP 5:
1. Log in to your account (the channel or channels for your NJDEP Online role will be available on the ‘myNewJersey’ page).
2. Make sure you are on the ‘myNewJersey’ screen. 3. Click on ‘DEPOnline Services’.
Figure 3.8 Access DEP Online services

Last Updated on: 1/28/08
Page 30 of 144
Step 6: 1. After a user creates an account in MyNJ and enters their authorization code, the
first screen will be the Portal ID Check screen.
Enter their EXISTING DEP ONLINE ID in the box and click Continue.
Figure 3.9 The Portal ID Check screen

Last Updated on: 1/28/08
Page 31 of 144
2. Request Certification PIN Screen For users that do not have any other DEP Online affiliations with Air or Land Use, they can select SKIP at this screen. PWTA users should select the SKIP button.
Figure 3.10 Press the “Skip” button to bypass the Request Certification screen

Last Updated on: 1/28/08
Page 32 of 144
My Facilities Screen 3. Click on the “Complete Setup” button.
Figure 3.11 Click on the “Complete Setup” button to complete the NJDEP Online setup

Last Updated on: 1/28/08
Page 33 of 144
4. My Services Screen Scroll down to the section “Services Not Requiring Facilties”. From here, the user can check PWTA, eDWR, and/or Volunteer Water Monitoring, depending on the programs for which you want access. PWTA users should click ‘PWTA’. Click on the OK button.
Figure 3.12 The “My Services” screen

Last Updated on: 1/28/08
Page 34 of 144
5. My Workspace Screen After selecting their services, the user will be returned to the “My Workspace” screen and be able to see the services that have been assigned to them in the “Services Selection” section.
The user should click on the links in the “Services Selection” section to log in to their desired service. The next time the user logs in, they will return back to the “My Workspace” screen as their DEP Online start page.
Figure 3.13 The “My Workspace” screen

Last Updated on: 1/28/08
Page 35 of 144
6. Forwarding to Service Screen Upon selecting a service, the user will receive a screen indicating that they are being forwarded to that service.
Figure 3.14 User being redirected the E2 PWTA application

Last Updated on: 1/28/08
Page 36 of 144
Figure 3.15 The E2 Laboratory Registration Form (E2-LAB-001). Step 2. Register the Laboratory for Electronic Reporting and Establish Laboratory Administrator A Responsible Official at the laboratory must complete, sign, and submit the E2 Laboratory Registration Form (E2-LAB-001) which is available for download at the PWTA website (http://www.state.nj.us/dep/pwta) or the NJDEP E2 website (http:www.state.nj.us/dep/online/e2). A sceen shot of this form is provided in Figure 3.15. This form indicates the laboratory’s desire to participate in the E2 program and identifies the individuals who will have Laboratory Administrator access to the E2 reporting system. It is recommended that a minimum of two Laboratory Administrators be identified at the level of Lab Manager and /or Quality Assurance Officer. The Responsible Official may also serve as the Laboratory Administrator. Send this form to: NJDEP – Office of Quality Assurance
PO Box 424 Trenton, NJ 08625-0424 Attn: E2 Coordinator
Please note that, the NJDEP will not accept any facsimiles or copies of the registration form. The original form with a blue ink signature must be submitted to the address above. If after initial registration it is necessary to add additional Laboratory Administrators an original E2 Laboratory Registration form must be submitted for each Administrator.

Last Updated on: 1/28/08
Page 37 of 144
Step 3. Administrator Makes a Laboratory Association Request in the E2 System Once a Lab Administrator completes and submits the Laboratory Registration Form, they must go into the E2 system and request an association with their laboratory. If the Laboratory Registration Form is complete and correct, then the Office of Quality Assurance will activate the Lab Administrator(s) account for a specific lab. An e-mail will be sent to the laboratory’s address informing them that they have been approved by the NJDEP as a Lab Administrator. Please follow the below-listed procedures to make a lab association request for an Administrator:
1. Go to njdeponline.com, click on the continue button, enter your User Name and Password on the myNewJersey page. Click on the PWTA link to log into the E2 system. The E2 Main page is displayed as shown in Figure 3.17.
2. 3. Click on the link under the My Account module on the
main E2 page on the left-hand side.
4. Click on the button in the upper right-hand corner to bring up the “Add Laboratory” screen.
5. Enter the laboratory name and/or certification number that you are requesting
an association with. After filling in this information, click on the button to bring up the next screen.
6. Locate “PWTA” under the Program column, and enter the desired role (Preparer, Certifier, or Administrator) from the drop-down box.
7. Place a in the box next to the role column and click on the
button. 8. The status of your request is listed as “pending” until approved by the
NJDEP’s Office of Quality Assurance. You will receive an e-mail from the E2 system listing your requested role, laboratory you are requesting association with, and program (PWTA) you are preparing/submitting electronic data.
9. To check the status of your request, click on the link under the “My Account” module. Once you have been approved by the NJDEP, your individual status will change from pending to active. The E2 system will also send an e-mail to the laboratory informing them that an individual has been approved as a Laboratory Administrator.
Step 4. Obtain a PIN to Upload PWTA XML Files for the Certifier of the Laboratory Results In addition to the Laboratory Registration Form, a second form must be filled out by every individual who will actually be uploading PWTA data to the E2 system. The Certifier (or Administrator if they chose to actually upload PWTA data) for the laboratory must complete, sign, and submit the Electronic Signature Agreement (E2-ESA-001). This document serves as a formal agreement between each PIN holder (Certifier) and

Last Updated on: 1/28/08
Page 38 of 144
the NJDEP regarding the responsibilities and use of their PIN. The Electronic Signature Agreement (Form E2-ESA-001) must be completed and signed by the Certifier as part of the process of obtaining a PIN to submit PWTA through E2. Once the form is completed, it must be submitted to the NJDEP’s Office of Quality Assurance listed in the address above in Step 2. Please note that this form must be properly notarized and submitted with with a raised seal. As with the Laboratory Registration Form, the NJDEP will not accept any facsimilies or copies of this form. An original, notarized form with a raised seal and blue ink signature must be mailed to the address listed above. This form can be downloaded from the PWTA website (http://www.state.nj.us/dep/pwta) or the NJDEP E2 website (http:www.state.nj.us/dep/online/e2). Step 5. Certifier Makes a Laboratory Association Request in the E2 System Once a Certifier has completed the Electronic Signature Agreement (E2-ESA-001) they must go to http://njdeponline.com to set up a user account to gain access to the E2 system (see Step 1). Once a Certifier has gained access to the E2 system they must request an association with their specific laboratory. Please follow the below-listed procedures for a Certifier to make a lab association request:
1. Go to njdeponline.com, click on the continue button, enter your User Name and Password in the myNewJersey page. Click on the Private Well Testing Act link to log into the E2 system. The E2 Main page is displayed as shown in Figure 3.17.
2. Click on the link under the My Account module on the main E2 page.
3. Click on the button in the upper right-hand corner to bring up the next screen.
4. Enter the laboratory name and/or certification number that you are requesting
association with. After filling in this information, click on the button to bring up the next screen.
5. Locate “PWTA” under the Program column, and under the Role drop-down menu select “Certifier”.
6. Place a in the box next to the role column and click on the
button. 7. The status of your request is listed as pending until approved by your
Laboratory Administrator. The approved Laboratory Administrator will be responsible for approving/rejecting all Certifiers and Preparers for their individual lab. The NJDEP will not be approving/rejecting Certifiers and Preaparers for specific laboratories. The approved Laboratory Administrator will manage all Certifer and Preparer E2 access for their specific laboratory. You will receive an e-mail from the E2 system listing your requested role (Certifier), laboratory you are requesting association with, and program (PWTA) you are submitting electronic data.

Last Updated on: 1/28/08
Page 39 of 144
8. To check the status of your request, click on the link under the “My Account” module. Once you have been approved by the Laboratory Administrator, your individual status will change from pending to active. The E2 system will also send an e-mail to the laboratory informing them that an individual has been approved as a Certifier.
Step 6. Laboratory Administrator Approves/Rejects Certifiers Lab Association Request in the E2 System Once a Certifier has made a laboratory association request, the Laboratory Administrator must go into the E2 system and approve/reject their request. When a Laboratory Administrator approves a Certifier, the NJDEP will e-mail the individual a PIN #. This PIN # is used to submit PWTA reports to the NJDEP through E2. A Laboratory Administrator can approve a Certifier or Preparer for their lab by following these procedures:
1. Go to njdeponline.com, click on the continue button, enter your User Name and Password in the myNewJersey page. Click on the Private Well Testing Act link to log into the E2 system. The main E2 page is displayed in Figure 3.1.7.
2. Click on the link under the Admin Tools module on the main E2 page. If no requests are visible, you can search for them using the fields in the Search Panel. Enter your Laboratory Name and/or Certification Number. Set the Association Status to “Pending” and User Role to “All”.
Click on the button. This should bring up a list of Certifiers/Preparers with a Laboratory Association Request.
3. Under the Status column, change the drop-down menu selection from “Pending” to “Active”.
4. Place a in the box next to the Status column and click on the
button.
As stated above, once a Laboratory Administrator approves a Certifier, the NJDEP will e-mail the individual a PIN #. This PIN # is used to only upload PWTA reports to the NJDEP through E2.
NOTE: Use of an electronic PIN by a reporting laboratory shall be used as an electronic signature certifying that all sampling, analyses and quality control procedures were conducted in accordance with N.J.A.C. 7:9E and N.J.A.C. 7:18.

Last Updated on: 1/28/08
Page 40 of 144
Figure 3.16 Screen Shot Indicating that A Certifier Has A Lab Association Request that Must Be Approved by a Laboratory Administrator.
Figure 3.17 The Main E2 Screen.

Last Updated on: 1/28/08
Page 41 of 144
Figure 3.18 Select a Method to Generate an XML File Under the PWTA Section. 3.2 Request Access for Additional Users Any person (in addition to the Certifier or Laboratory Administrator) that wishes to access laboratory reports within E2 will also need to be granted access to the laboratory. This can be accomplished by logging into E2, and requesting access to a particular laboratory. The user will request one of the following account types:
User Type Account Privileges: Preparer Allowed to download and prepare laboratory reports.
Allowed to view reports and past submissions, but not certify or upload any submissions.
Certifier Allowed to download, prepare, upload, review, and certify the accuracy of reports. Allowed to submit reports to the state agency.
Laboratory Administrator
Allowed to download, prepare, upload, review, and certify the accuracy of reports. Allowed to submit reports to the state agency. Allowed to approve or deny requests from others requesting to be associated with the laboratory
Each person may have a different access level depending on the laboratory and NJDEP program. For example, an employee for “Laboratory A” may have Certifier privileges for the PWTA program, but Preparer privileges for the NJQL program. The Laboratory Administrator can change the access level of a user for his or her laboratory at any time.

Last Updated on: 1/28/08
Page 42 of 144
The Laboratory Administrator can also approve additional personnel from their lab to be Preparers or Certifiers for their laboratory. This can be accomplished by doing the following:
1. The Laboratory Administrator logs into E2 through NJDEP Online and the myNew Jersey page.
2. Click on the link under the Admin Tools module.
3. Click on the tab and enter the name and/or certification number of your laboratory.
4. Change the status from “Pending” to in the drop-down box. Place a check mark in the empty white box next to the status.
5. Click the button and the individual is now active. Please note that, a Certifier must have completed, signed, submitted, and notarized the Electronic Signature Agreement form (E2-ESA-001) to the NJDEP. Once this is received and accepted, the NJDEP will e-mail the certifier a PIN # to submit electronic PWTA data.
Figure 3.19 Click on the Associated Laboratory Link to Request an Association and Role With a Specific Laboratory.

Last Updated on: 1/28/08
Page 43 of 144
Figure 3.20 Fill in the Name and/or Certification Number of the Laboratory that you are Requesting Association.
Figure 3.21 Fill in the Role and Program for which you are Requesting to Submit Data Using E2.

Last Updated on: 1/28/08
Page 44 of 144
Figure 3.22 Check the Status of your Association Request. If a user chooses to disassociate themselves from a particular laboratory they should perform the following steps:
1. Log into the E2 system through NJDEP Online and the myNewJesey home page.
2. Click on the link under the My Account module on the main E2 page.
3. Click on the icon in first column for the desired laboratory. This will bring up the screen in Figure 3.23.
4. Click on the button. 5. Click on the “Ok” button and you will be disassociated from the selected
laboratory as shown in Figure 3.24.

Last Updated on: 1/28/08
Page 45 of 144
Figure 3.23 The Disassociate Laboratory Screen in E2.
Figure 3.24 Dialog Box Confirming Disassociation Request From a Specific Laboratory. 3.3 Acceptance and Use of a PIN Only persons registered with a “Certifier” account are issued a PIN and are allowed to certify and submit reports to NJDEP. Each Certifier has a unique PIN that should not be shared with others. By accepting a PIN, the user agrees to be legally bound and responsible for all uses of the electronic signature as if it were a hand-written signature. It must be kept confidential. Failure to maintain confidentiality of the PIN may result in suspension or inactivation of E2 privileges. It is recommended that each reporting Laboratory have a minimum of two “Certifier” accounts. If a user forgets their PIN # to upload PWTA XML reports or it’s security is compromised, they can go into E2 to request a new one. As stated above, the initial

Last Updated on: 1/28/08
Page 46 of 144
PIN # to upload PWTA XML reports is generated and sent to the user by the NJDEP. The steps for requesting a new PIN # to upload XML reports is as follows:
1. Go to njdeponline.com, enter your User Name and Password in the myNewJersey home page. Click on the DEP Online Services link. Then click on the Private Well Testing Act to log into the E2 system. The initial screen of the E2 system is shown in Figure 3.17.
2. Under the My Account module, click on the link. 3. Enter your 4 digit verification code (last four digits of your Social Security Number
or other number) that you originally listed on your Electronic Signature Agreement form.
4. Click in the check box next to the “I agree to the terms and conditions in the agreement below” statement.
5. Click on the button. Your new PIN # to upload PWTA XML reports through E2 will e-mailed to your account’s e-mail address.
Figure 3.25 Screen Shot Illustrating how to Request a PIN # to Upload PWTA XML Reports.

Last Updated on: 1/28/08
Page 47 of 144
Figure 3.26 Flow Chart of the Laboratory Registration Process for Electronic PWTA data reporting Through the E2 System. Note: If a laboratory no longer wishes to submit PWTA data to the NJDEP, they must fill out the E2 Laboratory Inactivation Request Form (E2-LAB-002). This form must be signed and submitted to the address listed in Step 2 above. This form deactivates a laboratory for electronic reporting through the E2 system. A laboratory is still obligated to continue to use E2 to conclude any unfinished business (e.g. reporting or correcting submissions) that occurred during the time the laboratory was an active E2 participant. This form can be downloaded at the PWTA website (http://www.state.nj.us/dep/pwta) or the NJDEP E2 website (http:www.state.nj.us/dep/online/e2).

Last Updated on: 1/28/08
Page 48 of 144
3.4 Generating an XML File Containing PWTA Data PWTA electronic data must be in an XML format. Each file will be assigned a unique Submission ID number by E2 to uniquely identify each submission. Each submission or file must contain all required data for the reporting period and is considered to be one file requiring only one Submission ID. Any subsequent transmission or resubmission requires a different Submission ID, which will be assigned by E2. A certified PIN holder can then transmit the file to the NJDEP using the E2 Website. Alternatively, laboratories can use the NJDEP’s online web entry form to enter data using the E2 system. The NJDEP’s E2 system will then generate the XML file based on the data the laboratory entered. A certified PIN holder can then transmit the file to the NJDEP using the E2 Website. As stated previously, there are three (3) ways in which to generate PWTA data for submittal to the NJDEP utilizing the E2 system as shown in Figure 3.7. These include:
1. LIMS Programming/Upload: The reporting laboratory may choose to utilize their Laboratory Information and Management System (LIMS) as the vehicle to generate the analytical results in an XML (.xml) file format for upload to the NJDEP. Upload may be in batch format or as single submissions. The files for batch upload must be zipped, while the single file upload does not. The final .xml file(s) containing analytical results must be in the exact XML Schema format specified in this manual (Appendix 16). Additional information concerning this method of generating an XML file is provided in Chapter 5.
2. Online Web Entry: Once PIN access has been granted, the reporting laboratory
may begin to generate and submit private well testing results electronically by entering PWTA data directly online through a web-based application form. For easy use, the format of the online data entry form has been designed to mimic the data flow of the Excel spreadsheet. The web form consists of three basic data element sections: 1.) the Demographic Section, 2.) Well and Sample Information Section, and 3.) Results Information Section. Once data entry is completed, the user must then validate the data by clicking on the "Validate Results" button, and then either store it in E2 for future editing or submission, or send it immediately to the data base by clicking button. Additional information concerning this method of generating an XML file is provided in Chapter 6.
3. Spreadsheet/Upload: The reporting laboratory may choose to utilize a newly
designed Excel spreadsheet specifically created for the new PWTA system. The spreadsheet works very much the same way as the former version in the previous PWTA database management system. Once PWTA data is entered there is a button that converts the data file to XML format. The newly created XML file must then be uploaded by using the web based E2 application. Upload may be in batch format or as single submissions. Additional information concerning this method of generating an XML file is provided in Chapter 7.

Last Updated on: 1/28/08
Page 49 of 144
NOTE: It is imperative that all reporting laboratories follow the above-referenced
instructions exactly as provided to eliminate any potential submittal problems.
3.5 Submitting an XML File Containing PWTA Data Once a file has been created and has passed all validation checks utilizing one of the aforementioned methods, it must be submitted to the NJDEP. There are two ways for reporting labs to submit PWTA XML files electronically: 1.) Web Entry Online Form - the user (reporting lab) having entered PWTA data on
the online form may submit the data files directly through the E2 web based application by clicking the button once the data has been validated.
2.) Single or Batch Online Upload - the user (reporting lab) may upload the XML
file(s) created by a Laboratory Information and Management System (LIMS) or Excel Spreadsheet template, by clicking the upload button on the E2 web based application and browsing for the file(s) to be submitted. If multiple files are to be submitted via batch on-line upload, they must first be compressed into a .zip file format and submitted.

Last Updated on: 1/28/08
Page 50 of 144
4.0 Frequently Asked Questions Concerning the Electronic PWTA Submittal Process
4.1 How are duplicate PWTA submissions handled by the E2 system? Duplicate XML files will not be accepted by the new E2 delivery system. If ALL data is exactly the same in a resubmitted (duplicate) file the delivery system will reject the submission. The duplicate submission will not be stored in the database. The system will generate an email back to the reporting laboratory indicating that the submission was rejected. To see the details regarding the rejected submission, the reporting lab must log onto the E2 delivery system and look up the rejected submission under the file Submission ID number.
4.2 How are corrected PWTA submissions handled by the E2 system? Corrected XML files will be accepted as long as the correction is considered a significant change. Significant changes to a file include:
♦ address changes ♦ block/lot changes ♦ municipality/county changes ♦ test requestor information ♦ analytical result changes
If a correction must be made to the data that was previously reported, the PWTA reporting laboratory must create a new XML file. All data, not just the corrected numbers/values, must be included in the corrected submittal. The XML document format includes provisions for indicating that the submission is a revision, and indicates the Submission ID number of the previously submitted information. This file is sent in the same manner as the original submission, with its own unique Submission ID number. The E2 system tracks each transaction creating a chronology of submissions for each PWTA reporting laboratory. Once a corrected file is submitted, validated and accepted by the E2 delivery system the initial file will be permanently overwritten. NOTE: Do not resubmit a corrected file until a confirmation email has been sent by the NJDEP indicating the first submission has been successfully received. The E2 system will generate an e-mail back to the laboratory indicating that a submission has been received. A laboratory must log into E2 to check the status.
4.3 How do I check on the status of my PWTA file Submission? The E2 website includes a method for tracking the submissions from a reporting laboratory. In E2, to view the status of a submission, perform the following steps:
1. Click on the link under the laboratory module.

Last Updated on: 1/28/08
Page 51 of 144
2. Select the Lab Name, Submission Status, Program (PWTA) and Dates
Submitted between and click the button. A list of submissions for the selected laboratory will be listed as shown in Figure 4.1. The following submission statuses are available:
Status Explanation Received by E2
The E2 system has received the submission. This does NOT indicate whether or not the submission met the necessary reporting requirements or passed data validation. This status is represented by a question mark icon.
Processed by E2
The E2 system has successfully processed and validated the submitted information and the submission is available for viewing or printing. This status is represented by a green question mark icon.
Rejected by E2
The E2 system did not accept the XML file. A system message is provided which explains the reason the submission could not be interpreted, accepted, or validated by the E2 Server. The file must be re-submitted. This status is represented by a red “X” icon.
Figure 4.1 The Submission Status Screen in E2. Confirmation of the “Received” status and a Submission ID number are provided by the E2 system after the file is submitted. Additionally, the system will email a receipt message to the Certifier’s email account. The Laboratory can then view the submission status at the E2 website once the PWTA submission has been received as described

Last Updated on: 1/28/08
Page 52 of 144
above. It is the Laboratory’s responsibility to verify receipt of the PWTA data submission.
4.4 How are non-PWTA analytes handled by the E2 system? Non-PWTA analytes will result in the XML file being rejected by the E2 delivery system (this may happen if the file is generated by a LIMS if programmed incorrectly). The same logic is true for county specific analytes that appear in counties not requiring those analytes. For example, if arsenic results are included in a submission for a property in Salem County the submission will be rejected by E2 since the submission does not contain the proper number & type analytes. Salem is a county that does not require arsenic analysis as part of PWTA testing.
4.5 What are the minimum computer system requirements needed by a PWTA reporting lab?
The minimum computer system requirements for using the NJDEPOnLine electronic portal/ E2 are as follows:
Hardware Requirements: Pentium II processor or higher
256 MB of RAM or higher 100 MB disk space
Software Requirements: Microsoft Windows 2000 or higher
Microsoft Internet Explorer or Netscape Navigator Browser (version requirements specified on the NJDEPOnLine web page (http://www.njdeponline.com/) Adobe Acrobat Reader (Version 6.0 or higher) WinZip (Version 8.0 or higher) or similar program
Internet Connectivity: Broadband Internet Connection or higher
Note: The PWTA Excel spreadsheet template was programmed in Microsoft Excel 2003 format. In order to use the spreadsheet to submit PWTA data, you must have Microsoft Excel 2003 or higher.
4.6 What if my computer operating system is Mac and not Windows? Please note that, the E2 Electronic Environmental reporting system will not work on a computer running the Mac operating system.

Last Updated on: 1/28/08
Page 53 of 144
4.7 How can I obtain Technical assistance from the NJDEP?
I.) All aspects of the electronic data submittal are provided on the PWTA website at http://www.nj.gov/dep/pwta or
II.) Call the PWTA HOTLINE and ask for technical assistance with the
database system at 1-(866)-4PW-TEST (479-8378) or III.) Email us at: [email protected].
IV.) Refer to the NJDEP E2 Reporting System website at http://www.state.nj.us/dep/online/e2/. This website contains user guides, system documentation, link to the PWTA website, and other information related to the E2 system.

Last Updated on: 1/28/08
Page 54 of 144
5.0 XML File Format Requirements for Data Submittal via Laboratory Information Management System (LIMS) 5.1 XML Format Summary The new XML Schema format has already been provided to those laboratories that utilize a laboratory management information system (LIMS) to generate their PWTA data. The data files that are generated by the LIMS must be in XML format and must conform to the field names, lengths, types, etc. as described in the formatting requirements discussed in this section. Many of the data fields in the previous file format (.txt) are the same in this XML version; however, some fields have been renamed and/or relocated to another section of the file for clarification purposes. Some sections have been renamed or subdivided as well. In other instances new fields have been created so that NJDEP can better evaluate the water quality data collected. The new XML format has four primary data element sections in the file:
Header Information Demographic Information Well and Sample Information Results Information
5.2 Header Section
Three fields in the previous version have been relocated to the Header Section: Full/Partial test, Reporting Lab Certification Number, and Report Date. All are required fields. The first three fields of this section (Form Identifier, Revision Indicator, and Replaced Reported Reference Code) will be auto populated by the new delivery system. As a result, these fields must be represented in the XML file format.
5.3 Demographic Section This section contains information about the test requestor and the property in which the well that was sampled is located. There are two subsections: Test Requestor Information, and Property Information. Two new required fields have been created in the Test Requestor Subsection: Test Requestor Type and Sample Purpose. For those using a LIMS, please refer to Table 5.2 which lists the formatting of these fields. In the Property Information Subsection of the Demographic Section, several new fields have been created: Contract of Sale Date, Property Municipality, Property State, Property Zip Code, Year of Home construction, Treatment Present, and Treatment Type. For those laboratories using a LIMS, please refer to Appendix 5 which lists options for the treatment type field.

Last Updated on: 1/28/08
Page 55 of 144
5.4 Well and Sample Information Section: This section contains information about the characteristics of the well sampled, and the information about the sample itself. There are two subsections: Well Information, and Sample Collection Information. In the Well and Sample Information Section, several fields were moved into this section from the former Property Information Section of the previous PWTA database system; some are required and some are conditionally required. In the previous version of the PWTA database system, many of the data fields referred to the "property" characteristics instead of the well characteristics. In this version we have clarified many fields to indicate that they are characteristics of the well sampled. As a result, many of the data fields now begin with the word "well". These fields are: Well Block and Lot, Well County Code, and Well County/Municipality Code. In addition, we have changed the names of the X and Y coordinates to better reflect what they represent. They are now called NJ State Plane Easting feet (X), and the NJ State Plane Northing feet (Y). The GPS reference point code now includes an additional option of "alternate location" to be used in cases where none of the provided options are applicable. If the “alternate location” value is selected, then the GPS Reference Point Comments field is now a conditionally required field based on the selection of AltLo in the GPS Reference Point Comments Field. This field must be populated to explain where and why the well GPS coordinates were collected (See Appendix 7). In the Sample Collection Information Subsection, two new data fields were created: Flushing Location and Flushing Information Comments. The flushing location is a required field that collects information about "where" the flushing of the sample took place. If the none of the choices apply in Appendix 10 then the "alternate location" should be selected. If alternate location is selected, the flushing information comments field is now a conditionally required field based on the choice of "AltLo" in the Flushing Location field. The (required) untreated sample location field replaces the former collection point code field in the previous version of the PWTA database system and now offers various sample location options from which to choose (See Appendix 9).
5.5 Results Section: Three new fields have been added to this section: Radiological Result Count Error, Qualifier, and Results Comments. The Radiological Result Count Error is conditionally required and to be populated only when a gross alpha result is reported in the results section. The Qualifier field is a value “flag” that codes the value as cautioned or qualified for interpretation. It is left null for unqualified values. The Results Comments field is used to make specific comments about any of the data in the submittal. Some new microbiological data validation logic has been devised for the new system and is outlined below. Please be sure your submissions reflect this logic otherwise the file will be rejected.

Last Updated on: 1/28/08
Page 56 of 144
Reporting Microbiological PWTA Results (Total Coliform, Fecal and E.coli)
RESULT UNITS QUALIFIER DETECT FLAG MDL(default) >0 (1-200) Col/100ml or NULL Y NA MPN/100ml NULL Col/100ml or TNTC Y NA MPN/100ml NULL Col/100ml or MPN/100ml P Y NA NULL Col/100ml or MPN/100ml A N NA TNTC= Too Numerous Too Count P= Presence A= Absence NA= Not Applicable Microbiological Validation Logic If Qualifier equals "null", then Result must be an integer >0 and Detect Flag must be "Y" If Qualifier equals TNTC, then the result must be null and the Detect Flag must be"Y" If Qualifier equals "P", then Result must be null, and then Detect Flag must be "Y" If Qualifier equals "A", then Result must be Null and Detect Flag must be "N" Note: If total coliform Qualifier field is not “A” (present in some capacity), then either “P”, “A”, or “TNTC” must be present in the Qualifier field, or a numeric value (>0) in the result field for either E.coli or fecal coliform. Data Reminders: Use only those drinking water analytical methods for which your lab is certified by analyte. Remember to list those methods that are appropriate for that analyte or the submission will be rejected. For example, do not list a VOC method if you are reporting metals, otherwise you will receive an error. A final Gross Alpha result is required if the initial Gross Alpha result is greater than 5 pCi/l for those counties that must test for gross alpha or the sample will be rejected. Please note that, it is possible to have a negative result value for both initial and final gross alpha results. If you have a negative gross alpha result, please make sure the Detect Flag field is set to “Y”. The system will not accept a negative gross alpha result

Last Updated on: 1/28/08
Page 57 of 144
and a detect flag of “N”. Maximum length is indicated for all text fields. If the information is less than the maximum length, do not pad the value by adding extra spaces. Date is reported as MM/DD/YYYY (month/day/year). Time is reported in regular time as HH:MM (hour:minute) in the E2 Online Form, thus 10:30 p.m. must will be reported as 10:30 PM. Military time is used only in the Excel Spreadsheet template. AM or PM is required and must be indicated or an error message will be generated. Some fields are optional, therefore, when a field is not listed as "required", this means that a null or blank is appropriate. However, the field must still be represented in the data by the use of the tab delimiters. Please note that if a file (full or partial) is resubmitted (i.e. to correct erroneous data), the PWTA database will check the content of the file. If the submission content differs from the database content, the submission will be considered a correction and the different data will replace the existing database data. If the submission content exactly matches that in the database the file will be considered a duplicate and rejected. 5.6 Full PWTA XML Submission As was the case with the file format from the previous PWTA database system, one file must be generated and submitted for each well sample set collected and analyzed for the full suite of parameters mandated in the Private Well Testing Regulations (N.J.A.C. 7:9E). All sections in the file begin and end with the XML style tags and are mapped in Appendix 16. Below is a description of each data element that comprises the XML file format. 5.6.1 HEADER Information Section This section contains information related to the submission itself and to the valid values in place at the time the file was created. Each row must be represented in the XML file. TABLE 5.1 HEADER Information Section of essential elements in a Full XML data set ID Field Name Field
TypeSize Req'd. Definition Populated
by E2 on Web Entry
Header Information

Last Updated on: 1/28/08
Page 58 of 144
1.1 Form Identifier string 20 X
State assigned form identifier to uniquely identify Report Type at a particular state (NOTE: For PWTA this field is "PWTA") x
1.2 Revision Indicator string 10 X
Indicates if this is an original ("Original") or correction ("Revision") x
1.3 Replaced Reported Reference Code string 10 XX
The previous Report Reference Code this report intends to replace (for revision only) X
1.4 Full_Or_Partial_Test string 10 X
Was the submission a full or partial submission (partial submissions are for coliform only)
1.5 Reporting_Lab_Cert_Num string 10 X
Certification number of the lab that is actually submitting the data X
1.6 Report_Date date 10 X
Date the report was completed and sent to the test requestor.
5.6.2 Demographic Information Section This section is divided into two subsections: 1) test requestor information, and 2.) property information. The test requestor section contains information regarding why the test was conducted and by whom. The section also contains address related information of the test requestor. However, two new fields have been added for clarification purposes. They include: “Test Requestor Type" field which offers six different drop-down options (Builder, Home Owner, Realtor, Home buyer, Landlord, and Tenant) on the on-line form and Excel spreadsheet template. The second additional field is "Sample Purpose" which offers five drop-down options (Retest, New Well, Sell House, Buy House, and Rental 5 Year Retest) in the On-Line form and Excel spreadsheet template. The property information subsection contains details about the location of the property that contains the well and information about the house itself. Four new fields have been added for clarification purposes. These new fields include: Contract Of Sale Date, Year of Home Construction, Treatment Present, and Treatment Type if known. Some of these fields are conditionally required and may require a value based on the data entered in other fields.

Last Updated on: 1/28/08
Page 59 of 144
Table 5.2 Demographic Information Section of Essential Elements in a Full XML Data Set
ID Field Name Field Type Size Req'd. Definition Populated
by E2 on Web Entry
Demographic Information Test Requestor Information
2.1 Test_Requestor_Type String 12 X Role of test requestor
2.2 Sample_Purpose String 30 X Reason the private well is being sampled
2.3 Title String 5 Title of the of the PWTA requestor.
2.4 First_ Name String 30 X First name of the PWTA requestor.
2.5 Last_Name String 30 X Last name of the PWTA requestor.
2.6 Address_ 1 String 40 X
First line of the mailing address of the PWTA requestor.
2.7 Address_2 String 40
Second line of the mailing address of the PWTA requestor.
2.8 City String 30 X City of the PWTA requestor.

Last Updated on: 1/28/08
Page 60 of 144
2.9 State String 5 X
USPS state abbreviation or Province of the PWTA requestor.
2.10 Country String 5
Home country of the PWTA requestor’s address.
2.11 Postal_Code String 30 X
Postal code of the PWTA requestor. If US address – 5 digit ZIP code
2.12 Phone_Number String 30 X
Requestor phone number including area code.
Property Information
3.1 Contract_Of_Sale_Date Date 10 XX
Only required if a new parameter is added as part of the PWTA analytes. The format for this field is month, day, year. (mm-dd-yyyy).
3.2 Address_Line_ 1 String 40 X
First line of the property’s address of where the sample is collected.
3.3 Address_Line_ 2 String 40
Second line of the property’s address of where the sample is collected.
3.4 Property_City String 20 X
City in which the property a sample was collected at is located.
3.5 Property_State String 2 X
State in which the property a sample was collected is located X
3.6 Property_Zip_Code String 10 X
Zip code in which the property a sample was collected is located.

Last Updated on: 1/28/08
Page 61 of 144
3.7 Year_Of_Home_Construction Number 4 X
The known or approximate age of the dwelling on the referenced property
3.8 Treatment_Present Yes/No 1 X
Is there some type of treatment system installed?
3.9 Type_Of_Treatment String 30 XX
Lists the type of treatment system(s) installed. This field is only required if a value of "Y" is present in the "Treatment_Present" field.
5.6.3 Well and Sample Information Section This section is divided into two subsections: 1.) well information section, and sample collection information section. Well Information Some fields that formerly were in the "Sample" Section of the previous file format are now present in the well information subsection. Examples of such fields that now appear in the well information subsection are the Well Permit Number, Installation Date, and Well Driller Name. Note that now the block and lot of the well are required and the county/municipality code of the well are required in this section. In most instances these will be the same as that of the property but in case they are different this new field allows the user to capture such information more accurately. This well information subsection also contains details about the GPS coordinates and also contains a conditionally required comment field to be used when "alternate location" (Alt-Lo) is chosen for the GPS Reference Point code. Some fields that formerly were in the "Sample" Section of the previous file format are no longer present in the Sample section. Examples include Full or Partial test, Reporting Lab Certification Number, and Report Date; these fields have been relocated to the Header Section. As in the file format of the previous PWTA database system, the following conditional fields are only required for new well construction:
Well_Permit_Number Well_Driller_Name Well_Install_Date

Last Updated on: 1/28/08
Page 62 of 144
Table 5.3 Well and Sample Information Section of Elements in a Full Data Set
4.9 NJ_State_Plane_Northing_feet_(Y) number 20 X
The northing point value of well head or front door of property expressed in New Jersey State Plane Feet (Y) coordinate value).
4.10 Coordinate_Method_Code string 20 X
Method used to determine GPS coordinates.
4.11 GPS_Reference_Point_Code string 50 X
Code describing the specific location where coordinates were collected.
4.12 GPS_Reference_Point_Comments string 255 XX
This is conditionally required only if a value of "AltLo" is entered in the GPS_Reference_Point_Code field.
Sample Collection Information 5.1 Sample_Date date 10 X Date the sample was collected. 5.2 Sample_Time string 5 X Time the sample was collected.
5.3 Sampler_Name string 30 X Name of the person collecting the sample.
5.4 Sampler_Affiliation string 30 X Name of the company or agency collecting the sample.
5.5 Untreated_Sample_Location string 20 X
Location describing where the sample was collected (formerly collection point code).
5.6 Flushing_Location string 20 X Location describing where the residence's water supply was purged.
5.7 Flushing_Information_Comments string 255 XX
Used to make specific comments concerning information related to the flushing location. This is conditionally required only if a value of "AltLo" is entered in the Flushing_Location field.
5.8 Record ID string X
Unique identifier for the record within the submission (NOTE: This field is used in the error report to aid in locating records with errors) X
Field Name Field Type Size Req'd. Definition Populated by E2 on Web Entry
Well and Sample Information Well Information 4.1 Well_Block_Code number (STRING) 10 X Block code of the property. 4.2 Well_Lot_Code number (STRING) 10 X Lot code of the property.
4.3 Well_County_ Code number 4 (2) X 2 digit code identifying the county of the well in which sampling was conducted
4.4 Well_County_Muni_ Code number 4 X
4 digit code identifying the county and municipality of the well in which sampling was conducted - the first two digits identify the county, the second two digits identify the municipality.
4.5 Well_ Permit_Number string 30 XX Permit number for the well (required only for new construction)
4.6 Well_Driller_Name string 20 XX Name of the well driller (required only for new construction)
4.7 Well_Install_Date date 10 XX Date of well installation (required only for new construction)
4.8
NJ_State_Plane_Easting_feet_ (X) number 20 X
The easting point value of well head or front door of property expressed in New Jersey State Plane Feet (X) coordinate value).

Last Updated on: 1/28/08
Page 63 of 144
Sample Collection Information This section contains many of the same fields pertaining to the sample. Several new fields, however, were added to help in the interpretation of test results during data analysis. For example, flushing location and flushing information comments were added to help understand how/where the sample was flushed in the home plumbing system. This will facilitate interpreting the test results, especially for lead. The flushing location field has several drop-down choices available to those entering data on-line. The comment field is conditionally required only when the "alternate location" for flushing is chosen. Experience has shown that interpreting lead results can be quite problematic and can cause erroneous conclusions about lead exposure. Please note that the Field Sample Identification Number is no longer required for this new XML format.

Last Updated on: 1/28/08
Page 64 of 144
Table 5.4 Results Information Section of Essential Elements in a Full Data Set
5.6.4 Results Information This section contains information related to the analytical results of the testing. The Results section will have multiple rows where each row designates a result for a county-required parameter.
ID Field Name Field Type
Size Value List ID
Req'd. Definition Populated by E2 on Web Entry
Results Information 6.1 Analyzing_Lab_Cert_Number string 10 X NJDEP certification number of the lab that
actually did the analysis of a parameter.
6.2 Analysis_Start_Date date 10 X Start date the sample was analyzed for that result
6.3 Analysis_Start_Time string 5 X Start time the sample was analyzed for that result
6.2 Analysis_Completion_Date date 10 X Completion date the sample was analyzed for that result
6.3 Analysis_Completion_Time string 5 X Completion time the sample was analyzed for that result
6.4 Lab Sample_ID string 20 X Unique identifier for the sample in the lab.
6.5 Method_Code string 15 10 X The specific method used to analyze a sample for a given analyte- See Appendix 13 for valid values.
6.6 CAS_Number string 15 X CAS number of the specific analyte X
6.7 Analyte_Name string 30 X Analyte name for the parameter analyzed. X
6.8 Result number 20 X The quantitative reporting value for the parameter. Negative values are possible for gross alpha.
6.9 Units string 15 11 X Units the results are expressed in. With the exception of total coliform, fecal coliform, and E. coli, the units are prepopulated by E2. X
6.10 Detect_Flag_(Y_N) Yes/No 1 12 X ‘Y’ if detected above MDL/MDC, ‘N’ if not detected above MDL/MDC.
6.11 Detection_Level_(MDC_MDL) string 20 X The result specific MDL (Method Detection Limit) for this parameter including any mathematical corrections required due to sample dilution. For Gross Alpha results this field contains the MDC (Minimum Detectable Concentration).
6.12 Radiological_Result_Count_Error number 10 XX A +/- error value associated with the result value (gross alpha analyses only).
6.13 Qualifier string 10 13 XX A value "flag" that codes the Value as cautioned or qualified for interpretation; left Null for unqualified values. See Appendix 12 for valid values
6.14 Results_Comments string 255 Used to make specific comments concerning information related to the results.

Last Updated on: 1/28/08
Page 65 of 144
The Result Section includes the Sample Date and Time, Sampler Name, Sample ID Number, Lab ID, the name of the analyte or parameter, the concentration of the result, CAS Number, and other information. Please note that, with the exception of total coliform, fecal coliform, and E. coli the result units for all PWTA parameters are auto populated by the E2 system. The required units for PWTA parameters are as follows:
micrograms/liter (ug/l) - (used for volatile organics, mercury, arsenic, nitrate, and lead)
milligrams/liter (mg/l) - (used for iron and manganese only) colonies/100 ml or MPN/100 ml - (used only for microbiological results
which include total coliform, fecal coliform, and E. coli ) picocuries/liter (pCi/l) - (used for radiological results only) pH units - (used for pH only)
5.7 Partial PWTA XML Submissions
The partial file format is only to be used for the submission of additional PWTA testing results from the same well that has been previously sampled but whose microbiological results have expired. Microbiological results are only valid for a time period of six months. The results from all other PWTA parameters are valid for a time period of one year. Therefore only total coliform, fecal coliform, or E. coli data can possibly comprise a partial submission. The new E2 delivery system will not accept partial results for any other parameter at this time. In the E2 system, there are two types of partial XML files. The two types are a linked partial XML file and a stand alone partial XML file. A linked partial XML file is a partial file that is associated with an original full submission that has already been submitted to and accepted by the E2 system. As discussed below, in order for a partial to be linked to it’s corresponding full submission in E2, the same laboratory must have submitted both the full and corresponding partial submissions to E2. A stand alone partial is a file that is associated with a full submission that has not been submitted to the E2 system (i.e. it was submitted to the former PWTA Equis database system). Since the full and partial are in different database systems (Equis and E2), they cannot be linked together. A stand alone partial also refers to a partial file that was created by a certified laboratory which is different from the lab that created and submitted the corresponding original full submission to the E2 system as discussed below. Note: In regards to submitting and linking a partial submission to a full submission, if the laboratory submitting a partial is the lab that initially submitted the original full submission to the E2 system, they can be linked. This is accomplished by performing a search in E2 using the Submission ID number of the original full submission. Once the original full submission has been found in E2, a user can click on the icon under the Edit column to submit the corresponding partial. This partial would now be linked in the E2 system to the original full submission in E2.

Last Updated on: 1/28/08
Page 66 of 144
If the original full submission was submitted to the former PWTA database system (Equis) and the corresponding partial was submitted to E2, then the icon will not be available under the Edit column. The full and partial submittals cannot be linked together. Similarly, if a different laboratory from the one that originally submitted the full submission to E2 submits the partial submission to the E2 system, then the icon will also not be available. As a result, the full and partial submissions cannot be linked. Linking a full and partial submission together in E2 is only available for submissions with a status of .

Last Updated on: 1/28/08
Page 67 of 144
6.0 PWTA Data Submittal Utilizing the E2 Online Form 6.1 The E2 On-line Entry Form This section describes the process for entering PWTA data directly into an online web based application form by accessing the E2 delivery system through the NJDEP's online portal at www.njdeponline.com. Section 3 of this manual describes how to set up an online account by establishing a user ID and PIN. Once these necessary steps are completed the reporting lab is ready to access E2. 6.2 Getting Started In order to access the E2 system, a certified laboratory must go to www.njdeponline.com, click on the button, and enter their DEP user name and password on the myNewJersey homepage as shown in Figure 6.1. After providing your DEP user name and password, you must click on the DEP Online Services link on the next page. On the following page you will be asked to select a program in which you want to submit electronic data. Select the “Private Well Testing Act (PWTA) Analytical Results” link.
Figure 6.1 The myNewJersey home page After selecting the continue button, you are brought to the initial screen in the E2 system as depicted in Figure 6.2. From here a laboratory selects the program and method for

Last Updated on: 1/28/08
Page 68 of 144
generating an XML file and submitting data. Make sure your laboratory is highlighted in the “PWTA Report Form For” drop-down box. Under the “Private Well Testing Reports” section, there are several options listed including: View Form, Download, Online Entry, and Excel Spreadsheet. Select the icon (Online Entry) option to load the PWTA Online Entry Form.
Figure 6.2 Initial screen in E2 in which a certified laboratory selects the program and type of electronic report to send to the DEP. The PWTA online report form consists of three main pages: Demographic Information, Well and Sample Information, and Results and Submit which are listed on both the top and bottom of the screen. The user must correctly complete ALL of the required fields marked with an asterisk on all three pages or they will not be able to generate and submit an XML file automatically.
6.3 Basic Information For convenience, the online form has been designed to closely resemble the PWTA Excel spreadsheet template which is discussed in Chapter 7. When you first enter the E2 online form, you are automatically brought to the first page (Demographic Information) as shown in Figure 6.3 below. For each page, enter the correct information in the proper format for all of the applicable fields on that page. Once you have completely filled in all of the fields for a page, click on the button located at the top of the screen to save your data. You can also click on the next page in sequence to save your work and move onto the next page as shown in Figure 6.4. If a lab selects to only fill out a portion of the form, and intends to

Last Updated on: 1/28/08
Page 69 of 144
complete it a later date, click the button and then the button. A lab can return to a saved, unfinished PWTA report at anytime by following the procedures listed in Section 8.6. By clicking on the button or the next page in sequence, the E2 system will perform some validation checks to ensure all of the required fields have an entry in the correct format. If the validation checks identify any errors

Last Updated on: 1/28/08
Page 70 of 144
Figure 6.3 The Demographic Information Page of the PWTA On-Line Entry Form. (i.e. a required field with no entry), then the report cannot be saved and a red “X” will appear next to the field with the error as shown in Figure 6.5.
Figure 6.4 Page 1 (Demographic Information) has been filled out correctly. Click on “Page 2: Well and Sample Info” to Save Your Submission and Begin Filling Out Information on this Page.

Last Updated on: 1/28/08
Page 71 of 144
Figure 6.5 The E2 System Has Identified an Error in the On-Line Form as Indicated
by the Next to the First Name Field. Move your cursor over the red “X” to get a detailed explanation of the error for that field. Please note that, you cannot move onto the next page or submit the data until all of the errors (if any) are corrected from the previous page(s). Once all of the pages of the online form are error free, you will be able to generate and submit an XML file containing the PWTA sample results by clicking the button on “Page 3: Result and Submit”. Several new and old fields have drop-down boxes on their respective pages for your convenience. Additionally, fields requiring dates now have an electronic calendar for easier data entry. The following is a detailed summary of each page, some of the associated fields on that page, valid values, and drop-down menu choices for each of the three pages of the online form. 6.4 Demographic Information Page As shown in Figure 6.3, the Demographic Information page allows information to be entered about whether or not the submission is a full or partial submittal, the person who requested the well test, the property at which the well sample was collected, and if there is any treatment system on the potable water supply. There are 3 subsections of the Demographic Information page: General Information, PWTA Test Requestor Information, and Property Information.
6.4.1 General Information Section This section contains two fields. The first field is “Full or Partial Submission”. Use this field to identify the submission as a Full or Partial submission in the drop-down menu.

Last Updated on: 1/28/08
Page 72 of 144
As stated in Section 5.7, the partial file format is only to be used for the submission of additional PWTA testing results from the same well that has been previously sampled but whose microbiological results have expired. Only total coliform, fecal coliform, or E. coli data can possibly comprise a partial submission. The second field in this section is “Date Sent To Requester”. This is the date in which the lab sent the test requester the PWTA results.
6.4.2 PWTA Test Requester Section As shown in Figure 6.3, this section contains information related to the individual or entity that requested the PWTA test. There are several new fields with drop-down menus in this section. These include the Test Requester Type and Sample Purpose Fields. In the Test Requester Type drop-down menu, there are 6 choices: Builder (BLD), Home Owner (HO), Realtor (REL), Home Buyer (HB), Landlord (LLD), and Tenant (TEN). In the Sample Purpose drop-down menu, there are 5 choices: Retest (RTST), New Well (NW), Sell House (SH), Buy House (BH), and Rental 5 Year Retest (RT5YR). Please note that, when an entry is made into the phone number field, E2 will format it as follows: XXX-XXX-XXXX.
6.4.3 Property Information Section As shown in Figure 6.3, this section contains information related to the actual property at which a water sample was collected for the Private Well Testing Act. There are several new fields in this section including Contract of Sale Date, Year of Home Construction, and Treatment Present. It should also be noted that the Treatment Present field has a drop-down menu for a Yes (Y) or No (N) entry. If “Y” is selected, then a list of treatment types will appear. A user must check at least one treatment type that applies. The Contract of Sale Date is a new conditionally required field in this section. This field is only required when in the future, the PWTA program adds a new parameter to be analyzed for in a specific county or counties. As of November 2007, this field is not required. The logic of this field can be explained in the following example: If the PWTA program determines that perchlorate must be sampled for in Bergen county beginning September 1, 2006, then the Contract of Sale Date field will become a required field. Consequently, the logic of this field would be: If County = "Bergen" and Contract_Of_Sale_Date >= September 1, 2006, then result field (Page 3 of the On-Line form) for perchlorate cannot be null. For a lessor/lessee situation, the logic is the same: If county = "Bergen" and sample purpose = rental 5 yr retest and sample_date >= September 1, 2006, then the result field for perchlorate cannot be null. 6.5 Well and Sample Information Page As shown in Figure 6.6, the Well and Sample Information page allows information to be entered regarding the specific location of the well in which a sample

Last Updated on: 1/28/08
Page 73 of 144
was collected. In addition, detailed information regarding sample collection is also listed. There are 2 sections in the Well and Sample Information Page: Well Information and Sample Collection Information.
Figure 6.6 Demographic Information page
6.5.1 Well Information Section Please refer to appendices 1 and 2 to obtain the proper values for the Well County Code, and Well Municipality Code Fields. The Well Driller Name, Well Permit Number, and Well Install Date fields are conditionally required fields. They will become required if a value of “New Well (NW)” is listed in the Sample Purpose field on Page 1 of the

Last Updated on: 1/28/08
Page 74 of 144
online form. The Coordinate Method Code field should default to GPS and currently has no other choices available in it’s drop-down. The GPS Reference Point Code field has a total of six choices in it’s drop-down menu. They include: Raised Wellhead (WHR), Well Head Pit (WHP), Sample Collection Point (SCP), Flush mount (WHF), Front Door (FD), and Alternative Location (ALTLO). Please note that if Alternative Location is selected, then an entry must be made into the GPS Reference Point Comments field describing the location.
6.5.2 Sample Collection Information Section There are 2 fields with drop-down menus in this section. They include the Untreated Sample Location and Flushing Location fields. The Untreated Sample Location field has a total of 7 choices in it’s drop-down menu. They include: Well Head (WH), Holding/Pressure Tank (HPT), Kitchen Tap (KT), Bathroom Tap (BT), Spigot (SPIGO), Before Treatment (BT), and Alternative Location (ALTLO). The Flushing Location field has a total of 5 choices in it’s drop-down menu. They include: Well Head (WH), Holding/Pressure Tank (HPT), Kitchen Tap (KT), Bathroom Tap (BT), and Alternative Location (ALTLO). Please note that if Alternative Location is selected in the Flushing Location field, then an entry must be made into the Flushing Location Comments field describing the location.
Results and Submit Page As shown in Figure 6.7, this page contains the analytical results from an individual well test that was sampled for purposes of complying with the PWTA regulations. Please note that one row should be completed for each parameter analyzed AND all required parameters (based on county location of the well -Refer to Appendix 15) must be submitted in one file.

Last Updated on: 1/28/08
Page 75 of 144
Figure 6.7 Results and Submit Page When you first view this page, click the icon under the “Edit Record” column in the row of the parameter you want to enter data for. This will bring you to the screen shown in Figure 6.8. You will notice that several of the fields have already been prepopulated based on the information listed in the Demographic and Well and Sample Information pages. These include: The Analyzing lab Certification Number field which will be auto populated with the Reporting Lab Certification Number since many of the reporting labs are also the analyzing lab. Remember to change the analyzing lab certification number field for those analytes that are subcontracted to another lab for analysis. The Lab Sample ID Number field obtains valid values from the previous Well and Sample Information page where Lab Sample ID Number was provided by the reporting lab. In addition, the PWTA analytes, and their associated CAS numbers are auto populated based on the county/municipality in which the well is located. The Result Unit Code field is auto populated and cannot be edited for all parameters except for total coliform, fecal coliform, and E.coli. The units used are as follows:
micrograms/liter (ug/l) - (used for volatile organics, mercury, arsenic, nitrate, and lead)
milligrams/liter (mg/l) - (used for iron and manganese only) colonies/100 ml or MPN/100 ml - (must be entered manually and used
only for microbiological results which include total coliform, fecal coliform, and E. coli )
picocuries/liter (pCi/l) - (used for radiological results only) pH units - (used for pH only)

Last Updated on: 1/28/08
Page 76 of 144
Figure 6.8 Individual Parameter Results Data Entry Page. Once a lab has entered in all the required data for a specific parameter, click on the
button. E2 will perform a series of validation checks to ensure all of the required fields have been filled in with correct values. A lab can also click on
button to validate and save the sample results. This will also bring the user back to the screen in Figure 6.7 where they can click on the icon in the applicable row to enter the next result. Please note that, if you are entering a partial submission utilizing the On-Line form, Page 3: Results and Submit page will look like the screen shot in Figure 6.9.

Last Updated on: 1/28/08
Page 77 of 144
Figure 6.9 Screen Shot of a Partial Submittal in the On-Line Form.
A lab should click on the button in order to begin entering data for the parameter. As stated in Section 5.7, the partial file format is only to be used for the submission of additional PWTA testing results from the same well that has been previously sampled but whose microbiological results have expired. Microbiological results are only valid for a time period of six months. Therefore at this time, only total coliform, fecal coliform, or E. coli data can comprise a partial submission. The new E2 delivery system will not accept partial results for any other parameter at this time. If a
positive total coliform result is entered and the button is clicked, E2 will bring up the message box in Figure 6.10. Since the total coliform result was positive, the system will automatically add fecal coliform or E. coli to the on-line form based on if the user clicks on “OK” for fecal coliform or “Cancel” for E. coli.
Figure 6.10 Message Box for a Partial Submission if a Total Coliform Result is Positive.
Fill in the results for either fecal coliform or E. coli and click on button.

Last Updated on: 1/28/08
Page 78 of 144
6.6.1 Submitting a File to the NJDEP Through the E2 Online Form After completing all three pages of the PWTA report form for a full or partial submission, ensuring that all required fields have a meaningful value, and correcting all errors, the file is ready to be sent to the NJDEP. Click on the button. This will bring up the screen shown in figure 6.11. Enter you PIN # in Step 1. Click in the “I Certify” box in Step 2. Click the
button in Step 3 to send the XML file to the NJDEP. The lab will be notified via e-mail that there submission was received. If a submission fails, they will receive an e-mail informing them of that situation. You can check the status of this submission as discussed in Section 4.3. Note: Do not zip the single .xml file(s) you intend to send to the NJDEP. Only zip those files being submitted via batch upload. Please refer to section 2.4 for additional information on batch uploads.
Figure 6.11 The Upload XML File Screen
6.6.2 Important Facts about the Results Screen The Detect Flag field refers to the presence or absence (“Y” or “N”) of an analyzed parameter above the MDL. This value is case sensitive so please use UPPER CASE letters only. A "Y" present in this field does NOT automatically mean the results are above an applicable drinking water standard, but rather means that the analyte was "detected" which may or may not be above an applicable drinking water standard.

Last Updated on: 1/28/08
Page 79 of 144
When analytical results are non-detect a zero cannot be entered into the Result Field. If a result for a parameter is detected below it’s MDL, select the “<” from the Qualifier field and insert the actual MDL in the Result field. Do not leave the result field blank for any given parameter except for "qualitative" microbiological results. Please refer to Section 5.5 for the microbiological reporting logic and procedures. Use only those drinking water analytical methods for which your lab is certified by analyte. Remember to list those methods that are appropriate for that analyte or the submission will be rejected. For example, do not list a VOC method if you are reporting metals, otherwise you will receive an error email message and will not be permitted to proceed. All approved drinking water method(s) for PWTA parameters utilized during analysis appear in Appendix 13. MDC and Radiological Result Count Error fields are only to be populated when radiological (gross alpha) results are reported in the submission. The “<” Qualifier listed in the drop-down menu of the Qualifier field is available to report results that need clarification, such as if an analyte is detected below the MDL, e.g. MDL of 0.50. The remaining qualifiers (“P”, “A”, and “TNTC”) pertain to coliform analyses only. Please refer to section 5.5 for an explanation on how and when to use these qualifiers. The results comments field is a free text field that may be used to submit any additional information the reporting labs believes to be pertinent to the submission. Note: There are several advantages to using the on-line form which include:
• No need to have a copy of Microsoft Excel software or be concerned about
having the most current version of the spreadsheet. • No need to have knowledge or expertise of the XML programming language. • Validation checks, results and feedback are performed and displayed in real
time. The main disadvantage of using the on-line form is: • If you are dealing with a large volume of PWTA submissions, it can take a long
time to complete the on-line form.

Last Updated on: 1/28/08
Page 80 of 144
7.0 PWTA Data Submittal Utilizing the Excel Spreadsheet 7.1 The Excel Spreadsheet Template Entry Form This section describes the process for entering PWTA data directly into a specially formatted Microsoft Excel spreadsheet. Please note that as stated in Section 4.5, the PWTA Excel spreadsheet template was programmed in Microsoft Excel 2003 format. In order to use the spreadsheet to submit PWTA data, a laboratory must have a licensed copy of Microsoft Excel 2003 or higher installed on their machine. This new Excel spreadsheet is very similar to the spreadsheet used with the previous PWTA database system. As with the online form, the new Excel spreadsheet is composed of three pages or tabs (Demographic Information, Well and Sample Information, and Results and Submit). The new Excel spreadsheet generates an XML file based on the data entered into the fields on the three tabs of the spreadsheet. The XML file can then be uploaded through the E2 electronic delivery system for validation checking. As with the online web based application form, the Excel spreadsheet entry form can be accessed in the E2 system through the NJDEP's online portal at www.njdeponline.com. As stated in Section 3.1, an online account must be established with a user ID and PIN in order to initially access E2 and the Excel spreadsheet. 7.2 Getting Started The process for initially accessing the Excel spreadsheet is the same as the Online Form. In order to access the E2 system, a certified laboratory must go to www.njdeponline.com, click on the button, and enter their DEP user name and password on the myNewJersey homepage as shown in Figure 6.1 above. After providing your DEP user name and password, you must click on the DEP Online Services link on the next page. On the following page you will be asked to select a program in which you want to submit electronic data. Select the “Private Well Testing Act (PWTA) Analytical Results” link. After selecting the continue button, you are brought to the initial screen in the E2 system as depicted in Figure 7.1. From here a laboratory selects the program and method for generating an XML file and submitting data. Under the “Private Well Testing Reports” section, there are several options listed including: View Form, Download, Online Entry, and Excel Spreadsheet. Select the Excel spreadsheet option to load or save a new spreadsheet template onto your desktop.

Last Updated on: 1/28/08
Page 81 of 144
Figure 7.1 Initial Screen in E2 in Which a Certified Laboratory Selects the Program and Type of Electronic Report to Send to the DEP. As stated above, the Excel spreadsheet consists of three main tabs: Demographic Information, Well and Sample Information, and Results and Submit. The user must correctly complete ALL of the required fields and conditionally required fields (if necessary) marked with an asterisk on all three pages or they will not be able to generate and submit an XML file automatically.
7.3 Basic Information When the Excel spreadsheet is first opened, it will give you a security warning asking if you want to enable or disable macros. Please select “Enable Macros” as shown in Figure 7.1. The Demographic Information tab will be the first page loaded as shown in Figure 7.4.

Last Updated on: 1/28/08
Page 82 of 144
Figure 7.2 Screen Shot Showing the Security Warning for Macros in the Excel Spreadsheet. For each tab, enter the correct information in the proper format for all of the required fields (and non-required fields as applicable) on that tab. Once you have completely filled in all of the fields for the Demographic Information tab, click onto the Well and Sample tab and begin filling in the required information for this screen. Unlike the On-Line form, no validation checks are performed as you move from one tab to the next. Once all of the data has been entered for the Well and Sample tab, click on the Results and Submit tab. On the Results and Submit tab, you will see two buttons labeled “Populate List” and “Generate XML” at the top of the screen. Before entering any data
on the Results and Submit tab, click on the button which will auto populate several of the fields based on the county and municipality you selected on the Well and Sample tab. Fill in the remaining missing information on this tab. When you have completely filled in the entire spreadsheet (including all required fields),
click on the button found on the top of the Results and Submit tab. Some rudimentary validation checks (i.e. ensuring that all required fields have a value in the proper format) are performed. If errors are detected, you are informed of what the error is and what field it is associated with as shown in Figure 7.2. Once all of the errors
are corrected, click on the button again. A dialog box will popup asking “Are you ready to proceed?”. Select “Yes” and a screen will display asking you to name your XML file and where you want to save the file. Select a name for the file (ensure that it has an .XML extension) and a location to save for upload to E2.
Figure 7.3 Error Message Generated After Pressing “Generate XML” Button on the Results and Submit Tab.

Last Updated on: 1/28/08
Page 83 of 144
In order to upload the newly generated XML file into the database system, you must log back into the E2 system (if you logged out). Once in the system, click the
link located under the Laboratory module. This will bring you to the screen depicted in Figure 7.3. On this page, select the button to find the location you saved the generated XML file. Once you find the XML file, you can click on the button to check the structure of the XML file only. Please note that, this check will not perform any validations. It will only test the structure of the XML file against the approved XML schema and is an optional step. It is not required to perform this test to submit an XML file to the E2 system. Please also note that, if you perform this test you will have to re-enter the path to where you saved the XML file next to the
button. After you have tested the structure of the XML file, click on the check box and press the submit button. This will submit the XML file to E2
system where additional validation checks will be performed. You can view the status of your submission, correct any errors, and resubmit a corrected XML file through E2. These processes will be explained in Chapter 8.
Figure 7.4 The Upload XML Files Screen. As in the Online Form, several new and old fields have drop-down boxes on their respective pages for your convenience. Please note that all date fields in the Excel spreadsheet must be in the following format: MM/DD/YY. All fields which require a time must be in following format: HH:MM and using military time. The following is a detailed summary of some of the fields, valid values, and drop-down menu choices for each of the three tabs of the Excel spreadsheet:

Last Updated on: 1/28/08
Page 84 of 144
Figure 7.5 The Demographic Information tab of the Excel spreadsheet. 7.4 Demographic Information Page As shown in Figure 7.4, the Demographic Information tab is set-up very similarly to the online form. This tab allows information to be entered concerning whether or not the submission is a full or partial submittal, the person who requested the well test, the property at which the well sample was collected, and if there is any treatment system on the potable water supply. There are 3 sections of the Demographic Information page: General Information, PWTA Test Requester Information, and Property Information.
7.4.1 General Information Section This section contains several new required fields in relation to the previous Excel spreadsheet. In this section you must fill in the Lab Certification Number field with the PWTA reporting lab’s certification number. You must indicate whether the submission is an original or a revision in the “Original or Revision” field. The date the PWTA results were submitted to the test requestor must be filled in the “Date Sent to Test Requestor” field. The Full or Partial field contains a drop-down menu with a choice of “F” for full or “P” for a partial submission. Please note that, at this time the E2 system is only accepting a partial submission for total coliform, fecal coliform, and E.coli.
7.4.2 PWTA Test Requester Section This section contains information related to the individual or entity that requested the PWTA test. This section is organized the same way as the online form. There are

Last Updated on: 1/28/08
Page 85 of 144
several new fields with drop-down menus in this section. These include the Test Requester Type and Sample Purpose Fields. In the Test Requester Type drop-down menu, there are 6 choices: Builder (BLD), Home Owner (HO), Realtor (REL), Home Buyer (HB), Landlord (LLD), and Tenant (TEN). In the Sample Purpose drop-down menu, there are 5 choices: Retest (RTST), New Well (NW), Sell House (SH), Buy House (BH), and Rental 5 Year Retest (RT5YR). Please note that the State field is defaulted to “NJ”, and the Country field is defaulted to “US”. When entering the phone number, the parentheses for the area code and dash are automatically inserted.
7.4.3 Property Information Section This section contains information related to the actual property at which a water sample was collected for the Private Well Testing Act. There are several new fields in this section including Contract of Sale Date, Year of Home Construction, and Treatment Present. The same logic that applied to Contract of Sale Date in the On-Line form, applies the Excel spreadsheet template. Please refer to Section 6.4.3 for a complete explanation of this field. Please note that the Treatment Present field has a drop-down menu for a Yes (Y) or No (N). If “Y” is selected, then at least of the Treatment Type fields must be populated with a value from it’s respective drop-down menu. A list of the possible treatment types and their respective codes is listed in Appendix 5. Please also note that the State field in this section has been defaulted to “NJ”. Additionally, the Property Municipality has a drop-down menu to select the correct municipality. 7.5 Well and Sample Information Page As shown in Figure 7.6, the Well and Sample Information page allows information to be entered regarding the specific location of the well in which a sample was collected. In addition, detailed information regarding sample collection is also listed. As with the online form, there are 2 main sections in the Well and Sample Information Page: Well Information and Sample Collection Information.

Last Updated on: 1/28/08
Page 86 of 144
Figure 7.6 The Well and Sample Information Screen of the Excel spreadsheet
7.5.1 Well Information Section In this section there is a drop-down menu for the Well County Code and Well Municipality Code fields. Select the county where the well that was sampled is located from the drop-down in Well County Code field. Select the municipality that the well is located in from the drop-down menu in the Well Municipality Code field. This information will be used to prepopulate the list of parameters on the Results and Submit tab. Please note that, the Well Driller Name, Well Permit Number, and Well Install Date fields will become required if a value on New Well (NW) is selected from the drop-down menu of the Sample Purpose field on the Demographic Information tab. The Coordinate Method Code field also has a drop-down menu with only one choice listed as “GPS”. This field currently has no other choices available in it’s drop-down. The GPS Reference Point Code field has a total of six choices in it’s drop-down menu. They include: Raised Wellhead (WHR), Well Head Pit (WHP), Sample Collection Point (SCP), Flush mount (WHF), Front Door (FD), and Alternative Location (ALTLO). Please note that if Alternative Location is selected, then an entry must be made into the GPS Reference Point Comments field describing the location. You can also refer to Appendix 7 to get an explanation of the codes used in the GPS Reference Point Code field.

Last Updated on: 1/28/08
Page 87 of 144
7.5.2 Sample Collection Information Section As in the online form, there are 2 fields with drop-down menus in this section. They include the Untreated Sample Location and Flushing Location fields. The Untreated Sample Location field has a total of 7 choices in it’s drop-down menu. They include: Well Head (WH), Holding/Pressure Tank (HPT), Kitchen Tap (KT), Bathroom Tap (BT), Spigot (SPIGO), Before Treatment (BT), and Alternative Location (ALTLO). You can also refer to Appendix 9 for an explanation of the codes used in this drop-down menu. The Flushing Location field has a total of 5 choices in it’s drop-down menu. They include: Well Head (WH), Holding/Pressure Tank (HPT), Kitchen Tap (KT), Bathroom Tap (BT), and Alternative Location (ALTLO). You can also refer to Appendix 10 for an explanation of the codes used in this drop-down menu. Please note that if Alternative Location is selected, then an entry must be made into the Flushing Location Comments field describing the location. 7.6 Results and Submit Page As shown in Figure 7.7, this page contains the analytical results from an individual well test that was sampled for purposes of complying with the PWTA regulations. There are
two buttons labeled and on this sheet. Before
entering any data on this sheet, click the button. A dialog box will appear stating that “Warning: This will clear the contents below and repopulate the analyte list” as shown in Figure 7.8. It will also automatically prepopulate several of the fields based on the information listed in the Demographic and Well and Sample Information tabs. These include: Lab Cert Number field which will be auto populated with the Lab Certification Number of the PWTA reporting lab found on the Demographic Information tab since many of the reporting labs are also the analyzing lab. Remember to change this lab certification number field for those analytes that are subcontracted to another lab for analysis. The PWTA analytes, and their associated CAS numbers are auto populated based on the county/municipality in which the well is located based on the values listed on the Well and Sample Information tab. The Result Unit Code field is auto populated and cannot be edited for all parameters except for total coliform, fecal coliform, and E.coli. The units used are as follows:
micrograms/liter (ug/l) – (used for volatile organics milligrams/liter (mg/l) - (used for iron and manganese only) colonies/100 ml or MPN/100 ml - (used for microbiological results only and
must be entered manually) picocuries/liter (pCi/l) - (used for radiological results only) pH units - (used for pH only
In addition, the Detect Flag field for pH, and Total Coliform are prepopulated with a value of “NA”.

Last Updated on: 1/28/08
Page 88 of 144
Figure 7.7 The Results and Submit tab of the Excel spreadsheet
Figure 7.8 Dialog Box Warning That the Results and Submit Tab Will Overwrite and Auto Populate the Results and Submit Tab.

Last Updated on: 1/28/08
Page 89 of 144
7.6.1 Important Facts about the Results Screen The Lab Sample ID field is a drop-down menu containing all of the sample numbers listed from the Well and Sample Information tab. Please ensure that the correct sample number is listed. Please note that, each analyte will have a drop-down menu associated it listing all of the acceptable methods for that parameter. Use only those drinking water analytical methods for which your lab is certified by parameter. When analytical results are non-detect a zero cannot be entered into the Result Field. If a result for a parameter is detected below it’s MDL, select the “<” from the Qualifier field drop-down menu and insert the actual MDL in the Result field. Do not leave the result field blank for any given parameter except for "qualitative" microbiological results Please refer to Section 5.5 for the microbiological reporting logic, qualifiers, and procedures. As stated above, the “<” Qualifier listed in the drop-down menu of the Qualifier field is available to report results that need clarification, such as if an analyte is detected below the MDL, e.g. MDL of 0.50. The remaining qualifiers (“P”, “A”, and “TNTC”) pertain to coliform analyses only. Please refer to section 5.5 for an explanation on how and when to use these qualifiers. The Detect Flag field has a drop-down menu with two values that refer to the presence or absence (“Y” or “N”) of an analyzed parameter above the MDL. This value is case sensitive so only UPPER CASE letters are accepted by the system. A "Y" present in this field does NOT automatically mean the results are above an applicable drinking water standard, but rather means that the analyte was "detected" which may or may not be above an applicable drinking water standard. All approved drinking water method(s) utilized during analysis appear in Appendix 13. If a total coliform result is detected or has a qualifier of “P” or “TNTC”, then a dialog box as shown in Figure 7.9 will appear on the screen stating that “Since total coliform is positive, please select one of the following to report: E. coli or Fecal Coliform”. Select one of these parameters and fill in all the required fields including a correct method, units (col/100ml or MPN/100ml) and “NA” for the Detection Level field. MDC and Radiological Result Count Error fields are only to be populated when radiological (gross alpha) results are reported in the submission. If an initial gross alpha result is reported greater than 5 pCi/L, a dialog box as shown in Figure 7.10 will appear stating “Gross Alpha Final Must Be Reported”. Select OK and fill in all the required fields including a value in the Radiological Result Count Error and MDC fields. The results comments field is a free text field that may be used to submit any additional information the reporting labs believes to be pertinent to the submission.

Last Updated on: 1/28/08
Page 90 of 144
It is strongly recommended that reporting labs save the individual Excel spreadsheets used for a specific PWTA sample. If the submission is found to contain errors, it will make correcting and resubmitting the sample results to the NJDEP much easier. Additionally, you can save an incomplete spreadsheet and return to it at a later time to complete and submit it to the NJDEP. Note: If a partial submission is selected on the Demographic Information tab, only one parameter (total coliform) will be auto populated on the third page of the spreadsheet as shown in Figure 7.9. As with a full submission, if a total coliform result is detected or has a qualifier of “P” or “TNTC”, then a dialog box as shown in Figure 7.10 will appear on the screen stating that “Since total coliform is positive, please select one of the following to report: E. coli or Fecal Coliform”. Select one of these parameters and fill in all the required fields including a correct method, units (col/100ml or MPN/100ml) and “NA” for the Detection Level field.
Figure 7.9 Screen Shot of the Results Tab of a Partial Submission
Figure 7.10 Dialog Box Indicating that an E.coli or Fecal Coliform result are required if Total coliform was Detected or had a Qualifier of “P” or “TNTC”.

Last Updated on: 1/28/08
Page 91 of 144
Figure 7.11 Dialog Box Indicating that a Final Gross Alpha Result is Required if the Initial Gross Alpha was Detected at a Concentration Exceeding 5pCi/L.
7.6.2 Generating and Submitting a File to the DEP Through E2 Using the Excel spreadsheet
After completing all three tabs of the Excel spreadsheet, ensuring that all required fields have a meaningful value, and correcting all errors, you are ready to generate and submit the XML file to the DEP.
On the Results and Submit tab, there is a button labeled at the top of the screen. When all of the data has been entered correctly into the Excel spreadsheet with no errors click on this button. A dialog box shown in Figure 7.12 will appear asking “Are you ready to proceed?”. Click the “Yes” button. A dialog box will appear asking you to name the XML file and where you want to store the file for future upload. Enter a name for the XML file (make sure it has an .XML extension) and select a location to store the file.

Last Updated on: 1/28/08
Page 92 of 144
Figure 7.12 Screen Shot After Clicking on the Generate XML Button. As stated in Section 7.1, in order to upload the newly generated XML file into the database system, you must log back into the E2 system (if you logged out). Once in the system, click the link located under the Laboratory module. This will bring you to the screen depicted in Figure 7.4. On this page, select the button to find the location you saved the generated XML file. Once you find the XML file, you can click on the button to check the structure of the XML file only. Please note that, this check will not perform any validations. It will only test the structure of the XML file against the approved XML schema and is an optional step. It is not required to perform this test to submit an XML file to the E2 system. Please also note that, if you perform this test you will have to re-enter the path to where you saved the XML file next to the button. After you have tested the structure of the XML file, click on the check box and press the button. This will submit the XML file to E2 system where additional validation checks will be performed. You can view the status of your submission, correct any errors, and resubmit a corrected XML file through E2. These processes will be explained in Chapter 8. Note: Do not zip the single .xml file(s) you intend to send to the NJDEP. Only zip those files being submitted via batch upload. Please refer to section 2.4 for additional information on batch uploads.

Last Updated on: 1/28/08
Page 93 of 144
Note: There are several advantages to using the Excel spreadsheet template which include:
• Is much faster to fill out reports when compared to online web form entry option. • Immediate feedback on some validation errors. • No need to have knowledge of XML . • Laboratory can choose to integration with their LIMS system (based on
laboratory’s internal efforts. There are also some disadvantages to using the Excel spreadsheet template which include:
• A user does not get immediate feedback on all validation errors. • If Excel template changes, laboratory will need to make sure always using the
latest template format. • Requires laboratory to have a licensed copy of Microsoft Excel.

Last Updated on: 1/28/08
Page 94 of 144
8.0 Viewing, Obtaining the Status of, and Editing PWTA Electronic Submissions The E2 delivery system allows authorized users to check the status of, view, and edit electronic PWTA submissions.
8.1 Checking the Status of a Submitted PWTA Electronic Submission After a submission(s) has been sent to the NJDEP, a laboratory can check the status of this submission(s) through the E2 system. To check the status of a PWTA submission, click on the “View Submission” link under the Laboratory module section on the left hand side of the screen. This will open up the screen in Figure 8.1. Note: You should be on the “View Lab Submissions Tab” when you initially open the “View Submission” link.
Figure 8.1 The View Submission Screen Showing the Status of Submitted PWTA Electronic Submittals. The View Submission screen will provide the user with a listing of all the PWTA submissions for their specific lab in chronological order (with the most recent submittal being at the top of the list). Older submissions can be viewed by clicking on the numbers or arrows located above the Edit column as seen in Figure 8.1. The View Submission screen also allows the user to search for a submission(s) utilizing several different criteria which include: Lab Name, Submission Status, Program, and Submission Date. To view a specific submission, make sure your laboratory is selected in the Lab Name drop-down box and the correct program (PWTA) is selected. If you do not select a Program from the drop-down, no submissions will be displayed. In addition, ensure that the correct status of the specific submission is selected in the

Last Updated on: 1/28/08
Page 95 of 144
Submission Status drop-down menu. Currently, there are four possible statuses of a submission as described below:
: A submission with a “Received” status indicates that E2 has received your submission, but it has not yet been validated.
: A submission with a “Rejected” status indicates that the submission has
been received and validated by E2. During the validation process, one or more errors were discovered with the submission.
: A submission with a “Processed” status indicates that the submission has
been received and validated by both the E2 and Compass systems. During the validation process, no errors were detected and the submission was accepted. Note: Only sample results contained within “Processed” submissions will be moved and permanently stored into the NJDEP’s Compass database warehouse system.
: A submission with a “Resubmitted” status indicates that an original submission was made to the E2 system and rejected because it failed one or more validation checks or had other types of errors. A new submission was submitted to E2 that replaced the previous submission.
Make sure that “PWTA” is selected in the Program drop-down box when searching for a submission. Additionally, ensure that the correct dates are listed in the “Submitted between” drop-down menus. Once you have entered all of the necessary search criteria, click on the button. This should bring up a list of submissions for your laboratory based on the search criteria you entered in the search panel. The View Submission screen also provides additional information related to a submission including: Submission ID, Previous Submission ID, Received Date, Status, Status Date, and Submit User. The Submission Id is a unique number assigned to the submission by E2 for your specific laboratory. It is imperative that you record and keep this number in order to properly search for and identify specific submissions made by your laboratory. For submissions that are corrections or partials linking back to a previous full submission, the Previous Submission ID column lists the previous submission ID for linking purposes. The Previous Submission ID number is populated with the original Submission ID if your initial sample was rejected and you sent in a resubmission correcting the indicated errors. The corrected submission is given a new unique Submission ID. The Received Date is the date and time the submission was received by the NJDEP. As described above, the status of a submission can be processed, rejected, received, or resubmitted. The status date is the date and time a specific status was assigned to a submittal. The Submit User is the name of the individual who actually submitted the data to the NJDEP.

Last Updated on: 1/28/08
Page 96 of 144
8.2 Viewing a PWTA Electronic Submission in E2 A laboratory can view any of it’s electronic submission(s) through the E2 system. To view an electronic PWTA submission, click on the “View Submission” link under the Laboratory module section on the left hand side of the screen. Click on the “View Lab Reports” tab as shown in Figure 8.2.
The tab will provide the user with a listing of all the PWTA submissions for their specific lab in chronological order (with the most recent submittal being at the top of the list). Older submissions can be viewed by clicking on the numbers or arrows located above the View column as seen in Figure 8.2. The “View Lab Reports” tab also allows the user to search for a submission(s) utilizing several different criteria which include: Lab Name, Submission Status, Report Type and Submission Date. The Lab Name, Submission Status, and Submission Date drop-down boxes work the same way as checking the status of a submittal as described in Section 8.1. The Report Type drop-down box should be set to “Private Well Testing Act”. To view a specific submission, make sure your laboratory is selected in the Lab Name drop-down box. In addition, ensure that the correct status of the specific submission is selected in the Submission Status drop-down menu. As stated previously, make sure “Private Well Testing Act” is selected in the “Report Type” drop-down box and the correct submittal date is selected.
Figure 8.2 Viewing an Electronic PWTA Submittal On the View Lab Reports Tab. Once you have entered all of the necessary search criteria, click on the button. This will bring up a complete list of submissions that you can view for your laboratory based on the search criteria you entered in the search panel. Once you have found the report you want to examine, click on the “View” icon in the left hand column. This will bring up the screen shown in Figure 8.3 stating that the “file will be downloaded in 5 seconds. If your download does not start, click here.”

Last Updated on: 1/28/08
Page 97 of 144
Figure 8.3 After Clicking On the View Icon, the Electronic PWTA Submission that was Selected to View is Being Downloaded. Within 5 seconds you should see a screen similar to the one depicted in Figure 8.4 asking the user whether they want to save or open the .Zip file containing the PWTA electronic submission that is to be viewed. (Please note that, you must have a program such as Winzip installed on your computer to unzip and access the submission.)
Figure 8.4 Screen Shot Asking User if They Want to Open or Save the .Zip file containing the PWTA Electronic Submission to be Viewed. Once you have opened or saved the file to a disk, you can view the specific contents of the PWTA electronic submission. (Please also note that, the file is in .PDF format and will require that you have version 6.0 or higher of the Adobe Acrobat reader program installed on your computer). The first page of the actual submission is depicted in Figure 8.5. The third page is depicted in Figure 8.6.

Last Updated on: 1/28/08
Page 98 of 144
Figure 8.5 A View of the First Page of an Electronic PWTA Submission in .PDF
Figure 8.6 A View of the Third Page of an Electronic PWTA Submission in .PDF.

Last Updated on: 1/28/08
Page 99 of 144
8.3 Editing a Full and Partial PWTA Electronic Submission A laboratory can check the status of a full or partial submission by clicking on the
link under the Laboratory module. If the submission has a status of , then the submission contains errors and must be revised and resubmitted. To
determine the specific errors associated with a submission, click on the icon under the Status column for that specific submission. This will bring up the Error Message screen as shown in Figure 8.7 describing the specific errors in the submission.
Figure 8.7 Error Message Screen With a Detailed Explanation of the Error(s) Associated with an Electronic PWTA Submission. The error message screen will list and detail all error messages associated with the selected submission. Once solutions to the error messages have been determined, you can now edit the XML file and resubmit (see section 8.4) it to the NJDEP. There are several ways in which to edit an XML file that is to be resubmitted. These options include:
1.) If the original XML file was created using a LIMS system, download the XML file by clicking on the icon located in the Download column of the rejected file you wish to edit. When a user clicks on this icon, the system will display a message asking if a user wants to open or save the XML file as seen in Figure 8.8. A user should save this XML file to their local computer. The XML file can be opened, edited, and saved using Microsoft Windows Wordpad, Notepad or XML viewer application as seen in Figure 8.9. Once the XML file has been edited and the necessary corrections made, it can be uploaded as per Section 8.4.
2.) If the original XML file was created utilizing the Online Form, a user can
click on the icon under the Edit column of the View Submission page. This will load the Online Form for that submission which can now be revised. Note: Do not click on the icon to edit a submission

Last Updated on: 1/28/08
Page 100 of 144
originally created with the Online Form. All revisions must be completed within the Online Form itself. Do not make any modifications to the XML file generated using the Online Form.
3.) If the original XML file was created utilizing the Excel spreadsheet
template, then a Laboratory can utilize the originally saved Microsoft Excel spreadsheet template for that specific sample to edit the submission. As stated in Section 7.6.1, it is strongly recommended that reporting labs save the individual Excel spreadsheets used for a specific PWTA sample. If the submission is found to contain errors, it will make correcting and resubmitting the sample results to the NJDEP much easier. The NJDEP suggests using the Submission ID number as part of the name for a saved PWTA Excel spreadsheet containing data. Open the saved Excel spreadsheet containing the PWTA data that needs to be corrected. Make the necessary corrections and generate a new XML file as stated in Section 7.6.2. This corrected XML file can be uploaded as per Section 8.4.
Figure 8.8 Screen Shot Asking User if They Want to Open or Save the .XML file containing the PWTA Electronic Submission to be Edited.

Last Updated on: 1/28/08
Page 101 of 144
Figure 8.9 PWTA XML File Loaded in Word Pad.
8.4 Resubmitting Corrected Full and Partial PWTA Electronic Submissions Please note that two figures have been provided below and on the following page summarizing how to revise and resubmit corrected full and partial PWTA XML files that were originally created using a LIMS system, Online Form, and Excel spreadsheet. A narrative explaining in detail on how to resubmit each type of PWTA XML file is provided following these two figures. How To Submit Revisions to PWTA XML Files Originally Created in the Online Form Type Of Submission Click Here To Revise
Original Submittal Click on This Button to Resubmit Revision After Making Corrections
Full Edit Button Button
Stand Alone Partial Edit Button Button
Linked Partial Edit Button Button
Figure 8.10 Procedures for Revising and Resubmitting XML Files Created Using the Online Form.

Last Updated on: 1/28/08
Page 102 of 144
How To Submit Revisions to PWTA XML Files Originally Created in the Excel Spreadsheet or by a LIMS System Type of Submission
Original Submission Accepted or Rejected?
Mark XML File As Original or Revision
Click Here To Revise Original Submittal
Click on This Button to Resubmit Revision After Correcting Errors
Full Accepted Revision Saved spreadsheet or
icon under the Download column
Edit Button
Full Rejected Original Saved spreadsheet or
icon under the Download column
Stand-Alone Partial
Accepted Revision Saved spreadsheet or
icon under the Download column
Edit Button
Stand-Alone Partial
Rejected Original Saved spreadsheet or
icon under the Download column
Linked Partial Accepted Original Saved spreadsheet or
icon under the Download column
Button
Linked Partial Rejected Original Saved spreadsheet or
icon under the Download column
Button
Figure 8.11 Procedures for Revising and Resubmitting XML Files Created Using a LIMS System or the Excel Spreadsheet.
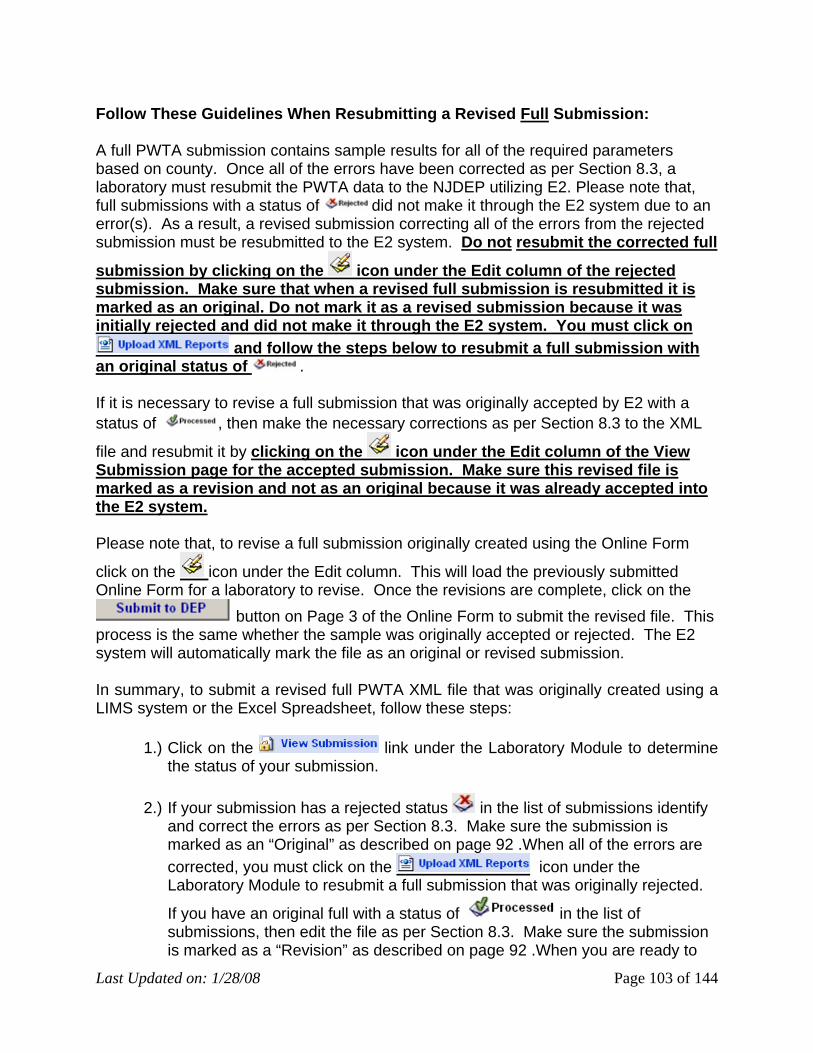
Last Updated on: 1/28/08
Page 103 of 144
Follow These Guidelines When Resubmitting a Revised Full Submission: A full PWTA submission contains sample results for all of the required parameters based on county. Once all of the errors have been corrected as per Section 8.3, a laboratory must resubmit the PWTA data to the NJDEP utilizing E2. Please note that, full submissions with a status of did not make it through the E2 system due to an error(s). As a result, a revised submission correcting all of the errors from the rejected submission must be resubmitted to the E2 system. Do not resubmit the corrected full
submission by clicking on the icon under the Edit column of the rejected submission. Make sure that when a revised full submission is resubmitted it is marked as an original. Do not mark it as a revised submission because it was initially rejected and did not make it through the E2 system. You must click on
and follow the steps below to resubmit a full submission with an original status of . If it is necessary to revise a full submission that was originally accepted by E2 with a status of , then make the necessary corrections as per Section 8.3 to the XML
file and resubmit it by clicking on the icon under the Edit column of the View Submission page for the accepted submission. Make sure this revised file is marked as a revision and not as an original because it was already accepted into the E2 system. Please note that, to revise a full submission originally created using the Online Form
click on the icon under the Edit column. This will load the previously submitted Online Form for a laboratory to revise. Once the revisions are complete, click on the
button on Page 3 of the Online Form to submit the revised file. This process is the same whether the sample was originally accepted or rejected. The E2 system will automatically mark the file as an original or revised submission. In summary, to submit a revised full PWTA XML file that was originally created using a LIMS system or the Excel Spreadsheet, follow these steps:
1.) Click on the link under the Laboratory Module to determine the status of your submission.
2.) If your submission has a rejected status in the list of submissions identify
and correct the errors as per Section 8.3. Make sure the submission is marked as an “Original” as described on page 92 .When all of the errors are corrected, you must click on the icon under the Laboratory Module to resubmit a full submission that was originally rejected.
If you have an original full with a status of in the list of submissions, then edit the file as per Section 8.3. Make sure the submission is marked as a “Revision” as described on page 92 .When you are ready to

Last Updated on: 1/28/08
Page 104 of 144
resubmit, click on the icon under the Edit column for that row to resend the XML file. This will bring up the screen in Figure 8.13.
3.) Once you are at the screen illustrated in Figure 8.13, utilize the following
steps to send a resubmittal to the NJDEP: a.) Step 1: Select the location of the corrected XML file to upload. b.) Step 2: An optional step which tests the structure of the XML file only.
It does not perform any validation checks. c.) Step 3: Enter you PIN number to upload PWTA XML reports. d.) Step 4: Click in the box. e.) Step 5: Click on the button.
The corrected PWTA XML file has now been uploaded to the system. An example of the correction and resubmittal process is illustrated in Figure 8.14. A PWTA submittal with Submission ID # 1385 was rejected and not saved in the E2 system. Corrections were made and the file was resubmitted to E2 with a new Submission ID of 1386. Additional errors were detected and corrected a second time. The file was resubmitted again with a Submission ID of # 1387. The resubmittal (Submission ID # 1387) passed all validation checks in E2 and was assigned a Submission ID # 1387. The Previous Submission ID# is listed as 1386. Follow These Guidelines When Resubmitting a Revised Linked Partial Submission: As stated in Section 5.7, there are two types of partial submissions in E2. A linked partial is a partial XML file that is associated with an original full submission that has already been submitted to and accepted by the E2 system. As with the full submission, once all of the errors have been corrected in a linked partial submission, a laboratory must resubmit the PWTA data to the NJDEP utilizing E2. A linked partial submission with a status of or that has been revised must be marked as an original. Click on the icon in the Edit column on the View Submissions page to resubmit a revised linked partial submission that was originally rejected or accepted by the E2 system. In summary, to submit a revised linked partial PWTA XML file originally created in a LIMS system or in the Excel spreadsheet, follow these steps:
1.) Click on the link under the Laboratory Module to determine the status of your submission.
2.) If your submission has a rejected status in the list of submissions identify
and correct the errors as per Section 8.3. Make sure the submission is marked as an “Original” as described on page 92. When all of the errors are corrected, you must click on the icon in the Edit column on the View Submissions page to resubmit a linked partial PWTA XML file that was

Last Updated on: 1/28/08
Page 105 of 144
originally rejected. If you have an original linked partial with a status of
in the list of submissions, then edit the file as per Section 8.3. Make sure the submission is marked as a “Revision” as described on page
92. When you are ready to resubmit, click on the icon under the Edit column for that row to resend the XML file. This will bring up the screen in Figure 8.13.
3.) Once you are at the screen illustrated in Figure 8.13, utilize the following
steps to send a resubmittal to the NJDEP: a. Step 1: Select the location of the corrected XML file to upload. b. Step 2: An optional step which tests the structure of the XML file only.
It does not perform any validation checks. c. Step 3: Enter you PIN number to upload PWTA XML reports. d. Step 4: Click in the box. e. Step 5: Click on the button.
A stand alone partial is a file that is associated with a full submission that has not been submitted to the E2 system (i.e. it was submitted to the former PWTA Equis database system) or the laboratory did not submit the original full submission. To resubmit a stand alone partial that was originally accepted by E2 with a status
of , a user must also click on the icon in the Edit column on the View Submission page. The submission must be marked as a revision. To resubmit a stand alone partial that was originally rejected by E2 with a status of , a user must also click on the icon in the Edit column on the View Submission page. The submission must be marked as an original. In summary, to submit a revised stand alone partial PWTA XML file originally created in a LIMS system or in the Excel spreadsheet, follow these steps:
1.) Click on the link under the Laboratory Module to determine the status of your submission.
2.) If your submission has a rejected status in the list of submissions identify
and correct the errors as per Section 8.3. Make sure the submission is marked as an “Original” as described on page 92. When all of the errors are corrected, you must click on the the icon in the Edit column on the View Submissions page to resubmit a stand alone partial PWTA XML file that was originally rejected. If your stand alone partial has
an original status of in the list of submissions, then edit the file as per Section 8.3. Make sure the submission is marked as a “Revision” as

Last Updated on: 1/28/08
Page 106 of 144
described on page 92. When you are ready to resubmit, click on the icon under the Edit column for that row to resend the stand alone partial XML file. This will bring up the screen in Figure 8.13.
3.) Once you are at the screen illustrated in Figure 8.13, utilize the following
steps to send a resubmittal to the NJDEP: a. Step 1: Select the location of the corrected XML file to upload. b. Step 2: An optional step which tests the structure of the XML file only.
It does not perform any validation checks. c. Step 3: Enter you PIN number to upload PWTA XML reports. d. Step 4: Click in the box. e. Step 5: Click on the button.
Please note that, to revise a linked or stand alone partial submission originally created
using the Online Form click on the icon under the Edit column. This will load the previously submitted Online Form for a laboratory to revise. Once the revisions are complete, click on the button on Page 3 of the Online Form to submit the revised file. This process is the same whether the sample was originally accepted or rejected. The E2 system will automatically mark the file as an original or revised submission. Note: To change a submission from an original to a revision in an XML file created by a LIMS system or the Excel spreadsheet template, open the XML File. To open an XML file for a specific submission, click on the icon on the View Submissions page. Save the file to your local drive. You can view the file using Microsft Wordpad, Notepad, or a separate XML file viewer. Find the line in the XML file beginning “Revision Indicator”. Change the word “Original” to “Revision” and save the file. Please refer to Figure 8.12. Alternatively, in an XML file originally created by the Excel spreadsheet, open up the saved spreadsheet and on Page 1 under General Information select “Revision” from the drop-down menu. Please note that, the E2 system will automatically change any XML file originally created using the Online Form from “Original” to “Revision”.

Last Updated on: 1/28/08
Page 107 of 144
Figure 8.12 Changing the Status of an XML File From an Original to a Revision.
Figure 8.13 Upload Corrected XML Files Using the Edit Button On the View Submission Screen.

Last Updated on: 1/28/08
Page 108 of 144
Figure 8.14 In the View Submission Screen, an Initial Submittal Was Rejected, Resubmitted, and then Accepted By the System.
8.5 Chain of Custody Under the “View Submission” link, you can view the Chain of Custody for a particular submission by clicking on the icon for a particular submission. The Chain of Custody provides information related to the date and time the submission was sent and received, Certifier’s name, submission ID, and other information as illustrated in Figure 8.13.
Figure 8.15 The Chain of Custody for a PWTA Submission.
8.6 Editing and Deleting an Incomplete Report Originally Created With the On-Line Form
When creating a report utilizing the On-Line Form, the user has the option to save their progress at any time. If necessary, they can return at a later date to complete the report and submit it to the NJDEP utilizing E2.

Last Updated on: 1/28/08
Page 109 of 144
To edit, or delete a saved report originally created in the On-Line Form that has not yet been submitted to the NJDEP click on “Retrieve Saved Reports” link under the Laboratory module on the left hand side of the screen. This will open up the screen in Figure 8.14.
Figure 8.16 The Retrieved Saved Reports Screen.
8.6.1 Editing an Incomplete Report Originally Created Using the Online Form
To edit an incomplete report created in the Online Form, select a laboratory from the drop-down menu and highlight the desired report. A laboratory can edit the report by clicking on the icon which will open the report. Complete or make any necessary changes to the report and submit it to the NJDEP.
8.6.2 Deleting an Incomplete Report A report can be deleted by checking the Delete check box next to the appropriate report in the first column of the page. After selecting the proper report, click on the “Update” button as seen in Figure 8.15. This will bring up a message box as seen in Figure 8.16 asking if you want to delete the selected report(s). To delete the reports, click on OK.
Figure 8.17 Deleting an Open PWTA Electronic Report.

Last Updated on: 1/28/08
Page 110 of 144
Figure 8.18 Dialog Box Confirming That You Want to Delete Selected the Selected Report(s)

Last Updated on: 1/28/08
Page 111 of 144
9.0 Definition of Fields and Terms
1. Header Information Section
Form Identifier- state assigned form identifier to uniquely identify the type of electronic report being submitted to the NJDEP. For the PWTA program, this field is “PWTA”.
Revision Indicator- this fields indicates whether the submission was an “original” or a correction (revision). This is handled automatically by the E2 system. Replace Reported Reference Code- The previous report reference code that this report intends to replace. This is used only for a revision and is auto populated by E2. Full or Partial Test- states whether the submission is a full or partial submission. NOTE: A partial submission is only currently being used for coliform (total coliform, fecal, E.coli) results that exceed the six month time frame for which the results are valid. Reporting Lab Cert. Number- the certification number of the laboratory that is actually submitting the data. Report Date- date the report was completed and sent to the test requestor.
2. Demographic Information Section (Test Requestor Information Subsection)
Test Requestor Type- role of the requestor. This field can have one of six values: Builder (BLD), Home Owner (HO), Realtor (RLT), Home Buyer (HB), Landlord (LLD), and Tenant (TNT).
Sample Purpose- reason for the private well being sampled. This field can have one of five values: Retest (RTST), New Well (NW), Sell House (SH), Buy House (BH), and Rental 5 Year Retest ( RT5YR) for a landlord/tenant scenario. Title- title of the PWTA requestor. First Name- first name of the PWTA requestor. Last Name- last name of the PWTA requestor. Address 1- first line of the mailing address of the PWTA requestor. Address 2- second line of the mailing address of the PWTA requestor. City- city of the PWTA requestor. State- USPS state abbreviation of the PWTA requestor.

Last Updated on: 1/28/08
Page 112 of 144
Country- home country of the PWTA requestor.
Postal Code-postal code of the PWTA requestor. If it is a U.S. address, a 5 digit zip code is to be used.
Phone Number- home phone number of the PWTA requestor including area code.
3. Demographic Information Section (Property Information Subsection)
Contract of Sale Date-conditionally required field that must only have a value if a new parameter is added in the future to the PWTA required parameter list. The logic for this field is as follows: If County = "x" and Contract_Of_Sale_Date >= the effective date of the new parameter, then result field for that new parameter cannot be null. If county = "x" and sample purpose = rental 5 yr retest and sample_date >= effective date of the new parameter, then the result field for that new parameter cannot be null.
Address Line 1- first line of the property’s address where the sample was collected. Address Line 2- second line of the property’s address where the sample was collected. Property City- city in which the property a sample was collected at is located. Property State- state in which the property a sample was collected is located. Property Zip Code- zip code in which the property a sample was collected is located. Year of Home Construction- the known or approximate age of the dwelling at which the sample was collected. Treatment Present- this field is used to indicate whether or not some type of treatment system(s) are currently installed. Type of Treatment- this field lists the type of known treatment systems installed. It is a conditionally required field. If a value of “Y” is entered in the Treatment Present field, then at least one treatment type must be indicated in the Type of Treatment field.
4. Well and Sample Information Section (Well Information Subsection)
Well Block Code- block code of the property.
Well Lot Code- lot code of the property. Well County Code- two digit code identifying the county of the well in which sampling was conducted.

Last Updated on: 1/28/08
Page 113 of 144
Well County Muni Code- four digit code identifying the county and municipality of the well in which sampling was conducted. The first two digits identify the county and the last two digits identify the municipality. Well Permit Number- permit number for the well. This field is a conditionally required field. If a value of “new construction” is entered in the Sample Purpose field, then a value must be present in the Well Permit Number field. Well Driller Name- name of the well driller who initially installed the well. This field is a conditionally required field. If a value of “new construction” is entered in the Sample purpose field, then a value must be present in the Well Driller Name field. Well Install Date- date of well installation. This field is a conditionally required field. If a value of “new construction” is entered in the Sample Purpose field, then a value must be present in the Well Install Date field. NJ State Plane Easting Feet (X)- the easting point value of the well head or front door of the property in which the sample was collected. This value must be expressed as a New Jersey State Plane coordinate value. NJ State Plane Northing Feet (Y)- the northing point value of the well head or front door of the property in which the sample was collected. This value must be expressed as a New Jersey State Plane coordinate value.
Coordinate Method Code- method used to determine GPS coordinates. The only value currently acceptable for this field is GPS. Additional values may be added in the future.
4.11 GPS Reference Point Code- a code describing the specific location where GPS
coordinates were collected. This field can have one of six values: Raised Wellhead (WHR), Well Head Pit (WHP), Sample Collection Point (SCP), Flush mount (WHF), Front Door (FD), and Alternative Location (ALTLO).
GPS Reference Point Comments- used to describe the exact location where GPS
coordinates were collected if alternative location (AltLo) is selected in the GPS Reference Point Code field. This field is a conditionally required field. If a value of “AltLo” is entered in the GPS Reference Point Code field, then a value must be present in the GPS Reference Point Comments field.
5. Well and Sample Information Section (Sample Collection Information
Subsection)
Sample Date- date that the sample was collected.
Sample Time-time the sample was collected. Sampler Name- name of the person(s) collecting the sample.

Last Updated on: 1/28/08
Page 114 of 144
Sampler Affiliation- name of the company or agency collecting the sample. Untreated Sample Location- location describing the exact location where the sample was collected. This field can have one of seven values: Well Head (WH), Holding/Pressure Tank (HPT), Kitchen Tap (KT), Bathroom Tap (BT), Spigot (SPIGO), Before Treatment (BFRT), and Alternative Location (ALTLO). Flushing Location- location describing where the residence’s water supply was purged. This field can have one of five values: Well Head (WH), Holding/Pressure Tank (HPT), Kitchen Tap (KT), Bathroom Tap (BT), and Alternative Location (ALTLO). Flushing Information Comments- used to describe the exact location where water supply was purged if alternative location (ALTLO) is selected in the Flushing Location field. This field is a conditionally required field. If a value of “ALTLO” is entered in the Flushing Location field, then a value must be present in the Flushing Information Comments section. Record ID- unique identifier for the record within the submission. This field is auto populated by E2 on the web entry form. (NOTE: this field is only used in the error report to aid in locating records with errors).
6. Results Information Section Analyzing Lab Cert. Number- NJDEP certification number of the laboratory that actually performed the analysis on a specific parameter.
Analysis Start Date- date the analysis was begun on the sample. Analysis Start Time- time the analysis was begun on the sample. Analysis Completion Date- date the analysis was completed on the sample. Analysis Completion Time- time the analysis was completed on the sample. Lab Sample ID- unique identifier for the sample in the lab. Method Code- the specific method used to analyze a particular parameter in a sample. CAS Number-Chemical Abstract Services number for the specific parameter. Analyte Name- specific name of the parameter.
6.10 Result- the quantitative reporting value for the specific parameter. NOTE: this field accepts negative values for gross alpha data.

Last Updated on: 1/28/08
Page 115 of 144
6.11Units- units the results are expressed in. This field is auto populated by E2 on the On-Line Form and Excel spreadsheet for all parameters except total coliform, fecal coliform, and E.coli.
6.12 Detect Flag- a Yes/No field which indicates whether a specific parameter was
detected at a concentration exceeding their respective Method Detection Limit (MDL) or the Method Detectable Concentration (MDC) for gross alpha.
6.13Detection Level (MDC/MDL)- the result specific Method Detection Limit (MDL)
for a parameter including any mathematical corrections required due to sample dilution. For gross alpha results, this field contains the Minimum Detectable Concentration (MDC).
6.14 Radiological Result Count Error- a +/- error value associated with gross alpha
analyses only. This is a conditionally required field only if gross alpha was a required parameter of analysis.
6.15 Qualifier- a value flag that codes the result value as cautioned or qualified for
interpretation. This field is left null for unqualified values. This field can have one of four values: less than (<), TNTC (Too Numerous To Count), P (Presence), and A (Absence). The qualifiers TNTC, P, and A apply to total coliform, fecal coliform, and E. coli only.
6.16 Results Comments- used to make specific comments concerning information
related to the result values.
Miscellaneous terms: Correction – refers to a resubmitted electronic PWTA data file whose content differs from the database content. If the sample already exists in the database, the file content will be compared to all data for the sample in the database. If any file content differs from the database content, the file will be considered a correction and the different data will replace the existing database data.
Duplicate – refers to a resubmitted electronic PWTA data file whose content exactly matches the database content. If this is the case, the file will be considered a duplicate and rejected by the system. A rejection notification will automatically be sent out to the sender. Full Submittal- a complete electronic PWTA analytical data package submitted to the NJDEP-PWTA Program that satisfies the requirements of N.J.A.C. 7:9E.
Partial Submittal- a partial electronic PWTA analytical data package submitted to the NJDEP-PWTA Program that satisfies the requirements of N.J.A.C. 7:9E-2.1 & N.J.A.C. 7:18 for microbiological (total coliform, fecal coliform, and E.coli) analyses only at this time.

Last Updated on: 1/28/08
Page 116 of 144
Stand alone partial XML File- a stand alone partial is a file that is associated with a full submission that has not been submitted to the E2 system (i.e. it was submitted to the former PWTA Equis database system). A stand alone partial also refers to a partial file that was created by a certified laboratory which is different from the lab that created and submitted the corresponding original full submission to the E2 system. Linked Partial XML File- a linked partial XML file is a partial file that is associated with an original full submission that has already been submitted to and accepted by the E2 system. In order for a partial to be linked to it’s corresponding full submission in E2, the same laboratory must have submitted both the full and corresponding partial submissions to E2. Required Parameters - Those analytes listed in the Private Well Testing Act namely: bacteria (total coliform), nitrate, iron, manganese, pH, lead, and all volatile organic compounds for which maximum contaminant levels (MCLs) have been established according to state law. The Private Well Testing Act Regulations (N.J.A.C. 7:9E) require the same parameters as the Act, plus *mercury, *#arsenic, and ♦+@gross alpha particle activity. XML Schema – A format that defines the data elements, required fields, order, and data types in an XML file. *Requirement is county-specific (see Appendix15)
# A new MCL of 5 ug/l (ppb) has been adopted by the NJDEP for arsenic and became effective January 23, 2006.
+ Requirement was phased-in for Cumberland and Gloucester counties with an effective date of March 15th, 2003. (see Appendix 15) ♦ Requirement was phased-in for Atlantic, Burlington, Camden and Salem Counties with an effective date of date September 16th, 2003. (see Appendix 15) @ Requirement was phased-in for Cape May, Hunterdon, Mercer, Middlesex, Monmouth, and Ocean Counties with an effective date of March 16th, 2004. (see Appendix 15)
Please note that a new Ground Water Quality Standard of 5 ug/l (ppb) has been adopted by the NJDEP for lead and is effective beginning January 23, 2006.
APPENDIX 1: Acceptable County Reference Codes For Electronic PWTA Data Reporting
COUNTY_CODE COUNTY_NAME 01 Atlantic

Last Updated on: 1/28/08
Page 117 of 144
02 Bergen 03 Burlington 04 Camden 05 Cape May 06 Cumberland 07 Essex 08 Gloucester 09 Hudson 10 Hunterdon 11 Mercer 12 Middlesex 13 Monmouth 14 Morris 15 Ocean 16 Passaic 17 Salem 18 Somerset 19 Sussex 20 Union 21 Warren

Last Updated on: 1/28/08
Page 118 of 144
APPENDIX 2: Municipal Reference Codes For Electronic PWTA Data Reporting
MUNI_CODE COUNTY_NAME MUNICIPALITY_NAME 0101 Atlantic Absecon City 0102 Atlantic Atlantic City 0103 Atlantic Brigantine City 0104 Atlantic Buena Boro 0105 Atlantic Buena Vista Twp 0106 Atlantic Corbin City 0107 Atlantic Egg Harbor City 0108 Atlantic Egg Harbor Twp 0109 Atlantic Estell Manor City 0110 Atlantic Folsom Boro 0111 Atlantic Galloway Twp 0112 Atlantic Hamilton Twp 0113 Atlantic Hammonton Town 0114 Atlantic Linwood City 0115 Atlantic Longport Boro 0116 Atlantic Margate City 0117 Atlantic Mullica Twp 0118 Atlantic Northfield City 0119 Atlantic Pleasantville City 0120 Atlantic Port Republic City 0121 Atlantic Somers Point City 0122 Atlantic Ventnor City 0123 Atlantic Weymouth Twp 0201 Bergen Allendale Boro 0202 Bergen Alpine Boro 0203 Bergen Bergenfield Boro 0204 Bergen Bogota Boro 0205 Bergen Carlstadt Boro 0206 Bergen Cliffside Park Boro 0207 Bergen Closter Boro 0208 Bergen Cresskill Boro 0209 Bergen Demarest Boro 0210 Bergen Dumont Boro 0211 Bergen Elmwood Park Boro 0212 Bergen East Rutherford Boro 0213 Bergen Edgewater Boro 0214 Bergen Emerson Boro 0215 Bergen Englewood City 0216 Bergen Englewood Cliffs Boro 0217 Bergen Fair Lawn Boro 0218 Bergen Fairview Boro 0219 Bergen Fort Lee Boro 0220 Bergen Franklin Lakes Boro

Last Updated on: 1/28/08
Page 119 of 144
0221 Bergen Garfield City 0222 Bergen Glen Rock Boro 0223 Bergen Hackensack City 0224 Bergen Harrington Park Boro 0225 Bergen Hasbrouck Heights Boro 0226 Bergen Haworth Boro 0227 Bergen Hillsdale Boro 0228 Bergen Ho-ho-kus Boro 0229 Bergen Leonia Boro 0230 Bergen Little Ferry Boro 0231 Bergen Lodi Boro 0232 Bergen Lyndhurst Twp 0233 Bergen Mahwah Twp 0234 Bergen Maywood Boro 0235 Bergen Midland Park Boro 0236 Bergen Montvale Boro 0237 Bergen Moonachie Boro 0238 Bergen New Milford Boro 0239 Bergen North Arlington Boro 0240 Bergen Northvale Boro 0241 Bergen Norwood Boro 0242 Bergen Oakland Boro 0243 Bergen Old Tappan Boro 0244 Bergen Oradell Boro 0245 Bergen Palisades Park Boro 0246 Bergen Paramus Boro 0247 Bergen Park Ridge Boro 0248 Bergen Ramsey Boro 0249 Bergen Ridgefield Boro 0250 Bergen Ridgefield Park Village 0251 Bergen Ridgewood Village 0252 Bergen River Edge Boro 0253 Bergen River Vale Twp 0254 Bergen Rochelle Park Twp 0255 Bergen Rockleigh Boro 0256 Bergen Rutherford Boro 0257 Bergen Saddle Brook Twp 0258 Bergen Saddle River Boro 0259 Bergen South Hackensack Twp 0260 Bergen Teaneck Twp 0261 Bergen Tenafly Boro 0262 Bergen Teterboro Boro 0263 Bergen Upper Saddle River Boro 0264 Bergen Waldwick Boro 0265 Bergen Wallington Boro 0266 Bergen Washington Twp 0267 Bergen Westwood Boro 0268 Bergen Woodcliff Lake Boro

Last Updated on: 1/28/08
Page 120 of 144
0269 Bergen Wood-Ridge Boro 0270 Bergen Wyckoff Twp 0301 Burlington Bass River Twp 0302 Burlington Beverly City 0303 Burlington Bordentown City 0304 Burlington Bordentown Twp 0305 Burlington Burlington City 0306 Burlington Burlington Twp 0307 Burlington Chesterfield Twp 0308 Burlington Cinnaminson Twp 0309 Burlington Delanco Twp 0310 Burlington Delran Twp 0311 Burlington Eastampton Twp 0312 Burlington Edgewater Park Twp 0313 Burlington Evesham Twp 0314 Burlington Fieldsboro Boro 0315 Burlington Florence Twp 0316 Burlington Hainesport Twp 0317 Burlington Lumberton Twp 0318 Burlington Mansfield Twp 0319 Burlington Maple Shade Twp 0320 Burlington Medford Twp 0321 Burlington Medford Lakes Boro 0322 Burlington Moorestown Twp 0323 Burlington Mount Holly Twp 0324 Burlington Mount Laurel Twp 0325 Burlington New Hanover Twp 0326 Burlington North Hanover Twp 0327 Burlington Palmyra Boro 0328 Burlington Pemberton Boro 0329 Burlington Pemberton Twp 0330 Burlington Riverside Twp 0331 Burlington Riverton Boro 0332 Burlington Shamong Twp 0333 Burlington Southampton Twp 0334 Burlington Springfield Twp 0335 Burlington Tabernacle Twp 0336 Burlington Washington Twp 0337 Burlington Westampton Twp 0338 Burlington Willingboro Twp 0339 Burlington Woodland Twp 0340 Burlington Wrightstown Boro 0401 Camden Audubon Boro 0402 Camden Audubon Park Boro 0403 Camden Barrington Boro 0404 Camden Bellmawr Boro 0405 Camden Berlin Boro 0406 Camden Berlin Twp

Last Updated on: 1/28/08
Page 121 of 144
0407 Camden Brooklawn Boro 0408 Camden Camden City 0409 Camden Cherry Hill Twp 0410 Camden Chesilhurst Boro 0411 Camden Clementon Boro 0412 Camden Collingswood Boro 0413 Camden Gibbsboro Boro 0414 Camden Gloucester City 0415 Camden Gloucester Twp 0416 Camden Haddon Twp 0417 Camden Haddonfield Boro 0418 Camden Haddon Heights Boro 0419 Camden Hi-Nella Boro 0420 Camden Laurel Springs Boro 0421 Camden Lawnside Boro 0422 Camden Lindenwold Boro 0423 Camden Magnolia Boro 0424 Camden Merchantville Boro 0425 Camden Mount Ephraim Boro 0426 Camden Oaklyn Boro 0427 Camden Pennsauken Twp 0428 Camden Pine Hill Boro 0429 Camden Pine Valley Boro 0430 Camden Runnemede Boro 0431 Camden Somerdale Boro 0432 Camden Stratford Boro 0433 Camden Tavistock Boro 0434 Camden Voorhees Twp 0435 Camden Waterford Twp 0436 Camden Winslow Twp 0437 Camden Woodlynne Boro 0501 Cape May Avalon Boro 0502 Cape May Cape May City 0503 Cape May Cape May Point Boro 0504 Cape May Dennis Twp 0505 Cape May Lower Twp 0506 Cape May Middle Twp 0507 Cape May North Wildwood City 0508 Cape May Ocean City 0509 Cape May Sea Isle City 0510 Cape May Stone Harbor Boro 0511 Cape May Upper Twp 0512 Cape May West Cape May Boro 0513 Cape May West Wildwood Boro 0514 Cape May Wildwood City 0515 Cape May Wildwood Crest Boro 0516 Cape May Woodbine Boro 0601 Cumberland Bridgeton City

Last Updated on: 1/28/08
Page 122 of 144
0602 Cumberland Commercial Twp 0603 Cumberland Deerfield Twp 0604 Cumberland Downe Twp 0605 Cumberland Fairfield Twp 0606 Cumberland Greenwich Twp 0607 Cumberland Hopewell Twp 0608 Cumberland Lawrence Twp 0609 Cumberland Maurice River Twp 0610 Cumberland Millville City 0611 Cumberland Shiloh Boro 0612 Cumberland Stow Creek Twp 0613 Cumberland Upper Deerfield Twp 0614 Cumberland Vineland City 0701 Essex Belleville Twp 0702 Essex Bloomfield Twp 0703 Essex Caldwell Boro 0704 Essex Cedar Grove Twp 0705 Essex East Orange City 0706 Essex Essex Fells Boro 0707 Essex Fairfield Twp 0708 Essex Glen Ridge Boro 0709 Essex Irvington Twp 0710 Essex Livingston Twp 0711 Essex Maplewood Twp 0712 Essex Millburn Twp 0713 Essex Montclair Twp 0714 Essex Newark City 0715 Essex North Caldwell Boro 0716 Essex Nutley Twp 0717 Essex Orange City Twp 0718 Essex Roseland Boro 0719 Essex South Orange Village Twp 0720 Essex Verona Twp 0721 Essex West Caldwell Twp 0722 Essex West Orange Twp 0801 Gloucester Clayton Boro 0802 Gloucester Deptford Twp 0803 Gloucester East Greenwich Twp 0804 Gloucester Elk Twp 0805 Gloucester Franklin Twp 0806 Gloucester Glassboro Boro 0807 Gloucester Greenwich Twp 0808 Gloucester Harrison Twp 0809 Gloucester Logan Twp 0810 Gloucester Mantua Twp 0811 Gloucester Monroe Twp 0812 Gloucester National Park Boro 0813 Gloucester Newfield Boro

Last Updated on: 1/28/08
Page 123 of 144
0814 Gloucester Paulsboro Boro 0815 Gloucester Pitman Boro 0816 Gloucester South Harrison Twp 0817 Gloucester Swedesboro Boro 0818 Gloucester Washington Twp 0819 Gloucester Wenonah Boro 0820 Gloucester West Deptford Twp 0821 Gloucester Westville Boro 0822 Gloucester Woodbury City 0823 Gloucester Woodbury Heights Boro 0824 Gloucester Woolwich Twp 0901 Hudson Bayonne City 0902 Hudson East Newark Boro 0903 Hudson Guttenberg Town 0904 Hudson Harrison Town 0905 Hudson Hoboken City 0906 Hudson Jersey City 0907 Hudson Kearny Town 0908 Hudson North Bergen Twp 0909 Hudson Secaucus Town 0910 Hudson Union City 0911 Hudson Weehawken Twp 0912 Hudson West New York Town 1001 Hunterdon Alexandria Twp 1002 Hunterdon Bethlehem Twp 1003 Hunterdon Bloomsbury Boro 1004 Hunterdon Califon Boro 1005 Hunterdon Clinton Town 1006 Hunterdon Clinton Twp 1007 Hunterdon Delaware Twp 1008 Hunterdon East Amwell Twp 1009 Hunterdon Flemington Boro 1010 Hunterdon Franklin Twp 1011 Hunterdon Frenchtown Boro 1012 Hunterdon Glen Gardner Boro 1013 Hunterdon Hampton Boro 1014 Hunterdon High Bridge Boro 1015 Hunterdon Holland Twp 1016 Hunterdon Kingwood Twp 1017 Hunterdon Lambertville City 1018 Hunterdon Lebanon Boro 1019 Hunterdon Lebanon Twp 1020 Hunterdon Milford Boro 1021 Hunterdon Raritan Twp 1022 Hunterdon Readington Twp 1023 Hunterdon Stockton Boro 1024 Hunterdon Tewksbury Twp 1025 Hunterdon Union Twp

Last Updated on: 1/28/08
Page 124 of 144
1026 Hunterdon West Amwell Twp 1101 Mercer East Windsor Twp 1102 Mercer Ewing Twp 1103 Mercer Hamilton Twp 1104 Mercer Hightstown Boro 1105 Mercer Hopewell Boro 1106 Mercer Hopewell Twp 1107 Mercer Lawrence Twp 1108 Mercer Pennington Boro 1109 Mercer Princeton Boro 1110 Mercer Princeton Twp 1111 Mercer Trenton City 1112 Mercer Robbinsville Twp 1113 Mercer West Windsor Twp 1201 Middlesex Carteret Boro 1202 Middlesex Cranbury Twp 1203 Middlesex Dunellen Boro 1204 Middlesex East Brunswick Twp 1205 Middlesex Edison Twp 1206 Middlesex Helmetta Boro 1207 Middlesex Highland Park Boro 1208 Middlesex Jamesburg Boro 1209 Middlesex Old Bridge Twp 1210 Middlesex Metuchen Boro 1211 Middlesex Middlesex Boro 1212 Middlesex Milltown Boro 1213 Middlesex Monroe Twp 1214 Middlesex New Brunswick City 1215 Middlesex North Brunswick Twp 1216 Middlesex Perth Amboy City 1217 Middlesex Piscataway Twp 1218 Middlesex Plainsboro Twp 1219 Middlesex Sayreville Boro 1220 Middlesex South Amboy City 1221 Middlesex South Brunswick Twp 1222 Middlesex South Plainfield Boro 1223 Middlesex South River Boro 1224 Middlesex Spotswood Boro 1225 Middlesex Woodbridge Twp 1301 Monmouth Allenhurst Boro 1302 Monmouth Allentown Boro 1303 Monmouth Asbury Park City 1304 Monmouth Atlantic Highlands Boro 1305 Monmouth Avon-By-The-Sea Boro 1306 Monmouth Belmar Boro 1307 Monmouth Bradley Beach Boro 1308 Monmouth Brielle Boro 1309 Monmouth Colts Neck Twp

Last Updated on: 1/28/08
Page 125 of 144
1310 Monmouth Deal Boro 1311 Monmouth Eatontown Boro 1312 Monmouth Englishtown Boro 1313 Monmouth Fair Haven Boro 1314 Monmouth Farmingdale Boro 1315 Monmouth Freehold Boro 1316 Monmouth Freehold Twp 1317 Monmouth Highlands Boro 1318 Monmouth Holmdel Twp 1319 Monmouth Howell Twp 1320 Monmouth Interlaken Boro 1321 Monmouth Keansburg Boro 1322 Monmouth Keyport Boro 1323 Monmouth Little Silver Boro 1324 Monmouth Loch Arbour Village 1325 Monmouth Long Branch City 1326 Monmouth Manalapan Twp 1327 Monmouth Manasquan Boro 1328 Monmouth Marlboro Twp 1329 Monmouth Matawan Boro 1330 Monmouth Aberdeen Twp 1331 Monmouth Middletown Twp 1332 Monmouth Millstone Twp 1333 Monmouth Monmouth Beach Boro 1334 Monmouth Neptune Twp 1335 Monmouth Neptune City Boro 1336 Monmouth Tinton Falls Boro 1337 Monmouth Ocean Twp 1338 Monmouth Oceanport Boro 1339 Monmouth Hazlet Twp 1340 Monmouth Red Bank Boro 1341 Monmouth Roosevelt Boro 1342 Monmouth Rumson Boro 1343 Monmouth Sea Bright Boro 1344 Monmouth Sea Girt Boro 1345 Monmouth Shrewsbury Boro 1346 Monmouth Shrewsbury Twp 1347 Monmouth Lake Como Boro 1348 Monmouth Spring Lake Boro 1349 Monmouth Spring Lake Heights Boro 1350 Monmouth Union Beach Boro 1351 Monmouth Upper Freehold Twp 1352 Monmouth Wall Twp 1353 Monmouth West Long Branch Boro 1401 Morris Boonton Town 1402 Morris Boonton Twp 1403 Morris Butler Boro 1404 Morris Chatham Boro

Last Updated on: 1/28/08
Page 126 of 144
1405 Morris Chatham Twp 1406 Morris Chester Boro 1407 Morris Chester Twp 1408 Morris Denville Twp 1409 Morris Dover Town 1410 Morris East Hanover Twp 1411 Morris Florham Park Boro 1412 Morris Hanover Twp 1413 Morris Harding Twp 1414 Morris Jefferson Twp 1415 Morris Kinnelon Boro 1416 Morris Lincoln Park Boro 1417 Morris Madison Boro 1418 Morris Mendham Boro 1419 Morris Mendham Twp 1420 Morris Mine Hill Twp 1421 Morris Montville Twp 1422 Morris Morris Twp 1423 Morris Morris Plains Boro 1424 Morris Morristown Town 1425 Morris Mountain Lakes Boro 1426 Morris Mount Arlington Boro 1427 Morris Mount Olive Twp 1428 Morris Netcong Boro 1429 Morris Parsippany-Troy Hills Twp 1430 Morris Long Hill Twp 1431 Morris Pequannock Twp 1432 Morris Randolph Twp 1433 Morris Riverdale Boro 1434 Morris Rockaway Boro 1435 Morris Rockaway Twp 1436 Morris Roxbury Twp 1437 Morris Victory Gardens Boro 1438 Morris Washington Twp 1439 Morris Wharton Boro 1501 Ocean Barnegat Light Boro 1502 Ocean Bay Head Boro 1503 Ocean Beach Haven Boro 1504 Ocean Beachwood Boro 1505 Ocean Berkeley Twp 1506 Ocean Brick Twp 1507 Ocean Dover Twp 1508 Ocean Eagleswood Twp 1509 Ocean Harvey Cedars Boro 1510 Ocean Island Heights Boro 1511 Ocean Jackson Twp 1512 Ocean Lacey Twp 1513 Ocean Lakehurst Boro

Last Updated on: 1/28/08
Page 127 of 144
1514 Ocean Lakewood Twp 1515 Ocean Lavallette Boro 1516 Ocean Little Egg Harbor Twp 1517 Ocean Long Beach Twp 1518 Ocean Manchester Twp 1519 Ocean Mantoloking Boro 1520 Ocean Ocean Twp 1521 Ocean Ocean Gate Boro 1522 Ocean Pine Beach Boro 1523 Ocean Plumsted Twp 1524 Ocean Point Pleasant Boro 1525 Ocean Point Pleasant Beach Boro1526 Ocean Seaside Heights Boro 1527 Ocean Seaside Park Boro 1528 Ocean Ship Bottom Boro 1529 Ocean South Toms River Boro 1530 Ocean Stafford Twp 1531 Ocean Surf City Boro 1532 Ocean Tuckerton Boro 1533 Ocean Barnegat Twp 1601 Passaic Bloomingdale Boro 1602 Passaic Clifton City 1603 Passaic Haledon Boro 1604 Passaic Hawthorne Boro 1605 Passaic Little Falls Twp 1606 Passaic North Haledon Boro 1607 Passaic Passaic City 1608 Passaic Paterson City 1609 Passaic Pompton Lakes Boro 1610 Passaic Prospect Park Boro 1611 Passaic Ringwood Boro 1612 Passaic Totowa Boro 1613 Passaic Wanaque Boro 1614 Passaic Wayne Twp 1615 Passaic West Milford Twp 1616 Passaic West Paterson Boro 1701 Salem Alloway Twp 1702 Salem Elmer Boro 1703 Salem Elsinboro Twp 1704 Salem Lower Alloways Creek Twp1705 Salem Mannington Twp 1706 Salem Oldmans Twp 1707 Salem Penns Grove Boro 1708 Salem Pennsville Twp 1709 Salem Pilesgrove Twp 1710 Salem Pittsgrove Twp 1711 Salem Quinton Twp 1712 Salem Salem City

Last Updated on: 1/28/08
Page 128 of 144
1713 Salem Carneys Point Twp 1714 Salem Upper Pittsgrove Twp 1715 Salem Woodstown Boro 1801 Somerset Bedminster Twp 1802 Somerset Bernards Twp 1803 Somerset Bernardsville Boro 1804 Somerset Bound Brook Boro 1805 Somerset Branchburg Twp 1806 Somerset Bridgewater Twp 1807 Somerset Far Hills Boro 1808 Somerset Franklin Twp 1809 Somerset Green Brook Twp 1810 Somerset Hillsborough Twp 1811 Somerset Manville Boro 1812 Somerset Millstone Boro 1813 Somerset Montgomery Twp 1814 Somerset North Plainfield Boro 1815 Somerset Peapack-Gladstone Boro 1816 Somerset Raritan Boro 1817 Somerset Rocky Hill Boro 1818 Somerset Somerville Boro 1819 Somerset South Bound Brook Boro 1820 Somerset Warren Twp 1821 Somerset Watchung Boro 1901 Sussex Andover Boro 1902 Sussex Andover Twp 1903 Sussex Branchville Boro 1904 Sussex Byram Twp 1905 Sussex Frankford Twp 1906 Sussex Franklin Boro 1907 Sussex Fredon Twp 1908 Sussex Green Twp 1909 Sussex Hamburg Boro 1910 Sussex Hampton Twp 1911 Sussex Hardyston Twp 1912 Sussex Hopatcong Boro 1913 Sussex Lafayette Twp 1914 Sussex Montague Twp 1915 Sussex Newton Town 1916 Sussex Ogdensburg Boro 1917 Sussex Sandyston Twp 1918 Sussex Sparta Twp 1919 Sussex Stanhope Boro 1920 Sussex Stillwater Twp 1921 Sussex Sussex Boro 1922 Sussex Vernon Twp 1923 Sussex Walpack Twp 1924 Sussex Wantage Twp

Last Updated on: 1/28/08
Page 129 of 144
2001 Union Berkeley Heights Twp 2002 Union Clark Twp 2003 Union Cranford Twp 2004 Union Elizabeth City 2005 Union Fanwood Boro 2006 Union Garwood Boro 2007 Union Hillside Twp 2008 Union Kenilworth Boro 2009 Union Linden City 2010 Union Mountainside Boro 2011 Union New Providence Boro 2012 Union Plainfield City 2013 Union Rahway City 2014 Union Roselle Boro 2015 Union Roselle Park Boro 2016 Union Scotch Plains Twp 2017 Union Springfield Twp 2018 Union Summit City 2019 Union Union Twp 2020 Union Westfield Town 2021 Union Winfield Twp 2101 Warren Allamuchy Twp 2102 Warren Alpha Boro 2103 Warren Belvidere Town 2104 Warren Blairstown Twp 2105 Warren Franklin Twp 2106 Warren Frelinghuysen Twp 2107 Warren Greenwich Twp 2108 Warren Hackettstown Town 2109 Warren Hardwick Twp 2110 Warren Harmony Twp 2111 Warren Hope Twp 2112 Warren Independence Twp 2113 Warren Knowlton Twp 2114 Warren Liberty Twp 2115 Warren Lopatcong Twp 2116 Warren Mansfield Twp 2117 Warren Oxford Twp 2119 Warren Phillipsburg Town 2120 Warren Pohatcong Twp 2121 Warren Washington Boro 2122 Warren Washington Twp 2123 Warren White Twp 9999 Out Of State

Last Updated on: 1/28/08
Page 130 of 144
APPENDIX 3: Valid Values For Test Requestor Type
Test_Requestor_Type Code Description BLD Builder HO Home Owner REL Realtor HB Home Buyer LLD Landlord TEN Tenant
APPENDIX 4: Valid Values For Sample Requestor Sample_Purpose
Code Description Definition
RTST Retest If sample results expired (microbiological results only)
NW New Well Installation of a well in a new development
SH Sell House The seller of the property is requesting a test of the well water
BH Buy House The buyer of the property is requesting a test of the well water
RT5YR Rental 5 year Retest The landlord of a leased property is meeting the requirement to retest once every 5 years from a beginning date of March 14, 2004.
APPENDIX 5: Valid Values For Type Of Treatment Type_Of_Treatment Code
Description Definition
ACF Activated Carbon Filtration Known to treat drinking water for volatile organics
AS Air Stripper Known to treat drinking water for volatile organics and iron (with filtration)
CF Calcite Filter Known to treat drinking water for pH CHL Chlorinators Known to treat drinking water for fecal and
E.coli coliform bacteria DIST Distillation Known to treat drinking water for nitrates
IE Ion Exchange/Softener Known to treat drinking water for manganese, iron, and gross alpha
RO Reverse Osmosis Known to treat drinking water for lead and nitrates
UV Ultraviolet Radiation Known to treat drinking water for fecal and E.coli coliform bacteria

Last Updated on: 1/28/08
Page 131 of 144
GFO/GFH Granular Ferric Oxide/Hydroxide
Known to treat drinking water for arsenic
KDF-55 Mercury Treatment Known to treat drinking water for mercury UNK Unknown If type of treatment is unknown
APPENDIX 6: Valid Values For Coordinate Method
Coordinate_Method_Code Description GPS GPS
APPENDIX 7: Valid Values For GPS Reference Point GPS_Reference_Point_Code
Description Definition
WHR Raised Wellhead Portion of the well that extends above grade
WHP Well Head Pit Position at grade directly above well head
SCP Sample Collection Point Sampling port WHF Flush mount Position of well head at grade FD Front Door Front door of the subject property
ALTLO Alternative Location Position other than well head or front door (specify in comments)
APPENDIX 8: Valid Values For Full Or Partial File Full_Or_Partial_Test Description Definition
F Full Full set of PWTA results is being submitted - E2 Defaults to Full
P Partial Select if a partial set of results is being submitted (currently coliform only)
APPENDIX 9: Valid Values For Untreated Sample Location Untreated_Sample_Location Code
Description Definition
WH Well head Uppermost portion of the well HPT Holding/Pressure Tank Tap attached to holding/pressure
tank KT Kitchen Tap Tap located in the kitchen within the
dwelling BT Bathroom Tap Tap located in a bathroom within the

Last Updated on: 1/28/08
Page 132 of 144
dwelling SPIGO Spigot Sample point located at an outside
spigot BFRT Before Treatment Sample point located before
treatment unit ALTLO Alternative Location Location other than well head,
basement, or household tap APPENDIX 10: Valid Values For Flushing Location Flushing_Location Code
Description Definition
WH Well head Uppermost portion of the well HPT Holding/Pressure Tank Tap attached to holding/pressure
tank KT Kitchen Tap Tap located in the kitchen within the
dwelling BT Bathroom Tap Tap located in a bathroom within the
dwelling ALTLO Alternative Location Location other than well head,
basement, or household tap APPENDIX 11: Valid Values For Detect Flag
Detect_Flag_(Y_N) Description Definition Y Yes Yes if detected above the MDL/MDC N No No if detected above the MDL/MDC
APPENDIX 12: Valid Values For Qualifier Code
Qualifier Code Description Definition < Less Than Used if result value is less than
MDL/MDC TNTC Too Numerous To Count Used if result value exceeds
quantitative limit for associated coliform method
P Presence Used if coliform is detected (qualitative)
A Absence Used if coliform is not detected (qualitative)

Last Updated on: 1/28/08
Page 133 of 144
APPENDIX 13: Acceptable Reference Codes For PWTA Analytical Methods
ANALYTE_NAME DESCRIPTION LAB_METHOD_CODE EPA Method 200.9 EPA200.9 EPA Method 200.8 EPA200.8
SM 3113B SM3113B
Lead
ASTM D3559-95D ASTMD355995D
EPA Method 200.9 EPA200.9 EPA Method 200.7 EPA200.7
SM 3113B SM3113B SM 3111B SM3111B
Iron
SM 3120B SM3120B
EPA Method 200.7 EPA200.7 EPA Method 200.8 EPA200.8 EPA Method 200.9 EPA200.9
SM 3113B SM3113B SM 3111B SM3111B
Manganese
SM 3120B SM3120B
EPA Method 300.0 EPA300.0 EPA Method 353.2 EPA353.2 ASTM D3867-90A ASTMD386790A ASTM D3867-90B ASTMD386790B
SM 4110B SM4110B SM 4500-NO3-D SM4500NO3D SM 4500-NO3-E SM4500NO3E SM 4500-NO3-F SM4500NO3F
Nitrate
Waters B1011 Waters B1011
EPA Method 150.1 EPA150.1 ASTM D1293-95 ASTMD129395
pH
SM 4500-H+B SM 4500HB
Gross Alpha (incl. radium & U excl. radon) Initial & Final
48 Hr. Rapid Gross Alpha Test
NJDEP48HRGAT
SM 9221B SM9221B SM 9221D SM9221D
SM 9222B (MPN/100ml) SM9222B (MPN/100ml) Colitag Colitag E Colite E Colite
Readycult Readycult SM 9222B (Col/100ml) SM9222B (Col/100ml)
Total Coliform
SM 9223B SM9223B

Last Updated on: 1/28/08
Page 134 of 144
ANALYTE_NAME DESCRIPTION LAB_METHOD_CODE E Colite E Colite
SM 9223B SM9223B SM 9221E+MUG SM9221E+MUG
Colitag Colitag
Escherichia coli (E coli) Readycult Readycult
Fecal Coliform SM 9221E SM9221E
EPA Method 200.9 EPA200.9 ASTM D2972-93B ASTMD297293B ASTM D2972-93C ASTMD297293C
SM 3113B SM3113B SM 3114B SM3114B
Arsenic
EPA Method 200.8 EPA200.8
EPA Method 200.8 EPA200.8 EPA Method 245.1 EPA245.1 EPA Method 245.2 EPA245.2 ASTM D3223-91 ASTMD322391
SM 3112B SM3112B
Mercury
Benzene EPA524.2
Carbon Tetrachloride Dichlorobenzene (1,3-) Dichlorobenzene (1,2-) Dichlorobenzene (1,4-) Dichorloethane (1,1-) Dichloroethane (1,2-) Dichloroethene (1,1-)
Dichloroethene (cis-1,2-) Dichloroethene (trans-1,2-)
Dichloropropane (1,2-) Ethylbenzene
Methyl tert-butyl ether Methylene Chloride (Dichloromethane)
Chlorobenzene Naphthalene
Styrene Tetrachloroethane (1,1,2,2-)
Tetrachloroethene Toluene
Trichlorobenzene (1,2,4-) Trichloroethane (1,1,1-) Trichloroethane (1,1,2-)
Trichloroethene
EPA Method 524.2

Last Updated on: 1/28/08
Page 135 of 144
Vinyl Chloride Xylenes (Total)
Benzene EPA502.2 Carbon Tetrachloride
Dichlorobenzene (1,3-) Dichlorobenzene (1,2-) Dichlorobenzene (1,4-) Dichorloethane (1,1-) Dichloroethane (1,2-) Dichloroethene (1,1-)
EPA Method 502.2
Dichloroethene (cis-1,2-)
Dichloroethene (trans-1,2-) Dichloropropane (1,2-)
Ethylbenzene Methyl tert-butyl ether Methylene Chloride (Dichloromethane)
Chlorobenzene Naphthalene
Styrene Tetrachloroethane (1,1,2,2-)
Tetrachloroethene Toluene
Trichlorobenzene (1,2,4-) Trichloroethane (1,1,1-) Trichloroethane (1,1,2-)
Trichloroethylene Vinyl Chloride
Xylenes (Total)
Carbon Tetrachloride EPA 551.1
Tetrachloroethene Trichloroethane (1,1,1-) Trichloroethane (1,1,2-)
Trichloroethene
EPA Method 551.1

Last Updated on: 1/28/08
Page 136 of 144
APPENDIX 14: Acceptable Reference Codes For PWTA Analytes And Their Chemical Abstract Service (CAS) Numbers
ANALYTE_NAME CAS_NUMBER Total Coliform SDWIS-3100
Escherichia coli (E coli) SDWIS-3014 Fecal Coliform SDWIS-3013
Nitrate 14797-55-8 Iron 7439-89-6
Manganese 7439-96-5 pH SDWIS-1925
Lead 7439-92-1 Benzene 71-43-2
Carbon Tetrachloride 56-23-5 Dichlorobenzene (1,3-) 541-73-1 Dichlorobenzene (1,2-) 95-50-1 Dichlorobenzene (1,4-) 106-46-7 Dichloroethane (1,1-) 75-34-3 Dichloroethane (1,2-) 107-06-2 Dichloroethene (1,1-) 75-35-4
Dichloroethene (cis-1,2-) 156-59-2 Dichloroethene (trans-1,2) 156-60-5
Dichloropropane (1,2-) 78-87-5 Ethylbenzene 100-41-4
Methyl tert-butyl ether 1634-04-4 Methylene Chloride (Dichloromethane)
75-09-2
Chlorobenzene 108-90-7 Naphthalene 91-20-3
Styrene 100-42-5 Tetrachloroethane (1,1,2,2-) 79-34-5
Tetrachloroethene 127-18-4 Toluene 108-88-3
Trichlorobenzene (1,2,4-) 120-82-1 Trichloroethane (1,1,1-) 71-55-6 Trichloroethane (1,1,2) 79-00-5
Trichloroethene 79-01-6 Vinyl Chloride 75-01-4
Xylenes (Total) 1330-20-7 Arsenic 7440-38-2 Mercury 7439-97-6
Gross - alpha (incl. radium & U excl. radon ) initial
SDWIS-4002I
Gross - alpha (incl. radium & U excl. radon ) final
SDWIS-4002F

Last Updated on: 1/28/08
Page 137 of 144
APPENDIX 15:Required Private Well Testing Parameters Listed By County
Effective September 16th, 2002
Req
uire
d Pa
ram
eter
s
Atla
ntic
B
erge
n B
urlin
gton
C
amde
n C
a pe
May
C
umbe
rlan
d E
ssex
G
louc
este
r H
udso
n H
unte
rdon
M
erce
r M
iddl
esex
M
onm
outh
M
orri
s O
cean
Pa
ssai
c Sa
lem
So
mer
set
Suss
ex
Uni
on
War
ren
Total Coliform
X X X X X X X X X X X X X X X X X X X X X
Fecal Coliform or E. coli
X X X X X X X X X X X X X X X X X X X X X
Nitrates X X X X X X X X X X X X X X X X X X X X XIron X X X X X X X X X X X X X X X X X X X X XManganese X X X X X X X X X X X X X X X X X X X X XpH X X X X X X X X X X X X X X X X X X X X XVOCs X X X X X X X X X X X X X X X X X X X X XLead X X X X X X X X X X X X X X X X X X X X XArsenic X X X X X X X X X X Mercury X X X X X X X X X Gross Alpha Particle Activity
2 2 2 3 1 1 3 3 3 3 3 2
1 = Testing required starting March 15, 2003 2 = Testing required starting September 16, 2003 3 = Testing required staring March 16, 2004

Last Updated on: 1/28/08
Page 138 of 144
APPENDIX 16: Mapping to the eDWR v2.0 XML Schema ID Field Name XML mapping
Header Information
1.1 Form Identifier
<eDWR> <EN:Submission> <EN:LabReport> <EN:ReportIdentification> <EN:FormIdentifier>
1.2 Revision Indicator
<eDWR> <EN:Submission> <EN:LabReport> <EN:ReportIdentification> <EN:RevisionIndicator>
1.3 Replaced Reported Reference Code
<eDWR> <EN:Submission> <EN:LabReport> <EN:ReportIdentification> <EN:ReplacedReportReferenceCode>
1.4 Full_Or_Partial_Test
<eDWR> <EN:Submission> <EN:LabReport> <NJ:ReportIdentification> <NJ:FullOrPartialTestCode>
1.5 Reporting_Lab_Cert_Num
<eDWR> <EN:Submission> <EN:LabReport> <EN:LabIdentification> <EN:LabStateIdentifier>
1.6 Report_Date
<eDWR> <EN:Submission> <EN:LabReport> <NJ:ReportIdentification> <NJ:ReportToRequesterDate>
Demographic Information Test Requestor Information
2.1 Test_Requestor_Type
<eDWR> <EN:Submission> <EN:LabReport> <NJ:TestRequester> <NJ:TestRequesterType>
2.2 Sample_Purpose
<eDWR> <EN:Submission> <EN:LabReport> <NJ:TestRequester> <EN:SamplePurpose>
2.3 Title
<eDWR> <EN:Submission> <EN:LabReport> <NJ:TestRequester> <facid:IndividualTitleText>
2.4 First_ Name
<eDWR> <EN:Submission> <EN:LabReport>

Last Updated on: 1/28/08
Page 139 of 144
ID Field Name XML mapping
<NJ:TestRequester> <NJ:IndividualFirstName>
2.5 Last_Name
<eDWR> <EN:Submission> <EN:LabReport> <NJ:TestRequester> <NJ:IndividualLastName>
2.6 Address_ 1
<eDWR> <EN:Submission> <EN:LabReport> <NJ:TestRequester> <EN:MailingAddress> <facid:MailingAddressText>
2.7 Address_2
<eDWR> <EN:Submission> <EN:LabReport> <NJ:TestRequester> <EN:MailingAddress> <facid:SupplementalAddressText>
2.8 City
<eDWR> <EN:Submission> <EN:LabReport> <NJ:TestRequester> <EN:MailingAddress> <facid:MailingAddressCityName>
2.9 State
<eDWR> <EN:Submission> <EN:LabReport> <NJ:TestRequester> <EN:MailingAddress> <facid:MailingAddressStateUSPSCode>
2.10 Country
<eDWR> <EN:Submission> <EN:LabReport> <NJ:TestRequester> <EN:MailingAddress> <facid:MailingAddressCountryName>
2.11 Postal_Code
<eDWR> <EN:Submission> <EN:LabReport> <NJ:TestRequester> <EN:MailingAddress> <facid:MailingAddressZIPCode>
2.12 Phone_Number
<eDWR> <EN:Submission> <EN:LabReport> <NJ:TestRequester> <facid:TelephoneNumber>
Property Information
3.1 Contract_Of_Sale_Date
<eDWR> <EN:Submission> <EN:LabReport> <NJ:PWTAProperty> <NJ:ContractOfSaleDate>

Last Updated on: 1/28/08
Page 140 of 144
ID Field Name XML mapping
3.2 Address_Line_ 1
<eDWR> <EN:Submission> <EN:LabReport> <NJ:PWTAProperty> <facid:LocationAddressText>
3.3 Address_Line_ 2
<eDWR> <EN:Submission> <EN:LabReport> <NJ:PWTAProperty> <facid:SupplementalLocationText>
3.4 Property_City
<eDWR> <EN:Submission> <EN:LabReport> <NJ:PWTAProperty> <facid:LocalityName>
3.5 Property_State
<eDWR> <EN:Submission> <EN:LabReport> <NJ:PWTAProperty> <facid:StateUSPSCode>
3.6 Property_Zip_Code
<eDWR> <EN:Submission> <EN:LabReport> <NJ:PWTAProperty> <facid:LocationZIPCode>
3.7 Year_Of_Home_Construction
<eDWR> <EN:Submission> <EN:LabReport> <NJ:PWTAProperty> <NJ:HomeConstructionYear>
3.8 Treatment_Present
<eDWR> <EN:Submission> <EN:LabReport> <NJ:PWTAProperty> <NJ:TreatmentPresentIndicator>
3.9 Type_Of_Treatment
<eDWR> <EN:Submission> <EN:LabReport> <NJ:PWTAProperty> <NJ:TreatmentTypeCode>
Sample and Report Information Well Information
4.1 Well_Block_Code
<eDWR> <EN:Submission> <EN:LabReport> <NJ:WellIdentification> <NJ:WellBlockCode>
4.2 Well_Lot_Code
<eDWR> <EN:Submission> <EN:LabReport> <NJ:WellIdentification> <NJ:WellLotCode>

Last Updated on: 1/28/08
Page 141 of 144
ID Field Name XML mapping
4.3 Well_County_ Code
<eDWR> <EN:Submission> <EN:LabReport> <NJ:WellIdentification> <NJ:WellCountyCode>
4.4 Well_County_Muni_ Code
<eDWR> <EN:Submission> <EN:LabReport> <NJ:WellIdentification> <NJ:WellCountyMunicipalityCode>
4.5 Well_ Permit_Number
<eDWR> <EN:Submission> <EN:LabReport> <NJ:WellIdentification> <NJ:WellPermitNumber>
4.6 Well_Driller_Name
<eDWR> <EN:Submission> <EN:LabReport> <NJ:WellIdentification> <NJ:WellDrillerName>
4.7 Well_Install_Date
<eDWR> <EN:Submission> <EN:LabReport> <NJ:WellIdentification> <NJ:WellInstallDate>
4.8 NJ_State_Plane_Easting_feet_(X)
<eDWR> <EN:Submission> <EN:LabReport> <NJ:WellIdentification> <NJ:NJStatePlaneEastingX>
4.9 NJ_State_Plane_Northing_feet_(Y)
<eDWR> <EN:Submission> <EN:LabReport> <NJ:WellIdentification> <NJ:NJStatePlaneNorthingY>
4.10 Coordinate_Method_Code
<eDWR> <EN:Submission> <EN:LabReport> <NJ:WellIdentification> <facid:HorizontalCollectionMethodText>
4.11 GPS_Reference_Point_Code
<eDWR> <EN:Submission> <EN:LabReport> <NJ:WellIdentification> <facid:ReferencePointText>
4.12 GPS_Reference_Point_Comments
<eDWR> <EN:Submission> <EN:LabReport> <NJ:WellIdentification> <NJ:ReferencePointComment>
Sample Collection Information
5.1 Sample_Date <eDWR> <EN:Submission>

Last Updated on: 1/28/08
Page 142 of 144
ID Field Name XML mapping
<EN:LabReport> <EN:Sample> <EN:SampleIdentification> <EN:SampleCollectionStartDate>
5.2 Sample_Time
<eDWR> <EN:Submission> <EN:LabReport> <EN:Sample> <EN:SampleIdentification> <EN:SampleCollectionStartTime>
5.3 Sampler_Name
<eDWR> <EN:Submission> <EN:LabReport> <EN:Sample> <EN:SampleIdentification> <EN:SampleCollector> <EN:IndividualFullName>
5.4 Sampler_Affiliation
<eDWR> <EN:Submission> <EN:LabReport> <EN:Sample> <EN:SampleIdentification> <NJ:SampleCollectorAffiliation>
5.5 Untreated_Sample_Location
<eDWR> <EN:Submission> <EN:LabReport> <EN:Sample> <EN:SampleLocationIdentification> <EN:SampleLocationTypeCode>
5.6 Flushing_Location
<eDWR> <EN:Submission> <EN:LabReport> <EN:Sample> <EN:SampleLocationIdentification> <NJ:FlushingLocationCode>
5.7 Flushing_Information_Comments
<eDWR> <EN:Submission> <EN:LabReport> <EN:Sample> <EN:SampleIdentification> <EN:SampleComments> <EN:Comments>
5.8 Record ID
<eDWR> <EN:Submission> <EN:LabReport> <EN:Sample> <EN:SampleIdentification> <EN:StateSampleIdentifier>
Results Information
6.1 Analyzing_Lab_Cert_Number
<eDWR> <EN:Submission> <EN:LabReport> <EN:Sample> <EN:AnalysisResultsInformation>

Last Updated on: 1/28/08
Page 143 of 144
ID Field Name XML mapping
<EN:LabAnalysisIdentification> <EN:LabIdentifier>
6.2 Analysis_Completion_Date
<eDWR> <EN:Submission> <EN:LabReport> <EN:Sample> <EN:AnalysisResultsInformation> <EN:LabAnalysisIdentification> <EN:AnalysisEndDate>
6.3 Analysis_Completion_Time
<eDWR> <EN:Submission> <EN:LabReport> <EN:Sample> <EN:AnalysisResultsInformation> <EN:LabAnalysisIdentification> <EN:AnalysisEndTime>
6.4 Lab Sample_ID
<eDWR> <EN:Submission> <EN:LabReport> <EN:Sample> <EN:AnalysisResultsInformation> <EN:LabAnalysisIdentification> <EN:LabAnalysisIdentifier>
6.5 Method_Code
<eDWR> <EN:Submission> <EN:LabReport> <EN:Sample> <EN:AnalysisResultsInformation> <EN:LabAnalysisIdentification> <EN:SampleAnalyticalMethod> <EN:MethodIdentifier>
6.6 CAS_Number
<eDWR> <EN:Submission> <EN:LabReport> <EN:Sample> <EN:AnalysisResultsInformation> <EN:AnalyteIdentification> <EN:AnalyteCode>
6.7 Analyte_Name
<eDWR> <EN:Submission> <EN:LabReport> <EN:Sample> <EN:AnalysisResultsInformation> <EN:AnalyteIdentification> <EN:AnalyteName>
6.8 Result
<eDWR> <EN:Submission> <EN:LabReport> <EN:Sample> <EN:AnalysisResultsInformation> <EN:AnalysisResult> <EN:Result> <EN:MeasurementValue>
6.9 Units <eDWR>

Last Updated on: 1/28/08
Page 144 of 144
ID Field Name XML mapping
<EN:Submission> <EN:LabReport> <EN:Sample> <EN:AnalysisResultsInformation> <EN:AnalysisResult> <EN:Result> <EN:MeasurementUnit>
6.10 Detect_Flag_(Y_N)
<eDWR> <EN:Submission> <EN:LabReport> <EN:Sample> <EN:AnalysisResultsInformation> <EN:AnalysisResult> <EN:DetectionLevelIndicator>
6.11 Detection_Level_(MDC_MDL)
<eDWR> <EN:Submission> <EN:LabReport> <EN:Sample> <EN:AnalysisResultsInformation> <EN:AnalysisResult> <EN:DetectionLimit> <EN:MeasurementValue>
6.12 Radiological_Result_Count_Error
<eDWR> <EN:Submission> <EN:LabReport> <EN:Sample> <EN:AnalysisResultsInformation> <EN:AnalysisResult> <EN:RadiologicalResultCountError>
6.13 Qualifier
<eDWR> <EN:Submission> <EN:LabReport> <EN:Sample> <EN:AnalysisResultsInformation> <EN:AnalysisResult> <EN:Result> <EN:MeasurementQualifier>
6.14 Results_Comments
<eDWR> <EN:Submission> <EN:LabReport> <EN:Sample> <EN:AnalysisResultsInformation> <EN:AnalysisResult> <EN:AnalysisResultComment> <EN:Comments>