pro tools express installation guide -...
TRANSCRIPT

Pro Tools Express Installation Guide®
Legal NoticesThis guide is copyrighted ©2012 by Avid Technology, Inc., (hereafter “Avid”), with all rights reserved. Under copyright laws, this guide may not be duplicated in whole or in part without the written consent of Avid.
003, 96 I/O, 96i I/O, 192 Digital I/O, 192 I/O, 888|24 I/O, 882|20 I/O, 1622 I/O, 24-Bit ADAT Bridge I/O, AudioSuite, Avid, Avid DNA, Avid Mojo, Avid Unity, Avid Unity ISIS, Avid Xpress, AVoption, Axiom, Beat Detective, Bomb Factory, Bruno, C|24, Command|8, Control|24, D-Command, D-Control, D-Fi, D-fx, D-Show, D-Verb, DAE, Digi 002, DigiBase, DigiDelivery, Avid, Avid Audio Engine, Avid Intelligent Noise Reduction, Avid TDM Bus, DigiDrive, DigiRack, DigiTest, DigiTranslator, DINR, DV Toolkit, EditPack, Eleven, HD Core, HD I/O, HD MADI, HD OMNI, HD Process, Hybrid, Impact, Interplay, LoFi, M-Audio, MachineControl, Maxim, Mbox, Media Composer, MIDI I/O, MIX, MultiShell, Nitris, OMF, OMF Interchange, PRE, ProControl, Pro Tools M-Powered, Pro Tools, Pro Tools|HD, Pro Tools|HD Native, QuickPunch, Recti-Fi, Reel Tape, Reso, Reverb One, ReVibe, RTAS, Sibelius, Smack!, SoundReplacer, Sound Designer II, Strike, Structure, SYNC HD, SYNC I/O, Synchronic, TL Aggro, TL AutoPan, TL Drum Rehab, TL Everyphase, TL Fauxlder, TL In Tune, TL MasterMeter, TL Metro, TL Space, TL Utilities, Transfuser, Trillium Lane Labs, Vari-Fi, Velvet, X-Form, and XMON are trademarks or registered trademarks of Avid Technology, Inc. Xpand! is Registered in the U.S. Patent and Trademark Office. All other trademarks are the property of their respective owners.
Product features, specifications, system requirements, and availability are subject to change without notice.
Guide Part Number 9329-65212-00 REV A 02/12
Documentation FeedbackAt Avid, we are always looking for ways to improve our documentation. If you have comments, corrections, or suggestions regarding our documentation, email us at [email protected].
Contents iii
Installing Pro Tools Express . . . . . . . . . . . . . . . . . . . . . . . . . . . . . . . . . . . . . . . . . . . . . . . . . . . . . 1
Installation de Pro Tools Express. . . . . . . . . . . . . . . . . . . . . . . . . . . . . . . . . . . . . . . . . . . . . . . . 11
Installieren von Pro Tools Express . . . . . . . . . . . . . . . . . . . . . . . . . . . . . . . . . . . . . . . . . . . . . . 23
Instalación de Pro Tools Express. . . . . . . . . . . . . . . . . . . . . . . . . . . . . . . . . . . . . . . . . . . . . . . . 35
ProTools Expressのインストール . . . . . . . . . . . . . . . . . . . . . . . . . . . . . . . . . . . . . . . . . . . . . . . . . . . . 47
安装 Pro Tools Express . . . . . . . . . . . . . . . . . . . . . . . . . . . . . . . . . . . . . . . . . . . . . . . . . . . . . . . . . . . 57
Contents

Pro Tools Express Installation Guideiv

Installing Pro Tools Express 1
Installing Pro Tools Express
Welcome to Pro Tools® Express from Avid. This guide documents how to install and authorize your Pro Tools Express software on Mac and Windows systems. For detailed information on configuring your system, and for complete information about Pro Tools Express software capabilities and functionality, see the Pro Tools Reference Guide (available from the Help menu in Pro Tools).
Pro Tools Express Software CapabilitiesPro Tools Express software provides the following capabilities, depending on your hardware configuration:
• Up to a total of 16 voiced mono or stereo audio tracks per session
• Up to 8 Auxiliary Input tracks
• Up to 8 Master Fader tracks
• Up to 16 MIDI tracks
• Up to 8 Instrument tracks
• A single QuickTime video track
• 16-bit, 24-bit, or 32-bit floating point audio resolution, at sample rates up to 96 kHz
• Automatic Delay Compensation (up to 16,383 samples at 48 kHz)
• Non-destructive, random-access editing and mix automation
• Audio processing with up to 5 real-time plug-ins per track, depending on your computer’s capabilities
• Up to 5 hardware inserts per track
• Up to 5 sends per track
• Up to 16 internal mix busses (mono or stereo) for routing and mixing
Plug-ins Included with Pro Tools ExpressPro Tools Express supports AAX, RTAS, and AudioSuite plug-in formats. The following plug-ins are installed with Pro Tools Express:
• AIR Chorus• AIR Distortion• AIR Dynamic Delay• AIR Flanger• AIR Frequency Shifter• AIR Lo-Fi• AIR Multi-Delay• AIR Phaser• AIR Vintage Filter• BF76 Compressor 1176 emulator• Click• D-Verb • DC Offset Removal• Dither• Duplicate• Eleven Free • EQ III 1-Band, 4-Band, and 7-Band EQs• Dyn III Compressor/Limiter, De-Esser, and
Expander/Gate• Invert• Normalize
For information about the I/O capabilities of your audio interface, see the documentation that came with your audio interface.
Pro Tools Express Installation Guide2
• Reverse• ReWire• Time Compression Expansion• TL InTune digital tuner
The separate AVID Virtual Instruments Express installer provides the following virtual instrument plug-ins and associated content for use with Pro Tools Express:
• Boom drum machine and sequencer• Structure Free sample player • Xpand!2 multitimbral workstation
System Requirements and CompatibilityPro Tools Express can only be used with a qualified audio interface (such as Mbox Mini), running on a qualified Windows or Mac computer.
An internet connection is required to download the Pro Tools Express installer application.
Avid can only assure compatibility and provide support for hardware and software it has tested and approved.
For complete system requirements and a list of qualified computers, operating systems, hard drives, and third-party devices, visit:
www.avid.com/compatibility
Authorized iLokPro Tools Express includes an empty iLok with an Activation Card for authorizing Pro Tools Express software. For more information, see “Authorizing Pro Tools Express” on page 4.
MIDI RequirementsUSB, FireWire, and PCI MIDI interfaces work effectively with Pro Tools systems on Mac or Windows.
Hard Drive RequirementsFor optimal audio recording and playback, all Pro Tools systems require one or more qualified hard drives.
Initialize your hard drives with the Disk Utility application included with Apple System software (Mac) or the Windows Disk Management (Windows).
For information about these plug-ins (and more), refer to the Audio Plug-ins Guide (available from the Pro Tools Express Help menu).
An authorized iLok must be inserted in an available USB port on your computer to run Pro Tools Express.
For a list of supported MIDI interfaces and controllers, visit www.avid.com.
For more information, see avid.custkb.com/avid/app/selfservice/search.jsp?DocId=380567

Installing Pro Tools Express 3
Avoid Recording to the System Drive
Recording to your system drive is allowed, but not recommended. Recording and playback on a system drive may result in lower track counts and fewer plug-ins.
Installing Hardware DriversBefore installing Pro Tools Express, ensure that you have installed your audio hardware and that you have installed the latest drivers for your hardware. Refer to the documentation that came with your hardware for more information. For Avid audio interfaces, visit avid.com/drivers to download and install the latest drivers for your device.
Installing Pro Tools Express SoftwareAfter you have installed the drivers for your audio interface, you are ready to install Pro Tools Express software.
To install Pro Tools Express:
1 Make sure you are logged in as an Administrator for the account where you want to install Pro Tools.
2 Download the Pro Tools Express installer online.
3 Do one of the following:
• On Mac, locate and double-click Install
Pro Tools Express.mpkg.
• On Windows, locate and double-click Setup.exe. Then, in the resultant mini-browser, select Install Pro Tools Express to begin installation.
4 Follow the on-screen instructions to continue with installation.
5 When prompted, click Install.
6 If prompted, enter your Administrator password and click OK to authenticate the installation.
7 Follow the remaining on-screen instructions.
8 When installation is complete, click Restart (Mac) or Finish (Windows).
For optimum performance, you may want to designate your system drive as a Playback or Transfer only volume in DigiBase. For more information, see the Pro Tools Reference Guide.
Pro Tools will not recognize your audio in-terface if you do not install the drivers. If you are upgrading Pro Tools, be sure to install the most current drivers for your hardware.
Before installing Pro Tools Express, refer to the included Read Me information.
On Windows, if the User Account Control di-alog appears, click Allow. Several messages are displayed during installation that can be ignored, including multiple “Found New Hardware” dialogs and “A Problem Occurred During Hardware Installation.” Addition-ally, if you get a warning dialog about the driver not passing Windows Logo testing, click Continue Anyway.
Pro Tools Express Installation Guide4
Installing Avid Virtual Instruments ExpressAvid provides a suite of free virtual instrument plug-ins with related sample content for use with Pro Tools Express. For more information, see the Audio Plug-ins Guide.
To install Avid Virtual Instruments:
1 Make sure you are logged in as an Administrator for the account where you want to install Avid Virtual Instruments.
2 Download the Avid Virtual Instruments installer and related content online.
3 Do one of the following:
• On Mac, locate and double-click Install Avid
Virtual Instruments Express.mpkg.
• On Windows, run Avid Virtual Instruments
Express Setup.exe.
4 Follow the on-screen instructions to continue with installation.
5 Click Install.
6 If prompted, enter your Administrator password and click OK to authenticate the installation.
7 Follow the remaining on-screen instructions.
8 When installation is complete, click Close (Mac) or Finish (Windows).
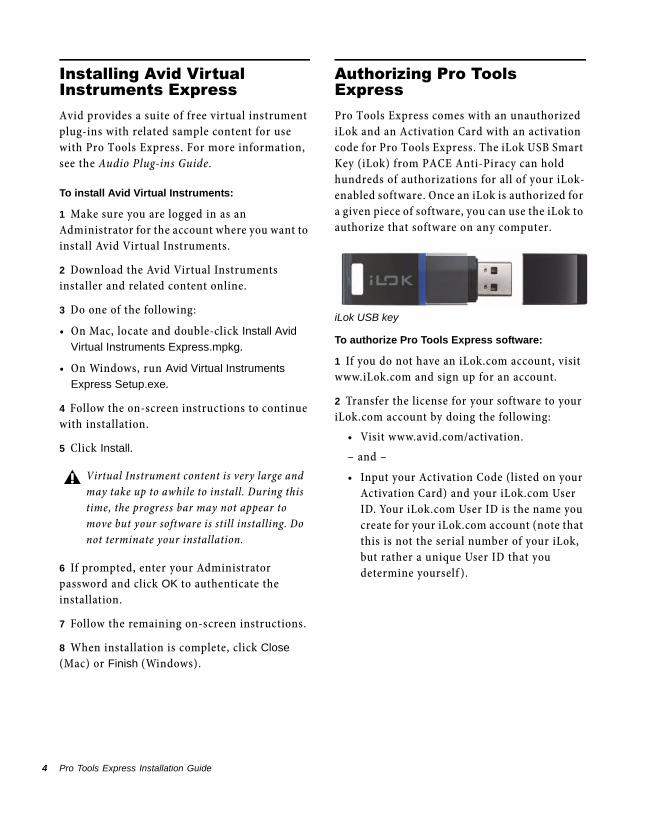
Authorizing Pro Tools ExpressPro Tools Express comes with an unauthorized iLok and an Activation Card with an activation code for Pro Tools Express. The iLok USB Smart Key (iLok) from PACE Anti-Piracy can hold hundreds of authorizations for all of your iLok-enabled software. Once an iLok is authorized for a given piece of software, you can use the iLok to authorize that software on any computer.
To authorize Pro Tools Express software:
1 If you do not have an iLok.com account, visit www.iLok.com and sign up for an account.
2 Transfer the license for your software to your iLok.com account by doing the following:
• Visit www.avid.com/activation.– and –• Input your Activation Code (listed on your
Activation Card) and your iLok.com User ID. Your iLok.com User ID is the name you create for your iLok.com account (note that this is not the serial number of your iLok, but rather a unique User ID that you determine yourself ).
Virtual Instrument content is very large and may take up to awhile to install. During this time, the progress bar may not appear to move but your software is still installing. Do not terminate your installation.
iLok USB key
Installing Pro Tools Express 5
3 Transfer the licenses from your iLok.com account to your iLok USB Smart Key by doing the following:
• Insert the iLok into an available USB port on your computer.
• Go to www.iLok.com and log in.• Follow the on-screen instructions for
transferring your licenses to your iLok.
4 Install and launch Pro Tools Express (see below).
5 If you have any other unauthorized software installed, you are prompted to authorize it. Follow the on-screen instructions to complete the authorization process.
Launching Pro Tools ExpressTo use Pro Tools Express software, you must have an iLok with a license authorizing the version of Pro Tools that you have installed (for more information, see “Authorizing Pro Tools Express” on page 4).
To launch Pro Tools Express software:
1 Make sure your audio interface is connected to your computer and powered on.
2 Insert an authorized iLok into any available USB port on your computer (see “Authorizing Pro Tools Express” on page 4).
3 Do one of the following:• On Mac, click the Pro Tools Express
shortcut in your Dock (or double-click the application icon in Macintosh HD/Applications/Avid/Pro Tools).
– or –• On Windows, double-click the Pro Tools
Express shortcut on your desktop (or the application in Program Files\Avid\Pro Tools).
4 Use the Quick Start dialog to do one of the following:
• Create a new session from template.• Create a new blank session.• Open any other session on your system.
Configuring Your Pro Tools Express SystemAfter you have installed, authorized, and launched Pro Tools Express software, you can configure your Pro Tools system to meet the specific needs of your studio. For detailed information on configuring your Pro Tools software, see the Pro Tools Reference Guide (which is available from the Help menu in Pro Tools).
For more information, visit the iLok website (www.iLok.com).
Do not remove the iLok during Pro Tools launch or use.
For more information about the Quick Start dialog and session templates, see the Pro Tools Reference Guide.
Pro Tools Express Installation Guide6
Uninstalling Pro Tools ExpressIf you upgrade from Pro Tools Express to the full version of Pro Tools, be sure to uninstall Pro Tools Express before installing the full version of Pro Tools. To uninstall Pro Tools Express software, use the Uninstaller application on Mac or use the Programs Control Panel on Windows.
Uninstalling Pro Tools Express on Mac
To uninstall Pro Tools Express on Mac:
1 Make sure you are logged in as an Administrator for the account where Pro Tools Express is installed.
2 Go to Applications/Avid/Pro Tools/Pro Tools Utilities and double-click Uninstall Pro Tools
Express.
3 Click Continue to proceed with the uninstallation.
4 Choose the type of uninstall you want to perform:
Safe Uninstall. Leaves certain plug-ins and system files needed for compatibility with some Avid products. Use Safe Uninstall if you are using an Avid application or preparing to update to a CS (customer support) release.
Clean Uninstall. Removes all Pro Tools files, including system files, Avid plug-ins, and MIDI patch names. Use Clean Uninstall whenever you are preparing to upgrade, or to troubleshoot from a clean system.
5 Click Uninstall.
6 Enter your Administrator password and click OK.
7 Click Finish to close the Installer window.
Uninstalling Pro Tools Express on Windows
To uninstall Pro Tools Express on Windows:
1 Choose Start > Control Panel.
2 Click Programs and Features.
3 Click Uninstall a program.
4 Select Avid Pro Tools Express from the list of installed applications.
5 Click Uninstall.
6 Follow the on-screen instructions to remove Pro Tools.
Optimizing a Mac System for Pro Tools ExpressTo ensure optimum performance with Pro Tools Express, configure your computer first.
Before configuring your computer, make sure you are logged in as an Administrator for the account where you want to install Pro Tools. For details on Administrator privileges in Mac OS X, see your Apple OS X documentation.
Note that you will have to uninstall plug-ins (such as Avid Effects), as well as any audio and MIDI device drivers separately.
Do not use the Mac OS X automatic Software Update feature, as it may upgrade your sys-tem to a version of Mac OS that has not yet been qualified for Pro Tools. For details on qualified versions of Mac OS, see the latest compatibility information on our website (www.avid.com).
Installing Pro Tools Express 7
Turning Off Software Update
To turn off the Software Update feature:
1 Choose System Preferences from the Apple menu.
2 Click Software Update.
3 Click the Scheduled Check tab.
4 Deselect Check for updates.
5 When you are done, choose System
Preferences > Quit System Preferences.
Turning Off Energy Saver
To turn off the Energy Saver feature:
1 Choose System Preferences from the Apple menu.
2 Click Energy Saver.
3 Set the Computer Sleep setting to Never.
4 Set the Display Sleep setting to Never.
5 Deselect “Put the hard disk(s) to sleep when
possible” option.
6 When you are done, choose System
Preferences > Quit System Preferences.
Disable or Reassign Mac Keyboard Shortcuts Used by Pro Tools
To have the full complement of Pro Tools keyboard shortcuts, you need to disable or reassign conflicting Mac OS X Keyboard Shortcuts in the Apple System Preferences.
To disable or reassign Mac keyboard shortcuts used by Pro Tools (Mac OS X Lion):
1 From the Apple menu, choose System
Preferences.
2 Click Keyboard.
3 Click the Keyboard Shortcuts tab.
4 You can disable or reassign Mac OS keyboard shortcuts that conflict with Pro Tools keyboard shortcuts. The following list includes several common Mac keyboard shortcuts that, depending on the make and model of your Mac, may also used by Pro Tools:
• Under “Launchpad & Dock”• “Turn Dock Hiding On/Off ”
• Under “Mission Control”• “Mission Control”• “Application windows”• “Show Desktop”• “Show Dashboard”• “Mission Control > Move left a space”• “Mission Control > Move right a space”• “Mission Control > Switch to Desktop n”
• Under “Keyboard & Text Input”• “Move focus to the window drawer”
• Under “Services”• “Send File To Bluetooth Device”• “Search With Google”• “Spotlight”• “Search Man Pages in Terminal”
• Under “Spotlight”• “Show Spotlight search field”• “Show Spotlight window”
• Under “Universal Access”• “Zoom”• “Contrast”
• Under “Application Shortcuts”• “Show Help menu”
For a complete list of Pro Tools keyboard shortcuts, see the Keyboard Shortcuts Guide (Help > Keyboard Shortcuts).

Pro Tools Express Installation Guide8
To disable or reassign Mac keyboard shortcuts used by Pro Tools (Mac OS X Snow Leopard):
1 From the Apple menu, choose System
Preferences.
2 Click Keyboard.
3 Click the Keyboard Shortcuts tab.
4 You can disable or reassign Mac OS keyboard shortcuts that conflict with Pro Tools keyboard shortcuts. The following list includes several common Mac keyboard shortcuts that are also used by Pro Tools:
• Under “Dashboard & Dock”• “Turn Dock Hiding On/Off ”• “Dashboard”
• Under “Exposé and Spaces”• “All windows”• “Application windows”• “Desktop”
• Under “Keyboard & Text Input”• “Move focus to the window drawer”
• Under “Spotlight”• “Show Spotlight search field” • “Show Spotlight window”
• Under “Application Shortcuts”• “Show Help menu”
Disabling Spotlight Indexing
The Mac OS X Spotlight feature automatically indexes files and folders on local hard drives in the background. In most cases, this is not a concern for normal Pro Tools operation. However, if Spotlight starts indexing drives while recording in a Pro Tools session with high track counts for an extended period of time, it can adversely affect Pro Tools system performance. You may want to disable Spotlight indexing for all local drives before using Pro Tools for big recording projects.
To disable Spotlight indexing:
1 Choose System Preferences from the Apple menu and click Spotlight.
2 In the Spotlight window, click the Privacy tab.
3 To prevent indexing of a drive, drag its icon from the desktop into the list.
Enabling Journaling for Audio Drives
To yield higher performance from audio drives, enable journaling.
To enable journaling:
1 Launch the Disk Utility application, located in Applications/Utilities.
2 Select the volume in the left column of the Disk Utility window.
3 Select Enable Journaling in the toolbar.
Disabling Spotlight indexing also disables the Find function in Mac OS X.
Installing Pro Tools Express 9
Optimizing a Windows System for Pro Tools ExpressTo ensure optimum performance with Pro Tools Express, configure your computer before using Pro Tools hardware and software.
Before configuring your computer, make sure you are logged in as an Administrator for the account where you want to install Pro Tools. For details on Administrator privileges, see your Windows documentation.
Required Optimizations
To ensure optimum performance with Pro Tools, configure the following settings before using Pro Tools hardware and software.
Disabling User Account Control
To disable User Account Control (UAC):
1 Choose Start > Control Panel.
2 Click User Accounts and Family Safety.
3 Click User Accounts.
4 Click on Change User Account Control settings.
5 Set the slider to Never Notify.
6 Click OK.
Configuring System Standby and Power Management
When using Pro Tools, the Windows System Standby power scheme must be set to Always On. This prevents long record or playback passes from stopping due to system resources powering down.
To configure Windows Power Management:
1 Choose Start > Control Panel.
2 Click on System and Security.
3 Click Power Options.
4 Click on the arrow to Show Additional Plans.
5 Select High Performance.
6 Click Change plan settings.
7 Click Change advanced power settings.
8 In the Power Options dialog, reveal Hard disk >
Turn off hard disk after.
9 Click Setting option.
10 Select the value in the Setting (Minutes) field and press Backspace on your computer keyboard or scroll the value to Never.
11 Click OK. The hard disk setting changes to Never and the Power Options dialog closes.
12 In the Edit Plan Settings window, click Save
changes and close the window.
For the latest information about Windows system settings and for information about specific computers, visit the Avid website (www.avid.com).
When you are finished changing Windows system settings, restart your computer.
Pro Tools automatically switches to the “High Performance” Power Management set-tings on launch. Windows reverts to the pre-viously selected Power Management settings (if different) when exiting Pro Tools. Conse-quently, when optimizing the Power Man-agement settings for Pro Tools, you should always only optimize the High Performance configuration.
Pro Tools Express Installation Guide10
Recommended OptimizationsPro Tools can also be affected by other software and hardware drivers installed on your computer. For best possible performance, it is recommended (but not required) that you do the following:
• Avoid running any unneeded programs at the same time as Pro Tools.
• Turn off any software utilities that run in the background, such as Windows Messenger, calendars, and disk maintenance programs.
• Turn off any non-essential USB devices while running Pro Tools.
Optional OptimizationsThe following system optimizations may help Pro Tools perform better on some systems. It is recommended that you only try these optimizations if necessary, as they may disable or adversely affect the functionality of other programs on your system.
Adjusting Processor Scheduling
To adjust Processor Scheduling performance:
1 Right-click Computer and choose Properties.
2 Click Advanced system settings.
3 Under the Performance section, click the Settings button.
4 In the Performance Options window, click the Advanced tab.
5 Under the Processor Scheduling section, select the Background Services option.
6 Click OK to close the Performance Options window.
7 Click OK to close the System Properties window.
Disabling System Startup Items
The fewer items in use by your computer, the more resources are available for Pro Tools. Some startup applications may be consuming unnecessary CPU resources, and can be turned off.
If you disable any of the following startup items, do so carefully:
• Portable media serial number (required for some applications that utilize a copy protection key)
• The Plug and Play service• Event log• Cryptographic services
To Disable System Startup Items:
1 From the Start menu, type “msconfig” in Start Search and press Enter to open the System Configuration Utility.
2 Under the General tab, choose Selective
Startup.
3 Deselect Load Startup Items and click OK.
4 Click Restart to restart the computer.
5 After restarting, the computer displays a System Configuration message. Check to see if Pro Tools performance has increased before you deselect the “Don't show this message again” option. If performance has not changed, run “msconfig” and return your computer Startup Selection back to Normal Startup - load all device
drives and services. Alternatively, try disabling Startup items and non-essential processes individually.

Installation de Pro Tools Express 11
Installation de Pro Tools Express
Bienvenue dans le logiciel Pro Tools® Express d'Avid. Ce guide présente la procédure d'installation et d'autorisation du logiciel Pro Tools Express sur les systèmes Mac et Windows. Pour obtenir des informations détaillées et exhaustives sur la configuration, les fonctionnalités et possibilités de votre logiciel Pro Tools Express, reportez-vous au Guide de référence Pro Tools (accessible à partir du menu Aide de Pro Tools).
Pro Tools Express - Capacités logiciellesLe logiciel Pro Tools Express offre les capacités suivantes, en fonction de votre configuration matérielle :
• Jusqu'à 16 pistes audio actives mono ou stéréo par session
• Jusqu'à 8 pistes d'entrée auxiliaire
• Jusqu'à 8 pistes Master Fader
• Jusqu'à 16 pistes MIDI
• Jusqu'à 8 pistes d'instrument
• Une piste vidéo QuickTime
• 16 bits, 24 bits ou 32 bits à virgule flottante à une fréquence d'échantillonnage maximale de 96 kHz
• Compensation automatique de la latence (jusqu'à 16 383 échantillons à 48 kHz)
• Édition à accès aléatoire et automation de mixage non destructives
• Traitement audio avec jusqu'à 5 plug-ins RTAS par piste, selon la puissance de l'ordinateur
• Jusqu'à 5 inserts matériels par piste
• Jusqu'à 5 départs par piste
• Jusqu'à 16 bus internes pour le mixage et le routage (mono ou stéréo)
Plug-ins inclus avec Pro Tools ExpressPro Tools Express supporte les formats de plug-in AAX, RTAS et AudioSuite. Les plug-ins suivants sont installés avec Pro Tools Express :
• AIR Chorus• AIR Distortion• AIR Dynamic Delay• AIR Flanger• AIR Frequency Shifter• AIR Lo-Fi• AIR Multi-Delay• AIR Phaser• AIR Vintage Filter• BF76 Compressor 1176 emulator• Click• D-Verb • DC Offset Removal• Dithering• Duplicate• Eleven Free • EQ III 1-Band, EQ 4-Band et 7-Band • Dyn III Compressor/Limiter, De-Esser et
Expander/Gate
Pour obtenir des informations sur les capacités d'E/S de votre interface audio, veuillez consulter la documentation fournie avec votre interface.
Guide d'installation de Pro Tools Express12
• Invert• Normalize• Reverse• ReWire• Time Compression Expansion• Accordeur numérique TL InTune
Le programme d'installation séparé AVID Virtual Instruments Express permet d'installer les plug-ins d'instruments virtuels suivants et leurs contenus associés pour une utilisation avec Pro Tools Express :
• Boîte à rythmes et séquenceur Boom• Lecteur d’échantillons Structure Free • Station de travail multitimbrale Xpand!2
Configuration requise et compatibilitéPro Tools Express peut uniquement être utilisé avec une interface audio qualifiée (telle que Mbox Mini) et sur un ordinateur Windows ou Mac, lui aussi qualifié.
Une connexion Internet est requise pour télécharger le programme d'installation de Pro Tools Express.
Avid ne peut assurer une compatibilité des produits et fournir une assistance que pour les matériels et les logiciels testés et approuvés par ses soins.
Pour connaître la configuration requise et consulter la liste exhaustive des ordinateurs, systèmes d'exploitation, disques durs et périphériques tiers pris en charge, rendez-vous sur :
www.avid.com/compatibility
Clé iLok autoriséePro Tools Express inclut une clé iLok vide et une carte d'activation pour l'autorisation de votre logiciel Pro Tools Express. Pour plus d'informations, reportez-vous à la section « Autorisation de Pro Tools Express » à la page 14.
Configuration MIDI requiseLes interfaces USB, FireWire et MIDI PCI fonctionnent de manière optimale avec les systèmes Pro Tools sous Mac ou Windows.
Configuration des disques durs requisePour une qualité d'enregistrement et de lecture audio optimale, tous les systèmes Pro Tools nécessitent l'utilisation d'un ou plusieurs disques durs qualifiés.
Pour plus d'informations sur ces plug-ins, et d'autres informations en tous genres, veuillez consulter le Guide des plug-ins audio (disponible depuis le menu Aide de Pro Tools Express).
Une clé iLok autorisée doit être insérée dans un port USB disponible de l'ordinateur pour pouvoir exécuter Pro Tools Express.
Pour obtenir la liste des interfaces et contrôleurs MIDI compatibles, rendez-vous sur www.avid.com/fr.
Pour plus d'informations, veuillez consulter avid.custkb.com/avid/app/selfservice/search.jsp?DocId=380567
Installation de Pro Tools Express 13
Initialisez vos disques durs à l'aide de l'application Utilitaire de disque incluse dans vos logiciels système Apple (Mac) ou du Gestionnaire de disques de Windows.
Enregistrement déconseillé sur le disque système
L'enregistrement sur votre disque système est possible, mais déconseillé. Les disques durs système fournissent parfois des performances d'enregistrement et de lecture inférieures, ce qui se traduit par un nombre inférieur de pistes et de plug-ins exploitables.
Installation des pilotes matérielsAvant d'installer le logiciel Pro Tools Express, assurez-vous d'avoir installé votre matériel audio ainsi que les derniers pilotes pour vos périphériques. Pour plus d’informations, reportez-vous à la documentation fournie avec votre matériel. Pour télécharger et installer les derniers pilotes correspondant à vos interfaces audio Avid, veuillez consulter avid.com/drivers.
Installation du logiciel Pro Tools ExpressAprès avoir installé les pilotes de votre interface audio, vous pouvez installer Pro Tools Express.
Pour installer Pro Tools Express :
1 Assurez-vous que vous êtes connecté en tant qu'administrateur pour le compte sur lequel vous souhaitez installer Pro Tools.
2 Téléchargez le programme d'installation de Pro Tools Express en ligne.
3 Effectuez l'une des opérations suivantes :
• Sur Mac, localisez le fichier Install Pro Tools
MP.mpkg et double-cliquez dessus pour l'ouvrir.
• Sous Windows, localisez le fichier Setup.exe et double-cliquez dessus pour l'ouvrir. Puis, dans la fenêtre qui s'ouvre, sélectionnez Installer Pro Tools Express pour commencer l'installation.
4 Suivez les instructions à l'écran pour continuer la procédure d'installation.
5 À l'invite, cliquez sur Installer.
6 Le cas échéant, saisissez votre mot de passe administrateur et cliquez sur OK pour valider l'installation.
Pour des performances optimales, utilisez DigiBase pour désigner le disque système comme disque de lecture ou de transfert uniquement. Pour plus d'informations, consultez le Guide de référence Pro Tools.
Pro Tools ne reconnaîtra pas votre interface audio si ses pilotes ne sont pas installés. Si vous effectuez une mise à niveau de Pro Tools, assurez-vous d'installer les pilotes les plus récents pour votre matériel.
Avant d'installer cette version de Pro Tools, consultez le fichier Lisez-moi inclus.
Sous Windows, si la boîte de dialogue Contrôle de compte utilisateur s'affiche, cliquez sur Autoriser. Plusieurs messages s'affichent pendant l'installation, comme les boîtes de dialogue « Nouveau matériel détecté » et « Un problème est survenu pendant l'installation du matériel ». Vous pouvez les ignorer. De plus, si un message d'avertissement vous indique que le pilote n'a pas été validé lors du test permettant d'obtenir le logo Windows, cliquez sur Continuer.

Guide d'installation de Pro Tools Express14
7 Suivez les instructions à l'écran jusqu'à la fin de la procédure.
8 Lorsque l'installation est terminée, cliquez sur Redémarrer (Mac) ou sur Terminer (Windows).
Installation des instruments virtuels Avid ExpressAvid fournit une suite de plug-ins d'instruments virtuels gratuits avec les samples associés, destinée à Pro Tools Express. Pour plus d'infor-mations, consultez le Guide des plug-ins audio.
Pour installer les instruments virtuels Avid :
1 Assurez-vous que vous êtes connecté en tant qu'administrateur pour le compte sur lequel vous souhaitez installer les instruments virtuels Avid.
2 Téléchargez le programme d'installation des instruments virtuels Avid et du contenu associé en ligne.
3 Effectuez l'une des opérations suivantes :
• Sur Mac, localisez et double-cliquez sur le fichier Install Avid Virtual Instruments
Express.mpkg.
• Sous Windows, exécutez Avid Virtual
Instruments Express Setup.exe.
4 Suivez les instructions à l'écran pour continuer la procédure d'installation.
5 Cliquez sur Installer.
6 Le cas échéant, saisissez votre mot de passe administrateur et cliquez sur OK pour valider l'installation.
7 Suivez les instructions à l'écran jusqu'à la fin de la procédure.
8 Lorsque l'installation est terminée, cliquez sur Fermer (Mac) ou sur Terminer (Windows).
Autorisation de Pro Tools ExpressPro Tools Express est fourni avec une clé iLok non autorisée et une carte d'activation sur laquelle figure un code d'activation pour Pro Tools Express. La clé USB iLok Smart Key de PACE Anti-Piracy peut comporter des centaines d'autorisations pour tous vos logiciels activés par iLok. Lorsqu'une clé iLok a été autorisée pour un logiciel spécifique, vous pouvez la réutiliser pour autoriser ce logiciel sur un autre ordinateur.
Afin d'autoriser le logiciel Pro Tools Express :
1 Si vous ne possédez pas de compte iLok.com, rendez-vous sur www.iLok.com et créez un compte.
2 Pour transférer la licence de votre logiciel sur votre compte iLok.com, procédez comme suit :
• Rendez-vous sur www.avid.com/activation.– et –• Saisissez votre code d'activation (indiqué
sur votre carte d'activation) et votre ID utilisateur iLok.com. Votre ID utilisateur iLok.com correspond au nom que vous créez pour votre compte iLok.com. Veuillez noter qu'il ne s'agit pas du numéro de série de votre iLok, mais d'un ID utilisateur unique que vous choisissez vous-même).
La taille du contenu associé aux instruments virtuels est très importante et son installation peut prendre du temps. Pendant ce temps, l'installation du logiciel progresse, même si la barre de progression ne semble pas l'indiquer. Ne quittez pas la procédure d'installation.
Clé USB iLok
Installation de Pro Tools Express 15
3 Transférez les licences de votre compte iLok.com vers votre clé USB iLok Smart Key en procédant comme suit :
• Insérez la clé iLok dans un port USB disponible de votre ordinateur.
• Rendez-vous sur www.iLok.com et connectez-vous à votre compte.
• Suivez les instructions à l'écran pour transférer vos licences vers votre clé iLok.
4 Installez et lancez Pro Tools Express (voir ci-dessous).
5 Si d'autres logiciels non autorisés sont installés sur votre ordinateur, un message vous invitant à les autoriser s'affiche. Suivez les instructions à l’écran pour effectuer la procédure d'autorisation.
Lancement de Pro Tools ExpressPour utiliser le logiciel Pro Tools Express, vous devez disposer d'une clé iLok associée à une licence d'autorisation pour la version de Pro Tools que vous avez installée (pour plus d'informations, reportez-vous à la section « Autorisation de Pro Tools Express » à la page 14).
Pour lancer le logiciel Pro Tools Express :
1 Vérifiez que votre interface audio est bien connectée à votre ordinateur et sous tension.
2 Insérez une clé iLok autorisée dans un port USB disponible de votre ordinateur (reportez-vous à la section « Autorisation de Pro Tools Express » à la page 14).
3 Effectuez l'une des opérations suivantes :• Sur Mac, cliquez sur le raccourci Pro Tools
Express du Dock ou double-cliquez sur l'icône de l'application sous Macintosh HD/Applications/Avid/Pro Tools.
– ou –• Sous Windows, double-cliquez sur le
raccourci Pro Tools Express du bureau ou sur l'application située dans le dossier Programmes\Avid\Pro Tools.
4 Utilisez la boîte de dialogue Démarrage rapide pour effectuer l'une des opérations suivantes :
• Créer une nouvelle session à partir d'un modèle.
• Créer une nouvelle session vierge.• Ouvrir une autre session présente sur votre
système.
Configuration de votre système Pro Tools ExpressUne fois que vous avez installé, autorisé et démarré le logiciel Pro Tools Express, vous pouvez configurer votre système selon les besoins spécifiques de votre studio. Pour obtenir des informations supplémentaires sur la configuration du logiciel Pro Tools, reportez-vous au Guide de référence Pro Tools (disponible à partir du menu Aide de Pro Tools).
Pour plus d'informations, consultez le site Web iLok (www.iLok.com).
Ne débranchez pas la clé iLok lors de l'ouverture ou de l'utilisation de Pro Tools.
Pour plus d'informations sur la boîte de dialogue Démarrage rapide et les modèles de session, consultez le Guide de référence Pro Tools.
Guide d'installation de Pro Tools Express16
Désinstallation de Pro Tools ExpressSi vous mettez votre système à niveau depuis Pro Tools Express vers la version complète de Pro Tools, veuillez vous assurer de bien désinstaller Pro Tools Express avant d'installer la version complète de Pro Tools. Afin de désinstaller le logiciel Pro Tools Express, veuillez utiliser le programme de désintallation sur Mac ou son équivalent dans le Panneau de configuration sous Windows.
Désinstallation de Pro Tools Express sur Mac
Pour désinstaller Pro Tools Express sur Mac :
1 Assurez-vous que vous êtes connecté en tant qu'administrateur au compte sur lequel Pro Tools Express est installé.
2 Accédez à Applications/Avid/Pro Tools/ Pro Tools Utilities, puis double-cliquez sur le fichier Uninstall Pro Tools Express.
3 Cliquez sur Continuer pour initier la procédure de désinstallation.
4 Sélectionnez le type de désinstallation à effectuer :
Désinstallation partielle : conserve des fichiers système et de plug-in requis pour la compatibilité avec certains produits Avid. Optez pour la désinstallation sécurisée si vous utilisez une application Avid ou effectuez une mise à jour vers une version CS (service clients).
Désinstallation complète : supprime tous les fichiers Pro Tools, y compris les fichiers système, les plug-ins Avid et les noms de patch MIDI. Optez pour la désinstallation complète si vous effectuez une mise à niveau ou souhaitez corriger des problèmes en repartant d'un système propre.
5 Cliquez sur Désinstaller.
6 Entrez le mot de passe administrateur, puis cliquez sur OK.
7 Cliquez sur Terminer pour fermer la fenêtre du programme d'installation.
Désinstallation de Pro Tools Express sous Windows
Pour désinstaller Pro Tools Express sous Windows :
1 Sélectionnez Démarrer > Panneau de
configuration.
2 Cliquez sur Programmes et fonctionnalités.
3 Cliquez sur Désinstaller un programme.
4 Sélectionnez Avid Pro Tools Express dans la liste des applications installées.
5 Cliquez sur Désinstaller.
6 Suivez les instructions à l'écran pour désinstaller Pro Tools.
Notez que vous devrez désinstaller séparément les plug-ins, tels que les effets Avid, ainsi que tous les pilotes audio et MIDI.

Installation de Pro Tools Express 17
Optimisation d'un système Mac pour Pro Tools ExpressPour des performances optimales avec Pro Tools Express, commencez par configurer votre ordinateur.
Avant de configurer votre ordinateur, assurez-vous que vous êtes connecté en tant qu'administrateur pour le compte sur lequel vous souhaitez installer Pro Tools. Pour obtenir des détails sur les privilèges d'administrateur sous Mac OS X, reportez-vous à votre documentation Apple OS X.
Désactivation de la mise à jour logicielle
Pour désactiver la fonction de mise à jour logicielle :
1 Dans le menu Pomme, sélectionnez Préférences Système.
2 Cliquez sur Mise à jour de logiciels.
3 Cliquez sur l'onglet Planification des
vérifications.
4 Désélectionnez l'option Rechercher les mises à
jour.
5 Ensuite, sélectionnez Préférences Système >
Quitter les Préférences Système.
Désactivation de l'économiseur d'énergie
Pour désactiver l'économiseur d'énergie :
1 Dans le menu Pomme, sélectionnez Préférences Système.
2 Cliquez sur Économiseur d'énergie.
3 Définissez le Mode de veille sur Jamais.
4 Définissez le paramètre de Veille d'affichage sur Jamais.
5 Désélectionnez Suspendre dès que possible
l'activité du ou des disques durs.
6 Ensuite, sélectionnez Préférences Système >
Quitter les Préférences Système.
Désactivation ou réassignation des raccourcis clavier Mac utilisés par Pro Tools
Pour exploiter tous les raccourcis clavier que propose Pro Tools, vous devez désactiver ou réassigner les éventuels raccourcis clavier Mac OS X en conflit dans les préférences système Apple.
Pour désactiver ou réassigner les raccourcis clavier Mac utilisés par Pro Tools (Mac OS X Lion) :
1 Dans le menu Pomme, sélectionnez Préférences Système.
2 Cliquez sur Clavier.
3 Cliquez sur l'onglet Raccourcis clavier.
N'utilisez pas la fonction de mise à jour logicielle automatique de Mac OS X, car cela peut entraîner une mise à jour de votre système avec une version de Mac OS qui n'a pas été qualifiée pour Pro Tools. Pour plus de détails sur les versions de Mac OS qualifiées, reportez-vous aux informations de compatibilité accessibles sur notre site Web (www.avid.com/fr).
Pour obtenir une liste complète des raccourcis clavier Pro Tools, reportez-vous au Guide des raccourcis clavier (Aide > Raccourcis clavier).

Guide d'installation de Pro Tools Express18
4 Vous pouvez désactiver ou réassigner les raccourcis clavier Mac OS en conflit avec ceux de Pro Tools. La liste suivante répertorie plusieurs raccourcis clavier Mac courants qui peuvent également être utilisés par Pro Tools, en fonction du modèle et de la configuration de votre Mac :
• Sous « Launchpad et Dock »• « Activer/désactiver le masquage du Dock »
• Sous « Mission Control »• « Mission Control »• « Fenêtres d'applications »• « Afficher le bureau »• « Afficher le Dashboard »• « Mission Control > Déplacer d'un espace
vers la gauche »• « Mission Control > Déplacer d'un espace
vers la droite »• « Mission Control > Passer au Bureau n »
• Sous « Saisie de texte »• « Déplacer le focus sur le volet de la
fenêtre »
• Sous « Services »• « Envoyer le fichier vers un appareil
Bluetooth »• « Rechercher avec Google »• « Spotlight »• « Rechercher dans les pages de manuels »
• Sous « Spotlight »• « Afficher le champ de recherche
Spotlight »• « Afficher la fenêtre Spotlight »
• Sous « Accès universel »• « Zoom »• « Contraste »
• Sous « Raccourcis d'applications »• « Afficher le menu Aide »
Pour désactiver ou réassigner les raccourcis clavier Mac utilisés par Pro Tools (Mac OS X Snow Leopard) :
1 Dans le menu Pomme, sélectionnez Préférences Système.
2 Cliquez sur Clavier.
3 Cliquez sur l'onglet Raccourcis clavier.
4 Vous pouvez désactiver ou réassigner les raccourcis clavier Mac OS en conflit avec ceux de Pro Tools. La liste suivante répertorie plusieurs raccourcis clavier Mac courants qui sont également utilisés par Pro Tools :
• Sous « Dashboard et Dock »• « Activer/désactiver le masquage du Dock »• « Dashboard »
• Sous « Exposé et Spaces »• « Toutes les fenêtres »• « Fenêtres d'applications »• « Bureau »
• Sous « Saisie de texte »• « Déplacer le focus sur le volet de la
fenêtre »
• Sous « Spotlight »• « Afficher le champ de recherche
Spotlight » • « Afficher la fenêtre Spotlight »
• Sous « Raccourcis d'applications »• « Afficher le menu Aide »

Installation de Pro Tools Express 19
Désactivation de l'indexation Spotlight
La fonction Spotlight de Mac OS X indexe automatiquement les fichiers et dossiers des disques durs locaux en arrière-plan. Dans la plupart des cas, cela ne perturbe pas le fonctionnement de Pro Tools ; cependant, si Spotlight lance l'indexation des disques durs lors d'un enregistrement dans une session Pro Tools comportant un nombre de piste élevé, les performances du système Pro Tools peuvent être affectées. Pour les projets d'enregistrement Pro Tools les plus importants, il est conseillé de désactiver l'indexation Spotlight pour tous les disques locaux.
Pour désactiver l'indexation Spotlight :
1 Dans le menu Pomme, sélectionnez Préférences Système, puis cliquez sur Spotlight .
2 Dans la fenêtre Spotlight, cliquez sur l'onglet Confidentialité.
3 Faites glisser l'icône du disque que vous ne souhaitez pas indexer du bureau vers la liste.
Activation de la journalisation des lecteurs audio
Les performances des lecteurs audio peuvent être améliorées en activant la journalisation.
Pour activer la journalisation :
1 Dans le dossier Applications/Utilitaires, démarrez l'application Utilitaire de disque.
2 Sélectionnez le volume dans la colonne de gauche de la fenêtre Utilitaire de disque.
3 Sélectionnez Activer la journalisation dans la barre d'outils.
Optimisation d'un système Windows pour Pro Tools ExpressPour des performances optimales avec Pro Tools Express, configurez l'ordinateur avant d'utiliser le matériel et le logiciel Pro Tools.
Avant de configurer votre ordinateur, assurez-vous que vous êtes connecté en tant qu'administrateur pour le compte sur lequel vous souhaitez installer Pro Tools. Pour tout renseignement complémentaire sur les privilèges d'administrateur, reportez-vous à votre documentation Windows.
Optimisations nécessaires
Pour garantir des performances optimales, configurez les paramètres suivants avant d'utiliser le logiciel Pro Tools.
Désactivation du contrôle de compte d'utilisateur
Pour désactiver le contrôle de compte d'utilisateur :
1 Sélectionnez Démarrer > Panneau de
configuration.
2 Cliquez sur Comptes et protection des
utilisateurs.
3 Cliquez sur Comptes d’utilisateur.
4 Cliquez sur Modifier les paramètres de contrôle
de compte d’utilisateur.
Notez que cela désactivera également la fonction Rechercher de Mac OS X.
Pour accéder aux informations les plus récentes sur le paramétrage des systèmes Windows et sur la configuration d'ordinateurs spécifiques, rendez-vous sur le site Web Avid (www.avid.com/fr).
Redémarrez votre ordinateur après avoir modifié les paramètres système de Windows.
Guide d'installation de Pro Tools Express20
5 Déplacez le curseur sur Ne jamais m'avertir.
6 Cliquez sur OK.
Configuration de la mise en veille et de la gestion de l'alimentation
Si vous utilisez Pro Tools, le mode de mise en veille du système Windows doit être défini sur Toujours actif. Cela permet d'éviter qu'une longue session d'enregistrement ou de lecture soit interrompue inopinément à cause de l'arrêt de ressources système.
Pour configurer la gestion de l'alimentation Windows :
1 Sélectionnez Démarrer > Panneau de
configuration.
2 Cliquez sur Système et sécurité.
3 Cliquez sur Options d'alimentation.
4 Cliquez sur la flèche pour Afficher les modes
supplémentaires.
5 Sélectionnez Performances élevées.
6 Cliquez sur Modifier les paramètres du mode.
7 Cliquez sur Modifier les paramètres
d'alimentation avancés.
8 Dans la boîte de dialogue Options d'alimentation, développez l'option Disque dur >
Arrêter le disque dur après.
9 Cliquez sur l'option Paramètre.
10 Sélectionnez une valeur dans le champ Paramètre (Minutes) et appuyez sur la touche Retour arrière du clavier ou sélectionnez Jamais dans la liste déroulante.
11 Cliquez sur OK. Le paramètre du disque dur est défini sur Jamais et la boîte de dialogue Options d'alimentation se ferme.
12 Dans la fenêtre Modifier les paramètres du mode de gestion de l’alimentation, cliquez sur Enregistrer les modifications puis fermez la fenêtre.
Optimisations recommandéesD'autres pilotes logiciels et matériels installés sur votre ordinateur peuvent également interférer avec Pro Tools. Pour obtenir des performances optimales, nous vous suggérons d'effectuer les opérations suivantes :
• Évitez d'exécuter simultanément Pro Tools et des programmes dont vous n'avez pas absolument besoin.
• Désactivez les logiciels qui fonctionnent en tâche de fond, tels que Windows Messenger, les calendriers et les programmes de maintenance de disque.
• Lorsque vous exécutez Pro Tools, éteignez tous les périphériques USB non indispensables.
Lors de son ouverture, Pro Tools modifie automatiquement les paramètres d'alimentation en les définissant sur Performances élevées. Si vous les aviez modifiés, les paramètres d'alimentation d'origine de Windows sont rétablis lorsque vous quittez le logiciel Pro Tools. Par conséquent, lorsque vous souhaitez optimiser les paramètres de gestion de l'alimentation pour Pro Tools, vous devez configurer uniquement le mode Performances élevées.
Installation de Pro Tools Express 21
Optimisations facultativesLes optimisations du système suivantes peuvent améliorer les performances de Pro Tools sur certains systèmes. Il est recommandé de ne recourir à ces optimisations qu'en cas de nécessité, car elles peuvent désactiver ou compromettre certaines fonctionnalités d'autres programmes installés sur votre système.
Réglage de la planification du processeur
Pour régler les performances de planification du processeur :
1 Cliquez avec le bouton droit de la souris sur Poste de travail, puis sélectionnez Propriétés.
2 Cliquez sur Paramètres système avancés.
3 Dans la zone Performances, cliquez sur le bouton Paramètres.
4 Dans la fenêtre Options de performances, cliquez sur l'onglet Avancé.
5 Dans la section Performance des applications, sélectionnez l'option Services d'arrière-plan.
6 Cliquez sur OK pour fermer la fenêtre Options de performances.
7 Cliquez sur OK pour fermer la fenêtre Propriétés système.
Désactivation des éléments de démarrage du système
Moins les processus actifs sur votre ordinateur sont nombreux, plus les ressources disponibles pour Pro Tools sont importantes. Certaines applications de démarrage consomment inutilement les ressources du processeur et peuvent être désactivées.
Ne désactivez les éléments de démarrage suivants qu'en toute connaissance de cause :
• le numéro de série d'un support mobile (nécessaire aux applications utilisant une clé de protection contre la copie)
• le service Plug and Play• le journal d'événements• les services cryptographiques.
Pour désactiver les éléments de démarrage du système :
1 Depuis le menu Démarrer, saisissez « msconfig » dans la zone de recherche et appuyez sur Entrée pour ouvrir l'utilitaire de configuration du système.
2 Sous l'onglet Général, sélectionnez Démarrage
sélectif.
3 Désactivez l'option Charger les éléments de
démarrage, puis cliquez sur OK.
4 Cliquez sur Redémarrer pour redémarrer l'ordinateur.
5 Après le redémarrage, un message relatif à la configuration système s'affiche à l'écran. Vérifiez que les performances de Pro Tools ont été améliorées avant de désactiver la case « Ne plus afficher ce message ». Si les performances n'ont pas été améliorées, exécutez l'utilitaire msconfig et sélectionnez le mode Démarrage
normal (charger tous les pilotes de périphérique et
tous les services) au lieu du mode de démarrage sélectif, ou désactivez un par un les éléments lancés au démarrage et les processus non indispensables.

Guide d'installation de Pro Tools Express22
Installieren von Pro Tools Express 23
Installieren von Pro Tools Express
Willkommen bei Pro Tools® Express von Avid. In diesem Handbuch erfahren Sie, wie Sie Ihre Pro Tools Express-Software auf Mac- und Windows-Systemen installieren und autorisieren. Nähere Informationen zur Konfiguration Ihres Systems sowie über die volle Funktionalität Ihrer Pro Tools Express-Software erhalten Sie im Pro Tools-Referenzhandbuch (Zugriff über das Hilfemenü in Pro Tools).
Pro Tools Express – SoftwareoptionenPro Tools Express-Software bietet – in Abhängigkeit von Ihrer Hardware-Konfiguration – die folgenden Funktionen:
• bis zu 16 spielbare Mono- oder Stereo-Audiospuren pro Session
• bis zu 8 Auxiliary-Eingangs-Spuren
• bis zu 8 Master-Fader-Spuren
• bis zu 16 MIDI-Spuren
• bis zu 8 Instrumentenspuren
• eine QuickTime-Videospur
• 16-Bit-, 24-Bit- oder 32-Bit-Audioauflösung mit Gleitkommaverarbeitung und Samplerates bis zu 96 kHz
• automatischer Verzögerungsausgleich (bis zu 16.383 Samples bei 48 kHz)
• nicht destruktiver, direkter Zugriff auf Audiomaterial und Mischautomation
• Audioverarbeitung mit bis zu 5 Echtzeit-Plug-Ins pro Spur (abhängig von den Leistungsmerkmalen Ihres Computers)
• bis zu 5 Hardware-Inserts pro Spur
• bis zu 5 Sends pro Spur
• bis zu 16 interne Mix-Busse (mono oder stereo) für Routing und Mixing
In Pro Tools Express enthaltene Plug-InsPro Tools Express unterstützt Plug-Ins der Formate AAX, RTAS und AudioSuite. Die folgenden Plug-Ins werden mit Pro Tools Express installiert:
• AIR Chorus• AIR Distortion• AIR Dynamic Delay• AIR Flanger• AIR Frequency Shifter• AIR Lo-Fi• AIR Multi-Delay• AIR Phaser• AIR Vintage Filter• BF76 Compressor 1176 Emulator• Click• D-Verb • DC Offset Removal• Dither• Duplicate• Eleven Free • EQ III 1-Band-, 4-Band- und 7-Band-EQs
Informationen über die Anschlussmöglichkeiten Ihres Audio-Interface erhalten Sie in der mit Ihrem Audio-Interface gelieferten Dokumentation.

Pro Tools Express-Installationsanleitung24
• Dyn III Compressor/Limiter, De-Esser und Expander/Gate
• Invert• Normalize• Reverse• ReWire• Time Compression Expansion• TL InTune – Digitaltuner
Das separate AVID Virtual Instruments Express-Installationsprogramm installiert die Plug-Ins für folgende virtuelle Instrumente sowie die jeweils dazugehörigen Inhalte zur Nutzung mit Pro Tools Express:
• Boom – Drum-Computer und -Sequencer• Structure Free – Sample-Player • Xpand!2 – multitimbrale Workstation
Systemanforderungen und KompatibilitätPro Tools Express kann nur auf einem qualifizierten Windows- oder Mac-Computer mit einem qualifizierten Audio-Interface (wie Mbox Mini) eingesetzt werden.
Für den Download des Pro Tools Express-Installationsprogramms benötigen Sie eine Internetverbindung.
Avid kann die Kompatibilität und technische Unterstützung nur für Hardware- und Softwarekomponenten zusichern, die entsprechend geprüft und genehmigt wurden.
Die kompletten Systemanforderungen und eine Liste der qualifizierten Computer, Betriebssysteme, Festplatten und Geräte von Drittanbietern finden Sie auf der Website:
www.avid.com/compatibility
Autorisierter iLokIm Lieferumfang von Pro Tools Express ist ein leerer iLok mitsamt Aktivierungskarte zur Autorisierung der Pro Tools Express-Software enthalten. Weitere Informationen hierzu finden Sie unter Abschnitt Autorisieren von Pro Tools Express auf Seite 26.
MIDI-AnforderungenUSB-, FireWire- und PCI MIDI-Interfaces funktionieren mit Pro Tools-Systemen auf Mac oder unter Windows.
Anforderungen an die FestplattenFür eine optimale Audioaufnahme und -wiedergabe benötigen alle Pro Tools-Systeme mindestens eine von Avid qualifizierte Festplatte.
Informationen zu diesen Plug-Ins (sowie weitere Informationen) erhalten Sie im Audio-Plug-Ins-Handbuch (Zugriff über das Hilfemenü in Pro Tools Express).
Damit Sie Pro Tools Express verwenden können, muss ein autorisierter iLok in einen USB-Anschluss Ihres Computers eingesteckt sein.
Eine Liste der unterstützten MIDI-Interfaces und MIDI-Controller finden Sie auf www.avid.com.
Weitere Informationen finden Sie unter avid.custkb.com/avid/app/selfservice/search.jsp?DocId=380567
Installieren von Pro Tools Express 25
Initialisieren Sie Ihre Festplatte mit dem Festplatten-Dienstprogramm in der Apple-Systemsoftware (Mac) oder mit der Windows-Datenträgerverwaltung (Windows).
Nicht auf das Systemlaufwerk aufnehmen
Das Aufnehmen auf das Systemlaufwerk ist möglich, aber nicht empfehlenswert. Bei Aufnahme und Wiedergabe auf Systemlaufwerken können weit weniger Spuren und Plug-Ins verwendet werden.
Installieren von Hardware-TreibernBevor Sie Pro Tools Express installieren, müssen Sie sicherstellen, dass Ihre Audio-Hardware installiert ist und die neuesten Treiber für Ihre Hardware eingerichtet wurden. Weitere Hinweise hierzu finden Sie in der Dokumentation zu Ihrer Hardware. Bei Avid-Audio-Interfaces erhalten Sie die aktuellen Treiber für Ihr Gerät unter avid.com/drivers.
Installieren der Pro Tools Express-SoftwareNachdem Sie die Treiber für Ihr Audio-Interface installiert haben, können Sie Pro Tools Express installieren.
So installieren Sie Pro Tools Express:
1 Sie müssen als Administrator für das Konto angemeldet sein, für das Sie Pro Tools installieren möchten.
2 Laden Sie das Installationsprogramm für Pro Tools Express herunter.
3 Sie haben folgende Möglichkeiten:
• Auf dem Mac suchen Sie die Datei Install
Pro Tools Express.mpkg und doppelklicken darauf.
• Unter Windows suchen Sie die Datei Setup.exe und doppelklicken darauf. Wählen Sie im daraufhin eingeblendeten Mini-Browser Pro Tools Express installieren.
Für optimale Leistung kann es von Vorteil sein, Ihr Systemlaufwerk mit DigiBase als Laufwerk nur für die Wiedergabe oder nur für die Übertragung einzurichten. Weitere Informationen hierzu finden Sie im Pro Tools-Referenzhandbuch.
Pro Tools erkennt Ihre Audio-Interfaces nicht, wenn Sie die Treiber nicht installieren. Wenn Sie ein Upgrade von Pro Tools vornehmen, achten Sie darauf, die neuesten Treiber für Ihre Hardware zu installieren.
Lesen Sie vor dem Installieren von Pro Tools Express die Informationen in der Readme-Datei.
Unter Windows klicken Sie im Dialogfeld der Benutzerkontensteuerung auf „Erlauben“. Während der Installation werden mehrere Meldungen angezeigt, die ignoriert werden können, darunter mehrfache „Neue Hardware gefunden“-Dialogfelder und „Während der Hardwareinstallation ist ein Problem aufgetreten“-Meldungen. Sollte außerdem an dieser Stelle eine Warnmeldung bezüglich des nicht bestandenen Windows-Logo-Tests eines Treibers angezeigt werden, ignorieren Sie diese und klicken Sie auf „Weiter“.
Pro Tools Express-Installationsanleitung26
4 Folgen Sie den Installationsanweisungen auf dem Bildschirm, um mit der Installation fortzufahren.
5 Klicken Sie auf Installieren, wenn Sie dazu aufgefordert werden.
6 Geben Sie bei entsprechender Aufforderung das Administrator-Kennwort ein und klicken Sie zum Ausführen der Installation auf OK.
7 Folgen Sie den weiteren Anweisungen auf dem Bildschirm.
8 Wenn die Installation abgeschlossen ist, klicken Sie auf Neu starten (Mac) oder Fertig
stellen (Windows).
Installieren von Avid Virtual Instruments ExpressAvid bietet eine Zusammenstellung virtueller Instrumenten-Plug-Ins und dazugehöriger Sample-Inhalte für die Verwendung mit Pro Tools Express. Weitere Informationen finden Sie im Audio-Plug-Ins-Handbuch.
So installieren Sie Avid Virtual Instruments:
1 Sie müssen als Administrator für das Konto angemeldet sein, für das Sie Avid Virtual Instruments installieren möchten.
2 Laden Sie das Installationsprogramm für Avid Virtual Instruments sowie die zugehörigen Inhalte von der Website herunter.
3 Sie haben folgende Möglichkeiten:
• Suchen Sie auf dem Mac die Datei Install Avid
Virtual Instruments Express.mpkg und doppelklicken Sie darauf.
• Unter Windows suchen Sie die Datei Avid
Virtual Instruments Express Setup.exe und doppelklicken Sie darauf.
4 Folgen Sie den Installationsanweisungen auf dem Bildschirm, um mit der Installation fortzufahren.
5 Klicken Sie auf Installieren.
6 Geben Sie bei entsprechender Aufforderung das Administrator-Kennwort ein und klicken Sie zum Ausführen der Installation auf OK.
7 Folgen Sie den weiteren Anweisungen auf dem Bildschirm.
8 Wenn die Installation abgeschlossen ist, klicken Sie auf Schließen (Mac) bzw. Fertig
stellen (Windows).
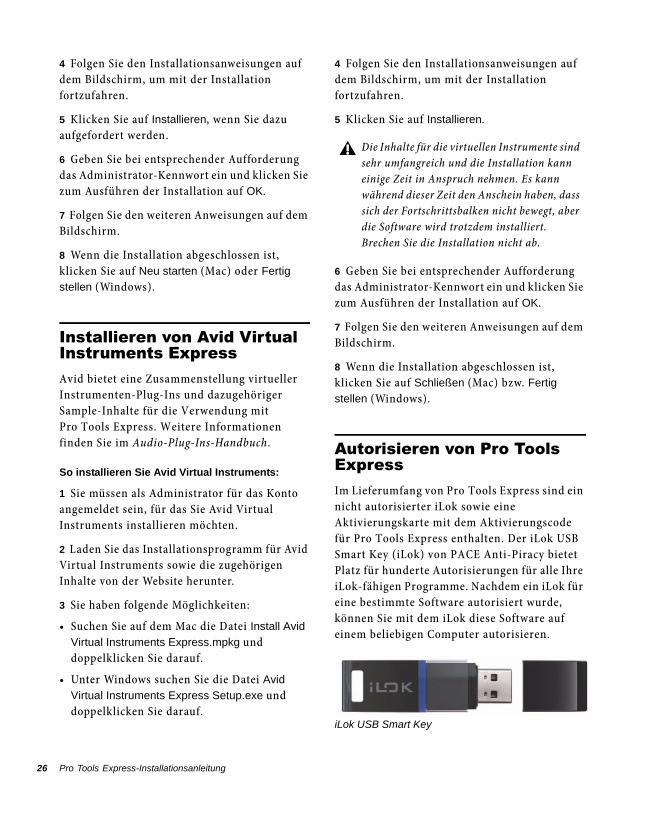
Autorisieren von Pro Tools ExpressIm Lieferumfang von Pro Tools Express sind ein nicht autorisierter iLok sowie eine Aktivierungskarte mit dem Aktivierungscode für Pro Tools Express enthalten. Der iLok USB Smart Key (iLok) von PACE Anti-Piracy bietet Platz für hunderte Autorisierungen für alle Ihre iLok-fähigen Programme. Nachdem ein iLok für eine bestimmte Software autorisiert wurde, können Sie mit dem iLok diese Software auf einem beliebigen Computer autorisieren.
Die Inhalte für die virtuellen Instrumente sind sehr umfangreich und die Installation kann einige Zeit in Anspruch nehmen. Es kann während dieser Zeit den Anschein haben, dass sich der Fortschrittsbalken nicht bewegt, aber die Software wird trotzdem installiert. Brechen Sie die Installation nicht ab.
iLok USB Smart Key
Installieren von Pro Tools Express 27
So autorisieren Sie die Pro Tools Express-Software:
1 Wenn Sie kein iLok.com-Konto haben, erstellen Sie eines auf www.iLok.com.
2 Übertragen Sie die Lizenz für Ihre Software folgendermaßen auf Ihr iLok.com-Konto:
• Besuchen Sie www.avid.com/activation.– und –• Geben Sie Ihren Aktivierungscode (auf
Ihrer Aktivierungskarte aufgeführt) und Ihre iLok.com-Anwender-ID ein. Ihre iLok.com-Anwender-ID ist der Name, den Sie beim Erstellen Ihres iLok.com-Kontos benutzt haben (beachten Sie, dass es nicht die Seriennummer Ihres iLok ist, sondern eine eindeutige Anwender-ID, die Sie selbst festgelegt haben).
3 Übertragen Sie die Lizenzen von Ihrem iLok.com-Konto wie folgt auf Ihren iLok USB Smart Key:
• Stecken Sie den iLok in einen USB-Anschluss am Computer.
• Gehen Sie zu www.iLok.com und melden Sie sich an.
• Folgen Sie den Anweisungen am Bildschirm, um Ihre Lizenzen auf Ihren iLok zu übertragen.
4 Installieren Sie Pro Tools Express und starten Sie die Software (siehe unten).
5 Wenn sonstige nicht autorisierte Software installiert ist, werden Sie aufgefordert, sie zu autorisieren. Folgen Sie den Anweisungen auf dem Bildschirm, um die Autorisierung abzuschließen.
Starten von Pro Tools ExpressUm Pro Tools Express-Software einsetzen zu können, müssen Sie über einen iLok mit einer Lizenz verfügen, die die von Ihnen installierte Pro Tools-Version autorisiert (Hinweise finden Sie unter Abschnitt Autorisieren von Pro Tools Express auf Seite 26).
So starten Sie die Pro Tools Express-Software:
1 Vergewissern Sie sich, dass das Audio-Interface mit dem Computer verbunden und eingeschaltet ist.
2 Stecken Sie einen autorisierten iLok in einen USB-Anschluss am Computer (siehe Abschnitt Autorisieren von Pro Tools Express auf Seite 26).
3 Sie haben folgende Möglichkeiten:• Auf dem Mac klicken Sie auf den Pro Tools
Express-Schnellaufruf in Ihrem Dock (oder doppelklicken Sie auf das Programmsymbol in Macintosh HD/Programme/Avid/Pro Tools).
– oder –• Unter Windows doppelklicken Sie auf die
Pro Tools-Verknüpfung auf Ihrem Desktop (oder auf die Anwendungsdatei in Programme\Avid\Pro Tools).
Weitere Informationen erhalten Sie auf der iLok-Website (www.iLok.com).
Entfernen Sie den iLok während des Starts und der Verwendung von Pro Tools nicht.
Pro Tools Express-Installationsanleitung28
4 Im Schnellstart-Dialogfeld (Quick Start) haben Sie folgende Möglichkeiten:
• Erstellen einer neuen Session aus einer Vorlage
• Erstellen einer neuen leeren Session• Öffnen einer anderen Session in Ihrem
System
Konfigurieren des Pro Tools Express-SystemsNachdem Sie die Pro Tools Express-Software installiert, autorisiert und gestartet haben, können Sie Ihr Pro Tools Express-System konfigurieren, um es an die besonderen Anforderungen Ihres Studios anzupassen. Detaillierte Hinweise zur Konfiguration Ihrer Pro Tools-Software finden Sie im Pro Tools-Referenzhandbuch (im Hilfemenü von Pro Tools).
Deinstallieren von Pro Tools ExpressWenn Sie von Pro Tools Express auf die Vollversion von Pro Tools upgraden, deinstallieren Sie Pro Tools Express, bevor Sie die Vollversion installieren. Zum Deinstallieren der Pro Tools Express-Software benutzen Sie am Mac die Deinstallations-Anwendung oder unter Windows die Systemsteuerungsoption „Software“.
Deinstallieren von Pro Tools Express auf dem Mac
So deinstallieren Sie Pro Tools Express auf dem Mac:
1 Vergewissern Sie sich, dass Sie als Administrator für das Konto angemeldet sind, für das Pro Tools Express installiert ist.
2 Rufen Sie das Verzeichnis Programme/Avid/Pro Tools/Pro Tools Utilities auf und doppelklicken Sie auf die Datei Uninstall
Pro Tools Express.
3 Klicken Sie auf Fortfahren, um mit der Deinstallation fortzufahren.
4 Wählen Sie die durchzuführende Deinstallationsart:
Sichere Deinstallation – bei dieser Deinstallationsart werden bestimmte Plug-Ins und Systemdateien, die zur Kompatibilität mit einigen Avid-Produkten erforderlich sind, nicht entfernt. Verwenden Sie „Sichere Deinstallation“, wenn Sie eine Avid-Anwendung verwenden oder eine Aktualisierung auf eine CS-Version (Customer Support) planen.
Vollständige Deinstallation – alle Pro Tools-Dateien werden entfernt, einschließlich Systemdateien, Avid-Plug-Ins und MIDI-Patch-Namen. Verwenden Sie „Vollständige Deinstallation“, wenn Sie eine Aktualisierung planen oder ein neu installiertes System zur Fehlerbehebung benötigen.
5 Klicken Sie auf Deinstallieren.
6 Geben Sie Ihr Administratorkennwort ein und klicken Sie auf OK.
7 Klicken Sie auf Fertig stellen, um das Installationsfenster zu schließen.
Weitere Informationen zu Quick Start-Dialogfeld und Session-Vorlagen finden Sie im Pro Tools-Referenzhandbuch.
Installieren von Pro Tools Express 29
Deinstallieren von Pro Tools Express unter Windows
So deinstallieren Sie Pro Tools Express unter Windows:
1 Wählen Sie Start > Systemsteuerung.
2 Klicken Sie auf Programme und Funktionen.
3 Klicken Sie auf Programm deinstallieren.
4 Wählen Sie Avid Pro Tools Express aus der Liste installierter Anwendungen.
5 Klicken Sie auf Deinstallieren.
6 Folgen Sie den Bildschirmanweisungen, um Pro Tools zu entfernen.
Optimieren eines Mac-Systems für Pro Tools ExpressDamit Pro Tools Express optimal funktioniert, sollten Sie den Computer vor der Verwendung der Pro Tools Express-Software konfigurieren.
Vor dem Konfigurieren Ihres Computers müssen Sie als Administrator für das Konto angemeldet sein, für das Sie Pro Tools installieren möchten. Weitere Informationen zur Anmeldung als Administrator auf Mac OS X finden Sie in der Dokumentation zu Apple OS X.
Deaktivieren der Software-Aktualisierung
So deaktivieren Sie die Software-Aktualisierung:
1 Wählen Sie aus dem Apple-Menü Systemeinstellungen.
2 Klicken Sie auf Softwareaktualisierung.
3 Klicken Sie auf die Registerkarte Planmäßige
Überprüfung.
4 Deaktivieren Sie Nach Updates suchen.
5 Wählen Sie anschließend Systemeinstellungen > Systemeinstellungen
beenden.
Deaktivieren der Energiesparfunktion
So deaktivieren Sie die Funktion „Energie sparen“:
1 Wählen Sie aus dem Apple-Menü Systemeinstellungen.
2 Klicken Sie auf Energie sparen.
3 Setzen Sie die Einstellung für den Ruhezustand des Computers auf Nie.
4 Setzen Sie die Einstellung für den Ruhezustand des Monitors auf Nie.
5 Heben Sie die Auswahl der Option Wenn
möglich Ruhezustand der Festplatte(n) aktivieren auf.
6 Wählen Sie anschließend Systemeinstellungen > Systemeinstellungen
beenden.
Beachten Sie, dass Plug-Ins (wie Avid Effects) sowie Audio- und MIDI-Gerätetreiber separat deinstalliert werden müssen.
Verwenden Sie keinesfalls die Funktion zur automatischen Software-Aktualisierung von Mac OS X, da sonst möglicherweise eine Version von Mac OS installiert wird, die noch nicht für die Verwendung mit Pro Tools qualifiziert wurde. Weitere Informationen zu empfohlenen Versionen von Mac OS erhalten Sie in den aktuellen Kompatibilitäts-informationen auf der Avid-Website (www.avid.com).
Pro Tools Express-Installationsanleitung30
Deaktivieren oder Neuzuordnen der Mac-Tastenkombinationen für Pro Tools
Um alle Pro Tools-Tastenkombinationen verwenden zu können, müssen Sie zuerst dazu im Widerspruch stehende Mac OS X-Tasten-kombinationen in den Apple-System-einstellungen deaktivieren oder neu zuordnen.
So deaktivieren Sie Mac-Tastenkombinationen für Pro Tools oder ordnen sie neu zu (Mac OS X Lion):
1 Wählen Sie aus dem Apple-Menü die Option Systemeinstellungen.
2 Klicken Sie auf Tastatur & Maus.
3 Klicken Sie auf die Registerkarte Tastatur-
Kurzbefehle.
4 Sie können die Mac OS-Tastenkombinationen, die mit den Pro Tools-Tastenkombinationen in Konflikt stehen, deaktivieren oder neu programmieren. Die folgende Liste enthält einige häufige Mac-Tastenkombinationen, die je nach Mac-Modell möglicherweise auch von Pro Tools benutzt werden:
• Unter „Launchpad & Dock“• Dock ein- oder ausblenden
• Unter „Mission Control“• Mission Control• Programmfenster• Schreibtisch einblenden• Dashboard einblenden• Mission Control > Einen Space nach links
bewegen• Mission Control > Einen Space nach rechts
bewegen
• Mission Control > Zu Schreibtisch n wechseln
• Unter „Tastatur & Texteingabe“• Fokus zum aktiven oder nächsten Fenster
bewegen
• Unter „Dienste“• Datei an Bluetooth-Gerät senden• Mit Google suchen• Spotlight• In man-Seiten im Terminal suchen
• Unter „Spotlight“• Spotlight-Suchfeld einblenden• Spotlight-Fenster einblenden
• Unter „Universal Access“• Zoom• Kontrast
• Unter dem Menü für Programm-Kurzbefehle• Hilfemenü einblenden
So deaktivieren Sie Mac-Tastenkombinationen für Pro Tools oder ordnen sie neu zu (Mac OS X Snow Leopard):
1 Wählen Sie aus dem Apple-Menü die Option Systemeinstellungen.
2 Klicken Sie auf Tastatur & Maus.
3 Klicken Sie auf die Registerkarte Tastatur-
Kurzbefehle.
4 Sie können die Mac OS-Tastenkombinationen, die mit den Pro Tools-Tastenkombinationen in Konflikt stehen, deaktivieren oder neu programmieren. Die folgende Liste enthält einige häufige Mac-Tastenkombinationen, die auch von Pro Tools verwendet werden:
• Unter „Dashboard & Dock“• Dock ein- oder ausblenden• Dashboard
Eine vollständige Liste der Pro Tools-Tastenkombinationen finden Sie in der Dokumentation zu den Tastenkombinationen (Hilfe > Tastatur-Kurzbefehle).
Installieren von Pro Tools Express 31
• Unter „Exposé & Spaces“• Alle Fenster• Programmfenster• Schreibtisch
• Unter „Tastatur & Texteingabe“• Fokus zum aktiven oder nächsten Fenster
bewegen
• Unter „Spotlight“• Spotlight-Suchfeld einblenden • Spotlight-Fenster einblenden
• Unter dem Menü für Programm-Kurzbefehle• Hilfemenü einblenden
Deaktivieren der Spotlight-Indizierung
Die Spotlight-Funktion von Mac OS X indiziert automatisch im Hintergrund Dateien und Ordner auf lokalen Festplatten. Dies ist für die normalen Pro Tools-Funktionen in den meisten Fällen kein Problem. Wenn aber Spotlight mit dem Indizieren der Festplatten während einer länger dauernden Aufnahme in einer Pro Tools-Sitzung mit vielen Spuren beginnt, kann das die Leistung des Pro Tools-Systems deutlich vermindern. Es kann also sinnvoll sein, die Spotlight-Indizierung für alle lokalen Festplatten zu deaktivieren, bevor Sie mit Pro Tools größere Aufnahmeprojekte durchführen.
So deaktivieren Sie die Spotlight-Indizierung:
1 Wählen Sie aus dem Apple-Menü System-
einstellungen und klicken Sie auf Spotlight.
2 Klicken Sie im Spotlight-Fenster auf die Registerkarte Privatsphäre.
3 Um die Indizierung eines Laufwerks zu verhindern, ziehen Sie das entsprechende Laufwerkssymbol vom Schreibtisch in die Liste.
Aktivieren von Journaling für Audiolaufwerke
Um die Leistung der Audiolaufwerke zu verbessern, können Sie Journaling aktivieren.
So aktivieren Sie Journaling:
1 Starten Sie das Festplattendienstprogramm (im Ordner „Programme/Dienstprogramme“).
2 Wählen Sie in der linken Spalte des Festplatten-Dienstprogramm-Fensters das Volume aus.
3 Wählen Sie in der Symbolleiste Journaling
aktivieren.
Optimieren eines Windows-Systems für Pro Tools ExpressDamit Pro Tools Express optimal funktioniert, sollten Sie den Computer vor der Verwendung der Pro Tools-Hardware und -Software konfigurieren.
Vor dem Konfigurieren Ihres Computers müssen Sie als Administrator für das Konto angemeldet sein, für das Sie Pro Tools installieren möchten. Weitere Informationen hierzu finden Sie in der Windows-Dokumentation.
Durch das Deaktivieren der Spotlight-Indizierung wird auch die Suchfunktion in Mac OS X deaktiviert.
Aktuelle Informationen zu Windows-Systemeinstellungen sowie Informationen zu bestimmten Computern finden Sie auf der Avid-Website (www.avid.com).

Pro Tools Express-Installationsanleitung32
Erforderliche Optimierungsmaßnahmen
Für eine optimale Leistung von Pro Tools sollten Sie vor dem Verwenden der Pro Tools-Hardware und -Software die im Folgenden beschriebenen Einstellungen vornehmen.
Benutzerkontensteuerung deaktivieren
So deaktivieren Sie die Benutzerkontensteuerung:
1 Wählen Sie Start > Systemsteuerung.
2 Klicken Sie auf Benutzerkonten und
Jugendschutz.
3 Klicken Sie auf Benutzerkonten.
4 Klicken Sie auf Einstellungen der
Benutzerkontensteuerung ändern.
5 Setzen Sie den Schieberegler auf Nie
benachrichtigen.
6 Klicken Sie auf OK.
Konfigurieren von System-Standby und Energieverwaltung
Bei der Arbeit mit Pro Tools muss das Energieschema für Windows-System-Standby immer auf Dauerbetrieb gesetzt sein. Dadurch wird vermieden, dass lange Aufnahme- oder Wiedergabedurchläufe aufgrund eines plötzlichen Ausfalls der Systemressourcen unterbrochen werden.
So konfigurieren Sie die Windows-Energieverwaltung:
1 Wählen Sie Start > Systemsteuerung.
2 Klicken Sie auf System und Sicherheit.
3 Klicken Sie auf Energieoptionen.
4 Klicken Sie auf den Pfeil für die Option Weitere
Energiesparpläne einblenden.
5 Wählen Sie Hohe Leistung.
6 Klicken Sie auf Energiesparplaneinstellungen
ändern.
7 Klicken Sie auf Erweiterte Energieeinstellungen
ändern.
8 Im Dialogfeld der Energieoptionen suchen Sie Festplatte > Festplatte ausschalten nach.
9 Klicken Sie auf die Option Einstellungen.
10 Wählen Sie im Feld für die Einstellung der Minuten den gewünschten Wert und drücken Sie die Rücktaste auf der Computertastatur oder setzen Sie den Wert auf Nie.
11 Klicken Sie auf OK. Die Festplatten-einstellung ändert sich auf Nie und das Dialogfeld für die Energieoptionen wird geschlossen.
12 Klicken Sie im Fenster „Energiesparplan-einstellungen bearbeiten“ auf Änderungen
speichern und schließen Sie das Fenster.
Nachdem Sie die erforderlichen Windows-Systemeinstellungen geändert haben, starten Sie den Computer neu.
Pro Tools aktiviert beim Start automatisch die Energiespareinstellung „Hohe Leistung“. Windows kehrt in die vorher ausgewählte Energiespareinstellung zurück, wenn Pro Tools beendet wird. Wenn Sie also die Energiespareinstellung für Pro Tools ändern möchten, brauchen Sie nur die Energie-spareinstellung „Hohe Leistung“ einzustellen.
Installieren von Pro Tools Express 33
Empfohlene Optimierungs-maßnahmenAndere auf dem Computer installierte Software- und Hardwaretreiber können sich auf die Leistung von Pro Tools auswirken. Beachten Sie die folgenden Empfehlungen, um eine optimale Leistung mit Pro Tools zu erzielen:
• Nicht erforderliche andere Programme sollten nicht gleichzeitig mit Pro Tools ausgeführt werden.
• Deaktivieren Sie im Hintergrund ausgeführte Dienstprogramme (wie Windows Messenger, Kalender und Datenträger-Wartungsprogramme).
• Schalten Sie während der Arbeit mit Pro Tools alle nicht unbedingt erforderlichen USB-Geräte aus.
Optionale Optimierungs-maßnahmenDie folgenden Maßnahmen zur Systemoptimierung steigern die Leistung von Pro Tools auf manchen Systemen. Sie sollten diese Optimierungseinstellungen nur vornehmen, wenn dies unbedingt nötig ist, da sie sich auf die Funktion anderer Programme Ihres Systems auswirken können.
Einstellen der Prozessorzeitplanung
So stellen Sie die Prozessorzeitplanung ein:
1 Klicken Sie mit der rechten Maustaste auf das Symbol Arbeitsplatz und wählen Sie Eigenschaften.
2 Klicken Sie auf Erweiterte Systemeinstellungen.
3 Klicken Sie unter „Leistung“ auf die Schaltfläche Einstellungen.
4 Klicken Sie im Dialogfeld „Leistungsoptionen“ auf die Registerkarte Erweitert.
5 Wählen Sie im Abschnitt „Prozessor-zeitplanung“ die Option Hintergrunddienste.
6 Klicken Sie auf OK, um das Dialogfeld „Leistungsoptionen“ zu schließen.
7 Klicken Sie auf OK, um das Dialogfeld „Systemeigenschaften“ zu schließen.
Deaktivieren von Elementen für den Systemstart
Je weniger Elemente von Ihrem Computer benutzt werden, desto mehr Ressourcen sind für Pro Tools verfügbar. Manche Systemstart-elemente verbrauchen unnötigerweise Rechnerressourcen und sollten daher deaktiviert werden.
Gehen Sie beim Deaktivieren der folgenden Systemstartelemente sorgfältig vor:
• Seriennummer der tragbaren Medien (für einige Anwendungen mit einem Kopierschutzschlüssel benötigt)
• Plug & Play-Dienst• Ereignisprotokoll• Kryptografiedienste
So deaktivieren Sie Elemente für den Systemstart:
1 Wählen Sie im Startmenü die Option „Ausführen“, geben Sie „msconfig“ ein und drücken Sie die Eingabetaste, um das Dienstprogramm zur Systemkonfiguration aufzurufen.
2 Wählen Sie auf der Registerkarte Allgemein die Option Benutzerdefinierter Systemstart.
3 Deaktivieren Sie Systemstartelemente laden und klicken Sie auf OK.
4 Klicken Sie auf Neu starten, um den Computer neu zu starten.
Pro Tools Express-Installationsanleitung34
5 Nach dem Neustart wird eine Meldung zur Systemkonfiguration angezeigt. Starten Sie Pro Tools und überprüfen Sie, ob die Leistung verbessert wurde, bevor Sie die Option „Diese Meldung nicht mehr anzeigen“ aktivieren. Hat sich die Leistung nicht verbessert, führen Sie „msconfig“ erneut aus und setzen Sie die Einstellung „Systemstartauswahl“ Ihres Computers wieder auf Normaler Systemstart -
Alle Gerätetreiber und Dienste laden. Sie können die Systemstartelemente und weniger wichtige Vorgänge auch manuell deaktivieren.
Instalación de Pro Tools Express 35
Instalación de Pro Tools Express
Te damos la bienvenida a Pro Tools® Express de Avid. En esta guía se explican los procesos de instalación y autorización del software Pro Tools Express en sistemas Mac y Windows. Para obtener información detallada sobre cómo configurar el sistema y las posibilidades y funciones del software Pro Tools Express, consulta la Guía de referencia de Pro Tools (disponible en el menú Ayuda de Pro Tools).
Funciones del software Pro Tools ExpressEl software Pro Tools Express proporciona las siguientes capacidades (según la configuración de hardware):
• Hasta 16 pistas procesables con voz mono o estéreo por sesión
• Hasta 8 pistas de entrada auxiliares
• Hasta 8 pistas master fader
• Hasta 16 pistas MIDI
• Hasta 8 pistas de instrumento
• Una pista de vídeo QuickTime
• Resolución de audio de 16, 24 o 32 bits con coma flotante, a frecuencias de muestreo de hasta 96 kHz
• Compensación automática del retardo (hasta 16 383 muestras a 48 kHz)
• Automatización de mezcla y edición de acceso aleatorio, no destructiva
• Procesamiento de audio con hasta 5 plug-ins en tiempo real por pista, según la capacidad del ordenador
• Hasta 5 insertos de hardware por pista
• Hasta 5 envíos por pista
• Hasta 16 buses de mezcla internos (mono o estéreo) para encaminamientos y mezclas
Plug-ins incluidos con Pro Tools ExpressPro Tools Express admite los formatos de plug-in AAX, RTAS y AudioSuite. Los siguientes plug-ins vienen instalados con Pro Tools Express:
• AIR Chorus• AIR Distortion• AIR Dynamic Delay• AIR Flanger• AIR Frequency Shifter• AIR Lo-Fi• AIR Multi-Delay• AIR Phaser• AIR Vintage Filter• BF76 Compressor (emulador del 1176)• Click• D-Verb • DC Offset Removal• Dither• Duplicate• Eleven Free • Ecualizadores EQ III de 1, 4 y 7 bandas• Dyn III Compressor/Limiter, De-Esser y
Expander/Gate
Para obtener más información sobre las capacidades de E/S de tu interface de audio, consulta su propia documentación.
Guía de instalación de Pro Tools Express36
• Invert• Normalize• Reverse• ReWire• Time Compression Expansion• TL InTune (afinador digital)
El instalador separado Avid Virtual Instruments Express proporciona los siguientes plug-ins de instrumentos virtuales y contenidos vinculados para usar con Pro Tools Express:
• Boom (secuenciador y caja de ritmos)• Structure Free (reproductor de muestras) • Xpand!2 (estación de trabajo
multitímbrica)
Requisitos y compatibilidad del sistemaPro Tools Express solo se puede utilizar con un interface de audio homologado (como Mbox Mini) y en un equipo Windows o Mac también debidamente homologado.
Se requiere una conexión a Internet para descargar el instalador de Pro Tools Express.
Avid solo puede asegurar la compatibilidad y proporcionar asistencia relativa al hardware y al software probado y homologado por Avid.
Para ver listas completas de requisitos de sistema, ordenadores admitidos, sistemas operativos, discos duros y dispositivos de otros fabricantes, visita:
www.avid.com/compatibility
Llave iLok autorizadaPro Tools Express incluye una llave iLok vacía y una tarjeta de activación para autorizar el software Pro Tools Express. Para más información, consulta “Autorización de Pro Tools Express” en la página 38.
Requisitos de MIDILos interfaces MIDI USB, FireWire y PCI funcionan correctamente con sistemas Pro Tools en equipos Mac o Windows.
Requisitos de disco duroPara grabar y reproducir audio de forma óptima, los sistemas Pro Tools requieren uno o varios discos duros homologados.
Inicializa tus discos duros con la Utilidad de disco incluida en los sistemas Apple (Mac) o la herramienta Administración de discos de Windows.
Para obtener más información sobre estos plug-ins (y más), consulta la Guía de plug-ins de audio, disponible en el menú Ayuda de Pro Tools Express.
Para poder ejecutar Pro Tools Express, hay que insertar una llave iLok autorizada en un puerto USB disponible en el ordenador.
Para ver una lista de interfaces y controladores MIDI admitidos, visita www.avid.com/es.
Para más información, consulta avid.custkb.com/avid/app/selfservice/search.jsp?DocId=380567
Instalación de Pro Tools Express 37
Procura no grabar en la unidad del sistema
Es posible grabar en la unidad del sistema, aunque no se recomienda. Grabar y reproducir en la unidad del sistema puede disminuir el número de pistas y de plug-ins que pueden utilizarse.
Instalación de drivers de hardwareAntes de instalar el software Pro Tools Express, cerciórate de tener instalados el sistema de hardware de audio y los drivers más recientes para el mismo. Consulta la documentación del hardware para obtener más información. Visita avid.com/drivers para descargar e instalar los drivers más recientes de los interfaces de audio de Avid.
Instalación del software Pro Tools ExpressCuando hayas instalado los drivers del interface de audio, podrás instalar Pro Tools Express.
Para instalar Pro Tools Express:
1 Inicia sesión como administrador en la cuenta donde desees instalar Pro Tools.
2 Descarga a través de Internet el instalador de Pro Tools Express.
3 Lleva a cabo uno de estos procedimientos:
• En un equipo Mac, busca y haz doble clic en Install Pro Tools Express.mpkg.
• En un equipo Windows, busca y haz doble clic en Setup.exe. A continuación, en el pequeño explorador, selecciona Install Pro Tools
Express para comenzar la instalación.
4 Sigue las instrucciones en pantalla para continuar con la instalación.
5 Cuando se te solicite, haz clic en Instalar.
6 Si se te solicita, introduce tu contraseña de administrador y haz clic en Aceptar para autorizar la instalación.
7 Sigue las instrucciones en pantalla.
8 Una vez completada la instalación, haz clic en Reiniciar (Mac) o Finalizar (Windows).
Para un rendimiento óptimo, es posible que desees designar la unidad del sistema como volumen de solo reproducción o solo transferencia en DigiBase. Para obtener más información, consulta la Guía de referencia de Pro Tools.
Pro Tools no reconocerá tu interface de audio si no instalas los drivers. Si estás actualizando Pro Tools, asegúrate de instalar los drivers más recientes para tu hardware.
Antes de instalarlo, consulta la información Léeme que se incluye.
En Windows, si se abre el cuadro de diálogo Control de cuentas de usuario, haz clic en Permitir. Aparecerán varios mensajes durante la instalación que se pueden omitir, como varios cuadros de diálogo sobre hardware nuevo encontrado y sobre problemas durante la instalación del hardware. Si aparece un cuadro de diálogo que indica que el driver no supera la prueba del logotipo de Windows, continúa de todos modos.
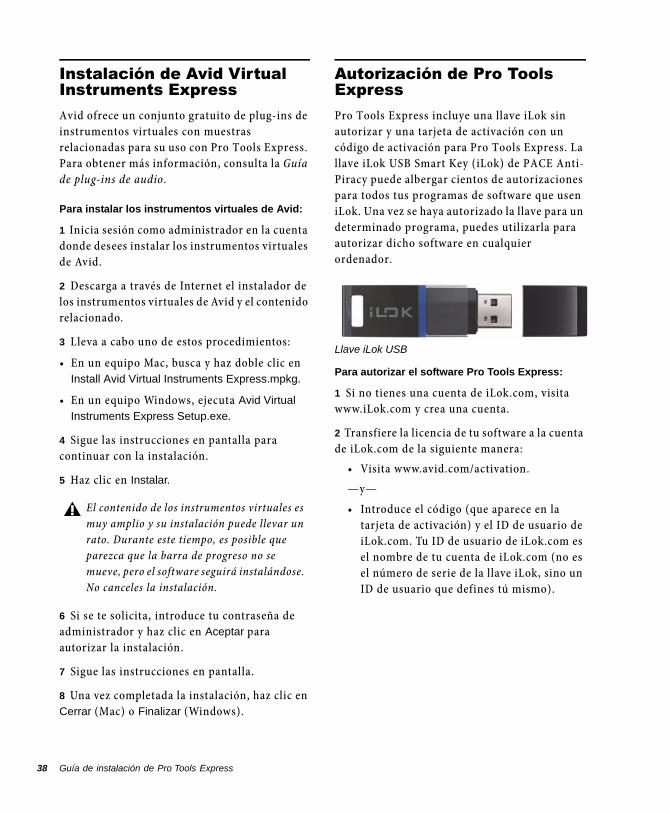
Guía de instalación de Pro Tools Express38
Instalación de Avid Virtual Instruments ExpressAvid ofrece un conjunto gratuito de plug-ins de instrumentos virtuales con muestras relacionadas para su uso con Pro Tools Express. Para obtener más información, consulta la Guía de plug-ins de audio.
Para instalar los instrumentos virtuales de Avid:
1 Inicia sesión como administrador en la cuenta donde desees instalar los instrumentos virtuales de Avid.
2 Descarga a través de Internet el instalador de los instrumentos virtuales de Avid y el contenido relacionado.
3 Lleva a cabo uno de estos procedimientos:
• En un equipo Mac, busca y haz doble clic en Install Avid Virtual Instruments Express.mpkg.
• En un equipo Windows, ejecuta Avid Virtual
Instruments Express Setup.exe.
4 Sigue las instrucciones en pantalla para continuar con la instalación.
5 Haz clic en Instalar.
6 Si se te solicita, introduce tu contraseña de administrador y haz clic en Aceptar para autorizar la instalación.
7 Sigue las instrucciones en pantalla.
8 Una vez completada la instalación, haz clic en Cerrar (Mac) o Finalizar (Windows).
Autorización de Pro Tools ExpressPro Tools Express incluye una llave iLok sin autorizar y una tarjeta de activación con un código de activación para Pro Tools Express. La llave iLok USB Smart Key (iLok) de PACE Anti-Piracy puede albergar cientos de autorizaciones para todos tus programas de software que usen iLok. Una vez se haya autorizado la llave para un determinado programa, puedes utilizarla para autorizar dicho software en cualquier ordenador.
Para autorizar el software Pro Tools Express:
1 Si no tienes una cuenta de iLok.com, visita www.iLok.com y crea una cuenta.
2 Transfiere la licencia de tu software a la cuenta de iLok.com de la siguiente manera:
• Visita www.avid.com/activation.—y—• Introduce el código (que aparece en la
tarjeta de activación) y el ID de usuario de iLok.com. Tu ID de usuario de iLok.com es el nombre de tu cuenta de iLok.com (no es el número de serie de la llave iLok, sino un ID de usuario que defines tú mismo).
El contenido de los instrumentos virtuales es muy amplio y su instalación puede llevar un rato. Durante este tiempo, es posible que parezca que la barra de progreso no se mueve, pero el software seguirá instalándose. No canceles la instalación.
Llave iLok USB

Instalación de Pro Tools Express 39
3 Transfiere las licencias de tu cuenta de iLok.com a tu USB Smart Key siguiendo estos pasos:
• Inserta la llave iLok en un puerto USB disponible del ordenador.
• Ve a www.iLok.com e inicia sesión.• Sigue las instrucciones en pantalla para
transferir las licencias a tu llave iLok.
4 Instala e inicia Pro Tools Express (ver a continuación).
5 Si tienes otro software no autorizado instalado, te pedirán que lo autorices. Sigue las instrucciones en pantalla para completar el proceso de autorización.
Inicio de Pro Tools ExpressPara usar el software Pro Tools Express, se debe tener una llave iLok con una licencia que autorice la versión de Pro Tools instalada (para obtener más información, consulta “Autorización de Pro Tools Express” en la página 38).
Para iniciar el software Pro Tools Express:
1 Comprueba que el interface de audio esté conectado al ordenador y encendido.
2 Inserta una llave iLok autorizada en cualquier puerto USB del ordenador que esté disponible (consulta “Autorización de Pro Tools Express” en la página 38).
3 Lleva a cabo uno de estos procedimientos:• En Mac, haz clic en el acceso directo a
Pro Tools Express en el Dock (o haz doble clic en el icono de la aplicación en Macintosh HD/Aplicaciones/Avid/Pro Tools).
—o bien—• En Windows, haz doble clic en el acceso
directo a Pro Tools Express en el escritorio (o accede a la aplicación en Archivos de programa\Avid\Pro Tools).
4 Utiliza el cuadro de diálogo Inicio rápido para:• Crear una sesión a partir de una plantilla.• Crear una sesión en blanco.• Abrir cualquier otra sesión que se
encuentre en el sistema.
Configuración del sistema Pro Tools ExpressCuando hayas instalado, autorizado e iniciado el software Pro Tools Express, podrás configurar el sistema Pro Tools Express según las necesidades específicas de tu estudio. Para obtener más información sobre la configuración del software Pro Tools, consulta la guía de referencia de Pro Tools (disponible en el menú Ayuda de Pro Tools).
Para obtener más información, visita la página web de iLok (www.iLok.com).
Durante el inicio o la utilización de Pro Tools, no retires la llave iLok.
Para obtener más información sobre el cuadro de diálogo Quick Start y las plantillas de sesión, consulta la guía de referencia de Pro Tools.
Guía de instalación de Pro Tools Express40
Desinstalación de Pro Tools ExpressSi vas a actualizarte de Pro Tools Express a la versión completa de Pro Tools, asegúrate de desinstalar Pro Tools Express primero. Para desinstalar el programa Pro Tools Express, usa la aplicación Desinstalador en Mac o la opción apropiada del Panel de control en Windows.
Desinstalación de Pro Tools Express en Mac
Para desinstalar Pro Tools Express de un sistema Mac:
1 Inicia sesión como administrador en la cuenta en la que esté instalado Pro Tools Express.
2 Ve a Aplicaciones/Avid/Pro Tools/Pro Tools Utilities y haz doble clic en Uninstall Pro Tools
Express.
3 Haz clic en Continuar para proceder a la desinstalación.
4 Selecciona el tipo de desinstalación que deseas efectuar:
Desinstalación segura Esta opción omite la desinstalación de plug-ins y archivos del sistema que se necesitan para la compatibilidad con otros productos de Avid. Utiliza la opción Desinstalación segura si usas una aplicación Avid o vas a actualizar a una versión de soporte de cliente.
Desinstalación completa Esta opción elimina todos los archivos de Pro Tools, incluidos los archivos del sistema, plug-ins de Avid y nombres de patches MIDI. Utiliza la opción Desinstalación completa si estás preparando el sistema para una actualización o si quieres solucionar problemas a partir de un sistema limpio.
5 Haz clic en Desinstalar.
6 Introduce la contraseña de administrador y haz clic en Aceptar.
7 Haz clic en Finalizar para cerrar la ventana del instalador.
Desinstalación de Pro Tools Express en Windows
Para desinstalar Pro Tools Express en un sistema Windows:
1 Elige Inicio > Panel de control.
2 Haz clic enProgramas y características.
3 Haz clic en Desinstalar un programa.
4 Selecciona Avid Pro Tools Express de la lista de aplicaciones instaladas.
5 Haz clic en Desinstalar.
6 Sigue las instrucciones en pantalla para eliminar el programa.
Optimización de un sistema Mac para Pro Tools ExpressPara garantizar el óptimo funcionamiento del equipo con Pro Tools Express, configura primero el ordenador.
Antes de configurar el ordenador, inicia sesión como administrador en la cuenta donde desees instalar Pro Tools. Para obtener información sobre los privilegios de administrador en Mac OS X, consulta la documentación de Apple OS X.
Advierte que deberás desinstalar los plug-ins (como Avid Effects), así como todos los drivers de dispositivos MIDI y de audio, por separado.
Instalación de Pro Tools Express 41
Desactivación de la actualización de software
Para desactivar la función de actualización de software:
1 Elige Preferencias del Sistema en el menú Apple.
2 Haz clic en Actualización de Software.
3 Haz clic en la pestaña Búsquedas programadas.
4 Anula la selección de Buscar actualizaciones.
5 Al finalizar, selecciona Preferencias del
Sistema > Salir de Preferencias del sistema.
Desactivación del economizador
Para desactivar la función de economizador:
1 Elige Preferencias del Sistema en el menú Apple.
2 Haz clic en Economizador.
3 Configura la opción Reposo del ordenador en Nunca.
4 Configura la opción Reposo del ordenador en Nunca.
5 Anula la selección de la opción Poner el disco
en reposo cuando sea posible.
6 Al finalizar, selecciona Preferencias del
Sistema > Salir de Preferencias del sistema.
Desactivación o reasignación de los atajos de teclado de Mac que se utilizan en Pro Tools
Para poder utilizar todos los métodos abreviados de teclado de Pro Tools, debes desactivar o reasignar en las preferencias del sistema de Apple los métodos abreviados de teclado de Mac OS X que entren en conflicto con el software.
Desactivación o reasignación de los métodos abreviados de teclado que se utilizan en Pro Tools (Mac OS X Lion):
1 En el menú Apple, selecciona Preferencias del
Sistema.
2 Haz clic en Teclado y ratón.
3 Haz clic en la pestaña Funciones rápidas de
teclado.
4 Puedes deshabilitar o reasignar los atajos de teclado que entren en conflicto con los de Pro Tools. La siguiente lista incorpora varios atajos de teclados comunes que, según cual sea el modelo de tu Mac, también pueden ser utilizados por Pro Tools:
• En “Launchpad y Dock”• “Ocultar y mostrar el Dock
automáticamente”
• En “Mission Control”• “Mission Control”• “Ventanas de aplicación”• “Mostrar escritorio”• “Mostrar Dashboard”• “Mission Control > Mover a la izquierda un
espacio”
No utilices la función de actualización automática del software de Mac OS X, ya que podría actualizar el sistema con una versión de Mac OS que aún no se haya homologado para Pro Tools. Para obtener información sobre versiones homologadas de Mac OS, consulta la información de compatibilidad actualizada de nuestra página web (www.avid.com/es).
Para ver una lista completa de los métodos abreviados de teclado de Pro Tools, consulta la Guía de métodos abreviados de teclado (Ayuda > Atajos de teclado).
Guía de instalación de Pro Tools Express42
• “Mission Control > Mover a la derecha un espacio”
• “Mission Control > Pasar al Escritorio n”
• En “Teclado y entrada de texto”• “Mover el enfoque al cajón de la ventana”
• En “Servicios”• “Enviar archivo a dispositivo Bluetooth”• “Buscar con Google”• “Spotlight”• “Buscar páginas man en Terminal”
• En “Spotlight”• “Mostrar el campo de búsqueda de
Spotlight”• “Mostrar la ventana de Spotlight”
• En “Acceso universal”• “Zoom”• “Contraste”
• En “Atajos de aplicaciones”• “Mostrar el menú Ayuda”
Desactivación o reasignación de los métodos abreviados de teclado de Mac que se utilizan en Pro Tools (Mac OS X Snow Leopard):
1 En el menú Apple, selecciona Preferencias del
Sistema.
2 Haz clic en Teclado y ratón.
3 Haz clic en la pestaña Funciones rápidas de
teclado.
4 Puedes deshabilitar o reasignar los atajos de teclado que entren en conflicto con los de Pro Tools. La lista siguiente incluye varios atajos de teclado comunes de Mac que también usa Pro Tools:
• En “Dashboard y Dock”• “Ocultar y mostrar el Dock
automáticamente”• “Dashboard”
• En “Exposé y Spaces”• “Todas las ventanas”• “Ventanas de aplicación”• “Escritorio”
• En “Teclado y entrada de texto”• “Mover el enfoque al cajón de la ventana”
• En “Spotlight”• “Mostrar el campo de búsqueda de
Spotlight” • “Mostrar la ventana de Spotlight”
• En “Atajos de aplicaciones”• “Mostrar el menú Ayuda”
Desactivación de los índices de Spotlight
La función Spotlight de Mac OS X indexa automáticamente los archivos y carpetas de los discos duros locales en segundo plano. En la mayoría de los casos, esto no supone un problema para el uso normal de Pro Tools. Sin embargo, si Spotlight comienza a indexar el contenido de las unidades de disco mientras se está grabando en una sesión de Pro Tools con muchas pistas durante un tiempo prolongado, puede afectar negativamente al rendimiento del sistema Pro Tools. Si piensas utilizar Pro Tools para proyectos de grabación de gran tamaño, es recomendable desactivar antes la indexación de las unidades locales de Spotlight.
Para desactivar la función de indexación de Spotlight:
1 Elige Preferencias del Sistema en el menú Apple y haz clic en Spotlight .
2 En la ventana Spotlight, haz clic en la pestaña Privacidad.
Al desactivar la indexación de Spotlight también se desactiva la función de búsqueda de Mac OS X.
Instalación de Pro Tools Express 43
3 Para evitar la indexación de una unidad, arrastra su icono del escritorio a la lista.
Activación del registro para las unidades de audio
Para conseguir un mejor rendimiento con unidades de audio, activa la función de registro.
Para activar la función de registro:
1 Inicia la aplicación Utilidad de disco, ubicada en Aplicaciones/Utilidades.
2 En la columna izquierda de la ventana Utilidad de disco, selecciona el volumen.
3 En la barra de herramientas, selecciona Activar
registro.
Optimización de un sistema Windows para Pro Tools ExpressPara asegurar un rendimiento óptimo con Pro Tools Express, configura el equipo antes de utilizar el hardware y el software Pro Tools.
Antes de configurar el ordenador, inicia sesión como administrador en la cuenta donde desees instalar Pro Tools. Para obtener más información al respecto, consulta la documentación de Windows.
Optimizaciones obligatorias
Para asegurar un rendimiento óptimo con Pro Tools, configura los parámetros siguientes antes de utilizar el hardware y el software Pro Tools.
Desactivación del Control de cuentas de usuario
Para desactivar el Control de cuentas de usuario:
1 Elige Inicio > Panel de control.
2 Haz clic en Cuentas de usuario y protección
infantil.
3 Haz clic en Cuentas de usuario.
4 Haz clic en Cambiar configuración de Control de
cuentas de usuario.
5 Coloca el control deslizante en No notificar
nunca.
6 Haz clic en Aceptar.
Configuración de inactividad del sistema y administración de energía
Cuando utilices Pro Tools, establece la opción de energía de modo de espera de Windows en Siempre activo. De este modo, se evita que se detengan los pases de grabación y reproducción prolongados porque el sistema entra en el modo de ahorro de nergía.
Para obtener la información más actualizada acerca de la configuración del sistema de Windows y para obtener información acerca de ordenadores específicos, visita la página web de Avid (www.avid.com/es).
Cuando hayas terminado de cambiar la configuración del sistema Windows, reinicia el ordenador.

Guía de instalación de Pro Tools Express44
Para configurar Administración de energía de Windows:
1 Elige Inicio > Panel de control.
2 Haz clic en Sistema y seguridad.
3 Haz clic en Opciones de energía.
4 Haz clic en la flecha para Mostrar planes
adicionales.
5 Selecciona Alto rendimiento.
6 Haz clic en Cambiar la configuración del plan.
7 Haz clic en Cambiar la configuración avanzada
de energía.
8 En el cuadro de diálogo Opciones de energía, abre Disco duro > Apagar disco duro tras.
9 Haz clic en la opción Configuración.
10 Selecciona el valor en el campo Configuración (minutos) y pulsa la tecla Retroceso en el teclado o lleva el valor a Nunca.
11 Haz clic en Aceptar. La configuración del disco duro cambia a Nunca y se cierra el cuadro de diálogo Opciones de energía.
12 En la ventana Editar la configuración del plan, haz clic en Guardar cambios y cierra la ventana.
Optimizaciones recomendadasOtros drivers de hardware y software que estén instalados en el ordenador también pueden afectar a Pro Tools. Para obtener un rendimiento óptimo, se recomienda (aunque no es imprescindible) que hagas lo siguiente:
• Evita la ejecución simultánea de otros programas innecesarios al mismo tiempo que Pro Tools.
• Cierra las utilidades de software que se ejecuten en segundo plano, por ejemplo, Windows Messenger, calendarios y programas de mantenimiento de discos.
• Mientras utilizas Pro Tools, apaga todos los dispositivos USB que no sean imprescindibles.
Optimizaciones opcionalesLas siguientes optimizaciones del sistema pueden contribuir a un mejor funcionamiento de Pro Tools en algunos sistemas. Se recomienda usar estas optimizaciones solamente cuando sea necesario, ya que pueden repercutir negativamente en otros programas del sistema o desactivar su funcionamiento.
Ajuste de la programación del procesador
Para ajustar el rendimiento de la programación del procesador:
1 Haz clic con el botón derecho del ratón en Mi
PC y selecciona Propiedades.
2 Haz clic en Configuración avanzada del sistema.
3 En el área Rendimiento, haz clic en el botón Configuración.
4 En la ventana Opciones de rendimiento, haz clic en la pestaña Opciones avanzadas.
Pro Tools cambia automáticamente a la opción de administración de energía “Alto rendimiento” al iniciarse. Windows regresa a la opción de administración de energía seleccionada anteriormente (si la hubiere) al salir de Pro Tools. Por consiguiente, al optimizar la opción de administración de energía para Pro Tools, siempre se debería optimizar únicamente la configuración de Alto rendimiento.
Instalación de Pro Tools Express 45
5 En Programación del procesador, selecciona Servicios en segundo plano.
6 Haz clic en Aceptar para cerrar la ventana Opciones de rendimiento.
7 Haz clic en Aceptar para cerrar la ventana Propiedades del sistema.
Desactivación de los elementos de inicio del sistema
Cuantos menos elementos utilice el ordenador, más recursos habrá disponibles para Pro Tools. Algunas aplicaciones que se inician automáticamente al arrancar el sistema pueden estar consumiendo recursos de la CPU innecesariamente y pueden desactivarse.
Ten cuidado si desactivas alguno de los elementos de inicio siguientes:
• Número de serie de medio portátil (necesario para algunas aplicaciones que utilizan una clave de protección anticopia)
• Servicio Plug and Play• Registro de eventos• Servicios de cifrado
Para desactivar los elementos de inicio del sistema:
1 En el menú Inicio, escribe “msconfig” en Ejecutar y haz clic en Aceptar para abrir la Utilidad de configuración del sistema.
2 En la pestaña General, elige Inicio selectivo.
3 Anula la selección de Cargar elementos de
inicio y haz clic en Aceptar.
4 Haz clic en Reiniciar para volver a iniciar el ordenador.
5 Tras reiniciar, el ordenador mostrará un mensaje de configuración del sistema. Comprueba si ha mejorado el rendimiento de Pro Tools antes de anular la selección de la casilla “No volver a mostrar este mensaje”. Si no se observa ninguna mejora en el rendimiento, ejecuta “msconfig” y vuelve a establecer Selección de inicio en Inicio normal: cargar todos
los controladores de dispositivo y servicios. También puedes desactivar los elementos de inicio y los procesos que no sean imprescindibles de uno en uno.

Guía de instalación de Pro Tools Express46
ProTools Expressのインストール 47
ProTools Expressのインストール
Avidの Pro Tools® Expressへようこそ。このガイドでは、Pro Tools ExpressソフトウェアのMacシステムとWindowsシステムへのインストールとオーソライズの方法を説明します。システムの設定方法と、Pro Tools Expressシステムの性能および機能について詳しくは、『Pro Toolsリファレンス・ガイド』(Pro Toolsの[ヘルプ]メニュー)をご参照ください。
Pro Tools Expressソフトウェアの性能Pro Tools Expressソフトウェアは、ご使用のハードウェア構成によって以下の性能を提供します。
• 1セッションあたり最大 16ボイス・モノ・オーディオ・トラックまたは 16ボイス・ステレオ・オーディオ・トラック
• 最大 8のAUXインプット・トラック• 最大 8のマスター・フェーダー・トラック• 最大 16のMIDIトラック• 最大 8のインストゥルメント・トラック• 1つのQuickTimeビデオ・トラック• 16ビット、24ビット、または 32ビットの浮動小数点オーディオ分解能。サンプルレートは最大 96kHz。
• 自動遅延補正(48kHzで最大 16,383サンプル)• ノンディストラクティブ編集、ランダム・アクセス編集、ミックス・オートメーション
• コンピューターの性能に応じて、1 トラックあたり最大 5つのリアルタイム・プラグインを使ったオーディオ・プロセッシング
• 1 トラックあたり最大 5 つのハードウェア・インサート
• 1トラックあたり最大 5つのセンド
• ルーティングとミキシング用の最大 16 の内部ミックス・バス(モノまたはステレオ)
Pro Tools Expressに付属しているプラグイン
Pro Tools ExpressはAAX、RTAS、AudioSuiteプラグイン・フォーマットに対応しています。以下のプラグインは Pro Tools Expressと共にインストールされます。
• AIR Chorus• AIR Distortion• AIR Dynamic Delay• AIR Flanger• AIR Frequency Shifter• AIR Lo-Fi• AIR Multi-Delay• AIR Phaser• AIR Vintage Filter• BF76 Compressor 1176 emulator• Click• D-Verb • DC Offset Removal• Dither• Duplicate• Eleven Free • EQ III 1-Band、4-Band、7-Band EQ• Dyn III Compressor/Limiter、De-Esser、
Expander/Gate• Invert• Normalize
ご使用のオーディオ・インターフェースの I/O性能については、オーディオ・インターフェースに付属の説明書をお読みください。
Pro Tools Expressインストレーション・ガイド48
• Reverse• ReWire• Time Compression Expansion• TL InTune digital tuner
別個のAVID Virtual Instruments Expressインストーラーは、Pro Tools Expressと共に使用するための、以下のバーチャル・インストゥルメント・プラグインとコンテンツを提供します。
• Boomドラム・マシンとシーケンサー• Structure Freeサンプル・プレーヤー • Xpand!2 マルチティンバー・ワークステーション
システム要件と互換性Pro Tools Expressは、要件を満たしたWindowsコンピューターまたはMacコンピューターと、要件を満たしたオーディオ・インターフェース(Mbox Miniなど)でのみ使用できます。
Pro Tools Expressインストーラー・アプリケーションをダウンロードするためにはインターネット接続が必要です。
Avidでは、動作が確認されたハードウェアとソフトウェアに対してのみ、互換性の保証とサポートの提供を行っています。
完全なシステム要件、および、要件を満たすコンピューター、オペレーティング・システム、ハードディスク、サードパーティ製デバイスのリストについては、こちらをご覧ください。
www.avid.com/compatibility
オーソライズ済み iLokPro Tools Express には、空の iLok と Pro ToolsExpressソフトウェアをオーソライズするためのアクティベーション・カードが付属しています。詳しくは、50 ページの「Pro Tools Expressをオーソライズする」をご参照ください。
MIDIの必要条件USB、FireWire、PCIのMIDIインターフェースは、M a c コンピューターまたはW i n d o w s コンピューター上の Pro Toolsシステムと共に動作します。
ハードディスクの必要条件
オーディオのレコーディングとプレイバックを最適に行うには、すべての Pro Toolsシステムは要件を満たした 1つまたは複数のハード・ドライブを必要とします。
[ディスクユーティリティ](Mac)または[ディスクの管理](Windows)を使ってハード・ドライブを初期化してください。
これらのプラグインについては、『オーディオ・プラグイン・ガイド』(Pro Tools Expressの[ヘルプ]メニュー)をご参照ください。
Pro Tools Expressを起動するためには、オーソライズ済み iLokをコンピューターのUSBポートに差し込んでおかなければなりません。
対応MIDI インターフェースとコントローラーのリストついては、www.avid.comをご覧ください。
詳しくは、avid.custkb.com/avid/app/selfservice/search.jsp?DocId=380567をご覧ください。
ProTools Expressのインストール 49
システム・ドライブへはレコーディングしない
システム・ドライブへレコーディングすることはできますが、これは推奨しません。システム・ドライブ上でレコーディングやプレイバックを行うと、使用できるトラックやプラグインの数が少なくなる場合があります。
ハードウェアのドライバーをインストールするPro Tools Expressをインストールする前に、オーディオ・ハードウェアがインストールされ、ご使用のハードウェア用の最新のドライバーがインストールされていることを確かめてください。詳しくは、ご使用のハードウェアに付属の説明書をご参照ください。A v i d のオーディオ・インターフ ェ ー ス の 最 新 の ド ラ イ バ ー は、avid.com/driversからダウンロードしてインストールしてください。
Pro Tools Expressソフトウェアをインストールするオーディオ・インターフェースのドライバーをインストールしたら、Pro Tools Expressをインストールできます。
Pro Tools Expressをインストールするには:
1 ProToolsをインストールするアカウントに、管理者としてログインしていることを確かめます。
2 オンラインで Pro Tools Expressインストーラーをダウンロードします。
3 以下のいずれかを行います。
• Macでは、[Install Pro Tools Express.mpkg]をダブルクリックします。
• Windowsでは、[Setup.exe]をダブルクリックします。次に、表示されたミニブラウザーで、[Install Pro Tools Express]を選択してインストレーションを開始します。
4 画面上の指示に従ってインストレーションを続けます。
5 メッセージが表示されたら、[インストール]をクリックします。
6 メッセージが表示されたら、管理者パスワードを入力し、[OK]をクリックしてインストールを承認します。
7 画面の指示に従います。
8 インストレーションが完了したら、[再起動](Mac)または[完了](Windows)をクリックします。
最大の処理能力を得るには、システム・ドライブを再生または転送用のみのボリュームとしてDigiBaseで指定してください。詳しくは、『Pro Toolsリファレンス・ガイド』をご参照ください。
ドライバーをインストールしなければ、ProToolsはオーディオ・インターフェースを認識しません。Pro Toolsをアップグレードする場合は、必ずご使用のハードウェア用の最新のドライバーをインストールしてください。
Pro Tools Expressをインストールする前に付属の『ReadMe(お読みください)』をご参照ください。
Windowsで[ユーザー アカウント制御]ダイアログが表示された場合は、[許可]をクリックします。インストール中にWindowsに表示される[新しいハードウェアの検出]ダイアログや「ハードウェアのインストール中に問題が発生しました」などのメッセージは無視してかまいません。また、「ドライバーがWindows Logoテストをパスしない」といったようなメッセージが表示されても、[続行]をクリックしてください。
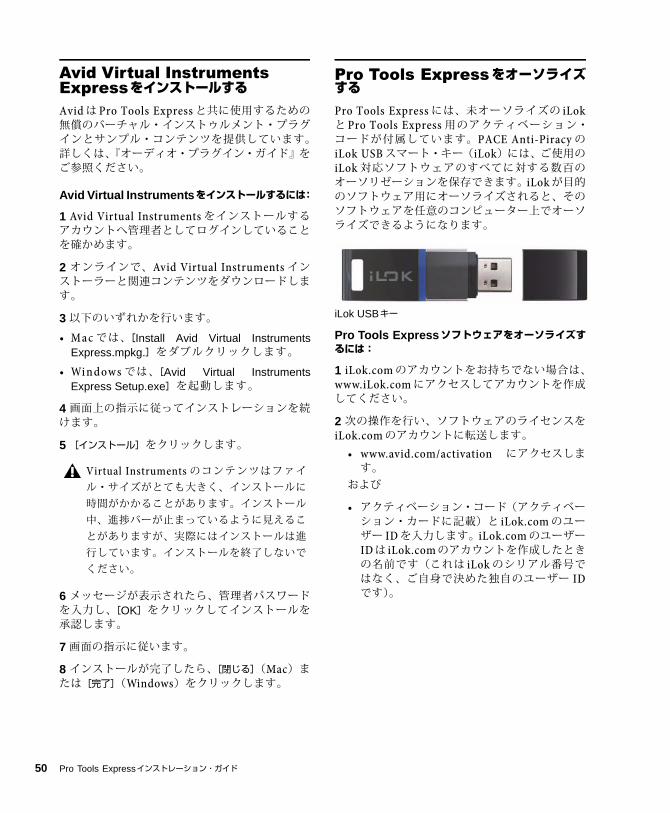
Pro Tools Expressインストレーション・ガイド50
Avid Virtual Instruments ExpressをインストールするAvidは Pro Tools Expressと共に使用するための無償のバーチャル・インストゥルメント・プラグインとサンプル・コンテンツを提供しています。詳しくは、『オーディオ・プラグイン・ガイド』をご参照ください。
Avid Virtual Instrumentsをインストールするには:
1 Avid Virtual Instrumentsをインストールするアカウントへ管理者としてログインしていることを確かめます。
2 オンラインで、Avid Virtual Instrumentsインストーラーと関連コンテンツをダウンロードします。
3 以下のいずれかを行います。
• Macでは、[Install Avid Virtual InstrumentsExpress.mpkg.]をダブルクリックします。
• Wi nd owsでは、[Avid Virtual InstrumentsExpress Setup.exe]を起動します。
4 画面上の指示に従ってインストレーションを続けます。
5 [インストール]をクリックします。
6 メッセージが表示されたら、管理者パスワードを入力し、[OK]をクリックしてインストールを承認します。
7 画面の指示に従います。
8 インストールが完了したら、[閉じる](Mac)または[完了](Windows)をクリックします。
Pro Tools ExpressをオーソライズするPro Tools Expressには、未オーソライズの iLokと Pro Tools Express用のアクティベーション・コードが付属しています。PACE Anti-PiracyのiLok USBスマート・キー(iLok)には、ご使用のiLok対応ソフトウェアのすべてに対する数百のオーソリゼーションを保存できます。iLokが目的のソフトウェア用にオーソライズされると、そのソフトウェアを任意のコンピューター上でオーソライズできるようになります。
Pro Tools Expressソフトウェアをオーソライズするには:
1 iLok.comのアカウントをお持ちでない場合は、www.iLok.comにアクセスしてアカウントを作成してください。
2 次の操作を行い、ソフトウェアのライセンスをiLok.comのアカウントに転送します。
• www.avid.com/activation にアクセスします。
および
• アクティベーション・コード(アクティベーション・カードに記載)と iLok.comのユーザー IDを入力します。iLok.comのユーザーIDは iLok.comのアカウントを作成したときの名前です(これは iLokのシリアル番号ではなく、ご自身で決めた独自のユーザー IDです)。
Virtual Instruments のコンテンツはファイル・サイズがとても大きく、インストールに時間がかかることがあります。インストール中、進捗バーが止まっているように見えることがありますが、実際にはインストールは進行しています。インストールを終了しないでください。
iLok USBキー
ProTools Expressのインストール 51
3 以下の方法で、iLok.comのアカウントのライセンスを iLok USBスマート・キーに転送します。
• iLok をコンピューターの USB ポートに差し込みます。
• www.iLok.com にアクセスしてログインします。
• 画面の指示に従ってライセンスを iLok に転送します。
4 Pro Tools Expressをインストールして起動します(下記参照)。
5 オーソライズされていないソフトウェアがインストールされている場合は、オーソライズするようメッセージが表示されます。画面の指示に従ってソフトウェアをオーソライズします。
Pro Tools Expressを起動するPro Tools Expressソフトウェアを使用するには、インストールした Pro Toolsのバージョンをオーソライズするライセンスを持つ iLokが必要です(詳しくは、50 ページの「Pro Tools Express をオーソライズする」をご参照ください)。
Pro Tools Expressソフトウェアを起動するには:
1 オーディオ・インターフェースがコンピューターに接続され、電源が入っていることを確かめます。
2 オーソライズされた iLokをコンピューターのUSBポートに差し込みます(50 ページの「Pro ToolsExpressをオーソライズする」参照)。
3 以下のいずれかを行います。
• Macでは、Dockにある[Pro Tools Express]のショートカットをクリックします(またはMacintosh HD/ アプリケーション /Avid/Pro Toolsにあるアプリケーションのアイコンをダブルクリックします)。
または
• Windowsでは、デスクトップにある[Pro ToolsExpress]の シ ョ ー ト カ ッ ト(ま た はProgram Files\Avid\Pro Toolsにあるアプリケーション)をダブルクリックします。
4 [クイック スタート]ダイアログを使って以下のいずれかを行います。
• テンプレートから新規セッションを作成する。
• 空の新規セッションを作成する。• システムにある他のセッションを開く。
Pro Tools Expressシステムを設定するPro Tools Expressソフトウェアをインストール、オーソライズ、起動したら、スタジオのニーズに合わせてPro Toolsシステムを設定できます。Pro Toolsソフトウェアの設定方法について詳しくは、『Pro Toolsリファレンス・ガイド』(Pro Toolsの[ヘルプ]メニュー)をご参照ください。
詳しくは、iLokのウェブサイト(www.iLok.com)をご覧ください。
Pro Toolsの起動中または使用中には iLokを取りはずさないでください。
[クイック スタート]ダイアログとセッション の テ ン プ レ ー ト に つ い て 詳 し く は、『Pro Toolsリファレンス・ガイド』をご参照ください。
Pro Tools Expressインストレーション・ガイド52
Pro Tools ExpressをアンインストールするPro Tools ExpressからPro Toolsのフルバージョンへアップグレードする場合は、フルバージョンのPro Toolsをインストールする前に必ずPro ToolsExpressをアンインストールしてください。Pro ToolsExpressソフトウェアをアンインストールするには、[Uninstaller]アプリケーション(Mac)または[コントロールパネル](Windows)を使用します。
Mac上のPro Tools Expressをアンインストールする
Mac上のPro Tools Expressをアンインストールするには:
1 Pro Tools Expressがインストールされているアカウントに、管理者としてログインしていることを確かめます。
2 アプリケーション /Avid/Pro Tools/Pro ToolsUtilitiesへ移動し、[Uninstall Pro Tools Express]をダブルクリックします。
3 次に、[続行]をクリックして、アンインストールを続けます。
4 アンインストールの種類を選択します。
セーフ・アンインストール Avid製品に対応する特定のプラグインとシステム・ファイルをアンインストールの対象から除外します。Avidアプリケーションを使用している場合や CS(カスタマー・サポート)リリースにアップデートする場合は、[セーフ アンインストール]を行ってください。
クリーン・アンインストール システム・ファイル、Avidプラグイン、MIDIのパッチ名など、すべての Pro Tools ファイルを削除します。アップグレードを行う場合やトラブルシューティングを行う場合は、[クリーン アンインストール]を行ってください。
5 [アンインストール]をクリックします。
6 管理者パスワードを入力し、[OK]をクリックします。
7 [完了]をクリックし、インストーラーのウィンドウを閉じます。
Windows上のPro Tools Expressをアンインストールする
Windows上のPro Tools Expressをアンインストールするには:
1 [スタート]>[コントロール パネル]を選択します。
2 [プログラムと機能] をダブルクリックします。
3 [プログラムのアンインストール]をクリックします。
4 インストールされているアプリケーションのリストから[Avid Pro Tools Express]を選択します。
5 [アンインストール]をクリックします。
6 画面の指示に従って、Pro Toolsを削除します。
Pro Tools Expressに対してMacシステムを最適化するPro Tools Expressの処理能力を最大にするために、まずコンピューターを設定してください。
コンピューターを設定する前に、Pro Toolsをインストールするアカウントに管理者としてログインしていることを確かめてください。 Mac OS Xの管理者権限について詳しくは、Apple OS Xの説明書をお読みください。
プラグイン(Avid Effectsなど)、およびオーディオとMIDIのデバイス・ドライバーは別途アンインストールしなければなりません。
Mac OS の自動の[ソフトウェア・アップデート]機能は使用しないでください。ご使用のシステムが Pro Tools の要件を満たさないMac OSのバージョンへアップグレードされる可能性があるからです。要件を満たすMac OSのバージョンについて詳しくは、弊社の ウ ェ ブ サ イ ト の 最 新 の 互 換 情 報(www.avid.com)をご覧ください。
ProTools Expressのインストール 53
ソフトウェア・アップデート機能をオフにする
ソフトウェア・アップデート機能をオフにするには:
1 [Apple]メニューから[システム環境設定]を選択します。
2 [ソフトウェア・アップデート]をクリックします。
3 [アップデート確認と予約設定]タブをクリックします。
4 [アップデートの確認]の選択を解除します。
5 設定が完了したら、[システム環境設定] > [システム環境設定の終了]を選択します。
省エネルギー機能をオフにする
省エネルギー機能をオフにするには:
1 [Apple]メニューから[システム環境設定]を選択します。
2 [省エネルギー]をクリックします。
3 [コンピュータのスリープ]設定を[しない]にします。
4 [ディスプレイのスリープ]設定を[しない]にします。
5 [可能な場合はハードディスクをスリープさせる]オプションの選択を解除します。
6 設定が完了したら、[システム環境設定] > [システム環境設定の終了]を選択します。
Pro Tools が使用するMac のキーボード・ショートカットを無効にするか再割り当てする
Pro Toolsのキーボード・ショートカットをすべて使用するためには、コンフリクトを起こすMacOS Xのキーボード・ショートカットをAppleの[システム環境設定]で無効にするか再割り当てする必要があります。
Pro Toolsで使用するMacキーボード・ショートカットを無効にするか再割り当てするには(Mac OS XLion):
1 [Apple]メニューから[システム環境設定]を選択します。
2 [キーボード]をクリックします。
3 [キーボードショートカット]タブをクリックします。
4 Pro Toolsキーボード・ショートカットとコンフリクトを起こすMac OSのキーボード・ショートカットは無効にするか再割り当てできます。以下に、Macの型とモデルによってPro Toolsキーボード・ショートカットとコンフリクトを起こす可能性があるMacのキーボード・ショートカットを示します。
•[LaunchpadとDock]の下•[Dockを自動的に隠す機能の入/切]
•[Mission Control]の下•[Mission Control]•[アプリケーションのウィンドウ]•[デスクトップを表示]•[Dashboardを表示]•[Mission Control > 左の操作スペースに移動]•[Mission Control > 右の操作スペースに移動]•[Mission Control > デスクトップnへ切り替え]
•[キーボードと文字入力]の下•[ウインドウの引き出しパネルを操作対象にする]
•[サービス]の下•[Bluetoothデバイスにファイルを送信]•[Googleで検索]•[Spotlight]•[Search Man Pages in Terminal]
Pro Toolsのキーボード・ショートカットの完全なリストについては、『キーボード・ショートカット・ガイド』([ヘルプ] > [キーボードショートカット])をご覧ください。
Pro Tools Expressインストレーション・ガイド54
•[Spotlight]の下•[Spotlight検索フィールドを表示]•[Spotlightウィンドウを表示]
•[ユニバーサルアクセス]の下•[拡大/縮小]•[コントラスト]
•[アプリケーション]の下•[ヘルプメニューを表示]
Pro Toolsで使用するMacキーボード・ショートカットを無効にするか再割り当てするには(Mac OS XSnow Leopard):
1 [Apple]メニューから[システム環境設定]を選択します。
2 [キーボード]をクリックします。
3 [キーボードショートカット]タブをクリックします。
4 Pro Toolsキーボード・ショートカットとコンフリクトを起こすMac OSのキーボード・ショートカットは無効にするか再割り当てできます。以下に、Pro Toolsキーボード・ショートカットとコンフリクトを起こす可能性があるMacキーボード・ショートカットを示します。
•[DashboardとDock]の下•[Dockを自動的に隠す機能の入/切]•[Dashboard]
•[Exposéと Spaces]の下•[すべてのウィンドウ]•[アプリケーションのウィンドウ]•[デスクトップ]
•[キーボードと文字入力]の下•[ウインドウの引き出しパネルを操作対象にする]
•[Spotlight]の下•[Spotlight検索フィールドを表示] •[Spotlightウィンドウを表示]
•[アプリケーション]の下•[ヘルプメニューを表示]
Spotlightの索引付けをオフにする
Mac OS Xの Spotlight機能は、ローカルのハードディスク上のファイルとフォルダーに索引を付けます。これはバックグラウンドで自動的に行われます。ほとんどの場合、これが Pro Toolsの動作に対して問題となることはありません。ただし、トラック数の多い Pro Toolsセッションを長時間レコーディングしているときに Spotlightがドライブの索引付けを始めると、Pro Toolsシステムの処理能力に悪影響を与える可能性があります。Pro Toolsを使って大規模なレコーディングを行うときは、ローカルのすべてのドライブに対するSpotlightの索引付けをオフにしておく方がよいでしょう。
Spotlightの索引付けをオフにするには:
1 Appleメニューから[システム環境設定]を選択し、[Spotlight] をクリックします。
2 [Spotlight]ウィンドウの[プライバシー]タブをクリックします。
3 ドライブの索引付けを防ぐには、ドライブのアイコンをデスクトップからリストへとドラッグします。
オーディオ・ドライバーのジャーナリングをオンにする
ジャーナル記録をオンにすると、オーディオ用ハードディスクの性能を高めることができます。
ジャーナル記録をオンにするには:
1 [アプリケーション]/[ユーティリティ]フォルダーの中にある[ディスクユーティリティ]アプリケーションを起動します。
2 [ディスクユーティリティ]ウィンドウの左の欄にあるボリュームを選択します。
3 ツールバーの[ジャーナル記録を開始]を選択します。
Spotlightの索引付けをオフにすると、Mac OS Xの[検索]機能もオフになります。
ProTools Expressのインストール 55
Pro Tools Express に対してWindowsシステムを最適化するPro Tools Expressの処理能力を最大にするために、Pro Toolsのハードウェアとソフトウェアを使用する前にコンピューターの設定を行ってください。
コンピューターを設定する前に、Pro Toolsをインストールするアカウントに管理者としてログインしていることを確かめてください。管理者権限について、詳しくはWindowsの説明書をご覧ください。
必要な最適化
P r o T o o l s の処理能力を最大にするために、Pro Toolsハードウェアとソフトウェアを使用する前に以下の設定を行います。
ユーザー・アカウント制御を無効にする
ユーザー・アカウント制御(UAC)を無効にするには:
1 [スタート]>[コントロール パネル]を選択します。
2 [ユーザー アカウントと家族のための安全設定]をクリックします。
3 [ユーザー アカウント]をクリックします。
4 [ユーザー アカウント制御の設定を変更する]をクリックします。
5 スライダーを[通知しない]に設定します。
6 [OK]をクリックします。
システム・スタンバイと電源管理の設定
Pro Toolsを使用するときは、Windowsの[システム スタンバイ]電源設定を[なし]に設定しなければなりません。これでシステムの電源がオフになることによる長いレコーディング・パスまたはプレイバック・パスの停止を防げます。
Windowsの電源設定を変更するには:
1 [スタート]>[コントロール パネル]を選択します。
2 [システムとセキュリティ]をクリックします。
3 [電源のオプション]をクリックします。
4 [別のプランを表示]の矢印をクリックします。
5 [高パフォーマンス]を選択します。
6 [プラン設定の変更]をクリックします。
7 [高度な電源設定の変更]をクリックします。
8 [電源オプション]ダイアログで、[ハード ディスク] > [次の時間が経過後ハード ディスクの電源を切る]を表示します。
9 [設定]のオプションをクリックします。
10 [設定](分)フィールドを選択し、コンピューターのキーボードの Backspaceを押すか、値をスクロールして[オフにしない]に設定します。
11 [OK]をクリックします。ハードディスクの設定が[なし]に変わり、[電源オプション]ダイアログが閉じます。
12 [プラン設定の編集]ウィンドウで、[変更の保存]をクリックしてウィンドウを閉じます。
Windowsのシステム設定の最新情報と特定のコンピューターに関する情報については、Avidのウェブサイト(www.avid.com)をご覧ください。
Windowsのシステム設定が完了したら、コンピューターを再起動します。
Pro Tools を起動すると、自動的に「高パフォーマンス」の電源設定に切り替わります。Pro Toolsを終了すると、それまで選択されていた電源設定に戻ります(設定が異なる場合)。従って、Pro Toolsに対して電源設定を最適化するときは「高パフォーマンス」にのみ設定してください。
Pro Tools Expressインストレーション・ガイド56
推奨される最適化
Pro Toolsは、コンピューターにインストールされた他のソフトウェアやハードウェア・ドライバーの影響を受けることがあります。 Pro Toolsの性能を最大限に引き出すため、以下を行うことをお勧めします(必須ではありません)。
• 不要なプログラムを Pro Toolsと同時に起動しない。
• Windows Messenger、カレンダー、ディスク管理プログラムなどのバックグラウンドで動作するソフトウェア・ユーティリティーをすべてオフにする。
• Pro Toolsの使用中は不要な USBデバイスをオフにする。
任意の最適化
システムによっては、下記の設定を行うと、ProToolsの処理能力が向上することがあります。これらの最適化は、ご使用のシステムのその他のプログラムの機能を無効にしたり、悪影響を与えることがありますので、必要な場合に限って行ってください。
プロセッサのスケジュールを設定する
プロセッサのスケジュールを設定するには:
1 [コンピューター]を右クリックし、[プロパティ]を選択します。
2 [システムの詳細設定]をクリックします。
3 [パフォーマンス]セクションの[設定]ボタンをクリックします。
4 [パフォーマンスオプション]ウィンドウの[詳細設定]タブをクリックします。
5 [プロセッサスケジュール]セクションの下の[バックグラウンドサービス]オプションを選択します。
6 [OK]をクリックして[パフォーマンスオプション]ウィンドウを閉じます。
7 [OK]をクリックして[システムのプロパティ]ウィンドウを閉じます。
スタートアップ項目をオフにする
スタートアップ項目が少ないほど、Pro Toolsに割り当てられるリソースが多くなります。不必要な CPUリソースを消費するスタートアップ・アプリケーションは、停止しておきましょう。
以下のスタートアップ項目をオフにする場合は、注意して行いましょう。
• Portable media serial number(コピープロテクション・キーを使用するアプリケーション用)
• Plug and Playサービス• イベント・ログ• Cryptographicサービス
スタートアップ項目をオフにするには:
1 [スタート]メニューの[ファイル名を指定して実行]を選択し、「msconfig」とタイプし、Enterを押して「システム構成ユーティリティ」を開きます。
2 [全般]タブの下の[スタートアップのオプションを選択]を選択します。
3 [スタートアップの項目を読み込む]のチェックをはずし、[OK]をクリックします。
4 [再起動]をクリックして、コンピューターを再起動します。
5 再起動後、[システム構成]のメッセージが表示されます。[このメッセージを表示しない]オプションを選択する前に、Pro Toolsの処理能力が向上しているかどうか確認してください。処理能力に変化がない場合は、「msconfig」を実行して、[スタートアップの選択]を[通常のスタートアップ -デバイス ドライバとサービスをすべて読み込みます]へ戻してください。また、スタートアップ項目や必要でないプロセスを個別にオフにすることもできます。
安装 Pro Tools Express 57
安装 Pro Tools Express
欢迎使用 Avid® 提供的 Pro Tools® Express。本指南说明如何在 Mac 和 Windows 系统中安装和授权Pro Tools Express 软件。有关配置您系统的详细信息,以及 Pro Tools Express 软件功能的完整信息,请参阅 《Pro Tools 参考指南》(可通过 Pro Tools的 “ 帮助 ” 菜单获取)。
Pro Tools Express 软件功能
Pro Tools Express 可提供以下功能(取决于您的硬件配置) :• 每个工程多达 16 个单声道或立体声音频的发音音
轨
• 多达 8 个辅助输入音轨
• 多达 8 个主推子轨道
• 多达 16 个 MIDI 轨道
• 多达 8 个乐器轨道
• 一个 QuickTime 视频轨道
• 16 比特或 24 比特浮点音频精度,采样率高达 96kHz。
• 自动延迟补偿 (48 kHz 时多达 16,383 个样本 )• 非破坏性、随机存取编辑和自动混音
• 音频处理时,每个轨道多达 5 个实时插件(取决于您的计算机功能)
• 每个轨道多达 5 个硬件插入
• 每个轨道多达 5 个发送
• 多达 16 条内部混音母线 (单声道或立体声),用于路由及混音
Pro Tools Express 中所含插件
P r o T o o l s E x p r e s s 支持 A A X 、 R T A S 和AudioSuite 插件格式。 Pro Tools Express 中可安装以下插件:
• AIR Chorus• AIR Distortion• AIR Dynamic Delay• AIR Flanger• AIR Frequency Shifter• AIR Lo-Fi• AIR Multi-Delay• AIR Phaser• AIR Vintage Filter• BF76 Compressor 1176 模拟器
• 节拍器
• D-Verb • 直流偏移消除
• 抖动
• 复制
• Eleven Free • EQ III 1 段、 4 段和 7 段 EQ• Dyn III 压缩 / 限幅、去咝声、扩展器 / 门限
• 反转
• 标准化
• 反向
• ReWire• 时间压缩扩展
• TL InTune 数字较音器有关您音频接口 I/O 功能的详细信息,请参阅您
音频接口的随附文档。有关这些插件(及更多)的信息,请参阅音频插
件指南 (见于 Pro Tools Express 帮助菜单)。
Pro Tools Express 安装指南58
独立的 AVID 虚拟乐器快件安装程序提供以下虚拟乐器插件和相关的内容,可与 Pro Tools Express 配合使用:
• Boom 鼓机与音序器
• Structure Free 采样播放器 • Xpand!2 多音色工作站
系统要求及兼容性
Pro Tools Express 能够与经认证的音频接口 (如Mbox Mini)配合使用,运行于经认证的 Windows或 Mac 计算机上。
需要连接到网络,以下载 Pro Tools Express 安装程序。
Avid 只保证已通过测试和批准的软件及硬件的兼容性,并仅提供有关这些软件及硬件的支持。
若要获得完整的系统要求及认可的计算机、操作系统、硬盘驱动器和第三方设备的列表,请访问:
www.avid.com/compatibility
授权的 iLokPro Tools Express 包括一个空置 iLok 及一张激活卡,用于授权 Pro Tools Express 软件。详细信息,请参阅第 59 页的 “ 授权 Pro Tools Express”。
MIDI 需求
USB、 FireWire 和 PCI MIDI 接口可在 Mac 或Windows 上与 Pro Tools 系统有效地协作。
硬盘需求
为 了 获 得 最 佳 的 音 频 录 音 和 播 放 效 果,所 有Pro Tools 系统均需要一个或多个经过认证的硬盘。
使用 Apple 系统软件包含的 Disk Utility (磁盘工具)应用程序 ( M a c ) 或 W i n d o w s 的 D i s kManagement(磁盘管理) (Windows) 对硬盘进行初始化。
避免向系统驱动器录音
允许向系统驱动器录音,但不推荐执行此操作。在系统驱动器上录音和播放可能会减少轨道数量和插件数量。
安装硬件驱动程序
安装 Pro Tools Express 软件前,请确保您已安装了音频硬件及最新的硬件驱动程序。有关详细信息,请参阅随硬件提供的文档。有关 Avid 音频接口,请访问 avid.com/drivers 以便下载最新的驱动程序,并安装在您的设备上。
安装 Pro Tools Express 软件
完 成 音 频 接 口 驱 动 程 序 的 安 装 后,即 可 安 装Pro Tools Express 软件。
要安装 Pro Tools Express:
1 确保以管理员身份登录要安装 Pro Tools 的帐户。
2 在线下载 Pro Tools Express 安装程序。
3 请执行以下操作之一:
• 在 Mac 上,找到并双击 Install Pro ToolsMP.mpkg。
• 在 Windows 上,找到并双击 Setup.exe。然后在所产生的迷你浏览器中选择 Install Pro ToolsExpress(安装 Pro Tools Express)以开始安装。
必须将已授权的 iLok 插入计算机上可用的 USB端口, Pro Tools Express 才能运行。
若要获取支持的 MIDI 接口和控制器的列表,请
访问 www.avid.com。
更多信息,请见 avid.custkb.com/avid/app/selfservice/search.jsp?DocId=380567
为了取得最佳性能,您可能需要将您的系统驱动
器指定为 DigiBase 中的仅播放卷或仅传输卷。
有关详细信息,请参阅《Pro Tools 参考指南》。
如果没有安装驱动程序,Pro Tools 将无法识别
您的音频接口。如果您打算升级 Pro Tools,请
务必安装最新的硬件驱动程序。
在安装此 Pro Tools Express 之前,请参阅随附
的 Read Me (自述文件)信息。
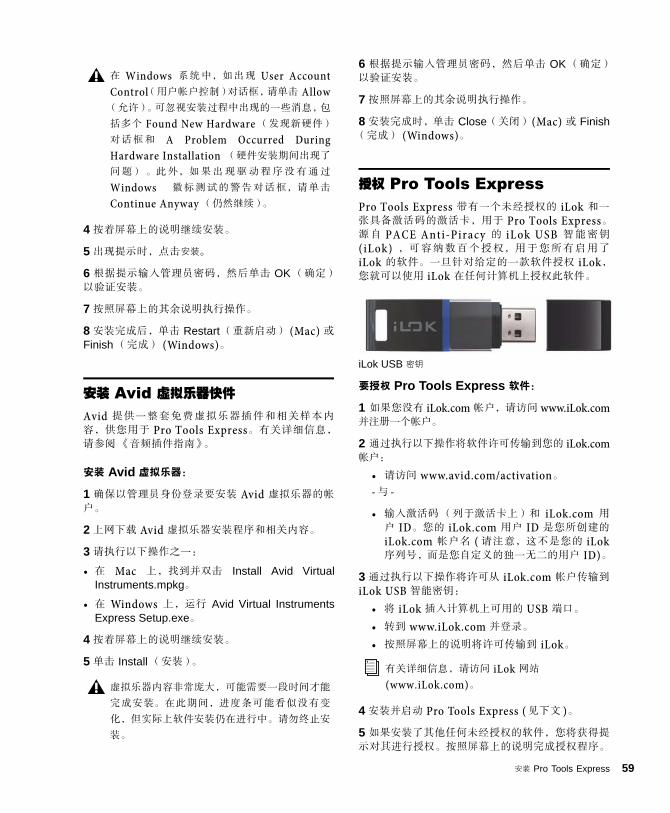
安装 Pro Tools Express 59
4 按着屏幕上的说明继续安装。
5 出现提示时,点击安装。
6 根据提示输入管理员密码,然后单击 OK (确定)以验证安装。
7 按照屏幕上的其余说明执行操作。
8 安装完成后,单击 Restart (重新启动) (Mac) 或Finish (完成) (Windows)。
安装 Avid 虚拟乐器快件
Avid 提供一整套免费虚拟乐器插件和相关样本内容,供您用于 Pro Tools Express。有关详细信息,请参阅 《音频插件指南》。
安装 Avid 虚拟乐器:
1 确保以管理员身份登录要安装 Avid 虚拟乐器的帐户。
2 上网下载 Avid 虚拟乐器安装程序和相关内容。
3 请执行以下操作之一:
• 在 Mac 上,找到并双击 Install Avid VirtualInstruments.mpkg。
• 在 Windows 上,运行 Avid Virtual InstrumentsExpress Setup.exe。
4 按着屏幕上的说明继续安装。
5 单击 Install (安装)。
6 根据提示输入管理员密码,然后单击 OK (确定)以验证安装。
7 按照屏幕上的其余说明执行操作。
8 安装完成时,单击 Close(关闭)(Mac) 或 Finish(完成) (Windows)。
授权 Pro Tools ExpressPro Tools Express 带有一个未经授权的 iLok 和一张具备激活码的激活卡,用于 Pro Tools Express。源自 PACE Anti-Piracy 的 iLok USB 智能密钥(iLok) ,可容纳数百个授权,用于您所有启用了iLok 的软件。一旦针对给定的一款软件授权 iLok,您就可以使用 iLok 在任何计算机上授权此软件。
要授权 Pro Tools Express 软件:
1 如果您没有 iLok.com 帐户,请访问 www.iLok.com并注册一个帐户。
2 通过执行以下操作将软件许可传输到您的 iLok.com帐户:
• 请访问 www.avid.com/activation。
- 与 -
• 输入激活码 (列于激活卡上)和 iLok.com 用户 ID。您的 iLok.com 用户 ID 是您所创建的iLok.com 帐户名 ( 请注意,这不是您的 iLok序列号,而是您自定义的独一无二的用户 ID)。
3 通过执行以下操作将许可从 iLok.com 帐户传输到iLok USB 智能密钥:
• 将 iLok 插入计算机上可用的 USB 端口。 • 转到 www.iLok.com 并登录。
• 按照屏幕上的说明将许可传输到 iLok。
4 安装并启动 Pro Tools Express ( 见下文 )。
5 如果安装了其他任何未经授权的软件,您将获得提示对其进行授权。按照屏幕上的说明完成授权程序。
在 Windows 系统中,如出现 User AccountControl(用户帐户控制)对话框,请单击 Allow(允许)。可忽视安装过程中出现的一些消息,包
括多个 Found New Hardware (发现新硬件)
对话框和 A Problem Occurred DuringHardware Installation (硬件安装期间出现了
问题) 。此外,如果出现驱动程序没有通过
Windows 徽标测试的警告对话框,请单击
Continue Anyway (仍然继续)。
虚拟乐器内容非常庞大,可能需要一段时间才能
完成安装。在此期间,进度条可能看似没有变
化,但实际上软件安装仍在进行中。请勿终止安
装。
iLok USB 密钥
有关详细信息,请访问 iLok 网站 (www.iLok.com)。
Pro Tools Express 安装指南60
启动 Pro Tools Express若要使用 Pro Tools Express 软件,您必须具备带有许可的 iLok,以对您安装的 Pro Tools 版本进行授权(有关详细信息,请参阅第 59 页的 “ 授权 Pro ToolsExpress”)。
要启动 Pro Tools Express 软件:
1 确保您的音频接口已连接到计算机,并且已打开电源。
2 将授权的 iLok 插入计算机上任何可用的 USB 端口(请参阅第 59 页的 “ 授权 Pro Tools Express”)。
3 请执行以下操作之一:
• 在 Mac 上,单击您的 Dock 中的 Pro ToolsExpress 快捷方式 (或双击 Macintosh HD/Applications/Avid/Pro Tools 中的应用程序图标)。
- 或 -
• 在 Windows 上,双击您桌面上的 Pro ToolsExpress 快捷方式 (或 Program Files\Avid\Pro Tools 中的应用程序)。
4 使用 Quick Start (快速启动)对话框执行以下任一操作:
• 使用模板创建一个新的工程。
• 创建新的空白工程。
• 打开系统中其它任何工程。
配置您的 Pro Tools Express 系统
完成 Pro Tools Express 软件的安装、授权和启动后,您便可配置您的 Pro Tools 系统,以满足您工作室的具体需求。有关 Pro Tools 软件配置的详细信息,请参阅 《P r o To o l s 参考指南》(可通过Pro Tools 的 “ 帮助 ” 菜单获取)。
卸载 Pro Tools Express如果您要从 Pro Tools Express 升级到完整版的Pro Tools,请确保在安装完整版的 Pro Tools 之前先卸载 P r o T o o l s E x p r e s s。要卸载 P r o T o o l sExpress 软件,请使用 Mac 上的 Uninstaller (卸载)应用程序,或使用 Windows 上的 ProgramsControl Panel (程序控制面板)。
在 Mac 系统上卸载 Pro Tools Express
要在 Mac 系统上卸载 Pro Tools Express:
1 确保以管理员身份登录安装了 Pro Tools Express的帐户。
2 访问 Applications/Avid/Pro Tools/Pro ToolsUtilities 并双击 “卸载 Pro Tools Express”。
3 单击 Continue (继续)进行卸载。
4 选择您要执行的卸载类型:
Safe Uninstall (安全卸载) 保留与某些 Avid 产品兼容所必需的特定插件与系统文件。如果使用的是Avid 应用程序或者准备更新至 CS (客户支持)版,请使用 Safe Uninstall (安全卸载)。
Clean Uninstall (完全卸载) 移 除 所 有Pro Tools 文件,包括系统文件、 Avid 插件以及MIDI 音色名。如果打算进行升级,或者从干净的系统进行故障排除,请使用 Clean Uninstall (完全卸载)。
5 单击 Uninstall (卸载)。
6 输入管理员密码并单击 OK (确定)。
7 单击 Finish (完成)以关闭安装程序窗口。
在 Windows 系统上卸载 Pro ToolsExpress
要在 Windows 上安装 Pro Tools Express:
1 选择 Start > Control Panel (开始 > 控制面板)。
2 单击 Programs and Features (程序和功能)。
3 单击 Uninstall a program (卸载程序)。
4 从已安装应用程序列表中选择 Avid Pro Express。
5 单击 Uninstall (卸载)。
不要在启动或使用 Pro Tools 过程中拔拆
iLok。
有关 “ 快速开始 ” 对话框以及工程模板的详细信
息,请参阅 《Pro Tools 参考指南》。

安装 Pro Tools Express 61
6 按照屏幕上的说明移除 Pro Tools。
优化用于 Pro Tools Express 的Mac 系统
为确保 Pro Tools Express 达到最佳性能,请先对计算机进行配置。
在配置计算机之前,确保以管理员身份登录要安装Pro Tools 的帐户。有关 Mac OS X 中管理员权限的详细信息,请参阅 Apple OS X 文档。
关闭软件更新
关闭软件更新功能:
1 从 Apple 菜单中选择 System Preferences(系统预置)。
2 单击 Software Update (软件更新)。
3 单击 Scheduled Check (计划检查)选项卡。
4 取消选择 Check for Updates (检查更新)。
5 完成此操作后,选择 System Preferences > QuitSystem Preferences(系统预置 > 退出系统预置)。
关闭节能器
关闭节能器功能:
1 从 Apple 菜单中选择 System Preferences(系统预置)。
2 单击 Energy Saver (节能器)。
3 将 Computer Sleep(计算机睡眠)设置设成 Never(永不)。
4 将 Display Sleep (显示器睡眠)设置设成 Never(永不)。
5 取消选择 Put the hard disk(s) to sleep whenpossible (如果可能,使硬盘进入睡眠)选项。
6 完成此操作后,选择 System Preferences > QuitSystem Preferences(系统预置 > 退出系统预置)。
禁用或重新分配供 Pro Tools 使用的 Mac 键盘迅捷
为完善 Pro Tools 键盘快捷键,您必须在 AppleSystem Preferences (系统预置)中禁用或重新分配所有冲突的 Mac OS X 键盘迅捷。
禁用或重新分配供 Pro Tools 使用的 Mac 键盘迅捷
(Mac OS X Lion):
1 从 Apple 菜单中选择 System Preferences(系统预置)。
2 单击 Keyboard (键盘)。
3 单击 Keyboard Shortcuts (键盘迅捷)选项卡。
4 您可以禁用或重新分配与 Pro Tools 键盘快捷键冲突的 Mac OS 键盘迅捷。下表包括各种常见的 Mac键盘迅捷,视您的 Mac 厂商和型号而定,它们也能供 Pro Tools 使用:
• 于 Launchpad & Dock(Launchpad 和 Dock)下
• Turn Dock Hiding On/Off(打开 / 关闭 Dock隐藏)
• 于 Mission Control 下• Mission Control• Application windows (应用程序窗口)
• Show Desktop (显示桌面)
• Show Dashboard (显示 Dashboard)
• Mission Control > Move left a space(Mission Control > 向左移动一个空间)
• Mission Control > Move right a space(Mission Control > 向右移动一个空间)
• Mission Control > Switch to Desktop n(Mission Control > 切换至桌面 n)
• 于 Keyboard & Text Input(键盘和文本输入)下
• Move focus to the window drawer (移动焦点至窗口抽屉)
请注意,您必须个别卸载插件 (如 Avid 效果)
以及任何音频和 MIDI 设备驱动程序。
请勿使用 Mac OS X 自动的 Software Update(软件更新)功能,因为该功能可能会将系统升
级到尚未获得 Pro Tools 认可的 Mac OS 版本。
有关 Mac OS 认证版本的详细信息,请参阅我们
网站 (www.avid.com) 上的最新兼容性信息。
要查看完整的 Pro Tools 键盘快捷键列表,请参
阅 《键盘快捷键手册》(Help > KeyboardShortcuts [ 帮助 > 键盘快捷键 ])。
Pro Tools Express 安装指南62
• 于 Services (服务)下
• Send File To Bluetooth Device (将文件发送到蓝牙设备)
• Search With Google (使用 Google 搜索)
• Spotlight• Search Man Pages in Terminal (在终端搜索
手册页)
• 于 Spotlight 下• Show Spotlight search field(显示 Spotlight
搜索字段)
• Show Spotlight window (显示 Spotlight 窗口)
• 于 Universal Access (通用访问)下
• Zoom (缩放)
• Contrast (对比度)
• 于 Application Shortcuts (应用程序迅捷)下
• Show Help menu (显示 “ 帮助 ” 菜单)
禁用或重新分配供 Pro Tools 使用的 Mac 键盘迅捷
(Mac OS X Snow Leopard):
1 从 Apple 菜单中选择 System Preferences(系统预置)。
2 单击 Keyboard (键盘)。
3 单击 Keyboard Shortcuts (键盘迅捷)选项卡。
4 您可以禁用或重新分配与 Pro Tools 键盘快捷键冲突的 Mac OS 键盘迅捷。下表包括各种常见的 Mac键盘迅捷,它们也能供 Pro Tools 使用:
• 于 Dashboard & Dock(Dashboard 和 Dock)下
• Turn Dock Hiding On/Off(打开 / 关闭 Dock隐藏)
• Dashboard• 于 Exposé and Spaces (Exposé 与 Spaces)下
• All windows (所有窗口)
• Application windows (应用程序窗口)
• Desktop (桌面)
• 于 Keyboard & Text Input(键盘和文本输入)下
• Move focus to the window drawer (移动焦点至窗口抽屉)
• 于 Spotlight 下• Show Spotlight search field(显示 Spotlight
搜索字段) • Show Spotlight window (显示 Spotlight 窗
口)
• 于 Application Shortcuts (应用程序迅捷)下
• Show Help menu (显示 “ 帮助 ” 菜单)
禁用 Spotlight 索引
Mac OS X Spotlight 功能会自动在后台对本地硬盘上的文件与文件夹进行索引。大多数情况下,普通Pro Tools 操作不会受此影响。不过,如果用户在具高轨道数的 Pro Tools 工程中进行长时间录音,而Spotlight 在此过程中开始对硬盘进行索引,则会对Pro Tools 系统性能造成不良影响。您可以在使用Pro Tools 进行大型录音项目前,对所有本地硬盘禁用 Spotlight 索引功能。
禁用 Spotlight 索引:
1 从 Apple 菜单中选择 System Preferences(系统预置),并单击 Spotlight 。
2 在 Spotlight 窗口中,单击 Privacy (隐私)选项卡。
3 为了防止对硬盘进行索引,请将其图标从桌面拖入列表中。
启用音频驱动器的日志功能
为了提高音频驱动器的性能,请启用日志功能。
启用日志功能:
1 启动位于 Applications/Utilities 下的 DiskUtility (磁盘工具)应用程序。
2 从 Disk Utility (磁盘工具)窗口的左列选择卷。
3 在工具栏中选择 Enable Journaling(启用日志)。
禁用 Spotlight 索引也会禁用 Mac OS X 的
Find (查找)功能。
安装 Pro Tools Express 63
优化用于 Pro Tools Express 的Windows 系统
为确保使用 Pro Tools Express 时获得最佳性能,请在使用 Pro Tools 硬件和软件前对计算机进行配置。
在配置计算机之前,确保以管理员身份登录要安装Pro Tools 的帐户。有关管理员权限的详细信息,请参阅 Windows 文档。
必要的优化
为确保使用 Pro Tools 时获得最佳性能,请在使用Pro Tools 硬件和软件前对下列设置进行配置。
禁用用户帐户控制
禁用用户帐户控制 (UAC):
1 选择 Start > Control Panel (开始 > 控制面板)。
2 单击 User Accounts and Family Safety (用户帐户和家庭安全)。
3 单击 User Accounts (用户帐户)。
4 单击 Change User Account Control settings (更改用户帐户控制设置)。
5 将滑杆设置到 Never Notify (从不通知)。
6 单击 OK (确定)。
配置系统待机和电源管理
使用 Pro Tools 时, Windows 的 System Standby(系统待机)电源使用方案必须设置为 Always On(一直开着) 。这有助于避免时间很长的录音或播放因系统资源耗尽电力,而导致录音或播放停止。
配置 Windows 的电源管理:
1 选择 Start > Control Panel (开始 > 控制面板)。
2 单击 System and Security (系统和安全)。
3 单击 Power Options (电源选项)。
4 单击箭头以显示 Additional Plans (其他方案)。
5 选择 High Performance (高性能)。
6 单击 Change plan settings (更改方案设置)。
7 单击 Change advanced power settings (更改高级电源设置)。
8 在 Power Options (电源选项)对话框中,显示Hard disk > Turn off hard disk after(硬盘 > 在一段时间后关闭硬盘)。
9 单击 Setting (设置)选项。
10 在 Setting (Minutes) (设置 [ 分钟 ] )字段中选择值,并按下计算机键盘上的 Backspace (空格键)或将值滚动至 Never (从不)。
11 单击 OK (确定) 。硬盘设置更改为 Never (从不),而 Power Options (电源选项)对话框将随即关闭。
12 在 Edit Plan Settings(编辑方案设置)窗口中,单击 Save changes (保存更改)并关闭窗口。
建议优化
Pro Tools 也可能会受到计算机上安装的其他软件和硬件驱动程序的影响。为了取得最佳性能,我们建议(但并不要求)采取以下措施:
• 在运行 Pro Tools 时避免运行任何不必要的程序。
• 关闭各种在后台运行的软件实用程序,例如Windows Messenger、日历程序和磁盘维护程序。
• 在运行 Pro Tools 时关闭各种非必要的 USB 设备。
可选优化
以下系统优化操作可能有助于提高 Pro Tools 在某些系统上的性能。建议只在必要时才尝试这些优化操作,因为它们可能会禁用系统上其他程序的功能或对其产生不利影响。
有关Windows系统设置的最新信息以及特定计算
机的信息,请访问 Avid 网站 (www.avid.com)。
在完成 Windows 系统设置的更改之后,请重新
启动计算机。
Pro Tools 在启动后将自动切换成 HighPerformance (高性能)电源管理设置。退出
Pro Tools 后, Windows 将恢复成之前选择的
电源管理设置 (如不同) 。因此,优化用于
Pro Tools 的电源管理设置时,应仅优化 HighPerformance (高性能)配置。
Pro Tools Express 安装指南64
调整处理器计划
调整处理器计划的性能:
1 右击 Computer(我的电脑)并选择 Properties(属性)。
2 单击 Advanced system settings (高级系统设置)。
3 在 Performance(性能)部分,单击 Settings(设置)按钮。
4 在 Performance Options(性能选项)窗口中,单击 Advanced (高级)选项卡。
5 在 Processor Scheduling (处理器计划)部分,选择 Background Services (后台服务)选项。
6 单击 OK (确定) ,关闭 Performance Options(性能选项)窗口。
7 单击 OK (确定),关闭 System Properties (系统属性)窗口。
禁用系统启动项目
计算机使用的程序越少,可供 Pro Tools 使用的资源就越多。有些在系统启动时加载的应用程序会不必要地消耗 CPU 资源,可以将此类程序关掉。
如果您要禁用以下启动项目,请小心操作:
• 便携式媒体序号 (用于使用拷贝保护键的某些应用程序)
• 即插即用服务
• 事件记录
• 密码编译服务
禁用系统启动项目:
1 在 Start(开始)菜单的 Start Search(开始搜索)中键入 “msconfig”,并按下 Enter 以打开 SystemConfiguration Utility (系统配置实用程序)。
2 在 General (一般)选项卡下,选择 SelectiveStartup (有选择的启动)。
3 取消选择 Load Startup Items (加载启动项),然后单击 OK (确定)。
4 单击 Restart (重新启动)以重启计算机。
5 重新启动之后,计算机就会显示 System Config-uration (系统配置)消息。取消选择 Don't showthis message again (不再显示此消息)选项之前,请先检查 Pro Tools 的性能是否有所提高。如果性能没有提高,请运行 “msconfig”,将计算机的 StartupSelection(启动选择)还原至 Normal Startup - loadall device drives and services (正常启动 - 加载所有设备驱动程序和服务)。或者,也可以尝试逐个禁用启动项目和非必要的进程。


Avid2001 Junipero Serra Boulevard Daly City, CA 94014-3886 USA
Technical Support (USA)Visit the Online Support Center at www.avid.com/support
Product InformationFor company and product information, visit us on the web at www.avid.com