project manual - university of nevada, las vegas 5234-bc exhibit...las vegas, nevada 89119 project...
TRANSCRIPT

WRIGHT HALL LABORATORY
BUILD OUT 4290 Maryland Parkway
Las Vegas, Nevada 89119
PROJECT MANUAL
Prepared by:
KGA Project #16355.00 May 5, 2016

KGA Architecture 00 01 10 -1 May 5, 2016 UNLV Wright Hall Laboratory Build Out - 16355.00 Table of Contents
PROJECT MANUAL
UNIVERSITY OF NEVADA AT LAS VEGAS
WRIGHT HALL LABORATORY BUILD OUT
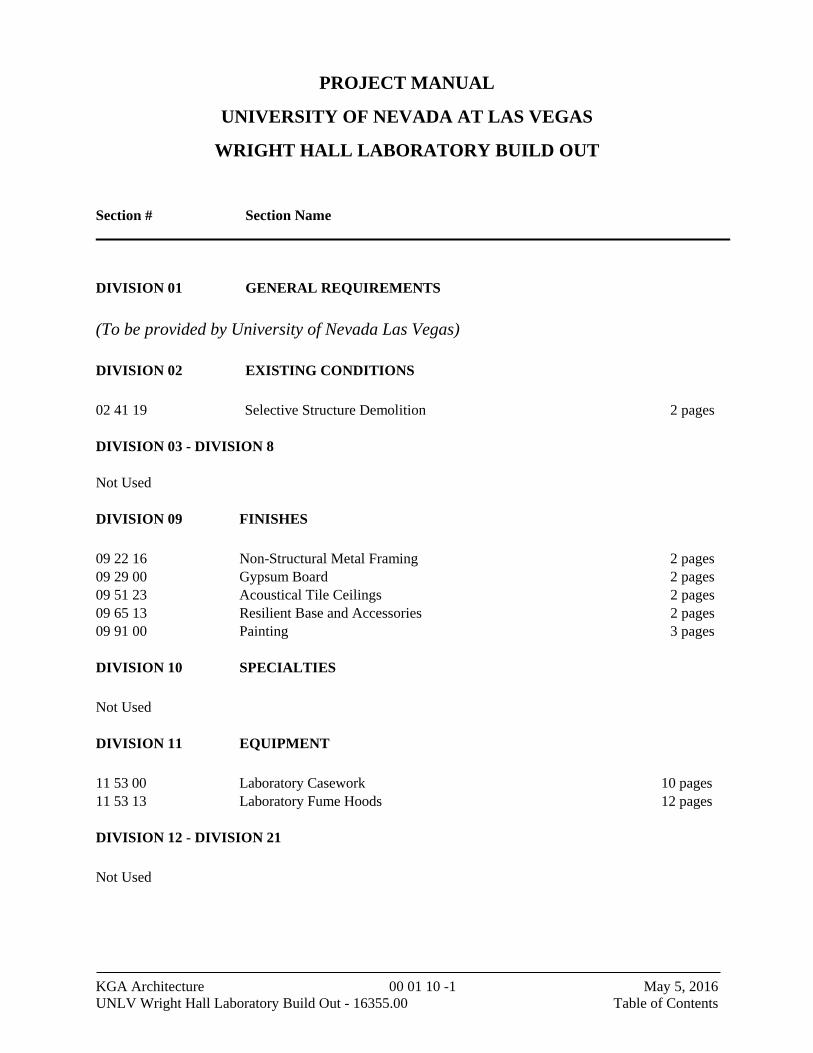
Section # Section Name DIVISION 01 GENERAL REQUIREMENTS
(To be provided by University of Nevada Las Vegas) DIVISION 02 EXISTING CONDITIONS
02 41 19 Selective Structure Demolition 2 pages DIVISION 03 - DIVISION 8 Not Used DIVISION 09 FINISHES
09 22 16 Non-Structural Metal Framing 2 pages 09 29 00 Gypsum Board 2 pages 09 51 23 Acoustical Tile Ceilings 2 pages 09 65 13 Resilient Base and Accessories 2 pages 09 91 00 Painting 3 pages DIVISION 10 SPECIALTIES
Not Used DIVISION 11 EQUIPMENT
11 53 00 Laboratory Casework 10 pages 11 53 13 Laboratory Fume Hoods 12 pages DIVISION 12 - DIVISION 21
Not Used

KGA Architecture 00 01 10 -2 May 5, 2016 UNLV Wright Hall Laboratory Build Out - 16355.00 Table of Contents
Section # Section Name DIVISION 22 PLUMBING
22 05 03 Pipes and Tubes for Plumbing Piping and Equipment 10 pages 22 05 23 General – Duty Valves for Plumbing Piping 5 pages 22 05 29 Hangers and Supports for Plumbing Piping and Equipment 8 pages 22 11 00 Facility Water Distribution 14 pages 22 13 00 Facility Sanitary Sewerage 8 pages 22 40 00 Plumbing Fixtures 8 pages DIVISION 23 HEATING VENTILATING AND AIR CONDITIONING 23 05 29 Hangers and Supports for HVAC Piping and Equipment 7 pages 23 05 53 Identification for HVAC Piping and Equipment 5 pages 23 05 93 Testing, Adjusting, and Balancing for HVAC 9 pages 23 07 00 HVAC Insulation 10 pages 23 21 13 Hydronic Piping 11 pages 23 21 16 Hydronic Piping Specialties 9 pages 23 31 00 HVAC Ducts and Casings 7 pages 23 33 00 Air Duct Accessories 7 pages 23 37 00 Air Outlets and Inlets 4 pages 23 96 00 Laboratory Control System 8 pages DIVISION 24 -25 Not Used DIVISION 26 ELECTRICAL 26 05 03 Equipment Wiring Systems 3 pages 26 05 05 Selective Demolition for Electrical 5 pages 26 05 10 Basic Electrical Requirements 2 pages 26 05 19 Low-Voltage Electrical Power Conductors and Cables 4 pages 26 05 26 Grounding and Bonding for Electrical Systems 4 pages 26 05 28 Seismic Restraint 5 pages 26 05 29 Hangers and Support for Electrical Systems 2 pages 26 05 33 Raceway and Boxes for Electrical Systems 5 pages 26 05 35 Boxes 3 pages 26 05 53 Identification for Electrical Systems 2 pages 26 05 70 Testing 5 pages

KGA Architecture 00 01 10 -3 May 5, 2016 UNLV Wright Hall Laboratory Build Out - 16355.00 Table of Contents
Section # Section Name DIVISION 26 ELECTRICAL CONT’D 26 24 16 Panelboards 4 pages 26 27 26 Wiring Devices 3 pages 26 28 19 Enclosed Switches 2 pages 26 51 00 Interior Lighting 7 pages
END OF TABLE OF CONTENTS

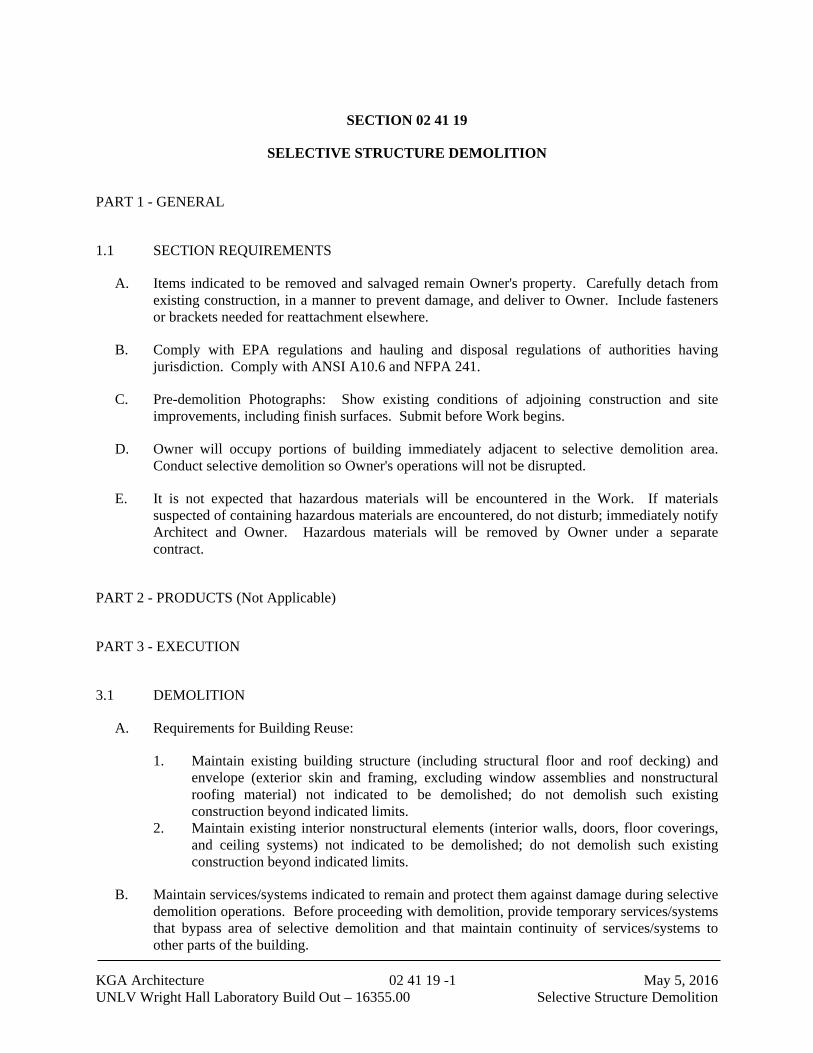
KGA Architecture 02 41 19 -1 May 5, 2016 UNLV Wright Hall Laboratory Build Out – 16355.00 Selective Structure Demolition
SECTION 02 41 19
SELECTIVE STRUCTURE DEMOLITION
PART 1 - GENERAL
1.1 SECTION REQUIREMENTS
A. Items indicated to be removed and salvaged remain Owner's property. Carefully detach from existing construction, in a manner to prevent damage, and deliver to Owner. Include fasteners or brackets needed for reattachment elsewhere.
B. Comply with EPA regulations and hauling and disposal regulations of authorities having jurisdiction. Comply with ANSI A10.6 and NFPA 241.
C. Pre-demolition Photographs: Show existing conditions of adjoining construction and site improvements, including finish surfaces. Submit before Work begins.
D. Owner will occupy portions of building immediately adjacent to selective demolition area. Conduct selective demolition so Owner's operations will not be disrupted.
E. It is not expected that hazardous materials will be encountered in the Work. If materials suspected of containing hazardous materials are encountered, do not disturb; immediately notify Architect and Owner. Hazardous materials will be removed by Owner under a separate contract.
PART 2 - PRODUCTS (Not Applicable)
PART 3 - EXECUTION
3.1 DEMOLITION
A. Requirements for Building Reuse:
1. Maintain existing building structure (including structural floor and roof decking) and envelope (exterior skin and framing, excluding window assemblies and nonstructural roofing material) not indicated to be demolished; do not demolish such existing construction beyond indicated limits.
2. Maintain existing interior nonstructural elements (interior walls, doors, floor coverings, and ceiling systems) not indicated to be demolished; do not demolish such existing construction beyond indicated limits.
B. Maintain services/systems indicated to remain and protect them against damage during selective demolition operations. Before proceeding with demolition, provide temporary services/systems that bypass area of selective demolition and that maintain continuity of services/systems to other parts of the building.
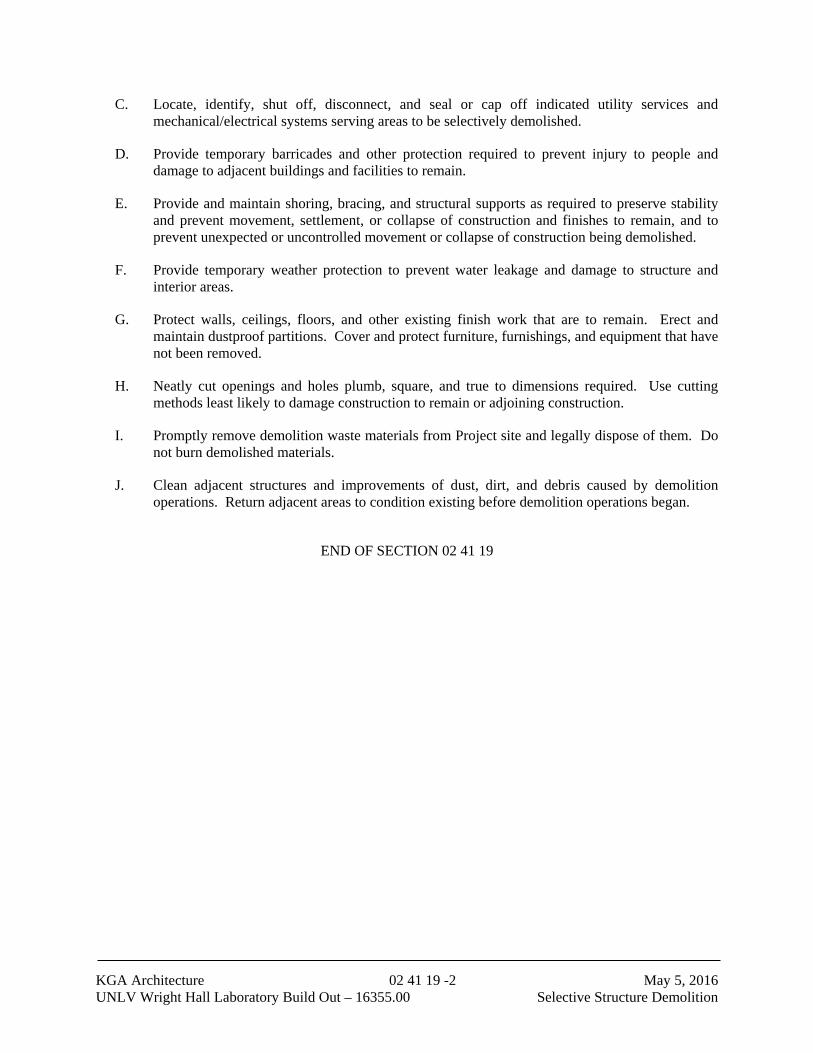
KGA Architecture 02 41 19 -2 May 5, 2016 UNLV Wright Hall Laboratory Build Out – 16355.00 Selective Structure Demolition
C. Locate, identify, shut off, disconnect, and seal or cap off indicated utility services and mechanical/electrical systems serving areas to be selectively demolished.
D. Provide temporary barricades and other protection required to prevent injury to people and damage to adjacent buildings and facilities to remain.
E. Provide and maintain shoring, bracing, and structural supports as required to preserve stability and prevent movement, settlement, or collapse of construction and finishes to remain, and to prevent unexpected or uncontrolled movement or collapse of construction being demolished.
F. Provide temporary weather protection to prevent water leakage and damage to structure and interior areas.
G. Protect walls, ceilings, floors, and other existing finish work that are to remain. Erect and maintain dustproof partitions. Cover and protect furniture, furnishings, and equipment that have not been removed.
H. Neatly cut openings and holes plumb, square, and true to dimensions required. Use cutting methods least likely to damage construction to remain or adjoining construction.
I. Promptly remove demolition waste materials from Project site and legally dispose of them. Do not burn demolished materials.
J. Clean adjacent structures and improvements of dust, dirt, and debris caused by demolition operations. Return adjacent areas to condition existing before demolition operations began.
END OF SECTION 02 41 19

KGA Architecture 09 22 16 -1 May 5, 2016 UNLV Wright Hall Laboratory Build Out – 16355.00 Non-Structural Metal Framing
SECTION 09 22 16
NON-STRUCTURAL METAL FRAMING PART 1 - GENERAL
1.1 SECTION REQUIREMENTS
A. Submittals: Product Data.
PART 2 - PRODUCTS
2.1 PERFORMANCE REQUIREMENTS
A. Fire-Resistance-Rated Assemblies: Provide materials and construction identical to those tested
in assemblies per ASTM E 119 by an independent testing and inspecting agency acceptable to authorities having jurisdiction.
B. STC-Rated Assemblies: Provide materials and construction identical to those tested in
assemblies per ASTM E 90 and classified per ASTM E 413 by a qualified independent testing and inspecting agency.
2.2 METAL FRAMING AND SUPPORTS
A. Steel Framing Members, General: ASTM C 754.
1. Steel Sheet Components: ASTM C 645. Thickness specified is minimum uncoated base-
metal thickness. 2. Protective Coating: ASTM A 653/A 653M, G40 (Z120), hot-dip galvanized zinc coating.
B. Suspended Ceiling and Soffit Framing:
1. Tie Wire: ASTM A 641/A 641M, Class 1 zinc coating, soft temper, 0.0625-inch (1.59-
mm) diameter, or double strand of 0.0475-inch- (1.21-mm-) diameter wire. 2. Wire Hangers: ASTM A 641/A 641M, Class 1 zinc coating, soft temper, and 8 gauge
diameter. 3. Carrying Channels: Cold-rolled steel, 0.0538 inch (1.37 mm) thick, 1-1/2 inches (38.1
mm) deep. 4. Furring Channels: Steel, rigid hat-shaped channels; 7/8 inch (22.2 mm) deep, 24 gauge. 5. Grid Suspension System for Interior Ceilings: Interlocking, direct-hung system.
C. Partition and Soffit Framing:
1. Studs and Runners: In depth indicated and 20 gauge thick unless otherwise indicated. 2. Flat Strap and Backing: 16 gauge thick.

KGA Architecture 09 22 16 -2 May 5, 2016 UNLV Wright Hall Laboratory Build Out – 16355.00 Non-Structural Metal Framing
3. Rigid Hat-Shaped Furring Channels: In depth indicated and 24 gauge thick. 2.3 ACCESSORIES
A. General: Comply with referenced installation standards.
1. Fasteners for Metal Framing: Of type, material, size, corrosion resistance, hold-
ing power, and other properties required to fasten steel members to substrates.
B. Acoustical Sealant for Concealed Joints: Nonsag, latex sealant complying with ASTM C
PART 3 - EXECUTION
3.1 INSTALLATION
A. Install steel framing to comply with ASTM C 754 and with ASTM C 840 requirements that apply to framing installation and with United States Gypsum's "Gypsum Construction Handbook."
1. Gypsum Plaster Assemblies: Also comply with ASTM C 841. 2. Portland Cement Plaster Assemblies: Also comply with ASTM C 1063. 3. Gypsum Veneer Plaster Assemblies: Also comply with ASTM C 844.
B. Install supplementary framing, and blocking to support fixtures, equipment services, heavy
trim, grab bars, toilet accessories, furnishings, or similar construction.
C. Isolate steel framing from building structure, except at floor, to prevent transfer of loading imposed by structural movement.
1. Where studs are installed directly against exterior walls, install asphalt-felt or
foam- gasket isolation strip between studs and wall.
D. Fire-Resistance-Rated Assemblies: Comply with requirements of listed asseblies.
END OF SECTION 09 22 16

KGA Architecture 09 29 00 -1 May 5, 2016 UNLV Wright Hall Laboratory Build Out – 16355.00 Gypsum Board
SECTION 09 29 00
GYPSUM BOARD PART 1 - GENERAL
1.1 SECTION REQUIREMENTS
A. Submittals: Product Data.
PART 2 - PRODUCTS
2.1 PERFORMANCE REQUIREMENTS
A. Fire-Resistance-Rated Assemblies: Provide materials and construction identical to those
tested in assemblies per ASTM E 119 by an independent testing and inspecting agency ac-ceptable to authorities having jurisdiction.
B. STC-Rated Assemblies: Provide materials and construction identical to those tested in as-
semblies per ASTM E 90 and classified per ASTM E 413 by a qualified independent test-ing and inspecting agency.
2.2 PANEL PRODUCTS
A. Provide in maximum lengths available to minimize end-to-end butt joints.
B. Interior Gypsum Board: ASTM C 36/C 36M or ASTM C 1396/C 1396M, in thickness indi-
cated, with manufacturer's standard edges. Type X where indicated, Sag-resistant type for ceiling surfaces.
C. Glass-Mat, Water-Resistant Gypsum Backing Board: ASTM C 1178/C 1178M, of thickness
indicated. Type X.
1. Product: G-P Gypsum; Dens-Shield Tile Guard (behind wall tile installation). 2.3 ACCESSORIES
A. Trim Accessories: ASTM C 1047, formed from galvanized or aluminum-coated steel
sheet, rolled zinc, plastic, or paper-faced galvanized-steel sheet. For exterior trim, use ac-cessories formed from hot-dip galvanized-steel sheet, plastic, or rolled zinc.
1. Provide cornerbead at outside corners unless otherwise indicated. 2. Provide LC-bead (J-bead) at exposed panel edges.

KGA Architecture 09 29 00 -2 May 5, 2016 UNLV Wright Hall Laboratory Build Out – 16355.00 Gypsum Board
B. Joint-Treatment Materials: ASTM C 475/C 475M.
1. Joint Tape: Paper unless otherwise recommended by panel manufacturer. 2. Joint Compounds: Drying-type, ready-mixed, all-purpose compounds.
C. Sound-Attenuation Blankets: ASTM C 665, Type I (unfaced).
PART 3 - EXECUTION
3.1 INSTALLATION
A. Install gypsum board to comply with ASTM C 840.
1. Isolate gypsum board assemblies from abutting structural and masonry work. Pro-vide edge trim and acoustical sealant.
2. Single-Layer Fastening Methods: Fasten gypsum panels to supports with screws. 3. Multilayer Fastening Methods: Fasten in accordance with UL Listing.
B. Fire-Resistance-Rated Assemblies: Comply with requirements of listed assem-
blies. C. Finishing Gypsum Board: ASTM C 840.
1. At concealed areas, unless a higher level of finish is required for fire-resistance-rated assemblies, provide Level 1 finish: Embed tape at joints.
2. At substrates for tile, provide Level 2 finish: Embed tape and apply separate first coat of joint compound to tape, fasteners, and trim flanges.
3. Unless otherwise indicated, provide Level 4 finish: Embed tape and apply separate first, fill, and finish coats of joint compound to tape, fasteners, and trim flanges.
D. Texture Finish Application: Mix and apply finish using powered spray equipment, to pro-
duce a uniform texture free of starved spots or other evidence of thin application or of appli-cation patterns. 1. Finish: Orange peel texture matching existing painted walls in building.
END OF SECTION 09 29 00

KGA Architecture 09 51 23 -1 May 5, 2016 UNLV Wright Hall Laboratory Build Out – 16355.00 Acoustical Ceilings
SECTION 09 51 23
ACOUSTICAL CEILINGS
PART 1- GENERAL
1.1 SUMMARY
A. Section Includes: Acoustical panels including but not limited to: 1. Suspended metal grid ceiling system and perimeter trim.
2. Acoustical panels. 3. Accessories required for a complete installation.
B. Related Sections:
1. Section 092900 - Gypsum Board 2. Division 15 - Mechanical Work. 3. Division 16 - Electrical Work.
1.2 REFERENCES
A. American Society Testing and Materials (ASTM).
B. Ceilings and Interior Systems Contractors Association (CISCA) Acoustical Ceilings: Use
and Practice. C. Underwriter's Laboratories Fire Resistance Directory and Building Material Directory.
1.3 QUALITY ASSURANCE
A. Regulatory Requirements, Codes, and Standards: 1. Fire Performance Characteristics: Identify acoustical ceiling components with
appropriate markings of applicable testing and inspecting organization. a. Surface Burning Characteristics: Tested per ASTM E 84 and complying with
ASTM E 1264 for Class A products. 1) Flame Spread: 25 or less. 2) Smoke Developed: 50 or less.
b. Fire Resistance Ratings: Indicated by reference to design designations in UL Fire Resistance Directory, tested per ASTM E 119.
2. Suspension system to rigidly secure acoustical ceiling system including integral mechanical and electrical components with maximum deflection of I/360.
B. Installer Qualifications: Installer having minimum 3 years documented experience
successfully completing work similar in material, design, and extent.
C. Single Source Responsibility for Ceiling Units: Obtain each type of acoustical ceiling unit from single source with resources to provide products of consistent quality in appearance and physical properties without delaying progress of the work.

KGA Architecture 09 51 23 -2 May 5, 2016 UNLV Wright Hall Laboratory Build Out – 16355.00 Acoustical Ceilings
D. Single Source Responsibility for Suspension System: Obtain each type of suspension
system from a single source with resources to provide products of consistent quality in appearance and physical properties without delaying progress of the work.
E. Coordination of Work: Coordinate layout and installation of acoustical ceiling units and
suspension system components with other construction penetrating ceilings or supported by them, including light fixtures, HV AC equipment, tire suppression system components (if any), and partition system (if any).
1.4 SUBMITTALS
A. Product Data: Manufacturer's technical product data and installation and maintenance instructions.
B. Shop Drawings: Indicate grid layout and related dimensioning, junctions with adjacent or
abutting work or ceiling finishes, and interrelation of mechanical and electrical items related to system.
C. Samples:
1. Full size acoustical units. 2. I foot lengths of suspension system components.
D. Certifications: Copies of certified tests indicating flame spread rating and smoke density
rating of materials specified.
1.5 DELIVERY, STORAGE, AND HANDLING
A. Deliver units to site in original, unopened packages and store in fully enclosed space protected against damage from moisture, direct sunlight, and surface contamination.
B. Before installing units, condition units to existing temperature and stabilized moisture
content of area receiving units.
C. Handle units carefully to avoid chipping edges or damaging units.
1.6 PROJECT CONDITIONS
A. Maintain uniform temperature of minimum 60 degrees F (16 degrees C), and maximum humidity of 40 percent prior to, during, and after acoustical unit installation.
B. Space Enclosure: Do not install interior acoustical ceilings until space is enclosed and
weatherproof, wet work in space is completed and nominally dry, work above ceilings is complete, and ambient conditions of temperature and humidity will be continuously maintained at values near those indicated for final occupancy.

KGA Architecture 09 51 23 -3 May 5, 2016 UNLV Wright Hall Laboratory Build Out – 16355.00 Acoustical Ceilings
PART 2- PRODUCTS
2.1 MATERIALS
A. Manufacturers: Selections indicated in finish schedule indicate colors and textures selected
for aesthetics and are not intended to limit materials; products by one of the following meeting aesthetic and technical requirements are acceptable. 1. Suspension Grids:
Armstrong World Industries, Inc. Chicago Metallic Corporation. Donn Products USG Interiors, Inc.
2. Ceiling Panels: Armstrong World Industries. Celotex Corporation. USG Interiors, Inc.
B. Suspension Systems: Comply with applicable ASTM C 635 requirements. 1. Finishes and Colors: As indicated in drawings.
2. Attachment Devices: Size for 5 times design load indicated in ASTM C 635, Table 1, Direct Hung, seismic requirements, and ceiling system flatness requirement specified.
3. Wire for Hangers and Ties: ASTM A 641, Class l zinc coating, soft temper. a. Gauge: Size wire that when stressed at 3 times hanger design load (ASTM C
635, Table 1, Direct Hung), will be less than yield stress of wire, using minimum 10-gauge wire.
4. Rod or Flat Hangers: Mild steel, zinc coated, or protected with rust inhibitive paint. 5. Angle Hangers: Angles w i t h legs of minimum 7 /8-inch-wide, formed with 0.0365-
i n c h - t h i c k galvanized steel sheet complying with ASTM A 446 Coating Designation G90, with bolted connections and 5116-inch diameter bolts.
6. Edge Moldings and Trim: Metal or extruded aluminum of types and profiles for standard moldings for edges and penetrations, including light fixtures, fitting edge detail and suspension system indicated.
7. Hold Down Clips for Nonfire Resistance Rated Ceilings: For interior ceilings composed of lay in panels weighing less than 1 l b . per sq. ft., provide hold down clipsspaced 2'0" o.c. on all cross tees.
8. Impact Clips: Impact clip system design to absorb impact forces against lay in panels.
C. Acoustical Panels: Location of each tile as indicated and to comply with ASTM El264: 1. a. Pattern, size and location as indicated. b. Thickness: 9/16 inch
c. Texture: As indicated. d. Fire Hazard Classification: None.
e. Edge: Fine Line. 2. Perimeter trim limited to Armstrong Axiom system. 3. Accessories:
a. Concealed Acoustical Sealant: Nondrying, non-hardening, non-skinning, non-staining, nonbleeding, gummable sealant. Refer to Section 07900.
b. Touch Up Paint: Type and color to match acoustical and grid units.

KGA Architecture 09 51 23 -4 May 5, 2016 UNLV Wright Hall Laboratory Build Out – 16355.00 Acoustical Ceilings
PART 3- EXECUTION
3.1 EXAMINATION
A. Examine substrates and structural framing for condition affecting installation and
anchorage of ceiling system.
B. Verify dimensions of in place and subsequent construction and layout of hangers will not interfere with other work. Do not begin work until unsatisfactory conditions have been corrected. Installation of materials constitutes acceptance of the supporting construction.
3.2 PREPARATION
A. Coordination: Furnish layouts for preset inse1ts, clips, and other ceiling anchors.
1. Furnish concrete inserts and similar devices to other trades for installation well in advance of time needed for coordination of other work.
2. Coordinate the location of lighting units, sprinkler heads, and protrusions in panels.
B. Measure each ceiling area and establish layout of acoustical units to balance border widths at opposite edges of each ceiling. Lay out system to balanced grid design with edge units minimum 50 percent of acoustical unit size. Comply with reflected ceiling plans.
C. Arrange acoustical units and orient directionally patterned units in alternating pattern.
3.3 INSTALLATION OF LAY IN GRID SUSPENSION SYSTEM
A. Install acoustical ceiling systems to comply with ASTM C 636 Standard for Installations
of Ceiling Suspension Systems and CISCA Ceiling Systems Handbook. Install fire rated system in accordance with UL Design Requirements.
B. Suspend ceiling hangers from building structural members:
l. Install hangers plumb and free from contact with insulation or other objects within ceiling plenum not part of supporting structural or ceiling suspension system. Splay hangers only where required to miss obstructions and offset resulting horizontal forces by bracing, counter playing, or other equally effective means.
2. Where width of ducts and other construction within ceiling plenum produces hanger spacing’s interfere with location of hangers at spacing required to support standard suspension system members, install supplemental suspension members and hangers in form of trapezes or equivalent devices. Size supplemental suspension members and hangers to support ceiling loads within performance limits established by referenced standards.
3. Secure wire hangers by looping and wire tying, either directly to structures or to inserts, eye screws, or other devices that are secure and appropriate for substrate, and preventing deterioration or failure due to age, corrosion, or elevated temperatures.
KGA Architecture 09 51 23 -5 May 5, 2016 UNLV Wright Hall Laboratory Build Out – 16355.00 Acoustical Ceilings
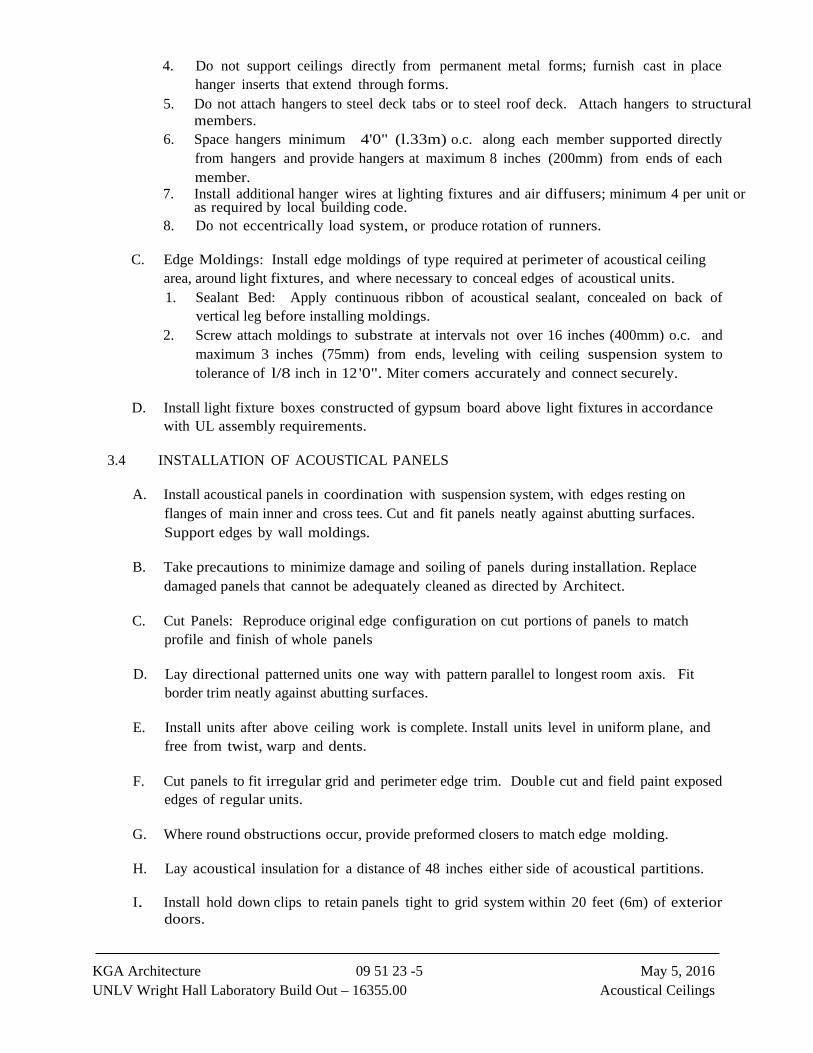
4. Do not support ceilings directly from permanent metal forms; furnish cast in place
hanger inserts that extend through forms. 5. Do not attach hangers to steel deck tabs or to steel roof deck. Attach hangers to structural
members. 6. Space hangers minimum 4'0" (l.33m) o.c. along each member supported directly
from hangers and provide hangers at maximum 8 inches (200mm) from ends of each member.
7. Install additional hanger wires at lighting fixtures and air diffusers; minimum 4 per unit or as required by local building code.
8. Do not eccentrically load system, or produce rotation of runners.
C. Edge Moldings: Install edge moldings of type required at perimeter of acoustical ceiling area, around light fixtures, and where necessary to conceal edges of acoustical units. 1. Sealant Bed: Apply continuous ribbon of acoustical sealant, concealed on back of
vertical leg before installing moldings. 2. Screw attach moldings to substrate at intervals not over 16 inches (400mm) o.c. and
maximum 3 inches (75mm) from ends, leveling with ceiling suspension system to tolerance of l/8 inch in 12 '0". Miter comers accurately and connect securely.
D. Install light fixture boxes constructed of gypsum board above light fixtures in accordance
with UL assembly requirements.
3.4 INSTALLATION OF ACOUSTICAL PANELS
A. Install acoustical panels in coordination with suspension system, with edges resting on flanges of main inner and cross tees. Cut and fit panels neatly against abutting surfaces. Support edges by wall moldings.
B. Take precautions to minimize damage and soiling of panels during installation. Replace
damaged panels that cannot be adequately cleaned as directed by Architect.
C. Cut Panels: Reproduce original edge configuration on cut portions of panels to match profile and finish of whole panels
D. Lay directional patterned units one way with pattern parallel to longest room axis. Fit
border trim neatly against abutting surfaces.
E. Install units after above ceiling work is complete. Install units level in uniform plane, and free from twist, warp and dents.
F. Cut panels to fit irregular grid and perimeter edge trim. Double cut and field paint exposed
edges of regular units.
G. Where round obstructions occur, provide preformed closers to match edge molding.
H. Lay acoustical insulation for a distance of 48 inches either side of acoustical partitions. I. Install hold down clips to retain panels tight to grid system within 20 feet (6m) of exterior
doors.

KGA Architecture 09 51 23 -6 May 5, 2016 UNLV Wright Hall Laboratory Build Out – 16355.00 Acoustical Ceilings
3.5 ERECTION TOLERANCES
A. Maximum Variation from Flat and Level Surface: 1/8 inch in 10 feet (3mm in 3m).
B. Maximum Variation from Plumb of Grid Members Caused by Eccentric Loads: 2 degrees.
3.6 IDENTIFICATION
A. Provide noncorrosive sheet metal screws with color coded heads (identification markers) in perforations of ceiling units to indicate location of concealed valves, dampers, and other equipment requiring adjustments or servicing. Coordinate with other trades. Color coding system and items to be identified as determined by Architect to comply with industry identification coding.
3.7 CLEANING
A. Clean exposed surfaces of acoustical ceilings, including trim, edge moldings, and suspension members. Comply with manufacturer's instructions for cleaning and touch up of minor finish damage. Remove and replace work that cannot be successfully cleaned and repaired to permanently eliminate evidence of damage.
END OF SECTION 09 51 23
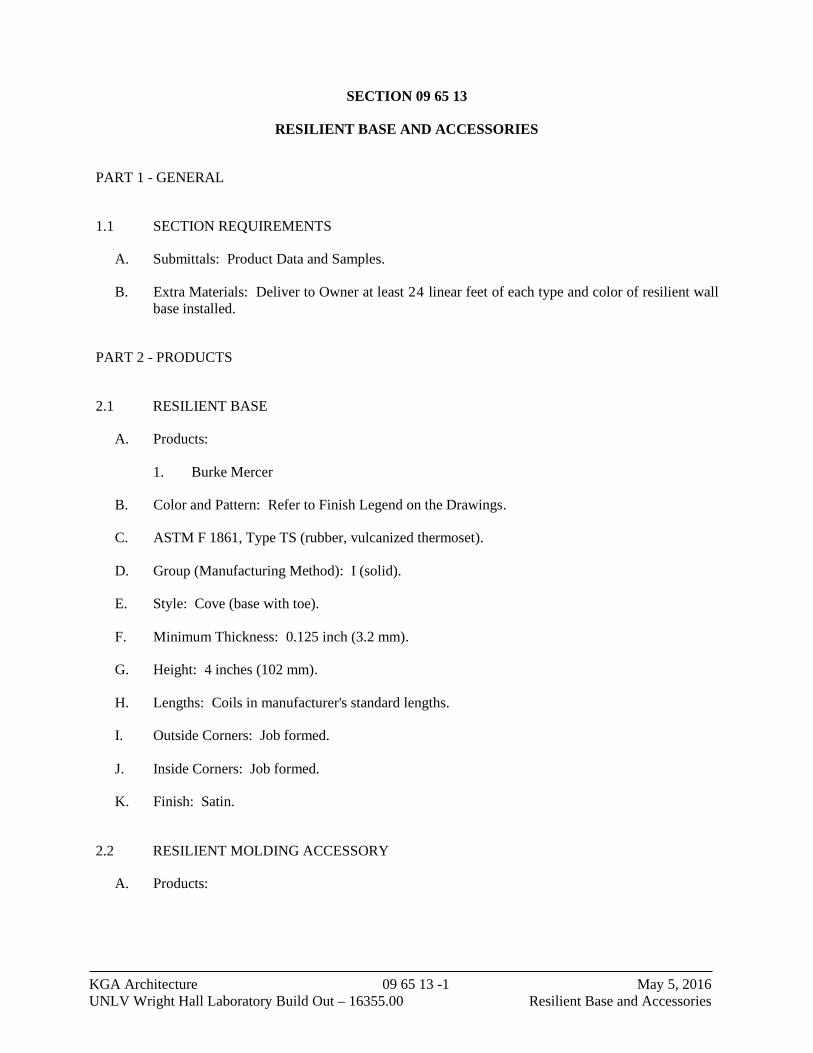
KGA Architecture 09 65 13 -1 May 5, 2016 UNLV Wright Hall Laboratory Build Out – 16355.00 Resilient Base and Accessories
SECTION 09 65 13
RESILIENT BASE AND ACCESSORIES PART 1 - GENERAL
1.1 SECTION REQUIREMENTS
A. Submittals: Product Data and Samples.
B. Extra Materials: Deliver to Owner at least 24 linear feet of each type and color of resilient wall
base installed. PART 2 - PRODUCTS
2.1 RESILIENT BASE
A. Products:
1. Burke Mercer
B. Color and Pattern: Refer to Finish Legend on the Drawings.
C. ASTM F 1861, Type TS (rubber, vulcanized thermoset).
D. Group (Manufacturing Method): I (solid).
E. Style: Cove (base with toe).
F. Minimum Thickness: 0.125 inch (3.2 mm).
G. Height: 4 inches (102 mm).
H. Lengths: Coils in manufacturer's standard lengths.
I. Outside Corners: Job formed.
J. Inside Corners: Job formed.
K. Finish: Satin.
2.2 RESILIENT MOLDING ACCESSORY
A. Products:

KGA Architecture 09 65 13 -2 May 5, 2016 UNLV Wright Hall Laboratory Build Out – 16355.00 Resilient Base and Accessories
1. Provide profiles as detailed on drawings. Manufacturer as selected by Contractor.
B. Color: As selected by Architect from manufacturer’s standard colors.
C. Description: Joiner for carpet and tile; Joiner for VCT and carpet; Edge for glue down carpet.
D. Material: Vinyl.
E. Profile and Dimensions: As indicated on drawings. 2.3 INSTALLATION ACCESSORIES
A. Adhesives: Water-resistant type recommended by manufacturer to suit products and sub-
strate conditions. PART 3 - EXECUTION
3.1 INSTALLATION
A. Adhesively install resilient wall base and accessories.
B. Install wall base in maximum lengths possible. Apply to walls, columns, pilasters, case-
work, and other permanent fixtures in rooms or areas where base is required.
C. Install reducer strips at edges of floor coverings that would otherwise be exposed.
END OF SECTION 09 65 13

KGA Architecture 09 91 00 -1 May 5, 2016 UNLV Wright Hall Laboratory Build Out - 16355.00 Painting
SECTION 09 91 00
PAINTING PART 1 - GENERAL
1.1 SECTION REQUIREMENTS
A. Submittals:
1. Product Data. Include printout of MPI's "MPI Approved Products List" with product highlighted.
2. Samples.
B. Mockups: Full-coat finish Sample of each type of coating, color, and substrate, applied where directed.
C. Extra Materials: Deliver to Owner 1 gal. (3.8 L) of each color and type of finish coat paint used
on Project, in containers, properly labeled and sealed. PART 2 - PRODUCTS
2.1 PAINT
A. Products:
1. Specified products is ICI. Other acceptable manufacturers are Dunn Edwards and Sher-
win Williams.
B. MPI Standards: Provide materials that comply with MPI standards indicated and listed in its "MPI Approved Products List."
C. Material Compatibility: Provide materials that are compatible with one another and with
substrates.
1. For each coat in a paint system, provide products recommended in writing by manufacturers of topcoat for use in paint system and on substrate indicated.
D. Use interior paints and coatings that comply with the following limits for VOC content:
1. Flat Paints and Coatings: 50 g/L. 2. Nonflat Paints, Coatings: 150 g/L. 3. Primers, Sealers and Undercoaters: 200 g/L.
E. Colors: As indicated in the Finish Legend on the Drawings.

KGA Architecture 09 91 00 -2 May 5, 2016 UNLV Wright Hall Laboratory Build Out - 16355.00 Painting
PART 3 - EXECUTION 3.1 PREPARATION
A. Comply with recommendations in MPI's "MPI Architectural Painting Specification Manual"
applicable to substrates indicated.
B. Remove hardware, lighting fixtures, and similar items that are not to be painted. Mask items that cannot be removed. Reinstall items in each area after painting is complete.
C. Clean and prepare surfaces in an area before beginning painting in that area. Schedule painting
so cleaning operations will not damage newly painted surfaces. 3.2 APPLICATION
A. Comply with recommendations in MPI's "MPI Architectural Painting Specification Manual"
applicable to substrates indicated.
B. Paint exposed surfaces, new and existing, unless otherwise indicated.
1. Paint surfaces behind movable equipment and furniture same as similar exposed surfaces. 2. Paint surfaces behind permanently fixed equipment or furniture with prime coat only. 3. Paint the back side of access panels. 4. Color-code mechanical piping in accessible ceiling spaces. 5. Do not paint prefinished items, items with an integral finish, operating parts, and labels
unless otherwise indicated.
C. Apply paints according to manufacturer's written instructions.
1. Use brushes only for exterior painting and where the use of other applicators is not practical.
2. Use rollers for finish coat on interior walls and ceilings.
D. Apply paints to produce surface films without cloudiness, spotting, holidays, laps, brush marks, roller tracking, runs, sags, ropiness, or other surface imperfections. Cut in sharp lines and color breaks.
1. If undercoats or other conditions show through topcoat, apply additional coats until cured
film has a uniform paint finish, color, and appearance.
E. Apply stains and transparent finishes to produce surface films without color irregularity, cloudi-ness, holidays, lap marks, brush marks, runs, ropiness, or other imperfections. Use multi-ple coats to produce a smooth surface film of even luster.
3.3 EXTERIOR PAINT APPLICATION SCHEDULE
A. Steel (Doors): 1. Semigloss, Alkyd Enamel: Two coats over rust-inhibitive primer: MPI EXT 5.1D.
KGA Architecture 09 91 00 -3 May 5, 2016 UNLV Wright Hall Laboratory Build Out – 16355.00 Painting
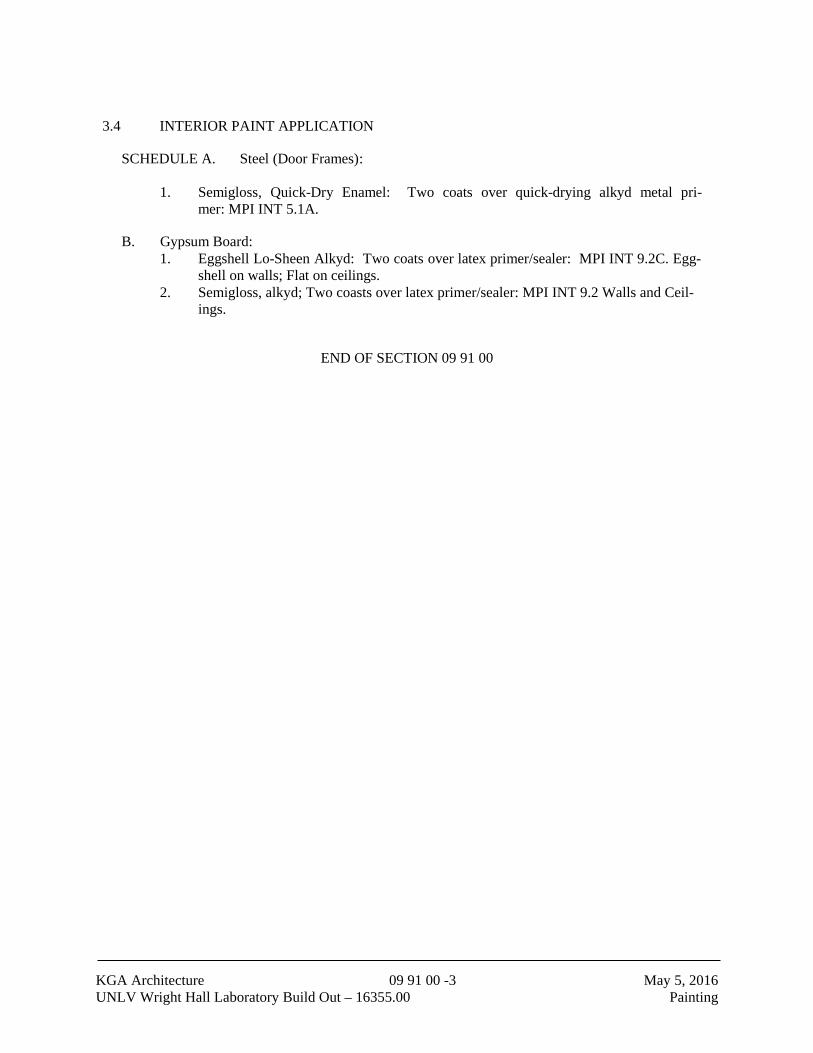
3.4 INTERIOR PAINT APPLICATION
SCHEDULE A. Steel (Door Frames):
1. Semigloss, Quick-Dry Enamel: Two coats over quick-drying alkyd metal pri-mer: MPI INT 5.1A.
B. Gypsum Board:
1. Eggshell Lo-Sheen Alkyd: Two coats over latex primer/sealer: MPI INT 9.2C. Egg-shell on walls; Flat on ceilings.
2. Semigloss, alkyd; Two coasts over latex primer/sealer: MPI INT 9.2 Walls and Ceil-ings.
END OF SECTION 09 91 00


KGA Architecture 11 53 00 -1 May 5, 2016 UNLV Wright Hall Laboratory Build Out – 16355.00 Laboratory Casework
SECTION 11 53 00
LABORATORY CASEWORK
PART 1 - GENERAL
1.01 DESCRIPTION OF WORK
A. All laboratory casework, working surfaces and other items specified herein shown on the drawings shall be furnished, installed and shall be demonstrated to properly perform in accordance with the function specified herein. Provide all necessary fillers, scribes and miscellaneous accessories and hardware to provide a complete installation
1.02 SECTION INCLUDES
A. Wood casework B. Work surfaces C. Moveable lab tables D. Moveable cabinets E. Storage Cabinets F. Wall Cabinets G. Adjustable Shelving H. High density storage units
1.03 RELATED SECTIONS
A. Division 9: Backing in Walls for Laboratory Casework and Accessory Anchorage B. Division 9: Base Molding C. Section 11602: Laboratory Fume Hoods D. Section 11603: Laboratory Fixtures and Fittings E. Section 15: Mechanical F. Section 16: Electrical
1.04 DELIVERY, STORAGE AND HANDLING
A. Schedule delivery of casework and equipment so that spaces are sufficiently complete to allow for installation immediately following delivery.
B. Protect finished surfaces from soiling or damage during handling and installation. Cover working surfaces with cardboard. Mark in large lettering “NO STANDING”.
1.05 PROJECT CONDITIONS
A. Do not deliver or install equipment until the following conditions have been met: 1. Windows and doors are installed and the building is secure and weather tight. 2. Ceiling, overhead ductwork, and lighting are installed.

KGA Architecture 11 53 00 -2 May 5, 2016 UNLV Wright Hall Laboratory Build Out – 16355.00 Laboratory Casework
3. All painting is completed and floor finish is installed. 4. Casework and related materials require the interior building temperature not to exceed 80
degrees (F) to avoid undue structural fatigue and damage. Additionally, frequent and/or excessive changes in temperature and/or humidity levels during the course of the material installation, or once materials are installed, must be avoided to prevent damage to equipment.
5. Under no conditions should moisture levels exceed 50% relative humidity. 1.06 SUBMITTALS
A. Product Data: Submit manufacturer’s data for each item of laboratory furnishings and equipment. Include component dimensions, configurations, construction details, joint details and attachments. Indicate location, size and service requirement for each utility connection. See Specification Division 1 for additional general requirements.
B. Shop Drawings:
1. Provide ½” = 1’0” scale elevations of each individual and battery of casework units showing cross sections, rough-in and anchor placements, tolerances and clearances. Indicate relationship of units to fume hoods, other laboratory equipment, surrounding walls, ceilings, windows, doors and other building components.
2. Provide ¼” = 1’0” rough-in plan drawings for coordination with trades. Rough-in shall show free area.
C. Top Material Samples: Submit 3” x 3” product sample of each type of benchtop.
D. Hardware Samples: Provide samples of door and drawers pulls, locks and hinges.
E. Finish Samples: Submit 3” x 5” samples of each color of finish from manufacturer’s standard
color offering for casework and accessories for selection by the Owner’s Representative.
F. Submit detailed seismic anchorage and attachment drawings and calculations complying with all Uniform Building Code requirements and regulations for seismic restraint.
1.07 QUALITY ASSURANCE
A. Single Source Responsibility: Laboratory casework, work surfaces and accessories included in this section and specification sections listed below shall be supplied by a single laboratory supplier. Proposals from brokers or multiple suppliers will not be accepted. 1. Section 11603 Laboratory Fixtures, Fittings and Accessories 2. Section 11602 Laboratory Fume Hoods
B. The supplier for work in this section shall use manufacturers with production facilities
including all tools, equipment and special machinery necessary for specializing in the fabrication and installation of the type of equipment specified, with skilled personnel, factory trained workmen and an experienced engineering department. Each shall have the demonstrated knowledge, ability and the proven capability to complete an installation of this size and type within the required time limits:

KGA Architecture 11 53 00 -3 May 5, 2016 UNLV Wright Hall Laboratory Build Out – 16355.00 Laboratory Casework
1. Ten years or more experience in manufacture of laboratory casework and equipment of type specified.
2. Ten installations of equal or larger size and requirements within the last five years. 1.08 REFERENCES
A. SAMA Standard LF8-1976 Metal Laboratory Furniture
B. ASTM A366 gauges U.S. high quality cold rolled milled steel.
PART 2 – PRODUCTS 2.01 WOOD LABORATORY CASEWORK
A. Manufacturers: Acceptable manufacturers of wood laboratory casework listed in alphabetical order are as follows: 1. Campbell Rhea
Market: K-12 & College / University Contact: Direct 1865 N. Market Street Paris, TN 38242 731-642-4251 [email protected]
2. Fisher Hamilton Scientific
Daryl Carr 9434 Chesapeake Drive, Suite 1212 858-279-1000 – Phone 619-733-1249 – Mobile 858-279-1002 – Fax [email protected]
3. Kewaunee
2700 W. Front Street, Statesville, NC 28677 Phone: 877-572-6610 Fax: 704-873-5160
B. Design Requirement:
1. Premium grade wood casework. All cabinets to be constructed of high quality birch
veneer core plywood, maple finish on both sides. Particle board construction not acceptable.
2. Door and drawer design: Full Flush Overlay: Square edged design with 1/8” reveals between door or drawer and frame, door to door, door to drawer, drawer to drawer; 1/8” (maximum) vertical reveal between doors/drawers and cabinet ends.
3. Grain pattern on end panels to be vertical.

KGA Architecture 11 53 00 -4 May 5, 2016 UNLV Wright Hall Laboratory Build Out – 16355.00 Laboratory Casework
4. Grain pattern on cabinet drawers and doors: Vertical matched grain (drawers and doors).
5. Self-supporting units capable of interchangeable use.
6. Flush Interiors: Set cupboard bottom flush with front end facers. Surface mounted bottoms and offsets caused by front face frames which interfere with ease of cleaning are not acceptable.
7. Joinery: 32mm doweled joinery system glued, clamped and screwed. Dowels are to be
hardwood, laterally fluted with chamfered ends and a minimum diameter of 8mm.
8. Door & Drawer edge detail: All exposed edges of drawer’s fronts and cabinet doors (wall cabinets, tall storage cabinets, moveable base cabinets, fixed base cabinets, and adjustable wall shelves) to be veneer core, with the layers of the veneer core visible.
C. Performance Requirements:
1. Chemical Resistance: Manufacturer shall provide verification of wood finish
performance. Testing to be performed by independent testing agency.
2. Procedure: Finished panels shall be oriented horizontally and vertically during exposure to the test chemicals. Chemical concentrations shall be adjusted by the volume method. Ambient temperature and chemical temperature shall be 68°-72° F. At the end of the test period, the surface shall be washed with detergent and warm water. Areas exposed to solvents shall be cleaned with a cloth dampened with the respective solvent. Prior to the evaluation, 16-24 hours after the chemicals have been removed, the test surface shall be scrubbed with a damp paper towel and dried with paper towels. a. Horizontal Test: Apply five (5) drops of the acid, base or salt substance to
correspondingly numbered areas of the surface to be tested. Position a 1” diameter watch glass in the liquid, convex side downward. Solvents shall be applied by saturating a 1” ball of cotton, then covering with an inverted 2 ounce wide-mouth bottle. Test duration shall be one hour.
b. Vertical Test: The test surface shall be marked to indicate divisions; 12’ high, ¾” wide, and numbered to identify the chemicals. Five (5) drops of each substance shall be applied to its respective numbered area in a vertical track pattern to prevent crossover. Test duration shall be two hours.
3. Ratings:
a. Excellent: Indicates excellent to superior integrity of finish film. Includes no effect of slight change in glass and slight discoloration.
b. Good: Allows change of gloss or discoloration or slight swelling while retaining integrity of finish film.
c. Failure: Obvious and significant deterioration, including blistering, pitting,
cratering, erosion and/or loss of finish material.

KGA Architecture 11 53 00 -5 May 5, 2016 UNLV Wright Hall Laboratory Build Out – 16355.00 Laboratory Casework
4. Test Results: HORIZONTAL VERTICAL TEST TEST REAGENT RATING RATING Acetic Acid 50% Excellent Excellent Acetic Acid 75% Good Excellent Hydrochloric Acid 20% Excellent Excellent Hydrochloric Acid 37% Good Excellent Hydrogen Peroxide 30% Excellent Excellent Nitric Acid 10% Excellent Excellent Nitric Acid 25% Good Good Phosphoric Acid 50% Excellent Excellent Phosphoric Acid 75% Excellent Excellent Sulfuric Acid 25% Excellent Excellent Sulfuric Acid 50% Good Excellent Glycerine Excellent Excellent Potassium Hydroxide 40% Excellent Good Potassium Hydroxide 45% Excellent Good Sodium Hydroxide 25% Excellent Excellent Sodium Hydroxide 35% Excellent Excellent Sodium Hydroxide 40% Excellent Excellent Sodium Hydroxide 50% Excellent Excellent Sodium Chloride, Saturated Excellent Excellent Sodium Carbonate, Saturated Excellent Excellent Sodium Hypochlorite 5.25% Excellent Excellent Zinc Chloride, Saturated Excellent Excellent Acetone Good Excellent Butyl Alcohol Excellent Excellent Ethyl Acetate Good Excellent Ethyl Alcohol Excellent Excellent Ethyl Ether Good Excellent Kerosene Excellent Excellent Methyl Alcohol Excellent Excellent Methyl Ethyl Ketone Good Excellent Naphthalene Excellent Excellent Toluene Good Excellent Xylene Good Excellent
D. Materials and Finishes:
1. Definition of cabinet components by surface visibility.
a. Exposed surfaces: 1. Surfaces visible when drawers and solid doors are closed. 2. Front edges of cabinet body members are visible or seen through a gap of
greater than 1/8” with doors and drawers closed. 3. Portions of cabinets visible when fixed appliances are installed.
b. Semi-exposed surfaces: 1. Surfaces visible when doors and drawers are open.

KGA Architecture 11 53 00 -6 May 5, 2016 UNLV Wright Hall Laboratory Build Out – 16355.00 Laboratory Casework
2. Surfaces visible behind clear glass doors. 3. Interior surfaces of open units. 4. Bottoms of cabinets 30” or more above finished floor. 5. Tops of cabinets less than 78” above finished floor, or are visible from an
upper floor or staircase after installation. c. Unexposed surfaces:
1. Surfaces not normally visible after installation. 2. Bottoms of cabinets less than 30” above finished floor 3. Tops of cabinets over 78” above finished floor which are not visible from an
upper level. 4. Stretchers, blocking and/or components concealed by drawers.
2. Hardwood:
a. Hardwood lumber, clean and free of defects. All lumber kiln dried to uniform moisture content of six (6) percent. 1. Exposed material: Hard maple 2. Semi-exposed and unexposed material: Sound hardwood of species suitable for
the intended purpose. 3. Plywood: a. Hardwood plywood featuring a balanced construction glued with water resistant
resin glue. 1. Core: 9-ply veneer core plywood for drawer fronts and cabinet doors. 12-ply
veneer core for adjustable shelves. 2. Exposed face veneer: Plain sliced hard select white maple veneer. Select white
hard maple. No heartwood allowed. 3. Semi-exposed select hardwood veneer. Same species as exposed veneer. 4. Unexposed sound grade hardwood veneer. 4. Glass: Float Glass – 3mm (nominal 1/8”) on framed glass doors on wall and upper cases
and 6 mm (nominal 7/32”) on tall cases, and solid glass sliding doors on wall and upper cases. Glass to be without imperfections or marred surfaces.
5. Glue: Type II and Type III. 6. Finish: Highly chemical resistant acrylic urethane finish with built-in UV blocker applied
over stain of selected color from manufacturer’s standard color offering. a. Preparation: Sand exposed surfaces smooth, free from dirt and defects. b. Stain application: Apply stain of color selected to all exposed casework surfaces.
Apply in a manner to achieve a match with the selected color sample upon completion of application of the finish.
c. Finish application: Apply finish coats evenly, force dry in a dust-free atmosphere, sand and wipe clean surfaces between coats to produce a smooth, satin luster finish. Surfaces exposed to view shall be water clear and bright. Cloudy, muddy finishes carrying tinting pigments will not be acceptable.
d. Finish schedule: Apply an acrylic urethane finish to the following areas: 1. Exposed surfaces: Multiple coats sanded between coats with final 1.5 dry mil
thick, minimum, finish. 2. Semi-exposed surfaces: Multiple coats with sanding between coats with final
1.0 dry mil thick, minimum, finish.

KGA Architecture 11 53 00 -7 May 5, 2016 UNLV Wright Hall Laboratory Build Out – 16355.00 Laboratory Casework
3. Unexposed surfaces: No finish required.
E. Construction:
1. Base units: a. Cabinet ends: ¾” thick veneer core plywood as specified, with 3mm (1/8” nominal)
thick exposed hardwood facer on front edges. Bore interior faces, as appropriate, for security panels, rails and four rows of shelf bracket support holes.
b. Front top rail: 1” x 3” solid hardwood. Secure and glue to cabinet ends with 8mm dowel joinery as required.
c. Vertical back rails: ¾” x 3-3/4” hardwood secured to cabinet ends with 8mm dowel system and screws.
d. 3-3/4” x ¾” front hardwood toe space rail, mounted between end panels, forming a 4” high x 2-1/2” deep toe space, closed to cupboard bottom. Secure rails to cabinet end panels with 8mm dowel joinery.
e. Base unit bottoms: ¾” thick plywood as specified. Set flush and joined to cabinet end panels with 8mm (1/4” nominal) dowels on 96mm (3-3/4” nominal) dowel space and metal screws. Front edge banded with 3mm (nominal 1/8”) hardwood facer.
f. Cabinet unit backs shall be removable one piece 3/16” hardboard. Sink base back shall be full half height construction to allow for plumbing and sink waste connection. Exposed/finished back panels where required, shall be 3/4” thick.
g. Provide split back on drawer cabinets of 3/16” hardboard. h. Vertical dividers: Full height dividers shall be 1-1/2” thick plywood, glued and
screwed in place. Provide 3mm (nominal 1/8”) thick hardwood facer on exposed edge.
i. Base unit front horizontal intermediate rail: ¾” x 1-1/2” exposed hardwood rail to be provided between doors and drawers. Secure to cabinet end panels with 8mm dowel joinery.
j. Base unit shelves are to be adjustable on 32mm centers. k. Drawer construction: Drawer box front, sides and back to be of ¾”, 9-ply Birch
plywood, finished with a 7-level polyester acrylic chemical resistant finish. Drawer joinery shall be lock shoulder construction or multiple dovetail construction. Drawer front edges to have the layers of the veneer core exposed and visible to view.
l. Drawer bottom shall be 6mm (nominal ¼”) tempered hardboard dadoed into 4-side drawer box and scaled with hot melt glue around drawer bottom perimeter.
m. Moveable base cabinets to have heavy duty, lockable casters, with removable top drawer. Construction of base cabinet must not allow overturning when top drawer is open.
2. Wall, upper and tall cases:
a. Wall, upper and tall cabinet ends: ¾” thick veneer core plywood as specified, with 3mm (1/8” nominal) thick exposed hardwood facer on front edges. Bore interior faces, as appropriate, for security panels, rails and four rows of shelf bracket support holes.
b. Veneer core plywood with 3mm nominal 1/8” hardwood facer on front edge. Bottom hardwood kick rail on tall cases 5-1/8” high joined to cabinet sides with 8mm (nominal 5/16”) dowels. Stained and finished to match exposed surfaces.

KGA Architecture 11 53 00 -8 May 5, 2016 UNLV Wright Hall Laboratory Build Out – 16355.00 Laboratory Casework
c. Solid doors shall be of ¾”, 9-ply Birch plywood, finished with a 7-level polyester acrylic chemical resistant finish. Door front edges to have the layers of the veneer core exposed and visible to view.
d. Framed-glazed doors: Solid hardwood construction ¾” x 2-3/4” solid stock machined to accept glass. Provide extruded vinyl retaining molding on interior design so glass can be replaced without tools.
3. Pull/writing boards (extended work surfaces): Provide where shown on drawings, 1”
thick hardwood plywood with chemical resistant plastic laminate veneer at top surface. Front pull out front to be ¾” 9 ply veneer core with all exposed edges to have the veneer core visible to view.
4. Hardware: a. Drawer and hinged door pulls shall be 8” aluminum wire pulls, all horizontally
mounted, and centered on doors and drawers. b. Hinges:
(1) Heavy duty, exposed 5 knuckle hinge attached with sheet metal screws. Provide two hinges for doors up to 48” high; three hinges for doors over 48” high. Notch for proper fit.
(2) Provide two hinges for doors up to 36” high. Three hinges for doors over 36” high.
c. Elbow catches: Spring type with strike. d. Bolts for tall storage cabinets shall be 3” long, shall have an 18” pull and an angle
strike to secure inactive door on cabinets over 72” in height. Elbow catches shall be used on inactive doors up to and including 72” in height.
e. Drawer suspension: Mechanical slides shall be full extension with overtravel, 150 lb. dynamic, zinc plated Accuride 3640 series. Drawer bodies less than 3-1/2” high (including pull out boards) to be furnished with full extension 100 lb. zinc plated Accuride 7432 series, or equal. (1) File drawers to be equipped with full extension with overtravel 150 lb.
dynamic zinc plated Accuride 3640 series, or equal.
5. Shelf supports: Single pin metal support. 2.02 LOCKS
A. Locks (location of locked cabinets to be determined), shall be:
1. 5-disc tumbler for master key system. a. Master Key System: Master key system shall have 5-disc tumbler locks with
capacity for 225 primary key changes. Master key one level with the potential of 40 different, non-interchangeable master key groups.
b. Keys: Stamped brass available from manufacturer or local locksmith, and supplied in the following quantities unless otherwise specified: 2 for each keyed different lock 3 for each group keyed alike locks 2 for master keys for each system
2. Lock types shall have heavy duty cylinder. Exposed lock nose finish to be dull nickel
(satin) plated. Provide locks by National or equal.

KGA Architecture 11 53 00 -9 May 5, 2016 UNLV Wright Hall Laboratory Build Out – 16355.00 Laboratory Casework
2.03 WORK SURFACES
A. Phenolic Resin Work Surface: Provide phenolic resin (equal or similar to Trespa Toplab) work surface for all fixed laboratory casework tops, and moveable lab benches, except as otherwise noted.
2.04 MOVEABLE LAB BENCH
A. Moveable lab benches:
1. Welded steel tube frame (1 5/8” x 1 5/8”), 12 gauge cold rolled steel, ground smooth, with white epoxy powder coat finish.
2. Adjustable height from 30” to 40”, with 2” increment adjustment. Universal clevis pin adjustment.
3. 1” phenolic resin black top.
4. Diagonal top bracing, integral and welded to table frame, located at top horizontal plan of
table. Diagonal tube bracing shall extend from front outside corners of table, and meet at center of back of table, forming a triangular frame.
5. Horizontal tube steel rail at 28” from top, at two sides and back. Front of table is open to
floor.
6. Adjustable screw leveler at base of each leg.
PART 3 – EXECUTION 3.01 INSTALLATION
A. Casework Installation:
1. Set casework components plumb, square, and straight with no distortion and securely anchored. Shim as required using concealed shims and or leveling bolts.
2. Screw continuous cabinets together with joints flush, tight and uniform, and with alignment of adjacent units within 1/16” tolerance.
3. Secure wall cabinets to solid supporting backing material, not to plaster, lath or gypsum
board.
B. Work Surface Installation:
1. Only factory prepared field joints, located per approved shop drawings, shall be permitted. Secure joints in field, where practical, in the same manner as in factory, with dowels, splines, adhesive or fasteners recommended by manufacturer.
2. Secure work surfaces to casework and equipment components with material and
procedures recommended by the manufacturer.
KGA Architecture 11 53 00 -10 May 5, 2016 UNLV Wright Hall Laboratory Build Out – 16355.00 Laboratory Casework
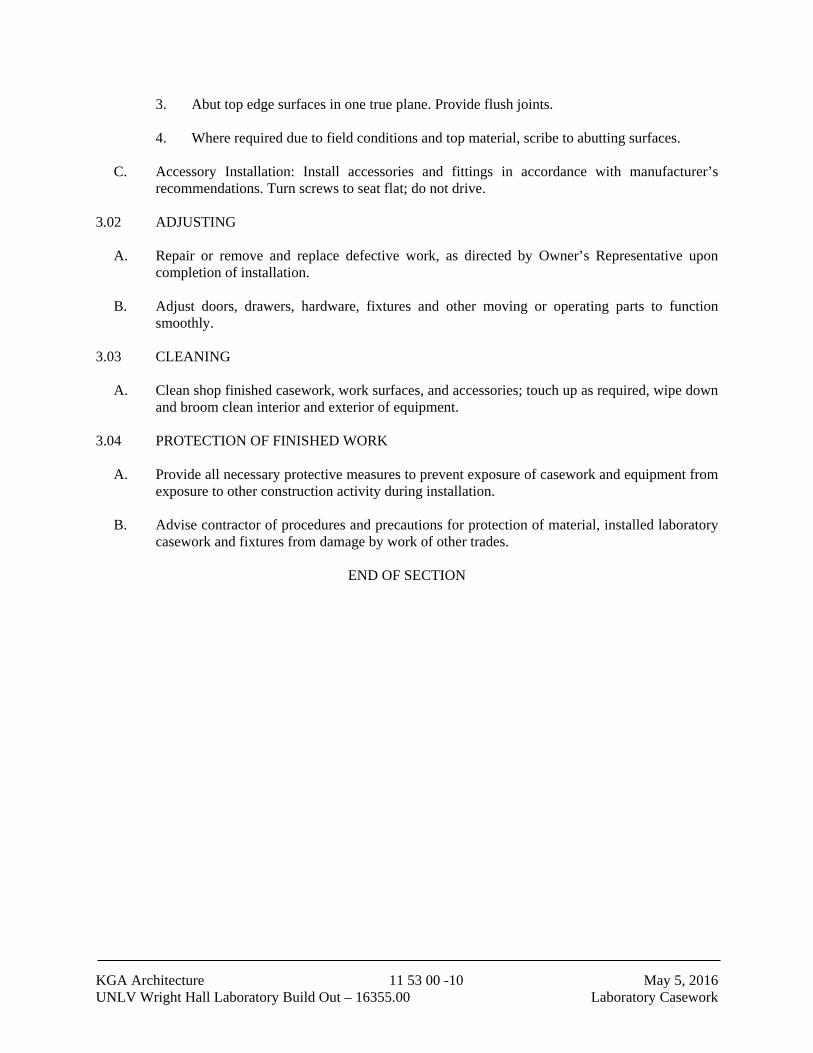
3. Abut top edge surfaces in one true plane. Provide flush joints.
4. Where required due to field conditions and top material, scribe to abutting surfaces.
C. Accessory Installation: Install accessories and fittings in accordance with manufacturer’s recommendations. Turn screws to seat flat; do not drive.
3.02 ADJUSTING
A. Repair or remove and replace defective work, as directed by Owner’s Representative upon completion of installation.
B. Adjust doors, drawers, hardware, fixtures and other moving or operating parts to function smoothly.
3.03 CLEANING
A. Clean shop finished casework, work surfaces, and accessories; touch up as required, wipe down and broom clean interior and exterior of equipment.
3.04 PROTECTION OF FINISHED WORK
A. Provide all necessary protective measures to prevent exposure of casework and equipment from exposure to other construction activity during installation.
B. Advise contractor of procedures and precautions for protection of material, installed laboratory casework and fixtures from damage by work of other trades.
END OF SECTION

KGA Architecture 11 53 13 -1 May 5, 2016 UNLV Wright Hall Laboratory Build Out – 16355.00 Laboratory Fume Hoods
SECTION 11 53 13
LABORATORY FUME HOODS
PART 1 – GENERAL
A. SUMMARY: This Specification identifies the minimum material and construction standards that are required to deliver a quality installation of laboratory fume hoods. Fume hoods shall be supplied in accordance with the requirements of this Specification. The fume hoods identified in this Specification shall include the miscellaneous metal panels and other related components as identified on the Drawings and that are necessary for the complete installation.
Hoods shall function as ventilated, enclosed work spaces, designed to capture, confine
and exhaust fumes, vapours and particulate matter produced or generated within the enclosure.
1.1 SECTION INCLUDES
A. Laboratory Fume Hoods 1.2 RELATED SECTIONS
A. Division 09 Section 65 13, “Resilient Base and Accessories” B. Division 12 Section 36 00, “Countertops”
C. Division 12 Section 35 53, “Manufactured Metal Casework
D. Division 12 Section 32 00, “Manufactured Wood Casework” E. Division 13 Section 21 00, “Controlled Environment Rooms” F. Division 22 Section 40 00, “Plumbing Fixtures”
G. Division 23 Section 30 00, “HVAC Air Distribution”
H. Division 26 Section 05 00, “Common Work Results for Electrical”
I. Related Work To Be Performed By Others:
1. Final installation of all plumbing, service and electrical fixtures attached to fume hood or countertop (excluding piping and wiring within fume hoods).
2. Final connection to service lines of all plumbing, service and electrical fixtures
attached to laboratory casework or fume hoods.
KGA Architecture 11 53 13 -2 May 5, 2016 UNLV Wright Hall Laboratory Build Out – 16355.00 Laboratory Fume Hoods
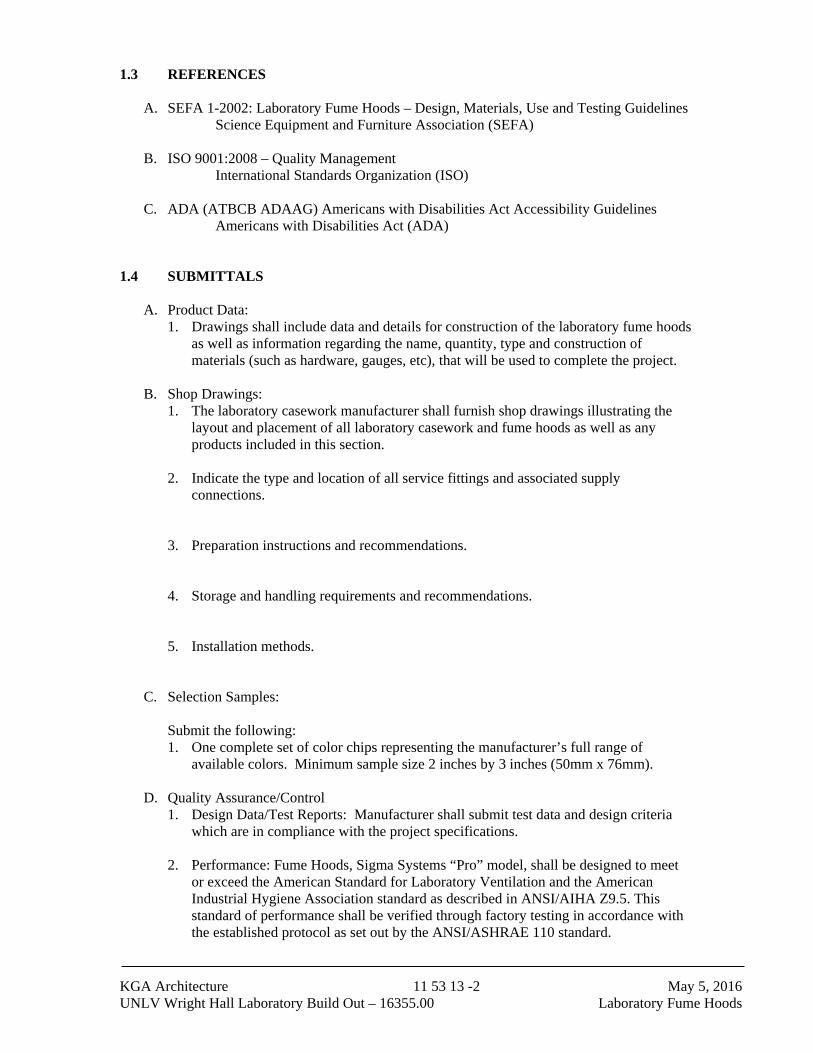
1.3 REFERENCES
A. SEFA 1-2002: Laboratory Fume Hoods – Design, Materials, Use and Testing Guidelines Science Equipment and Furniture Association (SEFA)
B. ISO 9001:2008 – Quality Management International Standards Organization (ISO)
C. ADA (ATBCB ADAAG) Americans with Disabilities Act Accessibility Guidelines Americans with Disabilities Act (ADA)
1.4 SUBMITTALS
A. Product Data: 1. Drawings shall include data and details for construction of the laboratory fume hoods
as well as information regarding the name, quantity, type and construction of materials (such as hardware, gauges, etc), that will be used to complete the project.
B. Shop Drawings: 1. The laboratory casework manufacturer shall furnish shop drawings illustrating the
layout and placement of all laboratory casework and fume hoods as well as any products included in this section.
2. Indicate the type and location of all service fittings and associated supply
connections.
3. Preparation instructions and recommendations. 4. Storage and handling requirements and recommendations.
5. Installation methods.
C. Selection Samples:
Submit the following: 1. One complete set of color chips representing the manufacturer’s full range of
available colors. Minimum sample size 2 inches by 3 inches (50mm x 76mm).
D. Quality Assurance/Control 1. Design Data/Test Reports: Manufacturer shall submit test data and design criteria
which are in compliance with the project specifications. 2. Performance: Fume Hoods, Sigma Systems “Pro” model, shall be designed to meet
or exceed the American Standard for Laboratory Ventilation and the American Industrial Hygiene Association standard as described in ANSI/AIHA Z9.5. This standard of performance shall be verified through factory testing in accordance with the established protocol as set out by the ANSI/ASHRAE 110 standard.

KGA Architecture 11 53 13 -3 May 5, 2016 UNLV Wright Hall Laboratory Build Out – 16355.00 Laboratory Fume Hoods
3. Certificates: All certifications required in the specifications shall be submitted with the original submittal package under separate cover. Certificates must be provided with the signature of a qualified individual of the supplier.
4. Manufacturers’ Instructions: Provide manufacturer’s instructions for installation and maintenance of all products provided and installed within this section. Instructions will be in bound form, tabbed and organized by section number.
5. Submit copy of the corrosion resistant label to be attached to the fume hood exterior with condensed information covering recommended locations for apparatus and accessories.
1.5 QUALITY ASSURANCE
A. Manufacturer Qualifications: 1. The following list of information will be provided to the Architect at least ten (10)
days prior to the bid opening: 2. List of manufacturing facilities; 3. Manufacturer of fume hoods shall have the capability within their facility of
performing fume hood tests based on the latest ANSI/ASHRAE Specification 110. 4. A list of ten (10) installations of comparable stature completed within the past 5
years; 5. Construction details depicting the materials, sizes and methods of construction;
B. Mock-Ups 1. Area mockups shall be as indicated on the shop drawings. Post bid mockup areas
must be priced for disassembly and reassembly and used within the project. 2. Do not proceed with remaining work until installation is approved by Architect.
a) Install base cabinet with specified hardware. b) Install fume hood with specified fixtures.
1.6 DELIVERY, STORAGE AND HANDLING
A. Packaging, Shipping, Handling and Unloading 1. Packaging: Products shall have packaging adequate enough to protect finished
surfaces from soiling or damage during shipping, delivery and installation. 2. Delivery: Fume hood delivery shall only take place after painting, utility rough-ins
and related activities are completed that could otherwise damage, soil or deteriorate fume hoods in installation areas.
3. Handling: Care, such as the use of proper moving equipment, experienced movers, etc., shall be used at all times to avoid damaging the fume hoods. Until installation takes place, any wrapping, insulation or other method of protection applied to products from the factory will be left in place to avoid accidental damage.
B. Acceptance at Site:
1. Fume hoods will not be delivered or installed until the conditions specified under Part 3, Installation section of this document have been met.
C. Storage:
1. Fume hoods shall be stored in the area of installation. If, prior to installation, it is necessary for the fume hoods to be temporarily stored in an area other than the installation area, the environmental conditions shall meet the environmental requirements specified under the Project Site Conditions article of this section.

KGA Architecture 11 53 13 -4 May 5, 2016 UNLV Wright Hall Laboratory Build Out – 16355.00 Laboratory Fume Hoods
D. Waste Management and Disposal:
1. The supplier of the laboratory fume hoods are responsible for removing any waste or refuse resulting from the installation of, or work pertaining to laboratory fume hoods; thereby leaving the project site clean and free of debris. Trash container(s) to be provided by others.
1.7 PROJECT SITE CONDITIONS
A. Building must be enclosed (windows and doors sealed and weather-tight); B. An operational HVAC system that maintains temperature and humidity at occupancy
levels must be in place;
C. Adjacent and related work shall be complete; D. Ceiling, overhead ductwork and lighting must be installed;
E. Site must be free of any further construction such as “wet work”;
F. Required casework must be installed accurately and the project must be ready for fume
hood installation. 1.8 WARRANTY
A. Furnish a written warranty that Work performed under this Section shall remain free from defects as to materials and workmanship for a period of two (2) years from date of shipment. Defects in materials and workmanship that may develop within this time are to be replaced without cost or expense to the Owner.
Defects include, but are not limited to:
1. Ruptured, cracked, or stained coating
2. Discoloration or lack of finish integrity
3. Cracking or peeling of finish
4. Slippage, shift, or failure of attachment to wall, floor, or ceiling
5. Weld or structural failure
6. Warping or unloaded deflection of components
7. Failure of hardware B. The warranty with respect to products of another manufacturer sold by Mott
Manufacturing is limited to the warranty extended by that manufacturer to Mott Manufacturing.

KGA Architecture 11 53 13 -5 May 5, 2016 UNLV Wright Hall Laboratory Build Out – 16355.00 Laboratory Fume Hoods
PART 2 – PRODUCTS 2.1 MANUFACTURER
A. Acceptable Manufacturer: Mott Manufacturing Ltd.; 452 Hardy Rd. Brantford, ON, Canada N3T 5L8. Tel: (519) 752-7825. Fax: (519) 752-2895. Email: [email protected], www.mott.ca.
B. Substitutions:
Must meet all specification requirements and have prior approval.
C. Requests for substitutions: All requests will be considered in accordance with provisions of Section 01 60 00.
2.2 FUME HOOD MATERIALS
A. Basic Materials
1. Exterior Panels Framing Members, and Furring Panels: Cold rolled and levelled mild steel and shall conform to ASTM A1008/A1008M, finished as in Para. 2.4.
2. Screws: Interior fastening devices; stainless steel screws complete with corrosion resistant plastic caps.
3. By-Pass Grilles: 18 Ga (1.2mm) thick mild steel directionally louvered upward, finished same as exterior panels.
4. Upper front panel: to be 18 Ga (1.2mm) thick mild steel, with out By-Pass Grilles, finished same as exterior panels.
5. Upper front Panel: 18 Ga (1.2mm) thick mild steel, finished same as exterior panels. 6. Auxiliary Air chamber and By-Pass Grilles: 18 Ga (1.2mm) thick mild steel finished
same as exterior panels 7. Upper panel: Laminated safety glass type 6mm (1/4”) thick. 8. Lower Foil: For hoods, form using 14 Ga (1.9mm) Type 316-4 stainless steel. 9. Lower Foil: To be Type 316 stainless steel mounted behind the sash and sitting in a
2” (50mm) deep trough flush with the counter top. For ease of cleaning, assembly shall swing up.
10. Lower Foil: For hoods, form using 14 Ga (1.9mm)Type 316-4 stainless steel with PTFE corrosion resistant coating
11. Lower Foil / Flush sill: Type 316-4 stainless steel powder coated. 12. Safety Glass: Laminated type 6mm (1/4”) thick as per Section 11 53 00. 13. Polycarbonate: 6mm (1/4”) thick clear polycarbonate as per Section 11 53 00 14. Sash guides: Track shall be corrosion resistant polyvinyl chloride (PVC). 15. Sash Cable: 3/32” (2mm) stranded stainless steel 7 x 19 construction. 16. Sash Chain: #35 hardened 17. Sprocket system for Sash Chain: Hardened sprockets with one full width shaft per
sash running in ball bearings. 18. Sash Pull: Type 316, 18 Ga (1.2mm) thick stainless steel with an AISI #4 satin
finish. 19. Sash Pull: Type 316, 18 Ga (1.2mm) thick stainless steel with PTFE corrosion
resistant coating. 20. Pulley Assembly For Sash Cable: 1-1/2” (38mm) diameter nylon rim, ball bearing
roller, with cable retaining device. Provide interior access panels on both sides, and secure using special molded white vinyl gasket designed to be removed and reinstalled without use of special tools.
KGA Architecture 11 53 13 -6 May 5, 2016 UNLV Wright Hall Laboratory Build Out – 16355.00 Laboratory Fume Hoods
21. Baffle support brackets: Fiberglass reinforced polyester thermoset resin of 3/16”
(5mm) thickness. 22. Baffle support brackets: Same material as hood lining. 23. Duct Stubs: Bell shaped Type 316, 18 Ga (1.2mm) stainless steel. 24. Duct Stubs: Bell shaped Type 316, 18 Ga (1.2mm) stainless steel with PTFE
corrosion resistant coating. 25. Light Switches: Light switches shall be black in color, commercial spec grade or
higher and shall be UL and CSA approved. 26. Electrical receptacles: Electrical receptacles shall be black in color, commercial spec
grade or higher and shall be UL and CSA approved. 27. Cover Plates: Electrical cover plates shall be black in color, nylon and UL and CSA
approved. 28. Fluorescent Fixture: Fixture shall be two tube rapid start or better. Energy saving
cool white T8 lamps shall be provided. Ballast shall be sound rated to limit noise.
B. Fume Hood Liner
1. FRP: Hood linings and baffles shall be fiberglass reinforced polyester thermoset resin of 3/16” (5mm) thickness. The fiberglass reinforced polyester panel shall have a minimum flexural strength of 15,000 psi (103,400 kPa), with a flame spread of 25 or less as per ASTM #E84. Final appearance shall be smooth and white in colour.
2. Perchloric Acid type: Hood linings and baffles shall be Poly Vinyl Chloride of ¼” (6mm) thickness with radiused corners. Final appearance shall be smooth and white in colour.
3. PVC type: a) Hood linings and baffles shall be Poly Vinyl Chloride of ¼” (6mm)
thickness. Final appearance shall be smooth and white in colour. b) Hood linings and baffles shall be Poly Vinyl Chloride of ¼” (6mm)
thickness with square corners. Final appearance shall be smooth and white in colour.
4. Stainless steel: a) 316 s/s square corners. b) 316 s/s radiused corners. c) 18 ga (1.2mm) 316 stainless steel with a number 4 finish. Inside
corners shall be coved with a nominal 3/4” (19mm) radius. All joints in liner shall be butt welded using the TIG process. Welds shall be blended and polished to match the finish of adjacent material. Baffles and wash down trough shall be of the same material. Hood work surface and trough shall be an integral part of the hood lining.
C. Fume Hood Furring Panels
1. Where called for, provide matching furring panels to enclose the space between top edge of fume hoods and the finished ceiling.
2. Panels shall be flanged, notched and reinforced where required to form a well-fitted enclosure, free from oilcanning. Secure panels using cadmium-plated, self-tapping screws; panels shall be removable for maintenance purposes.
3. Finish shall match fume hood to which it is connected.

KGA Architecture 11 53 13 -7 May 5, 2016 UNLV Wright Hall Laboratory Build Out – 16355.00 Laboratory Fume Hoods
2.3 BENCH FUME HOOD CONSTRUCTION
A. Fume hood superstructure shall be double wall construction consisting of an outer shell of sheet steel and an inner hood liner. Double wall shall house and conceal steel framing members, attaching brackets and remote operating service fixture mechanisms. Overall double wall thickness; 4-3/4” (121mm) maximum.
B. Front double-wall posts shall be pre-punched to accept up to 5 plumbing fittings per side, two electrical duplex outlets, light switch and optional monitor alarm where indicated on drawings. Electrical outlets and light switch shall be factory-wired and terminate at a junction box on roof of hood. All electrical components shall be UL listed/classified.
C. Exterior panel members shall be fastened by means of concealed devices. Exposed
screws are not acceptable. D. Provide access to remote-controlled fixture valves concealed between walls through
removable panels on hood exterior and access panels on both inside liner walls. Assemble hood superstructure, fasten and connect inner and outer frame into a rigid self supporting entity.
E. Install fluorescent lighting fixture on exterior of roof. Provide a 6mm (1/4”) safety glass
panel on hood "roof", sealed to isolate the lighting fixture from fume chamber. The 2-lamp fixture in each hood shall be largest possible for fume hood size. Average interior illumination levels within the fume chamber shall be 80 foot candles minimum. Finish fixture interior with white baked enamel.
F. Fume hood sash(s) shall be full view type providing a clear and unobstructed side to side
view of fume hood interior. Sash shall be laminated safety glass set into extruded polyvinyl chloride guide. Bottom and side sash rails shall be 18 Ga (1.2mm) stainless steel. Glass shall be set into rails with PVC glazing channel. Bottom rail shall be an integral, formed, full width, flush pull and shall be anchored on each side to sash cables at bottom. A single weight, pulley, cable, counter balance system shall be used for vertical operation of sash and prevent jamming to permit one finger operation at any point along full width sash pull and to maintain sash at any position without creep. Sash system shall be designed to prevent sash drop in the event of cable failure. Superstructure shall have a single sash and counter balance system. Sash shall open and close against rubber bumper stops.
G. Fume hood sash shall be full view type providing a clear and unobstructed side to side
view of fume hood interior. Sash shall be laminated safety glass set into extruded polyvinyl chloride guide. Bottom and side sash rails shall be 18 Ga (1.2mm) stainless steel. Glass shall be set into rails with PVC glazing channel. Bottom rail shall be an integral, formed, full width, flush pull and shall be anchored on each side to chains at bottom. A single weight, chain, bearing and shaft, counter balance system shall be used for vertical operation of sash and prevent jamming to permit one finger operation at any point along full width sash pull. Sash system shall be designed to prevent sash drop in the event of chain or cable failure. Superstructure shall have a single sash and counter balance system. Sash shall open and close against rubber bumper stops.
H. Fume hood sash shall be full view combination vertical rising, and horizontal sliding type
providing a clear and unobstructed side to side view of fume hood interior. Horizontal sash shall be laminated safety glass not greater than 18” (460mm) wide set into extruded aluminium shoes with PVC gaskets. Each shoe shall ride on 2 nylon rollers locked in the

KGA Architecture 11 53 13 -8 May 5, 2016 UNLV Wright Hall Laboratory Build Out – 16355.00 Laboratory Fume Hoods
vertical sash to avoid inadvertent removal. Vertical edges of sash glass panels to have a clear plastic edge guard. Vertical sash shall rise in a flush PVC track. Bottom, top and side sash rails shall be 18 Ga (1.2mm) stainless steel welded to form an integral structure. Bottom rail shall be an integral, formed, full width, flush pull and shall be anchored on each side to sash cables at bottom. A single weight, pulley, cable, counter balance system shall be used for vertical operation of sash and prevent jamming to permit one finger operation at any point along full width sash pull and to maintain sash at any position without creep. Sash system shall be designed to prevent sash drop in the event of chain or cable failure. Superstructure shall have a single sash and counter balance system. Sash shall open and close against rubber bumper stops.
I. Hood sash shall raise vertically into an enclosure box to assure a leak free chamber. J. Fume hood sash shall be full view type providing a clear and unobstructed side to side
view of fume hood interior. Sash shall be clear polycarbonate set into extruded polyvinyl chloride guide. Bottom and side sash rails shall be 18 Ga (1.2mm) stainless steel with PTFE corrosion resistant coating. Polycarbonate shall be set into rails with PVC glazing channel. Bottom rail shall be an integral, formed, full width, flush pull and shall be anchored on each side to sash cables at bottom. A single weight, pulley, cable, counter balance system shall be used for vertical operation of sash and prevent jamming to permit one finger operation at any point along full width sash pull and to maintain sash at any position without creep. Sash system shall be designed to prevent sash drop in the event of chain or cable failure. Superstructure shall have a single sash and counter balance system. Sash shall open and close against rubber bumper stops.
K. Fume hood sash shall be full view type providing a clear and unobstructed side to side
view of fume hood interior. Vertical view shall be a minimum of 34” (865mm) above the work surface with no intermediated frames or obstructions. Sash shall be laminated safety glass set into extruded polyvinyl chloride guide. Bottom and side sash rails shall be 18 Ga (1.2mm) powder coated stainless steel. Glass shall be set into rails with PVC glazing channel. Bottom rail shall be an integral, formed, full width, flush pull and shall be anchored on each side to sash cables at bottom. A single weight and counter balance system shall be used for vertical operation of sash and prevent jamming to permit one finger operation at any point along full width sash pull and to maintain sash at any position without creep. Sash system shall be designed to prevent sash drop in the event of cable or chain failure. Superstructure shall have a single sash and counter balance system. Sash shall open and close against rubber bumper stops.
L. Fume hood sash shall be a combination Vertical / Horizontal sash. Vertically rising
frame shall be of stainless steel construction grade 316 or better. Horizontal sliding panels shall be 6mm (1/4”) laminated safety glass with integral ground-in pulls. Sides of horizontal panels shall be protected with snap-on plastic edge guard. Horizontal sliding panels shall ride on rollers in an extruded aluminium bottom and top track with positive locking system to prevent inadvertent removal. Sash counterbalance mechanism shall be either chain or cable as required in main hood specification. Fume hoods shall also be equipped with a fixed panel located nominally 1” (25mm) behind the sash plane, covering the space between the interior roof of the fume hood and the upper edge of the sash frame. 1” (25mm) space shall be left open to provide downwardly vectored by-pass air, thus reducing dead space behind closed sash.
M. Fume hood sash shall be full view type providing a clear and unobstructed side to side
view of fume hood interior. Vertical view shall be a minimum of 34” (865mm) above the work surface. Sash shall be laminated safety glass. Bottom and side sash rails shall be
KGA Architecture 11 53 13 -9 May 5, 2016 UNLV Wright Hall Laboratory Build Out – 16355.00 Laboratory Fume Hoods
18 Ga (1.2mm) powder coated stainless steel. Bottom rail shall be an integral, formed, full width, flush pull and shall be anchored on each side to sash cables or chains at bottom. Horizontal sliding glass panels shall be provided in this vertically rising frame complete with flush pulls ground into the glass. A single weight and counter balance system shall be used for vertical operation of sash and prevent jamming to permit one finger operation at any point along full width sash pull and to maintain sash at any position without creep. Sash system shall be designed to prevent sash drop in the event of chain or cable failure. Superstructure shall have a single sash and counter balance system. Sash shall open and close against rubber bumper stops.
N. Fume hood sash(s) shall be full view type providing a clear and unobstructed side to side
view of fume hood interior. Sash shall be laminated safety glass set into extruded polyvinyl chloride guide. Bottom and side sash rails shall be 18 Ga (1.2mm) stainless steel. Glass shall be set into rails with PVC glazing channel. Bottom rail shall be an integral, formed, full width, flush pull and shall be anchored on each side to sash cables at bottom. A single weight, pulley, cable, counter balance system shall be used for vertical operation of each sash and prevent jamming to permit one finger operation at any point along full width sash pull and to maintain sash at any position without creep. Sash system shall be designed to prevent sash drop in the event of cable failure. Superstructure shall have a double sash and counter balance system. Sash shall open and close against rubber bumper stops. Both counter balance weights shall be placed on one end of the hood to allow for plumbing on the opposite end. Sash interlock option allows only one sash to be opened at a time.
O. Self Closing sash: A mechanism shall be provided which automatically lowers the sash to
the chosen working height (height shall be specified at time of order). A latch shall be provided to hold the sash fully open for setup/teardown of experiments. Below the chosen working height, the sash shall be neutrally balanced and function as a conventional sash.
P. Hood shall be constant volume type with a built in automatic compensating by-pass to
maintain constant exhaust volume regardless of sash position. By-pass shall be positive in action, and controlled by louvered panel in the area immediately above the top portion of the sash when closed. As the sash is lowered, the by-pass design limits the increase in face velocity to a maximum of 4-1/2 times average face velocity as measured with the sash fully open.
Q. Hood shall be constant volume type with a built in automatic compensating by-pass to
maintain constant exhaust volume regardless of sash position. A plenum shall be affixed to the bypass panel which may supply up to 70% of the exhaust air requirements of the fume hood. By-pass air shall be drawn directly from the auxiliary air plenum when the sash is in the lowered position. As the sash is lowered, the by-pass design limits the increase in face velocity to a maximum of 4-1/2 times average face velocity as measured with the sash fully open.
R. Restricted Bypass Option: Standard sash shall be deleted and replaced with the Low
Volume sash option (LV – Addendum 1). Standard front panel shall be supplemented by the addition of an adjustable panel behind louvered area. Adjustable panel shall be made of stainless steel grade 316 or fiberglass reinforced polyester. It shall be possible to achieve bypass opening ranging from a nominal 25mm (1”) to the maximum available opening of 406mm (16”). Lower edge of the adjustable bypass panel shall be equipped with a flexible rubberized fabric flap to reduce leakage. The adjustable bypass panel

KGA Architecture 11 53 13 -10 May 5, 2016 UNLV Wright Hall Laboratory Build Out – 16355.00 Laboratory Fume Hoods
shall be moved to the final setting by the ventilation contractor who is responsible for fume hood controls.
S. Hood shall be variable volume type without a built in automatic compensating by-pass. T. Hood shall be constant volume type with a built in automatic compensating by-pass to
maintain constant exhaust volume regardless of sash position. By-pass shall be positive in action, and controlled by upper glass vision panel position in the area immediately above the top portion of the sash when closed. As the sash is lowered, the by-pass design limits the increase in face velocity.
U. Hood shall be low constant volume, reduced face velocity design. V. Perimeter of sash opening shall have a lower air foil and streamlined shape side and top
with angled opening toward hood interior. Air shall enter under the bottom horizontal foil through a nominal 1” (25mm) by-pass when the sash is in the closed position. Bottom foil shall be removable without the use of special tools. Sash shall close on air foil.
W. Perimeter of sash opening shall have a lower flush sill containment trough and a radiused
side and top with radiused edge toward hood interior. Air shall enter under the bottom flush sill through a nominal 1” (25mm) by-pass when the sash is in the closed position. Bottom foil shall be removable without the use of special tools. Sash shall close on flush sill.
X. Three-piece main baffles shall provide controlled air vectors into and through the fume
hood and be fabricated of the same material as the liner. Provide exhaust slots on the full perimeter of baffles, with top slot adjustable. A fixed, permanently-open, horizontal slot located at 31-1/2” (800mm) above the work surface shall be provided at the overlapping mid-point of the main baffles
Y. Three-piece main baffles shall provide controlled air vectors into and through the fume
hood and be fabricated of the same material as the liner. Provide exhaust slots on the full perimeter of baffles, with adjustable valves for top and both sides of baffles. A fixed, permanently-open, horizontal slot located at 31-1/2” (800mm) above the work surface shall be provided at the overlapping mid-point of the main baffles.
Z. Three-piece main baffles shall provide controlled air vectors into and through the fume
hood and be fabricated of the same material as the liner. Provide exhaust slots on the full perimeter of baffles. A stepped baffle design shall be used with consideration being given to reducing the plenum size after each baffle slot.
AA. Remote-Control Baffle System:
1. Adjustment shall be instantaneous, one handed, with a single point control, accomplished while hood is in use, without disturbing apparatus.
BB. Manual-Control Baffle System:
1. Baffle positions should only be set by qualified personal experienced with fume hood
balancing.

KGA Architecture 11 53 13 -11 May 5, 2016 UNLV Wright Hall Laboratory Build Out – 16355.00 Laboratory Fume Hoods
CC. For safety, fume hood shall maintain essentially constant exhaust volume at any baffle position. Changes in average face velocity and exhaust volume as a result of baffle adjustment shall not exceed 5% for any baffle position at the specified face velocity.
DD. Design fume hoods to minimize static pressure loss with adequate slot area around the
baffle and the bell shaped exhaust collar configuration. Measured average static pressure loss reading taken three diameters above the hood outlet from four points, 90o apart, shall not exceed the following values based on 60” (1524mm) wide hood:
Face Velocity Measured Static Pressure Loss 75 F.P.M. (0.38 m/s) 0.15” (45.8 Pa) 100 F.P.M. (0.51 m/s) 0.20” (87.1 Pa) 125 F.P.M. (0.64 m/s) 0.25” (136.9 Pa) Face Velocity Measured Static Pressure Loss 60 F.P.M. (0.3 m/s) 0.10” (45.8 Pa)
EE. Airflow Requirements: RFV fume hood is designed to function with the following exhaust volumes when operating at 60 feet per minute face velocity with a vertical sash opening of 29.5” (750mm)
Hood Size Exhaust Volume Requirements (cubic Feet Per minute) 3 foot (915mm) 325 cfm 4 foot (1220mm) 473 cfm 5 foot (1524mm) 621 cfm 6 foot (1829mm) 768 cfm
8 foot (2439mm) 1063 cfm
FF. Hood shall be designed and constructed to provide a water wash down system. Integral work surface shall have a raised edge at the front and a full width trough with drain connection at the rear. Wash down pipe shall be located behind the upper baffle with a minimum of 3 and a maximum of 5 spray nozzles dependant upon hood width. Spray nozzles shall be directed upward. System shall include a control valve and associated internal piping.
GG. Electrical convenience duplex outlets shown mounted on the face of fume hoods shall be
installed in front posts and pre-wired to a junction box mounted on top of fume hood superstructure. Electrical devices shall be UL classified/listed.
HH. Sash height shall be limited to have two sets of integral sash height limiting hardware
mounted on the hood which prevents raising the vertical sash above certain points unless manually defeated by the operator. Set points shall be closed and at 15” (381mm) above counter top.
II. Bottom slot covered with stainless steel screen. Screen to be mounted horizontally behind
baffle as low as possible. Screen to be 3/4” (19mm) x 3/4” (19mm) 18 ga pattern.
JJ. The minimum sash height shall be 36” (915mm) with a 6” (152mm) clear static panel mounted at the top of the sash.

KGA Architecture 11 53 13 -12 May 5, 2016 UNLV Wright Hall Laboratory Build Out – 16355.00 Laboratory Fume Hoods
KK. Attach corrosion resistant labels to units as specified in Para. 1.4.D.4 2.4 FLOOR MOUNTED FUME HOOD CONSTRUCTION
A. Fume hood superstructure shall be double wall construction consisting of an outer shell of sheet steel and an inner hood liner. Double wall shall house and conceal steel framing members, attaching brackets and remote operating service fixture mechanisms. Overall double wall thickness; 4-3/4” (121mm) maximum.
B. Floor mounted hoods shall be equipped with two vertically rising sashes in two tracks.
Normal operation shall be with only one sash open. Both sashes shall be opened for set-up and teardown only.
C. Superstructure shall have a double hung sash and counter balance system. An independent weight, sprocket, chain, counter balance system shall be used for vertical operation of each sash and prevent jamming to permit one finger operation at any point along full width sash pull and to maintain sash at any position without creep. Sash system shall be designed to prevent sash drop in the event of chain failure.
D. Floor mounted hoods shall not be equipped with a lower airfoil. A one inch gap shall be
provided to prevent vapour build-up behind closed lower sash.
E. All other features of the floor mounted fume hood superstructure are as specified under “Bench Fume Hood Construction”.
2.5 FUME HOOD EXTERIOR FINISH
A. Coating Performance data is available in Appendix 1
2.6 AIR FLOW MONITOR / ALARM
A. TEL AFA 1001 Mk3 digital airflow alarm or equivalent shall be provided.
PART 3 – EXECUTION
3.1 INSTALLATION
A. In addition to requirements of Section 11 53 13, install fume hoods in positions shown, align and set level with levelling devices.
B. Work in close cooperation with allied trades installing ductwork, wiring and other
services.
C. Apply small bead of sealant to junction of fume hood counter top and adjacent hood liner.
D. Turn over to Mechanical Trades, service fitting remote control rods and valves for installation to fume hood superstructure and service lines.
END OF SECTION 11 53 13
KGA Architecture 22 05 03 -1 May 5, 2016
UNLV Wright Hall Laboratory Build Out – 16355.00 Piping and Tubes for Plumbing Piping
And Equipment
SECTION 22 05 03
PIPES AND TUBES FOR PLUMBING PIPING AND EQUIPMENT
PART 1 - GENERAL
1.1 SUMMARY
A. Section Includes: Pipe and pipe fittings for the following systems:
1. Domestic water piping, within 5 feet of building.
2. Sanitary sewer piping, within 5 feet of building.
3. Acid Waste Piping.
4. Vacuum System Piping
5. Equipment drains and over flows.
6. Unions and flanges.
7. Bedding and cover materials.
B. Related Sections:
1. Section 08 31 13 - Access Doors and Frames: Product requirements for access
doors for placement by this section.
2. Section 09 90 00 - Painting and Coating: Product and execution requirements for
painting specified by this section.
3. Section 22 05 23 - General-Duty Valves for Plumbing Piping: Product
requirements for valves for placement by this section.
4. Section 22 05 29 - Hangers and Supports for Plumbing Piping and Equipment:
Product requirements for pipe hangers and supports for placement by this section.
5. Section 22 07 00 - Plumbing Insulation: Product requirements for piping
insulation for placement by this section.
6. Section 31 20 00 – Earth Moving
1.2 REFERENCES
A. American Society of Mechanical Engineers:
1. ASME B16.1 - Cast Iron Pipe Flanges and Flanged Fittings.
2. ASME B16.3 - Malleable Iron Threaded Fittings.
3. ASME B16.4 - Gray Iron Threaded Fittings.
4. ASME B16.18 - Cast Copper Alloy Solder Joint Pressure Fittings.
5. ASME B16.22 - Wrought Copper and Copper Alloy Solder Joint Pressure
Fittings.
6. ASME B16.23 - Cast Copper Alloy Solder Joint Drainage Fittings (DWV).
7. ASME B16.26 - Cast Copper Alloy Fittings for Flared Copper Tubes.
8. ASME B16.29 - Wrought Copper and Wrought Copper Alloy Solder Joint
Drainage Fittings - DWV.
9. ASME B31.9 - Building Services Piping.
10. ASME B36.10M - Welded and Seamless Wrought Steel Pipe.
11. ASME Section IX - Boiler and Pressure Vessel Code - Welding and Brazing
Qualifications.
KGA Architecture 22 05 03 -2 May 5, 2016
UNLV Wright Hall Laboratory Build Out – 16355.00 Piping and Tubes for Plumbing Piping
And Equipment
B. ASTM International:
1. ASTM A47/A47M - Standard Specification for Ferritic Malleable Iron Castings.
2. ASTM A53/A53M - Standard Specification for Pipe, Steel, Black and Hot-
Dipped, Zinc-Coated, Welded and Seamless.
3. ASTM A74 - Standard Specification for Cast Iron Soil Pipe and Fittings.
4. ASTM A234/A234M - Standard Specification for Piping Fittings of Wrought
Carbon Steel and Alloy Steel for Moderate and High Temperature Service.
5. ASTM A395/A395M - Standard Specification for Ferritic Ductile Iron Pressure-
Retaining Castings for Use at Elevated Temperatures.
6. ASTM A536 - Standard Specification for Ductile Iron Castings.
7. ASTM A746 - Standard Specification for Ductile Iron Gravity Sewer Pipe.
8. ASTM B32 - Standard Specification for Solder Metal.
9. ASTM B42 - Standard Specification for Seamless Copper Pipe, Standard Sizes.
10. ASTM B43 - Standard Specification for Seamless Red Brass Pipe, Standard
Sizes.
11. ASTM B75 - Standard Specification for Seamless Copper Tube.
12. ASTM B88 - Standard Specification for Seamless Copper Water Tube.
13. ASTM B251 - Standard Specification for General Requirements for Wrought
Seamless Copper and Copper-Alloy Tube.
14. ASTM B306 - Standard Specification for Copper Drainage Tube (DWV).
15. ASTM B584 - Standard Specification for Copper Alloy Sand Castings for
General Applications.
16. ASTM D1785 - Standard Specification for Poly (Vinyl Chloride) (PVC) Plastic
Pipe, Schedules 40, 80, and 120.
17. ASTM D2235 - Standard Specification for Solvent Cement for Acrylonitrile-
Butadiene-Styrene (ABS) Plastic Pipe and Fittings.
18. ASTM D2466 - Standard Specification for Poly (Vinyl Chloride) (PVC) Plastic
Pipe Fittings, Schedule 40.
19. ASTM D2467 - Standard Specification for Poly (Vinyl Chloride) (PVC) Plastic
Pipe Fittings, Schedule 80.
20. ASTM D2564 - Standard Specification for Solvent Cements for Poly (Vinyl
Chloride) (PVC) Plastic Piping Systems.
21. ASTM D2661 - Standard Specification for Acrylonitrile-Butadiene-Styrene
(ABS) Schedule 40 Plastic Drain, Waste, and Vent Pipe and Fittings.
22. ASTM D2665 - Standard Specification for Poly (Vinyl Chloride) (PVC) Plastic
Drain, Waste, and Vent Pipe and Fittings.
23. ASTM D2680 - Standard Specification for Acrylonitrile-Butadiene-Styrene
(ABS) and Poly (Vinyl Chloride) (PVC) Composite Sewer Piping.
24. ASTM D2729 - Standard Specification for Poly (Vinyl Chloride) (PVC) Sewer
Pipe and Fittings.
25. ASTM D2751 - Standard Specification for Acrylonitrile-Butadiene-Styrene
(ABS) Sewer Pipe and Fittings.
26. ASTM D2855 - Standard Practice for Making Solvent-Cemented Joints with
Poly (Vinyl Chloride) (PVC) Pipe and Fittings.
27. ASTM F437 - Standard Specification for Threaded Chlorinated Poly (Vinyl
Chloride) (CPVC) Plastic Pipe Fittings, Schedule 80.
28. ASTM F438 - Standard Specification for Socket-Type Chlorinated Poly (Vinyl
Chloride) (CPVC) Plastic Pipe Fittings, Schedule 40.
29. ASTM F439 - Standard Specification for Socket-Type Chlorinated Poly (Vinyl
Chloride) (CPVC) Plastic Pipe Fittings, Schedule 80.

KGA Architecture 22 05 03 -3 May 5, 2016
UNLV Wright Hall Laboratory Build Out – 16355.00 Piping and Tubes for Plumbing Piping
And Equipment
30. ASTM F441/F441M - Standard Specification for Chlorinated Poly (Vinyl
Chloride) (CPVC) Plastic Pipe, Schedules 40 and 80.
31. ASTM D3035 - Standard Specification for Polyethylene (PE) Plastic Pipe (DR-
PR) Based on Controlled Outside Diameter.
32. ASTM D3139 - Standard Specification for Joints for Plastic Pressure Pipes Using
Flexible Elastomeric Seals.
33. ASTM D2609 - Standard Specification for Plastic Insert Fittings for Polyethylene
(PE) Plastic Pipe.
34. ASTM D2239 - Standard Specification for Polyethylene (PE) Plastic Pipe
(SIDR-PR) Based on Controlled Inside Diameters.
35. ASTM D2241 - Standard Specification for Polyethylene (PE) Plastic Pipe
(SIDR-PR) Based on Controlled Inside Diameter.
36. ASTM D2447 - Standard Specification for Polyethylene (PE) Plastic Pipe,
Schedules 40 and 80, Based on Outside Diameter.
37. ASTM F1281 - Standard Specification for Crosslinked
Polyethylene/Aluminum/Crosslinked Polyethylene (PEX-AL-PEX) Pressure
Pipe.
38. ASTM F1282 - Standard Specification for Polyethylene/Aluminum/Polyethylene
(PE-AL-PE) Composite Pressure Pipe.
C. American Welding Society:
1. AWS A5.8 - Specification for Filler Metals for Brazing and Braze Welding.
2. AWS D1.1 - Structural Welding Code - Steel.
D. American Water Works Association:
1. AWWA C104 - American National Standard for Cement-Mortar Lining for
Ductile-Iron Pipe and Fittings for Water.
2. AWWA C105 - American National Standard for Polyethylene Encasement for
Ductile-Iron Pipe Systems.
3. AWWA C110 - American National Standard for Ductile-Iron and Grey-Iron
Fittings, 3 in. through 48 in. (75 mm through 1200 mm), for Water and Other
Liquids.
4. AWWA C111 - American National Standard for Rubber-Gasket Joints for
Ductile-Iron Pressure Pipe and Fittings.
5. AWWA C151 - American National Standard for Ductile-Iron Pipe, Centrifugally
Cast, for Water.
6. AWWA C900 - Polyvinyl Chloride (PVC) Pressure Pipe, 4 in. through 12 in., for
Water Distribution.
7. AWWA C901 - Polyethylene (PE) Pressure Pipe and Tubing, 1/2 in. through 3
in., for Water Service.
E. Cast Iron Soil Pipe Institute:
1. CISPI 301 - Standard Specification for Hubless Cast Iron Soil Pipe and Fittings
for Sanitary and Storm Drain, Waste, and Vent Piping Applications.
2. CISPI 310 - Specification for Coupling for Use in Connection with Hubless Cast
Iron Soil Pipe and Fittings for Sanitary and Storm Drain, Waste, and Vent Piping
Applications.
KGA Architecture 22 05 03 -4 May 5, 2016
UNLV Wright Hall Laboratory Build Out – 16355.00 Piping and Tubes for Plumbing Piping
And Equipment
1.3 SUBMITTALS
A. Section 01 33 00 - Submittal Procedures: Submittal procedures.
B. Shop Drawings: Indicate layout of piping systems, including equipment, critical
dimensions, and sizes.
C. Product Data: Submit data on pipe materials and fittings. Submit manufacturers catalog
information.
1.4 QUALITY ASSURANCE
A. Perform Work in accordance with ASME B31.9 code for installation of piping systems
and ASME Section IX for welding materials and procedures.
1.5 QUALIFICATIONS
A. Manufacturer: Company specializing in manufacturing Products specified in this section
with minimum three years documented experience.
B. Installer: Company specializing in performing work of this section with minimum three
years documented experience.
1.6 PRE-INSTALLATION MEETINGS
A. Section 01 30 00 - Administrative Requirements: Pre-installation meeting.
B. Convene minimum one week prior to commencing work of this section.
1.7 DELIVERY, STORAGE, AND HANDLING
A. Section 01 60 00 - Product Requirements: Requirements for transporting, handling,
storing, and protecting products.
B. Furnish temporary end caps and closures on piping and fittings. Maintain in place until
installation.
C. Protect piping from entry of foreign materials by temporary covers, completing sections
of the Work, and isolating parts of completed system.
1.8 ENVIRONMENTAL REQUIREMENTS
A. Section 01 60 00 - Product Requirements: Environmental conditions affecting products
on site.
B. Do not install underground piping when bedding is wet or frozen.
1.9 FIELD MEASUREMENTS
A. Verify field measurements prior to fabrication.

KGA Architecture 22 05 03 -5 May 5, 2016
UNLV Wright Hall Laboratory Build Out – 16355.00 Piping and Tubes for Plumbing Piping
And Equipment
1.10 COORDINATION
A. Section 01 30 00 - Administrative Requirements: Requirements for coordination.
B. Coordinate installation of buried piping with trenching.
PART 2 - PRODUCTS
2.1 DOMESTIC WATER PIPING, BURIED WITHIN 5 FEET OF BUILDING
A. Copper Tubing: ASTM B88, Type K.
1. Fittings: ASME B16.18, cast copper, or ASME B16.22, wrought copper.
2. Joints: Brazed, AWS A5.8 BCuP silver/phosphorus/copper alloy with melting
range 1190 to 1480 degrees F.
B. PVC Pipe: AWWA C900 Class 150, polyvinyl chloride (PVC) material.
1. Fittings: AWWA C110, [ductile] [gray] iron, standard thickness.
2. Joints: ASTM D3139 compression gasket ring.
2.2 DOMESTIC WATER PIPING, ABOVE GRADE
A. Copper Tubing: ASTM B88, Type L, hard drawn.
1. Fittings: ASME B16.18, cast copper alloy or ASME B16.22, wrought copper and
bronze.
2. Joints: Solder, lead free, ASTM B32, 95-5 tin-antimony, or tin and silver, with
melting range 430 to 535 degrees F. Pipe Sizes 2” and larger, braze, AWS A5.8
BcuP silver/phosphorus/copper alloy with melting range 1190 to 1480 degrees F.
”T-Drill” type fittings not allowed.
3. Copper Pressure-Seal-Joint Fittings:
a)Manufacturers: Subject to compliance with requirements, provide products by
one of the following:
(1)Elkhart Products Corporation; Industrial Division.
(2)NIBCO INC.
(3)Viega; Plumbing and Heating Systems.
b)NPS 2 (DN 50) and Smaller: Wrought-copper fitting with EPDM-rubber O-
ring seal in each end.
c)NPS 3 and NPS 4 (DN 80 and DN 100): Cast-bronze or wrought-copper fitting
with EPDM-rubber O-ring seal in each end.
B. CPVC Pipe: ASTM D2846/D2846M, ASTM F441/F441M, or ASTM F442/F442M,
chlorinated polyvinyl chloride (CPVC) material.
1. Fittings: ASTM D2846/D2846M, ASTM F437, ASTM F438, ASTM F439, or
ASTM F441/F441M, CPVC.
2. Joints: ASTM D2846/D2846M, solvent weld with ASTM F493 solvent cement.
C. PEX Distribution System: ASTM F 877, SDR 9 tubing.
1. Fittings for PEX Tube: ASTM F 1807, metal-insert type with copper or
stainless-steel crimp rings and matching PEX tube dimensions.
KGA Architecture 22 05 03 -6 May 5, 2016
UNLV Wright Hall Laboratory Build Out – 16355.00 Piping and Tubes for Plumbing Piping
And Equipment
2. Manifold: Multiple-outlet, plastic or corrosion-resistant-metal assembly
complying with ASTM F 877; with plastic or corrosion-resistant-metal valve for
each outlet.
2.3 SANITARY SEWER PIPING, BURIED WITHIN 5 FEET OF BUILDING
A. ABS Pipe: ASTM D2661, Acrylonitrile-Butadiene-Styrene (ABS) material.
1. Fittings: ABS, ASTM D2661.
2. Joints: ASTM D2235, solvent weld.
B. PVC Pipe: ASTM D1785, Schedule 40, polyvinyl chloride (PVC) material, bell and
spigot style solvent sealed joint ends.
1. Fittings: ASTM D2466, Schedule 40, PVC.
2. Joints: ASTM D2855, solvent weld with ASTM D2564 Solvent cement.
2.4 SANITARY SEWER PIPING, ABOVE GRADE
A. Cast Iron Pipe: CISPI 301, hub-less, service weight.
1. Fittings: Cast iron, CISPI 301.
2. Joints: CISPI 310, neoprene gaskets and stainless steel clamp-and-shield
assemblies.
B. CPVC Pipe: ASTM F2618; ASTM E 84(15), Schedule 40, Chlorinated poly (Vinyl
Chloride) plastic pipe.
1. Fittings: ASTM F2618; ASTM E84(15), Schedule 40, CPVC.
2. Joints: ASTM F2618; ASTM E84(15), solvent weld with ASTM F493 Solvent
cement.
2.5 ACID WASTE PIPING
A. Borosilicate glass conforming with ASTM C1053-85 with mechanical joints of 316
stainless steel and Buna-N liner. Polyvinylidene Fluoride (PVDF) with socket fusion
joints may be used in return air plenums. Schedule 40 polypylene pipe with socket fusion
joints or, where accessible, mechanical joints are acceptable.
B. Adapter joints with threaded stainless steel nipples for glass pipe and, where above grade,
mechanical joints may be used for polypropylene pipe.
C. Expanded polystyrene covering on buried glass pipe and 5 mil. Polyvinyl Scotch Wrap
on buried fittings.
D. Piping systems in return air plenums chall meet 25/50 flame spread/smoke developed
ASTM E84 test.
2.6 VACUUM SYSTEM PIPING
A. Copper Tube: ASTM B88, Type L, hand drawn or ASTM B280, Type ACR-Oxy.
B. Fittings: ANSI B16.18, cast bronze or ANSI B16.22 Wrought copper.

KGA Architecture 22 05 03 -7 May 5, 2016
UNLV Wright Hall Laboratory Build Out – 16355.00 Piping and Tubes for Plumbing Piping
And Equipment
C. Joints: AWS A5.8, BcuP sivler braze or ANSI/ASTM B32, Grade 95TA.
2.7 EQUIPMENT DRAINS AND OVERFLOWS
A. Copper Tubing: ASTM B88, Type M, hard drawn.
B. Fittings: ASME B16.18, cast brass, or ASME B16.22 solder wrought copper.
C. Joints: Solder, lead free, ASTM B32, 95-5 tin-antimony, or tin and silver, with melting
range 430 to 535 degrees F. “T-Drill” type fittings not allowed.
2.8 FLUE AND COMBUSTION AIR PIPING
A. PVC Pipe: ASTM D1785, Schedule 80, polyvinyl chloride (PVC) material.
1. Fittings: ASTM D2467, Schedule 80, PVC ASTM D2464 PVC, threaded.
2. Joints: ASTM D2855, solvent weld with ASTM D2564 solvent cement. Prime
joints with a contrasting color.
2.9 UNIONS AND FLANGES
A. Unions for Pipe 2 inches and Smaller:
1. Ferrous Piping: Class 150, malleable iron, threaded.
2. Copper Piping: Class 150, bronze unions with soldered or brazed joints.
3. Dielectric Connections: Union with galvanized or plated steel threaded end,
copper solder end, water impervious isolation barrier.
B. Flanges for Pipe 2-1/2 inches and Larger:
1. Ferrous Piping: Class 150, forged steel, slip-on flanges.
2. Copper Piping: Class 150, slip-on bronze flanges.
3. Gaskets: 1/16 inch thick preformed neoprene gaskets.
2.10 BEDDING AND COVER MATERIALS
A. Bedding: Fill Type sand as specified in Section 31 05 16.
B. Cover: Fill Type sand, as specified in Section 31 05 16.
PART 3 - EXECUTION
3.1 EXAMINATION
A. Section 01 30 00 - Administrative Requirements: Verification of existing conditions
before starting work.
B. Verify excavations are to required grade, dry, and not over-excavated.
C. Verify trenches are ready to receive piping.

KGA Architecture 22 05 03 -8 May 5, 2016
UNLV Wright Hall Laboratory Build Out – 16355.00 Piping and Tubes for Plumbing Piping
And Equipment
3.2 PREPARATION
A. Ream pipe and tube ends. Remove burrs. Bevel plain end ferrous pipe.
B. Remove scale and dirt on inside and outside before assembly.
C. Prepare piping connections to equipment with flanges or unions.
D. Keep open ends of pipe free from scale and dirt. Protect open ends with temporary plugs
or caps.
3.3 INSTALLATION - BURIED PIPING SYSTEMS
A. Verify connection to existing piping system size, location, and invert are as indicated on
Drawings.
B. Establish elevations of buried piping with not less than 1.5 ft of cover.
C. Establish minimum separation of domestic water from sanitary sewer piping in
accordance with Uniform Plumbing Code.
D. Excavate pipe trench in accordance with Section 31 23 17.
E. Place bedding material at trench bottom to provide uniform bedding for piping, level
bedding materials in one continuous layer not exceeding 4 inches compacted depth;
compact to 95 percent maximum density.
F. Install pipe on prepared bedding.
G. Route pipe in straight line.
H. Install pipe to allow for expansion and contraction without stressing pipe or joints.
I. Install shutoff and drain valves at locations indicated on Drawings in accordance with
this Section and Section 22 05 23.
J. Pipe Cover and Backfilling:
1. Backfill trench in accordance with Section 31 23 23.
2. Maintain optimum moisture content of fill material to attain required compaction
density.
3. After hydrostatic test, evenly backfill entire trench width by hand placing backfill
material and hand tamping in 6 inches compacted layers to 6 inches minimum
cover over top of jacket. Compact to 95 percent maximum density.
4. Evenly and continuously backfill remaining trench depth in uniform layers with
backfill material.
3.4 INSTALLATION - ABOVE GROUND PIPING
A. Route piping in orderly manner and maintain gradient. Route parallel and perpendicular
to walls.

KGA Architecture 22 05 03 -9 May 5, 2016
UNLV Wright Hall Laboratory Build Out – 16355.00 Piping and Tubes for Plumbing Piping
And Equipment
B. Install piping to maintain headroom without interfering with use of space or taking more
space than necessary.
C. Group piping whenever practical at common elevations.
D. Sleeve pipe passing through partitions, walls and floors. Refer to Section 22 05 29.
E. Install piping to allow for expansion and contraction without stressing pipe, joints, or
connected equipment.
F. Provide clearance in hangers and from structure and other equipment for installation of
insulation and access to valves and fittings. Refer to Section 22 07 00.
G. Provide access where valves and fittings are not accessible. Coordinate size and location
of access doors with Section 08 31 13.
H. Install non-conducting dielectric connections wherever jointing dissimilar metals.
I. Establish invert elevations, slopes for drainage to minimum 1/4 for waste piping and 1/8
inch per foot for storm water. Maintain gradients.
J. Slope piping and arrange systems to drain at low points.
K. Protect piping systems from entry of foreign materials by temporary covers, completing
sections of the Work, and isolating parts of completed system.
L. Install piping penetrating roofed areas to maintain integrity of roof assembly.
M. Install valves in accordance with Section 22 05 23.
N. Install piping specialties in accordance with Section 23 21 16.
O. Insulate piping. Refer to Section 22 07 00.
P. Install pipe identification in accordance with Section 22 05 53.
3.5 INSTALLATION - DOMESTIC WATER PIPING SYSTEMS
A. Install domestic water piping system in accordance with Section 22 11 00.
3.6 INSTALLATION - SANITARY WASTE AND VENT PIPING SYSTEMS
A. Install sanitary waste and vent piping systems in accordance with Section 22 13 00.
B. Install bell and spigot pipe with bell end upstream.
C. Support cast iron drainage piping at every joint.

KGA Architecture 22 05 03 -10 May 5, 2016
UNLV Wright Hall Laboratory Build Out – 16355.00 Piping and Tubes for Plumbing Piping
And Equipment
3.7 INSTALLATION – ACID WASTE
A. Install glass and polypropylene piping in strict conformance with manufacturer’s
installation recommendations.
3.8 FIELD QUALITY CONTROL
A. Section 01 70 00 - Execution and Closeout Requirements: Field inspecting, testing,
adjusting, and balancing.
B. Test domestic water piping system in accordance with local authority having jurisdiction.
C. Test sanitary waste and vent piping system in accordance with local authority having
jurisdiction.
D. Vacuum air piping shall be tested to 200 psig for four (4) hours with no pressure drop.
3.9 CLEANING
A. Section 01 70 00 - Execution and Closeout Requirements: Requirements for cleaning.
1. Clean and disinfect domestic water distribution system in accordance with
Section 22 11 00.
END OF SECTION
KGA Architecture 22 05 23 -1 May 5, 2016
UNLV Wright Hall Laboratory Build Out – 16355.00 General-Duty Valves for Plumbing Piping
SECTION 22 05 23
GENERAL-DUTY VALVES FOR PLUMBING PIPING
PART 1 - GENERAL
1.1 SUMMARY
A. Section Includes:
1. Gate valves.
2. Ball valves.
3. Butterfly valves.
4. Check valves.
B. Related Sections:
1. Section 22 05 03 - Pipes and Tubes for Plumbing Piping and Equipment: Product and
installation requirements for piping materials applying to various system types.
2. Section 22 05 29 - Hangers and Supports for Plumbing Piping and Equipment: Product
and installation requirements for pipe hangers and supports.
3. Section 22 07 00 - Plumbing Insulation: Product and installation requirements for
insulation for valves.
4. Section 22 11 00 - Facility Water Distribution: Product and installation requirements for
piping, piping specialties, and equipment used in domestic water systems.
5. Section 22 13 00 - Facility Sanitary Sewerage: Product and installation requirements for
piping, piping specialties, and equipment used in sanitary waste and vent systems.
6. Section 22 14 00 - Facility Storm Drainage: Product and installation requirements for
piping, piping specialties, and equipment used in storm drainage systems.
1.2 REFERENCES
A. ASTM International:
1. ASTM D1784 - Standard Specification for Rigid Poly (Vinyl Chloride) (PVC)
Compounds and Chlorinated Poly (Vinyl Chloride) (CPVC) Compounds.
2. ASTM D4101 - Standard Specification for Propylene Injection and Extrusion Materials.
B. Manufacturers Standardization Society of the Valve and Fittings Industry:
1. MSS SP 67 - Butterfly Valves.
2. MSS SP 70 - Cast Iron Gate Valves, Flanged and Threaded Ends.
3. MSS SP 71 - Cast Iron Swing Check Valves, Flanged and Threaded Ends.
4. MSS SP 78 - Cast Iron Plug Valves, Flanged and Threaded Ends.
5. MSS SP 80 - Bronze Gate, Globe, Angle and Check Valves.
6. MSS SP 110 - Ball Valves Threaded, Socket-Welding, Solder Joint, Grooved and Flared
Ends.
1.3 SUBMITTALS
A. Section 01 33 00 - Submittal Procedures: Requirements for submittals.
B. Product Data: Submit manufacturers catalog information with valve data and ratings for each
service.

KGA Architecture 22 05 23 -2 May 5, 2016
UNLV Wright Hall Laboratory Build Out – 16355.00 General-Duty Valves for Plumbing Piping
C. Manufacturer's Installation Instructions: Submit hanging and support methods, joining
procedures.
D. Manufacturer's Certificate: Certify products meet or exceed specified requirements.
1.4 CLOSEOUT SUBMITTALS
A. Section 01 70 00 - Execution and Closeout Requirements: Requirements for submittals.
B. Project Record Documents: Record actual locations of valves.
C. Operation and Maintenance Data: Submit installation instructions, spare parts lists, exploded
assembly views.
1.5 QUALIFICATIONS
A. Manufacturer: Company specializing in manufacturing Products specified in this section with
minimum three years documented experience.
B. Installer: Company specializing in performing work of this section with minimum years
documented experience.
1.6 PRE-INSTALLATION MEETINGS
A. Section 01 30 00 - Administrative Requirements: Pre-installation meeting.
B. Convene minimum one week prior to commencing work of this section.
1.7 DELIVERY, STORAGE, AND HANDLING
A. Section 01 60 00 - Product Requirements: Requirements for transporting, handling, storing, and
protecting products.
B. Accept valves on site in shipping containers with labeling in place. Inspect for damage.
C. Provide temporary protective coating on cast iron and steel valves.
1.8 ENVIRONMENTAL REQUIREMENTS
A. Section 01 60 00 - Product Requirements: Environmental conditions affecting products on site.
B. Do not install valves underground when bedding is wet or frozen.
1.9 WARRANTY
A. Section 01 70 00 - Execution and Closeout Requirements: Requirements for warranties.
B. Furnish one year manufacturer warranty for valves excluding packing.

KGA Architecture 22 05 23 -3 May 5, 2016
UNLV Wright Hall Laboratory Build Out – 16355.00 General-Duty Valves for Plumbing Piping
1.10 EXTRA MATERIALS
A. Section 01 70 00 - Execution and Closeout Requirements: Requirements for extra materials.
B. Furnish two packing kits for each size valve.
PART 2 - PRODUCTS
2.1 GATE VALVES
A. Manufacturers:
1. Crane Valve, North America.
2. Hammond Valve.
3. Milwaukee Valve Company.
4. NIBCO, Inc.
5. Stockham Valves & Fittings.
6. Substitutions: Section 01 60 00 - Product Requirements.
B. 2 inches and Smaller: MSS SP 80, Class 150, bronze body and cap, bronze seat, Buna-N disc,
solder or threaded ends.
C. 2-1/2 inches and Larger: MSS SP 71, Class 125, cast iron body, bolted cap, bronze or cast iron
disc, renewable disc seal and seat, flanged ends.
2.2 GLOBE VALVES
A. Manufacturers:
1. Crane Company.
2. Conbraco Industries.
3. Hammond Valve.
4. Kitz.
5. Milwaukee Valve Co.
6. Nibco Inc.
7. Stockham, A crane Company.
8. Substitutions: Section 01 60 00 - Product Requirements.
B. Up to 2 Inches (50 mm): Bronze body, rising stem and handwheel, inside screw, renewable
composition disc, solder or screwed ends as required, with backseating capacity.
C. Over 2 Inches (50 mm): Iron body, bronze trim, rising stem and handwheel, OS&Y, plug-type
disc, flanged ends.
2.3 BALL VALVES
A. Manufacturers:
1. Crane Company.
2. Conbraco Industries.
3. Hammond Valve.
4. Kitz.
5. Milwaukee Valve Co.
KGA Architecture 22 05 23 -4 May 5, 2016
UNLV Wright Hall Laboratory Build Out – 16355.00 General-Duty Valves for Plumbing Piping
6. Nibco Inc.
7. Stockham, A crane Company.
8. Substitutions: Section 01 60 00 - Product Requirements.
B. Up to 2 Inches (50 mm): Bronze body, stainless steel ball, Teflon seats and stuffing box ring,
lever handle solder or threaded ends as required or with union.
C. Over 2 Inches (50 mm): Cast steel body, chrome plated steel ball, Teflon seat and stuffing box
seals, lever handle, flanged.
2.4 GAS COCKS
A. Up to 2 Inches (50 mm): Bronze body, bronze tapered plug. non-lubricated, Teflon packing,
threaded ends.
B. Over 2 Inches (50 mm): Cast iron body and plug, non-lubricated, Teflon packing, flanged ends.
2.5 BUTTERFLY VALVES
A. Iron body, bronze disc, and resilient replaceable seat for service to 180 degrees F (82 degrees
C), wafer or lug ends, 10 position lever handle.
2.6 SWING CHECK VALVES
A. Up to 2 Inches (50 mm): Bronze 45 degree swing disc, solder or screwed ends as required.
B. Over 2 Inches (50 mm): Iron body, bronze trim, 45 degree swing disc, renewable disc and seat,
flanged ends.
2.7 SPRING LOADED CHECK VALVES
A. Iron body, bronze trim, spring loaded, renewable composition disc, screwed, wafer, or flanged
ends.
2.8 WATER PRESSURE REDUCING VALVES
A. Up to 2 Inches (50 mm): Bronze body, stainless steel and thermoplastic internal parts, fabric
reinforced diaphragm, strainer, threaded or double union ends.
B. Over 2 Inches (50 mm): Cast iron body, bronze fitted, elastomer diaphragm and seat disc,
flanged.
2.9 RELIEF VALVES
A. Bronze body, Teflon seat, steel stem and springs, automatic, direct pressure actuated, capacities
ASME certified and labeled.
PART 3 - EXECUTION
3.1 EXAMINATION
A. Section 01 30 00 - Administrative Requirements: Verification of existing conditions before
starting work.

KGA Architecture 22 05 23 -5 May 5, 2016
UNLV Wright Hall Laboratory Build Out – 16355.00 General-Duty Valves for Plumbing Piping
B. Verify piping system is ready for valve installation.
3.2 INSTALLATION
A. Install valves with stems upright or horizontal, not inverted.
B. Install brass male adapters each side of valves in copper piped system. Solder adapters to pipe.
C. Install 3/4 inch ball valves with cap for drains at main shut-off valves, low points of piping,
bases of vertical risers, and at equipment.
D. Install valves with clearance for installation of insulation and allowing access.
E. Provide access where valves and fittings are not accessible. Coordinate size and location of
access doors with Section 08 31 13.
F. Refer to Section 22 05 29 for pipe hangers.
G. Refer to Section 22 07 00 for insulation requirements for valves.
H. Refer to Section 22 05 03 for piping materials applying to various system types.
3.3 VALVE APPLICATIONS
A. Install shutoff and drain valves at locations indicated on Drawings in accordance with this
Section.
B. Install ball or gate valves for shut-off and to isolate equipment, part of systems, or vertical
risers.
C. Install ball or globe valves for throttling, bypass, or manual flow control services.
D. Install spring loaded check valves on discharge of water pumps.
E. Install ball butterfly and gate valves in domestic water systems for shut-off service.
F. Install ball or gate valves in sanitary systems for shut-off service.
END OF SECTION

KGA Architecture 22 05 29 -1 May 5, 2016
UNLV Wright Hall Laboratory Build Out – 16355.00 Hangers and Supports for Plumbing Piping
And Equipment
SECTION 22 05 29
HANGERS AND SUPPORTS FOR PLUMBING PIPING AND EQUIPMENT
PART 1 - GENERAL
1.1 SUMMARY
A. Section Includes:
1. Pipe hangers and supports.
2. Hanger rods.
3. Inserts.
4. Flashing.
5. Sleeves.
6. Mechanical sleeve seals.
7. Formed steel channel.
8. Equipment bases and supports.
B. Related Sections:
1. Section 03 10 00 - Concrete Forming and Accessories: Execution requirements for
placement of inserts and sleeves in concrete forms specified by this section.
2. Section 03 30 00 - Cast-In-Place Concrete: Execution requirements for placement of
concrete housekeeping pads specified by this section.
3. Section 07 90 00 - Joint Protection: Product requirements for sealant materials for
placement by this section.
4. Section 09 90 00 - Painting and Coating: Product and execution requirements for painting
specified by this section.
5. Section 22 05 03 - Pipes and Tubes for Plumbing Piping and Equipment: Execution
requirements for placement of hangers and supports specified by this section.
6. Section 22 11 00 - Facility Water Distribution: Execution requirements for placement of
hangers and supports specified by this section.
7. Section 22 13 00 - Facility Sanitary Sewerage: Execution requirements for placement of
hangers and supports specified by this section.
8. Section 22 14 00 - Facility Storm Drainage: Execution requirements for placement of
hangers and supports specified by this section.
1.2 REFERENCES
A. American Society of Mechanical Engineers:
1. ASME B31.1 - Power Piping.
2. ASME B31.5 - Refrigeration Piping.
3. ASME B31.9 - Building Services Piping.
B. ASTM International:
1. ASTM E84 - Test Method for Surface Burning Characteristics of Building Materials.
2. ASTM E119 - Method for Fire Tests of Building Construction and Materials.
3. ASTM E814 - Test Method of Fire Tests of Through Penetration Firestops.
4. ASTM F708 - Standard Practice for Design and Installation of Rigid Pipe Hangers.
5. ASTM E1966 - Standard Test Method for Fire-Resistive Joint Systems.

KGA Architecture 22 05 29 -2 May 5, 2016
UNLV Wright Hall Laboratory Build Out – 16355.00 Hangers and Supports for Plumbing Piping
And Equipment
C. American Welding Society:
1. AWS D1.1 - Structural Welding Code - Steel.
D. Manufacturers Standardization Society of the Valve and Fittings Industry:
1. MSS SP 58 - Pipe Hangers and Supports - Materials, Design and Manufacturer.
2. MSS SP 69 - Pipe Hangers and Supports - Selection and Application.
3. MSS SP 89 - Pipe Hangers and Supports - Fabrication and Installation Practices.
E. Underwriters Laboratories Inc.:
1. UL 263 - Fire Tests of Building Construction and Materials.
2. UL 723 - Tests for Surface Burning Characteristics of Building Materials.
3. UL 1479 - Fire Tests of Through-Penetration Firestops.
4. UL 2079 - Tests for Fire Resistance of Building Joint Systems.
5. UL - Fire Resistance Directory.
1.3 SUBMITTALS
A. Section 01 33 00 - Submittal Procedures: Submittal procedures.
B. Shop Drawings: Indicate system layout with location including critical dimensions, sizes, and
pipe hanger and support locations and detail of trapeze hangers.
C. Product Data:
1. Hangers and Supports: Submit manufacturers catalog data including load capacity.
D. Design Data: Indicate load carrying capacity of trapeze, multiple pipe, and riser support
hangers. Indicate calculations used to determine load carrying capacity of trapeze, multiple
pipe, and riser support hangers.
E. Manufacturer's Installation Instructions:
1. Hangers and Supports: Submit special procedures and assembly of components.
F. Manufacturer's Certificate: Certify products meet or exceed specified requirements.
1.4 QUALIFICATIONS
A. Manufacturer: Company specializing in manufacturing Products specified in this section with
minimum three years documented experience.
B. Installer: Company specializing in performing Work of this section with minimum three years
documented experience.
1.5 PRE-INSTALLATION MEETINGS
A. Section 01 30 00 - Administrative Requirements: Pre-installation meeting.
B. Convene minimum one week prior to commencing work of this section.
KGA Architecture 22 05 29 -3 May 5, 2016
UNLV Wright Hall Laboratory Build Out – 16355.00 Hangers and Supports for Plumbing Piping
And Equipment
1.6 DELIVERY, STORAGE, AND HANDLING
A. Section 01 60 00 - Product Requirements: Requirements for transporting, handling, storing, and
protecting products.
B. Accept materials on site in original factory packaging, labeled with manufacturer's
identification.
C. Protect from weather and construction traffic, dirt, water, chemical, and damage, by storing in
original packaging.
1.7 ENVIRONMENTAL REQUIREMENTS
A. Section 01 60 00 - Product Requirements: Environmental conditions affecting products on site.
1.8 FIELD MEASUREMENTS
A. Verify field measurements prior to fabrication.
1.9 WARRANTY
A. Section 01 70 00 - Execution and Closeout Requirements: Product warranties and product
bonds.
B. Furnish one year manufacturer warranty for pipe hangers and supports.
PART 2 - PRODUCTS
2.1 PIPE HANGERS AND SUPPORTS
A. Plumbing Piping - DWV:
1. Conform to ASME B31.9.
2. Hangers for Pipe Sizes 1/2 to 1-1/2 inch: Malleable iron or Carbon steel, adjustable
swivel, split ring.
3. Hangers for Pipe Sizes 2 inches and Larger: Carbon steel, adjustable, clevis.
4. Multiple or Trapeze Hangers: Steel channels with welded spacers and hanger rods.
5. Wall Support for Pipe Sizes 3 inches and Smaller: Cast iron hook.
6. Wall Support for Pipe Sizes 4 inches and Larger: Welded steel bracket and wrought steel
clamp.
7. Vertical Support: Steel riser clamp.
8. Floor Support: Cast iron adjustable pipe saddle, lock nut, nipple, floor flange, and
concrete pier or steel support.
9. Copper Pipe Support: Copper-plated, carbon-steel adjustable, ring.
B. Plumbing Piping - Water:
1. Conform to ASME B31.9.
2. Hangers for Pipe Sizes 1/2 to 1-1/2 inch: Malleable iron or Carbon steel, adjustable
swivel, split ring.
3. Hangers for Cold Pipe Sizes 2 inches and Larger: Carbon steel, adjustable, clevis.

KGA Architecture 22 05 29 -4 May 5, 2016
UNLV Wright Hall Laboratory Build Out – 16355.00 Hangers and Supports for Plumbing Piping
And Equipment
4. Hangers for Hot Pipe Sizes 2 to 4 inches: Carbon steel, adjustable, clevis.
5. Hangers for Hot Pipe Sizes 6 inches and Larger: Adjustable steel yoke, cast iron roll,
double hanger.
6. Multiple or Trapeze Hangers: Steel channels with welded spacers and hanger rods.
7. Multiple or Trapeze Hangers for Hot Pipe Sizes 6 inches and Larger: Steel channels with
welded spacers and hanger rods, cast iron roll.
8. Wall Support for Pipe Sizes 3 inches and Smaller: Cast iron hook.
9. Wall Support for Pipe Sizes 4 inches and Larger: Welded steel bracket and wrought steel
clamp.
10. Wall Support for Hot Pipe Sizes 6 inches and Larger: Welded steel bracket and wrought
steel clamp with adjustable steel yoke and cast iron roll.
11. Vertical Support: Steel riser clamp.
12. Floor Support for Cold Pipe: Cast iron adjustable pipe saddle, lock nut, nipple, floor
flange, and concrete pier or steel support.
13. Floor Support for Hot Pipe Sizes 4 inches and Smaller: Cast iron adjustable pipe saddle,
lock nut, nipple, floor flange, and concrete pier or steel support.
14. Floor Support for Hot Pipe Sizes 6 inches and Larger: Adjustable cast iron roll and stand,
steel screws, and concrete pier or steel support.
15. Copper Pipe Support: Copper-plated, Carbon-steel ring.
2.2 ACCESSORIES
A. Hanger Rods: Mild steel threaded both ends, threaded on one end, or continuous threaded.
2.3 INSERTS
A. Inserts: Malleable iron case of galvanized steel shell and expander plug for threaded connection
with lateral adjustment, top slot for reinforcing rods, lugs for attaching to forms; size inserts to
suit threaded hanger rods.
2.4 FLASHING
A. Metal Flashing: 26 gage thick galvanized steel.
B. Metal Counterflashing: 22 gage thick galvanized steel.
C. Lead Flashing:
1. Waterproofing: 5 lb./sq. ft sheet lead.
2. Soundproofing: 1 lb./sq. ft sheet lead.
D. Flexible Flashing: 47 mil thick sheet butyl; compatible with roofing.
E. Caps: Steel, 22 gage minimum; 16 gage at fire resistant elements.
2.5 SLEEVES
A. Sleeves for Pipes through Non-fire Rated Floors: 18 gage thick galvanized steel.

KGA Architecture 22 05 29 -5 May 5, 2016
UNLV Wright Hall Laboratory Build Out – 16355.00 Hangers and Supports for Plumbing Piping
And Equipment
B. Sleeves for Pipes through Non-fire Rated Beams, Walls, Footings, and Potentially Wet Floors:
Steel pipe or 18 gage thick galvanized steel.
C. Sealant: Acrylic; refer to Section 07 90 00.
2.6 MECHANICAL SLEEVE SEALS
A. Manufacturers:
1. Thunderline Link-Seal, Inc.
2. NMP Corporation.
3. Substitutions: Section 01 60 00 - Product Requirements.
B. Product Description: Modular mechanical type, consisting of interlocking synthetic rubber links
shaped to continuously fill annular space between object and sleeve, connected with bolts and
pressure plates causing rubber sealing elements to expand when tightened, providing watertight
seal and electrical insulation.
2.7 FORMED STEEL CHANNEL
A. Manufacturers:
1. Allied Tube & Conduit Corp.
2. B-Line Systems Model.
3. Midland Ross Corporation, Electrical Products Division.
4. Unistrut Corp.
5. Substitutions: Section 01 60 00 - Product Requirements Not Permitted.
B. Product Description: Galvanized 12 gage) thick steel. With holes 1-1/2 inches on center.
PART 3 - EXECUTION
3.1 EXAMINATION
A. Section 01 30 00 - Administrative Requirements: Verification of existing conditions before
starting work.
B. Verify openings are ready to receive sleeves.
3.2 INSTALLATION - INSERTS
A. Install inserts for placement in concrete forms.
B. Install inserts for suspending hangers from reinforced concrete slabs and sides of reinforced
concrete beams.
C. Provide hooked rod to concrete reinforcement section for inserts carrying pipe 4 inches and
larger.
D. Where concrete slabs form finished ceiling, locate inserts flush with slab surface.

KGA Architecture 22 05 29 -6 May 5, 2016
UNLV Wright Hall Laboratory Build Out – 16355.00 Hangers and Supports for Plumbing Piping
And Equipment
E. Where inserts are omitted, drill through concrete slab from below and provide through-bolt with
recessed square steel plate and nut recessed into and grouted flush with slab.
3.3 INSTALLATION - PIPE HANGERS AND SUPPORTS
A. Install in accordance with ASME B31.1 or ASME B31.5.
B. Support horizontal piping as scheduled.
C. Install hangers with minimum 1/2 inch space between finished covering and adjacent work.
D. Place hangers within 12 inches of each horizontal elbow.
E. Use hangers with 1-1/2 inch minimum vertical adjustment.
F. Support horizontal cast iron pipe adjacent to each hub, with 5 feet maximum spacing between
hangers.
G. Support vertical piping at every floor. Support vertical cast iron pipe at each floor at hub.
H. Where piping is installed in parallel and at same elevation, provide multiple pipe or trapeze
hangers.
I. Support riser piping independently of connected horizontal piping.
J. Provide copper plated hangers and supports for copper piping.
K. Design hangers for pipe movement without disengagement of supported pipe.
L. Prime coat exposed steel hangers and supports. Refer to Section 09 90 00. Hangers and supports
located in crawl spaces, pipe shafts, and suspended ceiling spaces are not considered exposed.
M. Provide clearance in hangers and from structure and other equipment for installation of
insulation. Refer to Section 22 07 00.
3.4 INSTALLATION - EQUIPMENT BASES AND SUPPORTS
A. Provide housekeeping pads of concrete, minimum 3-1/2 inches thick and extending 6 inches
beyond supported equipment. Refer to Section 03 30 00.
B. Using templates furnished with equipment, install anchor bolts, and accessories for mounting
and anchoring equipment.
C. Construct supports of formed steel channel. Brace and fasten with flanges bolted to structure.
3.5 INSTALLATION - FLASHING
A. Provide flexible flashing and metal counterflashing where piping penetrates weather or
waterproofed walls, floors, and roofs.

KGA Architecture 22 05 29 -7 May 5, 2016
UNLV Wright Hall Laboratory Build Out – 16355.00 Hangers and Supports for Plumbing Piping
And Equipment
B. Flash vent and soil pipes projecting 3 inches minimum above finished roof surface with lead
worked 1 inch minimum into hub, 8 inches minimum clear on sides with 24 x 24 inches sheet
size. For pipes through outside walls, turn flanges back into wall and caulk, metal counter-flash,
and seal.
C. Flash floor drains in floors with topping over finished areas with lead, 10 inches clear on sides
with minimum 36 x 36 inch sheet size. Fasten flashing to drain clamp device.
D. Seal floor, shower and mop sink drains watertight to adjacent materials.
E. Adjust storm collars tight to pipe with bolts; caulk around top edge. Use storm collars above
roof jacks. Screw vertical flange section to face of curb.
3.6 INSTALLATION - SLEEVES
A. Exterior watertight entries: Seal with mechanical sleeve seals.
B. Set sleeves in position in forms. Provide reinforcing around sleeves.
C. Size sleeves large enough to allow for movement due to expansion and contraction. Provide for
continuous insulation wrapping.
D. Extend sleeves through floors 1 inch above finished floor level. Caulk sleeves.
E. Where piping penetrates floor, ceiling, or wall, close off space between pipe and adjacent work
with stuffing firestopping insulation and caulk airtight. Provide close fitting metal collar or
escutcheon covers at both sides of penetration.
F. Install chrome plated steel plastic stainless steel escutcheons at finished surfaces.
3.7 FIELD QUALITY CONTROL
A. Section 01 40 00 - Quality Requirements 01 70 00 - Execution and Closeout Requirements:
Field inspecting, testing, adjusting, and balancing.
3.8 CLEANING
A. Section 01 70 00 - Execution and Closeout Requirements: Requirements for cleaning.
B. Clean adjacent surfaces of firestopping materials.
3.9 PROTECTION OF FINISHED WORK
A. Section 01 70 00 - Execution and Closeout Requirements: Requirements for protecting finished
Work.
B. Protect adjacent surfaces from damage by material installation.

KGA Architecture 22 05 29 -8 May 5, 2016
UNLV Wright Hall Laboratory Build Out – 16355.00 Hangers and Supports for Plumbing Piping
And Equipment
3.10 SCHEDULES
PIPE SIZE MAX HANGER
SPACING
HANGER
DIAMETER
COPPER
1/2 to 1-1/2”
(12 to 32 mm)
2” and larger
(50 mm and up)
6’-2” (2 m)
10’-0” (3 m)
3/8” (9 mm)
3/8” (9 mm) to 4”
pipe
1/2” (13 mm) above
STEEL
1/2 to 3/4”
(12 to 19 mm)
1” and larger
(25 mm and up)
10’-1” (3 m)
12’-0” (4 m)
3/8” (9 mm)
3/8” (9 mm) to 4”
pipe
1/2” (13 mm) above
STEEL AND COPPER FOR
GAS
1/2”
(12 mm)
3/4” to 1”
(19 t 25 mm)
1-1/4” and larger
(32 mm and up)
C.I. Bell and Spigot
(or No Hub)
6-0” (2 m)
8’-0” (3 m)
10’-0” (4.25 m)
10’-0” (1.5 m)
and at all joints
3/8” (9 mm)
3/8” (15 mm)
3/8” (22 mm)
1/2” (13 mm)
END OF SECTION

KGA Architecture 22 11 00 -1 May 5, 2016
UNLV Wright Hall Laboratory Build Out – 16355.00 Facility Water Distribution
SECTION 22 11 00
FACILITY WATER DISTRIBUTION
PART 1 - GENERAL
1.1 SUMMARY
A. Section Includes:
1. Domestic water piping, within 5 feet of building.
2. Domestic water piping, above grade.
3. Unions and flanges.
4. Valves.
5. Pipe hangers and supports.
6. Pressure gages.
7. Flow control valves.
8. Water pressure reducing valves.
9. Relief valves.
10. Strainers.
11. Hose bibs.
12. Hydrants.
13. Recessed valve box.
14. Backflow preventers.
15. Water hammer arrestors.
16. Thermostatic mixing valves.
17. Diaphragm-type compression tanks.
18. System lubricated circulators.
B. Related Sections:
1. Section 03 30 00 - Cast-In-Place Concrete: Execution requirements for placement of
concrete housekeeping pads specified by this section.
2. Section 08 31 13 - Access Doors and Frames: Product requirements for access doors for
placement by this section.
3. Section 09 90 00 - Painting and Coating: Product and execution requirements for painting
specified by this section.
4. Section 22 05 03 - Pipes and Tubes for Plumbing Piping and Equipment: Product and
installation requirements for piping materials applying to various system types.
5. Section 22 05 23 - General-Duty Valves for Plumbing Piping: Product requirements for
valves for placement by this section.
6. Section 22 05 29 - Hangers and Supports for Plumbing Piping and Equipment: Product
requirements for pipe hangers and supports for placement by this section.
7. Section 22 05 53 - Identification for Plumbing Piping and Equipment: Product
requirements for pipe identification and valve tags for placement by this section.
8. Section 22 07 00 - Plumbing Insulation: Product and execution requirements for pipe
insulation.
9. Section 26 05 03 - Equipment Wiring Connections: Execution requirements for electric
connections to equipment specified by this section.
10. Section 31 20 00 – Earth Moving
KGA Architecture 22 11 00 -2 May 5, 2016
UNLV Wright Hall Laboratory Build Out – 16355.00 Facility Water Distribution
1.2 REFERENCES
A. American National Standards Institute:
1. ANSI Z21.22 - Relief Valves for Hot Water Supply Systems.
B. American Society of Mechanical Engineers:
1. ASME B16.18 - Cast Copper Alloy Solder Joint Pressure Fittings.
2. ASME B16.22 - Wrought Copper and Copper Alloy Solder Joint Pressure Fittings.
3. ASME B16.26 - Cast Copper Alloy Fittings for Flared Copper Tubes.
4. ASME B31.9 - Building Services Piping.
5. ASME B40.1 - Gauges - Pressure Indicating Dial Type - Elastic Element.
6. ASME Section VIII - Boiler and Pressure Vessel Code - Pressure Vessels.
7. ASME Section IX - Boiler and Pressure Vessel Code - Welding and Brazing
Qualifications.
C. American Society of Sanitary Engineering:
1. ASSE 1010 - Performance Requirements for Water Hammer Arresters.
2. ASSE 1011 - Performance Requirements for Hose Connection Vacuum Breakers.
3. ASSE 1012 - Performance Requirements for Backflow Preventer with Intermediate
Atmospheric Vent.
4. ASSE 1013 - Performance Requirements for Reduced Pressure Principle Backflow
Preventers and Reduced Pressure Fire Protection Principle Backflow Preventers.
5. ASSE 1019 - Performance Requirements for Vacuum Breaker Wall Hydrants, Freeze
Resistant, Automatic Draining Type.
6. ASSE 5013 - Performance Requirements for Reduced Pressure Principle Backflow
Preventers (RP) and Reduced Pressure Fire Protection Principle Backflow Preventers
(RFP).
7. ASSE 5015 - Performance Requirements for Testing Double Check Backflow Prevention
Assemblies (DC) and Double Check Fire Protection Backflow Prevention Assemblies
(RPDF).
D. ASTM International:
1. ASTM A53/A53M - Standard Specification for Pipe, Steel, Black and Hot-Dipped, Zinc-
Coated, Welded and Seamless.
2. ASTM A234/A234M - Standard Specification for Piping Fittings of Wrought Carbon
Steel and Alloy Steel for Moderate and High Temperature Service.
3. ASTM A395/A395M - Standard Specification for Ferritic Ductile Iron Pressure-
Retaining Castings for Use at Elevated Temperatures.
4. ASTM A536 - Standard Specification for Ductile Iron Castings.
5. ASTM B32 - Standard Specification for Solder Metal.
6. ASTM B42 - Standard Specification for Seamless Copper Pipe, Standard Sizes.
7. ASTM B88 - Standard Specification for Seamless Copper Water Tube.
8. ASTM B584 - Standard Specification for Copper Alloy Sand Castings for General
Applications.
9. ASTM E1 - Standard Specification for ASTM Thermometers.
10. ASTM E77 - Standard Test Method for Inspection and Verification of Thermometers.
11. ASTM F1476 - Standard Specification for Performance of Gasketed Mechanical
Couplings for Use in Piping Applications.

KGA Architecture 22 11 00 -3 May 5, 2016
UNLV Wright Hall Laboratory Build Out – 16355.00 Facility Water Distribution
E. American Welding Society:
1. AWS A5.8 - Specification for Filler Metals for Brazing and Braze Welding.
F. Manufacturers Standardization Society of the Valve and Fittings Industry:
1. MSS SP 58 - Pipe Hangers and Supports - Materials, Design and Manufacturer.
2. MSS SP 67 - Butterfly Valves.
3. MSS SP 69 - Pipe Hangers and Supports - Selection and Application.
4. MSS SP 70 - Cast Iron Gate Valves, Flanged and Threaded Ends.
5. MSS SP 71 - Cast Iron Swing Check Valves, Flanged and Threaded Ends.
6. MSS SP 78 - Cast Iron Plug Valves, Flanged and Threaded Ends.
7. MSS SP 80 - Bronze Gate, Globe, Angle and Check Valves.
8. MSS SP 85 - Cast Iron Globe & Angle Valves, Flanged and Threaded.
9. MSS SP 89 - Pipe Hangers and Supports - Fabrication and Installation Practices.
10. MSS SP 110 - Ball Valves Threaded, Socket-Welding, Solder Joint, Grooved and Flared
Ends.
G. National Electrical Manufacturers Association:
1. NEMA 250 - Enclosures for Electrical Equipment (1000 Volts Maximum).
H. Plumbing and Drainage Institute:
1. PDI WH201 - Water Hammer Arrester Standard.
1.3 SUBMITTALS
A. Section 01 33 00 - Submittal Procedures: Submittal procedures.
B. Product Data:
1. Piping: Submit data on pipe materials, fittings, and accessories. Submit manufacturer's
catalog information.
2. Valves: Submit manufacturers catalog information with valve data and ratings for each
service.
3. Hangers and Supports: Submit manufacturers catalog information including load
capacity.
4. Domestic Water Specialties: Submit manufacturers catalog information, component sizes,
rough-in requirements, service sizes, and finishes.
5. Pumps: Submit pump type, capacity, certified pump curves showing pump performance
characteristics with pump and system operating point plotted. Include NPSH curve when
applicable. Include electrical characteristics and connection requirements.
C. Manufacturer's Installation Instructions: Submit installation instructions for pumps, valves and
accessories.
D. Manufacturer's Certificate: Certify products meet or exceed specified requirements.
1.4 CLOSEOUT SUBMITTALS
A. Section 01 70 00 - Execution and Closeout Requirements: Closeout procedures.
B. Project Record Documents: Record actual locations of valves and equipment.

KGA Architecture 22 11 00 -4 May 5, 2016
UNLV Wright Hall Laboratory Build Out – 16355.00 Facility Water Distribution
C. Operation and Maintenance Data: Submit spare parts list, exploded assembly views and
recommended maintenance intervals.
1.5 QUALIFICATIONS
A. Manufacturer: Company specializing in manufacturing products specified in this section with
minimum three years documented experience.
B. Installer: Company specializing in performing Work of this section with minimum three years
documented experience.
1.6 PRE-INSTALLATION MEETINGS
A. Section 01 30 00 - Administrative Requirements: Pre-installation meeting.
B. Convene minimum one week prior to commencing work of this section.
1.7 DELIVERY, STORAGE, AND HANDLING
A. Section 01 60 00 - Product Requirements: Product storage and handling requirements.
B. Accept valves and equipment on site in shipping containers with labeling in place. Inspect for
damage.
C. Provide temporary protective coating on cast iron and steel valves.
D. Provide temporary end caps and closures on piping and fittings. Maintain in place until
installation.
E. Protect piping systems from entry of foreign materials by temporary covers, completing
sections of the Work, and isolating parts of completed system.
1.8 ENVIRONMENTAL REQUIREMENTS
A. Section 01 60 00 - Product Requirements.
B. Do not install underground piping when bedding is wet or frozen.
1.9 FIELD MEASUREMENTS
A. Verify field measurements prior to fabrication.
1.10 WARRANTY
A. Section 01 70 00 - Execution and Closeout Requirements: Product warranties and product
bonds.
B. Furnish one year manufacturer warranty for domestic water piping.

KGA Architecture 22 11 00 -5 May 5, 2016
UNLV Wright Hall Laboratory Build Out – 16355.00 Facility Water Distribution
1.11 EXTRA MATERIALS
A. Section 01 70 00 - Execution and Closeout Requirements: Spare parts and maintenance
products.
B. Furnish two packing kits for each size valve, two loose keys for hose bibs hose end vacuum
breakers for hose bibs service kits for and two pump seals for each pump model.
PART 2 - PRODUCTS
2.1 DOMESTIC WATER PIPING, BURIED WITHIN 5 FEET OF BUILDING
A. Copper Tubing: ASTM B88, Type K, annealed.
1. Fittings: ASME B16.18, cast copper, or ASME B16.22, wrought copper.
2. Joints: Compression connection or Brazed, AWS A5.8 BCuP silver/phosphorus/copper
alloy with melting range 1190 to 1480 degrees F.
2.2 DOMESTIC WATER PIPING, ABOVE GRADE
A. Copper Tubing: ASTM B88, Type L, hard drawn.
1. Fittings: ASME B16.18, cast copper alloy or ASME B16.22, wrought copper and bronze.
2. Joints: Solder, lead free, ASTM B32, 95-5 tin-antimony, or tin and silver, with melting
range 430 to 535 degrees F. Pipes 2 inches and over, braze, AWS A5.8 BCuP
silver/phosphorus/copper alloy with melting range 1190 to 1480 degrees F. “T-Drill”
type fittings not allowed.
2.3 FLUE AND COMBUSTION AIR PIPING
A. PVC Pipe: ASTM D1785, Schedule 40, polyvinyl chloride (PVC) material.
1. Fittings: ASTM D2466, Schedule 40, PVC.
2. Joints: ASTM D2855, solvent weld with ASTM D2564 solvent cement. Prime joints with
a contrasting color.
2.4 UNIONS AND FLANGES
A. Unions for Pipe 2 inches and Smaller:
1. Ferrous Piping: Class 150, malleable iron, threaded.
2. Copper Piping: Class 150, bronze unions with soldered joints, brazed joints for pipe sizes
2 inches and over.
3. Dielectric Connections: Union with galvanized or plated steel threaded end, copper solder
end, water impervious isolation barrier.
B. Flanges for Pipe 2-1/2 inches and Larger:
1. Ferrous Piping: Class 150, forged steel, slip-on flanges.
2. Copper Piping: Class 150, slip-on bronze flanges.
3. Gaskets: 1/16 inch thick preformed neoprene gaskets.

KGA Architecture 22 11 00 -6 May 5, 2016
UNLV Wright Hall Laboratory Build Out – 16355.00 Facility Water Distribution
2.5 PRESSURE GAGES
A. Manufacturers:
1. Alnor Instrument Co.
2. Bristol Babcock.
3. Dwyer, Cali-Tech.
4. Marsh Bellofram, Precision Control Division.
5. Miljoco.
6. Palmer.
7. Taylor.
8. Weiss.
9. Weksler.
10. Substitutions: Section 01 60 00 - Product Requirements.
B. Gage: ASME B40.1, with bourdon tube, rotary brass movement, brass socket, front calibration
adjustment, black scale on white background.
1. Case: Cast aluminum.
2. Bourdon Tube: Brass. Phosphor bronze or Type 316 stainless steel.
3. Dial Size: 2-1/2 inch diameter.
4. Mid-Scale Accuracy: One percent.
5. Scale: Psi.
2.6 PRESSURE GAGE TAPS
A. Needle Valve: Brass, 1/4 inch NPT for minimum 300 psi.
B. Pulsation Damper: Pressure snubber, brass with 1/4 inch NPT connections.
2.7 STEM TYPE THERMOMETERS
A. Manufacturers:
1. Alnor Instrument Co.
2. Bristol Babcock.
3. Dwyer, Cali-Tech.
4. Marsh Bellofram, Precision Control Division.
5. Miljoco.
6. Palmer.
7. Taylor.
8. Weiss.
9. Weksler.
10. Substitutions: Section 01 60 00 - Product Requirements.
B. Thermometer: ASTM E1, red appearing mercury, lens front tube, cast aluminum case with
enamel finish.
1. Size: 9 inch scale.
2. Window: Clear Lexan.
3. Stem: Brass, 3/4 inch NPT, 3-1/2 inch inch long.
4. Accuracy: ASTM E77 2 percent.
5. Calibration: Degrees F.

KGA Architecture 22 11 00 -7 May 5, 2016
UNLV Wright Hall Laboratory Build Out – 16355.00 Facility Water Distribution
2.8 FLOW CONTROL VALVES
A. Manufacturers:
1. GE Betz, Dole Flow Control Valve.
2. Substitutions: Section 01 60 00 - Product Requirements.
B. Construction: Nickel or Chrome plated brass body with Buna-N orifice, rated for maximum
operating conditions of 200 psi and 160 degrees F.
C. Calibration: Control flow within plus or minus 15 percent between 15 and 125 psi.
D. Devices for domestic hot water return service are to be sized for 0.5 gpm flow and shall be
installed with strainers up stream to prevent plugging.
2.9 WATER PRESSURE REDUCING VALVES
A. Manufacturers:
1. Bell & Gossett.
2. Cash Acme.
3. Watts Water Technologies, Inc.
4. Wilkins Operation, a Zurn Company.
5. Substitutions: Section 01 60 00 - Product Requirements.
B. 2 inches and Smaller: MSS SP 80, bronze body, stainless steel and thermoplastic internal parts,
fabric reinforced diaphragm, strainer, threaded and single union ends.
C. 2 inches and Larger: MSS SP 85, cast iron body, bronze fitted, elastomeric diaphragm and seat
disc, flanged.
2.10 RELIEF VALVES
A. Manufacturers:
1. Bell & Gossett.
2. Cash Acme.
3. Watts Water Technologies, Inc.
4. Wilkins Operation, a Zurn Company.
5. Substitutions: Section 01 60 00 - Product Requirements.
B. Pressure Relief:
1. Bronze body, Teflon seat, steel stem and springs, automatic, direct pressure actuated at
maximum 60 psi, UL listed for fuel oil, capacities ASME certified and labeled.
C. Temperature and Pressure Relief:
1. ANSI Z21.22 certified, bronze body, Teflon seat, stainless steel stem and springs,
automatic, direct pressure-actuated, temperature relief maximum 210 degrees F, capacity
ASME certified and labeled.

KGA Architecture 22 11 00 -8 May 5, 2016
UNLV Wright Hall Laboratory Build Out – 16355.00 Facility Water Distribution
2.11 STRAINERS
A. Manufacturers:
1. AW Cash.
2. Watts.
3. Armstrong.
4. O.C. Keckley.
5. Substitutions: Section 01 60 00 - Product Requirements.
B. 2 inch and Smaller: Class 150, threaded bronze body 300 psi CWP, Y pattern with 1/32 inch
stainless steel perforated screen.
C. 1-1/2 inch to 4 inch: Class 125, flanged iron body, Y pattern with 1/16-inch stainless steel
perforated screen.
D. 5 inch and Larger: Class 125, flanged iron body, basket pattern with 1/8 inch stainless steel
perforated screen.
2.12 HOSE BIBS
A. Manufacturers:
1. Acorn Engineering Company.
2. Chicago Faucet.
3. Jay R. Smith Manufacturing.
4. Josam Co.
5. Wade.
6. Woodford Manufacturing.
7. Substitutions: Section 01 60 00 - Product Requirements.
8. Interior: Bronze or brass with integral mounting flange, replaceable hexagonal disc, hose
thread spout, chrome plated where exposed with lock shield and removable key, integral
vacuum breaker in conformance with ASSE 1011.
2.13 HYDRANTS
A. Manufacturers:
1. Acorn Engineering Company.
2. Chicago Faucet.
3. Jay R. Smith Manufacturing.
4. Josam Co.
5. Wade.
6. Woodford Manufacturing.
7. Substitutions: Section 01 60 00 - Product Requirements. Wall Hydrant: ASSE 1019; non-
freeze, self-draining type with lockable recessed box hose thread spout, locks shield and
removable key, and integral vacuum breaker.
2.14 RECESSED VALVE BOX
A. Manufacturers:
1. Acorn Engineering Company.
2. Guy Gray Manufacturing Co.
3. Zurn Light Commercial Operation.

KGA Architecture 22 11 00 -9 May 5, 2016
UNLV Wright Hall Laboratory Build Out – 16355.00 Facility Water Distribution
4. Substitutions: Section 01 60 00 - Product Requirements.
B. Washing Machine: Plastic preformed rough-in box with brass valves with single lever handle,
socket for 2 inch waste, slip in finishing cover.
C. Refrigerator: Plastic preformed rough-in box with brass valves with wheel handle slip in
finishing cover.
2.15 BACKFLOW PREVENTERS
A. Manufacturers:
1. Febco.
2. Mueller Co., Hersey Meters Div.
3. Watts Water Technologies, Inc.
4. Wilkins Operation, A Zurn Company.
5. Substitutions: Section 01 60 00 - Product Requirements.
B. Reduced Pressure Backflow Preventers:
1. Comply with ASSE 1013.
2. Bronze body, with bronze internal parts and stainless steel springs.
3. Two independently operating, spring loaded check valves; diaphragm type differential
pressure relief valve located between check valves; third check valve opening under back
pressure in case of diaphragm failure; non-threaded vent outlet; assembled with two gate
valves, strainer, and four test cocks.
C. Double Check Valve Assemblies: Comply with ASSE 1012; Bronze body with corrosion
resistant internal parts and stainless steel springs; two independently operating check valves
with intermediate atmospheric vent.
2.16 WATER HAMMER ARRESTORS
A. Manufacturers:
1. Jay R Smith Mfg. Co.
2. Josam Co.
3. Zurn Specification Drainage Operation.
4. Substitutions: Section 01 60 00 - Product Requirements.
B. ASSE 1010; stainless steel or copper construction, bellows or piston type sized in accordance
with PDI WH-201.
C. Pre-charged suitable for operation in temperature range 34 to 250 degrees F and maximum 150
psi working pressure.
2.17 THERMOSTATIC MIXING VALVES
A. Manufacturers:
1. Leonard Valve Company.
2. Symmons Industries, Inc.
3. Powers Models 431, 432, 433, 434, 1432, and 1434.
4. Substitutions: Section 01 60 00 - Product Requirements.

KGA Architecture 22 11 00 -10 May 5, 2016
UNLV Wright Hall Laboratory Build Out – 16355.00 Facility Water Distribution
B. Valve: Chrome plated cast brass body, stainless steel or copper alloy bellows, integral
temperature adjustment.
C. Accessories:
1. Check valve on inlets.
2. Volume control shut-off valve on outlet.
3. Stem thermometer on outlet.
4. Strainer stop checks on inlets.
D. Cabinet: 16 gage stainless steel, for recessed mounting with keyed lock.
2.18 DIAPHRAGM-TYPE COMPRESSION TANKS
A. Manufacturers:
1. Armstrong.
2. Dresser Inc./Wheatley.
3. ITT Bell & Gossett.
4. Taco.
5. Substitutions: Section 01 60 00 - Product Requirements.
B. Construction: Welded steel, tested and stamped in accordance with ASME Section VIII;
supplied with National Board Form U-1, rated for working pressure of 125 psig, with flexible
EPDM diaphragm sealed into tank.
C. Accessories: Pressure gage and air-charging fitting, tank drain; pre-charge to 3 psig above
building water pressure.
2.19 SYSTEM LUBRICATED CIRCULATORS
A. Manufacturers:
1. Armstrong Pumps, Inc.
2. Bell & Gossett.
3. Grunfoss.
4. Taco.
5. Weinman, a Crane Company.
6. Substitutions: Section 01 60 00 - Product Requirements.
B. Type: Horizontal shaft, single stage, direct connected with multiple speed wet rotor motor for
in-line mounting, for 140 psig maximum working pressure, 230 degrees F maximum water
temperature.
C. Casing: Bronze with flanged pump connections.
D. Impeller, Shaft, Rotor: Stainless Steel.
E. Bearings: Metal Impregnated carbon (graphite) and ceramic.
F. Motor: Impedance protected, single speed.

KGA Architecture 22 11 00 -11 May 5, 2016
UNLV Wright Hall Laboratory Build Out – 16355.00 Facility Water Distribution
PART 3 - EXECUTION
3.1 EXAMINATION
A. Section 01 30 00 - Administrative Requirements: Coordination and project conditions.
B. Verify excavations are to required grade, dry, and not over-excavated.
3.2 PREPARATION
A. Ream pipe and tube ends. Remove burrs. Bevel plain end ferrous pipe.
B. Remove scale and dirt, on inside and outside, before assembly.
3.3 INSTALLATION - THERMOMETERS AND GAGES
A. Install one pressure gage for each pump, locate taps before strainers and on suction and
discharge of pump; pipe to gage.
B. Install gage taps in piping.
C. Install pressure gages with pulsation dampers. Provide needle valve to isolate each gage.
D. Install thermometers in piping systems in sockets in short couplings. Enlarge pipes smaller than
2-1/2 inches for installation of thermometer sockets. Allow clearance from insulation.
E. Provide instruments with scale ranges selected according to service with largest appropriate
scale.
F. Install gages and thermometers in locations where they are easily read from normal operating
level. Install vertical to 45 degrees off vertical.
G. Adjust gages and thermometers to final angle, clean windows and lenses, and calibrate to zero.
3.4 INSTALLATION - HANGERS AND SUPPORTS
A. Install hangers and supports in accordance with Section 22 05 29.
3.5 INSTALLATION - BURIED PIPING SYSTEMS
A. Verify connection size, location, and invert are as indicated on Drawings.
B. Establish elevations of buried piping with not less than 1.5 ft of cover.
C. Establish minimum separation of piping in accordance with uniform plumbing code.
D. Remove scale and dirt on inside of piping before assembly.
E. Install pipe to elevation as indicated on Drawings.
F. Route pipe in straight line.
KGA Architecture 22 11 00 -12 May 5, 2016
UNLV Wright Hall Laboratory Build Out – 16355.00 Facility Water Distribution
G. Install pipe to allow for expansion and contraction without stressing pipe or joints.
3.6 INSTALLATION - ABOVE GROUND PIPING
A. Install non-conducting dielectric connections wherever jointing dissimilar metals.
B. Route piping in orderly manner and maintain gradient. Route parallel and perpendicular to
walls.
C. Install piping to maintain headroom without interfering with use of space or taking more space
than necessary.
D. Group piping whenever practical at common elevations.
E. Slope piping and arrange systems to drain at low points.
F. Install piping to allow for expansion and contraction without stressing pipe, joints, or connected
equipment.
G. Provide clearance in hangers and from structure and other equipment for installation of
insulation and access to valves and fittings. Refer to Section 22 07 00.
H. Provide access where valves and fittings are not accessible. Coordinate size and location of
access doors with Section 08 31 13.
I. Where pipe support members are welded to structural building framing, scrape, brush clean, and
apply one coat of zinc rich primer to welding.
J. Prepare exposed, unfinished pipe, fittings, supports, and accessories ready for finish painting.
Refer to Section 09 90 00.
K. Install domestic water piping in accordance with ASME B31.9.
L. Sleeve pipes passing through partitions, walls and floors. Refer to Section 22 05 29.
M. Install unions downstream of valves and at equipment or apparatus connections.
N. Install valves with stems upright or horizontal, not inverted.
O. Install brass male adapters each side of valves in copper piped system. Solder adapters to pipe.
P. Install ball valves for shut-off and to isolate equipment, part of systems, or vertical risers.
Q. Provide lug end butterfly valves adjacent to equipment when functioning to isolate equipment.
R. Provide spring loaded check valves on discharge of water pumps.
S. Provide flow controls in water circulating systems as indicated on Drawings.
T. Install potable water protection devices on plumbing lines where contamination of domestic
water may occur; on boiler feed water lines, janitor rooms, fire sprinkler systems, premise
isolation, irrigation systems, flush valves, interior and exterior hose bibs.

KGA Architecture 22 11 00 -13 May 5, 2016
UNLV Wright Hall Laboratory Build Out – 16355.00 Facility Water Distribution
U. Pipe relief from valves, back-flow preventers and drains to nearest floor drain.
V. Test backflow preventers in accordance with ASSE 5013.
W. Install water hammer arrestors complete with accessible isolation valve on hot and cold water
supply piping to fixtures and appliances with quick opening and closing valves.
3.7 INSTALLATION - PUMPS
A. Provide pumps to operate at specified system fluid temperatures without vapor binding and
cavitation, are non-overloading in parallel or individual operation, and operate within 25 percent
of midpoint of published maximum efficiency curve.
B. Install long radius reducing elbows or reducers between pump and piping. Support piping
adjacent to pump so no weight is carried on pump casings. For close coupled or base mounted
pumps, install supports under elbows on pump suction and discharge line sizes 4 inches and
over.
C. Provide line sized shut-off valve and strainer on pump suction, and line sized soft seat check
valve, and shut-off valve on pump discharge. Refer to Section 23 21 16.
3.8 FIELD QUALITY CONTROL
A. Section 01 70 00 - Execution and Closeout Requirements: Field inspecting, testing, adjusting,
and balancing.
B. Test domestic water piping system in accordance with local authority having jurisdiction.
3.9 CLEANING
A. Section 01 70 00 - Execution and Closeout Requirements: Requirements for cleaning.
B. Prior to starting work, verify system is complete, flushed and clean.
C. Verify pH of water to be treated is between 7.4 and 7.6 by adding alkali (caustic soda or soda
ash) or acid (hydrochloric).
D. Inject disinfectant, free chlorine in liquid, powder and tablet or gas form, throughout system to
obtain residual from 50 to 80 mg/L.
E. Bleed water from outlets to obtain distribution and test for disinfectant residual at minimum 15
percent of outlets.
F. Maintain disinfectant in system for 24 hours.
G. When final disinfectant residual tests less than 25 mg/L, repeat treatment.
H. Flush disinfectant from system until residual concentration is equal to incoming water or 1.0
mg/L.
KGA Architecture 22 11 00 -14 May 5, 2016
UNLV Wright Hall Laboratory Build Out – 16355.00 Facility Water Distribution
I. Take samples no sooner than 24 hours after flushing, from 10 percent of outlets and from water
entry, and analyze in accordance with AWWA C651.
END OF SECTION
KGA Architecture 22 13 00 -1 May 5, 2016
UNLV Wright Hall Laboratory Build Out – 16355.00 Facility Sanitary Sewerage
SECTION 22 13 00
FACILITY SANITARY SEWERAGE
PART 1 - GENERAL
1.1 SUMMARY
A. Section Includes:
1. Sanitary sewer piping buried within 5 feet of building.
2. Sanitary sewer piping above grade.
3. Valves.
4. Floor drains.
5. Floor sinks.
6. Cleanouts.
7. Interceptors.
8. Sewage ejectors.
B. Related Sections:
1. Section 03 30 00 - Cast-In-Place Concrete: Execution requirements for placement of
concrete specified by this section.
2. Section 08 31 13 - Access Doors and Frames: Product requirements for access doors for
placement by this section.
3. Section 09 90 00 - Painting and Coating: Product and execution requirements for painting
specified by this section.
4. Section 22 05 03 - Pipes and Tubes for Plumbing Piping and Equipment: Product and
installation requirements for piping materials applying to various system types.
5. Section 22 05 29 - Hangers and Supports for Plumbing Piping and Equipment: Product
requirements for pipe hangers and supports for placement by this section.
6. Section 22 05 53 - Identification for Plumbing Piping and Equipment: Product
requirements for pipe identification for placement by this section.
7. Section 22 07 00 - Plumbing Insulation: Product and execution requirements for pipe
insulation.
1.2 REFERENCES
A. American Society of Mechanical Engineers:
1. ASME A112.14.3 - Grease Interceptors.
2. ASME A112.21.1 - Floor Drains.
3. ASME B16.1 - Cast Iron Pipe Flanges and Flanged Fittings.
4. ASME B16.23 - Cast Copper Alloy Solder Joint Drainage Fittings (DWV).
5. ASME B16.29 - Wrought Copper and Wrought Copper Alloy Solder Joint Drainage
Fittings - DWV.
6. ASME B31.9 - Building Services Piping.
B. ASTM International:
1. ASTM A47/A47M - Standard Specification for Ferritic Malleable Iron Castings.
2. ASTM A53/A53M - Standard Specification for Pipe, Steel, Black and Hot-Dipped, Zinc-
Coated, Welded and Seamless.
3. ASTM A74 - Standard Specification for Cast Iron Soil Pipe and Fittings.

KGA Architecture 22 13 00 -2 May 5, 2016
UNLV Wright Hall Laboratory Build Out – 16355.00 Facility Sanitary Sewerage
4. ASTM A234/A234M - Standard Specification for Piping Fittings of Wrought Carbon
Steel and Alloy Steel for Moderate and High Temperature Service.
5. ASTM A395/A395M - Standard Specification for Ferritic Ductile Iron Pressure-
Retaining Castings for Use at Elevated Temperatures.
6. ASTM A536 - Standard Specification for Ductile Iron Castings.
7. ASTM A746 - Standard Specification for Ductile Iron Gravity Sewer Pipe.
8. ASTM B32 - Standard Specification for Solder Metal.
9. ASTM B42 - Standard Specification for Seamless Copper Pipe, Standard Sizes.
10. ASTM B43 - Standard Specification for Seamless Red Brass Pipe, Standard Sizes.
11. ASTM B75 - Standard Specification for Seamless Copper Tube.
12. ASTM B88 - Standard Specification for Seamless Copper Water Tube.
13. ASTM B251 - Standard Specification for General Requirements for Wrought Seamless
Copper and Copper-Alloy Tube.
14. ASTM B302 - Standard Specification for Threadless Copper Pipe.
15. ASTM B306 - Standard Specification for Copper Drainage Tube (DWV).
16. ASTM C14 - Standard Specification for Concrete Sewer, Storm Drain, and Culvert Pipe.
17. ASTM C76 - Standard Specification for Reinforced Concrete Culvert, Storm Drain, and
Sewer Pipe.
18. ASTM C443 - Standard Specification for Joints for Circular Concrete Sewer and Culvert
Pipe, Using Rubber Gaskets.
19. ASTM C443M - Standard Specification for Joints for Circular Concrete Sewer and
Culvert Pipe, Using Rubber Gaskets (Metric).
20. ASTM C478 - Standard Specification for Precast Reinforced Concrete Manhole Sections.
21. ASTM C564 - Standard Specification for Rubber Gaskets for Cast Iron Soil Pipe and
Fittings.
22. ASTM C1053 - Standard Specification for Borosilicate Glass Pipe and Fittings for Drain,
Waste, and Vent (DWV) Applications.
23. ASTM D1784 - Standard Specification for Rigid Poly (Vinyl Chloride) (PVC)
Compounds and Chlorinated Poly (Vinyl Chloride) (CPVC) Compounds.
24. ASTM D1785 - Standard Specification for Poly (Vinyl Chloride) (PVC) Plastic Pipe,
Schedules 40, 80, and 120.
25. ASTM D2235 - Standard Specification for Solvent Cement for Acrylonitrile-Butadiene-
Styrene (ABS) Plastic Pipe and Fittings.
26. ASTM D2241 - Standard Specification for Poly(Vinyl Chloride) (PVC) Pressure-Rated
Pipe (SDR Series).
27. ASTM D2464 - Standard Specification for Threaded Poly (Vinyl Chloride) (PVC) Plastic
Pipe Fittings, Schedule 80.
28. ASTM D2466 - Standard Specification for Poly (Vinyl Chloride) (PVC) Plastic Pipe
Fittings, Schedule 40.
29. ASTM D2467 - Standard Specification for Poly (Vinyl Chloride) (PVC) Plastic Pipe
Fittings, Schedule 80.
30. ASTM D2564 - Standard Specification for Solvent Cements for Poly (Vinyl Chloride)
(PVC) Plastic Piping Systems.
31. ASTM D2661 - Standard Specification for Acrylonitrile-Butadiene-Styrene (ABS)
Schedule 40 Plastic Drain, Waste, and Vent Pipe and Fittings.
32. ASTM D2665 - Standard Specification for Poly (Vinyl Chloride) (PVC) Plastic Drain,
Waste, and Vent Pipe and Fittings.
33. ASTM D2729 - Standard Specification for Poly (Vinyl Chloride) (PVC) Sewer Pipe and
Fittings.
34. ASTM D2751 - Standard Specification for Acrylonitrile-Butadiene-Styrene (ABS) Sewer
Pipe and Fittings.

KGA Architecture 22 13 00 -3 May 5, 2016
UNLV Wright Hall Laboratory Build Out – 16355.00 Facility Sanitary Sewerage
35. ASTM D2855 - Standard Practice for Making Solvent-Cemented Joints with Poly (Vinyl
Chloride) (PVC) Pipe and Fittings.
36. ASTM D2996 - Standard Specification for Filament-Wound Fiberglass (Glass-Fiber-
Reinforced Thermosetting Resin) Pipe.
37. ASTM D2997 - Standard Specification for Centrifugally Cast Fiberglass (Glass-Fiber-
Reinforced Thermosetting-Resin) Pipe.
38. ASTM D3034 - Standard Specification for Type PSM Poly (Vinyl Chloride) (PVC)
Sewer Pipe and Fittings.
39. ASTM F628 - Standard Specification for Acrylonitrile-Butadiene-Styrene (ABS)
Schedule 40 Plastic Drain, Waste, and Vent Pipe with a Cellular Core.
40. ASTM F708 - Standard Practice for Design and Installation of Rigid Pipe Hangers.
41. ASTM F1476 - Standard Specification for Performance of Gasketed Mechanical
Couplings for Use in Piping Applications.
C. Cast Iron Soil Pipe Institute:
1. CISPI 301 - Standard Specification for Hubless Cast Iron Soil Pipe and Fittings for
Sanitary and Storm Drain, Waste, and Vent Piping Applications.
2. CISPI 310 - Specification for Coupling for Use in Connection with Hubless Cast Iron
Soil Pipe and Fittings for Sanitary and Storm Drain, Waste, and Vent Piping
Applications.
D. Manufacturers Standardization Society of the Valve and Fittings Industry:
1. MSS SP 58 - Pipe Hangers and Supports - Materials, Design and Manufacturer.
2. MSS SP 69 - Pipe Hangers and Supports - Selection and Application.
3. MSS SP 89 - Pipe Hangers and Supports - Fabrication and Installation Practices.
E. Plumbing and Drainage Institute:
1. PDI G101 - Standard - Testing and Rating Procedure for Grease Interceptors.
1.3 SUBMITTALS
A. Section 01 33 00 - Submittal Procedures: Submittal procedures.
B. Product Data:
1. Piping: Submit data on pipe materials, fittings, and accessories. Submit manufacturers
catalog information.
2. Valves: Submit manufacturers catalog information with valve data and ratings for each
service.
3. Hangers and Supports: Submit manufacturers catalog information including load
capacity.
4. Sanitary Drainage Specialties: Submit manufacturer’s catalog information, component
sizes, rough-in requirements, service sizes, and finishes.
5. Pumps: Submit pump type, capacity, certified pump curves showing pump performance
characteristics with pump and system operating point plotted. Include NPSH curve when
applicable. Include electrical characteristics and connection requirements.
C. Manufacturer's Installation Instructions: Submit installation instructions for material and
equipment.
D. Manufacturer's Certificate: Certify products meet or exceed specified requirements.
KGA Architecture 22 13 00 -4 May 5, 2016
UNLV Wright Hall Laboratory Build Out – 16355.00 Facility Sanitary Sewerage
1.4 CLOSEOUT SUBMITTALS
A. Section 01 70 00 - Execution and Closeout Requirements: Closeout procedures.
B. Project Record Documents: Record actual locations of equipment and clean-outs.
C. Operation and Maintenance Data: Submit frequency of treatment required for interceptors.
Include, spare parts lists, exploded assembly views for pumps and equipment.
1.5 QUALIFICATIONS
A. Manufacturer: Company specializing in manufacturing products specified in this section with
minimum three years documented experience.
B. Installer: Company specializing in performing Work of this section with minimum three years
documented experience.
1.6 PRE-INSTALLATION MEETINGS
A. Section 01 30 00 - Administrative Requirements: Pre-installation meeting.
B. Convene minimum one week prior to commencing work of this section.
1.7 DELIVERY, STORAGE, AND HANDLING
A. Section 01 60 00 - Product Requirements: Product storage and handling requirements.
B. Protect piping systems from entry of foreign materials by temporary covers, completing
sections of the Work, and isolating parts of completed system.
1.8 ENVIRONMENTAL REQUIREMENTS
A. Section 01 60 00 - Product Requirements.
B. Do not install underground piping when bedding is wet or frozen.
1.9 FIELD MEASUREMENTS
A. Verify field measurements prior to fabrication.
1.10 WARRANTY
A. Section 01 70 00 - Execution and Closeout Requirements: Product warranties and product
bonds.
B. Furnish one year manufacturer warranty for all materials and workmanship.
1.11 EXTRA MATERIALS
A. Section 01 70 00 - Execution and Closeout Requirements: Spare parts and maintenance
products.
KGA Architecture 22 13 00 -5 May 5, 2016
UNLV Wright Hall Laboratory Build Out – 16355.00 Facility Sanitary Sewerage
B. Furnish two sets of pump seals.
PART 2 - PRODUCTS
2.1 SANITARY SEWER PIPING, BURIED WITHIN 5 FEET OF BUILDING
A. Furnish materials in accordance with Section 22 05 03 – Pipes and Tubes for Plumbing Piping
and Equipment.
2.2 SANITARY SEWER PIPING, ABOVE GRADE
A. Furnish materials in accordance with Section 22 05 03 – Pipes and Tubes for Plumbing Piping
and Equipment.
2.3 PIPE HANGERS AND SUPPORTS
A. Furnish materials in accordance with Section 22 05 29 – Hangers and Supports for Plumbing
Piping and Equipment.
2.4 FLOOR DRAINS
A. Manufacturers:
1. Jay R Smith Manufacturing Company.
2. Josam Company.
3. Zurn Light Commercial Drainage Company.
4. Substitutions: Section 01 60 00 - Product Requirements.
B. Floor Drain: ASME A112.21.1; lacquered or galvanized cast iron two piece body with double
drainage flange, weep holes, reversible clamping collar, and round, adjustable nickel-bronze
strainer.
2.5 FLOOR SINKS
A. Manufacturers:
1. Jay R Smith Manufacturing Company.
2. Josam Company.
3. Zurn Light Commercial Drainage Company.
4. Substitutions: Section 01 60 00 - Product Requirements.
B. Floor Sink: Square enameled cast iron body with integral seepage pan, epoxy coated interior
dome strainer, epoxy coated, full, half or quarter grate as applicable.
2.6 CLEANOUTS
A. Manufacturers:
1. Jay R Smith Manufacturing Company.
2. Josam Company.
3. Zurn Specification Drainage Company.
4. Substitutions: Section 01 60 00 - Product Requirements.

KGA Architecture 22 13 00 -6 May 5, 2016
UNLV Wright Hall Laboratory Build Out – 16355.00 Facility Sanitary Sewerage
B. Exterior Surfaced Areas: Round cast nickel bronze access frame and non-skid cover.
C. Interior Finished Floor Areas: Lacquered cast iron body with anchor flange, threaded top
assembly, and round scored cover with gasket in service. Provide with square top in areas with
tile finish.
D. Interior Finished Wall Areas: Line type with lacquered cast iron body and round epoxy coated
cover with gasket, and round stainless steel access cover secured with machine screw.
E. Interior Unfinished Accessible Areas: Calked or threaded type. Provide bolted stack cleanouts
on vertical rainwater leaders.
2.7 SUBMERSIBLE SEWAGE EJECTORS
A. Type: Completely submersible, vertical, centrifugal.
B. Casing: Cast iron or Bronze pump body and oil filled motor chamber.
C. Impeller: Cast iron; or Bronze; open non-clog, stainless steel or corrosion resistant alloy steel
shaft.
D. Bearings: Ball bearings.
E. Accessories: Oil resistant 6 foot cord and plug with three-prong connector for connection to
electric wiring system including grounding connector.
F. Controls: Integral diaphragm or mercury switch type level controls.
PART 3 - EXECUTION
3.1 EXAMINATION
A. Section 01 30 00 - Administrative Requirements: Coordination and project conditions.
B. Verify excavations are to required grade, dry, and not over-excavated.
3.2 PREPARATION
A. Ream pipe and tube ends. Remove burrs. Bevel plain end ferrous pipe.
B. Remove scale and dirt, on inside and outside, before assembly.
C. Prepare piping connections to equipment with flanges or unions.
D. Keep open ends of pipe free from scale and dirt. Protect open ends with temporary plugs or
caps.
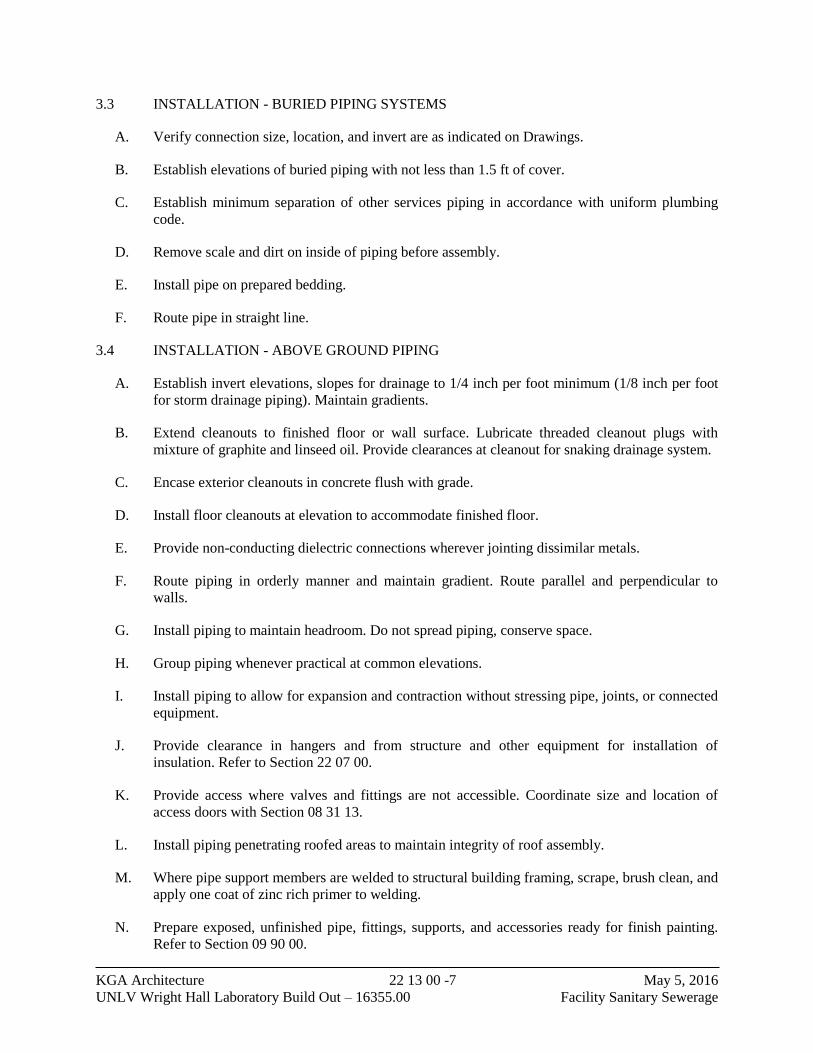
KGA Architecture 22 13 00 -7 May 5, 2016
UNLV Wright Hall Laboratory Build Out – 16355.00 Facility Sanitary Sewerage
3.3 INSTALLATION - BURIED PIPING SYSTEMS
A. Verify connection size, location, and invert are as indicated on Drawings.
B. Establish elevations of buried piping with not less than 1.5 ft of cover.
C. Establish minimum separation of other services piping in accordance with uniform plumbing
code.
D. Remove scale and dirt on inside of piping before assembly.
E. Install pipe on prepared bedding.
F. Route pipe in straight line.
3.4 INSTALLATION - ABOVE GROUND PIPING
A. Establish invert elevations, slopes for drainage to 1/4 inch per foot minimum (1/8 inch per foot
for storm drainage piping). Maintain gradients.
B. Extend cleanouts to finished floor or wall surface. Lubricate threaded cleanout plugs with
mixture of graphite and linseed oil. Provide clearances at cleanout for snaking drainage system.
C. Encase exterior cleanouts in concrete flush with grade.
D. Install floor cleanouts at elevation to accommodate finished floor.
E. Provide non-conducting dielectric connections wherever jointing dissimilar metals.
F. Route piping in orderly manner and maintain gradient. Route parallel and perpendicular to
walls.
G. Install piping to maintain headroom. Do not spread piping, conserve space.
H. Group piping whenever practical at common elevations.
I. Install piping to allow for expansion and contraction without stressing pipe, joints, or connected
equipment.
J. Provide clearance in hangers and from structure and other equipment for installation of
insulation. Refer to Section 22 07 00.
K. Provide access where valves and fittings are not accessible. Coordinate size and location of
access doors with Section 08 31 13.
L. Install piping penetrating roofed areas to maintain integrity of roof assembly.
M. Where pipe support members are welded to structural building framing, scrape, brush clean, and
apply one coat of zinc rich primer to welding.
N. Prepare exposed, unfinished pipe, fittings, supports, and accessories ready for finish painting.
Refer to Section 09 90 00.
KGA Architecture 22 13 00 -8 May 5, 2016
UNLV Wright Hall Laboratory Build Out – 16355.00 Facility Sanitary Sewerage
O. Install bell and spigot pipe with bell end upstream.
P. Sleeve pipes passing through partitions, walls and floors.
Q. Support cast iron drainage piping at every joint.
3.5 INSTALLATION - PUMPS
A. Provide pumps operating at specified system fluid temperatures without vapor binding and
cavitation, non-overloading in parallel or individual operation, and operating within 25 percent
of midpoint of published maximum efficiency curve.
B. Provide line sized gate ball valve, line sized soft seated on pump discharge.
3.6 FIELD QUALITY CONTROL
A. Section 01 70 00 - Execution and Closeout Requirements: Field inspecting, testing, adjusting,
and balancing.
B. Test sanitary waste and vent piping system in accordance with local authority having
jurisdiction.
END OF SECTION

KGA Architecture 22 40 00 -1 May 5, 2016
UNLV Wright Hall Laboratory Build Out – 16355.00 Plumbing Fixtures
SECTION 22 40 00
PLUMBING FIXTURES
PART 1 - GENERAL
1.1 SUMMARY
A. Section Includes:
1. Water closets.
2. Urinals.
3. Lavatories.
4. Sinks.
5. Service sinks.
6. Electric water coolers.
7. Drinking fountains.
8. Showers.
9. Wash fountains.
10. Emergency Eye and Face Wash.
B. Related Sections:
1. Section 07 90 00 - Joint Protection: Product requirements for calking between fixtures
and building components for placement by this section.
2. Section 22 11 00 - Facility Water Distribution: Supply connections to plumbing fixtures.
3. Section 22 13 00 - Facility Sanitary Sewerage: Waste connections to plumbing fixtures.
4. Section 26 05 03 - Equipment Wiring Connections: Execution requirements for electric
connections to sensor valves and faucets specified by this section.
1.2 REFERENCES
A. American National Standards Institute:
1. ANSI A117.1 - Accessible and Usable Buildings and Facilities.
2. ANSI Z358.1 - Emergency Eyewash and Shower Equipment.
B. Air-Conditioning and Refrigeration Institute:
1. ARI 1010 - Self-Contained, Mechanically Refrigerated Drinking-Water Coolers.
C. American Society of Mechanical Engineers:
1. ASME A112.6.1 - Floor-Affixed Supports for Off-the-Floor Plumbing Fixtures for Public
Use.
2. ASME A112.18.1 - Plumbing Fixture Fittings.
3. ASME A112.19.2M - Vitreous China Plumbing Fixtures.
4. ASME A112.19.3 - Stainless Steel Plumbing Fixtures (Designed for Residential Use).
5. ASME A112.19.5 - Trim for Water-Closet Bowls, Tanks and Urinals.
1.3 SUBMITTALS
A. Section 01 33 00 - Submittal Procedures: Submittal procedures.

KGA Architecture 22 40 00 -2 May 5, 2016
UNLV Wright Hall Laboratory Build Out – 16355.00 Plumbing Fixtures
B. Product Data: Submit catalog illustrations of fixtures, sizes, rough-in dimensions, utility sizes,
trim, and finishes.
C. Manufacturer's Installation Instructions: Submit installation methods and procedures.
D. Manufacturer's Certificate: Certify products meet or exceed specified requirements.
1.4 CLOSEOUT SUBMITTALS
A. Section 01 70 00 - Execution and Closeout Requirements: Closeout procedures.
B. Operation and Maintenance Data: Submit fixture, trim, exploded view and replacement parts
lists.
1.5 QUALIFICATIONS
A. Manufacturer: Company specializing in manufacturing products specified in this section with
minimum three years documented experience.
B. Installer: Company specializing in performing Work of this section with minimum three years
documented experience.
1.6 PRE-INSTALLATION MEETINGS
A. Section 01 30 00 - Administrative Requirements: Pre-installation meeting.
B. Convene minimum one week prior to commencing work of this section.
1.7 DELIVERY, STORAGE, AND HANDLING
A. Section 01 60 00 - Product Requirements: Product storage and handling requirements.
B. Accept fixtures on site in factory packaging. Inspect for damage.
C. Protect installed fixtures from damage by securing areas and by leaving factory packaging in
place to protect fixtures and prevent use.
1.8 WARRANTY
A. Section 01 70 00 - Execution and Closeout Requirements: Product warranties and product
bonds.
B. Furnish one year manufacturer warranty for plumbing fixtures.
1.9 EXTRA MATERIALS
A. Section 01 70 00 - Execution and Closeout Requirements: Spare parts and maintenance
products.
B. Furnish two sets of faucet washers flush valve service kits lavatory supply fittings shower heads
toilet seats.

KGA Architecture 22 40 00 -3 May 5, 2016
UNLV Wright Hall Laboratory Build Out – 16355.00 Plumbing Fixtures
PART 2 - PRODUCTS
2.1 FLUSH VALVE WATER CLOSETS
A. Manufacturers:
1. American Standard Plumbing Model 2257.103.
2. Kohler Co. Model 4330.
3. Toto Model CT 708.
4. Substitutions: Section 01 60 00 - Product Requirements.
B. Bowl: ASME A112.19.2M; wall hung, siphon jet vitreous china closet bowl, with elongated
rim, 1-1/2 inch top spud, china bolt caps.
C. Exposed Flush Valve: ASME A112.18.1; exposed chrome plated, diaphragm type with
oscillating handle, escutcheon, seat bumper, integral screwdriver stop and vacuum breaker;
maximum 1.6 gallon flush volume.
D. Seat: Solid white plastic, open front, extended back, self-sustaining hinge, brass bolts, without
cover.
E. Wall Mounted Carrier: ASME A112.6.1; adjustable cast iron frame, integral drain hub and vent,
adjustable spud, lugs for floor attachment, threaded fixture studs with nuts and washers.
2.2 WALL HUNG URINALS
A. Manufacturers:
1. American Standard Plumbing Model 6501.010.
2. Kohler Co. Model K-4960-ET.
3. Toto Model UT 477.
4. Substitutions: Section 01 60 00 - Product Requirements.
B. Urinal: ASME A112.19.2M; vitreous china, wall hung washout urinal with shields, integral
trap, 3/4 inch top spud, steel supporting hanger.
C. Exposed Flush Valve: ASME A112.18.1; exposed chrome plated, diaphragm type with
oscillating handle, escutcheon, integral screwdriver stop, vacuum breaker; maximum 0.5 gallon
flush volume.
D. Wall Mounted Carrier: ASME A112.6.1; cast iron and steel frame with tubular legs, lugs for
floor attachment, threaded fixture studs for fixture hanger, bearing studs.
2.3 LAVATORIES
A. Manufacturers:
1. Acorn Engineering Co.
2. American Standard Plumbing.
3. Briggs Industries, Inc.
4. Kohler Co.
5. Willoughby.
6. Substitutions: Section 01 60 00 - Product Requirements.

KGA Architecture 22 40 00 -4 May 5, 2016
UNLV Wright Hall Laboratory Build Out – 16355.00 Plumbing Fixtures
B. Vitreous China Wall Hung Basin: ASME A112.19.2M; vitreous china wall hung lavatory, with
4 inch high back, drillings on 4 inch centers, rectangular basin with splash lip, and front
overflow.
C. Vitreous China Counter Top Basin: ASME A112.19.2M; vitreous china self-rimming with
drillings on 4 inch centers, front overflow, seal of putty, caulking, or concealed vinyl gasket.
D. Metered Faucet: ASME A112.18.1; chrome plated metered mixing faucet with aerator and
cover plate, open grid strainer.
E. Accessories:
1. Chrome plated 17 gage brass P-trap and arm with escutcheon.
2. Screwdriver IPS stops.
3. Rigid supplies.
4. Supplies, trap, and waste insulated and offset to meet ADA compliance.
F. Wall Mounted Carrier: ASME A112.6.1; cast iron and steel frame with tubular legs, lugs for
floor attachment, concealed arm supports, bearing plate and studs.
2.4 SINKS
A. Manufacturers:
1. Advance Tabco.
2. Elkay Manufacturing.
3. Just Manufacturing.
4. Moen, Inc. Substitutions: Section 01 60 00 - Product Requirements.
B. ASME A112.19.3; 18 gage gage thick, Type 304 stainless steel. Self-rimming and undercoated,
with 1-1/2 inch stainless steel drain 3-1/2 inch crumb cup and tailpiece, ledge back drilled for
trim.
C. Trim: ASME A112.18.1; chrome plated brass supply with high rise swing spout, vandal proof
water economy aerator with maximum 2.2 gpm flow, single lever handle.
D. Accessories: Chrome plated 17 gage brass P-trap and arm with escutcheon, screwdriver IPS
stop, rigid supplies.
2.5 SHOWERS
A. Manufacturers:
1. Acorn Engineering.
2. Powers Hydroguard T/P.
3. Substitutions: Section 01 60 00 - Product Requirements.
B. Trim: ASME A112.18.1; concealed shower supply with thermostatic mixing valves, integral
service stops, hand held shower with 69 inch 60 inch metal clad hose and 24 inch slide bar,
female inlet.

KGA Architecture 22 40 00 -5 May 5, 2016
UNLV Wright Hall Laboratory Build Out – 16355.00 Plumbing Fixtures
2.6 DRINKING FOUNTAINS
A. Manufacturers:
1. Elkay.
2. Haws.
3. Sunroc.
4. Substitutions: Section 01 60 00 - Product Requirements.
B. Fountain: Molded white reinforced glass fiber with underside vandal proof cowling, hooded
elevated anti-squirt bubbler with stream guard, automatic stream regulator, mounting bracket,
screwdriver stop.
2.7 ELECTRIC WATER COOLERS
A. Manufacturers:
1. Elkay.
2. Halsey Taylor.
3. Haws.
4. Sunroc.
5. Substitutions: Section 01 60 00 - Product Requirements.
B. Fountain:
1. ARI 1010; surface mounted electric water cooler with stainless steel top, stainless steel
body, elevated anti-squirt bubbler with stream guard, automatic stream regulator, push
button, mounting bracket, refrigerated with integral air cooled condenser. Provide cane
skirt on dual high/low units.
2.8 WASH FOUNTAINS
A. Manufacturers:
1. Custom fabricated by others. Refer to Architectural drawings and specifications.
B. Bowl: Refer to Architectural drawings and specifications.
C. Accessories: Hand operated self-closing valve, spray head, pressure balancing mixing valve,
supporting tube, spud and strainer, operating mechanism, combination stop, strainer, and check
valves.
2.9 SERVICE SINKS
A. Service Sink Manufacturers:
1. Acorn Round Model TCR-28.
2. Acorn Drop Front Model TDF-24.
3. American Standard Florwell Model 7740.020.
4. Stern Williams Model HL-1800.
5. Stern Williams Model CRS-2200.
6. Substitutions: Section 01 60 00 - Product Requirements.
B. Bowl: white molded stone, floor mounted, with one inch wide shoulders, stainless steel bumper
guard, stainless steel strainer.

KGA Architecture 22 40 00 -6 May 5, 2016
UNLV Wright Hall Laboratory Build Out – 16355.00 Plumbing Fixtures
C. Trim: ASME A112.18.1 exposed wall type supply with lever handles, spout wall brace, vacuum
breaker, hose end spout, strainers, eccentric adjustable inlets, integral screwdriver stops with
covering caps and adjustable threaded wall flanges.
D. Accessories:
1. 5 feet of 1/2 inch diameter plain end reinforced rubber hose.
2. Hose clamp hanger.
3. Mop hanger.
E. Service Sink Faucet Manufacturers:
1. Chicago Model 305 VBRCF.
2. Chicago Model 897-RCF with hook.
3. Elkay Model LK-400.
4. Elkay Model LK410B.
5. Kohler Model K-8905-RP.
6. Kohler Model K-8906-RP with stops.
7. Substitutions: Section 01 60 00 - Product Requirements.
2.10 EMERGENCY EYE AND FACE WASH
A. Manufacturers:
1. Guardian.
2. Haws.
3. Speakman.
4. Substitutions: Section 01 60 00 - Product Requirements.
B. ANSI Z358.1; deck mounted, instant action stay open valve actuated by push flag, twin spray
heads, dust cover assembly. Furnish universal emergency sign.
2.11 LAVATORY INSULATION KIT
A. Product Description: Where lavatories or sinks are noted to be insulated for ADA compliance,
furnish the following: Safety Covers conforming to ANSI A177.1 and consisting of insulation
kit of molded closed cell vinyl construction, 3/16 inch thick, white color, for insulating
tailpiece, P-trap, valves, and supply piping. Furnish with weep hole and angle valve access
covers.
PART 3 - EXECUTION
3.1 EXAMINATION
A. Section 01 30 00 - Administrative Requirements: Coordination and project conditions.
B. Verify walls and floor finishes are prepared and ready for installation of fixtures.
C. Verify electric power is available and of correct characteristics.
D. Confirm millwork is constructed with adequate provision for installation of counter top
lavatories and sinks.

KGA Architecture 22 40 00 -7 May 5, 2016
UNLV Wright Hall Laboratory Build Out – 16355.00 Plumbing Fixtures
3.2 PREPARATION
A. Rough-in fixture piping connections in accordance with minimum sizes indicated in fixture
rough-in schedule for particular fixtures.
3.3 INSTALLATION
A. Install each fixture with trap, easily removable for servicing and cleaning.
B. Provide chrome plated rigid or flexible supplies to fixtures with loose key or screwdriver IPS
stops, reducers, and escutcheons.
C. Install components level and plumb.
D. Install and secure fixtures in place with wall carriers and bolts.
E. Seal fixtures to wall and floor surfaces with sealant as specified in Section 07 90 00, color to
match fixture.
F. For ADA accessible water closets, install flush valve with handle to wide side of stall.
3.4 INTERFACE WITH OTHER PRODUCTS
A. Review millwork shop-drawings. Confirm location and size of fixtures and openings before
rough in and installation.
3.5 ADJUSTING
A. Section 01 70 00 - Execution and Closeout Requirements: Testing, adjusting, and balancing.
B. Adjust stops or valves for intended water flow rate to fixtures without splashing, noise, or
overflow.
3.6 CLEANING
A. Section 01 70 00 - Execution and Closeout Requirements: Final cleaning.
B. Clean plumbing fixtures and equipment.
3.7 PROTECTION OF INSTALLED CONSTRUCTION
A. Section 01 70 00 - Execution and Closeout Requirements: Protecting installed construction.
B. Do not permit use of fixtures before final acceptance.
3.8 SCHEDULES
A. Fixture Mounting Heights:
1. Water Closet:
a. Standard: 15 inches to top of bowl rim.
b. Accessible: 18 inches to top of seat.
2. Water Closet Flush Valves:

KGA Architecture 22 40 00 -8 May 5, 2016
UNLV Wright Hall Laboratory Build Out – 16355.00 Plumbing Fixtures
a. Standard: 11 inches min. above bowl rim.
3. Urinal:
a. Standard: 22 inches to top of bowl rim.
b. Accessible: 17 inches to top of bowl rim.
4. Lavatory:
a. Standard: 31 inches to top of basin rim.
b. Accessible: 34 inches to top of basin rim.
5. Drinking Fountain:
a. Child: 30 inches to top of basin rim.
b. Standard Adult: 40 inches to top of basin rim.
c. Accessible: 36 inches to top of spout.
6. Shower Heads:
a. Adult Male: 69.5 inches to bottom of head.
b. Adult Female: 64.5 inches to bottom of head.
c. Child: 58.5 inches to bottom of head.
7. Emergency Eye and Face Wash: Standard: 38 inches to receptor rim.
8. Emergency Shower: Standard: 84 inches to bottom of head.
END OF SECTION

KGA Architecture 23 05 29 -1 May 5, 2016
UNLV Wright Hall Laboratory Build Out – 16355.00 Hangers and Supports for HVAC Piping
And Equipment
SECTION 23 05 29
HANGERS AND SUPPORTS FOR HVAC PIPING AND EQUIPMENT
PART 1 - GENERAL
1.1 SUMMARY
A. Section Includes:
1. Pipe hangers and supports.
2. Hanger rods.
3. Inserts.
4. Flashing.
5. Equipment curbs.
6. Sleeves.
7. Mechanical sleeve seals.
8. Formed steel channel.
9. Equipment bases and supports.
B. Related Sections:
1. Section 03 10 00 - Concrete Forming and Accessories: Execution requirements for
placement of inserts and sleeves in concrete forms specified by this section.
2. Section 03 30 00 - Cast-In-Place Concrete: Execution requirements for placement of
concrete housekeeping pads specified by this section.
3. Section 07 90 00 - Joint Protection: Product requirements for sealant materials for
placement by this section.
4. Section 09 90 00 - Painting and Coating: Product and execution requirements for painting
specified by this section.
5. Section 23 05 03 - Pipes and Tubes for HVAC Piping and Equipment: Execution
requirements for placement of hangers and supports specified by this section.
6. Section 23 05 48 - Vibration and Seismic Controls for HVAC Piping and Equipment:
Product and execution requirements for vibration isolators.
7. Section 23 21 13 - Hydronic Piping: Execution requirements for placement of hangers
and supports specified by this section.
1.2 REFERENCES
A. American Society of Mechanical Engineers:
1. ASME B31.1 - Power Piping.
2. ASME B31.9 - Building Services Piping.
B. ASTM International:
1. ASTM E84 - Test Method for Surface Burning Characteristics of Building Materials.
2. ASTM E119 - Method for Fire Tests of Building Construction and Materials.
3. ASTM E814 - Test Method of Fire Tests of Through Penetration Firestops.
4. ASTM F708 - Standard Practice for Design and Installation of Rigid Pipe Hangers.
C. American Welding Society:
1. AWS D1.1 - Structural Welding Code - Steel.

KGA Architecture 23 05 29 -2 May 5, 2016
UNLV Wright Hall Laboratory Build Out – 16355.00 Hangers and Supports for HVAC Piping
And Equipment
D. Manufacturers Standardization Society of the Valve and Fittings Industry:
1. MSS SP 58 - Pipe Hangers and Supports - Materials, Design and Manufacturer.
2. MSS SP 69 - Pipe Hangers and Supports - Selection and Application.
3. MSS SP 89 - Pipe Hangers and Supports - Fabrication and Installation Practices.
1.3 SUBMITTALS
A. Section 01 33 00 - Submittal Procedures: Submittal procedures.
B. Shop Drawings: Indicate system layout with location including critical dimensions, sizes, and
pipe hanger and support locations and detail of trapeze hangers.
C. Product Data:
1. Hangers and Supports: Submit manufacturers catalog data including load capacity.
D. Design Data: Indicate load carrying capacity of trapeze, multiple pipe, and riser support
hangers. Indicate calculations used to determine load carrying capacity of trapeze, multiple
pipe, and riser support hangers. Submit sizing methods and calculations.
E. Manufacturer's Installation Instructions:
1. Hangers and Supports: Submit special procedures and assembly of components.
F. Manufacturer's Certificate: Certify products meet or exceed specified requirements.
1.4 QUALIFICATIONS
A. Manufacturer: Company specializing in manufacturing Products specified in this section with
minimum three years documented experience.
B. Installer: Company specializing in performing Work of this section with minimum years
documented experience.
1.5 PRE-INSTALLATION MEETINGS
A. Section 01 30 00 - Administrative Requirements: Pre-installation meeting.
B. Convene minimum one week prior to commencing work of this section.
1.6 DELIVERY, STORAGE, AND HANDLING
A. Section 01 60 00 - Product Requirements: Requirements for transporting, handling, storing, and
protecting products.
B. Accept materials on site in original factory packaging, labeled with manufacturer's
identification.
C. Protect from weather and construction traffic, dirt, water, chemical, and damage, by storing in
original packaging.

KGA Architecture 23 05 29 -3 May 5, 2016
UNLV Wright Hall Laboratory Build Out – 16355.00 Hangers and Supports for HVAC Piping
And Equipment
1.7 ENVIRONMENTAL REQUIREMENTS
A. Section 01 60 00 - Product Requirements: Environmental conditions affecting products on site.
1.8 FIELD MEASUREMENTS
A. Verify field measurements prior to fabrication.
1.9 WARRANTY
A. Section 01 70 00 - Execution and Closeout Requirements: Product warranties and product
bonds.
B. Furnish one year manufacturer warranty for pipe hangers and supports.
PART 2 - PRODUCTS
2.1 PIPE HANGERS AND SUPPORTS
A. Manufacturers:
1. Channel Support Systems.
2. Miro Industries.
3. Portable Pipe Hanger, Inc.
4. Thermo Hanger Shield, Inc.
5. Substitutions: Section 01 60 00 - Product Requirements.
B. Hydronic Piping:
1. Conform to ASME B31.9.
2. Hangers for Pipe Sizes 1/2 to 1-1/2 inch: Malleable iron or Carbon steel, adjustable
swivel, split ring.
3. Hangers for Cold Pipe Sizes 2 inches and Larger: Carbon steel, adjustable, clevis.
4. Multiple or Trapeze Hangers: Steel channels with welded spacers and hanger rods.
5. Multiple or Trapeze Hangers for Hot Pipe Sizes 6 inches and Larger: Steel channels with
welded spacers and hanger rods, cast iron roll.
6. Wall Support for Pipe Sizes 3 inches and Smaller: Cast iron hooks.
7. Wall Support for Pipe Sizes 4 inches and Larger: Welded steel bracket and wrought steel
clamp.
8. Vertical Support: Steel riser clamp.
9. Floor Support for Cold Pipe: Cast iron adjustable pipe saddle, lock nut, nipple, floor
flange, and concrete pier or steel support.
10. Copper Pipe Support: Copper-plated, carbon steel ring.
2.2 ACCESSORIES
A. Hanger Rods: Mild steel threaded both ends, threaded on one end, or continuous threaded.

KGA Architecture 23 05 29 -4 May 5, 2016
UNLV Wright Hall Laboratory Build Out – 16355.00 Hangers and Supports for HVAC Piping
And Equipment
2.3 INSERTS
A. Inserts: Malleable iron case of galvanized steel shell and expander plug for threaded connection
with lateral adjustment, top slot for reinforcing rods, lugs for attaching to forms; size inserts to
suit threaded hanger rods.
2.4 FLASHING
A. Metal Flashing: 26 gage thick galvanized steel.
B. Metal Counterflashing: 22 gage thick galvanized steel.
C. Lead Flashing:
1. Waterproofing: 5 lb./sq. ft sheet lead.
2. Soundproofing: 1 lb./sq. ft sheet lead.
D. Flexible Flashing: 47 mil thick sheet butyl; compatible with roofing.
E. Caps: Steel, 22 gage minimum; 16 gage at fire resistant elements.
2.5 SLEEVES
A. Sleeves for Pipes through Non-fire Rated Floors: 18 gage thick galvanized steel.
B. Sleeves for Pipes through Non-fire Rated Beams, Walls, Footings, and Potentially Wet Floors:
Steel pipe or 18 gage thick galvanized steel.
C. Sleeves for Round Ductwork: Galvanized steel.
D. Sleeves for Rectangular Ductwork: Galvanized steel or wood.
2.6 MECHANICAL SLEEVE SEALS
A. Manufacturers:
1. Thunderline Link-Seal, Inc.
2. NMP Corporation Model.
3. Substitutions: Section 01 60 00 - Product Requirements.
B. Product Description: Modular mechanical type, consisting of interlocking synthetic rubber links
shaped to continuously fill annular space between object and sleeve, connected with bolts and
pressure plates causing rubber sealing elements to expand when tightened, providing watertight
seal and electrical insulation.
2.7 FORMED STEEL CHANNEL
A. Manufacturers:
1. Allied Tube & Conduit Corp.
2. B-Line Systems.
3. Midland Ross Corporation, Electrical Products Division.
4. Unistrut Corp.

KGA Architecture 23 05 29 -5 May 5, 2016
UNLV Wright Hall Laboratory Build Out – 16355.00 Hangers and Supports for HVAC Piping
And Equipment
5. Substitutions: Section 01 60 00 - Product Requirements.
B. Product Description: Galvanized 12 gage) thick steel. With holes 1-1/2 inches on center.
PART 3 - EXECUTION
3.1 EXAMINATION
A. Section 01 30 00 - Administrative Requirements: Verification of existing conditions before
starting work.
B. Verify openings are ready to receive sleeves.
3.2 PREPARATION
A. Obtain permission from Architect/Engineer before using powder-actuated anchors.
B. Obtain permission from Architect/Engineer before drilling or cutting structural members.
3.3 INSTALLATION - INSERTS
A. Install inserts for placement in concrete forms.
B. Install inserts for suspending hangers from reinforced concrete slabs and sides of reinforced
concrete beams.
C. Provide hooked rod to concrete reinforcement section for inserts carrying pipe 4 inches and
larger.
D. Where concrete slabs form finished ceiling, locate inserts flush with slab surface.
E. Where inserts are omitted, drill through concrete slab from below and provide through-bolt with
recessed square steel plate and nut recessed into and grouted flush with slab.
3.4 INSTALLATION - PIPE HANGERS AND SUPPORTS
A. Install in accordance with ASME 31.9.
B. Support horizontal piping as scheduled.
C. Install hangers with minimum 1/2 inch space between finished covering and adjacent work.
D. Place hangers within 12 inches of each horizontal and vertical elbow.
E. Use hangers with 1-1/2 inch minimum vertical adjustment.
F. Support vertical piping at every floor.
G. Where piping is installed in parallel and at same elevation, provide multiple pipe or trapeze
hangers.

KGA Architecture 23 05 29 -6 May 5, 2016
UNLV Wright Hall Laboratory Build Out – 16355.00 Hangers and Supports for HVAC Piping
And Equipment
H. Support riser piping independently of connected horizontal piping.
I. Provide copper plated hangers and supports for copper piping.
J. Design hangers for pipe movement without disengagement of supported pipe.
K. Prime coat exposed steel hangers and supports. Refer to Section 09 90 00. Hangers and supports
located in crawl spaces, pipe shafts, and suspended ceiling spaces are not considered exposed.
L. Provide clearance in hangers and from structure and other equipment for installation of
insulation. Refer to Section 22 07 00.
3.5 INSTALLATION - EQUIPMENT BASES AND SUPPORTS
A. Provide housekeeping pads of concrete, minimum 3-1/2 inches thick and extending 6 inches
beyond supported equipment. Refer to Section 03 30 00.
B. Using templates furnished with equipment, install anchor bolts, and accessories for mounting
and anchoring equipment.
C. Construct supports of formed steel channel. Brace and fasten with flanges bolted to structure.
D. Provide rigid anchors for pipes after vibration isolation components are installed. Refer to
Section 21 05 48.
3.6 INSTALLATION - FLASHING
A. Provide flexible flashing and metal counterflashing where piping and ductwork penetrate
weather or waterproofed walls, floors, and roofs.
B. Provide acoustical lead flashing around ducts and pipes penetrating equipment rooms for sound
control.
C. Adjust storm collars tight to pipe with bolts; caulk around top edge. Use storm collars above
roof jacks. Screw vertical flange section to face of curb.
3.7 INSTALLATION - SLEEVES
A. Exterior watertight entries: Seal with mechanical sleeve seals.
B. Set sleeves in position in forms. Provide reinforcing around sleeves.
C. Size sleeves large enough to allow for movement due to expansion and contraction. Provide for
continuous insulation wrapping.
D. Extend sleeves through floors 1 inch above finished floor level. Caulk sleeves.
E. Where piping or ductwork penetrates floor, ceiling, or wall, close off space between pipe or
duct and adjacent work with stuffing insulation and caulk airtight. Provide close fitting metal
collar or escutcheon covers at both sides of penetration.

KGA Architecture 23 05 29 -7 May 5, 2016
UNLV Wright Hall Laboratory Build Out – 16355.00 Hangers and Supports for HVAC Piping
And Equipment
F. Install chrome plated steel or stainless steel escutcheons at finished surfaces.
3.8 FIELD QUALITY CONTROL
A. Section 01 70 00 - Execution and Closeout Requirements: Field inspecting, testing, adjusting,
and balancing.
3.9 CLEANING
A. Section 01 70 00 - Execution and Closeout Requirements: Requirements for cleaning.
3.10 PROTECTION OF FINISHED WORK
A. Section 01 70 00 - Execution and Closeout Requirements: Requirements for protecting finished
Work.
B. Protect adjacent surfaces from damage by material installation.
3.11 SCHEDULES
A. Copper and Steel Pipe Hanger Spacing:
PIPE
SIZE
Inches
COPPER
TUBING
MAXIMUM
HANGER
SPACING
Feet
STEEL PIPE
MAXIMUM
HANGER
SPACING
Feet
COPPER
TUBING
HANGER ROD
DIAMETER
Inches
STEEL PIPE
HANGER
ROD
DIAMETER
Inches
1/2 5 7 3/8 3/8
3/4 5 7 3/8 3/8
1 6 7 3/8 3/8
1-1/4 7 7 3/8 3/8
1-1/2 8 9 3/8 3/8
2 8 10 3/8 3/8
2-1/2 9 11 1/2 1/2
3 10 12 1/2 1/2
4 12 14 1/2 5/8
5 13 16 1/2 5/8
6 14 17 5/8 3/4
8 16 19 3/4 3/4
END OF SECTION


KGA Architecture 26 05 53 -1 May 5, 2016
UNLV Wright Hall Laboratory Build Out – 16355.00 Identification for HVAC Piping and Equipment
SECTION 23 05 53
IDENTIFICATION FOR HVAC PIPING AND EQUIPMENT
PART 1 - GENERAL
1.1 SUMMARY
A. Section Includes:
1. Nameplates.
2. Tags.
3. Stencils.
4. Pipe markers.
5. Ceiling tacks.
6. Labels.
7. Lockout devices.
B. Related Sections:
1. Section 09 90 00 - Painting and Coating: Execution requirements for painting specified
by this section.
1.2 REFERENCES
A. American Society of Mechanical Engineers:
1. ASME A13.1 - Scheme for the Identification of Piping Systems.
1.3 SUBMITTALS
A. Section 01 33 00 - Submittal Procedures: Submittal procedures.
B. Product Data: Submit manufacturers catalog literature for each product required.
C. Shop Drawings: Submit list of wording, symbols, letter size, and color coding for mechanical
identification and valve chart and schedule, including valve tag number, location, function, and
valve manufacturer's name and model number.
D. Manufacturer's Installation Instructions: Indicate installation instructions, special procedures,
and installation.
E. Manufacturer's Certificate: Certify products meet or exceed specified requirements.
1.4 CLOSEOUT SUBMITTALS
A. Section 01 70 00 - Execution and Closeout Requirements: Closeout procedures.
B. Project Record Documents: Record actual locations of tagged valves; include valve tag
numbers.

KGA Architecture 26 05 53 -2 May 5, 2016
UNLV Wright Hall Laboratory Build Out – 16355.00 Identification for HVAC Piping and Equipment
1.5 QUALITY ASSURANCE
A. Conform to ASME A13.1 for color scheme for identification of piping systems and accessories.
B. Maintain one copy of each document on site.
1.6 QUALIFICATIONS
A. Manufacturer: Company specializing in manufacturing products specified in this section with
minimum three years documented experience.
B. Installer: Company specializing in performing Work of this section with minimum three years
documented experience.
1.7 PRE-INSTALLATION MEETINGS
A. Section 01 30 00 - Administrative Requirements: Pre-installation meeting.
B. Convene minimum one week prior to commencing work of this section.
1.8 FIELD MEASUREMENTS
A. Verify field measurements prior to fabrication.
PART 2 - PRODUCTS
2.1 NAMEPLATES
A. Manufacturers:
1. Brady Corporation.
2. Brimar Industries, Inc.
3. Marking Services, Inc.
4. Panduit Corporation.
5. Seton Identification Products.
6. Substitutions: Section 01 60 00 - Product Requirements.
B. Product Description: Laminated three-layer plastic with engraved black letters on light
contrasting background color.
2.2 TAGS
A. Plastic Tags:
1. Manufacturers:
a. Brady Corporation.
b. Brimar Industries, Inc.
c. Marking Services, Inc.
d. Panduit Corporation.
e. Seton Identification Products.
2. Substitutions: Refer to Section 01 60 00 - Product Requirements.

KGA Architecture 26 05 53 -3 May 5, 2016
UNLV Wright Hall Laboratory Build Out – 16355.00 Identification for HVAC Piping and Equipment
B. Laminated three-layer plastic with engraved black letters on light contrasting background color.
Tag size minimum 1-1/2 inches diameter or square.
C. Metal Tags:
1. Manufacturers:
a. Brady Corporation.
b. Brimar Industries, Inc.
c. Marking Services, Inc.
d. Panduit Corporation.
e. Seton Identification Products.
f. Substitutions: Refer to Section 01 60 00 - Product Requirements.
2. Brass, Aluminum or Stainless Steel with stamped letters; tag size minimum 1-1/2 inches
diameter or square with finished edges.
D. Information Tags:
1. Manufacturers:
a. Brady Corporation.
b. Brimar Industries, Inc.
c. Marking Services, Inc.
d. Panduit Corporation.
e. Seton Identification Products.
f. Substitutions: Refer to Section 01 60 00 - Product Requirements.
2. Clear plastic with printed "Danger," "Caution," or "Warning" and message; size 3-1/4 x
5-5/8 inches with grommet and self-locking nylon ties.
E. Tag Chart: Typewritten letter size list of applied tags and location in anodized aluminum frame.
2.3 STENCILS
A. Stencils: With clean cut symbols and letters of following size:
1. Up to 2 inches Outside Diameter of Insulation or Pipe: 1/2 inch high letters.
2. 2-1/2 to 6 inches Outside Diameter of Insulation or Pipe: 1-inch high letters.
3. Over 6 inches Outside Diameter of Insulation or Pipe: 1-3/4 inches high letters.
4. Ductwork and Equipment: 1-3/4 inches high letters.
B. Stencil Paint: As specified in Section 09 90 00, semi-gloss enamel, colors and lettering size
conforming to ASME A13.1.
2.4 PIPE MARKERS
A. Color and Lettering: Conform to ASME A13.1.
B. Plastic Pipe Markers:
1. Manufacturers:
a. Brady Corporation.
b. Brimar Industries, Inc.
c. Marking Services, Inc.
d. Panduit Corporation.
e. Seton Identification Products.
f. Substitutions: Refer to Section 01 60 00 - Product Requirements.

KGA Architecture 26 05 53 -4 May 5, 2016
UNLV Wright Hall Laboratory Build Out – 16355.00 Identification for HVAC Piping and Equipment
2. Factory fabricated, flexible, semi-rigid plastic, preformed to fit around pipe or pipe
covering. Larger sizes may have maximum sheet size with spring fastener.
C. Plastic Tape Pipe Markers:
1. Manufacturers:
a. Brady Corporation.
b. Brimar Industries, Inc.
c. Marking Services, Inc.
d. Panduit Corporation.
e. Seton Identification Products.
f. Substitutions: Refer to Section 01 60 00 - Product Requirements Not permitted.
2. Flexible, vinyl film tape with pressure sensitive adhesive backing and printed markings.
D. Plastic Underground Pipe Markers:
1. Manufacturers:
a. Brady Corporation.
b. Brimar Industries, Inc.
c. Marking Services, Inc.
d. Panduit Corporation.
e. Seton Identification Products.
f. Substitutions: Refer to Section 01 60 00 - Product Requirements Not permitted.
2. Bright colored continuously printed plastic ribbon tape, minimum 6 inches wide by 4 mil
thick, manufactured for direct burial service.
2.5 CEILING TACKS
A. Manufacturers:
1. Manufacturers:
a. Brady Corporation.
b. Brimar Industries, Inc.
c. Marking Services, Inc.
d. Panduit Corporation.
e. Seton Identification Products.
2. Substitutions: Section 01 60 00 - Product Requirements.
B. Description: Steel with 3/4 inch diameter color-coded head.
C. Color code as follows:
1. HVAC equipment: Yellow.
2. Heating/cooling valves: Blue.
PART 3 - EXECUTION
3.1 PREPARATION
A. Degrease and clean surfaces to receive adhesive for identification materials.
B. Prepare surfaces in accordance with Section 09 90 00 for stencil painting.

KGA Architecture 26 05 53 -5 May 5, 2016
UNLV Wright Hall Laboratory Build Out – 16355.00 Identification for HVAC Piping and Equipment
3.2 INSTALLATION
A. Apply stencil painting in accordance with Section 09 90 00.
B. Install identifying devices after completion of coverings and painting.
C. Install plastic nameplates with corrosive-resistant mechanical fasteners, or adhesive.
D. Install labels with sufficient adhesive for permanent adhesion and seal with clear lacquer. For
unfinished canvas covering, apply paint primer before applying labels.
E. Install tags using corrosion resistant chain. Number tags consecutively by location.
F. Install underground plastic pipe markers 6 to 8 inches below finished grade, directly above
buried pipe.
G. Identify air handling units, pumps, heat transfer equipment, tanks, and water treatment devices
with plastic nameplates. Identify in-line pumps and other small devices with tags.
H. Identify control panels and major control components outside panels with plastic nameplates.
I. Identify valves in main and branch piping with tags.
J. Identify air terminal units with numbered tags.
K. Tag automatic controls, instruments, and relays. Key to control schematic.
L. Identify piping, concealed or exposed in mechanical and service spaces, with plastic pipe
markers. Identify service, flow direction, and pressure. Install in clear view and align with axis
of piping. Locate identification not to exceed 40 feet on straight runs including risers and drops,
adjacent to each valve and tee, at each side of penetration of structure or enclosure, and at each
obstruction. Omit pipe marking in exposed finished spaces such as classroom and multipurpose
room.
M. Provide ceiling tacks to locate valves or dampers above T-bar type panel ceilings. Locate in
corner of panel closest to equipment.
END OF SECTION


KGA Architecture 23 05 93 -1 May 5, 2016
UNLV Wright Hall Laboratory Build Out – 16355.00 Testing, Adjusting, and Balancing for HVAC
SECTION 23 05 93
TESTING, ADJUSTING, AND BALANCING FOR HVAC
PART 1 - GENERAL
1.1 Section included for general information and coordination requirements. Testing and balancing
services are to be contracted by the Owner.
1.2 SUMMARY
A. Section Includes:
1. Testing, adjusting, and balancing of air systems.
2. Testing, adjusting, and balancing of hydronic systems.
3. Measurement of final operating condition of HVAC systems.
B. Related Sections:
1. Section 25 11 00 - Integrated Automation Network Devices.
2. Section 25 12 00 – Integrated Automation Network Gateways.
3. Section 25 14 00 – Integrated Automation Local Control Units.
4. Section 25 15 00 – Integrated Automation Software.
5. Section 25 90 00 – Integrated Automation Control Sequences.
1.3 REFERENCES
A. Associated Air Balance Council:
1. AABC MN-1 - National Standards for Testing and Balancing Heating, Ventilating, and
Air Conditioning Systems.
B. American Society of Heating, Refrigerating and Air-Conditioning Engineers:
1. ASHRAE 111 - Practices for Measurement, Testing, Adjusting and Balancing of
Building Heating, Ventilation, Air-Conditioning and Refrigeration Systems.
C. Natural Environmental Balancing Bureau:
1. NEBB - Procedural Standards for Testing, Adjusting, and Balancing of Environmental
Systems.
1.4 SUBMITTALS
A. Section 01 33 00 - Submittal Procedures: Submittal procedures.
B. Prior to commencing Work, submit proof of latest calibration date of each instrument.
C. Test Reports: Indicate data on AABC MN-1 National Standards for Total System Balance
forms or NEBB Report forms.
D. Field Reports: Indicate deficiencies preventing proper testing, adjusting, and balancing of
systems and equipment to achieve specified performance.

KGA Architecture 23 05 93 -2 May 5, 2016
UNLV Wright Hall Laboratory Build Out – 16355.00 Testing, Adjusting, and Balancing for HVAC
E. Prior to commencing Work, submit report forms or outlines indicating adjusting, balancing, and
equipment data required. Include detailed procedures, agenda, sample report forms and copy of
AABC National Project Performance Guaranty or Copy of NEBB Certificate of Conformance
Certification as applicable.
F. Submit draft copies of report for review prior to final acceptance of Project.
G. Furnish reports in soft cover, letter size, 3-ring or comb style binder manuals, complete with
table of contents page and indexing tabs, with cover identification at front and side. Include set
of reduced drawings with air outlets and equipment identified to correspond with data sheets,
and indicating thermostat locations.
1.5 CLOSEOUT SUBMITTALS
A. Section 01 70 00 - Execution and Closeout Requirements: Closeout procedures.
B. Operation and Maintenance Data: Furnish final copy of testing, adjusting, and balancing report
inclusion in operating and maintenance manuals.
1.6 QUALITY ASSURANCE
A. Perform Work in accordance with AABC MN-1 National Standards for Field Measurement and
Instrumentation, Total System Balance or NEBB Procedural Standards for Testing, Balancing
and Adjusting of Environmental Systems.
1.7 QUALIFICATIONS
A. Agency: Company specializing in testing, adjusting, and balancing of systems specified in this
section with minimum three years documented experience certified by AABC or NEBB.
1.8 PRE-INSTALLATION MEETINGS
A. Section 01 30 00 - Administrative Requirements: Pre-installation meeting.
B. Convene minimum one week prior to commencing work of this section.
1.9 SEQUENCING
A. Section 01 10 00 - Summary: Work sequence.
B. Sequence balancing between completion of systems tested and Date of Substantial Completion.
1.10 SCHEDULING
A. Section 01 30 00 - Administrative Requirements: Coordination and project conditions.
PART 2 - PRODUCTS
Not Used.
KGA Architecture 23 05 93 -3 May 5, 2016
UNLV Wright Hall Laboratory Build Out – 16355.00 Testing, Adjusting, and Balancing for HVAC
PART 3 - EXECUTION
3.1 EXAMINATION
A. Section 01 30 00 - Administrative Requirements: Coordination and project conditions.
B. Verify systems are complete and operable before commencing work. Verify the following:
1. Systems are started and operating in safe and normal condition.
2. Temperature control systems are installed complete and operable.
3. Proper thermal overload protection is in place for electrical equipment.
4. Final filters are clean and in place. If required, install temporary media in addition to final
filters.
5. Duct systems are clean of debris.
6. Fans are rotating correctly.
7. Air coil fins are cleaned and combed.
8. Access doors are closed and duct end caps are in place.
9. Air outlets are installed and connected.
10. Duct system leakage is minimized.
11. Hydronic systems are flushed, filled, and vented.
12. Pumps are rotating correctly.
13. Proper strainer baskets are clean and in place or in normal position.
14. Service and balancing valves are open.
3.2 PREPARATION
A. Furnish instruments required for testing, adjusting, and balancing operations.
B. Make instruments available to Architect/Engineer to facilitate spot checks during testing.
3.3 INSTALLATION TOLERANCES
A. Air Handling Systems: Adjust to within plus or minus 10 percent of design.
B. Air Outlets and Inlets: Adjust total to within plus 10 percent and minus 5 percent of design to
space. Adjust outlets and inlets in space to within plus or minus 10 percent of design.
C. Hydronic Systems: Adjust to within plus or minus 10 percent of design.
3.4 ADJUSTING
A. Section 01 70 00 - Execution and Closeout Requirements: Testing, adjusting, and balancing.
B. Verify recorded data represents actual measured or observed conditions.
C. Permanently mark settings of valves, dampers, and other adjustment devices allowing settings
to be restored. Set and lock memory stops.
D. After adjustment, take measurements to verify balance has not been disrupted. If disrupted,
verify correcting adjustments have been made.

KGA Architecture 23 05 93 -4 May 5, 2016
UNLV Wright Hall Laboratory Build Out – 16355.00 Testing, Adjusting, and Balancing for HVAC
E. Report defects and deficiencies noted during performance of services, preventing system
balance.
F. Leave systems in proper working order, replacing belt guards, closing access doors, closing
doors to electrical switch boxes, and restoring thermostats to specified settings.
G. At final inspection, recheck random selections of data recorded in report. Recheck points or
areas as selected and witnessed by Owner.
3.5 AIR SYSTEM PROCEDURE
A. Adjust air handling and distribution systems to obtain required or design supply, return, and
exhaust air quantities.
B. Make air quantity measurements in main ducts by Pitot tube traverse of entire cross sectional
area of duct.
C. Measure air quantities at air inlets and outlets.
D. Use volume control devices to regulate air quantities only to extent adjustments do not create
objectionable air motion or sound levels. Effect volume control by using volume dampers
located in ducts.
E. Vary total system air quantities by adjustment of fan speeds. Provide sheave drive changes to
vary fan speed. Vary branch air quantities by damper regulation.
F. Provide system schematic with required and actual air quantities recorded at each outlet or inlet.
G. Measure static air pressure conditions on air supply units, including filter and coil pressure
drops, and total pressure across fan. Make allowances for 50 percent loading of filters.
H. Adjust outside air automatic dampers, outside air, return air, and exhaust dampers for design
conditions.
I. Measure temperature conditions across outside air, return air, and exhaust dampers to check
leakage.
J. At modulating damper locations, take measurements and balance at extreme conditions.
Balance variable volume systems at maximum airflow rate, full cooling, at minimum airflow
rate, and at scheduled heating air flow, full heating.
K. Measure building static pressure and adjust supply, return, and exhaust air systems to obtain
required relationship between each to maintain approximately 0.03 inches positive static
pressure near building entries.
3.6 WATER SYSTEM PROCEDURE
A. Adjust water systems, after air balancing, to obtain design quantities.

KGA Architecture 23 05 93 -5 May 5, 2016
UNLV Wright Hall Laboratory Build Out – 16355.00 Testing, Adjusting, and Balancing for HVAC
B. Use calibrated fittings and pressure gauges to determine flow rates for system balance. Where
flow-metering devices are not installed, base flow balance on temperature difference across
various heat transfer elements in system.
C. Adjust systems to obtain specified pressure drops and flows through heat transfer elements prior
to thermal testing. Perform balancing by measurement of temperature differential in conjunction
with air balancing.
D. Effect system balance with automatic control valves fully open or in normal position to heat
transfer elements.
E. Effect adjustment of water distribution systems by means of balancing cocks, valves, and
fittings. Do not use service or shut-off valves for balancing unless indexed for balance point.
F. Where available pump capacity is less than total flow requirements or individual system parts,
simulate full flow in one part by temporary restriction of flow to other parts.
3.7 SCHEDULES
A. Equipment Requiring Testing, Adjusting, and Balancing:
1. HVAC Pumps.
2. Water Chillers.
3. Induced Draft Cooling Tower.
4. Packaged Roof Top Heating/Cooling Units.
5. Air Coils.
6. Evaporative Humidifier.
7. Air Handling Units.
8. Fans.
9. Air Filters.
10. Air Terminal Units.
11. Air Inlets and Outlets.
B. Report Forms
1. Title Page:
a. Name of Testing, Adjusting, and Balancing Agency
b. Address of Testing, Adjusting, and Balancing Agency
c. Telephone and facsimile numbers of Testing, Adjusting, and Balancing Agency
d. Project name
e. Project location
f. Project Architect
g. Project Engineer
h. Project Contractor
i. Project altitude
j. Report date
2. Summary Comments:
a. Design versus final performance
b. Notable characteristics of system
c. Description of systems operation sequence
d. Summary of outdoor and exhaust flows to indicate building pressurization
e. Nomenclature used throughout report
f. Test conditions

KGA Architecture 23 05 93 -6 May 5, 2016
UNLV Wright Hall Laboratory Build Out – 16355.00 Testing, Adjusting, and Balancing for HVAC
3. Instrument List:
a. Instrument
b. Manufacturer
c. Model number
d. Serial number
e. Range
f. Calibration date
4. Electric Motors:
a. Manufacturer
b. Model/Frame
c. HP/BHP and kW
d. Phase, voltage, amperage; nameplate, actual, no load
e. RPM
f. Service factor
g. Starter size, rating, heater elements
h. Sheave Make/Size/Bore
5. V-Belt Drive:
a. Identification/location
b. Required driven RPM
c. Driven sheave, diameter and RPM
d. Belt, size and quantity
e. Motor sheave diameter and RPM
f. Center to center distance, maximum, minimum, and actual
6. Pump Data:
a. Identification/number
b. Manufacturer
c. Size/model
d. Impeller
e. Service
f. Design flow rate, pressure drop, BHP and kW
g. Actual flow rate, pressure drop, BHP and kW
h. Discharge pressure
i. Suction pressure
j. Total operating head pressure
k. Shut off, discharge and suction pressures
l. Shut off, total head pressure
7. Air Cooled Condenser:
a. Identification/number
b. Location
c. Manufacturer
d. Model number
e. Serial number
f. Entering DB air temperature, design and actual
g. Leaving DB air temperature, design and actual
h. Number of compressors
8. Chillers:
a. Identification/number
b. Manufacturer
c. Capacity
d. Model number
e. Serial number

KGA Architecture 23 05 93 -7 May 5, 2016
UNLV Wright Hall Laboratory Build Out – 16355.00 Testing, Adjusting, and Balancing for HVAC
f. Evaporator entering water temperature, design and actual
g. Evaporator leaving water temperature, design and actual
h. Evaporator pressure drop, design and actual
i. Evaporator water flow rate, design and actual
j. Condenser entering water temperature, design and actual
k. Condenser pressure drop, design and actual
l. Condenser water flow rate, design and actual
9. Cooling Tower:
a. Tower identification/number
b. Manufacturer
c. Model number
d. Serial number
e. Rated capacity
f. Entering air WB temperature, specified and actual
g. Leaving air WB temperature, specified and actual
h. Ambient air DB temperature
i. Condenser water entering temperature
j. Condenser water leaving temperature
k. Condenser water flow rate
l. Fan RPM
10. Cooling Coil Data:
a. Identification/number
b. Location
c. Service
d. Manufacturer
e. Air flow, design and actual
f. Entering air DB temperature, design and actual
g. Entering air WB temperature, design and actual
h. Leaving air DB temperature, design and actual
i. Leaving air WB temperature, design and actual
j. Water flow, design and actual
k. Water pressure drop, design and actual
l. Entering water temperature, design and actual
m. Leaving water temperature, design and actual
n. Saturated suction temperature, design and actual
o. Air pressure drop, design and actual
11. Air Moving Equipment:
a. Location
b. Manufacturer
c. Model number
d. Serial number
e. Arrangement/Class/Discharge
f. Air flow, specified and actual
g. Return air flow, specified and actual
h. Outside air flow, specified and actual
i. Total static pressure (total external), specified and actual
j. Inlet pressure
k. Discharge pressure
l. Sheave Make/Size/Bore
m. Number of Belts/Make/Size
n. Fan RPM

KGA Architecture 23 05 93 -8 May 5, 2016
UNLV Wright Hall Laboratory Build Out – 16355.00 Testing, Adjusting, and Balancing for HVAC
12. Return Air/Outside Air Data:
a. Identification/location
b. Design air flow
c. Actual air flow
d. Design return air flow
e. Actual return air flow
f. Design outside air flow
g. Actual outside air flow
h. Return air temperature
i. Outside air temperature
j. Required mixed air temperature
k. Actual mixed air temperature
l. Design outside/return air ratio
m. Actual outside/return air ratio
13. Exhaust Fan Data:
a. Location
b. Manufacturer
c. Model number
d. Serial number
e. Air flow, specified and actual
f. Total static pressure (total external), specified and actual
g. Inlet pressure
h. Discharge pressure
i. Sheave Make/Size/Bore
j. Number of Belts/Make/Size
k. Fan RPM
14. Duct Traverse:
a. System zone/branch
b. Duct size
c. Area
d. Design velocity
e. Design air flow
f. Test velocity
g. Test air flow
h. Duct static pressure
i. Air temperature
j. Air correction factor
15. Duct Leak Test:
a. Description of ductwork under test
b. Duct design operating pressure
c. Duct design test static pressure
d. Duct capacity, air flow
e. Maximum allowable leakage duct capacity times leak factor
f. Test apparatus
1) Blower
2) Orifice, tube size
3) Orifice size
4) Calibrated
g. Test static pressure
h. Test orifice differential pressure
i. Leakage

KGA Architecture 23 05 93 -9 May 5, 2016
UNLV Wright Hall Laboratory Build Out – 16355.00 Testing, Adjusting, and Balancing for HVAC
16. Terminal Unit Data:
a. Manufacturer
b. Type, constant, variable, single, dual duct
c. Identification/number
d. Location
e. Model number
f. Size
g. Minimum static pressure
h. Minimum design air flow
i. Maximum design air flow
j. Maximum actual air flow
k. Inlet static pressure
17. Air Distribution Test Sheet:
a. Air terminal number
b. Room number/location
c. Terminal type
d. Terminal size
e. Area factor
f. Design velocity
g. Design air flow
h. Test (final) velocity
i. Test (final) air flow
j. Percent of design air flow
END OF SECTION


KGA Architecture 23 07 00 -1 May 5, 2016
UNLV Wright Hall Laboratory Build Out – 16355.00 HVAC Insulation
SECTION 23 07 00
HVAC INSULATION
PART 1 - GENERAL
1.1 SUMMARY
A. Section Includes:
1. HVAC piping insulation, jackets and accessories.
2. HVAC equipment insulation, jackets and accessories.
3. HVAC ductwork insulation, jackets, and accessories.
1.2 REFERENCES
A. ASTM International:
1. ASTM A167 - Standard Specification for Stainless and Heat-Resisting Chromium-Nickel
Steel Plate, Sheet, and Strip.
2. ASTM B209 - Standard Specification for Aluminum and Aluminum-Alloy Sheet and
Plate.
3. ASTM C195 - Standard Specification for Mineral Fiber Thermal Insulating Cement.
4. ASTM C449/C449M - Standard Specification for Mineral Fiber Hydraulic-Setting
Thermal Insulating and Finishing Cement.
5. ASTM C450 - Standard Practice for Prefabrication and Field Fabrication of Thermal
Insulating Fitting Covers for NPS Piping, Vessel Lagging, and Dished Head Segments.
6. ASTM C533 - Standard Specification for Calcium Silicate Block and Pipe Thermal
Insulation.
7. ASTM C534 - Standard Specification for Preformed Flexible Elastomeric Cellular
Thermal Insulation in Sheet and Tubular Form.
8. ASTM C547 - Standard Specification for Mineral Fiber Pipe Insulation.
9. ASTM C553 - Standard Specification for Mineral Fiber Blanket Thermal Insulation for
Commercial and Industrial Applications.
10. ASTM C585 - Standard Practice for Inner and Outer Diameters of Rigid Thermal
Insulation for Nominal Sizes of Pipe and Tubing (NPS System).
11. ASTM C591 - Standard Specification for Unfaced Preformed Rigid Cellular
Polyisocyanurate Thermal Insulation.
12. ASTM C612 - Standard Specification for Mineral Fiber Block and Board Thermal
Insulation.
13. ASTM C795 - Standard Specification for Thermal Insulation for Use in Contact with
Austenitic Stainless Steel.
14. ASTM C921 - Standard Practice for Determining the Properties of Jacketing Materials
for Thermal Insulation.
15. ASTM C1071 - Standard Specification for Thermal and Acoustical Insulation (Glass
Fiber, Duct Lining Material).
16. ASTM C1136 - Standard Specification for Flexible, Low Permeance Vapor Retarders for
Thermal Insulation.
17. ASTM C1290 - Standard Specification for Flexible Fibrous Glass Blanket Insulation
Used to Externally Insulate HVAC Ducts.
18. ASTM E84 - Standard Test Method for Surface Burning Characteristics of Building
Materials.
KGA Architecture 23 07 00 -2 May 5, 2016
UNLV Wright Hall Laboratory Build Out – 16355.00 HVAC Insulation
19. ASTM E96 - Standard Test Methods for Water Vapor Transmission of Materials.
20. ASTM E162 - Standard Test Method for Surface Flammability of Materials Using a
Radiant Heat Energy Source.
B. Sheet Metal and Air Conditioning Contractors’:
1. SMACNA - HVAC Duct Construction Standard - Metal and Flexible.
C. National Fire Protection Association:
1. NFPA 255 - Standard Method of Test of Surface Burning Characteristics of Building
Materials.
D. Underwriters Laboratories Inc.:
1. UL 723 - Tests for Surface Burning Characteristics of Building Materials.
2. UL 1978 - Standard for Safety for Grease Ducts.
1.3 SUBMITTALS
A. Section 01 33 00 - Submittal Procedures: Submittal procedures.
B. Product Data: Submit product description, thermal characteristics and list of materials and
thickness for each service, and location.
C. Manufacturer's Installation Instructions: Submit manufacturers published literature indicating
proper installation procedures.
D. Manufacturer's Certificate: Certify products meet or exceed specified requirements.
1.4 QUALITY ASSURANCE
A. Test pipe insulation for maximum flame spread index of 25 and maximum smoke developed
index of not exceeding 50 in accordance with ASTM E84, UL 723, and NFPA 255.
B. Pipe insulation manufactured in accordance with ASTM C585 for inner and outer diameters.
C. Factory fabricated fitting covers manufactured in accordance with ASTM C450.
1.5 QUALIFICATIONS
A. Manufacturer: Company specializing in manufacturing products specified in this section with
minimum three years documented experience.
B. Applicator: Company specializing in performing Work of this section with minimum three
years documented experience.
1.6 PRE-INSTALLATION MEETINGS
A. Section 01 30 00 - Administrative Requirements: Pre-installation meeting.
B. Convene minimum one week prior to commencing work of this section.

KGA Architecture 23 07 00 -3 May 5, 2016
UNLV Wright Hall Laboratory Build Out – 16355.00 HVAC Insulation
1.7 DELIVERY, STORAGE, AND HANDLING
A. Section 01 60 00 - Product Requirements: Requirements for transporting, handling, storing, and
protecting products.
B. Accept materials on site in original factory packaging, labeled with manufacturer's
identification, including product density and thickness.
C. Protect insulation from weather and construction traffic, dirt, water, chemical, and damage, by
storing in original wrapping.
1.8 ENVIRONMENTAL REQUIREMENTS
A. Section 01 60 00 - Product Requirements: Environmental conditions affecting products on site.
B. Install insulation only when ambient temperature and humidity conditions are within range
recommended by manufacturer.
1.9 FIELD MEASUREMENTS
A. Verify field measurements prior to fabrication.
1.10 WARRANTY
A. Section 01 70 00 - Execution and Closeout Requirements: Product warranties and product
bonds.
B. Furnish one year manufacturer warranty for manmade fiber.
PART 2 - PRODUCTS
2.1 MANUFACTURER
A. Manufacturers for Glass Fiber and Mineral Fiber Insulation Products:
1. CertainTeed Corporation.
2. Knauf Fiber Glass.
3. Johns Manville Corporation.
4. Owens-Corning.
5. Manson Insulation, Inc.
6. Substitutions: Section 01 60 00 - Product Requirements.
B. Manufacturers for Polyisocyanurate Foam Insulation Products:
1. CertainTeed Corporation.
2. Knauf Fiber Glass.
3. Johns Manville Corporation.
4. Owens-Corning.
5. Manson Insulation, Inc.
6. Substitutions: Section 01 60 00 - Product Requirements. PIPE INSULATION

KGA Architecture 23 07 00 -4 May 5, 2016
UNLV Wright Hall Laboratory Build Out – 16355.00 HVAC Insulation
C. TYPE P-1: ASTM C547, molded glass fiber pipe insulation.
1. Thermal Conductivity: 0.23 at 75 degrees F.
2. Operating Temperature Range: 0 to 850 degrees F.
3. Vapor Barrier Jacket: ASTM C1136, Type I, factory applied reinforced foil kraft with
self-sealing adhesive joints.
4. Jacket Temperature Limit: minus 20 to 150 degrees F.
D. TYPE P-2: ASTM C547, molded glass fiber pipe insulation.
1. Thermal Conductivity: 0.23 at 75 degrees F.
2. Operating Temperature Range: 0 to 850 degrees F.
E. TYPE P-3: ASTM C612; semi-rigid, fibrous glass board noncombustible, end grain adhered to
jacket.
1. Thermal Conductivity: 0.27 at 75 degrees F.
2. Operating Temperature Range: 0 to 650 degrees F.
3. Vapor Barrier Jacket: ASTM C1136, Type II, factory applied reinforced foil kraft with
self-sealing adhesive joints.
4. Jacket Temperature Limit: minus 20 to 150 degrees F.
F. TYPE P-4: ASTM C612; semi-rigid, fibrous glass board noncombustible.
1. Thermal Conductivity: 0.27 at 75 degrees F.
2. Operating Temperature Range: 0 to 650 degrees F.
G. TYPE P-5: ASTM C547, Type I or II, mineral fiber preformed pipe insulation, noncombustible.
1. Thermal Conductivity: 0.23 at 75 degrees F.
2. Maximum Service Temperature: 1200 degrees F.
3. Canvas Jacket: UL listed, 6 oz/sq yd, plain weave cotton fabric treated with fire retardant
lagging adhesive.
H. TYPE P-6: ASTM C591, Type IV, polyisocyanurate foam insulation, formed into shapes for
use as pipe insulation.
1. Density: 2.0 pounds per cubic foot.
2. Thermal Conductivity: 180 day aged value of 0.19 at 75 degrees F.
3. Operating Temperature Range: Range: Minus 297 to 300 degrees F.
4. Vapor Barrier Jacket: ASTM C1136, Type I, factory applied film of 4 mils thickness and
water vapor permeance of 0.02 perms.
I. TYPE P-7: ASTM C533; Type I, hydrous calcium silicate pipe insulation, rigid molded white;
asbestos free.
1. Thermal Conductivity: 0.45 at 200 degrees F.
2. Operating Temperature Range: 140 to 1200 degrees F.
2.2 PIPE INSULATION JACKETS
A. Vapor Retarder Jacket:
1. ASTM C921, white Kraft paper with glass fiber yarn, bonded to aluminized film.
2. Moisture vapor transmission: ASTM E96; 0.02 perm-inches.
B. Aluminum Pipe Jacket:
1. ASTM B209.
2. Thickness: 0.025 inch thick sheet.
KGA Architecture 23 07 00 -5 May 5, 2016
UNLV Wright Hall Laboratory Build Out – 16355.00 HVAC Insulation
3. Finish: Embossed.
4. Joining: Longitudinal slip joints and 2 inch laps.
5. Fittings: 0.016 inch thick die shaped fitting covers with factory attached protective liner.
6. Metal Jacket Bands: 1/2 inch wide; 0.015 inch thick aluminum. or 0.010 inch thick
stainless steel.
C. Stainless Steel Pipe Jacket:
1. ASTM A167 Type 304 stainless steel.
2. Thickness: 0.016 inch thick.
3. Finish: Corrugated.
4. Metal Jacket Bands: 1/2 inch wide; 0.010 inch thick stainless steel. PIPE INSULATION
ACCESSORIES
D. Covering Adhesive Mastic: Compatible with insulation.
E. Piping 1-1/2 inches diameter and smaller: Galvanized steel insulation protection shield. MSS
SP-69, Type 40. Length: Based on pipe size and insulation thickness.
F. Piping 2 inches diameter and larger: Hydrous calcium silicate saddle. Inserts length: not less
than 6 inches long, matching thickness and contour of adjoining insulation.
G. Tie Wire: 0.048 inch stainless steel with twisted ends on maximum 12 inch centers.
H. Mineral Fiber Hydraulic-Setting Thermal Insulating and Finishing Cement: ASTM
C449/C449M.
I. Insulating Cement: ASTM C195; hydraulic setting on mineral wool.
J. Adhesives: Compatible with insulation.
2.3 EQUIPMENT INSULATION
A. TYPE E-1: ASTM C553; glass fiber, flexible or semi-rigid, noncombustible.
1. Thermal Conductivity: 0.24 at 75 degrees F.
2. Operating Temperature Range: 0 to 450 degrees F.
3. Density: 1.5 pound per cubic foot.
2.4 EQUIPMENT INSULATION JACKETS
A. Canvas Equipment Jacket: UL listed, 6 oz/sq yd, plain weave cotton fabric with fire retardant
lagging adhesive compatible with insulation.
2.5 EQUIPMENT INSULATION ACCESSORIES
A. Covering Adhesive Mastic: Compatible with insulation.
B. Tie Wire: 0.048 inch stainless steel with twisted ends on maximum 12 inch centers.
C. Mineral Fiber Hydraulic-Setting Thermal Insulating and Finishing Cement: ASTM
C449/C449M.
KGA Architecture 23 07 00 -6 May 5, 2016
UNLV Wright Hall Laboratory Build Out – 16355.00 HVAC Insulation
D. Adhesives: Compatible with insulation.
2.6 DUCTWORK INSULATION
A. TYPE D-1: ASTM C1290, Type III, flexible glass fiber, commercial grade with factory applied
reinforced aluminum foil jacket meeting ASTM C1136, Type II.
1. Thermal Conductivity: 0.30 0.27 0.25 at 75 degrees F.
2. Maximum Operating Temperature: 250 degrees F.
3. Density: 1.0 pound per cubic foot.
B. TYPE D-2: ASTM C1071, Type II, rigid, glass fiber duct liner with coated air side.
1. Thermal Conductivity: 0.23 at 75 degrees F.
2. Density: 3.0 pound per cubic foot.
3. Maximum Operating Temperature: 250 degrees F.
4. Maximum Air Velocity: 4,000 feet per minute.
C. TYPE D-3: Inorganic blanket encapsulated with scrim reinforced foil meeting UL 1978.
1. Thermal Conductivity: 0.42 at 500 degrees F.
2. Weight: 1.4 pound per square foot.
3. Flame spread rating of 0 and smoke developed rating of 0 in accordance with ASTM
E84.
2.7 DUCTWORK INSULATION ACCESSORIES
A. Vapor Retarder Tape:
1. Kraft paper reinforced with glass fiber yarn and bonded to aluminized film, with pressure
sensitive rubber based adhesive.
B. Vapor Retarder Lap Adhesive: Compatible with insulation.
C. Adhesive: Waterproof, ASTM E162 fire-retardant type.
D. Liner Fasteners: Galvanized steel, welded with press-on head.
E. Tie Wire: 0.048 inch stainless steel with twisted ends on maximum 12 inch centers.
F. Adhesives: Compatible with insulation.
G. Membrane Adhesives: As recommended by membrane manufacturer.
PART 3 - EXECUTION
3.1 EXAMINATION
A. Section 01 30 00 - Administrative Requirements: Coordination and project conditions.
B. Verify piping, equipment and ductwork has been tested before applying insulation materials.
C. Verify surfaces are clean and dry, with foreign material removed.

KGA Architecture 23 07 00 -7 May 5, 2016
UNLV Wright Hall Laboratory Build Out – 16355.00 HVAC Insulation
3.2 INSTALLATION - PIPING SYSTEMS
A. Piping Exposed to View in Finished Spaces: Locate insulation and cover seams in least visible
locations.
B. Continue insulation through penetrations of building assemblies. Finish at supports, protrusions,
and interruptions.
C. Piping Systems Conveying Fluids Below Ambient Temperature:
1. Insulate entire system including fittings, valves, unions, flanges, strainers, flexible
connections, and expansion joints.
2. Furnish factory-applied or field-applied vapor retarder jackets. Secure factory-applied
jackets with pressure sensitive adhesive self-sealing longitudinal laps and butt strips.
Secure field-applied jackets with outward clinch expanding staples and seal staple
penetrations with vapor retarder mastic.
3. Insulate fittings, joints, and valves with molded insulation of like material and thickness
as adjacent pipe. Finish with glass cloth and vapor retarder adhesive or PVC fitting
covers.
D. Glass Fiber Board Insulation:
1. Apply insulation close to equipment by grooving, scoring, and beveling insulation. Fasten
insulation to equipment with studs, pins, clips, adhesive, wires, or bands.
2. Fill joints, cracks, seams, and depressions with bedding compound to form smooth
surface. On cold equipment, use vapor retarder cement.
3. Cover wire mesh or bands with cement to a thickness to remove surface irregularities.
E. Inserts and Shields:
1. Piping 1-1/2 inches Diameter and Smaller: Install galvanized steel shield between pipe
hanger and insulation.
2. Piping 2 inches Diameter and Larger: Install insert between support shield and piping and
under finish jacket.
a. Insert Configuration: Minimum 6 inches long, of thickness and contour matching
adjoining insulation; may be factory fabricated.
b. Insert Material: Compression resistant insulating material suitable for planned
temperature range and service.
3. Piping Supported by Roller Type Pipe Hangers: Install galvanized steel shield between
roller and inserts.
F. Insulation Terminating Points:
1. Coil Branch Piping 1 inch and Smaller: Terminate hot water piping at union upstream of
the coil control valve.
2. Chilled Water Coil Branch Piping: Insulate chilled water piping and associated
components up to coil connection.
3. Condensate Piping: Insulate entire piping system and components to prevent
condensation.
G. Pipe Exposed in Mechanical Equipment Rooms, packaged central plant or Finished Spaces (less
than 10 feet above finished floor): Finish with aluminum jacket or stainless steel jacket.

KGA Architecture 23 07 00 -8 May 5, 2016
UNLV Wright Hall Laboratory Build Out – 16355.00 HVAC Insulation
H. Piping Exterior to Building: Insulate fittings, joints, and valves with insulation of like material
and thickness as adjoining pipe, and finish with glass mesh reinforced vapor retarder cement.
Cover with aluminum or stainless steel jacket with seams located at 3 or 9 o’clock position on
side of horizontal piping with overlap facing down to shed water or on bottom side of horizontal
piping.
I. Heat Traced Piping Exterior to Building: Insulate fittings, joints, and valves with insulation of
like material, thickness, and finish as adjoining pipe. Size insulation large enough to enclose
pipe and heat tracer. Cover with aluminum or stainless steel jacket with seams located at 3 or 9
o’clock position on side of horizontal piping with overlap facing down to shed water.
J. Prepare pipe insulation for finish painting. Refer to Section 09 90 00.
3.3 INSTALLATION - EQUIPMENT
A. Factory Insulated Equipment: Do not insulate.
B. Exposed Equipment: Locate insulation and cover seams in least visible locations.
C. Fill joints, cracks, seams, and depressions with bedding compound to form smooth surface. On
cold equipment, use vapor retarder cement.
D. Equipment Containing Fluids Below Ambient Temperature:
1. Insulate entire equipment surfaces.
2. Apply insulation close to equipment by grooving, scoring, and beveling insulation. Fasten
insulation to equipment with studs, pins, clips, adhesive, wires, or bands.
3. Furnish factory-applied or field-applied vapor retarder jackets. Secure factory-applied
jackets with pressure sensitive adhesive self-sealing longitudinal laps and butt strips.
Secure field-applied jackets with outward clinch expanding staples and seal staple
penetrations with vapor retarder mastic.
4. Finish insulation at supports, protrusions, and interruptions.
E. Equipment in Mechanical Equipment Rooms, package central plant or Finished Spaces: Finish
with canvas jacket sized for finish painting.
F. Equipment Located Exterior to Building: Install vapor barrier jacket or finish with glass mesh
reinforced vapor barrier cement. Cover with aluminum or stainless steel jacket with seams
located on bottom side of horizontal equipment.
G. Nameplates and ASME Stamps: Bevel and seal insulation around; do not cover with insulation.
H. Equipment Requiring Access for Maintenance, Repair, or Cleaning: Install insulation for easy
removal and replacement without damage.
I. Prepare equipment insulation for finish painting. Refer to Section 09 90 00.
3.4 INSTALLATION - DUCTWORK SYSTEMS
A. Duct dimensions indicated on Drawings are finished inside dimensions.

KGA Architecture 23 07 00 -9 May 5, 2016
UNLV Wright Hall Laboratory Build Out – 16355.00 HVAC Insulation
B. Insulated ductwork conveying air below ambient temperature:
1. Provide insulation with vapor retarder jackets.
2. Finish with tape and vapor retarder jacket.
3. Continue insulation through walls, sleeves, hangers, and other duct penetrations.
4. Insulate entire system including fittings, joints, flanges, flexible connections, and
expansion joints.
C. Insulated ductwork conveying air above ambient temperature:
1. Provide with or without standard vapor retarder jacket.
2. Insulate fittings and joints. Where service access is required, bevel and seal ends of
insulation.
D. External Glass Fiber Duct Insulation:
1. Secure insulation with vapor retarder with wires and seal jacket joints with vapor retarder
adhesive or tape to match jacket.
2. Secure insulation without vapor retarder with staples, tape, or wires.
3. Install without sag on underside of ductwork. Use adhesive or mechanical fasteners
where necessary to prevent sagging. Lift ductwork off trapeze hangers and insert spacers.
4. Seal vapor retarder penetrations by mechanical fasteners with vapor retarder adhesive.
5. Stop and point insulation around access doors and damper operators to allow operation
without disturbing wrapping.
E. Duct Liner:
1. Adhere insulation with adhesive for 100 percent coverage.
2. Secure insulation with mechanical liner fasteners. Comply with SMACNA Standards for
spacing.
3. Seal and smooth joints. Seal and coat transverse joints.
4. Seal liner surface penetrations with adhesive.
5. Cut insulation for tight overlapped corner joints. Support top pieces of liner at edges with
side pieces.
F. Prepare duct insulation for finish painting. Refer to Section 09 90 00.
3.5 SCHEDULES
A. Cooling Services Piping Insulation Schedule:
Chilled Water Supply and Return 40 to
60 degrees F
P-1 1-1/4 inches and smaller
1-1/2 inches inch and larger
0.5
1.0
Condenser Water Interior to Building P-1 All sizes 1.0
Condenser Water Exterior to Building P-6 All sizes 1.5
Condensate Piping from Cooling Coils P-1 All sizes 0.5

KGA Architecture 23 07 00 -10 May 5, 2016
UNLV Wright Hall Laboratory Build Out – 16355.00 HVAC Insulation
B. Equipment Insulation Schedule:
Air Separators E-5 0.5 1.0
Expansion Tanks E-5 0.5 1.0
Chiller Cold Surfaces (Not Factory Insulated) E-5 0.5 1.0
C. Ductwork Insulation Schedule:
DUCTWORK SYSTEM
INSULATIO
N
TYPE
INSULATIO
N
THICKNESS
inches
Supply Ducts – All Rectangular (internally
insulated) D-2 1.0
Return Ducts – All Rectangular (internally
insulated)
D-2 1.0
Supply Ducts – All Round (externally insulated) D-1 1.5
Return Ducts - All Round (externally insulated) D-1 1.5
Rectangular Supply Ducts Downstream of Variable
Air Volume Boxes (internally insulated)
D-2 1.0
END OF SECTION
KGA Architecture 23 21 13 -1 May 5, 2016
UNLV Wright Hall Laboratory Build Out – 16355.00 Hydronic Piping
SECTION 23 21 13
HYDRONIC PIPING
PART 1 - GENERAL
1.1 RELATED DOCUMENTS
A. Drawings and general provisions of the Contract, including General and Supplementary
Conditions and Division 01 Specification Sections, apply to this Section.
1.2 SUMMARY
A. This Section includes pipe and fitting materials, joining methods, special-duty valves, and
specialties for the following:
1. Chilled-water piping.
2. Condenser-water piping.
3. Makeup-water piping.
B. Related Sections include the following:
1. Division 23 Section "Hydronic Pumps" for pumps, motors, and accessories for hydronic
piping.
1.3 DEFINITIONS
A. PTFE: Polytetrafluoroethylene.
B. RTRF: Reinforced thermosetting resin (fiberglass) fittings.
C. RTRP: Reinforced thermosetting resin (fiberglass) pipe.
1.4 PERFORMANCE REQUIREMENTS
A. Hydronic piping components and installation shall be capable of withstanding the following
minimum working pressure and temperature:
1. Chilled-Water Piping: 125 psig at 200 deg F (93 deg C).
2. Condenser-Water Piping: 125 psig at 150 deg F (66 deg C).
3. Makeup-Water Piping: 80 psig (552 kPa) at 150 deg F (66 deg C.
1.5 SUBMITTALS
A. Product Data: For each type of the following:
1. Valves. Include flow and pressure drop curves based on manufacturer's testing for
calibrated-orifice balancing valves and automatic flow-control valves.
2. Hydronic specialties.
KGA Architecture 23 21 13 -2 May 5, 2016
UNLV Wright Hall Laboratory Build Out – 16355.00 Hydronic Piping
B. Shop Drawings: Detail, at 1/4 (1:50) scale, the piping layout, fabrication of pipe anchors,
hangers, supports for multiple pipes, alignment guides, expansion joints and loops, and
attachments of the same to the building structure. Detail location of anchors, alignment guides,
and expansion joints and loops.
C. Welding certificates.
D. Qualification Data: For Installer.
E. Field quality-control test reports.
F. Operation and Maintenance Data: For air control devices, hydronic specialties, and special-duty
valves to include in emergency, operation, and maintenance manuals.
1.6 QUALITY ASSURANCE
A. Steel Support Welding: Qualify processes and operators according to AWS D1.1/D1.1M,
"Structural Welding Code - Steel."
B. Welding: Qualify processes and operators according to ASME Boiler and Pressure Vessel
Code: Section IX.
1. Comply with provisions in ASME B31 Series, "Code for Pressure Piping."
2. Certify that each welder has passed AWS qualification tests for welding processes
involved and that certification is current.
C. ASME Compliance: Comply with ASME B31.9, "Building Services Piping," for materials,
products, and installation. Safety valves and pressure vessels shall bear the appropriate ASME
label. Fabricate and stamp air separators and expansion tanks to comply with ASME Boiler and
Pressure Vessel Code: Section VIII, Division 01.
PART 2 - PRODUCTS
2.1 COPPER TUBE AND FITTINGS
A. Drawn-Temper Copper Tubing: ASTM B 88, Type L (ASTM B 88M, Type B).
B. DWV Copper Tubing: ASTM B 306, Type DWV.
C. Wrought-Copper Fittings: ASME B16.22.
1. Available Manufacturers: Subject to compliance with requirements, manufacturers
offering products that may be incorporated into the Work include, but are not limited to,
the following:
a. Anvil International, Inc.
b. Victaulic Company of America.
2. Grooved-End Copper Fittings: ASTM B 75 (ASTM B 75M), copper tube or
ASTM B 584, bronze casting.
3. Grooved-End-Tube Couplings: Rigid pattern, unless otherwise indicated; gasketed
fitting. Ductile-iron housing with keys matching pipe and fitting grooves, pre-lubricated
EPDM gasket rated for minimum 230 deg F (110 deg C) for use with housing, and steel
bolts and nuts.

KGA Architecture 23 21 13 -3 May 5, 2016
UNLV Wright Hall Laboratory Build Out – 16355.00 Hydronic Piping
2.2 STEEL PIPE AND FITTINGS
A. Steel Pipe: ASTM A 53/A 53M, black steel with plain ends; type, grade, and wall thickness as
indicated in Part 3 "Piping Applications" Article.
B. Malleable-Iron Threaded Fittings: ASME B16.3, Classes 150 and 300 as indicated in Part 3
"Piping Applications" Article.
C. Malleable-Iron Unions: ASME B16.39; Classes 150, 250, and 300 as indicated in Part 3
"Piping Applications" Article.
D. Cast-Iron Pipe Flanges and Flanged Fittings: ASME B16.1, Classes 25, 125, and 250; raised
ground face, and bolt holes spot faced as indicated in Part 3 "Piping Applications" Article.
E. Wrought-Steel Fittings: ASTM A 234/A 234M, wall thickness to match adjoining pipe.
F. Wrought Cast- and Forged-Steel Flanges and Flanged Fittings: ASME B16.5, including bolts,
nuts, and gaskets of the following material group, end connections, and facings:
1. Material Group: 1.1.
2. End Connections: Butt welding.
3. Facings: Raised face.
G. Grooved Mechanical-Joint Fittings and Couplings:
1. Available Manufacturers: Subject to compliance with requirements, manufacturers
offering products that may be incorporated into the Work include, but are not limited to,
the following:
a. Anvil International, Inc.
b. Central Sprinkler Company; a division of Tyco Fire & Building Products.
c. Victaulic Company of America.
2. Joint Fittings: ASTM A 536, Grade 65-45-12 ductile iron; ASTM A 47/A 47M,
Grade 32510 malleable iron; ASTM A 53/A 53M, Type F, E, or S, Grade B fabricated
steel; or ASTM A 106, Grade B steel fittings with grooves or shoulders constructed to
accept grooved-end couplings; with nuts, bolts, locking pin, locking toggle, or lugs to
secure grooved pipe and fittings.
3. Couplings: Ductile- or malleable-iron housing and synthetic rubber gasket of central
cavity pressure-responsive design; with nuts, bolts, locking pin, locking toggle, or lugs to
secure grooved pipe and fittings.
2.3 JOINING MATERIALS
A. Pipe-Flange Gasket Materials: Suitable for chemical and thermal conditions of piping system
contents.
1. ASME B16.21, nonmetallic, flat, asbestos free, 1/8-inch (3.2-mm) maximum thickness
unless thickness or specific material is indicated.
a. Full-Face Type: For flat-face, Class 125, cast-iron and cast-bronze flanges.
b. Narrow-Face Type: For raised-face, Class 250, cast-iron and steel flanges.
B. Flange Bolts and Nuts: ASME B18.2.1, carbon steel, unless otherwise indicated.
C. Solder Filler Metals: ASTM B 32, lead-free alloys. Include water-flushable flux according to
ASTM B 813.

KGA Architecture 23 21 13 -4 May 5, 2016
UNLV Wright Hall Laboratory Build Out – 16355.00 Hydronic Piping
D. Brazing Filler Metals: AWS A5.8, BCuP Series, copper-phosphorus alloys for joining copper
with copper; or BAg-1, silver alloy for joining copper with bronze or steel.
E. Welding Filler Metals: Comply with AWS D10.12/D10.12M for welding materials appropriate
for wall thickness and chemical analysis of steel pipe being welded.
F. Gasket Material: Thickness, material, and type suitable for fluid to be handled and working
temperatures and pressures.
2.4 DIELECTRIC FITTINGS
A. Description: Combination fitting of copper-alloy and ferrous materials with threaded, solder-
joint, plain, or weld-neck end connections that match piping system materials.
B. Insulating Material: Suitable for system fluid, pressure, and temperature.
C. Dielectric Unions:
1. Manufacturers: Subject to compliance with requirements, provide products by one of the
following:
a. Capitol Manufacturing Company.
b. Central Plastics Company.
c. Hart Industries International, Inc.
d. Watts Regulator Co.; a division of Watts Water Technologies, Inc.
e. Zurn Plumbing Products Group; AquaSpec Commercial Products Division.
2. Factory-fabricated union assembly, for 250-psig (1725-kPa) minimum working pressure
at 180 deg F (82 deg C).
D. Dielectric Flanges:
1. Available Manufacturers: Subject to compliance with requirements, manufacturers
offering products that may be incorporated into the Work include, but are not limited to,
the following:
a. Capitol Manufacturing Company.
b. Central Plastics Company.
c. Watts Regulator Co.; a division of Watts Water Technologies, Inc.
2. Factory-fabricated companion-flange assembly, for 150- or 300-psig (1035- or 2070-kPa)
minimum working pressure as required to suit system pressures.
E. Dielectric-Flange Kits:
1. Available Manufacturers: Subject to compliance with requirements, manufacturers
offering products that may be incorporated into the Work include, but are not limited to,
the following:
a. Advance Products & Systems, Inc.
b. Calpico, Inc.
c. Central Plastics Company.
d. Pipeline Seal and Insulator, Inc.
2. Companion-flange assembly for field assembly. Include flanges, full-face- or ring-type
neoprene or phenolic gasket, phenolic or polyethylene bolt sleeves, phenolic washers, and
steel backing washers.
3. Separate companion flanges and steel bolts and nuts shall have 150- or 300-psig (1035-
or 2070-kPa) minimum working pressure where required to suit system pressures.
KGA Architecture 23 21 13 -5 May 5, 2016
UNLV Wright Hall Laboratory Build Out – 16355.00 Hydronic Piping
F. Dielectric Couplings:
1. Available Manufacturers: Subject to compliance with requirements, manufacturers
offering products that may be incorporated into the Work include, but are not limited to,
the following:
2. Manufacturers: Subject to compliance with requirements, provide products by one of the
following:
a. Calpico, Inc.
b. Lochinvar Corporation.
G. Dielectric Nipples:
1. Available Manufacturers: Subject to compliance with requirements, manufacturers
offering products that may be incorporated into the Work include, but are not limited to,
the following:
2. Manufacturers: Subject to compliance with requirements, provide products by one of the
following:
a. Perfection Corporation; a subsidiary of American Meter Company.
b. Precision Plumbing Products, Inc.
c. Sioux Chief Manufacturing Company, Inc.
d. Victaulic Company of America.
2.5 VALVES
A. Check, Ball, and Butterfly Valves: Comply with requirements specified in Division 23 Section
"General-Duty Valves for HVAC Piping."
B. Automatic Temperature-Control Valves, Actuators, and Sensors: Comply with requirements
specified in Division 23 Section "Instrumentation and Control for HVAC."
C. Bronze, Calibrated-Orifice, Balancing Valves:
1. Available Manufacturers: Subject to compliance with requirements, manufacturers
offering products that may be incorporated into the Work include, but are not limited to,
the following:
a. Armstrong Pumps, Inc.
b. Bell & Gossett Domestic Pump; a division of ITT Industries.
c. Flow Design Inc.
d. Griswold Controls.
e. Taco.
2. Body: Bronze, ball or plug type with calibrated orifice or venturi.
3. Ball: Brass or stainless steel.
4. Plug: Resin.
5. Seat: PTFE.
6. End Connections: Threaded or socket.
7. Pressure Gage Connections: Integral seals for portable differential pressure meter.
8. Handle Style: Lever, with memory stop to retain set position.
9. CWP Rating: Minimum 125 psig (860 kPa).
10. Maximum Operating Temperature: 250 deg F (121 deg C).
D. Cast-Iron or Steel, Calibrated-Orifice, Balancing Valves:
1. Available Manufacturers: Subject to compliance with requirements, manufacturers
offering products that may be incorporated into the Work include, but are not limited to,
the following:

KGA Architecture 23 21 13 -6 May 5, 2016
UNLV Wright Hall Laboratory Build Out – 16355.00 Hydronic Piping
a. Armstrong Pumps, Inc.
b. Bell & Gossett Domestic Pump; a division of ITT Industries.
c. Flow Design Inc.
d. Griswold Controls.
e. Taco.
f. Tour & Andersson; available through Victaulic Company of America.
2. Body: Cast-iron or steel body, ball, plug, or globe pattern with calibrated orifice or
venturi.
3. Ball: Brass or stainless steel.
4. Stem Seals: EPDM O-rings.
5. Disc: Glass and carbon-filled PTFE.
6. Seat: PTFE.
7. End Connections: Flanged or grooved.
8. Pressure Gage Connections: Integral seals for portable differential pressure meter.
9. Handle Style: Lever, with memory stop to retain set position.
10. CWP Rating: Minimum 125 psig (860 kPa).
11. Maximum Operating Temperature: 250 deg F (121 deg C).
E. Automatic Flow-Control Valves:
1. Available Manufacturers: Subject to compliance with requirements, manufacturers
offering products that may be incorporated into the Work include, but are not limited to,
the following:
a. Flow Design Inc.
b. Griswold Controls.
2. Body: Brass or ferrous metal.
3. Piston and Spring Assembly: Stainless steel, tamper proof, self cleaning, and removable.
4. Combination Assemblies: Include bonze or brass-alloy ball valve.
5. Identification Tag: Marked with zone identification, valve number, and flow rate.
6. Size: Same as pipe in which installed.
7. Performance: Maintain constant flow, plus or minus 5 percent over system pressure
fluctuations.
8. Minimum CWP Rating: 175 psig (1207 kPa).
9. Maximum Operating Temperature: 200 deg F (93 deg C).
2.6 HYDRONIC PIPING SPECIALTIES
A. Y-Pattern Strainers:
1. Body: ASTM A 126, Class B, cast iron with bolted cover and bottom drain connection.
2. End Connections: Threaded ends for NPS 2 (DN 50) and smaller; flanged ends for
NPS 2-1/2 (DN 65) and larger.
3. Strainer Screen: 60-mesh startup strainer, and perforated stainless-steel basket with 50
percent free area.
4. CWP Rating: 125 psig (860 kPa).
B. Basket Strainers:
1. Body: ASTM A 126, Class B, high-tensile cast iron with bolted cover and bottom drain
connection.
2. End Connections: Threaded ends for NPS 2 (DN 50) and smaller; flanged ends for
NPS 2-1/2 (DN 65) and larger.
3. Strainer Screen: 60-mesh startup strainer, and perforated stainless-steel basket with 50
percent free area.

KGA Architecture 23 21 13 -7 May 5, 2016
UNLV Wright Hall Laboratory Build Out – 16355.00 Hydronic Piping
4. CWP Rating: 125 psig (860 kPa).
C. Stainless-Steel Bellow, Flexible Connectors:
1. Body: Stainless-steel bellows with woven, flexible, bronze, wire-reinforcing protective
jacket.
2. End Connections: Threaded or flanged to match equipment connected.
3. Performance: Capable of 3/4-inch (20-mm) misalignment.
4. CWP Rating: 150 psig (1035 kPa).
5. Maximum Operating Temperature: 250 deg F (121 deg C).
D. Spherical, Rubber, Flexible Connectors:
1. Body: Fiber-reinforced rubber body.
2. End Connections: Steel flanges drilled to align with Classes 150 and 300 steel flanges.
3. Performance: Capable of misalignment.
4. CWP Rating: 150 psig (1035 kPa).
5. Maximum Operating Temperature: 250 deg F (121 deg C).
E. Expansion fittings are specified in Division 23 Section "Expansion Fittings and Loops for
HVAC Piping."
PART 3 - EXECUTION
3.1 PIPING APPLICATIONS
A. Chilled-water piping, aboveground, NPS 2-1/2 (DN 65) and larger, shall be the following:
1. Schedule 40steel pipe, wrought-steel fittings and wrought-cast or forged-steel flanges and
flange fittings, and welded and flanged joints.
2. Schedule 40 steel pipe; grooved, mechanical joint coupling and fittings; and grooved,
mechanical joints.
B. Condenser-water piping, aboveground, NPS 2-1/2 (DN 65) and larger shall be the following:
1. Schedule 40 steel pipe, wrought-steel fittings and wrought-cast or forged-steel flanges
and flange fittings, and welded and flanged joints.
2. Schedule 40 steel pipe; grooved, mechanical joint coupling and fittings; and grooved,
mechanical joints.
C. Makeup-water piping installed aboveground shall be the following:
1. Type L (B), drawn-temper copper tubing, wrought-copper fittings, and soldered joints.
D. Equipment-Drain Piping: Type M (C), drawn-temper copper tubing, wrought-copper fittings,
and soldered joints.
3.2 VALVE APPLICATIONS
A. Install shut off-duty valves at each branch connection to supply mains, and at supply connection
to each piece of equipment.
B. Install calibrated-orifice, balancing valves at each branch connection to return main.
C. Install check valves at each pump discharge and elsewhere as required to control flow direction.

KGA Architecture 23 21 13 -8 May 5, 2016
UNLV Wright Hall Laboratory Build Out – 16355.00 Hydronic Piping
3.3 PIPING INSTALLATIONS
A. Drawing plans, schematics, and diagrams indicate general location and arrangement of piping
systems. Indicate piping locations and arrangements if such were used to size pipe and
calculate friction loss, expansion, pump sizing, and other design considerations. Install piping
as indicated unless deviations to layout are approved on Coordination Drawings.
B. Install piping in concealed locations, unless otherwise indicated and except in equipment rooms
and service areas.
C. Install piping indicated to be exposed and piping in equipment rooms and service areas at right
angles or parallel to building walls. Diagonal runs are prohibited unless specifically indicated
otherwise.
D. Install piping above accessible ceilings to allow sufficient space for ceiling panel removal.
E. Install piping to permit valve servicing.
F. Install piping at indicated slopes.
G. Install piping free of sags and bends.
H. Install fittings for changes in direction and branch connections.
I. Install piping to allow application of insulation.
J. Select system components with pressure rating equal to or greater than system operating
pressure.
K. Install groups of pipes parallel to each other, spaced to permit applying insulation and servicing
of valves.
L. Install drains, consisting of a tee fitting, NPS 3/4 (DN 20) ball valve, and short NPS 3/4
(DN 20) threaded nipple with cap, at low points in piping system mains and elsewhere as
required for system drainage.
M. Install piping at a uniform grade of 0.2 percent upward in direction of flow.
N. Reduce pipe sizes using eccentric reducer fitting installed with level side up.
O. Install valves according to Division 23 Section "General-Duty Valves for HVAC Piping."
P. Install unions in piping, NPS 2 (DN 50) and smaller, adjacent to valves, at final connections of
equipment, and elsewhere as indicated.
Q. Install flanges in piping, NPS 2-1/2 (DN 65) and larger, at final connections of equipment and
elsewhere as indicated.

KGA Architecture 23 21 13 -9 May 5, 2016
UNLV Wright Hall Laboratory Build Out – 16355.00 Hydronic Piping
R. Install strainers on inlet side of each control valve, pressure-reducing valve, solenoid valve, in-
line pump, and elsewhere as indicated. Install NPS 3/4 (DN 20) nipple and ball valve in
blowdown connection of strainers NPS 2 (DN 50) and larger. Match size of strainer blowoff
connection for strainers smaller than NPS 2 (DN 50).
S. Identify piping as specified in Division 23 Section "Identification for HVAC Piping and
Equipment."
3.4 HANGERS AND SUPPORTS
A. Hanger, support, and anchor devices are specified in Division 23 Section "Hangers and
Supports for HVAC Piping and Equipment." Comply with the following requirements for
maximum spacing of supports.
B. Seismic restraints are specified in Division 23 Section "Vibration and Seismic Controls for
HVAC Piping and Equipment."
C. Install the following pipe attachments:
1. Adjustable steel clevis hangers for individual horizontal piping less than 20 feet (6 m)
long.
2. Provide copper-clad hangers and supports for hangers and supports in direct contact with
copper pipe.
D. Install hangers for steel piping with the following maximum spacing and minimum rod sizes:
1. NPS 3/4 (DN 20): Maximum span, 7 feet (2.1 m); minimum rod size, 1/4 inch (6.4 mm).
2. NPS 1 (DN 25): Maximum span, 7 feet (2.1 m); minimum rod size, 1/4 inch (6.4 mm).
3. NPS 1-1/2 (DN 40): Maximum span, 9 feet (2.7 m); minimum rod size, 3/8 inch (10
mm).
4. NPS 2 (DN 50): Maximum span, 10 feet (3 m); minimum rod size, 3/8 inch (10 mm).
5. NPS 2-1/2 (DN 65): Maximum span, 11 feet (3.4 m); minimum rod size, 3/8 inch (10
mm).
6. NPS 3 (DN 80): Maximum span, 12 feet (3.7 m); minimum rod size, 3/8 inch (10 mm).
7. NPS 4 (DN 100): Maximum span, 14 feet (4.3 m); minimum rod size, 1/2 inch (13 mm).
8. NPS 6 (DN 150): Maximum span, 17 feet (5.2 m); minimum rod size, 1/2 inch (13 mm).
E. Install hangers for drawn-temper copper piping with the following maximum spacing and
minimum rod sizes:
1. NPS 3/4 (DN 20): Maximum span, 5 feet (1.5 m); minimum rod size, 1/4 inch (6.4 mm).
2. NPS 1 (DN 25): Maximum span, 6 feet (1.8 m); minimum rod size, 1/4 inch (6.4 mm).
3. NPS 1-1/2 (DN 40): Maximum span, 8 feet (2.4 m); minimum rod size, 3/8 inch (10
mm).
4. NPS 2 (DN 50): Maximum span, 8 feet (2.4 m); minimum rod size, 3/8 inch (10 mm).
5. NPS 2-1/2 (DN 65): Maximum span, 9 feet (2.7 m); minimum rod size, 3/8 inch (10
mm).
6. NPS 3 (DN 80): Maximum span, 10 feet (3 m); minimum rod size, 3/8 inch (10 mm).
F. Support vertical runs at roof, at each floor, and at 10-foot (3-m) intervals between floors.
KGA Architecture 23 21 13 -10 May 5, 2016
UNLV Wright Hall Laboratory Build Out – 16355.00 Hydronic Piping
3.5 PIPE JOINT CONSTRUCTION
A. Join pipe and fittings according to the following requirements and Division 23 Sections
specifying piping systems.
B. Ream ends of pipes and tubes and remove burrs. Bevel plain ends of steel pipe.
C. Remove scale, slag, dirt, and debris from inside and outside of pipe and fittings before
assembly.
D. Soldered Joints: Apply ASTM B 813, water-flushable flux, unless otherwise indicated, to tube
end. Construct joints according to ASTM B 828 or CDA's "Copper Tube Handbook," using
lead-free solder alloy complying with ASTM B 32.
E. Brazed Joints: Construct joints according to AWS's "Brazing Handbook," "Pipe and Tube"
Chapter, using copper-phosphorus brazing filler metal complying with AWS A5.8.
F. Threaded Joints: Thread pipe with tapered pipe threads according to ASME B1.20.1. Cut
threads full and clean using sharp dies. Ream threaded pipe ends to remove burrs and restore
full ID. Join pipe fittings and valves as follows:
1. Apply appropriate tape or thread compound to external pipe threads unless dry seal
threading is specified.
2. Damaged Threads: Do not use pipe or pipe fittings with threads that are corroded or
damaged. Do not use pipe sections that have cracked or open welds.
G. Welded Joints: Construct joints according to AWS D10.12/D10.12M, using qualified processes
and welding operators according to Part 1 "Quality Assurance" Article.
H. Flanged Joints: Select appropriate gasket material, size, type, and thickness for service
application. Install gasket concentrically positioned. Use suitable lubricants on bolt threads.
I. Grooved Joints: Assemble joints with coupling and gasket, lubricant, and bolts. Cut or roll
grooves in ends of pipe based on pipe and coupling manufacturer's written instructions for pipe
wall thickness. Use grooved-end fittings and rigid, grooved-end-pipe couplings.
3.6 TERMINAL EQUIPMENT CONNECTIONS
A. Sizes for supply and return piping connections shall be the same as or larger than equipment
connections.
B. Install control valves in accessible locations close to connected equipment.
C. Install ports for pressure gages and thermometers at coil inlet and outlet connections according
to Division 23 Section "Meters and Gages for HVAC Piping."
3.7 FIELD QUALITY CONTROL
A. Prepare hydronic piping according to ASME B31.9 and as follows:
1. Leave joints, including welds, uninsulated and exposed for examination during test.
2. Provide temporary restraints for expansion joints that cannot sustain reactions due to test
pressure. If temporary restraints are impractical, isolate expansion joints from testing.
KGA Architecture 23 21 13 -11 May 5, 2016
UNLV Wright Hall Laboratory Build Out – 16355.00 Hydronic Piping
3. Flush hydronic piping systems with clean water; then remove and clean or replace
strainer screens.
4. Isolate equipment from piping. If a valve is used to isolate equipment, its closure shall be
capable of sealing against test pressure without damage to valve. Install blinds in flanged
joints to isolate equipment.
B. Perform the following tests on hydronic piping:
1. Use ambient temperature water as a testing medium unless there is risk of damage due to
freezing. Another liquid that is safe for workers and compatible with piping may be
used.
2. While filling system, use vents installed at high points of system to release air. Use
drains installed at low points for complete draining of test liquid.
3. Isolate expansion tanks and determine that hydronic system is full of water.
4. Subject piping system to hydrostatic test pressure that is not less than 1.5 times the
system's working pressure. Test pressure shall not exceed maximum pressure for any
vessel, pump, valve, or other component in system under test. Verify that stress due to
pressure at bottom of vertical runs does not exceed 90 percent of specified minimum
yield strength or 1.7 times "SE" value in Appendix A in ASME B31.9, "Building
Services Piping."
5. After hydrostatic test pressure has been applied for at least 10 minutes, examine piping,
joints, and connections for leakage. Eliminate leaks by tightening, repairing, or replacing
components, and repeat hydrostatic test until there are no leaks.
6. Prepare written report of testing.
C. Perform the following before operating the system:
1. Open manual valves fully.
2. Inspect pumps for proper rotation.
3. Verify and set makeup pressure-reducing valves for required system pressure.
4. Inspect air vents at high points of system and determine if all are installed and operating
freely (automatic type), or bleed air completely (manual type).
5. Set temperature controls so all coils are calling for full flow.
6. Inspect and set operating temperatures of hydronic equipment, such as chillers, cooling
towers, to specified values.
7. Verify lubrication of motors and bearings.
END OF SECTION


KGA Architecture 23 21 16 -1 May 5, 2016
UNLV Wright Hall Laboratory Build Out – 16355.00 Hydronic Piping Specialties
SECTION 23 21 16
HYDRONIC PIPING SPECIALTIES
PART 1 - GENERAL
1.1 SUMMARY
A. Section Includes:
1. Positive displacement meters.
2. Liquid flow meters.
3. Pressure gages.
4. Pressure gage taps.
5. Thermometers.
6. Thermometer supports.
7. Test plugs.
8. Diaphragm-type expansion tanks.
9. Air vents.
10. Air separators.
11. Strainers.
12. Pump suction fittings.
13. Combination pump discharge valves.
14. Flow controls.
15. Flow meters.
16. Relief valves.
B. Related Sections:
1. Section 23 05 03 – Pipes and Tubes for HVAC Piping and Equipment: Execution
requirements for piping connections to products specified by this section.
2. Section 23 21 23 - Hydronic Pumps: Execution requirements for piping connections to
products specified by this section.
3. Section 23 91 00 - Packaged Plant: Specialties specified in this section to be provided and
installed under Section 23 91 00.
1.2 REFERENCES
A. American Society of Mechanical Engineers:
1. ASME B40.1 - Gauges - Pressure Indicating Dial Type - Elastic Element.
2. ASME Section VIII - Boiler and Pressure Vessel Code - Pressure Vessels.
B. ASTM International:
1. ASTM E1 - Standard Specification for ASTM Thermometers.
2. ASTM E77 - Standard Test Method for Inspection and Verification of Thermometers.
C. American Water Works Association:
1. AWWA C701 - Cold-Water Meters - Turbine Type, for Customer Service.
2. AWWA C706 - Direct-Reading, Remote-Registration Systems for Cold-Water Meters.
3. AWWA M6 - Water Meters - Selection, Installation, Testing, and Maintenance.

KGA Architecture 23 21 16 -2 May 5, 2016
UNLV Wright Hall Laboratory Build Out – 16355.00 Hydronic Piping Specialties
1.3 SUBMITTALS
A. Section 01 33 00 - Submittal Procedures: Submittal procedures.
B. Product Data: Submit for manufactured products and assemblies used in this Project.
1. Manufacturer’s data and list indicating use, operating range, total range, accuracy, and
location for manufactured components.
2. Submit product description, model, dimensions, component sizes, rough-in requirements,
service sizes, and finishes.
3. Submit schedule indicating manufacturer, model number, size, location, rated capacity,
load served, and features for each piping specialty.
4. Submit electrical characteristics and connection requirements.
C. Manufacturer's Installation Instructions: Submit hanging and support methods, joining
procedures, application, selection, and hookup configuration. Include pipe and accessory
elevations.
D. Manufacturer's Certificate: Certify products meet or exceed specified requirements.
1.4 CLOSEOUT SUBMITTALS
A. Section 01 70 00 - Execution and Closeout Requirements: Closeout procedures.
B. Project Record Documents: Record actual locations of actual locations of components and
instrumentation, flow controls and flow meters.
C. Operation and Maintenance Data: Submit instructions for calibrating instruments, installation
instructions, assembly views, servicing requirements, lubrication instruction, and replacement
parts list.
1.5 QUALIFICATIONS
A. Manufacturer: Company specializing in manufacturing products specified in this section with
minimum three years documented experience.
B. Installer: Company specializing in performing Work of this section with minimum three years
documented experience.
1.6 PRE-INSTALLATION MEETINGS
A. Section 01 30 00 - Administrative Requirements: Pre-installation meeting.
B. Convene minimum one week prior to commencing work of this section.
1.7 DELIVERY, STORAGE, AND HANDLING
A. Section 01 60 00 - Product Requirements: Product storage and handling requirements.
B. Accept piping specialties on site in shipping containers with labeling in place. Inspect for
damage.

KGA Architecture 23 21 16 -3 May 5, 2016
UNLV Wright Hall Laboratory Build Out – 16355.00 Hydronic Piping Specialties
C. Provide temporary protective coating on cast iron and steel valves.
D. Protect systems from entry of foreign materials by temporary covers, caps and closures,
completing sections of the work, and isolating parts of completed system until installation.
1.8 ENVIRONMENTAL REQUIREMENTS
A. Section 01 60 00 - Product Requirements.
B. Do not install instruments when areas are under construction, except rough in, taps, supports
and test plugs.
1.9 FIELD MEASUREMENTS
A. Verify field measurements before fabrication.
1.10 WARRANTY
A. Section 01 70 00 - Execution and Closeout Requirements: Product warranties and product
bonds.
B. Furnish one year manufacturer warranty for piping specialties.
1.11 EXTRA MATERIALS
A. Section 01 70 00 - Execution and Closeout Requirements: Spare parts and maintenance
products.
B. Furnish two pressure gages with pulsation damper and dial thermometers.
PART 2 - PRODUCTS
2.1 PRESSURE GAGES
A. Manufacturers:
1. Alnor Instrument Company.
2. Bristol Babcock.
3. Dwyer, Cali-Tech.
4. Marsh Bellofram, Precision Control Div.
5. Miljoco.
6. Palmer.
7. Weiss.
8. Weksler.
9. Substitutions: Section 01 60 00 - Product Requirements.
B. Gage: ASME B40.1, UL 393 with bourdon tube, rotary brass movement, brass socket, front
calibration adjustment, black scale on white background.
1. Case: Steel, Cast aluminum or Stainless steel.
2. Bourdon Tube: Brass, Phosphor bronze or Type 316 stainless steel.
3. Dial Size: 3-1/2 inch diameter.

KGA Architecture 23 21 16 -4 May 5, 2016
UNLV Wright Hall Laboratory Build Out – 16355.00 Hydronic Piping Specialties
4. Mid-Scale Accuracy: 1/2 percent.
5. Scale: Psi.
2.2 PRESSURE GAGE TAPS
A. Manufacturers:
1. Alnor Instrument Company.
2. Bristol Babcock.
3. Dwyer, Cali-Tech.
4. Marsh Bellofram, Precision Control Div.
5. Miljoco.
6. Palmer.
7. Weiss.
8. Weksler.
9. Substitutions: Section 01 60 00 - Product Requirements.
B. Needle Valve: Brass or Stainless Steel, 1/4 inch NPT for minimum 300 psi.
C. Ball Valve: Brass or Stainless Steel, 1/4 inch NPT for 250 psi.
D. Pulsation Damper: Pressure snubber, brass with 1/4 inch NPT connections.
E. Siphon: Steel, Schedule 40, Brass or Stainless Steel, 1/4 inch NPT angle or straight pattern.
2.3 STEM TYPE THERMOMETERS
A. Manufacturers:
1. Alnor Instrument Company.
2. Bristol Babcock.
3. Dwyer, Cali-Tech.
4. Marsh Bellofram, Precision Control Div.
5. Miljoco.
6. Palmer.
7. Weiss.
8. Weksler.
9. Substitutions: Section 01 60 00 - Product Requirements.
B. Thermometer: ASTM E1, adjustable angle, red appearing mercury, lens front tube, cast
aluminum case with enamel finish, cast aluminum adjustable joint with positive locking device.
1. Size: 9 inch scale.
2. Window: Clear glass.
3. Stem: Brass, 3/4 inch NPT, 3-1/2 inch inch long.
4. Accuracy: 2 percent.
5. Calibration: Degrees F.
2.4 THERMOMETER SUPPORTS
A. Socket: Brass separable sockets for thermometer stems with or without extensions, and with cap
and chain.

KGA Architecture 23 21 16 -5 May 5, 2016
UNLV Wright Hall Laboratory Build Out – 16355.00 Hydronic Piping Specialties
B. Flange: 3 inch outside diameter reversible flange, designed to fasten to sheet metal air ducts,
with brass perforated stem.
2.5 TEST PLUGS1/4 inch NPT or 1/2 inch NPT brass fitting and cap for receiving 1/8 inch outside
diameter pressure or temperature probe with:
1. Neoprene core for temperatures up to 200 degrees F.
2. Nordel core for temperatures up to 350 degrees F.
3. Viton core for temperatures up to 400 degrees F.
2.6 DIAPHRAGM-TYPE EXPANSION TANKS
A. Manufacturers:
1. Armstrong.
2. Dresser Inc./Wheatley.
3. ITT Bell & Gossett.
4. Taco.
5. Substitutions: Section 01 60 00 - Product Requirements. Construction: Welded steel,
tested and stamped in accordance with ASME Section VIII; supplied with National Board
Form U-1, rated for working pressure of 125 psig, with flexible EPDM diaphragm sealed
into tank, and steel support stand.
B. Accessories: Pressure gage and air-charging fitting, tank drain; pre-charge to 12 psig.
C. Automatic Cold Water Fill Assembly: Pressure reducing valve, reduced pressure double check
back flow prevention device, test cocks, strainer, vacuum breaker, and by-pass valves.
2.7 AIR VENTS
A. Manufacturers:
1. Armstrong.
2. Dresser Inc./Wheatley.
3. ITT Bell & Gossett.
4. Taco.
5. Substitutions: Section 01 60 00 - Product Requirements.
B. Manual Type: Short vertical sections of 2 inch diameter pipe to form air chamber, with 1/8 inch
brass needle valve at top of chamber.
C. Float Type:
1. Brass or semi-steel body, copper, polypropylene, or solid non-metallic float, stainless
steel valve and valve seat; suitable for system operating temperature and pressure; with
isolating valve.
2.8 AIR SEPARATORS
A. Manufacturers:
1. Armstrong.
2. Dresser Inc./Wheatley.
3. ITT Bell & Gossett.
4. Taco.
5. Substitutions: Section 01 60 00 - Product Requirements.

KGA Architecture 23 21 16 -6 May 5, 2016
UNLV Wright Hall Laboratory Build Out – 16355.00 Hydronic Piping Specialties
B. In-line Air Separators: Cast iron for sizes 1-1/2 inch and smaller, or steel for sizes 2 inch and
larger; tested and stamped in accordance with ASME Section VIII; for 125 psig operating
pressure.
C. Combination Air Separators/Strainers: Steel, tested and stamped in accordance with ASME
Section VIII; for 125 psig operating pressure, with integral bronze galvanized steel strainer,
tangential inlet and outlet connections, and internal stainless steel air collector tube.
2.9 STRAINERS
A. Size 2 inch and Smaller:
1. Screwed brass or iron body for 175 psig working pressure, Y pattern with 1/32 inch
stainless steel perforated screen.
B. Size 2-1/2 inch to 4 inch:
1. Flanged iron body for 175 psig working pressure, Y pattern with 3/64 inch stainless steel
perforated screen.
C. Size 5 inch and Larger:
1. Flanged iron body for 175 psig working pressure, basket pattern with 1/8 inch stainless
steel perforated screen.
2.10 PUMP SUCTION FITTINGS
A. Manufacturers:
1. Same as associated pump.
2. Substitutions: Not Permitted.
B. Fitting: Angle pattern, cast-iron body. Threaded for 2 inch and smaller, flanged for 2-1/2 inch
and larger. Rated for 175 psig working pressure, with inlet vanes, cylinder strainer with 3/16
inch diameter openings, disposable fine mesh strainer to fit over cylinder strainer, and
permanent magnet located in flow stream and removable for cleaning.
C. Accessories: Adjustable foot support, blow-down tapping in bottom, gage tapping in side.
2.11 COMBINATION PUMP DISCHARGE VALVES
A. Manufacturers:
1. Same as associated pump.
2. Substitutions: Not Permitted.
B. Valves: Straight or angle pattern, flanged cast-iron valve body with bolt-on bonnet for 175 psig
operating pressure, non-slam check valve with spring-loaded bronze disc and seat, stainless
steel stem, and calibrated adjustment permitting flow regulation.
2.12 FLOW CONTROLS
A. Manufacturers:
1. ITT/Bell & Gossett
2. Flow Design, Inc.
3. Griswold Valve and Controls.

KGA Architecture 23 21 16 -7 May 5, 2016
UNLV Wright Hall Laboratory Build Out – 16355.00 Hydronic Piping Specialties
4. Hammond Valve.
5. Milwaukee Valve Company.
6. Nibco.
7. Taco, Inc.
8. Tour & Anderson Hydronics.
9. Substitutions: Section 01 60 00 - Product Requirements.
B. Construction: Brass or bronze body with union on inlet, and outlet, temperature and pressure
test plug on inlet and outlet combination blow-down and back-flush drain.
C. Calibration: Control within 5 percent of design flow over entire operating pressure.
D. Control Mechanism: Stainless steel or nickel plated brass piston or regulator cup, operating
against stainless steel helical or wave formed spring.
E. Accessories: In-line strainer on inlet and ball valve on outlet.
2.13 RELIEF VALVES
A. Manufacturers:
1. Bell & Gossett.
2. Cash Acme.
3. Watts Water Technologies, Inc.
4. Wilkins Operation, A Zurn Company.
B. Bronze body, Teflon seat, stainless steel stem and springs, automatic, direct pressure actuated
capacities ASME certified and labeled.
PART 3 - EXECUTION
3.1 INSTALLATION - THERMOMETERS AND GAGES
A. Install one pressure gage for each pump, locate taps before strainers and on suction and
discharge of pump; pipe to gage.
B. Install gage taps in piping
C. Install pressure gages with pulsation dampers. Provide needle valve or ball valve to isolate each
gage. Extend nipples to allow clearance from insulation.
D. Install thermometers in piping systems in sockets in short couplings. Enlarge pipes smaller than
2-1/2 inches for installation of thermometer sockets. Allow clearance from insulation.
E. Install thermometer sockets adjacent to controls systems thermostat, transmitter, or sensor
sockets.
F. Coil and conceal excess capillary on remote element instruments.
G. Provide instruments with scale ranges selected according to service with largest appropriate
scale.

KGA Architecture 23 21 16 -8 May 5, 2016
UNLV Wright Hall Laboratory Build Out – 16355.00 Hydronic Piping Specialties
H. Install gages and thermometers in locations where they are easily read from normal operating
level. Install vertical to 45 degrees off vertical.
I. Adjust gages and thermometers to final angle, clean windows and lenses, and calibrate to zero.
3.2 INSTALLATION - HYDRONIC PIPING SPECIALTIES
A. Locate test plugs adjacent to control device sockets and as indicated on Drawings.
B. Where large air quantities accumulate, provide enlarged air collection standpipes.
C. Install manual air vents at system high points.
D. For automatic air vents in ceiling spaces or other concealed locations, install vent tubing to
nearest drain.
E. Provide air separator on suction side of system circulation pump and connect to expansion tank.
F. Provide drain and hose connection with valve on strainer blow down connection.
G. Provide pump suction fitting on suction side of base mounted centrifugal pumps. Remove
temporary strainers after cleaning systems and set next to pump for verification.
H. Provide combination pump discharge valve on discharge side of base mounted centrifugal
pumps.
I. Support pump fittings with floor mounted pipe and flange supports.
J. Provide flow control valves on water outlet for heating and cooling coils.
K. Provide relief valves on pressure tanks, low-pressure side of reducing valves, and expansion
tanks.
L. Select system relief valve capacity greater than make-up pressure reducing valve capacity.
Select equipment relief valve capacity to exceed rating of connected equipment.
M. Pipe relief valve outlet to nearest floor drain.
N. Where one line vents several relief valves, make cross sectional area equal to sum of individual
vent areas.
3.3 FIELD QUALITY CONTROL
A. Section 01 40 00 - Quality Requirements: Field inspecting, testing, adjusting, and balancing.
3.4 CLEANING
A. Section 01 70 00 - Execution and Closeout Requirements: Requirements for cleaning.

KGA Architecture 23 21 16 -9 May 5, 2016
UNLV Wright Hall Laboratory Build Out – 16355.00 Hydronic Piping Specialties
3.5 PROTECTION OF INSTALLED CONSTRUCTION
A. Section 01 70 00 - Execution and Closeout Requirements: Requirements for protecting installed
construction.
B. Do not install hydronic pressure gauges until after systems are pressure tested.
END OF SECTION


KGA Architecture 23 31 00 -1 May 5, 2016
UNLV Wright Hall Laboratory Build Out – 16355.00 HVAC Ducts and Casings
SECTION 23 31 00
HVAC DUCTS AND CASINGS
PART 1 - GENERAL
1.1 SUMMARY
A. Section Includes:
1. Duct Materials.
2. Insulated flexible ducts.
3. Single wall spiral round ducts.
4. Chemical laboratory fume hood exhaust ductwork
5. Casings.
6. Ductwork fabrication.
7. Duct cleaning.
B. Related Sections:
1. Section 09 90 00 - Painting and Coating: Execution requirements for Weld priming,
weather resistant, paint or coating specified by this section.
2. Section 23 05 29 - Hangers and Supports for HVAC Piping and Equipment: Product
requirements for hangers, supports and sleeves for placement by this section.
3. Section 23 33 00 - Air Duct Accessories: Product requirements for duct accessories for
placement by this section.
1.2 REFERENCES
A. ASTM International:
1. ASTM A36/A36M - Standard Specification for Carbon Structural Steel.
2. ASTM A90/A90M - Standard Test Method for Weight Mass of Coating on Iron and Steel
Articles with Zinc or Zinc-Alloy Coatings.
3. ASTM A240/A240M - Standard Specification for Chromium and Chromium-Nickel
Stainless Steel Plate, Sheet, and Strip for Pressure Vessels and for General Applications.
4. ASTM A666 - Standard Specification for Annealed or Cold-Worked Austenitic Stainless
Steel Sheet, Strip, Plate, and Flat Bar.
5. ASTM A568/A568M - Standard Specification for Steel, Sheet, Carbon, and High-
Strength, Low-Alloy, Hot-Rolled and Cold-Rolled, General Requirements for.
6. ASTM A653/A653M - Standard Specification for Steel Sheet, Zinc-Coated (Galvanized)
or Zinc-Iron Alloy-Coated (Galvannealed) by the Hot-Dip Process.
7. ASTM A1008/A1008M - Standard Specification for Steel, Sheet, Cold-Rolled, Carbon,
Structural, High-Strength Low-Alloy and High-Strength Low-Alloy with Improved
Formability.
8. A1011/A1011M-07 Standard Specification for Steel, Sheet and Strip, Hot-Rolled,
Carbon, Structural, High-Strength Low-Alloy, High-Strength Low-Alloy with Improved
Formability, and Ultra-High Strength
9. ASTM B209 - Standard Specification for Aluminum and Aluminum-Alloy Sheet and
Plate.
10. ASTM C443 - Standard Specification for Joints for Concrete Pipe and Manholes, Using
Rubber Gaskets.

KGA Architecture 23 31 00 -2 May 5, 2016
UNLV Wright Hall Laboratory Build Out – 16355.00 HVAC Ducts and Casings
11. ASTM E84 - Standard Test Method for Surface Burning Characteristics of Building
Materials.
B. National Fire Protection Association:
1. NFPA 90A - Standard for the Installation of Air Conditioning and Ventilating Systems.
2. NFPA 90B - Standard for the Installation of Warm Air Heating and Air Conditioning
Systems.
C. Sheet Metal and Air Conditioning Contractors:
1. SMACNA - HVAC Air Duct Leakage Test Manual.
2. SMACNA - HVAC Duct Construction Standard - Metal and Flexible.
D. Underwriters Laboratories Inc.:
1. UL 181 - Factory-Made Air Ducts and Connectors.
1.3 PERFORMANCE REQUIREMENTS
A. Variation of duct configuration or sizes other than those of equivalent or lower loss coefficient
is not permitted except by written permission. Size round ducts installed in place of rectangular
ducts in accordance with ASHRAE table of equivalent rectangular and round ducts.
1.4 SUBMITTALS
A. Section 01 33 00 - Submittal Procedures: Submittal procedures.
B. Shop Drawings: Submit duct fabrication drawings, drawn to scale not smaller than 1/8 inch
equals 1 foot, on drawing sheets same size as Contract Documents, indicating:
1. Fabrication, assembly, and installation details, including plans, elevations, sections,
details of components, and attachments to other work.
2. Duct layout, indicating pressure classifications and sizes in plan view. For exhaust duct
systems, indicate classification of materials handled as defined in this section.
3. Fittings.
4. Reinforcing details and spacing.
5. Seam and joint construction details.
6. Penetrations through fire rated and other walls.
7. Terminal unit, coil, and humidifier installations.
8. Hangers and supports, including methods for building attachment, vibration isolation, and
duct attachment.
C. Product Data: Submit data for duct materials duct liner duct connectors.
D. Test Reports: Indicate pressure tests performed. Include date, section tested, test pressure, and
leakage rate, following SMACNA HVAC Air Duct Leakage Test Manual.
1.5 CLOSEOUT SUBMITTALS
A. Section 01 70 00 - Execution and Closeout Requirements: Closeout procedures.
B. Project Record Documents: Record actual locations of ducts and duct fittings. Record changes
in fitting location and type. Show additional fittings used.

KGA Architecture 23 31 00 -3 May 5, 2016
UNLV Wright Hall Laboratory Build Out – 16355.00 HVAC Ducts and Casings
1.6 QUALITY ASSURANCE
A. Perform Work in accordance with SMACNA - HVAC Duct Construction Standards - Metal and
flexible.
B. Construct ductwork to NFPA 90A and NFPA 90B standards.
C. Maintain one copy of each document on site.
1.7 QUALIFICATIONS
A. Manufacturer: Company specializing in manufacturing products specified in this section with
minimum three years documented experience.
B. Installer: Company specializing in performing Work of this section with minimum three years
documented experience approved by manufacturer.
1.8 PRE-INSTALLATION MEETINGS
A. Section 01 30 00 - Administrative Requirements: Pre-installation meeting.
B. Convene minimum one week prior to commencing work of this section.
1.9 ENVIRONMENTAL REQUIREMENTS
A. Section 01 60 00 - Product Requirements.
B. Do not install duct sealant when temperatures are less than those recommended by sealant
manufacturers.
C. Maintain temperatures during and after installation of duct sealant.
1.10 FIELD MEASUREMENTS
A. Verify field measurements prior to fabrication.
1.11 WARRANTY
A. Section 01 70 00 - Execution and Closeout Requirements: Product warranties and product
bonds.
B. Furnish five year manufacturer warranty for ducts.
PART 2 - PRODUCTS
2.1 DUCT MATERIALS
A. Galvanized Steel Ducts: ASTM A653/A653M galvanized steel sheet, lock-forming quality,
having G60 zinc coating of in conformance with ASTM A90/A90M.
B. Steel Ducts: ASTM A1008/A1008M.

KGA Architecture 23 31 00 -4 May 5, 2016
UNLV Wright Hall Laboratory Build Out – 16355.00 HVAC Ducts and Casings
C. Aluminum Ducts: ASTM B209 (ASTM B209M); aluminum sheet, alloy 3003-H14. Aluminum
Connectors and Bar Stock: Alloy 6061-T6 or of equivalent strength.
D. Stainless Steel Ducts: ASTM A240/A240M or ASTM A666, Type 304 or 316.
E. Concrete Ducts: ASTM C14 (ASTM C14M); hub and spigot concrete sewer pipe with ASTM
C443 (ASTM C443M) joints, rubber gaskets.
F. Fasteners: Rivets, bolts, or sheet metal screws.
G. Hanger Rod: ASTM A36/A36M; steel, galvanized; threaded both ends, threaded one end, or
continuously threaded.
2.2 INSULATED FLEXIBLE DUCTS
A. Furnish materials in accordance with Municipality of Clark County standards.
B. Insulation; polyethylene vapor barrier film.
1. Pressure Rating: 10 inches wg (2.50 kPa) positive and 1.0 inches wg (250 Pa) negative.
2. Maximum Velocity: 4000 fpm (20.3 m/s).
3. Temperature Range: -10 degrees F to 160 degrees F (-23 degrees C to 71 degrees C).
4. Thermal Resistance: 4.2 square feet-hour-degree F per BTU (0.7 square meter- degree K
per watt).
2.3 SINGLE WALL SPIRAL ROUND DUCTS
A. Furnish materials in accordance with Municipality of Clark County standards.
B. Product Description: UL 181, Class 1, round spiral lockseam duct constructed of galvanized
steel.
C. Duct Coating: Polyvinyl chloride plastic, 4 mil (0.1 mm) thick on outside and 2 mil (0.05 mm)
thick on inside. Temperature range: minus 30 degrees F (minus 34 degrees C) to 200 degrees F
(93 degrees C).
D. Construct duct with the following minimum gages:
Diameter Gauge
3 inches to 14 inches 26
15 inches to 26 inches 24
28 inches to 36 inches 22
38 inches to 50 inches 20
52 inches to 84 inches 18
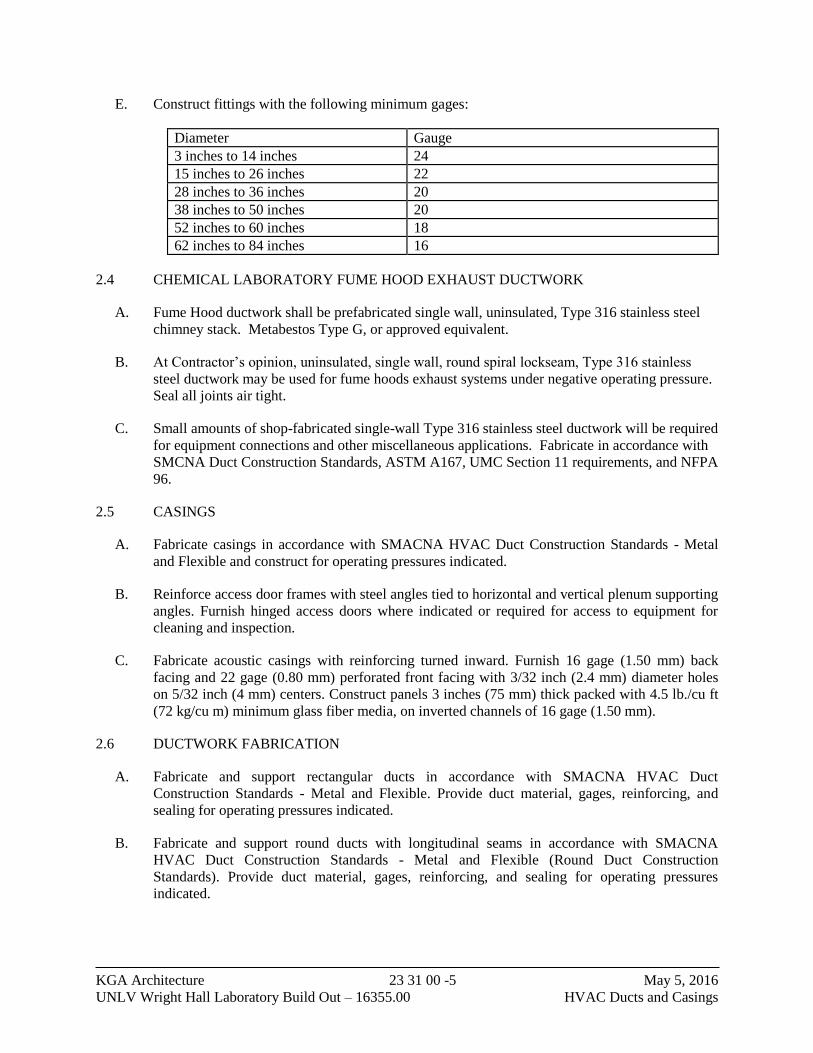
KGA Architecture 23 31 00 -5 May 5, 2016
UNLV Wright Hall Laboratory Build Out – 16355.00 HVAC Ducts and Casings
E. Construct fittings with the following minimum gages:
Diameter Gauge
3 inches to 14 inches 24
15 inches to 26 inches 22
28 inches to 36 inches 20
38 inches to 50 inches 20
52 inches to 60 inches 18
62 inches to 84 inches 16
2.4 CHEMICAL LABORATORY FUME HOOD EXHAUST DUCTWORK
A. Fume Hood ductwork shall be prefabricated single wall, uninsulated, Type 316 stainless steel
chimney stack. Metabestos Type G, or approved equivalent.
B. At Contractor’s opinion, uninsulated, single wall, round spiral lockseam, Type 316 stainless
steel ductwork may be used for fume hoods exhaust systems under negative operating pressure.
Seal all joints air tight.
C. Small amounts of shop-fabricated single-wall Type 316 stainless steel ductwork will be required
for equipment connections and other miscellaneous applications. Fabricate in accordance with
SMCNA Duct Construction Standards, ASTM A167, UMC Section 11 requirements, and NFPA
96.
2.5 CASINGS
A. Fabricate casings in accordance with SMACNA HVAC Duct Construction Standards - Metal
and Flexible and construct for operating pressures indicated.
B. Reinforce access door frames with steel angles tied to horizontal and vertical plenum supporting
angles. Furnish hinged access doors where indicated or required for access to equipment for
cleaning and inspection.
C. Fabricate acoustic casings with reinforcing turned inward. Furnish 16 gage (1.50 mm) back
facing and 22 gage (0.80 mm) perforated front facing with 3/32 inch (2.4 mm) diameter holes
on 5/32 inch (4 mm) centers. Construct panels 3 inches (75 mm) thick packed with 4.5 lb./cu ft
(72 kg/cu m) minimum glass fiber media, on inverted channels of 16 gage (1.50 mm).
2.6 DUCTWORK FABRICATION
A. Fabricate and support rectangular ducts in accordance with SMACNA HVAC Duct
Construction Standards - Metal and Flexible. Provide duct material, gages, reinforcing, and
sealing for operating pressures indicated.
B. Fabricate and support round ducts with longitudinal seams in accordance with SMACNA
HVAC Duct Construction Standards - Metal and Flexible (Round Duct Construction
Standards). Provide duct material, gages, reinforcing, and sealing for operating pressures
indicated.

KGA Architecture 23 31 00 -6 May 5, 2016
UNLV Wright Hall Laboratory Build Out – 16355.00 HVAC Ducts and Casings
C. Construct T's, bends, and elbows with minimum radius 1-1/2 times centerline duct width.
Where not possible and where rectangular elbows are used, provide turning vanes. Where
acoustical lining is indicated, furnish turning vanes of perforated metal with glass fiber
insulation.
D. Increase duct sizes gradually, not exceeding 15 degrees divergence wherever possible;
maximum 30 degrees divergence upstream of equipment and 45 degrees convergence
downstream.
E. Fabricate continuously welded round and oval duct fittings two gages heavier than duct gages
indicated in SMACNA Standard. Minimum 4 inch (100 mm) cemented slip joint, brazed or
electric welded. Prime coat welded joints.
F. Provide standard 45-degree lateral wye takeoffs. When space does not allow 45-degree lateral
wye takeoff, use 90-degree conical tee connections.
G. Seal joints between duct sections and duct seams with welds, gaskets, mastic adhesives, mastic
plus embedded fabric systems, or tape.
1. Sealants, Mastics and Tapes: Conform to UL 181A. Provide products bearing
appropriate UL 181A markings.
2. Do not provide sealing products not bearing UL approval markings.
PART 3 - EXECUTION
3.1 EXAMINATION
A. Section 01 30 00 - Administrative Requirements: Coordination and project conditions.
B. Verify sizes of equipment connections before fabricating transitions.
3.2 INSTALLATION
A. Install and seal ducts in accordance with SMACNA HVAC Duct Construction Standards -
Metal and Flexible.
B. During construction, install temporary closures of metal or taped polyethylene on open
ductwork to prevent construction dust from entering ductwork system.
C. Use crimp joints with or without bead or beaded sleeve couplings for joining round duct sizes 8
inch (200 mm) and smaller.
D. Install duct hangers and supports in accordance with Section 23 05 29.
E. Use double nuts and lock washers on threaded rod supports.
F. Connect flexible ducts to metal ducts with liquid adhesive plus tape.
G. Set plenum doors 6 to 12 inches (150 to 300 mm) above floor. Arrange door swing so fan static
pressure holds door in closed position.

KGA Architecture 23 31 00 -7 May 5, 2016
UNLV Wright Hall Laboratory Build Out – 16355.00 HVAC Ducts and Casings
H. Exhaust Outlet Locations:
1. Minimum Distance from Property Lines: 3 feet (914 mm).
2. Minimum Distance from Building Openings: 3 feet (914 mm).
3. Minimum Distance from Outside Air Intakes: 10 feet (3048 mm).
3.3 INTERFACE WITH OTHER PRODUCTS
A. Install openings in ductwork where required to accommodate thermometers and controllers.
Install pitot tube openings for testing of systems. Install pitot tube complete with metal can with
spring device or screw to prevent air leakage. Where openings are provided in insulated
ductwork, install insulation material inside metal ring.
B. Connect diffusers or light troffer boots to low pressure ducts directly or with 5 feet (1.5 m)
maximum length of flexible duct held in place with strap or clamp.
C. Connect air outlets and inlets to supply ducts directly or with five foot (1.5 m) maximum length
of flexible duct. Do not use flexible duct to change direction.
3.4 CLEANING
A. Section 01 70 00 - Execution and Closeout Requirements: Final cleaning.
B. Clean duct system and force air at high velocity through duct to remove accumulated dust. To
obtain sufficient air flow, clean one half of system completely before proceeding to other half.
Protect equipment with potential to be harmed by excessive dirt with temporary filters, or
bypass during cleaning.
C. Clean duct systems with high power vacuum machines. Protect equipment with potential to be
harmed by excessive dirt with filters, or bypass during cleaning. Install access openings into
ductwork for cleaning purposes.
3.5 TESTING
A. For ductwork designed for 3 inches w.c. above ambient, pressure test minimum 25 percent of
ductwork after duct cleaning, but before duct insulation is applied or ductwork is concealed.
1. Test in accordance with SMACNA HVAC Air Duct Leakage Test Manual.
2. Maximum Allowable Leakage: In accordance with ICC IECC.
END OF SECTION


KGA Architecture 23 33 00 -1 May 5, 2016
UNLV Wright Hall Laboratory Build Out – 16355.00 Air Duct Accessories
SECTION 23 33 00
AIR DUCT ACCESSORIES
PART 1 - GENERAL
1.1 SUMMARY
A. Section Includes:
1. Back-draft dampers.
2. Fire dampers.
3. Combination fire and smoke dampers.
4. Volume control dampers.
5. Flexible duct connections.
B. Related Sections:
1. Section 23 09 00 - Instrumentation and Control for HVAC: Execution and Product
requirements for connection and control of Combination Smoke and Fire Dampers for
placement by this section.
2. Section 23 09 23 - Direct-Digital Control System for HVAC: Execution and Product
requirements for connection and control of Combination Smoke and Fire Dampers for
placement by this section.
3. Section 23 09 53 - Pneumatic and Electric Control System for HVAC: Execution and
Product requirements for connection and control of Combination Smoke and Fire
Dampers for placement by this section.
4. Section 23 31 00 - HVAC Ducts and Casings: Requirements for duct construction and
pressure classifications.
5. Section 26 05 03 - Equipment Wiring Connections: Execution requirements for
connection of electrical Combination Smoke and Fire Dampers specified by this section.
1.2 REFERENCES
A. Air Movement and Control Association International, Inc.:
1. AMCA 500 - Test Methods for Louvers, Dampers, and Shutters.
B. ASTM International:
1. ASTM E1 - Standard Specification for ASTM Thermometers.
C. National Fire Protection Association:
1. NFPA 90A - Standard for the Installation of Air Conditioning and Ventilating Systems.
2. NFPA 92A - Recommended Practice for Smoke-Control Systems.
D. Sheet Metal and Air Conditioning Contractors:
1. SMACNA - HVAC Duct Construction Standard - Metal and Flexible.
E. Underwriters Laboratories Inc.:
1. UL 555 - Standard for Safety for Fire Dampers.
2. UL 555C - Standard for Safety for Ceiling Dampers.
3. UL 555S - Standard for Safety for Smoke Dampers.

KGA Architecture 23 33 00 -2 May 5, 2016
UNLV Wright Hall Laboratory Build Out – 16355.00 Air Duct Accessories
1.3 SUBMITTALS
A. Section 01 33 00 - Submittal Procedures: Submittal procedures.
B. Shop Drawings: Indicate for shop fabricated assemblies including volume control dampers.
C. Product Data: Submit data for shop fabricated assemblies and hardware used.
D. Product Data: Submit for the following. Include where applicable electrical characteristics and
connection requirements.
1. Backdraft dampers.
2. Flexible duct connections.
3. Volume control dampers.
4. Duct test holes.
E. Manufacturer's Certificate: Certify products meet or exceed specified requirements.
1.4 CLOSEOUT SUBMITTALS
A. Section 01 70 00 - Execution and Closeout Requirements: Closeout procedures.
1.5 QUALITY ASSURANCE
A. Dampers tested, rated and labeled in accordance with the latest UL requirements.
B. Damper pressure drop ratings based on tests and procedures performed in accordance with
AMCA 500.
C. Perform Work in accordance with Municipality of Clark County standard.
D. Maintain one copy of each document on site.
1.6 QUALIFICATIONS
A. Manufacturer: Company specializing in manufacturing products specified in this section with
minimum three years documented experience.
1.7 PRE-INSTALLATION MEETINGS
A. Section 01 30 00 - Administrative Requirements: Pre-installation meeting.
1.8 DELIVERY, STORAGE, AND HANDLING
A. Section 01 60 00 - Product Requirements: Product storage and handling requirements.
B. Protect dampers from damage to operating linkages and blades.
C. Delivery: Deliver materials to site in manufacturer's original, unopened containers and
packaging, with labels clearly indicating manufacturer and material.
D. Storage: Store materials in a dry area indoor, protected from damage.

KGA Architecture 23 33 00 -3 May 5, 2016
UNLV Wright Hall Laboratory Build Out – 16355.00 Air Duct Accessories
E. Handling: Handle and lift dampers in accordance with manufacturer's instructions. Protect
materials and finishes during handling and installation to prevent damage.
1.9 FIELD MEASUREMENTS
A. Verify field measurements prior to fabrication.
1.10 COORDINATION
A. Section 01 30 00 - Administrative Requirements: Coordination and project conditions.
B. Coordinate Work where appropriate with building control Work.
1.11 WARRANTY
A. Section 01 70 00 - Execution and Closeout Requirements: Product warranties and product
bonds.
B. Furnish five year manufacturer warranty for duct accessories.
1.12 EXTRA MATERIALS
A. Section 01 70 00 - Execution and Closeout Requirements: Spare parts and maintenance
products.
PART 2 - PRODUCTS
2.1 BACK-DRAFT DAMPERS
A. Perform Work in accordance with Municipality of Clark County standard.
B. Product Description: Multi-Blade, back-draft dampers: Parallel-action, gravity-balanced,
Galvanized 16 gage (1.5 mm) thick steel, or extruded aluminum. Blades, maximum 6 inch (150
mm) width,, with felt or flexible vinyl sealed edges. Blades linked together in rattle-free manner
with 90-degree stop, steel ball bearings, and plated steel pivot pin. Furnish dampers with
adjustment device to permit setting for varying differential static pressure.
2.2 FIRE DAMPERS
A. Type: Static; rated and labeled according to UL 555.
B. Closing rating in ducts up to 4-inch wg (1-kPa) static pressure class and minimum 2000-fpm
(10-m/s) velocity.
C. Fire Rating: 1-1/2 hours.
D. Frame: Curtain type with blades inside airstream; fabricated with roll-formed, 0.034-inch-
(0.85-mm-) thick galvanized steel; with mitered and interlocking corners.

KGA Architecture 23 33 00 -4 May 5, 2016
UNLV Wright Hall Laboratory Build Out – 16355.00 Air Duct Accessories
E. Mounting Sleeve: Factory- or field-installed, galvanized sheet steel.
1. Minimum Thickness: 0.05 (1.3 mm) thick, as indicated, and of length to suit application.
2. Exception: Omit sleeve where damper-frame width permits direct attachment of
perimeter mounting angles on each side of wall or floor; thickness of damper frame must
comply with sleeve requirements.
F. Mounting Orientation: Vertical or horizontal as indicated.
G. Blades: Roll-formed, interlocking, 0.024-inch- (0.61-mm) thick, galvanized sheet steel. In
place of interlocking blades, use full-length, 0.034-inch- (0.85-mm-) thick, galvanized-steel
blade connectors.
H. Horizontal Dampers: Include blade lock and stainless-steel closure spring.
I. Heat-Responsive Device: Replaceable, 165 deg F (74 deg C rated, fusible links.
J. Heat-Responsive Device: Electric link and switch package, factory installed, 165 deg F (74
deg C) rated.
2.3 COMBINATION FIRE AND SMOKE DAMPERS
A. Type: Dynamic; rated and labeled according to UL 555 and UL 555S by an NRTL.
B. Closing rating in ducts up to 4-inch wg (1-kPa) static pressure class and minimum 2000-fpm
(10-m/s) velocity.
C. Fire Rating: 1-1/2 and 3 hours.
D. Frame: Hat-shaped, 0.094-inch- (2.4-mm-) thick, galvanized sheet steel, with welded
corners and mounting flange.
E. Heat-Responsive Device: Resettable, 165 deg F (74 deg C) rated, fusible links.
F. Heat-Responsive Device: Electric resettable link and switch package, factory installed, rated.
G. Smoke Detector: Integral, factory wired for single-point connection.
H. Blades: Roll-formed, horizontal, interlocking, 0.063-inch- (1.6-mm-) thick, galvanized sheet
steel.
I. Leakage: Class I.
J. Rated pressure and velocity to exceed design airflow conditions.
K. Mounting Sleeve: Factory-installed, 0.039-inch- (1.0-mm-) thick, galvanized sheet steel; length
to suit wall or floor application.
L. Master control panel for use in dynamic smoke-management systems.
M. Damper Motors: Modulating or two-position action.

KGA Architecture 23 33 00 -5 May 5, 2016
UNLV Wright Hall Laboratory Build Out – 16355.00 Air Duct Accessories
N. Comply with NEMA designation, temperature rating, service factor, enclosure type, and
efficiency requirements for motors specified in Section 230513 "Common Motor Requirements
for HVAC Equipment."
1. Motor Sizes: Minimum size as indicated. If not indicated, large enough so driven load
will not require motor to operate in service factor range above 1.0.
2. Controllers, Electrical Devices, and Wiring: Comply with requirements for electrical
devices and connections specified in Section 230923 "Direct Digital Control (DDC)
System for HVAC."
3. Permanent-Split-Capacitor or Shaded-Pole Motors: With oil-immersed and sealed gear
trains.
4. Spring-Return Motors: Equip with an integral spiral-spring mechanism where indicated.
Enclose entire spring mechanism in a removable housing designed for service or
adjustments. Size for running torque rating of 150 in. x lbf (17 N x m) and breakaway
torque rating of 150 in. x lbf (17 N x m).
5. Outdoor Motors and Motors in Outdoor-Air Intakes: Equip with O-ring gaskets designed
to make motors weatherproof. Equip motors with internal heaters to permit normal
operation at minus 40 deg F (minus 40 deg C).
6. Nonspring-Return Motors: For dampers larger than 25 sq. ft. (2.3 sq. m), size motor for
running torque rating of 150 in. x lbf (17 N x m) and breakaway torque rating of 300 in. x
lbf (34 N x m).
7. Electrical Connection: 115 V, single phase, 60 Hz.
O. Accessories:
1. Auxiliary switches for signaling fan control or position indication – To match existing.
2. Test and reset switches, damper remote mounted.
2.4 VOLUME CONTROL DAMPERS
A. Furnish materials in accordance with Municipality of Clark County standards.
B. Fabricate in accordance with SMACNA HVAC Duct Construction Standards - Metal and
Flexible, and as indicated on Drawings.
C. Splitter Dampers:
1. Material: Same gage as duct to 24 inches (600 mm) size in both dimensions, and two
gages heavier for sizes over 24 inches (600 mm).
2. Blade: Fabricate of double thickness sheet metal to streamline shape, secured with
continuous hinge or rod.
3. Operator: Minimum 1/4 inch (6 mm) diameter rod in self aligning, universal joint action,
flanged bushing with set screw.
4. Single Blade Dampers: Fabricate for duct sizes up to 6 x 30 inch (150 x 760 mm).
D. Multi-Blade Damper: Fabricate of opposed blade pattern with maximum blade sizes 8 x 72 inch
(200 x 1825 mm). Assemble center and edge crimped blades in prime coated or galvanized
frame channel with suitable hardware.
E. End Bearings: Except in round ductwork 12 inches (300 mm) and smaller, furnish end bearings.
On multiple blade dampers, furnish oil-impregnated nylon or sintered bronze bearings. Furnish
closed end bearings on ducts having pressure classification over 2 inches wg 500 Pa.

KGA Architecture 23 33 00 -6 May 5, 2016
UNLV Wright Hall Laboratory Build Out – 16355.00 Air Duct Accessories
F. Quadrants:
1. Furnish locking, indicating quadrant regulators on single and multi-blade dampers.
2. On insulated ducts mount quadrant regulators on standoff mounting brackets, bases, or
adapters.
3. Where rod lengths exceed 30 inches (750 mm) furnish regulator at both ends.
2.5 FLEXIBLE DUCT CONNECTIONS
A. Furnish materials in accordance with Municipality of Clark County standards.
B. Fabricate in accordance with SMACNA HVAC Duct Construction Standards - Metal and
Flexible, and as indicated on Drawings.
C. Connector: Fabric crimped into metal edging strip.
1. Fabric: UL listed fire-retardant neoprene coated woven glass fiber fabric conforming to
NFPA 90A, minimum density 30 oz per sq yd (1.0 kg/sq m).
2. Net Fabric Width: Approximately 3 inches (50 mm) wide.
3. Metal: 3 inch (75 mm) wide, 24 gage (0.6 mm thick) galvanized steel.
D. Attenuation in 10 to 10,000 Hz range.
PART 3 - EXECUTION
3.1 EXAMINATION
A. Section 01 30 00 - Administrative Requirements: Coordination and project conditions.
B. Verify rated walls are ready for fire damper installation.
C. Verify ducts and equipment installation are ready for accessories.
D. Check location of air outlets and inlets and make necessary adjustments in position to conform
to architectural features, symmetry, and lighting arrangement.
3.2 INSTALLATION.
A. Install in accordance with NFPA 90A, and follow SMACNA HVAC Duct Construction
Standards - Metal and Flexible. Refer to Section 23 31 00 for duct construction and pressure
class.
B. Install back-draft dampers on exhaust fans or exhaust ducts nearest to outside and where
indicated on Drawings.
1. Mark access doors for fire and smoke dampers on outside surface, with minimum 1/2
inch high letters reading: FIRE/SMOKE DAMPER, SMOKE DAMPER, OR FIRE
DAMPER.
C. Install temporary duct test holes where indicated on Drawings and required for testing and
balancing purposes. Cut or drill in ducts. Cap with neat patches, neoprene plugs, threaded plugs,
or threaded or twist-on metal caps.

KGA Architecture 23 33 00 -7 May 5, 2016
UNLV Wright Hall Laboratory Build Out – 16355.00 Air Duct Accessories
3.3 DEMONSTRATION
A. Section 01 70 00 - Execution and Closeout Requirements: Requirements for demonstration and
training.
B. Demonstrate re-setting of fire dampers to Owner's representative.
END OF SECTION


KGA Architecture 23 37 00 -1 May 5, 2016
UNLV Wright Hall Laboratory Build Out – 16355.00 Air Outlets and Inlets
SECTION 23 37 00
AIR OUTLETS AND INLETS
PART 1 - GENERAL
1.1 WORK INCLUDED
A. Diffusers.
B. Diffuser boots.
C. Grilles.
D. Louvers.
1.2 RELATED WORK
A. Section 09 90 00 - Painting: Painting of ductwork visible behind outlets and inlets.
1.3 REFERENCES
A. ADC 1062 - Certification, Rating and Test Manual.
B. AMCA 500 - Test Method for Louvers, Dampers and Shutters.
C. ANSI/NFPA 90A - Installation of Air Conditioning and Ventilating Systems.
D. ARI 650 - Air Outlets and Inlets.
E. ASHRAE 70 - Method of Testing for Rating the Air Flow Performance of Outlets and Inlets.
F. SMACNA - Duct Construction Standard.
1.4 QUALITY ASSURANCE
A. Test and rate performance of air outlets and inlets in accordance with ANSI/ASHRAE 70 -
1991.
B. Test and rate performance of louvers in accordance with AMCA 500.
1.5 REGULATORY REQUIREMENTS
A. Conform to ANSI/NFPA 90A.
1.6 SUBMITTALS
A. Submit product data under provisions of Section 01 33 00.
B. Provide product data for items required for this project.

KGA Architecture 23 37 00 -2 May 5, 2016
UNLV Wright Hall Laboratory Build Out – 16355.00 Air Outlets and Inlets
C. Submit schedule of outlets and inlets indicating type, size, location, application, and noise level.
D. Review requirements of outlets and inlets as to size, finish, and type of mounting prior to
submitting product data and schedules of outlets and inlets.
E. Submit manufacturer's installation instructions under provisions of Section 01 33 00.
PART 2 - PRODUCTS
2.1 ACCEPTABLE MANUFACTURERS - CEILING DIFFUSERS
A. Anemostat.
B. Kruger.
C. Titus.
D. E.H. Price.
E. MetalAire.
F. Substitutions: Under provisions of Section 01 60 00.
2.2 RECTANGULAR CEILING DIFFUSERS
A. Rectangular, adjustable pattern, stamped, cone type diffuser to discharge air in 360 degree
pattern with sectorizing baffles where indicated.
B. Provide surface mount inverted T-bar type frame as required. In plaster ceilings, provide plaster
frame and ceiling frame.
C. Fabricate of steel with baked enamel white.
2.3 CEILING GRID CORE EXHAUST AND RETURN REGISTERS/GRILLES
A. Fixed grilles of ½ x ½ x 1 inch louvers.
B. Fabricate 1-1/4 inch (32 mm) margin frame with countersunk screw mounting or lay-in frame
for suspended grid ceilings.
C. Fabricate of aluminum with factory baked enamel finish.
2.4 ACCEPTABLE MANUFACTURERS - WALL REGISTERS/GRILLES
A. Anemostat.
B. Kruger.
C. Titus.
D. E.H. Price.

KGA Architecture 23 37 00 -3 May 5, 2016
UNLV Wright Hall Laboratory Build Out – 16355.00 Air Outlets and Inlets
E. MetalAire.
F. Substitutions: Under provisions of Section 01 60 00.
2.5 WALL SUPPLY REGISTERS/GRILLES
A. Streamlined reversible blades, depth of which exceeds 1/4 inch (19 mm) maximum spacing with
removable core to set pattern.
B. Fabricate 1-1/4 inch (32 mm) margin frame with countersunk screw mounting and gasket.
C. Fabricate of extruded aluminum with 20 gage (0.90 mm) minimum frames and 22 gage (0.80
mm) minimum blades.
2.6 ACCEPTABLE MANUFACTURERS – DUCT MOUNTED SUPPLY GRILLES
A. Anemostat.
B. Kruger.
C. Titus.
D. E.H. Price.
E. MetalAire.
F. Substitutions: Under provisions of Section 01 60 00.
2.7 DUCT MOUNTED SUPPLY GRILLES
A. Duct mounted supply grilles for rectangular ducts shall be similar to the wall mounted supply
register/grilles described above.
B. Duct mounted supply registers/grilles for round ducts shall be double deflection type having
individually adjustable blades on ¾” centers with pivots constructed 0.030” to 0.035” thick
extruded aluminum. The frame shall be constructed of 0.05)” to 0.062” thick extruded
aluminum with countersunk screw holes. The grille frame shall have a gasket to minimize air
leakage. The end caps shall be curved to match the diameter of the duct. Standard flat grilles
attached to saddle taps of form fitting foam end caps shall not be acceptable.
2.8 WALL EXHAUST AND RETURN REGISTERS/GRILLES
A. Streamlined blades, depth of which exceeds 3/4 inch (19 mm) spacing, with spring or other
device to set blades, vertical horizontal face.
B. Fabricate 1-1/4 inch (32 mm) margin frame with countersunk screw mounting.
C. Fabricate of steel with 20 gage (0.90 mm) minimum frames and 22 gage (0.80 mm) minimum
blades with factory baked enamel finish.
D. In gymnasiums, blades shall be front pivoted, welded in place, or securely fastened to be
immobile.

KGA Architecture 23 37 00 -4 May 5, 2016
UNLV Wright Hall Laboratory Build Out – 16355.00 Air Outlets and Inlets
2.9 ACCEPTABLE MANUFACTURERS - LOUVERS
A. American Warming and Ventilating.
B. Cesco Products.
C. Greenheck.
D. Industrial Louvers, Inc.
E. Ruskin Co.
F. Safe-Air/Dowco
G. Substitutions: Under provisions of Section 01 60 00.
2.10 LOUVERS
A. Provide 4 inch deep louvers as shown on drawings with blades on 45 degree slope, heavy
channel frame, birdscreen with ½ inch (13 mm) square mesh.
B. Fabricate of 16 gage galvanized steel, welded assembly, with paint grip finish suitable for field
painting.
C. Furnish with exterior flat flange as required or masonry strap anchors for installation.
PART 3 - EXECUTION
3.1 INSTALLATION
A. Install items in accordance with manufacturers' instructions.
B. Check location of outlets and inlets and make necessary adjustments in position to conform to
architectural features, symmetry, and lighting arrangement. Refer to Section 09 90 00.
C. Install diffusers to ductwork with air tight connection.
D. Provide balancing dampers on duct take-off to diffusers, grilles and registers, regardless of
whether dampers are specified as part of the diffuser, or grille and register assembly.
E. Paint ductwork visible behind air outlets and inlets matte black. Refer to Section 09 90 00.
F. Protect primer finish on louvers to allow paint adhesion after installation.
END OF SECTION

KGA Architecture 23 96 00 -1 May 5, 2016
UNLV Wright Hall Laboratory Build Out – 16355.00 Laboratory Control System
SECTION 23 96 00
LABORATORY CONTROL SYSTEM
(VOLUMETRIC OFFSET)
PART 1 - GENERAL
1.1 DESCRIPTION
A. Systems and equipment other than by Triatek shall only be considered for acceptance provided
that the substituted equipment be equal in every respect to the operational characteristics,
capacities, and intent of control sequence specified herein, and substituted laboratory control
manufacturer can demonstrate that the user safety, diversity, the sizing of the duct work, fans,
and energy costs will not be impacted by substitution. The alternate supplier will submit 20 days
prior to bid, a letter of compliance signed by a corporate officer of the lab system manufacturer
certifying compliance or non-compliance. It shall include the section, paragraph and
subparagraph of these specifications with direct statements to indicate compliance or non-
compliance. For all areas of non-compliance the alternate supplier will describe what specific
alternative approach has been taken.
B. A complete technical proposal of any alternate laboratory control system must be submitted
with the compliance schedule described above. It shall include but not limited to: project
specific sequence of operation and project specific lab control drawings, product data sheets,
dimensional information, independent system performance data, submittal data, operation and
maintenance manuals and installation information. This proposal is separate from any Lab
control system sales engineering binder and a sales engineering binder will not be accepted as a
technical proposal.
C. The plans and specifications for the laboratory control system and sizing of the air
delivery system, heating and cooling capacities, and diversity have been based on systems and
equipment as manufactured by Triatek LLC.
1.2 ACCEPTABLE MANUFACTURERS
A. Triatek, LLC.
1.3 WARRANTY PERIOD
A. Warranty shall commence upon the date of shipment and extend for a period of twenty four
(24) months whereupon any defects in materials or performance shall be remedied by the
supplier at no cost to the owner.
1.4 SYSTEM PERFORMANCE REQUIREMENTS
A. The laboratory airflow system shall be fully stand-alone for each individual laboratory.
B. The system shall not use or rely on information from controllers in other laboratory areas to
control the functions within the laboratory.

KGA Architecture 23 96 00 -2 May 5, 2016
UNLV Wright Hall Laboratory Build Out – 16355.00 Laboratory Control System
C. The laboratory airflow control system shall employ individual Face Velocity controllers that
directly measure the fume hood sash opening and face velocity to control the hoods in a
variable volume mode to maintain a constant face velocity over a minimum range of 10% to
100% at full sash opening. Safety and energy savings shall be assured through a corresponding
minimum change in exhaust flow from 5 to 1. The response time to vary the exhaust valves
feedback signal to within 90% of the final set-point shall be no more than 1 second
D. The laboratory venturi valves shall respond and maintain specific airflow (+/-5% of signal)
within one second of change in duct pressure irrespective of the magnitude of pressure change
between 0.6”~3.0”W.C.
E. The laboratory control system shall maintain intersystem stability within one second of a
change in pressure and /or flow to eliminate hunting, system oscillations, and crosstalk between
airflow controllers. This shall be achieved by exclusively using mechanically, pressure
independent venturi valves at all terminal locations for critical environments.
F. The laboratory airflow control system shall use volumetric offset control to maintain room
pressurization (negative or positive) within one second of a change in room/system
conditions.
G. The laboratory airflow control system shall employ highly accurate airflow control venturi
valves, (+/- 5% of signal) with a minimum 8 to 1 turndown to insure accurate pressurization at
low airflows and guarantee the maximum system diversity and energyefficiency.
H. Non-venturi valve terminal devices (VAV boxes or bladder valves) are not an acceptable
alternative.
1.5 FUME HOOD CONTROLLER
A. The Fume Hood Controllers (Triatek HMS-1655L) shall be a LONTALK microprocessor based
digital controller and shall be capable of measuring the face velocity of fume hood airflows. It
shall have a standard calibration range of 0-200 FPM. Hood Controller shall be factory
calibrated with NIST traceable standards and shall have an accuracy of ± 2 FPM.
B. The Fume Hood Controller shall provide immediate response to sash position changes. The
velocity sensor and controller will also override the sash sensor command if the face velocity
drops a fixed percentage (user selectable) below the set-point (i.e. a set-point of 100 with
override if the velocity drops below 70 FPM), which can be caused by lab personnel past the
fume hood or other factors. It shall alarm out-of-spec face velocities, be too high or too low,
and shall modulate the hood exhaust to maintain the desired set-point, usually set to 100
FPM (60 FPM stand-by/unoccupied).
C. The Fume Hood Controller shall have a Color-Graphic LCD Touch screen capable of showing
actual face velocity readings in FPM or in metric units up to five digits. Systems that use a
hood controller to display the calculated velocity from a sash sensor and a valve pot signal shall
be unacceptable. Where other variables are displayed on the additional display lines included
with the controller, each of these shall provide means to include up to an eight-character
descriptor.

KGA Architecture 23 96 00 -3 May 5, 2016
UNLV Wright Hall Laboratory Build Out – 16355.00 Laboratory Control System
D. The Fume Hood Controller shall have four (4) precision analog outputs derived from twelve
(12) bit conversion and true floating point math functions. The outputs shall be field-selectable
as either a linear signal directly relating to face velocity or as a PID control output. The
output shall be vdc. The outputs shall be field-scalable to provide the exact offset and span
required to yield the best operating results, e.g., compressed span for quick operation.
E. The Fume Hood Controller shall have four (4) precision analog inputs. The inputs shall have
twelve (12) bit analog-to-digital conversion and be processed using true floating point math
functions to provide maximum scaling accuracy. One of input shall be dedicated to the sash
sensor and another shall be dedicated for the velocity sensor. It shall also be field scalable to
standard input signals including 4-20 madc, 0-5vdc, or 0-10vdc.
F. The Fume Hood Controller shall have four (4) digital inputs. One input shall be used, for an
occupancy detection sensor input to sense lab personnel in front of or in near proximity to the
hood. Another input may be used for an exhaust detector circuit or for energy saving automatic
shutdown used during off-use periods. The occupancy shall provide for an adjustable time
delay (From the Operator’s Display or by the BMS) from 30 seconds to 20 minutes. The sensor
shall use Passive Infrared Detectors in combination with a Fresnel lens.
G. The Fume Hood Controller shall have both audible and visual alarms having adjustable set-
points. Alarm sequence shall be such that face velocity readings and alarm status lights have
instantaneous response to insufficient and excessive face velocity. Audible alarm shall have a
programmable time delay that has a resolution of one second to provide a time lag before the
audible alarm is activated. This programmable delay shall be adjustable from instantaneous (no
delay) to at least 3600 seconds in one-second increments. The ALARM SILENCE keypad on
the face of the controller shall be used to silence the audible alarm. Dual alarm output relays
shall be furnished to transmit alarms to remote monitoring equipment. Both alarm output
relays shall have user adjustable low and high alarm set-points and shall be individually
adjustable. The laboratory control system manufacturer shall provide a direct velocity
measuring monitor [not a calculated value from a sash sensor and valve feedback
potentiometer] to meet ANSI/AIHA Z 9.5. Alarm annunciation shall be menu selectable by the
user for Automatic Reset or Manual Reset. Under Automatic Reset any alarm condition sensed
after the time delay will be reset automatically when the alarm condition goes away and
adequate face velocity has been restored. That is, the alarm is not latched in and the alarms
shall be annunciated only as long as the alarm condition exists. Under Manual Reset any
alarm condition sensed after the time delay will be latched on and held, even after the face
velocity has returned to normal, until someone manually resets it by depressing the alarm
silence keypad on the face of the controller. This will allow for logging of the alarm when it is
reset. In either Automatic or Manual Reset the audible alarm can be acknowledged, or
silenced, at any time, leaving the visual alarm to reflect the actual face velocity status. Dual
adjustable alarm output relays shall be SPDT and shall be rated at 1.0A @ 30VDC/VAC.
H. The Fume Hood Controller shall have four face velocity status indications that have adjustable
ON and OFF set-points. These shall have colors of blue, green, amber, and red indicating
STAND-BY, NORMAL, CAUTION, and ALARM condition, respectively. When an alarm
condition is detected by the HMS-1650L, the alarm audible alert shall sound until the screen is
touched, and the screen will stay Red as long as the alarm condition persists.
I. The Fume Hood Controller shall have all set-points stored in nonvolatile memory to avoid any
loss of information when the power is restored.
KGA Architecture 23 96 00 -4 May 5, 2016
UNLV Wright Hall Laboratory Build Out – 16355.00 Laboratory Control System
1.6. AIRFLOW CONTROL DEVICE – GENERAL
A. The airflow control device shall be a venturi valve.
B. Valve body shall be formed in a venturi configuration to produce smooth variation in delivered
airflow control. Valve shall be pressure independent over a span of 0.6 to 3 in.wg. pressure
drop across the valve without means of external monitoring devices such as mechanical volume
regulators, flow control tubing or duct static measuring devices.
C. All valves shall be factory calibrated and the CFM modulation range factory set for the
maximum and minimum indicated on the schedule. Pressure independent response to changes
in duct static shall be no greater than one second to maintain the set airflow. Airflow accuracy
shall be within five percent of reading. Airflow turndown ratio shall be no less than eight to
one. The CFM setting shall be capable of being field adjusted by means of an external
calibrated dial. At any given CFM setting, from minimum to maximum CFM, the valve shall
require no periodic maintenance.
D. The airflow control device shall be constructed of one of the following two types:
1. Supply Valves and General Exhaust Valves - Valve housing shall be constructed of 14
gauge aluminum with internal components of aluminum and stainless steel. Critical
moving parts shall use Teflon® bushings for reduced friction, smooth operation and
extended life. Internal moving parts shall be constructed of 316 stainless steel, except
aluminum body valves shall have its cone constructed of aluminum. Valve body shall be
formed in a venturi configuration to produce smooth variation in delivered airflow
control. All supply devices shall be externally pre-insulated at the factory.
2. Hazardous Area Exhaust Valves - Valves shall be manufactured with Heresite or Kynar
coated aluminum body and cone or 316L stainless steel construction. Critical moving
parts shall use Teflon® bushings for reduced friction, smooth operation and extended life.
Internal moving parts shall be constructed of 316L stainless steel. Valve body shall be
formed in a venturi configuration to produce smooth variation in delivered airflow
control.
E. All variable volume valves shall be equipped with an electronic actuator furnished by the valve
manufacturer and mounted on the valve and set up by the valve manufacturer. The actuator
shall be powered by a 24 VAC transformer supplied by the manufacturer. The electronic
actuator shall be controlled by a 4 to 20 mA input (across a precision 500-Ohm resistor,
supplied) or a 2 to 10 VDC input signal. The valve manufacturer must be able to supply
electronic actuators that can operate over the full range of the valve in 3 seconds maximum
stroke time.
1.7. TWO POSITION EXHAUST AIRFLOW CONTROL DEVICE
A. The airflow control device shall maintain a factory calibrated fixed maximum and
minimum flow set-point based on a switched 0-10V signal. Two position devices
requiring feedback shall generate a 0-10V feedback signal that is linearly proportional to
its airflow.
1.8. LABORATORY AIRFLOW CONTROL DEVICE
A. The airflow control device shall maintain a temperature set-point by controlling the airflow and
the hot water reheat valve in response to a room temperature sensor.
KGA Architecture 23 96 00 -5 May 5, 2016
UNLV Wright Hall Laboratory Build Out – 16355.00 Laboratory Control System
1.9. CONSTANT VOLUME AIRFLOW CONTROL DEVICE
A. The airflow control device shall maintain a constant airflow set-point. It shall be factory
calibrated and set for the desired airflow. It shall also be capable of field adjustment for
future changes in desired airflow.
1.10. VAV-1000L VOLUMETRIC OFFSET CONTROLLER
A. The valve controller shall use closed loop control to regulate air volume for the hood exhaust,
general exhaust and make-up air linearly proportional to a 0-10 volt control signal. The valve
shall generate a 0-10volt feedback signal linearly proportional to its airflow for internal volume
control, DDC monitoring, or airflow tracking control.
B. Each individual laboratory as designated shall have dedicated volumetric controllers (Triatek
VAV-1000L). The VAV-1000L controller shall be a microprocessor based digital controller.
As a minimum, provide one complete stand-alone laboratory control unit per laboratory.
C. The control unit(s) shall be designed with analog and digital Inputs/Outputs. The inputs shall
accept signals proportional to the fume hood exhaust, general exhaust, supply and other
auxiliary airflows. The output signals shall control supply valves, general exhaust valves and
fume hood valves, reheat valves, etc.
D. The control unit shall maintain a constant, adjustable offset between the sum of the room’s
total exhaust and the supply/make-up air volumes. The offset shall be independent of the
exhaust volume magnitude and represent the volume of air that will enter (or exit) the room
from the corridor or other adjacent spaces.
E. The control unit shall generate analog signals linearly proportional to all airflow sources, sash
sensors, and flow alarms. The signal shall be available for BMS monitoring via direct LON
communication.
1. The following signals shall be available:
a. Fume hood exhaust flow
b. Fume hood exhaust flow alarm
c. Sash position
d. Fume hood face velocity
e. Total lab exhausts flow
f. Total lab supply flow
g. Emergency fume hood exhaust override
i. Room status (Normal, emergency) mode
F. All points integrated via the laboratory control unit, shall be stored in the respective BAS
system for the capability of trending, archiving, graphics, alarm notification and status reports.
Laboratory system performance (speed, stability and accuracy) shall be guaranteed regardless
of the quantity of points being monitored, processed, or controlled. Multiple peer-to-peer
laboratory control units shall be provided to insure at all times the performance of the
laboratory is being maintained.
G. Power supplies (either wall mounted, integral or panel mounted) shall be included to power the
complete laboratory airflow system.

KGA Architecture 23 96 00 -6 May 5, 2016
UNLV Wright Hall Laboratory Build Out – 16355.00 Laboratory Control System
1.11. VAV-1000L CONTROL UNIT
A. A VAV-1000L control unit shall control the supply and/or exhaust airflow control devices
to maintain proper room pressurization polarity (positive or negative).
B. The VAV-1000L shall be a LONTALK microprocessor based digital controller. It shall control
and communicate digitally via LONTALK (a high speed room level digital network using FTT-
10A media) with up to 31 digital fume hood, canopy, snorkel, bio-safety cabinet, general
exhaust, and make-up and laboratory office airflow control devices within a particular
pressurization zone.
C. The VAV-1000L shall maintain a constant design room offset between the sum of the room’s
total exhaust and make-up/supply air flows. This offset shall be field adjustable and represents
the volume of air which will enter (or exit) the room from the corridor or adjacent spaces.
D. All points shall be available through an interface to the building management system (BMS) for
trending, archiving, alarm notification and status reports. Laboratory airflow control system
performance (speed, stability and accuracy) shall be unaffected by the quantity of points being
monitored, processed or controlled.
E. Refer to the BMS specification for the required input/output summary for the necessary points
to be monitored and/or controlled
F. The VAV-1000L shall have the capability for full stand-alone operation; it shall be capable of
communicating digitally, using LONTALK protocol over a high speed, building-wide digital
laboratory network (LONTALK), furnished by the laboratory control system supplier.
G. The VAV-1000L shall provide a port for connecting a notebook computer. This port shall
provide access to all points within its respective lab. An I-LON gateway shall be provided to
allow access to all points within the lab building, both locally through a notebook PC or
remotely over the Internet.
H. The VAV-1000L shall provide I/O capability to address temperature and non-network sensors.
I. The VAV-1000L shall be panel mounted in NEMA enclosure and shall operate on 24VAC
power.
J. The VAV-1000L shall meet FCC Part 16 Subpart L Class A, and be UL916 listed.
K. The VAV-1000L shall provide I/O capability for the purpose of providing analog signal input
and output.
L. The VAV-1000L shall provide the following input/output capability:
1. Four analog Inputs that can be jumper configurable to provide 0-10vdc, 0-20madc, or
thermistor.
2. Four analog Outputs, to provide 0-10vdc for actuator control.
3. Four digital Inputs (open collector-250 ma or 30vdc).

KGA Architecture 23 96 00 -7 May 5, 2016
UNLV Wright Hall Laboratory Build Out – 16355.00 Laboratory Control System
M. Each lab room may have an occupancy sensor provided by the electrical contractor which shall
control the lighting. A dry-contact signal shall be provided for interface to the lab controller
which shall cause the room to revert to its occupied temperature and airflow settings if someone
walks into the room during the unoccupied schedule. (Occupied/Unoccupied schedule
determined by the BMS.)
1. Four digital Outputs, dry-contacts, can be software configurable for remote alarm/status
points.
2. The VAV-1000L shall meet FCC Part 15, subpart L, Class A and be UL 916 listed.
1.12. INTERFACE TO BUILDING MANAGEMENT
A. The laboratory control system network shall have the capability of digitally interfacing with the
BMS. Connectivity shall be via a LON FTT10A direct-connect cable or through a LON
FTT10A-to-BACnet/IP (Ethernet) bridge. The LON FTT10A-to-BACnet/IP device and its
database integration may be provided by the ATC/BAS contractor.
1.13. EXECUTION
A. Installation
1. The automatic temperature controls (ATC) contractor shall install the sash sensors,
velocity sensor, and fume hood monitor on the fume hood, and all room pressure
monitors outside their respective lab spaces being controlled, under initial supervision of
the laboratory control system supplier. Reel-type sash sensors and their Stainless steel
cables shall be hidden from view.
2. The ATC contractor shall install the VAV-1000L in an accessible location in the
designated laboratory room. The VAV-1000L can also be factory mounted and pre-wired
for easier field installation.
3. The ATC contractor shall install an appropriately sized and fused 24 VAC transformer
suitable for NEC Class II wiring.
4. All cables shall be furnished and installed by the ATC contractor. The ATC contractor
shall connect and terminate all cables as required. The ATC contractor shall mount and
wire the following devices to the VAV-1000L controller:
a. Room temperature sensor with set point adjustment and occupancy override
push button.
b. Room humidity sensor (if applicable).
c. Dry contact from room occupancy sensor/lighting control (provided by
electrical contractor), ATC to wire this signal into the VAV-1000L controller.
d. Hot water reheat coil valve actuator (modulating).
5. The mechanical contractor shall install all airflow control devices in the ductwork and
shall connect all airflow control valve linkages.
6. The mechanical contractor shall install provide and install all reheat coils, duct
transitions and piping arrangements.
7. Each pressurization zone shall have a dedicated, single phase primary or secondary
circuit provided and installed by the electrical subcontractor.

KGA Architecture 23 96 00 -8 May 5, 2016
UNLV Wright Hall Laboratory Build Out – 16355.00 Laboratory Control System
8. The Fume Hood Controller shall be installed on hoods as directed by the owner or at the
locations shown on the drawings. The controller shall be mounted at eye level on the
hood’s sash fascia. The sash sensor shall be mounted on the cross support strut behind
the top front hood panel, vertically to the sash or horizontally to the sash cable. The
velocity sensor shall be mounted on the side-wall of the hood, approximately six inches
back from the front sash frame, and approximately six inches above any opening into the
front of the fume hood, i.e. the sash when in its highest position or bypass louvers above
the sash. All details needed for installation and use must be included in an Installation
and Setup Guide provided with the Fume Hood Controller.
9. The electrical contractor shall provide a dedicated, single phase 120 vac power circuit
to all wall-mounted 120/24 VAC power supplies per laboratory area.
10. The mechanical contractor shall install all airflow control devices in the ductwork.
The mechanical contractor shall provide and install all reheat coils and transitions.
12. SYSTEM START-UP AND TRAINING
A. Initial System start-up and commissioning shall be provided by factory-trained technical
commissioning agent. Start-up shall include calibrating the fume hood controller equipment.
Start-up shall also provide electronic verification of airflow (fume hood exhaust, supply, make-
up, general exhaust, or return), integrating to the BMS and temperature control where required.
B. The balancing contractor shall be responsible for final verification and report of all airflows.
C. The laboratory airflow control system supplier shall furnish eight hours of owner training by
factory trained and certified personal at time of system start-up. The training will provide an
overview of the job specific airflow control components, verification of initial fume hood
controller calibration, general procedures for verifying airflows of air valves, and general
troubleshooting procedures.
D. Operation and Maintenance manuals, including as-built wiring diagrams and components lists
shall be provided for each training attendee.
E. Warranty shall be 2 years from date of shipment.
END OF SECTION

KGA Architecture 26 05 03 -1 May 5, 2016
UNLV Wright Hall Laboratory Build Out – 16355.00 Equipment Wiring Systems
SECTION 26 05 03
EQUIPMENT WIRING SYSTEMS
PART 1 - GENERAL
1.1 SECTION INCLUDES
A. Electrical connections to equipment specified under other sections.
1.2 RELATED SECTIONS
A. Section 01 11 00 - Summary of Work: Owner-furnished equipment.
B. Section 22 05 13 - Plumbing Equipment.
C. Section 26 05 19 - Building Wire and Cable.
D. Section 26 05 33 - Conduit.
E. Section 26 05 35 - Boxes.
1.3 REFERENCES
A. NEMA WD 1 - General Purpose Wiring Devices.
B. NEMA WD 6 - Wiring Device Configurations.
C. ANSI/NFPA 70 - National Electrical Code.
1.4 SUBMITTALS
A. Submit under provisions of Section 01 33 00.
B. Product Data: Provide wiring device manufacturer's catalog information showing dimensions,
configurations, and construction.
C. Manufacturer's Instructions: Indicate application conditions and limitations of use stipulated by
Product testing agency specified under Regulatory Requirements. Include instructions for
storage, handling, protection, examination, preparation, installation, and starting of Product.
1.5 REGULATORY REQUIREMENTS
A. Conform to requirements of ANSI/NFPA 70.
B. Furnish products listed and classified by Underwriters Laboratories, Inc. as suitable for purpose
specified and shown.

KGA Architecture 26 05 03 -2 May 5, 2016
UNLV Wright Hall Laboratory Build Out – 16355.00 Equipment Wiring Systems
1.6 COORDINATION
A. Coordinate work under provisions of Section 01 31 13.
B. Obtain and review shop drawings, product data, and manufacturer's instructions for equipment
furnished under other sections.
C. Determine connection locations and requirements.
D. Sequence rough-in of electrical connections to coordinate with installation schedule for
equipment.
E. Sequence electrical connections to coordinate with start-up schedule for equipment.
PART 2 - PRODUCTS
2.1 CORDS AND CAPS
A. Manufacturers:
1. Woodhead.
2. Hubbell.
3. Leviton.
4. Substitutions: Under provisions of Section 01 25 00.
B. Attachment Plug Construction: Conform to NEMA WD 1.
C. Configuration: NEMA WD 6; match receptacle configuration at outlet provided for equipment.
D. Cord Construction: ANSI/NFPA 70, Type SO multi-conductor flexible cord with identified
equipment grounding conductor, suitable for use in damp locations.
E. Size: Suitable for connected load of equipment, length of cord, and rating of branch circuit
overcurrent protection.
PART 3 - EXECUTION
3.1 EXAMINATION
A. Verify conditions under provisions of Section 01 31 13.
B. Verify that equipment is ready for electrical connection, wiring, and energization.
3.2 ELECTRICAL CONNECTIONS
A. Make electrical connections in accordance with equipment manufacturer's instructions.

KGA Architecture 26 05 03 -3 May 5, 2016
UNLV Wright Hall Laboratory Build Out – 16355.00 Equipment Wiring Systems
B. Make conduit connections to equipment subject to vibration using flexible conduit, maximum
36 inch length. Use liquid-tight flexible conduit with watertight connectors in damp or wet
locations. Make final connections to interior lighting fixtures using flexible conduit, maximum
72 inch length.
C. Make wiring connections using wire and cable with insulation suitable for temperatures
encountered in heat producing equipment.
D. Provide receptacle outlet where connection with attachment plug is indicated. Provide cord and
cap where field-supplied attachment plug is indicated.
E. Provide suitable strain-relief clamps and fittings for cord connections at outlet boxes and
equipment connection boxes.
F. Install disconnect switches, controllers, control stations, and control devices as indicated.
G. Modify equipment control wiring with terminal block jumpers as indicated.
H. Provide interconnecting conduit and wiring between devices and equipment where indicated.
END OF SECTION

KGA Architecture 26 05 05 -1 May 5, 2016
UNLV Wright Hall Laboratory Build Out – 16355.00 Selective Demolition for Electrical
SECTION 26 05 05
SELECTIVE DEMOLITION FOR ELECTRICAL
PART 1 - GENERAL
1.1 SUMMARY
A. Section Includes:
1. Removal of existing electrical equipment, wiring, and conduit in areas to be remodeled;
removal of designated construction; dismantling, cutting and alterations for completion of
the Work.
2. Disposal of materials.
3. Storage of removed materials.
4. Identification of utilities.
5. Salvaged items.
6. Protection of items to remain as indicated on drawings.
7. Relocate existing equipment to accommodate construction.
B. Related Sections:
1. Section 024119 - Selective Structure Demolition: Removal of designated building
equipment and construction.
1.2 CLOSEOUT SUBMITTALS
A. Section 017000 - Execution and Closeout Requirements: Requirements for submittals.
B. Project Record Documents: Record actual locations of capped capped conduits and equipment
abandoned in place.
C. QUALITY ASSURANCE
D. Perform Work in accordance with Public Works standard.
E. PRE-INSTALLATION MEETINGS
F. Section 013000 - Administrative Requirements: Pre-installation meeting.
G. Convene minimum one week prior to commencing work of this section.
1.3 SEQUENCING
A. Section 011000 - Summary: Requirements for sequencing.

KGA Architecture 26 05 05 -2 May 5, 2016
UNLV Wright Hall Laboratory Build Out – 16355.00 Selective Demolition for Electrical
B. Sequence work in the following order:
1. Verify all electrical equipment, wiring devices, and wiring to be removed.
2. Verify existing circuiting of equipment indicated to be removed and any equipment on
common circuit that is to remain.
3. Disconnect equipment indicated to be removed from existing circuit and provide for
continuity of circuit to existing equipment indicated to remain.
4. Provide protection for removed equipment and store in owner designated location.
1.4 SCHEDULING
A. Section 013000 – Administrative Requirements: Requirements for scheduling.
B. Schedule work to coincide with new construction and work of other trades.
C. Perform demolition work:
1. Between hours of 7:00am and 3:00pm.
D. Cease operations immediately when structure appears to be in danger and notify
Architect/Engineer. Do not resume operations until directed.
1.5 COORDINATION
A. Section 013000 - Administrative Requirements: Requirements for coordination.
B. Conduct demolition to minimize interference with adjacent and occupied building areas.
C. Coordinate demolition work with work of other trades.
D. Coordinate and sequence demolition so as not to cause shutdown of operation of surrounding
areas.
E. Shut-down Periods:
1. Arrange timing of shut-down periods of in service panels with Owner. Do not shut down
any utility without prior written approval.
2. Keep shut-down period to minimum or use intermittent period as directed by Owner.
3. Maintain life-safety systems in full operation in occupied facilities, or provide notice
minimum seven days in advance.
F. Identify salvage items in cooperation with Owner.

KGA Architecture 26 05 05 -3 May 5, 2016
UNLV Wright Hall Laboratory Build Out – 16355.00 Selective Demolition for Electrical
PART 2 - PRODUCTS
2.1 Not Used
PART 3 - EXECUTION
3.1 EXAMINATION
A. Section 01 30 00 - Administrative Requirements: Verification of existing conditions before
starting work.
B. Verify wiring and equipment indicated to be demolished serve only abandoned facilities.
C. Verify termination points for demolished services.
3.2 PREPARATION
A. Erect, and maintain temporary safeguards, including warning signs, barricades for protection of
the public, Owner, Contractor's employees, and existing improvements to remain.
B. Temporary egress signage and emergency lighting
3.3 DEMOLITION
A. Demolition Drawings are based on casual field observation and existing record documents.
Report discrepancies to Architect / Engineer before disturbing existing installation.
B. Remove exposed abandoned conduit, including abandoned conduit above accessible ceiling
finishes. Cut conduit flush with walls and floors, and patch surfaces to match existing.
C. Remove conduit, wire, boxes, and fastening devices to avoid any interference with new
installation in accessible locations.
D. Disconnect electrical systems in walls, floors, and ceilings scheduled for removal.
E. Reconnect equipment being disturbed by renovation work and required for continue service to
the existing circuit or nearest designated panel.
F. Disconnect or shut off service to areas where electrical work is to be removed. Remove
electrical fixtures, equipment, and related switches, outlets, conduit and wiring which are not
part of final project.
G. Install temporary wiring and connections to maintain existing systems in service during
construction.
H. Perform work on energized equipment or circuits with experienced and trained personnel.

KGA Architecture 26 05 05 -4 May 5, 2016
UNLV Wright Hall Laboratory Build Out – 16355.00 Selective Demolition for Electrical
I. Remove, relocate, and extend existing installations to accommodate new construction.
J. Repair adjacent construction and finishes damaged during demolition and extension work.
K. Remove exposed abandoned grounding and bonding components, fasteners and supports, and
electrical identification components, including components abandoned components above
accessible ceiling finishes. Cut embedded support elements flush with walls and floors.
L. Clean and repair existing equipment to remain, affected by demolition work, or to be re-
installed.
M. Protect and retain power to existing active equipment remaining.
N. Identify abandoned empty conduit at both ends as “abandoned”.
3.4 EXISTING PANELBOARDS
A. Ring out circuits in existing panel affected by the Work. Where additional circuits are needed,
use available “spare” circuit breakers or install new breakers.
B. Identify unused circuits as spare on the updated panelboard directory.
C. Where existing circuits are indicated to be reused, use sensing measuring devices to verify
circuits feeding Project area or are not in use.
D. Remove existing wire no longer in use from panel to equipment.
E. Provide new updated (Typed) directories where more than three circuits have been modified or
rewired.
3.5 SALVAGE ITEMS
A. Remove and protect items indicated on drawings or scheduled in this specification section to be
salvaged and turn over to Owner.
B. Items of salvageable value may be removed as work progresses. Transport salvaged items from
site as they are removed.
3.6 REUSABLE ELECTRICAL EQUIPMENT
A. Carefully remove and clean equipment, materials, or fixtures which are to be reused.
B. Disconnect, remove, or relocate existing electrical material and equipment interfering with new
installation.
C. Relocate existing lighting fixtures as indicated on Drawings. Clean fixtures and re-lamp. Test
fixture to see if it is in good working condition before installation at new location.

KGA Architecture 26 05 05 -5 May 5, 2016
UNLV Wright Hall Laboratory Build Out – 16355.00 Selective Demolition for Electrical
3.7 CLEANING
A. Section 01 70 00 - Execution and Closeout Requirements: Requirements for cleaning.
B. Remove demolished materials as work progresses. Legally dispose.
C. Keep workplace neat on a daily basis.
3.8 PROTECTION OF FINISHED WORK
A. Section 017000 - Execution and Closeout Requirements: Requirements for protecting finished
Work.
B. Do not permit traffic over unprotected floor surface.
C. SCHEDULES
D. Remove, store and protect the following materials and equipment:
1. Light fixtures.
2. Laboratory equipment.
E. Remove the following equipment for Owner's retention. Deliver to location designated by
Owner:
1. Lighting fixtures.
END OF SECTION


KGA Architecture 26 05 10 -1 May 5, 2016
UNLV Wright Hall Laboratory Build Out – 16355.00 Basic Electrical Requirements
SECTION 26 05 10
BASIC ELECTRICAL REQUIREMENTS
PART 1 - GENERAL
1.1 SECTION INCLUDES
A. Basic Electrical Requirements specifically applicable to Division 16 Sections, in addition to
Division 1 General Requirements.
1.2 ALTERNATES
A. Alternates quoted on Bid Forms will be reviewed and accepted or rejected at the Owner's
option. Accepted Alternates will be identified in Owner-Contractor Agreement.
B. Coordinate related work and modify surrounding work as required.
1.3 REFERENCES
A. ANSI/NFPA 70 - National Electrical Code.
1.4 SUBMITTALS
A. Submit under provisions of Section 01 33 00.
B. Proposed Products List: Include Products specified in the following Sections:
1. Section 26 22 03 - Dry Type Transformers
2. Section 26 24 13 - Distribution Switchboards.
3. Section 26 24 16 - Panelboards
4. Section 26 28 19 - Enclosed Switches
5. Section 26 28 26 - Enclosed Transfer Switch
6. Section 26 29 16 - Enclosed Contactors.
7. Section 26 56 00 - Site Lighting.
C. Submit shop drawings and product data grouped to include complete submittals of related
systems, products, and accessories in a single submittal.
D. Mark dimensions and values in units to match those specified.
1.5 REGULATORY REQUIREMENTS
A. Conform to Uniform Building Code.
B. Electrical: Conform to NFPA 70.
C. Electrical: Conform to local electrical ordinance.
D. Obtain permits, and request inspections from authority having jurisdiction.

KGA Architecture 26 05 10 -2 May 5, 2016
UNLV Wright Hall Laboratory Build Out – 16355.00 Basic Electrical Requirements
1.6 PROJECT/SITE CONDITIONS
A. Install Work in locations shown on Drawings, unless prevented by Project conditions.
B. The drawings are diagrammatic unless indicated otherwise. The drawings reflect equipment
installation and circuiting only and are not depicting exact conduit routing unless specifically
noted otherwise. Home run circuits may be combined per requirements of NEC. All circuits
indicated shall be run with dedicated neutral conductors.
C. Prepare drawings showing proposed rearrangement of Work to meet Project conditions,
including changes to Work specified in other Sections. Obtain permission of Owner before
proceeding.
D. Data presented on these drawings are as accurate as planning can determine, but field
verification of all dimensions, locations, levels, etc., to suit field conditions is required.
Review all architectural, structural, and civil drawings; and adjust all work to meet the
requirements of conditions shown. Discrepancies between different plans, or between
drawings and specifications, or regulations and codes governing the installation shall be
brought to the attention of the engineer in writing before the date of bid opening. If
discrepancies are not reported, the contractor shall bid the greater quantity or better quality, and
appropriate adjustments will be made after contract award. Contractor shall be responsible to
field measure and confirm mounting heights and location of electrical equipment with respect
to roadways, structures, etc. Do not scale distances off the electrical drawings. Use actual
building and site dimensions.
E. Guarantee all material furnished and all workmanship performed for a period of one year from
the date of final acceptance of the work. Any defects developing within this period, traceable
to material furnished as a part of this section or workmanship performed hereunder, shall be
made good at no additional expense to the owner.
1.7 SEQUENCING AND SCHEDULING
A. Construct Work in sequence under provisions of Section 01 11 00.
PART 2 - PRODUCTS
Not Used
PART 3 - EXECUTION
Not Used
END OF SECTION

KGA Architecture 26 05 19 -1 May 5, 2016
UNLV Wright Hall Laboratory Build Out – 16355.00 Low-Voltage Electrical Power Conductors
And Cables
SECTION 26 05 19
LOW-VOLTAGE ELECTRICAL POWER CONDUCTORS AND CABLES
PART 1 - GENERAL
1.1 SECTION INCLUDES
A. Building wire and cable.
B. Wiring connectors and connections.
1.2 RELATED SECTIONS
A. Section 26 05 33 - Conduit.
B. Section 26 05 35 - Boxes.
C. Section 26 05 53 – Electrical Identification.
1.3 REFERENCES
A. ANSI/NFPA 70 - National Electrical Code.
1.4 QUALIFICATIONS
A. Manufacturer: Company specializing in manufacturing products specified in this Section with
minimum three years documented experience.
1.5 REGULATORY REQUIREMENTS
A. Conform to requirements of ANSI/NFPA 70.
B. Furnish products listed and classified by Underwriters Laboratories, Inc. as suitable for purpose
specified and shown.
1.6 PROJECT CONDITIONS
A. Verify that field measurements are as shown on Drawings.
B. Conductor sizes are based on AWG copper.
C. Wire and cable routing shown on Drawings is approximate unless dimensioned. Route wire
and cable as required to meet Project Conditions. Include wire and cable lengths within 10 feet
of length shown.

KGA Architecture 26 05 19 -2 May 5, 2016
UNLV Wright Hall Laboratory Build Out – 16355.00 Low-Voltage Electrical Power Conductors
And Cables
D. Where wire and cable routing is not shown, and destination only is indicated, determine exact
outing and lengths required and document on “as-built” drawings at completion of project.
1.7 COORDINATION
A. Coordinate Work under provisions of Section 01 31 13.
B. Determine required separation between cable installation and other work.
C. Determine cable routing to avoid interference with work of other trades.
PART 2 - PRODUCTS
2.1 BUILDING WIRE AND CABLE
A. Description: Single conductor insulated wire.
B. Conductor: Copper.
C. Insulation Voltage Rating: 600 volts.
D. Insulation: ANSI/NFPA 70; Type THW, THHN/THWN, or XHHW insulation for feeders and
branch circuits larger than 6 AWG; Type THHN/THWN insulation for feeders and branch
circuits 6 AWG and smaller.
PART 3 - EXECUTION
3.1 EXAMINATION
A. Verify that interior of building has been protected from weather.
B. Verify that mechanical work likely to damage wire has been completed.
3.2 PREPARATION
A. Confirm that entire raceway installation has been completed and thoroughly swab raceway
before installing wire.
3.3 WIRING METHODS
A. In All Power Installations:
1. Building interior locations: Install conductors in EMT required for all exposed public
spaces.
2. Exposed exterior locations: Install conductors in Rigid Galvanized Steel (RGS) conduits.

KGA Architecture 26 05 19 -3 May 5, 2016
UNLV Wright Hall Laboratory Build Out – 16355.00 Low-Voltage Electrical Power Conductors
And Cables
3. Underground installations: Install conductors in Schedule 40 PVC conduit.
B. Use wiring methods indicated on Drawings.
3.4 WIRE COLOR
A. General:
1. For wire sizes 10 AWG and smaller – wire shall be colored as indicated below.
2. For wire sizes 8 AWG and larger – identify wire with colored tape at all terminals,
splices and boxes. Colors to be as indicated below.
3. Use black, red, and blue for Phases A, B & C in 120/208 volt circuits. Use brown,
orange, and yellow for Phases A, B & C in 277/480 volt circuits.
B. Neutral Conductors: White for 208Y/120V: 6 AWG and smaller. For 4 AWG and larger,
identify with white tape at both ends and visible points included in all junction boxes. Where
there are two or more neutrals in one conduit, each shall be individually identified with the
proper circuit. For 480Y/277V: Use gray conductor for 6 AWG and smaller. For 4 AWG and
larger, identify with gray tape at both ends and all visible points included in all junction boxes.
C. Branch Circuit Conductors: Three or four wire home runs shall have each phase uniquely color
coded.
D. Feeder Circuit Conductors: Each phase shall be uniquely color coded.
E. Ground Conductors: Green for 6 AWG and smaller. For 4 AWG and larger, indentify with
green tape at both ends and all visible points included in all junction boxes.
3.5 INSTALLATION
A. Install products in accordance with manufacturers’ instructions.
B. Use solid conductors for feeders and branch circuits 10 AWG and smaller.
C. Use stranded conductors for control circuits (Minimum wire size is #16 AWG).
D. Use conductors not smaller than 12 AWG for power and lighting circuits.
E. Use conductors not smaller than 16 AWG for control circuits.
F. Use 10 AWG conductors for 20 ampere, 120 volt branch circuits longer than 75 feet.
G. Use 10 AWG conductors for 20 ampere, 277 volt branch circuits longer than 200 feet.
H. Pull all conductors into raceway at same time.
I. Use suitable wire pulling lubricant for building wire 4 AWG and larger.
J. Neatly train and lace wiring inside boxes, equipment, and panelboards.
KGA Architecture 26 05 19 -4 May 5, 2016
UNLV Wright Hall Laboratory Build Out – 16355.00 Low-Voltage Electrical Power Conductors
And Cables
K. Clean conductor surfaces before installing lugs and connectors.
L. Make splices, taps, and terminations to carry full ampacity of conductors with no perceptible
temperature rise.
M. Use split bolt connectors for copper conductor splices and taps, 6 AWG and larger. Tape
uninsulated conductors and connector with electrical tape to 150 percent of insulation rating of
conductor.
N. Use solderless pressure connectors with insulating covers for copper conductor splices and
taps, 8 AWG and smaller.
O. Use insulated spring wire connectors with plastic caps for copper conductor splices and taps, 10
AWG and smaller.
P. Do not share neutrals for lighting or receptacle circuits.
3.6 INTERFACE WITH OTHER PRODUCTS
A. Identify wire and cable under provisions of Section 26 05 53.
B. Identify each conductor with its circuit number or other designation indicated on Drawings.
3.7 FIELD QUALITY CONTROL
A. Perform field inspection and testing under provisions of Section 01 40 00.
B. Inspect wire for physical damage and proper connection.
C. Measure tightness of bolted connections and compare torque measurements with
manufacturer's recommended values.
D. Verify continuity of each branch circuit conductor.
E. Verify continuity of each feeder.
END OF SECTION
KGA Architecture 26 05 26 -1 May 5, 2016
UNLV Wright Hall Laboratory Build Out – 16355.00 Grounding and Bonding for Electrical Systems
SECTION 26 05 26
GROUNDING AND BONDING FOR ELECTRICAL SYSTEMS
PART 1 - GENERAL
1.1 SECTION INCLUDES
A. Grounding electrodes and conductors.
B. Equipment grounding conductors.
C. Bonding.
1.2 RELATED SECTIONS
A. Section 03 20 00 - Concrete Reinforcement.
B. Section 03 10 00 - Concrete.
1.3 REFERENCES
A. Section 01 40 00 - Quality Control.
B. Section 01 42 19 - Reference Standards: Requirements for references and standards.
C. NETA ATS - Acceptance Testing Specifications for Electrical Power Distribution Equipment
and Systems (International Electrical Testing Association).
D. NFPA 70 - National Electrical Code.
1.4 GROUNDING SYSTEM DESCRIPTION
A. Metal underground water pipe if available.
B. Rod electrode.
1.5 PERFORMANCE REQUIREMENTS
A. Grounding System Resistance: 5 ohms.
1.6 SUBMITTALS FOR REVIEW
A. Section 01 33 00 - Submittals: Procedures for submittals.
B. Product Data: Provide for grounding electrodes and connections.

KGA Architecture 26 05 26 -2 May 5, 2016
UNLV Wright Hall Laboratory Build Out – 16355.00 Grounding and Bonding for Electrical Systems
1.7 SUBMITTALS FOR INFORMATION
A. Section 01 33 00 - Submittals: Submittals for information.
B. Test Reports: Indicate overall resistance to ground.
C. Manufacturer's Instructions: Indicate application conditions and limitations of use stipulated by
Product testing agency specified under Regulatory Requirements. Include instructions for
storage, handling, protection, examination, preparation, and installation of Product.
1.8 SUBMITTALS FOR CLOSEOUT
A. Sections 01 77 00 - Contract Closeout; 01 78 23 - Operation and Maintenance Data.
B. Project Record Documents: Record actual locations of components and grounding electrodes.
C. Certificate of Compliance: Indicate approval of installation by authority having jurisdiction.
1.9 QUALIFICATIONS
A. Manufacturer: Company specializing in manufacturing the Products specified in this section
with minimum three years experience, and with service facilities within 100 miles of Project.
1.10 REGULATORY REQUIREMENTS
A. Conform to requirements of NFPA 70.
B. Products: Listed and classified by Underwriters Laboratories, Inc. as suitable for the purpose
specified and indicated.
PART 2 - PRODUCTS
2.1 ROD ELECTRODES
A. Material: Copper-clad steel.
B. Diameter: 3/4 inch (19mm).
C. Length: 10 feet (3000 mm).
2.2 MECHANICAL CONNECTORS
A. Material: Bronze.

KGA Architecture 26 05 26 -3 May 5, 2016
UNLV Wright Hall Laboratory Build Out – 16355.00 Grounding and Bonding for Electrical Systems
2.3 EXOTHERMIC CONNECTIONS
A. Manufacturers:
1. Erico Cadweld.
2. Burndy.
3. Substitutions: Refer to Section 01 60 00 - Material and Equipment.
2.4 GROUND WIRE
A. Material: 3/0 Stranded copper.
B. Grounding Electrode Conductor: Size to meet NFPA 70 requirements.
PART 3 - EXECUTION
3.1 EXAMINATION
A. Section 01 31 13 - Coordination and Meetings: Verification of existing conditions prior to
beginning work.
B. Verify that final backfill and compaction has been completed before driving rod electrodes.
3.2 INSTALLATION
A. Section 01 40 00 - Quality Control: Manufacturer's instructions.
B. Install up to 2 additional rod electrodes as required to achieve specified resistance to ground.
Notify Engineer if resistance to ground is not less than 5 ohms.
C. Install 3/0 AWG bare copper wire at minimum 30 inch depth underground from rod to rod,
make exothermic connections.
D. Provide bonding to meet Regulatory Requirements.
1. Provide bonding jumpers at all insulated couplings and valves of metallic piping.
E. Bond together metal siding not attached to grounded structure; bond to ground.
F. Provide isolated grounding conductor for circuits where indicated on plans.
G. Equipment Grounding Conductor: Provide separate, insulated conductor within each feeder
and branch circuit raceway. Terminate each end on suitable lug, bus, or bushing.
H. Ground all transformers to grounding system as required by code. Increase size of equipment
grounding conductor in 3.2 - G per NEC Table 250-94 or install separate concrete encased
electrode. Ground rods are not permitted.

KGA Architecture 26 05 26 -4 May 5, 2016
UNLV Wright Hall Laboratory Build Out – 16355.00 Grounding and Bonding for Electrical Systems
3.3 FIELD QUALITY CONTROL
A. Sections 01 40 00 - Quality Assurance; 01 75 00 - Starting of Systems: Field inspection,
testing, adjusting.
B. Inspect and test in accordance with NETA ATS, except Section 4.
C. Perform inspections and tests listed in NETA ATS, Section 7.13.
END OF SECTION

KGA Architecture 26 05 28 -1 May 5, 2016
UNLV Wright Hall Laboratory Build Out – 16355.00 Seismic Restraint
SECTION 26 05 28
SEISMIC RESTRAINT
PART 1 - GENERAL
1.1 RELATED SECTIONS
A. Drawings and general provisions of Contract, including General and Supplementary Conditions,
Special Conditions, and Division-1 Specification sections, apply to work specified in this
section.
1. Section 26 05 19 – Raceway And Boxes.
2. Section 26 05 29 – Supporting Devices.
3. Section 26 05 33 – Conduit.
4. Section 26 22 03 – Dry Type Transformers.
5. Section 26 24 13 – Distribution Switchboards.
6. Section 26 28 19 – Enclosed Switches.
7. Section 26 28 26 – Enclosed Transfer Switch.
8. Section 26 56 00 – Site Lighting.
1.2 QUALITY ASSURANCE
A. Substitution of Materials: Refer to Division 1.
1.3 SCOPE
A. Design, furnish, and install attachment devices, anchor bolts, and seismic restraints that are
required for seismic compliance for all equipment, apparatus, conduit and raceways, , and other
components of the specified systems required by reference codes and standards.
B. Provide seismic restraint types as described. If the item to be restrained is not listed, select
appropriate restraint and submit for approval.
C. Provide seismic bracing as described in Table A for all electrical systems.
1.4 DEFINITIONS
A. "Transverse Bracing": Restraint(s) applied to limit motion perpendicular or angular to the
centerline of the conduit.
B. "Longitudinal Bracing": Restraints applied to limit motion along the centerline of the conduit.
KGA Architecture 26 05 28 -2 May 5, 2016
UNLV Wright Hall Laboratory Build Out – 16355.00 Seismic Restraint
1.5 ACCEPTABLE MANUFACTURERS
A. All devices specified in this section shall be the product of a single manufacturer. Acceptable
manufacturers are: AVNEC, Inc., Mason Industries, Amber Booth Company, Peabody Noise
Control, Korfund Dynamics Corporation, Vibration Mountings and Equipment, or Vibration
Eliminator Co. provided they meet the requirements of this specification. AVNEC Inc. Model
Numbers have been used in this specification to establish quality of components. Products of
the other listed manufacturers are acceptable provided their systems strictly comply with the
intent, structural design, performance and deflections of the components specified.
1.6 REFERENCE CODES AND STANDARDS
A. International Building Code – 2010 ed.
B. National Electrical Code (NEC) – 2011 ed.
C. Southern Nevada Amendments to the NEC – 2011 ed.
D. State and local codes.
1.7 DESIGN REQUIREMENTS; CERTIFICATION AND ANALYSIS
A. Seismic Restraints Requirements
1. For each seismic restraint, provide certified calculations to verify adequacy to meet the
following design requirements:
a. Ability to accommodate relative seismic displacements of supported item between
points of support.
b. Ability to accommodate the required seismic forces.
2. For each respective set of anchor bolts provide calculations to verify adequacy to meet
combined seismic-induced sheer and tension forces.
3. For each weldment between structure and item subject to seismic force, provide
calculations to verify adequacy.
4. Calculations shall be stamped by a professional engineer, who is registered in the state,
where the work is being performed, has specific experience in seismic calculations.
5. Restraints shall maintain the restrained item in a captive position without short circuiting
the vibration isolation.
1.8 SUBMITTALS
A. Catalog cuts or data sheets on specific products utilized, which detail compliance with the
specification. Reference “TYPE” as per “PRODUCTS” section of this specification.
B. Shop Drawings
1. Where walls and slabs are used as seismic restraint locations, provide details of
acceptable methods for restraint of equipment, conduit and other raceways shall be
included, with supporting certified calculations.
2. Provide specific details of seismic restraints and anchors; include number, size and
locations for each piece of equipment.
KGA Architecture 26 05 28 -3 May 5, 2016
UNLV Wright Hall Laboratory Build Out – 16355.00 Seismic Restraint
3. Coordination or contract drawings shall be marked-up with the specific locations and
types of restraints shown for all conduit, cable tray, busducts, etc. Rod bracing and
assigned load at each restraint location shall be clearly delineated. Each drawing shall be
stamped and signed by the engineer doing the seismic certification.
C. Seismic Certification and Analysis
1. Seismic restraint calculations shall be provided for all connections of equipment to the
structure. All performance of products (such as: strut, cable, anchors, clips, etc.)
associated with restraints shall be supported with manufacturer’s data sheets or certified
calculations. Seismic calculation shall be certified by a Professional Structural or Civil
Engineer registered in the State of the project.
2. Seismic restraint calculations shall be based on the acceleration criteria required by local
codes.
3. Calculations to support seismic restraints designs shall be stamped by a professional
registered engineer in the state where the work is being performed, with at least five years
of seismic design experience.
4. Table elevations refer to the structural point of attachment of the equipment support
system (i.e., use floor slab for floor supported equipment and the elevation of the slab
above for suspended equipment).
5. Analysis shall indicate calculated dead loads, derived loads, and materials utilized for
connections to equipment and structure. Analysis shall detail anchoring methods, bolt
diameter, embedment and/or weld length.
PART 2 - PRODUCTS
2.1 GENERAL
A. Provide seismic restraints as specified herein and seismic bracing as specified herein and/or
described in Table A (PART 3 - EXECUTION). If the item to be restrained is not listed in the
table, manufacturer shall select appropriate restraint and submit for approval.
2.2 PAD TYPE NEOPRENE ISOLATOR
A. When bolting is required for seismic restraints, neoprene and duct washers and bushings shall
be provided to prevent short circuiting.
1. AVNEC, Inc.: Type NP.75
2.3 PAD TYPE ELASTOMER ISOLATOR
A. When bolting is required for seismic restraints, neoprene washers and bushings shall be
provided to prevent short circuiting.
2.4 SEISMIC RESTRAINT TYPES
A. Type I: Shall comply with general characteristics of spring isolator Type A with the following
additional features. Isolator shall incorporate snubbing restraint in all directions, and be capable
of supporting equipment at fixed elevations during installation. Cast or aluminum housings,
except ductile iron, are not acceptable.
KGA Architecture 26 05 28 -4 May 5, 2016
UNLV Wright Hall Laboratory Build Out – 16355.00 Seismic Restraint
1. AVNEC, Inc.: Type RS
B. Type II: Each corner or side of equipment base shall incorporate a seismic restraint having a
minimum of 5/8" thick, all directional resilient pad limit stop. Restraints shall be fabricated of
plate, structural members or square metal tubing. Angle bumpers are not acceptable.
1. AVNEC, Inc.: Type SSN
C. Type III: Multiple metal cable or steel strut type with approved fastening devices to equipment
and structure. System to be field bolted to deck using two sided beam clamps or appropriately
designed inserts for concrete.
1. AVNEC, Inc.: Type SCA, SRA
D. Type IV: Double deflection neoprene isolator (min. 0.15") encased in ductile iron or steel
casing.
1. AVNEC, Inc.: Type SNCM
E. Type V: Non-isolated equipment shall be field bolted or welded (powder shots not acceptable)
to the structures as required to meet seismic forces. Bolt diameter, imbedment data, and/or weld
length must be shown in certified calculations as noted above.
PART 3 - EXECUTION
3.1 SEISMIC RESTRAINT INSTALLATION
A. All floor mounted equipment whether isolated or not shall be snubbed, anchored, bolted or
welded to structure to comply with the requirements of these specifications. Calculations that
determine that isolated equipment movement may be less than the operating clearances of
snubbers (restraints) do not preclude the need for snubbers. All equipment shall be positively
attached to the structure.
B. All suspended equipment and apparatus shall be two or four point independently braced with
TYPE III restraints, installed taught for non-isolated equipment and slack with 1/2" cable
deflection for isolated equipment. Suspending rods shall be braced as necessary to restrain
against angular motion.
C. All non-isolated floor or wall mounted equipment shall use RESTRAINT TYPE III or V.
D. Where base anchoring of equipment is insufficient to resist seismic forces, restraint TYPE III
shall be located above the component's center of gravity to suitably resist "G" forces specified.
Vertically mounted tanks and up-blast tubular centrifugal fans, tanks, or similar equipment, may
require this additional restraint.
E. A rigid piping system shall not be braced to dissimilar parts of building on two dissimilar
building systems that may respond in a different mode during an earthquake. Examples: Wall
and roof; solid concrete wall and a metal deck with lightweight concrete fill, busduct, cable tray,
conduit, etc., crossing a building expansion joint.

KGA Architecture 26 05 28 -5 May 5, 2016
UNLV Wright Hall Laboratory Build Out – 16355.00 Seismic Restraint
3.2 INSPECTION
A. Upon completion of installation of all seismic restraint devices, a certification report prepared
by the manufacturer shall be submitted in writing to the contractor indicating that all systems
are installed properly and in compliance with the specifications. The report must identify those
areas that require corrective measures or certify that none exists. Any field coordination type
changes to the originally submitted seismic restraint designs must be clearly defined and
detailed in this report.
PART 4 -
A.
TABLE A
SEISMIC BRACING TABLE
Equipment
On Center Spacing
Within Each Change of Direction
(Larger of...)
Transverse Longitudinal
Duct 30 Feet 60 Feet
Pipe
Threaded, Welded, Soldered or
Grooved
To 16" 40 Feet 80 Feet 10 Feet or 15 Diameters
18" – 28" 30 Feet 60 Feet 10 Feet or 15 Diameters
30"-40" 20 Feet 60 Feet 10 Feet or 15 Diameters
42" & Larger 10 Feet 30 Feet 10 Feet or 15 Diameters
NO-Hub, Bell & Spigot, Cast Iron
2.5" & Larger 10 Feet 20 Feet 4 Feet
Boiler Breaching 30 Feet 60 Feet 10 Feet or 15 Diameters
Chimneys & Stacks 30 Feet 60 Feet 10 Feet or 15 Diameters
Conduit 40 Feet 80 Feet 210 Feet or 15 Diameters
Bus Duct 20 Feet 40 Feet 4 Feet
Cable Tray 40 Feet 80 Feet 10 Feet
END OF SECTION

KGA Architecture 26 05 29 -1 May 5, 2016
UNLV Wright Hall Laboratory Build Out – 16355.00 Hangers and Supports for Electrical Systems
SECTION 26 05 29
HANGERS AND SUPPORT FOR ELECTRICAL SYSTEMS
PART 1 - GENERAL
1.1 SECTION INCLUDES
A. Conduit and equipment supports.
B. Anchors and fasteners.
1.2 REFERENCES
A. NECA - "Standard of Installation".
B. ANSI/NFPA 70 - National Electrical Code.
1.3 SUBMITTALS
A. Submit under provisions of Section 01 33 00.
B. Product Data: Provide manufacturer's catalog data for fastening systems.
C. Manufacturer's Instructions: Indicate application conditions and limitations of use stipulated by
Product testing agency specified under Regulatory Requirements. Include instructions for
storage, handling, protection, examination, preparation, installation, and starting of Product.
1.4 REGULATORY REQUIREMENTS
A. Conform to requirements of ANSI/NFPA 70.
B. Furnish products listed and classified by Underwriters Laboratories, Inc. as suitable for purpose
specified and shown.
PART 2 - PRODUCTS
2.1 PRODUCT REQUIREMENTS
A. Materials and Finishes: Provide adequate corrosion resistance.
B. Provide materials, sizes, and types of anchors, fasteners and supports to carry the loads of
equipment and conduit. Consider weight of wire in conduit when selecting products.
KGA Architecture 26 05 29 -2 May 5, 2016
UNLV Wright Hall Laboratory Build Out – 16355.00 Hangers and Supports for Electrical Systems
C. Anchors and Fasteners:
1. Concrete Structural Elements: Use precast insert system, expansion anchors and preset
inserts.
2. Steel Structural Elements: Use beam clamps and welded fasteners.
3. Concrete Surfaces: Use self-drilling anchors and expansion anchors.
4. Hollow Masonry, Plaster, and Gypsum Board Partitions: Use toggle bolts with 16GA
metal backing in lieu of hollow wall fasteners.
5. Solid Masonry Walls: Use expansion anchors and preset inserts.
6. Sheet Metal: Use sheet metal screws.
7. Wood Elements: Use wood screws.
2.2 STEEL CHANNEL
A. Manufacturer:
1. Unistrut
2. B-Line.
3. Substitutions: Under provisions of Section 01 25 00.
B. Description: Painted steel.
PART 3 - EXECUTION
3.1 INSTALLATION
A. Install products in accordance with manufacturer's instructions.
B. Provide anchors, fasteners, and supports in accordance with NECA "Standard of Installation".
C. Do not fasten supports to pipes, ducts, mechanical equipment, and conduit.
D. Obtain permission from Architect/Engineer before using spring steel clips and clamps.
E. Obtain permission from Architect/Engineer before drilling or cutting structural members.
F. Fabricate supports from structural steel or steel channel. Rigidly weld members or use hexagon
head bolts to present neat appearance with adequate strength and rigidity. Use spring lock
washers under all nuts.
G. Install surface-mounted cabinets and panelboards with minimum of four anchors.
H. In wet and damp locations use steel channel supports to stand cabinets and panelboards one
inch (25 mm) off wall.
I. Use sheet metal channel to bridge studs above and below cabinets and panelboards recessed in
hollow partitions.
END OF SECTION

KGA Architecture 26 05 33 -1 May 5, 2016
UNLV Wright Hall Laboratory Build Out – 16355.00 Raceway and Boxes for Electrical Systems
SECTION 26 05 33
RACEWAY AND BOXES FOR ELECTRICAL SYSTEMS
PART 1 - GENERAL
1.1 SECTION INCLUDES
A. Metal conduit.
B. Flexible metal conduit.
C. Liquidtight flexible metal conduit.
D. Electrical metallic tubing.
E. Nonmetal conduit.
F. Fittings and conduit bodies.
1.2 RELATED SECTIONS
A. Section 07 84 00 - Fire Stopping.
B. Section 26 05 26 - Grounding and Bonding.
C. Section 26 05 29 - Supporting Devices.
D. Section 26 05 35 - Boxes.
E. Section 26 05 53 - Electrical Identification.
1.3 REFERENCES
A. ANSI C80.1 - Rigid Steel Conduit, Zinc Coated.
B. ANSI C80.3 - Electrical Metallic Tubing, Zinc Coated.
C. ANSI/NEMA FB 1 - Fittings, Cast Metal Boxes, and Conduit Bodies for Conduit and Cable
Assemblies.
D. ANSI/NFPA 70 - National Electrical Code.
E. NECA "Standard of Installation."
F. NEMA RN 1 - Polyvinyl Chloride (PVC) Externally Coated Galvanized Rigid Steel Conduit
and Intermediate Metal Conduit.
G. NEMA TC 2 - Electrical Plastic Tubing (EPT) and Conduit (EPC-40 and EPC-80).

KGA Architecture 26 05 33 -2 May 5, 2016
UNLV Wright Hall Laboratory Build Out – 16355.00 Raceway and Boxes for Electrical Systems
H. NEMA TC 3 - PVC Fittings for Use with Rigid PVC Conduit and Tubing.
1.4 DESIGN REQUIREMENTS
A. Conduit Size: ANSI/NFPA 70. Minimum 1 inch diameter for underground installations.
1.5 PROJECT RECORD DOCUMENTS
A. Submit under provisions of Section 01 78 39.
B. Accurately record actual routing of conduits larger than 2 inches.
1.6 REGULATORY REQUIREMENTS
A. Conform to requirements of ANSI/NFPA 70.
B. Furnish products listed and classified by Underwriters Laboratories, Inc. as suitable for purpose
specified and shown.
1.7 DELIVERY, STORAGE, AND HANDLING
A. Deliver, store, protect, and handle Products to site under provisions of Section 01 60 00.
B. Accept conduit on site. Inspect for damage.
C. Protect conduit from corrosion and entrance of debris by storing above grade. Provide
appropriate covering.
D. Protect PVC conduit from sunlight.
1.8 PROJECT CONDITIONS
A. Verify that field measurements are as shown on Drawings.
B. Verify routing and termination locations of conduit prior to rough-in.
C. Conduit routing is shown on Drawings in approximate locations unless dimensioned. Route as
required to complete wiring system.
PART 2 - PRODUCTS
2.1 CONDUIT REQUIREMENTS
A. Minimum Size: 1/2 inch unless otherwise specified.

KGA Architecture 26 05 33 -3 May 5, 2016
UNLV Wright Hall Laboratory Build Out – 16355.00 Raceway and Boxes for Electrical Systems
B. Underground Installations:
1. More than Five Feet from Foundation Wall: Use PVC Schedule 40 conduit.
2. Within Five Feet from Foundation Wall: Use PVC Schedule 40 conduit.
3. In or Under Building Slab on Grade: Use PVC Schedule 40 conduit with PVC coated
RGS elbows and risers when penetrating thru floor slabs and housekeeping pads.
4. Minimum Size: 1 inch.
C. Outdoor Locations: Above Grade: Use rigid steel and intermediate metal conduit.
D. Wet and Damp Locations: Use rigid steel and electrical metallic tubing.
E. Dry Locations:
1. Concealed: Use electrical metallic tubing for Home runs.
2. Exposed: Use electrical metallic tubing.
2.2 METAL CONDUIT
A. Rigid Steel Conduit: ANSI C80.1.
B. Intermediate Metal Conduit (IMC): Rigid steel.
C. Fittings and Conduit Bodies: ANSI/NEMA FB 1; all steel fittings.
2.3 PVC COATED METAL CONDUIT
A. Description: NEMA RN 1; rigid steel conduit with external PVC coating, 20 mil thick.
B. Fittings and Conduit Bodies: ANSI/NEMA FB 1; steel fittings with external PVC coating to
match conduit.
2.4 FLEXIBLE METAL CONDUIT
A. Description: Interlocked steel construction.
B. Fittings: ANSI/NEMA FB 1.
2.5 LIQUIDTIGHT FLEXIBLE METAL CONDUIT
A. Description: Interlocked steel construction with PVC jacket.
B. Fittings: ANSI/NEMA FB 1.
2.6 ELECTRICAL METALLIC TUBING (EMT)
A. Description: ANSI C80.3; galvanized tubing.
B. Fittings and Conduit Bodies: ANSI/NEMA FB 1; steel, compression, or set screw type with
insulated throats.

KGA Architecture 26 05 33 -4 May 5, 2016
UNLV Wright Hall Laboratory Build Out – 16355.00 Raceway and Boxes for Electrical Systems
2.7 NONMETALLIC CONDUIT
A. Description: NEMA TC 2; Schedule 40 PVC.
B. Fittings and Conduit Bodies: NEMA TC 3.
PART 3 - EXECUTION
3.1 INSTALLATION
A. Install conduit in accordance with NECA "Standard of Installation."
B. Install nonmetallic conduit in accordance with manufacturer's instructions.
C. Arrange supports to prevent misalignment during wiring installation.
D. Support conduit using coated steel or malleable iron straps, lay-in adjustable hangers, clevis
hangers, and split hangers.
E. Group related conduits; support using conduit rack. Construct rack using steel channel.
F. Fasten conduit supports to building structure and surfaces under provisions of Section 26 05 29.
G. Do not support conduit with wire or perforated pipe straps. Remove wire used for temporary
supports
H. Arrange conduit to maintain headroom and present neat appearance.
I. Route conduit parallel and perpendicular to walls.
J. Route conduit installed above accessible ceilings parallel and perpendicular to walls.
K. Route conduit in and under slab from point-to-point.
L. Do not cross conduits in slab.
M. Maintain adequate clearance between conduit and piping.
N. Maintain 12 inch (300 mm) clearance between conduit and surfaces with temperatures
exceeding 104 degrees F (40 degrees C).
O. Cut conduit square using saw or pipe cutter; de-burr cut ends.
P. Bring conduit to shoulder of fittings; fasten securely.
Q. Join nonmetallic conduit using cement as recommended by manufacturer. Wipe nonmetallic
conduit dry and clean before joining. Apply full even coat of cement to entire area inserted in
fitting. Allow joint to cure for 20 minutes, minimum.

KGA Architecture 26 05 33 -5 May 5, 2016
UNLV Wright Hall Laboratory Build Out – 16355.00 Raceway and Boxes for Electrical Systems
R. Use conduit hubs or sealing locknuts to fasten conduit to sheet metal boxes in damp and wet
locations and to cast boxes.
S. Install no more than equivalent of three 90-degree bends between boxes. Use conduit bodies to
make sharp changes in direction, as around beams. Use hydraulic one-shot bender to fabricate
bends in metal conduit larger than 2 inch (50 mm) size.
T. Avoid moisture traps; provide junction box with drain fitting at low points in conduit system.
U. Provide suitable fittings to accommodate expansion and deflection where conduit crosses
expansion joints.
V. Provide suitable pull string in each empty conduit except sleeves and nipples.
W. Use suitable caps to protect installed conduit against entrance of dirt and moisture.
X. Ground and bond conduit under provisions of Section 26 05 26.
Y. Identify conduit under provisions of Section 26 05 53.
Z. Use suitable insulated bushings and inserts at connections to outlets, boxes, and equipment.
AA. Do not support conduit from roof deck.
3.2 INTERFACE WITH OTHER PRODUCTS
A. Install conduit to preserve fire resistance rating of partitions and other elements, using materials
and methods under the provisions of Section 07 84 00.
END OF SECTION


KGA Architecture 26 05 35 -1 May 5, 2016
UNLV Wright Hall Laboratory Build Out – 16355.00 Boxes
SECTION 26 05 35
BOXES
PART 1 - GENERAL
1.1 SECTION INCLUDES
A. Pull and junction boxes.
B. Hand holes
1.2 RELATED SECTIONS
A. Section 26 05 33 – Raceway and Boxes For Electrical Systems.
1.3 REFERENCES
A. ANSI/NEMA FB 1 - Fittings and Supports for Conduit and Cable Assemblies.
B. ANSI/NEMA OS 1 - Sheet-steel Outlet Boxes, Device Boxes, Covers, and Box Supports.
C. ANSI/NFPA 70 - National Electrical Code.
1.4 PROJECT RECORD DOCUMENTS
A. Submit under provisions of Section 01 78 39.
B. Accurately record actual locations and mounting heights of outlet, pull and junction boxes, and
hand holes.
1.5 REGULATORY REQUIREMENTS
A. Conform to requirements of ANSI/NFPA 70.
B. Furnish products listed and classified by Underwriters Laboratories, Inc. as suitable for purpose
specified and shown.
1.6 PROJECT CONDITIONS
A. Verify field measurements are as shown on Drawings.
B. Electrical boxes are shown on Drawings in approximate locations unless dimensioned. Install at
location required for box to serve intended purpose. Include installation within 10 feet of
location shown.

KGA Architecture 26 05 35 -2 May 5, 2016
UNLV Wright Hall Laboratory Build Out – 16355.00 Boxes
PART 2 - PRODUCTS
2.1 OUTLET BOXES
A. Sheet Metal Outlet Boxes: ANSI/NEMA OS 1, galvanized steel.
B. Cast Boxes: NEMA FB 1, Type FD, aluminum, cast feralloy. Provide gasketed cover by box
manufacturer. Provide threaded hubs.
2.2 PULL AND JUNCTION BOXES
A. Sheet Metal Boxes: NEMA OS 1, galvanized steel.
B. Hand holes: Pre-cast In-ground
1. Material: Concrete-Polymer
2. Cover: Bolt down, gasketed
3. Cover legend: Electric for power and Comm for communication.
4. Box shall be Quazite-Hubbell 24x36x18 DP bottomless unless noted otherwise.
PART 3 - EXECUTION
3.1 INSTALLATION
A. Install electrical boxes as shown on Drawings, and as required for splices, taps, wire pulling,
equipment connections and compliance with regulatory requirements.
B. Install electrical boxes to maintain headroom and to present neat mechanical appearance.
C. Install pull boxes and junction boxes above accessible ceilings and in unfinished areas only.
D. Install pre-cast hand holes with cover flush with finished grade, provide 12 inches of pea gravel
all around and below hand hole to allow for drainage.
E. Do not install flush mounting boxes back-to-back in walls; provide minimum 6 inch (150 mm)
separation. Provide minimum 24 inches (600 mm) horizontal separation in acoustic or fire rated
walls.
F. Secure flush mounting box to interior wall and partition studs. Accurately position to allow for
surface finish thickness.
G. Use stamped steel bridges to fasten flush mounting outlet box between studs.
H. Install flush mounting box without damaging wall insulation or reducing its effectiveness.
I. Support boxes independently of conduit, except cast box that is connected to two rigid metal
conduits, both supported within 12 inches (300 mm) of box.
J. Use gang box where more than one device is mounted together. Do not use sectional box.
K. Use gang box with plaster ring for single device outlets.
KGA Architecture 26 05 35 -3 May 5, 2016
UNLV Wright Hall Laboratory Build Out – 16355.00 Boxes
L. Use cast outlet box in exterior locations exposed to the weather and wet locations.
M. Large Pull Boxes: Boxes larger than 100 cubic inches (1600 cubic centimeters) in volume or 12
inches (300 mm) in any dimension.
1. Interior Dry Locations: Use hinged enclosure under provisions of Section 26 27 16.
2. Other Locations: Use surface-mounted NEMA 3R box.
N. Provide insulated bushings or insulated throat connectors on all conduit connections to metal
boxes.
3.2 INTERFACE WITH OTHER PRODUCTS
3.3 ADJUSTING
A. Adjust flush-mounting outlets to make front flush with finished wall material.
B. Install knockout closure in unused box opening.
END OF SECTION


KGA Architecture 26 05 53 -1 May 5, 2016
UNLV Wright Hall Laboratory Build Out – 16355.00 Identification for Electrical Systems
SECTION 26 05 53
IDENTIFICATION FOR ELECTRICAL SYSTEMS
PART 1 - GENERAL
1.1 SECTION INCLUDES
A. Nameplates and labels.
B. Wire and cable markers.
1.2 REFERENCES
A. ANSI/NFPA 70 - National Electrical Code.
1.3 REGULATORY REQUIREMENTS
A. Conform to requirements of ANSI/NFPA 70.
B. Furnish products listed and classified by Underwriters Laboratories, Inc. as suitable for purpose
specified and shown.
PART 2 - PRODUCTS
2.1 NAMEPLATES AND LABELS
A. Nameplates: Engraved three-layer phenolic, white letters on black background. For emergency
equipment, white letters on red background.
B. Locations:
1. Each electrical distribution and control equipment enclosure.
2. Panelboards.
3. Transformers.
4. Shore Stations
C. Letter Size:
1. Use 1/2 inch letters for identifying individual equipment and loads.
2. Use 1/4 inch letters for identifying voltage systems.
D. Labels: Embossed adhesive tape, with 3/16 inch white letters on black background. Use only for
identification of individual wall switches and receptacles, control device stations.
2.2 WIRE MARKERS
A. Description: Cloth, tape, split sleeve, or tubing type wire markers.
B. Locations: Each conductor at panelboard gutters, outlet and junction boxes, and each load
connection.

KGA Architecture 26 05 53 -2 May 5, 2016
UNLV Wright Hall Laboratory Build Out – 16355.00 Identification for Electrical Systems
C. Legend:
1. Power and Lighting Circuits: Branch circuit or feeder number indicated on drawings.
2. Control Circuits: Control wire number indicated on shop drawings.
2.3 UNDERGROUND WARNING TAPE
A. Description: 4 inch wide plastic tape, detectable type, colored red with suitable warning legend
describing buried electrical lines.
PART 3 - EXECUTION
3.1 PREPARATION
A. Degrease and clean surfaces to receive nameplates and labels.
3.2 APPLICATION
A. Install nameplate and label parallel to equipment lines.
B. Secure nameplate to equipment front using screws or rivets.
C. Secure nameplate to inside surface of door on panelboard that is recessed in finished locations.
D. Identify underground conduits using underground warning tape. Install warning tape along full
length of buried conduits, directly above at 6 inches below finished grade.
E. Identify all conductors, cables, communication, and control wires with wire markers.
END OF SECTION

KGA Architecture 26 05 70 -1 May 5, 2016
UNLV Wright Hall Laboratory Build Out – 16355.00 Testing
SECTION 26 05 70
TESTING
PART 1 - GENERAL
1.1 RELATED DOCUMENTS
A. Drawings and general provisions of Contract, including General and Supplementary Conditions
and Division-1 Specification sections, apply to work of this section.
B. Division-26 sections apply to work of this section.
1.2 WORK INCLUDED
A. Extent of testing required by this section is defined to include, but is not necessarily limited to,
electrical equipment and cables.
B. Component types of testing specified in this section includes the following as applied to
electrical equipment:
1. Switchgear - General.
2. Cables - Low Voltage.
3. Grounding System.
4. Manual Transfer Switch.
1.3 QUALITY ASSURANCE
A. All inspections and tests shall be in accordance with the following applicable codes and
standards except as provided otherwise herein.
1. National Electrical Code – NEC.
2. National Electrical Manufacturers Association – NEMA.
3. American Society for Testing and Materials – ASTM.
4. Institute of Electrical and Electronic Engineers – IEEE.
5. National Electrical Testing Association – NETA.
6. American National Standards Institute – ANSI.
7. State and Local Codes and Ordinances.
8. Insulated Cable Engineers Association – ICEA.
9. National Fire Protection Association – NFPA.
B. Inspections and tests shall utilize the following references:
1. Project Design Specifications.
2. Project Design Drawings.
3. Manufacturer’s instruction manuals applicable to each particular apparatus.
1.4 SUBMITTALS
A. Submit certified test reports, signed by Supervisor who performed work.
B. Include identification and types of instruments used, and their most recent calibration date with
submission of final test report.

KGA Architecture 26 05 70 -2 May 5, 2016
UNLV Wright Hall Laboratory Build Out – 16355.00 Testing
C. Submit biographical data on Supervisor who is to directly supervise testing, adjusting, and
balancing work.
1.5 PROJECT/SITE CONDITIONS
A. Do not proceed with testing until work pertaining to the specific test has been completed.
Ensure that there is no latent residual work still to be completed.
B. Do not proceed until work scheduled for testing and adjusting is clean and free from debris, dirt,
and discarded building materials.
1.6 RESPONSIBILITY
A. The contractor shall perform routine installation resistance, continuity and rotation tests for all
distribution and utilization equipment prior to putting electrical system into service.
B. Any system material or workmanship, which is found defective on the basis of acceptance tests,
shall be corrected and documented.
C. Maintain a written record of all tests and upon completion of project, assemble and certify a
final test report.
PART 2 - PRODUCTS
2.1 TEST INSTRUMENTS
A. Utilize test instruments and equipment for work required, of type, precision, and capacity as
recommended in the following standards:
1. NETA’s Acceptance Testing Standards for Electrical Power Distribution Equipment and
Systems.
2. Test Instrument Traceability:
a. The accuracy of all testing instruments shall be traceable to the National Bureau of
Standards in an unbroken chain.
b. Instruments shall be calibrated in accordance with the following frequency
schedule:
1. Field Instruments – 6 months maximum
2. Laboratory instruments – 12 months.
3. Leased specialty equipment – 12 months (Where accuracy is guaranteed by
lesser, i.e. Doble).
c. Dated calibration labels shall be visible on all test equipment.
d. Records must be kept up-to-date which show date and results of all instruments
calibrated or tested.
e. An up-to-date instrument calibration instruction and procedure will be maintained
for each test instrument.

KGA Architecture 26 05 70 -3 May 5, 2016
UNLV Wright Hall Laboratory Build Out – 16355.00 Testing
PART 3 - EXECUTION
3.1 INSPECTION AND TEST PROCEDURES
A. Switchgear and Switchboard Assemblies:
1. Visual and Mechanical Inspection:
a. Inspect for physical damage.
b. Compare equipment nameplate information with latest single line diagram and
report discrepancies.
c. Check tightness of accessible bolted bus joints by calibrated torque wrench
method. Refer to manufacturer’s instruction for proper foot pound levels. In the
absence of specific instructions use NETA Standards.
d. All doors, panels and sections shall be inspected for paint, dents, scratches and fit.
2. Electrical Tests:
a. Insulation Resistance Test:
1. Measure insulation resistance of each bus section phase to ground.
2. Potential application shall be for one (1) minute. Test voltage shall be in
accordance with NETA Standards or manufacturer’s recommendations.
b. Over Potential Test:
1. Perform over potential test on each bus section phase to ground. Potential
application shall be for one (1) minute. Test voltage shall be in accordance
with NETA Standards or manufacturer’s recommendations.
c. Test Values:
1. Bolt torque levels shall be in accordance with manufacturer’s
recommendations.
2. Insulation resistance test to be performed in accordance with Table A.
Table A
Insulation Resistance Test Voltage
Voltage Rating Test Voltage
150 – 600V 1000V DC
d. Values of insulation resistance less than manufacturer’s minimum of KV +1 in
megohms should be investigated. Over potential test should not proceed until
insulation resistance levels are raised to said minimum.
e. Over potential test voltages shall be applied in accordance with ANSI 37.20c.
3.2 CABLES – LOW VOLTAGE (600 VOLTS AND LESS)
A. Visual and Mechanical Inspection:
1. Cables to be inspected for physical damage and proper connection in accordance with
single line diagram.
2. Cable connection shall be torque tested to manufacturer’s recommended values.
B. Electrical Tests:
1. Perform insulation resistance test on each cable with respect to ground and adjacent
cables.
2. Perform continuity test to insure proper cable connection.

KGA Architecture 26 05 70 -4 May 5, 2016
UNLV Wright Hall Laboratory Build Out – 16355.00 Testing
C. Test Values:
1. Insulation resistance tests shall be performed at 1000 volts D.C. for one-half (1/2) minute.
2. When insulation resistance must be determined with all switchboards, panelboards, fuse
holders, switches, and overcurrent devices in place, the insulation resistance when tested
at 500 volts D.C. shall be no less than below:
MINIMUM INSULATION RESISTANCE
Conductor or Minimum
Conduit Size Resistance
No 14 and 12 AWG 1,000,000 ohms
25 ampere circuits and above 250,000 ohms
3.3 GROUNDING SYSTEMS
A. Visual and Mechanical Inspection:
1. Inspect ground system for compliance with plans and specifications.
B. Electrical Tests:
1. Perform all of potential test per IEEE Standard No. 81, Section 9.04 on the main
grounding electrode or system.
2. Perform the two (2) point method test per IEEE No. 81, Section 9.03 to determine the
grounded resistance between the main grounding system and all major electrical
equipment frames, system neutral and/or derived neutral points.
3. Alternate Method:
a. Perform ground continuity test between main ground system and equipment frame,
system neutral and/or derived neutral point. This test shall be made by passing a
minimum of ten (10) amperes D.C. current between ground reference system and
the ground point to be tested. Voltage drop shall be measured and resistance
calculated by voltage drop method.
4. Test Values:
a. The main ground electrode system resistance to ground should be no greater than
five (5) ohms for commercial or industrial systems.
3.4 MANUAL TRANSFER SWITCHES
A. Visual and Mechanical Inspection:
1. Inspect for physical damage.
2. Compare equipment nameplate information and connections with single line diagram and
report and discrepancies.
3. Check switch to insure positive interlock between normal and alternate sources.
4. Check tightness of all cable connections and bus joints.
5. Perform manual transfer operation.
B. Electrical Tests:
1. Perform insulation resistance tests phase to phase and phase to ground with switch in
both load distribution equipment positions.
2. Perform manual transfer between loads.
KGA Architecture 26 05 70 -5 May 5, 2016
UNLV Wright Hall Laboratory Build Out – 16355.00 Testing
3.5 SYSTEM FUNCTION TESTS
A. General:
1. Each system specified shall be function tested to insure total system operation.
2. Upon completion of equipment tests, the system function tests shall be performed. It is
the intent of system functional tests to prove the proper interaction of all sensing,
processing and action devices to effect the design end product or result.
3. Implementation:
a. Input signal or stimuli.
b. Current Transformers.
c. Potential Transformers.
d. Design process.
e. Action device.
f. Circuit Breaker – OCB.
g. Zone Fault Protection.
B. Prepare report of recommendation for correcting unsatisfactory electrical performances.
END OF SECTION

KGA Architecture 26 24 16 -1 May 5, 2016
UNLV Wright Hall Laboratory Build Out – 16355.00 Panelboards
SECTION 26 24 16
PANELBOARDS
PART 1 - GENERAL
1.1 SECTION INCLUDES
A. Distribution panelboards.
B. Mini-Power Zone Branch circuit panelboards.
1.2 RELATED WORK
A. Section 26 05 29 - Supporting Devices.
B. Section 26 05 53 - Electrical Identification: Engraved nameplates.
1.3 REFERENCES
A. NECA (National Electrical Contractors Association) "Standard of Installation."
B. NEMA AB 1 - Molded Case Circuit Breakers.
C. NEMA ICS 2 - Industrial Control Devices, Controllers, and Assemblies.
D. NEMA PB 1 - Panelboards.
E. NEMA PB 1.1 - Instructions for Safe Installation, Operation and Maintenance of Panelboards
Rated 600 Volts or Less.
F. NFPA 70 - National Electrical Code.
1.4 SUBMITTALS
A. Submit under provisions of Section 01 33 00.
B. Shop Drawings: Indicate outline and support point dimensions, voltage, main bus ampacity,
integrated short circuit ampere rating, circuit breaker and fusible switch arrangement and sizes.
C. Manufacturer's Installation Instructions: Indicate application conditions and limitations of use
stipulated by Product testing agency. Include instructions for storage, handling, protection,
examination, preparation, installation, and starting of Product.
1.5 PROJECT RECORD DOCUMENTS
A. Submit under provisions of Section 01 78 39.
B. Record actual locations of Products; indicate actual branch circuit arrangement.

KGA Architecture 26 24 16 -2 May 5, 2016
UNLV Wright Hall Laboratory Build Out – 16355.00 Panelboards
1.6 OPERATION AND MAINTENANCE DATA
A. Submit under provisions of Section 01 33 00.
B. Maintenance Data: Include spare parts data listing; source and current prices of replacement
parts and supplies; and recommended maintenance procedures and intervals.
1.7 QUALITY ASSURANCE
A. Perform Work in accordance with NECA "Standard of Installation".
B. Maintain one copy of each document on site.
1.8 QUALIFICATIONS
A. Manufacturer: Company specializing in manufacturing the Products specified in this section
with minimum three years documented experience.
1.9 REGULATORY REQUIREMENTS
A. Conform to requirements of NFPA 70.
B. Furnish products listed and classified by UL as suitable for purpose specified and indicated.
1.10 FIELD MEASUREMENTS
A. Verify that field measurements are as indicated on shop drawings.
1.11 MAINTENANCE MATERIALS
A. Provide maintenance materials under provisions of Section 01 78 43.
B. Provide two keys for each panelboard. All panelboards shall be keyed alike.
PART 2 - PRODUCTS
2.1 MANUFACTURERS
A. Square D.
B. Eaton.
C. GE.
D. Siemens.
E. Substitutions: Under provisions of Section 01 25 00.
1. Challenger equipment is not acceptable.

KGA Architecture 26 24 16 -3 May 5, 2016
UNLV Wright Hall Laboratory Build Out – 16355.00 Panelboards
2.2 DISTRIBUTION PANELBOARDS
A. Panelboards: NEMA PB 1, circuit breaker type.
B. Service Conditions:
1. Temperature: 120 degrees F (40 degrees C).
2. Altitude: 2,500 feet.
C. Panelboard Bus: Copper, ratings as indicated. Provide copper ground bus in each panelboard.
D. Minimum short circuit rating: Fully rated, 10,000 amperes rms symmetrical for 240 volt
panelboards; 14,000 amperes rms symmetrical for 480 volt panelboards, or as indicated on
schedules.
E. Molded Case Circuit Breakers: NEMA AB 1. Provide circuit breakers with integral thermal and
instantaneous magnetic trip in each pole. Provide circuit breakers UL listed as Type HACR for
air conditioning equipment branch circuits. Bolt-on type circuit breakers.
F. Provide circuit breaker accessory trip units and auxiliary switches as indicated.
G. Enclosure: NEMA PB 1, Type 3R. As needed by capacity. Indicated on drawings.
H. Cabinet Front: Surface type, fastened with screw cover. Provide hinged door with flush lock.
Finish in manufacturer's standard gray enamel.
I. Integral Surge Protection Device (SPD)
1. Provide per Specification Section 26 35 53.
2. Locations as shown on one line diagram
2.3 MINI-POWER ZONE BRANCH CIRCUIT PANELBOARDS
A. Lighting and Appliance Branch Circuit Panelboards: NEMA PB1, circuit breaker type.
B. Panelboard Bus: Copper, ratings as indicated. Provide copper ground bus in each panelboard;
provide insulated ground bus where scheduled.
C. Minimum integrated short circuit rating: 10,000 amperes rms symmetrical for 240 volt
panelboards.
D. Molded Case Circuit Breakers: NEMA AB 1, bolt-on type thermal magnetic trip circuit breakers,
with common trip handle for all poles. Provide circuit breakers UL listed as Type SWD for
lighting circuits. Provide UL Class A ground fault interrupter circuit breakers where scheduled.
Do not use tandem circuit breakers. Bolt on type circuit breakers.
1. Provide circuit breaker lock on devices for panels supplying computer loads.
E. Enclosure: NEMA PB 1, Type 3R.
F. Cabinet box: Integral, matching to transformer section.
G. Cabinet Front: Surface cabinet front with concealed trim clamps, concealed hinge, and flush lock
all keyed alike. Finish in manufacturer's standard gray enamel.

KGA Architecture 26 24 16 -4 May 5, 2016
UNLV Wright Hall Laboratory Build Out – 16355.00 Panelboards
PART 3 - EXECUTION
3.1 INSTALLATION
A. Install panelboards in accordance with NEMA PB 1.1.
B. Install panelboards plumb. Provide supports in accordance with Section 26 05 29.
C. Height: 6 ft to top of Mini-Power Zone enclosure.
D. Provide filler plates for unused spaces in panelboards.
E. Provide typed or neatly handwritten circuit directory for each branch circuit panelboard. Revise
directory to reflect circuiting changes required to balance phase loads.
F. Provide engraved plastic nameplates under the provisions of Section 26 05 53.
3.2 FIELD QUALITY CONTROL
A. Field inspection and testing will be performed under provisions of Section 01 40 00.
B. Measure steady state load currents at each panelboard feeder; rearrange circuits in the panelboard
to balance the phase loads to within 20 percent of each other. Maintain proper phasing for
multi-wire branch circuits.
C. Visual and Mechanical Inspection: Inspect for physical damage, proper alignment, anchorage,
and grounding. Check proper installation and tightness of connections for circuit breakers.
END OF SECTION
KGA Architecture 26 27 26 -1 May 5, 2016
UNLV Wright Hall Laboratory Build Out – 16355.00 Wiring Devices
SECTION 26 27 26
WIRING DEVICES
PART 1 - GENERAL
1.1 SECTION INCLUDES
A. Receptacles.
B. Device plates.
1.2 RELATED SECTIONS
A. Section 26 05 35 - Boxes.
B. Section 26 05 33 – Raceways and Boxes for Electrical Systems
1.3 REFERENCES
A. NEMA WD 1 - General Purpose Wiring Devices.
B. NEMA WD 6 - Wiring Device Configurations.
1.4 SUBMITTALS
A. Submit under provisions of Section 01 33 00.
B. Product Data: Provide manufacturer's catalog information showing dimensions, colors, and
configurations.
C. Manufacturer's Instructions:
1. Indicate application conditions and limitations of use stipulated by product testing
agency specified under regulatory requirements.
2. Include instructions for storage, handling, protection, examination, preparation,
operation and installation of product.
D. Warranty: Provide letter from manufacturer and contractor acknowledging warranty
requirements.
1.5 QUALIFICATIONS
A. Manufacturer: Company specializing in manufacturing products specified in this Section with
minimum three years documented experience.
1.6 REGULATORY REQUIREMENTS
A. Conform to requirements of ANSI/NFPA 70.
KGA Architecture 26 27 26 -2 May 5, 2016
UNLV Wright Hall Laboratory Build Out – 16355.00 Wiring Devices
B. Furnish products listed and classified by Underwriters Laboratories, Inc. as suitable for purpose
specified and shown.
1.7 RECEPTACLES
A. Manufacturers:
1. Leviton.
2. Pass & Seymour.
3. Hubbell.
B. Description: NEMA WD 1; heavy-duty specification grade side and back wired.
C. Device Body: Brown nylon.
D. Configuration: NEMA WD 6; type as specified and indicated.
E. Convenience Receptacle: Type 5-20.
F. GFCI Receptacle: Convenience receptacle with integral ground fault circuit interrupter to meet
regulatory requirements.
1.8 DEVICE PLATES
A. Device plates shall be weather-proof cast aluminum for device mounting with “in-use” cover.
1.9 EXAMINATION
A. Verify conditions under provisions of Section 01 31 13.
B. Verify outlet boxes are installed at proper height.
C. Verify branch circuit wiring installation is completed, tested, and ready for connection to
wiring devices.
1.10 INSTALLATION
A. Install products in accordance with manufacturer's instructions.
B. Install devices plumb and level.
C. Install receptacles with grounding pole on bottom.
D. Connect wiring device grounding terminal to branch circuit equipment grounding conductor.
E. Connect wiring devices by wrapping conductor around screw terminal or by using screw down
clamp.
KGA Architecture 26 27 26 -3 May 5, 2016
UNLV Wright Hall Laboratory Build Out – 16355.00 Wiring Devices
1.11 INTERFACE WITH OTHER PRODUCTS
A. Coordinate locations of outlet boxes provided under Section 26 05 35 to obtain mounting
heights specified and indicated on Drawings.
B. Install convenience receptacle 48 inches above finished grade.
1.12 FIELD QUALITY CONTROL
A. Inspect each wiring device for defects.
B. Verify that each receptacle device is energized.
C. Test each receptacle device for proper polarity.
D. Test each GFCI receptacle device for proper operation.
END OF SECTION


KGA Architecture 26 28 19 -1 May 5, 2016
UNLV Wright Hall Laboratory Build Out – 16355.00 Enclosed Switches
SECTION 26 28 19
ENCLOSED SWITCHES
PART 1 - GENERAL
1.1 SECTION INCLUDES
A. Fusible switches.
B. Nonfusible switches.
C. Fuses.
1.2 REFERENCES
A. NEMA KS 1 - Enclosed Switches.
B. NFPA 70 - National Electrical Code.
C. UL 198C - High-Interrupting Capacity Fuses; Current Limiting Type.
D. UL 198E - Class R Fuses.
1.3 SUBMITTALS
A. Submit under provisions of Section 01 33 00.
B. Product Data: Provide switch ratings and enclosure dimensions.
C. Manufacturer's Instructions: Indicate application conditions and limitations of use stipulated by
Product testing agency specified under Regulatory Requirements. Include instructions for
storage, handling, protection, examination, preparation, installation, and starting of Product.
1.4 QUALITY ASSURANCE
A. Perform Work in accordance with NECA Standard of Installation.
B. Maintain one copy of each document on site.
1.5 QUALIFICATIONS
A. Manufacturer: Company specializing in manufacturing Products specified in this Section with
minimum three years documented experience.
1.6 REGULATORY REQUIREMENTS
A. Conform to requirements of NFPA 70.

KGA Architecture 26 28 19 -2 May 5, 2016
UNLV Wright Hall Laboratory Build Out – 16355.00 Enclosed Switches
B. Furnish products listed and classified by UL as suitable for purpose specified and shown.
PART 2 - PRODUCTS
2.1 ENCLOSED SWITCHES
A. Fusible Switch Assemblies: NEMA KS 1, Type HD load interrupter enclosed knife switch
with externally operable handle interlocked to prevent opening front cover with switch in ON
position. Handle lockable in OFF position. Fuse clips: Designed to accommodate Class R
fuses.
B. Nonfusible Switch Assemblies: NEMA KS 1, Type HD load interrupter enclosed knife switch
with externally operable handle interlocked to prevent opening front cover with switch in ON
position. Handle lockable in OFF position.
C. Enclosures: NEMA KS 1.
1. Exterior Locations: Type 3R.
2.2 FUSES
A. Description: Dual element, current limiting, time delay, one-time fuse, UL 198E, Class RK 1.
B. Interrupting Rating: 200,000 rms amperes.
PART 3 - EXECUTION
3.1 INSTALLATION
A. Install disconnect switches where indicated.
B. Install fuses in fusible disconnect switches. Verify size with nameplate of equipment and
adjust fuse sizes to match.
C. Provide adhesive label on inside door of each switch indicating UL fuse class and size for
replacement.
D. Provide nameplate on outside per Section 26 05 53.
END OF SECTION

KGA Architecture 26 51 00 -1 May 5, 2016
UNLV Wright Hall Laboratory Build Out – 16355.00 Interior Lighting
SECTION 26 51 00
INTERIOR LUMINARIES
PART 1 - GENERAL
1.1 SECTION INCLUDES
A. Interior luminaries and accessories.
B. Emergency lighting units.
C. Exit signs.
D. Ballasts.
E. Lamps.
F. Luminaire accessories.
1.2 RELATED SECTIONS
A. Section 26 05 35 - Boxes.
1.3 REFERENCES
A. ANSI C78.379 - Electric Lamps - Incandescent and High- Intensity Discharge Reflector Lamps -
Classification of Beam Patterns.
B. ANSI C82.1 - Ballasts for Fluorescent Lamps -Specifications.
C. ANSI C82.4 - Ballasts for High-Intensity Discharge and Low Pressure Sodium Lamps (Multiple
Supply Type).
D. ANSI/NFPA 70 - National Electrical Code.
E. ANSI/NFPA 101 - Life Safety Code.
F. NEMA WD 6 - Wiring Devices-Dimensional Requirements.
1.4 SUBMITTALS
A. Submit under provisions of Section 01 33 00.
B. Shop Drawings: Indicate dimensions and components for each luminaire that is not a standard
product of the manufacturer.
C. Product Data: Provide dimensions, ratings, and performance data.
1. Provide documentation indicating the understanding and implementation of 3.2 S.

KGA Architecture 26 51 00 -2 May 5, 2016
UNLV Wright Hall Laboratory Build Out – 16355.00 Interior Lighting
D. Manufacturer's Instructions: Indicate application conditions and limitations of use stipulated by
product testing agency specified under Regulatory Requirements.
E. Manufacturer's Instructions: Include instructions for storage, handling, protection, examination,
preparation, and installation of product.
1.5 PROJECT RECORD DOCUMENTS
A. Submit under provisions of Section 01 78 39.
B. Accurately record actual locations of each luminaire.
1.6 OPERATION AND MAINTENANCE DATA
A. Submit under provisions of Section 01 78 23.
B. Maintenance Data: Include replacement parts list.
C. Warranty: Provide letter from manufacturer and letter from contractor acknowledging warranty.
1.7 QUALIFICATIONS
A. Manufacturer: Company specializing in manufacturing products specified in this Section with
minimum three years documented experience.
1. Ballast manufacturer shall have been manufacturing electronic ballast for at least 10 years.
1.8 REGULATORY REQUIREMENTS
A. Conform to requirements of ANSI/NFPA 70.
B. Conform to requirements of NFPA 101.
C. Furnish products listed and classified by Underwriters Laboratories, Inc. as suitable for purpose
specified and shown.
PART 2 - PRODUCTS
2.1 LUMINARIES
A. Furnish products as specified in schedule.
B. Substitutions: Under provisions of Section 01 25 00.
C. Fluorescent Fixtures:
1. Description: Static Troffer type luminaire with ballast and lamps installed by luminaire
manufacturer. The following fixtures have been evaluated as meeting the following
specification:
a. Lithonia.
KGA Architecture 26 51 00 -3 May 5, 2016
UNLV Wright Hall Laboratory Build Out – 16355.00 Interior Lighting
b. Columbia.
c. Lightolier.
d. Williams.
e. Prudential.
f. Metalux.
g. Daybrite.
h. Similar fixtures in the same specifications family for 2 lamp, 3 lamp, and 1 x 4
fixtures are also approved equal.
2. Material: .026 min. per UL "Code Gauge" gauge sheet steel housing with steel end plates
and embossed reinforced ribs for strength and rigidity.
3. Lens and Enclosure: Prismatic acrylic lens, pattern 19. Provide gasketing between frame
and luminaire housing or permanent, integral light stop to illuminate "light leak". Foam
gasketing is not acceptable.
4. Photometric Control Elements: White coating, baked to form a smooth glossy durable
finish electrostatically applied. Minimum reflectance to be 86%.
5. Photometric Performance: Minimum coefficient of utilization 0.65 at room cavity ratio of
2 with ceiling- wall-floor reflectance of 70-50-20 percent and with A19 lens.
6. Socket Assembly: Bracket assembly shall be code gauge cold rolled steel held firmly in
place without screws. Provide tombstone style pressure lock lampholders with plated
contacts. Center of lamp to lenses shall be no closer than 2.7 inches. Lenses shall have a
uniform brightness without lamp imaging.
7. Mounting: As scheduled.
8. Ballast: Per section 2.04.
9. Lamp: Two, three, or four as noted on schedule.
10. Flush Door Frame: .045 inch extruded aluminum with mitered corners, equipped with two
replaceable zinc plated T-type hinges and two replaceable cam latches. Painted white to
match fixture.
11. Wireway Cover: Code gauge tension secured with hinging on one side, or captioned
spring cover mounting with removable chains.
2.2 EXIT SIGNS
A. Description: Exit sign fixture.
B. Housing: Painted Steel.
C. Face: Painted Steel.
D. Directional Arrows: As indicated.
E. Mounting: As indicated.
F. Lamps: Photoluminescent (Red).
G. Input Voltage: N/A.
H. Accessories: Provide wire guard for signs in Multipurpose Room, P.E. Room and Exterior.

KGA Architecture 26 51 00 -4 May 5, 2016
UNLV Wright Hall Laboratory Build Out – 16355.00 Interior Lighting
2.3 BALLASTS
A. High Performance Fluorescent (Super T8) Electronic Ballast:
1. General: All electronic ballasts shall meet the requirements of UL 935 and shall bear the
appropriate UL label.
2. Submittals: Provide manufacturers' data for each type of electronic ballast installed. Also
provide nationally recognized independent test laboratory data verifying compliance with
the specifications herein. Indicate actual lumen output of lamps with ballast.
3. Warranty: The electronic ballasts shall be warranted against defects in material and
workmanship for five years and include a $15 replacement labor allowance.
4. Mechanical Construction: Electronic ballasts shall have the same physical dimensions,
mounting arrangements and ballast to lamp socket lead lengths as those of their core and
coil counterparts.
5. Electrical Characteristics: The electronic ballast shall withstand input power line
transients as defined in ANSI C62.41. The ballast shall tolerate a line voltage frequency
variation of +/- 10%.
a. Multi-Volt Ballast shall operate from a line voltage range of 108-305 volts, 50/60
HZ.
6. The power factor shall be 98% or higher. The lamp crest factor shall measure 1.7 or less.
7. The electronic ballast shall be Class "A" sound rated and UL Class P thermally protected.
8. Total harmonic distortion of the input current to the electronic ballast shall not exceed
10% of the input current.
9. The electronic ballast shall comply with FCC rules and regulations, Part 18 concerning the
generation of both EMI (electromagnetic interference) and RFI (radio frequency
interference).
10. Ballast system Efficacy shall not be less than 93 Lumens / Watt. Lamp lumens of the
ballast system shall not be less than 71% of the rated lumens of the lamp.
11. The electronic ballast shall operate the lamp at a frequency of 42 KHZ or greater to both
improve lamp efficiency and reduce the effects of lamp flicker. Lamp Flicker Index shall
be less than 3%.
12. The ballast shall start and operate standard lamps at 50 degrees F. and energy savings
lamps at 60 degrees F. Ballast case temperature shall not exceed 25 degrees C. rise above
a 40 degrees C. ambient.
13. The ballast shall be provided with an internal fuse to protect the electrical power supply
from internal component failure. The ballast shall also be short circuit protected in the
event of miswiring.
14. Due to the extensive use of motion sensors, only Programmed rapid-start type ballasts will
be considered. Do not use instant start type ballasts.
15. Approvals: Each ballast/lamp combination will be considered separately. Blanket
approval of a manufacturer's line of ballasts will not be given.
16. Performance Evaluation: All evaluations will be based upon independent laboratory test
data. All ballasts must be approved prior to individual project bidding.
17. Provide a single ballast in all 1, 2, 3, or 4 lamp fixtures that do not have multiple switching.
Provide 1 - 2 lamp and 1 - 1 lamp ballast in 3 lamp multiple switched fixtures. Provide 2 -
2 lamp ballasts in 4 lamp multiple switched fixtures. Lamps and ballasts may be Tandem
wired in multiple switched fixtures. Maximum run 20 ft.
18. Ballast shall allow for Independent Lamp Operation which allows for remaining lamps to
maintain full light output if one or more lamps fail.
KGA Architecture 26 51 00 -5 May 5, 2016
UNLV Wright Hall Laboratory Build Out – 16355.00 Interior Lighting
19. Ballast factors:
a. Low - .75 Minimum
b. Normal - .85
c. High – 1.2
20. Ballast shall be provided with integral loads per ANSI C82.11 and manufacturer installed
quick plug-in style connectors.
21. Ballast shall not contain designated hazardous chemicals.
22. Ballast shall be manufactured in IS0 9002 Certified Facility.
B. High Intensity Discharge (HID) Ballast:
1. Description: Pulse start metal halide ballast equal to Venture Uni-Form pulse start system.
2. Provide ballast suitable for lamp specified.
3. Voltage: Match luminaire voltage.
2.4 LAMPS
A. Lamps shall be as manufactured by:
1. Sylvania – Xtreme XPS EcoLogic (FO32/841/XPS/ECO).
2. General Electric – High Lumen ECO (F32T8/XL/SPX841/HL/ECO).
3. Philips – Advantage ALTO (F32T8/ADV/841/ALTO).
B. Metal halide lamps shall be equal to Venture Uni-Form pulse start lamps.
C. Do not substitute other manufacturers.
D. Super T8 fluorescent lamps shall be 230ma with an initial lumen output of 3100 lumens, 85 CRI,
and color temperature of 4100 Kelvins unless otherwise noted on the fixture schedule.
PART 3 - EXECUTION
3.1 EXAMINATION
A. Examine substrate and supporting grids for luminaires.
B. Examine each luminaire to determine suitability for lamps specified.
3.2 INSTALLATION
A. Install in accordance with manufacturer’s instructions.
B. Install suspended luminaries using pendants supported from swivel hangers. Provide pendant
length required to suspend luminaire at indicated height.
C. 2’ x 4’ luminaries are to be supported per one of the following methods:
1. Independently of the ceiling grid with (4) #12 gauge wires from the fixture to the building
structure. OR
2. By the ceiling grid with a minimum of one #12 gauge support wire from the grid within 3”
of each of the four corners of the fixture.
D. Locate recessed ceiling luminaries as indicated on reflected ceiling plan.

KGA Architecture 26 51 00 -6 May 5, 2016
UNLV Wright Hall Laboratory Build Out – 16355.00 Interior Lighting
E. Install surface mounted luminaries and exit signs plumb and adjust to align with building lines
and with each other. Secure to prohibit movement.
F. Install recessed luminaries to permit removal from below. Connect with flexible metal conduit
from a J-Box in vicinity of fixture. Limit flex to 6’ maximum.
G. Install recessed luminaries using accessories and firestopping materials to meet regulatory
requirements for fire rating.
H. Install clips to secure recessed grid-supported luminaries in place.
I. Install wall mounted luminaries, emergency lighting units and exit signs at height as indicated on
Drawings.
J. Install accessories furnished with each luminaire.
K. Connect luminaries, emergency lighting units and exit signs to branch circuit outlets provided
under Section 26 05 35 as indicated.
L. Make wiring connections to branch circuit using building wire with insulation suitable for
temperature conditions within luminaire.
M. Bond products and metal accessories to branch circuit equipment grounding conductor.
N. Install specified lamps in each luminaire, emergency lighting unit and exit sign.
O. Do not use manufactured wiring systems.
P. Install #12 seismic support wires to luminaries as follows:
1. 2’ x 4’ luminaire – 2 total, located at diagonal corners.
2. Recessed cans – 1 total.
Q. Seismic support wires may be slack under normal conditions but shall not allow more than 6”
deflection of the fixture if the ceiling is eliminated.
R. Ceiling mounted motion sensors and smoke detectors are to be fed with a shore flexible whip and
supported by a 24” bracket bar hanger clipped to T-bar ceiling.
S. Label all fixtures with manufacture name, catalog number, lamp part number and lamp
manufacture name in permanent marker pen. Use of preprinted labels is acceptable.
3.3 FIELD QUALITY CONTROL
A. Operate each luminaire after installation and connection. Inspect for proper connection and
operation.

KGA Architecture 26 51 00 -7 May 5, 2016
UNLV Wright Hall Laboratory Build Out – 16355.00 Interior Lighting
3.4 ADJUSTING
A. Adjust Work under provisions of Section 01 77 00.
B. Aim and adjust luminaries as indicated on Drawings.
C. Adjust exit sign directional arrows as indicated.
D. Relamp luminaries that have failed lamps at Substantial Completion.
3.5 CLEANING
A. Clean Work under provisions of Section 01 74 23.
B. Clean electrical parts to remove conductive and deleterious materials.
C. Remove dirt and debris from enclosure.
D. Clean photometric control surfaces as recommended by manufacturer.
E. Clean finishes and touch up damage.
3.6 DEMONSTRATION
A. Provide systems demonstration under provisions of Section 01 75 00.
B. Provide minimum of two hours demonstration of luminaire operation.
END OF SECTION
