proper body mechanics techniques for patient transfers...
TRANSCRIPT
Proper Body Mechanics Techniques for Patient Transfers,
and Bed Mobility
Athens-Limestone HospitalKevin Steen

General Safety Rules
Plan the activityMaintain neutral spineBrace abdominals, keep head and shoulders upGet as close to patient as possibleGet help or assistive equipment whenever possible

General Safety Rules
Pivot or side step-Do Not TwistMake sure path is clearProperly position chair/bed/equipmentTransfer patient to stronger side unless otherwise instructedBend your knees, use your legs when lifting. Do not lift with straight legs
General Safety Rules
Have the patient assist you as much as possible. Know their statusProvide clear directions to patient on what you are about to do, and their role assisting.Use a draw sheet for bed mobility if patient can only minimally assist.Adjust the bed to make transfers easier

General Safety Rules
Whenever possible, use your body weight and momentum to move patient rather than “muscle” a patient up.Place feet shoulder width apart or one foot in front of another to make a wide base.Do not lean over patient.
Back Injury: PreventionBack Injury: Prevention
Proper lifting techniques and transfer Proper lifting techniques and transfer trainingtraining Proper body mechanics can greatly decrease Proper body mechanics can greatly decrease
the risk for injury for both health care worker the risk for injury for both health care worker and the patient and the patient
B.A.C.KB.A.C.K BBack Straight ack Straight AAvoid Twisting void Twisting CClose to Body lose to Body KKeep Smootheep Smooth
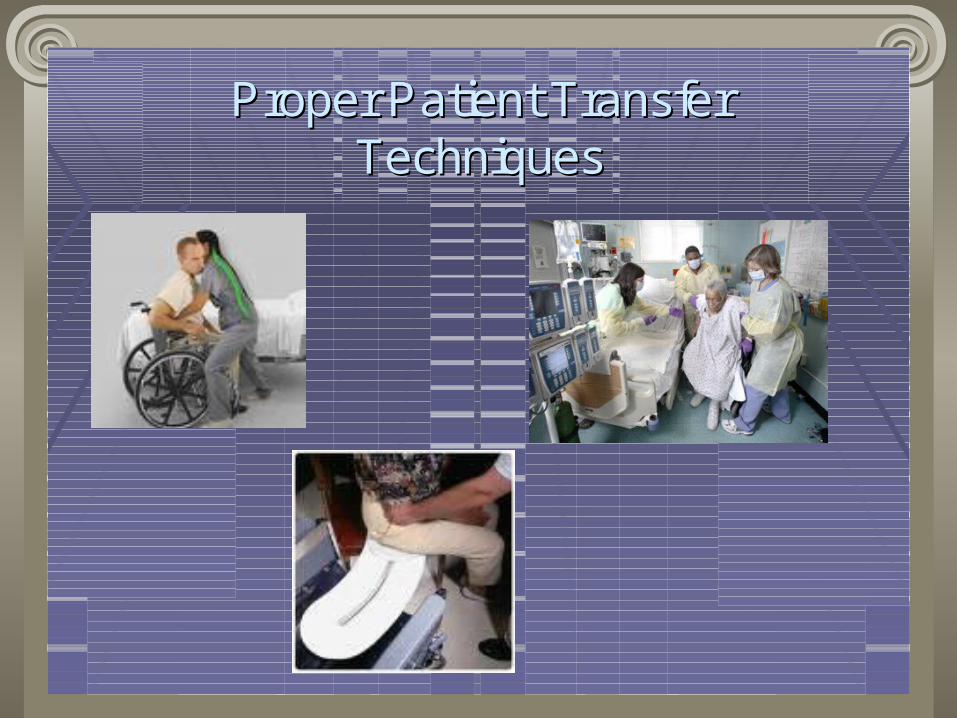
Proper Patient Transfer Proper Patient Transfer TechniquesTechniques

Types of Patient TransfersTypes of Patient Transfers
IndependentIndependent One or Two personOne or Two person Supine to sitSupine to sit Stand PivotStand Pivot Slide boardSlide board Mechanical liftMechanical lift Slide SheetSlide Sheet Bathroom: commode or tub transfersBathroom: commode or tub transfers

Tips for Safe TransfersTips for Safe Transfers
Always use a Gait Belt for added securityAlways use a Gait Belt for added security Provides comfort for patient and a better Provides comfort for patient and a better
handle for health care providerhandle for health care provider
Know patient before attempting transferKnow patient before attempting transfer Read chart to find limitations, precautions, etc Read chart to find limitations, precautions, etc
get the full picture firstget the full picture first
Make sure path is clear of clutter and Make sure path is clear of clutter and enough space is provided for safe transferenough space is provided for safe transfer

Patient LiftingPatient Lifting
Transfer technique similar to lifting Transfer technique similar to lifting technique just lifting a person technique just lifting a person vsvs an objectan object
Keeping center of gravity (COG) low will Keeping center of gravity (COG) low will provide more leverage in performing provide more leverage in performing transfertransfer

Transfer: Sliding Patient up Transfer: Sliding Patient up in bedin bed
Explain to patient what you are going to doExplain to patient what you are going to do Make sure head of bed is lowered fully, move Make sure head of bed is lowered fully, move
pillow up to where patients head will bepillow up to where patients head will be Have patient cross arms and lift headHave patient cross arms and lift head Use draw sheet/incontinence pad to decrease Use draw sheet/incontinence pad to decrease
shearing forceshearing force Use proper body mechanics and lift on “3”Use proper body mechanics and lift on “3” Make sure you position patient comfortably Make sure you position patient comfortably
following transfer following transfer

Transfer: Supine to SitTransfer: Supine to Sit
To get patient from laying down to sitting at the To get patient from laying down to sitting at the side of bedside of bed Explain the procedure of what you will be doingExplain the procedure of what you will be doing Use proper body MechanicsUse proper body Mechanics Support the patients body and bring them from supine Support the patients body and bring them from supine
to sitting at the edge of the bedto sitting at the edge of the bed Avoid pain as much as possibleAvoid pain as much as possible Sit with patient to ensure safety, then when ready Sit with patient to ensure safety, then when ready
position them for comfort or prepare for transferposition them for comfort or prepare for transfer

Supine to SitSupine to Sit
Dependent patients:Dependent patients: Move patient by body segments; lower legs, Move patient by body segments; lower legs,
hips, shoulders, head, etc to scoot them hips, shoulders, head, etc to scoot them closer to edge of bed, use draw pad for closer to edge of bed, use draw pad for moving trunkmoving trunk
Support shoulders while legs are close to Support shoulders while legs are close to EOB, use proper body mechanics and lift EOB, use proper body mechanics and lift shoulders as legs lowershoulders as legs lower
Support patient in sittingSupport patient in sitting

Supine to SitSupine to Sit
Patients who need min/mod assist:Patients who need min/mod assist: Have patients move toward EOB by scooting Have patients move toward EOB by scooting
their legs, have them do bridges to scoot hips their legs, have them do bridges to scoot hips and trunk, and lift their neck and shouldersand trunk, and lift their neck and shoulders
Once close to EOB, support patients Once close to EOB, support patients shoulders and assist them to sitshoulders and assist them to sit
Patients should use legs to dig into side of Patients should use legs to dig into side of bed to help pull to sittingbed to help pull to sitting

Supine to Sit: Log rollSupine to Sit: Log roll
Patients who need supervision:Patients who need supervision: Have patient bend knee and reach arm Have patient bend knee and reach arm
across body across body As knee falls across body and arm reaches As knee falls across body and arm reaches
patient will roll onto their sidepatient will roll onto their side Once in Once in sidelyingsidelying, pt will use arm and , pt will use arm and
opposite elbow to push themselves up as opposite elbow to push themselves up as their legs come off the side of the bedtheir legs come off the side of the bed
Sit to StandSit to Stand
Have patient scoot to edge of chairHave patient scoot to edge of chair Pull feet back toward them so knees are over Pull feet back toward them so knees are over
the toesthe toes Patients will use arm rails/chair rails to push up Patients will use arm rails/chair rails to push up
onon Use gait belt for better grasp/safetyUse gait belt for better grasp/safety Can use a count of 1Can use a count of 1--22--3, have patient lean 3, have patient lean
forward as they push up; “nose over toes” forward as they push up; “nose over toes” Steady patient and ensure no dizzinessSteady patient and ensure no dizziness

Transfer DemonstrationsTransfer Demonstrations
Sit to StandSit to Stand “nose over toes”“nose over toes”
Chair to WheelchairChair to Wheelchair Slide board Slide board vsvs stand pivotstand pivot
Stand PivotStand Pivot Weight bearing precautions patient CVAWeight bearing precautions patient CVA

AmbulationAmbulation
Use of gait beltUse of gait belt Use of an assistive device as appropriate:Use of an assistive device as appropriate:
WalkerWalker CaneCane CrutchesCrutches
Surfaces: Surfaces: Even and UnevenEven and Uneven inclines/declinesinclines/declines change in surface (tile to carpet to grass)change in surface (tile to carpet to grass)

Proper use of Assistive DeviceProper use of Assistive Device
Walkers: Kept close to the body, patient Walkers: Kept close to the body, patient should stay within the frame of the walkershould stay within the frame of the walker
Cane: To be used on the “weak” side (acts Cane: To be used on the “weak” side (acts as a supporting leg) OR used on strong as a supporting leg) OR used on strong side to decrease weight bearing (lean side to decrease weight bearing (lean away from bad leg)away from bad leg)
Crutches: Slow paced, Crutches: Slow paced, not good for the elderlynot good for the elderly

Wheelchair transfersWheelchair transfers
Prepare WC:Prepare WC: Place WC near bed/chairPlace WC near bed/chair Remove leg rests, swing them away if needed Remove leg rests, swing them away if needed
to remove tripping obstacleto remove tripping obstacle Remove arm rests if neededRemove arm rests if needed Lock WheelchairLock Wheelchair
Wheelchair TransfersWheelchair Transfers
StandStand--Pivot (supervision assist)Pivot (supervision assist) Stand to side of patient out of the path of the WCStand to side of patient out of the path of the WC Using gait belt, assist in standing; once standing, Using gait belt, assist in standing; once standing,
have patient reach toward far arm rest of wheel chairhave patient reach toward far arm rest of wheel chair Hand is placed securely on arm and bottom is turned Hand is placed securely on arm and bottom is turned
toward seat, patient reached back with other arm to toward seat, patient reached back with other arm to secure other arm rest and slowly lowers to seatsecure other arm rest and slowly lowers to seat
Position patient for comfortPosition patient for comfort

Wheelchair TransfersWheelchair Transfers
Stand Pivot (min to mod assistance)Stand Pivot (min to mod assistance) Remove arm rest closest to patientRemove arm rest closest to patient Stand in front of patient, use good body Stand in front of patient, use good body
mechanicsmechanics Use gait belt to assist patient to perform sit to Use gait belt to assist patient to perform sit to
stand transferstand transfer Have patient reach toward arm rest and aim Have patient reach toward arm rest and aim
bottom to WC, guide hips with gait belt and bottom to WC, guide hips with gait belt and slowly lower into seatslowly lower into seat
Replace arm rest, position patient comfortablyReplace arm rest, position patient comfortably

Wheelchair transfersWheelchair transfers
Slide Board transferSlide Board transfer Remove arm rest closest to patientRemove arm rest closest to patient Have them shift their weight to place board under one Have them shift their weight to place board under one
side of their bottom with the other end of side of their bottom with the other end of slideboardslideboardonto WConto WC
Pt will slowly scoot along Pt will slowly scoot along slideboardslideboard with hand on with hand on board to secure until in seat, have them shift weight in board to secure until in seat, have them shift weight in order to gently remove boardorder to gently remove board
Always use gait belt to guide pt and assist with liftingAlways use gait belt to guide pt and assist with lifting Replace arm rest and position pt comfortablyReplace arm rest and position pt comfortably