prospec hd101 prospec hd101dc - triple s · form no. 56091054 - prospec hd101 / hd101dc - 3...
TRANSCRIPT

10/11 Form Number 56091054
INSTRUCTIONS FOR USE
ProSpec HD101
MODELS: 56382658, 56382659
ProSpec HD101DC
FOR YOUR CONVENIENCE, RECORD THE FOLLOWING IMPORTANT INFORMATION
MODEL:
SERIAL NUMBER:
DATE PURCHASED:
PURCHASED FROM:

2 - FORM NO. 56091054 - ProSpec HD101 / HD101DC
IMPORTANT SAFETY INSTRUCTIONSWhen using an electrical appliance, basic precautions should always be followed, including the following:Read all instructions before using.This machine is for commercial use, for example in hotels, schools, hospitals, factories, shops and offi ces other than normal residential housekeeping purposes.THIS APPLIANCE IS INTENDED FOR DRY USE ONLY!DO NOT USE FOR WET FLOOR OR CARPET!
WARNING!To reduce the risk of fi re, electric shock, or injury:Failure to follow these safety instructions could result in damage to the machine, damage to property, or bodily injury.
* Use machine only as described in this manual. Do not use in ways it was not intended. Use only manufacturer’s recommended attachments.
* Do not leave the machine unattended when it is plugged in. Turn off all switches and unplug the electrical cord when not in use and before servicing.
* Do not allow to be used by untrained personnel. Close attention is necessary when used near children.* If the machine is not working as it should, has been dropped, damaged, or left outdoors, return it to a service center before
using.* Avoid electrical shock, do not handle the plug or machine with wet hands. To unplug the cord, grasp the plug. Do not pull on the
cord.* Do not use extension cords or outlets with inadequate current carrying capacity. Do not use with a damaged cord or plug. Connect
the machine only to a properly grounded outlet (refer to GROUNDING INSTRUCTIONS). Avoid damaging cord (closing doors on cord, pulling around sharp edges or corners, hot surfaces, or running machine over cord).
* This machine creates suction and contains a revolving brush roll. Keep hair, loose clothing, fi ngers, and all other parts of the body away from openings and moving parts. Do not insert any object into any of the openings in the machine.
* Do not pick up anything that is burning or smoking, such as cigarettes, matches, or hot ashes.* Do not use the machine to pick up fl ammable or combustible liquids such as gasoline. Do not use in areas where fl ammable and/
or explosive vapor or dust is present to avoid the possibility of fi re or explosion. Some cleaning fl uids can produce such vapors.* This machine is not suitable for picking up health endangering dust.* Use extra care when cleaning on stairs.* Unplug electrical appliances before vacuuming them.* Do not use outdoors or on wet surfaces.* Do not use without dust bag in place.* Store the machine in a cool, dry area.
SAVE THESE INSTRUCTIONS
FORM NO. 56091054 - ProSpec HD101 / HD101DC - 3
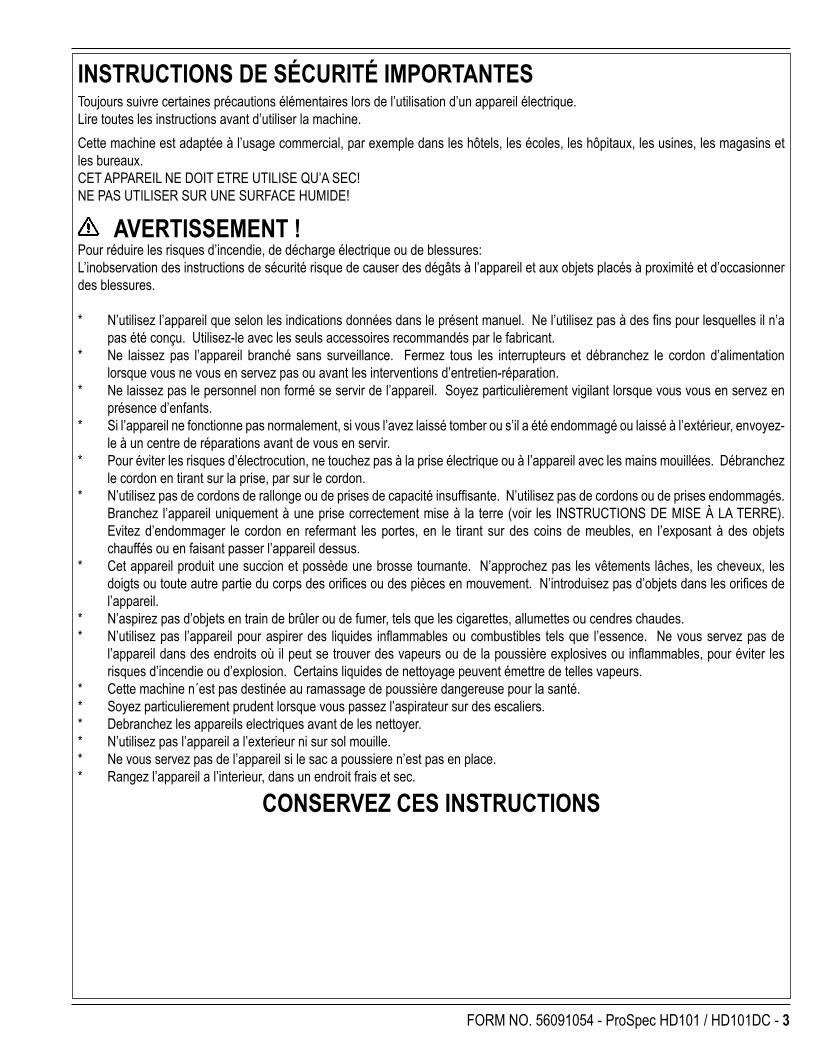
INSTRUCTIONS DE SÉCURITÉ IMPORTANTESToujours suivre certaines précautions élémentaires lors de l’utilisation d’un appareil électrique.Lire toutes les instructions avant d’utiliser la machine.Cette machine est adaptée à l’usage commercial, par exemple dans les hôtels, les écoles, les hôpitaux, les usines, les magasins et les bureaux. CET APPAREIL NE DOIT ETRE UTILISE QU’A SEC!NE PAS UTILISER SUR UNE SURFACE HUMIDE!
AVERTISSEMENT !Pour réduire les risques d’incendie, de décharge électrique ou de blessures:L’inobservation des instructions de sécurité risque de causer des dégâts à l’appareil et aux objets placés à proximité et d’occasionner des blessures.
* N’utilisez l’appareil que selon les indications données dans le présent manuel. Ne l’utilisez pas à des fi ns pour lesquelles il n’a pas été conçu. Utilisez-le avec les seuls accessoires recommandés par le fabricant.
* Ne laissez pas l’appareil branché sans surveillance. Fermez tous les interrupteurs et débranchez le cordon d’alimentation lorsque vous ne vous en servez pas ou avant les interventions d’entretien-réparation.
* Ne laissez pas le personnel non formé se servir de l’appareil. Soyez particulièrement vigilant lorsque vous vous en servez en présence d’enfants.
* Si l’appareil ne fonctionne pas normalement, si vous l’avez laissé tomber ou s’il a été endommagé ou laissé à l’extérieur, envoyez-le à un centre de réparations avant de vous en servir.
* Pour éviter les risques d’électrocution, ne touchez pas à la prise électrique ou à l’appareil avec les mains mouillées. Débranchez le cordon en tirant sur la prise, par sur le cordon.
* N’utilisez pas de cordons de rallonge ou de prises de capacité insuffi sante. N’utilisez pas de cordons ou de prises endommagés. Branchez l’appareil uniquement à une prise correctement mise à la terre (voir les INSTRUCTIONS DE MISE À LA TERRE). Evitez d’endommager le cordon en refermant les portes, en le tirant sur des coins de meubles, en l’exposant à des objets chauffés ou en faisant passer l’appareil dessus.
* Cet appareil produit une succion et possède une brosse tournante. N’approchez pas les vêtements lâches, les cheveux, les doigts ou toute autre partie du corps des orifi ces ou des pièces en mouvement. N’introduisez pas d’objets dans les orifi ces de l’appareil.
* N’aspirez pas d’objets en train de brûler ou de fumer, tels que les cigarettes, allumettes ou cendres chaudes.* N’utilisez pas l’appareil pour aspirer des liquides infl ammables ou combustibles tels que l’essence. Ne vous servez pas de
l’appareil dans des endroits où il peut se trouver des vapeurs ou de la poussière explosives ou infl ammables, pour éviter les risques d’incendie ou d’explosion. Certains liquides de nettoyage peuvent émettre de telles vapeurs.
* Cette machine n´est pas destinée au ramassage de poussière dangereuse pour la santé.* Soyez particulierement prudent lorsque vous passez l’aspirateur sur des escaliers.* Debranchez les appareils electriques avant de les nettoyer.* N’utilisez pas l’appareil a l’exterieur ni sur sol mouille.* Ne vous servez pas de l’appareil si le sac a poussiere n’est pas en place.* Rangez l’appareil a l’interieur, dans un endroit frais et sec.
CONSERVEZ CES INSTRUCTIONS

4 - FORM NO. 56091054 - ProSpec HD101 / HD101DC
120VAC GROUNDING INSTRUCTIONSThis appliance must be grounded. If it should electrically malfunction, grounding provides a path of least resistance for electric current to reduce the risk of electric shock. This appliance is equipped with a cord having an equipment-grounding conductor and grounding plug. The plug must be plugged into an appropriate outlet that is properly installed and grounded in accordance with all local codes and ordinances.
DANGER! Improper connection of the equipment-grounding conductor can result in a risk of electric shock. Check with a qualifi ed electrician or service person if you are in doubt as to whether the outlet is properly grounded. Do not modify the plug provided with the appliance. If it will not fi t the outlet, have a proper outlet installed by a qualifi ed electrician.This appliance is for use on a nominal 120-volt circuit, and has a grounding plug that looks like the plug illustrated in Figure 1 below. A temporary adapter illustrated in Figures 2 and 3 may be used to connect this plug to a 2-pole receptacle as shown in Figure 2 if a properly grounded outlet is not available. The temporary adapter should be used only until a properly grounded outlet (Figure 1) can be installed by a qualifi ed electrician. The green-colored rigid ear, tab, or the like extending from the adapter must be connected to a permanent ground such as a properly grounded outlet box cover. Whenever the adapter is used, it must be held in place by a metal screw. Grounding adapters are not approved for use in Canada.Replace the plug if the grounding pin is damaged or broken.The Green (or Green/Yellow) wire in the cord is the grounding wire. When replacing a plug, this wire must be attached to the grounding pin only.Extension cords connected to this machine should be 12 gauge, three-wire cords with three-prong plugs and outlets. DO NOT use extension cords more than 50 feet (15 m) long.
PLEASE NOTE: FOR NORTH AMERICA ONLY
FORM NO. 56091054 - ProSpec HD101 / HD101DC - 5
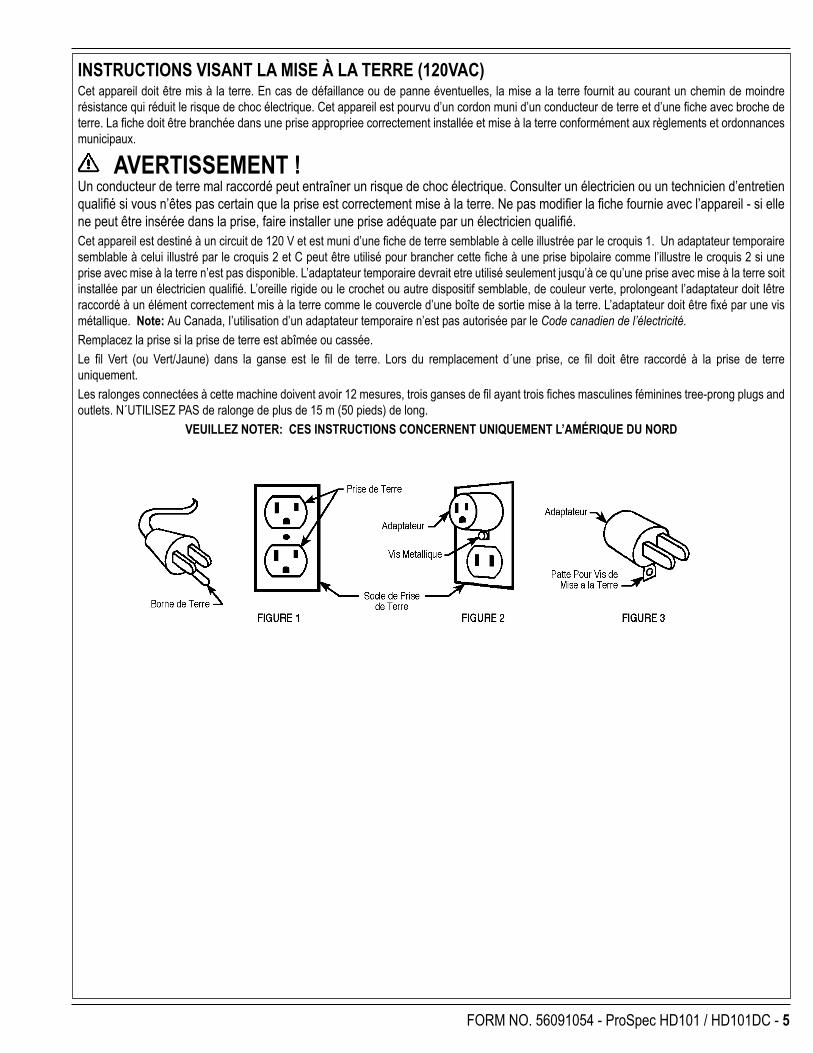
INSTRUCTIONS VISANT LA MISE À LA TERRE (120VAC)Cet appareil doit être mis à la terre. En cas de défaillance ou de panne éventuelles, la mise a la terre fournit au courant un chemin de moindre résistance qui réduit le risque de choc électrique. Cet appareil est pourvu d’un cordon muni d’un conducteur de terre et d’une fi che avec broche de terre. La fi che doit être branchée dans une prise appropriee correctement installée et mise à la terre conformément aux règlements et ordonnances municipaux.
AVERTISSEMENT !Un conducteur de terre mal raccordé peut entraîner un risque de choc électrique. Consulter un électricien ou un technicien d’entretien qualifi é si vous n’êtes pas certain que la prise est correctement mise à la terre. Ne pas modifi er la fi che fournie avec l’appareil - si elle ne peut être insérée dans la prise, faire installer une prise adéquate par un électricien qualifi é.Cet appareil est destiné à un circuit de 120 V et est muni d’une fi che de terre semblable à celle illustrée par le croquis 1. Un adaptateur temporaire semblable à celui illustré par le croquis 2 et C peut être utilisé pour brancher cette fi che à une prise bipolaire comme l’illustre le croquis 2 si une prise avec mise à la terre n’est pas disponible. L’adaptateur temporaire devrait etre utilisé seulement jusqu’à ce qu’une prise avec mise à la terre soit installée par un électricien qualifi é. L’oreille rigide ou le crochet ou autre dispositif semblable, de couleur verte, prolongeant l’adaptateur doit Iêtre raccordé à un élément correctement mis à la terre comme le couvercle d’une boîte de sortie mise à la terre. L’adaptateur doit être fi xé par une vis métallique. Note: Au Canada, I’utilisation d’un adaptateur temporaire n’est pas autorisée par le Code canadien de l’électricité.Remplacez la prise si la prise de terre est abîmée ou cassée.Le fi l Vert (ou Vert/Jaune) dans la ganse est le fi l de terre. Lors du remplacement d´une prise, ce fi l doit être raccordé à la prise de terre uniquement.Les ralonges connectées à cette machine doivent avoir 12 mesures, trois ganses de fi l ayant trois fi ches masculines féminines tree-prong plugs and outlets. N´UTILISEZ PAS de ralonge de plus de 15 m (50 pieds) de long.
VEUILLEZ NOTER: CES INSTRUCTIONS CONCERNENT UNIQUEMENT L’AMÉRIQUE DU NORD
6 - FORM NO. 56091054 - ProSpec HD101 / HD101DC
INTRODUCTIONThis manual will help you get the most from your Triple S vacuum. Read it thoroughly before operating the machine.This product is intended for commercial use only.
PARTS AND SERVICERepairs, when required, should be performed by your Authorized Triple S Service Center, who employs factory trained service personnel, and maintains an inventory of Triple S original replacement parts and accessories.Call the TRIPLE S DEALER named below for repair parts or service. Please specify the Model and Serial Number when discussing your machine.
UNPACK THE MACHINEWhen the machine is delivered, carefully inspect the shipping carton and the machine for damage. If damage is evident, save the shipping carton so that it can be inspected. Contact the dealer that sold you the machine immediately to fi le a freight damage claim.
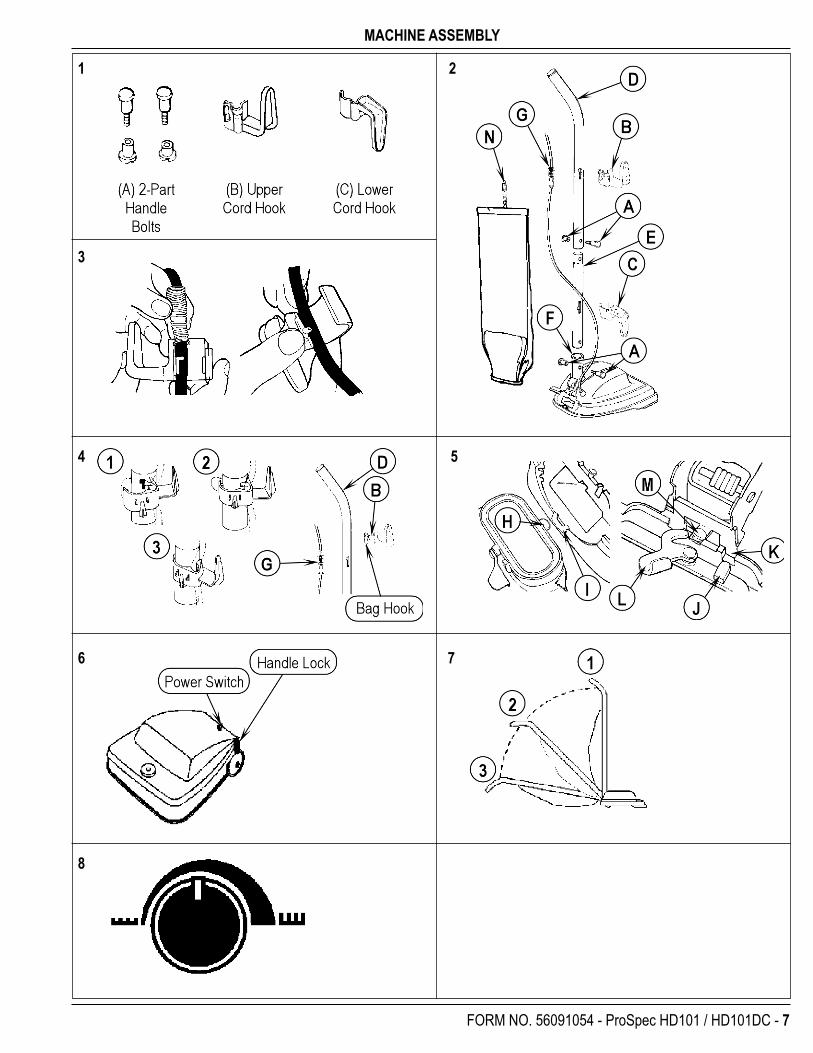
MACHINE ASSEMBLYRefer to diagrams 1-8 on page 7 for assembly.
CAUTION!Fully assemble the cleaner before using.
1 - ASSEMBLY PACKETThe packet contains two 2-part bolts and two cord hooks. An extra drive belt is also included.
2 – ATTACH LOWER / UPPER HANDLESlip the upper handle (D) and the lower handle (E) together so the handle bolt holes align and the slots in the handle are positioned as shown in Figure 2. Insert a 2-part bolt (A) in the center of the handle and tighten. Hold the assembled handle (D/E) so it curves away from the cleaner. Then push the handle into the handle socket (F) at the rear of the cleaner. Align the holes, insert the other 2-part bolt (A), and tighten.
3 / 4 – CORD HOOKSUPPER CORD HOOK: Pull the spring (G) on the cord upward toward the top of the handle. Insert the lower half of the spring (G) into the upper cord hook (B).Make sure slots in handle are positioned properly (Figure 2). Place inner tab into slot as shown in (1) and press hook around handle (2), snapping opposite inner tab into place (3) (Figure 4).LOWER CORD HOOK: Insert the power cord into the lower cord hook (C) (Figure 3). Snap the hook into the lower handle. Pull the cord up to tighten but leave enough slack near the base so the cord is not strained when the handle is lowered. Wrap the cord around the two cord hooks. Fasten the plug to the cord to prevent unwinding.
5 - HOW TO INSTALL THE BAGInsert the bag adapter clip (H) on the bottom of the bag collar into the bag adapter retainer (I) below the air outlet. Push the bag collar up and forward so the locator lug (J) to the right of the cam latch (L) slides into the slot (K), then turn the cam latch to lock the bag onto the shoulder rivet (M). To support the bag, loop the spring (N) from the top of the bag onto the bag support, located to the back of the upper cord hook (B) (Figure 2).
OPERATION6 - POWER SWITCHThe power switch is located at the rear of machine, to the left of the handle base. Simply step on it to turn the machine on or off.
7 - HANDLE ADJUSTMENTThe handle lock is located at the left rear side of the machine. Simply step on it to release and move the handle to one of the three positions.
8 - HEIGHT ADJUSTMENTThis machine has a 6-position adjustment knob. To select the proper setting, move the knob to the highest setting. Turn down one setting at a time until the machine’s sound changes to a smooth buzzing or vibrating tone. This is the sound of the beater bars grooming the pile.NOTE: Raise the front of the machine to ease changing the settings.
FORM NO. 56091054 - ProSpec HD101 / HD101DC - 7
1 2
3
4 5
6 7
8
MACHINE ASSEMBLY
8 - FORM NO. 56091054 - ProSpec HD101 / HD101DC
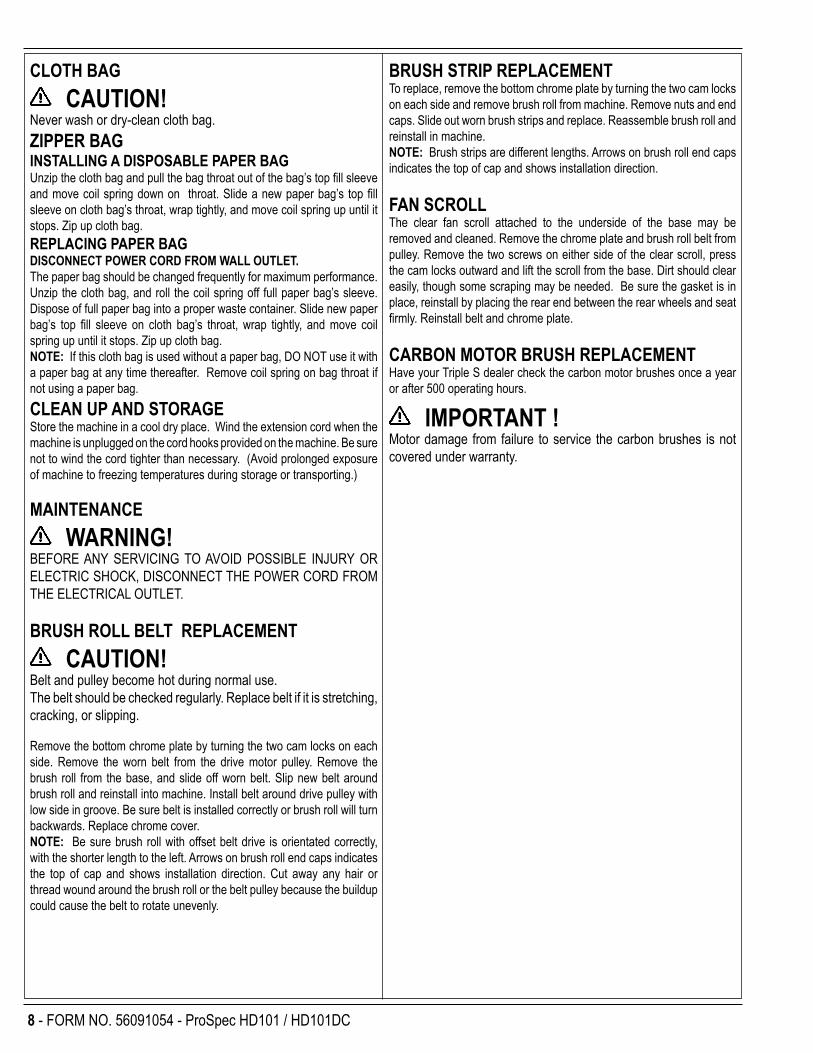
CLOTH BAG CAUTION!
Never wash or dry-clean cloth bag.ZIPPER BAGINSTALLING A DISPOSABLE PAPER BAGUnzip the cloth bag and pull the bag throat out of the bag’s top fi ll sleeve and move coil spring down on throat. Slide a new paper bag’s top fi ll sleeve on cloth bag’s throat, wrap tightly, and move coil spring up until it stops. Zip up cloth bag.REPLACING PAPER BAGDISCONNECT POWER CORD FROM WALL OUTLET.The paper bag should be changed frequently for maximum performance. Unzip the cloth bag, and roll the coil spring off full paper bag’s sleeve. Dispose of full paper bag into a proper waste container. Slide new paper bag’s top fi ll sleeve on cloth bag’s throat, wrap tightly, and move coil spring up until it stops. Zip up cloth bag.NOTE: If this cloth bag is used without a paper bag, DO NOT use it with a paper bag at any time thereafter. Remove coil spring on bag throat if not using a paper bag.CLEAN UP AND STORAGEStore the machine in a cool dry place. Wind the extension cord when the machine is unplugged on the cord hooks provided on the machine. Be sure not to wind the cord tighter than necessary. (Avoid prolonged exposure of machine to freezing temperatures during storage or transporting.)
MAINTENANCE WARNING!
BEFORE ANY SERVICING TO AVOID POSSIBLE INJURY OR ELECTRIC SHOCK, DISCONNECT THE POWER CORD FROM THE ELECTRICAL OUTLET.
BRUSH ROLL BELT REPLACEMENT CAUTION!
Belt and pulley become hot during normal use.The belt should be checked regularly. Replace belt if it is stretching, cracking, or slipping.
Remove the bottom chrome plate by turning the two cam locks on each side. Remove the worn belt from the drive motor pulley. Remove the brush roll from the base, and slide off worn belt. Slip new belt around brush roll and reinstall into machine. Install belt around drive pulley with low side in groove. Be sure belt is installed correctly or brush roll will turn backwards. Replace chrome cover.NOTE: Be sure brush roll with offset belt drive is orientated correctly, with the shorter length to the left. Arrows on brush roll end caps indicates the top of cap and shows installation direction. Cut away any hair or thread wound around the brush roll or the belt pulley because the buildup could cause the belt to rotate unevenly.
BRUSH STRIP REPLACEMENTTo replace, remove the bottom chrome plate by turning the two cam locks on each side and remove brush roll from machine. Remove nuts and end caps. Slide out worn brush strips and replace. Reassemble brush roll and reinstall in machine.NOTE: Brush strips are different lengths. Arrows on brush roll end caps indicates the top of cap and shows installation direction.
FAN SCROLLThe clear fan scroll attached to the underside of the base may be removed and cleaned. Remove the chrome plate and brush roll belt from pulley. Remove the two screws on either side of the clear scroll, press the cam locks outward and lift the scroll from the base. Dirt should clear easily, though some scraping may be needed. Be sure the gasket is in place, reinstall by placing the rear end between the rear wheels and seat fi rmly. Reinstall belt and chrome plate.
CARBON MOTOR BRUSH REPLACEMENTHave your Triple S dealer check the carbon motor brushes once a year or after 500 operating hours.
IMPORTANT !Motor damage from failure to service the carbon brushes is not covered under warranty.

ProSpec HD101DCThe following section also applies to ProSpec HD101 machines that have the Dirt Cup Conversion Kit part number 56039515 installed.
10 - FORM NO. 56091054 - ProSpec HD101 / HD101DC
1 2
3 4
5
DIRT CUP MODEL ASSEMBLY

FORM NO. 56091054 - ProSpec HD101 / HD101DC - 11
6 7
8 9
10 11
DIRT CUP MODEL ASSEMBLY
12 - FORM NO. 56091054 - ProSpec HD101 / HD101DC
INTRODUCTIONThis manual will help you get the most from your Triple S Vacuum Dirt Cup Model. Read it thoroughly before operating the machine.This product is intended for commercial use only.
PARTS AND SERVICERepairs, when required, should be performed by your Authorized Triple S Service Center, who employs factory trained service personnel, and maintains an inventory of Triple S original replacement parts and accessories.Call the TRIPLE S DEALER named below for repair parts or service. Please specify the Model and Serial Number when discussing your machine.
UNPACK THE MACHINEWhen the machine is delivered, carefully inspect the shipping carton and the machine for damage. If damage is evident, save the shipping carton so that it can be inspected. Contact the dealer that sold you the machine immediately to fi le a freight damage claim.
MACHINE ASSEMBLYRefer to diagrams 1-11 on pages 10-11 for assembly.
CAUTION!Fully assemble the cleaner before using.
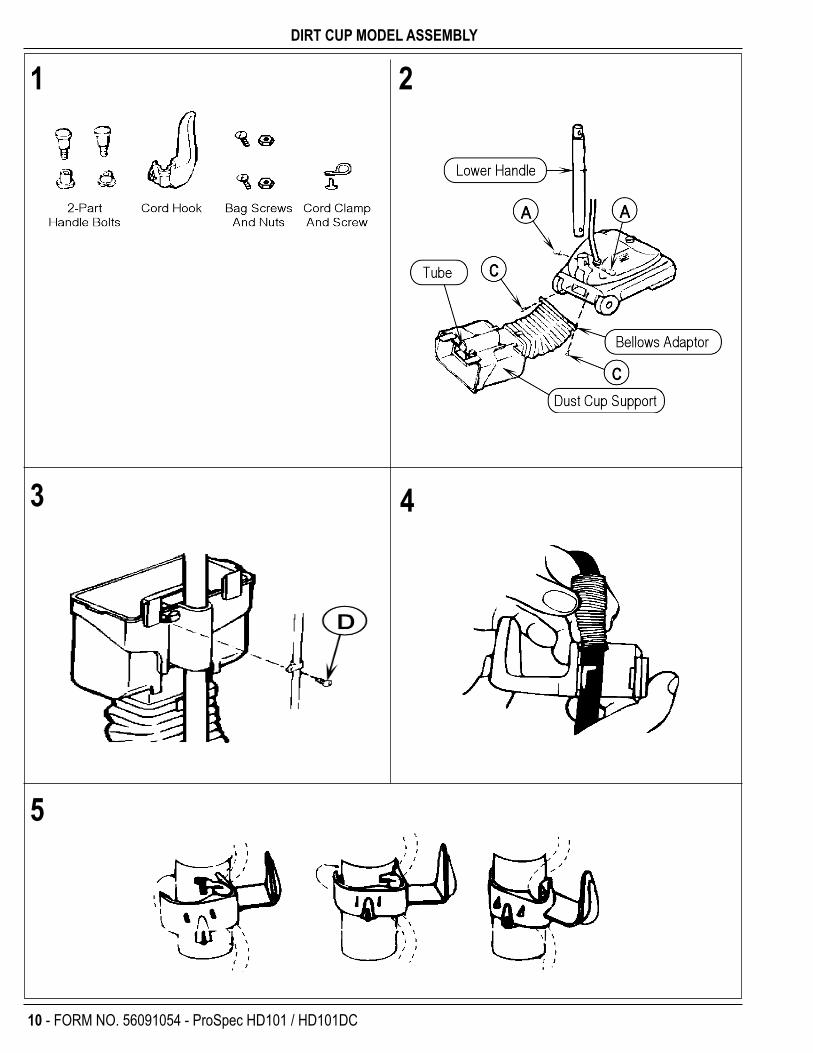
1 - ASSEMBLY PACKETThe assembly packet contains two 2-part handle bolts, one (1) cord hook, two (2) bag screws, two (2) bag nuts, and one (1) cord clamp with a screw.
2 - SECURE BELLOWSCheck to be sure the end of the bellows is secure in the chrome bellows adapter. Align the screw holes in the bellows adapter with the back of the base, start the screws (C) by hand and then tighten.
CAUTION!Do not over-tighten the screws.
2 - ATTACH LOWER HANDLERaise the dust cup support. Push the lower handle (largest end down) through the tube of the dust cup support and into the handle socket at the back of the cleaner. Align the holes, insert a 2-part bolt (A), and tighten.
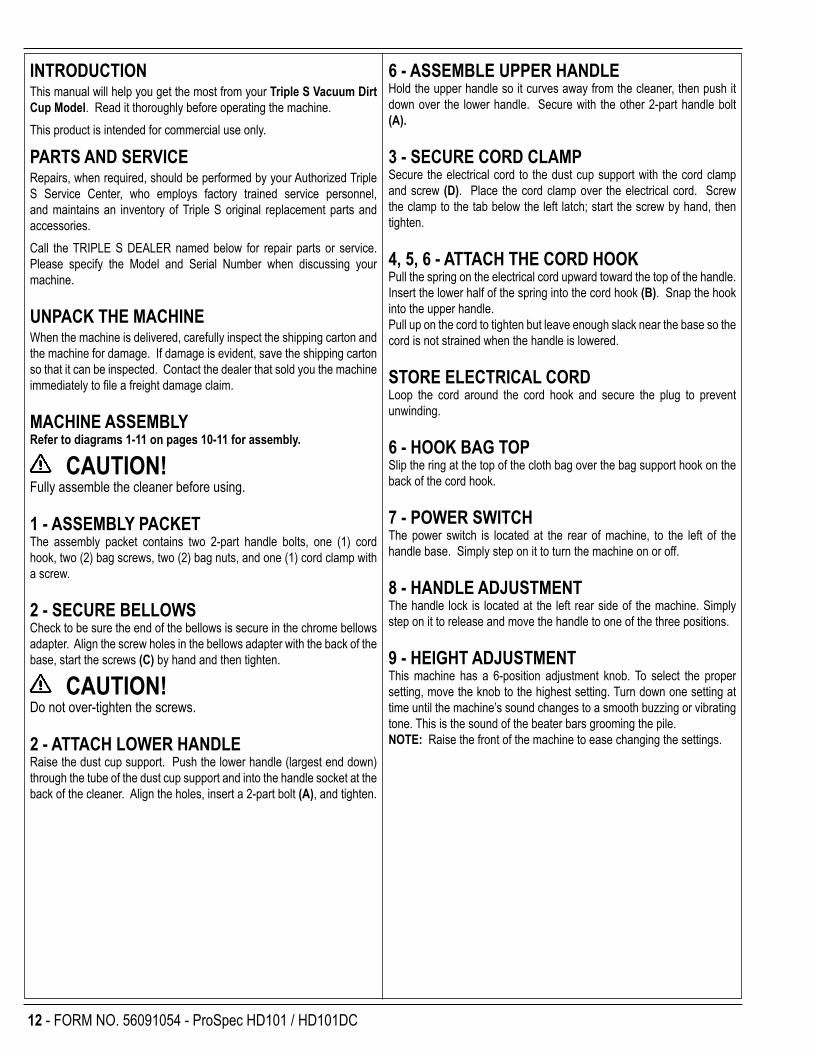
6 - ASSEMBLE UPPER HANDLEHold the upper handle so it curves away from the cleaner, then push it down over the lower handle. Secure with the other 2-part handle bolt (A).
3 - SECURE CORD CLAMPSecure the electrical cord to the dust cup support with the cord clamp and screw (D). Place the cord clamp over the electrical cord. Screw the clamp to the tab below the left latch; start the screw by hand, then tighten.
4, 5, 6 - ATTACH THE CORD HOOKPull the spring on the electrical cord upward toward the top of the handle. Insert the lower half of the spring into the cord hook (B). Snap the hook into the upper handle.Pull up on the cord to tighten but leave enough slack near the base so the cord is not strained when the handle is lowered.
STORE ELECTRICAL CORDLoop the cord around the cord hook and secure the plug to prevent unwinding.
6 - HOOK BAG TOPSlip the ring at the top of the cloth bag over the bag support hook on the back of the cord hook.
7 - POWER SWITCHThe power switch is located at the rear of machine, to the left of the handle base. Simply step on it to turn the machine on or off.
8 - HANDLE ADJUSTMENTThe handle lock is located at the left rear side of the machine. Simply step on it to release and move the handle to one of the three positions.
9 - HEIGHT ADJUSTMENTThis machine has a 6-position adjustment knob. To select the proper setting, move the knob to the highest setting. Turn down one setting at time until the machine’s sound changes to a smooth buzzing or vibrating tone. This is the sound of the beater bars grooming the pile.NOTE: Raise the front of the machine to ease changing the settings.
FORM NO. 56091054 - ProSpec HD101 / HD101DC - 13
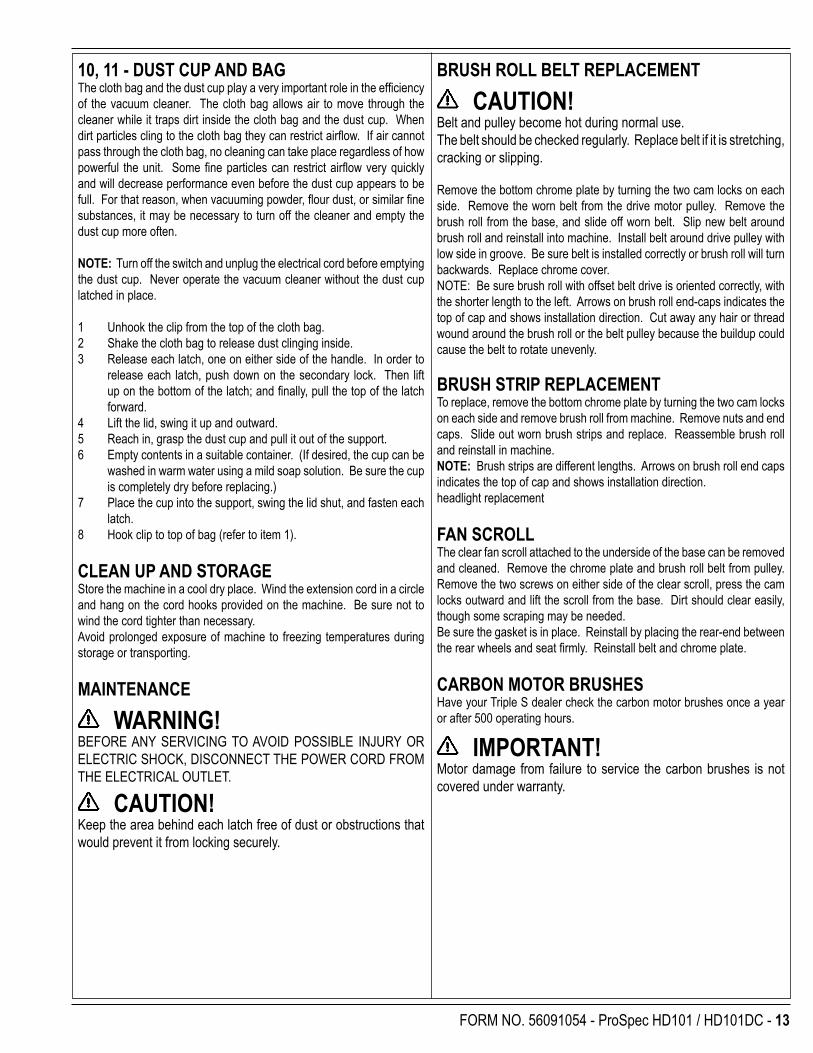
10, 11 - DUST CUP AND BAGThe cloth bag and the dust cup play a very important role in the effi ciency of the vacuum cleaner. The cloth bag allows air to move through the cleaner while it traps dirt inside the cloth bag and the dust cup. When dirt particles cling to the cloth bag they can restrict airfl ow. If air cannot pass through the cloth bag, no cleaning can take place regardless of how powerful the unit. Some fi ne particles can restrict airfl ow very quickly and will decrease performance even before the dust cup appears to be full. For that reason, when vacuuming powder, fl our dust, or similar fi ne substances, it may be necessary to turn off the cleaner and empty the dust cup more often.
NOTE: Turn off the switch and unplug the electrical cord before emptying the dust cup. Never operate the vacuum cleaner without the dust cup latched in place.
1 Unhook the clip from the top of the cloth bag.2 Shake the cloth bag to release dust clinging inside.3 Release each latch, one on either side of the handle. In order to
release each latch, push down on the secondary lock. Then lift up on the bottom of the latch; and fi nally, pull the top of the latch forward.
4 Lift the lid, swing it up and outward.5 Reach in, grasp the dust cup and pull it out of the support.6 Empty contents in a suitable container. (If desired, the cup can be
washed in warm water using a mild soap solution. Be sure the cup is completely dry before replacing.)
7 Place the cup into the support, swing the lid shut, and fasten each latch.
8 Hook clip to top of bag (refer to item 1).
CLEAN UP AND STORAGEStore the machine in a cool dry place. Wind the extension cord in a circle and hang on the cord hooks provided on the machine. Be sure not to wind the cord tighter than necessary.Avoid prolonged exposure of machine to freezing temperatures during storage or transporting.
MAINTENANCE
WARNING!BEFORE ANY SERVICING TO AVOID POSSIBLE INJURY OR ELECTRIC SHOCK, DISCONNECT THE POWER CORD FROM THE ELECTRICAL OUTLET.
CAUTION!Keep the area behind each latch free of dust or obstructions that would prevent it from locking securely.
BRUSH ROLL BELT REPLACEMENT
CAUTION!Belt and pulley become hot during normal use.The belt should be checked regularly. Replace belt if it is stretching, cracking or slipping.
Remove the bottom chrome plate by turning the two cam locks on each side. Remove the worn belt from the drive motor pulley. Remove the brush roll from the base, and slide off worn belt. Slip new belt around brush roll and reinstall into machine. Install belt around drive pulley with low side in groove. Be sure belt is installed correctly or brush roll will turn backwards. Replace chrome cover.NOTE: Be sure brush roll with offset belt drive is oriented correctly, with the shorter length to the left. Arrows on brush roll end-caps indicates the top of cap and shows installation direction. Cut away any hair or thread wound around the brush roll or the belt pulley because the buildup could cause the belt to rotate unevenly.
BRUSH STRIP REPLACEMENTTo replace, remove the bottom chrome plate by turning the two cam locks on each side and remove brush roll from machine. Remove nuts and end caps. Slide out worn brush strips and replace. Reassemble brush roll and reinstall in machine.NOTE: Brush strips are different lengths. Arrows on brush roll end caps indicates the top of cap and shows installation direction.headlight replacement
FAN SCROLLThe clear fan scroll attached to the underside of the base can be removed and cleaned. Remove the chrome plate and brush roll belt from pulley. Remove the two screws on either side of the clear scroll, press the cam locks outward and lift the scroll from the base. Dirt should clear easily, though some scraping may be needed.Be sure the gasket is in place. Reinstall by placing the rear-end between the rear wheels and seat fi rmly. Reinstall belt and chrome plate.
CARBON MOTOR BRUSHESHave your Triple S dealer check the carbon motor brushes once a year or after 500 operating hours.
IMPORTANT!Motor damage from failure to service the carbon brushes is not covered under warranty.

ProSpec HD101
10/11 revised 5/14 FORM NO. 56042594
PARTS LISTMODEL: 56382658
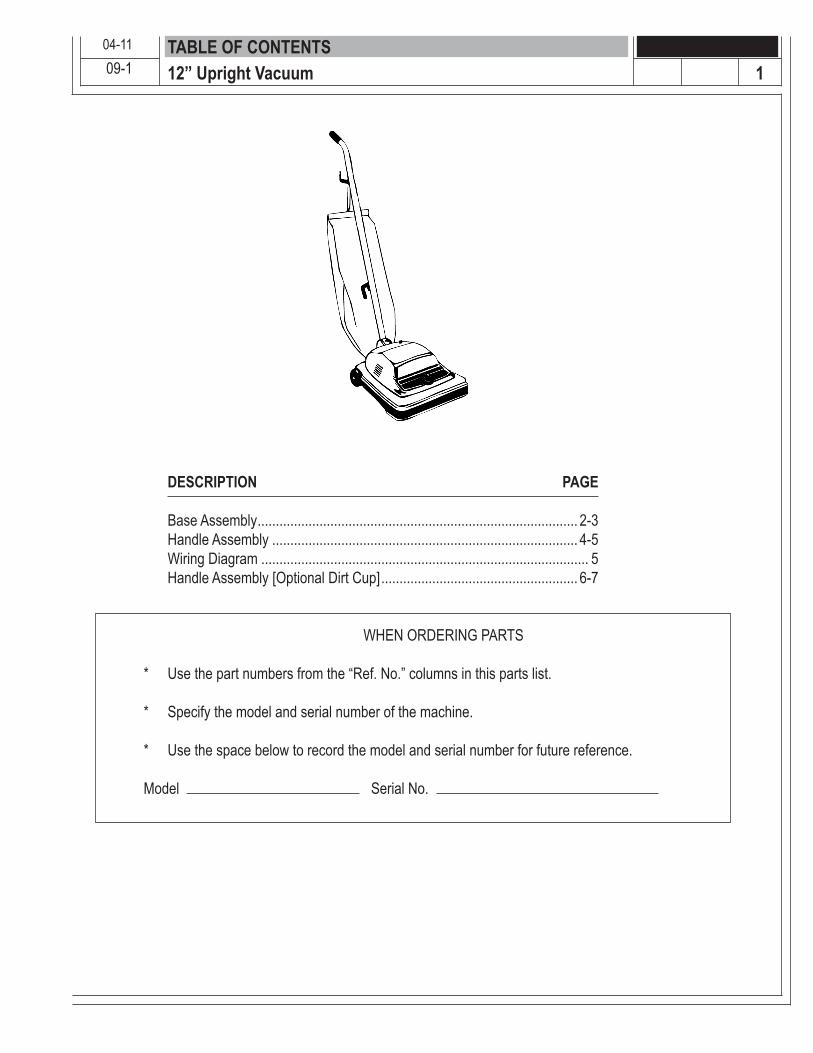
DESCRIPTION PAGE
Base Assembly ........................................................................................ 2-3Handle Assembly .................................................................................... 4-5Wiring Diagram .......................................................................................... 5Handle Assembly [Optional Dirt Cup] ...................................................... 6-7
WHEN ORDERING PARTS
* Use the part numbers from the “Ref. No.” columns in this parts list.
* Specify the model and serial number of the machine.
* Use the space below to record the model and serial number for future reference.
Model Serial No.
TABLE OF CONTENTS09-1 112” Upright Vacuum
04-11
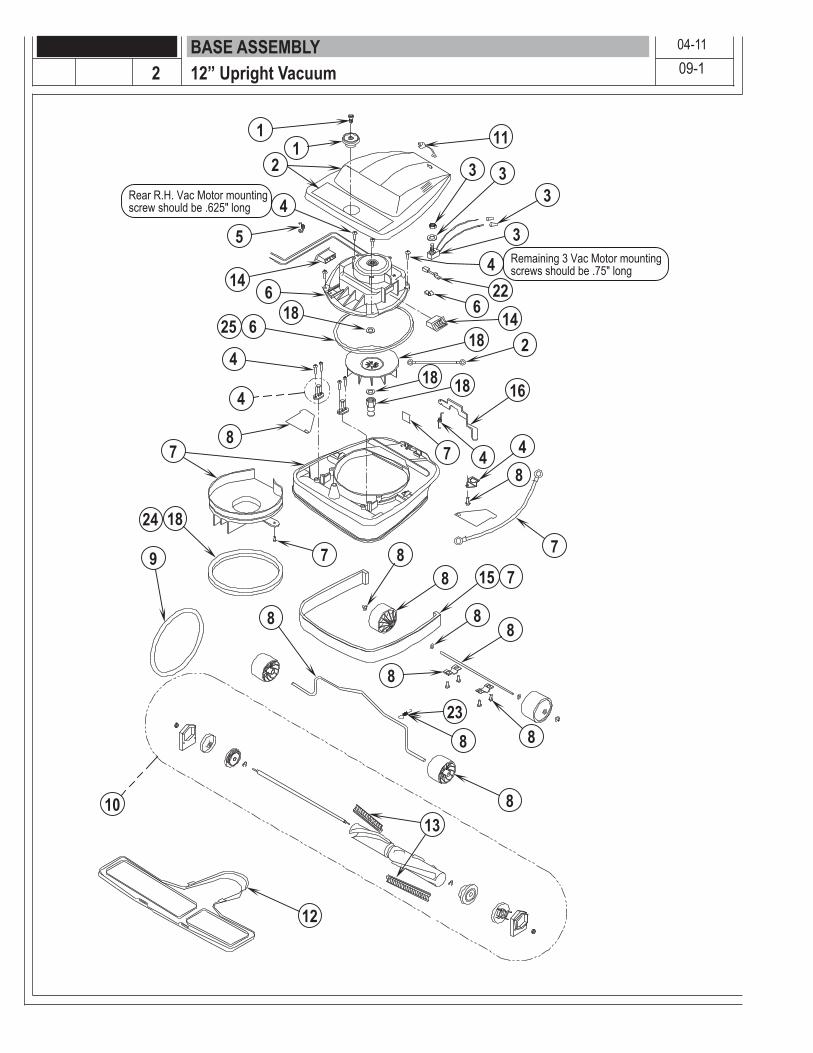
BASE ASSEMBLY
11
3 33
3422
614
18 2
18 18
7
16
4 48
788 15
88
8
88
8
12
10
9
8
78
4
4
614
54
21
1
23
13
7
18
618
7
Rear R.H. Vac Motor mountingscrew should be .625" long
Remaining 3 Vac Motor mountingscrews should be .75" long
25
24
09-112” Upright Vacuum04-11
2
BASE ASSEMBLY
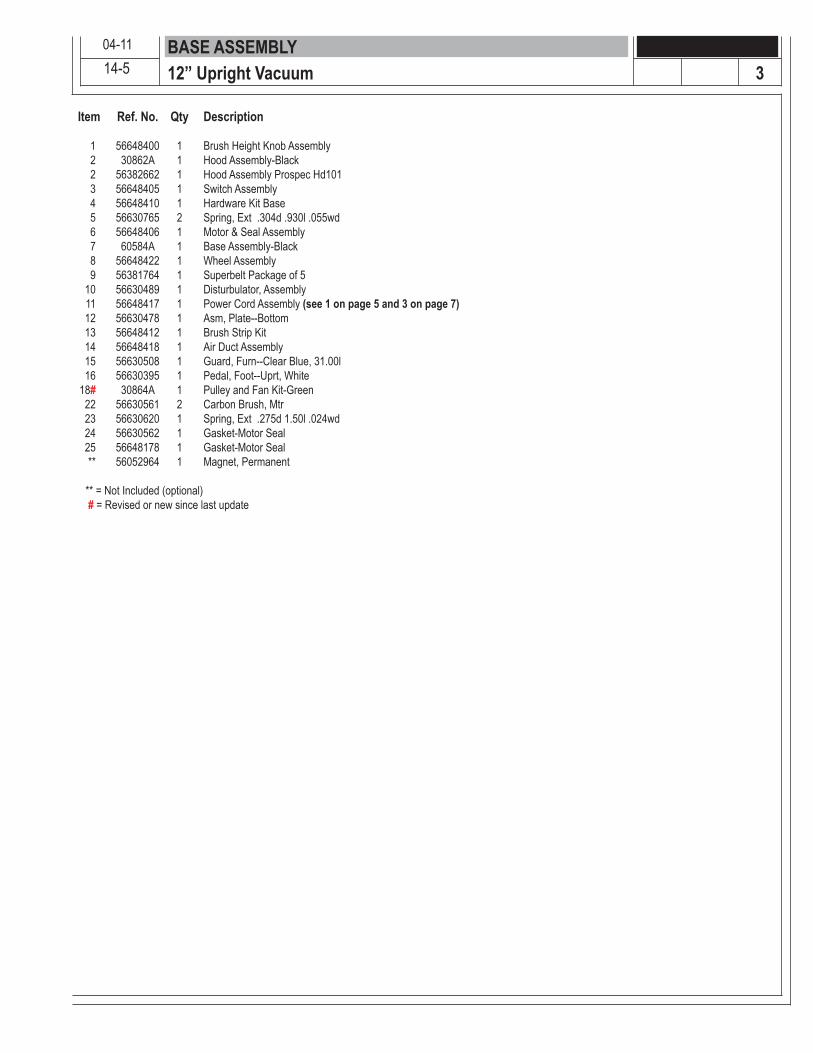
Item Ref. No. Qty Description
1 56648400 1 Brush Height Knob Assembly 2 30862A 1 Hood Assembly-Black 2 56382662 1 Hood Assembly Prospec Hd101 3 56648405 1 Switch Assembly 4 56648410 1 Hardware Kit Base 5 56630765 2 Spring, Ext .304d .930l .055wd 6 56648406 1 Motor & Seal Assembly 7 60584A 1 Base Assembly-Black 8 56648422 1 Wheel Assembly 9 56381764 1 Superbelt Package of 5 10 56630489 1 Disturbulator, Assembly 11 56648417 1 Power Cord Assembly (see 1 on page 5 and 3 on page 7) 12 56630478 1 Asm, Plate--Bottom 13 56648412 1 Brush Strip Kit 14 56648418 1 Air Duct Assembly 15 56630508 1 Guard, Furn--Clear Blue, 31.00l 16 56630395 1 Pedal, Foot--Uprt, White 18# 30864A 1 Pulley and Fan Kit-Green 22 56630561 2 Carbon Brush, Mtr 23 56630620 1 Spring, Ext .275d 1.50l .024wd 24 56630562 1 Gasket-Motor Seal 25 56648178 1 Gasket-Motor Seal ** 56052964 1 Magnet, Permanent
** = Not Included (optional) # = Revised or new since last update
14-5 312” Upright Vacuum04-11
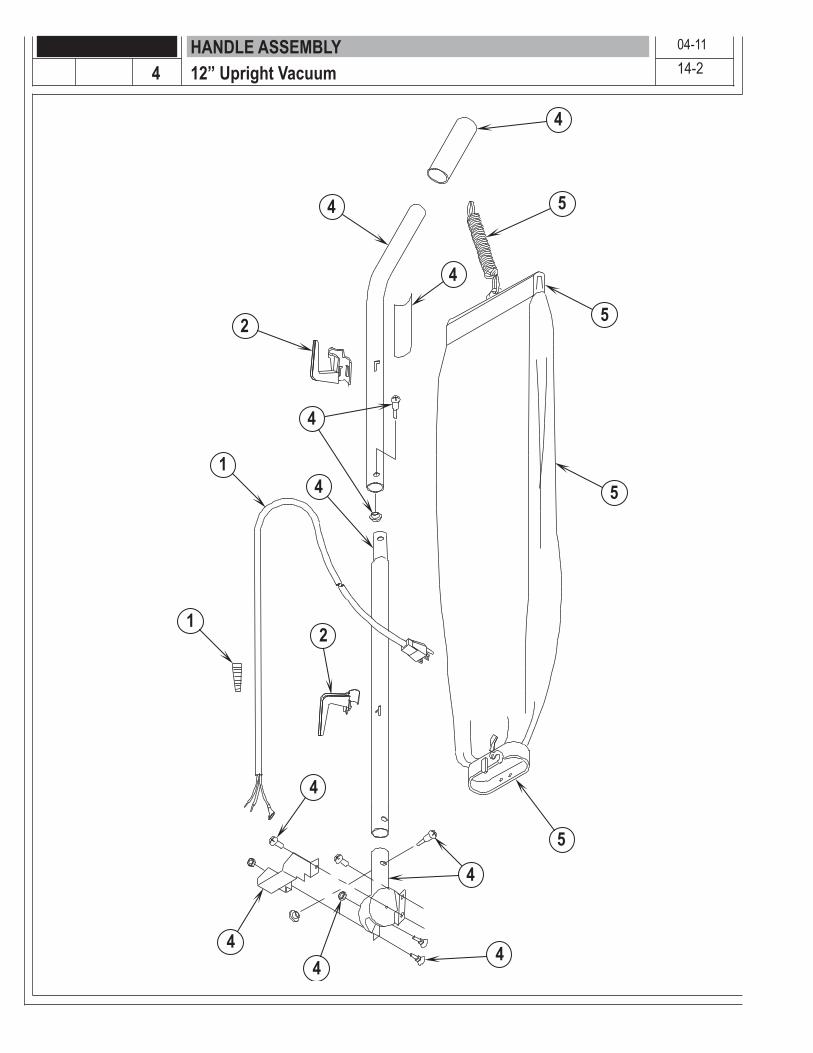
HANDLE ASSEMBLY
5
4
4
44
4
21
14
4
2
4
4
5
5
5
4
14-212” Upright Vacuum04-11
4
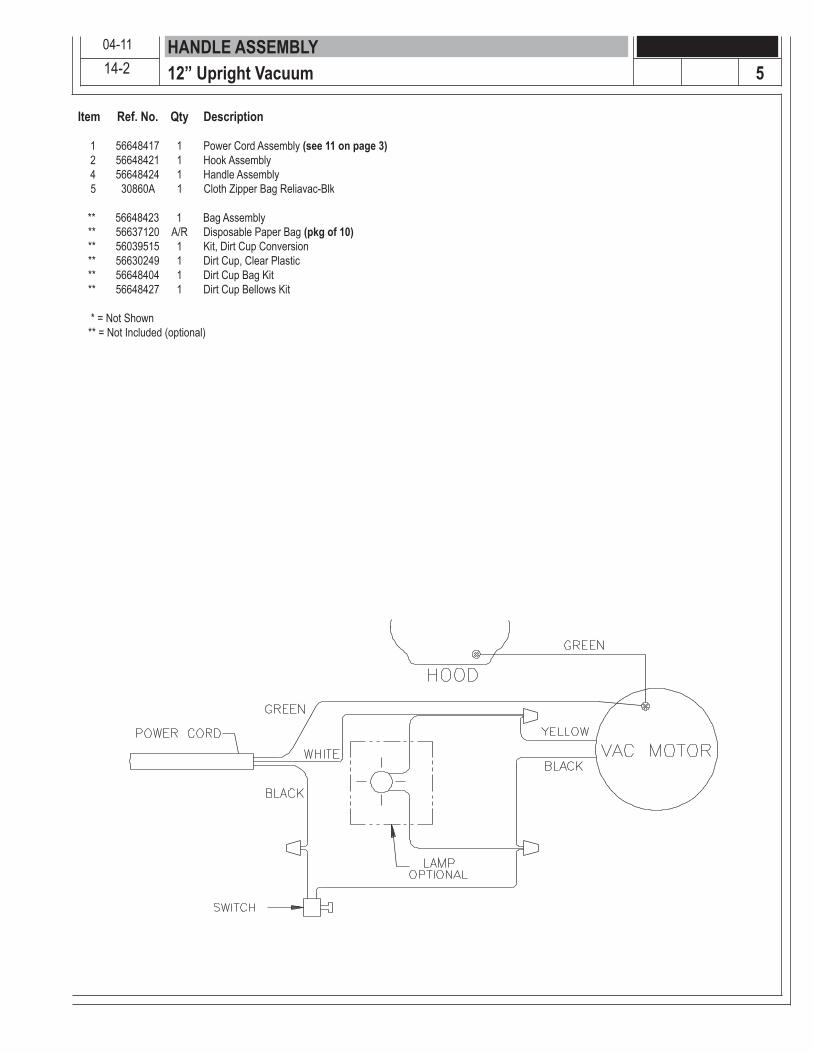
Item Ref. No. Qty Description
1 56648417 1 Power Cord Assembly (see 11 on page 3) 2 56648421 1 Hook Assembly 4 56648424 1 Handle Assembly
** 56648423 1 Bag Assembly
5 30860A 1 Cloth Zipper Bag Reliavac-Blk
** 56637120 A/R Disposable Paper Bag (pkg of 10) ** 56039515 1 Kit, Dirt Cup Conversion ** 56630249 1 Dirt Cup, Clear Plastic ** 56648404 1 Dirt Cup Bag Kit ** 56648427 1 Dirt Cup Bellows Kit
* = Not Shown ** = Not Included (optional)
HANDLE ASSEMBLY14-2 512” Upright Vacuum
04-11

HANDLE ASSEMBLY [OPTIONAL DIRT CUP]14-2
5
57
53
3
5
5
5 55
5
61
1
2
2
22
2
1
1
11
5
5
12” Upright Vacuum04-11
6

HANDLE ASSEMBLY [OPTIONAL DIRT CUP]14-2
Item Ref. No. Qty Description
1 56648404 1 Dirt Cup Bag Kit 2 56648427 1 Dirt Cup Bellows Kit 3 56648417 1 Power Cord Assy (see 11 on page 3) 5 56648411 1 Handle Assy 6 56039515 1 Dirt Cup Kit 7 56630353 1 Hook,Cord--Uprt,Dark Gray
712” Upright Vacuum04-11

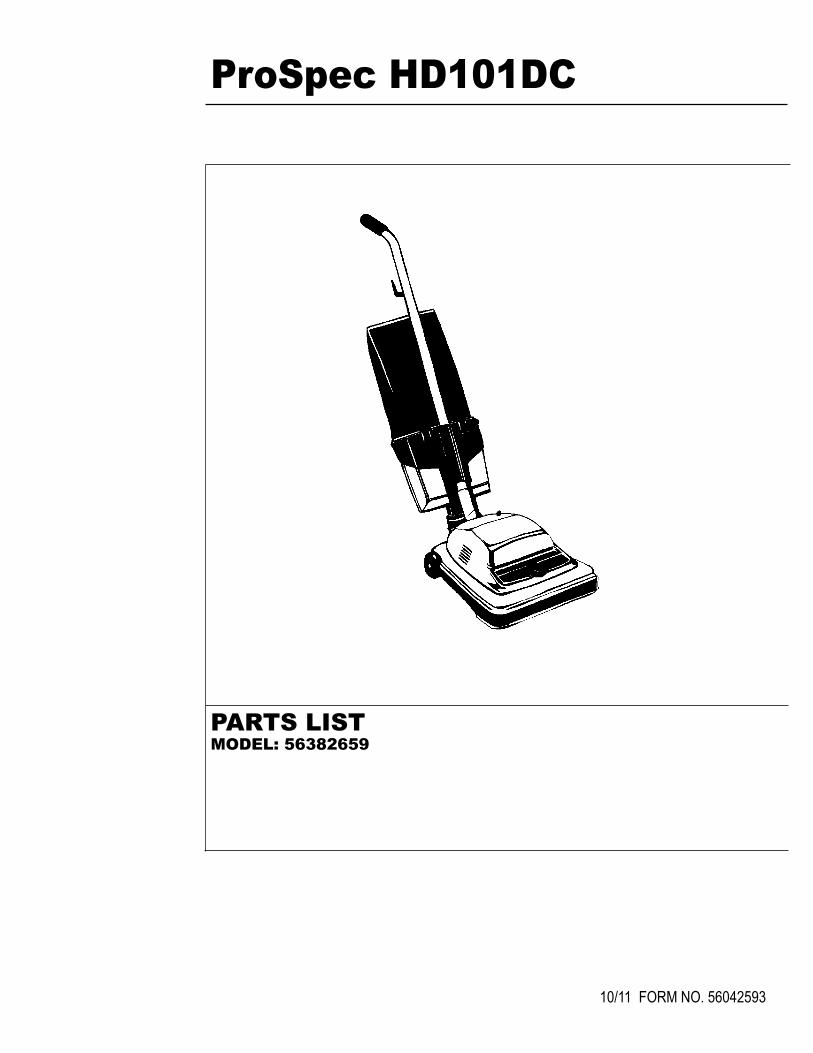
ProSpec HD101DC
10/11 FORM NO. 56042593
PARTS LISTMODEL: 56382659
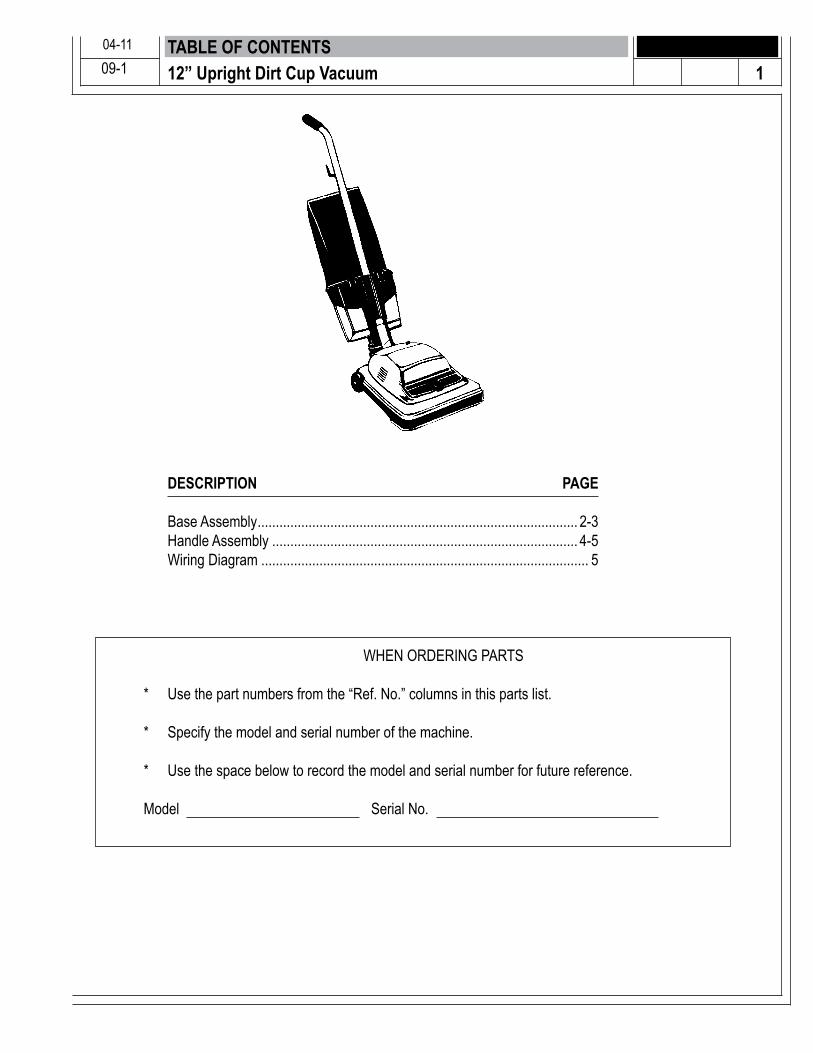
TABLE OF CONTENTS
DESCRIPTION PAGE
Base Assembly ........................................................................................ 2-3Handle Assembly .................................................................................... 4-5Wiring Diagram .......................................................................................... 5
WHEN ORDERING PARTS
* Use the part numbers from the “Ref. No.” columns in this parts list.
* Specify the model and serial number of the machine.
* Use the space below to record the model and serial number for future reference.
Model Serial No.
09-1 112” Upright Dirt Cup Vacuum04-11
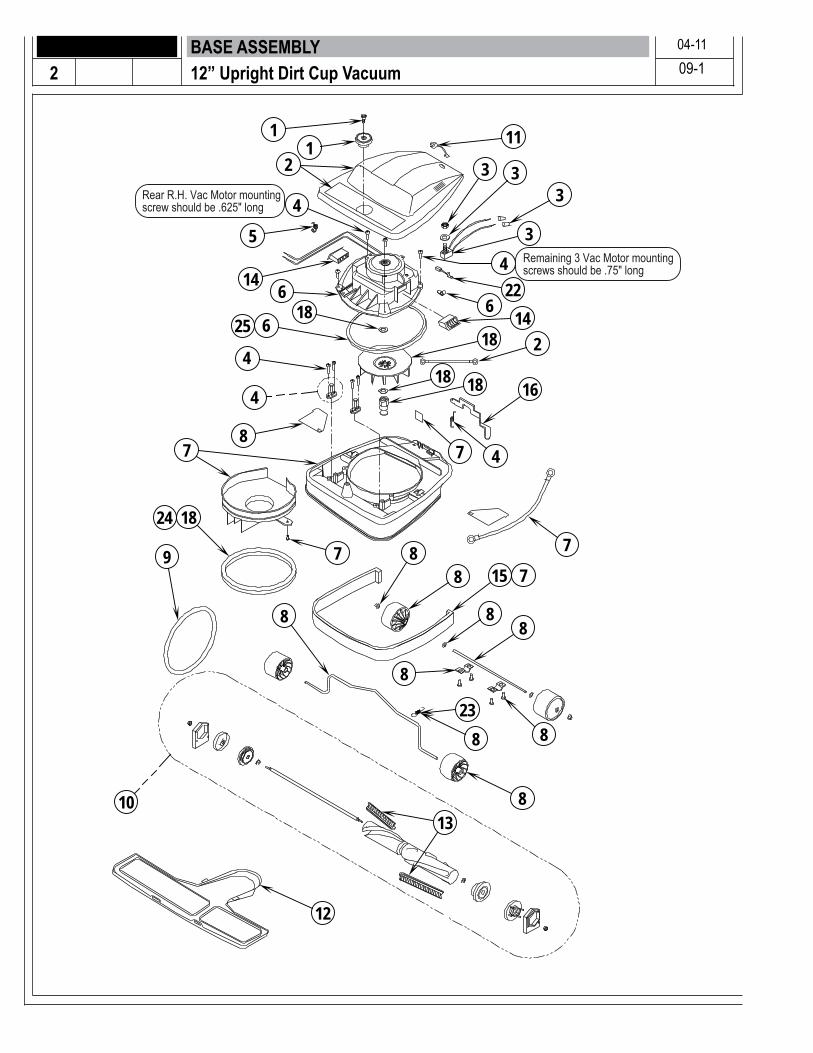
BASE ASSEMBLY
11
3 33
3422
614
18 2
18 18
7
16
4
788 15
88
8
88
8
12
10
9
8
78
4
4
614
54
21
1
23
13
7
18
618
7
Rear R.H. Vac Motor mountingscrew should be .625" long
Remaining 3 Vac Motor mountingscrews should be .75" long
25
24
09-112” Upright Dirt Cup Vacuum04-11
2
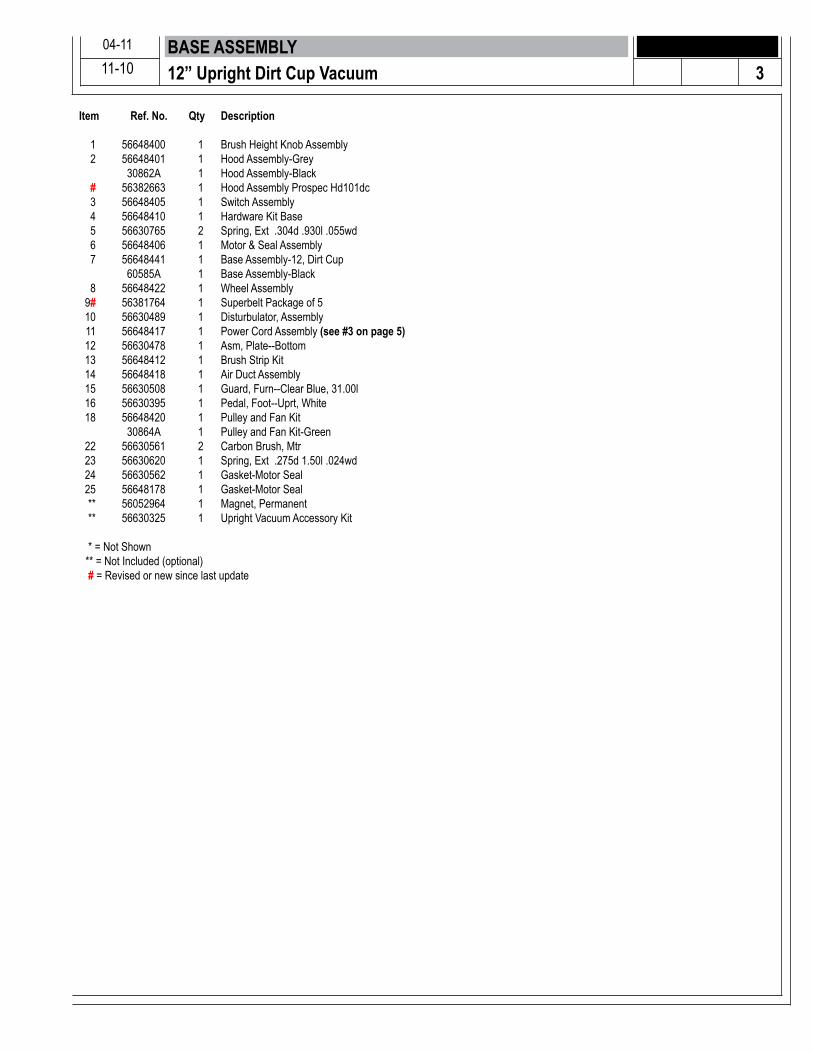
BASE ASSEMBLY
Item Ref. No. Qty Description
1 56648400 1 Brush Height Knob Assembly 2 56648401 1 Hood Assembly-Grey 30862A 1 Hood Assembly-Black # 56382663 1 Hood Assembly Prospec Hd101dc 3 56648405 1 Switch Assembly 4 56648410 1 Hardware Kit Base 5 56630765 2 Spring, Ext .304d .930l .055wd 6 56648406 1 Motor & Seal Assembly 7 56648441 1 Base Assembly-12, Dirt Cup 60585A 1 Base Assembly-Black 8 56648422 1 Wheel Assembly 9# 56381764 1 Superbelt Package of 5 10 56630489 1 Disturbulator, Assembly 11 56648417 1 Power Cord Assembly (see #3 on page 5) 12 56630478 1 Asm, Plate--Bottom 13 56648412 1 Brush Strip Kit 14 56648418 1 Air Duct Assembly 15 56630508 1 Guard, Furn--Clear Blue, 31.00l 16 56630395 1 Pedal, Foot--Uprt, White 18 56648420 1 Pulley and Fan Kit 30864A 1 Pulley and Fan Kit-Green 22 56630561 2 Carbon Brush, Mtr 23 56630620 1 Spring, Ext .275d 1.50l .024wd 24 56630562 1 Gasket-Motor Seal 25 56648178 1 Gasket-Motor Seal ** 56052964 1 Magnet, Permanent ** 56630325 1 Upright Vacuum Accessory Kit
* = Not Shown ** = Not Included (optional) # = Revised or new since last update
11-10 312” Upright Dirt Cup Vacuum04-11
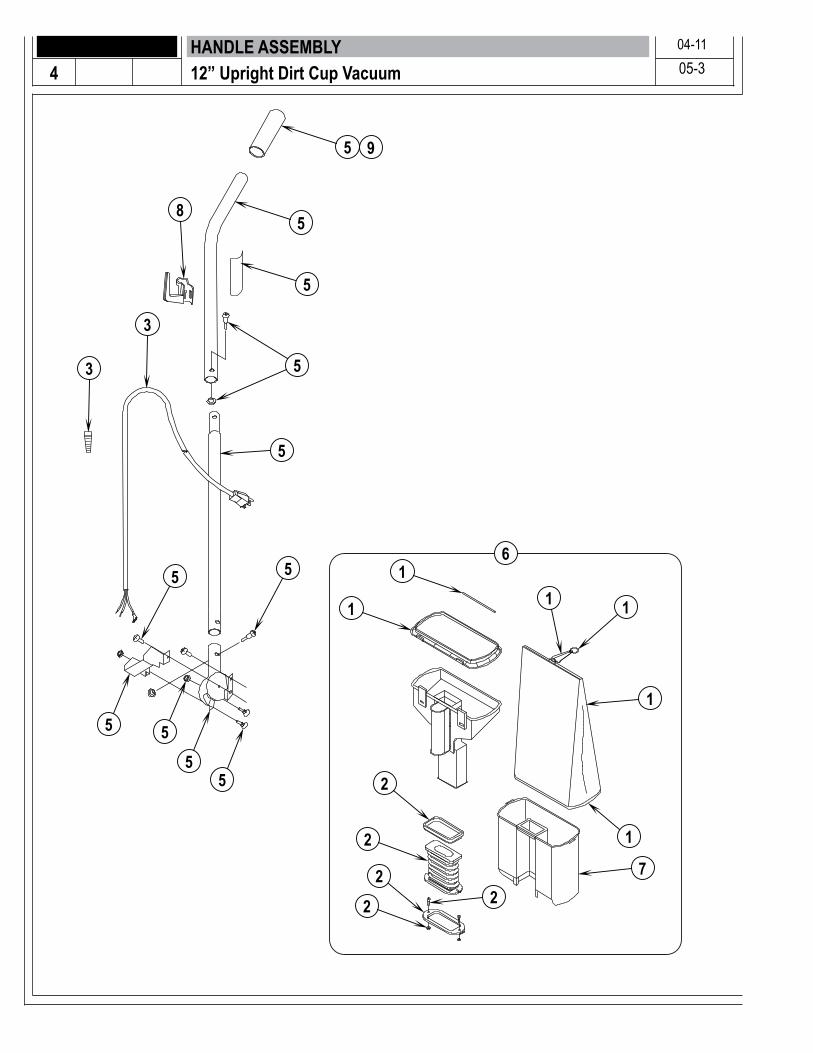
HANDLE ASSEMBLY
95
58
53
3
5
5
5 55
5
61
1
2
2
22
2
7
1
1
11
5
5
05-312” Upright Dirt Cup Vacuum04-11
4
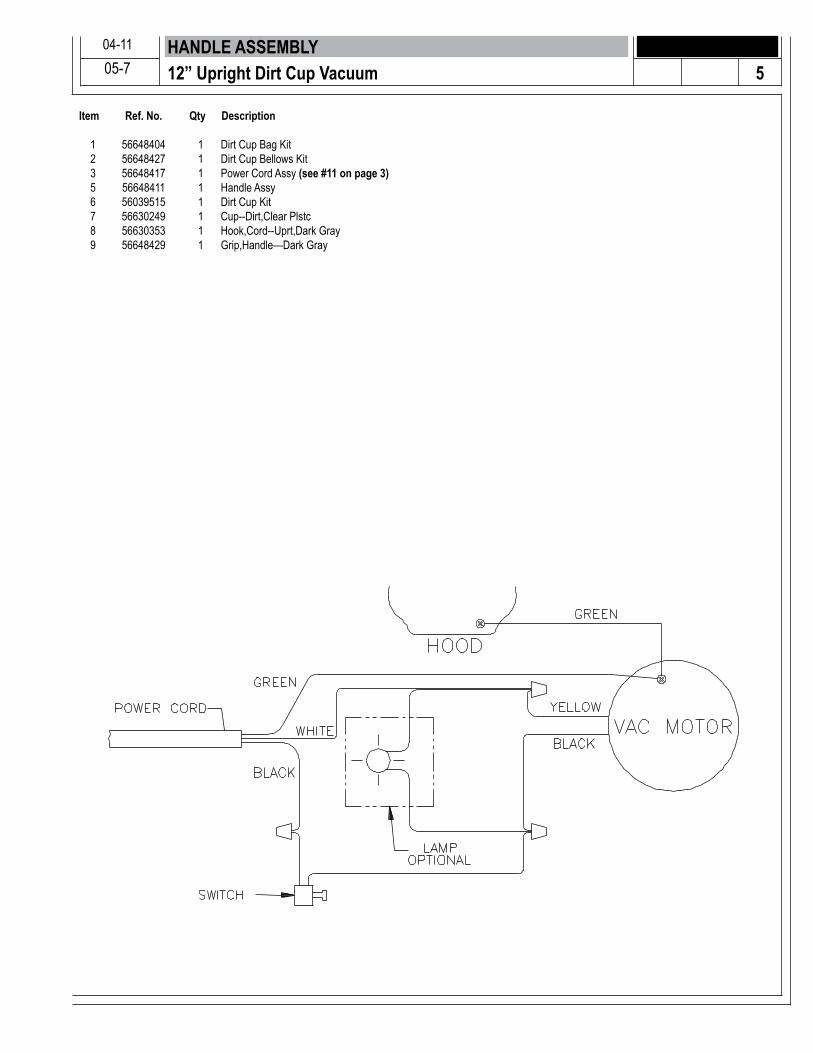
Item Ref. No. Qty Description
1 56648404 1 Dirt Cup Bag Kit 2 56648427 1 Dirt Cup Bellows Kit 3 56648417 1 Power Cord Assy (see #11 on page 3) 5 56648411 1 Handle Assy 6 56039515 1 Dirt Cup Kit 7 56630249 1 Cup--Dirt,Clear Plstc 8 56630353 1 Hook,Cord--Uprt,Dark Gray 9 56648429 1 Grip,Handle—Dark Gray
HANDLE ASSEMBLY05-7 512” Upright Dirt Cup Vacuum04-11