qmail-vmailmgr-courier-squirrelmail installation guide ... · installation guide (bsd systems)...
TRANSCRIPT

Qmail-Vmailmgr-Courier-SquirrelMail
Installation Guide (BSD Systems)
Konstantin [email protected]
Version 2.0: February 2002
Abstract
This document is useful for people who are looking to set up an e-mail system with an easy-to-use client webmail front end and supportfor name-based virtual domains. It proposes a Qmail-Vmailmgr-Courier-SquirrelMail tie-in as the best small to mid-class server solution. Thisdocument is written for BSD systems.
Copyright (c) 2001-2002 by Konstantin Riabitsev <[email protected]>.Permission is granted to copy, distribute and/or modify this documentunder the terms of the GNU Free Documentation License, Version 1.1or any later version published by the Free Software Foundation; withthe Invariant Sections being (no invariant sections), with the Front-CoverTexts being (none), and with the Back-Cover Texts being (none). A copyof the license is available to you in Appendix B.
Contents
1 The problem 2
2 Conventions used in this Guide 2
3 The Software 23.1 Operating System Software . . . . . . . . . . . . . . . . . . . . . 23.2 Stuff You Will Need . . . . . . . . . . . . . . . . . . . . . . . . . 3
4 Setting up Qmail 34.1 Preparing the scene . . . . . . . . . . . . . . . . . . . . . . . . . . 34.2 Compiling . . . . . . . . . . . . . . . . . . . . . . . . . . . . . . . 44.3 Configuring qmail . . . . . . . . . . . . . . . . . . . . . . . . . . . 54.4 Setting the sendmail wrapper . . . . . . . . . . . . . . . . . . . . 54.5 Startup scripts . . . . . . . . . . . . . . . . . . . . . . . . . . . . 6
1

CONTENTS CONTENTS
5 Setting up ucspi-tcp 65.1 Compiling ucspi-tcp . . . . . . . . . . . . . . . . . . . . . . . . . 75.2 Setting up tcprules . . . . . . . . . . . . . . . . . . . . . . . . . . 75.3 Running tcpserver for SMTP . . . . . . . . . . . . . . . . . . . . 85.4 Checking to see if it worked . . . . . . . . . . . . . . . . . . . . . 8
6 Useful Pointers for Qmail and Tcpserver 9
7 Configuring VmailMgr 97.1 Building and installing VmailMgr . . . . . . . . . . . . . . . . . . 97.2 Configuring Virtual Domains . . . . . . . . . . . . . . . . . . . . 97.3 Helper shell scripts . . . . . . . . . . . . . . . . . . . . . . . . . . 107.4 Creating a virtual domain . . . . . . . . . . . . . . . . . . . . . . 107.5 DNS settings . . . . . . . . . . . . . . . . . . . . . . . . . . . . . 107.6 Creating a sample user . . . . . . . . . . . . . . . . . . . . . . . . 117.7 Setting qmail system aliases . . . . . . . . . . . . . . . . . . . . . 11
8 Configuring Courier-IMAP 128.1 Taking care of inetd . . . . . . . . . . . . . . . . . . . . . . . . . 128.2 Building and installing Courier . . . . . . . . . . . . . . . . . . . 128.3 Configuring Courier-IMAP . . . . . . . . . . . . . . . . . . . . . 138.4 etc/imapd . . . . . . . . . . . . . . . . . . . . . . . . . . . . . . . 138.5 etc/pop3d . . . . . . . . . . . . . . . . . . . . . . . . . . . . . . . 138.6 Starting Courier-IMAP . . . . . . . . . . . . . . . . . . . . . . . 148.7 SSL pop and imap . . . . . . . . . . . . . . . . . . . . . . . . . . 148.8 Testing your setup . . . . . . . . . . . . . . . . . . . . . . . . . . 148.9 Vmailmgr login handles . . . . . . . . . . . . . . . . . . . . . . . 15
9 Setting Up Webmail 159.1 Compiling and installing Apache . . . . . . . . . . . . . . . . . . 16
10 PHP HTML Pre-processor 1610.1 Compiling and installing PHP . . . . . . . . . . . . . . . . . . . . 16
11 Setting up SquirrelMail 1711.1 Untarring and setting up directories. . . . . . . . . . . . . . . . . 1711.2 Configuring SquirrelMail . . . . . . . . . . . . . . . . . . . . . . . 18
12 Apache Configuration 1912.1 Minimalistic configuration . . . . . . . . . . . . . . . . . . . . . . 1912.2 Other possible configurations . . . . . . . . . . . . . . . . . . . . 2012.3 SquirrelMail plugins . . . . . . . . . . . . . . . . . . . . . . . . . 20
Revision 1.1.1.1, as of March 13, 2002 by graf25

CONTENTS CONTENTS
13 Administration Front-end 2013.1 Installing Ucspi-unix . . . . . . . . . . . . . . . . . . . . . . . . . 2113.2 Installing libmcrypt . . . . . . . . . . . . . . . . . . . . . . . . . 2113.3 Running vmailmgrd . . . . . . . . . . . . . . . . . . . . . . . . . 2113.4 Vmailmgr Admin plugin for SquirrelMail . . . . . . . . . . . . . 21
13.4.1 Recompiling PHP4 . . . . . . . . . . . . . . . . . . . . . . 2213.4.2 Getting and installing Vadmin . . . . . . . . . . . . . . . 22
13.5 Adding domains to Vadmin . . . . . . . . . . . . . . . . . . . . . 2313.5.1 Using domain magic.sh script . . . . . . . . . . . . . . . . 23
13.6 Adding more domains . . . . . . . . . . . . . . . . . . . . . . . . 24
14 Finalizing it all 2514.1 Why this is not recommended for large systems . . . . . . . . . . 2614.2 Corrections and Comments . . . . . . . . . . . . . . . . . . . . . 2614.3 Thank you and good luck! ;) . . . . . . . . . . . . . . . . . . . . 26
A Scripts 27A.1 edrelays.sh . . . . . . . . . . . . . . . . . . . . . . . . . . . . . . . 27A.2 addvirt.sh . . . . . . . . . . . . . . . . . . . . . . . . . . . . . . . 28A.3 rmvirt.sh . . . . . . . . . . . . . . . . . . . . . . . . . . . . . . . 31
B GNU Free Documentation License 34B.1 Applicability and Definitions . . . . . . . . . . . . . . . . . . . . 34B.2 Verbatim Copying . . . . . . . . . . . . . . . . . . . . . . . . . . 35B.3 Copying in Quantity . . . . . . . . . . . . . . . . . . . . . . . . . 36B.4 Modifications . . . . . . . . . . . . . . . . . . . . . . . . . . . . . 36B.5 Combining Documents . . . . . . . . . . . . . . . . . . . . . . . . 38B.6 Collections of Documents . . . . . . . . . . . . . . . . . . . . . . 38B.7 Aggregation With Independent Works . . . . . . . . . . . . . . . 39B.8 Translation . . . . . . . . . . . . . . . . . . . . . . . . . . . . . . 39B.9 Termination . . . . . . . . . . . . . . . . . . . . . . . . . . . . . . 39B.10 Future Revisions of This License . . . . . . . . . . . . . . . . . . 39
Revision 1.1.1.1, as of March 13, 2002 by graf25
3 THE SOFTWARE
1 The problem
Say, you are looking to start your own small-to-medium hosting business andyou need to come up with the best solution for an e-mail server. The things youare looking for are:
• Security
• Reliability
• Lax hardware requirements
• Support for many virtual hosts, all sitting on one IP address (name-basedhosting)
• SMTP relaying for your clients
• POP3 and IMAP mailbox access
• A nice webmail front-end for your clients
I was facing the same problem and I have found that one of the best solutionswould be to use Qmail-Courier-Vmailmgr-SquirrelMail tie-in. It is very easy toconfigure, runs very reliably, and has very good security features.
This guide will help you configure and set up a similar system.
2 Conventions used in this Guide
For an easier read, the following conventions will be used throughtout this guide.File names and directory paths will be shown inline in typewriter font, e.g.“/usr/libexec”. Names of commands will be presented in bold typeface, forexample “ps auxww | grep qmail”. Software names and other random bitsand pieces that I find worthy of highlighting will be marked in italics typeface.
Scripts and verbatim commands that you will need to execute will be pre-sented in typewriter font and placed in paragraphs of their own. For example:
mail# echo ’Hello World’ | wc -lmail# clear
Scripts can be found in the Appendix.
3 The Software
3.1 Operating System Software
There are many flavors of UN*X software out there and it’s very hard to writea uniform document that would work for every distribution. Currently, I havetwo versions of the guide – one aimed at Red Hat Linux people (since that’s
Revision 1.1.1.1, as of March 13, 2002 by graf25

4 SETTING UP QMAIL 3.2 Stuff You Will Need
what I use as well), and one guide aimed at a more generic BSD-ish system,be it FreeBSD, OpenBSD, NetBSD, or SlackWare. You are reading the latterversion. It has been tested on OpenBSD-3.0 and is written with OpenBSD inmind, although it should work on other BSD systems without any significantissues.
This document assumes that you have successfully configured your systemand are ready to put the e-mail stuff on it. Please refer to your BSD makers’web site for any installation instructions.
3.2 Stuff You Will Need
This shows latest versions at the time of writing. If newer versions are available,you should probably get them, unless otherwise instructed.
• qmail-1.03 (http://www.qmail.org/)
• ucspi-tcp-0.88 (http://cr.yp.to/)
• courier-imap-1.4.2 (http://www.courier-mta.org/)
• vmailmgr-0.96-9 (http://www.vmailmgr.org/)
• apache-1.3.23 (http://httpd.apache.org/)
• php-4.0.6 (http://www.php.net/)
• squirrelMail-1.2.4 (http://www.squirrelmail.org/)
• libmcrypt-2.4.18 (http://mcrypt.hellug.gr/)
• ucspi-unix-0.34 (http://untroubled.org/ucspi-unix/)
• vadmin-v1.0 (http://mricon.com/xmlparse/SM/)
4 Setting up Qmail
Setting up Qmail is rather trivial, but here are most basic steps you need totake.
4.1 Preparing the scene
Before you do anything, you will need to remove any traces of Sendmail fromyour system. Depending on the OS, sendmail could have been installed as aseparate package, or as a part of the system. Run “pkg info” and see if youhave sendmail installed as a package. If you in fact do, run “pkg delete” onit to remove the traces of this beast from your system. Otherwise just do thefollowing (or something like this). Kill the “sendmail” process first – run “ps ax| grep sendmail | grep -v grep”. If this command returned any lines, look
Revision 1.1.1.1, as of March 13, 2002 by graf25

4 SETTING UP QMAIL 4.2 Compiling
at the first field and then run “kill NNNN” where “NNNN” is the number inthe first field.
After the sendmail daemon has been stopped, we need to move the originalsendmail binaries somewhere where they don’t bother us (it’s ok if some of thefollowing commands return “no such file or directory”, but check your input fortypo’s!).
mail# chmod 0 /usr/sbin/sendmailmail# chmod 0 /usr/lib/sendmailmail# chmod 0 /usr/libexec/sendmailmail# chmod 0 /usr/lib/sendmail.mxmail# mv -f /etc/mail /etc/mail.origmail# mv -f /usr/sbin/sendmail /usr/sbin/sendmail.origmail# mv -f /usr/lib/sendmail /usr/lib/sendmail.origmail# mv -f /usr/libexec/sendmail /usr/libexec/sendmail.origmail# mv -f /usr/lib/sendmail.mx /usr/lib/sendmail.mx.orig
It is also possible that your system is configured to run cron scripts mon-itoring sendmail or the mail queue. Turn those off by running “crontab -e”and commenting out the line that calls sendmail.
Next, create a /var/qmail directory. You need to remember, that this iswhere qmail will store its queued e-mail, so if you want to be ready for somebig traffic (remember the iloveyou!), you might want to make sure you have areasonable amount of space available on that partition.
Qmail has very tight security features, and it achieves them by using sixseparate user accounts to handle various functions. You will need to createthese special accounts before you can compile and install qmail.
How you do it depends on your OS, but here is the process that should besuitable for most modern BSD systems (note that it’s “>>”, not “>” – VERYimportant):
mail# cd /etcmail# echo "nofiles:*:5000:" >> groupmail# echo "qmail:*:5001:" >> groupmail# echo "alias:*:5000:5000::0:0::/var/qmail/alias:" >> master.passwdmail# echo "qmaild:*:5001:5000::0:0::/var/qmail:" >> master.passwdmail# echo "qmaill:*:5002:5000::0:0::/var/qmail:" >> master.passwdmail# echo "qmailp:*:5003:5000::0:0::/var/qmail:" >> master.passwdmail# echo "qmailq:*:5004:5001::0:0::/var/qmail:" >> master.passwdmail# echo "qmailr:*:5005:5001::0:0::/var/qmail:" >> master.passwdmail# echo "qmails:*:5006:5001::0:0::/var/qmail:" >> master.passwdmail# pwd_mkdb -p /etc/master.passwd
4.2 Compiling
Now that you have created the necessary users and made sure you have a sensibleamount of free space in /var/qmail, you are ready to compile and install. This
Revision 1.1.1.1, as of March 13, 2002 by graf25

4 SETTING UP QMAIL 4.3 Configuring qmail
is very trivial and takes no time at all.I usually like to keep the sources in /usr/local/src, so let’s crete that
directory and do all of our compilations in there.
mail# mkdir -p /usr/local/srcmail# cd /usr/local/src
Now copy the qmail-1.03.tar.gz file into /usr/local/src and get on withcompiling:
mail# tar xzvf qmail-1.03.tar.gzmail# cd qmail-1.03mail# make && make setup check
If everything compiled without errors (which it should have), you are readyto configure qmail.
4.3 Configuring qmail
For the sake of providing examples I am going to assume that your hostname is“mail.hogwarts.jk”. You, of course, should use whatever is the domain name ofyour future mail server.
Go to /var/qmail/control directory:
mail# cd /var/qmail/controlmail# echo mail.hogwarts.jk > memail# echo mail.hogwarts.jk > defaultdomainmail# echo mail.hogwarts.jk > rcpthostsmail# echo mail.hogwarts.jk > localsmail# echo mail.hogwarts.jk > plusdomainmail# echo localhost >> localsmail# echo localhost >> rcpthosts
This covers the basic installation. We will get to virtual domains setup at alater step, since it’s much easier done with a simple script, than by hand.
4.4 Setting the sendmail wrapper
Since most systems cannot function without sendmail, qmail provides a sendmailwrapper. To activate it do this:
mail# ln -s /var/qmail/bin/sendmail /usr/lib/sendmailmail# ln -s /var/qmail/bin/sendmail /usr/sbin/sendmail
This should make every program totally oblivious to the fact that you’re notreally using sendmail any more.
Revision 1.1.1.1, as of March 13, 2002 by graf25

5 SETTING UP UCSPI-TCP 4.5 Startup scripts
4.5 Startup scripts
Go to /var/qmail/boot directory, locate the file called “home” and move it to/var/qmail/rc:
mail# cd /var/qmail/bootmail# mv home ../rc
Now we need to edit the rc file and make sure that it delivers into Maildirs,and not into Mailboxes, as it is still by default (by some horrible cosmic over-sight, I guess). Open /var/qmail/rc in your favorite editor, and change “./Mail-box” to “./Maildir”.
To run qmail all you have to do is execute:
mail# /var/qmail/rc &
To have it started automatically you need to put “/var/qmail/rc &” intoyour /etc/rc.local file. Check if you have /etc/rc.local first – it might notbe available by default on your flavor of BSD, but all of them check for thepresense of this file during the boot-up, and will execute any commands in yourrc.local automatically. If you don’t have a /etc/rc.local, then run:
mail# echo ’#!/bin/sh’ > /etc/rc.localmail# chmod 0755 /etc/rc.local
Now let’s tell the server that it needs to start qmail during the boot-up:
mail# echo ’/var/qmail/rc &’ >> /etc/rc.local
Just to make sure that rc.local gets executed during the boot-up, rebootyour machine. When the machine comes back up, run the following command:
mail# ps auxww | grep qmail
and find the “qmail-lspawn” process together with a few others. Test thesystem by sending a simple message like:
mail# uname -a | mail [email protected]
Check your remote server and make sure you have received this e-mail.If something didn’t work, check your /var/log/mail or /var/log/maillog(whichever) for a possible explanation. Sorry, troubleshooting is out of thescope of this document. Visit http://www.qmail.org/ for any support youneed.
5 Setting up ucspi-tcp
Your mail server is no good if it can’t accept SMTP connections. This is bestdone by using the ucspi-tcp package available from the same developers whowrote qmail. Get the tar.gz and put it into /usr/local/src.
Revision 1.1.1.1, as of March 13, 2002 by graf25

5 SETTING UP UCSPI-TCP 5.1 Compiling ucspi-tcp
5.1 Compiling ucspi-tcp
No sweat, as always. Simply do:
mail# tar xzvf ucspi-tcp-0.88.tar.gzmail# cd ucspi-tcp-0.88mail# make && make setup check
This will compile and install ucspi-tcp files in your /usr/local directory.
5.2 Setting up tcprules
We want to make sure that nobody but our own clients are able to use ourserver to send outgoing mail. Otherwise we will have what is called an “openrelay” – everyone will hate us and we’ll end up on various spam blacklists. Notsomething we want.
To enable “selective relaying’ ’, we need to create a file called relay.rulessomewhere where it makes sense, like in /var/qmail/control directory. Thegeneral file format goes something like this:
127.0.0.1:allow,RELAYCLIENT=’’192.168.1.:allow,RELAYCLIENT=’’:allow
What this does is instructs qmail that it should allow outgoing e-mail onlyfor clients connecting from the local machine and our trusted subnet, which inthis case is “192.168.1.0/24”. You, of course, will need to change it to your ownsubnet if you want this to work. You may add as many subnets in, followingthe given example and putting each on a separate line, to make sure that allyour clients are covered. Don’t forget the last “:allow” on the line, or we won’taccept any incoming mail for our clients either.
Once your /var/qmail/control/relay.rules file is completed, you willneed to compile it so it’s ready to be used. Do this by executing:1
mail# /usr/local/bin/tcprules /var/qmail/control/relays.cdb \/var/qmail/control/relays.tmp < /var/qmail/control/relay.rules
The command will compile your rules and put them in a binary file relays.cdb,located in the qmail control directory. Remember that you will need to recom-pile the rules if you add any more subnets in. I found it useful to use a no-brainscript whenever I needed to edit the rules, called edrelays.sh. It is included
1General note about scripts in this Guide: In order to make the scripts look sane on adisplayed/printed page, I am using backslashes to go to the next line. You can either omitthe “\” and just continue typing without hitting “return” until you get to the very end ofthe command, or you may follow my lead and use backslashes. In this case make sure youhit “return” right after you typed the “\”. What this does is it escapes the newline symboland the system accepts the command as if it was all on one line. Most shells will show a “>”symbol after you hit return to denote that you may continue input.
Revision 1.1.1.1, as of March 13, 2002 by graf25

5 SETTING UP UCSPI-TCP 5.3 Running tcpserver for SMTP
in the Appendix A.1 and is available for download from my website (read theintroduction to the Appendix A).
Now editing rules is as simple as running edrelays.sh (don’t forget to set theexecution bits).
5.3 Running tcpserver for SMTP
Running tcpserver is no easy task. ;) Well, it is, it just needs to be placed inrc.local so we don’t ever have to touch it again. The command line to executetcpserver looks like this:2
mail# /usr/local/bin/tcpserver -R -x/var/qmail/control/relays.cdb \-u5001 -g5000 0 smtp /var/qmail/bin/qmail-smtpd 2>&1 \| /var/qmail/bin/splogger &
A bit of explanation of what this does. The first flag, “-R” tells the servernot to try to establish an auth connection to the client, since it’s mostly uselessnowadays, when nearly everyone is running firewalls and/or silly operating sys-tems. -x/var/qmail/control/relays.cdb flag makes sure we use the relayingrules we have just compiled. -u5001 instructs tcpserver to run as user “qmaild”-g5000 is group “nofiles”, 0 means that we want tcpserver to listen on all in-terfaces, smtp means we want it to bind to port 25 (the standard SMTP portused for mail exchange), /var/qmail/bin/qmail-smtpd instructs the tcpserverto run qmail-smtpd program after establishing a connection, 2>&1 makes surethere isn’t any garbage spewing onto the console and it all goes into the logs, and/var/qmail/bin/splogger makes certain we log things in /var/log/maillog.Quite simple, really. ;)
Since we want the SMTP service to start during the system boot as well, weneed to add the monstrous line depicted above into our /etc/rc.local. Breakout your favorite editor and do so now.
5.4 Checking to see if it worked
Check to see if you have done everything correctly by doing this:
mail# telnet mail.hogwarts.jk smtp
You should see:
Trying 192.168.1.1...Connected to mail.hogwarts.jk.Escape character is ’^]’.220 mail.hogwarts.jk ESMTP
2If you get an “Ambiguous output redirect” message, then you are using csh and shouldbe beaten by big surly men. Run “sh” and then execute the command. You may “exit”afterwards if you’re that enamoured with csh. :)
Revision 1.1.1.1, as of March 13, 2002 by graf25

7 CONFIGURING VMAILMGR
Try saying hello. Type in
HELO hogsmeade.jk
It should say:
250 mail.hogwarts.jk
Type “quit” to close connection. We will do serious testing later.
6 Useful Pointers for Qmail and Tcpserver
Qmail and tcpserver are a very flexible and extendable combination. You maytweak the system to your liking – visit http://www.qmail.org/ for a verylengthy list of software and enhancements available.
7 Configuring VmailMgr
Get the latest version of vmailmgr from http://www.vmailmgr.org/. At thetime of writing it is vmailmgr-0.96-9.tar.gz.
7.1 Building and installing VmailMgr
Untar the distribution and cd into the vmailmgr-0.96-9 directory. Now con-figure and build it:
mail# ./configuremail# make && make install
That’s it. If you encounter any problems, try using “gmake” instead of“make”, and if that doesn’t work, please refer to help docs and any info on thevmailmgr website, as troubleshooting is out of the scope of this document.
7.2 Configuring Virtual Domains
It is best of all to add and remove virtual domains by using helper scripts, other-wise things get extensively verbose and tedious. Before we start, however, let’screate a /home/dom directory where we will put all virtual domain directories,and add a “dom” group. This is done to organize everything nicely.
mail# mkdir /home/dommail# echo "dom:*:5002:" >> /etc/group
Note that /home/dom is where all your incoming users’ e-mail messages willreside, so depending on how many users you are going to support, you mightwant to make sure that you have plenty of space on this partition.
Revision 1.1.1.1, as of March 13, 2002 by graf25
7 CONFIGURING VMAILMGR 7.3 Helper shell scripts
7.3 Helper shell scripts
It takes a lot of tedious steps to create or delete a virtual domain, therefore Ifound it useful to write a couple of shell scripts to do all the work for me.
The addvirt.sh script is presented to you in Appendix A.2. It will help youto significantly lessen the amount of typing you have to do in order to add avirtual domain. The rmvirt.sh script is located in Appendix A.3 and is just asuseful.
Copy these scripts into /usr/local/bin directory and set permissions toexecute. You might want to check if your /usr/local/bin is in your $PATH ifyou don’t want to type in the full path of each script every time.
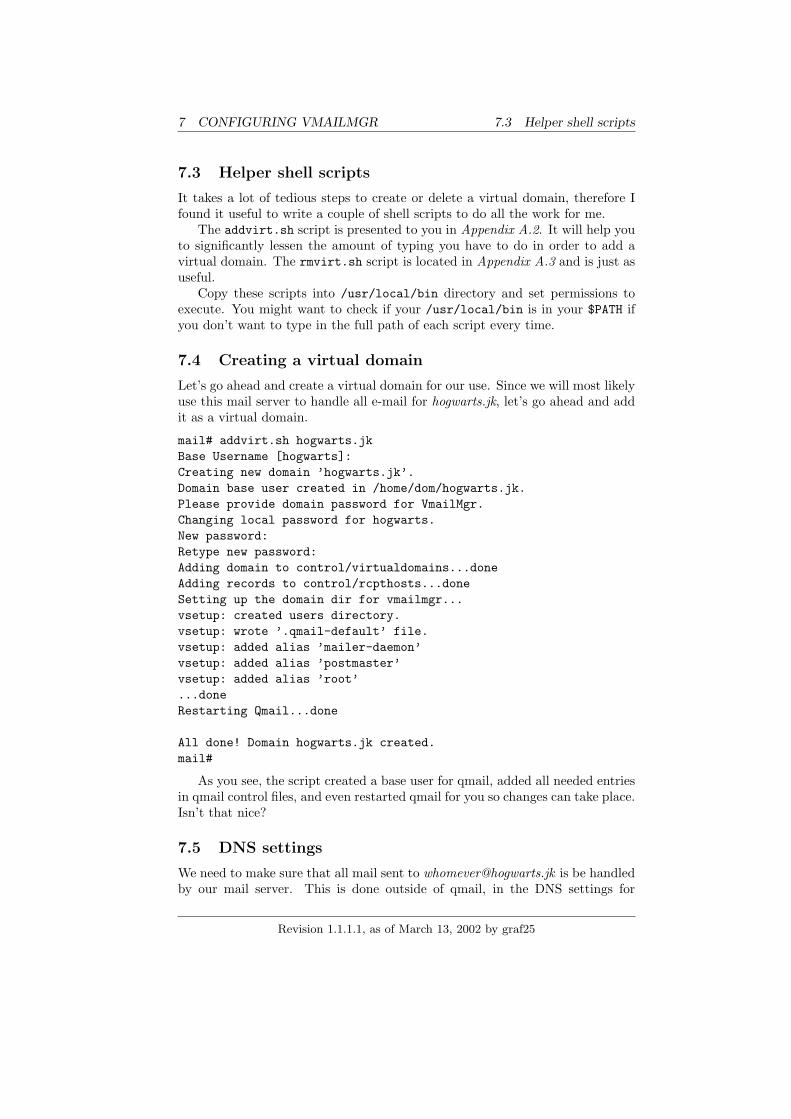
7.4 Creating a virtual domain
Let’s go ahead and create a virtual domain for our use. Since we will most likelyuse this mail server to handle all e-mail for hogwarts.jk, let’s go ahead and addit as a virtual domain.
mail# addvirt.sh hogwarts.jkBase Username [hogwarts]:Creating new domain ’hogwarts.jk’.Domain base user created in /home/dom/hogwarts.jk.Please provide domain password for VmailMgr.Changing local password for hogwarts.New password:Retype new password:Adding domain to control/virtualdomains...doneAdding records to control/rcpthosts...doneSetting up the domain dir for vmailmgr...vsetup: created users directory.vsetup: wrote ’.qmail-default’ file.vsetup: added alias ’mailer-daemon’vsetup: added alias ’postmaster’vsetup: added alias ’root’...doneRestarting Qmail...done
All done! Domain hogwarts.jk created.mail#
As you see, the script created a base user for qmail, added all needed entriesin qmail control files, and even restarted qmail for you so changes can take place.Isn’t that nice?
7.5 DNS settings
We need to make sure that all mail sent to [email protected] is be handledby our mail server. This is done outside of qmail, in the DNS settings for
Revision 1.1.1.1, as of March 13, 2002 by graf25
7 CONFIGURING VMAILMGR 7.6 Creating a sample user
hogwarts.jk, specifically by setting an MX record looking something like this:
hogwarts.jk. IN MX 10 mail.hogwarts.jk.
When other domains are added to our system in the future, they will allhave very similar DNS settings to the one above, like:
hogsmeade.jk. IN MX 10 mail.hogwarts.jk.diagonalley.jk. IN MX 10 mail.hogwarts.jk.theburrow.jk. IN MX 10 mail.hogwarts.jk.
For more information check with manuals for your DNS server, such as BINDor djbdns – I am not going to go in any details on the matter of DNS settingsin this guide.
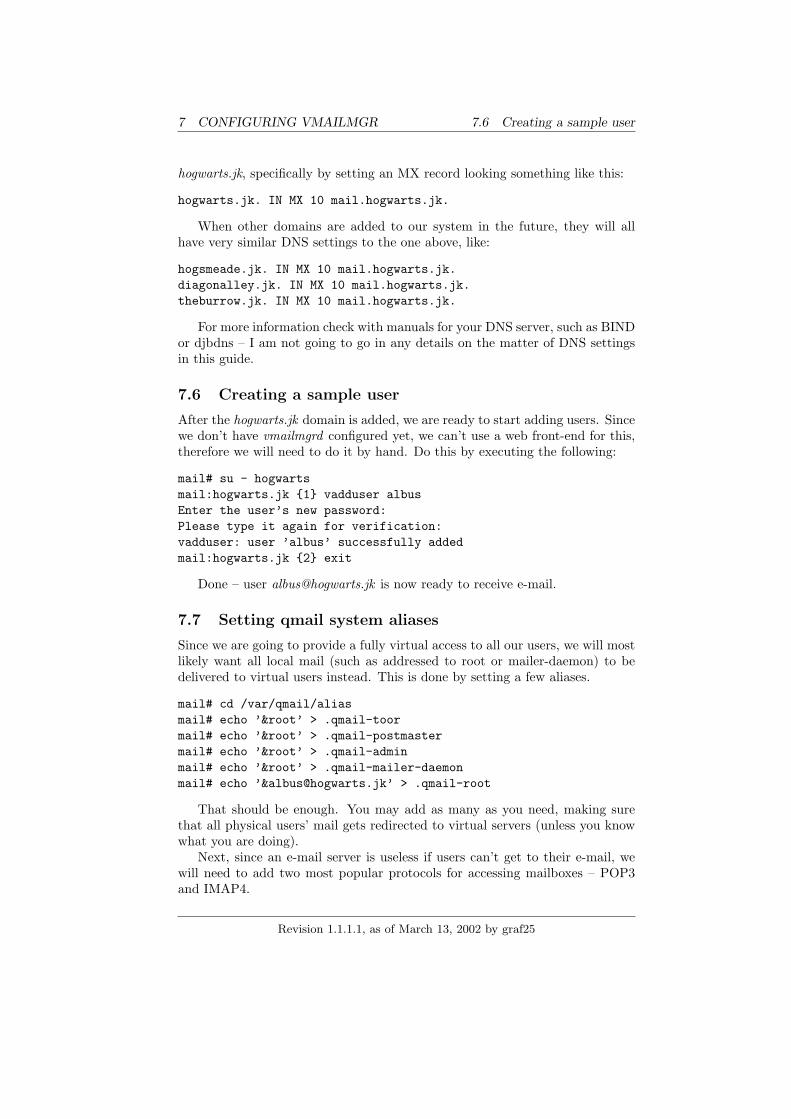
7.6 Creating a sample user
After the hogwarts.jk domain is added, we are ready to start adding users. Sincewe don’t have vmailmgrd configured yet, we can’t use a web front-end for this,therefore we will need to do it by hand. Do this by executing the following:
mail# su - hogwartsmail:hogwarts.jk {1} vadduser albusEnter the user’s new password:Please type it again for verification:vadduser: user ’albus’ successfully addedmail:hogwarts.jk {2} exit
Done – user [email protected] is now ready to receive e-mail.
7.7 Setting qmail system aliases
Since we are going to provide a fully virtual access to all our users, we will mostlikely want all local mail (such as addressed to root or mailer-daemon) to bedelivered to virtual users instead. This is done by setting a few aliases.
mail# cd /var/qmail/aliasmail# echo ’&root’ > .qmail-toormail# echo ’&root’ > .qmail-postmastermail# echo ’&root’ > .qmail-adminmail# echo ’&root’ > .qmail-mailer-daemonmail# echo ’&[email protected]’ > .qmail-root
That should be enough. You may add as many as you need, making surethat all physical users’ mail gets redirected to virtual servers (unless you knowwhat you are doing).
Next, since an e-mail server is useless if users can’t get to their e-mail, wewill need to add two most popular protocols for accessing mailboxes – POP3and IMAP4.
Revision 1.1.1.1, as of March 13, 2002 by graf25

8 CONFIGURING COURIER-IMAP
8 Configuring Courier-IMAP
Courier-IMAP will provide four services we need – imap-4, secure imap, pop-3,and secure pop. However, before we start on courier-imap, we need to take careof a minor annoyance.
8.1 Taking care of inetd
Many systems will have their own POP3 and IMAP handlers configured in inetd.This needs to be disabled, otherwise it will conflict with our installation. Edityour /etc/inetd.conf file, find a line starting with “pop3” and comment it outwith a “#” sign. Do the same for the line beginning with “imap”, if you haveone.
Frankly, there is no reason why inetd should be running at all on a mail-server. If you wish to disable it, check with your system’s manuals, but on mostBSD systems it’s as easy as editing the /etc/rc.conf file and changing thesetting to inetd=NO. Leaving it running will not impair you in any way, besidesleaving holes open for any potential attacks. However, just make sure that itdoesn’t try to serve pop3 and imap connections if you would like to leave itrunning for whatever purpose.
Restart inetd by running:
mail# ps ax | grep inetd | grep -v grep22545 ?? Is 0:00.02 inetdmail# kill -HUP 22545
Note that “22545” is only pertinent to my system, and yours will most likelyreturn a different number.
8.2 Building and installing Courier
Get Courier-IMAP from http://www.courier-mta.org/download.php. Notethat we don’t want the “courier” package, just “courier-imap”. The full packageincludes some other things we don’t need, like sqwebmail, which is not anywherenear as good as squirrelmail.
Courier-imap is tricky in a way that it requires you to build it as non-root(this is overall a very good idea, too). You may untar and configure it as aregular user, or you can just follow my example and override this:
mail# cd courier-imap-1.4.2mail# ./configure --disable-root-check
Courier-imap will take a while to configure and it might seem like it’s goingin a constant loop, but it’s not. When it’s done configuring, build and install itby running:
mail# make && make install
Revision 1.1.1.1, as of March 13, 2002 by graf25
8 CONFIGURING COURIER-IMAP 8.3 Configuring Courier-IMAP
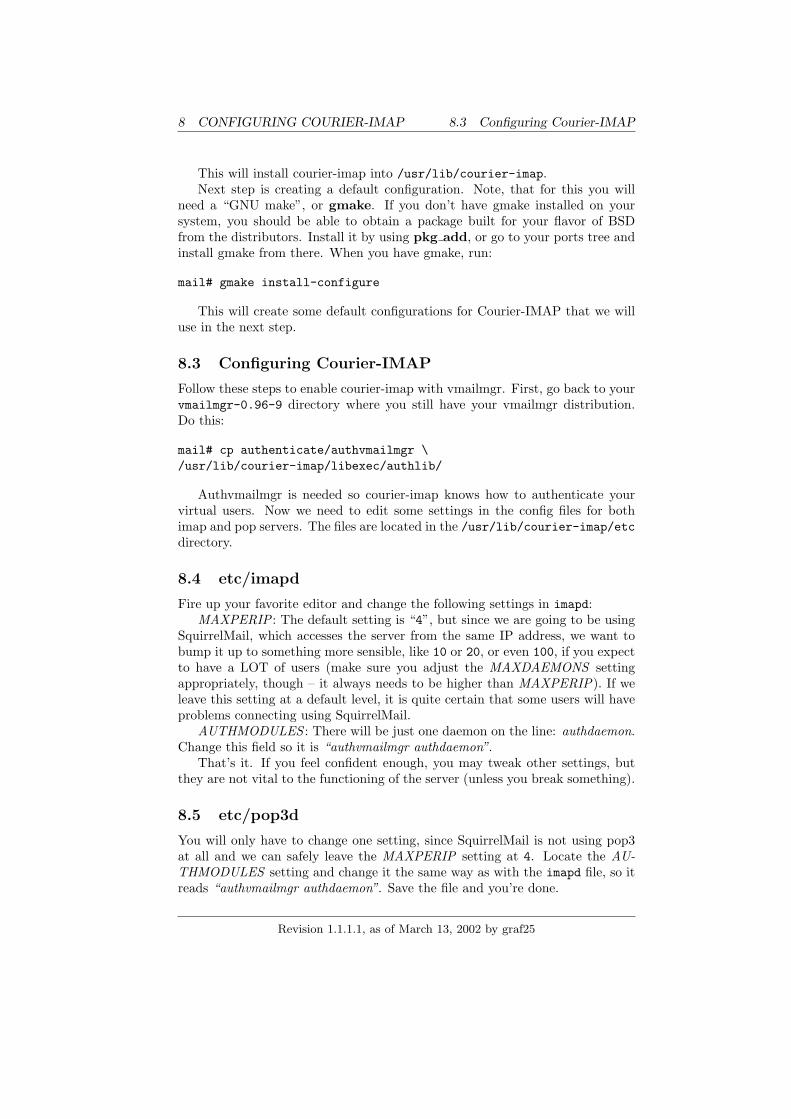
This will install courier-imap into /usr/lib/courier-imap.Next step is creating a default configuration. Note, that for this you will
need a “GNU make”, or gmake. If you don’t have gmake installed on yoursystem, you should be able to obtain a package built for your flavor of BSDfrom the distributors. Install it by using pkg add, or go to your ports tree andinstall gmake from there. When you have gmake, run:
mail# gmake install-configure
This will create some default configurations for Courier-IMAP that we willuse in the next step.
8.3 Configuring Courier-IMAP
Follow these steps to enable courier-imap with vmailmgr. First, go back to yourvmailmgr-0.96-9 directory where you still have your vmailmgr distribution.Do this:
mail# cp authenticate/authvmailmgr \/usr/lib/courier-imap/libexec/authlib/
Authvmailmgr is needed so courier-imap knows how to authenticate yourvirtual users. Now we need to edit some settings in the config files for bothimap and pop servers. The files are located in the /usr/lib/courier-imap/etcdirectory.
8.4 etc/imapd
Fire up your favorite editor and change the following settings in imapd:MAXPERIP : The default setting is “4”, but since we are going to be using
SquirrelMail, which accesses the server from the same IP address, we want tobump it up to something more sensible, like 10 or 20, or even 100, if you expectto have a LOT of users (make sure you adjust the MAXDAEMONS settingappropriately, though – it always needs to be higher than MAXPERIP). If weleave this setting at a default level, it is quite certain that some users will haveproblems connecting using SquirrelMail.
AUTHMODULES : There will be just one daemon on the line: authdaemon.Change this field so it is “authvmailmgr authdaemon”.
That’s it. If you feel confident enough, you may tweak other settings, butthey are not vital to the functioning of the server (unless you break something).
8.5 etc/pop3d
You will only have to change one setting, since SquirrelMail is not using pop3at all and we can safely leave the MAXPERIP setting at 4. Locate the AU-THMODULES setting and change it the same way as with the imapd file, so itreads “authvmailmgr authdaemon”. Save the file and you’re done.
Revision 1.1.1.1, as of March 13, 2002 by graf25

8 CONFIGURING COURIER-IMAP 8.6 Starting Courier-IMAP
8.6 Starting Courier-IMAP
Courier-imap developers were nice enough to provide a convenient startup script.To start courier-imap simply run:
mail# /usr/lib/courier-imap/libexec/imapd.rc startmail# /usr/lib/courier-imap/libexec/pop3d.rc start
You will need to add the above lines to our ever-growing /etc/rc.local fileif we want these services started during the system boot-up.
8.7 SSL pop and imap
SSL-imap and SSL-pop are very nifty services which run pop3 and imap over asecure tunnel, so all traffic is encrypted and none of our passwords get sniffed.We don’t really care that much if the passwords get hijacked, since none of themare system passwords, but our users might wish to have this feature available,since a stolen password jeopardizes their privacy.
If you are serious about running SSL services, you will need to obtain validSSL certificates for your mail server from Certification Authorities like Thawteor VeriSign. I will not give any instructions on how to go about getting thecertificates in this guide, consider it a test of your Googling abilities. ;)
If you want to just try it out, then run the following commands:
mail# cd /usr/lib/courier-imap/sharemail# ./mkimapdcertmail# ./mkpop3dcert
These will output a lot of dots and pluses, but at the end you will findtwo extra files in the directory: imapd.pem and pop3d.pem. Next, edit theconfiguration files for these services in the courier-imap’s etc directory.
In etc/imapd-ssl change IMAPDSSLSTART to “YES”, and in the etc/pop3d-sslfile change POP3DSSLSTART to “YES” as well. That’s it.
To start the SSL services, execute:
mail# /usr/lib/courier-imap/libexec/imapd-ssl.rc startmail# /usr/lib/courier-imap/libexec/pop3d-ssl.rc start
Add these lines to your /etc/rc.local to start these services during theboot time, but note that unless you get valid .pem files from a CertificationAuthority, your users will get “invalid certificate” warnings each time they tryto connect securely.
8.8 Testing your setup
Let’s see if everything is working as it should. Send an e-mail to [email protected] some remote location (of course, substituting our little Harry-Potterish
Revision 1.1.1.1, as of March 13, 2002 by graf25
9 SETTING UP WEBMAIL 8.9 Vmailmgr login handles
examples with whatever you have set up instead), and then try checking youre-mail with some client.
Your login settings would be the following:
• Server: mail.hogwarts.jk
• Login: [email protected]
• Password: whatever
Try imap first, then try pop3. If it works, then pat yourself on the back –your system is almost ready. ;) If it doesn’t, try troubleshooting the log filesand re-checking your steps (especially MX and other DNS settings). Maybe youmissed something?
8.9 Vmailmgr login handles
As you have already noticed, vmailmgr makes virtual users possible by requiringthe full e-mail address as the login. Actually, it will accept any of the following:
• albus:hogwarts.jk
• hogwarts-albus
However, heed my advice and don’t use anything but the first one. Userstend to get very confused between colons and dashes, so just tell them to usetheir full e-mail address as username and everyone will be happy.
9 Setting Up Webmail
Now that our e-mail system is up and running, it’s time to give our clients anice web-mail interface so they can check their e-mail whenever they are awayfrom their computers.
I am going to advise setting up a webserver on the same machine as whereyour mail server is running, meaning the box we just configured. A minimalisticApache/PHP install doesn’t require a lot of resources and will not weigh downyour mailserver box by much, but will give you several important advantages.
First, if you decide to limit your webmail access to HTTPS/SSL, you will nothave to worry about cleartext traffic going to IMAP server and back (Squirrel-Mail at the time of writing doesn’t support IMAPS or any alternative encryptionmethods. You can work around this by using “stunnel” or similar forwardingservices, however). By having both httpd and courier-imap server running onthe same box, you can firewall your ports to only allow access to IMAP from thelocal machine and force everyone else to connect to SSL-imap and SSL-pop3.
Second, you will need a webserver on that machine anyway if you want torun vmailmgr webmail front-end scripts.
Revision 1.1.1.1, as of March 13, 2002 by graf25
10 PHP HTML PRE-PROCESSOR 9.1 Compiling and installing Apache
Thus, my advice is to set up webmail on the same machine as the mailserver.If you choose otherwise, you may still refer to the rest of this document for hintson how to best configure SquirrelMail and your Apache server. The rest of us –let’s see how we can install a webserver on this machine.
To do this, we will first need to compile and install the Apache httpd server.
9.1 Compiling and installing Apache
Most BSD systems come with Apache pre-installed, at least my OpenBSD-3.0did. For whatever reason, it is installed not as package, but as part of the basesystem install. If the same is true for you, then you can skip this step as wecan use the pre-installed version of apache to do what we need. Check if youalready have apache by running “which httpd” – if you get “httpd: Commandnot found”, then you don’t have it and should build it from source. If your BSDsystem doesn’t come with apache already available, then download the tarballfrom http://httpd.apache.org and build it following these steps:
Untar the tar.gz file and cd into the apache-1.3.23 directory. To configureand build Apache, run these commands:3
mail# cd apache_1.3.23mail# ./configure --prefix=/usr/local/apache \--enable-module=somail# make && make install
This will build and install apache into /usr/local/apache directory. Let’sgo on directly to configuring and building PHP before we get dirty with httpd.confadaptation.
10 PHP HTML Pre-processor
You can get a copy of PHP from http://www.php.net/. The latest version atthe time of writing is php-4.1.1, but there are some annoying issues with it atthis time, like various things being broken, so we are going to install a releasethat is actually known to work reliably – php 4.0.6. Get it from php.net, fromthe “older releases” section.
10.1 Compiling and installing PHP
Untar and cd into the php-4.0.6 directory. Run these commands:
mail# ./configure --with-apxs=/usr/local/apache/bin/apxs
3Note: These instructions and configurations are only useful if you’re just usingApache/PHP to run SquirrelMail and nothing else. If you are planning to provide any addi-tional hosting on the same server, your mileage will vary. Note that for security purposes youare not encouraged to share the same server to do both hosting and web-mail, although if youknow what you are doing and can provide sufficient security, there is no reason not to go forit.
Revision 1.1.1.1, as of March 13, 2002 by graf25

11 SETTING UP SQUIRRELMAIL
If you didn’t build apache on your own, but used the one pre-installed onyour system, then your configure line will look like so:4
mail# ./configure --with-apxs=‘which apxs‘
You will need to make this substitution each time in the future when I’mtalking about using the --with-apxs flag.
If you want SquirrelMail to talk in other languages, you will need to enablegettext support, too. Most BSD systems come with gettext already availableand you just need to compile it into the PHP by adding “--with-gettext”to your configuration line. This is generally a good idea, anyway, since someof your users might speak in other languages, not just English. If you don’thave gettext available on your BSD system, there should be a gettext packageavailable from the distributors, or you can always build it from the ports tree.
With gettext support, the configure line will look like this (assuming thatyour gettext libraries are in /usr/local):
mail# ./configure --with-apxs=/usr/local/apache/bin/apxs \--with-gettext=/usr/local
After PHP configures itself, build it like you did all others:
root@mail:# make && make install
PHP will take forever to build, unless you’re using a very fast box, but onceit’s done, you should have PHP configured on your system.
Don’t fire up the server yet. It’s far from ready.
11 Setting up SquirrelMail
Download it from http://www.squirrelmail.org/. The latest version at thetime of writing is squirrelmail-1.2.4.
11.1 Untarring and setting up directories.
It is common practice to keep web-related documents in /var/www, so I willsuggest the same approach. Create /var/www if it doesn’t exist on your systemand copy your squirrelmail-1.2.4.tar.gz there. Do:
mail# tar xzvf squirrelmail-1.2.4.tar.gzmail# rm squirrelmail-1.2.4.tar.gzmail# ln -s squirrelmail-1.2.4 squirrelmailmail# cd squirrelmail
4Note that these are not “apostrophes”, but “backticks”, which are located under the tildeon your keyboard.
Revision 1.1.1.1, as of March 13, 2002 by graf25
11 SETTING UP SQUIRRELMAIL 11.2 Configuring SquirrelMail
The first order of business is setting up a secure data directory away fromthe document root. Do this:
mail# mkdir -p /var/lib/squirrelmailmail# mkdir -p /var/cache/squirrelmail/attachmentsmail# mv data /var/lib/squirrelmail/prefs
Now we need to find out the user and group your apache runs as. It used tobe “nobody:nogroup”, but it varies greatly now. To find out, run this:
mail# egrep ’^User |^Group ’ /usr/local/apache/conf/httpd.conf
If you are using a pre-installed version of apache, then your httpd.conf willbe elsewhere, but most likely in /var/www/conf.
In the following command substitute the “www:www” with whatever theprevious command returned, placing the username before the colon, and groupafter the colon:
mail# chown -R www:www /var/lib/squirrelmail/prefsmail# chmod 0700 /var/lib/squirrelmail/prefsmail# chown -R www:www /var/cache/squirrelmail/attachmentsmail# chmod 0700 /var/cache/squirrelmail/attachments
11.2 Configuring SquirrelMail
Using a provided perl script, this is a no-brainer.
root@mail:# cd configroot@mail:# ./conf.pl
Settings in part 1 are up to you. In part 2 be sure to set:
• Your domain name (in our case mail.hogwarts.jk)
• Set it to use SMTP. You will need to make sure that we accept relaysfrom 127.0.0.1 – run edrelays.sh and make sure we do.
• Set the server to “courier”.
There shouldn’t be anything in need of changing in part 3. In part 4 youneed to do two things:
• Change data directory from “../data/ ” to “/var/lib/squirrelmail/prefs/ ”.
• Change Attachment directory to “/var/cache/squirrelmail/attachments/ ”.
(If you’re a non-English speaker and use charset other than iso-8859-1,change that setting, too).
That’s it! You may play around with theme settings and such, if you wantto. LDAP address books are not covered in this document (see SquirrelMaildocs for info), and we will get to talk about plugins later.
Revision 1.1.1.1, as of March 13, 2002 by graf25

12 APACHE CONFIGURATION
12 Apache Configuration
Now it’s up to the fun part – we get to dig apache’s httpd.conf. There areplenty of different ways to configure it, but if you are going to use apache justto run Squirrelmail, a very minimalistic setup will suffice.
12.1 Minimalistic configuration
Open httpd.conf in your favorite editor. Don’t be dismayed by the size of thefile or by the abundance of comments – we will only need to change a few thingsas default settings will cover most anything. Let’s go over the directives youneed to change in the order in which they appear in our default httpd.confinstallation.
• Port : The default can be 8080, but you will need to change it to 80
• ServerAdmin: [email protected]
• ServerName: Make sure this directive is commented out, since we will beaccessing this machine as different domain each time.
• DocumentRoot : put “/var/www/squirrelmail”. You will also need tochange the <Directory ’/usr/local/apache/htdocs’> or <Directory ’/var/www/htdocs’>to <Directory ’/var/www/squirrelmail’> further down.
• DirectoryIndex : change it to be “index.php index.html”
• UseCanonicalName: change to Off
• Scroll a while and get to where it says “AddType application/x-httpd-php3.phtml”. Somewhere around there should be declarations for PHP. Un-comment the one which is marked for PHP 4.x. You don’t have to enablethe “.phps” setting, just the .php. The line should end up looking likethis:AddType application/x-httpd-php .php.
This completes the minimalistic setup of the apache server!Now run:
mail# apachectl start
This should fire up your web server (you might have to specify the full pathto apachectl when executing it). Go to http://mail.hogwarts.jk/ in your browserand enjoy a nice webmail front end. To log in, use the same login and passwordyou used before.
Since we would like to run Apache at boot time, let’s add this line to ourrc.local:
/usr/local/apache/bin/apachectl start
Revision 1.1.1.1, as of March 13, 2002 by graf25
13 ADMINISTRATION FRONT-END 12.2 Other possible configurations
If you are using a pre-installed version of apache, then check the /etc/rc.confand find the line that sets whether the web server is started at boot time ornot. E.g. on OpenBSD you will need to set httpd flags=’’ to have it startedautomatically.
12.2 Other possible configurations
Thick books have been written on the subject of Apache configuration. Natu-rally, most configurations are out of the scope of this guide. I can only give afew pointers.
If you are planning to use this Apache server for other stuff, you mightwant to bump all SquirrelMail-related stuff into VirtualHost directives so itdoesn’t get in the way. There are several ways to do this. For one, cre-ate a default VirtualHost which will handle all requests that don’t havetheir own ServerName allocated. The DocumentRoot for this server would be’/var/www/squirrelmail’ and therefore anybody accessing it as mail.domain.tldwill be served this default setting.
You may also set up every mail.domain.tld VirtualHost separately if you canstand the hassle. If you choose to do this, then simply point their Document-Root’s all to the same place where your SquirrelMail installation is.
If you are planning to host regular websites for these domains and want theusers to access mail in a special /mail subfolder of the www.domain.tld, youmight want to create a global alias /mail/ pointing to /var/www/squirrelmail.This will save you a headache of creating symlinks in every documentroot.
Overall, there are many ways to configure SquirrelMail so there is only onedocument root for each virtual domain. You are encouraged to experiment onyour own. ;)
12.3 SquirrelMail plugins
One of the greatest features of SquirrelMail is the ability to extend the basicapplication with additional snippets of code. Many plugins come bundled withSquirrelMail, and you are welcome to investigate them on your own. If youdecide to activate SquirrelSpell, then make sure you have aspell available onyour system.
Plugin installation is usually as easy as just untarring it in the plugins direc-tory, and then running the SquirrelMail’s conf.pl script, however some pluginswill require you to manually edit config files or running installer scripts. Consultthe plugin’s documentation for more information and installation instructions.
13 Administration Front-end
If you are anything like me, you prefer to have a nice http front-end to easesuch mundane tasks as adding and deleting users. Besides, if you are an ISP,you will probably want the domain owners to be able to administer their e-mail
Revision 1.1.1.1, as of March 13, 2002 by graf25

13 ADMINISTRATION FRONT-END 13.1 Installing Ucspi-unix
users without involving you. Using the system we have just configured and anice Vmailmgr Admin plugin I wrote, it is as easy as sneezing in February.
13.1 Installing Ucspi-unix
Very easy:
root@mail:# tar xzvf ucspi-unix-0.34.tar.gzroot@mail:# cd ucspi-unix-0.34root@mail:# make && make install
13.2 Installing libmcrypt
There were some changes in libmcrypt-2.4.19 and onwards, which make it in-compatible with php-4.0.6, therefore we will be using libmcrypt-2.4.18. Get itfrom http://mcrypt.hellug.gr/, untar, compile, and install:
mail# tar xzvf libmcrypt-2.4.18.tar.gzmail# cd libmcrypt-2.4.18mail# ./configure --prefix=/usr/localmail# make && make install
13.3 Running vmailmgrd
Now it’s time to run vmailmgrd. This is done by executing the following com-mand:
mail# /usr/bin/unixserver /tmp/.vmailmgrd \/usr/local/sbin/vmailmgrd 2>&1 | /var/qmail/bin/splogger &
Of course, we will want to stick this into our rc.local file as well to run itat system startup:
/usr/bin/unixserver /tmp/.vmailmgrd /usr/local/sbin/vmailmgrd \2>&1 | /var/qmail/bin/splogger &
That’s it, vmailmgrd is up and running.
13.4 Vmailmgr Admin plugin for SquirrelMail
This plugin will allow you to administer your domains without leaving the com-forts of your SquirrelMail interface. What’s more important, it allows you todesignate admins for each of your domains, so the owners of these domains canadminister their users without involving you, the ever-busy administrator.
Since security is a very important issue here, we will make use of that libm-crypt library we have just installed. First, though, we will need to recompilePHP to enable the libmcrypt support.
Revision 1.1.1.1, as of March 13, 2002 by graf25
13 ADMINISTRATION FRONT-END13.4 Vmailmgr Admin plugin for SquirrelMail
13.4.1 Recompiling PHP4
Go back to the directory with your PHP4 source. Now run this:
mail# make distcleanmail# ./configure --with-apxs=/usr/local/apache/bin/apxs \--with-gettext=/usr/local --with-mcrypt=/usr/localmail# make && make installmail# apachectl restart
This should activate the new build of PHP with libmcrypt support. Surf to“mail.hogwarts.jk” and make sure everything is working.
13.4.2 Getting and installing Vadmin
You can get the latest version of Vmailmgr Admin plugin for Squirrelmail here:
• http://mricon.com/xmlparse/SM/
The latest version is v1.0 at the time of writing. Download the plugin, thencopy it into your squirrelmail/plugins directory:
mail# cp vadmin-v1.0.tar.gz /var/www/squirrelmail/pluginsmail# cd /var/www/squirrelmail/pluginsmail# tar xzvf vadmin-v1.0.tar.gzmail# rm vadmin-v1.0.tar.gzmail# cd vadmin
Vadmin provides a convenient installer to make the installation of the plugineffortless. To engage the installer, do this:
mail# cd scriptsmail# ./installer.sh
The installer.sh shell script is very verbose and will guide you throughthe installation process giving you very detailed instructions. It would be sillyto repeat them here. When the installer asks you about who should be “elvis”,provide your login handle, which in our case is “[email protected]”.
After you have finished installing the plugin, you will need to restart yourApache server one more time so the changes can take effect:
mail# apachectl restart
Now activate the vadmin plugin by running SquirrelMail’s conf.pl scriptand choosing “plugins”. Activate vadmin and quit the configurator. The pluginis now activated.
After this, you should move the whole “scripts” directory somewhere whereit’s easy to get to them. Do this by going back to vadmin plugin directory andrunning the following commands:
Revision 1.1.1.1, as of March 13, 2002 by graf25
13 ADMINISTRATION FRONT-END 13.5 Adding domains to Vadmin
mail# mv scripts /root/vadmin-scriptsmail# cd /root/vadmin-scripts
Now we need to install a domain.
13.5 Adding domains to Vadmin
Let’s add hogwarts.jk to the list of domains available under vadmin. To do so,make sure you’re in your vadmin-scripts directory and run the vaddomain.shscript:
mail# ./vaddomain.sh hogwarts.jk
It will create the necessary directories and then will ask you “would you liketo add lowly admins to this domain?” Answer “no”, since we’re going to be theones doing all administering for this domain. Answer “no” to the next questionas well, since we don’t want to edit cross-admins yet (we will deal with adminsand cross-admins later).
Now go to http://mail.hogwarts.jk/ and log into SquirrelMail. You will no-tice that an “Admin” option appeared in the menu line – vadmin has detectedthat you are one of the admins and gives you an option to log into the admin-istrator interface.5 Go there.
You are given an option to log in. If you chose a “USER” option for cross-admin authentication (which is recommended for starters), then type in yourmailbox password in the “Password” field, otherwise type in whichever is thepassword you chose when you were creating the hogwarts.jk domain using ouraddvirt.sh script.
If you used your mailbox password when authenticating, the next screen willask you the domain password for hogwarts.jk. This is the system password youchose when you were creating this domain. Type it in and click “Proceed”. Thepassword will be saved on the server, but don’t worry – it will be saved in anencrypted format and vadmin’s security features are strong enough to make thejob of hijacking the passwords rather hard.
The next screen will be the Vadmin main menu – click away to explore theconvenience of this plugin. Everything should be pretty self-explanatory, pluslengthy descriptions are provided whenever something confusing comes up.
13.5.1 Using domain magic.sh script
If you are adding vadmin to an existing system already running several domainsconfigured with vmailmgr and qmail, you can run the domain magic.sh scriptto make them automagically available for use with vadmin.
5One of the security features of vadmin is that an “Admin” link will only be shown whenthe login username matches the http domain name. In other words, if you login as [email protected], you must log into http://mail.hogwarts.jk. If you login as [email protected] you’re accessing squirrelmail at http://mail.theburrow.jk, you will not see the “Admin”link.
Revision 1.1.1.1, as of March 13, 2002 by graf25

13 ADMINISTRATION FRONT-END 13.6 Adding more domains
13.6 Adding more domains
Now let’s mainstream the process of adding domains. Let’s say you want toadd two virtual domains to your system. For the purposes of being descriptive,I will make them be theburrow.jk and theministry.jk.
First, let’s edit our addvirt.sh script so it calls the vadmin’s scripts aftercreating these domains within the system. Fire up your favorite editor, andclose to the top uncomment the line setting up the “VADDOMAIN” variable.Do the same for the rmvirt.sh script, except the variable you’ll be looking for isgoing to be “VDELDOMAIN”.
Now let’s add theburrow.jk domain:
mail# addvirt.sh theburrow.jk
When it gets to the question “Would you like to add lowly admins for thisdomain?” say “y” this time, because we would like “[email protected]” tobe the administrator of this domain. Answering “y” will bring up your editor(if you didn’t set it up, this will bring up vi. Don’t panic, just type “i”, thentype “[email protected]”, then hit “Esc”, and type “:wq” + [Enter]).
The next question will be “Would you like to add cross-admins?”. Answer“y”. This will bring up the following screen:
Current cross-admins for ’theburrow.jk’:----------------------------------------------Handle/killall/exit:
Type in [email protected] and hit enter. The screen will update and youwill see “[email protected]” in the list of cross-admins. Typing “[email protected]”again will delete Mr. Weasley from the list of cross-admins.
Now that you have enabled this domain on your system and within vadmin,go to http://mail.hogwarts.jk/. Log in as [email protected] (the super-user),then click “Admin”. When you see the login screen to our vadmin interface,erase “hogwarts.jk” where it says “Domain” and type in “theburrow.jk”. Providethe domain password when it asks for it, and voila – you’re in the administrativeinterface for The Burrow.
Now you need to add the “arthur” and “molly” users. Select “add new user”,and follow instructions to create the user [email protected], then repeat [email protected]. After this, make sure you have “mail.theburrow.jk” domainenabled in your DNS settings and everything is ready for “[email protected]”and “[email protected]” to log into SquirrelMail, click on the “Admin” link,and start administering the domain.
Let’s finish exploring Vadmin by adding yet another domain. Type:
mail# addvirt.sh theministry.jk
Answer “y” to the “lowly admins” question, and make [email protected] lowly admin. When you are asked about cross-admins, answer “y”. Thiswill bring up a window looking like this:
Revision 1.1.1.1, as of March 13, 2002 by graf25

14 FINALIZING IT ALL
Current cross-admins for ’theministry.jk’:--------------------------------------------Handle/killall/exit:
Since Arthur Weasley works at the Ministry of Magic, we will want himto be able to administer both theburrow.jk and theministry.jk domains. Typein: “[email protected]” to enable cross-admining of “theministry.jk” for Mr.Weasley.
Now go to mail.hogwarts.jk, log in, click “Admin”, erase “hogwarts.jk”, typein “theministry.jk”, provide password, create the “fudge” user, then log out,sign out, go to mail.theburrow.jk, log in as “[email protected]” and click on“Admin”. You will see that you have a choice of administering either “thebur-row.jk” or “theministry.jk” domains.
If this all confuses you, play around with vadmin and vadmin scripts tofamiliarize yourself with them. Cross-admins are only useful if you have anyclients owning several domains and they find it a hassle to have to log out ofone mailbox and log into another one just to administer their users. If youdon’t have any clients who own several domains, you will only need to add“lowly admins” and not bother with cross-admins.
Vadmin is not capable of screwing up your system, so don’t be afraid to playwith it. The most it will do is make a domain operational or not operationalfrom within the vadmin plugin, so try it away. To find out what other scripts inthe vadmin-scripts directory do, run this command while in that directory:
mail# ./whatsthisdo.sh scriptname.sh
or just:
mail# ./whatsthisdo.sh
to see descriptions for them all.(In case you are wondering why I didn’t just make a web front-end interface
to adding domains, admins, and cross-admins, then the answer is – there isno really secure way of doing it from the web: too many possible exploits areavailable if I was to do something like this, therefore I didn’t.)
14 Finalizing it all
Your mail system is set up. If you have encountered any problems during theinstall, then consult the documentation provided with the misbehaving compo-nent – it will most likely tell you whom to contact for support. If everything isrunning smoothly and you are happy with your system, then congratulations –you’ve got yourself one of the best solutions out there.
Revision 1.1.1.1, as of March 13, 2002 by graf25

14 FINALIZING IT ALL14.1 Why this is not recommended for large systems
14.1 Why this is not recommended for large systems
The only reason this is not recommended for large systems is because Squirrel-Mail is currently not very scalable – you cannot easily run it on a server farm,since both SquirrelMail and Vadmin save their preferences onto the HDD (atrade-off for not requiring a database engine). However, if you decide not touse SquirrelMail/Vadmin, then Qmail-VmailMgr-Courier is definitely a strongenough solution to be run on high-demand servers, but this has its own set ofrequirements and is not covered under this guide.
14.2 Corrections and Comments
If you’ve found a mistake in this document which you would like to correct, orwould just like to comment on something, please send a message to [email protected] I can make the correction or read your comments. You may also check mywebsite at http://mricon.com/SM/guide/ for the latest version of this docu-ment.
14.3 Thank you and good luck! ;)
If you found this Guide useful, please let me know by executing:
mail# uname -a | mail [email protected] -s ’Thanks’
Sincerely, Konstantin Riabitsev, aka Mr.Icon.
Revision 1.1.1.1, as of March 13, 2002 by graf25

A SCRIPTS
A Scripts
The scripts presented in this section are all available for download on my web-site: http://www.mricon.com/SM/guide/. They have been tested on OpenBSD-3.0 and should work on most BSD systems with a few small changes, if any.
A.1 edrelays.sh
#!/bin/sh## edrelays.sh# ------------# This script makes editing selective relaying rules easy. It’s# distributed as a part of Qmail-VmailMgr-Courier-SquirrelMail# Guide, http://www.mricon.com/SM/guide/.## Copyright (c) 2001-2002 by Konstantin Riabitsev <[email protected]># Licensed under the GNU GPL. For full terms see http://www.gnu.org/## $Id: edrelays.sh.bsd,v 1.1.1.1 2002/03/13 00:29:41 graf25 Exp $## @author Konstantin Riabitsev <[email protected]> ($Author: graf25 $)# @version $Date: 2002/03/13 00:29:41 $#
# RULESPLAIN Is the variable that sets the location of the file with# relaying rules in a plain format.# RULESTEMP Is the variable setting the temporary file.# RULESCDB Is the location of the compiled cdb file.# TCPRULES Is the location of "tcprules" command.
RULESPLAIN="/var/qmail/control/relay.rules"RULESTEMP="/var/qmail/control/relays.tmp"RULESCDB="/var/qmail/control/relays.cdb"TCPRULES="/usr/local/bin/tcprules"
# See if we have an EDITOR set up.if test -z "$EDITOR"; then
EDITOR="vi"fi
$EDITOR $RULESPLAIN$TCPRULES $RULESCDB $RULESTEMP < $RULESPLAINecho "Compiled rules placed in $RULESCDB."
Revision 1.1.1.1, as of March 13, 2002 by graf25

A SCRIPTS A.2 addvirt.sh
A.2 addvirt.sh
#!/bin/sh## addvirt.sh# ------------# This script aims to greatly simplify the adding of new domains# to a BSD system running qmail and vmailmgr. It’s distributed# as part of the Qmail-Vmailmgr-Courier-Squirrelmail guide,# http://www.mricon.com/SM/guide/.## Copyright (c) 2001-2002 by Konstantin Riabitsev <[email protected]># Licensed under the GNU GPL. For full terms see http://www.gnu.org/## $Id: addvirt.sh.bsd,v 1.1.1.1 2002/03/13 00:29:40 graf25 Exp $## @author Konstantin Riabitsev <[email protected]> ($Author: graf25 $)# @version $Date: 2002/03/13 00:29:40 $#
## DGID: Group name to use when creating new domains (dom)# DHOME: Base directory for all virtual domains (/home/dom)# QHOME: Your qmail installation directory (/var/qmail)# VSETUP: The location of Vmailmgr’s "vsetup" command# (/usr/local/bin/vsetup)# VADDOMAIN: The location of vadmin’s vaddomain.sh script.# If you don’t use vadmin, comment the line out.DGID="dom"DHOME="/home/dom"QHOME="/var/qmail"VSETUP="/usr/local/bin/vsetup"#VADDOMAIN="/root/vadmin-scripts/vaddomain.sh"
# The original sh doesn’t provide us with $UID.if test ! $UID; then UID=‘id -u‘; fi
# Check if we’re root.if test $UID != "0" ; then
echo "Error: Must be root"exit 1
fi
# Check for omitted paramsif test -z $1; then
IAM=‘basename $0‘
Revision 1.1.1.1, as of March 13, 2002 by graf25

A SCRIPTS A.2 addvirt.sh
echo "Usage: $IAM newdomain.com"exit 1
fi
# Check if we will need to use "useradd" or "pw useradd" for# FreeBSD and Co.if test -f /usr/sbin/useradd
then USEPW="no"elif test -f /usr/sbin/pw;
then USEPW="yes"else
# Something odd here.echo "Couldn’t find either ’useradd’ or ’pw’. Aborting."exit 1
fi
# Check if this domain already exists in virtualdomains.if test -f $QHOME/control/virtualdomains; then
if egrep -q "^$1:" $QHOME/control/virtualdomains; thenecho "Error: Domain $1 exists"exit 1
fifi
NEWDOM=$1
# truncate to 8 symbolsBASEUSER=‘echo $NEWDOM | sed ’s/\./_/g; s/\(........\).*/\1/’‘echo -n "Base Username [$BASEUSER]: "read REPLYif test ! -z $REPLY; then BASEUSER=$REPLY; fi
# Check if we already have this baseuser. Loop if necessary.while egrep -q "^$BASEUSER:" /etc/passwd; do
echo "Base username $BASEUSER already exists. Please provide another."echo -n "Base Username [$BASEUSER]: "read REPLYif test $REPLY; then BASEUSER=$REPLY; fi
done
echo "Creating new domain ’$NEWDOM’."UFLAGS="-d $DHOME/$NEWDOM -g $DGID -m"if test $USEPW = "yes"
then pw useradd $BASEUSER $UFLAGSelse useradd $UFLAGS $BASEUSER
Revision 1.1.1.1, as of March 13, 2002 by graf25

A SCRIPTS A.2 addvirt.sh
fiecho "Domain base user created in $DHOME/$NEWDOM."echo "Please provide domain password for VmailMgr."passwd $BASEUSERecho -n "Adding domain to control/virtualdomains..."echo "$NEWDOM:$BASEUSER" >> $QHOME/control/virtualdomainsecho "done"echo -n "Adding records to control/rcpthosts..."echo "$NEWDOM" >> $QHOME/control/rcpthostsecho "done"echo "Setting up the domain dir for vmailmgr..."su $BASEUSER -c "$VSETUP"echo "...done"echo -n "Restarting Qmail..."kill ‘ps ax | grep qmail-lspawn | grep -v grep | awk ’{print $1}’‘$QHOME/rc &echo "done"echoif test ! -z "$VADDOMAIN"; then
$VADDOMAIN $NEWDOMfiecho "All done! Domain $NEWDOM created."
Revision 1.1.1.1, as of March 13, 2002 by graf25
A SCRIPTS A.3 rmvirt.sh
A.3 rmvirt.sh
#!/bin/sh## rmvirt.sh# ------------# This script aims to greatly simplify the removing of virtual domains# from a BSD system running qmail and vmailmgr. It’s distributed as# part of the Qmail-Vmailmgr-Courier-Squirrelmail guide,# http://www.mricon.com/SM/guide/.## Copyright (c) 2001-2002 by Konstantin Riabitsev <[email protected]># Licensed under the GNU GPL. For full terms see http://www.gnu.org/## $Id: rmvirt.sh.bsd,v 1.1.1.1 2002/03/13 00:29:45 graf25 Exp $## @author Konstantin Riabitsev <[email protected]> ($Author: graf25 $)# @version $Date: 2002/03/13 00:29:45 $ ##
# QHOME: Your qmail installation directory (/var/qmail)# VDELDOMAIN: Location of vadmin’s vdeldomain.sh script.# If you don’t use vadmin, comment that line out.QHOME="/var/qmail"#VDELDOMAIN="/root/vadmin-scripts/vdeldomain.sh"
# The original Bourne sh doesn’t provide us with $UID.if test ! $UID; then UID=‘id -u‘; fi
# Check if we are who we should be.if test $UID != 0 ; then
echo "Error: Must be root"exit 1
fi
# Checkf or omitted parameters.if test -z "$1"; then
IAM=‘basename $0‘echo "Usage: $IAM domain.com"exit 1
fi
# Check if we will need to use "userdel" or "pw userdel" for# FreeBSD and Co.if test -f /usr/sbin/userdel
then USEPW="no"
Revision 1.1.1.1, as of March 13, 2002 by graf25
A SCRIPTS A.3 rmvirt.sh
elif test -f /usr/sbin/pw;then USEPW="yes"
else# Something odd here.echo "Couldn’t find either ’userdel’ or ’pw’. Aborting."exit 1
fi
# Check if this domain actually exists.if ! egrep -q "^$1:" $QHOME/control/virtualdomains; thenecho "Error: No such domain $1"exit 1
fi
# get the baseuser.BASEUSER=‘egrep "^$1:" $QHOME/control/virtualdomains | sed ’s/^.*://’‘
# Check if there are discrepancies between qmail lists and /etc/passwd.if egrep -q "^$BASEUSER:" /etc/passwd; then
echo "This will delete ’$1’ and all its users."echo -n "Proceed? y/[n]: "read YNif test -z "$YN"; then YN="n"; fiif test $YN != "y" ; then
echo "Aborted."exit 1
fielse
echo "Error: Cannot remove domain. Base User not found in system files"exit 1
fi
OLDDOM=$1echo -n "Removing the domain with all user files..."UFLAGS="-r"if test $USEPW = "yes"
then pw userdel $BASEUSER $UFLAGSelse userdel $UFLAGS $BASEUSER
fiecho "done"echo -n "Removing domain from qmail’s control files..."cd $QHOME/controlgrep -v $OLDDOM virtualdomains > virt.newgrep -v $OLDDOM rcpthosts > rcpt.newmv virt.new virtualdomainsmv rcpt.new rcpthosts
Revision 1.1.1.1, as of March 13, 2002 by graf25

A SCRIPTS A.3 rmvirt.sh
echo "done"echo -n "Restarting qmail..."kill ‘ps aux | grep qmail-lspawn | grep -v grep | awk ’ { print $2 } ’‘$QHOME/rc &echo "done"echoif test ! -z "$VDELDOMAIN"; then
$VDELDOMAIN $OLDDOMfiecho "All done! Domain $OLDDOM deleted."
Revision 1.1.1.1, as of March 13, 2002 by graf25
B GNU FREE DOCUMENTATION LICENSE
B GNU Free Documentation License
Version 1.1, March 2000
Copyright c© 2000 Free Software Foundation, Inc.59 Temple Place, Suite 330, Boston, MA 02111-1307 USAEveryone is permitted to copy and distribute verbatim copies of this licensedocument, but changing it is not allowed.
Preamble
The purpose of this License is to make a manual, textbook, or other written doc-ument “free” in the sense of freedom: to assure everyone the effective freedomto copy and redistribute it, with or without modifying it, either commerciallyor noncommercially. Secondarily, this License preserves for the author and pub-lisher a way to get credit for their work, while not being considered responsiblefor modifications made by others.
This License is a kind of “copyleft”, which means that derivative works of thedocument must themselves be free in the same sense. It complements the GNUGeneral Public License, which is a copyleft license designed for free software.
We have designed this License in order to use it for manuals for free software,because free software needs free documentation: a free program should comewith manuals providing the same freedoms that the software does. But thisLicense is not limited to software manuals; it can be used for any textual work,regardless of subject matter or whether it is published as a printed book. Werecommend this License principally for works whose purpose is instruction orreference.
B.1 Applicability and Definitions
This License applies to any manual or other work that contains a notice placedby the copyright holder saying it can be distributed under the terms of thisLicense. The “Document”, below, refers to any such manual or work. Anymember of the public is a licensee, and is addressed as “you”.
A “Modified Version” of the Document means any work containing the Doc-ument or a portion of it, either copied verbatim, or with modifications and/ortranslated into another language.
A “Secondary Section” is a named appendix or a front-matter section ofthe Document that deals exclusively with the relationship of the publishersor authors of the Document to the Document’s overall subject (or to relatedmatters) and contains nothing that could fall directly within that overall subject.(For example, if the Document is in part a textbook of mathematics, a SecondarySection may not explain any mathematics.) The relationship could be a matterof historical connection with the subject or with related matters, or of legal,commercial, philosophical, ethical or political position regarding them.
Revision 1.1.1.1, as of March 13, 2002 by graf25
B GNU FREE DOCUMENTATION LICENSE B.2 Verbatim Copying
The “Invariant Sections” are certain Secondary Sections whose titles aredesignated, as being those of Invariant Sections, in the notice that says that theDocument is released under this License.
The “Cover Texts” are certain short passages of text that are listed, as Front-Cover Texts or Back-Cover Texts, in the notice that says that the Document isreleased under this License.
A “Transparent” copy of the Document means a machine-readable copy,represented in a format whose specification is available to the general public,whose contents can be viewed and edited directly and straightforwardly withgeneric text editors or (for images composed of pixels) generic paint programsor (for drawings) some widely available drawing editor, and that is suitable forinput to text formatters or for automatic translation to a variety of formatssuitable for input to text formatters. A copy made in an otherwise Transparentfile format whose markup has been designed to thwart or discourage subsequentmodification by readers is not Transparent. A copy that is not “Transparent”is called “Opaque”.
Examples of suitable formats for Transparent copies include plain ASCIIwithout markup, Texinfo input format, LATEX input format, SGML or XML us-ing a publicly available DTD, and standard-conforming simple HTML designedfor human modification. Opaque formats include PostScript, PDF, proprietaryformats that can be read and edited only by proprietary word processors, SGMLor XML for which the DTD and/or processing tools are not generally available,and the machine-generated HTML produced by some word processors for outputpurposes only.
The “Title Page” means, for a printed book, the title page itself, plus suchfollowing pages as are needed to hold, legibly, the material this License requiresto appear in the title page. For works in formats which do not have any titlepage as such, “Title Page” means the text near the most prominent appearanceof the work’s title, preceding the beginning of the body of the text.
B.2 Verbatim Copying
You may copy and distribute the Document in any medium, either commerciallyor noncommercially, provided that this License, the copyright notices, and thelicense notice saying this License applies to the Document are reproduced inall copies, and that you add no other conditions whatsoever to those of thisLicense. You may not use technical measures to obstruct or control the readingor further copying of the copies you make or distribute. However, you mayaccept compensation in exchange for copies. If you distribute a large enoughnumber of copies you must also follow the conditions in section 3.
You may also lend copies, under the same conditions stated above, and youmay publicly display copies.
Revision 1.1.1.1, as of March 13, 2002 by graf25
B GNU FREE DOCUMENTATION LICENSE B.3 Copying in Quantity
B.3 Copying in Quantity
If you publish printed copies of the Document numbering more than 100, andthe Document’s license notice requires Cover Texts, you must enclose the copiesin covers that carry, clearly and legibly, all these Cover Texts: Front-Cover Textson the front cover, and Back-Cover Texts on the back cover. Both covers mustalso clearly and legibly identify you as the publisher of these copies. The frontcover must present the full title with all words of the title equally prominentand visible. You may add other material on the covers in addition. Copyingwith changes limited to the covers, as long as they preserve the title of theDocument and satisfy these conditions, can be treated as verbatim copying inother respects.
If the required texts for either cover are too voluminous to fit legibly, youshould put the first ones listed (as many as fit reasonably) on the actual cover,and continue the rest onto adjacent pages.
If you publish or distribute Opaque copies of the Document numberingmore than 100, you must either include a machine-readable Transparent copyalong with each Opaque copy, or state in or with each Opaque copy a publicly-accessible computer-network location containing a complete Transparent copyof the Document, free of added material, which the general network-using publichas access to download anonymously at no charge using public-standard net-work protocols. If you use the latter option, you must take reasonably prudentsteps, when you begin distribution of Opaque copies in quantity, to ensure thatthis Transparent copy will remain thus accessible at the stated location untilat least one year after the last time you distribute an Opaque copy (directly orthrough your agents or retailers) of that edition to the public.
It is requested, but not required, that you contact the authors of the Doc-ument well before redistributing any large number of copies, to give them achance to provide you with an updated version of the Document.
B.4 Modifications
You may copy and distribute a Modified Version of the Document under theconditions of sections 2 and 3 above, provided that you release the ModifiedVersion under precisely this License, with the Modified Version filling the roleof the Document, thus licensing distribution and modification of the ModifiedVersion to whoever possesses a copy of it. In addition, you must do these thingsin the Modified Version:
• Use in the Title Page (and on the covers, if any) a title distinct from thatof the Document, and from those of previous versions (which should, ifthere were any, be listed in the History section of the Document). Youmay use the same title as a previous version if the original publisher ofthat version gives permission.
• List on the Title Page, as authors, one or more persons or entities respon-sible for authorship of the modifications in the Modified Version, together
Revision 1.1.1.1, as of March 13, 2002 by graf25
B GNU FREE DOCUMENTATION LICENSE B.4 Modifications
with at least five of the principal authors of the Document (all of its prin-cipal authors, if it has less than five).
• State on the Title page the name of the publisher of the Modified Version,as the publisher.
• Preserve all the copyright notices of the Document.
• Add an appropriate copyright notice for your modifications adjacent tothe other copyright notices.
• Include, immediately after the copyright notices, a license notice givingthe public permission to use the Modified Version under the terms of thisLicense, in the form shown in the Addendum below.
• Preserve in that license notice the full lists of Invariant Sections and re-quired Cover Texts given in the Document’s license notice.
• Include an unaltered copy of this License.
• Preserve the section entitled “History”, and its title, and add to it an itemstating at least the title, year, new authors, and publisher of the ModifiedVersion as given on the Title Page. If there is no section entitled “History”in the Document, create one stating the title, year, authors, and publisherof the Document as given on its Title Page, then add an item describingthe Modified Version as stated in the previous sentence.
• Preserve the network location, if any, given in the Document for publicaccess to a Transparent copy of the Document, and likewise the networklocations given in the Document for previous versions it was based on.These may be placed in the “History” section. You may omit a networklocation for a work that was published at least four years before the Doc-ument itself, or if the original publisher of the version it refers to givespermission.
• In any section entitled “Acknowledgements” or “Dedications”, preservethe section’s title, and preserve in the section all the substance and toneof each of the contributor acknowledgements and/or dedications giventherein.
• Preserve all the Invariant Sections of the Document, unaltered in their textand in their titles. Section numbers or the equivalent are not consideredpart of the section titles.
• Delete any section entitled “Endorsements”. Such a section may not beincluded in the Modified Version.
• Do not retitle any existing section as “Endorsements” or to conflict in titlewith any Invariant Section.
Revision 1.1.1.1, as of March 13, 2002 by graf25

B GNU FREE DOCUMENTATION LICENSE B.5 Combining Documents
If the Modified Version includes new front-matter sections or appendicesthat qualify as Secondary Sections and contain no material copied from theDocument, you may at your option designate some or all of these sections asinvariant. To do this, add their titles to the list of Invariant Sections in theModified Version’s license notice. These titles must be distinct from any othersection titles.
You may add a section entitled “Endorsements”, provided it contains nothingbut endorsements of your Modified Version by various parties – for example,statements of peer review or that the text has been approved by an organizationas the authoritative definition of a standard.
You may add a passage of up to five words as a Front-Cover Text, and apassage of up to 25 words as a Back-Cover Text, to the end of the list of CoverTexts in the Modified Version. Only one passage of Front-Cover Text and oneof Back-Cover Text may be added by (or through arrangements made by) anyone entity. If the Document already includes a cover text for the same cover,previously added by you or by arrangement made by the same entity you areacting on behalf of, you may not add another; but you may replace the old one,on explicit permission from the previous publisher that added the old one.
The author(s) and publisher(s) of the Document do not by this License givepermission to use their names for publicity for or to assert or imply endorsementof any Modified Version.
B.5 Combining Documents
You may combine the Document with other documents released under this Li-cense, under the terms defined in section 4 above for modified versions, providedthat you include in the combination all of the Invariant Sections of all of theoriginal documents, unmodified, and list them all as Invariant Sections of yourcombined work in its license notice.
The combined work need only contain one copy of this License, and multipleidentical Invariant Sections may be replaced with a single copy. If there aremultiple Invariant Sections with the same name but different contents, makethe title of each such section unique by adding at the end of it, in parentheses,the name of the original author or publisher of that section if known, or else aunique number. Make the same adjustment to the section titles in the list ofInvariant Sections in the license notice of the combined work.
In the combination, you must combine any sections entitled “History” inthe various original documents, forming one section entitled “History”; likewisecombine any sections entitled “Acknowledgements”, and any sections entitled“Dedications”. You must delete all sections entitled “Endorsements.”
B.6 Collections of Documents
You may make a collection consisting of the Document and other documentsreleased under this License, and replace the individual copies of this Licensein the various documents with a single copy that is included in the collection,
Revision 1.1.1.1, as of March 13, 2002 by graf25
B GNU FREE DOCUMENTATION LICENSEB.7 Aggregation With Independent Works
provided that you follow the rules of this License for verbatim copying of eachof the documents in all other respects.
You may extract a single document from such a collection, and distribute itindividually under this License, provided you insert a copy of this License intothe extracted document, and follow this License in all other respects regardingverbatim copying of that document.
B.7 Aggregation With Independent Works
A compilation of the Document or its derivatives with other separate and in-dependent documents or works, in or on a volume of a storage or distributionmedium, does not as a whole count as a Modified Version of the Document,provided no compilation copyright is claimed for the compilation. Such a com-pilation is called an “aggregate”, and this License does not apply to the otherself-contained works thus compiled with the Document, on account of their be-ing thus compiled, if they are not themselves derivative works of the Document.
If the Cover Text requirement of section 3 is applicable to these copies of theDocument, then if the Document is less than one quarter of the entire aggregate,the Document’s Cover Texts may be placed on covers that surround only theDocument within the aggregate. Otherwise they must appear on covers aroundthe whole aggregate.
B.8 Translation
Translation is considered a kind of modification, so you may distribute transla-tions of the Document under the terms of section 4. Replacing Invariant Sectionswith translations requires special permission from their copyright holders, butyou may include translations of some or all Invariant Sections in addition tothe original versions of these Invariant Sections. You may include a translationof this License provided that you also include the original English version ofthis License. In case of a disagreement between the translation and the originalEnglish version of this License, the original English version will prevail.
B.9 Termination
You may not copy, modify, sublicense, or distribute the Document except asexpressly provided for under this License. Any other attempt to copy, modify,sublicense or distribute the Document is void, and will automatically terminateyour rights under this License. However, parties who have received copies, orrights, from you under this License will not have their licenses terminated solong as such parties remain in full compliance.
B.10 Future Revisions of This License
The Free Software Foundation may publish new, revised versions of the GNUFree Documentation License from time to time. Such new versions will be
Revision 1.1.1.1, as of March 13, 2002 by graf25

B GNU FREE DOCUMENTATION LICENSEB.10 Future Revisions of This License
similar in spirit to the present version, but may differ in detail to address newproblems or concerns. See http://www.gnu.org/copyleft/.
Each version of the License is given a distinguishing version number. Ifthe Document specifies that a particular numbered version of this License ”orany later version” applies to it, you have the option of following the terms andconditions either of that specified version or of any later version that has beenpublished (not as a draft) by the Free Software Foundation. If the Documentdoes not specify a version number of this License, you may choose any versionever published (not as a draft) by the Free Software Foundation.
ADDENDUM: How to use this License for your documents
To use this License in a document you have written, include a copy of the Licensein the document and put the following copyright and license notices just afterthe title page:
Copyright c© YEAR YOUR NAME. Permission is granted to copy,distribute and/or modify this document under the terms of the GNUFree Documentation License, Version 1.1 or any later version pub-lished by the Free Software Foundation; with the Invariant Sec-tions being LIST THEIR TITLES, with the Front-Cover Texts beingLIST, and with the Back-Cover Texts being LIST. A copy of the li-cense is included in the section entitled “GNU Free DocumentationLicense”.
If you have no Invariant Sections, write “with no Invariant Sections” insteadof saying which ones are invariant. If you have no Front-Cover Texts, write“no Front-Cover Texts” instead of “Front-Cover Texts being LIST”; likewise forBack-Cover Texts.
If your document contains nontrivial examples of program code, we recom-mend releasing these examples in parallel under your choice of free softwarelicense, such as the GNU General Public License, to permit their use in freesoftware.
Revision 1.1.1.1, as of March 13, 2002 by graf25