r dazzling - cake craft shop
TRANSCRIPT
Page 1 of 2 ©Cake Craft World Ltd 2013 www.cakecraftshop.co.uk
What you need!
R Cake sizes of your choice we made 5” Cake, 9” Cake
5” Round Single Thick Card
(same size as your top tier)
12” Round Cerise Cake Drum
(board size 3” bigger than your bottom cake)
R White Sugarpaste
R Yellow Sugarpaste
R Cerise Pink Sattina Sugarpaste
R Bright Orange Sattina Sugarpaste
R Edible Glue & Brush
R Reversible 6 Piece Circular Cutter Set
RSet of 3 PME Plunger Sunflower/Daisy/
Gerbera Cutters
R Set of 6 Daisy Centre Stamps
R Fmm Multi Ribbon Cutters
R Plastic Dowels
R 25mm Satin Orange Ribbon
R 23mm Satin Fuchsia Ribbon
R Celformers for drying the flowers, or make
a cup shape with tin foil
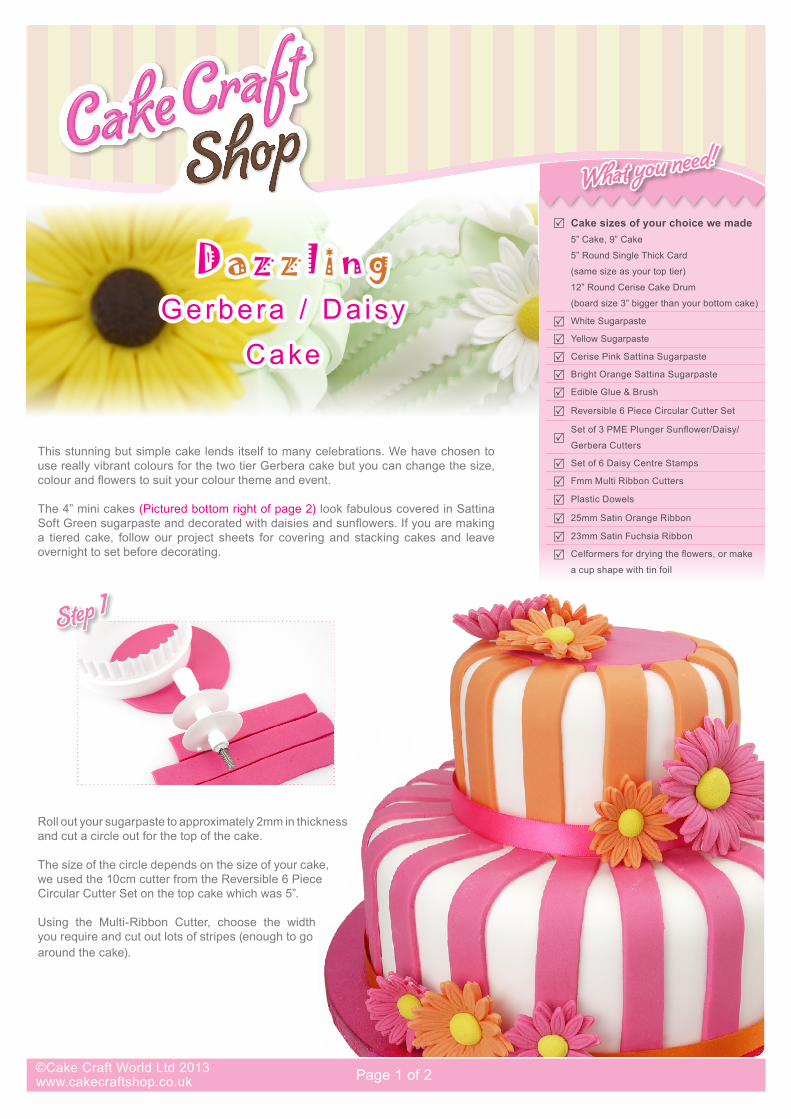
Roll out your sugarpaste to approximately 2mm in thickness and cut a circle out for the top of the cake.
The size of the circle depends on the size of your cake, we used the 10cm cutter from the Reversible 6 Piece Circular Cutter Set on the top cake which was 5”.
Using the Multi-Ribbon Cutter, choose the width you require and cut out lots of stripes (enough to go around the cake).
This stunning but simple cake lends itself to many celebrations. We have chosen to use really vibrant colours for the two tier Gerbera cake but you can change the size, colour and flowers to suit your colour theme and event.
The 4” mini cakes (Pictured bottom right of page 2) look fabulous covered in Sattina Soft Green sugarpaste and decorated with daisies and sunflowers. If you are making a tiered cake, follow our project sheets for covering and stacking cakes and leave overnight to set before decorating.
D a z z l i n g Gerbera / Da isy
Cake
Step 1
Page 2 of 2 ©Cake Craft World Ltd 2013 www.cakecraftshop.co.uk
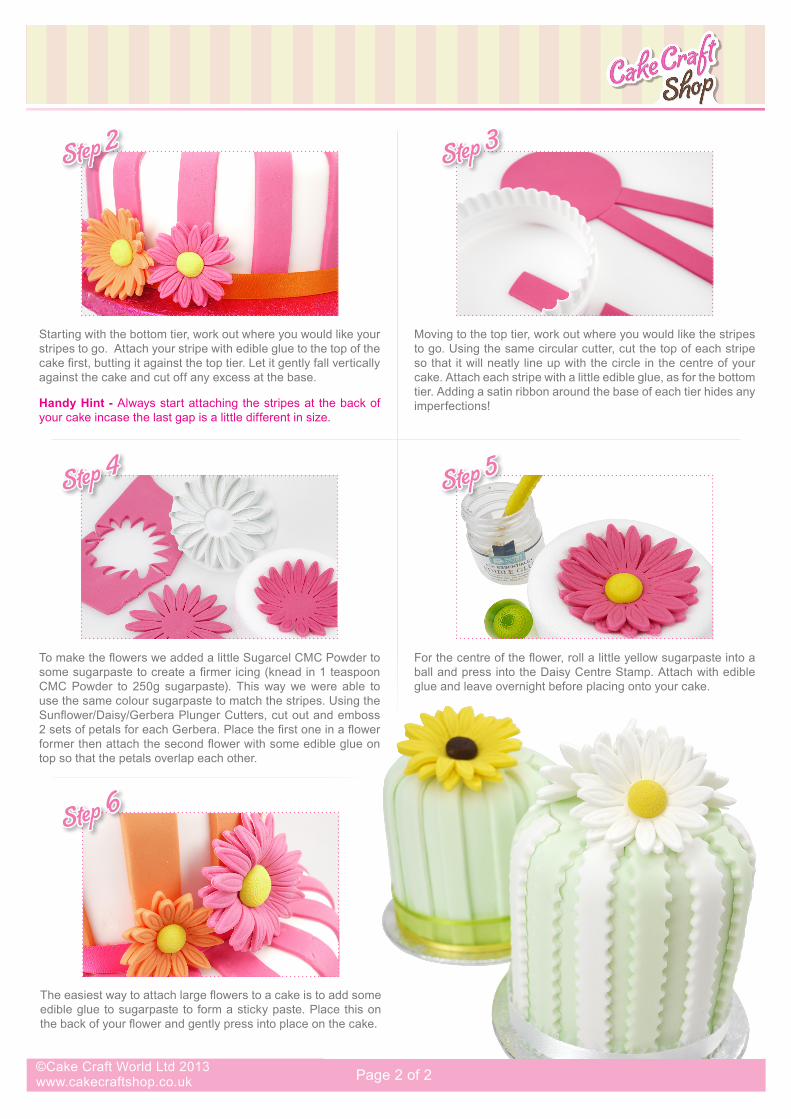
Starting with the bottom tier, work out where you would like your stripes to go. Attach your stripe with edible glue to the top of the cake first, butting it against the top tier. Let it gently fall vertically against the cake and cut off any excess at the base.
Handy Hint - Always start attaching the stripes at the back of your cake incase the last gap is a little different in size.
Moving to the top tier, work out where you would like the stripes to go. Using the same circular cutter, cut the top of each stripe so that it will neatly line up with the circle in the centre of your cake. Attach each stripe with a little edible glue, as for the bottom tier. Adding a satin ribbon around the base of each tier hides any imperfections!
To make the flowers we added a little Sugarcel CMC Powder to some sugarpaste to create a firmer icing (knead in 1 teaspoon CMC Powder to 250g sugarpaste). This way we were able to use the same colour sugarpaste to match the stripes. Using the Sunflower/Daisy/Gerbera Plunger Cutters, cut out and emboss 2 sets of petals for each Gerbera. Place the first one in a flower former then attach the second flower with some edible glue on top so that the petals overlap each other.
For the centre of the flower, roll a little yellow sugarpaste into a ball and press into the Daisy Centre Stamp. Attach with edible glue and leave overnight before placing onto your cake.
The easiest way to attach large flowers to a cake is to add some edible glue to sugarpaste to form a sticky paste. Place this on the back of your flower and gently press into place on the cake.
Step 2 Step 3
Step 4 Step 5
Step 6